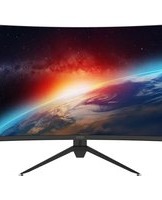
XP32 - Monitor Odys - Free user manual and instructions
Find the device manual for free XP32 Odys in PDF.


| Product Type | Monitor |
| Brand | Odys |
| Model | XP32 |
| Screen Size | 32 inches (81.28 cm) |
| Resolution | 1920 x 1080 (Full HD) |
| Aspect Ratio | 16:9 |
| Refresh Rate | 60 Hz |
| Response Time | 5 ms |
| Panel Type | VA (Vertical Alignment) |
| Brightness | 250 cd/m² |
| Contrast Ratio | 3000:1 |
| Viewing Angles | 178° / 178° |
| Input Ports | 1 x HDMI, 1 x VGA |
| Audio | Built-in speakers (2 x 2W) |
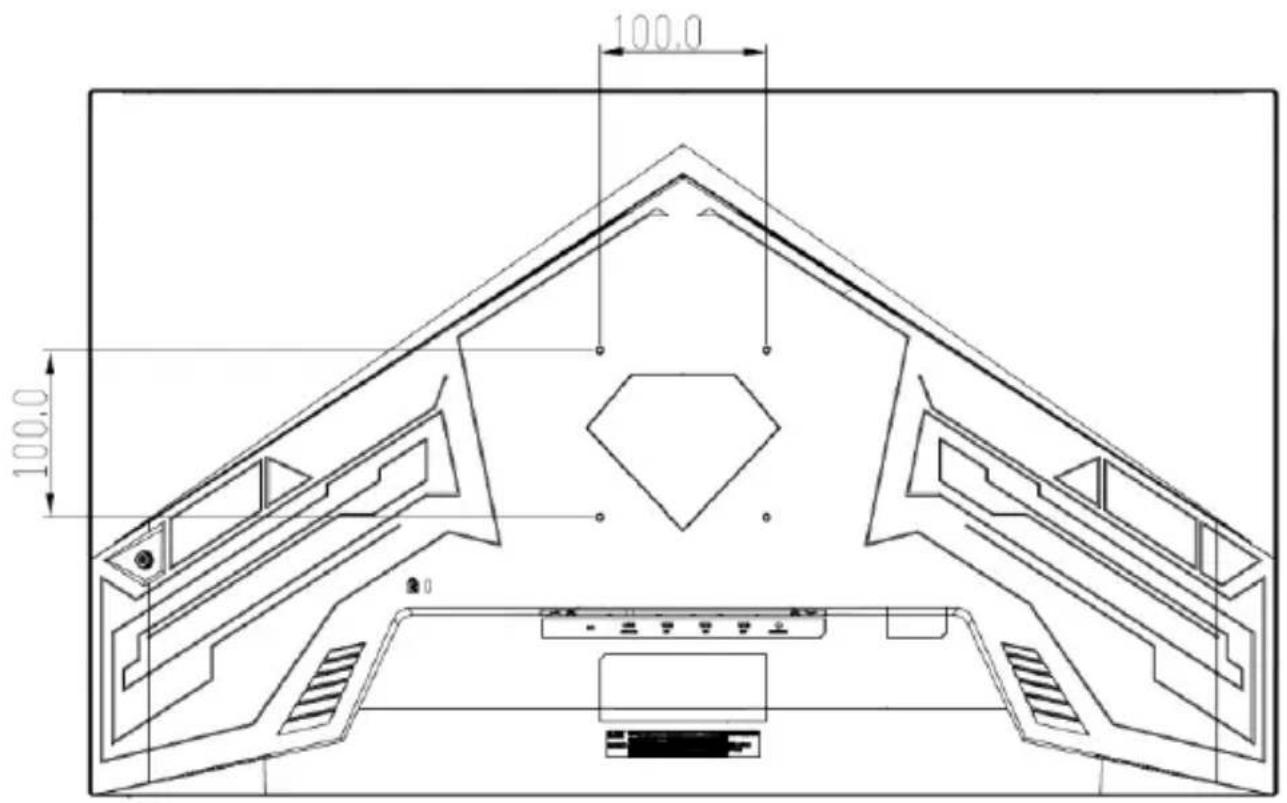
| VESA Mount | 100 x 100 mm |
| Dimensions (with stand) | 730 x 460 x 200 mm (W x H x D) |
| Weight (with stand) | 6.5 kg |
| Power Consumption | 35 W (typical), <0.5 W standby |
| Power Supply | AC 100-240V, 50/60 Hz |
| What's in the Box | Monitor, stand, power cable, VGA cable, user manual |
| Warranty | 2 years |
| Cleaning | Use a soft, dry cloth. Do not use solvents. |
| Safety | Place on stable surface, avoid liquid contact, unplug during storms |
| Repairability | No user-serviceable parts. Contact authorized service. |
| Operating Temperature | 0°C to 40°C |
Frequently Asked Questions - XP32 Odys
User questions about XP32 Odys
0 question about this device. Answer the ones you know or ask your own.
Ask a new question about this device
Download the instructions for your Monitor in PDF format for free! Find your manual XP32 - Odys and take your electronic device back in hand. On this page are published all the documents necessary for the use of your device. XP32 by Odys.
USER MANUAL XP32 Odys
1 Important Safety Instructions ....2
2 Conformity....6
3 Mounting - Dismantling....7
3.1 Stand mounting....7
3.2 Wall mounting 8
3.3 Stand dismantling 9
4 Operating elements and connections....10
4.1 On Device 10
4.2 Connections and Operating elements 11
5 Menu-Settings 13
5.1 Menu Display 13
5.2 Menu Color 14
5.3 Menu Gamemode Setup 15
5.4 Menu Input....16
5.5 Menu System Settings....16
5.6 Menu User Settings 17
6 Choosing your Input....17
7 Standby....17
8 Troubleshooting....18
9 Specification....19
10 Warranty 21
1 Important Safety Instructions
E Z
1) Read these instructions.
2) Keep these instructions.
3) Heed all warnings.
4) Follow all instructions.
5) Do not use this apparatus near water.
6) Clean only with dry cloth.
7) Do not block any ventilation openings, install in accordance with the instructions.
8) Do not install near any heat sources such as radiations, heat registers, stoves, or other apparatus (including amplifiers) that produce heat.
9) Do not defeat the safety purpose of the polarized plug. If the provided plug does not fit into your outlet, consult an electrician for replacement of the obsolete outlet.
10) Protected the power cord from being walked on or pinched particularly at plugs, convenience receptacles and the point where they exit from the apparatus.
11) Only use attachments/accessories specified by the manufacturer.
12) Unplug this apparatus during lighting storms or when unused for long periods of time.
13) Refer all servicing to qualified service personnel. Servicing is required when the apparatus has been damaged in any way, such as power-supply cord or plug is damaged, liquid has been spilled or objects have fallen into the apparatus, the apparatus has been exposed to rain or moisture, does not operate normally, or has been dropped.
14) Mains plug is used as the disconnect device, the disconnect device shall remain readily operable.
15) The ventilation should not be impeded by covering the ventilation openings with items, such as newspapers, table-cloth, curtains, etc.
16) No naked flame sources, such as lighted candles, should be placed on the apparatus.
17) Attention should be drawn to the environmental aspects of battery disposal.
18) The use of apparatus in moderate climate.

WARNING
To reduce the risk of fire or electric shock, do not expose this apparatus to rain or moisture.

The symbol indicates that dangerous voltages constituting a risk of electric shock are present within this unit.
The symbol indicates that there are important operating and maintenance instructions in the literature accompanying this unit.
The symbol indicates that this product incorporates double insulation between hazardous mains voltage and user accessible parts. When servicing use only identical replacement parts.
Warning

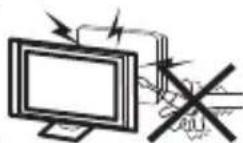

High voltages are used in the operation of this device. Do not remove the cabinet back from your set. Refer servicing to qualified service personnel.
To prevent fire or electrical shock hazard, do not expose the device to rain or moisture.
Do not drop or push objects into the device slots or openings. Never spill any kind of liquid on the device.
Do not block the ventilation holes in the back cover of the monitor. Adequate ventilation is essential to prevent failure of electrical components.
Do not trap the power supply cord under the device.
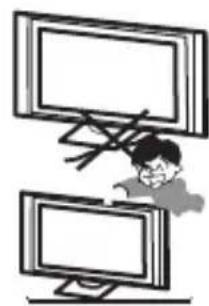
Never stand on, lean on, or suddenly push the device or its stand. You should pay special attention to children. Serious injury may result if it should fall.
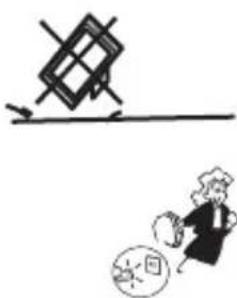
Do not place your monitor on an unstable cart, stand, shelf or table. Serious injury to an individual, and damage to the television, may result if it should fall.
When the device is not used for an extended period of time, it is advisable to disconnect the AC power cord from the AC outlet.
If the monitor is to be built into a compartment or similar enclosure, the minimum distances must be maintained. Heat build-up can reduce the service life of your television, and can also be dangerous.

Tips regarding environmental protection
At the end of its operating life, this product may not be disposed of by way of your normal household waste. Instead it must be delivered to a collection point for recycling electrical and electronic equipment. The icon on the product, in the operating instructions or on the packaging, indicates this.
The materials used in manufacturing this product are recyclable, depending on their identifying markings. By recycling this equipment, by recycling its components, or through other procedures of re-using outdated equipment, you are making an important contribution to protection our environment. Please ask your local municipal administration for the location of the corresponding recycling point.
Support
URL: http://www.odys.de
See our website for the latest information on this engine, on other products by our company and on our company itself. If you have any questions or problems, please read the FAQs on our website or contact our customer support service support@axdia.de
Manufacturer
| Axdia International GmbHFormerweg 9D-47877 Willich(Germany) | Support-Hotline:+49 (0)2154 / 8826-101Web:www.odys.deE-Mail:support@axdia.de |
Appropriate use
E Z
The device is designed to display signal content of a Computer source over the provided connections for private use. It is exclusively meant for this purpose and must only be used for the same. This also includes paying attention to all information contained in this operating manual, especially in the safety instructions. Any other usage is considered to be improper and may lead to material damages and even personal injuries. Moreover, it will result in the immediate loss of guarantee. The manufacturer does not bear any liability for damages caused due to improper use.
2 Conformity

We, Axdia International GmbH, hereby declare that this device corresponds to the basic requirements and relevant regulations outlined in guidelines 2014/53/EU and 2009/125/EC.
The CE declaration of conformity for this product may be found on the following link
3 Mounting - Dismantling
3.1 Stand mounting
Use the supplied screws to connect the stand. Then insert the stand at a >30° angle into the holder on the back of the unit as shown. Now you can snap the device into place. This is confirmed with a "click" sound.

3.2 Wall mounting
Attach your wall mount to the threads provided on the back of the bracket. Please note the hole spacing.
3.3 Stand dismantling
Release the stand by pulling the grid (marked red) upwards. Then you can pull the monitor away from the base at the bottom and then lift it up.

4 Operating elements and connections
4.1 On Device

Power Switch (To Power-Off the Display please hold Button for 3 seconds)
4.2 Connections and Operating elements
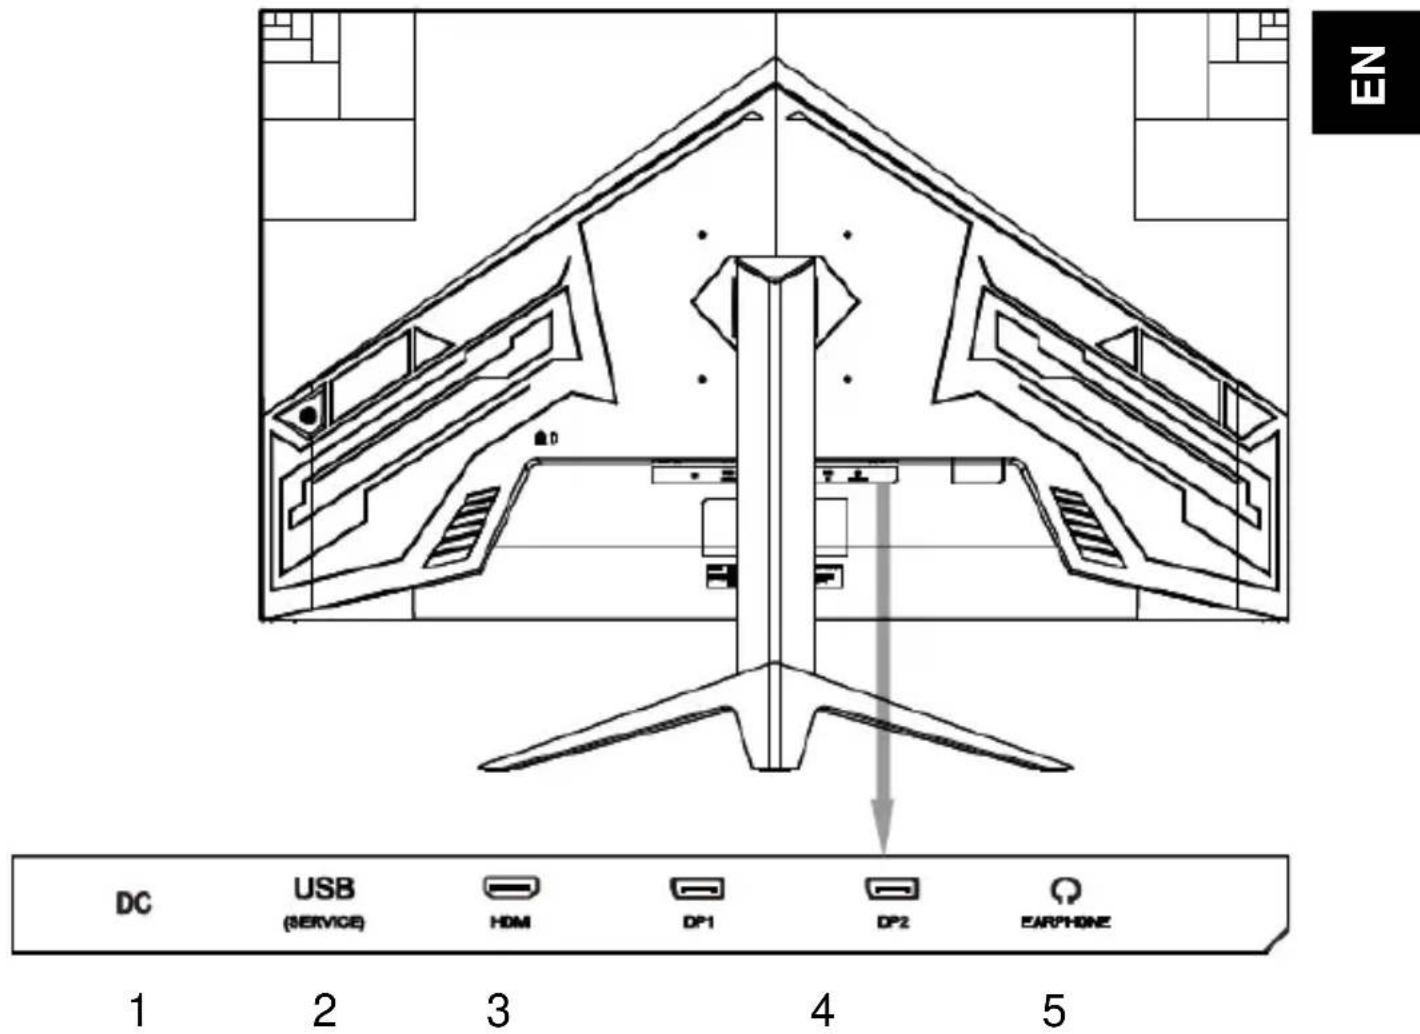
The Connections shown:
- DC Input (19V)
- USB-Port (Updates only)
- HDMI (2.0)
- Display Port 1 & 2 (V1.4)
- Earphone Output
ODYS XP32
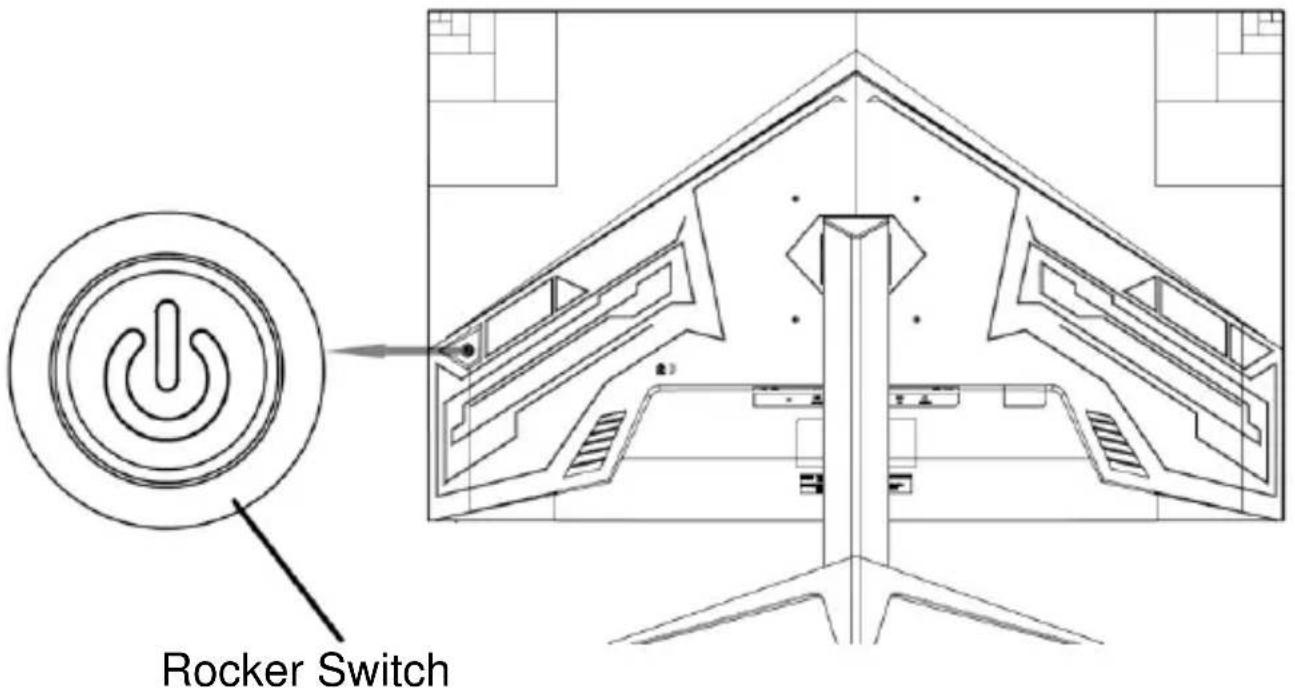
Functions of the Rocker Switch
| Up | Signal Source Selection |
| Down | Volume Change |
| Left | Game Plus Mode Speed Dial Key |
| Right | Speed Dial Key (free Selectable) |
| Press | Press 1x briefly to display the menuPress 1x for 3s to switch the display off |
Menu
| Up | Move Cursor Up |
| Down | Move Cursor Down |
| Left | Back |
| Right | Enter/Confirm |
| Press | Confirm |
5 Menu-Settings
Press the Menu - button and ▲/▼ to select a setting.
5.1 Menu Display
The first menu item is the Display menu. Here you can make image adjustments like contrast, brightness etc.
Press ▲▼ to select a setting, press ◀▶ to change the setting and Enter to confirm.
Press the Back button to return to the previous menu.
Description of the individual menu items
| Brightness | Brightness adjustable from 0-100 |
| Contrast | Contrast adjustable from 0-100 |
| Black Equalize | Black Equalize adjustable from 0-100 |
| Preset | Presets like Standard, User, Movie, Photo and more Choosable |
| Aspect Ratio | Here you can select the aspect ratio |
| Sharpness | Sharpness adjustable from 0-100 |
5.2 Menu Color
The second menu item is the Color menu. Here you can make image adjustments such as color temperature presets, gamma value, blue light filter, etc.
Press ▲▼ to select a setting, press ◀▶ to change the setting and Enter to confirm.
Press the Back button to return to the previous menu.
Description of the individual menu items
| Color Temperature | Color presets like normal, cold, warm, sRGB and user selectable |
| Gamma | Gamma value, 1.8, 2.0, 2.2 & 2.4 selectable |
| Hue | Hue value adjustable from 0-100 |
| Saturation | Saturation adjustable from 0-100 |
| Blue Light Filter | Here the blue light filtering can be adjusted in 4 steps |
5.3 Menu Gamemode Setup
The third menu item is the Game Mode Setup menu.
Here you can make panel settings like refresh rate, overdrive, game support, HDR etc.
Press ▲▼ to select a setting, press ◀▶ to change the setting and Enter to confirm.
Description of the individual menu items
| FreeSync/G-Sync | FreeSync/G-Sync Turn On/Off |
| Overdrive | Overdrive adjustable in the levels Off, Low, Middle and High |
| Game supprt | Timer (15-90 minutes), crosshairs and FPS counter adjustable |
| HDR | HDR (High Dynamic Range) Turn On/Off |
| DCR | DCR (Dynamic Contrast Ratio) Turn On/OFF |
| MPRT | MPRT (Motion Picture Response Time) Turn On/Off |
5.4 Menu Input
The fourth menu item is the Input menu. Here you can select the input with the ▲▼ keys and confirm with the ▶ key.
5.5 Menu System Settings
The fifth menu item is the System Settings menu. Here you can make general system settings, such as language, audio settings or a reset.
Press ▲▼ to select a setting, press ◀▶ to change the setting and Enter to confirm.
Press the Back button to return to the previous menu.
Description of the individual menu items
| Language | Language setting |
| OSD Settings | OSD Height Position, Vertical Position, OSD Timeout and Transparency changes |
| Audio | Possible Settings: Mute and Volume |
| Reset | Reset of all Settings |
| USB Upgrade | To perform a software update from a USB stick, select this option |
5.6 Menu User Settings
The sixth menu item is the User data menu. You can create various setting profiles and save them under the profiles User 1-3 and also load them again.
6 Choosing your Input
This unit includes various input sources that can be accessed by pressing the ▲ button on the monitor or the main menu.
| Input |
| DP2 |
| DP1 |
| HDMI |
Navigation Buttons ▲▼ and OK
From the input source menu, press ▲▼ directional buttons to select the desired screen mode and press ▶ button to enter the selected mode.
7 Standby
The ODYS XP32 has a built-in standby function. This is activated automatically after the monitor detects no signal. This happens approx. 10 seconds after no signal is present and is announced with the notes "No signal" and then "Energy saving mode".
8 Troubleshooting
| Display | Possible Cause | Solution |
| No Signal | An unused input was selected, or the display cable is damaged. | - Check the input source using the SOURCE button.- Check the display cable. |
| The Indicator LED is off | Power cable is loose.The screen is switched off. | - Check if the display and the junction box are well connected to the power supply and if the display is in shutdown mode |
| Picture to dark | Setting MPRT selected or brightness at low value. | - Turn off the MPRT mode- Check the brightness setting in the display menu. |
| Screen becomes too warm/overheated | The monitor is too cramped and there is not at least 5cm ventilation distance | Place the monitor in a place where there is at least 5cm space around the device. |
| Device does not turn on | There is no signal | To turn on the monitor, an input signal must be present. Please connect an HDMI or DP source |

Note
In some cases, in the event of a malfunction, the monitor should be reset to the factory settings (in the ADVANCED menu).
9 Specification
| Panel size | 31,5” |
| Viewing angle | H:178°,V:178° (CR>10) |
| Response time (Panel) | 20ms |
| Contrast ratio | 3000:1 |
| Optimal working resolution | 2560×1440@165Hz |
| Power input | DC 19V/3.42A |
| Work environment | 0°C~40°C 20%~85% |
| Storing environment | -10°C~60°C 10%~90% |
| Weight | 6,2kg |
Specifications are subject to change without notice.

Product information about the energy efficiency of this device according to EU regulation (EU) 2019/2013 can be found on the following website of the European Union from 1 st of March 2021. To open, please scan the following QR code with your cell phone.

Disposal of electrical and electronic equipment
This symbol on the product or in the instructions means that your electrical and electronic equipment should be disposed at the end of life separately from your household waste. There are separate collection systems for recycling in the EU. For more information, please contact the local authority or your retailer where you purchased the product.
10 Warranty
The following conditions comprise the requirements and scope of our warranty conditions and do not affect our legal and contractual warranty obligations.
We offer a warranty on our products in accordance with the following conditions:
- ODYS products are covered by a 12-month warranty. We will resolve damages or defects on ODYS products free of charge within 12 months of the purchase date under the following warranty conditions. For any damage or defect determined later than 12 months after the purchase date, proof of a manufacturing fault must be submitted for repair under warranty.
The warranty does not cover batteries and other parts, which are considered consumables, parts that break easily such as glass or plastic or defects based on normal wear and tear. There is no warranty obligation in the event of marginal differences compared to the target appearance and workmanship provided these have a negligible effect on the product's fitness for use, in the event of damage caused by chemical or electrochemical effects, by water or generally from abnormal conditions.
- The warranty will be performed in such a way that we shall decide whether to repair the defective parts or to replace them with working parts free of charge. AXDIA reserves the right to exchange the product for a replacement product of equal value if the product that is sent in cannot be repaired within a reasonable time or at reasonable cost. The product can also be exchanged for a different model of the same value. Requests cannot be made for repairs to be carried out on site. Parts that have been replaced or exchanged become our property.
- The warranty claim does not apply if repairs or other work is carried out by unauthorized persons or if our products are equipped with additional parts or accessories that are not approved for our products.
- Warranties that have been activated do not cause the warranty period to be extended, nor do they trigger a new warranty period. The warranty period for any replacement parts installed ends with the warranty period for the entire product.
- Any other or further claims are excluded, especially those for replacement due to damage caused outside of the product, provided there is no obligatory legal liability. We therefore accept no liability for
accidental, indirect or other consequential damage of any kind, which leads to usage restrictions, data loss, loss of earnings or interruption to business.
Asserting a warranty claim
- To make use of the warranty service, you must contact the AXDIA Service Center by e-mail, fax or phone (support@axdia.de). You can also use the service form on our website or on the back of the warranty conditions.
- AXDIA Service Centre will try to diagnose and solve your problem. If it is determined that a warranty claim exists, you will be given an RMA number (Return Material Authorization) and you will be asked to send the product to AXDIA.
IMPORTANT: AXDIA will only accept parcels that have an RMA number.
Please observe the following when sending the product:
- Send the product suitably packaged with carriage and insurance paid. Do not enclose any accessories with the products (no cables, CD's, memory cards, manuals, etc.), unless the AXDIA Service Centre specifies otherwise.
- Mark the RMA number on the outside of the package in such a way that it is visible and clearly legible.
- You must enclose a copy of the sales slip as proof of purchase.
- Once AXDIA has received the product, it will meet its warranty obligations in accordance with the warranty conditions and will return the product to the sender with carriage and insurance paid.
Service outside of warranty
AXDIA can refuse any service claim made that is not covered by the warranty. If AXDIA agrees to provide a service outside the warranty, the customer will be invoiced for all repair and transport costs.
AXDIA will not accept any packages that have not first been approved by AXDIA by means of an RMA (Return Material Authorization).


- 1 IMPORTANT SAFETY INSTRUCTIONS
- E Z
- WARNING
- TIPS REGARDING ENVIRONMENTAL PROTECTION
- SUPPORT
- APPROPRIATE USE
- 2 CONFORMITY
- 3 MOUNTING - DISMANTLING
- 3.1 STAND MOUNTING
- 3.2 WALL MOUNTING
- 3.3 STAND DISMANTLING
- 4 OPERATING ELEMENTS AND CONNECTIONS
- 4.1 ON DEVICE
- 4.2 CONNECTIONS AND OPERATING ELEMENTS
- THE CONNECTIONS SHOWN
- ODYS XP32
- 5 MENU-SETTINGS
- 5.1 MENU DISPLAY
- 5.2 MENU COLOR
- DESCRIPTION OF THE INDIVIDUAL MENU ITEMS
- 5.3 MENU GAMEMODE SETUP
- 5.4 MENU INPUT
- 5.5 MENU SYSTEM SETTINGS
- 5.6 MENU USER SETTINGS
- 6 CHOOSING YOUR INPUT
- NAVIGATION BUTTONS ▲▼ AND OK
- 7 STANDBY
- NOTE
- 9 SPECIFICATION
- DISPOSAL OF ELECTRICAL AND ELECTRONIC EQUIPMENT
- 10 WARRANTY
- WE OFFER A WARRANTY ON OUR PRODUCTS IN ACCORDANCE WITH THE FOLLOWING CONDITIONS
- ASSERTING A WARRANTY CLAIM
- IMPORTANT: AXDIA WILL ONLY ACCEPT PARCELS THAT HAVE AN RMA NUMBER
- SERVICE OUTSIDE OF WARRANTY
Brand : Odys
Model : XP32
Category : Monitor