
DPP 1025-070 LE - Portable DVD Player SEG - Free user manual and instructions
Find the device manual for free DPP 1025-070 LE SEG in PDF.


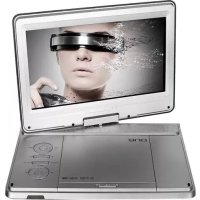
| Product Type | Portable DVD Player |
| Brand | SEG |
| Model | DPP 1025-070 LE |
| Display Size | 7 inch TFT LCD |
| Display Resolution | 480 x 234 pixels |
| Disc Compatibility | DVD, DVD±R/RW, CD, CD-R/RW, MP3, MPEG4, JPEG, VCD |
| TV System | NTSC / PAL |
| Digital TV Tuner | DVB-T |
| Power Supply | DC 9V 1.5A (AC adapter) / Built-in rechargeable battery 2000 mAh |
| Dimensions (Main Unit) | 191.5 x 165 x 39.4 mm |
| Weight (Main Unit) | 730.5 g |
| Audio Output | 3.5 mm stereo mini jack |
| Video Output | 3.5 mm mini jack (composite) |
| Headphone Jack | 3.5 mm stereo mini jack |
| Remote Control | Yes (coin battery) |
| Car Adapter | Included |
| USB Port | Yes (for media playback) |
| AV Input/Output | Yes (AV IN/OUT) |
| Battery Charging Time | Approx. 4-6 hours |
| Operating Temperature | 0°C to 35°C |
| Power Consumption | <10 W |
| Accessories Included | AC/DC adapter, remote control, car cigar adapter, antenna, manual, headphones |
Frequently Asked Questions - DPP 1025-070 LE SEG
User questions about DPP 1025-070 LE SEG
0 question about this device. Answer the ones you know or ask your own.
Ask a new question about this device
Download the instructions for your Portable DVD Player in PDF format for free! Find your manual DPP 1025-070 LE - SEG and take your electronic device back in hand. On this page are published all the documents necessary for the use of your device. DPP 1025-070 LE by SEG.
USER MANUAL DPP 1025-070 LE SEG
Important Safety Instruction
CAUTION: Use of controls or adjustments or performance of procedures other than those specified herein may result in hazardous radiation exposure. Please carefully study this manual and always keep it available. There are, however, some installation and operation precautions which you should be aware of.
(1) Read these instructions-All the safety and operating instructions should be read before the product is operated.
[2] Keep these instructions-The safety and operating instructions should be retained for future reference.
[3] Heed all warnings-All warnings on the product and in the operating instructions should be adhered to.
[4] Follow all instructions-All operating and use instructions should be followed.
(5) Do not use this apparatus near water-The apparatus shall not be exposed to dripping or splashing and that no objects filled with liquids, such as vases, shall be placed on the apparatus.
[6] Clean only with dry cloth-Unplug this product from the wall bullet before cleaning. Do not use liquid or aerosol cleaners. Clean only with dry cloth.
Exception: A product that is meant for uninterrupted service and that for some specific reason, such as the possibility of the loss of an authorization code for a CATV converter, is not intended to be unplugged by the user for cleaning or any other purpose, may exclude the reference to unplugging the product in the cleaning description otherwise required in 131.8(5)
[7] Do not block any ventilation openings. Install in accordance with the manufacturer's instruction-Slots and openings in the cabinet are provided for ventilation and to ensure reliable operation of the product and to protect it from overheating, and these openings must not be blocked or covered. The openings should never be blocked by placing the product on a bed, sofa, rug, or other similar surface. This product should not be placed in a built-in installation such as a bookcase or rack unless proper ventilation is provided or the manufacturer's instructions have been adhered to.
(8) Do not install near any heat sources such as radiators, heat registers, sleeves, or other apparatus(including amplifiers) that produce heat.
(9) Do not defeat the safety purpose of the polarized or grounding-type plug. A polarized plug has two blades with one wider than the other. A grounding type plug has two blades and a third grounding prong. The wide blade or the third prong is provided for your safety. If the provided plug does not fit into your outlet, consult an electrician for replacement of the obsolete outlet.
(10) Protect the power cord from being walked on or pinched particularly at plugs, convenience receptacles, and the point where they exit from the apparatus. Power-supply cords should be routed so that they are not likely to be walked on or pinched by items placed upon or against them, paying particular attention to cords at plugs, convenience receptacles, and the point where they exit from the product.
(11) Only use attachments/accessories specified by the manufacturer. Do not use attachments not recommended by the product manufacturer as they may cause hazards.
(12) Use only the cart, stand, tripod, bracket, or table specified by the manufacturer, or sold with the appa-ratus. When a cart is used, use caution when moving the cart/apparatus combination to avoid injury from tip-over.

(13) Unplug this apparatus during lightning storms or when unused for long periods of time. Unplug it from the wall outlet and disconnect the antenna or cable system. This will prevent damage to the product due to lightning and power-line surges.
[14] Refer all servicing to qualified service personnel. Servicing is required when the apparatus has been damaged in any way, such as power-supply cord or plug is damaged, liquid has been spilled or objects have fallen into the apparatus, the apparatus has been exposed to rain or moisture, does not operate normally, or has been dropped.
(15) Power Sources: This product should be operated only from the type of power source indicated on the marking label. If you are not sure of the type of power supply to your home, consult your product dealer or local power company. For products intended to operate from battery power, or other sources, refer to the operating instructions.
(16) Protective Attachment Plug-The product is equipped with an attachment plug having overload protection. This is a safety feature. See instruction manual for replacement or resetting of protective device. If replacement of the plug is required, be sure the service technician has used a replacement plug specified by the manufacturer that has the same overload protection as the original plug.
(17) Outdoor Antenna Grounding: If an outside antenna or cable system is connected to the product, be sure the antenna or cable system is grounded so as to provide some protection against voltage surges and built-up static charges. Article 810 of the National Electrical Code, ANS/NFPA 70, provides information with regard to proper grounding conductors, location or antenna-discharge unit, connection to grounding electrodes, and requirements for the grounding electrode.
(18) Power lines: An outside antenna system should not be located in the vicinity of overhead power lines or other electric light or power circuits, or where it can fall into such power lines or circuits. When installing an outside antenna system, extreme care should be taken to keep from touching such power lines or circuits as contact with them might be fatal.
(19) Overloading- Do not overload wall outlets, extension cords, or integral convenience receptacles as this can result in a risk of fire or electric shock.
(20) Object and Liquid Entry- Never push objects of any kind into this product through openings as they may touch dangerous voltage paints or short-out parts that could result in a fire or electric shock. Never spill liquid of any kind on the product.
(21) Servicing - Do no attempt to service this product yourself as opening or removing covers may expose you to dangerous voltage or other hazards. Refer all servicing to qualified service personnel.
[22] Replacement Parts-When replacement parts are required, be sure the service technician has used replacement parts specified by the manufacturer or have the same characteristics as the original part. Unauthorized substitutions may result in line, electric, or other hazards.
(23) Safety Check- Upon completion of any service or repairs to this product, ask the service technician to perform safety checks to determine that the product is in proper operating condition.
Safety Precautions

The lightning flash with arrowhead symbol within an equilateral triangle is intended to alert the user to the presence of uninsulated "dangerous voltage" within the product's enclosure that may be of sufficient magnitude to constitute risk of electric shock to persons.
The exclamation point within an equilateral triangle is intended to alert the user to the presence of important operating and maintenance [servicing] instructions in the literature accompanying the product.
WARNING: To reduce the risk of fire or electric shock, do not expose this appliance to rain or moisture. Dangerous high voltage is present inside the enclosure. Do not open the cabinet.
CAUTION: To prevent electric shock, match wide blade plug to wide slot, and fully insert.
CAUTION: This Digital Video Disc Player employs a laser System. To prevent direct exposure to the laser beam, do not try to open the enclosure. When open and the interlocks are detailed visible laser radiation is present. Use of controls or adjustments or performance of procedures other than those specified herein may result in hazardous radiation exposure. DO NOT STARE INTO BEAM.
FCC NOTICE: This equipment has been tested and found to comply with the limits for a Class B digital device. Pursuant with the FCC Rules Part 15. These limits are designed to provide reasonable protection against harmful interference in a residential installation. This equipment generates, uses and can radiate radio frequency energy and if not installed and used in accordance with the instruction may cause harmful interference to radio communication.
NOTICE: This product incorporates copyright protection technology that is protected by U.S. patents and other intellectual property rights. Use of this copyright protection technology must be authorized by Macrovision, and is intended for home and other limited viewing uses only unless otherwise authorized by Macrovision. Reverse engineering or disassembly is prohibited.
Safety Instructions and Important Information About Intended Use
Please read the following instructions and safety notes thoroughly before starting to use your product!
- Intended Use: this device has been designed for playing back DVD/CD discs and to watch TV. If the product is not used according to the instructions, the user's and other persons' safety is not guaranteed and the warranty will be void.
- User manuals: please read this User Manual thoroughly and keep it for any future reference in a safe place. For your own safety and in order to familiarize yourself with the different functions of the product, please follow the instructions in this manual carefully. When passing this product to other persons, please also hand over this User Manual. Please also read the user manuals of all devices that you are going to connect to this device.
- Connecting to the Power Supply: do not use the device if the device or its cables present visible damage. Connect the device only to the voltage indicated on the corresponding label on the product or AC adapter, resp. Never connect the device to a different voltage. Connect the device is grounded power outlets that comply with the corresponding safety standards only. Do not band or squeeze the cables. WARNING: Inside the device there is dangerous voltage. Never open the housing of the device: there is risk of personal injury by electric shock.
In order to completely disconnect the device from the mains, the power plug must be pulled out from the wall outlet. Always pull the power cord from the plug and never from the cable itself. Electric storms may damage any electric equipment; therefore disconnect the power plug from the wall outlet during a thunderstorm. It is also recommended to disconnect the device from the mains and to remove any batteries when you are intending not to use the device for a longer time.
- Objects inside the device: make sure that no foreign objects or liquids enter the device via the ventilation holes or other openings. There is risk of electric shock, damage to the device and short-circuit. In case of any emergency, immediately pull the power plug and contact a qualified service technician.
- Installation: place the device onto a flat and open surface. Never cover the ventilation holes of the device and make sure that the air can easily flow around the device [keep at least 10 cm / 4 inch space on the back and sides]. The device has anti-skid rubber feet. Over the long-term, these feet can dissolve due to chemical substances. It is recommended that you place the device on an anti-skid surface. WARNING: do not use this device outdoors!
- Condensation: when bringing this device from a cold to a warm environment (e.g. after transportation) moisture can condensate inside the device. In order to protect the device from damage and failure wait at least 2 hours prior to using the device.
- Health injury: extremely high audio volumes can damage your hearing permanently. Therefore carefully adjust the volume. Connect the headphones or earphones to the device prior to powering it on, as connecting it when already powered on can produce high sound levels causing damage to your hearing.
- Children: Do not allow children to play with electrical devices. Children may not be able to comprehend the presence of potential risks.
- Batteries: Keep batteries away from children. Always replace all the batteries at the same time [never mix old and new batteries]. Do not short-circuit any batteries. There is risk of explosion when misusing the batteries.
- Rechargeable battery: if your device has been designed for mobile use and contains any rechargeable batteries, please note the following instructions: charge the battery before using the device for the first time. If you are planning not to use the device for a longer period of time, recharge the battery every 2 or 3 months. This will improve the battery's lifetime. Do not short-circuit any rechargeable batteries. There is risk of explosion. Use the rechargeable battery supplied with the product only. If you have to replace the rechargeable battery, contact a qualified service technician or our Service Hotline. Rechargeable batteries are components subject to wearing out and not covered by the manufacturer warranty. Do not place any objects on the device and never apply any pressure onto the housing or the display. Do not place any recipients containing liquids beverages, vases, etc. onto or next to the device. Do not place any fire sources (such as candles) onto the device. This could damage the product.
- Environmental effects: Keep the device away from any heat sources (heating equipment, ovens, cooking places, candlelight, etc.), direct sun radiation, dirt, dust, vibrations, strong magnetic fields, moisture and rain.
- Cleaning: Clean the device with a soft, slightly moistened cloth. Do not use any chemicals, alcohol or solvents for cleaning. The finish of the device can be damaged by using these substances. Always make sure that no moisture enters the device.
- Servicing: when using the device according to the operating instructions, no special service or maintenance is required. In case of any loss of performance or other malfunction, contact a qualified service technician.
- Repairs: never open the device! Any repairs must be performed by authorized technicians or service personnel. Any unauthorised opening or modification will void the warranty and also the safety of the product may be altered. WARNING: Inside the device there is dangerous voltage. Never open the housing of the device; there is risk of personal injury by electric shock.
Environment
Old batteries do not belong in with the domestic waste!
Consumers are obliged by law to return any old batteries and rechargeable batteries to the corresponding local and/or public collection centres or to return them to the retail shops. This ensures that batteries will be disposed of respecting the environment.
Make sure to return any batteries and rechargeable batteries discharged.
Disposal of old electric and electronic devices:
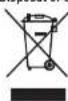
The icon of a dashed-out waste bin means that a separate disposal of electric/electronic equipment is necessary.
According to the Legislation of the European Union, any electric and electronic devices may not be disposed of with domestic trash but must be returned to a special collection center enabled for the recycling of these devices. The local waste companies should have set up specific collecting centres for this purpose, allowing private consumers to return any old devices for free. Please contact your local authorities or the local waste company for the available disposal possibilities.
Please support us actively by protecting the environment and recycle this product accordingly by returning it to a specific collection centre. This will protect the environment, other people and yourself. Thank you very much!
Table of Contents Unpacking
IMPORTANT SAFETY INSTRUCTIONS
Page
SAFETY INFORMATION
TABLE OF CONTENTS
UNPACKING....1
NOTE ON DISC 2
IDENTIFICATION OF CONTROLS 3-4
CONNECTIONS 5-6
PREPARATIONS BEFORE OPERATION....7
PLAYING A DISC....5
FUNCTION BUTTONS 9-12
SETUP MENU 13-14
DVB FUNCTION 15-18
TROUBLE SHOOTING....19
SPECIFICATIONS 20
Please make sure the following items are included with your DVD player. If any items are missing, contact your dealer.
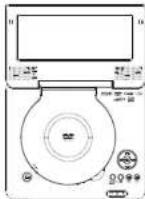
DVD Player Remote Control

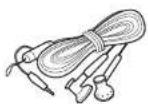
Headphone

AC/DC Adapter

Car-cigar adapter
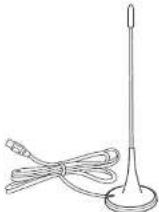
Antenna
Manual
Note on Disc
Disc Requirement
The DVD player can play back the following discs.
| Disc mark | Contents | Disc size | Maximum playback time | |
| DVD video discs | DVD | Audio+Video (knowing picture) | 12 cm | 133 min (55-51) |
| 747 min (55-51) | ||||
| 266 min (55-51) | ||||
| 486 min (55-51) | ||||
| CD | CD | Audio+Video 12 cm / 8 cm | 74min/20min | |
| MP3 | Audio 600 min | 12 cm | ||
| MPEG4 | Audio+Video | 12 cm | 600min | |
| JPEG | Still high resolution | 600min | ||
| VCO | VCO | Audio+Video | 12 cm / 8 cm | 74min/20min |
In addition, this unit can support CD/VD/MP3/MP4/WMA/DVD/DVDRW/Picture CD/CD-G
Care of Disc
idea disc contains high-density compressed data that needs proper handling.
Hold the disc with fingers.
Hold the disc's outer edge and/or the center spindle hole. Do not touch the disc surface.


Do not bend or press the disc. Do not expose the disc to direct sunlight or heating sources.

Store discs in cabinet vertically, and in dry condition. Prevent exposure to :
- Direct sunlight
• Heat or exhaust from a heating device.
- Extreme humidity
Clean the disc surface with a soft, dry cleaning cloth. Wipe the disc surface gently and radically from center toward the outer edge. Do not apply thinner, alcohol, chemical solvent, or sprays when cleaning. Such cleaning fluids will permanently damage the disc surface.
Identification of Controls
Main Unit
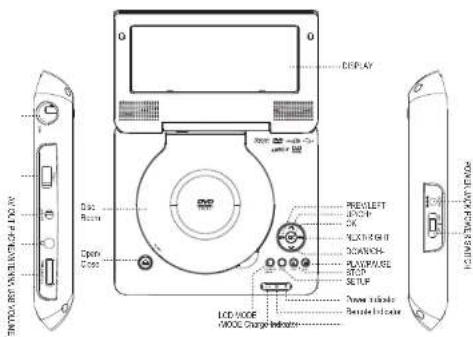
NOTE:
- Place a disc with label facing up, and push gently on the center of the disc so it goes into position.
- To start playing, press the OK or PLAY/PAUSE button. To stop playing, press the STOP button.
- To Skip Forward/Skip Backward, press and hold the PREV/NEXT button on the main unit for about two secondor press the 🎨/ punct on remote.
• To Fast Forward/Fast Backward, press the 🎨/⌘ on remote. - Power ON Indicator
- It is green under normal playback. It is red under STANDBY mode.
Identification of Controls Connections
Remote Control

Using the Coin Lithium Battery
- Draw out the battery holder out.
- Place the coin battery into the holder with the positive polarity facing up.
- Push in the battery holder

natural_image
Two technical diagrams showing a device with a lock and a separate panel assembly (no text or symbols)AV Connections
The player's AV function consists of the AV IN function and the AV OUT function. You can not only enjoy programs from external input sources through the AV IN function but can also transmit the player's signal to the external monitor using the AV OUT function.
When input the AV signal, connect the external signal source with the RCA cable and press the MODE button to set the unit into the AV mode.
When input the AV signal, please see the user's manual of the external device as well.
When output the AV signal (DVD/DVB), just connect the external receiver with a RCA cable in the DVD/DVB mode, the signal will be passed to the external monitor once the connection has been properly made. When output the DVD/DVB signal, please see the user's manual of the external device as well.
![a.g. AV Signal Output [TV or monitor with audio/video input] To AUDIO/VIDEO input. Audio/Video cable NOTE: 1. Refer to the owner's manual of the external devices. 2. Before connecting cube sure to turn the power off and unplug both units from this wall outlet.](/content/2026/05/861964/images/6793d755987c87f4959e45334980ff1d61fb37a68111775001d9bf74979a48c7.jpg)
USB Connection
USB Connection
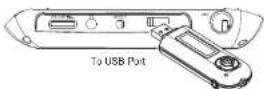
- Plug USB into the USB port on the unit side panel, briefly press the MODE button to display the DISC/USB/DTV optional menu, use the up/down direction button to select USB, press OK to access.
- It will take a short while for the player's reading data. Once USB is detected by the unit, the screen will display the playback menu, press the direction buttons to select the file. Press Play to start playing.
- To disconnect USB, just unplug it from the port when it is not in working.
Preparations before Operation Preparations before Operation
Power Connections → AC Adapter

AC adapter:
This AC adapter operates on
DC OUT: 9V
DC current: 1.5A
Max100--240V--50/60Hz 0.5A

Caution:
Do not connect the power plug to a power outlet other than that indicated on the label, as this
Do not connect or disconnect the power plug with wet hands. Doing so may cause electric shock.
Do not use the AC adapter other than one specified, as it can cause a fire or damage to the player.
Power Connections → Battery Pack
This unit works on either the AC adaptor or the built-in rechargeable battery pack.
When the unit works on the AC power, it will not consume the battery power.
Do not attempt to repair or disarmate the battery yourself. If it does not work to your expectation, contact the service center.
For new or exhausted rechargeable battery pack, we recommend it be charged for at least 4 hours.
Charging the battery pack
The battery pack can be recharged for about 300 times without obvious performance drop.
For initial use, we recommend it be charged for at least 6 hours.
The built-in battery pack can only be charged under the OFF mode.
Set the POWER SWITCH to OFF position then connect the AC adaptor as mentioned in page 6.
The charge indicator lights red during the process and will take off after it is fully charged.
*Important notice about build-in battery pack
This device is designed with build-in Lithium Polymer battery pack, capacity 2.000 mAh; the
battery pack can be recharged for about 300 times without obvious performance drop.
Use the rechargeable battery supplied with the product only. If you have to replace the rechargeable
battery, contact a qualified service technician or our Service Hotline. Rechargeable batteries are
components subject to wearing out and not covered by the manufacturer warranty. Please review any liability (bottles, etc. before disposal of old electronic devices).
Please remove any battery, battery-pack before disposal of the electronic devices. The bell
Figures shows how to remove bond-in battery. For duty disposal of the electronic devices and old batteries, please also refer to chapter "Environment" at the begin of this manual."

unfix the screws on the bottom cabinet with
a suitable screwdriver

open the bottom cabinet like picture shows,
the rechargeable battery at the bottom left corner.
cut the wire and remove it out
Playing a Disc
Basic Playback
Prepare the power supply
- Connect the power cord, slide the power switch to ON. Open the DVD cover by hand.
- Load a discPress OPEN button to open the disc lid and insert disc with the label up. Close the disc lid by hand.
- If the single sided disc is placed in upside down, "NO DISC" or "BAD DISC" will appear on the TV screen.
- After playing back all of the chapters in the title, the DVD player stops automatically and shows the menu screen.
- Start playback Press PLAY button to start playing. (Some discs may play automatically).
If a DVD disc menu appears on screen

Press the DIRECTION buttons to select the desired feature in the menu. Press OK to confirm settings.
- Adjust the volume Turn the volume control on the main unit to the desired volume level. Problem disc messages The following message will be displayed on screen when there is a formal problem with loaded disc:
Problem disc messages
The following message will be displayed on screen when there is format problem with loaded disc:
"WRONG REGIONAL "
Region code of the disc is not matching to the player's (region 1 to region 6)
"WRONG PASSWORD"
The rating level of the disc is higher than the rating level setting of the player.
The player will not play the disc.
"WRONG DISC"
The player is equipped with automatic disc quality detection software. When the player detects a problem or damaged disc, the unit may play the disc at a lower quality or stop completely, depending on the damaged level of the disc.
Production qualities of DVD discs vary. Some discs may deviate from the industry standard. Some incorrectly formatted discs may be played. However, the playback and operational quality may be substandard.
POWER management
If the player will not be in use for a long period of time, please disconnect the power supply.
Function Buttons
LCD Mode
LCD Mode To adjust the Brightness, Contrast, and Color of the TFT panel. Press the LCD Mode button to show the below picture,

When the RESET is selected, press the OK button to confirm. The three controls will be reverted to the default settings.
Press the up/down direction button to select the desired item and press the left/right direction button to adjust. When the SCREEN is selected, press the left/right direction button to set the screen size as 16:9 or 4:3.
Mode Briefly press the Mode button on the remote or the LCD MODE/MODE button on the main unit to display the Mode menu. DISC Use the up/down direction button to select the desired mode, press OK to access. DISC mode is the default mode.
Display
Press the Display button to display current working status. To quit the display mode, keep pressing the Display button.
Play/Pause/Stop
Press Play button for the first time to play the disc. Press the button for the second time to pause playing. (Still picture). Press it again to resume playback.
Press STOP once to stop playback by a time point, press it twice to stop playback completely.
Skip Forward/Backward
Press the button to skip advance DVD chapters or CD tracks.
Press the button to skip backward DVD chapters or CD tracks.
NOTE: Player will not skip forward or backward during "WARNING" section of a DVD disc. Single chapter DVD or single track CD cannot be skipped..
Fast Forward/Backward
Press the button to go fast forward through the disc. Repeatedly pressing the button will increase the search speed.

Press the button to go fast backward through the disc. Repeatedly pressing the button will increase the search speed. Press PLAY to resume the normal playback.
NOTE: The player is muted in fast forward or fast backward mode. The player will not fast forward or fast backward during WARNING section of a DVD disc.
Slow
Slow Press SLOW to play discs at a slow motion.

NOTE: The player is muted at SLOW mode.
Function Buttons Function Buttons
Disc MENU/TITLE
While playing DVD, press the Title/TTX button to display the DVD titlemenu.
Under the DVB mode, press to display the teletext. While playing DVD.
press the menu button to display the menu.
NOTE: Some DVD discs do not allow the TITLE function.
Select an item in the menu
In the DVD disc start menu or in the Set Up menu

Press the DIRECTION buttons to highlight function icons.
Press the OK button to confirm a selection.
Numeric Key Pad
(Random Program access)
1). To directly access a DVD Chapter or a CD track. 2). Input data for the DVD disc start menu or the player's setup menu.

NOTE: Some DVD discs do not allow direct access function.
MUTE
Press the MUTE button to set mute on/off
ZOOM
PLAYING DVD
Zoom Press the ZOOM button repeatedly to achieve the following zoom effect. ZOOM2→ZOOM3→ZOOM4→ZOOM1/2→ZOOM1/3→ZOOM1/4→ZOOM: OFF
PLAYING JPEG
While at 100%, press the direction button to rotate the picture.
While at 150% or 200%, press the direction button to move the picture position.
NOTE: The picture quality decreases as the picture size increases.
Color Buttons
Press to access the relative pages under the teletex mode.
GOTO
Go to a desired section. [A desired Title, Chapter, Time] Press the Right/Left button to select the entry. Press numeric buttons to input data. Press OK to execute the search. Press GOTO to quit
DVD mode

CD mode
A-B To repeat a specific section of a disc.
Press the A-B button at the starting point of the desired section. "Repeat A-" appears on screen. Press the A-B button again at the end of the desired section. "Repeat A-B" appears on screen. The player will start repeating the selected section from A to B until the function is cancelled. To cancel the function, press the A-B button for the third time.
NOTE: Some DVD discs do not allow the A-B function playback. This function does not apply to MP3 discs.
REPEAT
This function allows repeated playback of a Title, Chapter or Track.
○ Press the REPEAT button repeatedly to select the repeat mode.
In DVD mode: REP CHAPTER —REP TITLE —REP ALL —REP OFF
In CD mode: REP 1 —REP ALL —REP OFF
In MP3/MPEG4 mode: REP 1 — REP DIR — REP ALL — REP OFF
NOTE: Some DVD discs do not allow the repeat function
Step
Step Press the STEP button to start playback frame by frame. Press Play to quit the STEP mode.
Multi-Angle/Subtitle/Audio
While playing a DVD disc, press the ANGLE button to view the different camera angles on the disc. A DVD disc may contain up to 9 selectable camera angles.
While playing a DVD disc, press the Sub-Title button to select the language of the viewable subtitle. A DVD disc may contain up to 32 selectable subtitles.
CLEAR
Press to clear the incorrect input.
Function Buttons
AUDIO
Audio While playing a DVD disc, press AUDIO to select the language of the audio sound track. A DVD disc may contain up to 8 selectable audio sound tracks.
NOTE: Some DVD discs do not have multiple ANGLES, SUBTITLES or AUDIO features.
SETUP
Press the SETUP button to enter the player's setup menu. The SETUP menu allows the viewer to adjust the setting details of the DVD player. Please read the "SETUP menu" section for details.
PRO/EPG
PRO/EPG Under the DVD mode, press the button to display the electronic program guide. Under the DVD mode, press to display the program edit menu.
Programming Chapters / Tracks
You can store up to 16 programs in an individually programmed order. Please proceed accordingly: 1. Press the PROF/EPS button to show the menu.
e.g. DVD Mode DVD mode: T - titin, C - chapter. MP3 mode: T - folder, C - track.
- Use direction buttons to move between the input fields and press number buttons to input data.
- Press direction buttons to select "Play" and then press OK to start playback.
- To clear all input, select CLEAR and then press OK button.
- Press the PRO/EPC button again to exit.
NOTE: Some discs do not allow program setting.
FAV/PBC
FAWPBC Under the DVB mode, press the button to display the Channel Class menu Under the DVD mode, press to set PBC On/Off.
SCAN
Scan Press to scan channels under the DVB mode.
Setup Menu
Various features of the DVD player can be adjusted in the SETUP menu.
- Press the SETUP button to display the setup menu.
- Press the direction buttons to select the desired items, press OK to confirm.
- Press SETUP again to quit the SETUP menu.
SYSTEM SETUP MENU

1. TV System
Select the TV system from NTSC/PAL. The default setting is PAL. [The TV System for north America is NTSC.
2. Screen Saver
Shift between Screen Saver ON and OFF. The default setting is On. Press any button on main unit or remote control to exit from the screen saver.
3. TV Type
Select aspect ratio from 4:3 PS [Pan Scan]; 4:3 LB (Letter Box); 16:9 [Wide Screen]. The default setting is 16:9.
4. Password
Move the cursor to the PASSWORD prompt and press OK. Input the password B888 if it is the first use. After confirmation, you will be required to input a new 4-digit code and verify again.
5. Rating
There are eight levels of Parental Control. Level one opens discs to people of all ages. Level eight is suitable only for adults. To change the parental control setting, a 4-digit code is required to be input first. (The default code is 8888.) When the input code is confirmed, the level setting menu will appear. Select the appropriate level by the UP/DOWN button and press OK to confirm.
6. Default
This function allows you to change the player back to the factory default settings.
Setup Menu
LANGUAGE SETUP
Setup language for O50/Menu/Audio/Subtitle
Default setting is German
| Item | Instruction | Default setting |
| OSD Lang | Setup the OSD language | German |
| Audio Lang Germ | Setup the audio language | |
| Subtile Lang | Setup the subtitle languageWhen OFF is selected, the subtitle will not be displayed. | German |
| Menu Lang | Setup the menu language | German |
VIDEO SETUP
Adjust the brightness/ contrast/ hue /saturation / Sharpness effect.
| Item | Instruction | Default setting |
| Brightness | Adjust the LCD brightness effect .0 - 12. | 6 |
| Contrast | Adjust the color contrast. 0 - 12. | 6 |
| Hue | Adjust the display color. 6 - +6. | 0 |
| Saturation | Adjust the color saturation. 0 - 12. | 0 |
| Sharpness | Setup the image sharpness | 0 |
DIGITAL SETUP
14
| Item | Instruction | Default setting |
| [STEREO, MONO I/R, MIX MONO) | STEREODual Mono S |
Setup the mono effect.
DVB Function
Basic Operation
Attach the Antenna
-
Attach the supplied antenna to the antenna connector located on the player's rear panel.
-
Place the antenna on a stable plane.
You can relocate the antenna from time to time for a best possible reception when the signal performs weak.

natural_image
Line drawing of a portable electronic device connected to a speaker (no text or symbols present)Connect the Power Source
- Connect one end of the supplied AC adapter to the wall outlet with 100-240 V and the other end to the unit's
power jack on the unit's rear panel. - Slide the power switch to ON
Access the DVB Mode
Press the MODE button on the unit/remote to enter the DVB mode.
Initial Channel Scan - Auto Scan
The auto scan function is used to automatically scan for available broadcast channels, and should be used when
powering on the player for the first time. If initial again at a later time, this process will erase all of the
previously saved channels.
Use the Scan button on the remote to start Auto Scan. You also can perform Auto Scan under the system menu, press the Setup button to display the system menu.
Channel Access
Press the up/down direction button on the remote/unit to skip channels. Or press the numeric buttons to access the channel directly.
Adjust the Volume
Use the volume control to adjust the sound output to a proper listening level.
DVB System Menu
Various features of the DVB can be preset in the DVB menu. Press the Setup button to display the DVB menu. While working with the DVB menu, usually use the direction buttons and the OK button to select and to confirm an option. For more details, please see the DVB Menu section.
DVB Function
DVB Function buttons on the remote
TV/Radio : Switch between the TV program and the Radio program under the DVB mode.
FAV/PBC: Access the Channel Guide menu.
Title/TA: Press to display the teletext if it is available.
PRO/EPS: Access the electronic program guide. Scan: Search channels automatically overwriting the previous one.
Color Button: Access the relative pages under the teletext mode.
DVB Menu
Various features are preset in the DVB menu, press the SETUP button to show the
DVB menu. The DVB menu consists of Channel Guide, System Config, Installation and Game.
NOTE: While working with menu, press the direction buttons to highlight the desired
item and press OK to access.
Press SETUP to exit/back-up the setup menu.

DVB Function
DVB Menu Descriptions
Channel Guide
| ITEM | DESCRIPTION |
| TV Channels In this sub-menu, you can perform the following three functions1. Preview and access the TV channels2. Select the channel with classification.Repeatedly press the left/right direction button to display the classified channels. You need to classify channels first under the Channels Class menu.3. Sort channelsPress the DISPLAY button to access the Sort Channel menu.Use the up/down direction button and the OK button to sort channels to your own liking. | |
| Radio Channels Access the radio channel. The Radio Channel sub-menu provides the user with the same functions as the TV Channel sub-menu does.Refer to " TV Channels" for details | |
| Channels Class Access the Channel Class menu. In the Channel Class menu, use the direction buttons and the OK button to set the channels as Favor, Movie, News or Show. To release the setting, press OK again.Press the TV/Radio button to switch between the radio channels and the TV channels. | |
| Channels Edit Access the Channels Edit menu. In the Channel Edit menu, you can Move/Delete/Rename channels.Use the direction buttons and the OK button to move/delete the channels in the list. To rename the program title. See steps below1. Bo to the TV column, press the up/down direction button to select the channel, press OK to enter the edit model(Press OK again to quit the edit mode).2. In the edit mode, press the up/down direction button to change the character, press the left/right direction button to move position, press OK to confirmPress the TV/Radio button to switch between the TV channels and the radio channels. | |
DVB Function
System Config
| ITEM | DESCRIPTION |
| Parent Control | Change PinPress OK to access Change Pin -- Enter the old password --Enter the new password -- verify again.Change LockYou are required to input the password before access this function.The initial password is 8888.Use the direction buttons and the OK button to block the programs.To release the block, press OK againPress the TV/radio button to switch between the TV program andthe radio program. |
| TV Setting | Setup the screen aspect ration as 4:3 PS/LB or 16:9. |
| Video Setting | Adjust the screen brightness/contrast/hue/saturation. |
| Language | Setup the OSD language. |
Installation
| ITEM | DESCRIPTION |
| Auto Scan Scan | channels automatically.It will store all available channels automatically overwriting the previous channels. You need to select Area before perform the auto-scan. Press STOP to quit scanning. |
| Manual Scan Search | channels manually.Use the direction buttons to set the proper information,press the OKbutton to start Manual Scan. See screen instructions. |
| Default Setup Set | the player to the factory default. |
Game
The player is designed with three built-in games.
Use the direction buttons and the OK button to access the game.
While playing the electronic games, usually use the direction buttons and the OK button to make action, press SETUP to exit.
Trouble Shooting
Should your DVD player develop a problem, please check below before requesting service:
| Symptom | Check and Action |
| No power | 1. Make sure the unit has been powered on manually.2. Check if the power cord has been properly connected to the power outlet.3. Make sure the battery pack is fully charged. |
| Does not play 1 | No disc, load a disc.2. Disc has been loaded upside down. Place the disc with the label side up.3. Disc's rating level is higher than the player's setting.4. Disc is incorrect type for the player.5. Disc is damaged or dirty. Clean the disc or try another one.6. Moisture may be condensed inside the player. Remove the disc and leave the unitpower on for one or two hours. |
| No Picture | 1. Check if the TV set has been powered on. Use TV remote to select AV signal for DVD rather than broadcast.2. Check if the system connection is proper and secure.3. Check if the connection cables are damaged.4. Clean the disc. |
| Picture noisy/distorted | 1. Disc is damaged or dirty. Clean the disc or try another one.2. Reset the color system of the TV set.3. Make sure the DVD player is not connected through a VCR, cable or satellite dish. |
| No sound or sound output not complete | 1. Check if the TV and amplifier have been switched on and correctly set.2. Check if the TV and amplifier system connections are secured.3. Press AUDIO button to select other audio tracks of the disc.4. Check if the MUTE function of the TV or amplifier has been activated.5. There will be no sound output during REVERSE PLAY/PAUSE/SLOW and SEARCH. |
| Remote control does not work | 1. Make sure the unit is turned on.2. Remove the obstacles between the remote control and the player.3. Point the remote control towards the remote sensor on the player.4. Check if the batteries of the remote control have been loaded with correct polarities.5. Replace the batteries of the remote control. |
| Malfunction | Should the player develop a malfunction, unplug the player for 30 minutes. After that, power on the player and the restore function should reset the player. |
Specification
| Power supply | DC 9V 1.5A (AC adapter TERMINAL) |
| Power consumption | <10 W |
| DVD Signal system NTSC / PAL | |
| TV Signal system DVB | T |
| Video output 1=0.2 V | (p-p), 75hm, negative sync., 3.5 mm mini jack x1 |
| Audio output 0.3V +/- | 1.2Vrms1KHZ 0dB|, 3.5 mm mini jack x1 |
| Earphone terminal | 3.5mm stereo mini jack x1 |
| Signal/Noise ratio( audio) | 90dB typical |
| Dynamic rangelaudioI | 90dB typical |
| Panel size 7 inch (16:?) | |
| Resolution 480 X 3 | R3BI x 234 | |
| Laser Wavelength | 650 nm |
| Operating conditions | Temperature: 0°C to 35°C. Operation status : Horizontal |
| Dimensions 191.5x16.5x39.4 mm (main unit) | |
| Weight: 730.5g (main unit) | |
This product fulfills the following EN Norms:
EN 60065:2002+A1:2006
■ EN 55013:7001 + A1:2003 + A2:2006
EN 55020:2002+A1:2003+A2:2005
EN 61000-3-2:2000+A2:2005
■ EN 61000-3-3: 1995 + A1: 2001 + A2: 2005
Design and specifications are subject to change without notice.
- Important Safety Instruction
- Safety Precautions
- Safety Instructions and Important Information About Intended Use
- Environment
- Disposal of old electric and electronic devices:
- Table of Contents Unpacking
- Note on Disc
- Disc Requirement
- Care of Disc
- Identification of Controls
- NOTE:
- Identification of Controls Connections
- Using the Coin Lithium Battery
- AV Connections
- USB Connection
- Preparations before Operation Preparations before Operation
- AC adapter:
- Caution:
- Power Connections → Battery Pack
- Charging the battery pack
- Playing a Disc
- Basic Playback
- Prepare the power supply
- If a DVD disc menu appears on screen
- Problem disc messages
- "WRONG REGIONAL "
- "WRONG PASSWORD"
- "WRONG DISC"
- POWER management
- Function Buttons
- LCD Mode
- Display
- Play/Pause/Stop
- Skip Forward/Backward
- Fast Forward/Backward
- Slow
- Function Buttons Function Buttons
- Disc MENU/TITLE
- Select an item in the menu
- Numeric Key Pad
- MUTE
- ZOOM
- PLAYING JPEG
- Color Buttons
- GOTO
- DVD mode
- CD mode
- REPEAT
- Step
- Multi-Angle/Subtitle/Audio
- CLEAR
- AUDIO
- SETUP
- PRO/EPG
- Programming Chapters / Tracks
- FAV/PBC
- SCAN
- Setup Menu
- SYSTEM SETUP MENU
- TV System
- Screen Saver
- TV Type
- Password
- Rating
- Default
- LANGUAGE SETUP
- VIDEO SETUP
- DIGITAL SETUP
- DVB Function
- Basic Operation
- Attach the Antenna
- Connect the Power Source
- Access the DVB Mode
- Initial Channel Scan - Auto Scan
- Channel Access
- Adjust the Volume
- DVB System Menu
- DVB Function buttons on the remote
- DVB Menu
- DVB Menu Descriptions
- Channel Guide
- Game
- Trouble Shooting
Brand : SEG
Model : DPP 1025-070 LE
Category : Portable DVD Player