
MRT-3B - Audio recorder SAMSON - Free user manual and instructions
Find the device manual for free MRT-3B SAMSON in PDF.


| Product Type | Portable Audio Recorder |
| Brand | Samson |
| Model | MRT-3B |
| Recording Media | SD/SDHC card (up to 32 GB) |
| Recording Formats | MP3 (32-320 kbps), WAV (16-bit/44.1 kHz) |
| Microphone | Built-in stereo electret condenser |
| Inputs | 1/8" stereo line/mic input, built-in stereo mics |
| Outputs | 1/8" stereo headphone/line output |
| Power Supply | 2 x AA alkaline batteries or USB bus power |
| Battery Life | Approx. 15 hours (MP3 128 kbps) |
| Dimensions (H x W x D) | 1.2 x 2.5 x 5.5 inches |
| Weight | 0.5 lbs (without batteries) |
| Frequency Response | 20 Hz - 20 kHz |
| Recording Level Control | Manual with adjustable gain (0-100) |
| Playback Features | Skip, repeat, variable speed (0.5x-2x) |
| Display | Backlit LCD with recording level meters |
| Storage Capacity | Up to 32 GB (SDHC card, not included) |
| Connectivity | USB 2.0 (mass storage class) |
| Maintenance | Clean exterior with dry cloth; avoid liquids |
| Safety | Do not expose to moisture or extreme temperatures |
| Spare Parts & Repairability | Contact Samson support; no user-serviceable parts inside |
| Included Accessories | USB cable, 2 x AA batteries, pouch, quick start guide |
Frequently Asked Questions - MRT-3B SAMSON
User questions about MRT-3B SAMSON
0 question about this device. Answer the ones you know or ask your own.
Ask a new question about this device
Download the instructions for your Audio recorder in PDF format for free! Find your manual MRT-3B - SAMSON and take your electronic device back in hand. On this page are published all the documents necessary for the use of your device. MRT-3B by SAMSON.
USER MANUAL MRT-3B SAMSON
Micro RhythmTrak zoom MRT-3
Operation Manual

Safety Precautions/Usage Precautions
Safety Precautions
In this manual, symbols are used to highlight warnings and cautions for you to read so that accidents can be prevented. The meanings of these symbols are as follows:

This symbol indicates explanations about extremely dangerous matters. If users ignore this symbol and handle the device the wrong way, serious injury or death could result.

This symbol indicates explanations about dangerous matters. If users ignore this symbol and handle the device the wrong way, bodily injury and damage to the equipment could result.
Please observe the following safety tips and precautions to ensure hazard-free use of the MRT-3.

About power
Since power consumption of this unit is fairly high, we recommend the use of an AC adapter whenever possible. When powering the unit from the batteries, use only an alkaline type.
AC adapter operation
- Be sure to use only an AC adapter which supplies 9 V DC, 300 mA and is equipped with a "center minus" plug (Zoom AD-0006).
The use of an adapter other than the specified type may damage the unit and pose a safety hazard.
- Connect the AC adapter only to an AC outlet that supplies the rated voltage required by the adapter.
- When disconnecting the AC adapter from the AC outlet, always grasp the adapter itself and do not pull at the cable.
- If the unit is not to be used for a long time, disconnect the AC adapter from the outlet.
Battery operation
- Use four IEC R6 (size AA) batteries (alkaline or manganese).
- The MRT-3 cannot be used for recharging. Pay close attention to the labelling of the battery to make sure you choose the correct type.
- If the MRT-3 is not to be used for an extended period of time, remove the battery from the unit.
- If batteries leakage has occurred, wipe the battery compartment and the battery terminals carefully to remove all remnants of battery fluid.
- While using the unit, the battery compartment cover should be closed.

Environment
Avoid using your MRT-3 in environments where it will be exposed to:
- Extreme temperature
• High humidity or moisture - Excessive dust or sand
• Excessive vibration or shock

Handling
- Since the MRT-3 is a precision electronic device, avoid applying excessive force to the controls. Do not operate the keys or controls with your foot.
- Take care that no foreign objects (coins or pins etc.) or liquids can enter the unit.
- Be sure to turn the power to all equipment off before making connections.
- Before moving the unit, turn the power off, and disconnect all cables and the AC adapter.

Alterations
Never open the case of the MRT-3 or attempt to modify the product in any way since this can result in damage to the unit.

In Case of Trouble
If there seems to be a defect or a problem with the unit, immediately disconnect the AC adapter or remove the batteries to shut off the power. Then disconnect any other cables connected to the unit.
Usage Precautions
• Electrical interference
For safety considerations, the MRT-3 has been designed to provide maximum protection against the emission of electromagnetic radiation from inside the device, and protection from external interference. However, equipment that is very susceptible to interference or that emits powerful electromagnetic waves should not be placed near the MRT-3, as the possibility of interference cannot be ruled out entirely.
With any type of digital control device, the MRT-3 included, electromagnetic interference can cause malfunctioning and can corrupt or destroy data. Care should be taken to minimize the risk of damage.
- Cleaning
Use a soft, dry cloth to clean the MRT-3. If necessary, slightly moisten the cloth. Do not use abrasive cleanser, wax, or solvents (such as paint thinner or cleaning alcohol), since these may dull the finish or damage the surface.
Please keep this manual at hand for future reference.
Contents
Safety Precautions/
Usage Precautions 2
Introduction 5
Names of Parts 6
Top Panel 6
Rear Panel 6
Getting Connected 7
Connection Example 1 7
Connection Example 2 ....7
Preparations 8
Using Batteries 8
Terms Used in This Manual 9
Listening to the Demo Song …… 11
Playing the Pads (Manual Play) …… 12
Using Patterns (Pattern Mode) …… 14
Playing a Pattern 14
Changing the Tempo of Pattern Playback 15
Real-Time Pattern Recording 16
Pattern Step Recording 19
Changing User Pattern Resolution After Recording 21
Changing the User Pattern Length 21
Changing the User Pattern Beat …… 22
Copying a Pattern 23
Erasing a Single User Pattern 24
Deleting All User Patterns 25
Creating Your Own Kit
(Kit Mode) 26
Editing a User Kit 26
Kit Items 28
Copying a Kit 30
Creating Songs (Song Mode) …… 32
What Is a Song? 32
Recording Song Patterns 33
Changing the Tempo Within a Song 36
Changing the Song Volume 37
Selecting a Dedicated Song Kit 38
Checking the Amount of Remaining
Memory for Songs 39
Copying a Song 39
Deleting a Song 40
Deleting All Songs 41
Other Functions 42
Controlling the MRT-3 With a Foot Switch 42
Synchronizing Playback With an External Device 44
Playing MRT-3 Sounds From an External MIDI Component 46
Setting the Pattern/Song Playback Swing 47
Setting the Precount for Real-Time Recording 48
Returning the MRT-3 to the Factory Default Condition 49
Troubleshooting 50
Specifications 51
Reference 52
Kit List 52
MIDI Note Number Chart 53
Instrument List 54
Pattern List 56
MIDI Implementation 60
MIDI Implementation Chart 61
Index 62
Introduction
Thank you for purchasing the ZOOM Micro RhythmTrak MRT-3 (subsequently referred to as "the MRT-3").
The MRT-3 offers the following attractive features.
- Sophisticated rhythm machine incorporates 199 super-realistic drum and percussion sounds in an amazingly compact body. A full 396 preset patterns contain a wide variety of preprogrammed rhythms. 99 additional patterns can be programmed and stored by the user.
- Create a backing sequence (song) with up to 99 patterns. As many as 99 such songs can be stored for immediate use at any time.
- Internally lit pads let you follow the rhythm pattern visually during song playback or when using a pattern.
- Choose up to 14 sounds from the built-in drum and percussion sources, and then adjust level, tuning, and panning individually to create your very own drum kit. This gives you the flexibility to realize your creative vision.
- Perfectly intuitive and simple design lets you master the unit right away, even if you have never used a drum machine before.
- Optional foot switch FS01 allows pattern start/stop control or tempo switching. You can also operate an assigned sound such as bass drum or open/closed hi-hat.
- MIDI IN connector allows use with an external MIDI sequencer or other device. The Multitrak Recording Studio ZOOM MRS-4 is an ideal match, letting you synchronize the audio tracks from the recorder with the rhythm track from the MRT-3. Playing the sounds of the MRT-3 with an external MIDI component is also possible.
Please take the time to read this manual carefully so as to get the most out of your MRT-3 and to ensure optimum performance and reliability.
Names of Parts
Top Panel
![Names of Parts Display [VALUE +/-] keys [OUTPUT LEVEL] knob MIDI IN FOOT SW STEREO OUT INPUT MONO OFF POWER ON PROC IN Micro RhythmTrak zoom MRT-3 10N PATTERN MEASURE BEAT 8.886 L PADBITI STEP INSERT / COPY DELETE / ERASE - + [INSERT/COPY] key [DELETE/ERASE] key [SONG] key (LED) [PATTERN] key (LED) [KIT] key (LED) [TEMPO] key (LED) [REC] key (LED) [PLAY] key (LED) [STOP] key (LED) REAL-TIME REC PAD BANK 2 CRASH 4 CUP 6 FUNCTION TOM 1 TOM 2 TOM 3 TOM 1 PRE COUNT FOOT SW MDI PAD SENS 1 KICK 1 3 SNARE 5 CLOSED HAT 7 OPEN HAT KICK 2 SNARE 1 EXTRA 1 TIME SIG INST QUANTIZE TUNE BAR LENGTH PAR SWING LEVEL](/content/2026/05/861496/images/cc6568de6ab7e2a5152e48a9c4e68e3e57a39407096bdba1e55900d8342b4f35.jpg)
Pads 1 - 7 (LEDs)[PAD BANK][FeJN(EBD)N] key (LED)
NOTE
Keys marked (LED) have an integrated LED that causes the key itself to light up.
HINT
Names of top panel controls and rear panel connectors are indicated with angle brackets [] in this manual.
Rear Panel
![[POWER] switch [FOOT SW] jack DC 9V 300mA POWER ON OFF MONO OUTPUT STEREO (PHONES) FOOT SW MIDI IN [MIDI IN] connector [DC IN] connector [OUTPUT MONO] jack [OUTPUT STEREO/PHONES] jack](/content/2026/05/861496/images/520359cb666b0b46b44a9babc4aaf17265c5af710715abce06c91e5c2233235e.jpg)
Getting Connected
Connection Example 1
![For mono playback, connect a mono cable to the [OUTPUT MONO] jack. To monitor the sound with headphones, plug the phones into the [OUTPUT STEREO/PHONES] jack. FS01 If you connect the optional foot switch FS01 to the [FOOT SW] jack, you can control start/stop and switch the sound of the MRT-3 with your foot. DC 9V 300mA POWER ON OFF MONO OUTPUT STEREO (POONES) FOOT SW MIDI IN AC adapter Monitor system For stereo playback, connect a Y cable to the [OUTPUT STEREO/PHONES] jack and plug the other end of the cable into the L/R channel inputs of an audio system or two channels of a mixer assigned to left and right positions.](/content/2026/05/861496/images/3b0de9f19cf8b68815e8c3afe0865f5b90697100455195b3863a61c515e3f080.jpg)
Connection Example 2
![DC 9V 300mA POWER ON OFF MONO OUTPUT STEREO (PHONES) FOOT SW MIDI IN To synchronize the unit with a MIDI sequencer/recorder that has a MIDI clock output, connect a MIDI cable from the MIDI OUT connector of the device to the [MIDI IN] connector of the MRT-3. MIDI OUTAUX IN MRS-4](/content/2026/05/861496/images/2864e370bb17de4c88d79769213654960f43ae20441f3c3ef4ff6a7a94cbb80c.jpg)
Preparations
When connections are complete, set the volume as follows.
- While the playback system is still turned off and the volume is fully turned down, double-check whether all connections have been made correctly.
If cables are connected or disconnected while power is on, or if power is turned on with the volume turned up, damage to the speakers may occur.
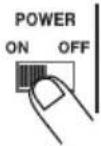
- Turn power to the MRT-3 on.
Set the [POWER] switch to ON.
-
Turn power to the playback system on and set the volume to about midway.
-
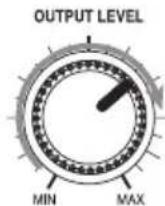
While tapping a pad to produce sound, adjust the [OUTPUT LEVEL] knob of the MRT-3 to obtain a suitable volume.
Using Batteries
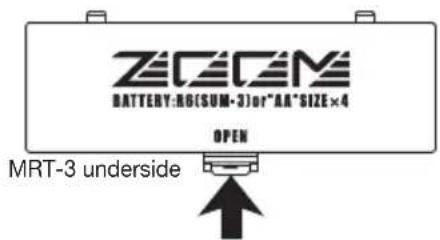
The MRT-3 can be powered from batteries (not supplied). Follow the steps below to insert the batteries.
- Turn the unit over and open the battery compartment cover.
-
Insert four fresh IEC R6 (size AA) batteries into the battery compartment. The use of alkaline batteries is recommended.
-
Close the battery compartment cover.
NOTE
When using batteries, a flashing dot at the right side of the display means that the batteries are nearly exhausted. Insert fresh batteries as soon as possible.
Four IEC R6 (size AA) batteries

Terms Used in This Manual
This section explains some important concepts of the MRT-3.
Pattern
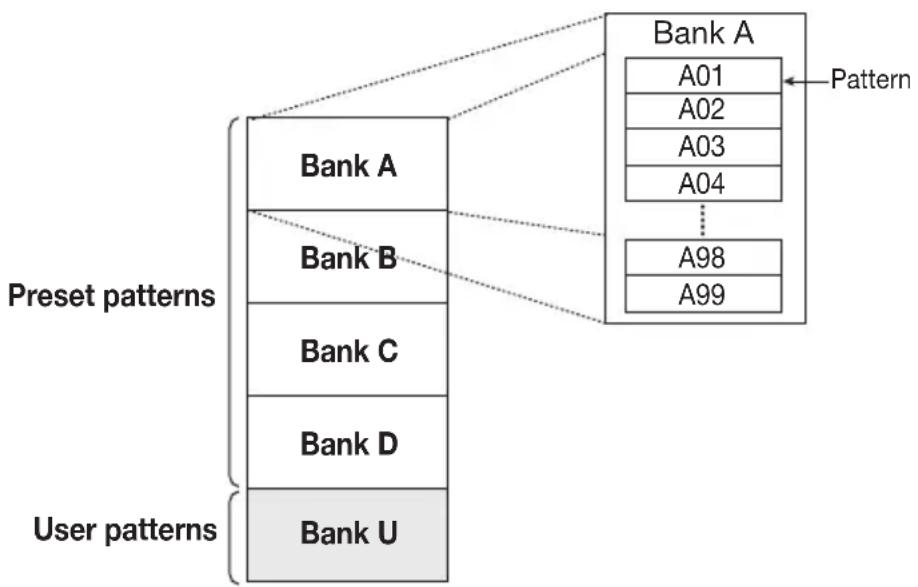
Playing a rhythm using sounds stored in the MRT-3 is called playing a pattern. The information stored in a pattern includes data such as pattern length, beat, and which kit (combination of drum/percussion sounds) is used.
The patterns are organized in banks (A - D, U) and numbers (01 - 99). The MRT-3 has 396 read-only preset patterns (A01 - D99) and 99 read/write user patterns (U01 - U99).
flowchart
graph TD
    subgraph Preset Patterns
        A["Bank A"] --> B["Bank B"]
        B --> C["Bank C"]
        C --> D["Bank D"]
        D --> E["Bank U"]
    end

    subgraph User Patterns
        F["Bank A"] --> G["A01"]
        F --> H["A02"]
        F --> I["A03"]
        F --> J["A04"]
        F --> K["A98"]
        F --> L["A99"]
    end

    A -.-> F
    B -.-> F
    C -.-> F
    D -.-> F
    E -.-> F
    style Preset Patterns fill:#f9f,stroke:#333
    style User Patterns fill:#ccc,stroke:#333
■ Song
A song is a sequence of patterns played in subsequent steps. The maximum number of steps in a song is 99. Provided that there is free memory, the MRT-3 has the capability to store up to 99 songs.
A song includes data such as pattern number, overall song tempo (master tempo), tempo change information, volume change information, dedicated kit information, etc.

flowchart
graph TD
    A["Song 01"] --> B["Master tempo Kit number"]
    C["Song 02"] --> B
    D["Song 03"] --> B
    E["..."] --> F["..."]
    G["Song 98"] --> F
    H["Song 99"] --> F
Kit
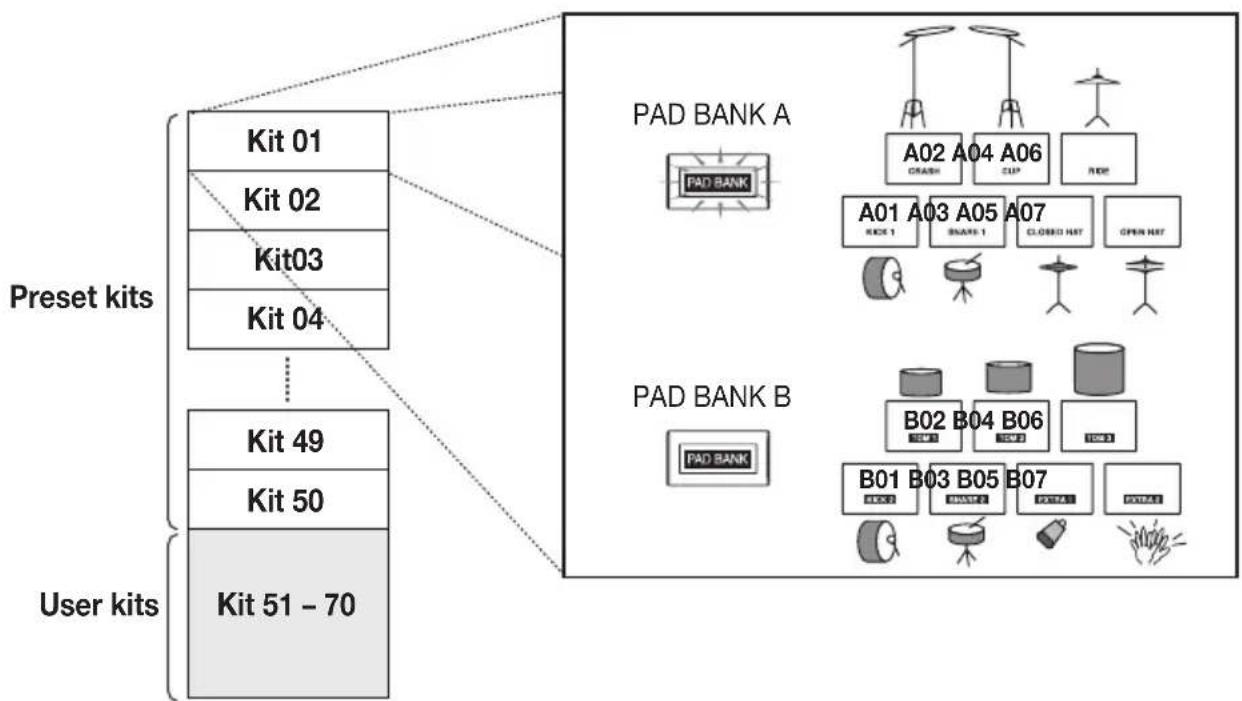
The MRT-3 lets you select 14 sounds from the built-in drum and percussion sources to use for playing with the pads. A combination of such sounds, together with pad sensitivity information and level/tuning information for each pad is called a kit. The MRT-3 has a capacity for 70 kits. Kits 01 – 50 are read-only preset kits and kits 51 – 70 are read/write user kits.
Pad/Pad Bank
Each pad on the MRT-3 can be used to play the currently selected sound, and to record it as a phrase in a pattern.
To be able to play 14 sounds with the 7 pads on the unit, pads are grouped in two banks (A and B) which can be switched with the [PAD BANK] key. When the [PAD BANK] key is out, bank A is selected. When the key is lit, bank B is selected.
flowchart
graph TD
    A["Preset kits"] --> B["Kit 01"]
    A --> C["Kit 02"]
    A --> D["Kit 03"]
    A --> E["Kit 04"]
    A --> F["..."]
    G["User kits"] --> H["Kit 49"]
    G --> I["Kit 50"]
    G --> J["Kit 51 - 70"]

    K["PAD BANK A"] --> L["PAD BANK"]
    K --> M["A02 A04 A06"]
    K --> N["A01 A03 A05"]
    K --> O["A07"]
    K --> P["CLOSED H87"]
    K --> Q["OPEN H87"]

    R["PAD BANK B"] --> S["B02 B04 B06"]
    R --> T["B01 B03 B05"]
    R --> U["B07"]
    R --> V["B01"]
    R --> W["B03"]
    R --> X["B05"]
    R --> Y["B07"]
    R --> Z["B01"]
    R --> AA["B03"]
    R --> AB["B05"]
    R --> AC["B07"]
    R --> AD["B01"]
    R --> AE["B03"]
    R --> AF["B05"]
    R --> AG["B07"]
    R --> AH["B01"]
    R --> AI["B03"]
Listening to the Demo Song
The MRT-3 comes with a demo song already built in. Listen to this song to hear for yourself what the MRT-3 can do.
1. Press the [FUNCTION] key.
The [FUNCTION] key flashes.
![SAMSON MRT-3B - Press the [FUNCTION] key. - 1](/content/2026/05/861496/images/742e1d237c78db895236ee5b18b6a29e78143ea2b63a5198c4b1802e5ac1e941.jpg)
2. Press the [SONG] key.
The indication "dEMo" appears on the display and the demo song starts. The display indication changes and the pads light up in sync with the song.
![SAMSON MRT-3B - Press the [SONG] key. - 1](/content/2026/05/861496/images/8025586133e3a59eb4d5ce860cdba8a606c4f936612c0af2caaf9219a7c3276a.jpg)
![SAMSON MRT-3B - Press the [SONG] key. - 2](/content/2026/05/861496/images/afeeed625969092613e884d096e3a7bdea6280dd19d6639699d3206b7107c933.jpg)
The demo song is played repeatedly until you stop it.
3. To stop the demo song, press the [PATTERN] key or the [SONG] key.

Playing the Pads (Manual Play)
The pads on the top panel of the MRT-3 each produce a different sound when hit. The sound depends on the currently selected kit and pad bank. Try hitting the pads to hear the realistic sounds of the MRT-3.
1. Press the [PATTERN] key.
![SAMSON MRT-3B - Press the [PATTERN] key. - 1](/content/2026/05/861496/images/59e91ef6b7ac7a1653b563965b8371ea2bbca0a1830db086d3d5fba84c657f9c.jpg)
The [PATTERN] key lights up and the MRT-3 goes into pattern mode (in which rhythm pattern playback and recording can be carried out).
2. Hit any pad.

The pad lights up briefly, and the sound assigned to it is played. The volume of the sound depends on the intensity with which the pad is hit.
3. To switch the bank, press the [PAD BANK] key so that the key lights up.
![SAMSON MRT-3B - To switch the bank, press the [PAD BANK] key so that the key lights up. - 1](/content/2026/05/861496/images/88a0c1251a61c612c38cd405345b4b56ba039ed9af24e90960abbb235a6fc013.jpg)
The key lights up, and the sound assigned to pads 1 - 7 changes. To return to the earlier sound, press the [PAD BANK] key once more.
![SAMSON MRT-3B - To switch the bank, press the [PAD BANK] key so that the key lights up. - 2](/content/2026/05/861496/images/f0267fb76f7eb2d42f981675a1825f8f72088f643392fea14bfca2bcfc430f5d.jpg)
When the [PAD BANK] key is out, bank A is selected. When the key is lit, bank B is selected.
4. To switch the kit played by the pads, press the [KIT] key.
The [KIT] key lights up, and the MRT-3 goes into kit mode. In this mode, you select the kit for playing the pads and patterns. The display shows the currently selected kit number.

![SAMSON MRT-3B - To switch the kit played by the pads, press the [KIT] key. - 3](/content/2026/05/861496/images/957f2a87584473b8f0376bdfff7f57d0c6e0121eadd4281f70e5db397278af39.jpg)
The kit can only be changed for a user pattern, not for a preset pattern.
- Use the [VALUE +/-] keys to select a kit number.
![SAMSON MRT-3B - To switch the kit played by the pads, press the [KIT] key. - 4](/content/2026/05/861496/images/0dc7910fc83038c4fc07f47c0130b34d75566fba499abb97eae20a035dad5231.jpg)
The kit numbers are switched in the order 01P - 50P, 51U - 70U.
Try hitting the pads and switching the pad bank to check out which sounds are available in the newly selected kit.
- When you have found the desired kit, press the [PATTERN] key to return to the pattern mode.
![SAMSON MRT-3B - To switch the kit played by the pads, press the [KIT] key. - 5](/content/2026/05/861496/images/1aa02b6c3a6662f22e45676b80769c8474d103fe1dad6a541f59bc9f16d37666.jpg)
Using Patterns (Pattern Mode)
This section shows how to play and record patterns of the MRT-3 in pattern mode.
Playing a Pattern
The MRT-3 has 396 read-only preset patterns (A01 – D99) and 99 read/write user patterns (U01 – U99). To select and play a pattern, proceed as follows.
NOTE
In the factory default condition, all user patterns are empty.
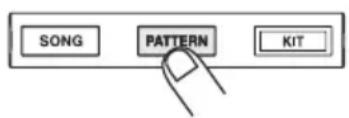
1. Press the [PATTERN] key.
The [PATTERN] key lights up and the MRT-3 goes into pattern mode. The display shows the bank and number of the currently selected pattern.

Pattern numberBank (A - D, U)
For an empty user pattern, "E" is shown here.
2. Use the [VALUE +/-] keys to select the pattern number.
![SAMSON MRT-3B - Use the [VALUE +/-] keys to select the pattern number. - 1](/content/2026/05/861496/images/3e578d9dca3154c5c2cded2ee826dc133a744024a1fe69b81838cf2ba22c8c77.jpg)
In pattern mode, the [VALUE +/-] keys serve to select the pattern. For example, if you repeatedly press the [VALUE +] key, the patterns are switched in the order U01 ... U99 →A01 ... A99 →B01 ... B99 →C01 ... C99 →D01 ... D99 →U01.
3. To directly switch the bank, press the [FUNCTION] key and then use the [VALUE +/-] keys.
This switches only the bank and keeps the pattern number.


Hint
The [FUNCTION] key serves for making various settings of the MRT-3. The actual effect of pressing the key depends on the currently selected mode and on which other keys are used together with it.
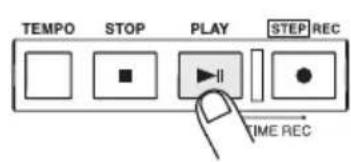
4. Press the [PLAY] key.
The [PLAY] key lights up and the pattern is played repeatedly. During playback, the [TEMPO] key flashes in sync with the tempo. The display shows the current position in the pattern (measure/beat).

Hint
- While a pattern is playing, you can also manually play the pads.
- While a pattern is playing, you can also switch to a different bank and pattern number. The new pattern will begin playing as soon as you switch to it.
5. To stop pattern playback, press the [STOP] key.

If you press the [PLAY] key instead of the [STOP] key, the unit goes into pause mode, and the [PLAY] key flashes. If you press the [PLAY] key again in this condition, playback resumes from the same position.
Changing the Tempo of Pattern Playback
In pattern mode, you can adjust the play tempo in the range of 40 - 250 BPM (quarter note beats per minute).
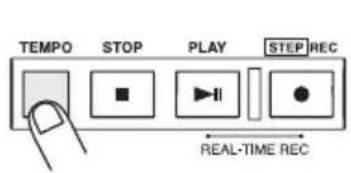
1. Press and hold the [TEMPO] key.
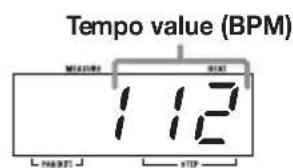
The [TEMPO] key lights up and the current tempo is shown on the display.
2. While keeping the [TEMPO] key depressed, use the [VALUE +/-] keys to adjust the tempo.
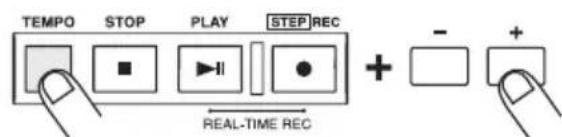
![SAMSON MRT-3B - While keeping the [TEMPO] key depressed, use the [VALUE +/-] keys to adjust the tempo. - 2](/content/2026/05/861496/images/22a4b861e3cccbbf139f4a6e034410043219c25d695edd20904a3cd01d44ce41.jpg)
- When the tempo is as desired, release the [TEMPO] key.
- To specify the tempo manually, tap the [TEMPO] key twice or more in the desired tempo (tap input function).

If you tap the [TEMPO] key twice or more often while a pattern is playing or stopped, the tapping interval of the last two taps is taken as the quarter note tempo. This allows you to simply set the tempo in sync with a song.
NOTE
The tempo set in pattern mode applies to all patterns. It is not possible to set the tempo for a pattern individually.
Real-Time Pattern Recording
The MRT-3 has 99 user pattern slots which can be filled with your own patterns. Creating and recording a pattern is possible in two ways: by actually playing the pattern on the pads (real-time recording), or by entering each sound individually (step recording).
This section describes the procedure for real-time recording.
- In pattern mode, select an empty user pattern (U01 - U99). If necessary, select a kit.
When you select an empty user pattern, the indication "E" appears on the right side of the display.

Hint
- If you change the kit in pattern mode while a user pattern is selected, the last selected kit will be stored for that pattern.
-
You can also erase a recorded user pattern to return it to the empty state. See page 24.
-
Press the [FUNCTION] key and then pad 3 (QUANTIZE).
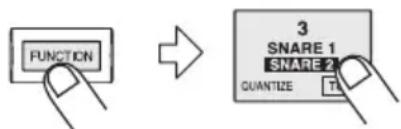
The display shows the current quantize setting. Quantization refers to the degree of detail with which notes are recorded. By setting the quantize value to the shortest note that you
want to use for the pattern, recording can be carried out while automatically maintaining precise timing.
3. Use the [VALUE +/-] keys to set the quantize value (shortest note to be recorded).
The following settings are available.
![SAMSON MRT-3B - Use the [VALUE +/-] keys to set the quantize value (shortest note to be recorded). - 1](/content/2026/05/861496/images/24eca0d50109bed0db50f4904b800ca46da9e7efbe40de6a72b60794737951fe.jpg)
| 4...... Quarter note | 24...... Sixteenth triplet note |
| 8...... Eighth note | 32...... Thirty-second note |
| 12...... Eighth triplet note | 48...... Thirty-second triplet note |
| 16...... Sixteenth note | Hi...... 1 tick (1/96 of quarter note) |
The selected setting will be used as shortest note for real-time recording.
4. Press the [FUNCTION] key again.
![SAMSON MRT-3B - Press the [FUNCTION] key again. - 1](/content/2026/05/861496/images/94ad1622e3ef6df82a24526784c79c3c86d0a865f8c345b02066588e7afc8740.jpg)
Hint
- The quantize setting applies to all patterns. When recording another pattern with the same resolution, it is not necessary to set the quantize value again.
- By changing the quantize setting after recording is completed, you can add another part with different resolution to the same pattern. For example, after recording bass drum and snare drum using sixteenth notes, you may want to record a hi-hat sequence with thirty-second notes.
- If desired, you can change the resolution of a recorded phrase afterwards. For details, see the section "Changing User Pattern Resolution After Recording".
5. While holding down the [REC] key, press the [PLAY] key.

The [REC] key and [PLAY] key light up. The [TEMPO] key flashes in sync with the tempo, and one measure of precount clicks is heard before recording starts. During recording, metronome clicks are heard, and the display shows the current position in the pattern (measure/beat).
Metronome sound


Hint
- Unless specified otherwise, the beat and duration of an empty pattern where nothing has been recorded are the same as those of the most recently selected recorded pattern. If desired, you can change the beat and number of measures for the pattern ( p. 21 – 22).
- If desired, the duration of the precount can be changed, or it can be turned off (→ p. 48).
6. Adjust the tempo if necessary.
The pattern tempo can be changed at any time. For recording a difficult phrase, it might be helpful to temporarily reduce the tempo.
7. Tap the pads in accordance with the metronome sound.
The sound of the respective pad is heard, and it is recorded for the duration set with the quantize value. You can verify the current position in the pattern by checking the display. When the end of the pattern is reached, the recording loops back to the beginning and continues, allowing you to add to the recording as often as desired. (If necessary, use the [PAD BANK] key to change the pad bank.)
8. To temporarily pause pattern recording, press the [REC] key while real-time recording is in progress.
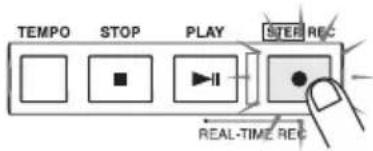
The [REC] key starts to flash. If you hit a pad in this condition, the sound will be heard, but it is not recorded. This is useful to check the phrasing and sound before actually recording. To resume recording, press the [REC] key once more.
9. To erase the sound from a specific pad, push the pad while holding down the [DELETE/ERASE] key.
While the key is held down, the sound from that pad is erased from the pattern.
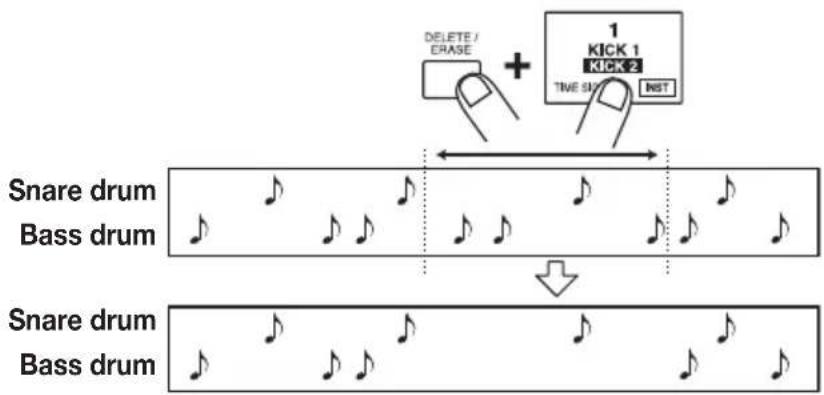
10. When recording is completed, press the [STOP] key.
NOTE
- If a MIDI clock signal is being received, real-time recording is not possible. For details, please refer to page 44.
- When there is not enough remaining free memory in the MRT-3, the indication "FULL" appears on the display, and further recording is not possible. Erase unneeded patterns.
Pattern Step Recording
This section describes step recording, which allows you to enter and record each sound separately, step by step, while the MRT-3 is in the stop condition. Even without mastering how to play the pads in real time, you can easily create complex drum and bass patterns. And you don't need to stop there, because you can even create patterns that would be impossible to play in real time.
For step recording, you select the shortest note that is to be used as unit, and you create the pattern by pressing a pad (note) or the [REC] key (rest) for each step.
For example, to create the following bass drum pattern with step recording, select an eighth note as smallest unit and make the entry as follows:
![9:4 Bass drum [REC][REC][P, P, P, P, P, P, P, P, P, P, P, P, P, P, P, P, P, P, P, P, P, P, P, P, P, P, P, P, P, P, P, P, P, P, P, P, P, P, P, P, P, P, P, P, P, P, P, P, P, P, P, MABEC [REC][REC] [REC] [REC] [REC] - - - - - - - - - - - - - - - - - - - - - - - - - - - - - - - - - - - - - - - - - - - - - - - - - - - - - - - - - - - - - - - - - - - - - - - - - - - - - - - - - - - - - - - - - - - - - - - - - - - - -](/content/2026/05/861496/images/20c976ea80065cfcd39792b071a1024615a8ce13e7e68b94ad60fe2d2e362072.jpg)
When the end of a pattern is reached, it loops automatically back to the beginning, allowing you to add other instrument sounds, to complete the pattern. By hitting two pads at the same time, you can enter two sounds in the same position.
-
In pattern mode, select an empty user pattern.
-
If required, select the kit for recording.
The kit selection procedure is the same as for manual play (→ p. 12).
- Press the [FUNCTION] key and then pad 3 (QUANTIZE).
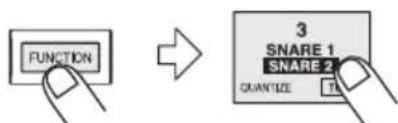
The current quantize setting appears on the display. The minimum unit (shortest note) for step recording is determined by this setting.

The quantize setting applies to all patterns.
- Use the [VALUE +/-] keys to set the quantize value (shortest note to be recorded).
The following settings are available.
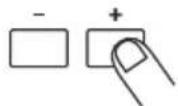
| 4...... Quarter note | 24...... Sixteenth triplet note |
| 8...... Eighth note | 32...... Thirty-second note |
| 12...... Eighth triplet note | 48...... Thirty-second triplet note |
| 16...... Sixteenth note | Hi...... 1 tick (1/96 of quarter note) |
5. Press the [REC] key.
The [REC] key and [START] key light up, indicating that the MRT-3 is ready for recording.
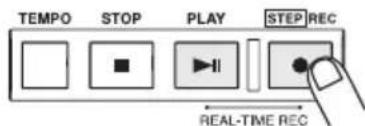
6. To enter a note, hit the pad corresponding to the desired sound.

For example, tapping pad 1 will enter a bass drum note (pad 1 lights up). The tapping intensity will also be recorded. When you press the [REC] key, the current position advances by the minimum unit. You can verify the current position (measure/beat) in the pattern by checking the display.
7. To enter a rest, press the [REC] key.
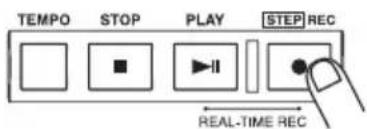
No sound is recorded, and the position advances by one step. If you press the [REC] key, the current position within the beat is shown as number of ticks.
NOTE
- If you press the [PLAY] key, the current position within the beat is shown as number of ticks, for as long as the button is held.
- When there is not enough remaining free memory in the MRT-3, the indication "FULL" appears on the display, and further recording is not possible. Erase unneeded patterns.
When the end of the pattern is reached, the recording loops back to the beginning and continues, allowing you to add to the recording as often as desired. (If necessary, use the [PAD BANK] key to change the pad bank.)
8. To erase a sound, use the [REC] key to move to the desired position. Then press the corresponding pad while holding down the [DELETE/ERASE] key.
![SAMSON MRT-3B - To erase a sound, use the [REC] key to move to the desired position. Then press the corresponding pad while holding down the [DELETE/ERASE] key. - 1](/content/2026/05/861496/images/7400e5dccdb4f04803580e921b230e46d124832389da528445c758f7c753debf.jpg)
As you move the position with the [REC] key, the pad that has been input for the current position lights up. Pressing the pad while holding the [DELETE/ERASE] key down causes the pad to go out and the sound will be erased.
9. When recording is completed, press the [STOP] key.
The [REC] key goes out and step recording terminates.
Changing User Pattern Resolution After Recording
The resolution that is recorded together with the play information of a user pattern can be changed later. For example, when a user pattern was recorded without quantization, it can be later set to a sixteenth note for dynamic matching.
-
In pattern mode, select the user pattern for which you want to change the resolution.
-
Press the [FUNCTION] key and then pad 3 (QUANTIZE).
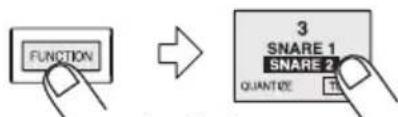
The current quantize setting appears on the display.
- Use the [VALUE +/-] keys to set the quantize value (shortest note to be recorded).
- Press the [REC] key.

The resolution of the recorded user pattern is changed, and the unit returns to the pattern mode.
NOTE
If you select a quantize value in step 3 that is finer than the value with which the pattern was recorded, no change will be made to the pattern.
Changing the User Pattern Length
You can change the length (number of measures) of a user pattern.
-
Select the user pattern whose length you want to change.
-
Press the [FUNCTION] key and then pad 5 (BAR LENGTH).
The number of measures for the user pattern selected in step 1 is shown.

- Use the [VALUE +/-] keys to set the new bar length.
The bar length (number of measures) can be set in the range from 1 - 99.
- Press the [FUNCTION] key.

The pattern length is changed. When a recorded pattern was made shorter, the excess measures at the end of the pattern will be cut off. When a recorded pattern was made longer, blank measures will be added at the end of the pattern.
Changing the User Pattern Beat
The beat (time signature) of an empty user pattern can be changed as follows.
-
Select the user pattern whose beat you want to change.
-
Press the [FUNCTION] key and then pad 1 (TIME SIG).
The beat of the user pattern selected in step 1 is shown.

- Use the [VALUE +/-] keys to set the new beat.
The available settings for the beat are as follows: 2 (2/4), 3 (3/4), 4 (4/4), 5 (5/4), 6 (6/4), 7(7/4).
- Press the [FUNCTION] key.
The pattern beat is changed.

Copying a Pattern
The currently selected pattern (user pattern or preset pattern) can be copied to any other user pattern number. This is useful for example when wishing to change only a part of a pattern, or to add a fill-in phrase.
- In pattern mode, select the pattern to be used as copy source.
The copy source can be either a preset pattern or a user pattern, but an empty user pattern (where "E" is shown on the right side of the display) cannot be selected as copy source.
Copy source pattern number
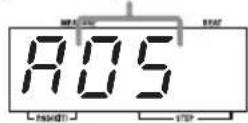
- Press the [INSERT/COPY] key.
The [INSERT/COPY] key flashes and the current pattern is selected as copy source. When the copy source is a user pattern, the indication "CoPy" flashes on the display.


When the copy source is a preset pattern, a user pattern with the same number as the source is selected and flashes.


- Use the [VALUE +/-] keys to select a user pattern (U01 - U99) as copy target.
Only user patterns can be selected as copy targets.
NOTE
- When the copy is executed, the existing contents of the user pattern selected as copy target will be erased. Make sure that the pattern you have selected is one that you don't mind erasing.
- When the copy source is a user pattern, the same pattern is first selected after step 2. However, it is not possible to copy a pattern onto itself.
- To execute the copy process, press the [INSERT/COPY] key. To cancel the process, press the [STOP] key.

When copying is completed, the unit returns to the pattern mode with the copy target pattern being selected.
If copying was canceled, the unit returns to the pattern mode with the copy source pattern being selected.
Erasing a Single User Pattern
When you no longer need a certain user pattern, you can erase its contents to return it to the empty state. This is useful to make room for new patterns and free up memory of the unit.
NOTE
Once you have erased a user pattern, you will not be able to restore it. Make sure that you really want to erase the pattern before carrying out the following steps.
- In pattern mode, select the user pattern to be erased (U01 - U99).
The pattern number is shown on the display.

- Press the [DELETE/ERASE] key.
The [DELETE/ERASE] key flashes and the indication "dEL" alternates on the display with the pattern number.

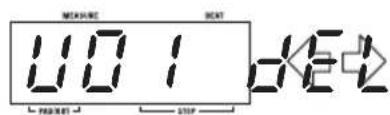
- To execute the erase process, press the [DELETE/ERASE] key. To cancel the process, press the [STOP] key.
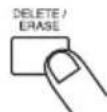
When erasing is completed, the unit returns to the pattern mode with the empty user pattern being selected.

If erasing was canceled, the unit returns to the pattern mode with the original user pattern being selected.

Deleting All User Patterns
If desired, you can erase all user patterns in one operation.
NOTE
Once you have deleted the user patterns, you will not be able to restore them. Make sure that you really want to delete the patterns before carrying out the following steps.
- In pattern mode, with playback stopped, press the [FUNCTION] key. The [FUNCTION] key flashes.
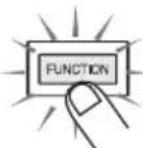
- Press the [DELETE/ERASE] key. The indications "dEL" and "ALL" alternate on the display.


- To execute the delete process, press the [DELETE/ERASE] key. When wishing to cancel the process, press the [STOP] key.
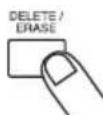
When you press the [DELETE/ERASE] key, all user patterns U01 - U99 are returned to the empty state.
Creating Your Own Kit (Kit Mode)
This section describes how you can edit a user kit and copy any preset kit or user kit into another user kit.
Editing a User Kit
In kit mode, you can select a user kit and change parameters such as sound, level, and pitch assigned to each pad.
1. Press the [KIT] key.
The [KIT] key lights up and the MRT-3 goes into kit mode. In this mode, you can select kits to use for patterns and songs, and you can create your own user kits. The display shows the currently selected kit number.
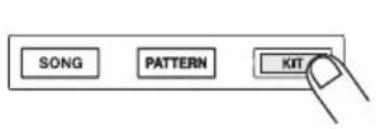

2. Use the [VALUE +/-] keys to select the user kit to edit (from kit numbers 51 - 70).
![SAMSON MRT-3B - Use the [VALUE +/-] keys to select the user kit to edit (from kit numbers 51 - 70). - 1](/content/2026/05/861496/images/ca131dacd285054c68d5f363e3f9f43aa3ac69b15aa838d318d62d55b6b979a8.jpg)
3. Press the [FUNCTION] key.
The [FUNCTION] key flashes.
![SAMSON MRT-3B - Press the [FUNCTION] key. - 1](/content/2026/05/861496/images/cb39d9f188e5822ac191b6120ce0f88aa9f0757f1bc70604a66f506d518d11e1.jpg)
4. Press pad 1 or 3 - 7 to select the item to change.
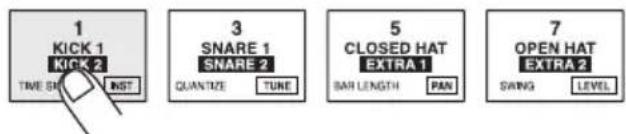
The selected pad lights up and the corresponding item can be edited. (The display indication depends on which item is selected.) The following items are assigned to the pads.
■ Items for individual pads (instrument sound)
- Pad 1 (PAD INST): ...... Select instrument sound for each pad
- Pad 3 (INST TUNE): ..... Adjust instrument sound pitch
- Pad 5 (INST PAN): ...... Adjust instrument sound panning (left/right stereo position)
- Pad 7 (INST LEVEL): .... Adjust instrument sound level
■ Items common to entire kit
- Pad 4 (KIT LEVEL): ...... Overall kit level
- Pad 6 (PAD SENS): ...... Pad sensitivity (response to hitting intensity) for overall kit

For details on the various items, see "Kit Items".
- If you have selected an item for individual pads in step 4 (pad 1, 3, 5, 7), use the [PAD BANK] key and then press the pad to specify which pad to edit.
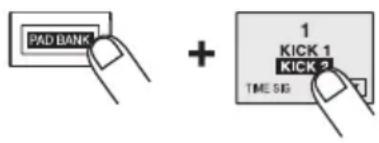
The currently selected pad can be checked from the [PAD BANK] key lit/out status and the pad number shown at the left of the display.
Setting of currently selected itemPad number

- Use the [VALUE +/-] keys to adjust the value of the item selected in step 4.
- If you have selected an item for individual pads in step 4, repeat steps 5 and 6 to adjust the value for other pads.
- Press the [FUNCTION] key once more.
The unit returns to the kit mode. If necessary, repeat steps 3 - 8 to set other items.
Kit Items
This section describes the items that make up a kit, as well as their setting range.
Pad 1: PAD INST
Selects the instrument sound to be used for each pad. When this item is selected, a number for the general sound category and a number for each instrument sound is shown.
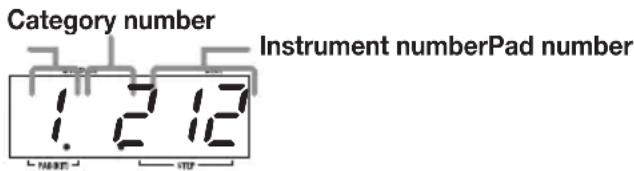
Each push of the [VALUE +/-] keys moves the instrument number one increment up or down. When the highest or lowest instrument number for that category is reached, the unit switches to the next category. The number of instruments differs for the various categories. For a list of categories and instrument sounds, refer to the "Reference" section at the end of this manual.
Hint
Pads 5 and 7 of pad bank A are special pads. The sound assigned to these two pads cannot be produced simultaneously. (When one pad is hit while the other is playing, the first sound stops.) This is useful for assigning two sounds that should not be played together, such as open/closed hi-hat.
Pad 3: INST TUNE
Allows tuning the pitch of the instrument sound assigned to a pad. Adjustment is possible from zero over a range of ±7.9 semitones, in 0.1 semitone steps.
Pad number INST TUNE value

Pad 5: INST PAN
Allows adjusting the panning (stereo left/right position) of the instrument sound assigned to a pad. Adjustment is possible over a range of L63 (fully left) - C (center) - R63 (fully right).
Pad number INST PAN value
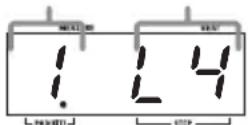
Pad 7: INST LEVEL
Allows adjusting the level of an instrument sound assigned to a pad. Adjustment is possible over a range of 1 - 15.
Pad number INST LEVEL value
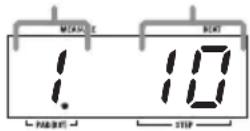
Pad 4: KIT LEVEL
Allows adjusting the level of the entire kit. This adjustment is relative to the INST LEVEL setting. Adjustment is possible over a range of 1 - 15.
KIT LEVEL value
Pad 6: PAD SENS
Allows adjusting the pad sensitivity for the entire kit. The following 7 settings are available.
- Soft (Fixed Soft): ...... Gives a soft sound regardless of the tapping intensity.
- MEd (Fixed Medium): ... Gives a medium sound regardless of the tapping intensity.
- Loud (Fixed Loud): ...... Gives a loud sound regardless of the tapping intensity.
- LItE (Light): ...... This setting gives the highest sensitivity.
- norM (Normal): ...... This setting gives medium sensitivity.
- HArD (Hard): ...... This setting gives low sensitivity.
- Ehrd (Extra Hard): ...... This setting gives the lowest sensitivity. To achieve a loud sound, the pads must be hit very hard.
PAD SENS value

Copying a Kit
A kit of the MRT-3 (preset kit or user kit) can be copied to any other user kit number (51 - 70). This is useful for example when wishing to change only a part of a kit.
1. In kit mode, select the kit to be used as copy source.
The copy source can be either a user kit or a preset kit.
Copy source kit number
2. Press the [INSERT/COPY] key.
The [INSERT/COPY] key flashes and the current kit is selected as copy source. When the copy source is a user kit, the indication "CoPy" flashes on the display.
![SAMSON MRT-3B - Press the [INSERT/COPY] key. - 1](/content/2026/05/861496/images/6ca2b7e0d5970277ddbd5ea783f52a65793c5fa9909336b3f6ecfb06eda7791b.jpg)

When the copy source is a preset kit, the user kit "51U" is selected as default target, and the number flashes on the display.
![SAMSON MRT-3B - Press the [INSERT/COPY] key. - 3](/content/2026/05/861496/images/7faeef0cab8d699dfb4029a25a6862084c19892aadc1359dd334069e54424462.jpg)

3. Use the [VALUE +/-] keys to select a user kit (U51 - U70) as copy target.
Only user kits can be selected as copy targets.
![SAMSON MRT-3B - Use the [VALUE +/-] keys to select a user kit (U51 - U70) as copy target. - 1](/content/2026/05/861496/images/6a4532c55c69ca1c363f7116279560a2c528ae80178f0d1ed03a5cdf05d31353.jpg)
NOTE
- When the copy is executed, the existing contents of the user kit selected as copy target will be erased. Make sure that the kit you have selected is one that you don't mind erasing.
-
When the copy source is a user kit, the same kit is first selected after step 2. However, it is not possible to copy a kit onto itself.
-
To execute the copy process, press the [INSERT/COPY] key. When wishing to cancel the process, press the [STOP] key.

When copying is completed, the unit returns to the kit mode with the copy target kit being selected.
If copying was canceled, the unit returns to the kit mode with the copy source kit being selected.
Creating Songs (Song Mode)
This section describes how to line up user patterns in a desired order to create an entire song. This mode of operation is called the song mode.
What Is a Song?
A song is a programmed sequence of preset patterns or user patterns that are played automatically. A song consists of multiple slots (called "steps"), each of which contains one pattern. The maximum length of a song is 99 steps. The maximum number of songs that can be stored in the MRT-3 is 99. (The actual number of available steps and songs will depend on the number of distinct sounds in user patterns and the number of steps in other songs.)
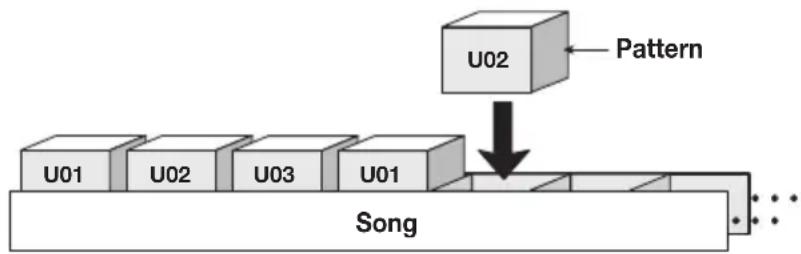
flowchart
graph TD
    A["U01"] --> B["U02"]
    C["U02"] --> D["Pattern"]
    E["U03"] --> F["Pattern"]
    G["U01"] --> H["Pattern"]
    I["Song"] --> J["Pattern"]
Note that the number of steps is not equal to the number of measures. The length of each step depends on the pattern that is contained in the step. For example, in the song in the above illustration, if the length of the pattern U01 is 2 measures and the length of patterns U02 and U03 1 measure, the song will look as follows.
Step 1 Step 2 Step 3 Step 4 Step 5
| U01 | U01U02 U02U03 |
Besides the pattern number, each song step can contain the following information.
Settings for entire song
- Song kit: ...... Number of kit to be used for entire song
- Master tempo:.... Tempo information for entire song
Settings for individual patterns
- Tempo change: ...... Information for changing the tempo within the song
• Volume change: ...... Information for changing the volume within the song
NOTE
It is also possible to not specify a song kit and memorize individual kits for each pattern. In this case, the kit will be switched together with the pattern.
Recording Song Patterns
This section describes how you can collect a number of patterns into a song.
1. Press the [SONG] key.
The MRT-3 goes into song mode, and the [SONG] key lights up. The display shows the currently selected song number.
![SAMSON MRT-3B - Press the [SONG] key. - 1](/content/2026/05/861496/images/0873ff2550584aec65959091a0c9943231405245e03be87aa10017819138dff1.jpg)
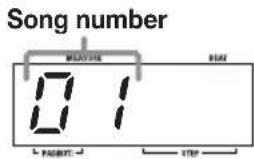
2. Use the [VALUE +/-] keys to select an empty song number.
When you select an empty song, the indication "E" appears on the right side of the display.
![SAMSON MRT-3B - Use the [VALUE +/-] keys to select an empty song number. - 1](/content/2026/05/861496/images/90e25a4080cd2ef25c9e8470c02d9e098c25206ff270c3b3f516af57a57ef290.jpg)
![SAMSON MRT-3B - Use the [VALUE +/-] keys to select an empty song number. - 2](/content/2026/05/861496/images/82e104853141dbca1ae09164df61e20834b0b49e0f3c65f54de9dfddfd8f333b.jpg)
3. Press the [REC] key.
The [REC] key lights up, indicating that the MRT-3 is ready for song recording. The last two digits of the display show the step number.
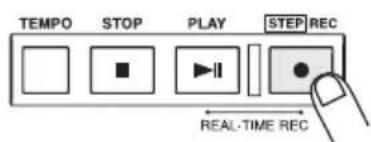

4. Use the [VALUE +/-] keys to select the user pattern number to be assigned to the first step.
When you press a [VALUE +/-] key, the [PATTERN] key flashes and the display shows the pattern bank and number.

Hint
- Y ou can also directly switch the pattern bank by pressing the [FUNCTION] key and then the [VALUE +/-] key.
- Y ou can listen to the currently selected pattern by pressing the [PLAY] key.
5. To proceed to the next step, press the [REC] key.
The last two digits of the display now show the second step number, and the first two digits show "EE" which indicates the end of the song. In this condition, you can select the pattern for the second step.
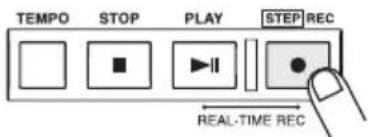
Indicates the last step of the song
![SAMSON MRT-3B - To proceed to the next step, press the [REC] key. - 2](/content/2026/05/861496/images/9ebd8d6221715bb671a8a7ece5326d25af47165f565c320e1becabae9a0c2d3f.jpg)
Hint
- By holding down the [SONG] key while pressing the [VALUE +/-] keys, you can move back and forth among steps.
- When there is not enough remaining free memory in the MRT-3, the indication "FULL" appears on the display, and further recording is not possible. Erase unneeded songs.
6. Use the [VALUE +/-] keys to assign a pattern to the second step.
7. Repeat steps 5 - 6 to create the entire song.
One song can have up to 99 (01 - 99) steps (patterns).
8. If you want to insert a step in a song, select the step where you want to insert a pattern, and press the [INSERT/COPY] key.
![SAMSON MRT-3B - If you want to insert a step in a song, select the step where you want to insert a pattern, and press the [INSERT/COPY] key. - 1](/content/2026/05/861496/images/2b50d8fc3b4790671cd4fdf096eaacf9cd0ad6209adf98e22c9b5edbd94a5021.jpg)
A new step is inserted before the currently selected step, and subsequent steps are shifted one count back. Select the pattern for the inserted keys with the [VALUE +/-] keys as necessary.
![SAMSON MRT-3B - If you want to insert a step in a song, select the step where you want to insert a pattern, and press the [INSERT/COPY] key. - 2](/content/2026/05/861496/images/3290b76ed81a516370a5b14d5ddda4215f848f7aa52809e9562073b58a4e33e5.jpg)
flowchart
graph TD
    A["Pattern E"] -->|Insert| B["Pattern A"]
    A --> C["Pattern B"]
    A --> D["Pattern C"]
    B --> E["Pattern A"]
    B --> F["Pattern B"]
    C --> G["Pattern E"]
    D --> H["Pattern C"]
    D --> I["Pattern D"]
9. To delete a step from a song, select the step and press the [DELETE/ERASE] key.
![SAMSON MRT-3B - To delete a step from a song, select the step and press the [DELETE/ERASE] key. - 1](/content/2026/05/861496/images/53535e8bf3699ae491c77697558a666c40318c0f8c4be84b61d89505f760fdd0.jpg)
The currently selected step is deleted, and subsequent steps are shifted one count forward.
![SAMSON MRT-3B - To delete a step from a song, select the step and press the [DELETE/ERASE] key. - 2](/content/2026/05/861496/images/0d782b36813d59ee1df01230b2dd88e6f50caac9f39f3cd80463de6b52c82ad9.jpg)
flowchart
graph TD
    A["Pattern A Pattern B Pattern C Pattern D"] -->|Delete| B["End"]
    C["Pattern A Pattern B Pattern D"] --> D["Down"]
10. When one song is completed, press the [STOP] key.

The [REC] key LED goes out, and song recording stops. The song position returns to step 1.
11. To listen to the song, press the [PLAY] key.
The [PLAY] key lights up and the song is played back. The [TEMPO] key flashes according to the tempo of the song. During playback, the first two digits of the display show the song number, and the last two digits show the current step number.
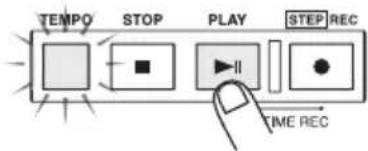

Pressing the [PATTERN] key during playback causes the display to show the number of measures since the start of the song.
![SAMSON MRT-3B - To listen to the song, press the [PLAY] key. - 3](/content/2026/05/861496/images/480dbc06a987da7495dce66c486947ede678bd32dcd24e00d78bc234db6abaaf.jpg)

Hint
- If you switch the song during playback, the new song is played immediately.
- If you want to insert a pause in the song, program an empty pattern as a step.
12. Press the [STOP] key whenever you want to terminate playback.
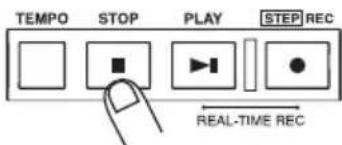
The song returns to the start position. By pressing the [PLAY] key again, you can start playback of the song again from the beginning.
Hint
- Pressing the [PLAY] key instead of the [STOP] key causes the PAUSE key to flash, and playback is paused. To resume playback from the same point, press the [PLAY] key once more.
- Also during playback of a song, you can use the pads for manual play.
- To start playback from a point within a song, hold down the [SONG] key while pressing the [VALUE +/-] keys.

When you press the [VALUE +] key, the step number shown on the display advances by 1, and when you press the [VALUE -] key, the step number goes backwards by 1. By pressing the [PLAY] key you can start playback from the selected step.
- To change the tempo of the song, hold down the [TEMPO] key while pressing the [VALUE +/-] keys. This adjusts the BPM value.
As in pattern mode, you can also tap the [TEMPO] key twice or more to specify the tempo.
Hint
The MRT-3 automatically stores the tempo ("master tempo") for each song. When you switch a song, the tempo that was last selected for that song will be selected.
Changing the Tempo Within a Song
This section describes how you can change the tempo within a song that has already been recorded.
-
In song mode, select the song whose tempo you want to alter.
-
Press the [REC] key.
The [REC] key lights up, and the song can be edited.
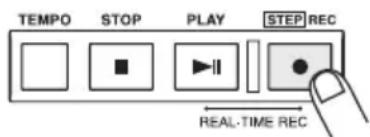
- Hold down the [SONG] key while pressing the [VALUE +/-] keys to select the step you want to edit.
The second two digits of the display show the step number.

4. Hold down the [TEMPO] key.
While the [TEMPO] key is being pressed, the tempo change information for that step is shown on the display. If no tempo change information is stored for that step, the indication is "---".

![SAMSON MRT-3B - Hold down the [TEMPO] key. - 2](/content/2026/05/861496/images/89cd9df15828598a365f48b761510e51d09927190217a7a80c904b7882c9ab74.jpg)
5. While holding down the [TEMPO] key, use the [VALUE +/-] keys to set the tempo value (40 - 250).

![SAMSON MRT-3B - While holding down the [TEMPO] key, use the [VALUE +/-] keys to set the tempo value (40 - 250). - 2](/content/2026/05/861496/images/fa2f2190c2e9082df7095d792bcb9d4fccdeb0564a3baf48a25ae96bbdc7abc8.jpg)
6. If desired, set the tempo for other song steps as well by repeating steps 3 - 5.
7. When you have completed the tempo change input, press the [STOP] key.
Changing the Song Volume
This section describes how you can change the pattern volume within a song that has already been recorded.
- In song mode, select the song whose volume you want to alter.
- Press the [REC] key.
The [REC] key lights up, and the song can be edited.
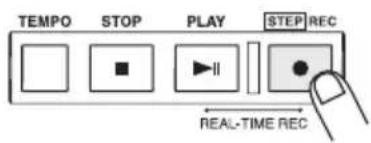
3. Hold down the [SONG] key while pressing the [VALUE +/-] keys to select the step you want to edit.
The last two digits of the display show the step number.

4. Hold down the [FUNCTION] key.
While the [FUNCTION] key is being pressed, the volume change information for that step is shown on the display. If no volume information is stored for that step, the indication is "---".
![SAMSON MRT-3B - Hold down the [FUNCTION] key. - 1](/content/2026/05/861496/images/59e7f481b9cbc3650ecf90cd7011578140a82cf54aec59a4617365b838a0cbe7.jpg)
![SAMSON MRT-3B - Hold down the [FUNCTION] key. - 2](/content/2026/05/861496/images/8ee8978f2e5971745edf5914b09836775b14b521e7f7438c0e37983071809c83.jpg)
5. While holding down the [FUNCTION] key, use the [VALUE +/-] keys to set the volume value (0 - 63).

![SAMSON MRT-3B - While holding down the [FUNCTION] key, use the [VALUE +/-] keys to set the volume value (0 - 63). - 2](/content/2026/05/861496/images/43bc9c8640e290992d9e5342af944e222ab738c69c64b19c66eefa4e52d98b30.jpg)
6. If desired, set the volume for other song steps as well by repeating steps 3 - 5.
7. When you have completed the volume change input, press the [STOP] key.
![SAMSON MRT-3B - When you have completed the volume change input, press the [STOP] key. - 1](/content/2026/05/861496/images/3aa1e91d83803b4c589d41a774836ddc49410bdbd752c7eec3fa309a13d49b85.jpg)
It is not possible to record both tempo change information and volume change information in the same step. The most recently made setting will be valid.
Selecting a Dedicated Song Kit
Unless specified otherwise, the kits stored for the respective patterns will be used during playback of a song. (When the pattern is switched, the kit is also switched.) It is also possible to specify a dedicated song kit so that this kit will be used for the entire song.
1. In song mode, select the song for which you want to specify a kit.
2. Press the [FUNCTION] key and then the [KIT] key.
The kit number for that song is shown on the display. The default setting is "Pat", which means that the kit selected for the respective pattern will be used.
![SAMSON MRT-3B - Press the [FUNCTION] key and then the [KIT] key. - 1](/content/2026/05/861496/images/9674dfac24cdb1ca67409e9f176da34237b30ab04681cf344ce738ea33284dd6.jpg)
![SAMSON MRT-3B - Press the [FUNCTION] key and then the [KIT] key. - 2](/content/2026/05/861496/images/483e103451a860b1667adb409f969e095576eb9728124cf0727b5a8fcfcdbf69.jpg)
![SAMSON MRT-3B - Press the [FUNCTION] key and then the [KIT] key. - 3](/content/2026/05/861496/images/d8c1763d6c40e44e4a0809be6f08df2025516ce743b52f200058a7a2e6027609.jpg)
![SAMSON MRT-3B - Press the [FUNCTION] key and then the [KIT] key. - 4](/content/2026/05/861496/images/bad27c1be39bd72278a4c9d107e492b8f1c132e7292940ca6ccfd33da4095231.jpg)
3. Use the [VALUE +/-] keys to select a dedicated kit for that song.
![SAMSON MRT-3B - Use the [VALUE +/-] keys to select a dedicated kit for that song. - 1](/content/2026/05/861496/images/a76dd7bef80fd4dfd40acaa87d925a474cb8237d6ca0907a9967b201b2595789.jpg)
![SAMSON MRT-3B - Use the [VALUE +/-] keys to select a dedicated kit for that song. - 2](/content/2026/05/861496/images/f75b920507646bc5bc8edca6455212a682dbc15937000252d0d6371254f14504.jpg)
4. When you have selected the kit, press the [FUNCTION] key.
The kit for that song is stored, and the unit returns to the song mode.
![SAMSON MRT-3B - When you have selected the kit, press the [FUNCTION] key. - 1](/content/2026/05/861496/images/e001fa679a7e640a7c3c8543ff8f5ec317a4bdf730275d28c18232ff63cf33e0.jpg)
![SAMSON MRT-3B - When you have selected the kit, press the [FUNCTION] key. - 2](/content/2026/05/861496/images/c7897b7e0e5af9a7b2481fd82a31a9a2b1d76c4cc993886ae6e261e143e35a2a.jpg)
Checking the Amount of Remaining Memory for Songs
You can call up a display that shows the remaining free memory for songs as a percentage. Proceed as follows.
1. In song mode, press the [FUNCTION] key, and then the [PATTERN] key.
The amount of free memory is shown in percent on the display. This indication is for information only and cannot be changed.
![SAMSON MRT-3B - In song mode, press the [FUNCTION] key, and then the [PATTERN] key. - 1](/content/2026/05/861496/images/51f912bd2efd30154d41c94f2d10a3a97bc7a2504b6d0e197a0bda01a2f0e348.jpg)
flowchart
graph LR
    A["FUNCTION"] --> B["SONG"]
    B --> C["PATTERN"]
    C --> D["KIT"]
![SAMSON MRT-3B - In song mode, press the [FUNCTION] key, and then the [PATTERN] key. - 2](/content/2026/05/861496/images/b9035f6325003c8de140d3f1fed53844de10becd65cdbb49d7573d517a4379c8.jpg)
2. Press the [FUNCTION] key again.
The unit returns to the song mode.
![SAMSON MRT-3B - Press the [FUNCTION] key again. - 1](/content/2026/05/861496/images/af7337bb2a81184a6e5cec15e3596dc47061833a8059fd52483415ae08c09394.jpg)
Copying a Song
This section describes how you can copy a song.
1. In song mode, select the song you want to copy.
Copy source song number
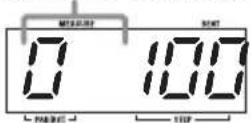
2. Press the [INSERT/COPY] key.
The [INSERT/COPY] key flashes and the current song is selected as copy source.
The indication "CoPy" flashes on the display.
![SAMSON MRT-3B - Press the [INSERT/COPY] key. - 1](/content/2026/05/861496/images/298e0cbe785f78787a313fc310202d7be92ffb202fb5134cc7738ea06c33379b.jpg)

- Use the [VALUE +/-] keys to select a song number as copy target.
![SAMSON MRT-3B - Press the [INSERT/COPY] key. - 3](/content/2026/05/861496/images/d3404b34945627aaa7c74d035cfcfa81666b08716552ded979d6d394c2a9b295.jpg)
NOTE
When the copy is executed, the existing contents of the song selected as copy target will be erased. Make sure that the song you have selected is one that you don't mind erasing.
- To execute the copy process, press the [INSERT/COPY] key. When wishing to cancel the process, press the [STOP] key.

When copying is completed, the unit returns to the song mode with the copy target song being selected.

If copying was canceled, the unit returns to the song mode with the copy source song being selected.
Deleting a Song
If you wish to delete a song, proceed as follows.
-
In song mode, select the song you want to delete.
-
Press the [DELETE/ERASE] key.
The [DELETE/ERASE] key flashes and the indication "dEL" alternates on the display with the song number.


- To execute the delete process, press the [DELETE/ERASE] key. To cancel the process, press the [STOP] key.

When deleting is completed, the unit returns to the song mode with an empty song being selected.
If deleting was canceled, the unit returns to the song mode with the original song pattern being selected.
Once deleted, a song cannot be restored. Proceed with care to prevent inadvertently deleting a song.

You can also reset the unit to the factory default condition, with all songs, user patterns, and user kits returned to the original state. For details, see "Returning the MRT-3 to the Factory Default Condition" (→ p. 48).
Deleting All Songs
If desired, you can delete all songs.

Once deleted, the songs cannot be restored. Proceed with care to prevent inadvertently deleting songs.
- In song mode, while playback is stopped, press the [FUNCTION] key.
- Press the [DELETE/ERASE] key.
The indications "dEL" and "ALL" alternate on the display.


- To execute the delete process, press the [DELETE/ERASE] key. When wishing to cancel the process, press the [STOP] key.

When you press the [DELETE/ERASE] key, all songs in numbers 01 - 99 are erased (returned to the empty state).
Other Functions
This section describes other convenient functions of the MRT-3 and how to return the unit to the factory default condition.
Controlling the MRT-3 With a Foot Switch
The separately available foot switch FS01 can be used to control various functions of the MRT-3.
- Connect the FS01 to the [FOOT SW] jack on the rear panel.
- In pattern mode, press the [FUNCTION] key and then pad 4 (FOOT SW).
The currently selected foot switch function is shown on the display.
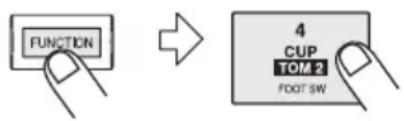

- Use the pads and keys to select the foot switch function.
The subsequent operation steps are different, depending on which function is to be controlled with the foot switch. The following functions can be selected.
- Use FS01 to produce the sound of a pad
This function allows you to produce the sound of a specific pad when you operate the foot switch. This is convenient for example to play the sound of a bass drum with your foot.
To select this function, press the [FUNCTION] key and then pad 4 (FOOT SW). Then press the foot switch, release it, and use the [PAD BANK] key and pads 1 – 7 to select the pad sound to assign to the foot switch. (The intensity with which you hit the pad when making the selection is also memorized.)
The display shows the pad number as A1 - A7, B1 - B7.
- Use FS01 to switch between the sounds of two pads
This function allows you to assign two drum or percussion sounds to a pad and use the foot switch to control which sound is produced. This is convenient for example to switch between open and closed hi-hat sound with your foot.
To select this function, press the [FUNCTION] key and then pad 4 (FOOT SW). Then press the foot switch and release it. Finally, push the first pad, followed by the second pad.
The number of the first pad is shown on the first two digits of the display, and the number of the second pad on the lower last digits.
First pad Second pad

The sound of the first pad can now be toggled with the foot switch. While the foot switch is pressed, the sound of the first pad is produced. When the foot switch is released, the sound of the second pad is produced. Also without hitting the pad, pressing the foot switch produces the sound of the first pad.
- Use FS01 to set the tempo
The foot switch can be made to function in the same way as the [TEMPO] key. To specify the tempo, you can press the foot switch twice or more in the desired tempo (tap input function).
To select this function, press the [FUNCTION] key and then pad 4 (FOOT SW). Then press the [TEMPO] key (the indication "tAP" appears on the display).
- Use FS01 to control start/pause
The foot switch can be made to function in the same way as the [PLAY] key. Pressing the foot switch then toggles between play and pause: "Start play" → "Pause" → "Resume play" etc.
To select this function, press the [FUNCTION] key and then pad 4 (FOOT SW). Then press the [PLAY] key (the indication "Cont" appears on the display).
- Use FS01 to control start/stop
The foot switch can be made to function in the same way as the [PLAY] and [STOP] keys. Pressing the foot switch then toggles between play and stop: "Start play" → "Stop" → "Start play from beginning" etc.
To select this function, press the [FUNCTION] key and then pad 4 (FOOT SW). Then press the [STOP] key (the indication "Strt" appears on the display).
- Use FS01 to mute a pattern/song
The foot switch can be made to mute the pattern or song while pressed. (Playback continues also while the sound is muted.)
To select this function, press the [FUNCTION] key and then pad 4 (FOOT SW). Then press the [KIT] key (the indication "MutE" appears on the display).
4. When you have selected the function, press the [FUNCTION] key once more.
The FS01 function is now set, and the MRT-3 returns to the previous mode. Try pressing the foot switch while using the MRT-3, to check the effect.
NOTE
The setting cannot be canceled. If you want to select another function, repeat the above procedure.
Synchronizing Playback With an External Device
You can synchronize operation of the MRT-3 to an external device with MIDI OUT, such as a MIDI sequencer or recorder. The MRT-3 then performs pattern or song playback using the tempo supplied by the external device.
1. Connect the MIDI OUT jack of the MIDI sequencer/recorder to the [MIDI IN] connector of the MRT-3, using a MIDI cable.
The illustration shows an example for connecting the Multitrak Recording Studio ZOOM MRS-4 to the MRT-3. If you connect the output of the MRT-3 to the AUX IN jack of the MRS-4, as shown here, the MRT-3 can be used to supply a dedicated rhythm track without taking up any audio tracks of the MRS-4
![SAMSON MRT-3B - Connect the MIDI OUT jack of the MIDI sequencer/recorder to the [MIDI IN] connector of the MRT-3, using a MIDI cable. - 1](/content/2026/05/861496/images/219b3df59d9fc8fe86d8a1347d964eba0702d48c55700f95a0633bab2661d8fe.jpg)
flowchart
graph TD
    A["AUX IN MIDI OUT\nMRS-4"] --> B["MIDI IN OUT PUT STEREO\nMRT-3"]
    B --> A
NOTE
Make sure that the external MIDI sequencer can send MIDI Clock, Start, Stop, and Continue signals.
2. In pattern mode, press the [FUNCTION] key and then pad 6 (MIDI).

The clock currently used by the MRT-3 is shown on the display.
The meaning of the indication is as follows.
- I nt (Internal)
The MRT-3 operates with its internal clock (default setting). This is the setting for using the MRT-3 on its own.
- Midi (MIDI clock)
The MRT-3 receives a clock signal from an external source (MIDI sequencer/recorder etc.) and synchronizes the playback tempo to this signal. Transport operations (playback start, stop, restart) and locate operations (moving the current position) can also be controlled remotely from the external device.
- rMt (Remote)
The MRT-3 operates on its internal clock, as with "Int". However, transport operations only can be controlled remotely from an external device.
The clock source and supported MIDI messages with the various settings are shown below.
| Int Midi rMt | |||
| Clock source | Internal clock | MIDI clock | Internal clock |
| Start/Stop/Continue supported | No | Yes | Yes |
| Song Position Pointer supported | No | Yes | No |
3. Use the [VALUE +/-] keys to select the "Midi" or "rMt" setting.
![SAMSON MRT-3B - Use the [VALUE +/-] keys to select the "Midi" or "rMt" setting. - 1](/content/2026/05/861496/images/03043101b867fbeeeac699a0ad5e733afaed613c2f65e05913bf5d43bc13daa7.jpg)
![SAMSON MRT-3B - Use the [VALUE +/-] keys to select the "Midi" or "rMt" setting. - 2](/content/2026/05/861496/images/d0e366cc5f5b59e1c38651e109e49d49c00be224eae6b3c37e30ffe2000da8ca.jpg)
When wishing to control the tempo, transport operations, and locate operations all from the external device, select "Midi". In this case, the internal tempo settings of the MRT-3 have no effect. Set the tempo at the external device.
When wishing to control only transport operations from the external device, select "rMt". In this case, the internal tempo settings of the MRT-3 are active. (Because the tempo of the MRT-3 and the tempo of the external device are not synchronized, position matching within a song for playback is not possible.)
4. Press the [FUNCTION] key once more.
The unit returns to the previous mode.
![SAMSON MRT-3B - Press the [FUNCTION] key once more. - 1](/content/2026/05/861496/images/f539bb2864235203e3a787c68ec72a98d122e087f7d2b48f79032051b8ca1d7c.jpg)
5. Select a song or pattern for synchronized playback.
6. Start playback at the MIDI sequencer/recorder.
- When "Midi" is selected as clock source
The MRT-3 starts playback from the start of the sequence/song in sync with the MIDI clock tempo. When the MIDI sequencer/recorder is stopped, the MRT-3 also stops.
When the MIDI sequencer/recorder is moved to a position within the song for playback, the MRT-3 also starts playback from that position.
- When "rMt" is selected as clock source
The MRT-3 starts playback from the start of the sequence/song, using its internal tempo setting. When the MIDI sequencer/recorder is stopped, the MRT-3 also stops.
If the MIDI sequencer/recorder is moved to a position within the song for playback, the MRT-3 cannot start playback from that position.
Playing MRT-3 Sounds From an External MIDI Component
Using an external MIDI sequencer or MIDI keyboard, you can play the sound sources of the MRT-3. To do this, the MIDI receive channel setting of the MRT-3 must match the MIDI send channel of the external device.
- Connect the MIDI OUT jack of the MIDI sequencer or similar to the [MIDI IN] connector of the MRT-3, using a MIDI cable.
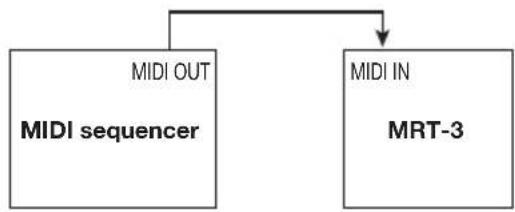
flowchart
graph TD
    A["MIDI OUT\nMIDI sequencer"] --> B["MIDI IN\nMRT-3"]
- In pattern mode, press the [FUNCTION] key and then pad 6 (MIDI).
The clock currently used by the MRT-3 is shown on the display.


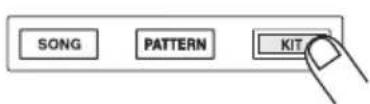
- Press and hold the [KIT] key.
While the [KIT] key is being pressed, the display shows the current MIDI receive channel setting (default setting: 10).

- Use the [VALUE +/-] keys to select the MIDI receive channel.
The MIDI receive channel can be set to OFF (no MIDI messages are received), or 1 – 16.


- When the setting is complete, press the [FUNCTION] key again.
The unit returns to the previous mode.

6. Play the external MIDI sequencer or keyboard.
The MRT-3 produces drum/percussion sound according to the note numbers received via the [MIDI IN] connector. For information on note number assignments, please refer to the "Reference" section at the end of this manual.
It is also possible to send a program change message to the MRT-3 to switch the kit. For information on program change number assignments, please refer to the "Reference" section at the end of this manual.

Setting the Pattern/Song Playback Swing
You can adjust the swing amount (rhythm flourish) for playback of patterns and songs. This setting affects all patterns and songs.
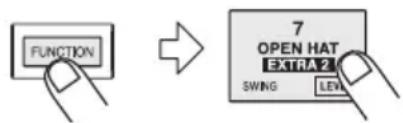
1. In pattern mode or song mode, press the [FUNCTION] key and then pad 7 (SWING).
The current swing amount setting is shown on the display (default setting: 50).
![SAMSON MRT-3B - In pattern mode or song mode, press the [FUNCTION] key and then pad 7 (SWING). - 2](/content/2026/05/861496/images/8b2c0e427ab5063a1e2a0b9d78444db04ec053f00302ec1ec2897cb9fe49bad5.jpg)
2. Use the [VALUE +/-] keys to adjust the swing amount.
![SAMSON MRT-3B - Use the [VALUE +/-] keys to adjust the swing amount. - 1](/content/2026/05/861496/images/deee5a6634e8eac3bb5ad6c8f1bbfa153a85291d17330b8fd94edc6c6ec102b0.jpg)
The setting range is 50 - 75. Raising the setting from the default of 50 (no swing) increases the interval between upbeat and downbeat in a measure, resulting in a swinging rhythm.

![SAMSON MRT-3B - Use the [VALUE +/-] keys to adjust the swing amount. - 3](/content/2026/05/861496/images/bffe2a6d4f4b61b20b486a6099e0adb2fc69f6cd7aa9639a7d46dbdac0441aea.jpg)
HINT

If necessary, press the [PLAY] key to play a pattern and check the effect.
3. When the setting is complete, press the [FUNCTION] key again.
![SAMSON MRT-3B - When the setting is complete, press the [FUNCTION] key again. - 1](/content/2026/05/861496/images/1d9e05549e33c7a05a9b0245d040fcf6efdcf9372bbf51efe27b684c9921ab43.jpg)
The unit returns to the previous mode.
Setting the Precount for Real-Time Recording
The MRT-3 can perform a countdown before the start of real-time recording. The number of precount measures can be changed, and precount can also be turned off. This setting affects all patterns.
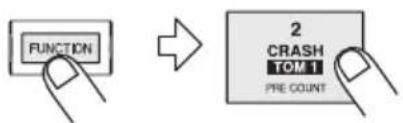
1. In pattern mode, press the [FUNCTION] key and then pad 2 (PRE COUNT).
The current precount setting is shown on the display (default setting: 1).
![SAMSON MRT-3B - In pattern mode, press the [FUNCTION] key and then pad 2 (PRE COUNT). - 2](/content/2026/05/861496/images/861f24ebd4684bac365b40c27256d73b449be43406ad948edfc61bbc1fb68e3b.jpg)
2. Use the [VALUE +/-] keys to select one of the following settings.
![SAMSON MRT-3B - Use the [VALUE +/-] keys to select one of the following settings. - 1](/content/2026/05/861496/images/98e90f38d0ac1c1715831701e66e5e106361d4e2e71e4f4414e8859d37a5cf37.jpg)
0: No precount
1: Precount of 1 measure
2: Precount of 2 measures
PAd: Recording starts when any pad is hit.
Hint
When "PAd" is selected, holding down the [REC] key while pressing the [PLAY] key in pattern mode brings up the indication "rEAdy" on the display, and the unit goes into recording standby mode.
3. When the setting is complete, press the [FUNCTION] key again.
![SAMSON MRT-3B - When the setting is complete, press the [FUNCTION] key again. - 1](/content/2026/05/861496/images/f7dbcb76aa2ad1f7f2c8b1854131ceb8c3e21431fd9a6c132bcff55d05397303.jpg)
The unit returns to the previous mode.
Returning the MRT-3 to the Factory Default Condition
You can return all stored data and settings of the MRT-3 to the factory default condition. This is called initialization.
NOTE
Use this function with care. Initialization will clear all user pattern data, user kit data, and song data that you have created.
1. Hold down the [REC] key while turning power to the MRT-3 on.
The display shows "Init".
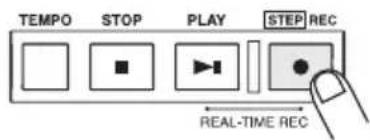

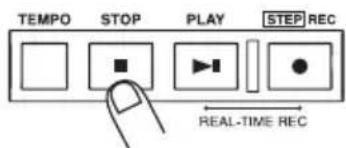
2. To carry out the initialization process, press the [REC] key once more. To cancel the operation, press the [STOP] key.

When initialization is performed, all data and settings of the MRT-3 will return to the factory default condition, and the unit will restart.
If the operation is canceled, the unit comes on normally.
Troubleshooting
Check the following items first if there seems to be a problem with the MRT-3.
No sound or very low volume.
- Is the [POWER] switch set to ON?
Turn power on, as described in the section "Preparations" (page 8).
- Is [OUTPUT] jack connected correctly to the playback system?
Make connections as described in "Getting Connected" (page 7).
- Is there a problem with the shielded cable?
Try using another cable.
- Is the connected playback system operating normally and is the volume setting appropriate?
Check the system and make sure that the level is adjusted properly.
- I s [OUTPUT LEVEL] control of MRT-3 set correctly?
Set the control to a suitable position.
Sound is distorted or intermittent.
- Is output level of MRT-3 set too high?
Set [OUTPUT LEVEL] control of MRT-3 to a suitable position.
Cannot record pattern.
- Is MRT-3 set to mode other than pattern mode?
Activate pattern mode ( p. 14).
- Is memory capacity limit reached?
Check remaining memory capacity(→ p.39), and delete unneeded patterns and songs.
Song cannot be recorded.
- Is MRT-3 set to mode other than song mode?
Activate song mode ( p. 33).
• Is memory capacity limit reached?
Check remaining memory capacity(→ p.39), and delete unneeded patterns and songs.
Playback sound is not in stereo.
- Is Y cable connected to [OUTPUT STEREO/PHONES] jack?
Make connections as described in "Getting Connected" (page 7).
- Is the panning setting appropriate?
Check whether the pan parameter for the instrument sounds in the currently used kit is set properly ( p. 28).
FS01 has no effect.
- Is foot switch connected correctly to the [FOOT SW] jack?
Make connections as described in "Getting Connected" ( page 7)
- Is correct function selected for FS01?
Use [FUNCTION] key and pad 4 (FOOT SW) to select the proper setting ( p. 42).
Specifications
Sampling frequency: 47.6 kHz
D/A Converter: 16-bit linear
Maximum polyphony: 21 voices
Resolution: 96 clock ticks per quarter note
Tempo: 40 – 250 BPM
Maximum notes/events: 20,000
Instrument sounds: 199
Drum kits: 70 (50 preset, 20 user)
Rhythm patterns: 495 (396 preset, 99 user)
Songs: 99
Pads: 7 pads (with velocity sensor)
Display: 4-digit, 7-segment LED display
Inputs
Control:
FOOT SW IN
MIDI: MIDI IN
Outputs
MONO OUT
Standard mono phone jack
(Maximum output level +3 dBm, into load impedance of 10 kilohms or higher)
STEREO OUT Standard stereo phone jack/headphone jack
(Maximum output level +3 dBm, into load impedance of 10 kilohms or higher)
Power Requirements:
AC adapter 9 V DC, center minus, 300 mA (ZOOM AD-0006)
Batteries IEC R6 (size AA) x 4
Battery life for continuous operation: approx. 15 hours (with alkaline batteries)
External Dimensions:
144 mm (W) x 165 mm (D) x 52 mm (H)
Weight:
440 g (without batteries)
Supplied accessories:
Instruction Manual
0 dB = 0.775 Vrms
Design and specifications subject to change without notice.
Reference
Kit List
| KIT# | MIDI PC#KIT NAME | |
| 01 | Live Rock | 3 |
| 02 | Studio | 4 |
| 03 | Standard | 5 |
| 04 | Funk Trap | 6 |
| 05 | Epic Rock | 7 |
| 06 | Ballad | 8 |
| 07 | Modern | 10 |
| 08 | Rap/HipHop | 11 |
| 09 | Techno Beat | 12 |
| 10 | General Drum | 13, 33 |
| 11 | Live Rock variation 1 | 14 |
| 12 | Live Rock variation 2 | 15 |
| 13 | Live Rock variation 3 | 16 |
| 14 | Studio variation 1 | 18 |
| 15 | Studio variation 2 | 2, 19 |
| 16 | Studio variation 3 | 20 |
| 17 | Standard variation 1 | 1, 21 |
| 18 | Standard variation 2 | 22 |
| 19 | Standard variation 3 | 23 |
| 20 | Funk Trap variation 1 | 24 |
| 21 | Funk Trap variation 2 | 27 |
| 22 | Funk Trap variation 3 | 28 |
| 23 | Epic Rock variation 1 | 29 |
| 24 | Epic Rock variation 2 | 30 |
| 25 | Ballad variation 1 | 31 |
| 26 | Ballad variation 2 | 32 |
| 27 | Modern variation 1 | 34 |
| 28 | Modern variation 2 | 35 |
| 29 | Rap/HipHop variation 1 | 36 |
| 30 | Rap/HipHop variation 2 | 37 |
| 31 | Rap/HipHop variation 3 | 38 |
| 32 | Techno Beat variation 1 | 39 |
| 33 | Techno Beat variation 2 | 40 |
| 34 | Techno Beat variation 3 | 42 |
| 35 | General Drum Room | 9, 43 |
| 36 | General Drum Power | 17, 44 |
| 37 | General Drum Electronic | 25, 45 |
| 38 | General Drum Analog | 26, 46 |
| 39 | General Drum Brush | 41, 47 |
| 40 | Latin Special | 48 |
| 41 | Percussions | 49 |
| 42 | Live Rock Mastering | 50 |
| 43 | Studio Mastering | 51 |
| 44 | Funk Trap Mastering | 52 |
| 45 | Epic Rock Mastering | 53 |
| 46 | Ballad Mastering | 54 |
| 47 | Modern Mastering | 55 |
| 48 | Power-benddown | 56 |
| 49 | Special Effect Sounds 1 | 57 |
| 50 | Special Effect Sounds 2 | 58 |
| KIT# | MIDI PC#KIT NAME | |
| 51 | USER 51 | 59 |
| \ | \ | \ |
| 70 | USER 70 | 78 |
| PRESET 01 | 79 | |
| PRESET 50 | 128 |
MIDI Note Number Chart
| Note # | INST NAME | PAD # |
| 24 | ||
| 25 | ||
| 26 | ||
| 27 | High Q | |
| 28 | Slap | |
| 29 | Scratch Push | |
| 30 | Scratch Pull | |
| 31 | Sticks | |
| 32 | Square Click | |
| 33 | Metronome Click | |
| 34 | Metronome Bell | |
| 35 | KICK 2 | PAD B-1 |
| 36 | KICK 1 | PAD A-1 |
| 37 | EXTRA1(Side Stick) | PAD B-5 |
| 38 | SNARE 1 | PAD A-3 |
| 39 | EXTRA2(Hand Clap) | PAD B-7 |
| 40 | SNARE 2 | PAD B-3 |
| 41 | (TOM 3) | (PAD B-6) |
| 42 | CLOSED HAT | PAD A-5 |
| 43 | TOM 3 | PAD B-6 |
| 44 | Pedal HiHat | |
| 45 | (TOM 2) | (PAD B-4) |
| 46 | OPEN HAT | PAD A-7 |
| 47 | TOM 2 | PAD B-4 |
| 48 | (TOM 1) | (PAD B-2) |
| 49 | CRASH | PAD A-2 |
| 50 | TOM 1 | PAD B-2 |
| 51 | RIDE | PAD A-6 |
| 52 | Chinese Cymbal | |
| 53 | CUP | PAD A-4 |
| 54 | Tambourine | |
| 55 | Splash Cymbal | |
| 56 | Cowbell | |
| 57 | Crash Cymbal 2 | (PAD A-2) |
| 58 | Vibraslap | |
| 59 | Ride Cymbal 2 |
| Note # | INST NAME | ||
| * MIDDLE C | 60 | High Bongo | |
| 61 | Low Bongo | ||
| 62 | Mute High Conga | ||
| 63 | Open High Conga | ||
| 64 | Low Conga | ||
| 65 | High Timbale | ||
| 66 | Low Timbale | ||
| 67 | High Agogo | ||
| 68 | Low Agogo | ||
| 69 | Cabasa | ||
| 70 | Maracas | ||
| 71 | Short Whistle | ||
| 72 | Long Whistle | ||
| 73 | Short Guiro | ||
| 74 | Long Guiro | ||
| 75 | Claves | ||
| 76 | High Wood Block | ||
| 77 | Low Wood Block | ||
| 78 | Mute Cuica | ||
| 79 | Open Cuica | ||
| 80 | Mute Triangle | ||
| 81 | Open Triangle | ||
| 82 | Shaker | ||
| 83 | Jingle Bell | ||
| 84 | Belltree | ||
| 85 | Castanets | ||
| 86 | Mute Surdo | ||
| 87 | Open Surdo | ||
| 88 |
Instrument List
| Inst # | NameCategory | |
| 1: KICK | 1 | Live Kick 1 |
| 2 | Live Kick 2 | |
| 3 | Studio Booth Kick | |
| 4 | Small Booth Kick | |
| 5 | Middle Booth Kick | |
| 6 | Muted Kick | |
| 7 | Tight Shell Kick | |
| 8 | Huge Kick | |
| 9 | Deep Hard beater Kick | |
| 10 | Ambient Kick | |
| 11 | Stage Ambient Kick 1 | |
| 12 | Stage Ambient Kick 2 | |
| 13 | Dry Kick | |
| 14 | Resonated Kick | |
| 15 | Deep Shell Kick | |
| 16 | Deep Muffed Kick | |
| 17 | Analog Kick | |
| 18 | Short Analog Kick | |
| 19 | DIGI-ANA Kick | |
| 20 | Long DIGI-ANA Kick | |
| 21 | Synth Kick | |
| 22 | Velocity Bend Kick | |
| 2: SNARE | 1 | Live Ambient 1 |
| 2 | Live Ambient 2 | |
| 3 | Booth Ambient | |
| 4 | Booth Dry | |
| 5 | Dry Snappy | |
| 6 | Dry High Tuned | |
| 7 | High Tuned 1 | |
| 8 | High Tuned 2 | |
| 9 | High Tuned 3 | |
| 10 | Deep Body Ambient | |
| 11 | Deep Snappy | |
| 12 | High Tensioned Snappy | |
| 13 | Tight Muted | |
| 14 | Resonated Tuning | |
| 15 | Tighten Gate | |
| 16 | Mono Analog | |
| 17 | Stereo Analog | |
| 18 | Mono DIGI-ANA | |
| 19 | Stereo DIGI-ANA | |
| 20 | Reverb Snare 1 | |
| 21 | Reverb Snare 2 | |
| 22 | Room Snare | |
| 23 | Power Snare | |
| 24 | Electric Snare | |
| 25 | Brush Short | |
| 26 | Brush Long | |
| 27 | Brush Slap | |
| 28 | Bend Down |
| Inst # | NameCategory | |
| 3: TOM | 1 | Live Tom 1 |
| 2 | Live Tom 2 | |
| 3 | Live Floor | |
| 4 | Studio Tom 1 | |
| 5 | Studio Tom 2 | |
| 6 | Studio Floor | |
| 7 | Dry Tom 1 | |
| 8 | Dry Tom 2 | |
| 9 | Dry Floor | |
| 10 | Loose Tom 1 | |
| 11 | Loose Tom 2 | |
| 12 | Loose Floor | |
| 13 | Ambient Tom 1 | |
| 14 | Ambient Tom 2 | |
| 15 | Ambient Floor | |
| 16 | Low Tune Tom 1 | |
| 17 | Low Tune Tom 2 | |
| 18 | Low Tune Floor | |
| 19 | Hard Hit Tom 1 | |
| 20 | Hard Hit Tom 2 | |
| 21 | Hard Hit Floor | |
| 22 | 808 Tom 1 | |
| 23 | 808 Tom 2 | |
| 24 | 808 Floor | |
| 25 | Power Gate Tom 1 | |
| 26 | Power Gate Tom 2 | |
| 27 | Power Gate Floor | |
| 28 | Acoustic Tom 1 | |
| 29 | Acoustic Tom 2 | |
| 30 | Acoustic Floor | |
| 31 | Room Tom 1 | |
| 32 | Room Tom 2 | |
| 33 | Room Floor | |
| 34 | Electric Tom 1 | |
| 35 | Electric Tom 2 | |
| 36 | Electric Floor | |
| 37 | Bend Down Tom 1 | |
| 38 | Bend Down Tom 2 | |
| 39 | Bend Down Floor | |
| 40 | TOMVERB | |
| 41 | FLOORVERB | |
| 42 | Synth Drum Tom | |
| 4: HI HATS | 1 | Live Close-Hat |
| 2 | Live Open-Hat | |
| 3 | Studio Close-Hat | |
| 4 | Clear Close-Hat | |
| 5 | Clear Open-Hat | |
| 6 | Analog Close-Hat | |
| 7 | Analog Open-Hat | |
| 8 | DIGI-ANA Close-Hat | |
| 4: HI HATS | 9 | DIGI-ANA Open-Hat |
| 10 | Acoustic Foot-Hat | |
| 11 | Acoustic Short Foot | |
| 12 | Analog Foot-Hat | |
| 13 | Bend Down Close-Hat | |
| 14 | Bend Down Open-Hat | |
| 15 | Bend Down Foot-Hat | |
| 5: CYMBAL | 1 | Crash 1 |
| 2 | Crash 2 | |
| 3 | Analog Crash | |
| 4 | Thin Crash | |
| 5 | Splash 1 | |
| 6 | Splash 2 | |
| 7 | Bend Down Crash | |
| 8 | China 1 | |
| 9 | China 2 | |
| 10 | Ride 1 | |
| 11 | Ride 2 | |
| 12 | Ride 3 | |
| 13 | Bend Down Ride | |
| 14 | Cup | |
| 15 | SFX Cup | |
| 6: EXTRA | 1 | Live Rim |
| 2 | Live Long Rim | |
| 3 | Dry Rim | |
| 4 | Velocity Bend Down Rim | |
| 5 | Cowbell 1 | |
| 6 | Analog Cowbell | |
| 7 | Velocity Bend Down Cowbell | |
| 8 | Live Tambourine | |
| 9 | Velocity Bend Down Tambourine | |
| 10 | Clap | |
| 11 | Filtered Clap | |
| 12 | Velocity Bend Down Clap | |
| 13 | Analog Claves | |
| 14 | DIGI-ANA Snap | |
| 15 | Click Noise | |
| 7: GLOBAL | 1 | High Q |
| 2 | Slap | |
| 3 | Scratch Push | |
| 4 | Scratch Pull | |
| 5 | Sticks | |
| 6 | Square Click | |
| 7 | Metronome Click | |
| 8 | Metronome Bell | |
| 9 | Tambourine | |
| 10 | Vibraslap | |
| 11 | High Bongo | |
| 12 | Low Bongo | |
| 13 | Mute High Conga |
| Inst # | NameCategory | |
| 7: GLOBAL | 14 | Open High Conga 1 |
| 15 | Open High Conga 2 | |
| 16 | Low Conga | |
| 17 | High Timbale | |
| 18 | Low Timbale | |
| 19 | High Agogo | |
| 20 | Low Agogo | |
| 21 | Cabasa | |
| 22 | Maracas | |
| 23 | Short High Whistle | |
| 24 | Long Whistle | |
| 25 | Short Guiro | |
| 26 | Long Guiro | |
| 27 | Claves | |
| 28 | High Wood Block | |
| 29 | Low Wood Block | |
| 30 | Mute Cuica | |
| 31 | Open Cuica | |
| 32 | Mute Triangle | |
| 33 | Open Triangle | |
| 34 | Shaker | |
| 35 | Jingle Bell | |
| 36 | Bell Tree | |
| 37 | Castanets | |
| 38 | Mute Surdo | |
| 39 | Open Surdo | |
| 8: SFX | 1 | Filter Swept Cymbal |
| 2 | Gamelan | |
| 3 | Bass Slide | |
| 4 | REV Wet 1 | |
| 5 | REV Wet 2 | |
| 6 | Bell | |
| 7 | Odaiko | |
| 8 | ChuDaiko | |
| 9 | Oedo | |
| 10 | Chinese Temple | |
| 11 | Mokugyo | |
| 12 | Huge Clock | |
| 13 | UFO | |
| 14 | Door Close | |
| 15 | Door Open | |
| 16 | Kishimi | |
| 17 | Sliding | |
| 18 | Engine Cell | |
| 19 | Sonar | |
| 20 | Space | |
| 21 | Sequence | |
| 22 | Minor7 | |
| 23 | Major7 |
Pattern List
| Display | Pattern name | KIT |
| A01 | 08Beat01 | 1 |
| A02 | 08Beat02 | 1 |
| A03 | 08Beat03 | 1 |
| A04 | 08Beat04 | 1 |
| A05 | 08Beat05 | 2 |
| A06 | 08Beat06 | 2 |
| A07 | 08Beat07 | 4 |
| A08 | 08Beat08 | 4 |
| A09 | 08Beat09 | 4 |
| A10 | 08Beat10 | 4 |
| A11 | 08Beat11 | 20 |
| A12 | 08Beat12 | 20 |
| A13 | 16Beat01 | 35 |
| A14 | 16Beat02 | 35 |
| A15 | 16Beat03 | 6 |
| A16 | 16Beat04 | 6 |
| A17 | 16Beat05 | 6 |
| A18 | 16Beat06 | 6 |
| A19 | 16Beat07 | 2 |
| A20 | 16Beat08 | 2 |
| A21 | 16FUS01 | 36 |
| A22 | 16FUS02 | 36 |
| A23 | JAZZ01 | 14 |
| A24 | JAZZ02 | 26 |
| A25 | JAZZ03 | 25 |
| A26 | JAZZ04 | 14 |
| A27 | BOSSA | 40 |
| A28 | CNTRY | 3 |
| A29 | 68BLUS | 6 |
| A30 | DANCE | 10 |
| A31 | Rock01 | 5 |
| A32 | Rock02 | 15 |
| A33 | Rock03 | 23 |
| A34 | Rock04 | 4 |
| A35 | Rock05 | 4 |
| A36 | Rock06 | 7 |
| A37 | Rock07 | 23 |
| A38 | Rock08 | 36 |
| A39 | Rock09 | 3 |
| A40 | Rock10 | 7 |
| A41 | Rock11 | 2 |
| A42 | Rock12 | 1 |
| A43 | Rock13 | 20 |
| A44 | Rock14 | 20 |
| A45 | Rock15 | 3 |
| A46 | Rock16 | 3 |
| A47 | Rock17 | 1 |
| A48 | Rock18 | 3 |
| A49 | Rock19 | 36 |
| A50 | Rock20 | 1 |
| Display | Pattern name | KIT |
| A51 | Rock21(shuffle) | 2 |
| A52 | Rock22(shuffle) | 14 |
| A53 | Rock23 | 4 |
| A54 | Rock24 | 1 |
| A55 | Rock25 | 1 |
| A56 | Rock26 | 4 |
| A57 | Rock27 | 1 |
| A58 | Rock28 | 4 |
| A59 | Rock29 | 1 |
| A60 | Rock30 | 2 |
| A61 | Rock31 | 1 |
| A62 | Rock32 | 4 |
| A63 | Rock33 | 1 |
| A64 | Rock34 | 14 |
| A65 | Rock35T | 1 |
| A66 | HRK01 | 1 |
| A67 | HRK02 | 24 |
| A68 | HRK03 | 13 |
| A69 | HRK04 | 13 |
| A70 | HRK05 | 17 |
| A71 | HRK06 | 5 |
| A72 | HRK07(shuffle) | 17 |
| A73 | HRK08 | 1 |
| A74 | HRK09 | 24 |
| A75 | HRK10 | 2 |
| A76 | HRK11 | 1 |
| A77 | MTL01 | 11 |
| A78 | MTL02 | 1 |
| A79 | MTL03 | 1 |
| A80 | MTL04 | 35 |
| A81 | MTL05 | 1 |
| A82 | MTL06 | 4 |
| A83 | THRS01 | 36 |
| A84 | THRS02 | 36 |
| A85 | THRS03 | 1 |
| A86 | PUNK01 | 24 |
| A87 | PUNK02 | 11 |
| A88 | FUS01 | 20 |
| A89 | FUS02 | 4 |
| A90 | FUS03 | 20 |
| A91 | FUS04 | 22 |
| A92 | FUS05 | 22 |
| A93 | FUS06 | 18 |
| A94 | FUS07 | 4 |
| A95 | FUS08 | 17 |
| A96 | FUS09 | 4 |
| A97 | FUS10 | 10 |
| A98 | FUS11 | 10 |
| A99 | FUS12 | 3 |
| B01 | POP01 | 3 |
| B02 | POP02 | 3 |
| B03 | POP03 | 18 |
| B04 | POP04 | 18 |
| B05 | POP05 | 3 |
| B06 | POP06 | 17 |
| B07 | POP07 | 17 |
| B08 | POP08 | 17 |
| B09 | POP09 | 17 |
| B10 | POP10(shuffle) | 4 |
| B11 | POP11(shuffle) | 22 |
| B12 | POP12 | 32 |
| B13 | POP13 | 33 |
| B14 | POP14 | 22 |
| B15 | POP15 | 40 |
| B16 | POP16 | 2 |
| B17 | POP17 | 35 |
| B18 | POP18 | 20 |
| B19 | POP19T | 26 |
| B20 | RnB01 | 20 |
| B21 | RnB02 | 4 |
| B22 | RnB03 | 6 |
| B23 | RnB04 | 2 |
| B24 | RnB05 | 4 |
| B25 | RnB06 | 27 |
| B26 | RnB07 | 10 |
| B27 | RnB08 | 11 |
| B28 | RnB09(shuffle) | 15 |
| B29 | RnB10 | 1 |
| B30 | RnB11 | 4 |
| B31 | RnB12 | 22 |
| B32 | RnB13 | 8 |
| B33 | RnB14 | 35 |
| B34 | FUNK01 | 22 |
| B35 | FUNK02 | 4 |
| B36 | FUNK03 | 14 |
| B37 | FUNK04 | 14 |
| B38 | FUNK05 | 13 |
| B39 | FUNK06 | 21 |
| B40 | FUNK07 | 4 |
| B41 | FUNK08 | 4 |
| B42 | FUNK09 | 4 |
| B43 | FUNK10 | 19 |
| B44 | FUNK11 | 3 |
| B45 | FUNK12 | 19 |
| B46 | FUNK13 | 6 |
| B47 | FUNK14 | 22 |
| B48 | FUNK15 | 2 |
| B49 | 16ROCK01 | 20 |
| B50 | 16ROCK02 | 21 |
| Display | Pattern name | KIT |
| B51 | 16ROCK03 | 4 |
| B52 | 16ROCK04 | 4 |
| B53 | 16ROCK05 | 4 |
| B54 | 16ROCK06 | 2 |
| B55 | GrvDrm01 | 40 |
| B56 | GrvDrm02 | 4 |
| B57 | GrvDrm03 | 1 |
| B58 | BALD01 | 40 |
| B59 | BALD02 | 2 |
| B60 | BALD03 | 40 |
| B61 | BALD04 | 6 |
| B62 | BALD05 | 20 |
| B63 | BALD06 | 20 |
| B64 | BALD07(shuffle) | 3 |
| B65 | BALD08(shuffle) | 3 |
| B66 | BALD09(shuffle) | 3 |
| B67 | BALD10(shuffle) | 7 |
| B68 | BALD11(shuffle) | 7 |
| B69 | BALD12T | 4 |
| B70 | BALD13T | 5 |
| B71 | BLUS01(shuffle) | 11 |
| B72 | BLUS02(shuffle) | 20 |
| B73 | BLUS03(shuffle) | 20 |
| B74 | BLUS04(shuffle) | 11 |
| B75 | BLUS05(shuffle) | 11 |
| B76 | BLUS06T | 7 |
| B77 | BLUS07T | 1 |
| B78 | BLUS08T | 17 |
| B79 | CNTR01 | 18 |
| B80 | CNTR02 | 3 |
| B81 | CNTR03 | 3 |
| B82 | CNTR04 | 17 |
| B83 | CNTR05 | 40 |
| B84 | JAZZ01 | 3 |
| B85 | JAZZ02 | 4 |
| B86 | JAZZ03 | 4 |
| B87 | JAZZ04 | 3 |
| B88 | JAZZ05 | 4 |
| B89 | JAZZ06 | 40 |
| B90 | JAZZ07 | 7 |
| B91 | JAZZ08T | 3 |
| B92 | JAZZ09P | 40 |
| B93 | SHFL01 | 15 |
| B94 | SHFL02 | 15 |
| B95 | SHFL03 | 14 |
| B96 | SHFL04 | 2 |
| B97 | SHFL05 | 2 |
| B98 | SHFL06 | 4 |
| B99 | SHFL07 | 4 |
| Display | Pattern name | KIT KIT |
| C01 | HIP01 | 33 |
| C02 | HIP02 | 8 |
| C03 | HIP03 | 17 |
| C04 | HIP04 | 9 |
| C05 | HIP05 | 8 |
| C06 | HIP06 | 24 |
| C07 | HIP07 | 9 |
| C08 | HIP08 | 9 |
| C09 | HIP09 | 1 |
| C10 | HIP10 | 3 |
| C11 | HIP11 | 3 |
| C12 | HIP12 | 39 |
| C13 | HIP13 | 8 |
| C14 | HIP14 | 24 |
| C15 | HIP15 | 1 |
| C16 | HIP16 | 31 |
| C17 | HIP17 | 9 |
| C18 | HIP18 | 30 |
| C19 | HIP19 | 11 |
| C20 | HIP20 | 4 |
| C21 | HIP21 | 4 |
| C22 | HIP22 | 3 |
| C23 | HIP23 | 30 |
| C24 | HIP24 | 5 |
| C25 | HIP25 | 8 |
| C26 | HIP26 | 4 |
| C27 | HIP27 | 9 |
| C28 | HIP28 | 30 |
| C29 | HIP29 | 33 |
| C30 | HIP30 | 33 |
| C31 | HIP31 | 40 |
| C32 | HIP32 | 40 |
| C33 | DANC01 | 33 |
| C34 | DANC02 | 21 |
| C35 | DANC03 | 40 |
| C36 | DANC04 | 21 |
| C37 | DANC05 | 9 |
| C38 | DANC06 | 40 |
| C39 | DANC07 | 33 |
| C40 | HOUS01 | 40 |
| C41 | HOUS02 | 8 |
| C42 | HOUS03 | 40 |
| C43 | HOUS04 | 40 |
| C44 | HOUS05 | 9 |
| C45 | HOUS06 | 34 |
| C46 | TECH01 | 8 |
| C47 | TECH02 | 9 |
| C48 | TECH03 | 9 |
| C49 | TECH04 | 8 |
| C50 | TECH05 | 9 |
| Display | Pattern name | |
| C51 | TECH06 | 9 |
| C52 | TECH07 | 8 |
| C53 | TECH08 | 40 |
| C54 | DnB01 | 32 |
| C55 | DnB02 | 8 |
| C56 | DnB03 | 4 |
| C57 | DnB04 | 9 |
| C58 | DnB05 | 30 |
| C59 | DnB06 | 22 |
| C60 | DnB07 | 29 |
| C61 | TRIP01 | 34 |
| C62 | TRIP02 | 3 |
| C63 | TRIP03 | 34 |
| C64 | AMB01 | 22 |
| C65 | AMB02 | 2 |
| C66 | AMB03 | 1 |
| C67 | AMB04 | 4 |
| C68 | INDUSTRIAL01 | 23 |
| C69 | INDUSTRIAL02 | 24 |
| C70 | INDUSTRIAL03 | 9 |
| C71 | REGG01 | 18 |
| C72 | REGG02 | 21 |
| C73 | REGG03 | 40 |
| C74 | REGG04 | 40 |
| C75 | SKA01 | 20 |
| C76 | SKA02 | 18 |
| C77 | SKA03 | 15 |
| C78 | LATN01 | 40 |
| C79 | LATN02 | 40 |
| C80 | LATN03 | 40 |
| C81 | LATN04 | 40 |
| C82 | LATN05 | 40 |
| C83 | LATN06 | 40 |
| C84 | LATN07 | 40 |
| C85 | LATN08 | 40 |
| C86 | LATN09 | 40 |
| C87 | LATN10 | 4 |
| C88 | LATN11 | 4 |
| C89 | LATN12 | 18 |
| C90 | BOSSA01 | 40 |
| C91 | SAMBA01 | 4 |
| C92 | SAMBA02 | 22 |
| C93 | AFRO01 | 16 |
| C94 | AFRO02 | 40 |
| C95 | AFRO03 | 40 |
| C96 | MidE01 | 13 |
| C97 | MidE02 | 3 |
| C98 | MidE03 | 40 |
| C99 | MidE04T | 22 |
| Display | Pattern name | KIT KIT |
| D01 | INTRO01 | 1 |
| D02 | INTRO02 | 1 |
| D03 | INTRO03 | 2 |
| D04 | INTRO04 | 4 |
| D05 | INTRO05 | 3 |
| D06 | INTRO06 | 20 |
| D07 | INTRO07 | 5 |
| D08 | INTRO08 | 6 |
| D09 | INTRO09(shuffle) | 1 |
| D10 | INTRO10 | 5 |
| D11 | INTRO11 | 20 |
| D12 | INTRO12 | 2 |
| D13 | INTRO13 | 3 |
| D14 | INTRO14 | 20 |
| D15 | INTRO15 | 3 |
| D16 | INTRO16 | 6 |
| D17 | INTRO17 | 19 |
| D18 | INTRO18 | 4 |
| D19 | INTRO19 | 14 |
| D20 | ROCK-FILL01 | 2 |
| D21 | ROCK-FILL02 | 2 |
| D22 | ROCK-FILL03 | 1 |
| D23 | ROCK-FILL04 | 1 |
| D24 | ROCK-FILL05 | 4 |
| D25 | ROCK-FILL06 | 5 |
| D26 | ROCK-FILL07 | 1 |
| D27 | ROCK-FILL08 | 4 |
| D28 | ROCK-FILL09 | 5 |
| D29 | HARDROCK-FILL01 | 14 |
| D30 | HARDROCK-FILL02 | 4 |
| D31 | HARDROCK-FILL03 | 6 |
| D32 | HARDROCK-FILL04 | 14 |
| D33 | METAL-FILL01 | 6 |
| D34 | METAL-FILL02 | 6 |
| D35 | THRASH-FILL01 | 2 |
| D36 | FUSION-FILL01 | 22 |
| D37 | FUSION-FILL02 | 35 |
| D38 | FUSION-FILL03 | 35 |
| D39 | FUSION-FILL04 | 4 |
| D40 | FUSION-FILL05 | 4 |
| D41 | FUSION-FILL06 | 4 |
| D42 | POPS-FILL01 | 3 |
| D43 | POPS-FILL02 | 17 |
| D44 | POPS-FILL03 | 18 |
| D45 | POPS-FILL04 | 3 |
| D46 | POPS-FILL05 | 17 |
| D47 | POPS-FILL06 | 17 |
| D48 | POPS-FILL07 | 18 |
| D49 | RnB-FILL01 | 7 |
| D50 | RnB-FILL02 | 19 |
| Display | Pattern name | |
| D51 | FUNK-FILL01 | 4 |
| D52 | FUNK-FILL02 | 4 |
| D53 | FUNK-FILL03 | 20 |
| D54 | FUNK-FILL04 | 20 |
| D55 | GROOVE-FILL01 | 4 |
| D56 | GROOVE-FILL02 | 22 |
| D57 | BALAD-FILL01 | 7 |
| D58 | BALAD-FILL02 | 7 |
| D59 | BLUES-FILL03 | 20 |
| D60 | BLUES-FILL04 | 20 |
| D61 | COUNTRY-FILL01 | 3 |
| D62 | COUNTRY-FILL02 | 3 |
| D63 | JAZZ-FILL01 | 6 |
| D64 | JAZZ-FILL02 | 6 |
| D65 | SHUFFLE-FILL01 | 23 |
| D66 | SHUFFLE-FILL02 | 1 |
| D67 | HIP-FILL01 | 8 |
| D68 | HIP-FILL02 | 30 |
| D69 | DANCE-FILL01 | 9 |
| D70 | DANCE-FILL02 | 9 |
| D71 | DANCE-FILL03 | 32 |
| D72 | DANCE-FILL04 | 33 |
| D73 | HOUSE-FILL01 | 4 |
| D74 | HOUSE-FILL02 | 40 |
| D75 | TECHNO-FILL01 | 9 |
| D76 | TECHNO-FILL02 | 9 |
| D77 | DRUMnBAS-FILL01 | 22 |
| D78 | DRUMnBAS-FILL02 | 21 |
| D79 | AMBIENT-FILL01 | 24 |
| D80 | AMBIENT-FILL02 | 4 |
| D81 | INDUSTRIAL-FILL01 | 23 |
| D82 | SHUFFLE-FILL01 | 15 |
| D83 | REGGAE-FILL01 | 21 |
| D84 | REGGAE-FILL02 | 21 |
| D85 | LATIN-FILL01 | 4 |
| D86 | LATIN-FILL02 | 4 |
| D87 | BOSSA-FILL01 | 18 |
| D88 | BOSSA-FILL02 | 4 |
| D89 | AFRO-FILL01 | 40 |
| D90 | AFRO-FILL01 | 40 |
| D91 | MidE-FILL01 | 4 |
| D92 | MidE-FILL02 | 40 |
| D93 | ENDING01 | 1 |
| D94 | ENDING02 | 2 |
| D95 | ENDING03 | 4 |
| D96 | ENDING04 | 3 |
| D97 | ENDING05 | 6 |
| D98 | ENDING06 | 6 |
| D99 | ENDING07 | 4 |
MIDI Implementation
1. Recognized Messages
| Status | 1st | 2nd | Description | |
| 8nH | kk | vv | Note Off kk: note number vv: velocity will be ignored | (See Note 1) |
| 9nH | kk | 00H | Note Off kk: note number | (See Note 1) |
| 9nH | kk | vv | Note On kk: note number vv: velocity | |
| BnH | 07H | vv | Channel Volume vv: volume value | |
| BnH | 11H | vv | Channel Expression vv: expression value | |
| BnH | 78H | xx | All Sounds Off | |
| BnH | 7BH | xx | All Notes Off | |
| CnH | pp | Program Change pp: program number | (See Note 2) | |
| F2H | sl | sh | Song Position Pointer shsl: song position | (See Note 3) |
| F3H | ss | Song Select ss: song number 0-98 | ||
| F8H | Timing Clock | |||
| FAH | Start | |||
| FBH | Continue | |||
| FCH | Stop |
NOTE: n = MIDI Channel Number (0000 - 1111)
-
Note Off Messages is recognized but will be ignored.
-
Relationship between Program Numbers and Kit Numbers are assigned as "Kits List" attached.
-
SongPositionPointer for a pattern, new location is wrapped around the bar length of the pattern.
-
Note On messages can be recorded into a pattern.
2. Transmitted Messages
NONE.
3. System Exclusive Messages
No SysEx messages are recognized/transmitted.
MIDI Implementation Chart
[DRUM MACHINE]
Model MRT-3
]
MIDI Implementation Chart
Date : 20.Feb.,2002
Version :1.00
| Function ... | Transmitted | Recognized | Remarks | ||
| Basic Default Channel Changed | 1-161-16 | Memorized | |||
| Mode Default Messages Altered | ********** | 3 | |||
| Note Number | True voice | ********** | 0-127 | ||
| Velocity Note ON Note OFF | o x | ||||
| After Key's Touch Ch's | x x | ||||
| Pitch Bend | x | ||||
| Control Change | 7 11 120 | Volume Expression All Sounds Off | |||
| Prog Change | True # | ********** | o 0-127 | ||
| System Exclusive | x | ||||
| System Common | Song Pos Song Sel Tune | o o x | |||
| System Real Time | Clock Commands | o o | |||
| Aux Mes-sages | Local ON/OFF All Notes OFF Active Sense Reset | x o x x | |||
| Notes | No messages will be transmitted. | ||||
Mode 1 : OMNI ON, POLY
Mode 2 : OMNI ON, MONO
o : Yes
Mode 3 : OMNI OFF, POLY
Mode 4 : OMNI OFF, MONO
x : No
Index
■ Display ■
ALL (ALL) 25,41
Copy (COPY) 23, 30, 39
del (DEL) 24, 40
dENO (DEMO) 11
FULL (FULL) 18, 20, 34
In 北 (INIT) 49
INT (INT) 46
17 18 1 (MIDI) 45
nor17 (NORM) 29
PAL (PAT) 38
-ERADY (READY) 48
51-1 (STRT) 42
A
AC adapter 7
B
Bank 9
Switching 14
Battery operation 8
C
Clock source 45
Connection example 7
D
Demo song 11
F
Factory default condition, returning to 49
Foot switch 42
■ | ■
Initialization 49
INST LEVEL 29
INST PAN 28
INST TUNE 28
Instrument list 54
■K■
Kit level 29
Kit list 52
Kit mode 26
Kit 10
Copying 30
Editing user kit 26
Selecting 12
■ M ■
Master tempo 32
MIDI components
Playing MRT-3 sound 46
Synchronizing 44
MIDI implementation chart 61
MIDI implementation 60
MIDI note number chart 53
■ P ■
Pad bank 10, 12
PAD INST 28
PAD SENS 29
Pad 10, 12
Pattern list 56
Pattern mode 14
Pattern 9
Changing the beat of a user
pattern....22
Copying 23
Erasing a single user pattern ..... 24
Erasing all user patterns 25
Playing 14
Real-time recording 16
Step recording 19
Precount 48
Preset kit 10
Preset pattern 9
Q
Quantize 17
■ R ■
Real-time recording 16
■S■
Song mode 32
Song 9,32
Copying 39
Dedicated kit 32
Deleting a single song 40
Deleting all songs 41
Deleting a step 34
Inserting a step 34
Pattern recording 33
Remaining memory 39
Selecting a kit 38
Tempo change 36
Volume change 37
Step recording 19
Swing 47
Synchronized playback 44
■T■
Tempo change 32
Tempo.... 15
■ U ■
User kit 10
User pattern 9
■ V ■
Volume change 32
ZECEM®
CATCH US IF YOU CAN
ZOOM CORPORATION
NOAH Bldg., 2-10-2, Miyanishi-cho, Fuchu-shi, Tokyo 183-0022, Japan
PHONE: +81-42-369-7116 FAX: +81-42-369-7115
Web Site: http://www.zoom.co.jp
MRT-3 - 5000-2

- Micro RhythmTrak zoom MRT-3
- Operation Manual
- Safety Precautions/Usage Precautions
- Safety Precautions
- About power
- AC adapter operation
- Battery operation
- Environment
- Handling
- Alterations
- In Case of Trouble
- Usage Precautions
- • Electrical interference
- - Cleaning
- Contents
- Safety Precautions/
- Usage Precautions 2
- Introduction 5
- Names of Parts 6
- Getting Connected 7
- Preparations 8
- Terms Used in This Manual 9
- Listening to the Demo Song …… 11
- Playing the Pads (Manual Play) …… 12
- Using Patterns (Pattern Mode) …… 14
- Creating Your Own Kit
- (Kit Mode) 26
- Creating Songs (Song Mode) …… 32
- Other Functions 42
- Troubleshooting 50
- Specifications 51
- Reference 52
- Index 62
- Introduction
- Names of Parts
- NOTE
- HINT
- Getting Connected
- Connection Example 1
- Connection Example 2
- Preparations
- Using Batteries
- Terms Used in This Manual
- Pattern
- ■ Song
- Kit
- Pad/Pad Bank
- Listening to the Demo Song
- Press the [FUNCTION] key.
- Press the [SONG] key.
- To stop the demo song, press the [PATTERN] key or the [SONG] key.
- Playing the Pads (Manual Play)
- Press the [PATTERN] key.
- Hit any pad.
- To switch the bank, press the [PAD BANK] key so that the key lights up.
- To switch the kit played by the pads, press the [KIT] key.
- Using Patterns (Pattern Mode)
- Playing a Pattern
- Use the [VALUE +/-] keys to select the pattern number.
- To directly switch the bank, press the [FUNCTION] key and then use the [VALUE +/-] keys.
- Press the [PLAY] key.
- To stop pattern playback, press the [STOP] key.
- Changing the Tempo of Pattern Playback
- Press and hold the [TEMPO] key.
- While keeping the [TEMPO] key depressed, use the [VALUE +/-] keys to adjust the tempo.
- Real-Time Pattern Recording
- Use the [VALUE +/-] keys to set the quantize value (shortest note to be recorded).
- Press the [FUNCTION] key again.
- While holding down the [REC] key, press the [PLAY] key.
- Adjust the tempo if necessary.
- Tap the pads in accordance with the metronome sound.
- To temporarily pause pattern recording, press the [REC] key while real-time recording is in progress.
- To erase the sound from a specific pad, push the pad while holding down the [DELETE/ERASE] key.
- When recording is completed, press the [STOP] key.
- Pattern Step Recording
- Press the [REC] key.
- To enter a note, hit the pad corresponding to the desired sound.
- To enter a rest, press the [REC] key.
- To erase a sound, use the [REC] key to move to the desired position. Then press the corresponding pad while holding down the [DELETE/ERASE] key.
- When recording is completed, press the [STOP] key.
- Changing User Pattern Resolution After Recording
- Changing the User Pattern Length
- Changing the User Pattern Beat
- Copying a Pattern
- Erasing a Single User Pattern
- Deleting All User Patterns
- Creating Your Own Kit (Kit Mode)
- Editing a User Kit
- Press the [KIT] key.
- Use the [VALUE +/-] keys to select the user kit to edit (from kit numbers 51 - 70).
- Press the [FUNCTION] key.
- Press pad 1 or 3 - 7 to select the item to change.
- ■ Items for individual pads (instrument sound)
- ■ Items common to entire kit
- Kit Items
- Pad 1: PAD INST
- Pad 3: INST TUNE
- Pad 5: INST PAN
- Pad 7: INST LEVEL
- Pad 4: KIT LEVEL
- Pad 6: PAD SENS
- Copying a Kit
- In kit mode, select the kit to be used as copy source.
- Press the [INSERT/COPY] key.
- Use the [VALUE +/-] keys to select a user kit (U51 - U70) as copy target.
- Creating Songs (Song Mode)
- What Is a Song?
- Settings for entire song
- Settings for individual patterns
- Recording Song Patterns
- Press the [SONG] key.
- Use the [VALUE +/-] keys to select an empty song number.
- Press the [REC] key.
- Use the [VALUE +/-] keys to select the user pattern number to be assigned to the first step.
- To proceed to the next step, press the [REC] key.
- Use the [VALUE +/-] keys to assign a pattern to the second step.
- Repeat steps 5 - 6 to create the entire song.
- If you want to insert a step in a song, select the step where you want to insert a pattern, and press the [INSERT/COPY] key.
- To delete a step from a song, select the step and press the [DELETE/ERASE] key.
- When one song is completed, press the [STOP] key.
- To listen to the song, press the [PLAY] key.
- Press the [STOP] key whenever you want to terminate playback.
- Changing the Tempo Within a Song
- Hold down the [TEMPO] key.
- While holding down the [TEMPO] key, use the [VALUE +/-] keys to set the tempo value (40 - 250).
- If desired, set the tempo for other song steps as well by repeating steps 3 - 5.
- When you have completed the tempo change input, press the [STOP] key.
- Changing the Song Volume
- Hold down the [SONG] key while pressing the [VALUE +/-] keys to select the step you want to edit.
- Hold down the [FUNCTION] key.
- While holding down the [FUNCTION] key, use the [VALUE +/-] keys to set the volume value (0 - 63).
- If desired, set the volume for other song steps as well by repeating steps 3 - 5.
- When you have completed the volume change input, press the [STOP] key.
- Selecting a Dedicated Song Kit
- In song mode, select the song for which you want to specify a kit.
- Press the [FUNCTION] key and then the [KIT] key.
- Use the [VALUE +/-] keys to select a dedicated kit for that song.
- When you have selected the kit, press the [FUNCTION] key.
- Checking the Amount of Remaining Memory for Songs
- In song mode, press the [FUNCTION] key, and then the [PATTERN] key.
- Press the [FUNCTION] key again.
- Copying a Song
- In song mode, select the song you want to copy.
- Deleting a Song
- Deleting All Songs
- Other Functions
- Controlling the MRT-3 With a Foot Switch
- - Use FS01 to set the tempo
- - Use FS01 to control start/pause
- - Use FS01 to control start/stop
- - Use FS01 to mute a pattern/song
- When you have selected the function, press the [FUNCTION] key once more.
- Synchronizing Playback With an External Device
- Connect the MIDI OUT jack of the MIDI sequencer/recorder to the [MIDI IN] connector of the MRT-3, using a MIDI cable.
- In pattern mode, press the [FUNCTION] key and then pad 6 (MIDI).
- - I nt (Internal)
- - Midi (MIDI clock)
- - rMt (Remote)
- Use the [VALUE +/-] keys to select the "Midi" or "rMt" setting.
- Press the [FUNCTION] key once more.
- Select a song or pattern for synchronized playback.
- Start playback at the MIDI sequencer/recorder.
- - When "Midi" is selected as clock source
- - When "rMt" is selected as clock source
- Playing MRT-3 Sounds From an External MIDI Component
- Play the external MIDI sequencer or keyboard.
- Setting the Pattern/Song Playback Swing
- In pattern mode or song mode, press the [FUNCTION] key and then pad 7 (SWING).
- Use the [VALUE +/-] keys to adjust the swing amount.
- When the setting is complete, press the [FUNCTION] key again.
- Setting the Precount for Real-Time Recording
- In pattern mode, press the [FUNCTION] key and then pad 2 (PRE COUNT).
- Use the [VALUE +/-] keys to select one of the following settings.
- Returning the MRT-3 to the Factory Default Condition
- Hold down the [REC] key while turning power to the MRT-3 on.
- To carry out the initialization process, press the [REC] key once more. To cancel the operation, press the [STOP] key.
- Troubleshooting
- No sound or very low volume.
- Sound is distorted or intermittent.
- Cannot record pattern.
- Song cannot be recorded.
- Playback sound is not in stereo.
- FS01 has no effect.
- Specifications
- Reference
- MIDI Note Number Chart
- Instrument List
- Pattern List
- MIDI Implementation
- Recognized Messages
- Transmitted Messages
- System Exclusive Messages
- MIDI Implementation Chart
- Index
- ■ Display ■
- A
- B
- C
- D
- F
- ■ | ■
- ■K■
- ■ M ■
- ■ P ■
- Q
- ■ R ■
- ■S■
- ■T■
- ■ U ■
- ■ V ■
- ZECEM®
- CATCH US IF YOU CAN
Brand : SAMSON
Model : MRT-3B
Category : Audio recorder