
NVR-7509-22HD-N - TV NEVIR - Free user manual and instructions
Find the device manual for free NVR-7509-22HD-N NEVIR in PDF.


| Product Type | LED Television |
| Screen Size (Diagonal) | 22 inches (55.9 cm) |
| Resolution | HD 1366 x 768 pixels |
| Refresh Rate | 60 Hz |
| Dimensions (with stand) | 51.2 x 32.4 x 8.5 cm |
| Weight (with stand) | 3.8 kg |
| Power Consumption (typical) | 30 W |
| Power Supply | AC 100-240 V, 50/60 Hz |
| Inputs | 2x HDMI, 1x USB, 1x VGA, 1x RF, 1x Composite AV, 1x Headphone out |
| Connectivity | Wi-Fi (optional via USB dongle) |
| Tuner | DVB-T/T2, DVB-C, DVB-S/S2 |
| Audio Output | 2 x 3 W speakers |
| Remote Control | Included (batteries not included) |
| Wall Mount Compatible | VESA 100 x 100 mm |
| Energy Class | E (EU 2019) |
| Maintenance | Clean with a soft, dry cloth. Avoid water and solvents. |
| Safety | Do not open the casing. Keep away from heat sources. |
| Spare Parts Availability | Contact Nevir customer service for parts |
| Repairability Index | Not rated |
| General Information | Model NVR-7509-22HD-N, Brand Nevir |
Frequently Asked Questions - NVR-7509-22HD-N NEVIR
User questions about NVR-7509-22HD-N NEVIR
0 question about this device. Answer the ones you know or ask your own.
Ask a new question about this device
Download the instructions for your TV in PDF format for free! Find your manual NVR-7509-22HD-N - NEVIR and take your electronic device back in hand. On this page are published all the documents necessary for the use of your device. NVR-7509-22HD-N by NEVIR.
USER MANUAL NVR-7509-22HD-N NEVIR
natural_image
Close-up of a lion's face with open mouth and teeth, displayed on a monitor (no text or symbols visible)Manual de Usuario
- PRÓLOGO 2
- PRECAUCIONES DE SEGURIDAD 2
-
CONTENIDO DEL EMBALAJE 4
4.VISTA FRONTAL Y BOTONES DELANTEROS 5 -
VISTA TRASEI
-
MANDO A DISTANCIA
natural_image
Simple line drawing of a computer monitor with a floral symbol above it (no text or labels)natural_image
Cartoon illustration of a computer monitor with lightning bolts and broken-out paper (no text or symbols)natural_image
Illustration of a computer monitor with a crossed-out X symbol, no text or symbols presentnatural_image
Line drawing of a flat-screen computer monitor with no text or symbols on the screen or stand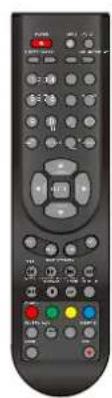
TV LED Mando a distancia
Manual de Usuario
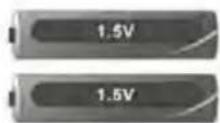
Pilas AAA
Manual de Usuario
natural_image
Technical line drawing of a mechanical or electronic component with no visible text, numbers, or symbols.6. MANDO A DISTANCIA
natural_image
Close-up of a dark gray mechanical part with an arrow pointing to it, no visible text or symbols.natural_image
Close-up of a dark, textured object with a gray arrow pointing to it (no visible text or symbols)bar
PICTURE | Picture Mode | Standard | On | |---|---|---| | Contrast | 50 | 50 | | Brightness | 50 | 50 | | Colour | 50 | 50 | | Tint | 50 | 50 | | Sharpness | 50 | 50 | | Contrast Booster | On | | | Colour Temperature | Normal | |bar
| Sound Level | Value | |---|---| | Stable Sound | Standard | | Bass | 50 | | Treble | 50 | | Balance | 0 | | Surround | Off | | AVL | Off | | Digital Audio Output | PCM | | Reset | Enter || APPLICATIONS | |
| Channel | Enter |
| Channel Options | Enter |
| Country | Russia |
| DTV Type | Terrestrial |
| Auto Tuning | Enter |
| ATV Manual Tuning | Enter |
| DTV Manual Tuning | Enter |
| PREFERENCES | ||
| Menu Language | English | |
| Teletext Language | English | |
| Key Lock | Off | |
| PC Settings | Enter | |
| PIN Setting | Enter | |
| Parental Control | Enter | |
| Auto Power Down | 4 hours | |
Multimedia
natural_image
Close-up of a lion's face with open mouth and teeth, displayed on a monitor (no text or symbols visible)natural_image
Close-up of a dark rectangular object with a gray arrow pointing diagonally to its left side (no text or symbols visible)natural_image
Two rectangular objects, one resembling a stylized letter or symbol and the other a rounded rectangle, with no visible text or symbols.natural_image
Simple grayscale illustration of a dark rectangular object with an arrow pointing to it, no text or symbols present.bar
PICTURE | Picture Mode | Standard | On | |---|---|---| | Contrast | 50 | 50 | | Brightness | 50 | 50 | | Colour | 50 | 50 | | Tint | 50 | 50 | | Sharpness | 50 | 50 | | Contrast Booster | 50 | 50 | | Colour Temperature | 50 | 50 | | Colour Temperature (Normal) | 50 | 50 || APPLICATIONS | |
| Channel | Enter |
| Channel Options | Enter |
| Country | Russia |
| DTV Type | Terrestrial |
| Auto Tuning | Enter |
| ATV Manual Tuning | Enter |
| DTV Manual Tuning | Enter |
| Common Interface | Enter |
Configurações DTV
Programa Timers
| Menu Language | English |
| Teletext Language | English |
| Key Lock | Off |
| PC Settings | Enter |
| PIN Setting | Enter |
| Parental Control | Enter |
| Automatic Power Down | Off |
Definição de PIN
Controlo Parental
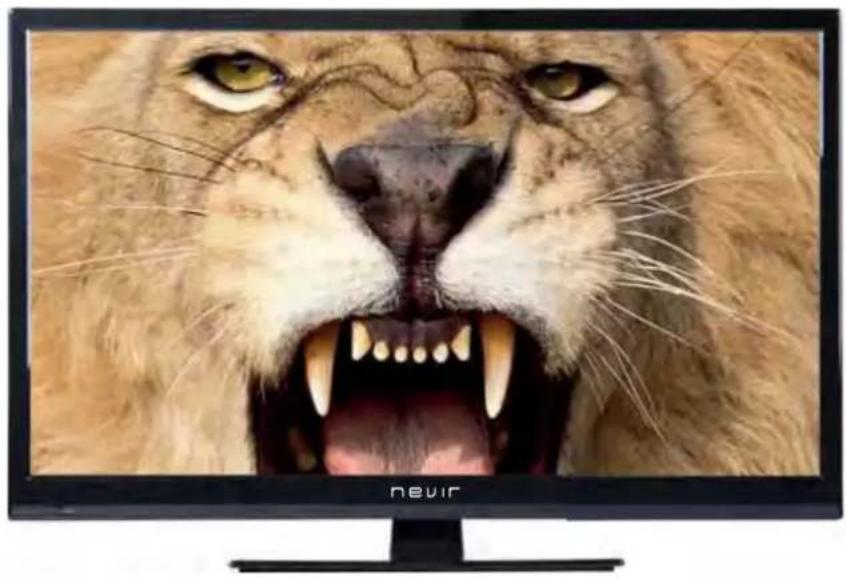
22" (55.88CM) LED TV WITH HD DVBT
natural_image
Large black-and-white photo of a lion's face with open mouth and teeth, displayed on a monitor (no text or symbols visible)USER MANUAL
CONTENTS
- Warning 2
Important Safety Instructions 3
2.ACCESSORIES 5
3.Front view/side view 5
4.Rear View 6
5.REMOTE CONTROL 7
Remote Control Instructions in DTV mode 7
Remote Control Instructions in Teletext/Media mode 9
Remote Control Setup 10
Select Input Source 11
Picture Menu 13
Sound Menu 15
Applications 17
Preferences 20
Setup 23
Media Operation 25
7.TROUBLESHOOTING 31
1. Warning
CAUTION
RISK OF ELECTRIC SHOCK DO NOT OPEN
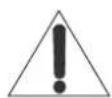
CAUTION: To reduce the risk of electric shock. Do not remove cover (or back). No user serviceable parts inside. Refer servicing to qualified service personnel.
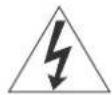
The lightning flash with arrowhead symbol, within an equilateral triangle is intended to alert the user to the presence of uninsulated "dangerous voltage" within the product's enclosure that may be of sufficient magnitude to constitute a risk of electric shock to persons.
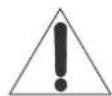
The exclamation point within an equilateral triangle is intended to alert the user to the presence of important operating and maintenance (servicing) instructions in the literature accompanying the appliance.
WARNING: TO PREVENT FIRE OR SHOCK HAZARDS, DO NOT EXPOSE THIS APPARATUS TO RAIN OR MOISTURE.
CAUTION: TO INSURE PERSONAL SAFETY, OBSERVE THE FOLLOWING RULES REGARDING THE USE OF THIS UNIT.
- Operate only from the power source specified on the unit.
- Avoid damaging the AC plug and power cord.
- Avoid improper installation and never position the unit where good ventilation is unattainable.
- Do not allow objects or liquid into the cabinet openings.
- In the event of trouble, unplug the unit and call a service technician. Do not attempt to repair it yourself or remove the rear cover.
* When you don't use this TV set for a long period of time, be sure to disconnect both the power plug from the AC outlet and antenna for your safety.
* To prevent electric shock do not use this power plug with an extension cord, receptacle or other outlet unless the blades can be fully inserted to prevent blade exposure.
Do not attempt to service the product yourself
Caution
To prevent electrical shock, do not open the TV casing.
There are no user serviceable parts inside.
Please refer to qualified service personnel for repairs.
Important Safety Instructions
1) Read these instructions.
2) Keep these instructions.
3) Heed all warnings.
4) Follow all instructions.
5) Do not use this apparatus near water.
6) Clean only with dry cloth.
7) Do not block any ventilation openings. Ventilation should not be impeded by covering the ventilation openings with items such as newspapers, table-cloths, curtains etc. There must be a minimum distance of 5cm clear space around the unit at all times to ensure proper ventilation.
8) Do not install near any heat sources such as radiators, heat registers, stoves, or other apparatus (including amplifiers) that produce heat. No naked flame sources, such as lit candles, should be placed on or near the unit.
9) Protect the power cord from being walked on or pinched particularly at plugs, convenience receptacles, and the point where they exit from the apparatus.
10) Only use attachments/accessories specified by the manufacturer.
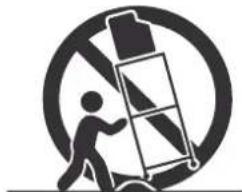
11) Use only with a cart, stand, tripod, bracket, or table specified by the manufacturer, or sold with the apparatus. When a cart is used, use caution when moving the cart/apparatus combination to avoid injury from tip-over.
natural_image
Silhouette of a person climbing a ladder inside a circular frame (no text or symbols)12) Unplug this apparatus during lightning storms or when unused for long periods of time.
13) Refer all servicing to qualified service personnel. Servicing is required when the apparatus has been damaged in any way, such as power-supply cord or plug is damaged, liquid has been spilled or objects have fallen into the apparatus, the apparatus has been exposed to rain or moisture, does not operate normally, or has been dropped.
14) Apparatus should not be exposed to dripping or splashing and no objects filled with liquids, such as vases, should be placed on the apparatus.
15) Place the television on a stable, flat surface. Failure to do so can result in the television falling, causing injury.
16) Do not allow young children to play around or on the television. Do not hang from the unit. Failure to do so can result in the television falling, causing injury.
17) Do not allow young children to play with the plastic bag that came with the television when you unpacked it. Failure to do so can result in suffocation, which may lead to death.
18) Avoid improper installation and never position the unit where good ventilation is impossible. When installing this unit, distance recommendations must be maintained between the set and the wall, as well as inside a tightly enclosed area or piece of furniture. Keep to the minimum distance guidelines shown for safe operation.
19) Cautions for installation
— Do not tilt the unit towards the left or right, or towards the back.
— Ensure the power cord is out of the path of foot traffic.
— The unit will generate a slight amount of heat during operation. Ensure that sufficient space is available around the unit to allow satisfactory cooling.
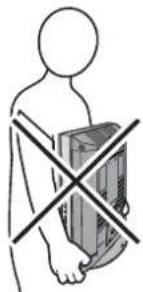
— Have two people remove the unit from the box with the screen facing away from you. It's possible your clothing, (such as a belt buckle or button) may scratch the front of the unit. Do the same when moving the unit to another location.
natural_image
Human figure holding a device with a cross symbol (no text or labels)Important Safety Instructions
20) When attaching to a wall, use a suitable wall mounting unit.
Caution
— Consult qualified installers.
— Use with an improper wall mounting unit is capable of resulting in instability or causing possible injury.
21) Make enough room for inserting and removing the power plug. Place the unit as close to the outlet as possible. The main power supply for this unit is controlled by inserting or removing the power plug. Physically disconnecting the power plug is the only way to completely disconnect the unit from the mains power source.
22) Batteries shall not be exposed to excessive heat such as sunshine, fire or the like.
23) When this unit is connected to the wall outlet, it is always on standby even when all the LED lamps are not lit. To shut down the unit, unplug the unit from the wall outlet.
24) If the supply cord is damaged, it must be replaced before further use by the manufacturer, its service agent or similarly qualified persons in order to avoid a hazard.
25) Always place the TV on furniture that can safely support the TV. Make sure the ends of the TV do not overhang the edge of the supporting furniture.
26) Do not place the TV on tall furniture (for example, cupboards or bookcases) without anchoring both the furniture and the TV to a wall or other suitably strong support.
27) Do not stand the TV on cloth or other materials placed between the TV and the supporting furniture.
28) Where the mains plug is used as the disconnect device, the disconnect device shall remain readily operable.
IMPORTANT INFORMATION
Televisions that are not positioned in sufficiently stable locations can present potential falling hazards. To avoid injuries, particularly to children, take the following simple precautions:
- Place this television only on furniture that can safely support it.
- Use only a cabinet or stand recommended by the manufacturer of the television.
- Ensure the television does not hang over the edge of supporting furniture.
- Do not place the television on tall furniture (such as cupboards or bookcases) without anchoring both the furniture and the television to a suitable support.
- Do not place cloth or other materials between the television and the supporting furniture.
- Do not let children climb on furniture to reach the television or its controls.
2. Accessories
User's Manual Remote Control
natural_image
Black remote control with black buttons and a red 'OK' button (no readable text or symbols beyond basic function labels)Batteries AAAX2
3.Front view/side view
- Press"SOURCE" to select the input source.
- Press "MENU" to bring up the main menu on the screen.
- Press"CH+"or "CH-" to change channels.
- Press "VOL+" or "VOL-" to increase or decrease the sound level.
- Press"POWER" button to turn standby mode on or off.
- ON/OFF LED Indicator: Shows red in standby mode and green while your TV is turned on.
- IR Sensor: Infrared sensor for the remote control.
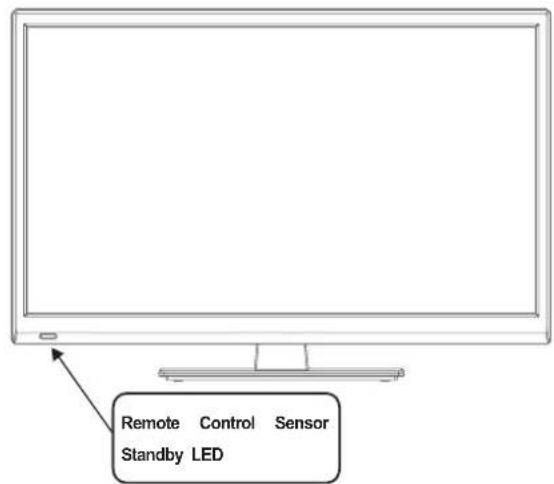

4. Rear View
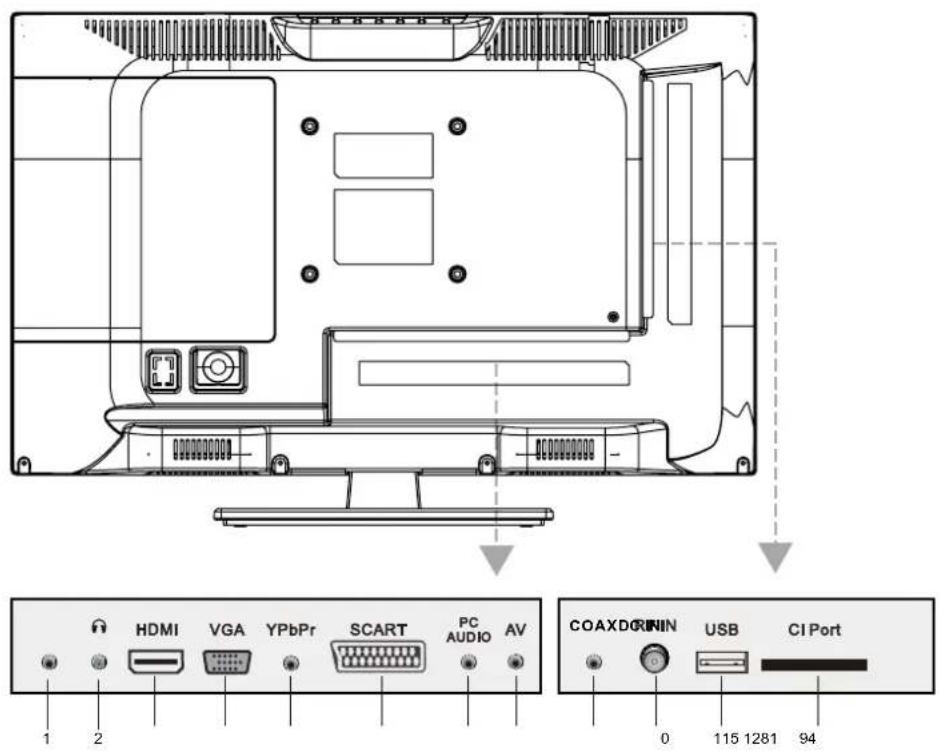
1.DC IN
DC input socket
2.Headp hone Jack
Connecting for headphone.
- HDMI Input Jack
Connecting for HDMI signal.
- VGA input Jack
Connected to the VGA output jack on a personal computer.
- YPBPR Input Jacks
Connecting for the YPBPR Input in component mode.
- SCART Jack
Connect to external equipment with SCART socket.
- PC Audio Input Jack
Connected to the audio output jack on a personal computer.
- AV Input Jacks
Connecting for AV signal input in composite mode.
- Coax OUT
Connecting the audio output
10.Antenna Input Jack
Connected to external antenna to receive the ATV/DTV program in ATV/DTV mode.
- USB HOST
Connecting for USB device.
12.CI Port
Connect the CI Card.
5. REMOTE CONTROL
Remote Control Instructions in DTV mode
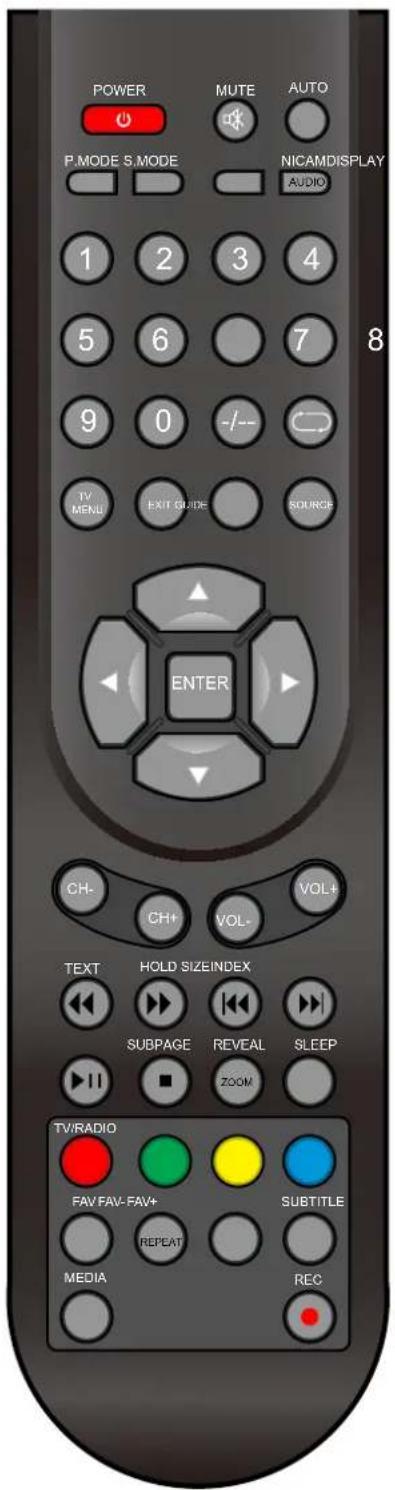
POWER
Turn the LED TV ON or OFF.
MUTE
Press to mute the sound. Press again or press VOL+ to un-mute the TV.
P.MODE
Press to select the picture modes.
S.MODE
Press this button to change the audio mode.
DISPLAY
Press to display the source and channel's information. NICAM
Press to select the NICAM modes.
AUDIO
Audio select button.
NUMBER BUTTONS
The numerical keys are used for editing the name of the channel.
○
Return to the previous channel viewed.
-/-
Press this button to enter a program number for multiple program channel such as 21,etc.
TV MENU
Press to enter or exit the setup menu.
EXIT
Press to exit all the OSD on the screen.
GUIDE
Press to display the channel guide menu.
SOURCE
Press SOURCE to display the OSD input source, Press ▲▼
to select an input source, and then press ENTER to confirm.
THUMBSTICK( ▲/ ▼/◀ / ▶/ ENTER)
Allows you to navigate the on-screen menus and adjust the system settings to your preference.
CH+/CH-
Press to scan through channels.
VOL+/VOL-
Press to increase/decrease the sound level.
Remote Control Instructions in DTV mode
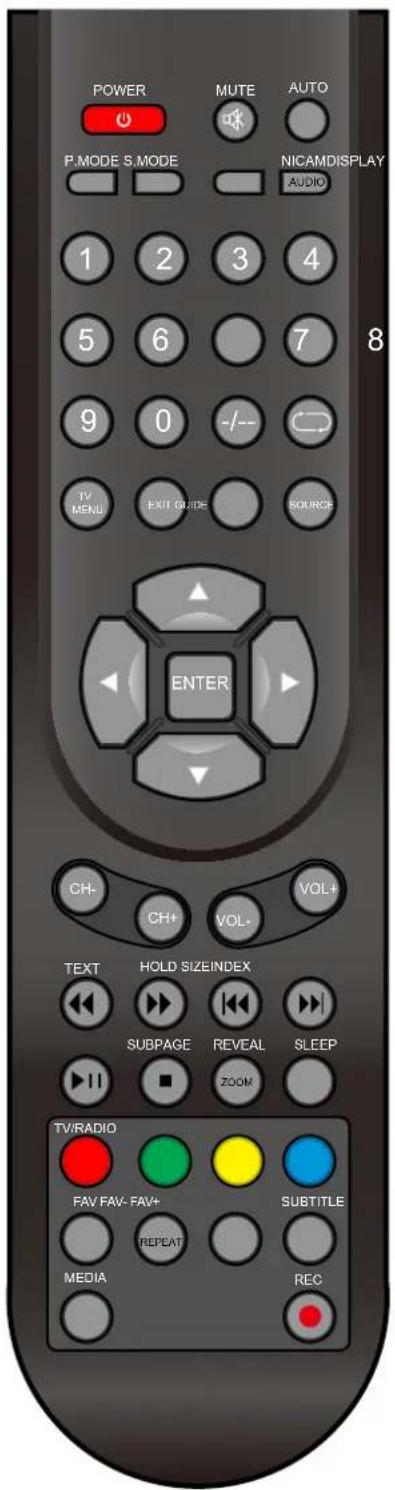

Playing backward fast in timeshift mode.

Playing forward fast in timeshift mode.
▶|| (Timeshift)
Press to perform the Timeshift function.
NOTE: Select Time Shifting Mode "off" in the menu, then the "teletext" can be available.

Press to stop recording.
ZOOM
Zoom can change display size.
SLEEP
Lets you select amount of time before your TV turn itself off automatically.
Color button
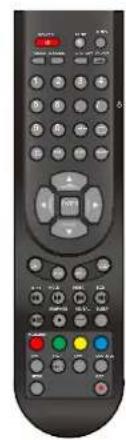
Color buttons (respectively red, green, yellow and blue) used in a few sub-menus.
TV/RADIO
When watching a channel, allows you switch between TV and Radio modes.
FAV
Displays the selected favorite programmers.
FAV-
Displays the selected favorite down programmers.
FAV+
Displays the selected favorite up programmers.
SUBTITLE
In DTV mode, Press to select alternate subtitle languages during view/playback of a DTV program.

Record button.
AUDIO
ZOOM
REPEAT
Remote Control Setup
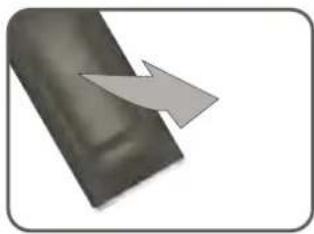
- Open the cover.
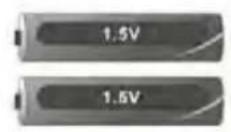
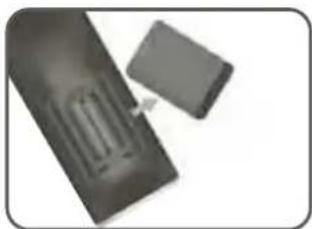
- Use three AAA size batteries. When inserting the batteries, make sure correct polarities "+" and "-" marks on the batteries line up correctly with compartment markings.
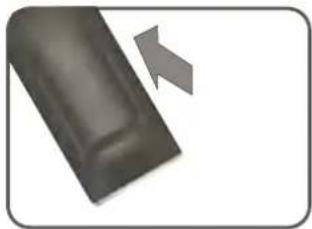
- Replace the battery cover.
Place the remote control on a even surface and
insert the supplied batteries into the remote control as follows.
- Softly push the back cover to open the battery compartment.
natural_image
Close-up of a dark, textured surface with a gray arrow pointing to it (no text or symbols)- Insert two batteries(1.5V size AAA Batteries), please make sure the polarity matches the marks inside the compartment.
natural_image
Two rectangular electronic components with internal traces, one larger and one smaller, shown against a plain background (no text or symbols visible)- Softly press the back cover to close it.
natural_image
Close-up of a dark, textured object with a gray arrow pointing to it (no text or symbols visible)6. TV Operation And System Setup
SELECT INPUT SOURCE
| Input |
| DTV |
| ATV |
| AV |
| SCART |
| YPBPR |
| HDMI |
| PC |
| MEDIA |
Press SOURCE button to display the input source list;
Press ▲/▼button to select the input source you want to watch;
Press ENTER button to enter the input source;
bar
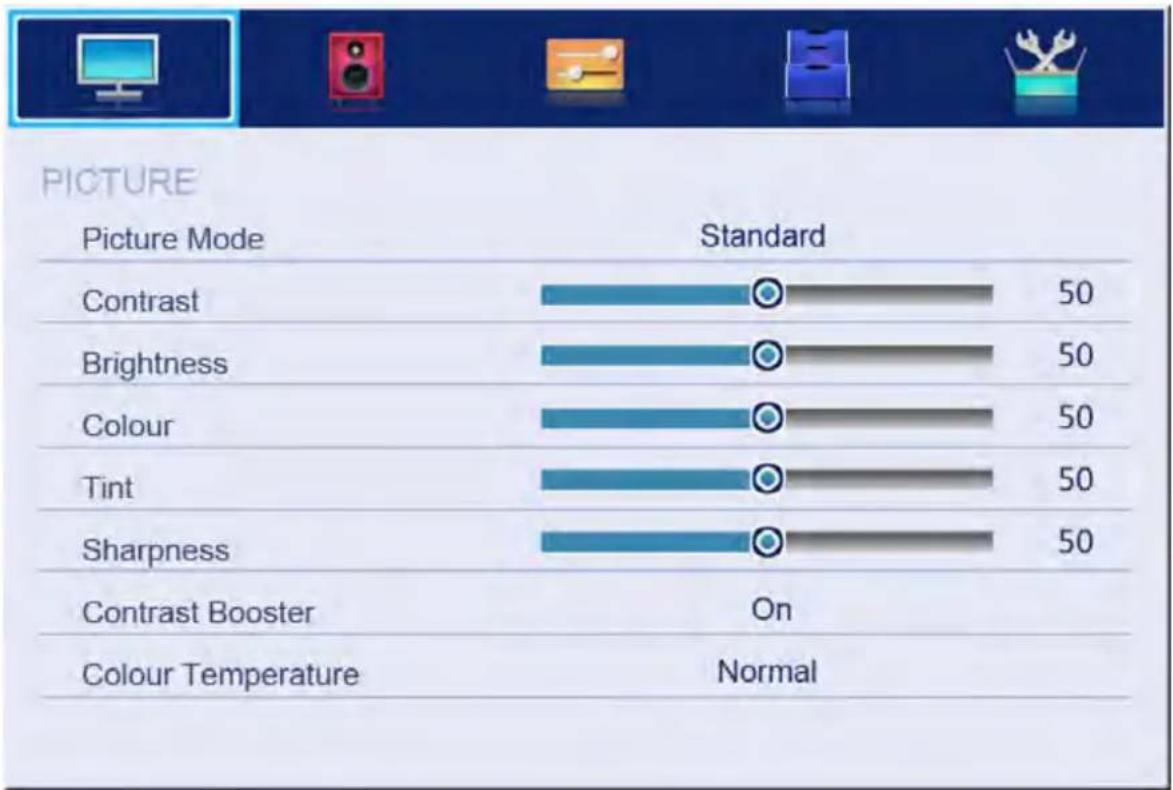
PICTURE | Picture Mode | Standard | Normal | |---|---|---| | Contrast | 50 | 50 | | Brightness | 50 | 50 | | Colour | 50 | 50 | | Tint | 50 | 50 | | Sharpness | 50 | 50 | | Contrast Booster | On | | | Colour Temperature | Normal | |- Press MENU button to display the MAIN OSD MENU;
- Press ◀/▶button to select the MENU you want;
- Press ENTER button or ▼ button to enter the sub menu, and press ▲ button to return back to the previous menu.
- Press ◀/▶ button to select the option and then press ENTER button or ▼ button to enter the submenu, press ◀/▶ button to adjust the value or press / ▼ button to select in the sub menu;
- You can press MENU button to save and return back to the previous menu, and press EXIT button to exit the entire menu.
Press DISPLAY button on the remote control to display program information.
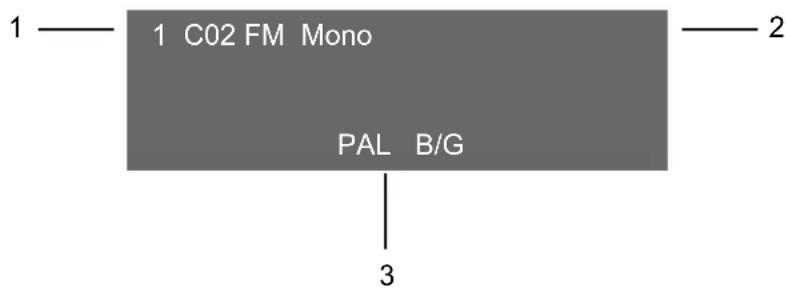
- Current program Number.
- The NICAM mode of current program.
- The sound system of current channel could be changed on Analog Manual Search Menu.
Picture Menu
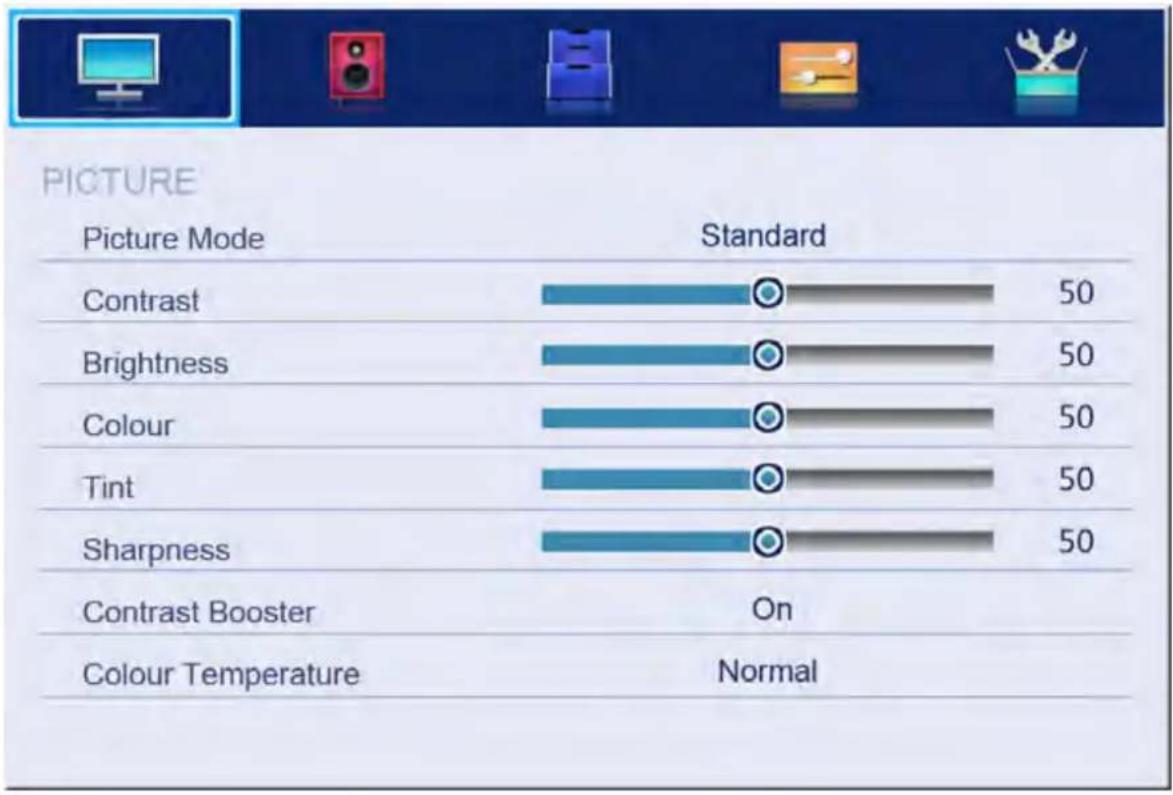
The picture is for a reference only; the actual item is the standard.
Press TV MENU button to display the main menu.
Press ◀/▶ button to select Picture in the main menu, and then press ENTER button to enter.
bar
PICTURE | Picture Mode | Standard | Normal | |---|---|---| | Contrast | 50 | 50 | | Brightness | 50 | 50 | | Colour | 50 | 50 | | Tint | 50 | 50 | | Sharpness | 50 | 50 | | Contrast Booster | On | | | Colour Temperature | Normal | |- Press ◀/▶ button to select the option that you want to adjust in the Picture menu, and then press ENTER button or ▼ button to enter.
- Press ◀/▶ button to adjust or press ▲/▼ button to select. And press ENTER button to select the sub menu.
- After finishing your adjustment, press MENU button to save and return back to the previous menu, and press EXIT button to exit the entire menu.
Picture Mode
Press ▲/▼ button to select Picture Mode, then press ENTER button to enter and press ◀/▶ button to select. (Available Picture Mode: User, Dynamic, Standard, Mild)
You only can change the value of brightness, contrast, sharpness, color, when the picture is in User mode.
TIPS: You can press P-MODE button on the remoter control again and again to change the picture mode directly.
Picture Mode
Standard
Contrast
Press ▲/▼ button to select Contrast, then press ENTER button to enter and press ◀/▶
button to adjust. Then press MENU button to return back the previous menu directly.
Brightness
Press ▲/▼ button to select Brightness, then press ENTER button to enter and press ◀/▶ button to adjust. Then press MENU button to return back the previous menu directly.
Colour
Press ▲/▼ button to select Colour, then press ENTER button to enter and press ◀/▶ button to adjust. Then press MENU button to return back the previous menu directly.
Tint
Press ▲/▼ button to select Tint, then press ENTER button to enter and press ◀/▶ button to adjust. Then press MENU button to return back the previous menu directly.
Sharpness
Press ▲/▼ button to select Sharpness, then press ENTER button to enter and press ◀/▶ button to adjust. Then press MENU button to return back the previous menu directly.
Contrast Booster
Press ▲/▼ button to select Contrast Booster, then press ENTER button to enter and press ◀/▶ button to select On or Off. Then press MENU button to return back the previous menu directly.
Colour Temperature
Press ▲/▼ button to select Colour Temperature, then press ENTER button to enter and ◀/▶ button to select Standard, Cool, Warm.
DNR
Press ▲/▼ button to select DNR, and then press ENTER button to enter and ◀/▶ button to select Off, Low, Middle, High.
Reset
Press ▲/▼ button to select Reset, then press ENTER button to enter the confirm menu, and then choose OK to reset the value.
SOUND Menu
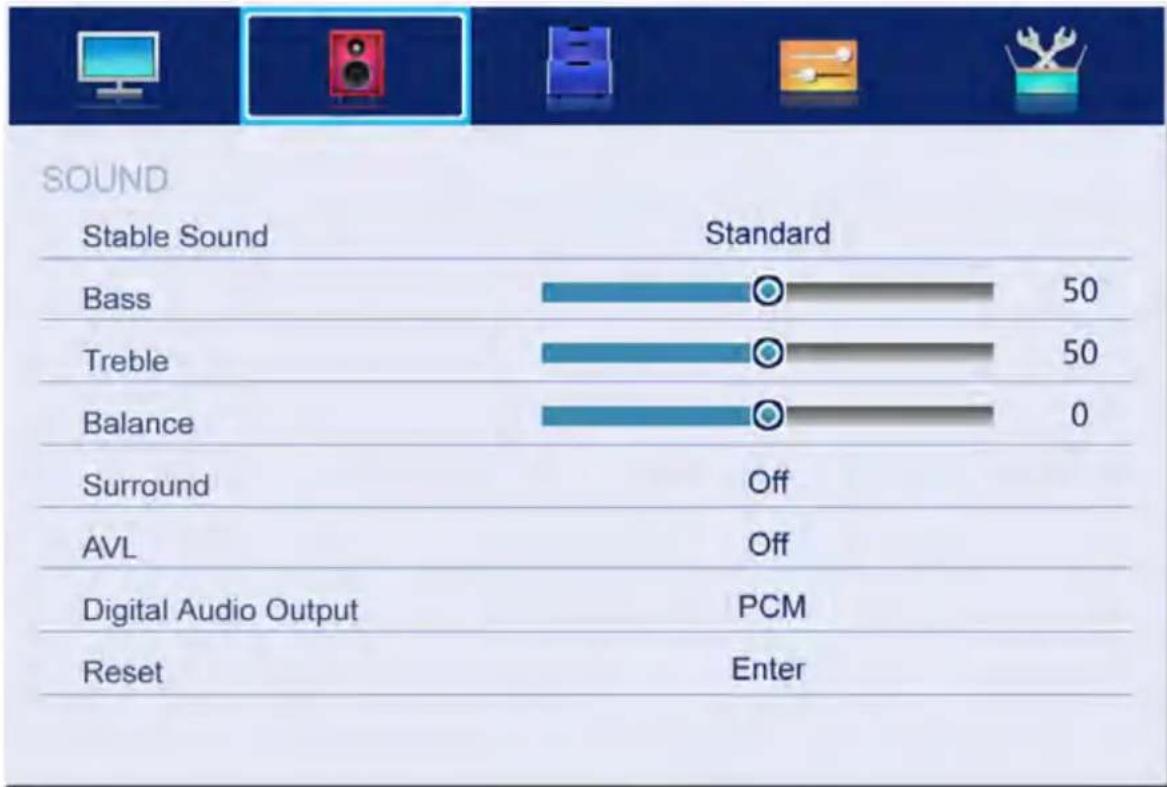
The picture is for a reference only; the actual item is the standard.
Press MENU button to display the main menu.
Press ◀/▶ button to select Sound in the main menu, and then press ENTER button or ▼ button to enter.
bar
SOUND | Sound | Stable Sound | Standard | | :--- | :--- | :--- | | Bass | 50 | 50 | | Treble | 50 | 50 | | Balance | 0 | 0 | | Surround | Off | Off | | AVL | Off | Off | | Digital Audio Output | PCM | PCM | | Reset | Enter | Enter |- Press ◀/▶ button to select the option that you want to adjust in the Sound menu, then press ENTER button to enter.
- press ◀/▶ button to adjust or press ▲/▼ to select, and press ENTER button to select submenu.
- After finishing your adjustment, Press MENU button to save and return back to the previous menu, or press EXIT button to exit the entire menu.
Sound mode
Press ▲/▼ button to select Sound mode, and then press ENTER button to enter. And then press ◀/▶ button to select. (Available Sound mode: User, Standard, Music, Movie).
You can change the value of bass and treble, Balance and EQ, when the sound is in User mode.
TIPS: You can press S-MODE button on the remote control to change the Sound Mode directly.
Sound Mode
Standard
Bass
Press ▲/▼ button to select Bass, then press ENTER or ▶ button to enter and press ◀/▶ button to adjust. It can only be adjusted under user mode. Then press MENU button to return
back the previous menu directly.
Treble
Press ▲/▼ button to select Treble, then press ENTER button to enter and press ◀/▶ button to adjust. It can only be adjusted under user mode Then press MENU button to return back the previous menu directly.
Balance
Press ▲/▼ button to select Balance, then press ENTER button to enter and press ◀/▶ button to adjust. Then press MENU button to return back the previous menu directly.
Surround
Press ▲/▼ button to select Surround, and then press ENTER button to enter and press ◀/▶ button to select ON or OFF.
AVL
Press ▲/▼ button to select AVL, and then press ENTER button to enter and press ◀/▶ button to select ON or OFF.
Digital Audio Output
Press ▲/▼ button to select Digital Audio Output, then press ENTER button to enter and press ◀/▶ button to select.
(Available SPDIF mode: OFF, PCM, AUTO)
Then press ENTER button or ▶ button to enter and press ◀/▶ button to adjust, then press MENU button to return back the previous menu directly.
Reset
Press ▲/▼ button to select Reset, then press ENTER button to enter RESET menu.
APPLICATIONS
The picture is for a reference only; the actual item is the standard.
Press MENU button to display the main menu.
Press ◀/▶ button to select APPLICATIONS in the main menu, and then press ENTER button to enter.
| APPLICATIONS | |
| Channel | Enter |
| Channel Options | Enter |
| Country | Russia |
| DTV Type | Terrestrial |
| Auto Tuning | Enter |
| ATV Manual Tuning | Enter |
| DTV Manual Tuning | Enter |
| Common Interface | Enter |
- Press ◀/▶ button to select the option that you want to adjust in the APPLICATIONS menu, and then press ENTER button to enter.
- Press ◀/▶ button to select and press ENTER button to select the sub menu.
- After finishing your adjustment, press MENU button to save and return back to the previous menu, or press EXIT button to exit the entire menu.
Channel
Press ▲/▼ button to select Channel, and then press ENTER button to play the channel selected. The menu will appear as follows:
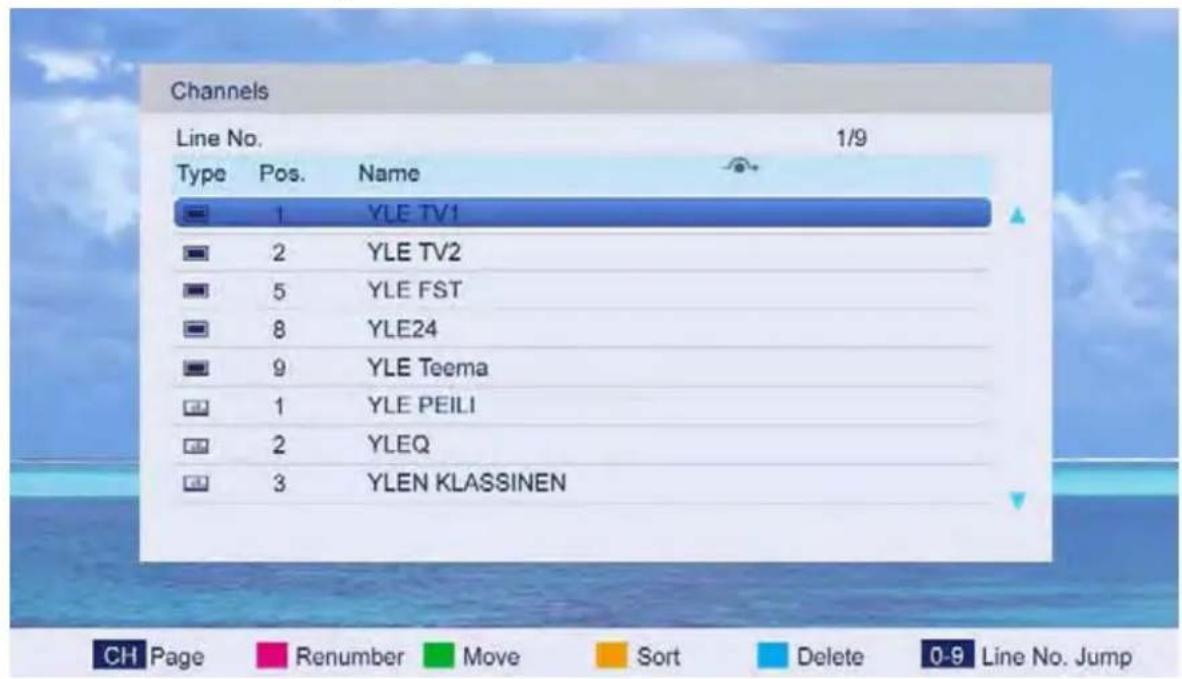
Key Description:
CH button: Press CH+ or CH- to turn the page.
RED button: Press this button to modify the channel number.
GREEN button: Press this button to move down the channel.
YELLOW button: Press this button to the order to restore the default channel.
BLUE button: Press this button to delete the channel selected.
0-9 button: Press these buttons to jump to the appropriate channel by inputting different channel number.
Channel Options
Press ▲/▼ button to select Channel Options, and then press ENTER button to the channel List menu. The menu will appear as follows:
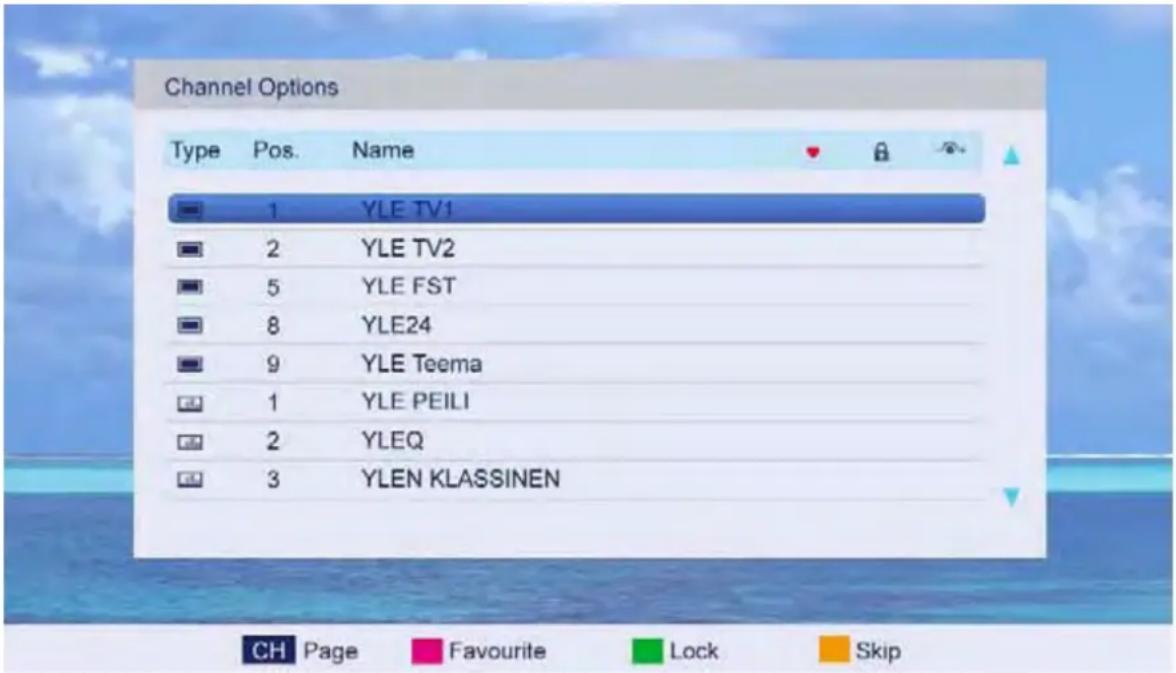
Key Description:
CH button: Press CH+ or CH- to turn the page.
RED button: Press this button to set the favorites channels.
GREEN button: Press this button to lock the channel.
YELLOW button: Press this button to skip the channel, if the channels already skipped, press YELLOW button again will cancel skip.
Country
Press ▲/▼ button to select Country, and then press ◀/▶ button to select which area you stay.
DTV Type
Press ▲/▼ button to select DTV Type, then press ◀/▶ button to select.
(Available DTV Type: Cable, Terrestrial)
Auto Tuning
Press ▲/▼ button to select Auto Tuning, and then press ENTER button to enter (When the System Lock is on, please input the PIN code to unlock).
Select to open the auto searching page, and press Enter button to start the scan.
ATV Manual Tuning
Press ▲/▼ button to select ATV Manual Tuning, and then press ENTER button to start the scan.
DTV Manual Tuning
Press ▲/▼ button to select DTV Manual Tuning, and then press ENTER button to start the scan.
Common Interface
Press ▲/▼ button to select Common Interface, and then press ENTER button to display the CI slot Information.
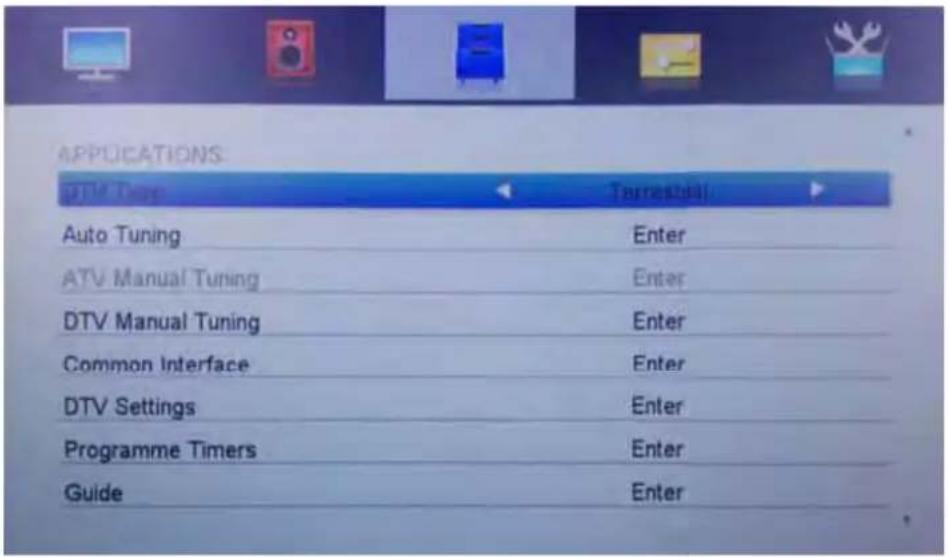
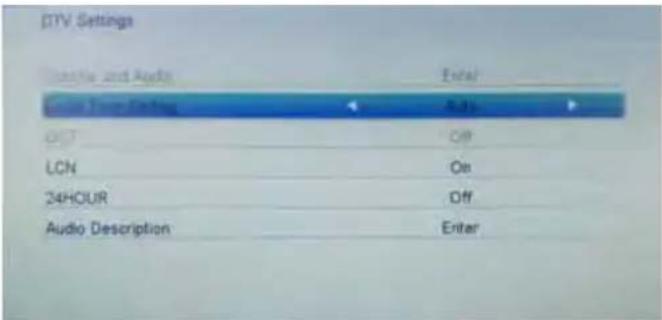
DTV Settings
Press ▲/▼ button to select DTV Settings, and then press ENTER button to enter.
Programme Timers
Press ▲/▼ button to select Programme Timers, and then press ENTER button to enter.
Guide
Press ▲/▼ button to select Guide, and then press ENTER button to enter.
PREFERENCES
The picture is for a reference only; the actual item is the standard.
Press MENU button to display the main menu.
Press ◀/▶ button to select PREFERENCES in the main menu, and then press ENTER or ▼ to enter.
| Menu Language | English |
| Teletext Language | English |
| Key Lock | Off |
| PC Settings | Enter |
| PIN Setting | Enter |
| Parental Control | Enter |
| Automatic Power Down Off |
- Press ON to select the option that you want to adjust in the PREFERENCES menu, then press ENTER to enter.
- Press ◀/▶ button to adjust or press ▲/▼ button to select.
- After finishing your adjustment, press MENU button to save and return back to the previous menu and press EXIT button to exit the entire menu.
Menu Language
Press ▲/▼ button to select Menu Language, then press ENTER or ▶ button to enter the sub menu, then press ▲/▼ button to select, then press ENTER or button to confirm.
Teletext Language
Press ▲/▼ button to select Teletext Language, then press ENTER or ▶ button to enter the sub menu, then press ▲/▼ button to select, then press ENTER or button to confirm.
Key Lock
Press ▲/▼ button to select Key Lock, then press ENTER button to enter and press ◀/button to select ON or OFF.
PC Settings
Press ▲/▼ button to select PC Settings, then press ENTER to enter the sub menu. Then Press ▶ to enter, then press ENTER or ▶ to confirm. (When the PC signal is connected).
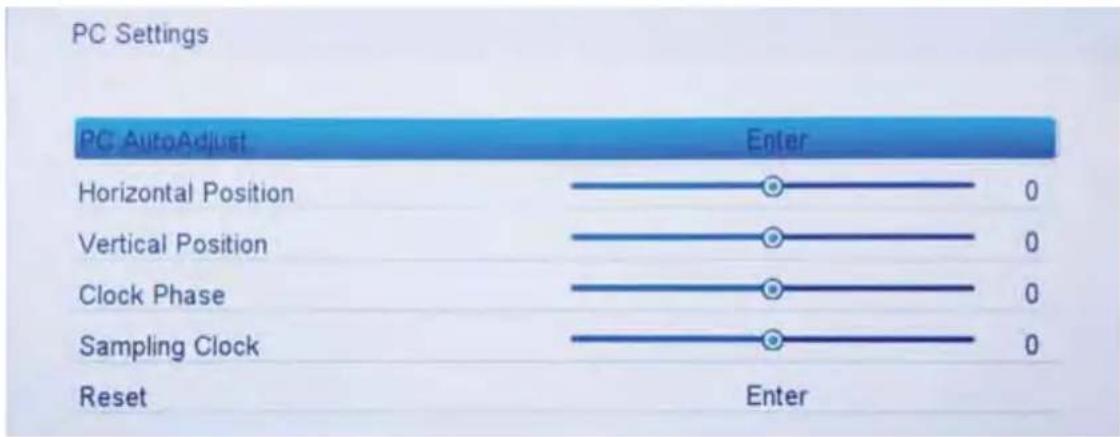
PIN Setting
Press ▲/▼ button to select PIN Setting, then press ENTER button to enter the sub menu, and than you can set a password.
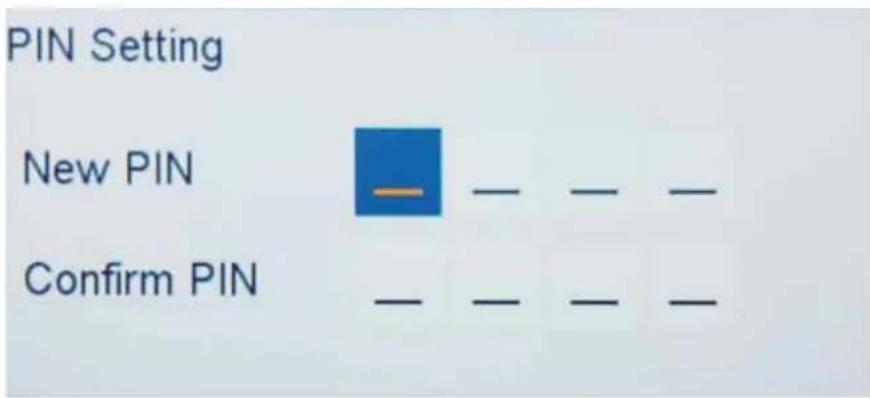
Parental Control
Press ▲/▼ button to select Parental Control, then press ENTER or ▶ button to enter the sub menu. Then press ▲/▼ button to select Rate (From4-17, or None). Then press ENTER or ▶ button to confirm.
Automatic Power Down
Press ▲/▼ button to select Automatic Power Down and press ◀/▶ button to select Off or 1 hour, 2 hours, 4 hours.
SETUP
The picture is for a reference only; the actual item is the standard.
Press MENU button to display the main menu.
Press ◀/▶ button to select Setup in the main menu, then press ENTER to enter.
| SETUP | |
| OSD Timer | Off |
| Cinema | Super Live |
| Blue Screen | On |
| Sleep Timer | Off |
| Location | Home |
| Quick Setup | Enter |
| Reset TV | Enter |
- Press ◀/▶ button to select the option that you want to adjust in the Setup menu, then press ENTER or ▼ button to enter.
- Press ◀/button to adjust or press / button to select.
- After finishing your adjustment, press MENU button to save and return back to the previous menu and press EXIT button to exit the entire menu.
OSD Timer
Press ▲/▼ button to select OSD Timer, and then Press ◀/▶ button to select. (Available OSD Timer: 10 S, 20 S, 30S, 40S, 50S, 60S, off), then press ENTER button to confirm.
Cinema
Press ▲/▼ button to select Cinema, and then Press ◀/▶ button to select. (Available Cinema: Auto, 4x3, Wide, Super Live), then press ENTER button to confirm.
Blue Screen
Press ▲/▼ button to select Blue Screen, then press ◀/▶ to select On or Off. Then press ENTER to confirm.
Sleep Timer
Press ▲/▼ button to select Sleep Timer, and then Press ◀/▶ button to select. (Available Sleep Timer: 00:15, 00:30, 01:00, 01:30, 02:00, off), then press ENTER button to confirm.
Location
Press ▲/▼ button to select Location, and then Press ◀/▶ button to select Home or Store, then press ENTER button to confirm.
Quick Setup
Press ▲/▼ button to select Quick Setup, and then Press then press ENTER button to enter the sub menu, enter the password if locked, and then you can quickly make some basic settings of the TV.
Reset TV
Press ▲/▼ button to select Reset TV, and then press ENTER to enter the sub menu, enter the password if locked, and then you can restore factory settings.
MEDIA OPERATION
The picture is for a reference only; the actual item is the standard.
Note: Before operation MEDIA menu, Plug in USB device or memory card, then press SOURCE button to set the Source to Media.
Press ▲/▼ button to select MEDIA in the Source Menu, and then press ENTER or ▶ to enter. You can also enter the Media by pressing MEDIA button on the remote control.
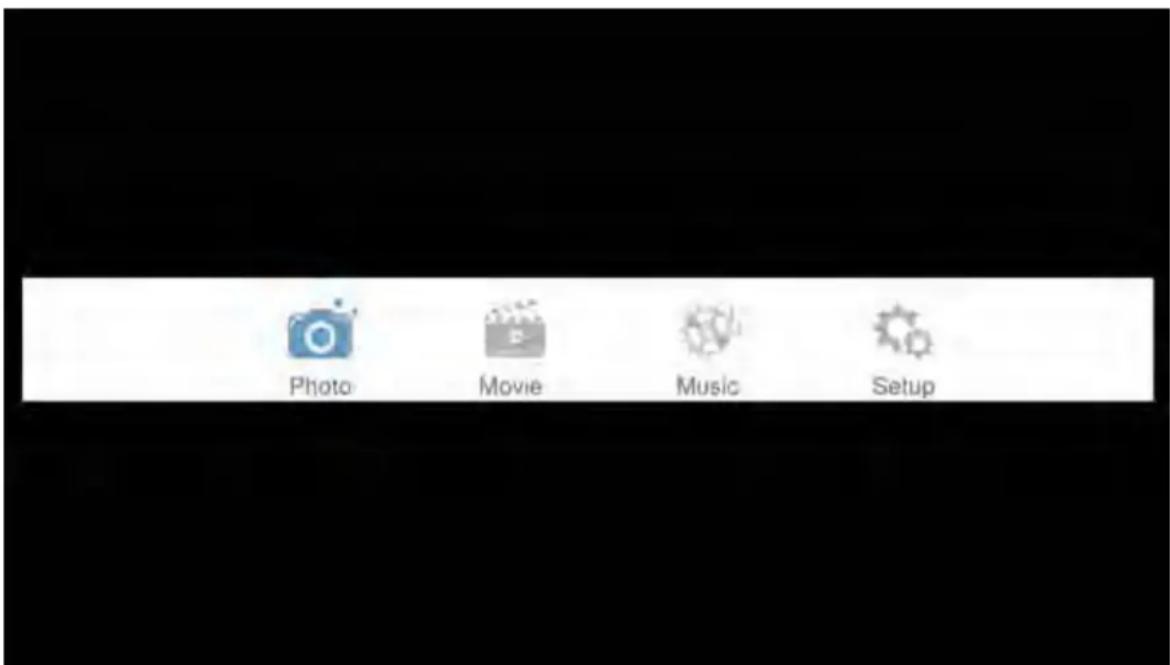
- Press ▲/▼ button to select the option that you want to adjust in the Media menu, then press ENTER or ▶ button to enter.
- Press ◀/button to adjust or press bENTER select.
- press EXIT button to exit the entire menu.
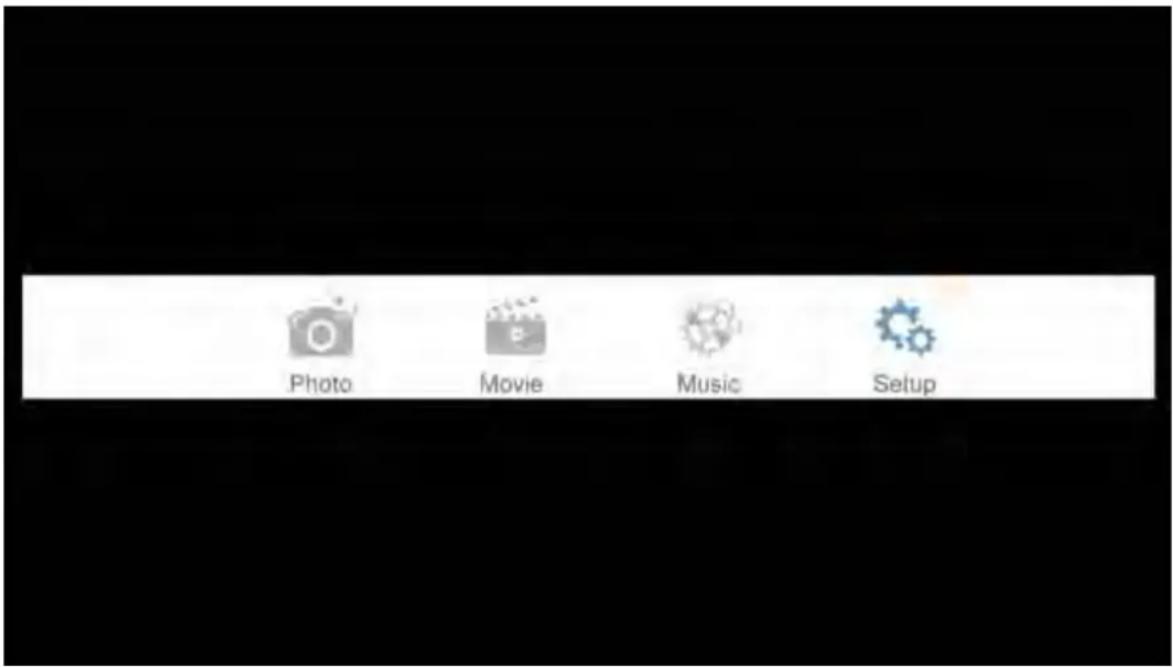
Photo
The picture is for a reference only; the actual item is the standard.
Press ◀/▶ button to select Music in the main menu, and then press ENTER button to enter.
Press EXIT button to return back to the previous menu.
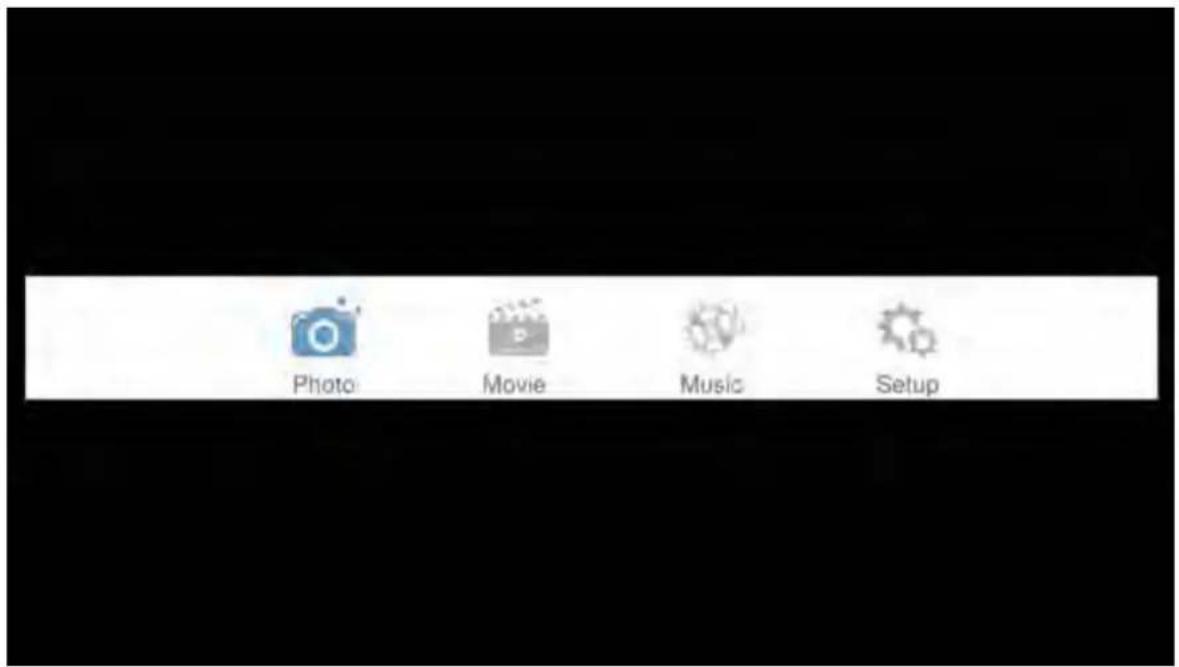
Press ◀/▶ to select the photos, press ENTER or ▶ || button to view.
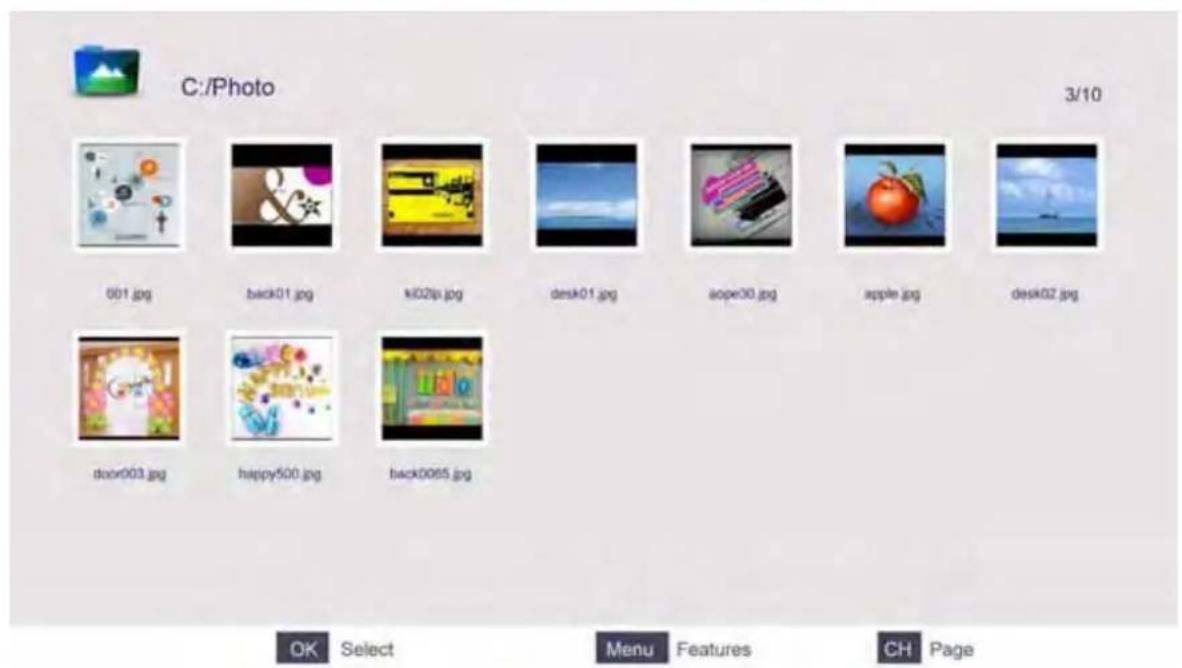
You can see the information of the current playing photo after press DISPLAY button, then press ▶ || button to play or pause, you can see the playing state in the right.
Then press ▲/▼r / ◀button to ratite the picture.
Notes: Other menu and description are the same as that for Movie menu.
Movie
The picture is for a reference only; the actual item is the standard.
Press ◀/▶ button to select Movie in the main menu, then press ENTER button to enter.
Press EXIT button to return back to the previous menu.
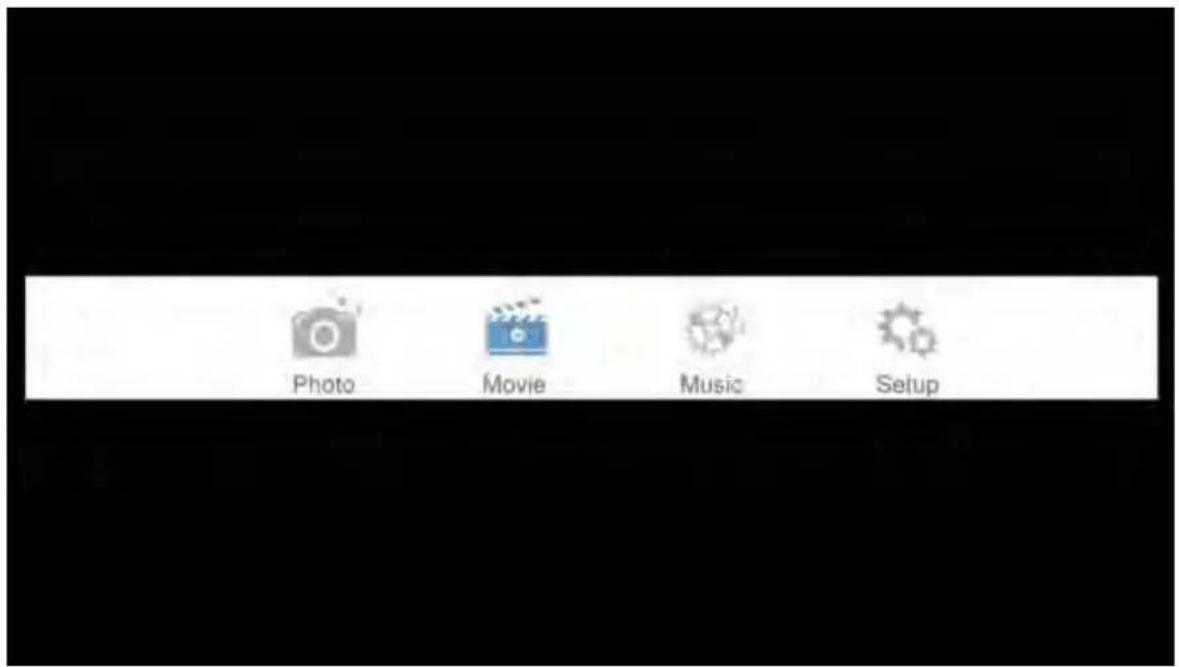
Press ◀/button to select the folder that you want to view.
Press ENTER button to select the sub folder.
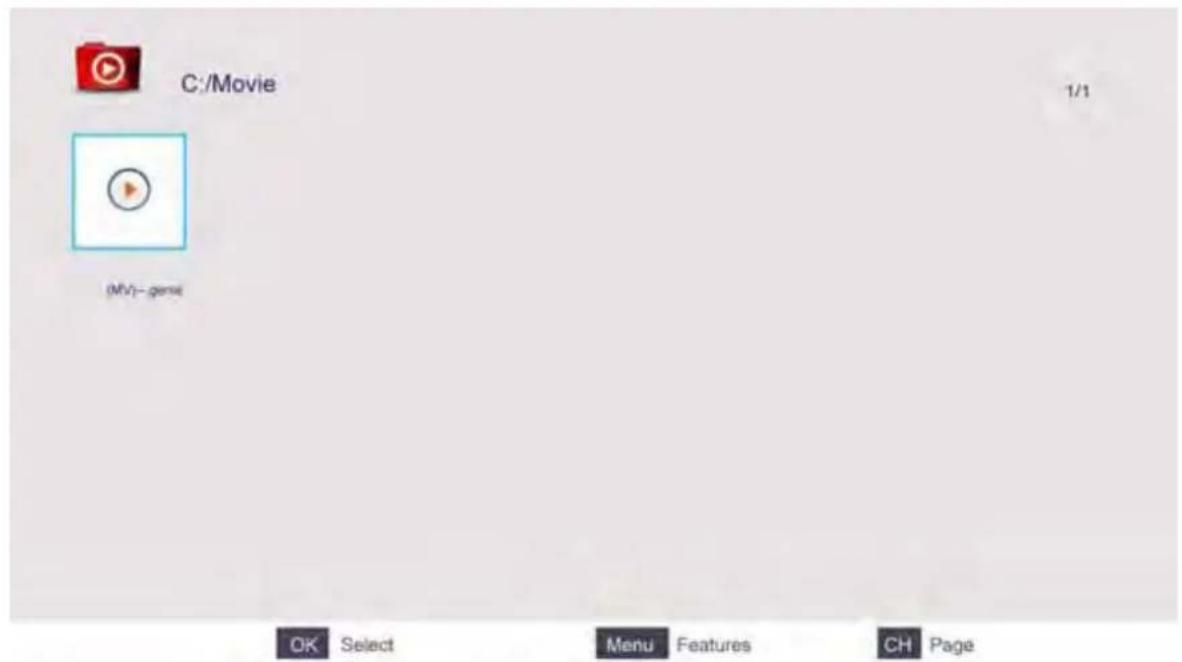
Press ENTER button or ▶ || button to play,
Press ■ button or EXIT button to stop playing.
Press the ◀ button to return back to previous page.
You can see the information of the current playing media at the first flew second or after pressDISPLAY button.
Music
The picture is for a reference only; the actual item is the standard.
Press ◀/▶ button to select Music in the main menu, and then press ENTER button to enter.
Press EXIT button to return back to the previous menu.
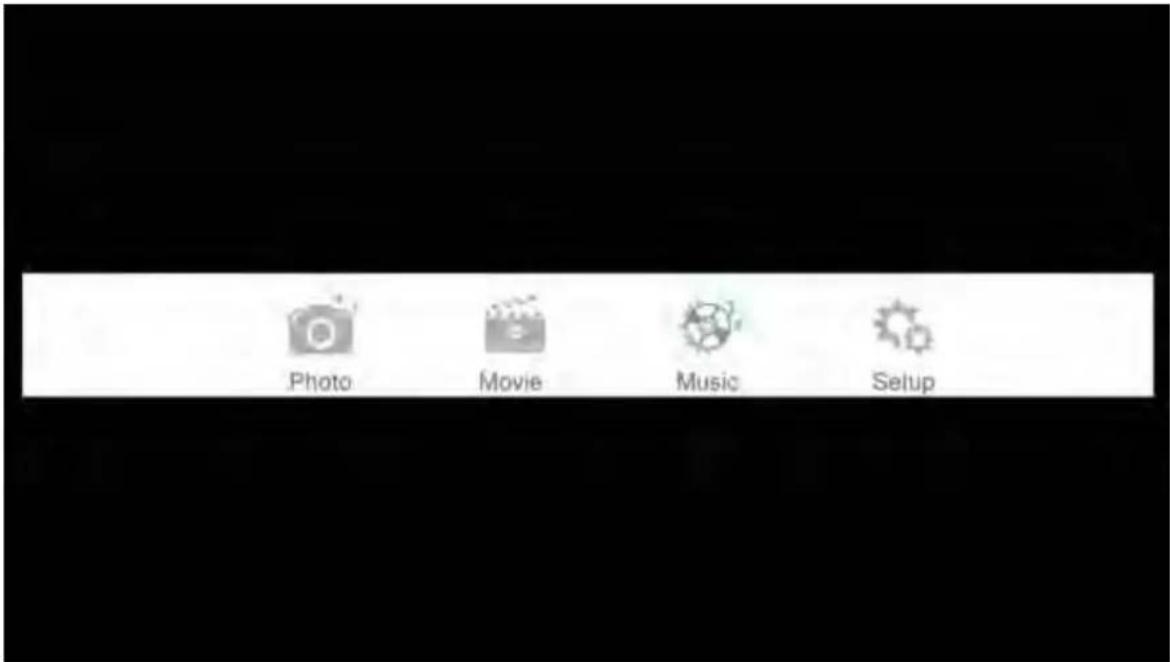
Press ◀/▶ button to select the sonny you want to listen, and then press ENTER or ▶ || or ▶ button to play.
Press ◀ button to return back to the previous menu.
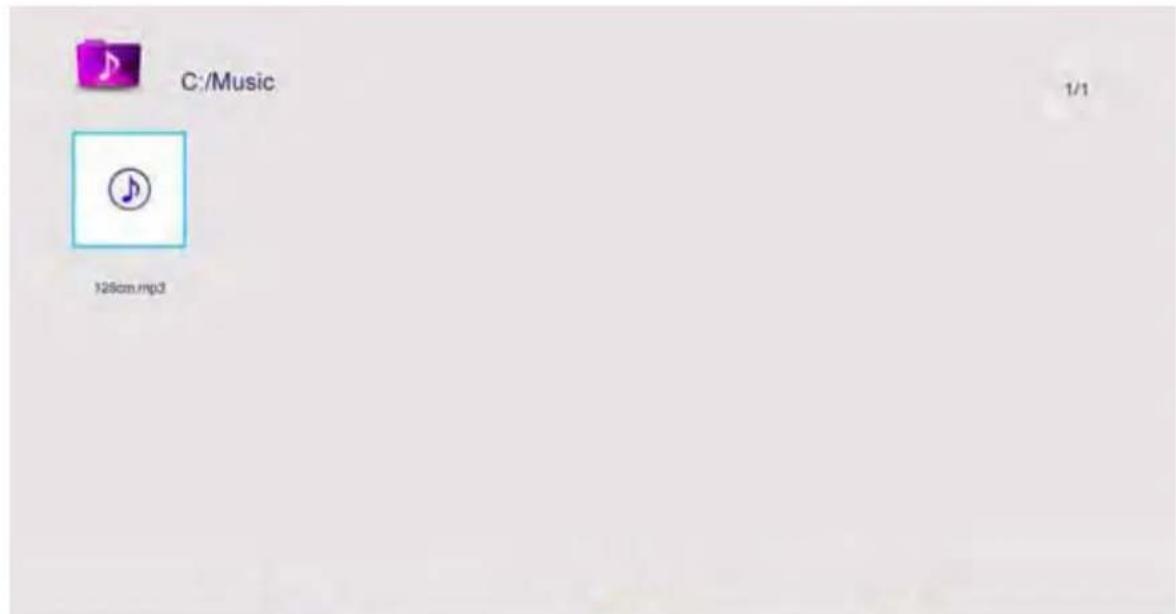

Select

Features

Page
You can see the information of the current playing sonny at the left of the menu.
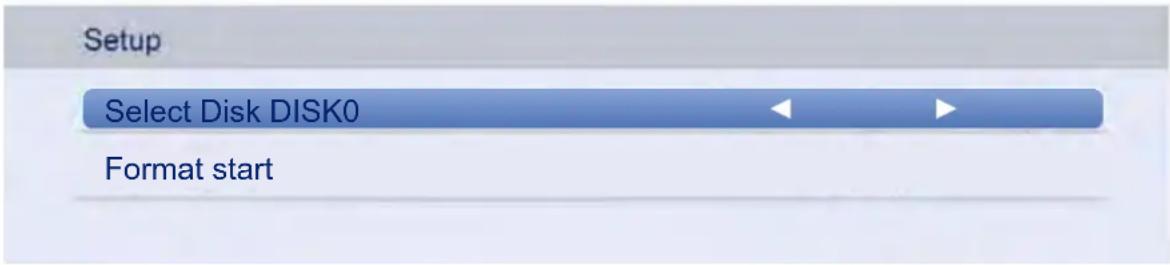
Setup
The picture is for a reference only; the actual item is the standard.
Press ◀/▶ button to select Setup in the main menu, and then press ENTER button to enter. Press EXIT button to return back to the previous menu.
Press ▲/▼button to select the option, and then Press / ◀button to select it on or off.
Usb Multimedia Playback Format
| Media | Ext. | Video | Audio | Remark |
| Movie | .mpg | MPEG-1, MPEG-e | MP3, WMA, AAC, AC3 | Max Solution: 1920x1080Max Data Rate: 20 Mbps |
| .avi | DivX, Xvid, MJPEG,MPEG-4 SP/ASP, H.264 | |||
| .ts | MPEG-2, H.264 | |||
| .mov/. mkv | MPEG-4 SP/ASP, H.264 | |||
| .mp4 | MPEG-4 SP/ASP, H.264 | |||
| MPEG-1, MPEG-2 | Max Solution: 1920x1080Max Data Rate: 40 Mbps | |||
| .vob | MPEG-2 | |||
| Music | .mp3 | -- | MP3 | Sample Rate: 8K-48KHzBit Rate: 32K-320Kbps |
| .wma | -- | WMA | ||
| .m4a/a ac | -- | AAC | Sample Rate: 16K-48KHzBit Rate: 32K-442KbpsChannel: Mono/Stereo | |
| photo | .jpg | Progressive JPEG | Max Resolution:1024x768 | |
| .jpeg | Baseline JPEG | Max Resolution:8192x8192 | ||
| .bmp | BMP | Max Resolution:6500x6500Pixel Dept h: 1/4/8/16/24/32bpp | ||
| .png | Non-Interlaced | Max Resolution:3000x3000 | ||
| Interlaced | Max Resolution:1500x1500 | |||
| File System: Hi Speed FS, FAT32,FAT16,NTFS(NTFS compressed file is not supported)Note: Licenses are required for Divx,MPEG,H.264,AC3, MP3,WMA and ACC. | ||||
This symbol indicates that when the end-user wishes to discard this product, it must be sent to separate collection facilities for recovery and recycling. By separating this products from other household-type waste, the volume of waste sent to incinerators or land fields is reduced and natural resources will thus be conserved.
Besides that, waste batteries and / or accumulators must be removed prior to delivery of WEEE, through the separated collection channels provided for this purpose (distributors and / or facilities of Local Authorities)
In order to fulfill ruling UNE EN-60065, we indicate that if the flexible wire is damaged, it can only be substituted by a technical service recognized by NEVIR, S.A., as per special tooling is required
7. Troubleshooting
Carry out the problem-solving measures described in the following section before contacting customer support. Turn off the device immediately as soon as you suspect a malfunction and unplug the power plug. Do not attempt to repair the device yourself.
| METIKCEHCMOTPM | |
| LCD screen stays Dark. | Make sure the unit is turned on and the connections are correct.Make sure the power adapter is correctly connected. |
| There is no sound | Make sure the system connection is correct.Mack sure the power of speaker is turned on. |
| There is no picture or picture move up and down unsteady. | Check if the connections with the external AV signal source are correct.Correctly set the items in the picture menu.Check if the video type input signal is not corresponding to the unit.Make sure the unit is turned on and in correct video type. |
| The remote control does not work. | Make sure there are no obstructions between the remote control and the unit.Make sure the remote control is pointing at the unit.Make sure the batteries are inserted or the polarity is correct.Make sure the batteries are not weak.Replace the weak battery. |
Screen cut short at HDMI pc model
When using HDMI input 1080P from a PC, please set the "Aspect Ratio" or "PC mode"/"Screen mode" on TV to "Point to Point", "Under scan" or "Just scan" etc. so the TV can fully display without cut short
Other Notes:
Static or other external interfere may cause the player to behave abnormally. In this occurs, unplug the power-supply cord from the outlet and plug it in again to reset the player. If the problems persist, then please disconnect the power and consult a qualified technician.
2004/108/EC 2006/95/EC

- MANDO A DISTANCIA
- Multimedia
- Configurações DTV
- Programa Timers
- Definição de PIN
- Controlo Parental
- CONTENTS
- Warning
- CAUTION
- Do not attempt to service the product yourself
- Important Safety Instructions
- 19) Cautions for installation
- IMPORTANT INFORMATION
- Accessories
- 3.Front view/side view
- Rear View
- REMOTE CONTROL
- Remote Control Instructions in DTV mode
- POWER
- TV MENU
- SLEEP
- Remote Control Setup
- TV Operation And System Setup
- SELECT INPUT SOURCE
- Picture Menu
- Picture Mode
- Contrast
- Brightness
- Colour
- Tint
- Sharpness
- Contrast Booster
- Colour Temperature
- DNR
- Reset
- SOUND Menu
- Sound mode
- Bass
- Treble
- Balance
- Surround
- AVL
- Digital Audio Output
- APPLICATIONS
- Channel
- Channel Options
- Country
- DTV Type
- Auto Tuning
- ATV Manual Tuning
- DTV Manual Tuning
- Common Interface
- DTV Settings
- Programme Timers
- Guide
- PREFERENCES
- Menu Language
- Teletext Language
- Key Lock
- PC Settings
- PIN Setting
- Parental Control
- Automatic Power Down
- SETUP
- OSD Timer
- Cinema
- Blue Screen
- Sleep Timer
- Location
- Quick Setup
- Reset TV
- MEDIA OPERATION
- Photo
- Movie
- Music
- Troubleshooting
- Screen cut short at HDMI pc model
- Other Notes:
Brand : NEVIR
Model : NVR-7509-22HD-N
Category : TV