
Zensor Vokal - Loudspeaker Dali - Free user manual and instructions
Find the device manual for free Zensor Vokal Dali in PDF.


| Product Type | Center Channel Speaker |
| Model | Zensor Vokal |
| Brand | Dali |
| Dimensions (W x H x D) | 441 x 161 x 286 mm |
| Weight | 6.5 kg |
| Frequency Range | 53 - 26,500 Hz |
| Sensitivity | 88 dB (2.83V/1m) |
| Impedance | 6 ohms |
| Recommended Amplifier Power | 30 - 120 W |
| Drivers | 2 x 4.5" Wood Fiber Cone Woofer, 1 x 25mm Soft Dome Tweeter |
| Crossover Frequency | 2,400 Hz |
| Enclosure Type | Closed Box |
| Available Finishes | Black Ash, Light Walnut, White |
| Magnetic Shielding | Yes |
| Placement | Center speaker, below or above TV/screen |
| Cleaning Instructions | Wipe with a soft dry cloth; avoid solvents |
| Spare Parts & Repairability | Refer to qualified service personnel; no user-serviceable parts |
| Safety | Do not expose to moisture or extreme temperatures |
Frequently Asked Questions - Zensor Vokal Dali
User questions about Zensor Vokal Dali
0 question about this device. Answer the ones you know or ask your own.
Ask a new question about this device
Download the instructions for your Loudspeaker in PDF format for free! Find your manual Zensor Vokal - Dali and take your electronic device back in hand. On this page are published all the documents necessary for the use of your device. Zensor Vokal by Dali.
USER MANUAL Zensor Vokal Dali
FIGURE 1A FIGURE 1B FIGURE 1C

flowchart
graph TD
    A["Object 1"] -->|A| B["Object 2"]
    A -->|B| C["Person in chair"]
    B -->|A| C

flowchart
graph TD
    A["Block A"] --> B["Block B"]
    B --> C["Block C"]
    C --> D["Block D"]
    D --> A
    style A fill:#f9f,stroke:#333
    style B fill:#ccf,stroke:#333
    style C fill:#cfc,stroke:#333
    style D fill:#fcc,stroke:#333

flowchart
graph TD
    A["A"] --> B["B"]
    B --> C["C"]
    C --> D["D"]
    D --> E["E"]
    E --> F["F"]
    F --> G["X"]
    G --> H["x"]
    H --> I["Central Center"]
    style A fill:#f9f,stroke:#333
    style B fill:#ccf,stroke:#333
    style C fill:#cfc,stroke:#333
    style D fill:#fcc,stroke:#333
    style E fill:#cff,stroke:#333
    style F fill:#ffc,stroke:#333
    style G fill:#cfc,stroke:#333
    style H fill:#fcc,stroke:#333
    style I fill:#cfc,stroke:#333
TABLE 1
| ZENSOR 1 & PICO 3 5 7 PICO VOKAL VOKAL | ||||||
| Speaker(s)pr. carton | 2 | 2 | 2 | 1 | 1 | 1 |
 | √x8 | √x4 | ||||
 | √x8 | √x8 | √x8 | √ | ||
 | √x8 | √x8 | ||||
 | √ | √ | √ | √ | √ | √ |
FIGURE 1A FIGURE 1B FIGURE 1C

flowchart
graph TD
    A["Object 1"] -->|A| B["Object 2"]
    B -->|θ| C["Person"]
    C -->|A| A
    style A fill:#999,stroke:#333
    style B fill:#999,stroke:#333
    style C fill:#ccc,stroke:#333

flowchart
graph TD
    A["Block A"] --> B["Block B"]
    B --> C["Block C"]
    C --> D["Block D"]
    D --> A
    style A fill:#f9f,stroke:#333
    style B fill:#ccf,stroke:#333
    style C fill:#cfc,stroke:#333
    style D fill:#fcc,stroke:#333

flowchart
graph TD
    A["A"] --> B["B"]
    B --> C["C"]
    C --> D["D"]
    D --> E["E"]
    E --> F["F"]
    F --> G["G"]
    G --> H["H"]
    H --> I["O"]
    I --> J["P"]
    J --> K["L"]
    K --> L["M"]
    L --> M["N"]
    M --> N["O"]
    N --> O["P"]
    O --> P["L"]
    P --> Q["C"]
    Q --> R["D"]
    R --> S["E"]
    S --> T["F"]
    T --> U["G"]
    U --> V["L"]
    V --> W["M"]
    W --> X["X"]
    X --> Y["P"]
    Y --> Z["C"]
    Z --> AA["D"]
    AA --> AB["E"]
    AB --> AC["L"]
    AC --> AD["M"]
    AD --> AE["P"]
    AE --> AF["L"]
The lightning flash within an equilateral triangle is intended to alert you to the presence of non insulated "dangerous voltage" within the product's enclosure that may be of sufficient magnitude to constitute an electric shock to persons.

The exclamation point within an equilateral triangle is intended to alert you to the presence of important operating and maintenance (servicing) instructions in the literature accompanying the appliance.
1 Read instructions - all the safety and operating instructions should be read before the appliance is operated.
2 Retain instructions - the safety and operating instructions should be retained for future reference.
3 Heed warnings - all warnings on the appliance and in the operating instructions should be adhered to.
4 Follow instructions - all operating and use instructions should be followed.
5 Water and moisture - the appliance should not be used near water - for example, near a bathtub, washbowl, kitchen sink, laundry tub, in a wet basement, or near a swimming pool and the like.
6 Carts and stands - the appliance should be used only with a cart or stand if recommended by the manufacturer.
7 Wall or ceiling mounting - the appliance should be mounted to a wall or ceiling only as recommended by the manufacturer.
8 Ventilation - the appliance should be situated so that its location or position does not interfere with proper ventilation. For example, the appliance should not be situated on a bed, sofa, rug, or similar surface that may block the ventilation openings; or placed in a built-in installation, such as a bookcase or cabinet, that may impede the flow of air through the ventilation openings.
9 Heat - the appliance should be situated away from heat sources such as radiators, heat registers, stoves, or other appliances that produce heat.
10 Power sources - the appliance should be connected to a power supply only of the type described in the operating instructions or as marked on the appliance.
11 Power cord protection - power-supply cords should be routed so that they are not likely to be walked on or pinched by items placed on or against them, paying particular attention to cords at plugs, convenience receptacles and the point where they exit from appliance.
12 Cleaning - do not use any liquid cleaners. Use only a dry cloth to wipe off dust and grease.
13 Non-use periods - the power cord of the appliance should be unplugged from the outlet when left unused for a long period of time.
14 Object and liquid entry - care should be taken so that objects do not fall and liquids are not spilled into the enclosure through openings.
15 Damage requiring service - the appliance should be serviced by qualified personnel when:
a) The power-supply cord or the plug has been damaged; or
b) Objects have fallen, or liquid has been spilled into the appliance; or
c) The appliance has been exposed to rain; or
d) The appliance does not appear to operate normally, or exhibits a marked change in performance; or
e) The appliance has been dropped, or the enclosure damaged.
16 Servicing - the user should not attempt to service the appliance beyond that described in the opera ting instructions. All other servicing should be referred to qualified service personnel.
CONTENTS
1.0 INtRODuctION 8
2.0 uNPAcKING 8
3.0 POSITIONING 8
4.0 cONNEctION 9
5.0 RuNNING-IN 10
6.0 cLEANING AND MAINtENANcE 10
7.0 DISPOSAL 10
8.0 POWER AND AcOuStlc PRESSuRE 10
9.0 tHE LISTENING ROOM 11
10.0 tEcHNlcAL SPEcIFlcAtlONS 11
1.0 INTRODUCTION
Congratulations with your new DALI ZENSOR loudspeaker. It is important to us that your new DALI loudspeakers are set up and connected optimally. For this reason, we recommend that you read this manual and follow its recommendations. The manual contains instructions for setup and connection, as well as tips and advice on how to get the most out of your new loudspeakers. DALI is acclaimed around the world for unique loudspeakers built to our uncompromising standards for design and performance. The goal for every single DALI loudspeaker is always our foremost commitment: To create a listening experience in your home that will make you forget time and place.
Remember to sign up for the DALI newsletter at www.dali-speakers.com.
Enjoy!
2.0 UNPACKING
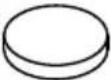
Be careful not to damage the contents when you unpack the parts. Depending on which DALI ZENSOR model you have bought, different accessories come with the loudspeaker. Check that all parts are contained in the cardboard box (see Table 1). Keep the packaging materials should your speaker need to be relocated or serviced.
3.0 POSITIONING
To achieve the best results, the loudspeaker setup should be symmetrical round your favorite listening position, see Figure 1A - C. We recommend that you experiment with the position of your loudspeakers – the sound quality will change depending on the loudspeaker position. For ZENSOR 1, ZENSOR PICO, ZENSOR 3, ZENSOR PICO VOKAL and ZENSOR VOKAL, the speakers should ideally be positioned, so that the height of the tweeter is approximately at ear height when seated in your favorite listening position.
ZENSOR 5 and 7 are designed as floor standing speakers. They should be positioned minimum 10 – 20 cm (4 – 8") from the rear wall. ZENSOR 1, ZENSOR PICO, ZENSOR 3, ZENSOR PICO VOKAL and ZENSOR VOKAL are designed to be positioned flat up against the wall.
Objects positioned between the speaker and the listening position might negatively affect sound quality. The speakers are designed to meet our wide dispersion principle, so they should NOT be angled towards the listening position, but be positioned parallel with the rear wall, see Figure 2. By parallel positioning, the distortion in the main listening area will be lowered and the room integration will be improved. The wide dispersion principle will ensure that sound is spread evenly within a large area in the listening room.
3.1 DALI ZENSOR 1 & PlcO
The speaker can be positioned on a stand/shelf or hung on a wall using the integrated wall bracket. If positioned on a stand or shelf, the enclosed rubber bumpers can be mounted under the speaker for stable and vibration free positioning, see Figure 3A. If hung on a wall, mount the bumpers on the rear edges of the speakers, see Figure 3B. The speakers are hung on a wall using one screw mounted in the wall. The screw must fit the wall bracket on the rear side of the speaker, see Figure 3C.
3.2 DALI ZENSOR 3
The speaker can be positioned on a stand/shelf. If positioned on a stand or shelf, the enclosed rubber bumpers can be mounted under the speaker for stable and vibration free positioning, see Figure 3A.
3.3 DALI ZENSOR 5 and 7
The speakers are designed to stand on the floor. ZENSOR 5 and 7 can be used with spikes or rubber bumpers under the speakers, see Figure 3D/E. Be careful not to over tighten the locking nuts. Spikes or rubber bumpers can improve the sound quality. You can try both to hear what gives the best sound quality in your setup. Please be aware, that spikes may damage the floor, if it is not protected by e.g. coins under the spikes.
3.4 DALI ZENSOR VOKAL & PlcO VOKAL
ZENSOR VOKAL is the dedicated centre channel and has been specially designed to be positioned close to the large surface of the TV screen. You can place it above or below the screen, on a stand or on a shelf. We recommend fitting the enclosed bumpers to ensure a stable, vibration-free setup (see Figure 3F).
4.0 CONNECTION
Correct, tight connections to your amplifier are extremely important for your listening experience. Always use cables of the same type and length for left and right channels. We recommend using special speaker cables from DALI, available from your dealer.
Connection in correct phase is a detail that is often ignored. The red (+) terminal of the amplifier must be connected to the red (+) terminal of the loudspeaker. The black (-) terminal of the amplifier must be connected to the black (-) terminal of the loudspeaker (see figure 4). Even a single loudspeaker connected out-of-phase in a stereo or surround installation will make the bass weaker and the stereo image unfocused.
For the optimal listening experience, the right loudspeaker (as seen from the listening position) must be connected to the amplifier output terminals marked "R" or "Right". The left loudspeaker must be connected to the amplifier output terminals marked "L" or "Left".
NOTE: Before connecting cables or changing any connections, ALWAYS turn off your amplifier.
NOTE: Make sure that the bare conductors are tightly gripped by the terminals with no loose wires which could cause a short circuit and damage the amplifier (see Figure 5).
NOTE: If you are using DALI ZENSOR in a surround system, follow the instructions included with your surround amplifier.
5.0 RUNNING-IN
Like any mechanical system, a loudspeaker requires a “running-in” period to perform at its best. You will experience a gradual increase in sound quality during the first period of use. The break-in period will vary depending on use and playback volume. You should expect up to 100 hours of playback until maximum performance is reached. Unlike other mechanical systems, the life-span of a loudspeaker is increased by normal, regular playback of music.
6.0 CLEANING AND MAINTENANCE
Clean the cabinets with a soft, dry cloth. If the cabinets are dirty, wipe with a soft cloth dipped in all-purpose cleaner and then well wrung out. Be very careful when wiping the speaker cones, as they are very fragile. Front grilles can be cleaned with a clothes brush and wiped with a wellwrung, lint-free cloth and mild all-purpose cleaner.
6.1 AVOID DIREcT SUNLIGHT:
The surfaces of the speakers may fade or become discoloured over time when exposed to direct sunlight. Therefore avoid positioning the speakers in direct sunlight.
7.0 DISPOSAL
If you want to dispose of this product, do not mix it with general household waste. There is a separate collection system for used electronic products in accordance with legislation that requires proper treatment, recovery and recycling. Private households in the EU member states, Switzerland, Liechtenstein and Norway may return their used electronic products free of charge to designated collection facilities or to a retailer (if you purchase a similar new one). If you reside in countries not mentioned above, please contact your local authorities for the correct method of disposal. By following this process, you will ensure that your disposed product undergoes the necessary treatment, recovery and recycling and thus prevent potential negative effects on the environment and human health.
8.0 POWER AND ACOUSTIC PRESSURE
How loud a speaker is able to play and still sound good is completely dependent on the signal it has to reproduce. So, in practice, it is not possible to define an unequivocal level for use in comparing different speakers.
Lots of pure, undistorted output from a large amplifier is better than a distorted signal from a small amplifier stretched beyond its capacity. The signal from a distorting (clipping) amplifier contains much more high-frequency information than an undistorted signal, and therefore puts a heavy strain on the tweeter. Consequently, speakers are often damaged by small amplifiers, having to work too hard - and very rarely by large amplifiers, which are practically running idle.
It is worth noting that turning tone controls above the neutral setting significantly burdens both speakers and amplifier. On a good sound system, tone controls should only be used to compensate for poor recordings and not to permanently compensate for weaknesses elsewhere in the system. DALI recommends the tone controls generally be set to the neutral position, and to achieve your desired sound image through correct positioning of the speakers. Ensuring that you keep the volume low enough for the sound to remain clear and undistorted will minimize the strain on both speakers and amplifier.
All DALI loudspeakers are designed with linear impedance for an optimal amplifier load. The result is a significantly more open and detailed sonic image.
9.0 THE LISTENING ROOM
Every room has its own distinctive acoustics, which influence the way we experience sound from a speaker. The sound you hear consists of direct sound from the speakers and reflected sound from the floor, ceiling and walls. The latter will affect how you experience the sound. As a basic rule, try to avoid large, hard and reflective areas in the immediate vicinity of your loudspeakers as it will typically cause strong reflections, which might disturb the precision and spatial effect of the sound reproduction. Reflection might be suppressed by positioning e.g. a plant between the speaker and the reflecting surface. Soft items such as carpets, curtains etc. might help if the sound is too bright. Both the amount and quality of the deep bass depend on the size and shape of the room, and the position of the speakers. Positioning the speakers near a side or back wall will accentuate the bass.
A corner location will accentuate it even more, but will also increase the reflections.
10.0 TECHNICAL SPECIFICATIONS
In Table 2 you will find the most common specifications for our speakers. Please have in mind that there are countless methods for measuring speakers. However, none of them tell you anything useful about how a speaker really sounds. Only your ears can decide whether one speaker sounds better than another. Like all our speakers, DALI ZENSOR series is designed to reproduce music as honestly as possible.
Enjoy your new DALI ZENSOR!
VORSICHT
| ZENSOR 1 ZENSOR 3 ZENSOR 5 ZENSOR 7 ZENSOR | PICO PICO | ||||||
| VOKAL | VOKAL | ||||||
| Frequency Range [+/- 3] dB [Hz] 53 | -26,500 50 - | 26,500 43 - 26,500 40 - 26,500 47 - 26,500 62 - 26,500 62 - 26,500 | |||||
| Sensitivity [2.83V/1m] [dB] 86.5 88.0 | 88.0 90.0 88.5 | 84 84 | |||||
| Nominal Impedance [ohms] 6 6 6 6 | 6 6 6 | ||||||
| Maximum SPL [dB] 106 108 108 110 | 109 103 103 | ||||||
| Recommended Amp. Power [Watts] | 25 - 100 25 | -125 30 - 150 | 30 - 150 30 - | 120 40 - 125 40 - 125 | |||
| Crossover Frequencies [Hz] | 2,900 | 2,600 | 2,400 | 2,400 | 2,400 | 2,000 | 2,000 |
| Crossover Principle | 2-way | 2-way | 2-way | 2-way | 2-way | 2-way | 2-way |
| High Frequency Driver | 25 mm soft dome | 25 mm soft dome | 25 mm soft dome | 25 mm soft dome | 25 mm soft dome | 25 mm soft dome | 25 mm soft dome |
| Low Frequency/midrange Driver(s) | 1 x 51⁄4" | 1 x 7" | 2 x 51⁄4" | 2 x 7" | 2 x 51⁄4" | 1 x 41⁄2" | 1 x 41⁄2" |
| Enclosure Type | Bass reflex | Bass reflex | Bass reflex | Bass reflex | Bass reflex | Bass reflex | Bass reflex |
| Bass Reflex Tuning Frequency [Hz] | 51.5 | 46.0 | 44.0 | 40.0 | 45.0 | 57.0 | 57.0 |
| Connection Input(s) | Single wire | Single wire | Single wire | Single wire | Single wire | Single | Single |
| Recommended Placement | Wall/shelf/(Stand) | shelf/Stand | Floor | Floor Shelf below TV screen | below TV screen | Wall/shelf/(Stand) | Wall/shelf/(Stand) |
| Magnetic Shielding | Semi shielding | No | No | No | Semi shielding | No | No |
| Dimensions (H x W x D) [mm] | 274 x 162 x 220 | 351 x 205 x 293 | 825 x 162 x 267 | 978 x 205 x 312 | 161 x 441 x 281 | 230 x 144 x 196 | 144 x 230 x 196 |
| Dimensions (H x W x D) [inches] | 10.8 x 6.4 x 8.7 | 13.8 x 8.1 x 11.5 | 32.5 x 6.4 x 10.5 | 38.5 x 8.1 x 12.3 | 6.3 x 17.4 x 11.1 | 9.1 x 5,7 x 7.7 | 5.7 x 9.1 x 7.7 |
| Weight [kg/lb] | 4.2/9.3 | 6.3/13.9 | 10.3/22.7 | 14.9/32.8 | 6.8/15.0 | 3.1/6.8 | 3.1/6.8 |
All technical specifications are subject to change without notice.



Brand : Dali
Model : Zensor Vokal
Category : Loudspeaker