
Perfect Finish - Iron SINGER - Free user manual and instructions
Find the device manual for free Perfect Finish SINGER in PDF.


| Product Type | Steam Iron |
| Brand | Singer |
| Model | Perfect Finish |
| Power Consumption | 2400 W |
| Voltage | 220-240 V ~ 50/60 Hz |
| Soleplate Material | Stainless Steel |
| Water Tank Capacity | 300 ml |
| Steam Output (Continuous) | 35 g/min |
| Steam Boost | 140 g/min |
| Spray Function | Yes |
| Vertical Steaming | Yes |
| Anti-Drip System | Yes |
| Self-Cleaning | Yes |
| Auto Shut-Off | Yes (8 minutes) |
| Cord Length | 1.8 m |
| Weight | 1.2 kg |
| Dimensions (L x W x H) | 28 x 12 x 15 cm |
| Variable Temperature Control | Yes |
| Overheat Protection | Yes |
Frequently Asked Questions - Perfect Finish SINGER
User questions about Perfect Finish SINGER
0 question about this device. Answer the ones you know or ask your own.
Ask a new question about this device
Download the instructions for your Iron in PDF format for free! Find your manual Perfect Finish - SINGER and take your electronic device back in hand. On this page are published all the documents necessary for the use of your device. Perfect Finish by SINGER.
USER MANUAL Perfect Finish SINGER
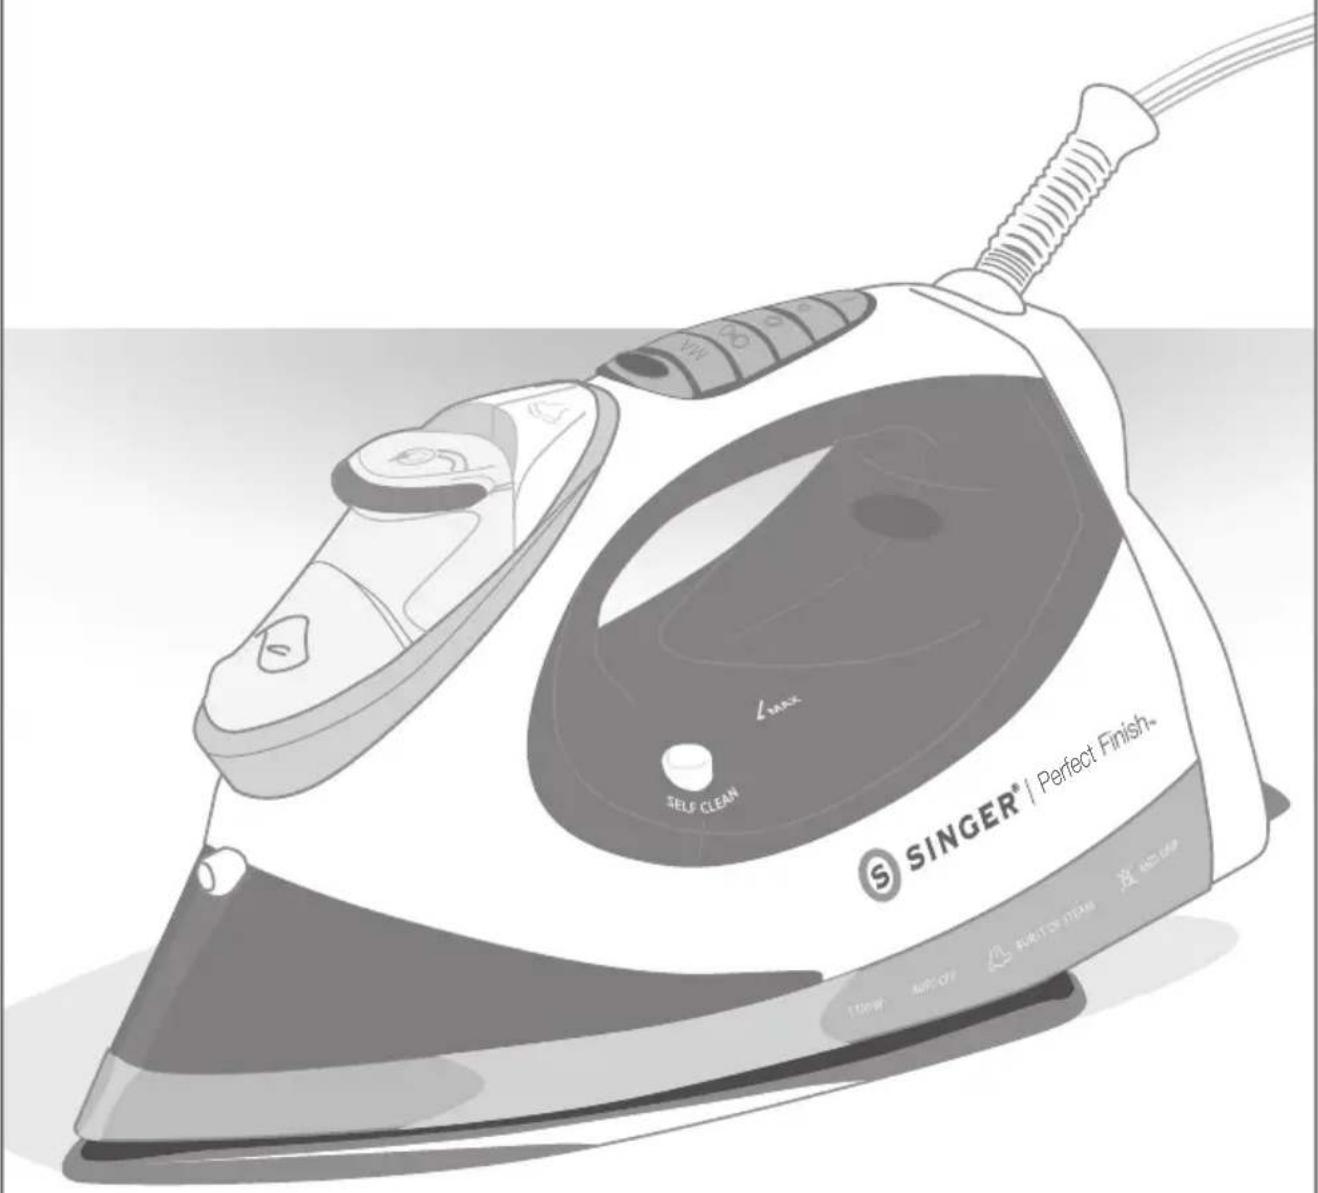
Household Steam Iron
IMPORTANT SAFETY INSTRUCTIONS
READ ALL INSTRUCTIONS BEFORE USING.
Save these instructions in a safe place for future reference.
Use appliance only for its intended use.1.
To protect against risk of electrical shock, do not immerse the iron in water 2. or other liquids.
This appliance should always be turned to "OFF" before plugging or unplug-3. ging from an outlet. Never yank the cord to disconnect from outlet, always grasp plug and pull to disconnect.
Always disconnect the appliance from the electrical outlet when filling with 4. water or emptying or when not in use.
Do not allow cord to touch hot surfaces. Let the iron cool completely before 5. putting away.
Do NOT operate appliance with a damaged cord, or if the appliance has 6. been dropped or damaged. If electrical cord is damaged it must be replaced by the manufacturer or authorized service agent to avoid a safety hazard.
To avoid the risk of electrical shock, do NOT disassemble the iron. Ship to 7. the nearest authorized SINGER ^® approved service center for examination and repair. Incorrect reassembly or repair can cause a risk of fire, electrical shock, or injury when the appliance is used.
Not intended for use by children. Close supervision is necessary for any 8. appliance being used near children. Unsupervised use can result in fire or personal injury. Do not leave appliance unattended while plugged in, on an ironing board, or while it is still hot.
Burns can occur from touching hot metal parts, hot water or steam. Use 9. caution when you turn a steam iron upside down as there may be hot water in the reservoir.
Never use or rest the iron on an unstable surface.10.
When iron is hot, never set on an unprotected surface.11.
SPECIAL INSTRUCTIONS:
To avoid a circuit overload, do not operate another high-wattage appliance on the same circuit. If an extension cord is absolutely necessary, a 15-amp cord should be used. Cords rated with less amperage may overheat. Use care to arrange the cord so that it cannot be pulled or tripped over.

WARNING: THE POWER CORD ON THIS PRODUCT CONTAINS LEAD, A CHEMICAL KNOWN TO THE STATE OF CALIFORNIA TO CAUSE BIRTH DEFECTS OR OTHER REPRODUCTIVE HARM. WASH HANDS AFTER HANDLING.
Remove any protective films or stickers from the soleplate and the iron.
Read all safety and operating instructions.
Fill the water tank as described in "How to Fill Water".
Plug the iron into a grounded electrical outlet.
Consult the garment's label for temperature instructions or use the chart on page 6 of this manual for recommendations.
Turn the iron on by pressing the Temperature Control Button. The Temperature Display Light will flash with an audible beep sound.
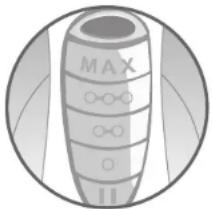
Select the maximum temperature by pressing the Temperature Control Button • repeatedly until the MAX light is lit.
When the selected temperature is reached, the Temperature Display Light will stop flashing and an audible beep will sound. The iron is ready to use.
Move the Variable Steam Control Dial to the maximum position ⚙️.
On an ironing board or protected surface, iron an old towel or other heavy material until the water tank is empty and no more steam is produced.
It is normal for a small amount of smoke and a light odor to be produced the first time the iron is used. This will disappear quickly.
Particles may emit from the iron the first time it is used. They are not harmful and should disappear after the iron has been used as described above.
Filling the Water Tank
Ensure iron is unplugged.
- Move the Variable Steam Control Dial to ✗ position.
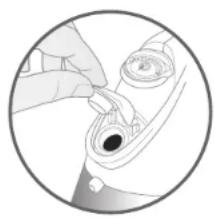
- Open the Water Inlet Cover and tilt the iron slightly forward, resting on its heel.
• Using the filling cup provided, fill the water chamber to the MAX mark. - Close the Water Inlet Cover.
- To refill the water tank during ironing, always unplug the iron. When you return to ironing, make sure the iron reheats to the desired level and the Temperature Display Light stops flashing before continuing.
natural_image
Close-up of a hand adjusting a small mechanical component (no visible text or symbols)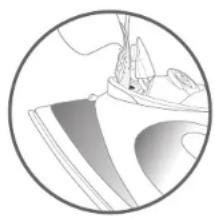
natural_image
Cross-sectional illustration of a shoe with visible internal structure (no text or symbols)Water Recommendations
- Singer Home Essentials irons are designed to be used with regular tap water.
- If your water is especially hard or if you use a water softener, try using inexpensive bottled spring water.
Never use water with additives, including scents, starches, or fabric • conditioners, as they can cause deposits to form in the iron that can stain clothing.

WARNING: ALWAYS MAKE SURE THE IRON IS UNPLUGGED BEFORE FILLING WITH WATER OR COMING INTO CONTACT WITH LIQUID OF ANY KIND.
Selecting the Temperature
CONSULT THE GARMENT'S LABEL FOR TEMPERATURE INSTRUCTIONS. WE RECOMMEND USING THE CHART BELOW AS A GUIDE.
| Temperature Control Settings | ||
 |  |  |
| acetate elastane polyamide polypropylene | polyester silk triacetate viscose wool | cotton linen |
| ### | ### |  MAX MAX |
Plug the iron into a grounded electrical outlet.
Turn the iron on by pressing the Temperature Control Button. The • Temperature Display Light will flash with an audible beep sound.
To adjust the temperature settings, press the Temperature Control Button • repeatedly until the desired temperature setting is lit.
The Temperature Indicator Light will flash to indicate the iron is heating up or cooling down.
When the selected temperature is reached, the Temperature Display Light will stop flashing and an audible beep will sound. The iron is ready to use.
Turning the Iron Off
To turn the iron off, press and hold the Temperature Control Button for 3 seconds. The Temperature Display Light will turn off and an audible beep will sound.
natural_image
Illustration of a cylindrical device with 'MAX' label, no additional text or symbols visibleIRONING YOUR GARMENTS
Dry Ironing

To iron without steam, turn the Variable Steam Control Dial to the "no steam" position ✗.

Turn the iron on by pressing the Temperature Control Button. The • Temperature Indicator Light will flash with an audible beep sound.
Select the desired temperature.
To iron garments with a dry iron, SINGER recommends using this iron with an empty water tank.
Steam Ironing


WARNING: NEVER IRON OR STEAM CLOTHES WHILE THEY ARE BEING WORN. NEVER DIRECT THE STEAM JET AT PEOPLE OR ANIMALS.
- Fill the water tank as described in "Filling the Water Tank" section.
Turn the iron on by pressing the Temperature Control Button. The • Temperature Display Light will flash with an audible beep sound.
- Select the ○○○ or MAX temperature setting by pressing the Temperature Control Button.
When the selected temperature is reached, the Temperature Display Light will stop flashing and an audible beep will sound. The iron is ready to use.
- Select the desired steam pressure on the Variable Steam Control Dial to the position.
TIP: The tougher the wrinkle, the more steam you will need.
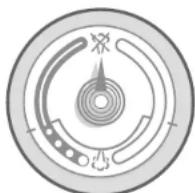
dry iron setting
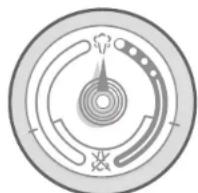
steam iron setting
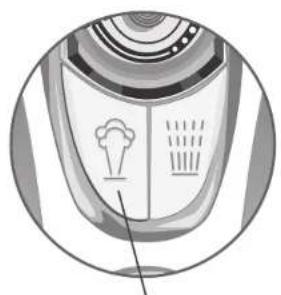
Burst of Steam
This function is ideal for removing stubborn wrinkles or pressing extra-sharp creases.

WARNING: NEVER IRON OR STEAM CLOTHES WHILE THEY ARE BEING WORN. NEVER DIRECT THE STEAM JET AT PEOPLE OR ANIMALS.
Fill the water tank as described in "Filling the Water Tank" section.
Turn the iron on by pressing the Temperature Control Button. The • Temperature Display Light will flash with an audible beep sound.
- Select the ○○○ or MAX temperature setting by pressing the Temperature Control Button.
When the selected temperature is reached, the Temperature Display Light will stop flashing and an audible beep will sound. The iron is ready to use.
- While ironing, press the Burst of Steam button every 4 to 5 seconds. Most wrinkles can be removed within three bursts.
NOTE: It may be necessary to press the Burst of Steam button a few times to start this function. For optimum steam quality, do not operate the Burst of Steam more than three times after the Thermostat Light goes off.
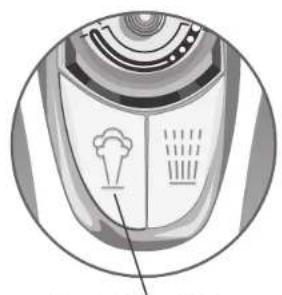
natural_image
Close-up of a hand holding a small object, possibly a device or appliance, with no visible text or symbols.Burst of Steam Button
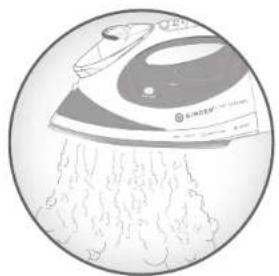
natural_image
Illustration of a steam iron with steam rising from its chimney (no text or symbols)burst of steam
Vertical Burst of Steam
This feature enables you to remove wrinkles from hanging garments (jackets, coats, shirts), hanging curtains, or other hanging fabric.

WARNING: NEVER IRON OR STEAM CLOTHES WHILE THEY ARE BEING WORN. NEVER DIRECT THE STEAM JET AT PEOPLE OR ANIMALS.
Place the garment on a hanger.
Fill the water tank as described in "Filling the Water Tank" section
Turn the iron on by pressing the Temperature Control Button. The • Temperature Display Light will flash with an audible beep sound.
- Select the ○○○ or MAX temperature setting by pressing the Temperature Control Button.
When the selected temperature is reached, the Temperature Display Light will stop flashing and an audible beep will sound. The iron is ready to use.
Hold the iron upright, 6-12 inches away from the garment.
Press the Burst of Steam button to direct steam at the area.
Steam will penetrate into the garment, removing the wrinkles.
For stubborn wrinkles, wait 4 to 5 seconds before pressing the Burst of Steam Button again. Most wrinkles can be removed within three bursts.
NOTE: Maintain a distance of 6-12 inches from delicate fabric (synthetics, silk, velvet, etc.), otherwise the fabric could be damaged.
It may be necessary to press the Burst of Steam button a few times to start this function. For optimum steam quality, do not operate the Burst of Steam more than three times after the Thermostat Light goes off.
natural_image
Close-up of a mechanical device with a circular outline and internal components (no visible text or symbols)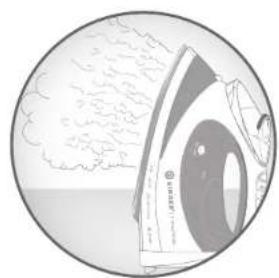
natural_image
Illustration of a steam iron in a circular frame with smoke rising above (no text or symbols)vertical burst of steamBurst of Steam B
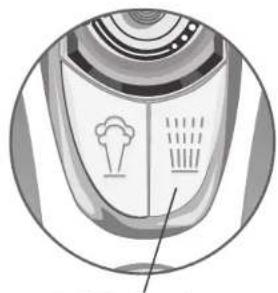
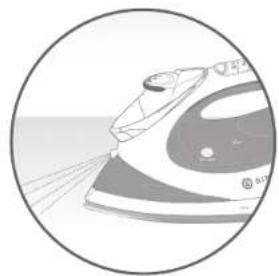
Cool Mist Spray
The Cool Mist Spray function can be used on any temperature setting. Use the spray to dampen fabrics in order to remove tough wrinkles.
Aim the nozzle at the garment.
Press the Cool Mist Spray Button. You may need to press the button a few times before the water sprays at full pressure.
Iron as usual.
Do not spray silk. •
natural_image
Close-up of a mechanical device with a circular outline and internal components (no visible text or symbols)Cool Mist Spray Button
natural_image
Illustration of a high-speed train in motion, showing speed and lane (no text or symbols)cool mist spray
3-Way Smart Auto-Off

The SINGER Perfect Finish Iron is equipped with an automatic shut-off. The Smart Auto-Off switches the iron off if it has been left unattended.
If the iron is left on and is not moved for 8 minutes in a vertical position, it will automatically shut off and a beep will sound.
If the iron is left on its soleplate or tipped over, it will shut off after 30 seconds • and an audible beep will sound.
The Smart Auto-Off Indicator light will flash, indicating the Auto-Off has been activated.
To de-activate the Auto-Off, move the iron or shake gently. The iron will take about 60 seconds to reach the previous soleplate temperature.
To turn the iron off, press and hold the Temperature Control Button for 3 seconds. The Indicator Light will turn off and an audible beep will sound.
Anti-Drip
This iron is designed to reduce dripping and spitting while in use. Steam is automatically disabled when the soleplate temperature is too low to create steam, preventing spitting or dripping.
The Anti-Drip system may make a loud clicking sound during use. This is normal and indicates that the system is functioning correctly.
Anti-Scale System
The built-in Anti-Scale cartridge is designed to reduce the buildup of mineral substances in the water which occurs during steam ironing, thereby extending the life of your SINGER Perfect Finish Iron. However, please note that the anti-scale cartridge will not completely stop the natural process of lime scale buildup.
CLEANING AND STORAGE
Self-Cleaning
This feature removes loose minerals and other impurities that have been built up in the steam chamber. It is recommended that this function be performed at least once a month or more regularly depending on the hardness of the water used.

WARNING: THE SELF-CLEAN FUNCTION WILL CAUSE HOT STEAM AND WATER TO BE EJECTED FROM THE SOLEPLATE. TAKE ALL PROPER PRECAUTIONS AND HOLD IRON AWAY FROM BODY. STEAM AND WATER ARE VERY HOT AND CAN CAUSE BURNS.
Fill the water tank half way, as described in the "Filling the Water Tank" section.
Place the iron on its heel on a flat surface.
- Plug the iron into a grounded outlet.
- Turn the iron on by pressing the Temperature Control Button. The Temperature Display Light will flash with an audible beep sound.
- Select the ○○○○ or MAX temperature setting by pressing the Temperature Control Button.
- Wait until the Temperature Display Light stops flashing and the beep sounds.
- Turn the iron off by holding the Temperature Control Button for 3 seconds.
Unplug the iron.
Hold the iron horizontally over a sink with the soleplate pointing away from the body and press and hold the Self-Clean Button. Steam and hot water will drain from the soleplate holes, washing away the scales and minerals that have built up inside the steam chamber.
Gently move the iron back and forth until the water tank is empty.
When self-cleaning is complete, release the Self-Clean Button.
Place iron on its heel and let it cool completely.
Carefully wipe all water from the soleplate with an old towel, as the water and minerals may leave stains.
NOTE: Before using the iron after self-cleaning, test the steam and burst of steam on an old towel or cloth that can be discarded.
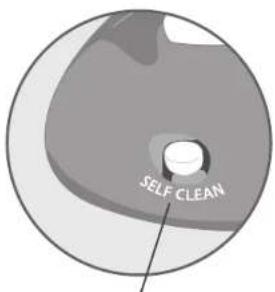
Self-Clean Button
Emptying and Storing
Move the Variable Steam Control Dial to ✗ position.
Unplug the iron.
Place the iron on its heel and allow to cool completely.
Empty water from the iron before storing.
To protect the soleplate, store the iron on its heel.
Cleaning the Soleplate
In normal use, a coating may build up on the soleplate from starch, detergent or burnt synthetic fibers. This can be easily removed by using a quality iron soleplate cleaner.
When the iron is cold and unplugged, the iron can be cleaned with a damp cloth and wiped dry.
NOTE: Never use abrasive household cleaners or other chemical agents to clean the iron.
Never use sharp or rough objects to remove deposits on the soleplate.
TROUBLESHOOTING
| PROBLEM REASON & SOLUTION | |
| Iron does not heat | The iron is not properly plugged in•The temperature setting is too low – set the temperature • to a higher settingAuto-Off has been engaged – move or shake the iron • gently to de-activate Auto-Off |
| No steam or not enough steam | • The water tank may be low or empty – add water• The iron is not set to steam setting – for maximum steam, temperature should be on MAX• Variable Steam is set too low – turn the Variable Steam Control Dial to the position. |
| Iron is emitting small particles or odor | • This is normal – follow instructions for first time use• Water may need to be changedBuildup of mineral deposits inside steam chamber – see • Self-Cleaning section |
| Iron is dripping water from steam vents | Overfilled – do not fill past the MAX line on water tank• The iron may not be hot enough – set the temperature to MAX• Overuse of Burst of Steam – allow more time between bursts |
If troubleshooting does not solve the problem, please call SINGER at 1-800-4-SINGER or 1-800-474-6437.
SINGER ^® SEWING COMPANY LIMITED WARRANTY PERFECT FINISH ^™ STEAM IRON
IMPORTANT: SAVE THIS DOCUMENT AND KEEP IT IN A SAFE PLACE
What Does This Limited Warranty Cover?
The SINGER Perfect Finish™ Steam Iron is warranted to be free from defects in material and workmanship.
How Long Is This Limited Warranty?
The warranty for the IRON's wiring and electronic parts is for a period of two (2) years from the date of purchase.
The warranty for all other parts of the IRON is for a period of ninety (90) days from the date of purchase.
What Will SINGER Do?
If the electronic parts and/or the other parts in the IRON, after inspection by SINGER, prove to be defective during the applicable warranty period(s), the electronic parts and/or the other parts will be repaired or replaced at SINGER's option, without charge, except for any expense associated with sending the IRON to SINGER.
If SINGER sends a replacement IRON, it will carry the remaining warranty of the original IRON.
Who Is Covered By This Limited Warranty?
This warranty may only be used by the original consumer owner of the IRON and may not be transferred or assigned.
What Are The Other Exclusions or Limitations?
Service under this warranty may only be obtained within the 48 contiguous states, • Alaska, Hawaii and Canada.
The IRON is warranted only for normal household (non-commercial) use. This • warranty does not cover defect(s) caused by abuse, lack of maintenance or other neglect, failure to follow the care, cleaning or other instructions for the IRON, misuse, or events beyond our control.
ANY IMPLIED WARRANTY APPLICABLE TO THE IRON, INCLUDING WITHOUT • LIMITATION THE WARRANTIES OF MERCHANTABILITY AND/OR FITNESS FOR A PARTICULAR PURPOSE, IS LIMITED IN DURATION TO THE DURATION OF THIS WRITTEN WARRANTY. SINGER SHALL NOT BE LIABLE FOR CONSEQUENTIAL ECONOMIC DAMAGES RESULTING FROM BREACH OF THIS WARRANTY OR ANY IMPLIED WARRANTY.
SINGER does not authorize any person to create for it any obligation or liability • in connection with the IRON and any of its parts beyond those set forth in this warranty.
SINGER disclaims liability under this warranty for any damage or defect resulting • from the use of other than SINGER parts and SINGER approved service in the repair and maintenance of the IRON.
Does State Law Affect My Rights?
This warranty gives you specific legal rights, and you may also have other rights ■ which vary from state to state.
Some states do not allow limitations on how long an implied warranty lasts, so the above limitation may not apply to you.
Some states do not allow the exclusion or limitation of incidental or consequential damages, so the above limitation or exclusion may not apply to you.
How Do I Get Service Under The Warranty?
Service under the warranty may be obtained by returning the IRON with:
This original warranty document; and 1.
Proof of purchase (such as the purchase receipt) to:2.
SINGER Sewing Company
ATTN: Service Department
1224 Heil Quaker Boulevard
LaVergne, TN 37068
What If I Have Questions About The Warranty?
If you have any questions regarding these warranties, please contact us:
SINGER Sewing Company
1-800-4-SINGER
E-mail: talktoUS@singerco.com
ATTN: Consumer Affairs (1-800-474-6437)
1224 Heil Quaker Boulevard
LaVergne, TN 37068
or through the Customer Service Area of our web site: www.singerco.com

SINGER®
SINGER ^® IS A REGISTERED TRADEMARK OF THE SINGER COMPANY LIMITED.

SINGER®
Perfect Finish™ PF
natural_image
Illustration of a SINGER brand air iron with visible branding and mounting details (no text or symbols on the device itself)SINGER
HOME ESSENTIALS.
natural_image
Close-up of a hand adjusting a small mechanical component (no visible text or symbols)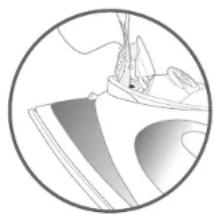
natural_image
Cross-sectional illustration of a shoe with visible internal structure (no text or symbols)natural_image
Close-up of a mechanical device with a circular outline and internal components (no visible text or symbols)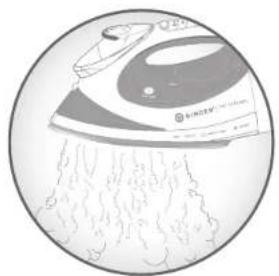
natural_image
Illustration of a steam iron with steam rising from its side (no text or symbols)natural_image
Close-up of a kitchen appliance with a spoon and lid (no visible text or symbols)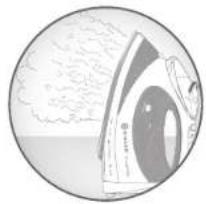
natural_image
Illustration of a steam iron with smoke clouds above it (no text or symbols)Rociado frío
natural_image
Illustration of a steam iron cutting through water, showing speed and exhaust (no text or symbols)Does State Law Affect My Rights?
ATTN: Service Department
1224 Heil Quaker Boulevard
LaVergne, TN 37068


- IMPORTANT SAFETY INSTRUCTIONS
- READ ALL INSTRUCTIONS BEFORE USING.
- SPECIAL INSTRUCTIONS:
- Filling the Water Tank
- Water Recommendations
- Selecting the Temperature
- Turning the Iron Off
- IRONING YOUR GARMENTS
- Dry Ironing
- Steam Ironing
- Burst of Steam
- Vertical Burst of Steam
- Cool Mist Spray
- 3-Way Smart Auto-Off
- Anti-Drip
- Anti-Scale System
- CLEANING AND STORAGE
- Self-Cleaning
- Emptying and Storing
- Cleaning the Soleplate
- TROUBLESHOOTING
- SINGER ® SEWING COMPANY LIMITED WARRANTY PERFECT FINISH ™ STEAM IRON
- SINGER®
- Rociado frío
- Does State Law Affect My Rights?
Brand : SINGER
Model : Perfect Finish
Category : Iron