
P1-K - Hi-Fi System PIONEER - Free user manual and instructions
Find the device manual for free P1-K PIONEER in PDF.

| Product Type | Hi-Fi System |
| Brand | Pioneer |
| Model | P1-K |
| Dimensions (W x H x D) | Approx. 400 x 300 x 200 mm |
| Weight | Approx. 5 kg |
| Power Supply | AC 220-240 V, 50/60 Hz |
| Power Consumption | 50 W (operation) |
| Standby Power Consumption | < 1 W |
| Supported Media | CD, CD-R/RW, MP3 |
| Tuner | FM/AM radio with presets |
| Amplifier Output | 2 x 20 W (RMS) |
| Speaker Impedance | 4-8 ohms |
| Audio Inputs | Auxiliary (3.5 mm) |
| Audio Outputs | Headphone jack, speaker terminals |
| Display | LCD with backlight |
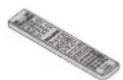
| Remote Control | Included |
| Cleaning Instructions | Wipe with a soft dry cloth; do not use liquids |
| Safety Precautions | Do not expose to rain or moisture; keep ventilation slots clear |
| Spare Parts Availability | Contact Pioneer service center |
| Repairability | Designed for professional service only |
| General Information | Hi-Fi system for music enjoyment at home |
Frequently Asked Questions - P1-K PIONEER
User questions about P1-K PIONEER
0 question about this device. Answer the ones you know or ask your own.
Ask a new question about this device
Download the instructions for your Hi-Fi System in PDF format for free! Find your manual P1-K - PIONEER and take your electronic device back in hand. On this page are published all the documents necessary for the use of your device. P1-K by PIONEER.
USER MANUAL P1-K PIONEER
Discover the benefits of registering your product online at http://www.pioneer.co.uk (or http://www.pioneer.eu).
Operating Instructions
CAUTION
TO PREVENT THE RISK OF ELECTRIC SHOCK, DO NOT REMOVE COVER (OR BACK). NO USER-SERVICEABLE PARTS INSIDE, REFER SERVICING TO QUALIFIED SERVICE PERSONNEL.
D3-4-2-1-1_B1_En
WARNING
This equipment is not waterproof. To prevent a fire or shock hazard, do not place any container filled with liquid near this equipment (such as a vase or flower pot) or expose it to dripping, splashing, rain or moisture.
D3-4-2-1-3_A1_En
WARNING
To prevent a fire hazard, do not place any naked Ilame sources (such as a lighted candle) on the equipment.
D3-4-2-1-7a_A1_En
Operating Environment
Operating environment temperature and humidity: +5 °C to +35 °C (-41 °F to +95 °F); less than 85 %RH (cooling vents not blocked)
Do not install this unit in a poorly ventilated area, or in locations exposed to high humidity or direct sunlight (or strong artificial light).
D3-4-2-1-7c* A2 En
WARNING
Store small parts out of the reach of children and infants. If accidentally swallowed, contact a doctor immediately.
D41-6-4 A1 En
VENTILATION CAUTION
When installing this unit, make sure to leave space around the unit for ventilation to improve heat radiation (at least 10 cm at top, 10 cm at rear, and 10 cm at each side).
WARNING
Slots and openings in the cabinet are provided for ventilation to ensure reliable operation of the product, and to protect it from overheating. To prevent fire hazard, the openings should never be blocked or covered with items (such as newspapers, table-cloths, curtains) or by operating the equipment on thick carpet or a bed.

Do not install your speakers overhead on the ceiling or wall. The grill is designed to be detachable, and as such it may fall and cause damage or personal injury if installed overhead. SGK004_A1_En
POWER-CORD CAUTION
Handle the power cord by the plug. Do not pull out the plug by tugging the cord and never touch the power cord when your hands are wet as this could cause a short circuit or electric shock. Do not place the unit, a piece of furniture, etc., on the power cord, or pinch the cord. Never make a knot in the cord or tie it with other cords. The power cords should be routed such that they are not likely to be stepped on. A damaged power cord can cause a fire or give you an electrical shock. Check the power cord once in a while. When you find it damaged, ask your nearest PIONEER authorized service center or your dealer for a replacement.
S002*A1_En
CAUTION
This product is a class 1 laser product classified under the Safety of laser products. IEC 60825-1:2007.

D58-5-2-2a_A1_En
CAUTION
The 0/I STANDBY/ON switch on this unit will not completely shut off all power from the AC outlet. Since the power cord serves as the main disconnect device for the unit, you will need to unplug it from the AC outlet to shut down all power. Therefore, make sure the unit has been installed so that the power cord can be easily unplugged from the AC outlet in case of an accident. To avoid fire hazard, the power cord should also be unplugged from the AC outlet when left unused for a long period of time (for example, when on vacation).
D3-4-2-2-2a*A1_En
This product is for general household purposes. Any failure due to use for other than household purposes (such as long-term use for business purposes in a restaurant or use in a car or ship) and which requires repair will be charged for even during the warranty period.
K041 A1 En
Do not attach these speakers to the wall or ceiling, as they may cause injury in the event of a fall.
5GK007*A1_En
Information for users on collection and disposal of old equipment and used batteries
(Symbol for equipment)

(Symbol examples) for batteries

These symbols on the products, packaging, and/or accompanying documents mean that used electrical and electronic products and batteries should not be mixed with general household waste.
For proper treatment, recovery and recycling of old products and used batteries, please take them to applicable collection points in accordance with your national legislation.
By disposing of these products and batteries correctly, you will help to save valuable resources and prevent any potential negative effects on human health and the environment which could otherwise arise from inappropriate waste handling.
For more information about collection and recycling of old products and batteries, please contact your local municipality, your waste disposal service or the point of sale where you purchased the items.
These symbols are only valid in the European Union.
For countries outside the European Union:
If you wish to discard these items, please contact your local authorities or dealer and ask for the correct method of disposal.
K058a_A1_En
Condensation
If the player is moved suddenly from a cold place into a warm room (in winter, for example) or if the temperature in the room in which the player is installed rises suddenly due to a heater, etc., water droplets (condensation) may form inside (on operating parts and the lens). When condensation is present, the player will not operate properly and playback is not possible. Let the player stand at room temperature for 1 or 2 hours with the power turned on (the time depends on the extent of condensation). The water droplets will dissipate and playback will become possible. Condensation can also occur in the summer if the player is exposed to the direct wind from an air-conditioner. If this happens, move the player to a different place.
S005 A1 En
Thank you for purchasing this PIONEER product. To obtain the best performance from this product, please read this manual carefully. It will guide you in operating your PIONEER product.
Contents
Accessories 4
Before you start 5
General 5
Loading the batteries....5
Controls 6
Remote control 6
Front panel 9
Connecting your equipments .... 10
Stereo receiver 10
CD player 12
Connecting the stereo receiver and CD player....12
AC power connection 12
General control....13
To turn the power on....13
Setting the clock....13
General functions 13
Listening to a CD or MP3/WMA disc ..... 15
Disc playback 15
Various disc functions....16
Advanced CD or MP3/WMA disc playback 16
MP3/WMA folder mode (only for MP3/WMA files)....17
Listening to the iPod/iPhone/iPad mini ..... 19
Supported models....19
Connecting your iPod/iPhone/iPad mini 19
Playing an iPod/iPhone/iPad mini 19
Listening to USB mass storage device/MP3
player 20
Connecting a USB device 20
Playing a USB device 20
Listening to the FM radio 21
Tuning to a FM radio station 21
Using the Radio Data System (RDS) .....
Introduction to RDS 22
Listening to the DAB (XC-P01DAB only) ..... 23
Selecting DAB. 23
Timer and sleep operation 25
Setting the wake-up timer....25
Sleep operation 25
Additional information 26
Troubleshooting chart 26
Condensation 26
If problem occurs....26
Factory reset, clearing all memory 27
Before transporting the unit 27
Care of compact discs 27
Cleaning the cabinet....27
Caution for when the unit is installed in a rack with
a glass door 27
About playable music file formats 28
Specifications....28
About iPod/iPhone/iPad mini 29
Disclaimer for Third Party Content 29
XC-P01/XC-P01DAB CD Receiver System consists of a stereo receiver and CD player.
Accessories
Please confirm that the following accessories are included.
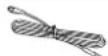
 Remote control x 1 Remote control x 1 | “AAA” size battery x 2 |
 FM aerial x 1 (XC-P01 only)DAB/FM aerial x 1(XC-P01DAB only) FM aerial x 1 (XC-P01 only)DAB/FM aerial x 1(XC-P01DAB only) | RCA audio cable(red/white plugs) |
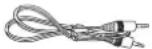 Remote control cable x 1 Remote control cable x 1 | Power cord x 2Speaker caution sheetWarranty cardThese operating instructions(CD-ROM)Quick Start Guide |
Before you start
Before you start
General
- Use the unit on a firm, level surface free from vibration.
- Keep the unit away from direct sunlight, strong magnetic fields, excessive dust, humidity and electronic/electrical equipment (home computers, facsimiles, etc.) which generate electrical noise.
- Do not place anything on top of the unit.
- Do not expose the unit to moisture, to temperatures higher than 60 °C (140 °F) or to extremely low temperatures.
- If your system does not work properly, disconnect the AC power lead from the wall socket. Plug the AC power lead back in, and then turn on your system.
• In case of an electrical storm, unplug the unit for safely. - Hold the AC power plug by the head when removing it from the wall socket, as pulling the lead can damage internal wires.
- The AC power plug is used as a disconnect device and shall always remain readily operable.
- Do not remove the outer cover, as this may result in electric shock. Refer internal service to your local PIONEER service facility.
- The ventilation should not be impeded by covering the ventilation openings with items, such as newspapers, lablecloths, curlains, etc.
- No naked flame sources, such as lighted candles, should be placed on the apparatus.
- Attention should be drawn to the environmental aspects of battery disposal.
• The apparatus is designed for use in moderate climates. - Do not touch this stereo receiver's bottom panel while the power is on or just after it is turned off. The bottom panel becomes hot when the power is on (or right after it is turned off) and could cause burns.
CAUTION
- The voltage used must be the same as that specified on this unit. Using this product with a higher voltage other than that which is specified is dangerous and may result in a fire or other type of accident causing damage.
PIONEER will not be held responsible for any damage resulting from use of this unit with a voltage other than that which is specified.
Loading the batteries

natural_image
Technical line drawing of a mechanical device with two views: one showing a lever mechanism and the other showing a handle (no text or symbols present)The batteries included with the unit are to check initial operations; they may not last over a long period. We recommend using alkaline batteries that have a longer life.
CAUTION
- Incorrect use of batteries may result in such hazards as leakage and bursting. Observe the following precautions:
- Never use new and old batteries together.
- Insert the plus and minus sides of the batteries properly according to the marks in the battery case.
- Batteries with the same shape may have different voltages. Do not use different batteries together.
- When inserting the batteries, make sure not to damage the springs on the battery's (-) terminals. This can cause batteries to leak or overheat.
- When disposing of used batteries, please comply with governmental regulations or environmental public institution's rules that apply in your country/area.
WARNING
- Do not use or store batteries in direct sunlight or other excessively hot place, such as inside a car or near a heater. This can cause batteries to leak, overheat, explode or catch fire. It can also reduce the life or performance of batteries.
Controls
Controls
Remote control
There are functions which can be operated only when the remote control is set in either of the sleeve receiver control mode or CD player control mode, and functions which can be operated regardless of the mode of the remote control.

Buttons for general operations
The following functions are available regardless of the mode of the remote control.
1 ⏻ SYSTEM
Press to turn on and off the stereo receiver and CD player (page 13).
2 ◆ RECEIVER
Press to turn on and off the stereo receiver (page 13).
3 CD
Press to turn on and off the CD player (page 13).
4 Input function buttons
Use to select the input source for the stereo receiver (page 14).
5 Playback control buttons
Use the buttons to control playback.
6 ▲ OPEN/CLOSE
Press to open or close the disc tray (page 15).
7 Remote control mode selection buttons
CONTROL RCV – Press to operate the functions available only in the stereo receiver control mode.
CONTROL CD – Press to operate the functions available only in the CD player control mode.
8 C D U S B
Press to select the CD or iPod/USB function for the CD player.
9 DIRECT
Use to listen to the sound source in the original sound quality (page 14).
10 TREBLE +/-
Press to adjust the treble (page 14).
11 SLEEP
Press to select the amount of time before the stereo receiver turns off (Off - 30 min. - 60 min. - 90 min.). You can check the remaining time by pressing the SLEEP button once (page 25).
12 BASS +/-
Press to adjust the bass (page 14).
13 CLOCK
Press to check the current time (page 13).
14 INPUT
Use to select the input source for the stereo receiver (page 14).
15 VOLUME +/-
Use to sell the listening volume (page 13).
16 MUTE
Use to mute the volume (page 14).
17 REPEAT
Press to repeat the playback of track/file (pages 16, 19, 20).
18 SHUFFLE
Press to shuffle the playback order of tracks/files (pages 17, 19, 20).
Controls

Buttons available for the stereo receiver control mode
The following functions are available only when the remote control is in the stereo receiver control mode.
Important
- Press the CONTROL RCV button before pressing the following buttons.
1 C L O C K
Press to set the clock (page 13).
2 AUTO TUNE
Press to start the DAB auto scan (XC-P01DAB only) (page 23).
3 RDS function buttons
PTY - Use to search for RDS program types (page 22).
RDS DISP – Press to display the different types of RDS information available (page 22).
4 TOP MENU
Press to display the DAB setting menu (XC-P01DAB only) (page 24).
5 ↑/↓/←/→
Use to select system setting and switch modes.
TUNE ↑/↓ - Use to find radio frequencies (pages 21, 23).
PRESET ←/→ - Use to select preset radio stations (pages 21, 22).
6 ENTER
Press to confirm actions.
7 SETUP
Press to access the setup menu (pages 14, 27).
8 Numeric buttons
Use to enter the number (page 21).
9 Tuner control buttons
BAND – XC-P01:Switches between FM ST (stereo) and FM MONO radio bands (pages 21, 22).
XC-P01DAB: Switches between FM ST (stereo) and FM MONO, and DAB radio bands (pages 21, 22, 23).
TUNER EDIT – Use to memorize/name stations for recall (page 21).
10 TIMER
Press to set the wake-up timer or check the current setting (page 25).
11 DIMMER
Press to adjust the brightness of the display (page 13).
12 DISPLAY
Press to display information of the current mode (pages 22, 24).
13 RETURN
Press to exit the current menu screen.
14 CLEAR
Press to clear the specified settings.
Controls

Buttons available for the CD player control mode
The following functions are available only when the remote control is in the CD player control mode.
Important
- Press the CONTROL CD button before pressing the following buttons.
1 TOP MENU
Press to display the iPod/iPhone/iPad mini top menu (page 19).
2 ↑/↓/←/→
Use to select system setting and switch modes.
3 ENTER
Press to confirm actions.
4 SETUP
Press to access the setup menu (pages 14, 27).
5 Numeric buttons
Use to enter the number (pages 16, 17, 20).
6 CLEAR
Press to clear a programmed track (page 17).
7 DIMMER
Press to adjust the brightness of the display (page 13).
8 DISPLAY
Press to display information of the current mode (pages 17, 18).
9 PROGRAM
Press to set programmed playback (page 17).
10 PLAY MODE
Press to enter the folder playback mode (page 18).
11 FOLDER +/-
Use to select a folder of a MP3/WMA disc or of a USB mass storage device (page 18).
Test of the remote control
Check the remote control after checking all the connections. Point the remote control directly at the remote sensor on the stereo receiver. The remote control can be used within the range shown below:

Controls
Front panel
Stereo receiver

1 ⏻/I STANDBY/ON
Press to turn on and off the stereo receiver (page 13).
2 SOURCE
Use to select the input source for the stereo receiver (page 14).
3 DIRECT indicator
Lights when the DIRECT function is on (page 14).
4 TIMER indicator
Lights when the timer is set (page 25).
5 Remote sensor
Receives signals from the remote control.
6 VOLUME control
Use to set the listening volume (page 13).
7 PHONES (headphone) socket
Connect headphones. When the headphones are connected, there is no sound output from the speakers (page 14).
8 PRESET
Use to select preset radio stations (page 21)
9 DIRECT
Use to listen to the sound source in the original sound quality (page 14).
CD player

1 ⏻/I STANDBY/ON
Press to turn on and off the CD player (page 13).
2 Disc tray
Place a disc, label side up (page 15).
3
Use to open or close the disc tray (page 15).
4 iPod/iPhone/iPad mini/USB terminal
Connect your iPod/iPhone/iPad mini or USB mass storage as an audio source (pages 19, 20).
5 CD/USB
Press to select the CD or iPod/USB playback.
6
Use to stop the playback.
7
Use to select the desired track or folder to be played back.
8
Use to select the desired track or folder to be played back.
9 ▶/II
Use to play back or resume playback from the paused point.
Connecting your equipments
Connecting your equipments
Before making or changing the connections, turn off the power and disconnect the power cord from the AC outlet.
Stereo receiver

Aerial connection
Supplied FM aerial (XC-P01), DAB/FM aerial (XC-P01DAB):
Connect the supplied FM aerial wire or DAB/FM aerial wire to the FM socket or DAB/FM socket, and position the aerial wire in the direction where the strongest signal can be received.
External FM aerial:
Use an external FM aerial (75 ohms coaxial cable) for better reception. When an external FM aerial is used, disconnect the supplied FM aerial wire.
Note
- Placing the aerial on the unit or near the AC power lead may cause noise pickup. Place the aerial away from the unit for better reception.
Speaker connection
Use speakers with an impedance of 4 ohms as lower impedance speakers can damage the unit.
1 Loosen the knobs of the speaker output terminals.
2 Insert the speaker cable wires into each of the terminal post holes (positive (+) cable to the red knob, and negative (-) cable to the black knob), then tighten the knobs.
Connecting your equipments
3 Connect the other ends of the cables to the terminals of speakers (make sure the positive and negative (+/-) terminals on the speakers match those on the stereo receiver).
CAUTION
- These speaker terminals carry HAZARDOUS LIVE voltage. To prevent the risk of electric shock when connecting or disconnecting the speaker cables, disconnect the power cord before touching any uninsulated parts.
- Do not mistake the right and the left channels. The right speaker is the one on the right side when you face the unit.
- Do not let the bare speaker wires touch each other.
- Make sure that all the bare speaker wire is twisted together and inserted fully into the speaker terminal. If any of the bare speaker wire touches the back panel, it may cause the power to cut off as a safety measure.
Controlling the unit using a remote control of other Pioneer component
This unit can be controlled using a remote control of other Pioneer component if the stereo receiver is connected to the component with a monaural mini-plug cord (commercially available).
Using other subwoofer
You can connect a subwoofer with an amplifier to the SUBWOOFER OUT socket.

Note
- No sound is output from the subwoofer without a built-in amplifier.
Connecting a network audio device
You can connect a network audio device to the stereo receiver using a RCA audio cable (commercially available).

Note
- To select NETWORK Input; On remote control: Press the NETWORK button, or press the INPUT button repeatedly until NETWORK is displayed in the front panel display. On stereo receiver: Turn the SOURCE knob until NETWORK is displayed in the front panel display.
Connecting digital audio device
You can connect a digital audio device to the stereo receiver using an optical or coaxial cable (commercially available).
Optical cable (commercially available)

flowchart
graph TD
    A["Digital OUT\nOPTICAL"] --> B["Coaxial cable (commercially available)"]
    C["Digital recording device"] --> D["Coaxial"]
    E["Digital OUT\nCOXIAL"] --> F["Stereo receiver"]
    G["Power Supply"] --> H["CD/Network"]
    H --> I["USB/RODER OUT"]
Note
- To select digital input:
On remote control: Press the DIG IN 1/2 button repeatedly, or press the INPUT button repeatedly until
DIGITAL IN 1 (for optical input) or DIGITAL IN 2 (for coaxial input) is displayed in the front panel display. On stereo receiver: Turn the SOURCE knob until DIGITAL IN 1 (for optical input) or DIGITAL IN 2 (for coaxial input) is displayed in the front panel display. - Digital signal formats that can be input to the stereo receiver include linear PCM signals with sampling rate and quantitative bits up to 192 kHz/24 bits. (Depending on the connected device and environment, operation may not be successful).
Connecting your equipments
CD player

Connecting to a digital audio device
You can connect the CD player to a digital device using a coaxial cable (commercially available).

- The audio of iPod/iPhone/iPad mini is not output from the COAXIAL OUT socket of the CD player.
Connecting the stereo receiver and CD player
Connect the stereo receiver and CD player using the supplied remote control cable and RCA audio cable.
Stereo receiver (XC-P01 for example)

CD player
Note
- Make sure to connect the stereo receiver and the CD player using the supplied remote control cable and RCA audio cable.
AC power connection
After checking all the connections have been made correctly, plug the AC power load of this unit into the wall socket.
CAUTION
- Unplug the AC power lead from the wall socket if the unit will not be in use for a prolonged period of time.
- Handle the power cord by the plug. Do not pull out the plug by tugging the cord and never touch the power cord when your hands are well as this could cause a short circuit or electric shock. Do not place the unit, a piece of furniture, etc., on the power cord, or pinch the cord. Never make a knot in the cord or lie it with other cords. The power cords should be routed such that they are not likely to be stepped on. A damaged power cord can cause a fine or give you an electrical shock. Check the power cord once in a while. When you find it damaged, ask your nearest PIONEER authorized service centre or your dealer for a replacement.
General control
General control
To turn the power on
Press the Ⓧ SYSTEM bullon on the remote control to turn on both of the stereo receiver and CD player.
To turn on the stereo receiver only:
Press the ◊ RECEIVER button on the remote control or the ◊/I STANDBY/ON button on the stereo receiver.
To turn on the CD player only:
Press the CD button on the remote control or the I STANDBY/ON button on the CD player.
After use:
To turn off the unit, press the ⏻ SYSTEM/ conver/ CD button on the remote control, or press the ⏻/I STANDBY/ON button on the stereo receiver/CD player.
Setting the clock

In this example, the clock is set to the 24-hour (0:00) display.
1 Turn on the stereo receiver.
Refer to To turn the power on above for details.
2 Press the CONTROL RCV button on the remote control.
3 P r e €LOCKbuttoreon the remote control.
The current day and time are displayed.
The default setting (Sun 0:00) is displayed when the first time you set the clock.
4 Press ENTER button.
5 U s←→ to set the day, then press ENTER.
6 U s←→ to select 24-hour or 12-hour display, then press ENTER.

7 U s to set the hour, then press ENTER.
8 U s←e→ to set the minute, then press ENTER to
confirm.
Note
- Press the CLOCK or RETURN button to exit the setting mode without setting the clock.
To confirm the time display:
Press the CLOCK button. The current lime and day are displayed in the front panel display of the stereo receiver for 5 seconds.
Note
• The current time and day display is canceled if;
- the volume is adjusted.
- The SETUP. BASS +/-, TREBLE +/-, DIRECT, or SLEEP button is pressed.
- the stereo receiver is turned off.
- The input source for the stereo receiver is changed.
To readjust the clock:
Perform "Selling the clock" from step 1.
Note
- If the AC power cord of the stereo receiver is disconnected from the wall socket, the clock setting is cleared. Set the clock.
To change the 24-hour or 12-hour display:
1 Clear all the programmed contents.
Refer to Factory reset, clearing all memory on page 27 for details.
2 Perform "Setting the clock" from step 1 onwards.
General functions

Display brightness control
Select the stereo receiver or CD player by pressing the CONTROL RCV or CONTROL CD button on the remote control.
Press DIMMER button to dim the display brightness. The brightness can be controlled in four steps.
Volume control
Press the VOLUME +/- on the remote control to increase or decrease volume, or turn the VOLUME knob on the stereo receiver to the right to increase volume, and to the left to decrease the volume.

CAUTION
- The sound level at a given volume setting depends on speaker efficiency, location, and various other factors. It is advisable to avoid exposure to high volume levels. Do not turn the volume on to full at switch on. Listen to music at moderate levels. Excessive sound pressure from earphones and headphones can cause hearing loss.
Note
- If you turn off and on the stereo receiver with the volume set to 61 or higher, the volume starts at 60.
- When the DIRECT function is off, the volume can be set from minimum to 60.
General control
Muting
The volume is muted temporarily when pressing the MUTE button on the remote control. Press again to restore the volume.
DIRECT function
Press the DIRECT button on the remote control or on the stereo receiver to listen to the sound source in the original sound quality. The DIRECT indicator lights in the front panel display of the stereo receiver when the DIRECT function is on. Press the DIRECT button again to cancel the DIRECT function.
Note
- If the DIRECT function is turned off when the volume is set to 61 or higher, the volume is automatically set to 60.
Bass control
Press the BASS + button on the remote control to emphasize the bass, and the BASS - button to de-emphasize it.
Note
- This function is not available when the DIRECT function is on.
Treble control
Press the TREBLE + button on the remote control to emphasize the treole, and the TREBLE - button to de-emphasize it.
Note
- This function is not available when the DIRECT function is on.
Input selection
The input source for the stereo receiver can be selected by pressing the INPUT button repeatedly or each input selection button (CD/USB, TUNER, NETWORK, and DIG IN 1/2) on the remote control, or turning the SOURCE knob on the stereo receiver.
Note
- If pressing the INPUT button on the remote control repeatedly or turning the SOURCE knob on the stereo receiver to the right, the input source is switched in the following order.

If turning the SOURCE knob to the left, the order is reversed.
- The backup function will memorize the input mode and restore it in case of a power failure or that the AC power cord is disconnected.
Headphones
Plug headphones (commercially available) into the PHONES socket on the stereo receiver.

- Do not turn the volume on to full at switch on and listen to music at moderate levels. Excessive sound pressure from earphones and headphones can cause hearing loss.
- Before plugging in or unplugging the headphone, reduce the volume.
- Be sure your headphone has a 3.5 mm diameter plug and impedance between 16 and 50 ohms. The recommended impedance is 32 ohms.
- Plugging in the headphone disconnects the speakers automatically.
Auto power down setup
The unit turns off automatically if no operations are performed for specified period of time.
- Default setting: 6H
1 Select the stereo receiver or CD player by pressing the CONTROL RCV or CONTROL CD button on the remote control.
2 Pre SETUP buttone
3 P r ←/→ to specify the amount of time.
You can select 0.5 (CD player only), 2, 4 or 6 hours, or off (if no automatic shutoff is desired).
4 Press the ENTER button.
Note
- Press the RETURN button to exit the selling mode without setting the auto power down function.
CAUTION
- If setting the auto power down for the stereo receiver, both of the stereo receiver and CD player are automatically turned off after the specified period of time has elapsed. - If setting the auto power down for the CD player, only the CD player is automatically turned off after the specified period of time has elapsed.
Listening to a CD or MP3/WMA disc
Listening to a CD or MP3/WMA disc
Disc playback

This system can play back a standard CD, CD-R/RW in the CD format and CD-R/RW with MP3 or WMA files.
Important
• See About playable music file formats on page 28 for more on supported music file formats.
• This system cannot record on CD-R/RW.
- Some audio CD-R and CD-RW discs may not be playable due to the state of the disc or the device that was used for recording.
1 Turn on the stereo receiver and CD player.
Refer to To turn the power on on page 13 for details.
2 Press the CD/USB button on the remote control to select the CD/USB input for the stereo receiver.
You can also select the CD/USB input by pressing the INPUT button on the remote control repeatedly, or turning the SOURCE knob on the stereo receiver.
3 Press the CD USB button on the remote control to select CD function for the CD player.
You can also select the CD function by pressing the CD/USB button on the CD player.
4 Press the ▲ OPEN/CLOSE to open the disc tray.
You can also use the ▲ button on the CD player.
5 Place a disc on the disc tray, label side up.

natural_image
Illustration of a microwave oven with a CD inside, showing internal components and a circular inset (no text or symbols)6 Press the ▲ OPEN/CLOSE button to close the disc tray. You can also use the ▲ button on the CD player.
7 Press the ▶ button to start playback.
You can also use the ▶/■ button on the CD player.
After the last track is played, the unit will stop automatically.

CAUTION
- Do not place two discs in one disc tray.
- Do not play discs of special shapes (hearl, oclagon, etc.). It may cause malfunctions.
- Do not push the disc tray while it is moving.
- If the power fails while the tray is open, wait until the power is restored.
- Be sure to place 8 cm disc in the middle of the disc tray.
Note
- "Can't Play" will appear for the file which cannot be played back with this CD player.
- Due to the structure of the disc information, it takes longer to read an MP3/WMA disc than a normal CD (approximately 20 to 90 seconds).
- "MP3" or "WMA" will appear after the unit reads information on an MP3 or WMA disc.
- If TV or radio interference occurs during CD operation, move the unit away from the TV or radio.
Listening to a CD or MP3/WMA disc
Various disc functions
| Function | On CD player | Remote control | Operation |
| Play |  |  | Press in the stop mode. |
| Stop | [63AH] | Press in the playback mode. | |
| Pause | [32AB] | Press in the playback mode. Press the ▶ or ▶/□ button to resume playback from the paused point. | |
| Track up/ down | [Y50D] | Press in the playback or stop mode. If you press the button in the stop mode, press the ▶ or ▶/□ button to start playback of the desired track. | |
| Fast forward/ reverse |  | Press and hold in the playback mode. Release the button to resume playback. |
Resume playback:
If the ■ button is pressed while playing back a disc, the playback stops and the system memorizes the stopped track. To resume the playback of the track you have stopped, press the ▶ (▶/□) button while ■ blanks in the front panel display of the CD player. The playback resumes from the beginning of the track you have stopped.
To cancel the resume playback:
Press the ■ button while ■ blinks in the front panel display of the CD player.
Advanced CD or MP3/WMA disc playback


Direct track search
By using the numeric buttons, the desired track on the current disc can be played.
1 Press the CONTROL CD button on the remote control.
2 Use the numeric buttons to select a track to be played back.
- The numeric buttons allow you to select up to number 9.
- When selecting number 10 or higher, use the "+10" button.
- When selecting number 100 or higher, use the "+100" button.
A. For example, to choose 13
1 Press the "+10" button.
2 Press the "3" button.

Selected track number
B. For example, to choose 130
1 Press the "+100" button.
2 Press the "+10" button three times.
3 Press the "0" button.
Note
- A track number higher than the number of tracks on the disc cannot be selected.
- During shuffle play, direct track search is not possible.
To stop playback:
Press the ■ button.
Repeat play
Repeat play can play one track, all tracks or a programmed sequence continuously.
- During repeat play, "18 displayed.

To repeat one track:
Press the REPEAT button repeatedly until "Repeat One" appears. Press the ▶ (▶/II) button.
To repeat all tracks:
Press the REPEAT button repeatedly until "Repeat All" appears. Press the ▶ (▶/II) button.
To repeat desired tracks:
Perform steps of Programmed play (CD format only) on page 17, and then press the REPEAT button repeatedly until "Repeat All" appears.
To cancel repeat play:
Press the REPEAT button repeatedly until "Repeat Off" appears and "☐" disappears.
Note
• After performing repeat play, be sure to press the ■ button. Otherwise, the disc will play continuously.
Listening to a CD or MP3/WMA disc
Shuffle play
The tracks on the disc can be played in shuffle order automatically.
- During shuffle play, "×s displayed.

To shuffle play all tracks:
Press the SHUFFLE button on the remote control.
To cancel shuffle play:
Press the SHUFFLE button and "×" disappears.
Note
- If you press the ▶▶1 button during shuffle play, you can move to the track selected next by the shuffle operation. On the other hand, the ◀◀ button does not allow you to move to the previous track. The beginning of the track being played will be located.
- In shuffle play, the unit will select and play tracks automatically. (You cannot select the order of the tracks.)
Programmed play (CD format only)
You can choose up to 32 tracks for playback in the order you like.
1 Press the CONTROL CD button on the remote control.
2 Pre BROGRAM button in the stop mode to enter the programming mode.

3 Press the or button or numeric buttons on the remote control to select the desired track.

4 Press the ENTER button to save the track number.
5 Repeat steps 3 and 4 for other tracks.
Up to 32 tracks can be programmed. If you make a mistake, the programmed tracks can be cleared by pressing the CLEAR button.
6 Press the ▶ (▶/II) button to start playback.
Adding tracks to the program:
Stop the playing mode, then follow steps 3 and 4 to add tracks. The new tracks will be stored after the last track of the previous program.
To clear the programmed tracks:
Press the CLEAR button. The last track is cleared. Repeat the operations to clear all the tracks to be cleared.
Note
- When a disc is ejected, the programme is automatcally cancelled.
- If the CD player turns off or you change the function from CD to another, the programmed selections will be cleared.
- During the program operation, shuffle play is not possible.
Displaying disc information
Press the CONTROL CD button on the remote control, and then press the DISPLAY button repeatedly while playing back to display the disc information.
For discs in the CD format, the remaining playback time of the track, the elapsed playback time of the disc, and the remaining playback time of the disc are displayed in order.
MP3/WMA folder mode (only for MP3/WMA files)

To play back MP3/WMA (Windows Media Audio) file There are many music sites on the internet that you can download MP3/WMA (Windows Media Audio) music files. Follow the instructions from the website on how to download the music files. You can then play back these downloaded music files by burning them to a CD-R/RW disc.
- Your downloaded song/files are for personal use only. Any other usage of the song without owner's permission, is against the law.
Listening to a CD or MP3/WMA disc
About folder playback order
If MP3/WMA files are recorded in several folders, a folder number will be set to each folder automatically.
Press the CONTROL CD button on the remote control, and then press the PLAY MODE to select the folder playback mode.
These folders can be selected by the FOLDER +/- button on the remote control. If there is no supported file formats inside the selected folder, the folder is skipped and the next folder will be selected.
Example: How to set folder number if MP3/WMA format files are recorded as the figure below.
- ROOT folder is set as folder 1.
- Playback will be in the order of the diagram below.
- Up to 255 folders and 999 files can be read.

flowchart
graph TD
    A["○"] --> B["1"]
    B --> C["2"]
    C --> D["3"]
    D --> E["4"]
    E --> F["5"]
    F --> G["6"]
    G --> H["7"]
    H --> I["8"]
    I --> J["9"]
    style A fill:#fff,stroke:#000
    style B fill:#fff,stroke:#000
    style C fill:#fff,stroke:#000
    style D fill:#fff,stroke:#000
    style E fill:#fff,stroke:#000
    style F fill:#fff,stroke:#000
    style G fill:#fff,stroke:#000
    style H fill:#fff,stroke:#000
    style I fill:#fff,stroke:#000
    style J fill:#fff,stroke:#000
Layer 1 Layer 2 Layer 3 Layer 4 Layer 5
MP3/WMA disc playback in the folder mode
1 Press the CONTROL CD button on the remote control.
2 Press the PLAY MODE button to select the folder playback mode.
Disc info is displayed.

3 P r FOLDER +/- to select a folder.
Playback starts.

• Title, Artist and Album name are displayed if they are recorded on the disc.
- In case of playback with the folder mode on, press FOLDER +/-, and the folder can be selected even though it is in playback/pause mode. It will continue playback/pause mode in the 1st track of the selected folder.
- Display content can be changed by pressing the DISPLAY button.
Total folders and Total Tracks (in the stop mode)
Folder number and Track number (while playing back)

flowchart
graph TD
    A["Album name display*"] --> B["File name display"]
    C["Artist name display*"] --> D["Music title display*"]
    E["Folder name display"] --> F["Music title display*"]
*The song title, artist name, and the album name will only be displayed during playback.
To cancel the folder playback mode, stop the playback, press the PLAY MODE button, and select the normal playback mode.
Note
- If "Protected" is displayed, it means "Copyright protected WMA file" is selected.
- If "Can't Play" is displayed, it means "Not supported playback file" is selected.
Listening to the iPod/iPhone/iPad mini
Listening to the iPod/iPhone/iPad mini
Supported models
- iPod touch (5th/4th/3rd/2nd/1st generation)
- iPod nano (7u/6u/5u/4u/3-u generation)
- iPhone 5, iPhone 4S, iPhone 4, iPhone 3GS, iPhone 3G.
iPhone - iPadmin
Important
- Pioneer cannot under any circumstances accept responsibility for any direct or indirect loss arising from any inconvenience or loss of recorded material resulting from the iPod/iPhone/iPad mini failure.
Note
- This system has been developed and tested for the software version of iPod/iPhone/iPad mini indicated on the website of Pioneer (http://pioneer.jp/nomeav/support/ios/eu/).
- Installing software versions other than indicated on the website of Pioneer to your iPod/iPhone/iPad mini may result in incompatibility with this system.
- iPod/iPhone/iPad mini is charged if it is connected to the CD player when the power of the CD player is on.
- iPod/iPhone/iPad mini is licensed for reproduction of non-copyrighted materials or materials the user is legally permitted to reproduce.
Connecting your iPod/iPhone/iPad mini
CAUTION
- Unplug all accessories from the iPod/iPhone/iPad mini before connecting it to the CD player.
1 Turn on the stereo receiver and CD player.
Refer to To turn the power on on page 13 for details.
2 Press the CD/USB button on the remote control to select the CD/USB input for the stereo receiver.
You can also select the CD/USB input by pressing the INPUT button on the remote control repeatedly, or turning the SOURCE knob on the stereo receiver.
3 Press the CD USB button on the remote control to select iPod/USB function for the CD player.
You can also select the iPod/USB function by pressing the CD/USB button on the CD player.
4 Connect the USB connector cable (commercially available) to an iPod/iPhone/iPad mini.

5 Connect the iPod/iPhone/iPad mini to the CD player via USB connector.

"Loading" appears on the display panel as the CD player starts recognizing the connected iPod/iPhone/iPad mini. When the track number is displayed, the files in the iPod/iPhone/iPad mini are ready to be played back.
Note
• USB connector do not support VIDEO out.
Important
- If "No Device" is displayed or an iPod/iPhone/iPad mini does not work properly after connecting the iPod/iPhone/iPad mini to the CD player and selecting the iPod/USB mode, turn off the CD player and reconnect the iPod/iPhone/iPad mini to the CD player. If it still does not work properly, try resetting the iPod.
Playing an iPod/iPhone/iPad mini
The buttons on the remote control and the CD player can be used for controlling an iPod/iPhone/iPad mini.
| Function | On CD player | Remote control | Operation |
| Display the menu | TOP | MENU | Press theCONTROLCD button first, and press to access the iPod/iPhone/iPad mini menu. |
| Navigate /Confirm | - | ↑/↓/ENTER | Press theCONTROLCD button first, and use to control the iPod/iPhone/iPad mini menu. |
| Play | Press in the stop/pause mode. | ||
| Stop/Pause | Press in the playback mode. Press the►or►/IIbutton to resume playback from the paused point. | ||
| Track up/down | Press in the playbackor stop/pause mode. If you press the button in the stop/pause mode, press the►or►/IIbutton to start playback of the desired track. | ||
| Fast forward/reverse | Press and hold in the playback mode. Release the button to resume playback. | ||
| REPEAT | - REPEAT Press lo repeat the playback of files.*1 | ||
| SHUFFLE | - SHUFFLE Press to play back files in random order.*2 | ||
*1 See Repeat play on page 16 for details.
* See Shuffle play on page 17 for details.
Listening to USB mass storage device/MP3 player
Listening to USB mass storage device/MP3 player
You can listen to two-channel audio using the USB interface on the front of CD player.

Important
• See About playable music file formats on page 28 for supported music file formats.
Connecting a USB device
1 Turn on the stereo receiver and CD player.
Refer to To turn the power on on page 13 for details.
2 Press the CD/USB button on the remote control to select the CD/USB input for the stereo receiver.
You can also select the CD/USB input by pressing the INPUT button on the remote control repeatedly, or turning the
SOURCE knob on the stereo receiver.
3 Press the CD USB button on the remote control to select iPod/USB function for the CD player.
You can also select the iPod/USB function by pressing the CD/USB button on the CD player.
4 Connect a USB device to the CD player via USB connector.

"Loading" appears on the display panel as the CD player starts recognizing the connected USB device.
When the total numbers of folders and tracks are displayed, the files in the USB device are ready to be played back.
Important
- Pioneer cannot guarantee compatibility (operation and/or bus power) with all USB mass storage devices and assumes no responsibility for any loss of data that may occur when connected to the CD player.
Note
- This includes playback of WMA/MP3/WAV files (except files with copy-protection or restricted playback).
- Compatible USB devices include external magnetic hard drives, portable flash memory (particularly keydrives) and digital audio players (MP3 players) of format FAT16/S2. It is not possible to connect the CD player to a personal computer for USB playback.
• The CD player does not support a USB hub. - With large amounts of data, it may take longer for the CD player to read the contents of a USB device.
Playing a USB device
The buttons on the remote control and the CD player can be used for playback controls of files in a USB device.
| Function | On CD player | Remote control | Operation |
| Play | Press in the stop/pause mode. | ||
| Stop/Pause | Press in the playback mode. Press the ▶ or ▶/III button to resume playback from the paused point. | ||
| Track up/down | Press in the playbackor stop/pause mode. If you press the button in the stop/pause mode, press the ▶ or ▶/IIbutton to start playback of the desired track. |
| Fast forward/reverse | Press and hold in the playback mode. Release the button to resume playback. | ||
| REPEAT | - REPEAT Press to | repeat the playback of tiles.*1 | |
| SHUFFLE | - SHUFFLE Press to | play back tiles in random order.*2 | |
| Specify track number | - Numeric buttons | Press the CONTROL CD button first, and use to specify track number.*3 | |
See Repeat play on page 16 for details
*? See Shuffle play on page 17 for details.
^35 MP3/WMA/WAV files to be played back can be specified from folders. See About folder playback order on page 18 for details.
Important
- If an error message is displayed, try following the points below:
- Turn on and off the CD player.
- Reconnect the USB device.
- Select another input source, then switch back to iPod/USB.
- Use a dedicated AC adapter (supplied with the device) for USB power.
If it does not clear the problem, the USB device may not be compatible with the CD player.
Note
- If the selected file cannot be played back, the CD player automatically skips to the next playable file.
- Non-roman characters in the playlist are displayed as '*' in the front panel display.
Listening to the FM radio
Listening to the FM radio
Tuning to a FM radio station
Tune to FM radio broadcasts using the automatic (search) and manual (slop) tuning functions. Once you are tuned to a station, you can memorize the frequency for recall later.

1 Turn on the stereo receiver.
Refer to To turn the power on on page 13 for details.
2 Press the TUNER button on the remote control to select the TUNER input.
You can also select the TUNER input by pressing the INPUT button on the remote control repeatedly, or turning the SOURCE knob on the stereo receiver.
3 Press the CONTROL RCV button on the remote control.
4 Press the BAND button to change the band, if necessary. XC-P01: Each press switches the band between FM stereo and FM mono.
XC-P01DAB: Each press switches the band between FM (sereo or mono) and DAB (for details on DAB, see Listening to the DAB (XC P01DAB only) on page 23).
5 Tune to a station.
Automatic tuning
To search for stations in the currently selected band, press and hold TUNE ↑/↓ for about a second. The stereo receiver will start searching for a station, and stop when it has found one. Repeat to search for other stations.
Manual tuning
To change the frequency one step at a time, press TUNE ↑/↓.
High speed tuning
Press and hold TUNE ↑/↓ for high speed tuning. Release the button at the frequency you want.
- Lights when a normal broadcast channel. - Lights when a stereo FM broadcast is being received in auto stereo mode.
Improving FM sound
If the _r indicator does not light when tuning to an FM station because the signal is weak, set the stereo receiver to the mono reception mode.
1 Press the CONTROL RCV button on the remote control. 2 Press BAND to select FM MONO.
This should improve the sound quality and allow you to enjoy the broadcast.
Saving station presets
If you often listen to a particular radio station, it is convenient to have the stereo receiver store the frequency for easy recall whenever you want to listen to that station. This saves the effort of manually tuning in each time. This unit can memorize up to 40 stations.
1 Tune to a station you want to memorize.
See Tuning to a FM radio station above for more on this.
2 Press the CONTROL RCV button on the remote control.
3 Press TUNER EDIT.
The preset number is blinking.
4 Press PRESET ←/→ to select a station preset number.
You can also use the numeric buttons. See Direct track search on page 16.
5 Press ENTER.
The preset number stops blinking and the stereo receiver stores the station.
Note
- If the stereo receiver is left disconnected from the AC power outlet for over a month, the station memories will be lost and will have to be reprogrammed.
- Stations are stored in stereo. Even if the station is stored in the FM MONO mode, is displayed when recalled.
Listening to station presets
Preset stations beforehand. See Saving station presets above if stations have not been preset.
1 Press the CONTROL RCV button on the remote control.
2 Press PRESET ←/→ to select the station preset you want.
You can also use the numeric buttons or the PRESET button on the stereo receiver.
Naming preset stations
For easier identification, you can name all of your preset stations.
1 Choose the station preset you want to name.
See Listening to station presets above for how to do this.
2 Press the CONTROL RCV button on the remote control.
3 Press TUNER EDIT twice.
The cursor at the first character position blinks on the display.
4 Input the name you want.
Choose a name up to eight characters long.
- Use to select character position.
• Use ↑/↓ to select characters.
- The name is stored when ENTER is pressed.
Using the Radio Data System (RDS)
Using the Radio Data System (RDS)
Introduction to RDS
Radio Data System (RDS) is a system used by most FM radio stations to provide listeners with various kinds of information—the name of the station and the kind of show they are broadcasting, for example.
One feature of RDS is that you can search by type of program. For example, you can search for a station that is broadcasting a show with the program type, JAZZ.
You can search the following program types:
NEWS – News
AFFAIRS – Current affairs
INFO - General information
SPORT - Sport
EDUCATE Educational
DRAMA – Radio plays, etc.
CULTURE – National or
regional culture, theater, etc.
SCIENCE – Science and
technology
VARIED - Usually talk based material, such as quiz shows or interviews.
POP M - Pop music
ROCK M - Rock music
EASY M - Easy listening
LIGHT M - 'Light' classical music
CLASSICS - 'Serious' classical
music
OTHER M - Music not fitting above categories
WEATHER – Weather reports
FINANCE – Stock market reports, commerce, trading, etc.
CHILDREN – Programs for children
SOCIAL – Social affairs
RELIGION - Programs
concerning religion
PHONE IN - Public expressing
their views by phone
TRAVEL - Holiday-type travel
rather than traffic
announcements
LEISURE – Leisure interests
and nobbles
JAZZ-Jazz
COUNTRY - Country music
NATION M – Popular music in
a language other than English
OLDIES – Popular music from
the '50s and '60s
FOLK M - Folk music
DOCUMENT - Documentary
Note
• In addition, there are three other program types, ALARM,
ALARMTST, and NO TYPE. ALARM and ALARMTST are used for emergency announcements. 'NO TYPE' appears when a program type cannot be found.

Searching for RDS programs
You can search for a program type listed above.
1 Turn on the stereo receiver.
Refer to To turn the power on on page 13 for details.
2 Press the TUNER button on the remote control to select the TUNER input.
You can also select the TUNER input by pressing the INPUT button on the remote control repeatedly, or turning the SOURCE knob on the stereo receiver.
3 Press the CONTROL RCV button on the remote control.
4 Press the BAND button to select the FM band.
• RDS is only possible in the FM band.
5 Press PTY
6 Press PRESET ←/→ to select a program type.
7 Press ENTER to search for the program type.
The system starts searching through the station presets for a match, and stops when it finds one. Repeat to search for other stations.
If "NO PTY" is displayed it means the luner could not find that program type at the time of the search.
- RDS searches station presets only. If no stations have been presel, or if the program type could not be found among the station presets "NO PTY" is displayed.
"FINISH" means the search is complete.
Displaying RDS information
Use the RDS DISP or DISPLAY button to display the different types of RDS information available.
1 Press the CONTROL RCV button on the remote control.
2 Press the RDS DISP or DISPLAY button for RDS information.
Each press changes the display as follows:
- Program Service Name (PS) – The name of the radio station.
- Program Type (PTY) – This indicates the kind of program currently being broadcast.
- Radio Text (RT) – Messages sent by the radio station. For example, a talk radio station may provide a phone number as RT.
• Current tuner frequency (FREQ)
Note
- If any noise is picked up while displaying the RT scroll, some characters may be displayed incorrectly.
- If you see "NO TEXT" in the RT display, it means no RT data is sent from the broadcast station. If no PS data, "NO NAME" is displayed.
- In the PTY display, "NO PTY" may be shown.
Listening to the DAB (XC-P01DAB only)
Listening to the DAB (XC-P01DAB only)
DAB (Digital Audio Broadcasting) is a digital transmission system where audio signals are converted to digital signals for broadcasting.
DAB broadcasts a group of data called multiplex (ensemble) which may contain one or more stations (services). Each station contains a primary service and there may be one or more secondary services.
This allows several programs or services to be transmitted on a single frequency.

flowchart
graph TD
    A["DAB SIGNAL"] --> B["MULTIPLEX (ENSEMBLE)"]
    B --> C["SERVICES"]
    B --> D["SERVICES COMPONENTS (STATIONS)"]
    C --> E["1"]
    C --> F["2"]
    C --> G["3"]
    C --> H["4"]
    C --> I["5"]
    C --> J["6"]
Selecting DAB

1 Turn on the stereo receiver.
Refer to To turn the power on on page 13 for details.
2 Press the TUNER button on the remote control to select the TUNER input.
You can also select the TUNER input by pressing the INPUT button on the remote control repeatedly, or turning the SOURCE knob on the stereo receiver.
3 Press the CONTROL RCV button on the remote control.
4 Press the BAND button repeatedly to select "DAB".

flowchart
graph TD
    A["DAB"] --> B["Station name"]
    B --> C["BBC News"]
Using the auto scan function manually
Using DAB for the very first time
The very first time you use DAB, press the AUTO TUNE button to run the Auto Scan.
If a new DAB station is introduced, or you move to a new area, you can run the Auto Scan function again.
1 Select DAB.
See Selecting DAB above for more on this.
2 Press the CONTROL RCV button on the remote control.
3 Press the AUTO TUNE button.

Selecting DAB stations
1 Select DAB.
See Selecting DAB above for more on this.
2 Press the CONTROL RCV button on the remote control.
3 Press the TUNE ↑/↓ button to select a DAB service.

4 Press the ENTER button to listen to the service.
The station is tuned.
While the primary service is selected, brackets < > are displayed. While the secondary service is selected, brackets () are displayed.

If you select a station that cannot be received properly, "DAB No Tuned" is displayed.

Listening to the DAB (XC-P01DAB only)
Displaying DAB radio information
1 Select DAB.
See Selecting DAB on page 23 for more on this
2 Press the CONTROL RCV button on the remote control.
3 Press the RDS DISP or DISPLAY button repeatedly to display information about the selected DAB station.
Program Type
Displays the type of program.
BBC
News
SNR (Signal Noise Rate)
Noise may be generated and reception quality may become poor according to Signal Noise Rate. If reception quality is poor, move the antenna in different directions to find a position where the good rate is displayed.
BBC
SNR:100
DLS (Dynamic Label Segment)
When tuned to a station which is broadcasting DLS text data, the text will scroll across the display.
BBC
All the late
←--- Scroll
Audio Mode
Displays the audio mode (stereo or mono).
BBC
DAB Stereo
Frequency
Displays the frequency of the current multiplex.
BBC
FREQ:239.200MHz
Multiplex Name
Displays the name of the current multiplex.
BBC
BBC Station
Bitrate
Displays the bit rate.
BBC
BITRATE:192kbps
DAB setup
1 Press the CONTROL RCV button on the remote control.
2 Press the TOP MENU button.
3 Press the ←/→ button to select the item to be set, then press the ENTER button.
The following settings are available for DAB.
DRC
The DRC (Dynamic Range Control) function lets you change the dynamic range of the received sound depending on the content of the broadcast so that the sound is easier to hear even when the volume is low.
Press the ←/→ button to select the following options, and then press the ENTER button.
DRC:Off : DRC is switched off.
Any DRC level broadcast will be ignored. This is the default selling.
DRC:On : Applies DRC level as sent with the broadcast.
Component Reset
Deletes all the stations.
While "Reset: Yes?" appears, press the ENTER button.
Timer and sleep operation
Timer and sleep operation

Setting the wake-up timer
Timer playback:
The unit turns on and plays the desired source (CD, DAB (XC-P01DAB only), TUNER PRESET, NETWORK, DIGITAL IN 1, or DIGITAL IN 2) at a preset time.
Before setting timer:
- Check that the clock is set to the correct time (Setting the clock on page 13). If it is not set, you cannot use the timer function.
- For timer playback: Load a disc to be played.
1 Turn on the stereo receiver.
Refer to To turn the power on on page 13 for details.
2 Press the CONTROL RCV button on the remote control.
3 Pre TIMER buttone
4 P r ←/→ button to select 'Timer Set' within ten seconds, then press ENTER.
When selling the wake-up timer for the first time, only 'Timer Set' is available.
5 Select the source you want to play.
Use ←/→ button to select CD, DAB (XC-P01DAB only)
TUNER PRESET, NETWORK, DIGITAL IN 1, or DIGITAL IN 2 6 Press ENTER.
If TUNER PRESET is selected in step 3, use ←/→ button to select a presel.
7 Set the day(s) of the week.
Use ←/→ button to choose the day(s).
The timer can be set as follows.
EVERYDAY SUNDAY MONDAY
TUESDAY WEDNESDAY THURSDAY
FRIDAY SATURDAY MON-FRI
TUE-SAT SAT-SUN
8 Press ENTER.
9 Set the switch-on time.
Use ←/→ button to set the hour, then press ENTER.
Set the minute in the same way, and then press ENTER.
10 Set the switch-off time.
Set as above, and then press ENTER
11 Use ←/→ button to set the volume.
The volume level that can be set for the wake-up timer is up to 60.
12 Press ENTER.
The TIMER indicator lights, and the settings can be confirmed in the front panel display of the stereo receiver.
13 Turn off the stereo receiver.
Refer to To turn the power on on page 13 for details.
Turning the wake-up timer on/off
If you have already set the wake-up timer, you can switch it on/off.
1 Turn on the stereo receiver.
Refer to To turn the power on on page 13 for details.
2 Press the CONTROL RCV button on the remote control.
3 Press the TIMER button.
4 P r ←/→ button to select 'Timer On' or 'Timer Off' within ten seconds, then press ENTER.
When 'Timer On' is selected, the timer indicator lights, and the settings can be confirmed in the front panel display of the stereo receiver.
5 When 'Timer On' is selected, turn off the stereo receiver.
Refer to To turn the power on on page 13 for details.
Reusing the memorised timer setting
The timer setting will be memorised once it is entered. To reuse the same setting, perform the following operations.
1 Turn on the stereo receiver.
Refer to To turn the power on on page 13 for details.
2 Press the CONTROL RCV button on the remote control.
3 Press the TIMER button.
4 P r ←/→ button to select 'Timer Call' within ten seconds, then press ENTER.
The TIMER indicator lights, and the settings can be confirmed in the front panel display of the stereo receiver.
Sleep operation
Press SLEEP to change the amount of time before the stereo receiver switches into standby (30 min. - 60 min. - 90 min. - Off).
- When the sleep timer is set, "★" displayed in the front panel display of the stereo receiver.
- You can check the remaining sleep time at any time by pressing SLEEP once.
Additional information
Additional information
Troubleshooting chart
Many potential problems can be resolved by the owner without calling a service technician. If something is wrong with this product, check the following before calling your authorized PIONEER dealer or service centre.
General
The clock is not set to the correct time.
→ Did a power failure occur?
→ Reset the clock. (Refer to page 13)
When a button is pressed, the unit does not respond.
→ Have you correctly selected the stereo receiver or CD player using the CONTROL RCV or CONTROL CD button on the remote control before using the function button?
→ Set the unit to the power stand-by mode and then turn it back on.
→ If the unit still malfunctions, reset it. (Refer to page 27)
No sound is heard.
→ Is the volume level set to "Min"?
→ Is the volume muted?
→ Are the headphones connected?
→ Are the speaker wires disconnected?
CD player
Playback does not start.
Playback stops in the middle or is not performed properly.
→ Is the disc loaded upside down?
→ Does the disc satisfy the standards?
→ Is the disc distorted or scratched?
Playback sounds are skipped, or stopped in the middle of a track.
→ Is the unit located near excessive vibrations?
→ Is the disc very dirty?
→ Has condensation formed inside the unit?
Remote control
The remote control does not operate.
→ Is the AC power lead of the unit plugged in?
→ Is the battery polarity correct?
→ Are the batteries dead?
→ Is the distance or angle incorrect?
→ Does the remote control sensor receive strong light?
→ Are the stereo receiver and CD player connected correctly with the supplied remote control cable and RCA audio cable?
Tuner
The radio makes unusual noises continuously.
→ Is the unit placed near the TV or computer?
→ Is the FM aerial placed properly? Move the aerial away from the AC power lead if it is located nearby.
DAB
DAB reception is poor.
→ Check the connections, and adjust the location and position of aerial. After that, execute Auto Scan function manually. (Refer to page 23)
→ If the reception environment changed by removal, etc., execute Auto Scan function manually. (Refer to page 23)
USB
Device cannot be detected.
→ Is there any MP3/WMA/WAV file available?
→ Is the device properly connected?
→ Is it an MTP device?
Playback does not start.
→ Is it a copyright protected WMA file?
→ Is it a false MP3 file?
No sound is produced.
→ The iPod/iPhone/iPad mini is not playing.
→ The iPod/iPhone/iPad mini is not properly connected to the unit.
→ Is the AC power lead of the unit plugged in?
→ Audio of iPod/iPhone/iPad mini cannot be heard via the headphones connected to the unit.
→ Audio of iPod/iPhone/iPad mini is not output from the
COAXIAL OUT socket of the CD player.
iPod/iPhone/iPad mini will not charge.
→ The iPod/iPhone/iPad mini is not making full contact with the connector.
→ The iPod/iPhone/iPad mini is not supported. Refer to
Supported models on page 19 for compatible models.
"This accessory is not made to work with iPhone" or "This accessory is not supported by iPhone" appears on iPhone screen.
→ iPhone is not properly docked.
Condensation
Sudden temperature changes, storage or operation in an extremely humid environment may cause condensation inside the cabinet (CD pickup, etc.) or on the transmitter on the remote control. Condensation can cause the unit to malfunction. If this happens, leave the power on with no disc in the unit until normal playback is possible (about 1 hour). Wipe off any condensation on the transmitter with a soft cloth before operating the unit.
If problem occurs
When this product is subjected to strong external interference (mechanical shock, excessive static electricity, abnormal supply voltage due to lightning, etc.) or if it is operated incorrectly, it may malfunction.
If such a problem occurs, do the following:
1 Set the unit to the stand-by mode and turn the power on again.
2 If the unit is not restored in the previous operation, unplug and plug in the unit again, and then turn the power on.
Note
- If neither operation above restores the unit, clear all the memory by reselling it.
Additional information
Factory reset, clearing all memory
CAUTION
- If iPod/iPhone/iPad mini is connected to the unit, disconnect it.
Important
- Perform the following operations for the stereo receiver and CD player separately to reset both of the stereo receiver and CD player.
1 Turn on the unit.
Refer to To turn the power on on page 13 for details.
2 Select the stereo receiver or CD player by pressing the CONTROL RCV or CONTROL CD button on the remote control.
3 Press the SETUP button.
4 Pre \\ button to select 'Factory Reset'.
5 Press the ENTER button.
6 Pre ←/→ button to select 'RESET OK?'.
7 Press the ENTER button.
The stereo receiver or CD player is restarted automatically.
CAUTION
- This operation will erase all data stored in memory including clock, timer settings, tuner preset, and CD program.
Before transporting the unit
Remove the iPod/iPhone/iPad mini, USB memory device and disc from the unit. Then, set the unit to the power stand by mode. Carrying the unit with iPod/iPhone/iPad mini or USB memory device left docked or discs left inside might damage the unit.
Care of compact discs
Compact discs are fairly resistant to damage, however, mistracking can occur due to an accumulation of dirt on the disc surface. Follow the guidelines below for maximum enjoyment from your CD collection and player.
- Do not write on either side of the disc, particularly the non-label side from which signals are read. Do not mark this surface.
- Keep your discs away from direct sunlight, heat, and excessive moisture.
• Always hold the CDs by the edges. Fingerprints, dirt, or water on the CDs can cause noise or mistracking. If a CD is dirty or does not play properly, clean it with a soft, dry cloth, wiping straight out from the centre, along the radius.
NO


YES
Correct


Cleaning the cabinet
Period cally wipe the cabinet with a soft cloth and a diluted soap solution, then with a dry cloth.
CAUTION
- Do not use chemicals for cleaning (petrol, paint thinner, etc.). It may damage the cabinet.
- Do not apply oil to the inside of the unit. It may cause malfunctions.
Caution for when the unit is installed in a rack with a glass door
Do not press the ▲ OPEN/CLOSE on the remote control to open the disc tray while the glass door is closed. The door will hamper the movement of the disc tray, and the unit could be damaged.
Additional information
About playable music file formats
This CD player supports the following music file formats.
- Note that some file formats are not available for playback although they are listed as playable file formats. Also, the compatibility of file formats varies depending on the type of server. Check with your server to ensure the compatibility of file formats supported by your server.
Category Extension Stream
| MP3^*1 | .mp3 MPEG-1/2 Audio Layer-3 Sampling frequency 32 kHz, 44.1 kHz, 48 kHz | ||
*1 "MPEG Layer-3 audio decoding technology licensed from Fraunhofer IIS and Thomson multimedia."
MP3 is a type of audio codec which is processed by significant compression from the original audio source with very little loss in sound quality.
^2 WMA files are Advanced System Format files that include audio files which are compressed with Windows Media Audio codec. WMA is developed by Microsoft as an audio format file for Windows Media Player.
^23 Supported for USB device only.
Specifications
As part of our policy of continuous improvement, PIONEER reserves the right to make design and specification changes for product improvement without prior notice. The performance specification figures indicated are nominal values of production units. There may be some deviations from these values in individual units.
*The specifications are applicable when the power supply is 230 V.
Stereo receiver
Amplifier section
| RMS power output. | 75 W + 75 W |
| (1 kHz, 0.7 % T.H.D., 4 ohms) |
Guaranteed speaker impedance ..... 4 ohms to 16 ohms
Headphones.....recommended: 32 ohms
Tuner section
| XC-P01: | |
| Frequency range (FM) | 87.5 MHz to 108 MHz |
| Antenna input (FM) | 75 ohms unbalanced |
| XC-P01DAB: | |
| Frequency range (FM) | 87.5 MHz to 108 MHz |
| Frequency range (DAB) | 174.928 MHz to 239.200 MHz(BAND III) |
| Antenna input (DAB/FM) | 75 ohms unbalanced |
Other connectors
| Digital audio input | |
| Coaxial digital input | RCA jack |
| Optical digital input | Optical digital jack |
Miscellaneous
| Power source | AC 220 V to 230 V, 50 Hz |
| Power consumption | |
| Power on | 48 W |
| Power stand-by | 0.3 W or less |
| Dimensions (excluding the foot) | |
| Width | 285 mm |
| Height | 88 mm |
| Depth | 287 mm |
| Weight | 4.1 kg |
Additional information
CD player
Digital audio characteristics
| Frequency range | 4 Hz to 20 kHz |
| S/N ratio | 110 dB |
| Dynamic range | 100 dB |
| Total harmonic distortion | 0.003 % |
Connectors
| Front USB connector | .5 V, 1 A |
| Coaxial digital audio output | RCA jack |
Miscellaneous
| Power source | AC 220 V to 230 V, 50 Hz |
| Power consumption | |
| Power on | 28 W |
| Power stand-by | 0.3 W or less |
| Dimensions (excluding the foot) | |
| Width | 285 mm |
| Height | 88 mm |
| Depth | 257.5 mm |
| Weight | 3.1 kg |
About iPod/iPhone/iPad mini
Made for

iPod

iPhone
"Made for iPod" and "Made for iPhone" mean that an electronic accessory has been designed to connect specifically to iPod or iPhone, respectively, and has been certified by the developer to meet Apple performance standards. Apple is not responsible for the operation of this device or its compliance with safety and regulatory standards. Please note that the use of this accessory with iPod or iPhone may affect wireless performance. iPhone, iPod, iPod nano and iPod touch are trademarks of Apple Inc., registered in the U.S. and other countries. Lightning is a trademark of Apple Inc.
Disclaimer for Third Party Content
Access to content provided by third parties requires a high speed internet connection and may also require account registration and a paid subscription. Third party content services may be changed, suspended, interrupted, or discontinued at any time without notice, and Pioneer disclaims any liability in connection with such occurrences.
Pioneer does not represent or warrant that content services will continue to be provided or available for a particular period of time, and any such warranty, express or implied, is disclaimed.
© 2013 PIONEER CORPORATION
All rights reserved.
http://www.pioneer.co.uk
http://www.pioneer.eu
© 2013 PIONEER CORPORATION.
All rights reserved.
PIONEER CORPORATION
1-1, Shin-ogura, Saiwai-ku, Kawasaki-shi, Kanagawa 212-0031, Japan
PIONEER ELECTRONICS (USA) INC.
P.O. BOX 1540, Long Beach, California 90801-1540, U.S.A. TEL: (800) 421-1404
PIONEER ELECTRONICS OF CANADA, INC.
340 Ferrier Street, Unit 2, Markham, Ontario L3R 2Z5, Canada TEL: 1-877-283-5901, 905-479-4411
PIONEER EUROPE NV
Haven 1087, Keetberglaan 1, B-9120 Melsele, Belgium TEL: 03/570.05.11
PIONEER ELECTRONICS ASIACENTRE PTE. LTD.
253 Alexandra Road, #04-01, Singapore 159936 TEL: 65-6472-7555
PIONEER ELECTRONICS AUSTRALIA PTY. LTD.
5 Arco Lane, Heatherton, Victoria, 3202, Australia, TEL: (03) 9586-6300
PIONEER ELECTRONICS DE MEXICO S.A. DE C.V.
Blvd.Manuel Avila Camacho 138 10 piso Col.Lomas de Chapultepec, Mexico, D.F. 11000 TEL: 55-9178-4270
K002 B3 En
<6517-00000-137-0S>