
X-HM76D - Hi-Fi System PIONEER - Free user manual and instructions
Find the device manual for free X-HM76D PIONEER in PDF.


| Product type | Micro Hi-Fi system |
| Brand | Pioneer |
| Model | X-HM76D |
| Dimensions (W x H x D) | 290 mm x 108 mm x 230 mm |
| Weight | 3.5 kg |
| Power supply | 220-240 V, 50/60 Hz |
| Power consumption | 55 W (standby: < 0.5 W) |
| Supported audio formats | CD, CD-R/RW, MP3, WMA, WAV, FLAC |
| Tuner | DAB+ / FM with RDS |
| Connectivity | Bluetooth, USB (front), AUX input (3.5 mm), headphone output |
| Output power | 2 x 15 W RMS (4 ohms) |
| Speakers | 2-way, bass-reflex |
| Main functions | CD playback, DAB+/FM radio, Bluetooth streaming, clock, timer, equalizer |
| Maintenance and cleaning | Clean with a soft, dry cloth. Do not use abrasive products. |
| Safety | Do not expose to moisture, heat sources or dust. Disconnect before cleaning. |
| Spare parts and repairability | Contact a Pioneer authorized service center. The device is not designed for user repair. |
| Included accessories | Remote control, FM antenna, power cable, user manual |
Frequently Asked Questions - X-HM76D PIONEER
User questions about X-HM76D PIONEER
0 question about this device. Answer the ones you know or ask your own.
Ask a new question about this device
Download the instructions for your Hi-Fi System in PDF format for free! Find your manual X-HM76D - PIONEER and take your electronic device back in hand. On this page are published all the documents necessary for the use of your device. X-HM76D by PIONEER.
USER MANUAL X-HM76D PIONEER
Front Panel ....4 Rear Panel (X-HM76D, X-HM86D, XC-HM86D) ....5
Rear Panel (X-HM76) 6
Remote Controller
Display
Speakers System (X-HM76D, X-HM76) 9
Speakers System (X-HM86D) 10
Install
Connect the Speakers 11
Connecting the antennas and power cord, etc. 12
Initial Setup
Power On & Initial Setup 13
Time settings 16
Playback
Playing CDs 17
USB Storage Device/HDD 19
Internet Radio 21
Spotify 22
Listening to the FM Radio 23
Listening to DAB Digital Radio (X-HM76D, X-HM86D, XC-HM86D) .....26
BLUETOOTH ^® 27
AirPlay ^® 29
Playing audio from an external device 30
Music Server 31
Using the alarm to start play 33
Entering text, adjusting sound quality, etc. 34
Advanced Setup
Advanced Settings....35
Firmware Update
Firmware Update 39
Others
Troubleshooting 41
General Specifications 44
License and Trademark Information 46
> Before Start > Part Names > Install > Initial Setup > Playback
Advanced Setup | Firmware Update | Others
What's in the box
X-HM76D:①②③⑤⑥
X-HM76:12456
X-HM86D:①②③⑤⑥⑦
XC-HM86D:①②③
①

natural_image
Line drawing of a computer monitor with ports and a screen (no text or symbols)Main unit (1)
②

Remote controller (RC-945S) (1), Batteries (AAA/R03) (2)
3

DAB/FM wire antenna (1)
4

Indoor FM antenna (1)
5

natural_image
Two identical rectangular panels with rounded corners, no text or symbols presentSpeaker system (2)
6

natural_image
Two identical illustrations of bundled cables with wires, no text or symbols presentSpeaker cable (1.5 m) (2)

> Before Start > Part Names > Install > Initial Setup > Playback
Advanced Setup | Firmware Update | Others

7

Non-skid pads (8)

- The power cord must be connected only after all other cable connections are completed.
- Connect speakers with 4 Ω to 16 Ω impedance.
- We will not accept responsibility for damage arising from the connection of equipment manufactured by other companies.
- Functionality may be introduced by firmware updates and service providers may cease services, meaning that some network services and content may become unavailable in the future.
- Specifications and appearance are subject to change without prior notice.

Before Start
Part Names
Install
Initial Setup
Playback
Advanced Setup | Firmware Update | Others
Front Panel
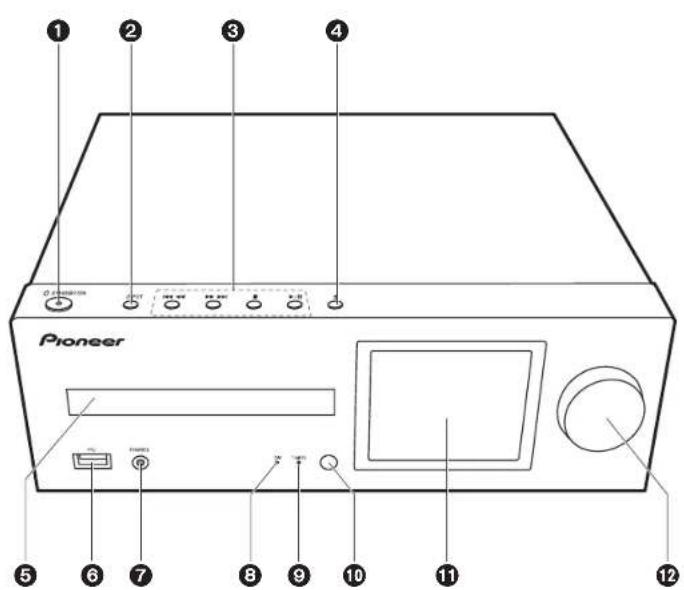
-
⏻ STANDBY/ON button: Turns the unit on or to standby mode.
-
INPUT button: Switches the input to be played.
-
Play button:
|◀◀◀◀ : Return to the beginning of the track being played. Press and hold to rewind the track quickly. (CD)
Move to the previous track. (USB, Music Server)
▶▶▶▶: Move to the next track. Press and hold to fast-forward through the track. (CD) Move to the next track. (USB, Music Server)
■: This button stops playback.
▶/II: This button pauses the playback.
• Depending on the input, the operation may not start.
-
▲ button: Open or close the disc tray.
-
Disc tray: Place discs here. 8-cm discs can also be used.
-
USB port: Connect a USB storage device or HDD (hard disk drive) to play music files. You can also supply power (maximum 5 V/0.5 A) to USB devices with a USB cable.
- When connecting a HDD that requires more than 5 V/0.5 A, connect to the USB port (maximum 5 V/1 A) on the rear of the unit.
-
PHONES jack: Connect stereo headphones with a mini plug.
-
Power indicator: This lights blue when the unit is on.
-
TIMER indicator: This lights when the alarm is set.
-
Remote control sensor
-
Display (→P8)
-
VOLUME dial: Adjust the volume. Adjust between 0 and 50.


Before Start
Part Names
Install
Initial Setup
Playback
Advanced Setup | Firmware Update | Others
Rear Panel (X-HM76D, X-HM86D, XC-HM86D)
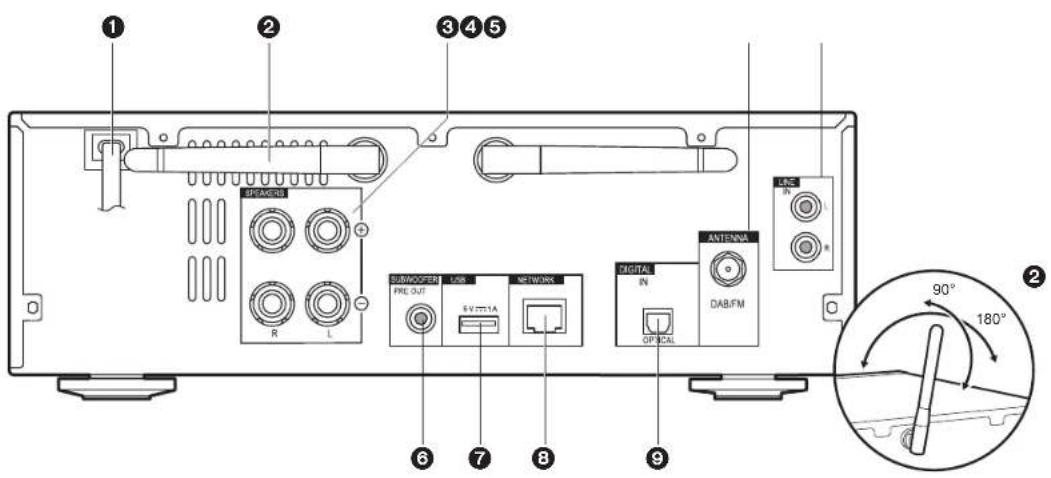
- Power cord
- Wireless antenna: Used for Wi-Fi connection or when using a BLUETOOTH enabled device. Adjust their angles according to the connection status.
- Speaker terminals: Connect speakers with speaker cables.
- DAB/FM ANTENNA jack: Connect the supplied DAB/FM wire antenna.
- LINE IN jack: You can play the audio from an external device such as a television connected with an analogue audio cable.
- SUBWOOFER PRE OUT jacks: Connect a subwoofer with built-in amplifier.
- USB port: Connect a USB storage device or HDD (hard disk drive) to play music files. You can also supply power (maximum 5 V/1 A) to USB devices with a USB cable.
- NETWORK jack: Connect to the network with an ethernet cable.
- DIGITAL IN OPTICAL jack: You can play the digital audio from an external device such as
a television connected with a digital optical cable.
> Part Names
Rear Panel (X-HM76)
1
2
3
4
5
90^
2
180°
6
7
8
9
- Power cord
- Wireless antenna: Used for Wi-Fi connection or when using a BLUETOOTH enabled device. Adjust their angles according to the connection status.
- Speaker terminals: Connect speakers with speaker cables.
- FM ANTENNA jack: Connect the supplied indoor FM antenna.
- LINE IN jack: You can play the audio from an external device such as a television connected with an analogue audio cable.
- SUBWOOFER PRE OUT jacks: Connect a subwoofer with built-in amplifier.
- USB port: Connect a USB storage device or HDD (hard disk drive) to play music files. You can also supply power (maximum 5 V/1 A) to USB devices with a USB cable.
- NETWORK jack: Connect to the network with an ethernet cable.
- DIGITAL IN OPTICAL jack: You can play the digital audio from an external device such as
a television connected with a digital optical cable.
Before Start
Part Names
Install
Initial Setup
Playback
Advanced Setup | Firmware Update | Others
Remote Controller

-
⏻ STANDBY/ON button: Turns the unit on or into standby mode.
-
TIMER button: Used to set the time and set the alarm.
-
SLEEP button: Set the sleep timer. When the time set (30, 60, or 90 minutes) has elapsed, the unit switches to standby. If SLEEP button is pressed after setting, the time remaining until sleep is displayed.
-
INPUT SELECTOR buttons: Switches the input to be played.
-
Play buttons:
◀: Return to the beginning of the track being played. (CD) Move to the track before the one being played. (USB, Music Server)
▶/II: Play or pause play.
▶▶: Move to the next track.
◀◀: Rewind the track quickly. (CD only)
■: Stop playback.
▶▶: Fast-forward the track. (CD only)
• Depending on the input, the operation may not start.
PRESET +/- buttons: Used to select stations that have been registered or to give names to stations.
TUNE +/- buttons: Used to select radio stations.
-
MEMORY button: Used to register favorite radio stations.
-
SHUFFLE/REPEAT button: Set repeat play and shuffle play.
-
MODE button: Used for program play of CDs.
-
Cursors, ENTER button: Select the item with the cursors and press ENTER to confirm.
-
SETUP button: Displays the Setup menu.
-
VOLUME +/- buttons: Adjust the volume. Adjust between 0 and 50.
-
SOUND button: Adjust the sound quality.
-
DIMMER button: Switch the display off or adjust the brightness of the display in three steps.
-
CLEAR button: Used when entering text, etc.
-
i (NOW PLAYING) button: Switches the information on the display.
-
RETURN button: Returns the display to the previous state.
-
MUTE button: Temporarily mutes audio. Press again to cancel muting.

Before Start
Part Names
Install
Initial Setup
Playback
Advanced Setup | Firmware Update | Others
Display

- The input mode is displayed.
(USB Front / USB Rear / CD / Bluetooth / Network / Digital In / Line / Tuner DAB* / Tuner FM)
*X-HM76D, X-HM86D, XC-HM86D - The name of the file, artist, album, station, etc., is displayed.
- Displays the play status.
- Displays file format, sampling frequency, and quantization bit information.
- The file play status is displayed. This may not be displayed depending on the input or file.
- This is displayed when muting is on.
- Displayed when the sleep timer is set.
- Lights in the following conditions.
☐: When the connection setting on the unit is "Wired" and the unit is connected to the network.
X: When the connection setting on the unit is "Wired" and the unit is not connected to the network.
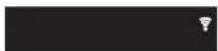
: When the connection setting on the unit is "Wi-Fi" and the unit is connected to the network.
: When the connection setting on the unit is "Wi-Fi" and the unit is not connected to the network. -
If an album jacket is recorded for the file being played, it is displayed here.
-
Lights in the following conditions.
: When all track repeat play is on
: When one track repeat play is on
×: When shuffle play is on
- When DIMMER is pressed to turn off the display, the unit may appear the same as if you had unplugged the unit from the power outlet, but electricity is still being supplied to the unit. To completely cut the unit off from the power supply, you need to unplug the power plug (shutoff device) unit from the power outlet.


Before Start
Part Names
Install
Initial Setup
Playback
Advanced Setup | Firmware Update | Others
Speakers System (X-HM76D, X-HM76)
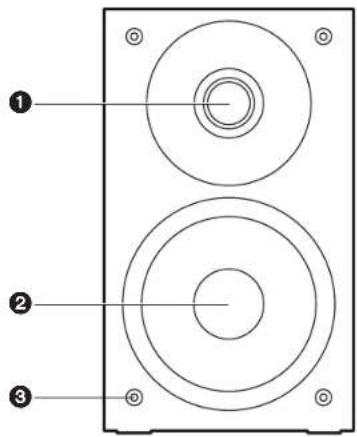


There is no distinction between left and right with the included speaker system. There will be no difference in sound quality whichever side you choose to put each speaker.
-
Speaker terminals: Connect speakers to the main unit with speaker cables.
-
Tweeter: Plays the mid range and treble.
- Woofer: Plays the bass.
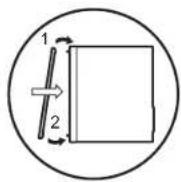
- Grill net fittings: Used to attach the grill nets. When removing the grill net, hold the bottom of the grill net with both hands and pull gently forward, then gently pull the top of the grill out to remove. To attach again, attach the top first, then the bottom.
- Speaker cabinet
- Bass ref duct: This releases the reverberations that occur within the cabinet to enhance the reproductive capabilities of the bass range. Do not block the ducts.
Before Start
Part Names
Install
Initial Setup
Playback
Advanced Setup | Firmware Update | Others
Speakers System (X-HM86D)


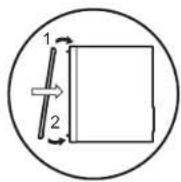
There is no distinction between left and right with the included speaker system. There will be no difference in sound quality whichever side you choose to put each speaker.
- Tweeter: Plays the mid range and treble.
- Woofer: Plays the bass.
- Grill net fittings: Used to attach the grill nets. When removing the grill net, hold the bottom of the grill net with both hands and pull gently forward, then gently pull the top of the grill out to remove. To attach again, attach the top first, then the bottom.
- Speaker cabinet
-
Bass ref duct: This releases the reverberations that occur within the cabinet to enhance the reproductive capabilities of the bass range. Do not block the ducts.
-
Speaker terminals: Connect speakers to the main unit with speaker cables.
Before Start
Part Names
Install
Initial Setup
Playback
Advanced Setup | Firmware Update | Others
Connect the Speakers


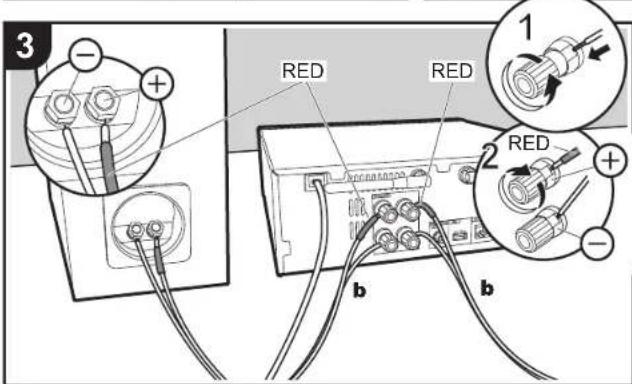
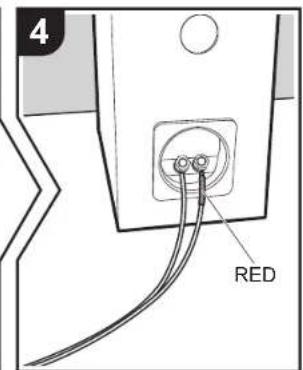
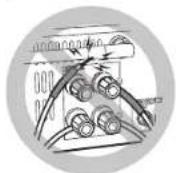
When connecting the speaker system for X-HM76D, X-HM76 or X-HM86D, connect the included speaker cables with ends with the red tubing attached to the + jacks on the main unit and the speaker. If connection is wrong, the phase reverses and this makes it harder to output bass. For XC-HM86D, use the illustration as a reference to connect your own speakers. After inserting the speaker cables, tighten the terminals firmly by turning to the right. Also make sure the exposed wires of the speakers do not stick out of the speaker terminals when connecting. If the exposed wires of the speakers touch the rear panel or the + and - wires touch each other, the protection circuit may be activated and the power may turn off.
You can also connect a subwoofer with a built-in amplifier to boost bass playback even more. Use a subwoofer cable for connection.

natural_image
Illustration of a control panel connected to a speaker unit (no text or symbols visible)a Non-Skid pads, b Speaker cable
Before Start
Part Names
Install
Initial Setup
Playback
Advanced Setup | Firmware Update | Others
Connecting the antennas and power cord, etc.
X-HM76D, X-HM86D, XC-HM86D X-HM76


a DAB/FM wire antenna, b Indoor FM antenna, c Power cord
Antenna Hookup
Move the antenna around while playing the radio to find the position with the best reception.
Power Cord Hookup
Connect the power cord to the power outlet after completing all other connections.
To connect to the network with an ethernet cable, use the NETWORK jack. When using Wi-Fi connection, make settings in initial settings (→P13). You can enjoy features such as internet radio and AirPlay by connecting to the network.

natural_image
Diagram showing two views of a device with a hand interacting with a control panel (no text or symbols present)Before Start
Part Names
Install
Initial Setup
Playback
Advanced Setup | Firmware Update | Others
Power On & Initial Setup

natural_image
Illustration of hands inserting a battery into a device (no text or symbols visible)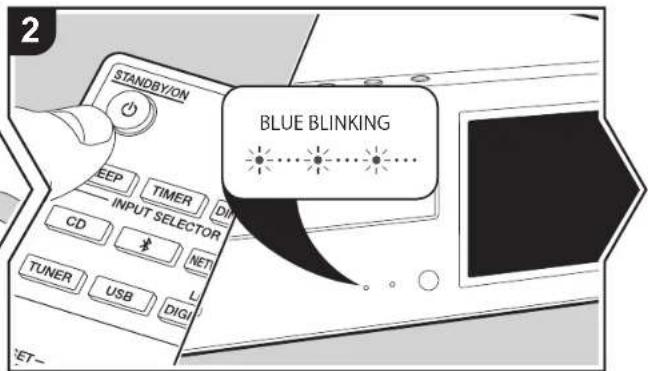

Starting up: When you press ⏻ STANDBY/ON, the power indicator on the main unit slowly blinks blue, then "Hello" is displayed on the display about 20 seconds later. After this, the display goes blank, then after the Pioneer logo is displayed, you can start operating the unit.
Wi-Fi connection settings
When you first turn the power on, the initial setup screen is displayed automatically, allowing you to easily make Wi-Fi connection settings.

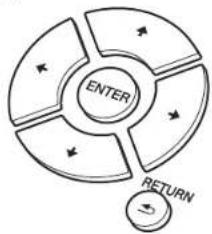
To set, select the item with the cursors on the remote controller and press ENTER to confirm. To return to the previous display, press RETURN.
flowchart
graph TD
    A["ENTER"] --> B["RETURN"]
    B --> C["Return"]
Before Start > Part Names > Install > Initial Setup > Playback
Advanced Setup | Firmware Update | Others
To make Wi-Fi settings, select "Wi-Fi". If you have connected with an ethernet cable, select "Wired(Exit)" and confirm. If you select "Wi-Fi", select the method for setting in the next screen (for example "Scan Networks").

- To redo the initial settings, press SETUP on the remote controller, select "Wi-Fi" in "Network Setting" - "Connection", then select "Wi-Fi Setup".
■ Scan Networks
From the list of SSID for access points such as wireless LAN routers, select the required SSID and make the settings.
- Select the SSID of the access point you want to connect and then confirm.

- Select either "Enter Password" or "Push Button" and confirm. If the access point has an automatic setting button, by selecting "Push Button" you can connect without entering a password.

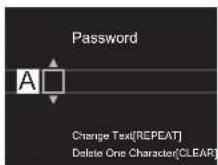
- If you select "Enter Password", enter the password of the access point and press ENTER. For details on how to enter text, refer to "Entering text" (→P34).
If you select "Push Button", then after pressing and holding the automatic setting button on the access point for the required amount of time, press ENTER on the remote controller.
- 📋 displayed when the settings are complete.
■ Use iOS Device
Set by sharing the iOS device's Wi-Fi settings with this unit. 1. Connect the iOS device by Wi-Fi.
- Select this device in the "SET UP NEW AIRPLAY SPEAKER..." item on the screen of the iOS device and select "Next".
• This unit is displayed as "Pioneer HM76D (76 or 86D)
XXXXXX".
-
After establishing the connection, select "Done" on the screen of the iOS device.
-
F displayed on the display of the unit when the settings are complete.

■ Enter SSID of the access point
Set by entering the SSID of the access point you want to connect.
- Enter the SSID. For details on how to enter text, refer to "Entering text" (→P34).

- Select and confirm the authentication method.

- If you select "None", proceed to step 3. If you select "WEP", "WPA", or "WPA2", enter the password and confirm.
- 📋 displayed when the settings are complete.
Before Start
Part Names
Install
Initial Setup
Playback
Advanced Setup | Firmware Update | Others


Before Start
Part Names
Install
Initial Setup
Playback
Advanced Setup | Firmware Update | Others
Time settings

By setting the time, you can use the alarm to start play (→P33). 1. Press TIMER.
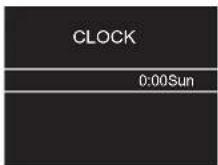
- Press ENTER.
- Set the day of the week with ←/→, then press ENTER.
- In the next screen, use to select either "24H" (24-hour display) or "12H" (12-hour display) and press ENTER.
- In the next screen, set the time with ←/→, then press ENTER.
- In the next screen, set the minutes with / , then press ENTER. Setting ends automatically after a short time.
- Once you have completed the setting, the set time can be displayed for about 10 seconds by pressing TIMER.

Before Start > Part Names > Install > Initial Setup > P I a y b a c k
Advanced Setup | Firmware Update | Others
Playing CDs


flowchart
graph TD
    A["PRESET"] --> B["TUNE"]
    C["PRcSET+"] --> D["TUNE+"]
    E["SHUFFLE"] --> F["REPEAT"]
    G["MEMORY"] --> H["MODE"]
    style A fill:#f9f,stroke:#333
    style C fill:#f9f,stroke:#333
    style E fill:#f9f,stroke:#333
    style G fill:#f9f,stroke:#333
    style B fill:#ccf,stroke:#333
    style D fill:#ccf,stroke:#333
    style F fill:#ccf,stroke:#333
    style H fill:#ccf,stroke:#333
This unit can also play CD-R recorded with MP3 or WMA format files, along with commercially available music CDs.
- The supported sampling rates for MP3 files are 8 kHz to 48 kHz, and supported bitrates are between 64 kbps and 384 kbps.
- The supported sampling rates for WMA files are 32 kHz, 44.1 kHz, and 48 kHz, and supported bitrates are between 64 kbps and 320 kbps.
- Play of CDs not conforming to the CD standards, such as copy control CDs, is not guaranteed.
Playing music CDs
- Turn the unit on.
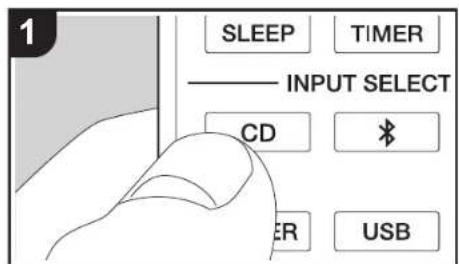
- Press CD to change input to CD.
- Press ▲ on the main unit to open the disc tray.
- Put the disc on the tray, then press ▲ to close the tray.
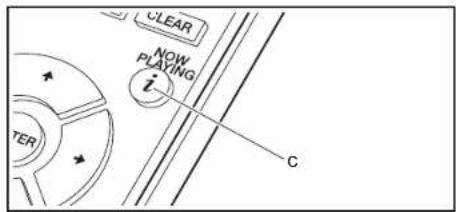
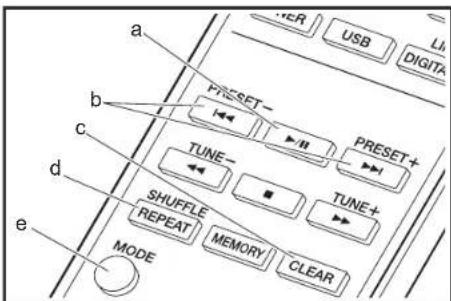
- Press ▶/□ (a) on the remote controller to start play. Use other play buttons (b) to stop play or choose tracks to play. If you press (NOW PLAYING) (c), you can switch the display to show the elapsed time or remaining time of the track.
> Before Start > Part Names > Install > Initial Setup > Play back
Advanced Setup | Firmware Update | Others

Playing MP3/WMA discs
- Turn the unit on.
- Press CD to change input to CD.
- Press ▲ on the main unit to open the disc tray.
- Put the disc on the tray, then press ▲ to close the tray.
- When reading of the disc is complete, the numbers of folders containing MP3/WMA files and track numbers are displayed.

• If MP3/WMA files are stored in two or more folders.
each folder is automatically allocated a number.
-
To start play, press ▶/■ (a) on the remote controller. To select a folder to play, press ←/→ (f) to select the folder. Play starts automatically when you select a folder.
-
Folders that do not contain music files this unit can play are skipped.
- A maximum of 255 folders can be read. This includes folders that contain files this unit cannot play.
Repeat play/Shuffle play
- Repeatedly press SHUFFLE/REPEAT (d) to display
, or on the display.
: Repeat play of all tracks.
: Repeat play of the selected individual track.
×: Play tracks randomly.
To cancel repeat or shuffle play, press SHUFFLE/
REPEAT (d) several times until the icons disappear.
Program play (Music CDs)
You can program up to 32 tracks to play.
1. Press MODE (e).
2. The track number (T--) flashes on the display.

- Press ◄◀/▶▶ (b) to select the track to register and press ENTER (g). Repeat this step to register other tracks. The last track in the program is deleted if you press CLEAR (c).
-
Press ▶/■ (a) to start play.
-
If you press MODE (e) again while play is stopped, the entire program is cleared.
- Shuffle play and 1 track repeat play cannot be used while playing a program.

Before Start > Part Names > Install > Initial Setup > P I a y b a c k
Advanced Setup | Firmware Update | Others
USB Storage Device/HDD


flowchart
graph TD
    A["ENTER"] --> B["PLAYING"]
    B --> C["RETURN"]
    C --> D["PLAYING"]
    style A fill:#f9f,stroke:#333
    style B fill:#ccf,stroke:#333
    style C fill:#cfc,stroke:#333
    style D fill:#fcc,stroke:#333
Basic operations
You can play music files by connecting a USB storage device or HDD (hard disk drive) to the USB port on the front or rear of the unit.
- The USB port on the front supports a maximum 5 V/0.5 A power supply. If the HDD requires more than this, connect to the USB port (maximum 5 V/1 A) on the rear of the unit.
- Turn the unit on.
- Press USB to select either "USB Front" or "USB Rear".

- Plug your USB storage device or HDD into the USB port on the front or rear.
- Folders and music files are displayed on the display when loading is complete.
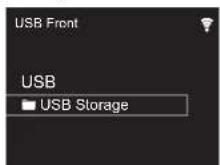
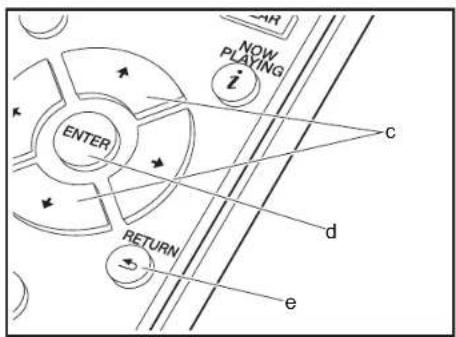
- Select the folder or music file with the cursors (c) of the remote controller and press ENTER (d) to confirm. To return to the previous display, press RETURN (e).
- Use play buttons (a) to stop play or choose tracks to play. • The display of album name, artist name, and album art is supported with MP3/WMA/Apple Lossless/FLAC/AAC/
> Before Start > Part Names > Install > Initial Setup > Play back

Advanced Setup | Firmware Update | Others
DSD (DSF only) format music files. The formats for embedded images are JPEG and PNG.
- Characters that cannot be displayed by this unit appear as "*".
- The USB port of this unit conforms with the USB 2.0 standard. The transfer speed may be insufficient for some content you play, which may cause some interruption in sound.
Repeat/Shuffle
- Repeatedly press SHUFFLE/REPEAT (b) during play to display ☐ or ☐ on the display.
: Repeat play of all tracks.
: Repeat play of the selected individual track.
×: Play tracks in a folder randomly.
To cancel repeat or shuffle play, press SHUFFLE/REPEAT (b) several times until the icons disappear.
USB Storage / HDD Device Requirements
- Note that operation is not guaranteed with all USB storage devices or HDD.
- This unit can use USB storage devices that comply with the USB mass storage device class standard. (However, there are still devices that cannot be played by this unit even if they comply with the USB mass storage class standard.)
- The unit is also compatible with USB storage devices using the FAT16 or FAT32 file system formats. Other formats such as exFAT, NTFS, and HFS cannot be played by this unit.
- If the USB storage device has been partitioned, each section will be treated as an independent device.
- Up to 20,000 tracks per folder can be displayed, and folders may be nested up to 16 levels deep.
-
USB hubs and USB storage devices with hub functions are not supported. Do not connect these devices to the unit.
-
USB storage devices with security function are not supported on this unit.
- If the USB storage device or HDD comes with an AC adapter, we recommend that you use its AC adapter to power it.
• Media inserted to the USB card reader may not be available in this function. Furthermore, depending on the USB storage device, proper reading of the contents may not be possible.
• We accept no responsibility whatsoever for the loss or damage to data stored on a USB storage device when that device is used with this unit. We recommend that you back up your important music files beforehand.
Supported Audio Formats
For server playback and playback from a USB storage device, this unit supports the following music file formats. Note that sound files that are protected by copyright cannot be played on this unit.
MP3 (.mp3/.MP3):
• Supported formats: MPEG-1/MPEG-2 Audio Layer 3
• Supported sampling rates: 44.1 kHz, 48 kHz
• Supported bitrates: Between 8 kbps and 320 kbps and VBR.
WMA (.wma/.WMA):
• Supported sampling rates: 44.1 kHz, 48 kHz
• Supported bitrates: Between 5 kbps and 320 kbps and VBR.
• WMA Pro/Voice/WMA Lossless formats are not supported
WAV (.wav/.WAV):
WAV files include uncompressed PCM digital audio.
• Supported sampling rates: 44.1 kHz, 48 kHz, 88.2 kHz, 96 kHz, 176.4 kHz, 192 kHz
• Quantization bit: 8 bit, 16 bit, 24 bit
AIFF (.aiff/.aif/.aifc/.afc/.AIFF/.AIF/.AIFC/.AFC):
AIFF files include uncompressed PCM digital audio.
• Supported sampling rates: 44.1 kHz, 48 kHz, 88.2 kHz, 96 kHz, 176.4 kHz, 192 kHz
• Quantization bit: 8 bit, 16 bit, 24 bit
AAC (.aac/.m4a/.mp4/.3gp/.3g2/.AAC/.M4A/.MP4/.3GP/
.3G2):
• Supported formats: MPEG-2/MPEG-4 Audio
• Supported sampling rates: 44.1 kHz, 48 kHz, 88.2 kHz, 96 kHz
• Supported bitrates: Between 8 kbps and 320 kbps and VBR.
FLAC (.flac/.FLAC):
• Supported sampling rates: 44.1 kHz, 48 kHz, 88.2 kHz, 96 kHz, 176.4 kHz, 192 kHz
• Quantization bit: 8 bit, 16 bit, 24 bit
Apple Lossless (.m4a/.mp4/.M4A/.MP4):
• Supported sampling rates: 44.1 kHz, 48 kHz, 88.2 kHz, 96 kHz, 176.4 kHz, 192 kHz
• Quantization bit: 16 bit, 24 bit
DSD (.dsf/.dff/.DSF/.DFF):
• Supported formats: DSF/DSDIFF
• Supported sampling rates: 2.8 MHz, 5.6 MHz, 11.2 MHz
> Before Start > Part Names > Install > Initial Setup > P I a y b a c k
Advanced Setup | Firmware Update | Others
Internet Radio

Basic operations
When this unit is connected to a network, you can listen to TuneIn or other preregistered Internet radio services.
Depending on the internet radio service, the user may need to register from their computer first.
-
Turn the unit on.
-
Press NETWORK.

- Select "Tuneln Radio" with the cursors (a) of the remote controller and press ENTER (b) to confirm. After switching the display to the internet radio service, you can select stations with the cursors (a) on the remote controller and press ENTER (b) to confirm. To return to the previous display, press RETURN (c).
Tuneln
You can register a station you have played as a favorite.
-
Press ENTER (b) while playing TuneIn.
-
Select "Add to My Presets" on the display and confirm.
-
To play a favorite, in the top screen of TuneIn, select the registered station in "My Presets" and confirm. To delete favorites, press ENTER (b) during play, select "Remove from My Presets" and confirm.


Before Start > Part Names > Install > Initial Setup > Play back
Advanced Setup | Firmware Update | Others
Spotify


natural_image
Illustration of a finger pressing a speaker icon on a screen (no text or symbols)

Basic Operation
Spotify Connect play is possible by connecting this unit to the same network as a smart phone or tablet. To enable Spotify Connect, install the Spotify application on your smartphone or tablet and create a Spotify premium account.
- Connect the smartphone to the network that this unit is connected to.
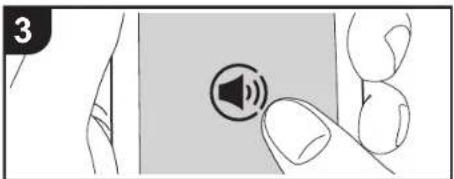
- Click the Connect icon in the track play screen of the Spotify app.
- Select this unit.
- This unit is displayed as "Pioneer HM76D (76 or 86D)XXXXXX"
- This unit turns on automatically and the input selector changes to NETWORK and streaming of Spotify starts. • If "Option Setting" - "Power Off Setting" - "Network Standby" is set to "Off" in the Setup menu, manually turn the unit on and then press NETWORK on the remote controller.
- Refer to the following for Spotify settings: www.spotify.com/connect/
- The Spotify software is subject to third party licenses found here: www.spotify.com/connect/third-party-licenses
The following remote controller operations are also possible.
(a) Pressed during play this button pauses playback. Pressed while paused, and it restarts play.
(b) This button plays the previous track.
(c) This button plays the next track.
(d) Start Repeat or Shuffle play. Pressing this button repeatedly cycles through the repeat/shuffle modes.
Before Start > Part Names > Install > Initial Setup > P I a y b a c k
Advanced Setup | Firmware Update | Others
Listening to the FM Radio

flowchart
graph TD
    a["PRESET"] --> b["TUNE"]
    b --> c["SHUFFLE"]
    c --> d["REPEAT"]
    c --> e["CLEAR"]
    e --> f["MODE"]
    style a fill:#f9f,stroke:#333
    style b fill:#ccf,stroke:#333
    style c fill:#cfc,stroke:#333
    style d fill:#fcc,stroke:#333
    style e fill:#cff,stroke:#333
    style f fill:#ffc,stroke:#333

Tuning Automatically
- Turn the unit on.
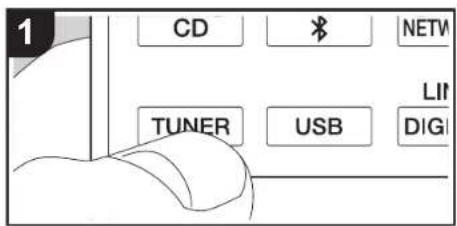
- Repeatedly press TUNER to switch input to Tuner FM.
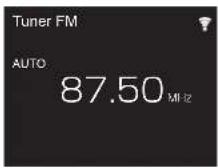
- When you press TUNE +/- (b) on the remote controller, automatic tuning starts, and searching stops when a station is found. "Tuned Stereo" or "Tuned Mono" is displayed when FM stations are being received.
When FM broadcasts are difficult to receive: Perform the procedure for "Tuning Manually". If the "Tuning Mode" is set to "Manual", the reception for FM broadcasts will be monaural rather than stereo, irrespective of the sensitivity of the reception.
Tuning Manually
You will need to change the initial settings. Press SETUP (h) on the remote controller and select "Option Setting" - "Tuner Setting" - "Tuning Mode" - "Manual" on the display and confirm. Press SETUP (h) to finish the settings.
1. Turn the unit on.
2. Repeatedly press TUNER to switch input to Tuner FM.
> Before Start > Part Names > Install > Initial Setup > P I a y b a c k

Advanced Setup | Firmware Update | Others

- Select the station you want to listen to while pressing TUNE +/- (b) on the remote controller.
- The frequency changes by 1 step each time you press the button. The frequency changes continuously if the button is held down and stops when the button is released. Tune by looking at the display.
Registering a station
You can register a maximum of 40 stations.
1. Tune into the radio station you want to register.
2. Press MEMORY (c) on the remote controller so that the preset number on the display flashes.

- While the preset number is flashing (about 8 seconds), repeatedly press PRESET +/- (a) on the remote controller to select a number between 1 and 40.
- Press MEMORY (c) on the remote controller again to register the station. When registered, the preset number stops flashing.
Selecting registered stations
- Repeatedly press TUNER to switch input to Tuner FM.
- Press PRESET +/- (a) on the remote controller to select a preset number.
To delete a registered station
- Repeatedly press TUNER to switch input to Tuner FM.
- Press PRESET +/- (a) on the remote controller to select the preset number you want to delete.
- Press CLEAR (d) on the remote controller to delete the preset number.
To give a name to a registered station
- Repeatedly press TUNER to switch input to Tuner FM.
- Press PRESET +/- (a) on the remote controller to select a preset number.
- Press SETUP (h) on the remote controller.
- Press ♦/♦ (f) on the remote controller to select "Option Setting" - "Tuner Setting" - "Preset Name" and press ENTER (g).
- Enter a name for the station. For details on how to enter text, refer to "Entering text" (→P34).
Using RDS
RDS stands for Radio Data System and is a method of transmitting data in FM radio signals. In regions using RDS, the radio station name is displayed when you tune into a radio station broadcasting program information. When you press MODE (e) on the remote controller in this state, you can use the following functions.
Displaying text information (Radio Text)
- While the name of the station is being displayed on the display, press MODE (e) on the remote controller once. Radio Text (RT) broadcast by the station is displayed scrolling across the display. "Not RDS" is displayed when no text information is available.
• Unusual characters may be displayed when the unit
receives unsupported characters. However, this is not a malfunction. Also, if the signal from a station is weak, information may not be displayed.
Search for stations by Program Type
-
While the name of the station is being displayed on the display, press MODE (e) on the remote controller twice.
-
Press the PRESET +/− (a) on the remote controller to select the Program Type you want to find, then press ENTER (g) to start the search.
The Program Types displayed are as follows:
None
News (News reports)
Current affair
Information
Sport
Education
Drama
Cultures
Science (Science and technology)
Varied speech
Pop music
Rock music
Easy listening
Light classics
Serious classi (Serious classics)
Other music
Weather & metr
Finance
Children's pro (Children's programmes)
Social affairs
Religion
Phone in
Travel & touri
Leisure & hobb
Jazz music
Country music
Nation music
Oldies music
> Before Start > Part Names > Install > Initial Setup > Play back
Advanced Setup | Firmware Update | Others
Folk music
Documentary
- The information displayed may sometimes not match the content being broadcast by the station.
-
"FINISH" is displayed when a station is found and the frequency display flashes. Press ENTER (g) while this is happening to start receiving that station. If you don't press ENTER (g), the unit continues to search for another station.
-
If no stations are found, the message "Not Found" is displayed.
- Unusual characters may be displayed when the unit receives unsupported characters. However, this is not a malfunction. Also, if the signal from a station is weak, information may not be displayed.


> Before Start > Part Names > Install > Initial Setup > P I a y b a c k
Advanced Setup | Firmware Update | Others
Listening to DAB Digital Radio (X-HM76D, X-HM86D, XC-HM86D)

Tuning
- Turn the unit on.
- Repeatedly press TUNER to switch input to Tuner DAB.
- The very first time you select Tuner DAB, the Auto Tuning function automatically scans the DAB Band 3 for the multiplexes (i.e., stations) available in your area.
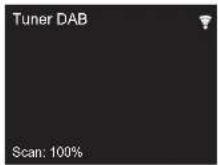
- Once the scanning process is complete, the first station that was detected is selected.
-
If a new DAB station is introduced, or you move to a new area, press SETUP on the remote controller, then use "DAB Scan" in "Option Setting" - "Tuner Setting".
-
Select the desired radio station with the cursors (c) on the remote controller.
Changing the order stations are displayed
You can sort the abailable stations alphabetically or by multiplex.
- Press MODE (a) repeatedly to set the method for sorting the display order from the following.
Alphabet (default setting) : Sort stations alphabetically. Multiplex : Sort stations by multiplex.
Displaying DAB Radio Information
- Press the iNOW PLAYING) button (b) repeatedly to display more information about the selected DAB station.
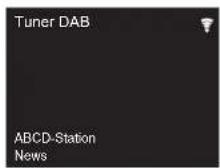
DLS (Dynamic Label Segment) : When tuned to a station that's broadcasting DLS text data, the text will scroll across the display.
Program Type : Displays the type of program.
Bit Rate and Audio Mode : Displays the station's bit rate and audio mode (Stereo, Mono).
Quality : Displays the signal quality.
0 - 59: Poor reception
60 - 79: Good reception
80 - 100: Excellent reception
Multiplex Name : Displays the name of the current multiplex.
Multiplex Number and Frequency : Displays the number and frequency of the current multiplex.
Before Start > Part Names > Install > Initial Setup > Play back
Advanced Setup | Firmware Update | Others
BLUETOOTH®
Playing BackPairing


natural_image
Illustration of a hand holding a tablet with a play button, no text or symbols presentPairing
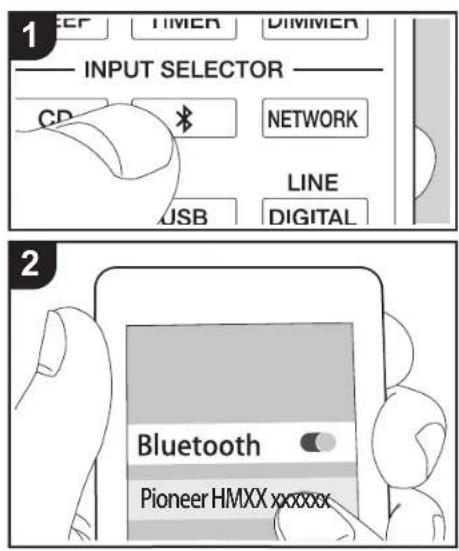
- Turn the unit on.
- When you press the button on the remote controller, "Now Pairing..." is displayed on the display, and the pairing mode is enabled.

- Enable (turn on) the BLUETOOTH function of the BLUETOOTH enabled device, then select this unit from amongst the devices displayed. If a password is requested, enter "0000". • This unit is displayed as "Pioneer HM76D (76 or 86D) XXXXXX".
- "Now Pairing..." on the display changes to the name of the BLUETOOTH enabled device.
- To connect another BLUETOOTH enabled device, press and hold the button until "Now Pairing..." is displayed, then perform step 3 above. This unit can store the data of up to eight paired devices.
- The coverage area is 10 meters. Note that connection is not always guaranteed with all BLUETOOTH enabled devices.
Playing Back
- Turn the unit on.
- Perform the connection procedure on the BLUETOOTH enabled device.
- The input selector on this unit automatically switches to "Bluetooth".
Before Start > Part Names > Install > Initial Setup > Play back
Advanced Setup | Firmware Update | Others
- Play the music files. Increase the volume of the BLUETOOTH enabled device to an appropriate
- Due to the characteristics of BLUETOOTH wireless technology, the sound produced on this unit may slightly be behind the sound played on the BLUETOOTH enabled device.


Before Start > Part Names > Install > Initial Setup > P I a y b a c k
Advanced Setup | Firmware Update | Others
AirPlay®


natural_image
Illustration of a hand pressing a play button on a square (no text or symbols)Basic Operation
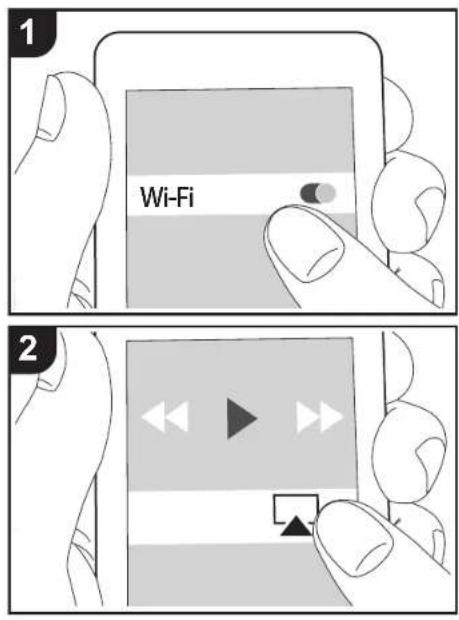
You can wirelessly enjoy the music files on an iPhone ^® , iPod touch ^® , or iPad ^® connected to the same access point as this unit. Update the OS version on your iOS device to the latest version.
- Turn the unit on.
- Connect the iOS device to the same network as this unit.
- Tap the AirPlay icon in the control center of the iOS device and select this unit from the list of devices displayed, and tap "Done".
- This unit is displayed as "Pioneer HM76D (76 or 86D)XXXXXX".
- If an "AirPlay Password" has been set on this unit, enter the password you set.
-
Play the music files on the iOS device
-
In the Setup menu displayed by pressing SETUP on the remote controller, when "Option Setting" - "Power Off Setting" - "Network Standby" is set to "On", when play of AirPlay starts, this unit turns on automatically and play starts.
- Due to the characteristics of AirPlay wireless technology, the sound produced on this unit may slightly be behind the sound played on the AirPlay-enabled device.
- SHUFFLE/REPEAT on the remote controller does not work. Operate from the iOS device.
You can also play the music files on a computer with iTunes (Ver. 10.2.2 or later). Make sure this unit and the computer are connected to the same network, click the AirPlay icon in iTunes, select this unit from the list of devices displayed, and start play of a music file.
Before Start > Part Names > Install > Initial Setup > P I a y b a c k
Advanced Setup | Firmware Update | Others
Playing audio from an external device
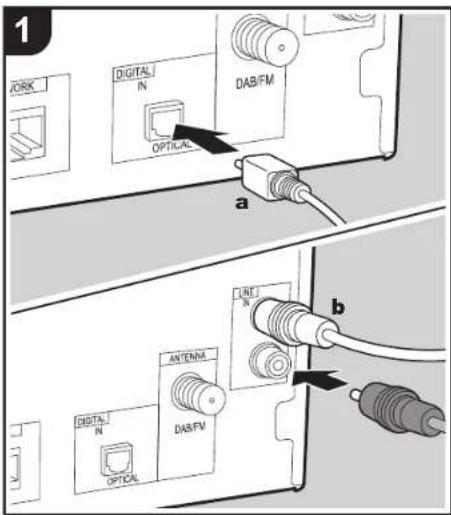

a Digital optical cable, b Analogue audio cable
Connections
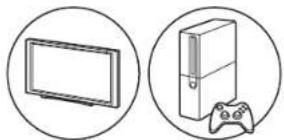
You can play the audio from external devices such as TVs and game consoles through this unit. If the external device has an optical digital output terminal, connect using a digital optical cable to the DIGITAL IN OPTICAL terminal on this unit. When the external device is to be connected with an analog audio cable, connect to the LINE IN jack on this unit.
natural_image
Two circular icons: one showing a flat-screen monitor, the other showing a game controller with a hand (no text or symbols)Playing Back
- Turn the unit on.
- When playing a device connected to the DIGITAL IN OPTICAL terminal, press LINE/DIGITAL repeatedly to change the input on this unit to "Digital In".

When playing a device connected to the LINE IN terminal, press LINE/DIGITAL repeatedly to change the input on this unit to "Line".
- Start play on the player.
- When connected by a digital optical cable, this unit supports linear PCM signals of up to 192 kHz/24 bits for input.
> Before Start > Part Names > Install > Initial Setup > Play back

Advanced Setup | Firmware Update | Others
Music Server


It is possible to stream music files stored on PCs or NAS devices connected to the same network as this unit. The network servers this unit is compatible with are those PCs with players installed that have the server functionality of Windows Media® Player 11 or 12, or NAS that are compatible with home network functionality. You may need to make some settings in advance to use Windows Media® Player 11 or 12. Note that only music files registered in the library of Windows Media® Player can be played.
Configuring Windows Media® Player
Windows Media Player 11
- Tum on your PC and start Windows Media® Player 11.
- In the "Library" menu, select "Media Sharing" to display a dialog box.
- Select the "Share my media" check box, and then click "OK" to display the compatible devices.
- Select this unit, click "Allow" and put a check mark next to the icon for this unit.
- Click "OK" to close the dialog.
- Depending of the version of Windows Media Player, there may be differences in the names of items you can select.
Windows MediaPlayer 12
- Turn on your PC and start Windows Media® Player 12.
- In the "Stream" menu, select "Turn on media streaming" to display a dialog box.
- If media streaming is already turned on, select "More streaming options..." in the "Stream" menu to list players in the network, and then go to step 4.
- Click "Turn on media streaming" to list players in the network.
- Select this unit in "Media streaming options" and check that it is set to "Allow".
- Click "OK" to close the dialog.
• Depending of the version of Windows Media Player,
there may be differences in the names of items you can select.
Playing
- Turn the unit on.
- Start the server (Windows Media® Player 11, Windows Media® Player 12, or NAS device) containing the music files to play.
- Make sure that the PCs and/or NASs are properly connected to the same network as this unit.
- Press NETWORK to display the network service list screen.

- With ♦/▼ (a), select "Music Server", and then press ENTER (b).
- Select the server and music file with ♦/♦ (a) and press ENTER (b) to confirm. To return to the previous display, press RETURN (c).
- If "No Server" is displayed, check whether the network is properly connected.
- Depending on the server being used and the files played, elapsed play time and remaining play time may not be displayed.
- For music files on a server, there can be up to 20,000 tracks per folder, and folders may be nested up to 16 levels deep.
Controlling Remote Playback from a PC
> Before Start > Part Names > Install > Initial Setup > Play back
Advanced Setup | Firmware Update | Others
You can use this unit to play music files stored on your PC by operating the PC inside your home network. The unit supports remote playback with Windows Media® Player 12.
- Turn on your PC and start Windows Media® Player 12.
- Open the "Stream" menu and check that "Allow remote control of my Player..." is checked. Click "Turn on media streaming" to list players in the network.
- Select and right-click the music file to play with Windows Media® Player 12. To remotely play a music file on another server, open the target server from "Other Libraries" and select the music file to play.
- Select this unit in "Play to" to open the "Play to" window of Windows Media ^® Player 12 and start playback on the unit. If your PC is running on Windows ^® 8.1, click "Play to", and then select this unit. If your PC is running on Windows ^® 10, click "Cast to Device", and select this unit. Operations during remote playback are possible from the "Play to" window on the PC.
-
Adjust the volume using the volume bar on the "Play to" window.
-
Sometimes, the volume displayed on the remote playback window may differ from that appeared on the display of the unit. Also, when the volume is adjusted from this unit, this is not reflected in the "Play to" window.
- Remote playback is not possible when using a network service or playing music files on a USB storage device.
- Depending of the version of Windows Media Player, there may be differences in the names of items you can select.
Supported Audio Formats
For server playback and playback from a USB storage device, this unit supports the following music file formats.
- Note that playback via wireless LAN of sampling rates of 88.2 kHz or higher, and DSD are not supported.
- Remote play of FLAC, and DSD is also not supported.
• Variable bit-rate (VBR) files are supported. However,
playback times may not be displayed correctly.
- Remote playback does not support the gapless playback.
MP3 (.mp3/.MP3):
- Supported formats: MPEG-1/MPEG-2 Audio Layer-3
- Supported sampling rates: 44.1 kHz, 48 kHz
• Supported bitrates: Between 8 kbps and 320 kbps and VBR.
WMA (.wma/.WMA):
• Supported sampling rates: 44.1 kHz, 48 kHz
• Supported bitrates: Between 8 kbps and 320 kbps and VBR.
- WMA Pro/Voice/WMA Lossless formats are not supported.
WAV (.wav/.WAV):
WAV files include uncompressed PCM digital audio.
• Supported sampling rates: 44.1 kHz, 48 kHz, 88.2 kHz, 96 kHz, 176.4 kHz, 192 kHz
• Quantization bit: 8 bit, 16 bit, 24 bit
AIFF (.aiff/.aif/.aifc/.afc/.AIFF/.AIF/.AIFC/.AFC):
AIFF files include uncompressed PCM digital audio.
• Supported sampling rates: 44.1 kHz, 48 kHz, 88.2 kHz, 96 kHz, 176.4 kHz, 192 kHz
• Quantization bit: 8 bit, 16 bit, 24 bit
AAC (.aac/.m4a/.mp4/.3gp/.3g2/.AAC/.M4A/.MP4/.3GP/.3G2):
• Supported formats: MPEG-2/MPEG-4 Audio
• Supported sampling rates: 44.1 kHz, 48 kHz, 88.2 kHz, 96 kHz
• Supported bitrates: Between 8 kbps and 320 kbps and VBR.
FLAC (.flac/.FLAC):
• Supported sampling rates: 44.1 kHz, 48 kHz, 88.2 kHz, 96 kHz, 176.4 kHz, 192 kHz
• Quantization bit: 8 bit, 16 bit, 24 bit
LPCM (Linear PCM):
• Supported sampling rates: 44.1 kHz, 48 kHz
• Quantization bit: 16 bit
Apple Lossless (.m4a/.mp4/.M4A/.MP4):
• Supported sampling rates: 44.1 kHz, 48 kHz, 88.2 kHz, 96 kHz, 176.4 kHz, 192 kHz
• Quantization bit: 16 bit, 24 bit
DSD (.dsf/.dff/.DSF/.DFF):
• Supported formats: DSF/DSDIFF
• Supported sampling rates: 2.8 MHz, 5.6 MHz, 11.2 MHz
FLAC (.flac/.FLAC):
> Before Start > Part Names > Install > Initial Setup > Play back

Advanced Setup | Firmware Update | Others
Using the alarm to start play

Settings
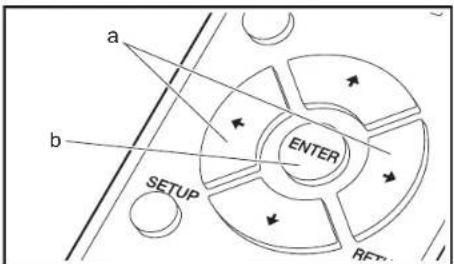
At the set time, the unit switches on and starts play of the desired source. You can set two different timers, "TIMER 1" and "TIMER 2". Make sure that the clock on this unit is set correctly. You cannot use the timers if the clock has not been set.
- Press and hold TIMER for 2 seconds.

To set "TIMER 1", proceed to step 2. To set "TIMER 2", press TIMER once more.
-
Press ENTER (b) when "Timer Set" is displayed.
-
Press (a) to select the source to use for timer play, then press ENTER (b).
The sources you can select are "CD", "FM" and "DAB" (X-HM76D, X-HM86D, XC-HM86D). When you select "FM", press ◀/→ (a) to select a preset station and press ENTER (b). When you select "DAB", the service last used is received.
- Press ←/→ (a) to select "Every" or "Once" and press ENTER (b).
If you select "Every", select days of the week from amongst "Everyday", "Sunday", "Monday", "Tuesday", "Wednesday", "Thursday", "Friday", "Saturday", "Mon-Fri", "Tue-Sat", and "Sat-Sun" and confirm. If you select "Once", select a day of the week from amongst "Sunday", "Monday", "Tuesday", "Wednesday", "Thursday", "Friday", or "Saturday" and confirm.
-
Press ←/→ (a) to set the start time for the alarm and press ENTER (b).
-
Press (a) to set the end time for the alarm and press ENTER (b).
- Press / (a) to set the volume (0 to 50) for the alarm and press ENTER (b).
- The TIMER indicator lights when the settings are complete, and the content you set is displayed on the display.
- Press ⏻ STANDBY/ON to switch the unit to standby.
Check whether the alarm setting is On or Off: When the TIMER indicator is on and red, the alarm is on. The alarm is off if the indicator is off.
Turning the alarm setting On or Off: If the alarm is already set, you can turn the function on or off. 1. Press and hold TIMER for 2 seconds.
- "TIMER 1" is displayed. To modify "TIMER 1", proceed to step 3. To modify "TIMER 2", press TIMER once more.
- To turn off, press ENTER (b) when "Timer Off" is displayed.
- To turn on, press ENTER (b) when "Timer On" is displayed.
- Press ←/→ (a) to select "Timer Call", then press ENTER (b) to check the content you set.
- Press ⏻ STANDBY/ON to switch the unit to standby.

> Before Start > Part Names > Install > Initial Setup > P I a y b a c k
Advanced Setup | Firmware Update | Others
Entering text, adjusting sound quality, etc.

flowchart
graph TD
    A["SHUFFLE REPEAT"] --> B["MEMORY"]
    B --> C["CLEAR"]
    D["TUNE+"] --> E["Arrow to top right"]
    F["MODE"] --> G["Arrow left"]
    H["a"] --> I["b"]

Entering text
Text entry, for passwords, etc., uses the following remote controller buttons.
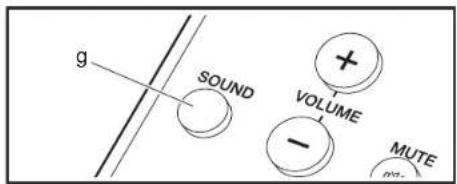
SHUFFLE/REPEAT button (a): Each press changes text type in the order upper case → lower case → numbers → symbols.
+/↓ buttons (c): Each press changes the character.
←/→ buttons (d): Move the position (cursor position) where the character is to be entered.
CLEAR button (b): Deletes the character in the cursor position.
ENTER button (e): Confirms the entered content.
RETURN button (f): Cancels input and returns you to the previous display.

Adjusting the sound quality
Adjusting the bass (BASS)
- Press SOUND button (g)
- Press ←/→ buttons (d) to adjust the bass. (-5 to +5)
Adjusting the treble (TREBLE)
- Press SOUND button (g) twice.
- Press ←/→ buttons (d) to adjust the treble. (-5 to +5)
Emphasizing the low range (P.BASS)
- Press SOUND button (g) three times.
- Press ←/→ buttons (d) to select "On" and press ENTER (e).
> Before Start > Part Names > Install > Initial Setup > Playback
Advanced Setup | Firmware Update | Others
Advanced Settings
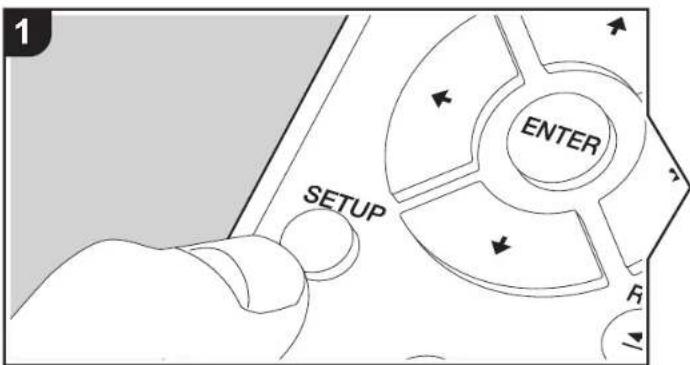
The unit allows you to configure advanced settings to provide you with an even better experience.
- Press SETUP on the remote controller.

- After the Setup screen is displayed, select the content or the setting with the cursors on the remote controller and press ENTER to confirm your selection. To return to the previous screen, press RETURN.
- To exit the settings, press SETUP.

flowchart
graph TD
    A["ENTER"] --> B["RETURN"]
    B --> C["OK"]
Network Setting
■ Connection
Select the type connection to the network.
"Wi-Fi": To connect via wireless LAN
"Wired" (Default Value): To connect via wired LAN
Perform "Wi-Fi Setup" if you select "Wi-Fi".
■ Wi-Fi Setup
> Before Start > Part Names > Install > Initial Setup > Playback
Advanced Setup | Firmware Update | Others
Make Wi-Fi connection settings. (→P13)
This can be set only when "Wi-Fi" is selected in "Connection".
- You can make Wi-Fi connection settings using a web browser on a computer. For details, refer to "Web Setup" (→P38).
DHCP
"On" (Default Value): Auto configuration by DHCP
"Off": Manual configuration without DHCP
If selecting "Off", you must set "IP Address", "Subnet Mask", "Gateway", and "DNS Server" manually.
IP Address
Displays/Sets the IP address.
Subnet Mask
Displays/Sets the subnet mask.
Gateway
Displays/Sets the gateway.
DNS Server
Displays/Sets the primary DNS server.
Proxy URL
Displays/Sets the proxy server URL.
■ Proxy Port
Displays/Sets the proxy server port number when you enter "Proxy URL".
■ Friendly Name
Change the device name for this unit which is shown on other devices connected to the network to an easily recognized name. You can input up to 31 characters. For details on how to enter text, refer to "Entering text" (→P34). After finishing input, press ENTER.
AirPlay Password
You can set a password of up to 31 characters so that only registered users can use AirPlay.
For details on how to enter text, refer to "Entering text" (→P34). After finishing input, press ENTER.
Network Check
You can check the network connection.
Option Setting
■ Power Off Setting
| Auto Standby | This setting places the unit on standby automatically after 20 minutes of inactivity without any audio input."On" (Default Value): The unit will automatically enter standby mode."Off": The unit will not automatically enter standby mode. |
| Network Standby | When this feature is turned "On", you can turn on the power of the unit via the network using an application that can control this unit .Setting to "On" (Default Value) increases the power consumption even when the unit is on standby."Network Standby", which suppresses power consumption, may be disabled when the network connection is lost. |
| Bluetooth Wakeup This function wakes up the unit on standby by connecting a BLUETOOTH enabled device."On": Use this function"Off" (Default Value): Do not use this functionSetting to "On" increases the power consumption even when the unit is on standby.This setting is fixed to "Off" if "Bluetooth Setting" - "Auto Input Change" is set to "Off". | |
Digital Filter
"Slow": Soft and fluid sound
"Sharp" (Default Value): Sound with more structure and firmness
"Short": Sound that starts quick and seems to move forward
Language
> Before Start > Part Names > Install > Initial Setup > Playback
Advanced Setup | Firmware Update | Others
Select the language displayed on the display.
English (Default Value), German, French, Spanish, Italian, Dutch, Swedish, Russian,
Chinese
Tuner Setting
| Tuning Mode Set the tuning method for the radio. | |
| "Auto" (Default Value): Radio stations that can be received are tuned automatically."Manual": Tune to stations manually. If the "Tuning Mode" is set to"Manual", the reception for FM broadcasts will be monaural rather than stereo, irrespective of the sensitivity of the reception. | |
| FM Search Level* | You can choose to have only those FM stations with strong reception selected when tuning into stations automatically if tuning regularly stops on FM stations with weak reception."Normal" (Default Value)"Strong": Select only stations with strong reception. |
| DAB Scan× | You can run the auto scan when new DAB stations are added or when you move house. |
| DAB DRC× | With the DRC (Dynamic Range Control) setting, you can reduce the dynamic range of DAB digital radio so that you can still hear quiet parts even when listening at low volume levels - ideal for listening to the radio late at night when you don't want to disturb anyone."0" (Default Value): DRC off"1": Large reduction in dynamic range"1/2": Small reduction in dynamic range |
| Preset Name | You can give names to the stations that you have registered. For details on how to enter text, refer to " Entering text" (→P34). After finishing input, press ENTER. |
* X-HM76D, X-HM86D, XC-HM86D
Bluetooth Setting
| Bluetooth Select whether | or not to use the BLUETOOTH function."On" (Default Value): Enables connection with a BLUETOOTH enabled device by using the BLUETOOTH function. Select "On" also when making various BLUETOOTH settings."Off": When not using the BLUETOOTH function |
| Auto Input Change The | input of the unit will automatically be switched to"BLUETOOTH" when connection is made from a BLUETOOTH enabled device to the unit."On" (Default Value): The input will automatically become"BLUETOOTH" when a BLUETOOTH enabled device is connected."Off": The function is disabled.If the input is not switched automatically, set to "Off" and change the input manually. |
| Auto Reconnect | This function automatically reconnects to the BLUETOOTH enabled device connected last when you change the input to"BLUETOOTH"."On" (Default Value): Use this function"Off": Do not use this functionThis may not work with some BLUETOOTH enabled devices. |
| Pairing Information You | can initialize the pairing information saved on this unit.Press ↕/♦ to select "Clear", then press ENTER to initialize the pairing information stored in this unit.This function does not initialize the pairing information on the BLUETOOTH enabled device. When pairing the unit again with the device, be sure to clear the pairing information on the BLUETOOTH enabled device in advance. For information on how to clear the pairing information, refer to the BLUETOOTH enabled device's instruction manual. |
System Info
The MAC address of this unit and the current firmware version will be displayed.
> Before Start > Part Names > Install > Initial Setup > Playback
Advanced Setup | Firmware Update | Others

Factory Reset
Reset the settings of this unit to the status at the time of shipment. We recommend that you take a note of the settings you have changed before going ahead with a factory reset. Select "Start" and confirm to go ahead. The unit will be placed on standby automatically when initializing is completed.
Update
"Update" is not displayed if there are no firmware updates.
via Network
Press ENTER to select when you want to update the firmware via network.
via USB
Press ENTER to select when you want to update the firmware via USB.
Web Setup
You can make Wi-Fi connection settings using a web browser on a computer. Be sure your computer is connected to the router wirelessly. If this unit is connected to the router using ethernet cable, you can not do this setting.
- Turn the unit on.
- Press SETUP on the remote controller, select "Wi-Fi" in "Network Setting" - "Connection", then select "Wi-Fi Setup".
-
Press ♦/▼ to select "Use iOS Device" and press ENTER.
-
In the list of wireless LAN connections on your computer, select SSID of this unit (softap_0009B0xxxxxx).
- "xxxxxx" in SSID is the lower three bytes of the MAC address.
-
Open the web browser on your computer and access http://192.168.200.1.
-
The "Web Setup" menu is displayed. Make network settings for this unit.
- Depending on the equipment being used or connection environment, this function may not work.
- Consult the appropriate operating instructions for information regarding operation of the computer.
- Since this kind of connection is not encoded, a minor security risk may be involved.

> Before Start > Part Names > Install > Initial Setup > Playback
Advanced Setup | Firmware Update | Others

Firmware Update
The updating function on this unit
This unit has functionality to update the firmware (the system software) over a network or by the USB port. This enables us to make improvements to a variety of operations and to add features.
For details about the updated play features, see here.
How to update
There are two methods for updating the firmware: via network and via USB. The update may take about 5 minutes to complete for either method: via network or via USB. Furthermore, existing settings are guaranteed regardless of the method used for update.
- For the latest information on updates, visit our company's website. There is no need to update the firmware on this unit if there is no update available.
- When performed over the network, it may take even more time depending on the connection status.
- During an update, do not
- Disconnect and reconnect any cable or USB storage device, or perform any operation on the component such as turn off its power
- Accessing this unit from a PC or smartphone using an application
Disclaimer: The program and accompanying online documentation are furnished to you for use at your own risk. We will not be liable and you will have no remedy for damages for any claim of any kind whatsoever concerning your use of the program or the accompanying online documentation, regardless of legal theory, and whether arising in tort or contract.
In no event will we be liable to you or any third party for any special, indirect, incidental, or consequential damages of any kind, including, but not limited to, compensation, reimbursement or damages on account of the loss of present or prospective profits, loss of data, or for any other reason whatsoever.
Updating the Firmware via Network
- Check that the unit is turned on, and the connection to the Internet is secured.
-
Turn off the controller component (PC etc.) connected to the network.
-
Stop any playing Internet radio, USB storage device, or server content.
- The setup screen is displayed on the display when SETUP on the remote controller is pressed.

- Press ♦/♦ and ENTER to select "Update" - "via Network" in order.

- "Update" is not displayed if there are no firmware updates.
- Press ENTER to start the firmware update.
- "COMPLETE" is displayed when the update is complete.
- Press ⏻ STANDBY/ON on the main unit to switch the unit to standby. The process is completed and your firmware is updated to the latest version.
If an error message is displayed: When an error occurs, "*-* * Error!" is displayed on the display of this unit. ("*" represents an alphanumeric character.) Check the following:
> Before Start > Part Names > Install > Initial Setup > Playback

Advanced Setup | Firmware Update | Others
- * -01, * -10: Ethernet cable not found. Connect the Ethernet cable properly.
- *-02, *-03, *-04, *-05, *-06, *-11, *-13, *-14, *-16, *-17, *-18, *-20, *-21: Internet connection error. Check the following:
- The router is turned on
- This unit and the router are connected via the network. Try to disconnect and then connect again the power to the unit and router. This may solve the problem. If you are still unable to connect to the Internet, the DNS server or proxy server may be temporarily down. Check the service status with your ISP provider.
- Others: Disconnect then reconnect the AC power cord, then repeat from the beginning.
Updating via USB
• Prepare a 128 MB or larger USB storage device. FAT16 or FAT32 file system format.
- Delete any data stored on the USB storage device.
- Turn off the controller component (PC etc.) connected to the network.
- Stop any playing Internet radio. USB storage device, or server content.
- Some USB storage devices may take long to load, may not be loaded correctly, or may not be correctly fed depending on the device or their content.
- We will not be liable whatsoever for any loss or damage of data, or storage failure arising from the use of the USB storage device with this unit. Thank you for your understanding.
-
Connect the USB storage device to your PC.
-
Download the firmware file from our company's website to your PC and unzip.
Firmware files are named in the following way:
PIOHIM **** ******* ******.zip Unzip the file on your PC. The number of unzipped files and folders varies depending on the model.
- Copy all unzipped files and folders to the root folder of
the USB storage device.
Make sure to copy the unzipped files.
- Connect the USB storage device to the USB port of this unit.
- If you connect a USB hard disk drive to the USB port of the unit, we recommend that you use its AC adapter to power it.
-
If the USB storage device has been partitioned, each section will be treated as an independent device.
-
The setup screen is displayed on the display when SETUP button on the remote controller is pressed.

- Press ♦/▼ and ENTER to select "Update" - "via USB" in order.
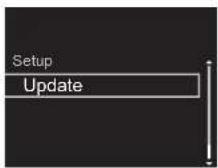
- "Update" is not displayed if there are no firmware updates.
- Press ENTER to start the firmware update.
- "COMPLETE" is displayed when the update is complete.
- Press ⏻ STANDBY/ON on the main unit to switch the unit to standby. The process is completed and your
firmware is updated to the latest version.
- Remove the USB storage device from this unit.
If an error message is displayed: When an error occurs, "* - ** Error!" is displayed on the display of this unit. Check the following:
- * -01, * -10: USB storage device not found. Check whether the USB storage device or USB cable is correctly inserted to the USB port of this unit. Connect the USB storage device to an external power source if it has its own power supply.
- * -05, * -13, * -20, * -21: The firmware file is not present in the root folder of the USB storage device, or the firmware file is for another model. Retry from the download of the firmware file.
- Others: Disconnect then reconnect the AC power cord, then repeat from the beginning.
> Before Start > Part Names > Install > Initial Setup > Playback
Advanced Setup | Firmware Update
Others
Troubleshooting
Before starting the procedure
When operation is unstable, problems may be solved by simply turning the power on or to standby or disconnecting/connecting the power cord, rather than reviewing settings and operations. Try the simple measures on both the unit and the connected device. If the problem isn't fixed after referring to "Troubleshooting", resetting the unit to the status at the time of shipment may solve the problem. Note that your settings will also be initialized when you reset, so we recommend that you note down your settings before doing the following.
Resetting the unit (this resets the unit settings to the default)
- Press SETUP on the remote controller, select "Factory Reset" - "Start" in the Setup screen and press ENTER.
-
Press ENTER.
-
The unit switches to standby and the settings are reset.
Power
Cannot turn on the unit
- Unplug the power cord from the wall outlet, wait 5 seconds or more, then plug it in again.
The unit turns off unexpectedly
- The unit automatically switches to standby when the "Option Setting" - "Power Off Setting" - "Auto Standby" setting in the Setup menu functions.
- Check if the speaker cable wires are touching the rear panel or if the + side and - side have shorted. If there is contact or shorting, the unit will switch to standby automatically.
- If the power turns off and indicators on the front panel continually blink, there may have been a malfunction with the amplifier or the protection circuit may have tripped.
- If the power indicator blinks at approximately 1 second intervals: There may have been a malfunction in the
amplifier section. Unplug the power cord from the wall outlet immediately and contact the dealer or our company's support.
- If the power indicator blinks at approximately 0.3 second intervals: The protection circuit may have tripped due to playback at high volume. Reduce the volume for playback. Alternatively, the wires in the speaker cables may have touched the rear panel or other wires. Connect the wires so they do not protrude from the speaker jacks.
If the same symptoms such as being unable to turn the unit on happen repeatedly, unplug the power cord from the wall outlet immediately and contact the dealer or our company's support.
■There is no audio from external devices
- There is no sound if this unit is muted. Press MUTE on the remote controller to cancel muting.
- Confirm that the connection between the output jack on the external device and the input jack on this unit is correct.
- Change the input selector on this unit to the position of the terminal to which the external device is connected.
- Check the digital audio output setting on the connected component. On some game consoles, such as those that support DVD, the default setting is off.
■The display doesn't light
- The display may go dim while the DIMMER is working, and may also turn off. Press DIMMER button and change the brightness level of the display.
■Wi-Fi Connection
- Try plugging/unplugging the power supply of wireless LAN router and the unit, check the wireless LAN router
power-on status, and try reboot of the wireless LAN router.
Cannot connect to the access point
- Check that the setting of SSID and encryption (WEP, etc.) is correct. Make sure the network settings of the unit is properly set.
- Connection to an SSID that includes multi-byte characters is not supported. Name the SSID of the wireless LAN router using single-byte alphanumeric characters only and try again.
- When the wireless LAN router setting is at stealth mode (mode to hide the SSID key) or when ANY connection is off, the SSID is not displayed. Change the setting and try again.
Connected to an SSID different to the SSID selected
- Some access points allow you to set multiple SSIDs for one unit. If you use the automatic setting button on such a router, you may end up connecting with a different SSID from the SSID you wanted to connect to. Use the connection method requiring you to enter a password if this happens.
Playback is interrupted and communication does not work
Shorten the distance from the access point or remove obstacles to improve visibility, and try again. Place the unit away from microwave ovens or other access points. It is recommended to place the access point and the unit in the same room.
- If there is a metallic object near the unit, wireless LAN connection may not be possible as the metal can effect on the radio wave.
- When other access point are used near the unit, several issues such as interrupted playback and communication may occur. You can avoid these issues by changing the channel of the access point. For instructions on changing channels, see the instruction manual provided with the access point.
> Before Start > Part Names > Install > Initial Setup > Playback

Advanced Setup | Firmware Update
Others
■Cannot play discs
- Place the disc in the disc tray so the label is facing up.
- Play may not be possible if the disc is scratched or dirty.
■Cannot Play USB storage device / HDD
- Check whether the USB storage device or USB cable is correctly inserted to the USB port of the unit.
- Disconnect the USB storage device from the unit, and then try reconnecting.
- This unit may not recognize USB storage devices and HDDs as proper devices sometimes. Try switching this unit to standby and then turning it on again.
- Depending on the type of format, the playback may not be performed normally. Check the type of the file formats that is supported. (→P20)
- Cautions regarding USB and HDD devices (→P20)
■FM reception is poor
• Re-check the antenna connection.
- Separate the antenna from speaker cables and the power cord.
- Move the unit away from your TV or PC.
• Passing cars and airplanes can cause interference.
• Concrete walls weaken radio signals.
- FM reception may become clearer if you use the antenna jack on the wall used for the TV.
- FM reception improves if the Tuning Mode (→P37) is set to Manual. However, reception will be monaural rather than stereo.
■Network function
- If you cannot select a network service, it will become selectable when the network function is started.
• Try plugging/unplugging the power supply of this unit and
the router, and try rebooting the router.
Cannot access the Internet radio
- Certain network service or contents available through the unit may not be accessible in case the service provider terminates its service.
- Make sure that your modem and router are properly connected, and make sure they are both turned on.
• Depending on ISP, setting the proxy server is necessary.
• Make sure that the used router and/or modem is supported by your ISP.
Cannot access the network server
- This unit needs to be connected to the same router as the network server.
- This unit is compatible with Windows Media Player 11 or 12 network servers or NAS that are compatible with home network functionality. Furthermore, when using a PC, only music files registered in the Windows Media® Player library can be played.
Playback stops while listening to music files on the network server
- When the PC is serving as the network server, try quitting any application software other than the server software (Windows Media® Player 12, etc.).
- If the PC is downloading or copying large files, the playback may be interrupted.
The album names and artist names for the Music Server are not displayed
- Meta data, such as album names and artist names, needs to be recognized on the server for distribution to this unit, so this depends on the specifications of the NAS or server you are using.
- The file formats supported depend on the NAS or server software. For details, contact the manufacturer of NAS or the server software.
Album art in Music Server is displayed sometimes but
not other times
• Music Server depends on the specifications of the server software.
• The formats supported depend on the server software.
- For details, contact the manufacturer of the server software.
■BLUETOOTH function
- Try plugging/unplugging the power of the unit and try turning on/off the BLUETOOTH enabled device. Restarting the BLUETOOTH enabled device may be effective.
- The BLUETOOTH enabled devices must support the A2DP profile.
- Near components such as microwave oven or cordless phone, which use the radio wave in the 2.4 GHz range, a radio wave interference may occur, which disables the use of this unit.
- If there is a metallic object near the unit, BLUETOOTH connection may not be possible as the metal can effect on the radio waves.
- In order to respond to operations on the remote controller of this unit, the BLUETOOTH enabled device must support the AVRCP profile.
- Note that operation with the remote controller is not always guaranteed with all BLUETOOTH enabled devices.
Cannot connect with this unit
- Check that the BLUETOOTH function of the BLUETOOTH enabled device is enabled.
- If an already paired unit cannot be connected, delete the pairing information on the BLUETOOTH enabled device, then pair again.
Music playback is unavailable on the unit even after successful BLUETOOTH connection
- When the audio volume of your BLUETOOTH enabled
> Before Start > Part Names > Install > Initial Setup > Playback
Advanced Setup | Firmware Update

device is set low, the playback of audio may be unavailable. Turn up the volume on the BLUETOOTH enabled device.
- Some BLUETOOTH enabled devices may be equipped with a Send/Receive selector switch. Select Send mode.
Sound is interrupted
- There may be a problem with the BLUETOOTH enabled device. Check the information on the internet.

General Specifications
■Analog Audio Output Section
RMS Output Power
• X-HM86D, XC-HM86D : 65 W + 65 W (4 ohms, 1 kHz THD 10%)
Tone Control Characteristics
- ±10 dB (100 Hz (BASS))
• ±10 dB (10 kHz (TREBLE))
Supported Speaker Impedance
• 4 ohms - 16 ohms
■Tuner Section
X-HM76
Tuning Frequency Range (FM)
• 87.5 MHz - 108.0 MHz, RDS
Antenna (FM)
• 75 Ω unbalanced
Preset Channel
• 40
X-HM76D, X-HM86D, XC-HM86D
Tuning Frequency Range (FM)
• 87.5 MHz - 108.0 MHz, RDS
Tuning Frequency Range (DAB)
• 174.928 MHz - 239.200 MHz
Antenna (FM/DAB)
- 75 Ω unbalanced
Preset Channel
• 40
■CD Section
Media/Format
- CD: Standard CD
• CD-R/RW : CD format/MP3, WMA File
■Digital Audio Input
Front/Rear USB
• Type A, USB2.0 High Speed
DC Output
- 5 V 1 A (Rear)/5 V 0.5 A (Front)
Optical Digital Input
- Optical Jack
■Network Section
Wired LAN
- Ethernet Jack
• 10BASE-T/100BASE-TX
Wireless LAN (Wi-Fi)
• IEEE 802.11 a/b/g/n standard
• 5 GHz/2.4 GHz band
■Bluetooth Section
Communication system
- BLUETOOTH Specification version 4.1
Frequency band
• 2.4 GHz (2.402 GHz - 2.480 GHz)
Modulation method
• FHSS (Freq Hopping Spread Spectrum)
Compatible Bluetooth profiles
A2DP 1.2
AVRCP 1.3
• HOGP-Host (Client)
• HOGP-HID Device (Server)
• HID Service (HIDS)
Supported Codecs
• SBC
- AAC
Transmission range (A2DP)
• 20 Hz - 20 kHz (Sampling frequency 44.1 kHz)
Maximum communication range\*
• (Line of sight approx.) 10 m.
* The actual range will vary depending on factors such as obstacles between devices, magnetic fields around a microwave oven, static electricity, cordless phone, reception sensitivity, antenna's performance, operating system, software application, etc.
■General
Power Supply
• AC 220 - 230 V, 50/60 Hz
Power Consumption
• X-HM76D, X-HM76 : 40 W
• X-HM86D, XC-HM86D : 42 W
• 0.3 W (In Standby)
• 2.5 W (In Standby, Network Standby : On, Network Setting : Wired)
• 2.8 W (In Standby, Network Standby : On, Network Setting : Wi-Fi)
• 2.2 W (In Standby, Bluetooth Wakeup : On)
• 2.9 W (In Standby, Network Standby : On, Network Setting : Wi-Fi, Bluetooth Wakeup : On)
Auto Standby
- On (20 min)/Off
> Before Start > Part Names > Install > Initial Setup > Playback
Advanced Setup | Firmware Update | Others

Dimensions (W × H × D)
- 290 mm × 98 mm × 333 mm
Weight
• 3.5 kg
■Speaker (X-HM76D, X-HM76, X-HM86D)
Type
• Bass-reflex bookshelf type
Configuration
• 2-way
- Woofer :
X-HM76D, X-HM76 : 12 cm Cone
X-HM86D : 13 cm Glass fiber cone
- Tweeter :
2.5 cm Soft Dome
Impedance
• 4 ohms
Maximum input power
Effective Frequency Range
• X-HM76D, X-HM76 : 70 Hz - 40 kHz
• X-HM86D : 60 Hz - 40 kHz
Recommended Frequency Range
• X-HM76D, X-HM76 : 50 Hz - 40 kHz
• X-HM86D : 45 Hz - 40 kHz
Crossover Frequency
• 4 kHz
Output Sound Pressure Level
Dimensions (W × H × D)
• X-HM76D : 148 mm × 263 mm × 217 mm
• X-HM76 : 148 mm × 263 mm × 213 mm
• X-HM86D : 165 mm × 280 mm × 259 mm
Weight
• X-HM76D : 3.4 kg/each
• X-HM76 : 3.3 kg/each
• X-HM86D : 4.4 kg/each

> Before Start > Part Names > Install > Initial Setup > Playback
Advanced Setup | Firmware Update
Others
License and Trademark Information


The Wi-Fi CERTIFIED Logo is a certification mark of Wi-Fi Alliance ^® .


AirPlay, iPad, iPhone, and iPod touch are trademarks of Apple Inc., registered in the U.S. and other countries.
iPad Air and iPad mini are trademarks of Apple Inc.
"Made for iPod", "Made for iPhone" and "Made for iPad" mean that an electronic accessory has been designed to connect specifically to iPod, iPhone, or iPad, respectively, and has been certified by the developer to meet Apple performance standards. Apple is not responsible for the operation of this device or its compliance with safety and regulatory standards.
Please note that the use of this accessory with iPod, iPhone or iPad may affect wireless performance.
AirPlay works with iPhone, iPad, and iPod touch with iOS 4.3.3 or later, Mac with OS X Mountain Lion or later, and PC with iTunes 10.2.2 or later.
Bluetooth
The Bluetooth ^® word mark and logos are registered trademarks owned by the Bluetooth SIG, Inc.

Google Cast and the Google Cast badge are trademarks of Google inc.

This Mark Certifies that this product is compliant with the BLACKFIRE ALLIANCE Standard. Please refer to WWW.BLACKFIREALLIANCE.COM for more information. BLACKFIRE™ is a Registered Trademark (No. 85,900,599) of BLACKFIRE RESEARCH CORP. All rights reserved.

FireConnect™ is technology powered by BlackFire Research.

The product with this logo is conformed to Hi-Res Audio standard defined by Japan Audio Society. This logo is used under license from Japan Audio Society.
This product is protected by certain intellectual property rights of Microsoft. Use or distribution of such technology outside of this product is prohibited without a license from Microsoft.
Windows and the Windows logo are trademarks of the Microsoft group of companies.
DSD and the Direct Stream Digital logo are trademarks of Sony Corporation.
MPEG Layer-3 audio coding technology licensed from Fraunhofer IIS and Thomson.
"All other trademarks are the property of their respective owners."
Anteros Building, Odyssey Business Park, West End Road, South Ruislip, Middlesex, HA4 6QQ United Kingdom
Tel: +44(0)208 836 3612
6, Avenue de Marais F - 95816 Argenteuil Cedex FRANCE
Tel: +33(0)969 368 050
Корпорация О энд Пи
Register your product on http://www.pioneer.eu (Europe)
© 2016 Onkyo & Pioneer Corporation. All rights reserved.
Onkyo group has established its Privacy Policy, available at [http://www.pioneer-audiovisual.com/privacy].
"Pioneer" and "PBASS" are trademarks of Pioneer Corporation, and is used under license.
SN 29402674
F1609-0
natural_image
Line drawing of a computer monitor with ports and screen (no text or symbols)Appareil principal (1)
②

Télécommande (RC-945S) (1), Piles (AAA/R03) (2)
3

Fil d'antenne DAB/FM (1)
natural_image
Two identical rectangular panels with rounded corners, no text or symbols present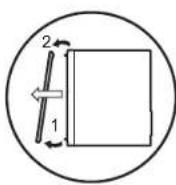

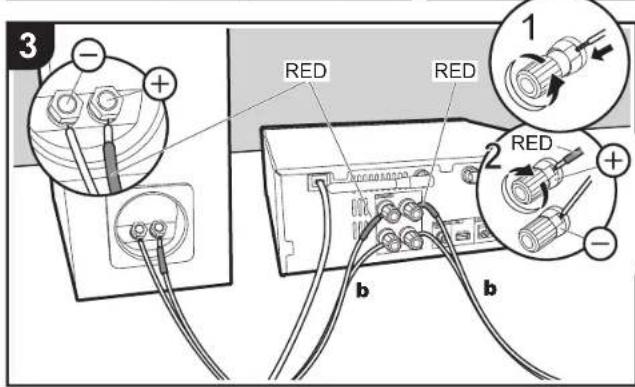
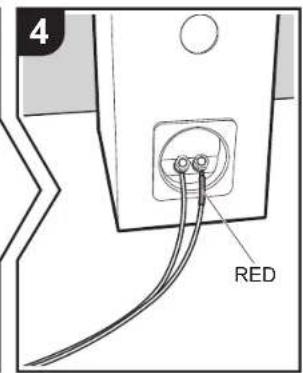
natural_image
Diagram showing a device with a control panel and a speaker unit (no text or symbols visible)natural_image
Diagram showing two views of a device with a switch and cable, no text or symbols present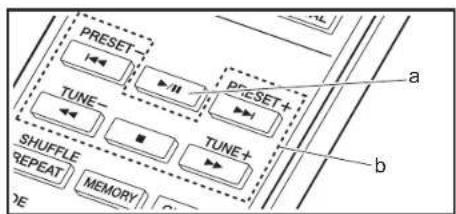
flowchart
graph TD
    A["PRESET"] --> B["TUNE"]
    C["PREFSET+"] --> D["TUNE+"]
    E["SHUFFLE"] --> F["REPEAT"]
    G["MEMORY"] --> H["MODE"]
    style A fill:#f9f,stroke:#333
    style C fill:#f9f,stroke:#333
    style E fill:#f9f,stroke:#333
    style G fill:#f9f,stroke:#333
    style B fill:#ccf,stroke:#333
    style D fill:#ccf,stroke:#333
    style F fill:#ccf,stroke:#333
    style H fill:#ccf,stroke:#333

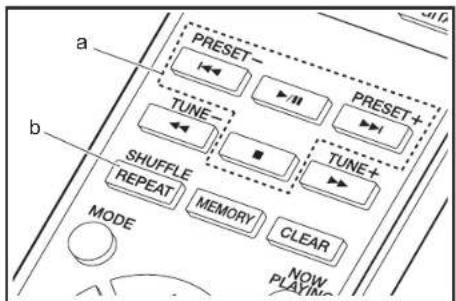
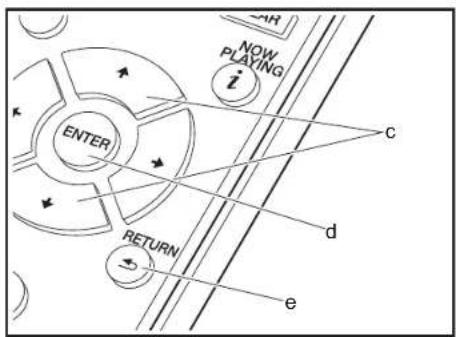
flowchart
graph TD
    A["ENTER"] --> B["PLAYING"]
    B --> C["EXIT"]
    D["RETURN"] --> E["PLAYING"]
    E --> F["EXIT"]
    G["PLAYING"] --> H["EXIT"]
    I["PLAYING"] --> J["EXIT"]
    K["PLAYING"] --> L["EXIT"]
    M["PLAYING"] --> N["EXIT"]
    O["PLAYING"] --> P["EXIT"]
    Q["PLAYING"] --> R["EXIT"]
    S["PLAYING"] --> T["EXIT"]
    U["PLAYING"] --> V["EXIT"]
    W["PLAYING"] --> X["EXIT"]
    Y["PLAYING"] --> Z["EXIT"]
    AA["PLAYING"] --> AB["EXIT"]
    AC["PLAYING"] --> AD["EXIT"]
    AE["PLAYING"] --> AF["EXIT"]
    AG["PLAYING"] --> AH["EXIT"]
    AI["PLAYING"] --> AJ["EXIT"]
    AK["PLAYING"] --> AL["EXIT"]
    AM["PLAYING"] --> AN["EXIT"]
    AO["PLAYING"] --> AP["EXIT"]
    AQ["PLAYING"] --> AR["EXIT"]
    AS["PLAYING"] --> AT["EXIT"]
    AU["PLAYING"] --> AV["EXIT"]
    AW["PLAYING"] --> AX["EXIT"]
    AY["PLAYING"] --> AZ["EXIT"]
Commandes de base
AIFF (.aiff/.aif/.aifc/.afc/.AIFF/.AIF/.AIFC/.AFC):
48 kHz, 88,2 kHz, 96 kHz, 176,4 kHz, 192 kHz
- Bits de quantification: 8 bits, 16 bits, 24 bits
AAC (.aac/.m4a/.mp4/.3gp/.3g2/.AAC/.M4A/.MP4/.3GP/
.3G2):
DSD (.dsf/.dff/.DSF/.DFF):
Oldies music (Anciens tubes)
Folk music (Musique folk)
Documentary (Documentaire)
natural_image
Illustration of a hand holding a tablet with a play button, no text or symbols presentJumelage
natural_image
Illustration of hands holding a video player interface with playback controls (no text or symbols)

natural_image
Illustration of a hand pressing a button on a gray square with a play button (no text or symbols)
natural_image
Two circular icons: one showing a flat-screen monitor, the other showing a game controller (no text or symbols)Lecture
- Bits de quantification: 8 bits, 16 bits, 24 bits
AAC (.aac/.m4a/.mp4/.3gp/.3g2/.AAC/.M4A/.MP4/.3GP/.3G2):
DSD (.dsf/.dff/.DSF/.DFF):
Saisie d'un texte
• ±10 dB (10 kHz (TREBLE))
• FHSS (Freq Hopping Spread Spectrum)
Profils Bluetooth compatibles
A2DP 1.2
AVRCP 1.3
• HOGP-Host (client)
Dimensions (L × H × P)
Dimensions (L × H × P)
• X-HM76D : 148 mm × 263 mm × 217 mm
• X-HM76 : 148 mm × 263 mm × 213 mm
• X-HM86D : 165 mm × 280 mm × 259 mm
Poids
The Wi-Fi CERTIFIED Logo is a certification mark of Wi-Fi Alliance ^® .


AirPlay, iPad, iPhone, and iPod touch are trademarks of Apple Inc., registered in the U.S. and other countries.
iPad Air and iPad mini are trademarks of Apple Inc.
"Made for iPod", "Made for iPhone" and "Made for iPad" mean that an electronic accessory has been designed to connect specifically to iPod, iPhone, or iPad, respectively, and has been certified by the developer to meet Apple performance standards. Apple is not responsible for the operation of this device or its compliance with safety and regulatory standards.
Please note that the use of this accessory with iPod, iPhone or iPad may affect wireless performance.
AirPlay works with iPhone, iPad, and iPod touch with iOS 4.3.3 or later, Mac with OS X Mountain Lion or later, and PC with iTunes 10.2.2 or later.
The Bluetooth ^® word mark and logos are registered trademarks owned by the Bluetooth SIG, Inc.

Google Cast and the Google Cast badge are trademarks of Google inc.

This Mark Certifies that this product is compliant with the BLACKFIRE ALLIANCE Standard. Please refer to WWW.BLACKFIREALLIANCE.COM for more information. BLACKFIRE™ is a Registered Trademark (No. 85,900,599) of BLACKFIRE RESEARCH CORP. All rights reserved.

FireConnect™ is technology powered by BlackFire Research.

The product with this logo is conformed to Hi-Res Audio standard defined by Japan Audio Society. This logo is used under license from Japan Audio Society.
This product is protected by certain intellectual property rights of Microsoft. Use or distribution of such technology outside of this product is prohibited without a license from Microsoft.
Windows and the Windows logo are trademarks of the Microsoft group of companies.
DSD and the Direct Stream Digital logo are trademarks of Sony Corporation.
MPEG Layer-3 audio coding technology licensed from Fraunhofer IIS and Thomson.
"All other trademarks are the property of their respective owners."
Anteros Building, Odyssey Business Park, West End Road, South Ruislip, Middlesex, HA4 6QQ United Kingdom
Tel: +44(0)208 836 3612
6, Avenue de Marais F - 95816 Argenteuil Cedex FRANCE
Tel: +33(0)969 368 050
Корпорация О энд Пи
© 2016 Onkyo & Pioneer Corporation. All rights reserved.
Onkyo group has established its Privacy Policy, available at [http://www.pioneer-audiovisual.com/privacy].
"Pioneer" and "PBASS" are trademarks of Pioneer Corporation, and is used under license.
SN 29402674
F1609-0

Panel frontal ....4 Panel trasero (X-HM76D, X-HM86D, XC-HM86D) ....5
Panel trasero (X-HM76)....6 Mando a distancia....7
Pantalla ....8 Sistema de altavoces (X-HM76D, X-HM76) ....9
Sistema de altavoces (X-HM86D) 10
Instalación
natural_image
Two identical rectangular blocks with rounded corners, no text or symbols present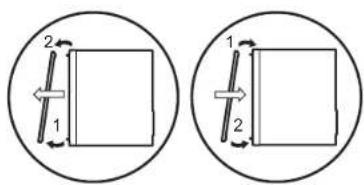


natural_image
Diagram showing a device panel connected to a speaker unit, with no visible text or symbols.
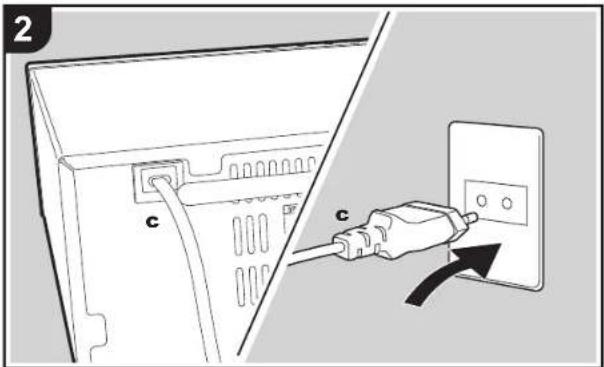
natural_image
Diagram showing two views of a device with a switch and cable, no text or symbols presentnatural_image
Illustration of hands inserting a battery into a device (no text or symbols visible)
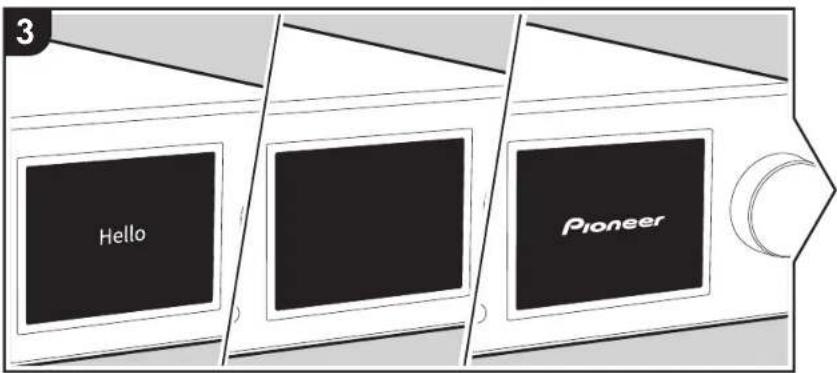

flowchart
graph TD
    A["PRESET"] --> B["TUNE"]
    C["PREFSET+"] --> D["TUNE+"]
    E["SHUFFLE"] --> F["REPEAT"]
    G["MEMORY"] --> H["MODE"]
    style A fill:#f9f,stroke:#333
    style C fill:#f9f,stroke:#333
    style E fill:#f9f,stroke:#333
    style G fill:#f9f,stroke:#333
    style B fill:#ccf,stroke:#333
    style D fill:#ccf,stroke:#333
    style F fill:#ccf,stroke:#333
    style H fill:#ccf,stroke:#333


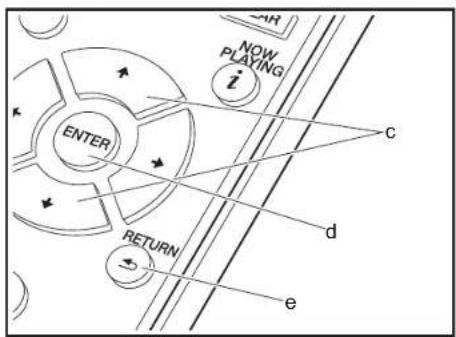
flowchart
graph TD
    A["ENTER"] --> B["PLAYING"]
    B --> C["RETURN"]
    C --> D["PLAYING"]
    style A fill:#f9f,stroke:#333
    style B fill:#ccf,stroke:#333
    style C fill:#cfc,stroke:#333
    style D fill:#fcc,stroke:#333
Operaciones básicas
AIFF (.aiff/.aif/.aifc/.afc/.AIFF/.AIF/.AIFC/.AFC):
AAC (.aac/.m4a/.mp4/.3gp/.3g2/.AAC/.M4A/.MP4/.3GP/.3G2):
DSD (.dsf/.dff/.DSF/.DFF):
- Formatos compatibles: DSF/DSDIFF
- Tasas de muestreo compatibles: 2,8 MHz, 5,6 MHz, 11,2 MHz
Country music (Música country)
natural_image
Illustration of a hand holding a tablet with a play button, no text or symbols presentEmparejado
natural_image
Illustration of a hand holding a play button with a triangular play symbol, no text or symbols present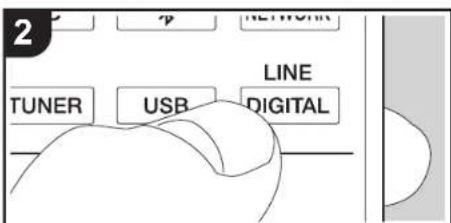
Conexiones
natural_image
Two circular icons showing a flat-screen monitor and a Sony game controller (no text or symbols)Reproducción
AIFF (.aiff/.aif/.aifc/.afc/.AIFF/.AIF/.AIFC/.AFC):
AAC (.aac/.m4a/.mp4/.3gp/.3g2/.AAC/.M4A/.MP4/.3GP/.3G2):
DSD (.dsf/.dff/.DSF/.DFF):
- Formatos compatibles: DSF/DSDIFF
- Tasas de muestreo compatibles: 2,8 MHz, 5,6 MHz, 11,2 MHz
"Friday" o "Saturday" y confirme.
English (Valor predeterminado), German, French, Spanish, Italian, Dutch, Swedish,
Russian, Chinese
Tuner Setting
(4 ohms, 1 kHz THD 10%)
• ±10 dB (10 kHz (TREBLE))
87,5 MHz - 108,0 MHz, RDS
The Wi-Fi CERTIFIED Logo is a certification mark of Wi-Fi Alliance ^® .


AirPlay, iPad, iPhone, and iPod touch are trademarks of Apple Inc., registered in the U.S. and other countries.
iPad Air and iPad mini are trademarks of Apple Inc.
"Made for iPod", "Made for iPhone" and "Made for iPad" mean that an electronic accessory has been designed to connect specifically to iPod, iPhone, or iPad, respectively, and has been certified by the developer to meet Apple performance standards. Apple is not responsible for the operation of this device or its compliance with safety and regulatory standards.
Please note that the use of this accessory with iPod, iPhone or iPad may affect wireless performance.
AirPlay works with iPhone, iPad, and iPod touch with iOS 4.3.3 or later, Mac with OS X Mountain Lion or later, and PC with iTunes 10.2.2 or later.
Bluetooth
The Bluetooth ^® word mark and logos are registered trademarks owned by the Bluetooth SIG, Inc.

Google Cast and the Google Cast badge are trademarks of Google inc.

This Mark Certifies that this product is compliant with the BLACKFIRE ALLIANCE Standard. Please refer to WWW.BLACKFIREALLIANCE.COM for more information. BLACKFIRE™ is a Registered Trademark (No. 85,900,599) of BLACKFIRE RESEARCH CORP. All rights reserved.

FireConnect™ is technology powered by BlackFire Research.

The product with this logo is conformed to Hi-Res Audio standard defined by Japan Audio Society. This logo is used under license from Japan Audio Society.
This product is protected by certain intellectual property rights of Microsoft. Use or distribution of such technology outside of this product is prohibited without a license from Microsoft.
Windows and the Windows logo are trademarks of the Microsoft group of companies.
DSD and the Direct Stream Digital logo are trademarks of Sony Corporation.
MPEG Layer-3 audio coding technology licensed from Fraunhofer IIS and Thomson.
"All other trademarks are the property of their respective owners."
Anteros Building, Odyssey Business Park, West End Road, South Ruislip, Middlesex, HA4 6QQ United Kingdom
Tel: +44(0)208 836 3612
6, Avenue de Marais F - 95816 Argenteuil Cedex FRANCE
Tel: +33(0)969 368 050
Корпорация О энд Пи
© 2016 Onkyo & Pioneer Corporation. All rights reserved.
Onkyo group has established its Privacy Policy, available at [http://www.pioneer-audiovisual.com/privacy].
"Pioneer" and "PBASS" are trademarks of Pioneer Corporation, and is used under license.
SN 29402674
F1609-0
natural_image
Line drawing of a portable electronic device with buttons and a screen (no text or symbols)natural_image
Two identical rectangular blocks side by side, no text or symbols presentnatural_image
Two identical illustrations of bundled cables with wires, no text or symbols present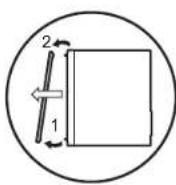
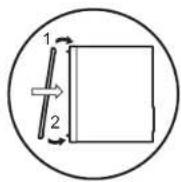
natural_image
Two circular diagrams showing a device panel and a speaker unit (no text or symbols visible)

natural_image
Diagram showing two views of a device with connectors and a close-up view of the internal structure (no text or symbols)natural_image
Illustration of hands inserting a battery into a device (no text or symbols visible)

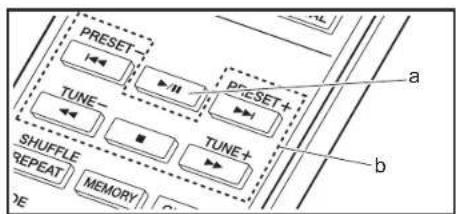
flowchart
graph TD
    A["PRESET"] --> B["TUNE"]
    C["PRcSET+"] --> D["TUNE+"]
    E["SHUFFLE"] --> F["REPEAT"]
    G["MEMORY"] --> H["MODE"]
    style A fill:#f9f,stroke:#333
    style C fill:#f9f,stroke:#333
    style E fill:#f9f,stroke:#333
    style G fill:#f9f,stroke:#333
    style B fill:#ccf,stroke:#333
    style D fill:#ccf,stroke:#333
    style F fill:#ccf,stroke:#333
    style H fill:#ccf,stroke:#333
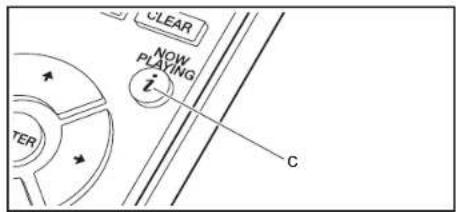


flowchart
graph TD
    A["ENTER"] --> B["PLAYING"]
    B --> C["RETURN"]
    C --> D["PLAYING"]
    style A fill:#f9f,stroke:#333
    style B fill:#ccf,stroke:#333
    style C fill:#cfc,stroke:#333
    style D fill:#fcc,stroke:#333
Operazioni base
AIFF (.aiff/.aif/.aifc/.afc/.AIFF/.AIF/.AIFC/.AFC):
AAC (.aac/.m4a/.mp4/.3gp/.3g2/.AAC/.M4A/.MP4/.3GP/.3G2):
DSD (.dsf/.dff/.DSF/.DFF):
Serious classi (Serious classics)
Other music
Weather & metr
Finance
Children's pro (Children's programmes)
Social affairs
Religion
Phone in
Travel & touri
Leisure & hobb
Jazz music
Country music
Nation music
Oldies music
Folk music
Documentary
natural_image
Illustration of a hand holding a tablet with a play button, no text or symbols presentAbbinamento
natural_image
Illustration of a hand pressing a play button on a square screen (no text or symbols)Operazione base

natural_image
Two circular icons: one showing a flat-screen monitor, the other showing a game controller with a hard drive (no text or symbols)Riproduzione
AIFF (.aiff/.aif/.aifc/.afc/.AIFF/.AIF/.AIFC/.AFC):
AAC (.aac/.m4a/.mp4/.3gp/.3g2/.AAC/.M4A/.MP4/.3GP/
.3G2):
DSD (.dsf/.dff/.DSF/.DFF):
Immissione di testo
English (Valore predefinito), German, French, Spanish, Italian, Dutch, Swedish, Russian, Chinese
Tuner Setting
• ±10 dB (10 kHz (TREBLE))
• FHSS (Freq Hopping Spread Spectrum)
Profili Bluetooth compatibili
A2DP 1.2
AVRCP 1.3
• HOGP-Host (Client)
• Dispositivo HOGP-HID (Server)
- Servizio HID (HIDS)
Codec supportati
• SBC
- AAC
Dimensioni (L × A × P)
- 290 mm × 98 mm × 333 mm
Dimensioni (L × A × P)
• X-HM76D : 148 mm × 263 mm × 217 mm
• X-HM76 : 148 mm × 263 mm × 213 mm
The Wi-Fi CERTIFIED Logo is a certification mark of Wi-Fi Alliance ^® .


AirPlay, iPad, iPhone, and iPod touch are trademarks of Apple Inc., registered in the U.S. and other countries.
iPad Air and iPad mini are trademarks of Apple Inc.
"Made for iPod", "Made for iPhone" and "Made for iPad" mean that an electronic accessory has been designed to connect specifically to iPod, iPhone, or iPad, respectively, and has been certified by the developer to meet Apple performance standards. Apple is not responsible for the operation of this device or its compliance with safety and regulatory standards.
Please note that the use of this accessory with iPod, iPhone or iPad may affect wireless performance.
AirPlay works with iPhone, iPad, and iPod touch with iOS 4.3.3 or later, Mac with OS X Mountain Lion or later, and PC with iTunes 10.2.2 or later.
Bluetooth
The Bluetooth ^® word mark and logos are registered trademarks owned by the Bluetooth SIG, Inc.

Google Cast and the Google Cast badge are trademarks of Google inc.

This Mark Certifies that this product is compliant with the BLACKFIRE ALLIANCE Standard. Please refer to WWW.BLACKFIREALLIANCE.COM for more information. BLACKFIRE™ is a Registered Trademark (No. 85,900,599) of BLACKFIRE RESEARCH CORP. All rights reserved.

FireConnect™ is technology powered by BlackFire Research.

The product with this logo is conformed to Hi-Res Audio standard defined by Japan Audio Society. This logo is used under license from Japan Audio Society.
This product is protected by certain intellectual property rights of Microsoft. Use or distribution of such technology outside of this product is prohibited without a license from Microsoft.
Windows and the Windows logo are trademarks of the Microsoft group of companies.
DSD and the Direct Stream Digital logo are trademarks of Sony Corporation.
MPEG Layer-3 audio coding technology licensed from Fraunhofer IIS and Thomson.
"All other trademarks are the property of their respective owners."
Anteros Building, Odyssey Business Park, West End Road, South Ruislip,
Middlesex, HA4 6QQ United Kingdom
Tel: +44(0)208 836 3612
6, Avenue de Marais F - 95816 Argenteuil Cedex FRANCE
Tel: +33(0)969 368 050
Корпорация О энд Пи
© 2016 Onkyo & Pioneer Corporation. All rights reserved.
Onkyo group has established its Privacy Policy, available at [http://www.pioneer-audiovisual.com/privacy].
"Pioneer" and "PBASS" are trademarks of Pioneer Corporation, and is used under license.
SN 29402674
natural_image
Two identical rectangular blocks with rounded corners, no text or symbols presentnatural_image
Two identical illustrations of bundled cables with wires, no text or symbols present
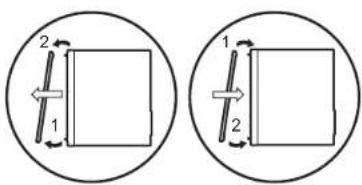


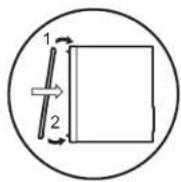
natural_image
Diagram showing a device with a connector and a speaker unit (no text or symbols visible)natural_image
Diagram showing two views of a device with a hand operating a switch and connected to a vertical panel (no text or symbols visible)natural_image
Illustration of hands inserting a battery into a device (no text or symbols visible)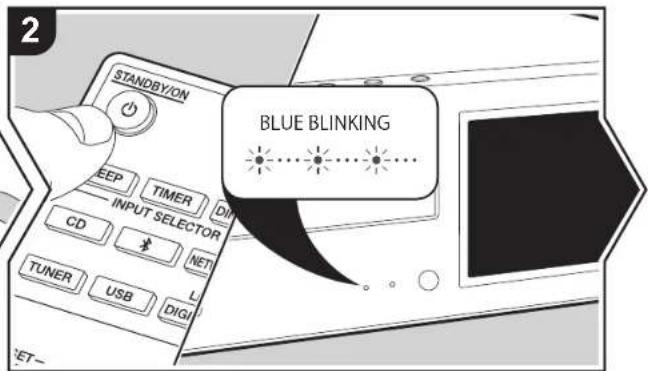

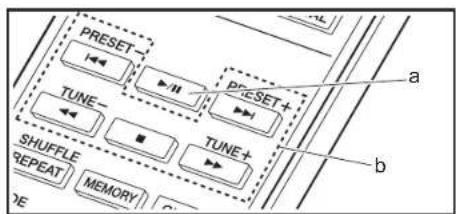
flowchart
graph TD
    A["PRESET"] --> B["TUNE"]
    C["PRcSET+"] --> D["TUNE+"]
    E["SHUFFLE"] --> F["REPEAT"]
    G["MEMORY"] --> H["MODE"]
    style A fill:#f9f,stroke:#333
    style C fill:#f9f,stroke:#333
    style E fill:#f9f,stroke:#333
    style G fill:#f9f,stroke:#333
    style B fill:#ccf,stroke:#333
    style D fill:#ccf,stroke:#333
    style F fill:#ccf,stroke:#333
    style H fill:#ccf,stroke:#333

AIFF (.aiff/.alf/.aifc/.afc/.AIFF/.AIF/.AIFC/.AFC):
AAC (.aac/.m4a/.mp4/.3gp/.3g2/.AAC/.M4A/.MP4/.3GP/.3G2):
DSD (.dsf/.dff/.DSF/.DFF):
News (News reports)
Current affair
Information
Sport
Education
Drama
Cultures
Science (Science and technology)
Varied speech
Pop music
Rock music
Easy listening
Serious classi (Serious classics)
Other music
Weather & metr
Finance
Children's pro (Children's programmes)
Social affairs
Religion
Phone in
Travel & touri
Leisure & hobb
Jazz music
Country music
Nation music
Oldies music
Folk music
Documentary
natural_image
Illustration of a hand holding a tablet with a play button, no text or symbols presentPairing
natural_image
Illustration of a hand pressing a play button on a square screen (no text or symbols)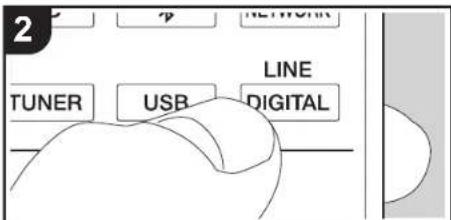
natural_image
Two circular icons showing a flat-screen monitor and a stylized game controller (no text or symbols)Wiedergabe
AIFF (.aiff/.aif/.aifc/.afc/.AIFF/.AIF/.AIFC/.AFC):
AAC (.aac/.m4a/.mp4/.3gp/.3g2/.AAC/.M4A/.MP4/.3GP/.3G2):
DSD (.dsf/.dff/.DSF/.DFF):
Eingeben von Text
English (Standardwert), German, French, Spanish, Italian, Dutch, Swedish, Russian, Chinese
Tuner Setting
• ±10 dB (10 kHz (TREBLE))
• 87.5 MHz–108.0 MHz, RDS
Antenne (FM)
• 87.5 MHz–108.0 MHz, RDS
• FHSS (Freq Hopping Spread Spectrum)
Kompatible Bluetooth Profile
A2DP 1.2
AVRCP 1.3
• HOGP-Host (Client)
The Wi-Fi CERTIFIED Logo is a certification mark of Wi-Fi Alliance ^® .


AirPlay, iPad, iPhone, and iPod touch are trademarks of Apple Inc., registered in the U.S. and other countries.
iPad Air and iPad mini are trademarks of Apple Inc.
"Made for iPod", "Made for iPhone" and "Made for iPad" mean that an electronic accessory has been designed to connect specifically to iPod, iPhone, or iPad, respectively, and has been certified by the developer to meet Apple performance standards. Apple is not responsible for the operation of this device or its compliance with safety and regulatory standards.
Please note that the use of this accessory with iPod, iPhone or iPad may affect wireless performance.
AirPlay works with iPhone, iPad, and iPod touch with iOS 4.3.3 or later, Mac with OS X Mountain Lion or later, and PC with iTunes 10.2.2 or later.
Bluetooth
The Bluetooth ^® word mark and logos are registered trademarks owned by the Bluetooth SIG, Inc.
PANDORA
PANDORA, the PANDORA logo, and the Pandora trade dress are trademarks or registered trademarks of Pandora Media, Inc. Used with permission.

Google Cast and the Google Cast badge are trademarks of Google inc.

This Mark Certifies that this product is compliant with the BLACKFIRE ALLIANCE Standard. Please refer to WWW.BLACKFIREALLIANCE.COM for more information. BLACKFIRE™ is a Registered Trademark (No. 85,900,599) of BLACKFIRE RESEARCH CORP. All rights reserved.

FireConnect™ is technology powered by BlackFire Research.

The product with this logo is conformed to Hi-Res Audio standard defined by Japan Audio Society. This logo is used under license from Japan Audio Society.
This product is protected by certain intellectual property rights of Microsoft. Use or distribution of such technology outside of this product is prohibited without a license from Microsoft.
Windows and the Windows logo are trademarks of the Microsoft group of companies.
DSD and the Direct Stream Digital logo are trademarks of Sony Corporation.
MPEG Layer-3 audio coding technology licensed from Fraunhofer IIS and Thomson.
"All other trademarks are the property of their respective owners."
Anteros Building, Odyssey Business Park, West End Road, South Ruislip,
Middlesex, HA4 6QQ United Kingdom
Tel: +44(0)208 836 3612
6, Avenue de Marais F - 95816 Argenteuil Cedex FRANCE
Tel: +33(0)969 368 050
Корпорация О энд Пи
© 2016 Onkyo & Pioneer Corporation. All rights reserved.
Onkyo group has established its Privacy Policy, available at [http://www.pioneer-audiovisual.com/privacy].
"Pioneer" and "PBASS" are trademarks of Pioneer Corporation, and is used under license.
SN 29402674

natural_image
Line drawing of a computer monitor with ports and a screen (no text or symbols)Hoofdtoestel (1)
②
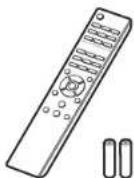
Afstandsbediening (RC-945S) (1), Batterijen (AAA/R03) (2)
3

DAB/FM-draadantenne (1)
4
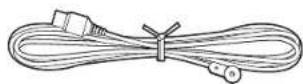
FM-binnenantenne (1)
5

natural_image
Two identical rectangular panels with rounded corners, no text or symbols presentnatural_image
Two identical bundles of coiled wires, no text or symbols present


natural_image
Diagram showing a device connected to a speaker block, with no visible text or symbols.

a DAB/FM-draadantenne, b FM-binnenantenne, c Netsnoer
natural_image
Diagram showing two views of a device with a switch and cable, no text or symbols presentnatural_image
Illustration of hands inserting a battery into a device (no text or symbols visible)


flowchart
graph TD
    A["PRESET"] --> B["TUNE"]
    C["pre-set"] --> D["TUNE"]
    E["SHUFFLE"] --> F["REPEAT"]
    G["MEMORY"] --> H["OR"]
    I["a"] --> J["Block 1"]
    K["b"] --> L["Block 2"]

AIFF (.aiff/.aif/.aifc/.afc/.AIFF/.AIF/.AIFC/.AFC):
AAC (.aac/.m4a/.mp4/.3gp/.3g2/.AAC/.M4A/.MP4/.3GP/.3G2):
• Ondersteunde formaten: MPEG-2/MPEG-4 Audio
- Ondersteunde bemonsteringsfrequencies: 44,1 kHz, 48 kHz, 88,2 kHz, 96 kHz
48 kHz, 88.2 kHz, 96 kHz, 176.4 kHz, 192 kHz
• Kwantiseringsbit: 8 bit, 16 bit, 24 bit
Apple Lossless (.m4a/.mp4/.M4A/.MP4):
• Ondersteunde bemonsteringsfrequenties: 44,1 kHz,
48 kHz, 88,2 kHz, 96 kHz, 176,4 kHz, 192 kHz
• Kwantiseringsbit: 16 bit, 24 bit
DSD (.dsf/.dff/.DSF/.DFF):
• Ondersteunde formaten: DSF/DSDIFF
- Ondersteunde bemonsteringsfrequencies: 2,8 MHz, 5,6 MHz, 11,2 MHz

Oldies music (Oldies)
natural_image
Illustration of a hand holding a tablet with a play button, no text or symbols presentKoppelen
natural_image
Illustration of hands interacting with a video player interface (no text or symbols visible)
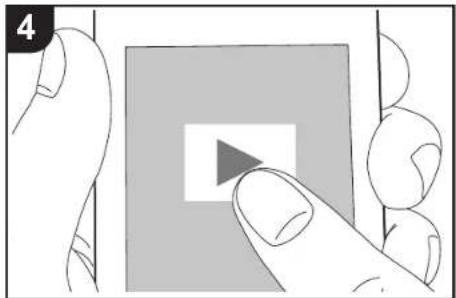
natural_image
Illustration of a hand pressing a play button on a square screen (no text or symbols)Basisbediening
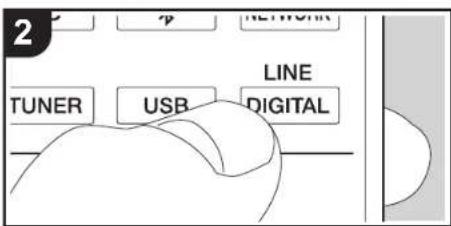
natural_image
Two circular icons: one showing a flat-screen monitor, the other showing a game controller (no text or symbols)Afspelen
AIFF (.aiff/.aif/.aifc/.afc/.AIFF/.AIF/.AIFC/.AFC):
AAC (.aac/.m4a/.mp4/.3gp/.3g2/.AAC/.M4A/.MP4/.3GP/
.3G2):
• Ondersteunde formaten: MPEG-2/MPEG-4 Audio
• Ondersteunde bemonsteringsfrequencies: 44,1 kHz, 48 kHz, 88,2 kHz, 96 kHz
- Ondersteunde bitsnelheden: Tussen 8 kbps en 320 kbps en VBR
FLAC (.flac/.FLAC):
- Ondersteunde bemonsteringsfrequencies: 44,1 kHz, 48 kHz, 88,2 kHz, 96 kHz, 176,4 kHz, 192 kHz
• Kwantiseringsbit: 8 bit, 16 bit, 24 bit
LPCM (Linear PCM):
- Ondersteunde bemonsteringsfrequencies: 44,1 kHz, 48 kHz
• Kwantiseringsbit: 16 bit
Apple Lossless (.m4a/.mp4/.M4A/.MP4):
- Ondersteunde bemonsteringsfrequencies: 44,1 kHz, 48 kHz, 88,2 kHz, 96 kHz, 176,4 kHz, 192 kHz
• Kwantiseringsbit: 16 bit, 24 bit
DSD (.dsf/.dff/.DSF/.DFF):
• Ondersteunde formaten: DSF/DSDIFF
- Ondersteunde bemonsteringsfrequencies: 2,8 MHz, 5,6 MHz, 11,2 MHz
Als u "Every" selecteert, selecteer dagen van de week uit "Everyday", "Sunday", "Monday", "Tuesday",
"Wednesday", "Thursday", "Friday", "Saturday", "Mon-Fri", "Tue-Sat", en "Sat-Sun" en bevestig. Als u "Once" selecteert, selecteer dan een dag van de week uit "Sunday", "Monday", "Tuesday", "Wednesday",
"Thursday", "Friday", of "Saturday" en bevestig.
Invoeren tekst
"Wired" (Fabrieksinstelling): Verbinden via bedraden LAN
(4 ohms, 1 kHz THD 10%)
• ±10 dB (10 kHz (TREBLE))
• FHSS (Freq Hopping Spread Spectrum)
Compatibele Bluetooth profielen
A2DP 1.2
AVRCP 1.3
• HOGP-Host (Client)
• HOGP-HID Apparaat (Server)
• HID Service (HIDS)
Ondersteunde codecs
• SBC
- AAC
Zendbereik (A2DP)
• 20 Hz - 20 kHz (Bemonsteringsfrequentie 44,1 kHz)
Maximum communicatiebereik *
The Wi-Fi CERTIFIED Logo is a certification mark of Wi-Fi Alliance ^® .


AirPlay, iPad, iPhone, and iPod touch are trademarks of Apple Inc., registered in the U.S. and other countries.
iPad Air and iPad mini are trademarks of Apple Inc.
"Made for iPod", "Made for iPhone" and "Made for iPad" mean that an electronic accessory has been designed to connect specifically to iPod, iPhone, or iPad, respectively, and has been certified by the developer to meet Apple performance standards. Apple is not responsible for the operation of this device or its compliance with safety and regulatory standards.
Please note that the use of this accessory with iPod, iPhone or iPad may affect wireless performance.
AirPlay works with iPhone, iPad, and iPod touch with iOS 4.3.3 or later, Mac with OS X Mountain Lion or later, and PC with iTunes 10.2.2 or later.

The Bluetooth ^® word mark and logos are registered trademarks owned by the Bluetooth SIG, Inc.

Google Cast and the Google Cast badge are trademarks of Google inc.

This Mark Certifies that this product is compliant with the BLACKFIRE ALLIANCE Standard. Please refer to WWW.BLACKFIREALLIANCE.COM for more information. BLACKFIRE™ is a Registered Trademark (No. 85,900,599) of BLACKFIRE RESEARCH CORP. All rights reserved.

FireConnect™ is technology powered by BlackFire Research.

The product with this logo is conformed to Hi-Res Audio standard defined by Japan Audio Society. This logo is used under license from Japan Audio Society.
This product is protected by certain intellectual property rights of Microsoft. Use or distribution of such technology outside of this product is prohibited without a license from Microsoft.
Windows and the Windows logo are trademarks of the Microsoft group of companies.
DSD and the Direct Stream Digital logo are trademarks of Sony Corporation.
MPEG Layer-3 audio coding technology licensed from Fraunhofer IIS and Thomson.
"All other trademarks are the property of their respective owners."
Anteros Building, Odyssey Business Park, West End Road, South Ruislip, Middlesex, HA4 6QQ United Kingdom
Tel: +44(0)208 836 3612
6, Avenue de Marais F - 95816 Argenteuil Cedex FRANCE
Tel: +33(0)969 368 050
Корпорация О энд Пи
© 2016 Onkyo & Pioneer Corporation. All rights reserved.
Onkyo group has established its Privacy Policy, available at [http://www.pioneer-audiovisual.com/privacy].
"Pioneer" and "PBASS" are trademarks of Pioneer Corporation, and is used under license.
SN 29402674

F1609-0
natural_image
Line drawing of a computer monitor with ports and a screen (no text or symbols)natural_image
Two identical rectangular panels with rounded corners, no text or symbols present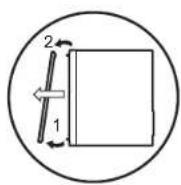


natural_image
Diagram showing a device panel connected to a speaker unit, both enclosed in circular frames (no text or symbols visible)natural_image
Diagram showing two views of a device with an open panel and cable, no text or symbols present
natural_image
Illustration of hands inserting a battery into a device (no text or symbols visible)
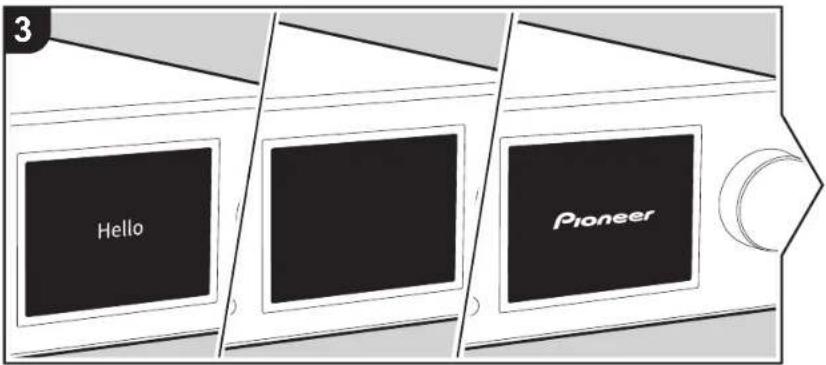

flowchart
graph TD
    A["PRESET"] --> B["TUNE"]
    C["PRESET+"] --> D["TUNE+"]
    E["SHUFFLE"] --> F["REPEAT"]
    G["MEMORY"] --> H["DE"]
    style A fill:#f9f,stroke:#333
    style C fill:#f9f,stroke:#333
    style E fill:#f9f,stroke:#333
    style G fill:#f9f,stroke:#333
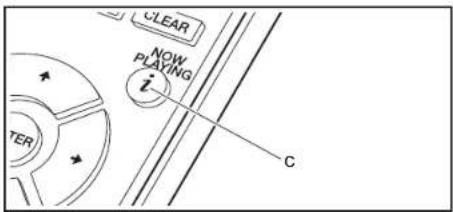


flowchart
graph TD
    A["ENTER"] --> B["PLAYING"]
    B --> C["RETURN"]
    C --> D["PLAYING"]
    style A fill:#f9f,stroke:#333
    style B fill:#ccf,stroke:#333
    style C fill:#cfc,stroke:#333
    style D fill:#fcc,stroke:#333
Основные операции
AIFF (.aiff/.aif/.aifc/.afc/.AIFF/.AIF/.AIFC/.AFC):
AAC (.aac/.m4a/.mp4/.3gp/.3g2/.AAC/.M4A/.MP4/.3GP/.3G2):
DSD (.dsf/.dff/.DSF/.DFF):
natural_image
Illustration of a finger pressing a speaker icon on a screen (no text or symbols)
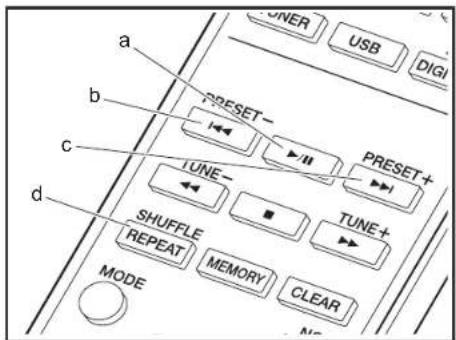
Основные функции
www.spotify.com/connect/
"Option Setting" - "Tuner Setting" - "Tuning Mode" -
Country music (Кантри)
natural_image
Illustration of a hand holding a tablet with a play button, no text or symbols present
Соединения
natural_image
Two circular icons: one showing a flat-screen monitor, the other showing a game controller with a hard drive (no text or symbols)Воспроизведение
AIFF (.aiff/.aif/.aifc/.afc/.AIFF/.AIF/.AIFC/.AFC):
AAC (.aac/.m4a/.mp4/.3gp/.3g2/.AAC/.M4A/.MP4/.3GP/.3G2):
DSD (.dsf/.dff/.DSF/.DFF):
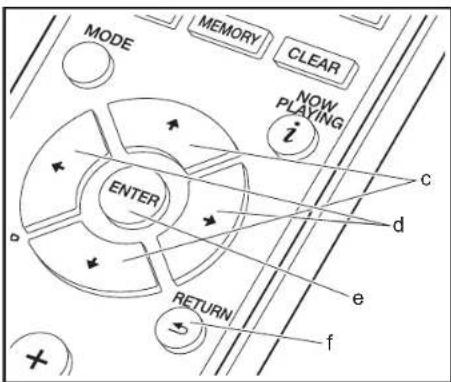
flowchart
graph TD
    A["MODE"] --> B["ENTER"]
    B --> C["RETURN"]
    C --> D["OUTPUT"]
    D --> E["NOT"]
    F["MEMORY"] --> G["CLEAR"]
    H["NOW PLAYING"] --> I["i"]
    J["c"] --> K["d"]
    L["e"] --> M["f"]
    N["+"] --> O["+"]

Ввод текста
English (значение по умолчанию), German, French, Spanish, Italian, Dutch, Swedish, Russian, Chinese
Tuner Setting
• FHSS (Freq Hopping Spread Spectrum)
The Wi-Fi CERTIFIED Logo is a certification mark of Wi-Fi Alliance ^® .


AirPlay, iPad, iPhone, and iPod touch are trademarks of Apple Inc., registered in the U.S. and other countries.
iPad Air and iPad mini are trademarks of Apple Inc.
"Made for iPod", "Made for iPhone" and "Made for iPad" mean that an electronic accessory has been designed to connect specifically to iPod, iPhone, or iPad, respectively, and has been certified by the developer to meet Apple performance standards. Apple is not responsible for the operation of this device or its compliance with safety and regulatory standards.
Please note that the use of this accessory with iPod, iPhone or iPad may affect wireless performance.
AirPlay works with iPhone, iPad, and iPod touch with iOS 4.3.3 or later, Mac with OS X Mountain Lion or later, and PC with iTunes 10.2.2 or later.
Bluetooth
The Bluetooth ^® word mark and logos are registered trademarks owned by the Bluetooth SIG, Inc.
Google Cast
Google Cast and the Google Cast badge are trademarks of Google inc.

This Mark Certifies that this product is compliant with the BLACKFIRE ALLIANCE Standard. Please refer to WWW.BLACKFIREALLIANCE.COM for more information. BLACKFIRE™ is a Registered Trademark (No. 85,900,599) of BLACKFIRE RESEARCH CORP. All rights reserved.

FireConnect™ is technology powered by BlackFire Research.

The product with this logo is conformed to Hi-Res Audio standard defined by Japan Audio Society. This logo is used under license from Japan Audio Society.
This product is protected by certain intellectual property rights of Microsoft. Use or distribution of such technology outside of this product is prohibited without a license from Microsoft.
Windows and the Windows logo are trademarks of the Microsoft group of companies.
DSD and the Direct Stream Digital logo are trademarks of Sony Corporation.
MPEG Layer-3 audio coding technology licensed from Fraunhofer IIS and Thomson.
"All other trademarks are the property of their respective owners."
Anteros Building, Odyssey Business Park, West End Road, South Ruislip, Middlesex, HA4 6QQ United Kingdom
Tel: +44(0)208 836 3612
6, Avenue de Marais F - 95816 Argenteuil Cedex FRANCE
Tel: +33(0)969 368 050
Корпорация О энд Пи
© 2016 Onkyo & Pioneer Corporation. All rights reserved.
Onkyo group has established its Privacy Policy, available at [http://www.pioneer-audiovisual.com/privacy].
"Pioneer" and "PBASS" are trademarks of Pioneer Corporation, and is used under license.
SN 29402674
F1609-0




- Install
- Initial Setup
- Playback
- Advanced Setup
- Firmware Update
- Others
- > Before Start > Part Names > Install > Initial Setup > Playback
- What's in the box
- 7
- Front Panel
- Rear Panel (X-HM76D, X-HM86D, XC-HM86D)
- > Part Names
- Rear Panel (X-HM76)
- Remote Controller
- Display
- Speakers System (X-HM76D, X-HM76)
- Speakers System (X-HM86D)
- Connect the Speakers
- Connecting the antennas and power cord, etc.
- Antenna Hookup
- Power Cord Hookup
- Power On & Initial Setup
- Wi-Fi connection settings
- ■ Scan Networks
- ■ Use iOS Device
- XXXXXX".
- ■ Enter SSID of the access point
- Time settings
- Playing CDs
- Playing music CDs
- > Before Start > Part Names > Install > Initial Setup > Play back
- Playing MP3/WMA discs
- Repeat play/Shuffle play
- Program play (Music CDs)
- USB Storage Device/HDD
- Basic operations
- Repeat/Shuffle
- USB Storage / HDD Device Requirements
- Supported Audio Formats
- MP3 (.mp3/.MP3):
- WMA (.wma/.WMA):
- WAV (.wav/.WAV):
- AIFF (.aiff/.aif/.aifc/.afc/.AIFF/.AIF/.AIFC/.AFC):
- AAC (.aac/.m4a/.mp4/.3gp/.3g2/.AAC/.M4A/.MP4/.3GP/
- .3G2):
- FLAC (.flac/.FLAC):
- Apple Lossless (.m4a/.mp4/.M4A/.MP4):
- DSD (.dsf/.dff/.DSF/.DFF):
- > Before Start > Part Names > Install > Initial Setup > P I a y b a c k
- Internet Radio
- Tuneln
- Spotify
- Basic Operation
- Listening to the FM Radio
- Tuning Automatically
- Tuning Manually
- Registering a station
- Selecting registered stations
- To delete a registered station
- To give a name to a registered station
- Using RDS
- Displaying text information (Radio Text)
- Search for stations by Program Type
- Folk music
- Documentary
- Listening to DAB Digital Radio (X-HM76D, X-HM86D, XC-HM86D)
- Tuning
- Changing the order stations are displayed
- Displaying DAB Radio Information
- BLUETOOTH®
- Pairing
- Playing Back
- AirPlay®
- Playing audio from an external device
- Connections
- Music Server
- Configuring Windows Media® Player
- Windows Media Player 11
- Windows MediaPlayer 12
- Playing
- Controlling Remote Playback from a PC
- AAC (.aac/.m4a/.mp4/.3gp/.3g2/.AAC/.M4A/.MP4/.3GP/.3G2):
- LPCM (Linear PCM):
- Using the alarm to start play
- Settings
- Entering text, adjusting sound quality, etc.
- Entering text
- Adjusting the sound quality
- Adjusting the bass (BASS)
- Adjusting the treble (TREBLE)
- Emphasizing the low range (P.BASS)
- Advanced Settings
- Network Setting
- ■ Connection
- ■ Wi-Fi Setup
- DHCP
- IP Address
- Subnet Mask
- Gateway
- DNS Server
- Proxy URL
- ■ Proxy Port
- ■ Friendly Name
- AirPlay Password
- Network Check
- Option Setting
- Digital Filter
- Language
- Bluetooth Setting
- System Info
- Factory Reset
- Update
- via Network
- via USB
- Web Setup
- The updating function on this unit
- How to update
- Updating the Firmware via Network
- Updating via USB
- Troubleshooting
- Before starting the procedure
- Resetting the unit (this resets the unit settings to the default)
- Power
- Cannot turn on the unit
- The unit turns off unexpectedly
- ■There is no audio from external devices
- ■The display doesn't light
- ■Wi-Fi Connection
- Cannot connect to the access point
- Connected to an SSID different to the SSID selected
- Playback is interrupted and communication does not work
- ■Cannot play discs
- ■Cannot Play USB storage device / HDD
- ■FM reception is poor
- ■Network function
- Cannot access the Internet radio
- Cannot access the network server
- Playback stops while listening to music files on the network server
- The album names and artist names for the Music Server are not displayed
- not other times
- ■BLUETOOTH function
- Cannot connect with this unit
- Music playback is unavailable on the unit even after successful BLUETOOTH connection
- Sound is interrupted
- General Specifications
- ■Analog Audio Output Section
- RMS Output Power
- Tone Control Characteristics
- Supported Speaker Impedance
- ■Tuner Section
- X-HM76
- Antenna (FM)
- Preset Channel
- X-HM76D, X-HM86D, XC-HM86D
- Tuning Frequency Range (DAB)
- Antenna (FM/DAB)
- ■CD Section
- Media/Format
- ■Digital Audio Input
- Front/Rear USB
- DC Output
- Optical Digital Input
- ■Network Section
- Wired LAN
- Wireless LAN (Wi-Fi)
- ■Bluetooth Section
- Communication system
- Frequency band
- Modulation method
- Compatible Bluetooth profiles
- Supported Codecs
- Transmission range (A2DP)
- Maximum communication range\*
- ■General
- Power Supply
- Power Consumption
- Auto Standby
- Dimensions (W × H × D)
- Weight
- ■Speaker (X-HM76D, X-HM76, X-HM86D)
- Type
- Configuration
- Impedance
- Maximum input power
- Effective Frequency Range
- Recommended Frequency Range
- Crossover Frequency
- Output Sound Pressure Level
- License and Trademark Information
- Bluetooth
- Commandes de base
- Jumelage
- Lecture
- Saisie d'un texte
- Poids
- Instalación
- Operaciones básicas
- Emparejado
- Conexiones
- Reproducción
- Operazioni base
- Abbinamento
- Operazione base
- Riproduzione
- Immissione di testo
- Tuner Setting
- Profili Bluetooth compatibili
- Codec supportati
- Dimensioni (L × A × P)
- AIFF (.aiff/.alf/.aifc/.afc/.AIFF/.AIF/.AIFC/.AFC):
- Wiedergabe
- Eingeben von Text
- Antenne (FM)
- Kompatible Bluetooth Profile
- PANDORA
- Koppelen
- Basisbediening
- Afspelen
- Invoeren tekst
- Основные операции
- Основные функции
- Соединения
- Воспроизведение
- Ввод текста
- Google Cast
Brand : PIONEER
Model : X-HM76D
Category : Hi-Fi System