
MW0711 - Tablet AOC - Free user manual and instructions
Find the device manual for free MW0711 AOC in PDF.


| Product Type | Tablet |
| Model | MW0711-E |
| Display | 7-inch TFT LCD capacitive touchscreen, 800x480 pixels |
| Operating System | Android 4.x |
| Processor | ARM Cortex-A8, up to 1.2 GHz |
| Memory (RAM) | 1 GB DDR3 |
| Storage | 4 GB internal flash; expandable via microSD (TF) up to 32 GB |
| Wireless Connectivity | Wi-Fi 802.11b/g/n |
| Camera | Front 0.3 megapixel |
| Dimensions (L×W×H) | 19.2 × 12.1 × 0.99 cm (7.56 × 4.76 × 0.39 in) |
| Weight | 0.330 kg (0.73 lbs) with battery |
| Battery | Built-in lithium-ion polymer rechargeable, 3.7V, 3100 mAh |
| Power Adapter | AC input 100-240V, 50/60 Hz; DC output 5V, 1.5A |
| Ports | Micro USB 2.0, OTG, 3.5mm headset jack |
| Audio | Built-in microphone and speaker, stereo headset output |
| Multimedia | Video player, audio player, picture browser, camera, recorder |
| Productivity | Email, browser, alarm, calculator, explorer, app installation |
| Cleaning and Maintenance | Clean with dry soft cloth; avoid moisture, dust, and extreme temperatures. |
| Safety Warnings | Do not disassemble; use only provided charger; avoid strong magnetic fields and electrostatic environments. |
| Spare Parts / Repairability | No user-serviceable parts; contact authorized service center for repairs or battery replacement. |
| General Information | Manufacturer: AOC; model year: not specified; complies with FAT32 file system. |
Frequently Asked Questions - MW0711 AOC
User questions about MW0711 AOC
0 question about this device. Answer the ones you know or ask your own.
Ask a new question about this device
Download the instructions for your Tablet in PDF format for free! Find your manual MW0711 - AOC and take your electronic device back in hand. On this page are published all the documents necessary for the use of your device. MW0711 by AOC.
USER MANUAL MW0711 AOC
natural_image
Tablet displaying a Google app interface with multiple app icons on its screen, set against a geometric background (no readable text or symbols)MW0711-E
USER MANUAL

Android 4.x
7"
WiFi
Table of Contents
CHAPTER 1 PRODUCT OVERVIEW ....1
1.1 Functions overview.... 1
1.2 Notes ...... 1
1.3 Packaging list 2
1.4 Technical specifications.... 2
CHAPTER 2 BUTTONS AND APPEARANCE....4
CHAPTER 3 EASYCONFIG....6
CHAPTER 4 BASIC OPERATIONS....8
4.1 Booting up 8
4.2 Shutdown 8
4.3 Network 8
4.4 Standby Mode....8
4.5 Reset......8
4.6 Connecting to PC and file transfer 9
4.7 Volume adjustment....9
4.7.1 Adjusting the media volume.... 10
4.7.2 Adjusting the alarm volume 10
4.7.3 Adjusting the notification volume 10
4.8 Charging.... 10
4.9 Touch screen operations 10
4.10 Search icon....11
CHAPTER 5 COMMON FEATURES ....12
5.1 Landscape/Portrait display switching 12
5.2 Using virtual keyboard to type.... 12
5.2.1 Android keyboard.... 12
5.2.2 Editing text.... 13
5.3 Notification bar.... 14
5.3.1 Opening notification bar 14
5.3.2 Closing notification panel.... 14
5.4 Recently run apps 14
5.5 Changing wallpaper 14
5.6 Power control 14
CHAPTER 6 MAIN INTERFACE....16
6.1 Main interface 16
6.2 Apps interface 16
6.3 Browser 17
6.3.1 Opening browser 17
6.3.2 Going to a webpage 18
6.3.3 Setting a home page 18
6.3.4 Browsing a webpage.... 18
6.3.5 Managing bookmarks.... 19
6.3.6 Other functions.... 20
6.4 Video player 20
6.4.1 Video playing 20
6.4.2 Delete video.... 22
6.5 Audio player....22
6.5.1 Playlist 22
6.5.2 Playing audio 23
6.5.3 Sound effects.... 24
6.6 Picture browser 25
6.6.1 Browsing pictures ...... 25
6.6.2 Picture file operation.... 26
6.7 Camera 27
CHAPTER 7 APPS....28
7.1 Moving a program icon to another interface.... 28
7.2 Deleting a program icon.... 28
7.3 Adding a Widget.... 28
7.4 Creating a folder.... 28
7.5 Renaming a folder 28
CHAPTER 8 COMMON TOOLS ......29
8.1 E-mail..... 29
8.1.1 Opening e-mail.... 30
8.1.2 Creating and sending e-mails 31
8.1.3 Receiving and reading e-mail.... 32
8.1.4 Managing e-mail 32
8.1.5 Email Settings.... 33
8.2 Recorder.... 33
8.3 Alarm 34
8.3.1 Set alarm.... 34
8.3.2 Delete alarm 34
8.4 Calculator.... 35
8.5 Explorer 35
8.6 Installing apps 35
8.7 Uninstall app.... 35
CHAPTER 9 SETTINGS....36
9.1 WIRELESS & NETWORK Settings.... 36
9.1.1 Wi-Fi network connection.... 36
9.1.2 More 38
9.2 DEVICE Settings.... 38
9.2.1 Sound.... 38
9.2.2 Display 38
9.2.3 Storage 38
9.2.4 Battery 39
9.2.5 Apps....39
9.3 PERSONAL Settings 39
9.3.1 Accounts & Sync 40
9.3.2 Location services 40
9.3.3 Security.... 40
9.3.4 Language & input 40
9.3.5 Backup & reset 41
9.4 SYSTEM Settings 41
9.4.1 Data & Time 41
9.4.2 Accessibility.... 41
9.4.3 About device 41
CHAPTER 10 USING MICRO SD (TF) CARD ....42
CHAPTER 11 CONNECTING TO USB DRIVE....43
CHAPTER 12 ABOUT THE BATTERY AND POWER....44
CHAPTER 13 FIRMWARE UPDATING / RESETTING TO FACTORY....45
CHAPTER 14 FREQUENTLY ASKED QUESTIONS....46
CHAPTER 15 TROUBLESHOOTING....48
Chapter 1 Product Overview
1.1 Functions overview
- 7 inch wide screen True Color TFT touch screen with a high resolution of 800*480 pixels.
- Surf the Internet wirelessly via Wi-Fi to enjoy the Internet on the go.
● Support all mainstream e-mail services for more convenient e-mail sending and receiving. - Switching between portrait mode and landscape mode is possible through gravity sensing.
Four-direction rotation display is supported.
● Shooting images or videos via 300 thousand pixels front camera.
● Support Video Player, Audio Player, Photo Browser, Camera and Shelves.
● Equipped with a built-in microphone, enabling audio-recording. - Eco settings enable the brightness to be freely adjusted.
1.2 Notes
- Do not use the unit in an overly hot, cold, wet, or dusty environment. Do not expose it to sunlight.
● Try not to use this unit in an environment with a strong magnetic field or static electricity. - Avoid dropping this unit or subjecting to strong impacts.
- The adapter of this product should not be dropped nor splashed with liquid. Any object filled with liquid, such as a vase, should not be placed on the top of it.
- There are no user-serviceable parts inside the product. Do not dismantle this unit. Otherwise, the warranty may be voided. Contact servicing personnel if you need assistance.
● The battery life may vary depending on the use conditions and product age. - Replacing the battery in this product by user is not recommended. Do not dismantle the unit yourself. Explosion may occur if the battery is not properly handled or replaced. Suggest you contact professional servicing personnel for such service. Also recommend to only use the same brand of battery or equivalent for replacement.
- The long life of a lithium battery is due to its much smaller memory effects than that of the regular Nickel-Cadmium batteries. However, if the lithium battery is degrading, contact the local Service Center.
- The company is not liable for the data loss or deletion on machine resulting from the misuse of software, improper operation of the battery, servicing, other accidents, or other indirect loss
thereof.
- The actual product may be different from that described in the Instructions due to the software updates. These Instructions are for informational purposes only.
● This being a highly mobile product, we recommend you back-up your data regularly.
1.3 Packaging list
| AOC Breeze Tablet Unit | X1 |
| USB cable | X1 |
| OTG cable | X1 |
| Micro USB Adapter | X1 |
| Quick Setup Guide | X1 |
| Warranty Statement | X1 |
Note: The actual accessories provided with the product may vary.
1.4 Technical specifications
Basic specifications
| Model no. AOC Tablet MW0711-E | |
| Installed OS | Android OS 4.x |
| Processor (CPU) | ARM Cortex-A8,CPU Frequency Up To 1.2G Hz |
| Memory | 1GB, DDR3 |
| WLAN WI-FI IEEE 802.11b/g/n | |
| Camera | Front 0.3 megapixels |
| Storage capacity Built-in 4GB Flash Memory | |
| Expansion cards | Micro SD (TF) card, up to 32 GB. |
| LCD | 7 inch TFT LCD capacitive touch screen with a resolution of 800*480 pixels |
| Audio output | Headset: Stereo output; internal speakers: Mixed output. |
Power specifications
| Voltage | Supply voltage: 5V Charging voltage: 5V |
| Current | Max. current for playback is 1A DC.Max. current for charging is 1.2A DC. |
| Battery used | Built-in lithium-ion polymer rechargeable battery, 3.7V, 3100mAh |
| Power adapter | AC input: 100-240V 50/60Hz DC input: 5V 1.5A |
| Charging time | It takes about 3.5 hours for the battery to be fully charged when the provided charger is used while powered-down. The charging time may vary depending on the remaining battery level.Note: Do not charge the battery for more than 12 hours continuously. |
| Battery use time(Under the condition that the battery is fully charged in a normal temperature) | Audio: About 12 hoursVideo: About 4 hoursWeb browsing: About 4 hours |
External dimensions
| Dimension (L×W×H) | 7.56 ×4.76 × 0.39inch (19.2 ×12.1 ×0.99cm) |
| Weight 0.73 lbs (0.330 kgs) (with battery) | |
| Ports | Micro USB 2.0 high speed port, OTG, 3.5mm headset |
Environmental conditions
| Operating temperature | 0°C ~ 40°C |
| Storage temperature -20°C ~ 55°C | |
| Max. humidity | 90% RH (non-condensation) |
| Supported OS | Windows2000/XP/Windows 7/Vista, Macintosh OS X |
Note: Windows 2000+SP1/SP2 is not supported by this product. The user should upgrade to SP3 or above. This product does not guarantee all video formats are playable. Even if some formats are listed in the instructions, they may be not play properly, due to some video particularities..
Chapter 2 Buttons and Appearance

| A. Operation indicator | B. Power button |
| C. Volume +/- buttons D. Front camera | |
| E. Touch screen |

| F. Headphone jack H. Build-in Microphone | |
| G. Micro USB port (Power cable jack/connecting to PC/ connecting to USB drive) | |
| I. Micro SD (TF) card slot | J. Audio speaker |
Note 1: During operation, sounds will be automatically output from the Audio speaker if there is audio output.
Note 2: In the Instructions, “Press” means pressing a button while “Press and Hold” means continuously pressing a button for 2 \~ 3 seconds.
Chapter 3 EasyConfig
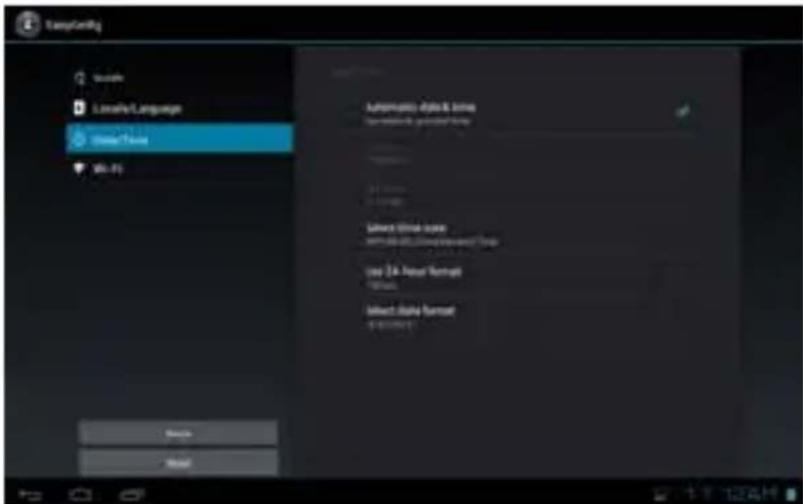
When first using the tablet breeze, the EasyConfig window will pop up. It includes Language, Date/Time and Wi-Fi settings.

Touch "Next" to setup language, and then choose a language you want.

Touch "Next" to setup date, time zone and time.
Tap "Next" to go to the Wi-Fi settings interface.

Touch the "SCAN" icon to search for the available wireless networks in the vicinity.
Touch the desired wireless network name to connect to it. You will be prompted, if a password is required.
- If static IP address needs to be entered. Then click on "show advanced options" to show "IP settings". Touch the pop-up menu and select "static". Then enter the IP address, gateway, network mask, and DNS information required for such Wi-Fi network connections.
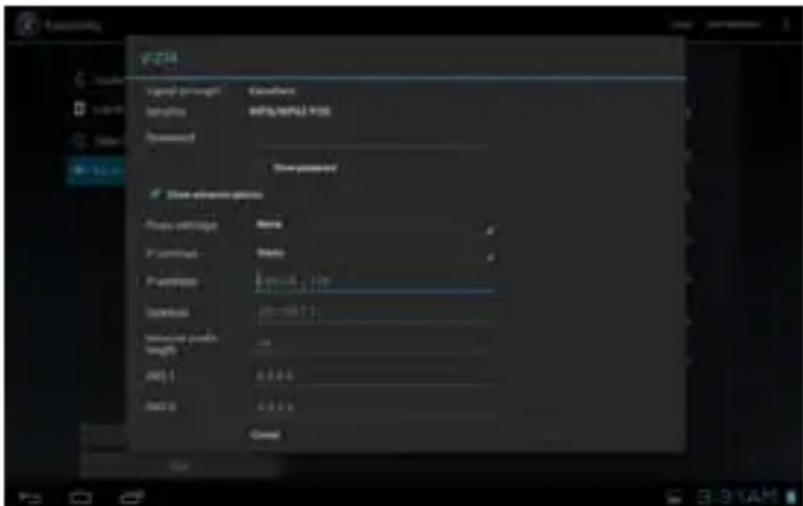
- If you use dynamic IP address keep the default "DHCP" in the "IP settings" option.
Note: The word "Connected" displayed under the network name indicates a successful connection.
Afterwards touch "End" to exit and then you can surf the Internet, connect to email services, etc.
Chapter 4 Basic Operations
4.1 Booting up
Press and hold the Power button for a few seconds. After the boot screen is shown (for about 1 minute), the unlock interface is shown. Touch and hold the unlock icon at the middle right of the screen and drag it rightward to the “open lock” icon to unlock it. Once unlocked, the main Interface will be shown.
Note: Touch and hold the unlock icon at the middle right of the screen and drag it leftward to the Camera icon to enter directly into camera mode.
4.2 Shutdown
In any mode, Press and hold the Power button for about 2 seconds. The device shutdown window will appear: Touch "OK" to turn off the product.
Note 1: If the battery is low, the product will shutdown automatically.
Note 2: If the product freezes during operation, press and hold the Power button for 8 seconds to force shutdown.
4.3 Network
To surf the Internet wirelessly, make sure the Wi-Fi wireless network signals are present and set the Wi-Fi network connection. There are two ways of going to the “Wireless & Networks” settings interface:
a. Touch the notification icon at the bottom right corner of the main interface, touch the popup window and touch "Wi-Fi".
b. In the "Apps" interface, touch settings icon to go to the settings interface, and then touch "Wi-Fi".
Note: For detailed settings, refer to "9.1 Wireless & Network Settings".
4.4 Standby Mode
Standby: During use, you can press the power button to enter into standby mode to save battery power and lock the key and screen.
Wake up: When the device is in standby mode, press the Power button, after the screen lights up, Touch and hold the unlock icon at the middle right of the screen and drag it rightward to the "open lock" icon to unlock it. Once unlocked, the main Interface will be shown.
4.5 Reset
If the product crashes during operation, you can press and hold the Power button for 8 seconds to force shutdown.
4.6 Connecting to PC and file transfer
Connecting to PC:
- While the product is on, plug the smaller end of the provided USB cable to the Micro USB port on the side of it, and the larger end of it to a USB port on PC.
- If the "Media device (MTP)" option is selected, (in Storage Settings / menu / USB computer connection), the device is connected as a media device and you can transfer any files on Windows PC, or using "Android File Transfer" on a Macintosh PC.
- If the "Camera (PTP)" option is selected, device connected as a camera" and you can transfer only photos.
- If the "Mass Storage" option is selected, (in Storage Settings / menu / USB computer connection), the USB connected interface will pop up on the tablet with the option to "Turn on USB storage". Tap the button "Turn on USB storage" to connect. When the message changes to "Turn off USB storage", the connection has successfully been established.
The tablet (and SD card if installed) will be mounted on your computer as mass storage devices. You may access their data directly on your PC.
Disconnecting from PC:
Touch the "Safely Remove Hardware" icon at the bottom right corner of the Windows PC screen to remove the device safely on PC. On a Macintosh, just "eject drives" from desktop.
Then tap "Turn off USB storage" button on the tablet to disconnect tablet from computer.
Note: File transfer requires: Windows XP system need Windows Media Player 11 or greater than 11 supported, while Mac system may need to install MTP software packages. (* "Android File Transfer" for Mac OS X is available at www.android.com/filetransfer.)
4.7 Volume adjustment
Media volume: Adjust the volume for playing music and video.
Alarm: Adjust the volume of alarm.
Notification volume: Adjust the volume of notification ring tones.
4.7.1 Adjusting the media volume
There are two ways of going to the "Media Volume" adjustment interface:
- In any interface, press or press and hold the Volume +/- button on the top of the product to adjust the media volume.
- In the apps interface, touch “Settings -> Sound -> Volume”, touch the media volume bar to adjust the volume after the Volume window appears.
4.7.2 Adjusting the alarm volume
- In the apps interface, touch "Settings -> Sound -> Volume". Touch the alarm volume bar to adjust the volume after the Volume window appears.
4.7.3 Adjusting the notification volume
In the apps interface, touch "Settings -> Sound -> Volume". Touch the notification volume bar to adjust the volume after the Volume window appears.
4.8 Charging
When the battery is low, the provided adapter can be used to charge it.
- If the product is powered on during charging, the status bar will show the charging icon ( ). After the battery is fully charged, the bar will show the full battery icon ( ).
- If the product is shutdown during charging, the large charging icon interface will be displayed. After the battery is fully charged, the full battery icon ( ) will be shown; in the large charging icon interface, press the Power button according to the prompts to turn on.
Note 1: Check the detailed charging percentage through "Settings -> About Tablet -> Status -> Battery Level".
Note 2: To extend battery life, avoid charging the battery frequently when it is in high level.
(Example: more than 90%) It is not recommended to charge the product at this time; if charging is performed at this time, the percentage shown may not be 100%. This is normal.
Note 3: Once a “Low battery” message is displayed, the tablet should be charged as soon as possible.
4.9 Touch screen operations
Tip: The display used in this product is a capacitive multi touch screen. When using, you can operate it by using the buttons on its body or touching the corresponding icons on the display with finger to enable the corresponding functions.
Touch
Touch the screen icons to select. When you want to use the on-screen keyboard to type, or press an on-screen icons, just touch them using your finger.
Touch and hold
Touch the screen icons continuously until the option expands.
Slide
Place and slide your finger on the screen. Slide your finger up or down to scroll up or down; or if the list has a scroll bar, slide your finger up or down in the list to page down or up; when you are browsing pictures, slide your finger to the left or to the right to view the previous or next picture.
MultiTouch
While surfing the Internet or browsing pictures.
Zoom in: Touch the screen with two fingers, and slide two fingers together.
Zoom out: Touch the screen with two fingers, and slide two fingers together apart.
4.10 Search icon
In the main interface, touch the "Search" icon to search for the relevant information using the browser.
Chapter 5 Common Features
5.1 Landscape/Portrait display switching
- In the "Settings" interface, touch "Display ->Auto-rotate screen." When the "√" symbol appeared, the Landscape/Portrait screen display switching is on; when the "√" symbol disappeared, the Landscape/Portrait screen display switching is off.
- Hold this product vertically with your hands and tilt it to the left or right. When it is tilted to a position 90^ to the horizontal plane, the gravity sensor built in the product senses the action and the screen switches to Portrait mode from Landscape mode.
On the contrary, when it is tilted to a position 0^ to the horizontal plane, the screen switches to Landscape mode from Portrait mode.

Tip: This product supports 4-direction rotation display.
Note 1: For gravity sensing (display orientation), the screen orientation will not change if this product is placed on the level and stationary surface, regardless of how you rotate the product. Note 2: For some interfaces, such as the main interface, video player interface, and online video interface (full screen mode), gravity sensing will be disabled.
5.2 Using virtual keyboard to type
Touch any text input box to pop up the virtual keyboard as shown below. Use this keyboard to type any text or characters.
5.2.1 Android keyboard

| A. Show box: Show the text typed. Touch and hold this box to display the Edit Text menu for you to cut, copy, and paste the text. |
| B. Shift: Touch this key to switch between uppercase and lowercase text. |
| C. Touch this key to switch between numeric keypad and symbol keyboard; For numeric keypad and symbol keyboard, touch the ATL key to display the special symbols (such as ~, ±, ÷, ×, etc.). |
| D. Touch this key to hide the Android keyboard. |
| E. Touch to delete the edited text. |
| F. Touch to ensure input and go to next step. |
| G. Touch this key to switch between input method and input languages. |
| H. Tab: Touch this key to switch to next input table. Touch Shift key and then touch this key to switch to previous position. |
| I. Touch this key to input space. |
Tip: During the input process, you can move the cursor by touching a position.
5.2.2 Editing text
The typed text can be edited.
When there is text in the input field, touch and hold the input field (or touch and hold the show box in the keyboard) to open the Edit Text menu. Touch the options in the menu to edit the text.
| Select all Select all text typed | |
| Cut | Cut text typed |
| Copy | Copy text typed |
| Paste | Paste cut or copied text |
| Share Share the selected text via Gmail or Email. | |
5.3 Notification bar
The notification icon appears when a message is received, PC is connected, or music is played. You can open the notification bar to check for messages and played music.
5.3.1 Opening notification bar
After a new notification icon appears in the notification bar, touch the notification bar to open the notification bar.
5.3.2 Closing notification panel
Touch any space except for notification bar to close it.
5.4 Recently run apps
Touch the recent apps icon in the main interface to go to show the background apps. Touch the icon in the window to open the corresponding app.
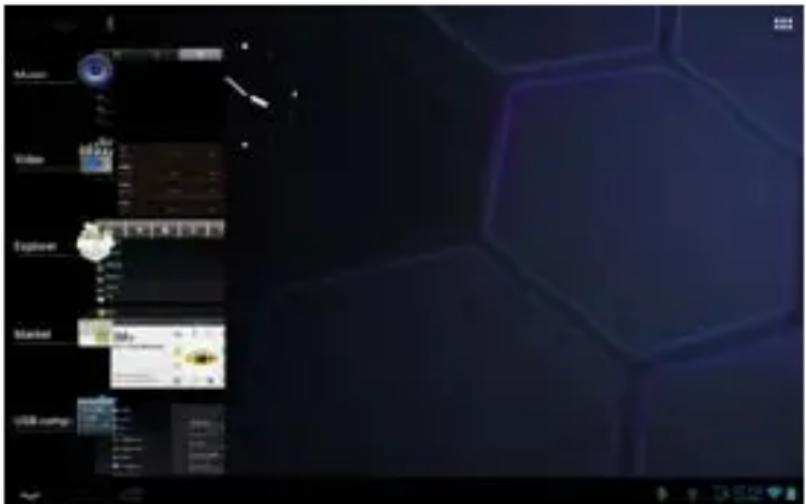
Touch the app in the window and slide your finger towards right to close the corresponding app.
5.5 Changing wallpaper
In the main interface, touch and hold a blank space, choose the desire wallpaper from “Live Wallpapers”, “Gallery” or “Wallpapers”.
5.6 Power control
In the apps interface, Slide your finger toward left to go to the Widgets interface, then continue sliding to the end widgets interface. Touch and hold the widgets icon to move it to main interface, as the picture show below:

| A. Wireless network on/off Touch to turn on or off the wireless network. | |
| B. Sync icon | Touch to set whether the wireless network can be used together with other programs. |
| C. Brightness adjustment icon | Touch to adjust the screen brightness. |
Chapter 6 Main Interface
Make sure the Wi-Fi wireless network connection is established to use the following functions.
6.1 Main interface

After booting and unlocking, you can go to the main interface (as shown below).
| A. Quick search box Touch to begin search. | |
| B. Voice Search Touch for voice search. | |
| C. Apps icon | Touch to go to APPS and Widgets Interface. |
| D. Back icon | Touch to go back one screen. |
| E. Home icon Touch to return to the home screen at any time. | |
| F. Go to recent apps | Touch to show thumbnails of your recent Apps. Touch a thumbnail to select it or flick a thumbnail left or right to remove from list. Slide up to scroll through list. |
| G. Notification bar | Touch for details on status, time, settings, etc. |
6.2 Apps interface
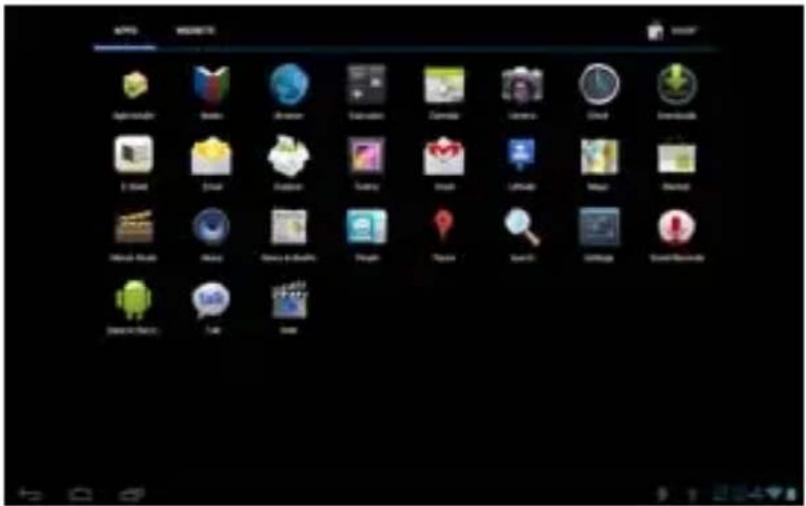
Touch the Apps & Widgets icon at the right of the main interface to go to the Apps interface, as shown below:
6.3 Browser
Open the browser to enjoy a colorful experience. You can also access news, weather forecast, and sports or traffic information when needed.
6.3.1 Opening browser
In the "Apps" interface, touch "Browser" to open a webpage.

| A. Back icon Touch to go to previous webpage. | |
| B. Next icon | Touch to go to next webpage. |
| C. Refresh icon | Touch to refresh the current webpage. |
| D. Close icon Touch to close the current tab. | |
| E. Add icon | Touch to open a new tab. |
| F. Delete/Add bookmark icon | Touch “x” to delete the text in the table. /Touch “☆” to add the current webpage to bookmark. |
| G. Voice search icon | Touch to use voice input to search Internet. |
| H. Menu icon Touch to | show menu options. |
| I. Bookmark icon | Touch to go to bookmark interface. |
Tip: When you touch a webpage link in an e-mail or message, the browser will be opened automatically.
6.3.2 Going to a webpage
-
Type a URL using the keyboard.
-
Touch the “←” icon at the right of the virtual keyboard to open a webpage.
6.3.3 Setting a home page
-
Touch the menu icon and touch "Setting->Set home page".
-
Touch "use current page", "Blank page", "Default page", "Most visited sites" or enter the URL of the webpage as home page.
Touch the back icon to return to the previous page. Touch the "+" icon, to open a new tab and you can go to the newly set home page.
6.3.4 Browsing a webpage
A browser provides many functions, allowing you to browse a webpage as you do on a PC.
You can simultaneously open several pages and touch one of them to browse.
You can slide your finger around the screen to browse other areas of webpage.
You can also zoom in or out of a webpage by sliding two fingers together or apart for easier browsing.
Open new browser tab
You can open several browser tabs, allowing you to browse between several websites easily. Up to 16 browser tabs can be opened.
To open a new tab, touch the menu icon, and touch "New tab" to open a new browser tab and go to the preset home page.
Switching between browser tabs
Touch the tab title to view the corresponding tab.
Selecting link in webpage
The selected link will be put in a blue box.
- Touch it to open a webpage.
- Touch and hold to open the Actions menu, Open, Save link, Copy link URL and Select text.
Selecting text in webpage
Touch and hold the text in webpage, the selected slider and menu option will display, slide the left and right slider to select the text for easier copying or sharing.
Saving webpage
You can save webpage for offline reading. In browser interface, touch menu icon and touch "Save for offline reading".
Finding text on a webpage

-
When browsing a webpage, touch the menu icon and touch "Find on Page".
-
Type the item to be found. After the content is typed, the shade of the text of the matches is highlighted in blue. Touch “^” or “▼” to skip forward or backward one match. Touch “Done” to finish finding.
6.3.5 Managing bookmarks
Bookmarks can be stored while browsing a webpage. In the browser interface, touch "Bookmarks" icon to go to the bookmarks management interface where there are three tabs: BOOKMARKS, HISTORY and SAVED PAGES..
BOOKMARKS: Bookmarks management interface.
HISTORY: History webpage interface.
SAVED PAGES: Show the list of saving webpage.
Adding bookmark
Touch “☆” to add the current webpage to bookmark.
Opening bookmark
In the "Bookmark" interface, perform any of the following steps to open a bookmark:
- Touch the bookmark you want to open.
- Touch and hold the bookmark you want to open, and touch "Open" or "Open in new window".
Editing bookmark
- In the bookmark interface, touch and hold the bookmark you want to edit.
- Touch "Edit Bookmark" in the options to show the Edit Bookmark window.
- Enter your desired changes and touch "OK" to finish editing.
Using bookmark
Touch and hold a bookmark in the bookmark list to pop up the Actions option: Open,
Open in New Window, Edit bookmark, Add Shortcut to Home, Share Link, Copy Link URL,
Delete bookmark, and set as homepage.
6.3.6 Other functions
In the browser interface, touch the "Menu" icon to perform more operations:
Refresh, New tab, New incognito tab, Share page, Find on Page, Request desktop site, Save for offline reading, Page info and Settings.
6.4 Video player
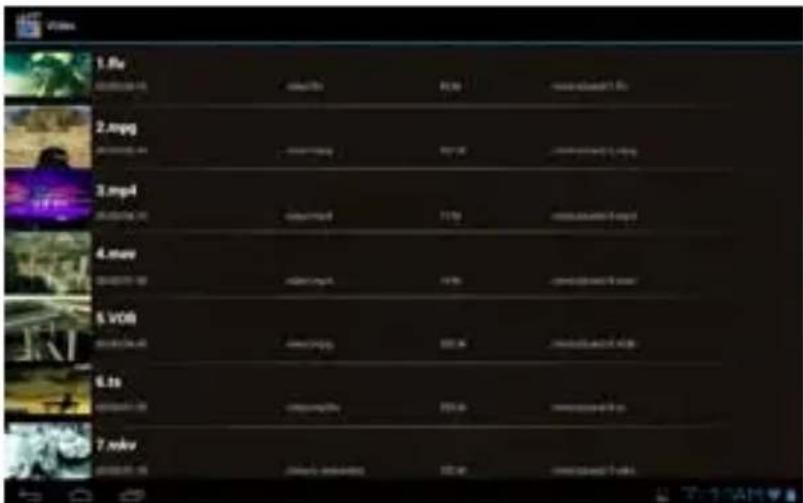
In the "Apps" interface, touch "Video" to go to the video file list.
6.4.1 Video playing
In the file list, slide your finger up and down to find the videos you want to play. Touch one to play.

Touch the screen to show the Hide menu:
| A. Add video bookmark | B. Adjust screen brightness | |
| C. Touch: Previous video file.Touch and hold: Rewind. | D. Play/pause | |
| E. Touch: Next video file.Touch and hold: Fast forward. | F. Screen extension: Touch to select Full Screen, Normal, 16:9, 4:3. | |
| G. Return to the video list | I/J. Decrease/increase volume | |
| H. More | Delete Bookmark And Play from beginning | Touch this option to delete the video bookmarks and play from the beginning of the title. |
| Delete bookmark | Delete the video bookmarks and continue playing. | |
| Play mode | Select Repeat mode. | |
| Subtitle Select | Select one subtitle while there is more than one kind of subtitle in the video. | |
| Audio Track Select | Select one audio track while there is more than one kind of audio track in the video. | |
| Help | Tips icon function. | |
| Return | Return to the Play interface. | |
| K. Play progress bar | Touch any position of the play progress bar to skip to this position; Touch and hold it to move to any position to continue playing. | |
Note 1: It takes a longer time to start playing a larger formatted video file. Convert video files that exceed the max. resolution supported by the unit.
Note 2: For some supported video sources, a few video files that are partly damaged may not be played by the unit. Convert them on the PC and play the converted files on unit.
Note 3: This product can not guarantee that all video files are supported. While some are recognizable in the system and played, not all features may be supported; , such as fast forward and rewind, may not be used by individual video files.
6.4.2 Delete video
In the video file list, touch and hold the video you want to delete, then touch "Yes" in reply to "Sure to delete this video".
6.5 Audio player
In the "Apps" interface, touch "Music" to go to the audio file list.
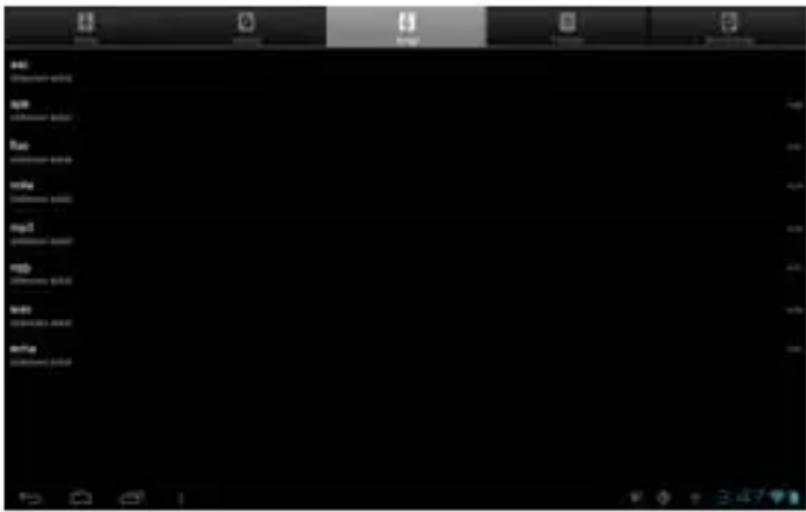
| Artists Sort by “Artist” | |
| Albums | Sort by “Album” |
| Songs | Display the all music stored on built-in Flash memory, SD card and USB device |
| Playlists Display the play list | |
| Now playing Go to the currently played music file | |
6.5.1 Playlist
In the music file list, touch "playlists" to go to the playlist.

Touch and hold "Recently added" to play or edit the time of the "Recently added" list.
In the music file list, touch and hold a song or a folder, then touch "Add to playlist" to add the song to a new playlist or other playlist.
Tip: You cannot delete the "Recently added" list.
6.5.2 Playing audio
Touch the music you want to played and go to the music playing interface.

| A. Play list Touch to open the playlist. | |
| B. Shuffle Playing songs at random mode. | |
| C. Play mode | 1) Stop after the end song is played. |
| 2) Repeat playing all songs in the current directory. | |
| 3) Repeat the current song. | |
| D. LRC | Touch to show or hide lyrics. |
| E. File info | When the network connection is established, touch and hold it to check the link information about the currently played music file. |
| F. Rewind/previous | Touch: Switch to the previous song.Touch and hold: Rewind. |
| G. Play/pause | Play/pause music. |
| H. Fast forward/next | Touch: Switch to the next song.Touch and hold: Fast forward. |
| I. Play progress bar | Touch any position of the play progress bar to skip to this position; Touch and hold it to move to any position to continue playing. |
Note: Keep the lrc file name consistent with the audio file name, copy them to a same folder in tablet.
6.5.3 Sound effects
In the music playing interface, touch the menu icon and touch "Sound effects" to go to sound effects settings interface.
Slide the slider switch at the top right corner to turn on and off sound effects.
To select pre-set music type equalizer settings, touch the drop-down menu that show the current "type" selected. Select your preferred sound effects by choosing a type of music type from the menu or by sliding your finger up and down on the sound effect frequency bars.

bar
| Category | Value | |---|---| | A1 | 4.0 | | B1 | 3.5 | | B2 | 2.8 | | C1 | 4.2 | | C2 | 4.1 | | D1 | 4.0 |Note: Few MP3/WMA audio files that are specifically encoded may not be played by the product. Convert them using an audio conversion tool and download the converted files to the product to play.
6.6 Picture browser
In the "Apps" interface, touch "Gallery" to go to the picture list.

natural_image
Three-panel image showing a cat on a tree branch, a girl sitting with flowers, and a tree branch with grass (no text or symbols)Tip: The system will automatically search for all pictures on Flash memory, SD card and USB device and display them as folders.
6.6.1 Browsing pictures
In the directory, touch the pictures you want to browse to open the picture browsing interface.
Touch the screen to pop up or hide the menu:

natural_image
Illustration of a cartoon character in water with floating waves and floating objects, no text or symbols present| A. Share icon | Share the current picture through Picasa, Gmai or Email. |
| B. Trash can Delete the current picture. | |
| C. Menu Touch to show the menu options. | |
Touch the menu icon to show the menu options

| Slideshow | Automatically browse pictures. |
| Edit Touch to edit the current picture. | |
| Rotate left | Rotate the picture 90° counter-clockwise. Touch this icon to rotate the picture counter-clockwise in the following order: 90°, 180°, 270° and restore. |
| Rotate right | Rotate the picture 90° clockwise. Touch this icon to rotate the picture clockwise in the following order: 90°, 180°, 270° and restore. |
| Crop | Crop current picture. |
| Set picture as Set the picture as Wallpaper background or Contact photo. | |
| Details Show the name of the picture file, its resolution, etc. | |
Tip1: When browsing pictures, you can slide your finger to the left or right rapidly to switch to the previous or next picture.
Tip2: When browsing pictures, you can zoom in or zoom out the picture by sliding two fingers together or apart.
6.6.2 Picture file operation
In the picture list, touch and hold a picture or a folder to pop up the Multi-choice operation list.

| A. Done Finish the operation. | |
| B. X items selected | Show the number of the selected picture. Touch a picture to be selected or unselected |
| C. Share Share the pictures through Picasa, Gmail or Email. | |
| D. Delete Delete the selected pictures. | |
| E. Menu Touch to show the menu options. | |
6.7 Camera
Touch the camera icon to go to the camera interface.
Touch " " icon for camera mode, touch " " icon for video record mode.
Slide along the arc icon to zoom in or out.
Touch "●" icon to take photo or start recording video. Touch "●" to end recording video.
Take photos
| Image Size File Size | |
| QVGA (320 X 240) | |
| VGA (640 X 480) |
Note: You can view and edit the photographs and recording videos on you computer in path: AOC TABLET:\Internal Storage\DCIM\Camera.
Chapter 7 Apps
In the main interface, click "Apps" icon to go to the "Apps" interface in which the installed apps will be shown.

7.1 Moving a program icon to another interface
To create a program alias icon and move it to other interfaces, touch and hold the program icon and the screen will switch to last interface viewed. Then place the icon at a desired position and release.
7.2 Deleting a program icon
In the main interface, touch and hold the program icon you want to remove. When the "X Remove" appears at top of the screen, drag program icon to "X Remove" to delete it.
7.3 Adding a Widget
In the "Widgets" interface, touch and hold a widget you want to add and the screen will switch to the last interface viewed. Then place the widgets at the desired position and release.
7.4 Creating a folder
Create a folder in the interface to store the app icons or controls. To make a new folder on your Home screen, stack one app icon on top of another. Then to add more program icons to a folder, touch and hold a program icon on the screen and drag it to the folder.
Tip: To delete a folder, refer to the steps described in "Deleting a program icon".
7.5 Renaming a folder
Touch the folder and the name of the folder will display. Touch the name to rename the folder.
Chapter 8 Common Tools
8.1 E-mail
When you use the e-mail for the first time, you need to create an e-mail account first.
- Enter the address and password for your e-mail account and Touch "Next".

- Select an account type. Touch "POP3" for a POP3 account.

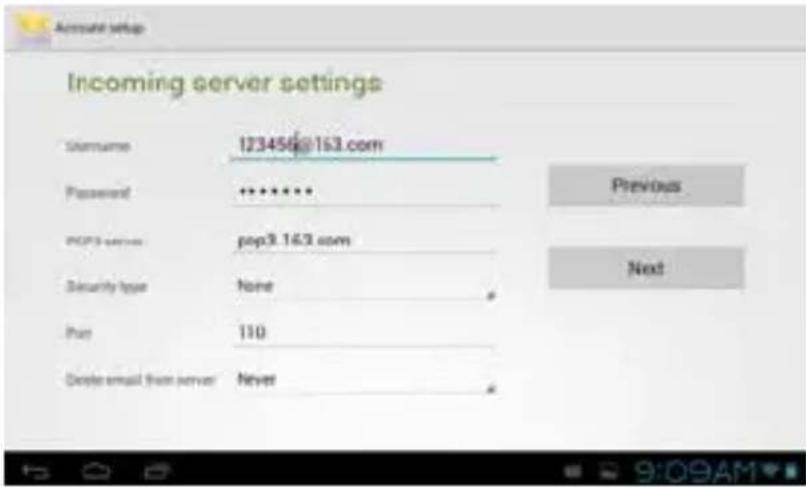
- Touch "POP3 Server" and "Port", enter "pop.+ account suffix" and port number. For example, if the e-mail account is 123456@163.com and the port number is 110, enter "pop.163.com" and "110". Then touch "Next".
Note: If you select IMAP Account in step 2, touch "IMAP Server" and enter "IMAP.163.com".
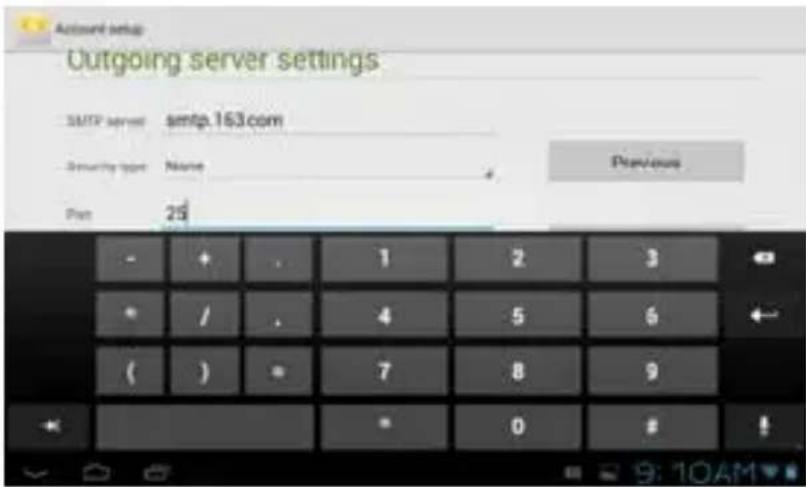
- Touch "SMTP Server" and "Port", enter "smtp.+ account suffix" and port number, for example "smtp.163.com". Then touch "Next".
- Set the account options and touch "Next" to finish settings.
Note: Since the e-mail service providers may vary, configure the server settings based on the actual e-mail account. This product can support the accounts provided by the popular e-mail service providers, such as Yahoo, Zoho, etc.
8.1.1 Opening e-mail
In the "apps" interface, touch "E-mail" to enter.

Tip 1: By default, this product can be used to browse the inbox after the e-mail app has synchronize with email provider. All e-mails you received will be put into the inbox.
Tip 2: Touch “ ” icon to send or receive a new e-mail and synchronize your e-mails with your e-mail accounts.
8.1.2 Creating and sending e-mails
-
Touch the “ ” (Compose) icon at the top right of the E-mail interface.
-
Next to "To", enter the e-mail address of the receiver.

Tip: If you want to send a carbon copy or a blind carbon copy e-mail to other recipients, touch "+CC/BCC.
- Enter the e-mail subject and compose your e-mail.
Tip: If you want to add a picture attachment, touch the “ ” (paper clip) icon, select the picture you want to attach, and touch it to confirm or touch the “Cancel” icon to cancel.
- After composing your e-mail, touch "Send".
Tip: When you compose your e-mail, touch the "Save draft" or back icon to save your e-mail to Draft.
8.1.3 Receiving and reading e-mail
When a new e-mail is received, the notification bar will show the new e-mail (▼) icon.
Perform one of the following to read your e-mail:
- Touch the notification bar, and touch the new e-mail to read.
- Touch the unread e-mails in the Inbox to read.
8.1.4 Managing e-mail
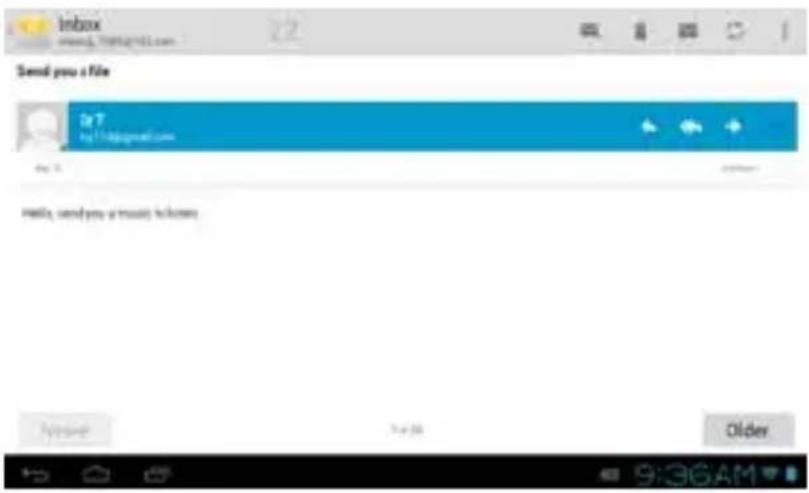
Open an e-mail, touch “◀” icon to reply, touch “◀” icon to reply all and touch “▶” icon to forward the email.
Touch mini-box in front of the e-mail to show the menu:

| “ ” Delete | Delete the e-mails. |
| “ ” Mark as read/unread | The unread e-mails in the Inbox are highlighted with white background. |
| Add “ ★” (Star) | Flag with a Star |
8.1.5 Email Settings
In the e-mail interface, touch the menu icon, and touch "Settings" to go to the e-mail settings interface. Touch "Add Account" to add a new e-mail account.
Note: You can set several e-mail accounts. The default account will show whenever you perform e-mail apps.
| Account name | Display and change an account name. |
| Your name | Display and change the sender's name of the account. |
| Signature Display your signature at the bottom of your email. | |
| Quick responses | Edit text that you frequently insert when composing email. |
| Default account Send e-mails form this account by default. | |
| Inbox check frequency | Set the interval of receiving e-mails. There are six options available: Never, Every 5 minutes, Every 10 minutes, Every 15 minutes, Every 30 minutes, and Every hour. |
| E-mail notifications | Notify in Notification bar when e-mail arrives. |
| Choose ringtone | Set the ringtone used when an e-mail is received. |
| Incoming settings | Display and change the receiving server settings. |
| Outgoing settings | Display and change the sending server settings. |
| Remove account Remove user account. | |
8.2 Recorder
In the "Apps" interface, touch "Sound Rec" to go to the record interface.
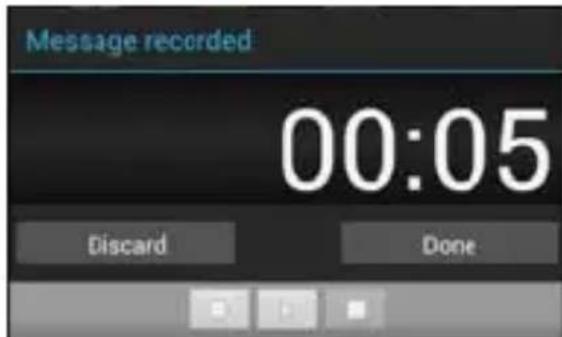
Touch “☐” to start recording or “☐” to stop recording. After recording is finished, touch “☐” to play the just recorded file. Touch “Done” to save the just recorded file or touch “Discard” to not save the recorded file.
Note 1: The recorded file can be automatically saved in flash so that you can find them in the
AudioPlayer " playlists ->My recordings" to play.
Note2: The naming rule of the recorded file: recording_Year+Month+Date+Time stamp.
8.3 Alarm
In the "Apps" interface, touch "Clock" to the clock interface.
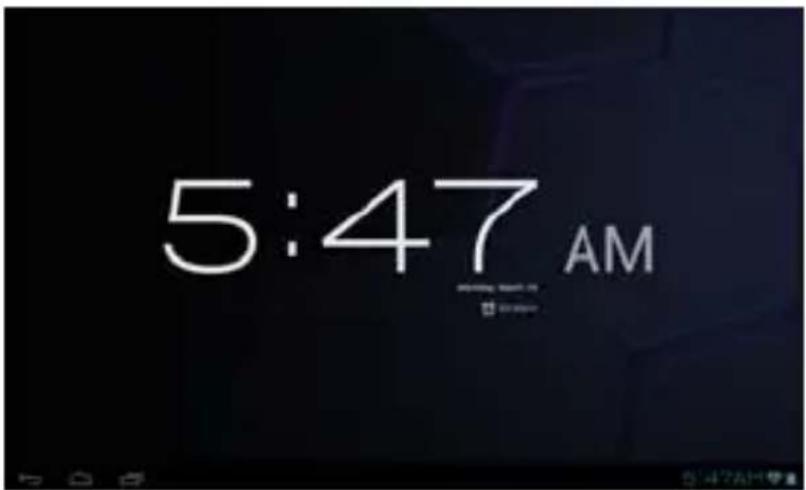
Touch "Set alarm" to enable the alarm function.

8.3.1 Set alarm
- Touch the preset alarm to select an alarm or touch "Add alarm" to add new alarm.
- Touch "Time", and set the time for the alarm. Slide your finger up and down to adjust the time, and touch "Set" to complete.
- Touch "Repeat," select the date you want the alarm to ring, and touch "OK".
- Touch "Ringtone" and select alarm ringtone. After selection, the ringtone will be played temporarily.
- Touch the "Label", set the name of the alarm.
- Touch the "DONE" icon to go back to the alarm interface.
Tip: Touch "☐" to turn on or turn off the alarm.
Note: When it is shut down, the alarm is not affected.
8.3.2 Delete alarm
Touch and hold the alarm you want to delete and touch "Delete alarm -> OK" to delete it.
8.4 Calculator
In the apps interface, touch the "Calculator" icon to go to the calculator interface.
You can perform the basic math operations by this calculator.
8.5 Explorer
In the "Apps" interface, touch "Explorer" to go to the Explorer interface that includes the following options:
| Home Touch to return to the root directory. | |
| Level Up | Touch to return to the upper level directory. |
| Multi | Touch to select multiple files. |
| Editor | Allow you to Copy, delete, move, paste or rename a file. |
| NewFolde Create a new folder. | |
| Back | Back to the previous operation. |
| Next | Back to the next operation. |
Note: This product complies with the fat32 file system. When you name a file, do not use special characters, or you may not rename it later.
8.6 Installing apps
- Copy the setup file to your PC. (Make sure the format of the setup file is xxx.apk format supported by this product.)
- Connect the device to PC using USB cable.
- Copy the setup file xxx.apk to the device.
- Disconnect the device from PC.
- Turn on the device and activate Explorer.
- Locate the xxx.apk file and touch it to open.
- Install the app according to the on-screen prompts.
- After completion, you will see the installed app in the apps interface.
8.7 Uninstall app
- In the apps interface, touch and hold the app you want to uninstall.
- Move the app to trash can and touch "OK" to uninstall it.
Tip: You cannot delete the pre-installed factory default app on this product.
Chapter 9 Settings
In apps interface, touch the "Settings" icon to go to the "Settings" interface.
9.1 WIRELESS & NETWORK Settings
9.1.1 Wi-Fi network connection
Connection
- Touch "Wi-Fi" to enter into Wi-Fi settings interface.
- Slide the slider to right to enable Wi-Fi and scans for available wireless networks.

- Touch the desired wireless network name to connect to it. You will be prompted, if a password is required.
- If static IP address needs to be entered, touch "show advanced options" for more options. Then click on "show advanced options" to show "IP settings". Touch the pop-up menu and select "static". Then enter the IP address, gateway, network mask, and DNS information required for such Wi-Fi network connections.
- If you use dynamic IP address keep the default "DHCP" in the "IP settings" option.
Note: The word "Connected" displayed under the network name indicates a successful connection.
Afterwards you can surf the Internet, connect to email services, etc.
Note 1: When you connect Wi-Fi for the first time and the prompt “Failed” appears, disconnect Wi-Fi and reconnect it. When you input an incorrect password and the prompt “Authentication problem” appears, touch the network and touch “Forget”, then connect with correct password. Note 2: You do not have to re-enter the password when you re-connect to the previously connected wireless network that is encrypted, unless you reset the product to the factory settings.
Note 3: Auto search for Wi-Fi is performed, i.e., no additional steps are required to connect to the Wi-Fi network. For some closed wireless networks, the username or password may be required. Note 4: The availability of Wi-Fi signals may depend on the distance, infrastructure, and objects through which a signal must pass.
Scan
Touch the “SCAN” icon at the top right corner of screen to search for the available wireless networks in the vicinity.
Advanced settings
| Network notification Select to notify you when an open network is available. | |
| Keep Wi-Fi on during sleep | Choose under which condition (Always, Only when plugged in or Never) to keep Wi-Fi on when tablet is in standby mode. |
| MAC address Shows the tablet's Wi-Fi MAC address. | |
| IP address Shows the tablet's IP address. | |
Checking status of wireless network
You can check the status of the currently connected Wi-Fi through the following methods:
- Status bar
After the product is connected to the wireless network, the status bar shows the Wi-Fi icon “ 📋” and signal strength (the number of the bars lighting up).
- Wi-Fi network
In the network connection interface, touch "Wi-Fi settings" and touch the currently connected wireless network to show the information, such as name, status, speed, signal strength, and security.

Tip: If you want to remove the network settings, touch "Forget" in this window; if you want to connect to this network, the settings should be configured again.
Connecting to other Wi-Fi networks
In the "Wi-Fi" settings interface, touch "ADD NETWORK," enter the corresponding network
settings, and touch "Save".
Tip: Not all wireless networks are connected to the Internet. Some wireless networks may be connected to several computers and cannot be connected to the Internet.
9.1.2 More
VPN: Add VP N network.
Portable hotspot: (Only for tablets with 3G/4G connections or USB Network Interface Card)
9.2 DEVICE Settings
9.2.1 Sound
| Volumes | Music, video, games & other media | Set the media volume for music and video. Touch the volume bar to adjust the volume level. |
| Notifications | Set the notification volume by touching the volume bar to adjust the volume level. | |
| Alarms | Set the alarm volume by touching the volume bar to adjust the volume level. | |
| Default notification | Set your default notification ringtone. | |
| Touch sounds | Play sound when touch screen. | |
| Screen lock sounds | Play sounds when locking and Un-locking the screen. | |
9.2.2 Display
| Brightness | Adjust the screen brightness. Touch the brightness bar to adjust the volume level and touch “OK” to save. |
| Wallpaper | Choose wallpaper from Gallery, Live Wallpapers or Wallpapers. |
| Auto-rotate screen | When feature is checked on, the Landscape/Portrait switching feature is enabled.This product supports 4-direct ion rotation display. |
| Sleep | Select the delay time before the screen automatically closes. There are six options available: 15 seconds, 30 seconds, 1 minute, 2 minutes, 5 minutes, 10 minutes, 30 minutes. |
| Font size | four options Set the font available: Small, Normal, Large and Huge. |
9.2.3 Storage
| INTERNAL STORAGE | Total space Show the total capacity of the Internal Memory. | |
| Apps Show the used space of the apps. | ||
| Available | Show the remaining free space of the data memory. | |
| INTERNAL FLASH | Total space | Show the total capacity of the Internal Flash memory. |
| Apps Show the used space of the apps. | ||
| Pictures, videos d videos. Show the used space of pictures an | ||
| Available | Show the remaining free space of the Internal Flash memory. | |
| Erase storage Erase | Internal Flash Storage. | |
After SD card and USB drive plugged he following options will appear.
| SD CARD | Total space Show the total capacity of the SD card Storage. | |
| Available Show the free space on the SD card Storage. | ||
| Unmount storage Safely remove the SD card Storage locally. | ||
| Erase storage Erase all data on the SD card Storage. | ||
| USB Disk | Total space Show the total capacity of the USB drive. | |
| Available Show the free space on the USB drive. | ||
| Unmount storage Safely remove the USB drive locally. | ||
| Erase storage Erase all data on the USB drive. | ||
Touch the menu icon at the top right corner of screen, touch "USB computer connection.
| CONNECT AS | Media device (MTP) Android File | It lets you transfer files on Windows, or using Transfer on MAC. |
| Camera(PTP) | It lets you transfer photos using camera software. | |
| Mass Storage | Use Mass Storage to share files (Mac or Windows). |
9.2.4 Battery
It shows the status of battery and the elapsed time of use
9.2.5 Apps
Manage and delete installed apps: For uninstall apps, clear data, clear cache, clear default and force stop.
9.3 PERSONAL Settings
9.3.1 Accounts & Sync
SYNC: Slide the slider at the top right of screen to the right to turn on sync.
ADD ACCOUNT: Touch "ADD ACCOUNT" to add corporate, Email or Google account.
9.3.2 Location services
| Google's location service approximate location data from Wi-Fi or mobile networks. | Select to allow Google's location service to collect |
| Location & Google search | Select to allow Google to use location for improved search results and other services. |
9.3.3 Security
| Screen lock | Lock screen with Slide, Face Unlock, Pattern, PIN, or Password. |
| Owner info Show the | information user want you display on lock screen. |
| Encrypt tablet | Require a numeric PIN or password to decrypt your tablet each time you power it on. |
| Make passwords , the visible | After third feature is whebledthe keyboard is used to type it. |
| Device administrators | View or deactivate device administrators. |
| Unknown sources pps. | Select to allow installation of non-Market a |
| Trusted credentials | Display trusted CA certificates |
| Install form SD card | Install certificates from SD card |
| Clear credentials Remove all certificates. | |
9.3.4 Language & input
| Language | Select language for device |
| Spelling correction | Select to enable spelling correction. |
| Personal dictionary Add & remove words form user dictionary | |
| Default Set the default input method. | |
| Android keyboard | Touch settings icon to set Android keyboard. |
| Google speech-to-txt | Select to enable Google speech-to-text. |
| Voice Search | Touch to set language, SafeSearch, Block offensive words and show hints. |
| Text-to-speech Touch | to set the preferred engine, set the speed at which |
| output ct. | the text is spoken, and e |
| Pointer speed Set the | pointer speed of (optional) mouse and trackpad. |
9.3.5 Backlep & r
| Backup my data | Select to back up app data, Wi-Fi passwords and other Google settings. |
| Factory data reset Erases all data on tablet. | |
9.4 SYSTEM Settings
9.4.1 Data & Time
| Automatic date &time | Use network-provided time. |
| Set date | Set year, month and day. |
| Set time | Set hour and minute. |
| Select time zone Select the time zone. | |
| Use 24-hour format | Show 12-hour or 24-hour format |
| Select date format | Select the format used for date display. |
9.4.2 Accessibility
| Talk Back | Slide the slider to the right to enable the talk back.When talkback is on, tablet provides spoken feedback to help blind and low-vision users. |
| Large text | Select to show large text. |
| Auto-rotate screen | Turned on to enable the Landscape/ Portrait switching feature. |
| Speak passwords Allow spoken passwords | |
| Touch & hSh at touch & hold delay to Short, Medium or Long time. | |
| Install web scripts Allows Apps to install scripts from Google | |
9.4.3 About device
This option allows you to check information about the battery status, Legal information, Model number, Android version, Kernel version and Build number.
Chapter 10 Using Micro SD (TF) Card
The external card supported by this product is a Micro SD card, through which the capacity of storage can be expanded. To install, insert the Micro SD card into the slot with the silk screen lettering facing away from front of tablet. Push into card slot until it is fully inserted and locks inside the product. To remove Micro SD card, press the Micro SD card inward to eject it.
Note:
- Insert cards face-down into the card slot.
- Do not bend the card. The card should be in a protected case, when not in use.
- Keep the chip clean and avoid dust and chemicals.
- Format new Micro SD cards before first use.
- Avoid insertion and removal of the Micro SD card while in use to avoid damage or losing data.
- This product does not support the write-protect feature of Micro SD cards.
- Back up files on card before deleting data to avoid possible loss due to errors.
Chapter 11 Connecting to USB Drive
Plug the larger end of the provided OTG cable to the USB drive, and the smaller end of it to the Micro USB port on the side of product.
Open Explorer and you can see the "USB" directory. This directory is your USB drive. Touch USB to check the files on USB drive. Note that when unit is connected to a USB drive, it should be turn off / shutdown. Avoid insertion and removal when the files on USB drive are in play / use to avoid damaging the data on USB drive.
Note: When you unplug the OTG cable or USB cable or USB adapter from the micro USB port on the side of product, please pinch the head of the cable, do not pinch the middle of the cable.
The correct way

natural_image
Hand holding a tablet displaying a photo grid interface with app icons (no readable text or symbols on the screen)The wrong way

natural_image
Hand holding a pen with a red X symbol pointing at a tablet screen displaying photo thumbnails (no readable text or symbols on screen)Chapter 12 About the Battery and Power
This product uses a built-in 3100mAh polymer lithium battery. When the provided power adapter is connected, the battery is automatically charged.
When you charge this product for the first time, it is recommended to shutdown the product and charge it continuously for more than 3.5 hours for optimal battery use.
When using a new product, the battery should be fully charged and totally discharged for the first three times, to activate set a battery's ideal lifecycle.
If charging is performed while the product is in use, it takes a longer time to charge.
Charging time: Typically takes about 3.5 hours to charge. The actual time depends on the battery level when starting to charge.
It is recommended to fully charge and discharge the product once every 3 months to extend the lithium battery life.
Do not plug the charger into the electric outlet when the product is not also connected to it.
When tablet will not be used for an extended period of time, fully charge the battery before storing. It should also be charged and discharged about every three months.
If the battery ever gets too hot, the charging protection circuit will automatically open the charging circuit to protect the lithium battery and the tablet.
When the battery is low, charge before using. When it is running out of power, charge the machine using the provided charger..
Charge it if:
A. The battery charging icon indicates that battery power is almost exhausted / really low
B. The system automatically shuts down. It also shuts down quickly after reboot.
C. After you press buttons, there is no response.
Chapter 13 Firmware Updating / Resetting to Factory
- Go to for the website (www.aoc.com) to download the current / latest firmware for your device..
- Follow the instructions provided for the model of AOC tablet being updated.
Note: During the upgrade / resetting process, it is best to have the device plugged into electric power, using the supplied power adapter.
Chapter 14 Frequently Asked Questions
• Product cannot be turned on or boots-up abnormally
① Plug the AC adapter.
② Press and hold the Power button for 6 to 10 seconds, to restart.
③ Shutdown (ensure the USB cable is unplugged, then,
a) Press and hold the power button and volume button 3 seconds at the same time. Release the buttons and tablet will boot and an Android robot will be displayed.
b) Press the power button for 2 seconds, then press the volume up “+” button to enter into Android system recovery utility interface.
c) Select "wipe data/factory reset" or "recovery system from backup" (navigate menu by pressing volume up/down ("+" /"-") buttons), then,
d) Press the power button to perform selection.
e) Navigate (with the volume up/down (“+” / “-”) buttons) to the menu item: “Yes – delete all user data.
f) Press the power button to perform selection.
g) When presented with "reboot system now", press the power button to perform selection.
The tablet will be restored to factory defaults and all data on device will be erased.
• No sounds from headset
Check if the volume is set to 0 (lowest).
Check if the headset is properly connected (plugged all the way in).
- Loud / static noises
Check if the plug of the headset is clean. Dirt may result in noise.
Check if the file being played for possible damage. Play other music files to confirm this. If it is damaged, it may cause loud noises or sound skipping.
• Screen shows garbled / incomprehensible characters
Check if the correct language is set (in Settings / Language & input).
- Cannot download files
Make sure that the computer is properly connected to the tablet
Make sure that the storage space is not full
Make sure that the USB cable is not damaged
- Connect to Wi-Fi but cannot surf the Internet
Confirm connection to internet from another source using same Wi-Fi network...
If static IP addresses are needed, make to enter a valid IP address. If dynamic IP addresses are used, static IP addresses should be disabled while the network is connected.
- Cannot connect to computer
Make sure the tablet is turned on
Make sure the tablet is not in sleep mode
Make sure to use the correct USB cable
- Cannot view files in AudioPlayer, PhotoBrowser, Video Player, Shelves and/or Explorer. Cannot record sound.
Confirm the correct files have been downloaded to your tablet.
Ensure your device is not connecting to PC.
Wait a few minutes for to allow refresh of media library.
Chapter 15 Troubleshooting
- When I view JEPG pictures, some of them cannot be viewed. Why?
Some JPEG files may have a non-standard resolution, they may not be viewed in full screen, or zoomed in or out. If an error prompt appears, touch the back icon to exit or touch the Reset button on the side of the product to resolve the problem.
- The product cannot play my videos. Why?
Make sure the video format is supported by this product. Some video files are encoded in different formats and versions. We cannot guarantee that all formats are playable.
- Why does image lag occurs when the video files are played?
Upgrade system software to the latest version.
In addition, this also depends on the video file, high bit-rate streaming video and high resolution video:
① High bit-rate streaming video. For example, the motion scenes of some videos have a bit-rate of 5\~6M and image lag may occur.
② High resolution video. If the max frames are reached, non-synchronization may occur.
- Product does not respond to operations.
Various conditions may cause the tablet to be unable to shutdown or respond. You can press and hold the Power button for 8 seconds to force the product to shutdown. After restarting, the problem is usually solved.
- The space available on PC is not consistent with that shown on the tablet.
The space on a PC is calculated by 1024 bytes while this tablet's capacity is calculated by 1000 bytes. So the actual free space of the tablet will be slightly different from indicated capacity, also the operating system uses part of the available space.
- Cannot connect to Wi-Fi.
If you can not connect to Wi-Fi after resetting tablet, please restart and then connect again.
AOC
breeze™
TABLET

aoc.com
breezetablet.com
V1.0
Information provided in this manual may vary depending on the model. Therefore, your model may not have some of the features described in this user guide. We reserve the right to change any information in this user guide without prior notice.



- MW0711-E
- USER MANUAL
- Table of Contents
- CHAPTER 1 PRODUCT OVERVIEW ....1
- CHAPTER 2 BUTTONS AND APPEARANCE....4
- CHAPTER 3 EASYCONFIG....6
- CHAPTER 4 BASIC OPERATIONS....8
- CHAPTER 5 COMMON FEATURES ....12
- CHAPTER 6 MAIN INTERFACE....16
- CHAPTER 7 APPS....28
- CHAPTER 8 COMMON TOOLS ......29
- E-mail..... 29
- Recorder.... 33
- Alarm 34
- Calculator.... 35
- Explorer 35
- Installing apps 35
- Uninstall app.... 35
- CHAPTER 9 SETTINGS....36
- WIRELESS & NETWORK Settings.... 36
- DEVICE Settings.... 38
- PERSONAL Settings 39
- SYSTEM Settings 41
- Chapter 1 Product Overview
- Functions overview
- Notes
- Packaging list
- Technical specifications
- Chapter 3 EasyConfig
- Chapter 4 Basic Operations
- Booting up
- Shutdown
- Network
- Standby Mode
- Reset
- Connecting to PC and file transfer
- Connecting to PC:
- Disconnecting from PC:
- Volume adjustment
- Adjusting the media volume
- Adjusting the alarm volume
- Adjusting the notification volume
- Charging
- Touch screen operations
- Touch
- Touch and hold
- Slide
- MultiTouch
- Search icon
- Chapter 5 Common Features
- Landscape/Portrait display switching
- Using virtual keyboard to type
- Android keyboard
- Editing text
- Notification bar
- Opening notification bar
- Closing notification panel
- Recently run apps
- Changing wallpaper
- Power control
- Chapter 6 Main Interface
- Main interface
- Apps interface
- Browser
- Opening browser
- Going to a webpage
- Setting a home page
- Browsing a webpage
- Open new browser tab
- Switching between browser tabs
- Selecting link in webpage
- Selecting text in webpage
- Saving webpage
- Finding text on a webpage
- Managing bookmarks
- Adding bookmark
- Opening bookmark
- Editing bookmark
- Using bookmark
- Other functions
- Video player
- Video playing
- Delete video
- Audio player
- Playlist
- Playing audio
- Sound effects
- Picture browser
- Browsing pictures
- Picture file operation
- Camera
- Chapter 7 Apps
- Moving a program icon to another interface
- Deleting a program icon
- Adding a Widget
- Creating a folder
- Renaming a folder
- Chapter 8 Common Tools
- Opening e-mail
- Creating and sending e-mails
- Receiving and reading e-mail
- Managing e-mail
- Email Settings
- Recorder
- Alarm
- Set alarm
- Delete alarm
- Calculator
- Explorer
- Installing apps
- Uninstall app
- Chapter 9 Settings
- WIRELESS & NETWORK Settings
- Wi-Fi network connection
- Connection
- Scan
- Advanced settings
- Checking status of wireless network
- Connecting to other Wi-Fi networks
- More
- DEVICE Settings
- Sound
- Display
- Storage
- Battery
- Apps
- PERSONAL Settings
- Accounts & Sync
- Location services
- Security
- Language & input
- Backlep & r
- SYSTEM Settings
- Data & Time
- Accessibility
- About device
- Chapter 10 Using Micro SD (TF) Card
- Note:
- Chapter 11 Connecting to USB Drive
- Chapter 12 About the Battery and Power
- Charge it if:
- Chapter 13 Firmware Updating / Resetting to Factory
- Chapter 14 Frequently Asked Questions
- • Product cannot be turned on or boots-up abnormally
- • No sounds from headset
- - Loud / static noises
- • Screen shows garbled / incomprehensible characters
- - Cannot download files
- Chapter 15 Troubleshooting
- AOC
- breeze™
- TABLET
- V1.0
Brand : AOC
Model : MW0711
Category : Tablet