
Studio - Uncategorized Dalla Corte - Free user manual and instructions
Find the device manual for free Studio Dalla Corte in PDF.


| Product Type | Espresso Machine |
| Brand | Dalla Corte |
| Model | Studio |
| Dimensions (W x D x H) | 40 x 53 x 48 cm |
| Weight | 30 kg |
| Power Supply | 220-240 V / 50-60 Hz, 1500 W |
| Boiler Type | Dual Stainless Steel |
| Boiler Capacity | 1.5 L (steam) + 0.5 L (coffee) |
| Water Reservoir Capacity | 2.5 L |
| Pump Type | Rotary Vane Pump |
| Pressure | 9 bar |
| Portafilter Size | 58 mm |
| Number of Group Heads | 1 |
| Steam Wand | Active steam wand with anti-scald tip |
| Hot Water Dispensing | Yes, via dedicated button |
| Cleaning Cycle | Automatic backflush and rinse program |
| Safety Features | Overheat protection, auto shut-off, safety valve |
| Warranty | 2 years limited |
| Compliance | CE, RoHS, WEEE |
Frequently Asked Questions - Studio Dalla Corte
User questions about Studio Dalla Corte
0 question about this device. Answer the ones you know or ask your own.
Ask a new question about this device
Download the instructions for your Uncategorized in PDF format for free! Find your manual Studio - Dalla Corte and take your electronic device back in hand. On this page are published all the documents necessary for the use of your device. Studio by Dalla Corte.
USER MANUAL Studio Dalla Corte
1 General safety warnings 49
2 Preparations for installation 56
3 Set up and use of the appliance 59
4 Espresso coffee brewing 61
5 Preparation of hot milk 62
6 Periodic maintenance performed by the user 64
7 Display 67
8 Menu 68
9 Alarms 82
Wiring diagram 213
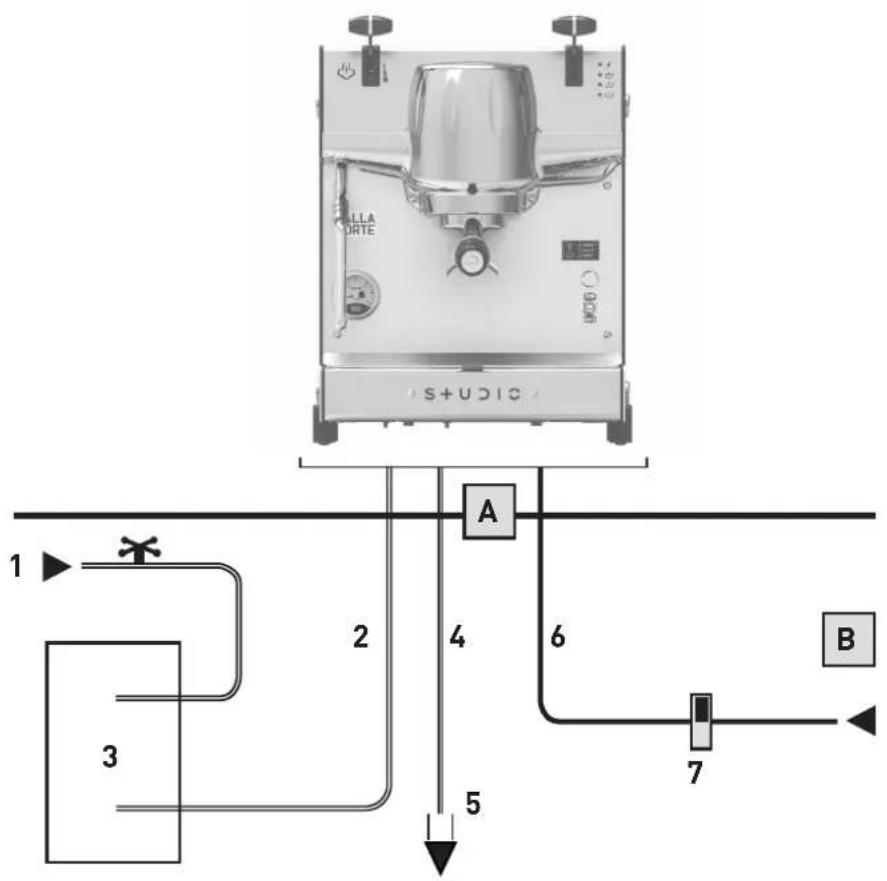
Fig.1a
LEGEND
1 Water tap
2 Flexible water hoses
3 Water softener (optional)
4 Drain hose
5 Drain siphon
6 Electric supply cable
7 Single phase electric SCHUKO plug 16A
A Hole on support panel
B Under-counter space
flowchart
graph TD
    A["CAULA ORTE"] --> B["S+UDIC"]
    B --> C["1"]
    B --> D["2"]
    B --> E["3"]
    B --> F["4"]
    B --> G["5"]
    B --> H["6"]
    B --> I["7"]
    B --> J["B"]
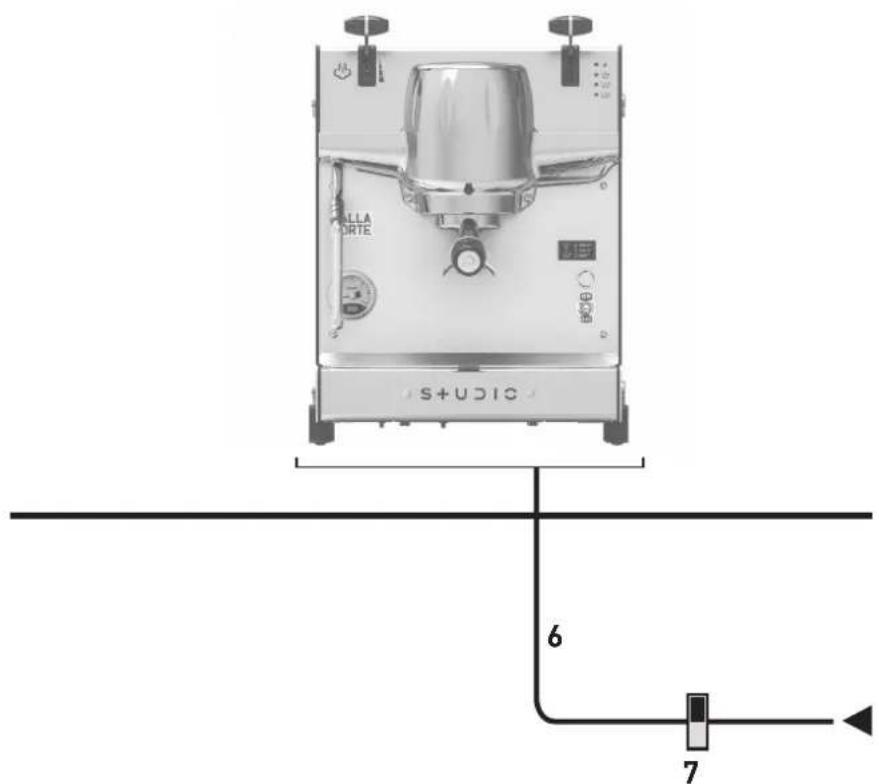
LEGEND
6 Electric supply cable
7 Single phase electric SCHUKO plug 16A
s+471=
Machine description
Fig.2
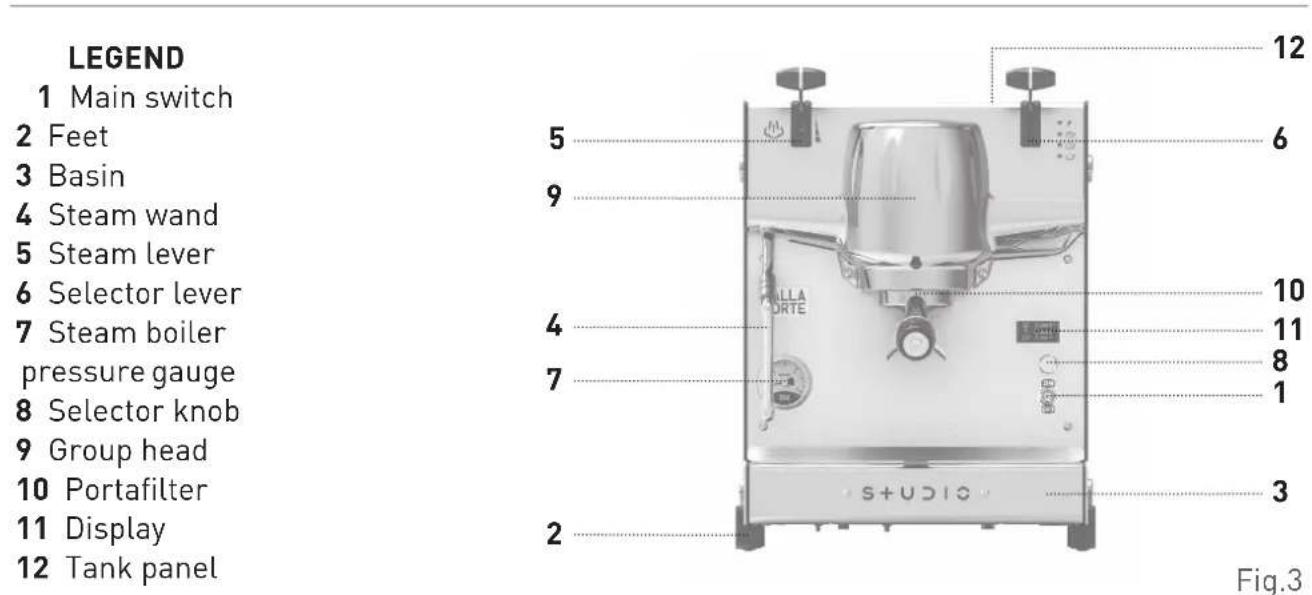
LEGEND
1 Main switch
2 Feet
3 Basin
4 Steam wand
5 Steam lever
6 Selector lever
7 Steam boiler pressure gauge
8 Selector knob
9 Group head
10 Portafilter
11 Display
12 Tank panel
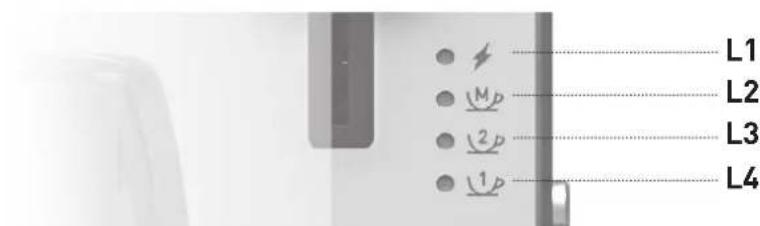
LEGEND
L1 Line
L2 Manual erogation
L3 Double shot erogation
L4 Single shot erogation
1. General safety warnings

WARNING
Read the entire manual carefully before use.
Read carefully the warnings contained by this handbook before use as it provides important instructions regarding safety, installation, use and maintenance. Improper use may cause damage to people, animals or things for which the manufacturer cannot be held liable. Keep this handbook for any further consultation. Keep the following instructions and make sure that they accompany the appliance in case of transport or sale so that anyone who uses the product throughout its entire life is properly informed on the correct use and safety of the appliance.
The manufacturer reserves the right to modify this manual without the obligation to update previous editions.
The pictures in this manual are entirely indicative. Dalla Corte reserves the right to make changes with regard to the production and the manual without the obligation to update production and previous manuals.
Check the integrity of the appliance after removing the packaging. In case of doubt, do not use the appliance and contact the authorized technical support service. The packaging elements (plastic bags, polystyrene, supports, screws, nails etc.) MUST NOT be left within reach of children as they are potential sources of danger; they must not be dispersed in the environment.
(For proper disposal follow the instructions for the separate collection of waste in your country).
The manufacturer cannot be held liable for any damage caused by the lack of the appliance's grounding system. In order to ensure the electrical safety of this appliance it is mandatory to set up the grounding system by contacting a licensed electrician who must check that the electrical capacity of the system is suitable for the maximum power of the appliance specified on the plate.
The technician must perform the water connections by following the rules of hygiene and hydraulic safety of environmental protection in force in the place of installation.
FOR THE WATER SUPPLY VERSION: The appliance must be supplied with potable water according to the provisions in force in the place of installation. For a proper operation and maintenance of the equipment it may be necessary to install a water softener for the feed water in order to avoid the formation of scale. This assessment must be made by the softener technician according to the indications given in the instruction handbook.
This device must be used solely for the purpose for which it has been expressly designed. Any other use is to be considered inappropriate and improper. The manufacturer cannot be held liable for any damage caused by improper, incorrect or unreasonable use.
The appliance is not intended for use by children, persons with reduced physical, sensory and mental capabilities or lack of knowledge, unless supervised and instructed.
The maximum and minimum storage temperatures must be within the range 0^ C, +55^ C.
The operating temperature must be within the range + 5°C, + 30°C.

WARNING
General indications
The use of any electrical appliance involves the compliance with some fundamental rules.
In particular:
- Always place the appliance on a flat and stable surface. If possible keep out of reach of children.
- Do not place the appliance on a hot surface or near sources of heat such as a hot oven, a heater, a hob or other sources of heat.
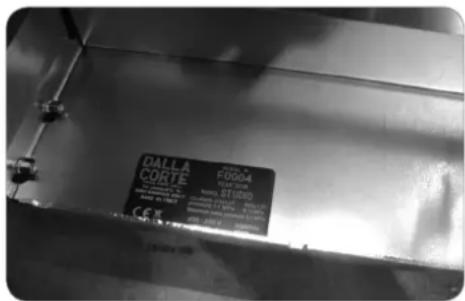
- Before connecting the appliance to the power grid, make sure that the data on the plate comply with those of the local electrical distribution network. The plate is located below the drain tray (see indications on page 57). Contact the dealer and do not use the appliance if the voltage does not match.
-
The installation must be carried out by qualified and authorized personnel in compliance with the regulations in force in the place of installation according to the manufacturer's instructions.
-
Do not leave the cable hanging on the edges of the table top; make sure the cable does not touch hot surfaces.
- The device is not designed to work with external timers or remote control systems.
- Before filling the jug switch off the appliance and disconnect the plug from the mains.
- Do not touch the cord or plug with wet hands.
- Do not touch the appliance with wet hands or feet.
- The power cord must not be replaced by the user. In case of damage switch off the appliance and disconnect it from the mains and contact the manufacturer or an authorized service center for replacement.
- Do not use the appliance barefoot.
- Before carrying out any cleaning or routine maintenance operations switch off the appliance by means of the switch (1 fig.2), disconnect it from the mains and close the water (for the WATER SUPPLY version).
- Do not pull the power cord to disconnect the appliance from the power supply.
- Do not leave the appliance switched on and unattended for long periods (e.g.1 day).
- Children must be supervised to make sure that they do not play with the appliance.
- In case of failure and/or malfunctioning of the appliance, turn it off completely by disconnecting it from the mains, and do not try to repair it. Therefore contact only the manufacturer or a Technical Support Service authorized by the manufacturer.
-
The appliance must be installed in such a way that the high surface is at least 1, 2 meters high.
-
To guarantee the efficiency of the appliance and its correct operation it is essential to follow the manufacturer's instructions by carrying out routine maintenance.
- Never remove the filter holder during the coffee brewing operation.
- Do not use water jets for cleaning operations and do not immerse the appliance in water.
- Do not expose the appliance to atmospheric agents (rain, sun, etc.).
- Do not allow the appliance to be used by children or unauthorized personnel or personnel who have not read and understood this manual.
- The appliance must not be used by persons (including children) with reduced physical, sensory or mental capabilities or with no experience or knowledge, unless they are supervised by a person responsible for their safety and instructed with regard to the use of the appliance in order to understand the potential hazards associated with use.
- Unwind the power cable along its entire length to avoid dangerous overheating.
- Do not completely block the intake on the suction and/or dissipation of the appliance in particular the cup rack.
- Make the appliance inoperative when you permanently decide not to use it; cut the power cord after having disconnected the plug from the socket.
WARNING: ELECTRIC SHOCK HAZARD
- Insert the plug into a compliant grounded socket.
- Do not tamper with grounding.
- Do not use an adapter.
- Do not use an extension cord.
- Before filling the jug switch off the appliance and disconnect the plug from the mains.
- Do not touch the cord or plug with wet hands.
- Do not touch the appliance with wet hands or feet.
- Do not use the appliance barefoot.
- Do not pull the power cord to disconnect the appliance from the power supply.
- Do not spill liquid on the power plug and/or power cord.
- Make sure the appliance is not wet before turning it on by means of the main switch.
- Failure to comply with these warnings can cause death, fire or electrocution.
WARNING: BURN HAZARD
- Some parts reach high temperatures during the operation of the appliance, such as brew units (9 fig.2), filter holders (10 fig.2) and steam nozzles (4 fig.2). In order to avoid burns make sure not to touch or place your hands under these parts during use.
- Never remove the filter holder during the coffee brewing operation.
Area of use and intended use
The espresso coffee machine is designed for: the preparation of espresso coffee through the appropriate dispensers, the heating of the milk to prepare cappuccino by supplying steam from the special nozzle according to the procedures described below. Any other use is to be considered improper and therefore dangerous.
Transport and handling

WARNING: IMPACT OR CRUSH HAZARD
Take the necessary precautions to avoid losing control of the appliance during handling as its fall could cause damage to people, animals, things or the equipment itself could be damaged.
When handling the appliance while still being packaged make sure to respect the word "TOP" on the packaging.
Do not turn the appliance upside down during handling.
The operator must make sure that during handling there are no persons, things or objects in the area of operation.
Handle with care. Lifting must be done from the bottom; do not lift by levering on protruding parts of the machine especially the knobs or levers.
Proceed with the loading after checking that there are no obstacles, things or people.
Do not perform this operation alone.
We recommend the appliance to be handled by two persons. The manufacturer cannot be held liable for damage caused by improper handling or failure to comply with the aforementioned rules.
2. Preparations for installation
The appliance must be placed on a surface that can guarantee a safe support of the equipment.
FOR THE WATER SUPPLY VERSION: When preparing the systems provide an opening (A fig.1a) of at least 10x10 cm on the support surface in order to carry out the connections with the systems in the below space (B fig.1a). The water pressure must be between 0.1 and 0.6 MPa. Consult the manufacturer in the absence of this last requirement.
A shut-off valve (1 fig.1a) must be installed between the water mains and the water supply pipe of the machine in order to close the water passage in case of need.
The appliance must be supplied exclusively with potable cold water in accordance with and in compliance with national regulations.
Connect the appliance to a 16A socket. It is recommended to use a grounded thermal-magnetic circuit breaker (automatic cut-out).
Technical information
The continuous weighted sound pressure level is less than 70 dB. The maximum dimensions 312 x 390 x 419,2 and weight 28. Water tank volume 4 lt.
Data plate
DALLA CORTE
DALLA CORTE S.R.L. VIA ZAMBELETTI, 10 20021 BARANZATE (ITALY) MADE IN ITALY

SERIAL N FXXXXXXXXX YEAR XXXX
MODEL STUDIO
Coffee circuit Boiler 3l pressure 1.1 MPa 0.15MPa Maximum water pressure 0.6MPa
220 - 230 V 19750 W
50/60Hz IPX2
Machine accessories
- single-dose complete portafilter
- double-dose complete portafilter
- two single-dose filters with two different depths
- two double-dose filters with two different depths
- one shower
- blind filter
- cleaning brush
- box of cleaning tablets
- tamper
• cloth for cleaning external parts - rubber tamping station
- user manual
- shower key
3. Set up and use of the appliance
NOTE
Before switching on (the machine must be disconnected from the power grid) clean the external surfaces of the machine, wash the grids, filters, filter holders, steam nozzles with dishwashing detergent and rinse thoroughly.
Carry out the following instructions by consulting the diagram shown in fig.2, fig.1b for the JUG version and fig.1a for the WATER SUPPLY version.
- WATER SUPPLY VERSION: Open the water supply cock (1 fig.1a).
- JUG VERSION: Fill the machine tank as shown in punto 3.1.
- Connect the plug to the mains electricity.
- Turn on the main switch of the appliance (1 fig.2); then make sure the display is on.
- As soon as the appliance is switched on, the automatic self-level starts filling the boiler until reaching the operating level.
- Once the loading phase is completed, the supply unit starts to heat up, and the heating unit indicator light L1 will start to flash.
- At the end of the unit heating phase the value shown on the display will stop flashing, showing the temperature value set in the unit and the other parameters specified in paragraph 7.
- DISPLAY: At the same time, the boiler will start heating.
NOTE
In this manner it is already possible to brew from the unit and prepare the espresso while all the functions connected to the boiler are inhibited.
- The value shown on the display will stop flashing at the end of the boiler heating phase. The machine is then ready for use.
NOTE
Carry out a unit washing cycle as explained in paragraph 6 when the machine is ready for use and BEFORE using it.
NOTE
The above mentioned heating enabling sequence occurs only when the appliance is switched on after a total switch-off by means of the main switch. This sequence does not require too much energy in the heating phase of the appliance thus avoiding problems of overloading the electrical system of the place of installation.
3.1 Jug filling instructions (jug version)
- Before filling the jug switch off the appliance and disconnect the plug from the mains.
- Never fill the water tank with hot, boiling or sparkling water to avoid damaging the tank and the appliance.
- Lift the panel 12 fig.2 to access the jug compartment.
- Remove the silicone tube from the jug.
- Lift the jug and remove it from the machine.
-
Fill the tank using potable water as explained in punto 3.2 paying attention not to exceed the limit indicated by the word MAX.
-
Dry the jug.
- Carefully reinsert the jug into the appropriate compartment of the espresso machine making sure not to spill the water inside the machine.
- Reinsert the silicone tube into the appropriate hole of the jug.
- Reposition the panel 12 fig.2.
3.2 Water to use
It is recommended to use bottled mineral water with a low content of mineral salts to prevent scale formations in the jug and in the hydraulic circuit of the machine which lead to malfunctioning or blocking.
4. Espresso coffee brewing
NOTE
In order to always obtain a good coffee it is necessary to keep the filter holder (10 fig.2) always inserted in the brew unit (9 fig.2) to always keep it at the correct temperature.
To prepare the espresso coffee, follow the procedure below:
- Unhook the filter holder, making sure not to grip hot metal parts.
- Clean the filter inside the filter holder from any residual coffee.
-
Then load the filter with fresh ground coffee at the right grinding point (1 dose of coffee for the single filter, 2 doses of coffee for the double filter).
-
Press the coffee firmly with the special manual press supplied.
- Clean the edge of the filter from any coffee residues and hook the filter holder to the brew unit.
- Place selettore S (8 fig.2) in the desired position, L1 for single coffee and L2 for double coffee.

WARNING: BURN HAZARD
Avoid putting your hands under the brew unit during operation. Do not touch the metal parts of the brew unit or of the filter holder as they may cause burns.
5. Preparation of hot milk
Pour some milk into a jug with handle. Insert the steam pipe (4 fig.2) into the jug and open the steam wand (5 fig.2) relative to the steam pipe used. Close the steam wand wen the milk temperature reaches the desired one. As soon as this last operation is completed, clean the steam pipe with a damp cloth to prevent the formation of milk encrustation on the wand. Drain the steam on the grid of the tray to clean the inside of the steam nozzle from any residual milk, and use a damp cloth to protect against possible splashes.
NOTE
To obtain good quality milk cream it is necessary to perform a specific procedure during heating. This procedure can be taught through training courses and specific videos. The procedure is not described in this manual for safety reasons.

WARNING: BURN HAZARD
Use the special insulating handle to maneuver the steam nozzle. Do not open the steam wand without having inserted the steam pipe into the jug to avoid possible burns. Do not direct the steam nozzle terminal toward yourself or other people or animals. Make sure that there are no children in the immediate vicinity of the espresso machine during the heating procedure.
Do not bring your face closer than 50 cm from the jug inside which the milk is heating. Do not remove the nozzle from the jug without first having closed the steam wand by bringing the steam lever back to its rest position. Do not heat the contents of the jug beyond 50 gradi.
6. Periodic maintenance performed by the user
WARNING
The manufacturer cannot be held liable for damage to people, things or animals caused by improper maintenance. The efficiency of the equipment is guaranteed by proper maintenance; it is therefore important to follow the instructions below in order to perform proper maintenance.
Cleaning of body parts

WARNING: BURN AND ELECTRIC SHOCK HAZARD
Perform the following procedure only after turning off the machine and waiting for it to cool down and having disconnected the machine from the mains electricity.
Clean all body parts with a damp, non-dripping cloth and avoid using abrasive detergents or sponges.
Daily cleaning of parts in contact with coffee
Unhook the filter holder (10 fig.2) from the brew unit (9 fig.2) every evening or at the end of the use of the appliance, and wait for it to cool down or cool it under running water. Remove the filter from the filter holder. Wash all these parts with the brush supplied with the machine to prevent the formation of coffee encrustations on both internal and external surfaces. Remove and thoroughly wash the tray (3 fig.2) and the relative grid.
Washing of groups (daily)
In order to wash the unit, proceed as follows:
- Unhook the filter holder from the unit you want to clean, wait for it to cool down or cool the filter holder under running water, remove the relative filter and install the blind filter supplied with the appliance.
- Put a cleaning tablet supplied with the appliance inside the blind filter and hook the filter holder.
- Put the selector lever in the “manual dose” position for 5 seconds and return it to the stop position for other 5 seconds. Repeat the cycle 10 times.
- After completing the unit washing operations and before use, drain at least 200 cc of water from the washed unit without the hooked filter holder to remove any residual detergent.
Boiler washing (annual)
It is necessary to completely empty the water in the boiler on an annual basis. This operation must be carried out exclusively by a specialized technician and it is therefore necessary to contact the manufacturer or an authorized technical support center.
Periodic cleaning

WARNING: BURN HAZARD
Perform the following procedure only after turning off the machine and waiting for it to cool down.
Approximately every 3-6 days (depending on the amount of daily work) disassemble the spray heads and the spray heads holders located under the brew units and clean them with the special brush supplied. Reassemble these parts paying attention to reposition them correctly, otherwise it could cause a bad coffee extraction and damage to the brew units.
Jug cleaning
Sanitize the jug periodically (da definire) using food disinfectant. Replace the jug in case of severe encrustation or damage.
7. Display
The following screen is shown on the display of the machine during normal operation.
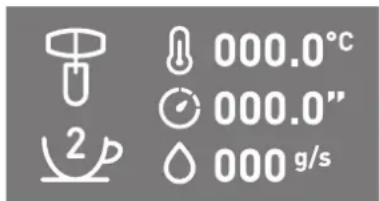
Indicates the current position of the selector lever.
The symbol corresponding to the dose we are preparing is displayed during brewing. (remains displayed until the next brewing).
Shows the SET temperature of the brew unit.
Shows the time taken to brew the coffee. (remains displayed until the next brewing).
It shows in real time the water flow for brewing.
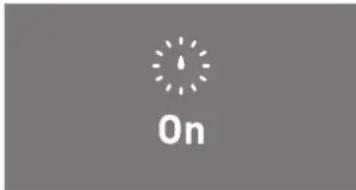
The display shows the following screen if the timer function is enabled and the value is outside the set working time.
8. Menu
You can access the MENU by pressing the selector knob for 3 seconds in order to view useful information or adjust the parameters of the espresso machine.
Turn the selector knob to scroll through the MENU items and press it to access the submenu.
Press the selector to change a parameter; once the parameter is flashing we can change its value by turning the knob; press the selector again to confirm the value and then the parameter will stop flashing.
To return to the previous/main MENU, press and hold the selector for 3 seconds.
BOILER ENABLING

BOILER
ENABLING
This menu item allows you to enable or disable the operation of the steam boiler.
Press the selector knob to access the menu.

On

Off
The value will start flashing by pressing the selector knob; you can adjust the value by turning the knob. Press the selector knob again to confirm. The boiler will be enabled by selecting ON, and will be disabled by selecting OFF.
Press the selector knob for 3 seconds to return to the previous menu.
BOILER TEMPERATURE

This menu item allows you to adjust the temperature of the steam boiler. Press the selector knob to access the menu.
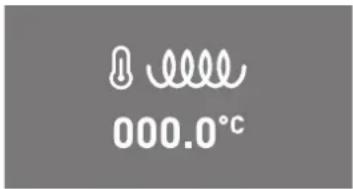
The value will start flashing by pressing the selector knob; you can adjust the value by turning the knob. Press the selector knob again to confirm.
The temperature can be set from a minimum of 110^ up to a maximum of 125^ .
Press the selector knob for 3 seconds to return to the previous menu.
UNIT ENABLING
This menu item allows you to enable or disable the operation of the brew unit.

Press the selector knob to access the menu.
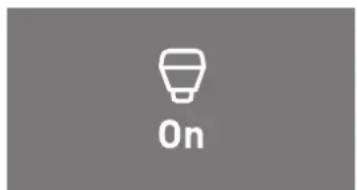
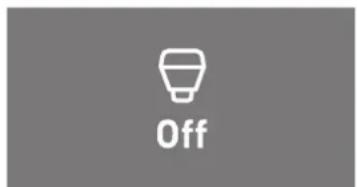
The value will start flashing by pressing the selector knob; you can adjust the value by turning the knob. Press the selector knob again to confirm. The brew unit will be enabled by selecting ON, and will be disabled by selecting OFF.
Press the selector knob for 3 seconds to return to the previous menu.
UNIT TEMPERATURE
This menu item allows you to adjust the temperature of the unit.

Press the selector knob to access the menu.
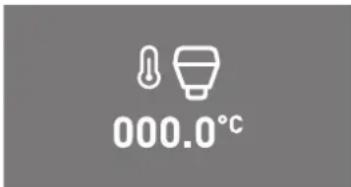
The value will start flashing by pressing the selector knob; you can adjust the value by turning the knob. Press the selector knob again to confirm. The temperature can be set from a minimum of 90^ up to a maximum of 105^ .
Press the selector knob for 3 seconds to return to the previous menu.
DOSES ADJUSTMENT
This menu item allows you to adjust the automatic doses for both single and double coffee.

Press the selector knob to access the menu.
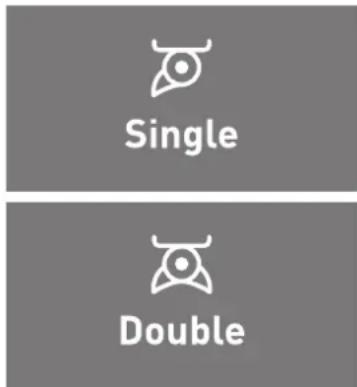
Here you can choose whether you want to adjust the single or the double dose.
Choose by turning the selector knob and confirm by pressing it.
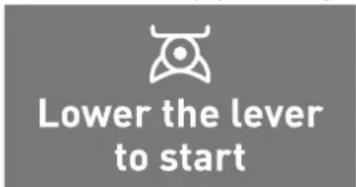
This screen will display the message “Lower the lever to start” indicating that the machine is ready for programming. Then prepare the machine for brewing the espresso by placing the selector in the correct position.
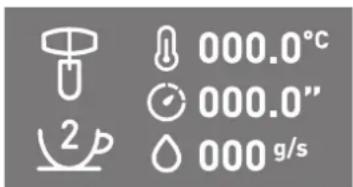
At this point a screen is displayed during the brewing showing the delivery parameters such as temperature, stopwatch and flow.
When the espresso reaches the desired level, stop brewing by placing the selector to the rest position. At this point the machine will automatically save the brewed quantity.
Press the selector knob for 3 seconds to return to the previous menu.
PREBREWING ADJUSTMENT
This menu item allows you to enable or disable the prebrewing function. The prebrewing function consists in delaying the start of the pump with regard to the start of the brewing in order to have a certain settable time during which the water drips on the coffee panel without pressure.
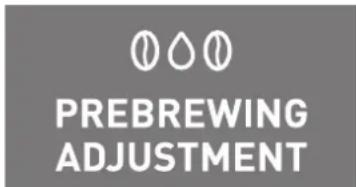
Press the selector knob to access the menu.
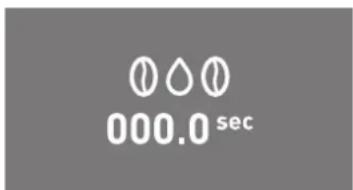
The value will start flashing by pressing the selector knob; you can adjust the value by turning the knob. Press the selector knob again to confirm. Here it is possible to set the delay of the pump and consequently the pre-brewing time.
Press the selector knob for 3 seconds to return to the previous menu.
LIGHT ENABLING
This menu item allows you to enable or disable the front light of the espresso machine.

Press the selector knob to access the menu.
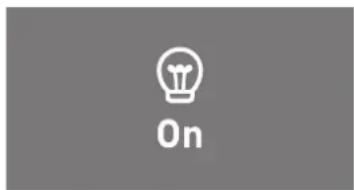
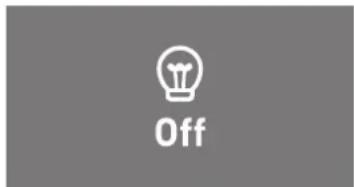
The value will start flashing by pressing the selector knob; you can adjust the value by turning the knob. Press the selector knob again to confirm.
The light will be enabled by selecting ON, and will be disabled by selecting OFF.
Press the selector knob for 3 seconds to return to the previous menu.
INFO
This browsing menu is able to display a series of useful information. Press the selector knob to access the menu.
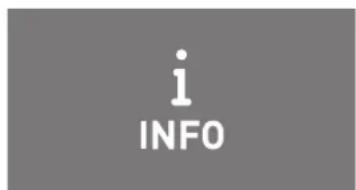
Then turn the selector knob to scroll through the menu items.
SERIAL NUMBER
This menu item displays the serial number of the espresso machine.
SERIAL NUMBER XXXXXXXXX
FIRMWARE
This menu item displays the firmware version of the espresso machine.
FIRMWARE XXX.X
COUNTERS
This menu item displays the number of coffees that have been brewed by the espresso machine.
07 COUNTERS
Press the selector knob to access the menu.
07 1p XXXXXX
09 2p XXXXXX
Then the number of coffees divided by single and double dose is displayed. Turn the selector knob to scroll through the menu items.
Press the selector knob for 3 seconds to return to the previous menu.
SETTINGS
This menu allows making adjustments or changing some parameters of the espresso machine.
Press the selector knob to access the menu.

Then turn the selector knob to scroll through the menu items.
Enter the password "11111" to access the menu.
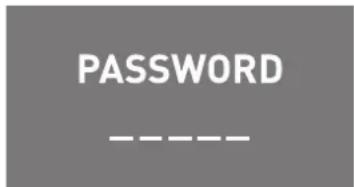
The password is requested in order to access this menu. In order to enter the password, turn the flashing box selector to change its value and confirm to go to the next box.
You are allowed to access the menu if the password is correct.
LANGUAGE
This menu item allows you to choose the language you want to use.
| LANGUAGE English |
| LANGUAGE Español |
| LANGUAGE Italiano |
The value will start flashing by pressing the selector knob; you can adjust
the value by turning the knob. Press the selector knob again to confirm. Press the selector knob for 3 seconds to return to the previous menu.
BOILER DELTA
This menu item allows you to adjust the heating delta of the boiler. Press the selector knob to access the menu.
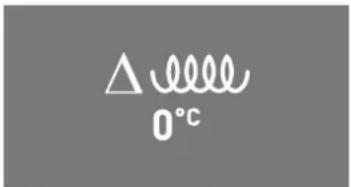
The value will start flashing by pressing the selector knob; you can adjust the value by turning the knob. Press the selector knob again to confirm. The boiler delta can be set from a minimum of 1^ up to a maximum of 5^ . Press the selector knob for 3 seconds to return to the previous menu.
RESET
This submenu allows you to reset the counters and the alarm history. Press the selector knob to access the menu.
It is possible to scroll through the menu items by turning the selector knob; press the selector knob to confirm.
CANCELLING
This menu item allows you to return directly to the previous menu.

Press the selector knob to confirm the selection.
Press the selector knob for 3 seconds to return to the previous menu.
COUNTERS
This menu item allows you to reset the brewing counters.
Press the selector knob to confirm the selection.
Press the selector knob for 3 seconds to return to the previous menu.
ALARMS
This menu item allows you to reset the alarms history.
Press the selector knob for 3 seconds to return to the previous menu.
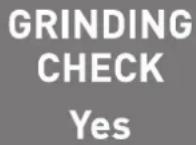
GRINDING CHECK
This menu item allows you to enable or disable the grinding check function of the espresso machine.
The grinding check function allows the machine to control the brewing flow in order to detect if the coffee grinding is correct or incorrect.
GRINDING CHECK No
The value will start flashing by pressing the selector knob; you can adjust the value by turning the knob. Press the selector knob again to confirm. The GRINDING CHECK function will be enabled by selecting YES, and will be disabled by selecting NO.
UNIT TEMPERATURE DISPLAY
This menu item displays the actual temperature read by the temperature probe of the brew unit.

BOILER TEMPERATURE DISPLAY
This menu item displays the actual temperature read by the temperature probe of the steam boiler.

SERIAL NUMBER
This menu item allows you to set the serial number of the machine.
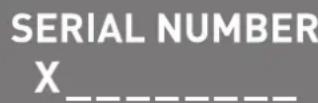
In order to enter the serial number, turn the flashing box selector to change its value and confirm to go to the next box.
WATER SUPPLY
This menu item allows you to set whether the espresso machine will be supplied using the water coming from the jug or by connecting it to the water supply.
WATER SUPPLY Jug
WATER SUPPLY Water
The value will start flashing by pressing the selector knob; you can adjust the value by turning the knob. Press the selector knob again to confirm. The machine will disable the jug level sensor by selecting WATER; the jug level sensor will be enabled by selecting JUG.
TIMER
This menu item allows enabling/disabling and programming the timer function of the espresso machine.
TIMER ENABLING
The timer function consists in setting an ON time at which the machine will be enabled and an OFF time at which the machine will be disabled. When the machine is disabled all functions are inhibited and therefore the power consumption is zero. The machine must not be switched off manually by means of the main switch in order to allow the timer to operate.
When the machine is off the following screen will appear on the display.

On
Press the selector button in case you still want to use the machine even if turned off by the timer. At this point the machine will start to heat up in order to resume its normal operation. The machine with active timer will be disabled after the time set in "Automatic Switch-off" (default 60 min.).
TIMER ENABLING
This menu item allows enabling/disabling and programming the timer function of the espresso machine.

On

Off
The value will start flashing by pressing the selector knob; you can adjust the value by turning the knob. Press the selector knob again to confirm. The timer function will be enabled and will follow the set values by selecting ON; the timer function will be disabled and the machine will always be on by selecting OFF.
TIMER ADJUSTMENT
This menu item allows you to set the operating times of the timer function if enabled.

ADJUSTMENT
Press the selector knob to access the menu.
On 00:00
Off 00:00
Autom. Switch-off 60 min
Then turn the selector knob to scroll through the menu items. The value will start flashing by pressing the selector knob; you can adjust the value by turning the selector.
Press the selector knob again to confirm.
ON indicates the time at which the machine will be enabled automatically.
OFF indicates the time at which the machine will be disabled automatically.
Automatic Switch-off indicates how much time must pass after the last coffee prepared outside the set time, so that the machine will switch off again. It can be set from a minimum of 30 minutes up to a maximum of 120 minutes.
Press the selector knob for 3 seconds to return to the previous menu.
9. Alarms
The ALXX screen is displayed if one of the following alarms occurs: DESCRIPTION.
| Alarm Cause | Effect | |
| AL01 Boiler Timeout | The alarm is enabled if the boiler temperature probe does not rise above 50°C in 3 min. at Power On | The boiler heating and boiler loading functions are inhibited; the unit with all its functions continues working.Press the encoder while the alarm is displayed or turn the machine off and on again in order to disable the alarm |
| AL02 Boiler temperature probe interrupted | The alarm is enabled if the boiler temperature probe reads the minimum range and is therefore interrupted | The boiler heating and boiler loading functions are inhibited; the unit with all its functions continues working.The alarm display is canceled by pressing the encoder but the boiler remains inhibited until the next POWER ON |
| AL03 Boiler temperature probe in short circuit | The alarm is enabled if the boiler temperature probe reads the maximum range and is therefore in short circuit | The boiler heating and boiler loading functions are inhibited; the unit with all its functions continues working.The alarm display is canceled by pressing the encoder but the boiler remains inhibited until the next POWER ON |
| Alarm Cause Effect | ||
| AL04 Boiler overtemperature (Boiler set + 5°C) | The alarm is enabled if the boiler temperature probe re-ads a temperature of 5° higher than the set one | The boiler heating and boiler loading functions are inhibited; the unit with all its functions continues working. The alarm display is canceled by pressing the encoder but the boi-ler remains inhibited until the next POWER ON |
| AL05 Unit timeout = unit resistor off | The alarm is enabled if the unit probe does not rise above 50°C in 3 min. after the first Power On of the resistor (TR1) | The unit heating function is disabled; the boiler continues working. The alarm display is canceled by pres-sing the encoder but the unit remains inhibited until the next POWER ON |
| AL06 Unit temperature probe in short circuit | The alarm is enabled if the unit temperature probe reads the maximum range and is therefore in short circuit | The unit heating function is disabled; the boiler continues working. The alarm display is canceled by pressing the encoder but the unit remains inhibited until the next POWER ON |
| AL07Unit temperature probe interrupted in short circuit | The alarm is enabled if the boiler temperature probe reads the minimum range and is therefore interrupted | The unit heating function is disabled; the boiler continues working.The alarm display is canceled by pressing the encoder but the unit remains inhibited until the next POWER ON |
| AL08Unit overtemperature | The alarm is enabled if the boiler temperature probe reads a temperature higher than 120° | The unit heating function is disabled; the boiler continues working.The alarm display is canceled by pressing the encoder but the unit remains inhibited until the next POWER ON |
| Unit flow meter alarms | ||
| AL09Flow meter Alarm | The alarm is enabled if at least 100 pulses are not counted in the first 5 sec during brewing | Brewing is not interrupted but the Led of the selected dose flashes. Alarm enabled only on the 2 dosed selections. Alarm reset by setting the lever to the stop position |
| Alarm Cause | Effect | |
| Boiler level alarms | ||
| AL10Self-levelalarm | The alarm is enabled if the level probe is open continuously for more than the time set on the “timeout level” menu parameter | The boiler loading and boiler heating functions are disabled.The alarm is reset by pressing the encoder and the machine resumes loading |
| Alarms related to brewing timeout | ||
| AL11Brewingtimeout | The alarm is enabled if the continuous coffee supply remains active for more than 2 minutes | The brewing stops and the Led of the selected dose start flashing.The alarm is reset by pressing the encoder |
| Alarm related to the lack of water in the jug | ||
| AL12Empty jug | The alarm is enabled with the jug level sensor open (therefore the water in the jug has dropped under a certain level | All the Leds in series start flashing [Led 2, Led 3, Led 4] and all the functions of the machine are blocked (heating, boiler load, brewing, etc.). If it happens during brewing, the brewing in progress is blocked. The alarm is canceled once the jug is filled, the Leds stop flashing and all the functions are restored as a POWER ON |
| Alarm Cause Effect | ||
| General alarms | ||
| AL13Data loss | The alarm is enabled when Equadro and Flash do not pass the checksum | At this point Equadro is reset (except for the counters) and the default data is reloaded. The screen display of the alarm is canceled by pressing the encoder button |
| AL14Hall lever effect alarm | The alarm is enabled when no brewing lever hall is detected for 5 seconds | With the alarm enabled you can test all the positions of the lever to check the correct functioning of all the halls. Reset the alarm by pressing the encoder button.If the stop position sensor is not detected during the check, the operation is switched from automatic to manual mode (with warning to be confirmed by pressing the encoder button) and the sensors 1-2 stop while the sensors 3-4 continue the brewing |
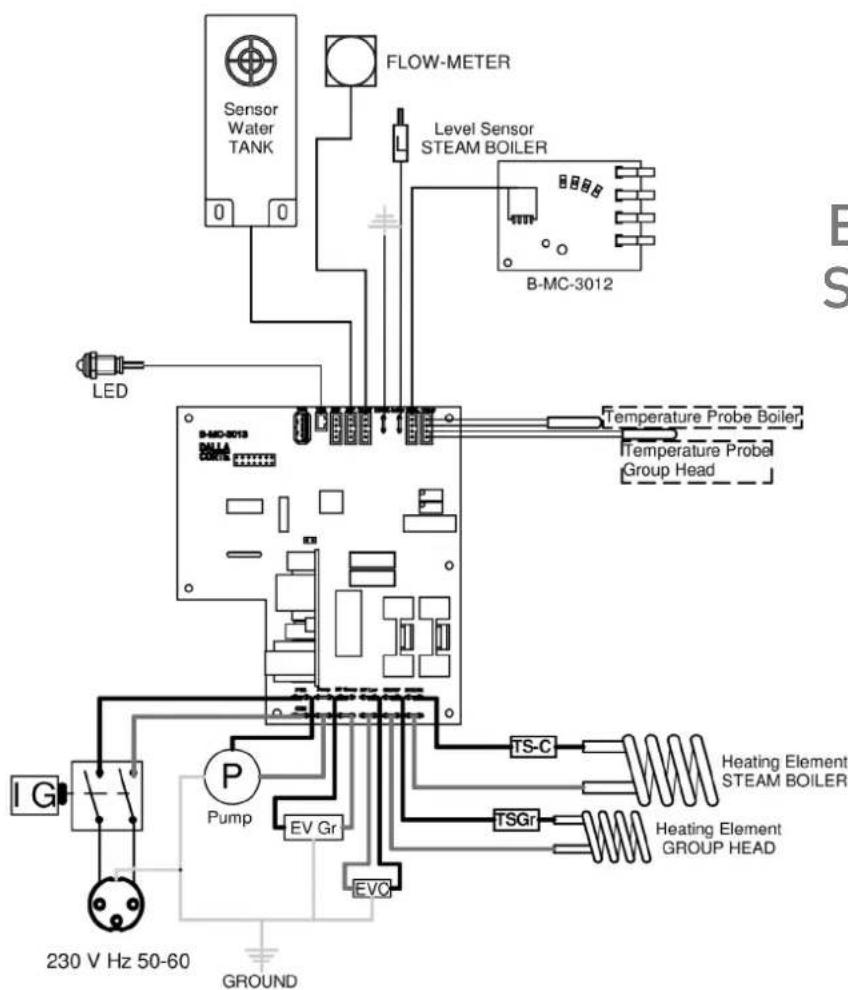
Schema elettrico
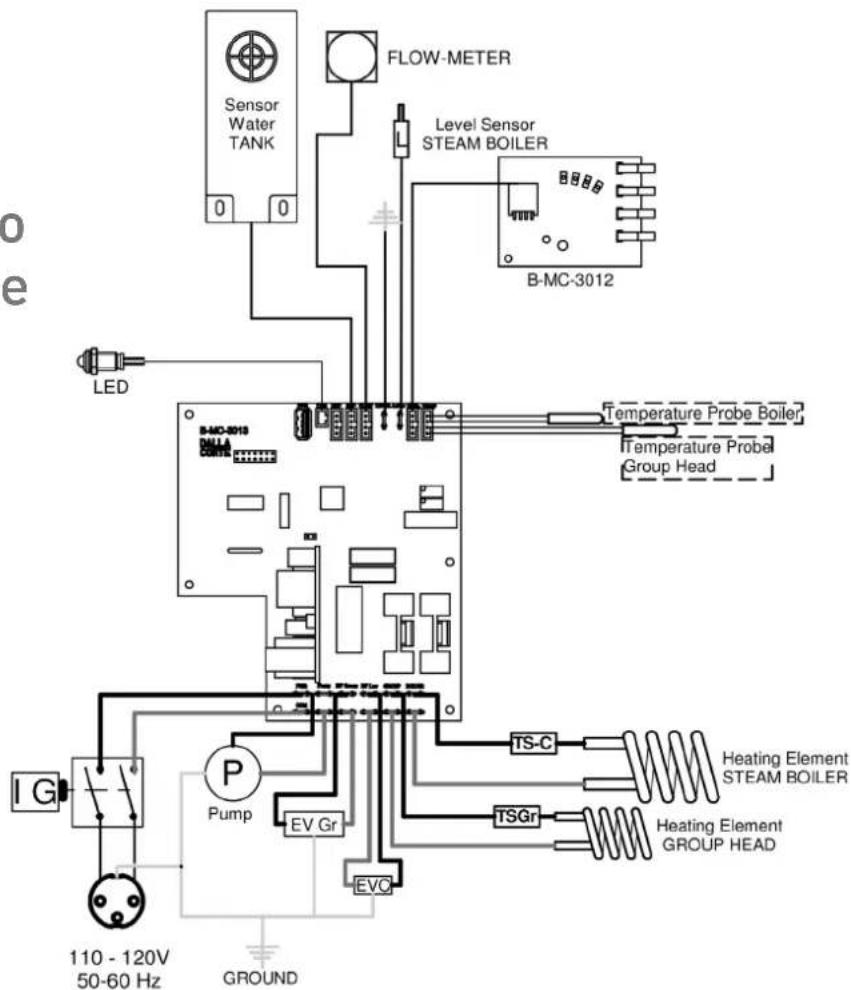
Wiring diagram
Schaltplan
Esquema eléctrico
Schéma électrique
V200-240 Hz 50-60
s+2b3c
Schema elettrico Wiring diagram Schaltplan Esquema eléctrico Schéma électrique V110-120 Hz 50-60
Declaration of conformity
The undersigned company:
Dalla Corte S.R.L.
with registered office in:
Via Zambeletti 10, 20021, Baranzate, MI, Italy
As the manufacturer, hereby declares that:
The STUDIO Espresso coffee machine
Complies with the following Community
directives: 2006/42/EC - 2014/35/EU -
The object of the declaration above is in compliance with the relevant Union
harmonization legislation: EN 55014-
1:2006+A1:2009+A2:201; EN 55014-2:2015;
EN 61000-3-2:2014; EN 61000-3-3:2013
EN 60335-1:2012 + A11:2014; EN 60335-2-
64:2016; EN 62233:2008
Dalla Corte S.R.L. is authorized to hold the technical file.
The legal representative
Paolo Dalla Corte
natural_image
Symbol of a trash bin crossed with two crossed lines, no text or numbers present220¢1c
Information for the correct disposal of the product pursuant to art. 14 of European Directive 2012/19/EU of 4 July 2012
At the end of its useful life, the product must NOT be disposed of together with municipal waste. It can be delivered to the special separate collection centers set up by the municipal administrations. Please contact your municipality, or local authority, for all information regarding the separate collection systems available in your area or contact our authorized dealers. The appropriate separate collection for the subsequent forwarding of the disposed equipment for recycling, processing, and environmentally compatible disposal helps to avoid possible negative effects on the environment and on health and favors the re-use and/or recycling of the materials the equipment is composed of.
For information contact: DALLA CORTE S.r.l. - Via Zambeletti 10 Baranzate (MI) Tél. +39 02 45486443

- LEGEND
- Machine description
- General safety warnings
- WARNING
- General indications
- In particular:
- WARNING: ELECTRIC SHOCK HAZARD
- WARNING: BURN HAZARD
- Area of use and intended use
- Transport and handling
- WARNING: IMPACT OR CRUSH HAZARD
- Preparations for installation
- Technical information
- Data plate
- DALLA CORTE
- SERIAL N FXXXXXXXXX YEAR XXXX
- Machine accessories
- Set up and use of the appliance
- NOTE
- Jug filling instructions (jug version)
- Water to use
- Espresso coffee brewing
- Preparation of hot milk
- Periodic maintenance performed by the user
- Cleaning of body parts
- WARNING: BURN AND ELECTRIC SHOCK HAZARD
- Daily cleaning of parts in contact with coffee
- Washing of groups (daily)
- Boiler washing (annual)
- Periodic cleaning
- Jug cleaning
- Display
- Menu
- BOILER ENABLING
- BOILER TEMPERATURE
- UNIT ENABLING
- UNIT TEMPERATURE
- DOSES ADJUSTMENT
- PREBREWING ADJUSTMENT
- LIGHT ENABLING
- INFO
- SERIAL NUMBER
- FIRMWARE
- COUNTERS
- SETTINGS
- LANGUAGE
- BOILER DELTA
- RESET
- CANCELLING
- ALARMS
- GRINDING CHECK
- GRINDING CHECK No
- UNIT TEMPERATURE DISPLAY
- BOILER TEMPERATURE DISPLAY
- WATER SUPPLY
- TIMER
- On
- TIMER ENABLING
- Off
- TIMER ADJUSTMENT
- ADJUSTMENT
- Alarms
- Schema elettrico
- Wiring diagram
- Schaltplan
- Esquema eléctrico
- Schéma électrique
- Information for the correct disposal of the product pursuant to art. 14 of European Directive 2012/19/EU of 4 July 2012
Brand : Dalla Corte
Model : Studio
Category : Uncategorized