
MDRS619FIE - Refrigerator MIDEA - Free user manual and instructions
Find the device manual for free MDRS619FIE MIDEA in PDF.


| Product type | Combined refrigerator |
| Brand | Midea |
| Model | MDRS619FIE |
| Total volume | 460 L |
| Refrigerator volume | 271 L |
| Freezer volume | 189 L |
| Dimensions (W x D x H) | 835 x 635 x 1775 mm |
| Rated voltage / Frequency | 220-240 V ~ 50 Hz |
| Rated current | 1.9 A |
| Freezing capacity | 12 kg/24 h |
| Power failure autonomy | 9 h |
| Climate class | SN, N, ST, T (from +10 to +43 °C) |
| Recommended set temperature | Refrigerator: +4°C, Freezer: -18°C |
| Refrigerator temperature range | +2°C to +8°C |
| Freezer temperature range | -24°C to -16°C |
| Special functions | Super Cool, Super Freeze, Wi-Fi (MSmartHome) |
| Lighting | LED (class G) |
| Display | Digital with icons |
| Defrost | Automatic (no frost) |
| Child lock | Yes (control panel) |
| Coldest zone indicator | Yes (optional) |
| Connectivity | Wi-Fi 2.4 GHz (module MWB-S-WB01) |
| Maintenance and cleaning | Soft cloth, neutral detergent, no abrasives |
| Spare parts available | Thermostats, sensors, boards, lamps, handles, hinges, drawers, baskets, gaskets (7 to 10 years) |
| Safety | Disconnect before intervention, entrust lamp replacement to a professional |
Frequently Asked Questions - MDRS619FIE MIDEA
User questions about MDRS619FIE MIDEA
0 question about this device. Answer the ones you know or ask your own.
Ask a new question about this device
Download the instructions for your Refrigerator in PDF format for free! Find your manual MDRS619FIE - MIDEA and take your electronic device back in hand. On this page are published all the documents necessary for the use of your device. MDRS619FIE by MIDEA.
USER MANUAL MDRS619FIE MIDEA
natural_image
Simple diagram of two vertical rectangular panels with corner brackets, no text or symbols present.Refrigerator
SIDE BY SIDE SERIES

MSmartHome
Download the app & activate product
USER MANUAL
MDRS619FIE
LANGUAGES
EN English
DE Deutsch
IT Italian
FR French
ES Spanish
PT Portuguese
GR Greek
PL Polish
LV Latvian
SR Serbian
Thank you for choosing Midea! Before using your new Midea product, please read this manual thoroughly to ensure that you know how to operate the features and functions that your new appliance offers in a safe way.
CONTENTS
THANK YOU LETTER 01
SPECIFICATIONS 02
PRODUCT OVERVIEW 03
PRODUCT INSTALLATION 04
OPERATION INSTRUCTIONS 08
APP SETUP AND OPERATION 13
CLEANING AND MAINTENANCE----15
TROUBLESHOOTING 16
APPENDIX 20
SPECIFICATIONS
| Product model MDRS619FIE | |
| Rated Voltage/Frequency 220-240V-/50Hz | |
| Rated Current 1.9A | |
| Total Volume 460L | |
| Fresh Food Storage Compartment Volume 271L | |
| Frozen Food Storage Volume 189 | |
| Temperature Rise Time 9h | |
| Freezing Capacity 12kg/24h | |
| Overall Dimension (W x D x H) 835x635x1775mm |

MSmartHome
Wireless Network module model MWB-S-WB01
| Standard IEEE 802. 11b/g/n | |
| Antenna Type Printed PCB antenna | |
| Frequency Band 2400-2483.5 MHz | |
| Operating Temperature | 0 °C ~ 85 °C /32 °F ~185 °F Operation humidity: 10%~85% |
| Power Input | DC5V/500mA Maximum Transmission power: <20dBm |
PRODUCT OVERVIEW
Names of components
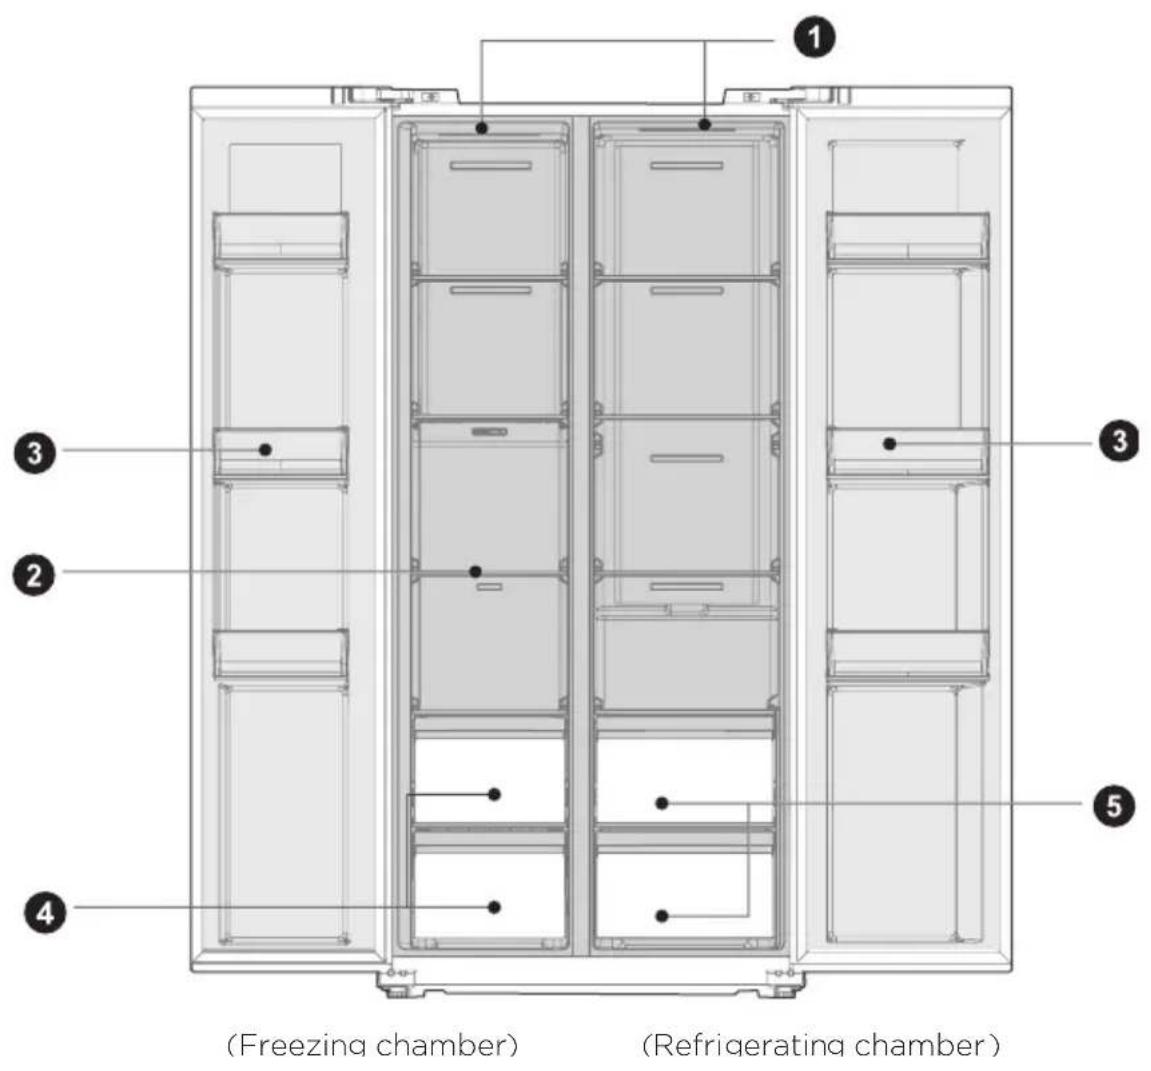
1 LED Lamp
4 Drawer
2 Glass Shelf
5 Fruits And Vegetables Box
3 Door Tray

ATTENTION
The picture above is only for reference. The actual configuration will depend on the physical product or statement by the distributor
PRODUCT INSTALLATION
Install Instruction
For refrigerating appliances with climate class
- Depending on the climate class, This refrigerating appliance is intended to be used at ambient temperatures range as specified following table.
- The climate class can be found on the rating plate. The product may not operate properly at temperatures outside of the specific range.
• You can find the climate class on the product label.
Effective temperature range
- The product is designed to operate normally in the temperature range specified by its class rating.
| Class Symbol | Ambient temperature range °C | ||
| IEC 62552 (ISO 15502) ISO 8561 | |||
| Extended temperate SN | + 10 to + 32 | + 10 to + 32 | |
| Temperate N + 16 to + 32 | + 16 to + 32 | ||
| Subtropical ST + 16 to + 38 | + 18 to + 38 | ||
| Tropical T + 16 to + 43 | + 18 to + 43 | ||
Dimensions and Clearances
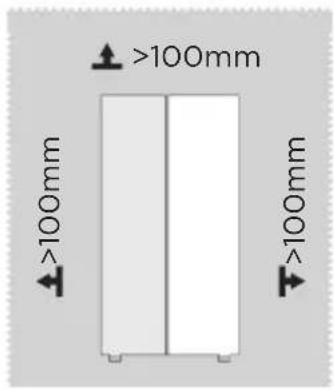
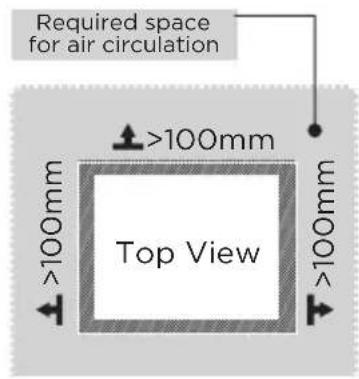
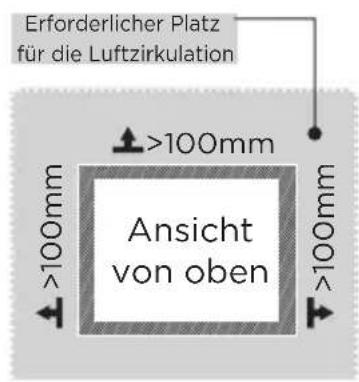
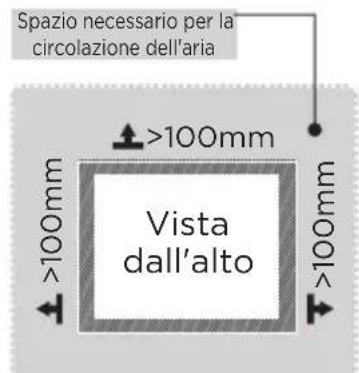
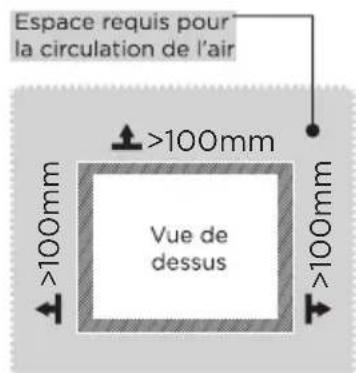
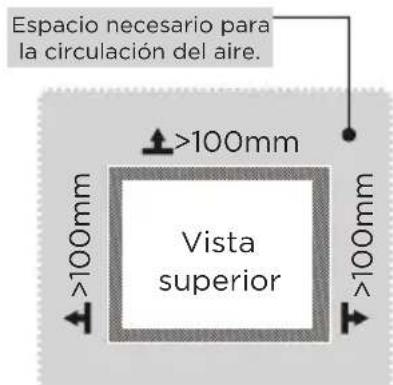
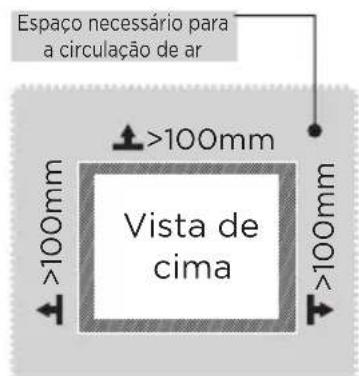
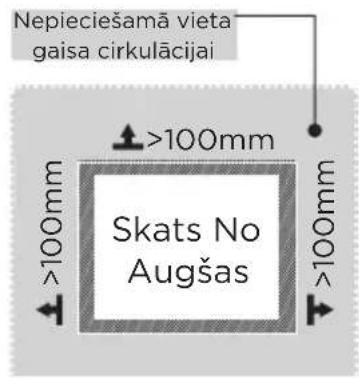
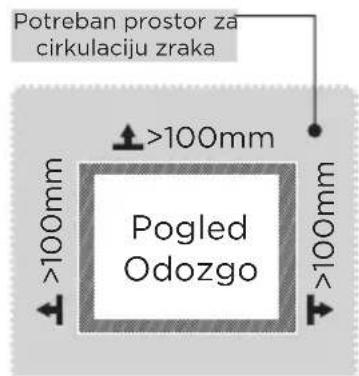
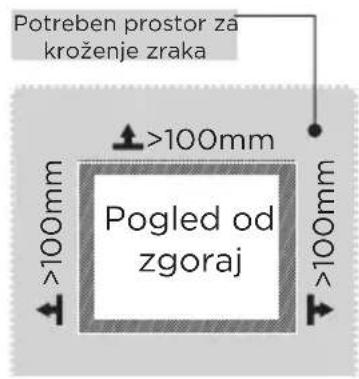
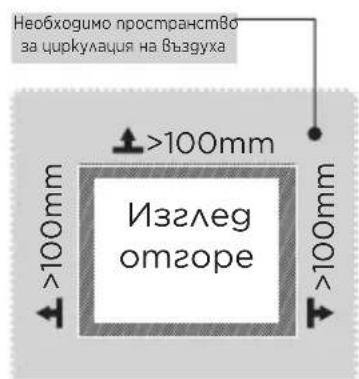
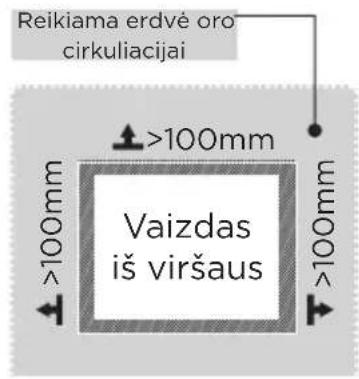
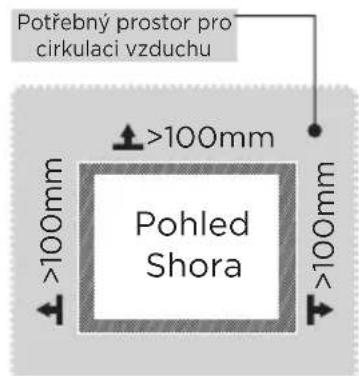
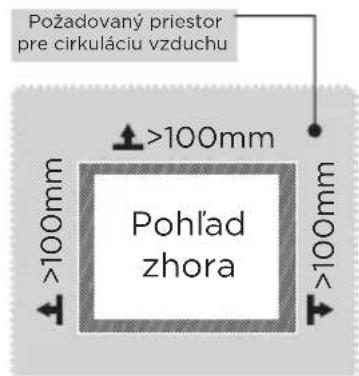
- Too small of a distance from adjacent items may result in the degradation of freezing capability and increased electricity costs. Allow over 100 mm of clearance from each adjacent wall when installing the appliance.

ATTENTION
The picture above is only for reference. The actual configuration will depend on the physical product or statement by the distributor
Space requirement diagram (when the door is open and when the door is closed)
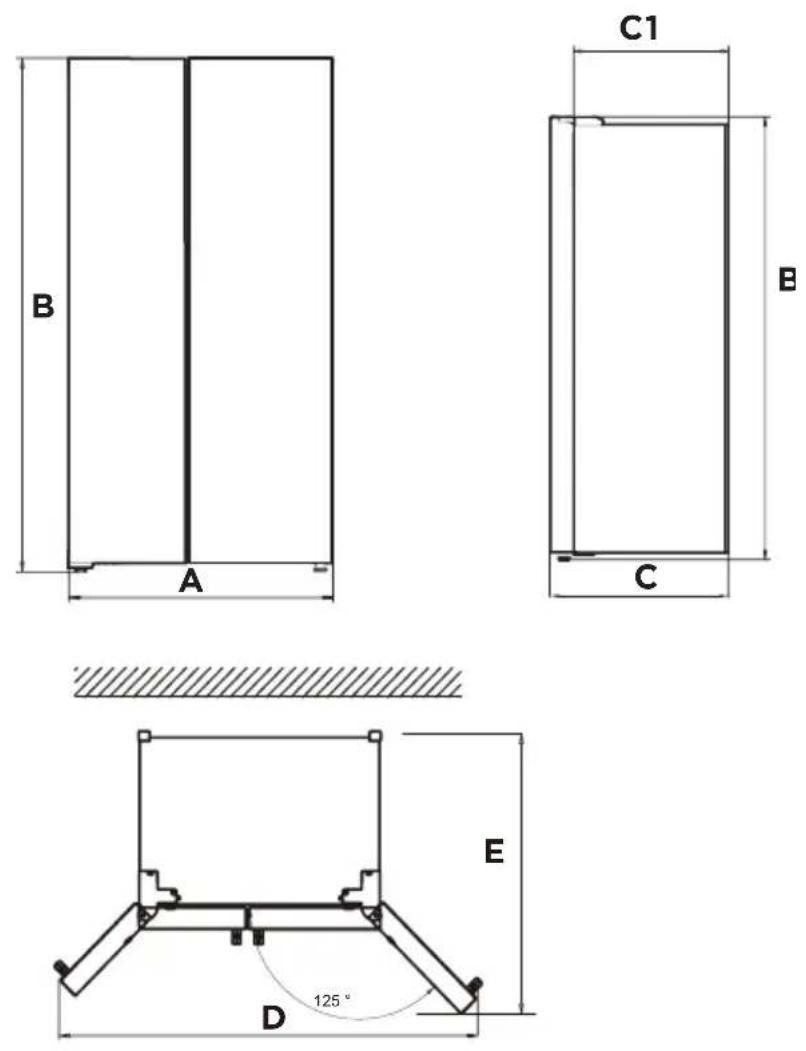
| Width | Overall Height | Depth | Depth Without door | Width doors open 125° | Depth doors open 125° |
| A B C | C1 D E | ||||
| 835 1775 | 635 540 | 1411 1105 |
Notice: All dimensions in mm
Leveling feet
To avoid vibration, the unit must be leveled.
If required, adjust the leveling screws to compensate for the uneven floor.
The front should be slightly higher than the rear to aid in door closing.
Leveling screws can be turned easily by tipping the cabinet slightly.
Turn the leveling screws counterclockwise 📋 to raise the unit, clockwise 📋 lower it.
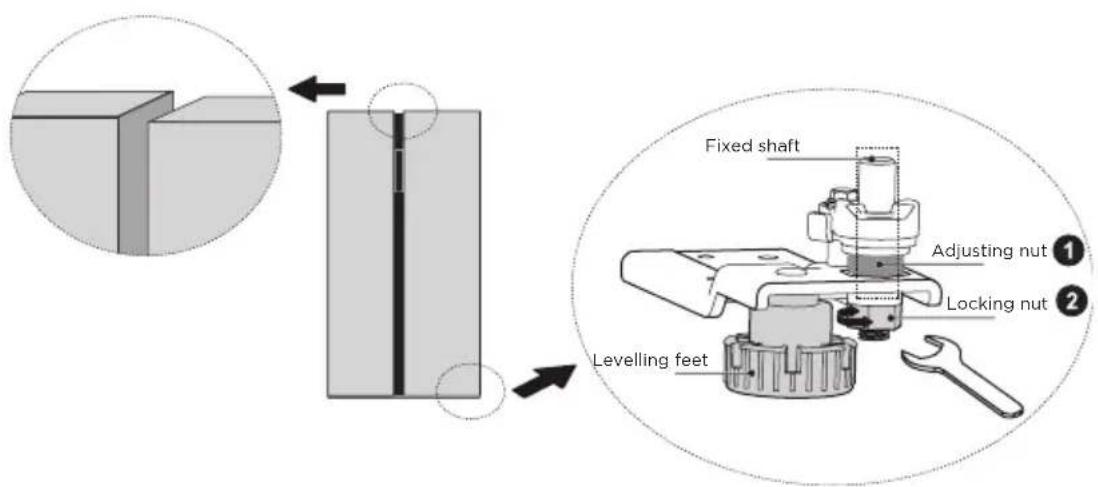
Leveling doors
If the doors are not at the same height, the door can be adjusted with a spanner.
A- To raise the door, turn the nut (1) anticlockwise.
B- To lower the door, turn the nut (1) clockwise.
C- When the door is correctly aligned, fix it with the nut (2).
Moving the appliance
- Remove all food from inside the appliance.
- Pull the power plug out, insert and fix it into the power plug hook at the rear or on top of the appliance.
- Tape parts such as shelves and the door handle to prevent from falling off while moving the appliance.
- Move the appliance with more than two people carefully. When transporting the appliance over a long distance, keep the appliance upright.
- After installing the appliance, connect the power plug into a socket out to switch on the appliance.

ATTENTION
Precautions before operation:
Before making changes the refrigerator must be disconnected from power.
precautions should be taken to prevent any personal injury.
Changing the light
- Any replacement or maintenance of the LED lamps is intended to be made by the manufacturer, its service agent or similar qualified person.

ATTENTION
This product contains two light sources of energy efficiency class (G).
Connecting the appliance
After installing the appliance, connect the power plug into a socket outlet.

ATTENTION
After connecting the power supply cord (or plug) to the outlet, wait 2 or 3 hours before you put food into the appliance. If you add food before the appliance has cooled completely, your food may spoil.
Tips for energy saving
- Do not place the appliance near cookers, radiators or other heat sources. If the ambient temperature is high, the compressor will run more frequently and for longer, resulting in increased energy consumption.
- Ensure that there is sufficient ventilation at the base of the appliance, on the sides of the appliance and at the back of the appliance. Never cover ventilation openings.
- Please also observe the spacing dimensions in the chapter "Installation".
- The arrangement of drawers, shelves and racks as shown in the illustration offers the most efficient use of energy and should therefore be retained as far as possible. All drawers and shelves should remain in the appliance to keep the temperature stable and save energy.
- To obtain a larger storage space (e.g. for large refrigerated/frozen goods), the middle drawers can be removed. The top and bottom drawers and shelves should be removed last if necessary.
- An evenly filled refrigerator/freezer compartment contributes to optimal energy use. Therefore, avoid empty or half-empty compartments.
- Allow warm food to cool before placing it in the refrigerator/freezer. Food that has already cooled down increases energy efficiency.
- Allow frozen food to defrost in the refrigerator. The coldness of the frozen food reduces the energy consumption in the refrigerator compartment and thus increases the energy efficiency.
- Open the door only as briefly as necessary to minimise cold loss. Opening the door briefly and closing it properly reduces energy consumption.
- The door seals of your appliance must be perfectly intact so that the doors close properly and energy consumption is not increased unnecessarily.
OPERATION INSTRUCTIONS
Control panal
EN
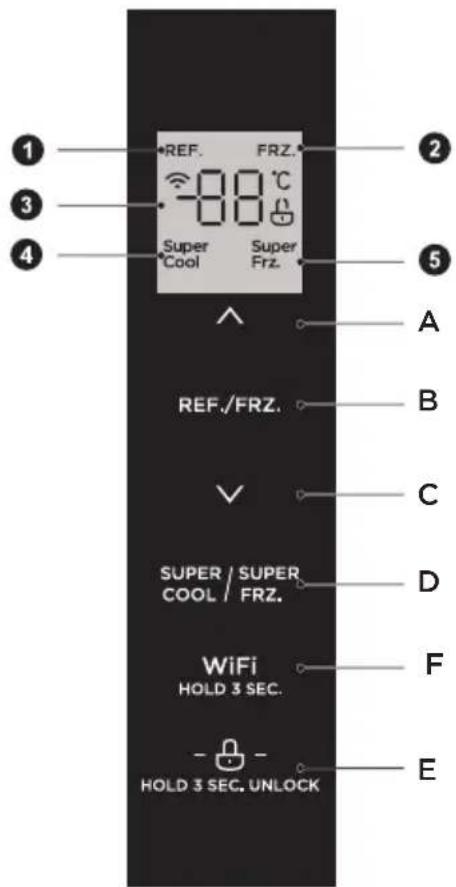
| Display Button | |||
| 1 | Refrigerating icon | A | Temperature up button |
| 2 | Freezing icon | B | Temperature zone selection button |
| 3 | Temperature display icon | C | Temperature down button |
| 4 | Super cool icon | D | Super cool/freezing button |
| 5 | Super freezing icon | E | Lock/Unlock button |
| F | Wireless button | ||

ATTENTION
The actual control panel may differ from model to model.
Display
- When electrify the refrigerator, the display screen will total display for 3 seconds. Meanwhile the starting up bell rings and then the screen enters the normal display of the operation.
- The first time for using the refrigerator, the default settemperature of refrigerating chamber and freezing chamber is 5 °C -18 respectively.
- When the error occurs, the display shows the error code (see next page); during normal running, the display shows the set temperature of the refrigerating chamber or freezing chamber.
- Under normal circumstances, if there is no operation on display panel or door opening action within 30s, then the display is lock, and the sate "☐" goes out.
Lock / unlock
- In the unlocked state, long press the lock button “ ” for 3 seconds, enter the lock state. The logo “ ” lights up and buzzer sounds, it means the display panel is locked, at this time, button operation cannot be implemented;
- In the lockedstate, long press the lock button “ - 🔊 - ” for 3 seconds, enter the unlocked state. The logo “ 🔊” lights up and buzzer sounds, it means the display panel is unlocked, at this time, button operation can be implemented;
Temperature setting of refrigerating chamber
- Press temperature zone selection button “ ”REO,CHOOSE the setting temperature zone of refrigerating chamber The “REFicon will light up, and then press “” or “ ” to adjust the setting temperature of refrigerating chamber.
• The temperature setting range for refrigerating chamber is 2^ C8 ^ C
Temperature setting of freezing chamber
- Press temperature zone selection button " "REO,CHOOSE the setting temperature zone of freezing chamber, The "FRicon will light up, and then press " or " " to adjust the setting temperature of freezing chamber.
• The temperature setting range for freezing chamber is -24 °C \~ -16°C
Mode setting
- When super cool mode “ Super CBI set, temperature of refrigerating chamber will automatically set at 2 °C, the longest running time of this mode is 6 h.
- Exit super cool mode “Super Cool”, temperature of refrigerating chamber will automatically returnback to temperature set before supercool mode.
- When superfreezing mode “ Super Frz ” is set, temperature of freezing chamber will automatically set at -24 °C, exit after 24 hours of operation.
- Exit super freezing mode “Super Frz.”, temperature of freezing chamber will automatically return back to temperature set before super freezing mode.
ATTENTION
According to IEC62552: 2007, the testing condition as follow: start the super freezer mode in advance, and wait when the fridge enters automatic defrosting, and then apply the freezer load.
The maximum defrosting time is 72 hours and the minimum is 12 hours at 32°C. Recommended setting: refrigerating chamber 4 °C freezing chamber - 18 . °C
Storage upon power failure
- In case of power failure, the instant working state will be locked and maintained t re-electrification.
Error code
- The following warnings appearing on the display indicate corresponding faults of the refrigerator. Though the refrigerator may still have cold storage function with the following faults, the user shall contact a maintenance specialist for maintenance, so as to ensure optimized operation of the appliance.
| Error code Error Description |
| E1 Temperature sensor failure of refrigerating chamber |
| E2 Temperature sensor failure of freezing chamber |
| E5 Freezing defrost sensor detection circuit error |
| E6 Communication error |
| E7 Circulation of temperature detection circuit error |
Out of operation
- Power failure: In case of power failure, even if it is in summer, foods inside the appliance can be kept for several hours; during the power failure, the times of door opening shall be reduced, and no more fresh food shall be put into the appliance.
- Long-time nonuse: The appliance shall be unplugged and then cleaned; then the doors are left open to prevent odor.
- Moving: Before the refrigerator is moved, take all objects inside out, fix the glass partitions, vegetable holder, freezing chamber drawers and etc. with tape, and tighten the leveling feet; close the doors and fix them with tape. During moving, the appliance shall not be laid upside down or horizontally, or be vibrated; the inclination during movement shall be no more than 45°.

ATTENTION
The appliance shall run continuously once it is started. Generally, the operation of the appliance shall not be interrupted; otherwise the service life may be impaired.
Tips on storing food
Freezer compartment
- The freezer is designated for the storage of food frozen at very low temperature, long-term storage of frozen food, and for the production of ice.
- Only use the shelves in the door of the freezer to store frozen food, not for storing hot food designated for freezing.
- Do not put fresh and frozen food next to each other. The frozen food may thaw.
- When freezing fresh food (such as meat, fish or chopped meat), cut them into parts that can be used at the same time.
- Storing frozen food: instructions are usually stated on the packages, which must be followed. If there is no information on the packaging, food should not be stored for longer than three months from the date of purchase.
- When purchasing frozen food, make sure that it was frozen at a suitable temperature and that the packaging is not damaged.
- Frozen food should be kept in suitable packages to retain the quality and should be returned to the freezer compartment as soon as possible.
- If a package of frozen food shows moisture or abnormal bulging, it is probable that it was stored at the wrong temperature and the content is spoiled.
- The storage period for frozen food depends on the room temperature, the thermostat setting, the frequency of opening the door of the freezer, the type of food and the time of transporting the product from the shop to the household. Always follow the instructions printed on the packaging and never exceed the maximum storage time stated on the package.
Cooling compartment
- To reduce moisture and subsequent ice build-up, never put liquid into the refrigerator in unsealed containers. Frost tends to concentrate in the coolest parts of the evaporator. Storing uncovered liquids results in a more frequent need for defrosting.
- Never put warm foods in the refrigerator. These should first cool down at room temperature and then be placed so as to ensure adequate air circulation in the refrigerator.
- Foods or food containers should not touch the back wall of the refrigerator because they could freeze to the wall. Do not keep regularly opening the door of the refrigerator.
- Meat and clean fish (packed in a package or plastic foil) can be placed in the refrigerator, which can be used in 1-2 days.
- Fruit and vegetables without packaging can be placed in the part designated for fresh fruit and vegetables.
Recommended Temperature
The optimal temperature setting for food storage:
- Fridge: 4 °C, Freezer: -18 °C

ATTENTION
The optimal temperature setting of each compartment depends on the ambient temperature. Above optimal temperature is based on the ambient temperature of 25 °C .
| Order | Compartments TYPE | Target storage temp. [°C] | Appropriate food |
| 1 Fridge +2 +8 | ≤ | Eggs, cooked food, packaged food, fruits and vegetables, dairy products, cakes, drinks and other foods are not suitable for freezing. | |
| 2 (***)-Freezer | ≤-18 | Seafood (fish, shrimp, shellfish), freshwater aquatic products and meat products (recommended for 3 months, the longer the storage time, the worse the taste and nutrition), suitable for frozen fresh food. | |
| 3 ***-Freezer | ≤-18 | Seafood (fish, shrimp, shellfish), freshwater aquatic products and meat products (recommended for 3 months, the longer the storage time, the worse the taste and nutrition), suitable for frozen fresh food. | |
| 4 **-Freezer | ≤-12 | Seafood (fish, shrimp, shellfish), freshwater aquatic products and meat products (recommended for 3 months, the longer the storage time, the worse the taste and nutrition), suitable for frozen fresh food. | |
| 5 *-Freezer | ≤-6 | Seafood (fish, shrimp, shellfish), freshwater aquatic products and meat products (recommended for 3 months, the longer the storage time, the worse the taste and nutrition), suitable for frozen fresh food. | |
| 6 0-star -6 | ≤0 | Fresh pork, beef, fish, chicken, some packaged processed foods, etc. (Recommended to eat within the same day, preferably no more than 3 days).Partially encapsulated processed foods (non-freezable foods). | |
| 7 Chill -2 | ≤+3 | Fresh/ frozen pork, beef, chicken, freshwater aquatic products, etc. (7 days below 0°C and above 0°C is recommended for consumption within that day, preferably no more than 2 days). Seafood (less than 0 for 15 days, it is not recommended to store above 0°C. | |
| 8 Fresh food 0 | ≤+4 etc.(Recommended to eat within the same day, preferably no more than 3 days) | ||
| 9 Wine +5 | ≤+20 Red wine, white wine, sparkling wine, etc. | ||

ATTENTION
please store different foods according to the compartments or target storage temperature of your purchased
APP SETUP AND OPERATION
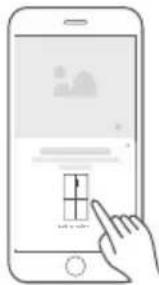
Download the MSmarthome App
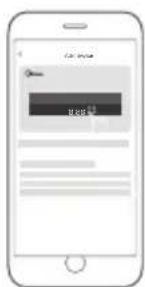
On an app market (Google Play Store, Apple App Store), search for "MSmartHome" and find the MSmartHome app. Download and install it on your phone. You can also download the app by scanning the QR code below.
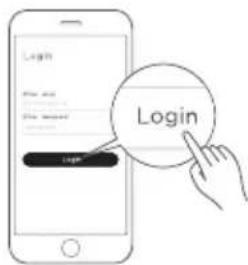
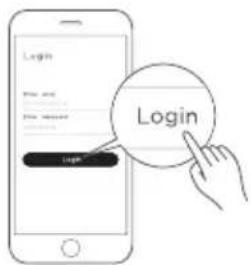
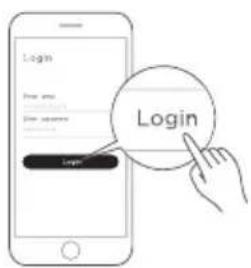
Register and log in
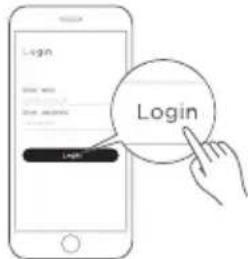
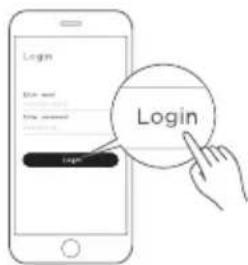
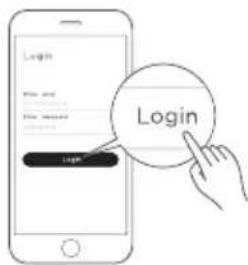
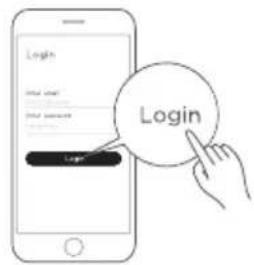
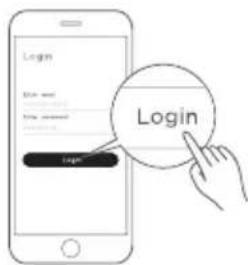
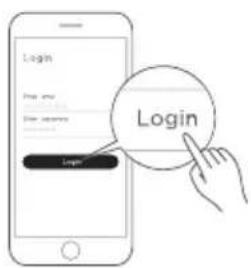
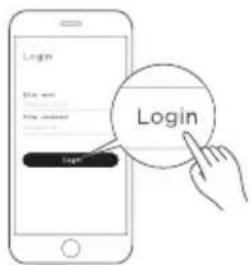
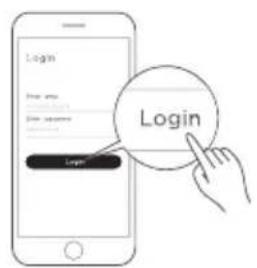
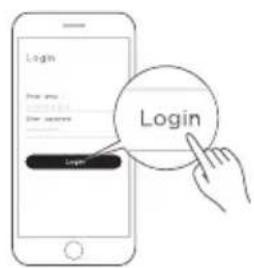
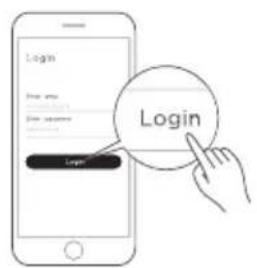
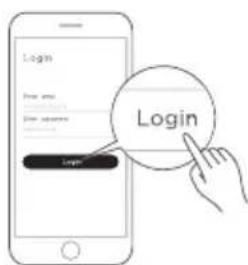
Open the MSmartHome app, and create a new account to start (you can also register through a third-party account). If you already have an existing account, use the account to log in.
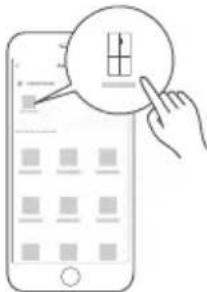
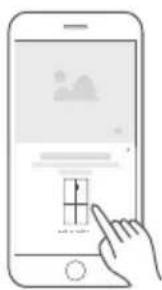
Connect your devices to MSmarthome
- Please make sure your mobile phone is connected to a wireless network. If it is not, go to Settings and enable wireless networks and Bluetooth.
- Please power on your devices.
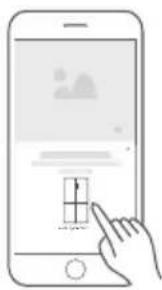
- Open MSmarthome App on your phone.
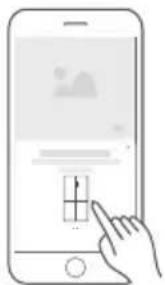
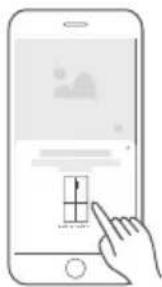
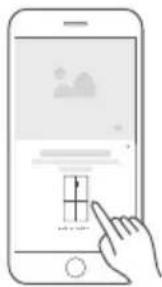
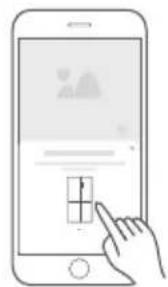
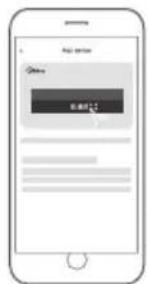
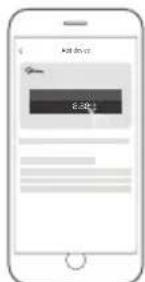
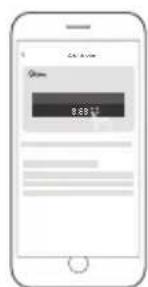
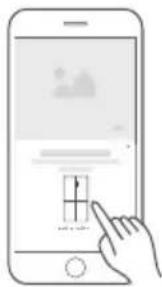
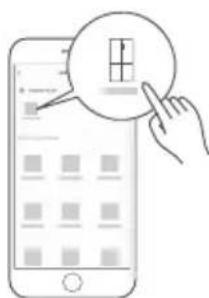
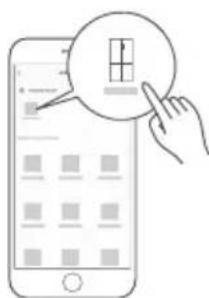
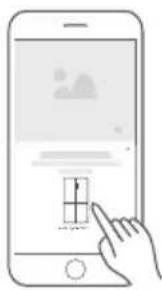
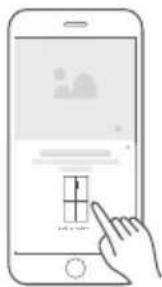
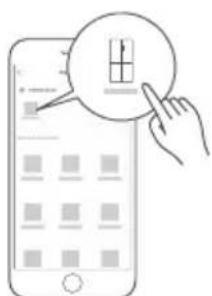
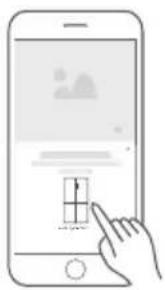
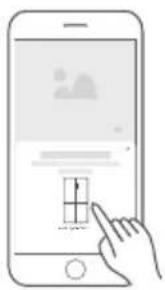
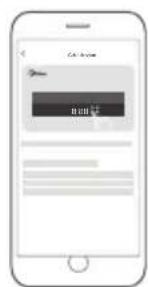
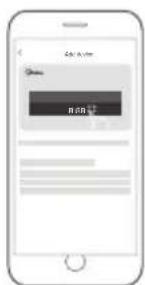
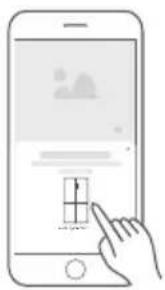
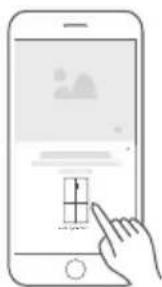
- If a message of "Smart devices discovered nearby" appears, click to add.
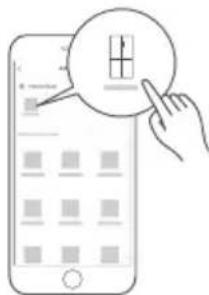
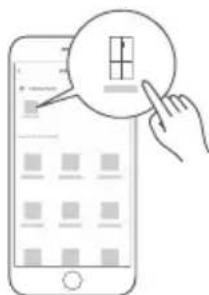
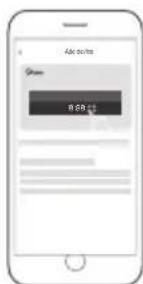
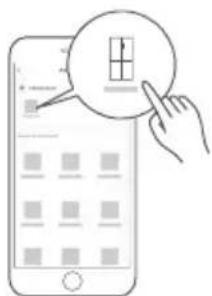
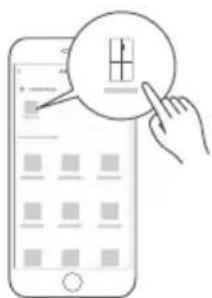
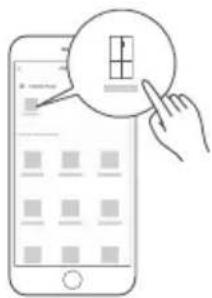
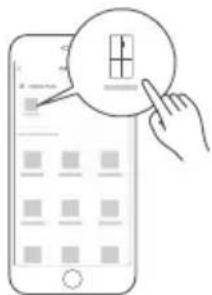
- If no message appears, select "+" on the page and select your device in the list of nearby devices available. If your device is not listed, please add your device manually by the device category and device model.
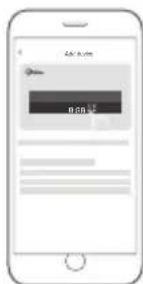
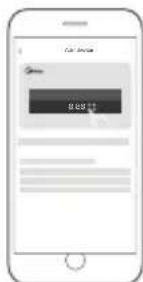
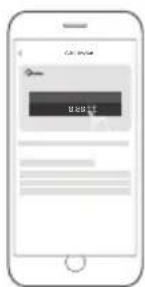
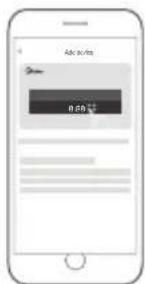
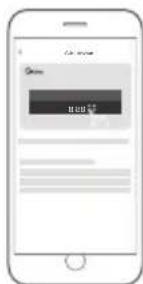
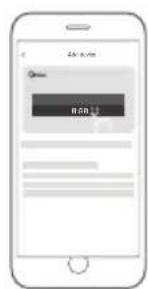
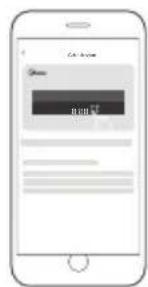
- Connect your device to the wireless network according to instructions on app. If the connection fails, please follow the instructions provided by the app to continue with the operation.

natural_image
Illustration of a hand interacting with a smartphone displaying a grid interface (no text or symbols)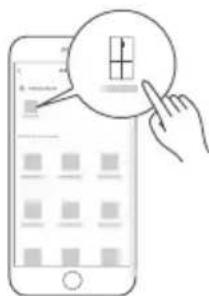
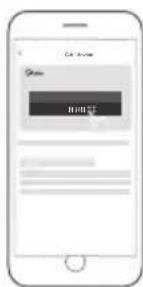

NOTE
- Make sure your devices are powered on.
- Keep your mobile phone close enough to your device when you are connecting your device to the network.
- Connect your mobile phone to the wireless network at home, and make sure you know the password of the wireless network.
- Check if your wireless router supports 2.4 GHz band and turn it on. If you are not sure whether the router supports 2.4 GHz band, please contact the router manufacturer.
- The device cannot connect to the wireless network that requires authentication, and it usually appears in public areas such as hotels, restaurants, etc. Please connect to a wireless network that does not require authentication.
- Turn off the WLAN+ (Android) or WLAN Assistant (iOS) function of your mobile phone when connecting your device to the network.
- In the case that your device connected to a wireless network before but it needs to reconnect, please click “+” on the app Home page, and add your device again by the device category and model according to the instructions on app.
CLEANING AND MAINTENANCE
Defrosting
- The refrigerator is made based on the air-cooling principle and thus has automatic defrosting function. Frost formed due to change of season or temperature may also be manually removed by disconnection of the appliance from power supply or by wiping with a dry towel.
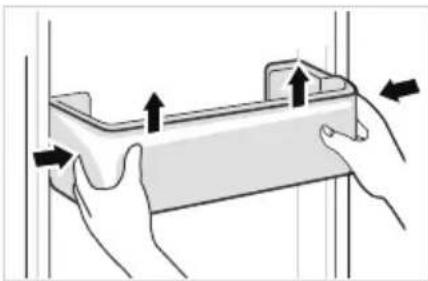
Cleaning of door tray
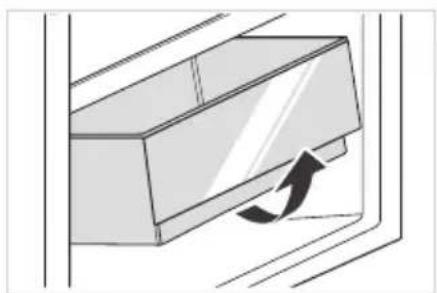
- According to the direction arrow in the figure below, use both hands to squeeze the tray, and push it upward, then you can take it out.
• After washing the tray having been taken out, you can adjust its installing height in accordance with your requirement.
natural_image
Illustration of hands holding a rectangular object with arrows indicating movement or force (no text or symbols)Cleaning of glass shelf
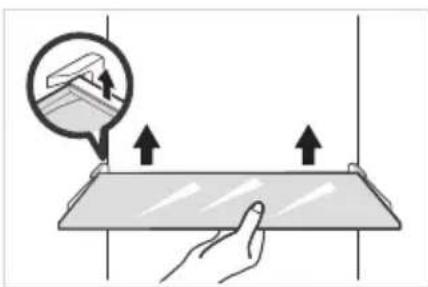
- As the innermost part of the refrigerator liner where contacting the shelves has a backstop, you shall raise the shelves upward, then you can be able to take it out.
- Adjust or clean the shelves according to your requirement.
natural_image
Illustration of a hand pressing down on a flat surface with upward arrows indicating motion or force (no text or symbols)Cleaning the vegetable drawer
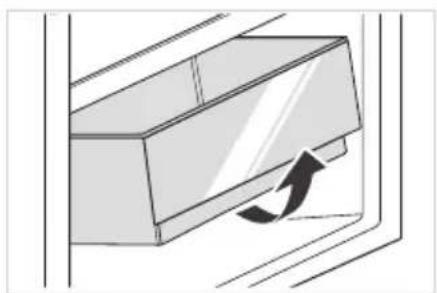
- Remove the contents of the drawer. Hold the handle of the vegetable drawer and pull it out completely until it stops.
- Lift the vegetable drawer up and remove it by pulling it out.
natural_image
Diagram of a door handle with an arrow indicating clockwise motion (no text or symbols)ATTENTION
Soft towels or sponge dipped in water and non-corrosive neutral detergents are suggested for cleaning. The freezer of shall be finally cleaned with clean water and dry cloth. Open the door for natural drying before the power is turned on. Do not use hard brushes, clean steel balls, wire brushes, abrasives, such as toothpastes, organic solvents (such as alcohol, acetone, banana oil, etc.), boiling water, acid or alkaline items clean refrigerator considering that this may damage the fridge surface and interior.
TROUBLESHOOTING
The following simple issues can be handled by the user. Please call the after-sale service department if the issues are not solved.
| Problem Possible reason | |
| Failed operation | ·Check whether the appliance is connected to power or whether the plug is in well contact |
| ·Check whether the voltage is too low | |
| ·Check whether there is a power failure or partial circuits have tripped | |
| Odor | ·Odorous foods shall be tightly wrapped |
| ·Check whether there is any rotten food | |
| ·Clean the inside of the refrigerator | |
| Long-time operation of the compressor | ·Long operation of the refrigerator is normal in summer |
| ·when the ambient temperature is high It is not suggestible having too much food in the appliance at the same time | |
| ·Food shall get cool before being put into the appliance | |
| ·The doors are opened too frequently | |
| Light fails to get lit | ·Check whether the refrigerator is connected to power supply and whether the illuminating light is damaged |
| ·Have the light replaced by a specialist | |
| Door can not be properly closed | ·The door is stuck by food packages Too much food is placed |
| ·The refrigerator is tiltedr. | |
| Loud noises | ·Check whether the floor is level and whether the refrigerator is placed stably |
| ·Check whether accessories are placed at proper locations | |
| Door seal fails to be tight | Remove foreign matters on the door seal |
| Heat the door seal and then cool it for restoration (or blow it with an electrical drier or use a hot towel for heating) | |
| Water pan overflows | There is too much food in the chamber or food stored contains too much water, resulting in heavy defrosting |
| The doors are not closed properly, resulting in frosting due to entry of air and increased water due to defrosting | |
| Hot housing | Heat dissipation of the built-in condenser via the housing, which is normal When housing becomes hot due to high ambient temperature, storage of too much food or shutdown of the compressor is shut down, provide sound ventilation to facilitate heat dissipation |
| Surface condensation | Condensation on the exterior surface and door seals of the refrigerator is normal when the ambient humidity is too high. Just wipe the condensate with a clean towel. |
DOC AND CERTIFICATIONS
Declaration of Conformity
We hereby confirm that the following customer model names and Midea model names match each other respectively.
| Brand Midea Model Marketing Model Factory Model | |||
| Midea HC-598WEN | MDRS619FIE46 CE-BCD460WZ-JQ | ||
| HC-598WEN | CE-BCD460WZ-JQ Midea MDF | ||
Application of Council Directives LVD: 2009/125/EC
Standards, to which Conformity Is Declared EMC: 2004/108/EC
EN 300 328 V 2.2.2:2019
EN 301 489-1 V 2.2.3:2019
EN 301489-17 V 3.2.4:2020
EN IEC 55014-1:2021
EN IEC 55014-2:2021
EN IEC 61000-3-2:2019+A1
EN IEC 61000-3-3:2013+A1+A2
EN 60335-1:2012+A11:2014+A13:2017+A1:2019+A14:2019+A2:2019+A15:2021
EN 60335-2-24:2010+A1:2019+A2:2019+A11:2020
EN 62233:2008
EN IEC 62311:2020
EN 50665:2017
EN 62479:2010
EN 50663:2017
Manufacturer's Name: Hubei Midea Refrigerator Co., Ltd.
Manufacturer's Address: No.38 Oriental Road, 434000, Jingzhou, Hubei, P.R. China
We, Hubei Midea Refrigerator Co., Ltd.
hereby declare that the above-mentioned products comply with the above-mentioned currently valid regulations and standards.
SIGNATURE: Date: 2023-01-16
General Manager
16.012013
CE
Midea hereby declares that the appliance with MSmartHome functionality meets the essential requirements and other relevant provisions of the Directive 2014/53/EU. A detailed RED Declaration of Conformity can be found online at www.midea.com among the additional documents on the product page for your appliance.

Special for new European standard
The ordered parts in the following table can be acquired from Service provider channel
| Ordered part Provided by | Minimum time required for Provision | |
| Thermostats Professional maintenance personnel | At least 7 years after the last model is launched on the market | |
| Temperature sensors | Professional maintenance personnel | At least 7 years after the last model is launched on the market |
| Printed circuit boards | Professional maintenance personnel | At least 7 years after the last model is launched on the market |
| Light sources Professional maintenance personnel | At least 7 years after the last model is launched on the market | |
| Door handles Professional repairers and final users | At least 7 years after the last model is launched on the market | |
| Door hinges Professional repairers and final users | At least 7 years after the last model is launched on the market | |
| Trays Professional repairers and final users | At least 7 years after the last model is launched on the market | |
| Baskets Professional repairers and final users | At least 7 years after the last model is launched on the market | |
| Door gaskets Professional repairers and final users | At least 10 years after the last model is launched on the market | |
Dear customer
- If you want to return or replace the product, please contact the store where you buy.
(Remember to bring the purchase invoice)
- If your product breaks down which needs to repair, please contact after-sales service provider.

ATTENTION
The model information in the product database, as well as the model identifier, can be obtained througha weblink scanned by a QR code, if any, on the energy efficiency label of the product.
For more information about the energy efficiency of the appliance, visit https://ec.europa.eu and search using the model name.
The model name can be found on the rating label of the appliance.
Coldest zone in the refrigerator
OPTIONAL: OK-temperature indicator
- The OK-temperature indicator can be used to determine temperatures below +4°C. Gradually reduce the temperature if the sign does not indicate "OK".
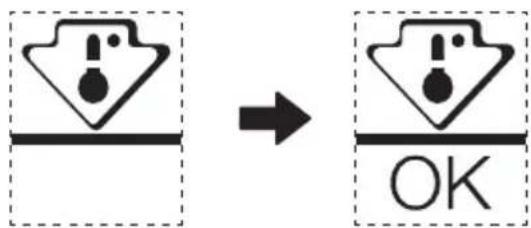
- To ensure the temperature in this area, do not change the positioning of the shelf. Inforced air refrigerators (equipped with a fan or No Frost models), the symbol of the coldest zone is not represented because the temperature inside is homogeneous.
Temperature indicator setting
• To help you set your refrigerator well, it is equipped with a temperature indicator that will monitor the average temperature in the coldest zone.
- WARNING: This indicator is intended to work only with your refrigerator, do not use it in another refrigerator (in fact, the coldest zone is not the same), or for any other use.
Checking the temperature in the coldest zone
- With the temperature indicator, you can check regularly that the temperature of the coldest zone is correct. Indeed, the internal temperature of the refrigerator depends on several factors such as the ambient temperature of the room, the amount of food stored and the frequency of door opening. Take these factors into consideration when setting the device.
- When the indicator shows « OK », this means that your thermostat is well adjusted and the internal temperature correct.
- If the indicator of temperature turns WHITE, this means that the temperature is too high; in this case, increase the refrigerator temperature control setting and wait for 12 hours before performing a new visual inspection of the indicator. When fresh food has been introduced or the door has been left open, it is possible for the indicator of temperature to turn WHITE after a while.
DANKESBRIEF


HINWEIS
natural_image
Illustration of hands holding a rectangular object with arrows indicating movement or force (no text or symbols)natural_image
Illustration of a hand holding a flat surface with upward arrows indicating movement or force, and a magnified inset showing a small object above it (no text or symbols present)natural_image
Diagram of a door handle with an arrow indicating clockwise motion (no text or symbols)ACHTUNG

NOTA
natural_image
Illustration of hands holding a rectangular object with arrows indicating movement or force (no text or symbols)natural_image
Illustration of a hand interacting with a flat surface under an upward arrow, with a magnified inset showing a small object (no text or symbols)natural_image
Diagram of a door handle with an arrow indicating clockwise motion (no text or symbols)ATTENZIONE
INSTALLATION DU PRODUIT 04
INSTRUCTION D'OPÉRATION ----08
CONFIGURATION DE L'APPLICATION ET FONCTIONNEMENT 13
NETTOYAGE ET ENTRETIEN 15
DÉPANNAGE 16
ANNEXE 19
SPÉCIFICATIONS
DC5 V/500 mA maximum
INSTALLATION DU PRODUIT
natural_image
Illustration of a hand interacting with a smartphone displaying a grid interface (no text or symbols)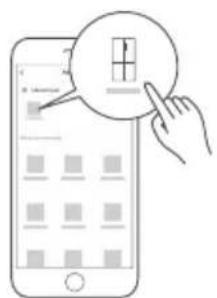
natural_image
Illustration of hands holding a rectangular object with arrows indicating movement or force (no text or symbols)natural_image
Illustration of a hand pressing down on a flat surface with upward arrows, showing a magnified view of the object (no text or symbols present)natural_image
Diagram of a door handle with an arrow indicating clockwise motion (no text or symbols)ATTENTION
natural_image
Illustration of a hand interacting with a smartphone displaying a grid interface (no text or symbols)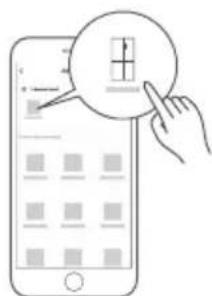

NOTA
natural_image
Illustration of hands holding a rectangular object with arrows indicating movement or force (no text or symbols)natural_image
Illustration of a hand pressing down on a flat surface with arrows indicating direction (no text or symbols)natural_image
Diagram of a door handle with an arrow indicating clockwise motion (no text or symbols)
CUIDADO
natural_image
Illustration of a hand interacting with a smartphone displaying a simple UI element (no text or symbols visible)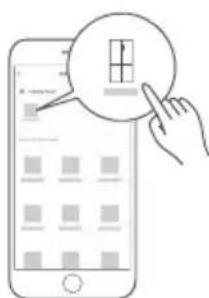

NOTA
natural_image
Illustration of hands holding a rectangular object with arrows indicating movement or force (no text or symbols)Limpeza de prateleiras de vidro
natural_image
Illustration of a hand pressing down on a flat surface with upward arrows indicating movement or force (no text or symbols)Limpeza da gaveta dos legumes
natural_image
Diagram of a door handle with an arrow indicating clockwise motion (no text or symbols)ATENÇÃO

ΣΗΜΕΙΩΣΗ
natural_image
Illustration of hands holding a rectangular object with arrows indicating movement or force (no text or symbols)natural_image
Illustration of a hand interacting with a flatbed electronic device, showing upward arrows and a magnified view of the screen (no text or symbols)natural_image
Diagram of a door handle with an arrow indicating clockwise motion (no text or symbols)ΠΡΟΣΟΧΗ

NOTA
natural_image
Illustration of hands holding a rectangular object with arrows indicating movement or force (no text or symbols)natural_image
Illustration of a hand holding a flat surface with upward arrows, showing a magnified view of a small object (no text or symbols present)natural_image
Diagram of a door handle with an arrow indicating clockwise motion (no text or symbols)UWAGA
PRODUKTA PÄRSKATS 03
PRODUKTA UZSTĀDĪŠANA 04
LIETOŠANAS INSTRUKCIJAS 08
LIETOTNES IESTATĪŠANA UN LIETOŠAA 13
TİRİŞANA UN APKOPE 15
DARBĪBAS TRAUCĒJUMI 16
PIELIKUMS 19
SPECIFIKĀCIJA


PIEZIME
natural_image
Illustration of hands holding a rectangular object with arrows indicating movement or force (no text or symbols)natural_image
Illustration of a hand holding a flat surface with arrows indicating upward motion, no text or symbols presentnatural_image
Diagram of a door handle with an arrow indicating clockwise motion (no text or symbols)UZMANIBU
natural_image
Illustration of a hand interacting with a smartphone displaying a small grid interface (no text or symbols visible)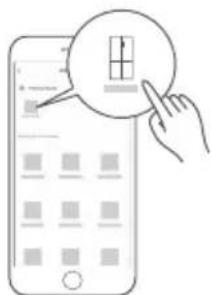

БЕЛЕШКА
natural_image
Illustration of hands holding a rectangular object with arrows indicating movement or force (no text or symbols)natural_image
Illustration of a hand holding a flat surface with arrows indicating upward movement, no text or symbols presentnatural_image
Diagram of a door handle with an arrow indicating clockwise motion (no text or symbols)ПАЖЊА
(Komora za zamrzavanje) (Rashladna komora)
1 Led Svjetiljka
4 Ladica
2 Staklena Polica
5 Ladica Za Voće I Povrće
3 Ladica Za Vrata

PAŽNJA

PAŽNJA

BILJEŠKA
- Provjerite jesu li vaši uređaji uključeni.
- Držite svoj mobilni telefon dovoljno blizu uređaja kada povezujete uređaj s mrežom.
- Povežite svoj mobilni telefon s bežičnom mrežom kod kuće i provjerite znate li lozinku bežične mreže.
- Provjerite podržava li vaš bežični usmjerivač 2,4 GHz mrežu i uključite ga. Ako niste sigurni da li ruter podržava opseg od 2,4 GHz, obratite se proizvođaču rutera.
- Uređaj se ne može spojiti na bežičnu mrežu koja zahtijeva autentifikaciju i obično se pojavljuje na javnim mjestima kao što su hoteli, restorani itd. Povežite se na bežičnu mrežu koja ne zahtijeva autentifikaciju.
- Isključite funkciju WLAN+ (Android) ili WLAN Assistant (iOS) na svom mobilnom telefonu kada povezujete uređaj na mrežu.
- U slučaju da se vaš uređaj prije povezivao s bežičnom mrežom, ali se mora ponovno spojiti, kliknite "+" na početnoj stranici aplikacije i ponovno dodajte svoj uređaj prema kategoriji uređaja i modelu prema uputama u aplikaciji.
ČIŠĆENJE I ODRŽAVANJE
Odmrzavanje
natural_image
Illustration of hands holding a rectangular object with arrows indicating movement or force (no text or symbols)Čišćenje staklene police
natural_image
Illustration of a hand holding a flat surface with upward arrows, showing a magnified view of a small object (no text or symbols present)Čišćenje ladice za povrće
- Izvadite sadržaj ladice. Držite ručku ladice za povrće i potpuno je izvucite dok se ne zaustavi.
- Podignite ladicu za povrće i izvadite je izvlačenjem.
natural_image
Diagram of a door handle with an arrow indicating clockwise motion (no text or symbols)PAŽNJA
Za čišćenje se preporučuju mekane krpe ili spužva umočeni u vodu, i nekorozivni neutralni deterdženti. Zamrzivač očistite čistom vodom i suhom krpom. Nakon čišćenja otvorite vrata i ostavite da se unutrašnjost prirodno osuši prije ponovnog uključenja. Nemojte koristiti tvrde četke, čeličnu vunu, abrazivna sredstva poput pasta za zube, organska otapala (poput alkohola, acetona, ulja od banane itd.), kipuću vodu ili kisela i alkalna sredstva koja mogu oštetiti vanjske i unutarnje površine hladnjaka.
RJEŠAVANJE PROBLEMA
- Kako biste osigurali temperaturu u ovom području, nemojte mijenjati položaj police. Hladnjaci s pojačanim zrakom (opremljeni ventilatorom ili No Frost modeli), simbol najhladnije zone nije prikazan jer je unutrašnja temperatura homogena.
Podešavanje indikatora temperature
Lock/unlock (Zár/felold)

JEGYZET
natural_image
Illustration of hands holding a rectangular object with arrows indicating movement or force (no text or symbols)natural_image
Illustration of a hand holding a flatboard with upward arrows indicating movement or force (no text or symbols present)natural_image
Diagram of a door handle with an arrow indicating clockwise motion (no text or symbols)ATENTIE
(záfrezevinalnakombera) (HladikRēkoneoba)ng chamber)
1 LED svetilka
4 Predal
2 Steklena polica
5 Posoda za sadje in zelenjavo
3 Predal v vratih

POZOR

POZOR
natural_image
Illustration of a hand interacting with a smartphone displaying a grid interface (no text or symbols)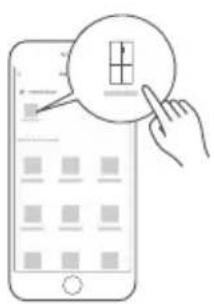

OPOMBA
natural_image
Illustration of hands holding a rectangular object with arrows indicating movement or force (no text or symbols)Čiščenje steklene police
natural_image
Illustration of a hand holding a flat surface with upward arrows, showing a magnified view of a small object (no text or symbols present)natural_image
Diagram of a door handle with an arrow indicating clockwise motion (no text or symbols)POZOR
(Câmerândecamongole) (Caméră deleqrefrigerahember)
1 Lampa cu LED
4 Sertar
2 Sertar de sticlă
5 Cutie Pentru Fructe Si Legume
3 Raftul uşii

ATENTIE
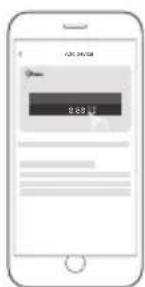

NOTĂ
natural_image
Illustration of hands holding a rectangular object with arrows indicating movement or force (no text or symbols)natural_image
Illustration of a hand interacting with a flatbed surface, showing upward arrows and a magnified view of the surface (no text or symbols)natural_image
Diagram of a door handle with an arrow indicating clockwise motion (no text or symbols)ATENTIE
natural_image
Illustration of a hand interacting with a smartphone displaying a grid interface (no text or symbols)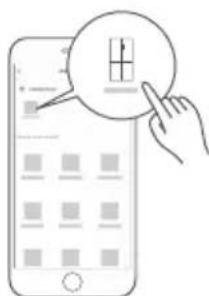
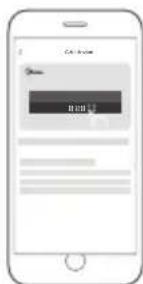

HOTA
natural_image
Illustration of hands holding a rectangular object with arrows indicating movement or force (no text or symbols)natural_image
Illustration of a hand pressing down on a flat surface with upward arrows indicating movement or force (no text or symbols)natural_image
Diagram of a door handle with an arrow indicating clockwise motion (no text or symbols)
ВНИМАНИЕ
(Šediklio kametos) (UžšaldýRefsikameiroschamber)
1 LED lempa
4 Stalčius
2 Stiklinė lentyna

PASTABA
natural_image
Illustration of hands holding a rectangular object with arrows indicating movement or force (no text or symbols)natural_image
Illustration of a hand holding a flat surface with upward arrows, showing a magnified view of a small object (no text or symbols present)natural_image
Diagram of a door handle with an arrow indicating clockwise motion (no text or symbols)DÈMESIO
(Hapsira e ngrirjes) (Hapsira e ftohjes)
1 Llampë LED
4 Fioka
2 Rafti Prej Qelqi
INSTALIMI I PRODUKTIT
Instruksionet e instalimit
Për pajisjet ftohëse me klasë klimatike
natural_image
Illustration of a hand interacting with a smartphone displaying a small grid interface (no text or symbols visible)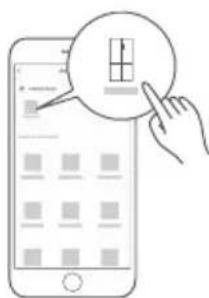

SHËNIM
natural_image
Illustration of hands holding a rectangular object with arrows indicating movement or force (no text or symbols)Pastrimi i sirtarit prej xhami
natural_image
Illustration of a hand holding a flat surface with arrows indicating upward movement, and an inset showing a magnified view of a device (no text or symbols present)natural_image
Diagram of a door handle with an arrow indicating clockwise motion (no text or symbols)VINI RE


POZNÁMKA
natural_image
Illustration of hands holding a rectangular object with arrows indicating movement or force (no text or symbols)natural_image
Illustration of a hand holding a flat surface with upward arrows, showing a magnified view of a small object (no text or symbols present)natural_image
Diagram of a door handle with an arrow indicating clockwise motion (no text or symbols)POZOR
1 LED lampa
4 Zásuvka
2 Sklenená polica
5 Box na ovocie a zeleninu
SK

POZOR
natural_image
Illustration of a hand interacting with a smartphone displaying a grid interface (no text or symbols visible)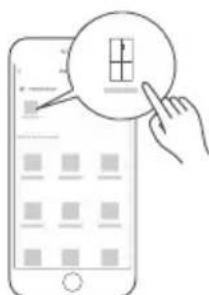

POZNÁMKA
natural_image
Illustration of hands holding a rectangular object with arrows indicating movement or force (no text or symbols)natural_image
Illustration of a hand holding a flat surface with upward arrows, showing a magnified view of a small object (no text or symbols present)natural_image
Diagram of a door handle with an arrow indicating clockwise motion (no text or symbols)POZOR
make yourself at home
- USER MANUAL
- LANGUAGES
- CONTENTS
- SPECIFICATIONS
- MSmartHome
- PRODUCT OVERVIEW
- ATTENTION
- PRODUCT INSTALLATION
- Install Instruction
- For refrigerating appliances with climate class
- Effective temperature range
- Dimensions and Clearances
- Leveling feet
- Leveling doors
- Moving the appliance
- Changing the light
- Connecting the appliance
- Tips for energy saving
- OPERATION INSTRUCTIONS
- Control panal
- Display
- Lock / unlock
- Temperature setting of refrigerating chamber
- Temperature setting of freezing chamber
- Mode setting
- Storage upon power failure
- Error code
- Out of operation
- Tips on storing food
- Freezer compartment
- Cooling compartment
- Recommended Temperature
- APP SETUP AND OPERATION
- Download the MSmarthome App
- Register and log in
- Connect your devices to MSmarthome
- NOTE
- CLEANING AND MAINTENANCE
- Defrosting
- Cleaning of door tray
- Cleaning of glass shelf
- Cleaning the vegetable drawer
- TROUBLESHOOTING
- DOC AND CERTIFICATIONS
- Declaration of Conformity
- CE
- Special for new European standard
- Dear customer
- Coldest zone in the refrigerator
- OPTIONAL: OK-temperature indicator
- Temperature indicator setting
- Checking the temperature in the coldest zone
- DANKESBRIEF
- HINWEIS
- ACHTUNG
- NOTA
- ATTENZIONE
- SPÉCIFICATIONS
- INSTALLATION DU PRODUIT
- CUIDADO
- Limpeza de prateleiras de vidro
- Limpeza da gaveta dos legumes
- ATENÇÃO
- ΣΗΜΕΙΩΣΗ
- ΠΡΟΣΟΧΗ
- UWAGA
- SPECIFIKĀCIJA
- PIEZIME
- UZMANIBU
- БЕЛЕШКА
- ПАЖЊА
- PAŽNJA
- BILJEŠKA
- ČIŠĆENJE I ODRŽAVANJE
- Odmrzavanje
- Čišćenje staklene police
- Čišćenje ladice za povrće
- RJEŠAVANJE PROBLEMA
- Podešavanje indikatora temperature
- Lock/unlock (Zár/felold)
- JEGYZET
- ATENTIE
- POZOR
- OPOMBA
- Čiščenje steklene police
- NOTĂ
- HOTA
- ВНИМАНИЕ
- PASTABA
- DÈMESIO
- INSTALIMI I PRODUKTIT
- Instruksionet e instalimit
- SHËNIM
- Pastrimi i sirtarit prej xhami
- VINI RE
- POZNÁMKA
Brand : MIDEA
Model : MDRS619FIE
Category : Refrigerator