
W9.2 - Action Camera Lamax - Free user manual and instructions
Find the device manual for free W9.2 Lamax in PDF.


| Product Type | Action Camera |
| Model | Lamax W9.2 |
| Water Resistance (camera only) | Up to 12 m (with covers closed) |
| Water Resistance (with case) | Up to 40 m |
| Remote Control Water Resistance | Up to 2 m |
| Battery Type | Li-ion, rechargeable |
| Charging Time | Approx. 4.5 hours (0–100%), 2.5 hours (0–80%) |
| Memory Card Support | microSDHC/SDXC up to 128 GB, UHS Speed Class U3 or higher recommended |
| Video Stabilization | MaxSmooth, available up to 60 FPS |
| Slow Motion | Supported at 60 FPS and 120 FPS |
| Time-Lapse | Video and photo modes with adjustable interval and duration |
| Loop Recording | Yes, with selectable time segments |
| WiFi | Built-in, for mobile app control (app: LAMAX W9.2) |
| Mounting Options | Pole mount, fast plug-in, J mount, tripod adapter, 3-axis connector, adhesive mounts |
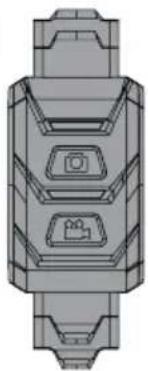
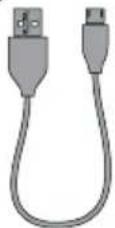
| Box Contents | Camera, waterproof case (40 m), remote control (2 m), Li-ion battery, USB-C cable, microfibre cloth, mini tripod, mounts |
| Additional Features | Fisheye correction (LDC), wind noise reduction, date stamp, exposure metering modes, self-timer, long exposure |
| Safety & Maintenance | Do not use damaged charger; charge at 0–40°C; rinse with fresh water after saltwater use; dry naturally; keep seals clean |
Frequently Asked Questions - W9.2 Lamax
User questions about W9.2 Lamax
0 question about this device. Answer the ones you know or ask your own.
Ask a new question about this device
Download the instructions for your Action Camera in PDF format for free! Find your manual W9.2 - Lamax and take your electronic device back in hand. On this page are published all the documents necessary for the use of your device. W9.2 by Lamax.
USER MANUAL W9.2 Lamax
CS – UŽIVATELSKÁ PŘÍRUČKA
SK – POUŽÍVATEL'SKÁ PRÍRUČKA
PL - INSTRUKCJA OBSŁUGI
HU - FELHASZNÁLÓI KÉZIKÖNYV
HR - KORISNIČKI PRIRUČNIK
SL – UPORABNIŠKI PRIROČNIK
LAMAX
ELECTRONICS
LAMAX W9.2
ACTION CAMERA

CONTENTS
- BOX CONTENTS 2
- GETTING TO KNOW YOUR CAMERA....3
- CAMERA CONTROLS 4
- TURNING IT ON FOR THE FIRST TIME....4
- VIDEO MODE SETTINGS....5
- PHOTO MODE SETTINGS....5
- CAMERA SETTINGS 6
- WIFI - MOBILE APP....7
- WATER RESISTANCE....7
- SAFETY PRECAUTIONS....8
1. BOX CONTENTS
A
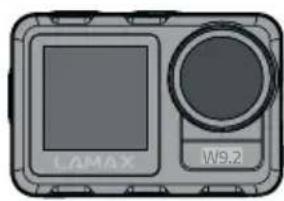
natural_image
Front view of a gray electronic device with a screen and circular button, labeled 'LAMAX' and 'W9.2' (no additional text or symbols)B
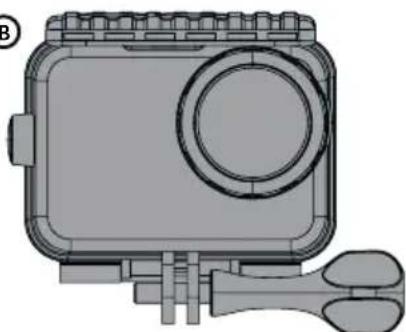
natural_image
3D rendering of a gray rectangular device with a circular lens and mechanical base (no text or symbols visible)©
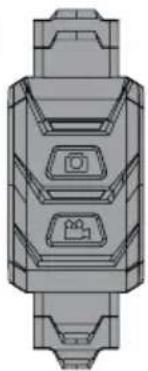
natural_image
Technical illustration of a mechanical component with three labeled parts (no text or symbols)D

E
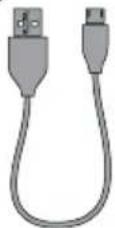
F

G

H

natural_image
Collection of mechanical components and assembly diagrams without any text or symbolsA LAMAX W9.2 Action Camera
B Case, waterproof up to 40 m
© Remote control, waterproof up to 2 m
D Li-ion battery
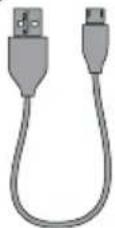
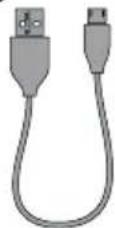
E USB-C cable for charging/transferring files
F Microfibre cloth
G Mini tripod
H Mounts
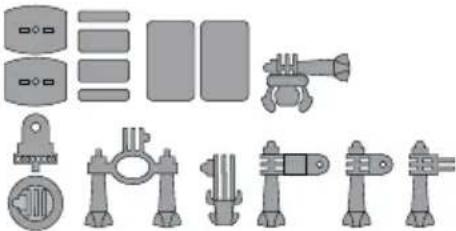
MOUNTS

natural_image
Pure mechanical component diagram without any text, numbers, or symbols


natural_image
Three identical mechanical components with mounting holes and a circular symbol labeled 'FGH' (no text or symbols on the components themselves)

natural_image
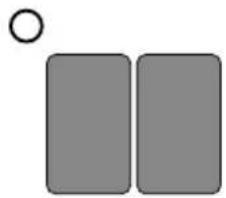
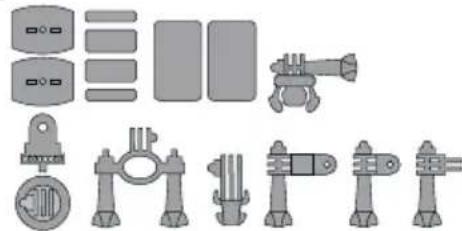
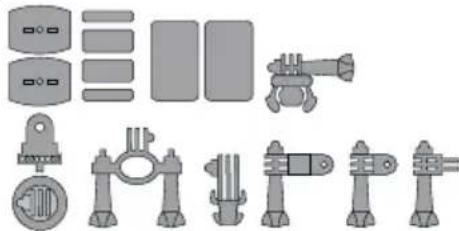
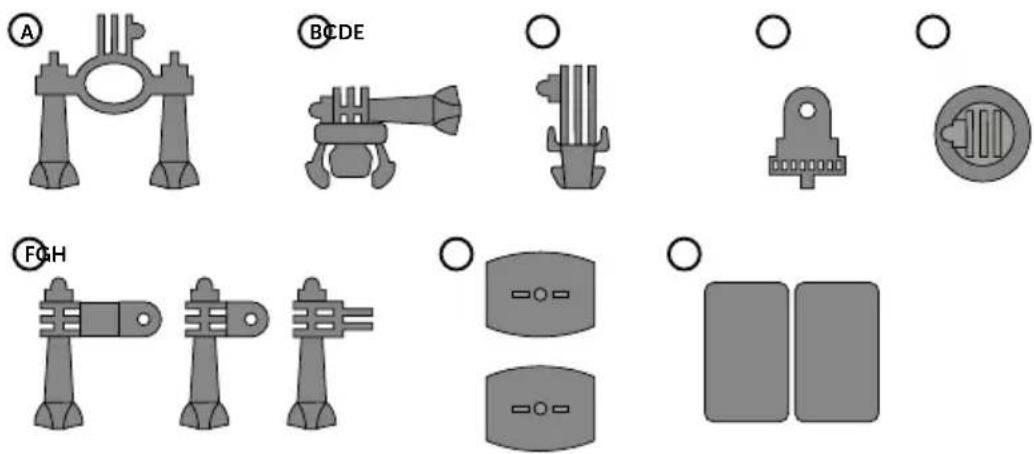
Two gray rectangular blocks with a small circle above them (no text or symbols)A Pole mount – to mount, for example, on handlebars
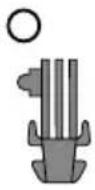
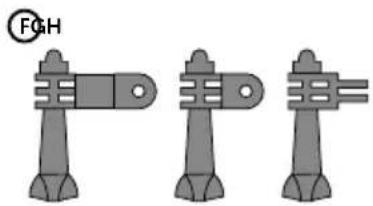
B Fast plug-in – to quickly snap in place
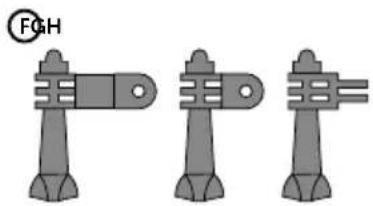
© J mount – to quickly snap in place with elevation
(D) Tripod adapter – to connect the camera without a case
E Tripod adapter – to connect the camera in the case to the tripod
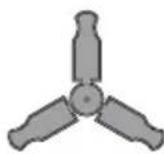
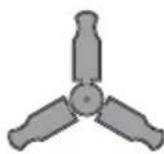
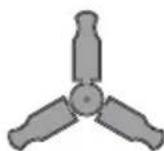
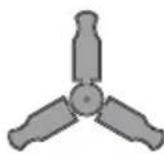
⑤ 3-axis connector (3 parts) – to mount in any direction
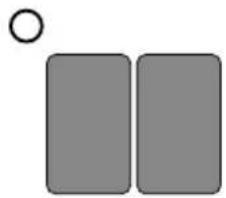
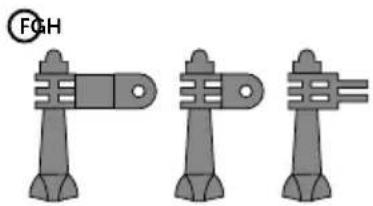
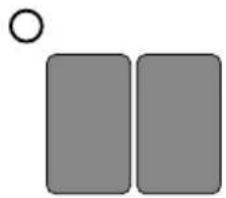
G Adhesive mounts (2×) – to attach to a smooth surface (helmet, hood)
H Spare 3M adhesive pads (2×) – to reattach the adhesive mount
2. GETTING TO KNOW YOUR CAMERA


Ⓐ POWER button
B REC button
© MODE button
(D) Cover for USB-C and micro HDMI connector
E Door for battery and microSD card slot
F Thread to attach the camera to a tripod or selfie stick
Note: Use only the recommended accessories, otherwise the camera may be damaged.
3. CAMERA CONTROLS
| Turn on / off Hold down the POWER button or swipe down and press the POWER icon | |
| Start / stop the recordingor take a photo | Press the REC button |
| Switch quickly betweenphoto / video mode | Swipe to the side or press the MODE button |
| Select the mode | Touch the icon [IMAGE] or swipe up and select the desired mode |
| Settings Touch the icon | [0688C] |
| View files Touch the icon | [50H4] |
| Switch between displays Hold the MODE button | |
| Turn WiFi on / off Press the POWER button or touch the WiFi icon, which you can find bytouching the icon [IMAGE] | |
4. TURNING IT ON FOR THE FIRST TIME

natural_image
3D mechanical component diagram showing a vertical assembly with a green arrow indicating direction (no text or symbols)
natural_image
Diagram of a device with an external plug and internal components, showing a green arrow pointing to a connector (no text or symbols present)Ⓐ INSERT THE MICROSD CARD INTO THE CAMERA AS SHOWN (CONNECTORS TOWARDS THE LENS)
Only insert the card when the camera is turned off and not connected to your computer.
Format the card directly in the camera the first time you use it.
We recommend memory cards with a higher write speed (UHS Speed Class -U3 and higher) and a maximum capacity of 128 GB.
Note: Use only micro SDHC or SDXC cards from reputable manufacturers. With generic third-party cards, there is no guarantee that the data storage will work properly.
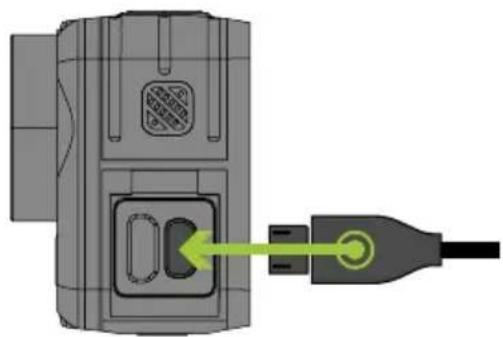
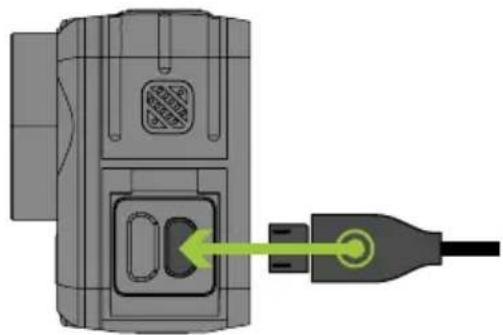
B CONNECT THE CAMERA TO A POWER SOURCE
You can charge the camera by either connecting it to your computer or using an optional AC adapter.
It takes approximately 4.5 hours to charge the battery from 0 to 100%. When charged, the charge indicator turns off.
Note: Charging the battery from 0 to 80% takes 2.5 hours.
5. VIDEO MODE SETTINGS
| Video resolution The resolution and FPS (frames per second) settings at which the camera will record. | |
| Video quality Sets the desired video quality. | |
| Audio recording Sets whether the camera records audio. | |
| Exposure Exposure compensation setting. A higher value means a lighter video, a lower value means a darker video. | |
| Stabilization MaxSmooth stabilization on/off, available in all resolutions at a maximum of 60 FPS. When stabilized, the field of view (FOV) is smaller and can negatively affect video quality in low-light conditions. It cannot be combined with the fisheye correction feature. | |
| Loop recording When enabled, the video is divided into time segments according to the chosen settings. | |
| Time-lapse interval Sets the time interval at which the camera will take photos, which it then saves as a single video file. | |
| Time-lapse duration Sets the duration of the time-lapse video. After the set time has elapsed, the recording will stop. | |
| Slow motion video Slow motion videos can be recorded at resolutions with a frame rate of 60 FPS and 120 FPS. For the best results, we recommend using a tripod. | |
| Fast motion video Selects the value for fast motion video recording. | |
| Wind noise reduction Improves the audio recorded in strong winds. | |
| Metering Sets how the exposure is metered. There are three modes („Center“, „Average“ and „One Point“) to choose from.➢ Center – for shooting objects that will mainly be in the middle of the shot.➢ Average – the camera obtains light information from the entire scene and sets average values.➢ Single point – allows you to measure a small part of the scene, the default setting being the center. Use the touch screen to select another point from which the camera determines the exposure. | |
| Date stamp Turns the date and time stamp on the recorded video on/off. |
6. PHOTO MODE SETTINGS
| Photo resolution | Sets the resolution of the photos you take. |
| ISO | ISO settings. Setting the ISO value determines its sensitivity to light. |
| Exposure Exposure compensation settings. A higher value means a lighter photo, a lower value means a darker photo. | |
| Time-lapse interval | Sets the time interval at which the camera will take pictures that it saves as individual files. |
| Time-lapse duration Sets the duration of time-lapse photos. | |
| Self-timer Sets the time interval for the self-timer. | |
| Long exposure Sets the exposure time. Under this setting, the camera leaves the shutter open for longer than normal. For best results, we recommend using a tripod and not moving the camera. | |
| Date stamp Turns the date and time stamp on/off in the photo taken. | |
- CAMERA SETTINGS
| Network frequency Enables you to select the frequency in accordance with the frequency of the grid (on the European continent there is a current with a frequency of 50 Hz, in the Americas and parts of Asia it is 60 Hz). | |
| Sounds Turns the camera system sounds on/off and adjusts their volume. | |
| White balance Adjusts the white balance for different ways of lighting a scene. | |
| Effects Sets colour modes. | |
| LDC Turns fisheye correction on/off. When on, it reduces the field of view.Cannot be combined with the image stabilization function. | |
| Date and time Sets the system date and time. | |
| Screen saver Sets the time after which the display automatically turns off to save battery. Touch the display or press the buttons to activate the display again. | |
| Auto power off Sets the camera to turn off automatically when idle. When turned on, the camera powers off if not recording video. | |
| Power on auto record Sets the camera to automatically record when powered on. | |
| Language | Selects the language. |
| Format | Erases all data on the memory card. |
| System Accesses camera firmware information, memory card information as well as restoring factory settings. | |
8. WIFI - MOBILE APP
flowchart
graph LR
    A["APPLICATION"] --> B["BAGD"]
    B --> C["手机下载"]
    C --> D["Wi-Fi access"]
    D --> E["手机操作"]
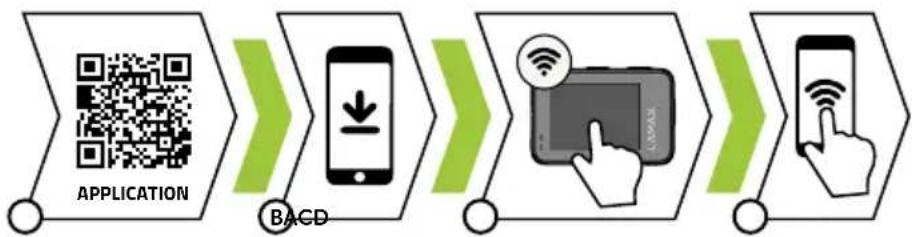
The mobile app enables you to change camera modes and settings, or view and download videos and photos directly to your mobile device.
Ⓐ Scan the QR code to download the app or click the following link: https://www.lamax-electronics.com/w92/app/
B Install the app on your mobile device.
© Turn on the camera WiFi by pressing the POWER button or by touching the „WiFi“ icon, which you can find by touching on the icon [Video 4K30].
On your mobile device, connect to the WiFi network named after the camera. The WiFi password is shown on the camera display (default: 1234567890).
9. WATER RESISTANCE
Resistance when immersed in water under the following conditions:
ACTION CAMERA:
The camera without the case can resist immersion to a depth of 12 metres. Before immersion, make sure that the covers on the side and bottom of the camera are properly closed. Covers and seals must be free from any impurities such as dust, sand and alike. Do not open camera covers before the camera body is dry. If used in salt water, rinse the camera with drinking water. Do not use any fabrics or external heat sources (hairdryer, microwave oven, etc.) to dry, always allow the camera to dry gradually.
WATERPROOF CASE:
The case can resist immersion to a depth of 40 metres. Before using the camera in the case, make sure that the rear door of the case is properly closed using the mechanism on the top of the case. The case door and seal must be free of any impurities such as dust, sand and alike. When used in salt water, rinse the case with drinking water. Do not use any fabrics or external heat sources (hairdryer, microwave oven, etc.) for drying, always allow the case to dry gradually. When in the waterproof case, the touch screen of the camera display cannot be used, and the camera must be operated using the buttons.
REMOTE CONTROL:
The remote control can resist immersion to a depth of 2 metres. Before immersion, make sure that the USB cover on the underside of the control is properly closed. Do not open the cover before the remote control has dried. Do not use external heat sources (hairdryer, microwave oven, etc.) for drying, allow the remote control to dry gradually or use a small cloth.
10. SAFETY PRECAUTIONS
The consumer is required to learn the principles of safe use of the product before first use.
PRECAUTIONS AND NOTICES
- For your own safety, do not use the camera's controls while driving.
- A window mount is needed when using the recorder in a car. Make sure that you place the recorder in an appropriate place, so as not to obstruct the driver's view or deployment of airbags.
- Make sure that no object is blocking the camera lens and no reflective material is placed near the lens. Please keep the lens clean.
- If the car's windshield is tinted or coated, it may impact the recording quality.
SAFETY PRECAUTIONS
- Do not use the charger in high moister environment. Never touch the charger when your hands or feet are wet.
- Allow adequate ventilation around the charger when using it to operate the device or to charge the battery. Do not cover the charger with paper or other objects that will reduce cooling. Do not use the charger while it is inside a carrying case.
-
Connect the charger to a proper power source. The voltage requirements are found on the product case and/or on the packaging.
-
Do not use the charger if it is visibly damaged. In case of damage, do not repair the equipment yourself!
- In case of device overheating, immediately disconnect the power source.
– Charge the device under supervision only.
- Packaging contains small pieces, that can be dangerous for children. Store the product always out of reach of children. Bags or many of the pieces containing may cause suffocation after swallowing.
SAFETY NOTICES FOR LI-ION BATTERIES
– Before first use, fully charge the battery.
- For charging only use chargers, that is specified for this type of battery.
- Use standard cables for charging, otherwise it could damage the device.
- Never connect to a mechanically damaged charger or if the batteries are swollen. Do not use batteries in this condition due to risk of explosion.
- Do not use any damaged adapter or charger.
- Charge at room temperature, never charge at a temperature below 0^ or at a temperature higher than 40^ .
- Avoid dropping the battery, don't puncture, or mutilate it. Definitely do not attempt to repair a damaged battery.
- Do not expose the charger or battery to moisture, water, rain, snow or any kind of various liquids.
- Do not leave the battery in the car, do not expose to direct sunlight and do not place it near heat sources. Strong light or high temperatures can damage the battery.
- Never leave batteries without supervision during charging, short circuit or accidentally overcharge. Some batteries are unsuitable for fast charging or being charged excessively. This can cause a shock, or due to charger failure, may cause leakage of aggressive chemicals, explosion or subsequent fire!
- In the case of excessive heating of the battery during charging, immediately disconnect it from the power supply.
- Do not place charger and charging battery on or near flammable objects. Beware of curtains, carpets, tablecloths etc.
- Once the battery or device with integrated battery is fully charged, disconnect it from the power supply.
- Keep the battery out of the reach of children and animals.
- Never disassemble the charger or battery. If the battery is integrated, do not disassemble the device, unless stated otherwise. Any such attempt is dangerous and can cause injury or damage to the product and subsequent loss of warranty.
- Do not dispose worn or damaged batteries into the trash, fire or into heating devices, but hand them in at collection points for hazardous waste.
CARING FOR YOUR DEVICE
- Taking good care of your device will ensure trouble-free operation and reduce the risk of damage.
- Keep your device away from excessive moisture and extreme temperatures and avoid exposing your device to direct sunlight or strong ultraviolet light for extended periods of time.
- Do not drop your device or subject it to severe shock.
- Do not subject your device to sudden and severe temperature changes. This could cause moisture condensation inside the unit, which could damage your device. In the event of moisture condensation, allow the device to dry out completely before use.
- The screen surface can easily be scratched. Avoid touching it with sharp objects.
- Never clean your device when it is powered on. Use a soft, lint-free cloth to wipe the screen and the exterior of your device. Do not use paper towels to clean the screen.
- Never attempt to disassemble, repair or make any modifications to your device. Disassembly, modification or any attempt at repair could cause damage to your device and even bodily injury or property damage and will void any warranty.
- Do not store or carry flammable liquids, gases or explosive materials in the same compartment as your device, its parts or accessories.
- To discourage theft, do not leave the device and accessories in plain view in an unattended vehicle.
- Overheating may damage the device.
- In the case of contact with heavily chlorinated water or sea water, rinse the camera in drinking water and dry it.
- Do not use an external heat source such as a microwave oven or hair dryer to dry the camera.
- Always make sure that the battery door or the power port door is not ajar before swimming or diving. If they are, close them. Otherwise, the camera will not remain watertight.
- Wipe the touchscreen only with a cloth designed for the purpose and avoid scratching.
OTHER INFORMATION
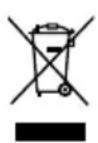
1) For households: This marking (indicates that this product should not be disposed with other household wastes throughout the EU. To prevent possible harm to the environment or human health from uncontrolled waste disposal, recycle it responsibly to promote the sustainable reuse of material resources. To return your used device, please use the return and collection systems or contact the retailer where the product was purchased. They can take this product for environmental safe recycling. In case of incorrect disposal of this kind of wastes user can be fined according to national laws. User information for disposal of electric and electronic devices in countries outside the EU: The symbol stated above (crossed recycle bin) is valid only in countries in European Union. For correct disposal of electric and electronic devices ask your city hall or distributor of these devices. Everything is expressed by the symbol of crossed recycle bin on product, cover or printed materials.
2) You can determine a warranty service at the place of purchase. In case of technical problems or queries contact your dealer who will inform you about the following procedure. Follow the rules for work with electric devices. User is not allowed to disassembly the device neither replace any of its components. To reduce the risk of electric shock, do not remove or open the cover. In case of incorrect setup and plug in of device you will expose yourself risk of electric shock.
The warranty period for the product is 24 months, unless specified otherwise. The warranty does not apply to damage caused by non-standard use, mechanical damage, exposure to aggressive conditions, handling contrary to the manual and regular wear and tear. The warranty period for the battery is 24 months, for its capacity 6 months.
The manufacturer, importer and distributor bear no responsibility for any damage cause by the assembly or improper use of the product.
DECLARATION OF CONFORMITY:
Hereby, elem6 s.r.o., declares that all LAMAX products are in compliance with the essential requirements and other relevant provisions of Directive 2014/30/EU and 2014/53/EU. Products are intended for sale without any restriction in Germany, Czech Republic, Slovak Republic, Poland, Hungary and other EU countries. Products are covered by a two year warranty, unless otherwise stated. You can download the Declaration of Conformity from the website: www.lamax-electronics.com/support/doc.
Frequency band in which the radio equipment operates: 2412 MHz\~2462 MHz
Maximum radio-frequency power transmitted in the frequency band in which the radio equipment operates: 12.51 dBm
MANUFACTURER:
elem6 s.r.o., Braškovská 308/158, 161 00 Praha 6 https://www.lamax-electronics.com
CE

Misprints and changes in the manual are reserved.
LAMAX
ELECTRONICS
LAMAX W9.2
ACTION CAMERA

INHALT
natural_image
Front view of a gray electronic device with a screen and circular button, labeled 'LAMAX' and 'W9.2' (no additional text or symbols)B

natural_image
3D rendering of a gray rectangular device with a circular lens and mechanical base (no text or symbols visible)©

natural_image
Technical illustration of a mechanical component with three labeled parts (no text or symbols)D

E
F

G
H

natural_image
Collection of mechanical components and tools, including blocks, gears, and linkages (no text or symbols visible)natural_image
Pure mechanical component diagram without any text, numbers, or symbols


natural_image
Three identical mechanical components with mounting holes and a circular symbol labeled 'FGH' (no text or symbols on the components themselves)
natural_image
Two gray rectangular blocks with a small circle above them (no text or symbols)Ⓐ POWER Taste
B REC Taste
© MODE Taste
natural_image
3D mechanical component diagram showing a vertical assembly with a green arrow indicating direction (no text or symbols)
natural_image
Diagram of a device with a green arrow pointing to a plug, no text or symbols present8. WIFI - MOBILE APPLIKATION

flowchart
graph LR
    A["APPLICATION"] --> B["BAGD"]
    B --> C["手机下载"]
    C --> D["手机操作界面"]
    D --> E["手部接触"]
https://www.lamax-electronics.com

CE

natural_image
Front view of a gray LAMAX camera with dual screen and circular lens (no text or symbols visible)B

natural_image
3D rendering of a gray rectangular device with a circular lens and mechanical base (no text or symbols visible)©

natural_image
Technical illustration of a mechanical component with three labeled parts (no text or symbols)D

E

F

G
H

natural_image
Collection of mechanical components and tools, including blocks, gears, and linkages (no text or symbols visible)natural_image
Diagram of a device with a green arrow pointing to a component, labeled (A), showing no text or symbols beyond the label.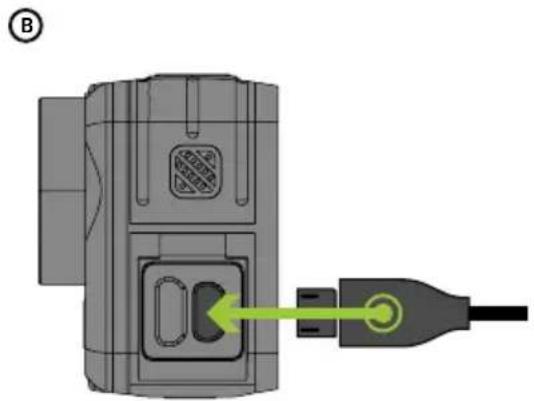
natural_image
Diagram of a device with an external plug and internal components, showing a green arrow pointing to a connector (no text or symbols present)Ⓐ VLOŽTE MICROSD KARTU DO KAMERY PODLE OBRÁZKU (KONEKTORY SMĚREM K OBJEKTIVU)
natural_image
Front view of a gray electronic device with a screen and circular button, labeled 'LAMAX' and 'W9.2' (no additional text or symbols)B

natural_image
3D rendering of a gray rectangular device with a circular lens and mechanical base (no text or symbols visible)©
natural_image
Technical illustration of a mechanical component with no visible text or symbolsD

E
F

G
H

natural_image
Collection of mechanical components and assembly symbols (no text or labels)natural_image
Pure mechanical component diagram without any text, numbers, or symbols


natural_image
Three identical mechanical components with no visible text or symbols, labeled 'FGH' in the top-left corner (no other text or symbols)
natural_image
Two gray rectangular blocks with a small circle above them (no text or symbols)natural_image
Diagram of a device with a green arrow pointing to a component, labeled (A), showing no text or symbols beyond the label.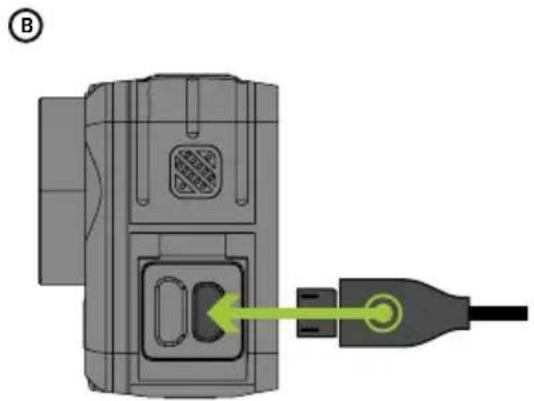
natural_image
Diagram of a device with a green arrow pointing to a plug, no text or symbols presentⒶ VLOŽTE MICROSD KARTU DO KAMERY PODL'A OBRÁZKU (KONEKTORY SMEROM K OBJEKTÍVU)
natural_image
Front view of a gray LAMAX camera with a circular lens and screen (no text or symbols visible)B

natural_image
Technical illustration of a camera module with no visible text or symbols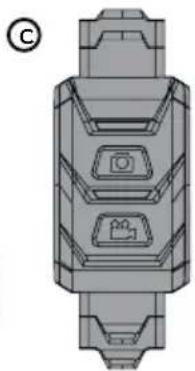
natural_image
Technical diagram of a mechanical component with internal channels and mounting features (no text or symbols)D

E
F

G

H
natural_image
Collection of mechanical components and assembly symbols (no text or labels visible)natural_image
Pure mechanical component diagram without any text, numbers, or symbols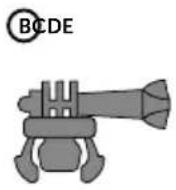


natural_image
Three identical mechanical components with mounting holes and a circular symbol labeled 'FGH' (no text or symbols on the components themselves)

natural_image
Two gray rectangular blocks with a small circle above them (no text or symbols)natural_image
3D mechanical component diagram with green arrow indicating direction (no text or symbols)B
natural_image
Diagram of a device with a green arrow pointing to a connector or socket (no text or symbols present)Ⓐ WŁÓŻ KARTĘ MICROSD DO KAMERY ZGODNIE Z RYSUNKIEM (ZŁĄCZA W KIERUNKU OBIEKTYWU)
https://www.lamax-electronics.com
CE

natural_image
Front view of a gray electronic device with a screen and circular button, labeled 'LAMAX' and 'W9.2' (no additional text or symbols)B

natural_image
3D rendering of a gray rectangular device with a circular lens and mechanical base (no text or symbols visible)
natural_image
Technical illustration of a mechanical component with no visible text or symbolsD
E

F

G

H

natural_image
Collection of mechanical components and assembly diagrams without any text or symbolsnatural_image
Pure mechanical component diagram without any text, numbers, or symbols



natural_image
Three identical mechanical components with mounting holes and a circular symbol labeled 'FGH' (no text or symbols on the components themselves)

natural_image
Two gray rectangular blocks with a small circle above them (no text or symbols)natural_image
Diagram of a device with a green arrow pointing to a component, labeled (A), showing no text or symbols.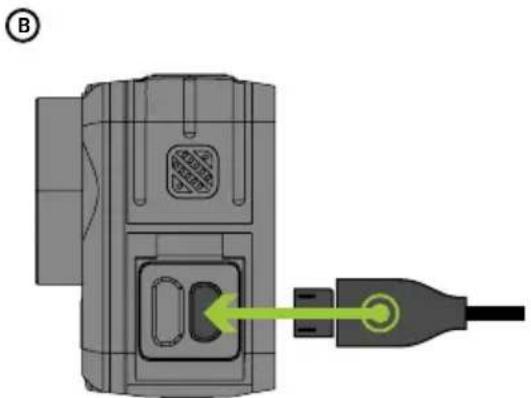
natural_image
Diagram of a device with an external plug and internal components, showing a green arrow pointing to a connector (no text or symbols present)Ⓐ HELYEZZE A MICROSD-KÁRTYÁT A KAMERÁBA AZ ÁBRÁN LÁTHATÓ MÓDON (CSATLAKOZÓKKAL AZ OBJEKTÍV FELÉ FORDÍTVA)
natural_image
Front view of a gray electronic device with a screen and circular button, labeled 'LAMAX' and 'W9.2' (no additional text or symbols)B

natural_image
3D rendering of a gray rectangular device with a circular lens and mechanical base (no text or symbols visible)©

natural_image
Technical illustration of a mechanical component with no visible text or symbolsD
E

F

G

H
natural_image
Collection of mechanical components and assembly symbols (no text or labels)natural_image
Pure mechanical component diagram without any text, numbers, or symbols


natural_image
Three identical mechanical components with no visible text or symbols, labeled FGH (no text or symbols on the components themselves)
natural_image
Two gray rectangular blocks with a small circle above them (no text or symbols)A Gumb POWER
B Gumb REC
© Gumb MODE
D Vratca za priključka USB-C in micro HDMI
E Vratca za baterijo in reža za kartico micro SD
F Navoj za pritrditev kamere na stojalo ali selfi palico
natural_image
3D mechanical component diagram with green arrow indicating direction (no text or symbols)B

natural_image
Diagram of a device with a green arrow pointing to a plug, showing internal components without any text or symbols.A VSTAVITE KARTICO MICROSD V KAMERO, KOT PRIKAZUJE SLIKA (KONEKTORJI V SMERI OBJEKTIVA)
natural_image
Front view of a gray electronic device with a screen and circular button, labeled 'LAMAX' and 'W9.2' (no additional text or symbols)B

natural_image
3D rendering of a gray rectangular device with a circular lens and mechanical base (no text or symbols visible)©

natural_image
Technical illustration of a mechanical component with three labeled parts (no text or symbols)D

E

F

G
H
natural_image
Collection of mechanical components and tools, including blocks, gears, and linkages (no text or symbols visible)① Akcijska kamera LAMAX W9.2
② Vodonepropusno kućište za zaron do dubine od 40 m
③ Daljinski upravljač vodootporan do 2 m
④ Li-ion baterija
⑤ USB-C kabel za punjenje / prijenos datoteka
⑥ Krpica od mikrofibre
⑦ Ministativ
⑧ Držači
DRŽAČI
natural_image
3D mechanical component diagram with a green arrow indicating direction (no text or symbols)B
natural_image
Diagram of a device with a green arrow pointing to a plug, showing internal components (no text or symbols)Ⓐ UMETNITE MICROSD KARTICU U KAMERU KAKO JE PRIKAZANO NA SLICI (KONEKTORI OKRENUTI PREMA OBJEKTIVU)
Pritisnite sigurnosnu tipku na dnu kamere. Gurnite vrata prema van i otvorite ih.
Umetnite karticu samo kada je kamera isključena i nije spojena na računalo.
Kada karticu koristite prvi put, formatirajte je izravno u kameri.
Preporučujemo memorijske kartice s višom klasom brzine (UHS Speed Class – U3 i viša) i maksimalnog kapaciteta 128 GB.
Napomena: Koristite samo Micro SDHC ili SDXC kartice renomiranih proizvođača. Kartice nepoznatih proizvođača ne jamče ispravno funkcioniranje pohrane podataka.
B PRIKLJUČITE KAMERU NA NAPAJANJE
flowchart
graph LR
    A["APPLICATION"] --> B["BACD"]
    B --> C[" SMS & Wi-Fi icon"]
    C --> D["Hand interacting with SMS & Wi-Fi icon"]
Zahvaljujući mobilnoj aplikaciji, moći ćete mijenjati režime i postavke kamere ili pregledavati i preuzimati snimljena videa i fotografije izravno na vaš mobilni uređaj.
A Skenirajte QR kod za preuzimanje aplikacije ili kliknite na sljedeću poveznicu: https://www.lamax-electronics.com/w92/app/
B Instalirajte aplikaciju na svoj mobilni uređaj.
© Uključite bežičnu mrežu u kameri povlačenjem palca prema dolje i zatim pritiskom ikone bežične kamere
D Na svom mobilnom uređaju povežite se na WiFi mrežu s nazivom kamere. WiFi lozinka prikazana je na zaslonu fotoaparata (zadano 12345678).
9. VODOOTPORAN
PRAVILA I OBAVIJESTI


- LAMAX
- ELECTRONICS
- LAMAX W9.2
- ACTION CAMERA
- CONTENTS
- BOX CONTENTS
- MOUNTS
- GETTING TO KNOW YOUR CAMERA
- CAMERA CONTROLS
- TURNING IT ON FOR THE FIRST TIME
- Ⓐ INSERT THE MICROSD CARD INTO THE CAMERA AS SHOWN (CONNECTORS TOWARDS THE LENS)
- B CONNECT THE CAMERA TO A POWER SOURCE
- VIDEO MODE SETTINGS
- PHOTO MODE SETTINGS
- WIFI - MOBILE APP
- WATER RESISTANCE
- ACTION CAMERA:
- WATERPROOF CASE:
- REMOTE CONTROL:
- SAFETY PRECAUTIONS
- PRECAUTIONS AND NOTICES
- SAFETY PRECAUTIONS
- SAFETY NOTICES FOR LI-ION BATTERIES
- CARING FOR YOUR DEVICE
- OTHER INFORMATION
- DECLARATION OF CONFORMITY:
- MANUFACTURER:
- INHALT
- WIFI - MOBILE APPLIKATION
- Ⓐ VLOŽTE MICROSD KARTU DO KAMERY PODLE OBRÁZKU (KONEKTORY SMĚREM K OBJEKTIVU)
- Ⓐ VLOŽTE MICROSD KARTU DO KAMERY PODL'A OBRÁZKU (KONEKTORY SMEROM K OBJEKTÍVU)
- Ⓐ WŁÓŻ KARTĘ MICROSD DO KAMERY ZGODNIE Z RYSUNKIEM (ZŁĄCZA W KIERUNKU OBIEKTYWU)
- Ⓐ HELYEZZE A MICROSD-KÁRTYÁT A KAMERÁBA AZ ÁBRÁN LÁTHATÓ MÓDON (CSATLAKOZÓKKAL AZ OBJEKTÍV FELÉ FORDÍTVA)
- A VSTAVITE KARTICO MICROSD V KAMERO, KOT PRIKAZUJE SLIKA (KONEKTORJI V SMERI OBJEKTIVA)
- DRŽAČI
- Ⓐ UMETNITE MICROSD KARTICU U KAMERU KAKO JE PRIKAZANO NA SLICI (KONEKTORI OKRENUTI PREMA OBJEKTIVU)
- B PRIKLJUČITE KAMERU NA NAPAJANJE
- VODOOTPORAN
- PRAVILA I OBAVIJESTI
Brand : Lamax
Model : W9.2
Category : Action Camera