
W10.2 - Action Camera Lamax - Free user manual and instructions
Find the device manual for free W10.2 Lamax in PDF.


| Product Type | Action Camera |
| Brand | Lamax |
| Model | W10.2 |
| Video Resolution | Up to 4K (3840x2160) at 30fps; 1080p at 60fps |
| Photo Resolution | Up to 20 MP |
| Water Resistance (Camera) | 12m without case; 40m with waterproof case |
| Water Resistance (Remote) | 2m |
| Battery Type | Li-ion, rechargeable |
| Charging Time | Approx. 4.5 hours (0-100%); 2.5 hours (0-80%) |
| Storage | microSDHC/SDXC up to 256 GB (UHS Speed Class U3 or higher recommended) |
| Connectivity | WiFi 2.4 GHz, USB-C, micro HDMI |
| Display | Touchscreen with front selfie display |
| Stabilization | MAXsmooth electronic stabilization (up to 60fps) |
| Field of View | Adjustable with LDC fisheye reduction |
| Remote Control | Included, waterproof to 2m |
| Mounts Included | Tripod adapter, adhesive mounts, pole mount, 3-axis connector, J mount, quick plug-in |
| Other Accessories | Waterproof case, mini tripod, USB-C cable, microfiber cloth, filters (pink, transparent) |
| Maintenance | Keep seals clean; rinse with fresh water after saltwater use; dry gently without heat |
| Safety | Do not use while driving; charge under supervision; avoid extreme temperatures; dispose of battery properly |
| Warranty | 24 months for device, 24 months for battery (capacity: 6 months) |
Frequently Asked Questions - W10.2 Lamax
User questions about W10.2 Lamax
0 question about this device. Answer the ones you know or ask your own.
Ask a new question about this device
Download the instructions for your Action Camera in PDF format for free! Find your manual W10.2 - Lamax and take your electronic device back in hand. On this page are published all the documents necessary for the use of your device. W10.2 by Lamax.
USER MANUAL W10.2 Lamax
natural_image
Front view of a LAMAX camera module with display and control panel (no text or symbols on body)②

natural_image
3D technical illustration of a camera module with no visible text or symbols3

natural_image
Technical illustration of a mechanical component with no visible text or symbols④

5

6

O

natural_image
Simple 3D diagram of a three-blade propeller or fan with a central hub (no text or symbols)⑧

natural_image
Collection of gray mechanical and electrical component icons including batteries, switches, and cylinders (no text or symbols)① LAMAX W10.2 Action Camera
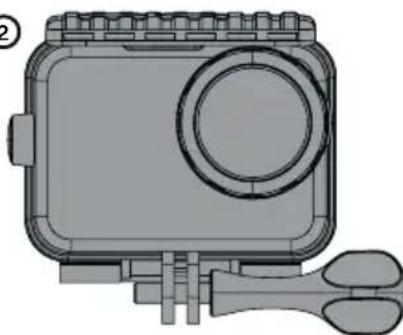
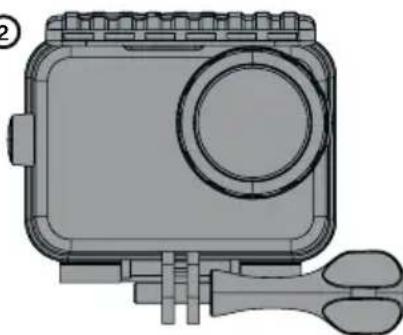
② Case, waterproof up to 40 m
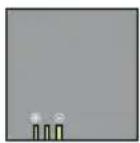
③ Remote control, waterproof up to 2 m
④ Li-ion battery
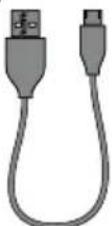
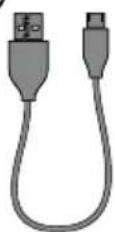
⑤ USB-C cable for charging/transferring files
⑥ Microfibre cloth
⑦ Mini tripod
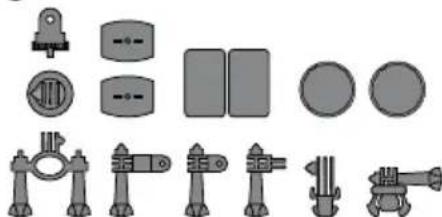
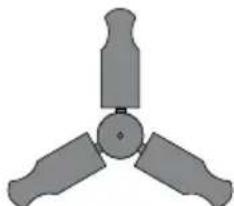
⑧ Mounts
⑤ USB-C cable for charging/transferring files
⑥ Microfibre cloth
⑦ Mini tripod
⑧ Mounts
MOUNTS
A
©

D

E

F

B
H
G


①

J

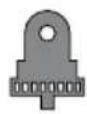
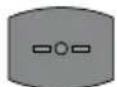
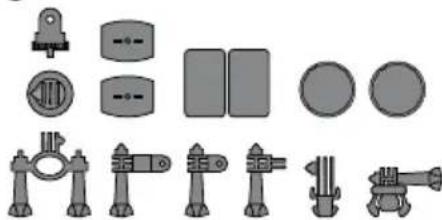
A Tripod adapter – to connect the camera without a case
B Tripod adapter – to connect the camera in the case to the tripod
© Adhesive mounts (2×) – to attach to a smooth surface (helmet, hood)
D Spare 3M adhesive pads (2×) – to reattach the adhesive mount
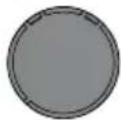
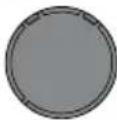
E Pink filter for diving
F Transparent filter to protect the lens
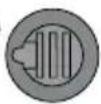
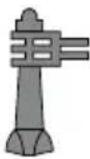
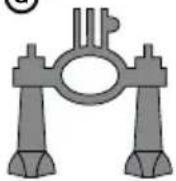
G Pole mount – to mount, for example, on handlebars
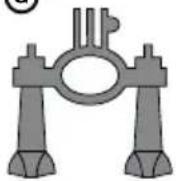
(H) 3-axis connector (3 parts) – to mount in any direction
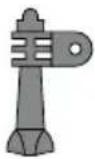
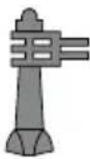
① J mount – to quickly snap in place with elevation
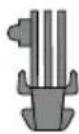
J Fast plug-in – to quickly snap in place
2. GETTING TO KNOW YOUR CAMERA


Ⓐ POWER button
B REC button
© MODE button
(D) Cover to USB-C and micro HDMI connectors
E Cover to battery and micro SD card slot
F Thread for mounting the camera on a tripod or selfie stick
Note: Use only the recommended accessories, otherwise the camera may be damaged.
3. CAMERA CONTROLS
| Turn on / off Hold down the POWER button or swipe down and press the POWER icon | |
| Select a mode Touch the icon |  or press the MODE button or drag the thumb upwards to select the desired mode or press the MODE button or drag the thumb upwards to select the desired mode |
| Mode settings | Touch the icon  or press the POWER button or press the POWER button |
| Settings Touch the icon | [ADDS] |
| View files Touch the icon | [DTW] |
| Switch between displays Hold down the MODE button | |
| Return back Touch the icon | < |
| Turning on the remote control Swipe down and then press the remote control icon | |
| Control lock Swipe down and then touch the lock icon | |
| Turning off the camera Swipe down and then tap the Shutdown icon | |
4. TURNING IT ON FOR THE FIRST TIME

natural_image
3D mechanical component diagram showing a cylindrical device with internal components and a green arrow indicating upward motion (no text or symbols)A


natural_image
3D mechanical component diagram with highlighted internal channel and green arrow indicator (no text or symbols)B
natural_image
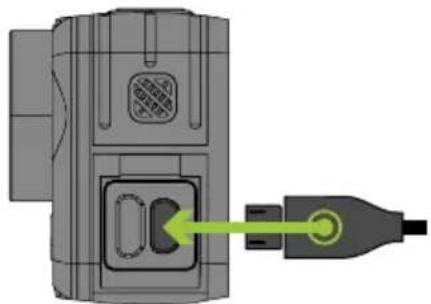
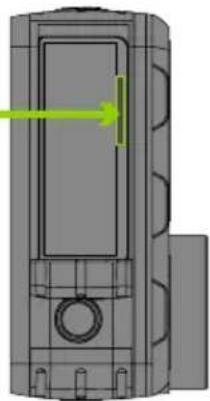
Diagram of a device with a green arrow pointing to a connector (no text or symbols present)Ⓐ INSERT THE MICROSD CARD INTO THE CAMERA AS SHOWN (CONNECTORS TOWARDS THE LENS)
Only insert the card when the camera is turned off and not connected to your computer.
Format the card directly in the camera the first time you use it.
We recommend memory cards with a higher write speed (UHS Speed Class -U3 and higher) and a maximum capacity of 256 GB.
Note: Use only micro SDHC or SDXC cards from reputable manufacturers. With generic third-party cards, there is no guarantee that the data storage will work properly.
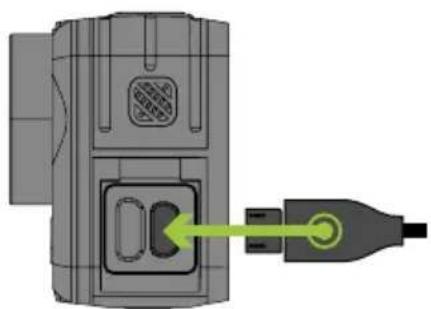
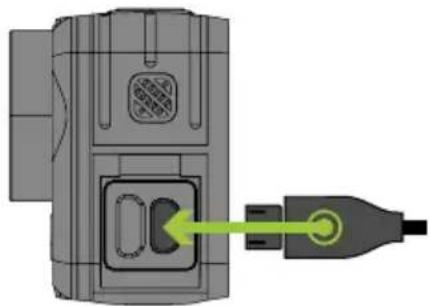
B CONNECT THE CAMERA TO A POWER SOURCE
You can charge the camera by either connecting it to your computer or using an optional AC adapter.
It takes approximately 4.5 hours to charge the battery from 0 to 100%. When charged, the charge indicator turns off.
Note: Charging the battery from 0 to 80% takes 2.5 hours.
- VIDEO MODE SETTINGS
| Video resolution The resolution and FPS (frames per second) settings at which the camera will record. | |
| Loop recording When enabled, the video is divided into time segments based on the selected settings. | |
| Audio Sets whether the camera records audio. | |
| Encoding Video codec selection. | |
| LDC Fisheye reduction. | |
| Stabilization MAXsmooth stabilization on/off, available in all resolutions at a maximum of 60 FPS. When stabilized, the field of view (FOV) is smaller and can negatively affect video quality in low-light conditions. It cannot be combined with the fisheye correction feature. | |
| Metering Sets how the exposure is metered. There are three modes („Center“, „Average“ and „Spot“) to choose from.➢ Center – For shooting objects that will mainly be in the middle of the shot.➢ Average – The camera obtains light information from the entire scene and sets average values.➢ Spot – This setting allows you to meter a small portion of the scene, the default setting is centre. The user can use the touchscreen to select a different point from which the camera will determine the exposure. | |
| Exposure Exposure compensation setting. A higher value means a lighter video, a lower value means a darker video. | |
| Shutter Select the shutter speed. | |
| ISO ISO settings. Setting the ISO value determines its sensitivity to light. | |
| AWB Adjusts the white balance for different scene lighting. | |
| Scene mode | Preset modes for different types of scenes. |
| Sharpness | Adjusts the sharpness of the video. |
| Grid | Displays a grid on the screen for better composition. |
| Filter | Selects the video filter. |
6. PHOTO MODE SETTINGS
Photo resolution Sets the resolution of the photos you take.
LDC Fisheye reduction.
Metering Sets how the exposure is metered. There are three modes („Center“,
„Average“ and „Spot“) to choose from.
Center – For shooting objects that will mainly be in the middle of the shot.
Average – The camera obtains light information from the entire scene and sets average values.
Spot – This setting allows you to meter a small portion of the scene, the default setting is centre. The user can use the touchscreen to select a different point from which the camera will determine the exposure.
Exposure Exposure compensation settings. A higher value means a lighter photo, a lower value means a darker photo.
Shutter Select the shutter speed.
ISO ISO settings. Setting the ISO value determines its sensitivity to light.
AWB Adjusts the white balance for different scene lighting.
Scene mode Preset modes for different types of scenes.
Sharpness Adjusts the sharpness of the video.
Filter Selects the video filter.
Grid Displays a grid on the screen for better composition.
7. SETTING CAMERA
| WiFi | Display a menu where you can turn WiFi on/off, view WiFi information or change the WiFi network name and password. |
| Screen saver | Sets the time after which the display automatically turns off to save battery. Touch the display or press the buttons to activate the display again. |
| Auto power off | Sets the camera to turn off automatically when idle. When turned of, the camera powers off if not recording video. |
| Language Selects the language. | |
| Video format | Colour encoding setting. |
| Network frequency | Enables you to select the frequency in accordance with the frequency of the grid (on the European continent there is a current with a frequency of 50 Hz, in the Americas and parts of Asia it is 60 Hz). |
| WDR | Enable/disable dynamic range. |
| Selfie display | Choose between a larger or smaller display of content on the front screen. |
Image rotation 180° image rotation.
Stamp Insert a watermark into a photo or video.
Key sound Turn the sound of the keys on/off.
Shutter sound Turn the shutter sound on/off.
Power on sound Turn on/off the welcome tone.
Date / Time Set the system date and time.
SD format Erases all data on the memory card.
Factory settings Reset the camera to factory settings.
Information Allows access to camera firmware information.
8. WIFI - MOBILE APP

flowchart
graph LR
    A["APPLICATION"] --> B["手机下载"]
    B --> C["BAGD"]
    C --> D["手机操作界面"]
    D --> E["手部接触时钟"]
With the mobile app, you'll be able to change camera modes and settings or view and download recorded videos and photos directly to your mobile device.
Ⓐ Scan the QR code to download the app or click the following link: https://www.lamax-electronics.com/w102/app/
(B) Install the app on your mobile device.
© Turn on WiFi on the camera by swiping your thumb downwards and then pressing the WiFi icon 📞.
On your mobile device, connect to the WiFi network named after the camera. The WiFi password is displayed on the camera screen (default: 12345678).
9. WATER RESISTANCE
Resistance when immersed in water under the following conditions:
ACTION CAMERA:
The camera without a case can withstand immersion to a depth of 12 metres. Before submerging, make sure the covers on the side and bottom of the camera are properly closed. The covers and seals must be free of all debris such as dust, sand, etc. Do not open the camera covers before the camera body has dried. If used in salt water, rinse the camera with fresh water. Do not use any fabrics or external heat sources (hair dryer, microwave oven, etc.) to dry the camera; always allow the camera to dry gently.
WATERPROOF CASE:
The case can resist immersion to a depth of 40 metres. Before using the camera in the case, make sure that the rear door of the case is properly closed using the mechanism on the top of the case. The case door and seal must be free of any impurities such as dust, sand and alike. When used in salt water, rinse the case with drinking water. Do not use any fabrics or external heat sources (hairdryer, microwave oven, etc.) for drying, always allow
the case to dry gradually. When in the waterproof case, the touch screen of the camera display cannot be used, and the camera must be operated using the buttons.
REMOTE CONTROL:
The remote control can withstand immersion to a depth of 2 metres. Before submerging, make sure the USB cover on the bottom of the control is properly closed. Do not open the cover before the body of the remote control has dried. Do not use external heat sources (hairdryer, microwave, etc.) to dry the remote control, let it dry slowly or use a soft cloth to dry it.
10. SAFETY PRECAUTIONS
Before first use, the consumer is obliged to familiarize himself with the principles of safe use of the product.
POLICIES AND NOTICES
- To ensure your own safety, do not use the controls of this device while driving.
- When using the recorder in a car, a window holder is necessary. Place the recorder in a suitable place so that it does not obstruct the driver's view or the activation of safety features (e.g. airbags).
- The camera lens must not be blocked by anything and there must not be any reflective material near the lens. Keep the lens clean.
- If the windshield of the car is tinted with a reflective layer, it may limit the quality of the recording.
SECURITY PRINCIPLES
- Do not use the charger in a highly humid environment. Never touch the charger with wet hands or while standing in water.
- When powering the device or charging the battery, leave enough space around the charger for air circulation. Do not cover the charger with papers or other objects that could impair its cooling. Do not use the charger stored in the transport package.
- Connect the charger to the correct voltage source. The voltage data is indicated on the product casing or on its packaging.
- Do not use the charger if it is obviously damaged. If the device is damaged, do not repair it yourself!
– In case of excessive heating, immediately disconnect the device from the power supply.
– Charge the device under supervision.
- The package contains small parts that can be dangerous for children. Always store the product out of the reach of children. The bags or the many parts they contain can cause suffocation if swallowed or applied to the head.
SAFETY NOTICE FOR LI-ION BATTERIES
– Fully charge the battery before first use.
- For charging, use only the charger that is intended for this type of battery.
- Use standard charging cables, otherwise the device may be damaged.
- Never connect mechanically damaged or swollen batteries to the charger. Do not use the battery in this state at all, there is a risk of explosion.
- Do not use any damaged power adapter or charger.
- Charge at room temperature, never charge below 0^ or above 40^ .
- Be careful of falls, do not puncture or otherwise damage the battery. Never repair a damaged battery.
- Do not expose the charger or battery to moisture, water, rain, snow or various sprays.
- Do not leave the battery in the vehicle, do not expose it to sunlight and do not place it near heat sources. Strong light or high temperatures can damage the battery.
- Never leave batteries unattended during charging, a short circuit or accidental overcharging (of a battery not suitable for fast charging or charged with excessive current or in case of a charger failure) can cause the leakage of aggressive chemicals, explosion or subsequent fire!
- If the battery overheats while charging, disconnect the battery immediately.
- When charging, do not place the charger and the charged battery on or near flammable objects. Pay attention to curtains, carpets, tablecloths, etc.
- Once the charging device is fully charged, unplug it for safety.
- Keep the battery out of the reach of children and animals.
- Never disassemble the charger or battery.
- If the battery is integrated, never disassemble the device unless otherwise specified. Any such attempt is risky and may result in product damage and subsequent loss of warranty.
- Do not throw worn or damaged batteries into the trash can, fire, or into heating devices, but hand them in at hazardous waste collection points.
– Device maintenance
OTHER INFORMATION
1) For households: The indicated symbol (△) on the product or in the accompanying documentation means that used electrical or electronic products must not be disposed of together with municipal waste. In order to properly dispose of the product, hand it in at designated collection points, where they will be accepted free of charge. By disposing of this product correctly, you help preserve valuable natural resources and help prevent potential negative impacts on the environment and human health that could result from improper waste disposal. Ask your local authority or nearest collection point for further details. Improper disposal of this type of waste may result in fines in accordance with national regulations. Information for users on the disposal of electrical and electronic equipment (company and business use): For the correct disposal of electrical and electronic equipment, ask your dealer or supplier for detailed information. Information for users for the disposal of electrical and electronic equipment in other countries outside the European Union: The above symbol (crossed out bin) is only valid in the countries of the European Union. For the correct disposal of electrical and electronic equipment, request detailed information from your authorities or equipment dealer. Everything is expressed by the crossed-out container symbol on the product, packaging or printed materials.
2) Apply for device warranty repairs at your dealer. In case of technical problems and questions, contact your dealer, who will inform you about the next procedure. Follow the rules for working with electrical devices. The user is not authorized to disassemble the device or replace any of its parts. There is a risk of electric shock when opening or removing covers. You also run the risk of electric shock if the device is assembled and reconnected incorrectly.
The warranty period for products is 24 months, unless otherwise stated. The warranty does not cover damage caused by non-standard use, mechanical damage, exposure to aggressive conditions, handling contrary to the manual and normal wear and tear. The warranty period for the battery is 24 months, for its capacity 6 months. More information about the warranty can be found at www.elem6.com/warranty
The manufacturer, importer or distributor shall not be liable for any damage caused by the installation or misuse of the product.
EU DECLARATION OF CONFORMITY:
The company elem6 s.r.o. hereby declares that the LAMAX W10.2 device is in compliance with the essential requirements and other relevant provisions of Directive 2014/30/EU and 2014/53/EU. All LAMAX brand products are intended for sale without restrictions in Germany, the Czech Republic, Slovakia, Poland, Hungary and other EU member states. The full Declaration of Conformity can be downloaded from https://www.lamax-electronics.com/support/doc/
Frequency band in which the radio device works: 2.4 – 2.48 GHz
Maximum radio frequency power transmitted in the frequency band in which the radio equipment is operated: 12.51 dBi
MANUFACTURER:
elem6 s.r.o., Braškovská 308/158, 161 00 Praha 6 www.lamax-electronics.com

CE

Typographical errors and changes in the manual are reserved.
LAMAX
ELECTRONICS
LAMAX W10.2
ACTION CAMERA

INHALT
natural_image
Front view of a gray LAMAX camera with a screen and control panel (no visible text or symbols beyond branding)②
natural_image
3D rendering of a camera module with no visible text or symbols3

natural_image
Technical illustration of a mechanical component with two internal components (no text or symbols)④
⑤
⑥

O

natural_image
Simple diagram of a three-blade propeller or fan with no text or symbols8
natural_image
Collection of gray mechanical and electrical component icons including batteries, switches, and cylinders (no text or symbols)Ⓐ POWER Taste
B REC Taste
© MODE Taste
natural_image
3D mechanical component diagram showing a cylindrical device with a green arrow indicating upward motion (no text or symbols)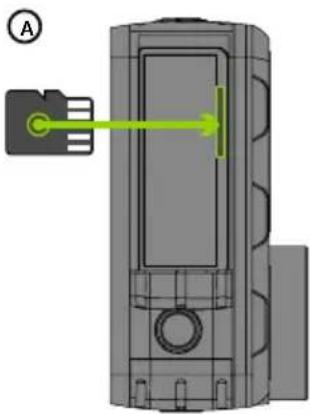
natural_image
Diagram of a device with a green arrow pointing to a component, labeled (A), showing no text or symbols.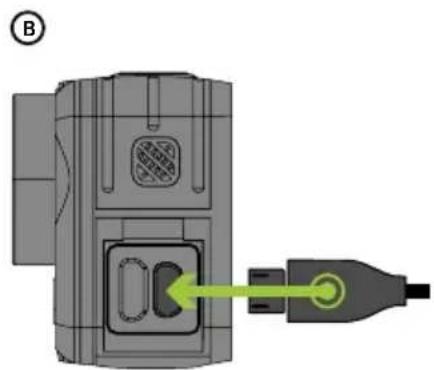
natural_image
Diagram of a device with a green arrow pointing to a plug, no text or symbols present8. WIFI - MOBILE APPLIKATION

flowchart
graph LR
    A["APPLICATION"] --> B["手机"]
    B --> C["手触屏"]
    C --> D["手按图标"]
natural_image
Front view of a gray LAMAX camera with a circular lens and control panel (no text or symbols visible)②
natural_image
3D rendering of a camera module with no visible text or symbols3

natural_image
Technical illustration of a mechanical component with no visible text or symbols④

⑤

⑥

O

natural_image
Simple diagram of a three-blade propeller or fan with no text or symbols8

natural_image
Collection of gray mechanical and electrical component icons including batteries, switches, and cylinders (no text or symbols)natural_image
3D technical diagram of a mechanical device with a green arrow indicating upward motion (no text or symbols)
natural_image
Diagram of a device with a green arrow pointing to a component, labeled (A), showing no text or symbols beyond the label.
natural_image
Diagram of a device with a green arrow pointing to a connector (no text or symbols present)Ⓐ VLOŽTE MICROSD KARTU DO KAMERY PODLE OBRÁZKU (KONEKTORY SMĚREM K OBJEKTIVU)
natural_image
Front view of a gray LAMAX camera with a screen and control panel (no visible text or symbols beyond branding)②

natural_image
3D rendering of a camera module with no visible text or symbols3

natural_image
Technical illustration of a mechanical component with no visible text or symbols④

⑤

⑥

O
natural_image
Simple diagram of a three-bladed propeller or fan with no text or symbols8

natural_image
Collection of gray mechanical and electrical component icons including batteries, switches, and cylinders (no text or symbols)① Akčná kamera LAMAX W10.2
② Vodotesný obal do 40 m
③ Dialkové ovládanie, vodotesné do 2 m
④ Li-ion batéria
⑤ USB-C kábel pre nabíjanie/prenos súborov
⑥ Handrička z mikrovlákna
⑦ Mini statív
⑧ Úchyty
ÚCHYTY
A

©
D

E
F
B

H
G


①
J

A Tlačidlo POWER
B Tlačidlo REC
© Tlačidlo MODE
D) Dvierka ku konektorom USB-C a micro HDMI
E Dvierka k batérii a slotu na micro SD kartu
F Závit pre upevnenie kamery na statív alebo selfie tyč
natural_image
3D rendering of a cylindrical device with a green arrow pointing to the top section (no text or symbols visible)
natural_image
3D mechanical component diagram with highlighted green arrow and labeled section (A), no readable text or symbols present.
natural_image
Diagram of a device with a green arrow pointing to a connector (no text or symbols present)Ⓐ VLOŽTE MICROSD KARTU DO KAMERY PODL'A OBRÁZKU (KONEKTORY SMEROM K OBJEKTÍVU)
V spodnej časti kamery stlačte poistné tlačidlo. Posuňte dvierka smerom von a otvorte.
Kartu vkladajte len, ked'je kamera vypnutá a nie je pripojená k počítaču.
natural_image
Front view of a LAMAX camera module with display and control panel (no text or symbols on body)②

natural_image
3D technical illustration of a camera module with no visible text or symbols3

natural_image
Technical illustration of a mechanical component with no visible text or symbols④

5

6

O

natural_image
Simple 3D diagram of a three-blade propeller or fan with a central hub (no text or symbols)⑧

natural_image
Collection of mechanical and electrical component icons including batteries, switches, and meters (no text or labels)① Kamera sportowa LAMAX W10.2
② Wodoodporne etui do 40 m
③ Pilot zdalnego sterowania wodoodporny do 2 m
④ Baterie Li-ion
A Przycisk POWER
B Przycisk REC
© Przycisk MODE
natural_image
3D technical illustration of a cylindrical device with a green arrow indicating upward motion (no text or symbols)
natural_image
3D mechanical component diagram with green arrow indicating direction (no text or symbols)
natural_image
Diagram of a device with a green arrow pointing to a plug, showing internal components without any text or symbols.Ⓐ WŁÓŻ KARTĘ MICROSD DO KAMERY ZGODNIE Z RYSUNKIEM (ZŁĄCZA W KIERUNKU OBIEKTYWU)
https://www.lamax-electronics.com/w102/app/
natural_image
Front view of a gray LAMAX camera with a circular lens and control panel (no text or symbols visible)②

natural_image
3D rendering of a camera module with no visible text or symbols3

natural_image
Technical illustration of a mechanical component with no visible text or symbols④
⑤
⑥

O

natural_image
Simple 3D diagram of a three-bladed propeller or fan with no text or symbols8

natural_image
Collection of various mechanical and electrical component symbols (no text or labels)Ⓐ POWER gomb
B REC gomb
© MODE gomb
natural_image
3D technical illustration of a cylindrical device with internal components and a green arrow indicating upward motion (no text or symbols)
natural_image
Diagram of a device interior with a green arrow pointing to a component, no visible text or symbols
natural_image
Diagram of a device with a green arrow pointing to a connector (no text or symbols present)Ⓐ HELYEZZE A MICROSD-KÁRTYÁT A KAMERÁBA AZ ÁBRÁN LÁTHATÓ MÓDON (CSATLAKOZÓKKAL AZ OBJEKTÍV FELÉ FORDÍTVA)
natural_image
Front view of a gray LAMAX camera with a screen and control panel (no visible text or symbols beyond branding)②

natural_image
3D rendering of a camera module with no visible text or symbols3

natural_image
Technical illustration of a mechanical component with no visible text or symbols④

⑤
⑥

O

natural_image
Simple 3D diagram of a three-bladed propeller or fan with no text or symbols8
natural_image
Collection of various mechanical and electrical component symbols (no text or labels)Ⓐ Gumb POWER
B Gumb REC
© Gumb MODE
D Vratca za priključka USB-C in micro HDMI
E Vratca za baterijo in reža za kartico micro SD
F Navoj za pritrditev kamere na stojalo ali selfi palico
natural_image
3D rendering of a cylindrical device with a green arrow pointing to the top section (no text or symbols visible)
natural_image
Diagram of a device interior with a green arrow pointing to a component, labeled (A), showing no text or symbols beyond the label.

natural_image
Diagram of a device with a green arrow pointing to a connector (no text or symbols present)A VSTAVITE KARTICO MICROSD V KAMERO, KOT PRIKAZUJE SLIKA (KONEKTORJI V SMERI OBJEKTIVA)
natural_image
Front view of a gray LAMAX camera with a circular lens and control panel (no text or symbols visible)②

natural_image
3D rendering of a camera module with no visible text or symbols3

natural_image
Technical illustration of a mechanical component with no visible text or symbols④
⑤

⑥

O

natural_image
Simple diagram of a three-bladed propeller or fan with no text or symbols8

natural_image
Collection of gray mechanical and electrical component icons including batteries, switches, and cylinders (no text or labels)① Akcijska kamera LAMAX W10.2
② Vodonepropusno kućište za zaron do dubine od 40 m
③ Daljinski upravljač vodootporan do 2 m
④ Li-ion baterija
⑤ USB-C kabel za punjenje / prijenos datoteka
⑥ Krpica od mikrofibre
⑦ Ministativ
⑧ Držači
DRŽAČI
A

©
D

E

F

B

H
G


①

J

A Tipka POWER
B Tipka REC
© Tipka MODE
D Poklopac USB-C i mikro HDMI konektora
E Poklopac pretinca za bateriju i utora za mikro SD karticu
F Navoj za učvršćivanje kamere na stativ ili štap za slefije
Napomena: Koristite samo preporučenu dodatnu opremu, inače se kamera može oštetiti.
3. UPRAVLJANJE KAMEROM
| Uključivanje i isključivanje | Držanjem gumba POWER ili povlačenjem palca prema dolje i zatim pritis-kom ikone POWER | |
| Odabir načina rada | Dodirom ikone |  , gumba MODE ili povlačenjem palca prema gore izatim odabirom željenog načina rada , gumba MODE ili povlačenjem palca prema gore izatim odabirom željenog načina rada |
| Postavka načina rada | Dodirom ikone |  ili gumba POWER ili gumba POWER |
| Postavke Dodirnite ikonu |  | |
| Pregledavanje datoteka | Dodirom ikone | [GTR] |
| Prebacivanje između zaslona | Držeći pritisnutu tipku „MODE“ | |
| Povratak | Dodirom na ikonu | < |
| Uključivanje daljinskog upravljača | Povlačenjem prsta prema dolje i zatim klikom ikone daljinskog upravljača | |
| Kontrolna brava | Povlačenjem prsta prema dolje i dodirivanjem ikone lokota | |
| Isključite kameru | Povlačenjem prema dolje i dodirivanjem ikone za isključivanje | |
4. PRVO UKLJUČENJE

natural_image
3D mechanical component diagram with no visible text or symbolsA

natural_image
3D mechanical component diagram with highlighted internal channel and green directional arrow (no text or symbols)B

natural_image
Diagram of a device with a connector and cable, showing internal components and a green arrow pointing to a component (no text or symbols present)A UMETNITE MICROSD KARTICU U KAMERU KAKO JE PRIKAZANO NA SLICI (KONEKTORI OKRENUTI PREMA OBJEKTIVU)
Pritisnite sigurnosnu tipku na dnu kamere. Gurnite vrata prema van i otvorite ih.
Umetnite karticu samo kada je kamera isključena i nije spojena na računalo.
Kada karticu koristite prvi put, formatirajte je izravno u kameri.
Preporučujemo memorijske kartice s višom klasom brzine (UHS Speed Class – U3 i viša) i maksimalnog kapaciteta 256 GB.
Napomena: Koristite samo Micro SDHC ili SDXC kartice renomiranih proizvođača. Kartice nepoznatih proizvođača ne jamče ispravno funkcioniranje pohrane podataka.
B PRIKLJUČITE KAMERU NA NAPAJANJE
PRAVILA I OBAVIJESTI


- MOUNTS
- GETTING TO KNOW YOUR CAMERA
- CAMERA CONTROLS
- TURNING IT ON FOR THE FIRST TIME
- Ⓐ INSERT THE MICROSD CARD INTO THE CAMERA AS SHOWN (CONNECTORS TOWARDS THE LENS)
- B CONNECT THE CAMERA TO A POWER SOURCE
- PHOTO MODE SETTINGS
- SETTING CAMERA
- WIFI - MOBILE APP
- WATER RESISTANCE
- ACTION CAMERA:
- WATERPROOF CASE:
- REMOTE CONTROL:
- SAFETY PRECAUTIONS
- POLICIES AND NOTICES
- SECURITY PRINCIPLES
- SAFETY NOTICE FOR LI-ION BATTERIES
- OTHER INFORMATION
- EU DECLARATION OF CONFORMITY:
- MANUFACTURER:
- LAMAX
- ELECTRONICS
- LAMAX W10.2
- ACTION CAMERA
- INHALT
- WIFI - MOBILE APPLIKATION
- Ⓐ VLOŽTE MICROSD KARTU DO KAMERY PODLE OBRÁZKU (KONEKTORY SMĚREM K OBJEKTIVU)
- ÚCHYTY
- Ⓐ VLOŽTE MICROSD KARTU DO KAMERY PODL'A OBRÁZKU (KONEKTORY SMEROM K OBJEKTÍVU)
- Ⓐ WŁÓŻ KARTĘ MICROSD DO KAMERY ZGODNIE Z RYSUNKIEM (ZŁĄCZA W KIERUNKU OBIEKTYWU)
- Ⓐ HELYEZZE A MICROSD-KÁRTYÁT A KAMERÁBA AZ ÁBRÁN LÁTHATÓ MÓDON (CSATLAKOZÓKKAL AZ OBJEKTÍV FELÉ FORDÍTVA)
- A VSTAVITE KARTICO MICROSD V KAMERO, KOT PRIKAZUJE SLIKA (KONEKTORJI V SMERI OBJEKTIVA)
- DRŽAČI
- UPRAVLJANJE KAMEROM
- PRVO UKLJUČENJE
- A UMETNITE MICROSD KARTICU U KAMERU KAKO JE PRIKAZANO NA SLICI (KONEKTORI OKRENUTI PREMA OBJEKTIVU)
- B PRIKLJUČITE KAMERU NA NAPAJANJE
- PRAVILA I OBAVIJESTI
Brand : Lamax
Model : W10.2
Category : Action Camera