
ARC 11.6 - Laptop TechBite - Free user manual and instructions
Find the device manual for free ARC 11.6 TechBite in PDF.


| Product Type | Convertible Laptop with Touchscreen |
| Brand | TechBite |
| Model | ARC 11.6 |
| Dimensions | 277.5 x 190 x 20.2 mm |
| Weight | 1100 g |
| Display Size | 11.6 inches |
| Display Resolution | 1366 x 768 pixels |
| Touchscreen | Yes, Multi-Touch capacitive |
| Processor | Intel Celeron N4020 Dual-Core @ 2.8 GHz |
| Graphics | Intel UHD Graphics 600 |
| RAM | 4 GB DDR |
| Storage Capacity | 128 GB internal + M.2 2280 slot (up to 512 GB) |
| Card Reader | microSD up to 128 GB |
| Operating System | Microsoft Windows 10 64-bit |
| Front Camera | 0.3 MP with microphone |
| Wireless Connectivity | Wi-Fi 802.11 b/g/n (2.4 GHz), Bluetooth 4.0 |
| Audio | Built-in stereo speakers, 3.5 mm minijack |
| Video Output | miniHDMI |
| Ports | 1x USB 2.0, 1x USB 3.0, microSD, power |
| Battery | 4000 mAh, 7.4 V (built-in) |
| Power Supply Input | 100-240 V~, 0.5 A, 50-60 Hz |
| Power Supply Output | 12 V, 24 W |
| Package Contents | Laptop, AC Power Supply, User Manual |
| Additional Features | Fingerprint reader, Windows Hello, 360° hinge, touchscreen, microSD slot |
Frequently Asked Questions - ARC 11.6 TechBite
User questions about ARC 11.6 TechBite
0 question about this device. Answer the ones you know or ask your own.
Ask a new question about this device
Download the instructions for your Laptop in PDF format for free! Find your manual ARC 11.6 - TechBite and take your electronic device back in hand. On this page are published all the documents necessary for the use of your device. ARC 11.6 by TechBite.
USER MANUAL ARC 11.6 TechBite
natural_image
Stacked black laptops with visible Windows 63 and keyboard, arranged in a starburst pattern (no text or symbols on screens)Nr partii: 202104
1. Spis treści
4. Ważne informacje
natural_image
Hand pressing a green button with a blue curved arrow above it (no text or symbols)
natural_image
White hand gesture with blue directional arrows indicating movement or motion (no text or symbols)natural_image
Stacked black laptops with visible Windows 60s and keyboard, arranged in a starburst shape (no text or symbols on screens)Lot number: 202104
We create for you.
Thank you for choosing techBite device. This product has been designed especially for you. We are doing everything to make its use pleasurable and comfortable.
We made sure that elegance, functionality and convenience of use were combined with an affordable price.
For the sake of your safety, please read this manual carefully.
Manufacturer:
mPTech Ltd.
Manufactured in China
User manual
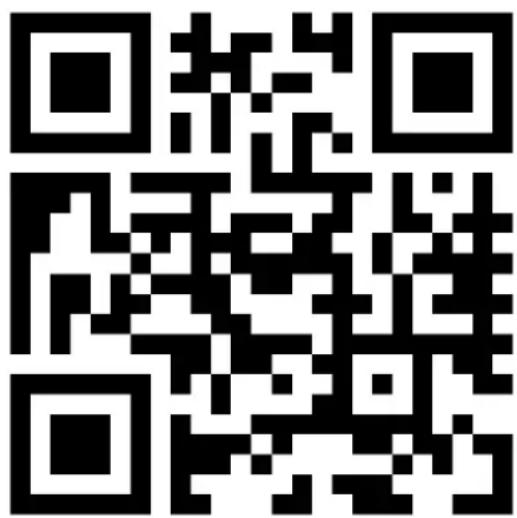
The actual product, accompanying accessories and some of its features may differ from the presented in this manual images and descriptions. The newest version of the manual is available on the website: www.mptech.eu/qr/techbite/ To open this page simply scan this QR Code.
1. Table of contents
- Table of contents....29
- Safety....30
- The use of the manual 31
- Important information....32
- Technical Specification....32
5.1 Technical data 33
5.2 Package content 33
- Appearance of laptop....34
6.1 Screen and desktop 34
6.2 Right side.... 35
6.3 Left side 35
6.4 Bottom 35
- Before the first start....36
- Keyboard....36
- Switching between laptop and tablet modes 37
- Using the touch screen....37
10.1. Touch 37
10.2 Swipe.... 37
10.3 Hold and swipe 37
10.4 Slide in and out.... 37
- Basic support for Windows 10 ....38
EN © 2022 techBite. All rights reserved.
ARC 11.6 128GB HD
11.1 Turning on the device.... 38
11.2 Start screen - desktop 38
11.3 Start menu.... 39
11.4 Taskbar 39
11.5 Notification area.... 40
11.6 Action Center 40
11.7 Tablet mode.... 40
11.8 Turning the device off 41
-
Mounting additional memory M.2 2280 (B or B/M)......41
-
Hello function and use of a fingerprint reader ....43
13.1 Hello function 43
13.2 Fingerprint reader 44
- Safety remarks......47
14.1 Troubleshooting.... 47
14.2 Support for portable memory and memory cards.... 47
14.3 Protection of personal data and important information ...... 47
14.4 Correct battery use remarks 48
- Maintenance of the device 48
- Surroundings security ....49
- The use of the manual....49
17.1 Consents 49
17.2 Appearance.... 49
17.3 Trademarks.... 49
- Correct disposal of used equipment....50
- Correct disposal of used battery 50
- Declaration of conformity with European Union Directives .....50
2. Safety
Read these guidelines carefully. Not following them may be dangerous or illegal.
-DO NOT RISK-
All wireless devices may cause interferences, which could affect the performance of other devices. Do not switch on the device when the use of mobile phones is prohibited or if it might cause interference or danger.
—PETROL STATIONS—
Always turn off the device while refuelling your car on petrol station. Do not use your device close to chemicals.
-WI-FI (WLAN)-
In the European Union Member States, a WLAN network may be used indoors without any restrictions.
—RESTRICTED AREAS—
Switch OFF the device in an airplane since it may disturb the operation of other equipment located therein. The device may interfere with operation of the medical equipment in hospitals and health protection entities. Abide by any kinds of prohibitions, regulations and warnings conveyed by the medical staff.
-QUALIFIED SERVICE-
Only qualified personnel or an authorized service center may install or repair this product. Repairing by an unauthorized or unqualified service may cause device damage and warranty loss.
—PHYSICALLY OR MENTALLY DISABLED PEOPLE—
This device should not be operated by people (including children) with limited physical or mental abilities, as well as by people with no earlier experience in operation of electronic equipment. They may use the device only under supervision of people responsible for their safety. This device is not a toy. Cables and plastic parts of packaging may wrap around a child's neck and cause strangulation or other health problems. Keep the device and its accessories out of reach of children.
—BATTERY AND ACCESSORIES—
Avoid exposing the battery to very high/low temperatures (below 0^ C/ 32^ F and over 40^ C/ 104^ F). Extreme temperatures may influence capacity and battery life. Avoid contact with liquids and metal objects as it may cause partial or complete battery damage. The battery should be used according to its purpose. Do not destroy, impair or throw the battery into flames - it is dangerous and may cause fire. Worn-out or impaired battery should be placed in a dedicated container. A single battery charge should not last longer than 1 day. Installing an incorrect battery type can cause an explosion. Never open the battery. Please dispose of battery according to the instructions. Disconnect an unused charger from power grid. Disconnect an unused charger from power grid. In case of the charger wire damage, it should not be repaired but replaced with a new one. Use the original manufacturer's accessories only.
-ROAD SAFETY-
Do not use this device while driving any kind of vehicle.
-HEARING-
To avoid hearing damage, do not use the device at high volume levels for a long period of time, do not put operating device directly to the ear.
3. The use of the manual
The device and screen shots contained in this manual may differ from the actual product. Accessories attached to the Laptop may differ from the illustrations included in manual. Options described in the manual are found in Microsoft Windows 10 system. Those descriptions may differ, depending on the version of the operating system and applications installed on the device.
You can find a comprehensive manual of Microsoft Windows 10 manuals and components at the address below: https://support.microsoft.com/en-us/products/windows?os=windows-10
It can be reached by scanning the QR code presented below.

4. Important information
The majority of applications which can be installed on the device are Microsoft Store applications. Applications installed on the device may vary depending on country, region, and hardware specifications. The manufacturer is not liable for problems caused by third party software. The manufacturer is not responsible for anomalies that may occur when editing the registry settings and modifying the operating system software. Attempts to modify the operating system can cause malfunctions and problems with applications and may lead to a loss of warranty.
5. Technical Specification

Touchscreen 11.6" and 1366x768 px resolution
The modern display provides deep colors and a wide viewing angle, allowing you to appreciate movies, photos and games in incredible, real and juicy colors.

Multi-Touch
Touchscreen provides a really fun to work with ARC 11.6. Play, write, draw, rotate images, maps - all on a top-quality capacitive screen.
Wi-Fi
Laptop ARC 11.6 is equipped with Wi-Fi r, providing data transmission at speeds compatible with 802.11 b/g/n, so you can wirelessly connect to the the omnipresent hot spots and home network. Receive and send data, programs, and files without restrictions to the network and other devices.

MicroSD card reader - up to 128 GB
Laptop ARC 11.6 does not have problems with storage memory capacity. Use exchangeable microSD cards and do not worry about where you save the music, movies and photos.
5.1 Technical data
| Display | 11.6", HD 1366x768 px, touchscreen |
| Processor | Intel Celeron N4020 Dual-Core@2.8GHz |
| Graphics | Intel UHD Graphics 600 |
| RAM memory | 4 GB DDR |
| Data carrier capacity | 128 GB + additional memory slot M.2 2280 (B-type connector) up to 512 GB |
| The card reader | microSD (up to 128 GB) |
| Operating system | Microsoft Windows 10, 64-bit |
| Camcorder | 0.3 Mpix with microphone |
| Connectivity | Wi-Fi 802.11 b/g/n (2.4 GHz), Bluetooth 4.0 |
| Audio | Built-in stereo speakersMinijack port 3.5 mm |
| Video output | miniHDMI |
| Ports | 1xUSB 2.0, 1xUSB 3.0, minijack 3.5 mm, miniHDMI, microSD, power |
| Battery | 4000 mAh 7.4V (built-in) |
| Power supply input parameters | 100-240 V~, 0.5A, 50-60Hz, |
| Power supply output parameters | 12V , 24W |
| Dimensions | 277,5 x 190 x 20,2 mm |
| Net weight | 1100g |
5.2 Package content
• Laptop ARC 11.6 128GB HD
- AC Power Supply
- User manual

If any of the above items is missing or damaged, please contact your dealer.

We advise to keep the container in case of any complaints. Keep the container out each of children.

Dispose of container in accordance with local regulations when it is no longer led.
6. Appearance of laptop
6.1 Screen and desktop

- Screen
- Camera
- Hinges
-
Microphones
-
LED status indicator
- Keypad
- Fingerprint reader
- Touch panel
6.2 Right side

-
Power button
-
microSD card(s) slot
-
USB port 2.0
-
Audio socket
6.3 Left side

-
Supply socket
-
USB port 3.0
-
MiniHDMI socket
6.4 Bottom
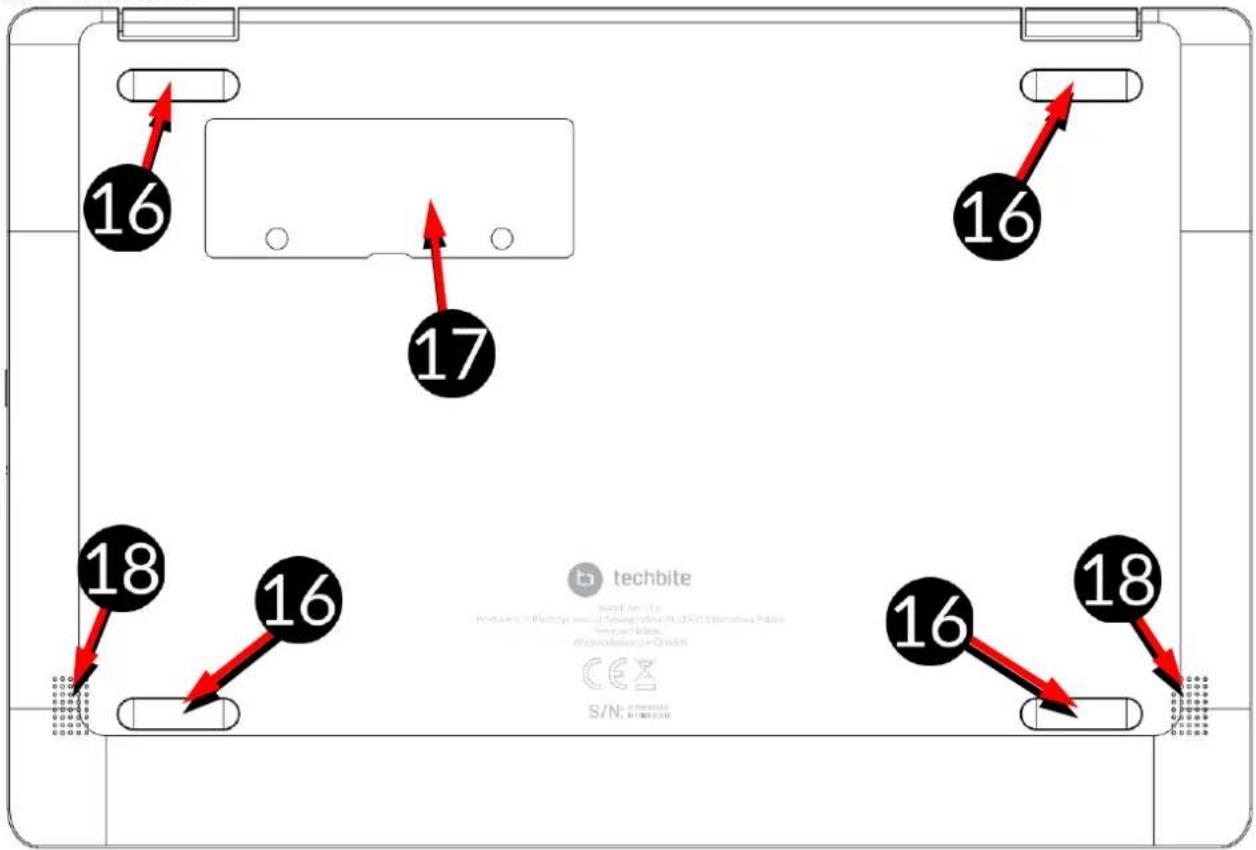
-
Rubber pad
-
Memory slot cover
-
Speaker
7. Before the first start
Before turning the device on for the first time, charge the battery using the supplied power supply unit. Use only power supply recommended by the manufacturer. Using incompatible power supply can cause explosion of the battery or damage to your device. If in doubt contact the seller or manufacturer service. When the battery is near a complete discharge, the notification is displayed on a low battery charge. To continue use of the device charge the battery. If the battery is completely discharged the device can not be switched on even when the loading process is ongoing. If so, the battery has to be charged for at least a few minutes.
To charge the battery, connect the plug on the power supply cable to the unit's power outlet (13).
Do not use excessive force for it can cause damage to the AC adapter or the device. The damages resulting from improper handling are not covered by the warranty.
Plug the power supply into the wall socket.
The device can heat up during charging. It is a regular occurrence and should not affect the stability or performance of the device.
If the device does not charge properly or there are other problems with the battery, it should be delivered with the power supply to the manufacturer's service center.
8. Keyboard
The laptop keyboard has a standard QWERTY layout. In addition, there are directional buttons in the lower right corner. Text is entered using the keyboard.

Thanks to combinations of some keys with the Fn button, it is possible to use additional functions of the device and Microsoft Windows. Additional features include starting the sleep mode, increasing or decreasing the volume and brightness of the screen, muteing and controlling the media, switching the display between the built-in and optional miniHDMI screens, and operating the numeric keypad.
9. Switching between laptop and tablet modes
The device can work both as a laptop and tablet. All this thanks to the touch screen screen and the system of hinges that allow you to rotate the display in relation to the base by 360 degrees. A built-in position sensor ensures that the screen image adapts to the position where the device is held or resting on the tabletop.
The device should be positioned where there is no risk of falling, slipping or being dropped. Any mechanical damage is not covered by the warranty.
10. Using the touch screen
A touch screen of the laptop lets you easily select items or perform operations. The touchscreen can be controlled by the following actions:
10.1. Touch
Touch one to start options, app, menu.
10.2 Swipe
Quickly swipe up, down, to the left or to the right, to scroll the list or the screen.
10.3 Hold and swipe
Touch an element (an icon perhaps) and hold it for about 1 second. Then you can delete/uninstall that element.
10.4 Slide in and out
Touch the screen with two fingers and slide them together or apart to zoom in or out a photo or a map.

flowchart
graph TD
    A["Hand with green circle"] --> B["Arrow to green circle"]
    B --> C["Arrow to blue arrow"]
    C --> D["Hand with green circle"]
    D --> E["Arrow to blue arrow"]
    E --> F["Hand with green circle"]
The touch screen will be turned off after some time of inactivity. To turn off the screen press the blockade button.
11. Basic support for Windows 10
Your device has Microsoft Windows 10 installed.
To work with Microsoft Windows 10, you must have or create a Microsoft account and log-in when you first boot up your operating system.
11.1 Turning on the device
Briefly press switch (9) to turn the device on.
11.2 Start screen - desktop

The start screen contains the application icons, the START button (the lower left corner of the screen) and the taskbar (the bottom right of the screen, next to START button). You can place application icons, shortcuts to applications or documents, links to websites, widgets, etc. on your screen. You can also place shortcuts to applications and web pages in the taskbar, but also icons that symbolize open and active applications. START button activates the start menu.
11.3 Start menu

Buttons - Accounts, Documents, Images, Settings, Power
The start menu allows you to run the applications (programs) installed on your computer. This version of the system combines the advantages of a menu known from Windows 7 and above with a modern tiled menu known from Windows 8 and 8.1. On the left there are buttons that transfer you to the menu managing user accounts, documents, images, system settings and power (here you can switch your computer into standby, turn it off or restart it). In the middle we have selected a list of all the programs installed on your computer. It can be scrolled up and down, giving you access to all your applications. At the top of this field are the most recently installed and frequently used programs. There are also applications for installation suggested by the Microsoft Store. Below you will find a list of alphabetically sorted programs. On the right there is a start-up screen with tiles. This is an alternative way to run the installed applications. Tiles are also in use in tablet mode.
11.4 Taskbar
The taskbar is located at the bottom of the start screen - desktop. There is a START button on the left. Another icon is a magnifying glass, which allows you to quickly find applications installed on your system - if you know he name of the application. The next icon opens a chronological view of your computer activities. Then there are the application icons, which you can insert and delete yourself. They allow you to launch applications quickly. Here, too, the icons for running programs appear temporarily and disappear when you close them. This makes it easier to find out which programs are active. There is a notification area on the right side of the taskbar.
11.5 Notification area
The notification area is where the icons for applications working in the background are located. The first icon shows Contacts, the next icon shows hidden icons of applications that are running less frequently in the background. Next, there is the power icon (it shows the battery level and whether the charging is running when the power supply is connected). The next icon allows you to view and control Wi-Fi, followed by the next icon for media volume. The touch keyboard icon allows you to activate it in both tablet and laptop mode. Then the time and date are shown. At the end of the screen you can see the icon of the Action Center.
11.6 Action Center

The action center allows you to view the messages that the system sends out in relation to the system's activities and presents descriptions of problems that occur. Below you will find tiles that allow you to quickly run some of the functions of your computer or to access useful menus. There is also a Tablet mode button here, which toggles the system desktop to a touchscreen display that you can control.
11.7 Tablet mode
When the tablet mode button is pressed, the desktop switches to the device mode via the touch screen only. The responsiveness of the screen increases and tiles appear on the screen instead of the start menu. Then you can rotate the device screen to use the device like a tablet. In this position, the laptop keyboard is locked, so there is no risk of causing any unwanted action. If you turn the display to the normal laptop position, the system will request the tablet mode to be disabled - this can also be set to automatic switching. When you turn off Tablet mode, the desktop changes from Tiled to Icon mode, the keyboard is activated and the display sensitivity decreases.
11.8 Turning the device off

To turn your laptop into the sleep mode, turn it off or restart, select the start menu and then select the power icon. A menu will appear to select one of the desired actions.
If you select Sleep mode, the drive will stop operating and the device screen will fade, saving power without turning off the computer. It is faster to return from sleep mode than to switch on the laptop again.
Selecting the Switch off option will turn off your laptop completely.
Selecting Restart will switch the laptop off and on again automatically.
12. Mounting additional memory M.2 2280 (B or B/M)
The memory of the device can be extended by installing the M.2 2280 module in a socket on the underside underneath a screw-on cover with a B or B/M connector.
The B/M format is versatile and can be used in both B and M sockets. The M-format cannot be used in this device. Formats differ in the position of the indentation and the number of connections.
When buying a memory expansion module, ask your retailer to check if it fits into your device's slot and if it works properly.
Do not insert the memory module by force, as you may damage the memory module and the slot, which may lead to the loss of warranty for the device.

Differences between sockets and connectors B and M. Source: Wikipedia.org
To mount the memory in the device, close the flap and place the memory on it. This is best done on a soft, stable and flat surface (e.g. a dry towel on a table top or desk) so that the housing is not scratched.

Locate the memory cover. It has two screws.
Unscrew both screws with a small crosshead screwdriver. Gently raise the cover at the cut-out location and lift it off.

Unscrew the retaining screw and remove it. Slide the M.2 2280 gently into the connector until the cut-out in the module fits into the socket. Secure the module by gently screwing it to the housing. Replace the compartment cover and tighten the screws that secure it.
With the help of the tool located in:
Control panel \ All elements of the control panel \ Administrative tools \ Computer management \ Disk management
You can create and delete partitions on the new disc. Once you have set up your operating system partition, find the new disc and format it according to your preferences.
We strongly advise against any manipulation of the parameters of "Disc 0", which is a system disc, as any problems caused by interference in its structure may result in voiding the warranty.
13. Hello function and use of a fingerprint reader
13.1 Hello function
When Windows Hello is enabled, you can log in using fingerprint recognition. This allows for faster and safer logging in to the operating system, as well as to selected applications or websites. To enable and configure this function, run the following Start > Settings > Accounts > Sign-in options.
Sign-in options
Manage how you sign in to your device
Select a sign-in option to add, change, or remove it.

Windows Hello Face
This option is currently unavailable—click to learn more

Windows Hello Fingerprint
Sign in with your fingerprint scanner (Recommended)

Windows Hello PIN
Sign in with a PIN (Recommended)

Security Key
Sign in with a physical security key

Password
Sign in with your account's password

Picture Password
Swipe and tap your favorite photo to unlock your device
Require sign-in
If you've been away, when should Windows require you to sign in again?
When PC wakes up from sleep

In order to use other login options you need to set a password to your account.
13.2 Fingerprint reader
The device is equipped with a fingerprint reader located in the upper left corner of the touch panel. It can be used to protect your operating system from unauthorized access in the same way as a password, PIN code or other form of security. To enable and configure this function, run the following:
Start > Settings > Accounts > Login options.
A screen such as the one shown above will appear.
Select option Windows Hello Fingerprint. The screen as shown below will appear.
Windows Hello setup

Welcome to Windows Hello
Your device just got more personal. Say goodbye to entering complex passwords and start using Windows Hello to unlock your device, verify your identity, and buy things in the Store using your fingerprint.
Learn more
Get started
Cancel
Select Start.
The screen as shown below will appear.

Touch the reader with your finger which you will use to unlock the operating system. The screen as shown below will appear.

Follow the instructions and suggestions in the wizard. Move your finger slightly within the sensor, rotate it sideways so that the sensor collects as much data as possible. You can also add other fingerprints. You can also delete stored fingerprints to refresh them in the system database.
14. Safety remarks
14.1 Troubleshooting
If you have any problems with the device, please read the following advice and follow the instructions below.
- MicroSD Memory Card - Make sure that the microSD memory card is installed correctly in the correct microSD slot for the microSD cards. If it does not help use another memory card of appropriate class and capacity.
- USB socket - Check the cable by connecting another device. If it doesn't help, use another cable.
- Internet / Wi-Fi - Check if the aeroplane mode is not on because it disables using any wireless network functions. Check network range. Check if the function is activated in the device and the parameters set correctly. Check the login password to the Wi-Fi network.
- Bluetooth - check whether the connection is active and Bluetooth visibility options are enabled. Make sure that both devices are in Bluetooth connection range and there are no obstacles between them (interesting fact - some LCDs absorb magnetic waves). Make sure that the devices have a sufficient amount of memory to exchange files. Check if both devices work in aeroplane mode (Aeroplane mode blocks Bluetooth).
- Sounds - make sure that the sound in the laptop is not muted. Check other laptop sound settings. Make sure that the headset, speaker, or microphone cable plug is not plugged into the 3.5 mm mini-jack socket. Some minijack tips are different from others, and this may also cause a sound problem - try a different cable or use an adapter.
- Although the battery is being charged, its level of charge is constantly dropping - turn off all options such as Wi-Fi, Bluetooth, Location, and then reduce the brightness of the screen, then turn on the aircraft mode in the device and stop working intensively or limit it for the duration of charging. Those easy steps will accelerate the charging process. It is recommended to charge the device with the charger supplied by the manufacturer.
If the problem persists, contact your dealer.
14.2 Support for portable memory and memory cards
- Do not remove portable memories or memory cards when the information is being transferred to or used by the device. This may cause data loss or damage to the portable memory and/or the device.
- Do not touch the pins with your fingers or metal objects. In case of any dirt, wipe the portable memory with a soft dry cloth.
14.3 Protection of personal data and important information
- We recommend regular backups of important data. The manufacturer is not liable for any loss of information.
- Before selling or donating the device, delete all data and restore the laptop to its factory settings. This way you can protect yourself from accessing your personal information by unauthorized people.
- Downloading applications, refer to the on-screen information. Particular caution should be exercised in the case of applications that have access to many functions or to a significant amount of personal information.
- Regularly check your account in terms of unauthorized or suspicious use. If traces of misuse of personal information are discovered, contact your service provider to delete or change your account information.
- In the case of loss or theft of the device immediately change the passwords for the accounts (system, email, social networking, etc.).
- Try not to use applications coming from unknown sources. Lock the device using the password, fingerprint or PIN code.
- Do not distribute copyright-protected material.
- Do not distribute copyrighted content without permission of the copyright holder. Failure to do so may result in copyright infringement. The manufacturer is not liable for any legal consequences of illegal use by the user of copyrighted material.
- Use anti-virus software, which regularly update the virus signature database.
14.4 Correct battery use remarks
- If the battery level is low, recharge it to continue the use of the phone. If you wish to prolong the battery lifespan, discharge the battery beneath 10% of the battery capacity and charge it back to 100%.
- The temperature of the battery has an impact on its charging cycle. Prior to the charging process, cool the battery and the device or raise its temperature so that it is similar to the room temperature. If the battery temperature exceeds 40^ C the battery must not be charged!
- Do not use a damaged battery!
- The battery life span can be shortened, if it has been exposed to very low or very high temperatures - this causes interference to the device, even when the battery has been properly charged.
15. Maintenance of the device
To prolong the lifespan of the device act according to these instructions.
- Keep the device and its accessories out of reach of children.
- Avoid contact with liquids; it can cause damage to electronic components of the device.
- Avoid very high temperatures for it can shorten the life of device electronic components, melt the plastic parts and destroy the battery.
- Do not try to disassemble the device. Tampering with the device in an unprofessional manner may cause serious damage to the phone or destroy it completely.
- For cleaning use only a dry, soft cloth.
- Use the original accessories only. Violation of this rule may result in an invalidation of the warranty.

The packaging of the device can be recycled in accordance with local regulations.

Symbol for cardboard.
PAP
16. Surroundings security
Turn off the device in areas where its use is forbidden or when it may cause interference or danger. The use of any devices that radio waves causes interference with medical devices (i.e. cardiac pacemaker), if they are not properly secured (if in doubt, consult your doctor or medical device manufacturer). Please observe the national and local regulations at the place of use.
| Attention | Statement |
| The manufacturer is not responsible for any consequences caused by improper usage of the device and not obeying the above instructions. | The software version can be upgraded without earlier notice. |
| Frequency Range | Wi-Fi 2412-2472 MHz | Bluetooth 2402-2480 MHz |
| Transmit Power | 10,44 dBm EIRP | 4,79 dBm EIRP |
17. The use of the manual
17.1 Consents
Without prior written consent of the manufacturer, no part of this manual may be photocopied, reproduced, translated or transmitted in any form or by any means, electronic or mechanical, including photocopying, recording or storing in any systems of storing and sharing information.
17.2 Appearance
The device and screen shots contained in this manual may differ from the actual product. Accessories attached to the set may differ from the illustrations included in manual.
17.3 Trademarks
- Wi-Fi® Wi-Fi logo are a registered trademarks Wi-Fi Alliance association.
- All other trademarks and copyrights belong to their respective owners.
18. Correct disposal of used equipment
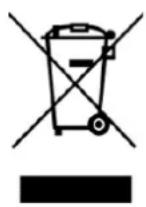
The device is marked with a crossed-out garbage bin, in accordance with the European Directive 2012/19/EU on used electrical and electronic Equipment (Waste Electrical and Electronic equipment - WEEE). Products marked with this symbol should not be disposed of or dumped with other household waste after a period of use. The user is obliged to dispose of waste electrical and electronic equipment by delivering it to a designated recycling facility. Collecting this type of waste in designated locations, and the actual process of their recovery contribute to the protection of natural resources. Proper disposal of used electrical and electronic equipment is beneficial to human health and environment. Information on where and how to dispose of waste electrical and electronic equipment in an environmentally sound manner shall be provided by the relevant local authorities, collection or sales points where the equipment was purchased.
19. Correct disposal of used battery

According to the EU directive 2006/66/EC with changes contained in EU directive 2013/56/UE on the disposal of batteries, this product is marked with crossed-out garbage bin symbol. The symbol indicates that the batteries used in this product should not be disposed with regular household waste, but treated according to the legal directives and local regulations. It is not allowed to dispose of batteries and accumulators with unsorted municipal waste. Users of batteries and accumulators must use the available collection points of these items, which allows them to return, recycle and disposal. Within the EU, the collection and recycling of batteries and accumulators is a subject to separate procedures. To learn more about existing procedures of recycling of batteries and accumulators please contact your local office or an institution for waste disposal or landfill.
20. Declaration of conformity with European Union Directives

mPTech Ltd. hereby declares that laptop ARC 11.6 is compliant with Directive 2014/53/EU. The full text of the EU Declaration of Conformity is available at the following Internet address:
www.mptech.eu/qr/techbite/


- Spis treści
- Ważne informacje
- We create for you.
- Manufacturer:
- User manual
- Table of contents
- Safety
- -DO NOT RISK-
- —PETROL STATIONS—
- -WI-FI (WLAN)-
- —RESTRICTED AREAS—
- -QUALIFIED SERVICE-
- —PHYSICALLY OR MENTALLY DISABLED PEOPLE—
- —BATTERY AND ACCESSORIES—
- -ROAD SAFETY-
- -HEARING-
- The use of the manual
- Important information
- Technical Specification
- Touchscreen 11.6" and 1366x768 px resolution
- Multi-Touch
- Wi-Fi
- MicroSD card reader - up to 128 GB
- Package content
- Appearance of laptop
- Screen and desktop
- Right side
- Left side
- Bottom
- Before the first start
- Keyboard
- Switching between laptop and tablet modes
- Using the touch screen
- Touch
- Swipe
- Hold and swipe
- Slide in and out
- Basic support for Windows 10
- Turning on the device
- Start menu
- Taskbar
- Notification area
- Action Center
- Tablet mode
- Turning the device off
- Mounting additional memory M.2 2280 (B or B/M)
- Control panel \ All elements of the control panel \ Administrative tools \ Computer management \ Disk management
- Hello function and use of a fingerprint reader
- Hello function
- Sign-in options
- Fingerprint reader
- Welcome to Windows Hello
- Safety remarks
- Troubleshooting
- If the problem persists, contact your dealer.
- Support for portable memory and memory cards
- Protection of personal data and important information
- Correct battery use remarks
- Maintenance of the device
- Surroundings security
- The use of the manual
- Consents
- Appearance
- Trademarks
- Correct disposal of used equipment
- Correct disposal of used battery
- Declaration of conformity with European Union Directives
Brand : TechBite
Model : ARC 11.6
Category : Laptop