
IR 237 BTDAB - Radio GoGen - Free user manual and instructions
Find the device manual for free IR 237 BTDAB GoGen in PDF.


| Product Type | Portable DAB+/FM Radio |
| Brand | GoGen |
| Model | IR 237 BTDAB |
| Dimensions (approx.) | 200 x 130 x 70 mm |
| Weight (approx.) | 0.5 kg |
| Power Supply | Mains AC 230V 50Hz or 4 x AA batteries |
| Radio Bands | DAB/DAB+ (Band III), FM 87.5-108 MHz |
| Preset Stations | 20 (10 DAB, 10 FM) |
| Alarm Function | Dual alarm with buzzer or radio wake-up |
| Sleep Timer | Yes, adjustable (15-120 min) |
| Display | LCD with backlight |
| Headphone Jack | 3.5 mm stereo |
| Speaker | Built-in mono speaker |
| Antenna | Telescopic for DAB/FM |
| Maintenance | Clean with a soft, dry cloth; do not use solvents |
| Safety Instructions | Do not expose to rain or moisture; use indoors only |
| Spare Parts / Repairability | Contact authorized service center; no user-serviceable parts |
Frequently Asked Questions - IR 237 BTDAB GoGen
User questions about IR 237 BTDAB GoGen
0 question about this device. Answer the ones you know or ask your own.
Ask a new question about this device
Download the instructions for your Radio in PDF format for free! Find your manual IR 237 BTDAB - GoGen and take your electronic device back in hand. On this page are published all the documents necessary for the use of your device. IR 237 BTDAB by GoGen.
USER MANUAL IR 237 BTDAB GoGen
Thank you for buying our product. Please read through these operating instructions, so you will know how to operate your equipment properly. After you finished reading the instructions manual, put it away in a safe place for future reference.
SAFETY
General
- Do not drop the device and do not expose it to liquid, moisture or humidity. These might lead to damage to the device.
- If the device is moved from a cold environment into a warmer one, do let it adapt to the new temperature before operate the device. Otherwise, it might lead to condensation and cause malfunctions in the device.
- Do not use the device in the dust environment as dust can damage the interior electronic components and lead to malfunctions in the device.
- Protect the device from strong vibrations and place it on stable surfaces.
- Do not attempt to disassembly the device.
- If the device is not using for a long period of time, disconnect it from the power supply by unplugging the power plug. This is to avoid the risk of fire.
- The ventilation should not be impeded by covering the ventilation openings with items, such as newspapers, table-cloths, curtains, etc.
- No naked flame sources, such as lighted candles, should be placed on the apparatus.
- To maintain the compliance with the WiFi RF exposure requirement, place the product at least 20 cm from nearby persons except when operating the controls.
Power adapter
- Only use the power adaptor delivered with the device.
- The socket outlet should be installed near the device and should be easily accessible.
- Never touch the power plug with wet hands and never pull on the power cable when pulling the plug out of the power socket.
- Make sure the electrical voltage specified on the device and its power plug is corresponding to the voltage of the power socket. Incorrect voltage will destroy the device.
Risks associated with high volumes
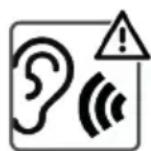
Connect headphones with volume set low and increase it if required. Prolonged listening through some headphones at high volume settings can result in hearing damage. To prevent possible hearing damage, do not listen at high volume levels for long periods.
Battery handling and usage
- Only adults should handle battery. Do not allow a child to use this apparatus unless the battery cover is securely attached.
- Remove batteries if exhausted or if they will not be used again for a long period. The incorrect use of batteries can cause electrolyte leakage and will corrode the compartment or cause the batteries to burst, therefore:
- Do not mix battery types, e.g. alkaline with zinc carbonate.
- When inserting new batteries, replace all batteries at the same time.
- Batteries contain chemical substances, so they should be disposed of properly.
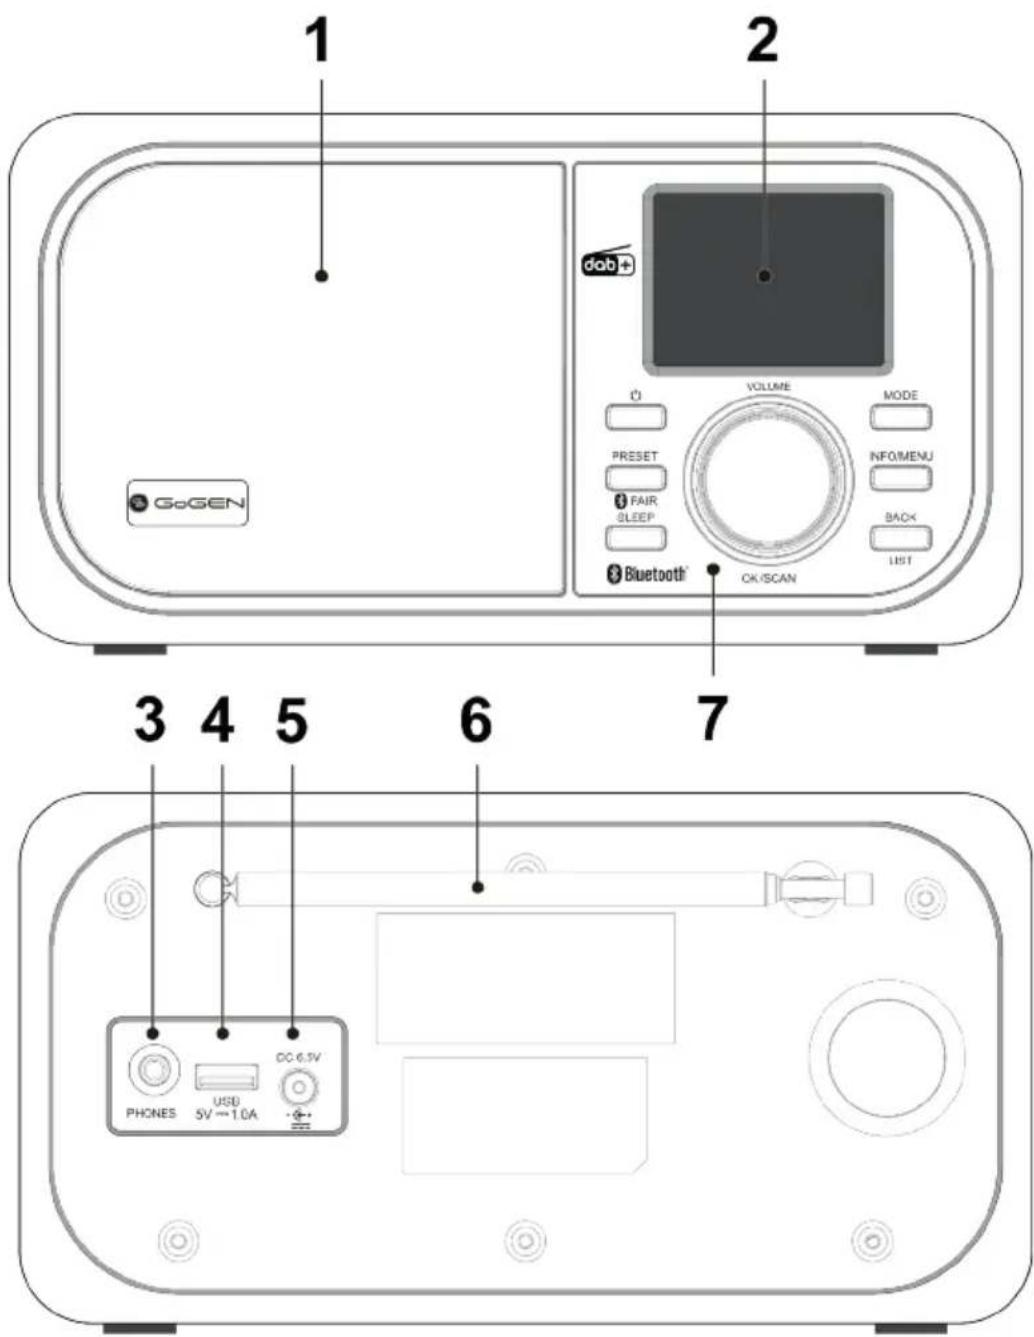
- Speaker
- Display
- Headphone output
- USB port
- DC IN socket
-
Antenna
-
Control buttons:
button
PRESET/PAIR button
SLEEP button
VOLUME/OK/SCAN knob
MODE button
INFO/MENU button
BACK/LIST button
REMOTE CONTROL BUTTONS
| Power on/offAlarm Off | |
| SNOOZE | Press repeatedly to set the snooze period |
| I<</▶▶ | FM: Press repeatedly to set desired station/frequencyPress and hold to search for the previous/next stationDAB: Press to skip to the previous/next stationUSB/BT: Press to skip to the previous/next track |
| ▶▶ | USB/BT: Start/Pause playback |
| ■ | USB/BT: Stop playback |
| ○ | USB: Repeat playback |
| × | USB: Random playback |
| ∠ | Press repeatedly to set the sleep timer |
| 1 | Alarm1/Alarm2 settingStandby mode: Activation/deactivation of the Alarm 1/Alarm 2 |
| INFO | Press repeatedly to view information about the currently playing content |
| BACK | Step backDAB: Press to view the Station list |
| SCAN | FM: Press to search for the next stationDAB: Press to start a full scan |
| EQ | Select equalizer preset |
| MODE | Mode selection |
| MENU | Open menu |
| ^/√ | Move up/downFM: Press repeatedly to set desired station/frequency |
| VOL+/- | Increase/Decrease volumeStep forward/Step back in the menuConfirm entry |
| OK | FM: Press to search for the next stationDAB : Press to view the picture or information in the full-screen size |
| P+/- | Up/down preset selection |
| 0~9 | Press to select a preset 1-9 directlyPress and hold to store a radio station to the presets 1-9 directly |
| Mute, unmute | |
| PRESET | Press and hold to store a radio station to the presetsPress to select a preset |
To install the batteries
Lift off the battery compartment cover from the rear of the remote control. Insert 2 x 1,5V AAA size batteries in accordance with the diagram in the battery compartment. Take care to observe the correct polarity.
Remote control operation
To operate the device with the remote control, point the remote handset at the remote sensor on the front panel and press the appropriate button on the remote handset.
The remote works best within a range of 6 \~ 7 meters from the front panel and on an angle of 30 degrees. Bright sunlight or room light conditions can interfere with the remote control. If the remote operation is unsatisfactory or stops working entirely, first try replacing the remote batteries, then try reducing the room lighting conditions.
GETTING STARTED
Connect the power adaptor to the back of device and plug it into power socket. Pull out the rod DAB/FM antenna for DAB and FM reception.
Connecting the headphones
Turn the volume down before using the headphones. Inset the headphone plug (standard 3,5 mm) into the headphone socket.
GENERAL DEVICE FUNCTIONS
Power on/off
Press the button to switch on the device. Press the same button again to switch the device back to Standby mode. The time, WiFi connection status and any active alarm times display on the screen.
Menu operation
Press and hold the INFO/MENU button to open the menu. On the menu, rotate the VOLUME/OK knob move along the entries. Press the VOLUME/OK knob to confirm. Press the BACK button to step back or exit the menu.
Mode selection
Press MODE to select modes. Rotate the VOLUME/OK knob to select mode. Press the VOLUME/OK knob to confirm.
Volume
Rotate the VOLUME knob to adjust the volume.
Presets
To store a radio station to the presets, press and hold the PRESET button, the display shows the [Save to Preset] screen. Select one of the 20 presets, and press the VOLUME/OK knob to confirm. To select a preset, press the PRESET button, the display shows the [Recall from Preset] screen. Select one of the listed preset stations, press the VOLUME/OK knob to confirm.
NOTE: When a preset station is playing, it shows [★ 1], [★ 2], etc. at the bottom of the display.
Now playing information
While stream/DAB/FM is playing, the screen shows some information about the station, press the INFO/MENU button to view.
Press the VOLUME/OK knob to view the picture or information in the full-screen size.
FIRST INSTALLATION
The default language is Czech. If you need to change the language, you have to go through the first installation. After changing the language, you will be able to launch the first installation in your language again. Follow the steps below:
- When powering the device on for the first time, it displays information of the privacy policy. Press the VOLUME/OK knob to continue.
- In the next step [Začít ted?], choose [NE].
- In the next step [Spustit znovu průvodce při příštím spuštění?], choose [NE].
- The main menu will appear, select [Nastavení] >[Jazyk] and set your language.
- Press the BACK button and select [Setup wizard] to launch the first installation.
Setting time and date
- Select [12] for 12-hour display format or [24] for 24-hour display format. If you select the 12-hour format, the display shows AM in the morning or PM in the afternoon after the time.
- Choose how the time data will be synchronized: [Update from DAB], [Update from FM], [Update from Network] or [No update].
NOTE: If you choose [Update from Network] you must set your time zone [Set timezone], and in the next step summer time [Daylight saving]. If you choose [No update], you will have to enter the date and time manually.
Setting network
- If you want to control the device in all operating modes via the app, set [Keep network connected?] to [YES]. If choosing [NO], it won't be possible to control the device from the app in the (Standby, AUX IN, FM, DAB) operating modes.
Note: The power consumption in standby mode will be higher when the network connection is kept up.
- The device searches for WLAN networks. After the search is finished, a list of available networks will be displayed. Select your preferred network and enter the password.
NOTE: To enter the password, use the VOLUME/OK knob to highlight the next relevant character and press the knob to select each character in turn. Backspace (BCSP), OK and Cancel can be found on the right of the password screen.
Once the installation is complete, press the VOLUME/OK knob to start using the device.
MODE SELECTION
INTERNET RADIO / PODCASTS
The device can play thousands of radio stations and podcasts from around the world through a broadband Internet connection. When you select Internet radio or Podcasts mode, the device directly contacts the portal to get a list of stations or podcasts, organized into different categories like Country, Popular, Genre, and so on. Choose the required category and search for the station or podcast to listen to.
NOTE: The contents and submenus may change from time to time.
MUSIC PLAYER / USB
NOTE: Only MP3 audio format is supported. The device supports USB drives up to 32 GB. The USB port does not support charging.
Playback
To view files stored on USB, press MENU and choose [USB Playback]. Select the desired folder/track and press OK to start playback.
My playlist
To add a track to the [My playlist], press and hold the OK button while playing the desired track. To view the added tracks, press MENU and choose [My playlist]. To delete the list, press MENU and choose [Clear My playlist].
Repeat playback
Press button on the remote control, the display will show [] and the current folder will be played repeatedly. To cancel press the same button.
Random playback
Press button on the remote control, the display will show [] and the tracks from the current folder will be played randomly. To cancel press the same button.
DAB+ RADIO
DAB mode receives DAB/DAB+ digital radio and displays information about the station, stream and track playing.
Scanning for stations
- The first time you select DAB radio mode, or if the station list is empty, the radio automatically performs a full scan to see what stations are available.
- To start a full scan choose [Scan] in the menu.
- To start a manual tune choose [Manual tune] and the desired frequency.
Station selection
To view the station list press the BACK/SLEEP button or select [Station list] in the menu. Rotate the VOLUME/OK knob to select the desired station, and press the knob to confirm the selection.
Settings menu
[Prune invalid] > Once the scan is complete, the radio shows a list of available stations. To remove all invalid stations (marked with ?) that are listed but not available choose this option.
[DRC] (Dynamic range compression) > If you are listening to music with a high dynamic range in a noisy environment, you may wish to compress the audio dynamic range. This makes quiet sounds louder, and loud sounds quieter. You can change DRC as off, low or high.
[Station order] > You can choose the order of the DAB station list to be either Alphanumeric, Ensemble.
FM RADIO
FM radio mode receives analog radio from the FM band and displays RDS (Radio Data System) information about the station and where broadcast.
Scanning for stations
- Press the VOLUME/OK/SCAN knob on the device to search for the next station.
- Press repeatedly the / button on the remote control to set desired station/frequency. Press and hold the same button to search for the previous/next station.
Settings menu
[Scan settings] > By default, FM scans stop at any available station. This may result in a poor signal-to-noise ratio (hiss) from weak stations. To change the scan settings to stop only at stations with good signal strength, select [YES] after choosing [Strong station only?].
[Audio settings] > All stereo stations are reproduced in stereo. For weak stations, this may result in a poor signal-to-noise ratio (hiss). To play weak stations in mono, select [YES] after choosing [Listen in mono only?].
BLUETOOTH
Pair your phone with the device before listening to music. If the device is not paired with any phone, the ☒con will flash at the bottom display. Activate Bluetooth of mobile phone and search for device name "IR 237 BTDAB" then connect it.
NOTE: If you are asked to enter a passcode, enter 0000.
If the pairing is successful, the 📄con will be solid and you can use the device to listen to music from your mobile phone.
NOTE: The operational range between the unit and the device is approximately 8 meters. If the signal strength is weak, your Bluetooth receiver may disconnect, but it will re-enter pairing mode automatically. For better signal reception, remove any obstacles between the unit and the Bluetooth device. Compatibility with all devices and media types is not guaranteed. Some mobile phones with Bluetooth functions may connect and disconnect as you make and end calls. This is not an indication of a problem with your unit.
Disconnecting the paired mobile phone
To disconnect your phone from the device, press and hold PRESET/PAIR button.
ALARM
There are two wake-up alarms with a snooze facility. Each alarm can be set to start in a particular mode.
Select [Alarms] under the [Main menu] to set or change an alarm. After setup all the parameters, select [Save] to activate.
NOTE: When the alarm is set, it shows the [ 🔑 ] and/or [ 🔒 ] icon at the bottom of the display.
At the set time, the alarm will sound:
- Press the button on the device or on the remote control to turn off the alarm.
- To temporarily silence, press the SNOOZE button on the remote control. You can set the snooze period (5, 10, 15, 30 min.). The radio returns to standby for the set period, with the alarm icon flashing.
SLEEP TIMER
To set the sleep timer press repeatedly SLEEP button or select [Sleep] under the [Main menu].
Rotate the VOLUME/OK knob to adjust the sleep time OFF, 15, 30, 45 or 60 minutes and confirm.
NOTE: When the sleep time is set, it shows the [37] icon with the remaining time at the bottom of the display.
UNDOK
The device gives a feature of network remote by smartphone or tablet in iOS or Android system.
By downloading the assigned app named UNDOK, you can view all the modes the device. Search UNDOK from Google Play or Apple Store, and install it to your smartphone or tablet.
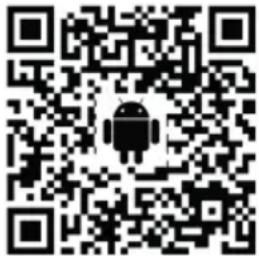

Before using the UNDOK app, make sure the device and the smartphone / tablet are in the same WiFi network. Launch the app. The app initializes and scans for Internet Radio in the network. Tap the device to make the connection.
When prompted, enter the current PIN code. The default PIN is 1234. You can view and edit the current PIN on the Internet Radio in the menu Select your desired mode in the main page. You may then control the selected mode on your smartphone / tablet and on the display of the device simultaneously.
NOTE: Be aware that if another smartphone / tablet with the app in the same network have access with the device, the original connection will be cut off.
SYSTEM SETTINGS
EQUALISER
Several preset EQ modes are available: Normal, Flat, Jazz, Rock, Movie, Classic, Pop, News.
A user-defined [My EQ] setting is available. Select [My EQ profile setup] to create your own setup with custom bass, treble settings.
STREAMING AUDIO QUALITY
Set the streaming quality to Low quality, Medium quality or High quality.
NETWORK
[Network wizard] > Search for available AP SSID (Wireless networks). Then input the password to connect your wireless network.
[PBC Wlan setup] > Connect the AP that supports WPS (WiFi Protected Setup).
[View settings] > View the information of the currently connected network.
[Manual settings] > Enable or disable DHCP (Dynamic Host Configuration Protocol). Input the SSID, WEP / WPA key and/or other configuration.
[NetRemote PIN Setup] > View and edit the NetRemote PIN. The default NetRemote PIN is: 1234.
The NetRemote PIN is required when you want to connect a smartphone or Tablet PC to your device.
[Network profile] > View the list of registered networks. You can also delete unwanted networks.
Press OK to delete the selected network.
NOTE: The device remembers the last four wireless networks it has connected to, and automatically tries to connect to whichever one of them it can find.
[Clear network settings] > Clear all the current network settings.
If you enable [Keep network connected] the device will not disconnect from the wireless network, even if you are in standby mode. This option allows the device to be ready for UNDOK control.
TIME/DATE
[Set Time/Date] > Set the time/date manually.
[Auto update] > Auto-update the time/date from the selected source.
You can also edit the details of the time/date settings: Set format, Timezone, Daylight savings.
INACTIVE STANDBY
Set the desired time, after which the device will go into standby mode automatically in case it is not controlled.
LANGUAGE
Set the desired language.
NOTE: The default language is Czech. Available languages: English, Hungarian, Czech, Slovak, and Polish.
FACTORY RESET
Resetting all user settings to default values, so that time and date, network configuration, and presets are lost.
SOFTWARE UPDATE
[Auto-check setting] > Check for new updates from time to time automatically.
Automatic updating is enabled by default.
[Check now] > Search for available updates immediately.
You will be asked if you want to go ahead with the download and installation of an update.
After a software upgrade, all user settings are maintained.
NOTE: Before starting a software upgrade, ensure that the device is plugged into a stable main power connection.
Disconnecting power during an upgrade may permanently damage the device.
SETUP WIZARD
With this function, you can start the setup wizard at any time.
INFO
View the SW version and the Radio ID.
PRIVACY POLICY
View the information of Privacy Policy.
BACKLIGHT
Set the desired time [Timeout], after which the display backlight level will be changed.
Adjust the levels of backlight for both states [On level] / [Dim level].
MAINTENANCE / CLEANING
• Always power off the device when cleaning it.
- Never use any harsh or strong solvents to clean the device since these may damage the surface of the device. Dry, soft cloth is appropriate, however, if the device is extremely dirty, it may be wiped off with a slightly moist cloth. Make sure the device is dried off after cleaning.
When you are necessary to ship the device, store it in its original package. Save the package for this purpose.
TROUBLESHOOTING
| ERROR REMEDY | |
| The device does not switch on. | Check it the power adaptor is connected properly. |
| No sound. | Turn on the sound as it may be muted. Increase the volume.Pull any connected headphone or speaker from the connector jack. |
| No network connection can be established. | Check the WLAN function.Try to set an IP address at the device.Activate the DHCP function on the router and make the connection again at the device.A firewall is activated on the network > set the respective program in such a way that access is possible.Reboot the router |
| Hiss in FM mode. | Check/move the FM antenna.Move the radio. |
| No stations available / burbling / intermittent in DAB mode. | Move the radio.Rescan local stations only (high-strength).Check the local DAB coverage. |
| Alarm does not work. | Switch on the alarm.Due to the volume setting, refer to the solutions of “No sound”.The source of alarm was set to be station but there is no network connection. Change the source of alarm or reconfigure the connection. |
| All other undetermined cases. | The smart radio may process large amount of data after a period of operation, no matter in which mode, it will cause the system freeze or malfunction. Reboot the device if necessary. |
| The normal function of the product may be disturbed by strong Electro-Magnetic Interference. If so, simply reset the product to resume normal operation by following the instruction manual. In case the function could not resume, please use the product in other location. | |
| The device may malfunction when used in areas with strong radio interference. The device will work properly again once there is no more interference. | |
SPECIFICATIONS
Display: 2,4", 300 x 240 pxl, TFT colour display
FM Frequency Range: 87,5 - 108 MHz
DAB+ Frequency Range: 174,928 - 239,200 MHz
Number of preset stations: 20 Internet / 20 DAB / 20 FM
BT Frequency Range/EIRP: 2402 - 2480 MHz / 3,25 dBm
Supported WLAN networks: WiFi IEEE 802.11b/g/n wireless / 2,4 GHz / 12,09 dBm (EIRP)
Supported security protocols: WEP, WPA, WPA2, WPS
Power supply: 6,5 V / 3 A DC
Power consumption (in operation): 7 W
Power consumption (standby): ≤ 1 W
Remote Control Power Supply: 2 x 1,5V AAA battery
Power output: 1 x 4 W (RMS)
Dimensions: 210 x 112 x 130 mm
Weight: 800 g
WE RESERVE THE RIGHT TO CHANGE TECHNICAL SPECIFICATIONS.
PACKAGE CONTENTS
Internet/DAB+ Audio System, Power adaptor, Remote control, 2 x 1,5V AAA batteries, Audio cable with 3,5 mm jack at both ends, User manual
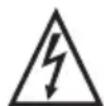
WARNING: DO NOT USE THIS PRODUCT NEAR WATER, IN WET AREAS TO AVOID FIRE OR INJURY OF ELECTRIC CURRENT. ALWAYS TURN OFF THE PRODUCT WHEN YOU DON'T USE IT OR BEFORE A REVISION. THERE AREN'T ANY PARTS IN THIS APPLIANCE WHICH ARE
REPARABLE BY CONSUMER. ALWAYS APPEAL TO A QUALIFIED AUTHORIZED SERVICE. THE PRODUCT IS UNDER A DANGEROUS TENTION.
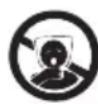

TO AVOID DANGER OF SUFFOCATION, KEEP THE PLASTIC BAG AWAY FROM BABIES AND CHILDREN. DO NOT USE THIS BAG IN CRIBS, BEDS, CARRIAGES OR PLAYPENS. THIS BAG IS NOT A TOY.
Disposal of old Electrical & Electronic Equipment
(Applicable in the European Union and other European countries with separate collection systems)
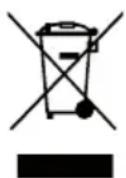
This symbol on the product or on its packaging indicates that this product shall not be treated as household waste. Instead it shall be handed over to the applicable collection point for the recycling of electrical and electronic equipment. By ensuring this product is disposed of correctly, you will help prevent potential negative consequences for the environment and human health, which could otherwise be caused by inappropriate
waste handling of this product. The recycling of materials will help to conserve natural resources. For more detailed information about recycling of this product, please contact your local Civic Office, your household waste disposal service or the shop where you purchased the product.
Hereby, ETA a.s. declares that the radio equipment type IR237BTDAB is in compliance with Directive 2014/53/EU. The full text of the EU declaration of conformity is available at the following internet address: www.GoGEN.cz/declaration_of_conformity
WPROWADZENIE

POLITYKA PRYWATNOŚCI

STREAMING HANGMINŐSÉG
| EN - English | ||
| Charging adapter | ||
| A | Manufacturer's name or trademark, business registration number and address | "Dongguan Dongsong Electronic Co. Ltd., Dongsong Electronic Building, No.19, Xintian Street, Baizhoubian Village, East District, Dongguan, Guangdong, P.R.China" |
| B | Model identifier DYS824-065300W-2 | |
| C | Input voltage 100-240 V | |
| D | Input frequency 50/60 Hz | |
| E | Output voltage 6,5 V | |
| F | Output current 3,0 A | |
| G | Output power 19,5 W | |
| H | Average efficiency in active mode 87,01% | |
| I | Low load efficiency (10%) 83,13% | |
| J | Power consumption without load | 0,07 W |
natural_image
Abstract black and white circular logo with stylized white lines forming a stylized 'S' shape (no text or symbols)- SAFETY
- General
- Power adapter
- Risks associated with high volumes
- Battery handling and usage
- To install the batteries
- Remote control operation
- GETTING STARTED
- Connecting the headphones
- GENERAL DEVICE FUNCTIONS
- Power on/off
- Menu operation
- Mode selection
- Volume
- Presets
- Now playing information
- FIRST INSTALLATION
- Setting time and date
- Setting network
- INTERNET RADIO / PODCASTS
- MUSIC PLAYER / USB
- Playback
- My playlist
- Repeat playback
- Random playback
- DAB+ RADIO
- Scanning for stations
- Station selection
- Settings menu
- FM RADIO
- BLUETOOTH
- Disconnecting the paired mobile phone
- ALARM
- SLEEP TIMER
- UNDOK
- SYSTEM SETTINGS
- EQUALISER
- STREAMING AUDIO QUALITY
- NETWORK
- TIME/DATE
- INACTIVE STANDBY
- LANGUAGE
- FACTORY RESET
- SOFTWARE UPDATE
- SETUP WIZARD
- INFO
- PRIVACY POLICY
- BACKLIGHT
- MAINTENANCE / CLEANING
- SPECIFICATIONS
- WE RESERVE THE RIGHT TO CHANGE TECHNICAL SPECIFICATIONS.
- PACKAGE CONTENTS
- Disposal of old Electrical & Electronic Equipment
- WPROWADZENIE
- POLITYKA PRYWATNOŚCI
- STREAMING HANGMINŐSÉG
Brand : GoGen
Model : IR 237 BTDAB
Category : Radio