
MCR-50MK4 - Gramophone DENVER - Free user manual and instructions
Find the device manual for free MCR-50MK4 DENVER in PDF.


| Product Type | Multimedia gramophone with turntable, CD, cassette, USB, FM/AM radio, and AUX input |
| Turntable Speeds | 33, 45, 78 RPM |
| Record Sizes Supported | 17.5, 25, 30 cm (7, 10, 12 inch) |
| CD Playback | CD, CD-R, CD-RW, MP3 discs |
| Cassette Playback | Supports C60 and C90 cassettes (C120 not recommended) |
| USB Playback | MP3 files from USB flash drive |
| Radio Bands | AM 530–1650 kHz, FM 87.5–108.5 MHz |
| Output Power | 2 x 2.5W |
| Power Supply | AC cord (100-240V, 50/60Hz) |
| Remote Control | Infrared, requires 2x AAA batteries (not included) |
| USB Recording | Record from CD, MP3 disc, cassette, vinyl, or AUX to USB |
| Headphone Jack | 3.5mm on front panel |
| Aux Input | 3.5mm jack on rear panel |
| Line Out | RCA on rear panel |
| Auto-Stop Function | Selectable on/off for turntable |
| Dimensions | Approximately 40 x 30 x 25 cm (estimated based on typical model) |
| Weight | Approximately 5 kg (estimated) |
| Cleaning Instructions | Wipe wooden cabinet with soft, dry cloth; do not use water or spray cleaners |
| Safety Features | Auto power-off after 15 min inactivity (ERP2 compliant) |
Frequently Asked Questions - MCR-50MK4 DENVER
User questions about MCR-50MK4 DENVER
0 question about this device. Answer the ones you know or ask your own.
Ask a new question about this device
Download the instructions for your Gramophone in PDF format for free! Find your manual MCR-50MK4 - DENVER and take your electronic device back in hand. On this page are published all the documents necessary for the use of your device. MCR-50MK4 by DENVER.
USER MANUAL MCR-50MK4 DENVER
natural_image
Vintage wooden radio with black textured back panel and digital display, no visible text or symbols on the device itself.USER MANUAL
MCR-50MK3
WWW.DENVER-ELECTRONICS.COM
Please read this user manual carefully before start using the product.
CAUTION
TO PREVENT FIRE OR SHOCK HAZARD, DO NOT USE THIS PLUG WITH AN EXTENSION CORD, RECEPTACLE OR OTHER OUTLET UNLESS THE BLADES CAN BE FULLY INSERTED TO PREVENT BLADE EXPOSURE. TO PREVENT FIRE OR SHOCK HAZARD, DO NOT EXPOSE THIS APPLIANCE TO RAIN OR MOISTURE.
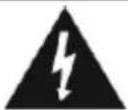
The LIGHTNING FLASH with arrowhead symbol, within an equilateral triangle is intended to alert the user to the presence of uninsulated 'dangerous voltage' within the product's enclosure that may be of sufficient magnitude to constitute a risk of electric shock to persons.
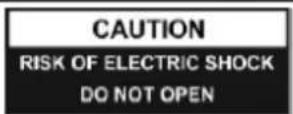
WARNING: TO REDUCE THE RISK OF ELECTRIC SHOCK DO NOT REMOVE COVER (OR BACK), NO USER SERVICEABLE PARTS INSIDE REFER SERVICING TO QUALIFIED SERVICE PERSONNEL

The exclamation point within an equilateral triangle is in-tended to alert the user to the presence of important operating and maintenance (servicing) instructions in the literature accompanying the appliance.
IMPORTANT SAFETY INSTRUCTIONS
- Read, keep and follow all these instructions in this manual.
- Clean only with dry cloth.
- Do not block any ventilation openings. Install in accordance with the manufacturer's instructions.
- Do not install near any heat sources such as radiators, heat registers, stoves, or other apparatus(including amplifiers) that produce heat.
- Protect the power cord from being walked on or pinched particularly at plugs, convenience receptacles, and point where they exit from the apparatus.
- Unplug this apparatus during lightning storms or when unused for long periods of time.
- Refer all servicing to qualified service personnel. Servicing is required when the apparatus has been damaged in any way, such as power-supply cord or plug is damaged, liquid has been spilled or objects have fallen into the apparatus, the apparatus has been exposed to rain or moisture, does not operate normally, or has been dropped.
- This appliance shall not be exposed to dripping or splashing water and no object filled with liquids such as vases shall be placed on the apparatus.
- Do not overload wall outlet.
- Operate controls and buttons as described in the manual.
- Store your CDs, cassettes in a cool area to avoid damage from heat.
- When moving the set, be sure to first disconnect the power cord.
CLEANING THE CABINET
If the wooden cabinet becomes dusty please wipe it with a soft, non-abrasive dust cloth. Also don't use water or spray cleaners as this can damage the cabinet and the plastic/metal parts of the unit.
TECHNICAL SPECIFICATION
• Turntable speed: 33/45/78 RPM (Disc size 17.5/25/30cm)
• CD can play CD/CD-R/CD-RW/MP3
- USB can play MP3
• Cassette: C60 & C90 (C120 cassette is not recommended)
- Output power: 2x2.5W
PREPARATION FOR USE
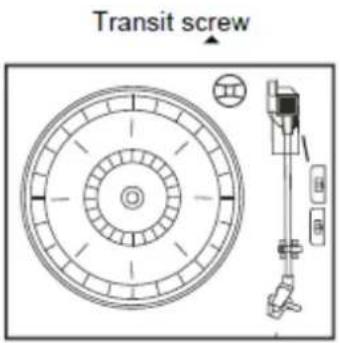
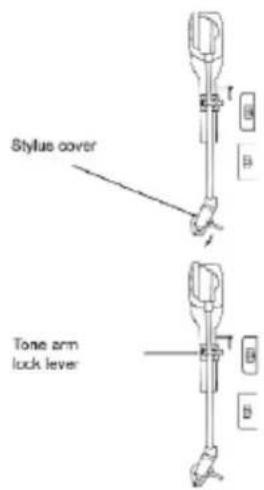
IMPORTANT: RAISING AN LOWERING THE TURNTABLE LID
To open the lid. Raise it as far as it can go until the lid support bracket locks in the position.
To close the lid. Pull forward the lid support bracket to release and then gently lower the lid.
TO AVOID DAMAGING THE CABINET OR THE LID, NEVER FORCE THE LID CLOSED. ALWAYS RAISE THE LID TO RELEASE THE LID SUPPORT BRACKET.
LOCATIONS OF CONTROLS AND INDICATORS
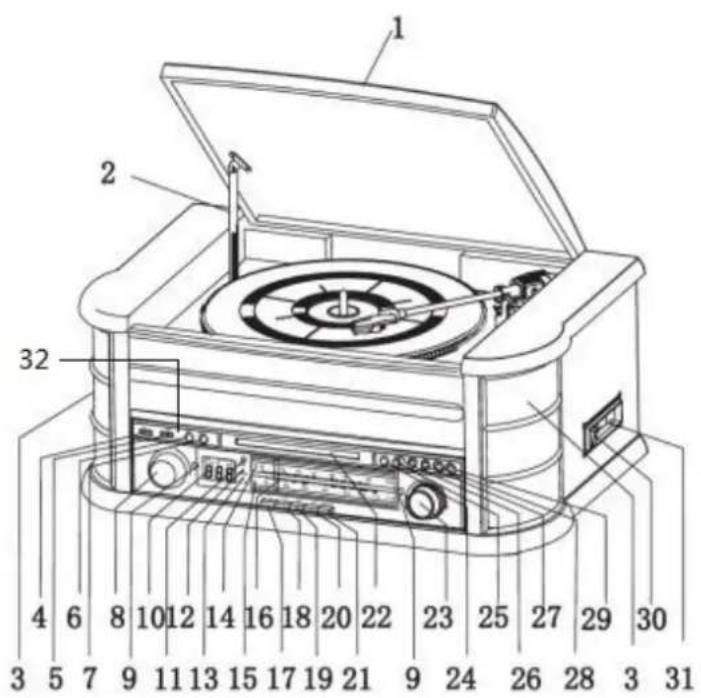
Locations of Controls:
- TURNTABLE LID
- TURNTABLE LID SUPPORT BRACKET
- SPEAKERS
- USB
- AUX IN
- RECORD/DELETE BUTTON
- NOT AVAILABLE
- VOLUME/STANDBY/ON/OFF CONTROL
- TUNER BACKLIGHT
- LCD DISPLAY
- REMOTE CONTROL SENSOR
- POWER INDICATOR
- FM ST./REC INDICATOR
- FM DIAL SCALE
- AM DIAL SCALE
-
TUNING POINTER
-
TUNER
- CD/USB
- TAPE/AUX IN
-
PHONO
-
EQ
-
CD DRAWER
- TUNING CONTROL
- PLAY/PAUSE BUTTON
- STOP BUTTON
- DN/F.R BUTTON
- UP/F.F BUTTON
- PLAY MODE/PROG BUTTON
- OP/CL BUTTON
(CD OPEN/CLOSE BUTTON)
- CASSETTE EJ/F.F BUTTON
(EJECT/FAST FORWARD)
-
CASSETTE PLAYER SLOT
-
HEADPHONE CONNECTOR
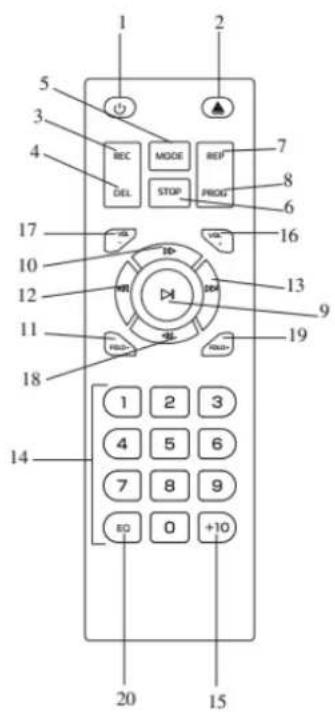
Remote Control:
- POWER ON/OFF
- CD DOOR OPEN/CLOSE BUTTON
- RECORD BUTTON
- DELETE BUTTON
- MODE BUTTON
- STOP BUTTON
- REPEAT BUTTON
- PROGRAM BUTTON
-
PLAY/PAUSE BUTTON
-
REWIND BUTTON
- FOLDER-
- SKIP- BUTTON
- SKIP+ BUTTON
- NUMERIC KEYBOARD
15.+10 - volume+
- volume-
- FAST FORWARD BUTTON
- FOLDER+
- EQ
Press (5) on remote repeatedly to select FM / AM / CD / USB / AUX / PHONO / TAPE mode
REMOTE BATTERY INSTALLATION
The infrared remote control requires 2 PCS UM-4 R03, AAA (3V) Battery(excluded)
Note 1: All buttons on the remote control have the same function as the buttons on the unit. The remote control is just used for CD/MP3 and USB mode.
Note 2: Long pressing DELETE on remote control for 2 times will delete file in USB mode.
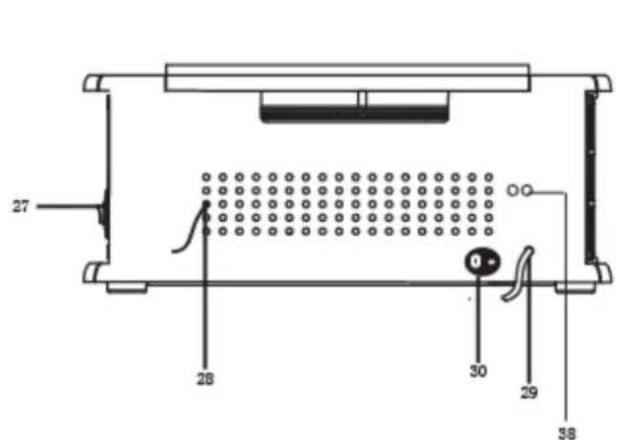
REAR VIEW
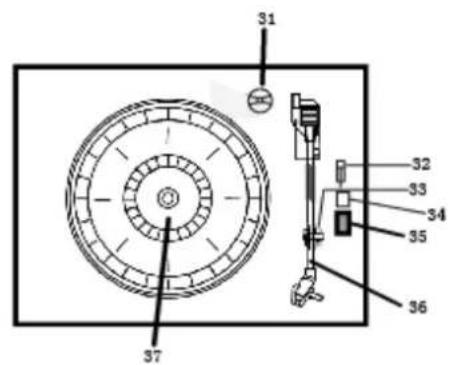
TURNTABLE
-
CASSETTE MECHANISM/TAPE STOP / EJ 28. FM ANTENNA
-
AC CORD
-
Auto-stop ON/OFF
-
ON/OFF SWITCH
-
33/45/78 RPM SPEED SELECTOR
-
ADAPTOR
-
Tone needle
-
TURNTABLE PAUSE SWITCH
37.TURNTABLE
- PICK-UP HOLDER
38.LINE OUT
INFORMATION
The AM antenna is inside the cabinet. IF AM reception is unsatisfactory try re-positioning the cabinet slightly until the internal antenna is picking up the strongest signal.
The FM wire is located back of the cabinet. If necessary adjust the position and direction of this antenna until you find the position that provides the best reception.
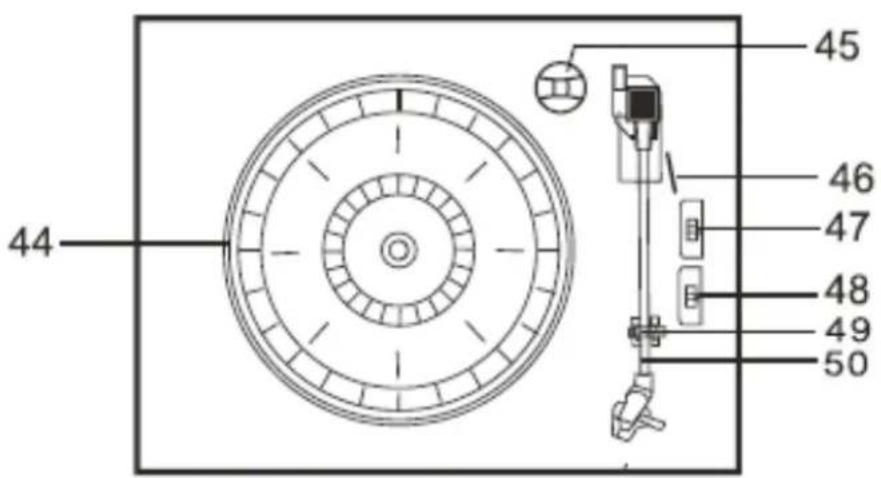
- Turntable
- 45 rpm adapter
- Cue lever
- Auto Stop control
- Speed selector (33/45/78 rpm)
- Tone arm lock
- Tone arm with stylus
POWER ON/OFF
- Press POWER to turn the system on. The power indicator lights up.
- Press the function selector buttons (AM/FM/CD/USB/TAPE/PHONO/AUX IN) to select the desired function.
- Start to adjust the volume by using the volume control button.
- When finished listening press POWER again to turn off the system. The power indicator goes off.
Remark: The unit is comply with ERP2, the unit will turn to Standby mode if there is no operation on the unit after 15 mins, please press POWER button 2 times if you want to re-start the unit.
RADIO OPERATION
- Press POWER to turn the system on.
- Make sure you connected the FM antenna cable on the rear side of the unit.
- Press MW button for AM or UKW button for FM radio.
- Rotate the TUNING control to tune the desired radio station, the FM ST/REC indicator will light.
CD OPERATION
- Press the CD/USB button to enter CD mode, the “---” and ‘DISC’ icon will be shown on the screen. The unit can play CD, CD-R and CD-RW.
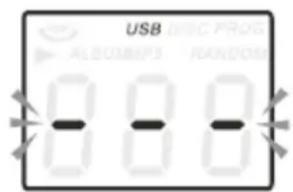
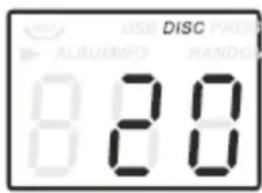
- Press the OP/CL button top open the CD drawer.
- Place your disc in the CD drawer with the label side facing up.
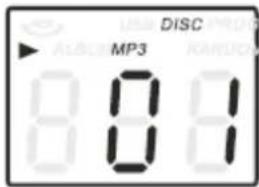
- Press the OP/CL button again to close the CD drawer. Playback will automatically start from the first track.
- MP3 icon will be shown if MP3 file is detected in the disc.
PLAYING CASSETTE
Note: Before inserting the tape in the player be sure that there is no excess slack in the cassette that could jam the mechanism.
-
Press POWER to turn the system on.
-
Press TAPE button to enter TAPE mode.
-
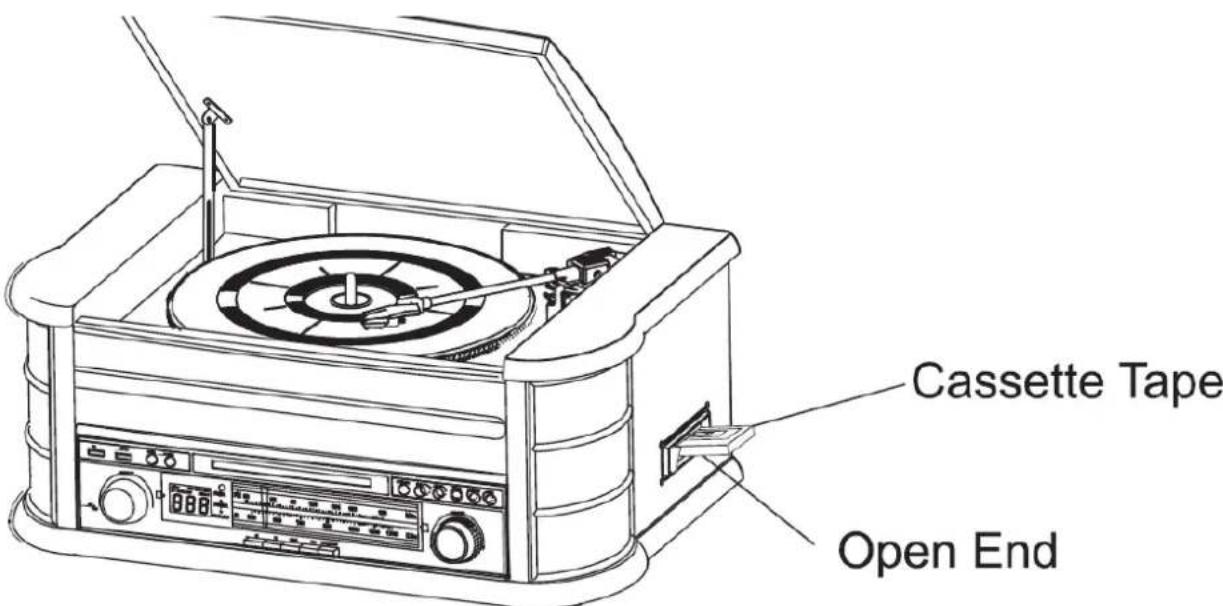
Insert your cassette into the slot located on the right side of the cabinet, as shown in the illustration, with the side you wish to play facing up and the open end on the right side.
- Cassette playback begins as soon as the tape is inserted. Adjust the VOLUME control to the desired level.
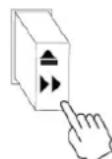
- To advance the tape rapidly, depress the button approximately half way. The tape will move forward rapidly as long as the button is depressed. Normal playback will resume when the button is released.
-
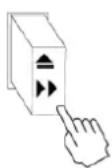
When the tape ends, the player stops automatically. Depress the button completely to remove the tape from the player. You may depress button to stop playing the tape at any time.
-
Press POWER again to turn the system off.
PLAYING VINYLS RECORDS
The system includes a full-size, 3 speed, belt-drive turntable. You can play 33, 45 and 78rpm records.
- Press POWER to turn the system on.
- Press the PHONO button to enter the PHONO mode.
- Make sure you have removed the stylus cover from the stylus and have released the tone arm lock that secured the tone arm to the tone arm rest.
- Set the turntable speed selector to appropriate speed 33, 45 or 78rpm. If you are playing 45 rpm singles, place the 45rpm adapter on the centre spindle.
- Place your record on the the centre spindle.
- Raise the cue lever to lift the tone arm of its rest. Move the tone arm to the edge of the record. The turntable starts automatically. Use the cue lever to gently lower the tone arm onto the record.
- Adjust the volume control to the desired level.
- When the tone arm reaches the end of the record it automatically returns to the tone arm rest and the record player stops.
- Press POWER again to turn the system off. The POWER indicator goes OFF.
Note: Do not turn or stop the turntable manually. Moving or jarring the turntable without securing the tone arm clamp could result in damage to the tone arm.
AUX IN OPERATION
Connect the audio system into the AUX IN jack on the rear panel, Press the PHONO/AUX IN button. Start playing from the connected device.
USB OPERATION
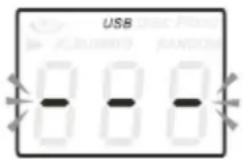
- Press the CD/USB button first and the FUNCTION button to enter USB mode. The ‘---’ and USB icon will be shown.
- Insert a USB flash device into the USB socket.
- PLAY/PAUSE, DN/UP and stop functions are the same as CD functions.
PLAYING IN MP3 MODE (CD/USB)
- Press PLAY/PAUSE button to start or pause playback selected track.
- While playing the song, the song number and folder number of the selected track will be shown in the display.
- You can stop the playback at any time by pressing the STOP button.
TRACK SKIP AND HIGH SPEED TRACK SEARCH IN CD/USB MODE
During CD/USB playback press UP/F.F () or DN/F.R () button on the unit front panel or on the remote control repeatedly to change track. To rapidly search forward or backwards within a track
press and hold UP/F.F () or DN/F.R () button. To skip 10 tracks back or forth then press TRACK-10 or TRACK+10 on the remote control.
USB RECORDING
1. CD recording
Insert USB flash drive into the USB socket. Then press CD/USB button. Place CD into the CD drawer and play the track which will be recorded. Press RECORD button twice to start recording. If all CD is played, Then all tracks will be recorded.
NOTE: Recording will fail if pressing STOP button during recording
2. MP3 DISC recording
Insert USB flash drive into the USB socket. Then press CD/USB button. Place CD with MP3 files into the CD drawer and play the MP3 track which will be recorded. Press RECORD button twice to start recording. If all MP3 files is played, Then all tracks will be recorded.
NOTE: Recording will fail if pressing STOP button during recording
3. Cassette recording
Insert USB flash drive into the USB socket. Then press TAPE button. Place the cassette into the socket. Play cassette. Press RECORD button twice to start recording. Press STOP button to stop recording.
4. Vinyl recording
Insert USB flash drive into the USB socket. Then press PHONO/AUX IN button. Play the vinyl and press RECORD button twice to start recording. Press STOP button to stop recording.
5. AUX IN recording
Insert USB flash drive into the USB socket. Connect the external audio device into the AUX jack on the rear panel. Then press PHONO/AUX IN button and play audio and press RECORD button twice to start recording.
DELETE TRACKS FROM USB DISC
Press CD/USB button on the front panel or long press PLAY/PAUSE on remote control to select USB mode. Select the track and press delete for 2 times and the track is deleted.
ALL RIGHTS RESERVED, COPYRIGHT DENVER ELECTRONICS A/S
DENVER®
www.denver-electronics.com

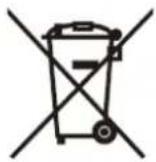

Electric and electronic equipment contains materials, components and substances that can be hazardous to your health and the environment, if the waste material (discarded electric and electronic equipment) is not handled correctly.
Electric and electronic equipment is marked with the crossed out trash can symbol, seen below. This symbol signifies that electric and electronic equipment should not be disposed of with other household waste, but should be disposed of separately.
All cities have established collection points, where electric and electronic equipment can either be submitted free of charge at recycling stations and other collection sites, or be collected from the households. Additional information is available at the technical department of your city.
Hereby, Inter Sales A/S declares that the radio equipment type MCR-50 MK3 is in compliance with Directive 2014/53/EU. The full text of the EU declaration of conformity is available at the following internet address: http://www.denver-electronics.com/denver-mcr-50mk3/
Operating Frequency Range: AM: 530 – 1650kHz FM: 87.5 – 108.5MHz
Max Output Power: 29W
Imported by:
DENVER ELECTRONICS A/S
Omega 5A, Soeften
DK-8382 Hinnerup
Denmark
facebook.com/denverelectronics


- CAUTION
- IMPORTANT SAFETY INSTRUCTIONS
- CLEANING THE CABINET
- TECHNICAL SPECIFICATION
- IMPORTANT: RAISING AN LOWERING THE TURNTABLE LID
- LOCATIONS OF CONTROLS AND INDICATORS
- Locations of Controls:
- Remote Control:
- REMOTE BATTERY INSTALLATION
- INFORMATION
- RADIO OPERATION
- CD OPERATION
- PLAYING CASSETTE
- PLAYING VINYLS RECORDS
- AUX IN OPERATION
- USB OPERATION
- PLAYING IN MP3 MODE (CD/USB)
- TRACK SKIP AND HIGH SPEED TRACK SEARCH IN CD/USB MODE
- USB RECORDING
- CD recording
- MP3 DISC recording
- Cassette recording
- Vinyl recording
- AUX IN recording
- DELETE TRACKS FROM USB DISC
- DENVER®
Brand : DENVER
Model : MCR-50MK4
Category : Gramophone