
FZS 2107-E - Lawn mower Fieldmann - Free user manual and instructions
Find the device manual for free FZS 2107-E Fieldmann in PDF.


| Product Type | Electric Lawn Mower (Corded) |
| Brand | Fieldmann |
| Model | FZS 2107-E |
| Power Source | 230 V ~ 50 Hz |
| Motor Power | 1400 W |
| Cutting Width | 37 cm (14.5 in) |
| Cutting Height Adjustment | Central, 6 positions (20-60 mm) |
| Grass Collection Bag Capacity | 40 L |
| Dimensions (L x W x H) | 77 x 48 x 42 cm |
| Weight | 11.5 kg |
| Noise Level (LwA) | 91 dB(A) |
| Vibration Level | 4.5 m/s² |
| Mulching Function | Yes (with mulching plug) |
| Side Discharge | Not available |
| Rear Discharge | Not available |
| Handle Type | Folding, height-adjustable |
| Grass Box Full Indicator | Yes |
| Safety Features | Double switch (hand lever + start button), blade brake |
| Recommended Lawn Area | Up to 500 m² |
| Power Cord Length | 10 m (extension cord recommended) |
| Protection Class | II (double insulated) |
| Warranty | 2 years |
| Included Accessories | Mulching plug, grass collection bag, manual |
Frequently Asked Questions - FZS 2107-E Fieldmann
User questions about FZS 2107-E Fieldmann
0 question about this device. Answer the ones you know or ask your own.
Ask a new question about this device
Download the instructions for your Lawn mower in PDF format for free! Find your manual FZS 2107-E - Fieldmann and take your electronic device back in hand. On this page are published all the documents necessary for the use of your device. FZS 2107-E by Fieldmann.
USER MANUAL FZS 2107-E Fieldmann
natural_image
Abstract black-and-white spiral pattern with no text or symbolsFIELDMANN®
Home & Garden Performance
natural_image
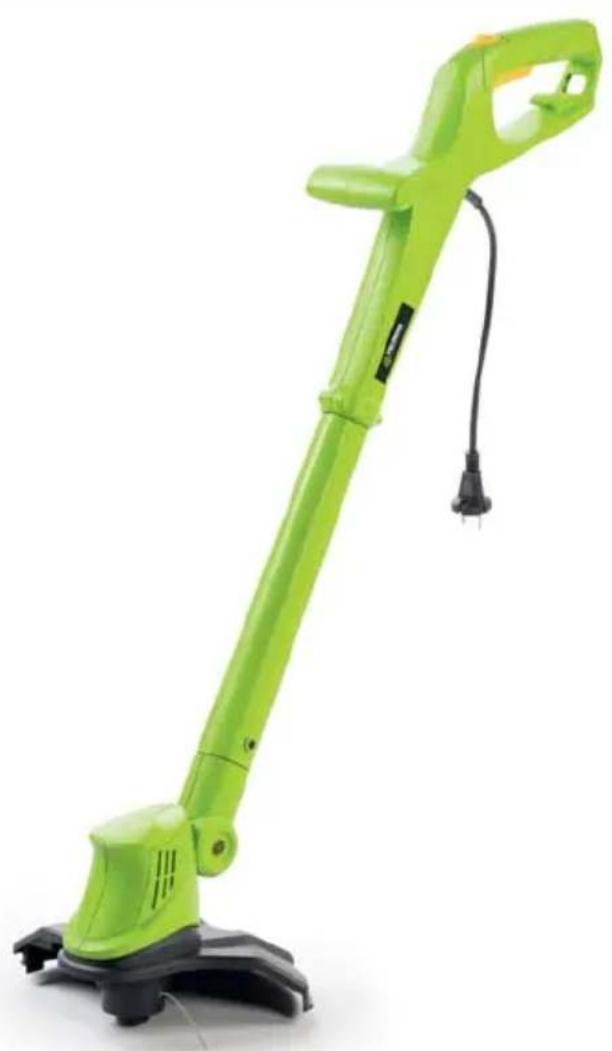
Green electric tool with black base and power cord, isolated on white background (no text or symbols visible)FZS 2107-E
English 7 - 17
Čeština 18 - 27
Slovenčina 28 - 37
Magyarul 38 - 47
Polski 48 - 57
7
2

natural_image
Close-up of a mechanical component with a cylindrical shaft and internal connector (no visible text or symbols)3
natural_image
Three-step diagram showing a mechanical assembly with arrows indicating process steps (no text or symbols present)4
natural_image
Close-up of a black mechanical component with a white arrow indicating a specific part (no text or symbols visible)5
natural_image
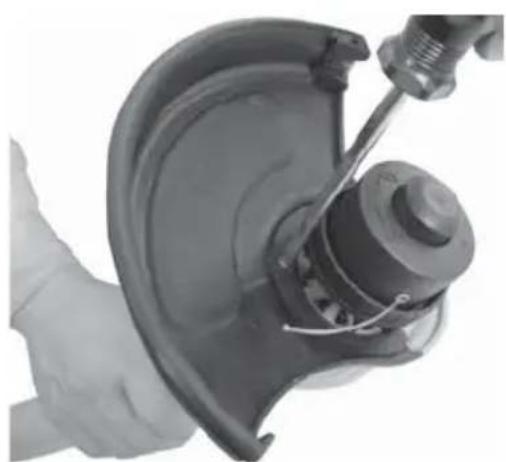
Close-up of a hand using a screwdriver to adjust or repair a mechanical component (no visible text or symbols)6
natural_image
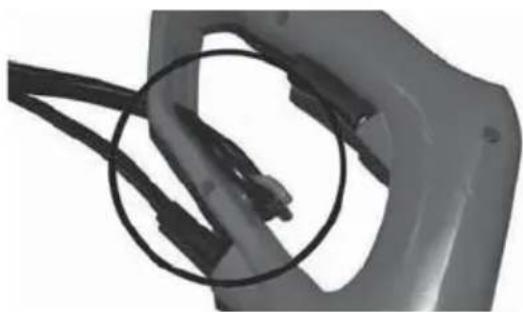
Close-up of a mechanical component with a circular inset highlighting a cable or wire (no text or symbols visible)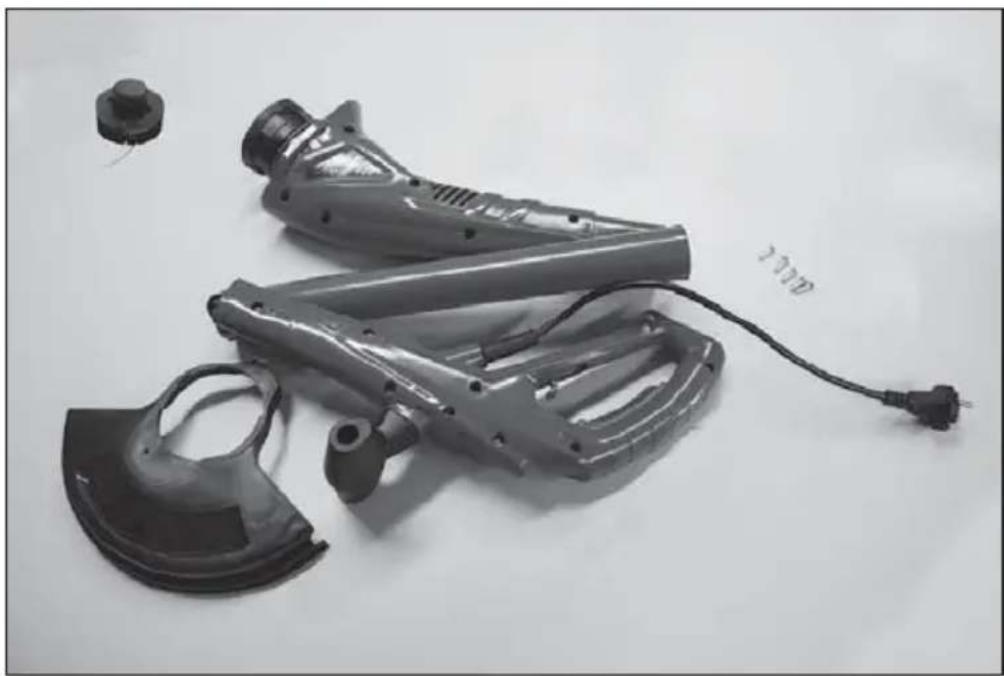
natural_image
Disassembled car body with attached power plug and cable, no visible text or symbolsElectric String Trimmer
INSTRUCTION MANUAL
Thank you for your purchase of the electric string trimmer. For your personal safety, read and understand the Instruction Manual before using. Keep the Instruction Manual in a safe place for future reference.
CONTENTS
PICTURE ANNEX 3
- GENERAL SAFETY INSTRUCTION 8
- SYMBOLS AND WARNINGS ON MACHINE 9
- SAFETY INSTRUCTION 11
- MACHINE DESCRIPTION AND ITEMS DELIVERED 12
- APPLICATION 12
- ASSEMBLY OF STRING TRIMMER 13
- OPERATION 13
- MAINTENANCE 14
- TECHNICAL SPACIFICATION 14
- DISPOSAL 16
1. GENERAL SAFETY INSTRUCTION
Important safety warnings
* Unpack the product carefully and be sure not to throw away any part of the package before having found all components of the product.
- Keep the product in a dry place out of reach of children.
Read all cautions and instructions. The failure to adhere to warning cautions and instructions may result in an accident, fire and/or a serious injury.
Packaging
The product is placed in a package preventing damage during transport. This package is a raw material therefore it can be handed-over for recycling.
Instructions for use
Before beginning to work with the machine, read the following safety rules and instructions for use. Familiarize with operating elements and the proper use of the device. Keep the manual in a safe place for future reference. We recommend keeping the original package including the inner packaging materials, cash voucher and guarantee card for a period of warranty at minimum. For a case of transportation, pack the machine into the original box from the manufacturer, thus ensuring a maximum protection of the product during a possible transport (e.g. moving or sending into a service station).

Note: If you hand the machine over to next persons, hand it over together with the manual. Adherence to the attached instructions for use is a precondition for the proper use of the machine. The operation manual includes also instructions for operation, maintenance and repairs.
The manufacturer does not take any responsibility for accidents or damages resulting from the failure to adhere to this manual.
2. SYMBOLS AND WARNINGS ON MACHINE

Warning!

Read the Instruction Manual attentively before operating the tool.
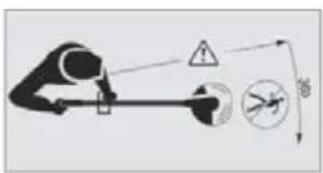
Keep other persons in a safe distance off the tool!

Do not operate the tool if raining or in wet conditions.

natural_image
Simple black-and-white icon of a person wearing glasses inside a circle (no text or symbols)Always wear eye protection.

natural_image
Icon of two white gloves inside a dark circular background (no text or symbols)While working use protective gloves.

natural_image
Silhouette of a boots inside a circular frame (no text or symbols)Use solid insulating work footwear.

natural_image
Gray circular icon with a white headset silhouette (no text or symbols)Use hearing protection.
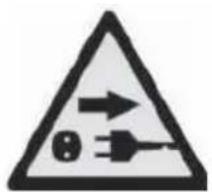
In the event that the power cord is damaged, immediately disconnect it from the power supply.
natural_image
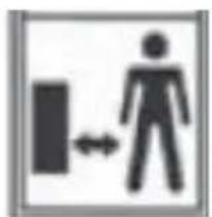
Simple icon showing a person standing next to a vertical bar with bidirectional arrow (no text or symbols)Be careful about items thrown off by the appliance. Keep the nearby standing persons at a safe distance.
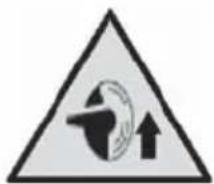
Be careful not to be hit by deflect objects.
3. SAFETY INSTRUCTION
⚠ WARNING! Keep all safety instructions when operating the electric tool. For your as well as other persons' safety, read and understand the Instruction Manual attentively prior to use of the tool. Keep the Instruction Manual in a safe place for future reference.
When operating the tool, wear the safety glasses.
When operating the tool, wear the safety gloves.
Do not expose the tool to rain or moisture.
Read the Instructions Manual attentively and get familiarized with all control features and their functions.
Do not allow children or untrained individuals to use the tool.
- Keep all bystanders, children and pets away from the trimmer; the grass which is cut and dispersed may contain stones and debris. Should other persons be in your close vicinity, particularly the children, stop mowing.
When operating the tool, keep other persons, children or animals at the minimum distance of 4.5 m from the string trimmer.
Operate the tool only by daylight or by appropriate artificial lighting.
Prior to use of the tool or after any impact, always check the string trimmer for damage or wear. Repair the string trimmer, if necessary. Do not operate the string trimmer if the cutting string is not properly fixed or is damaged.
* Always check whether the tool is in a good condition. If not, it can endanger the user.
When operating the trimmer, always use all the safeguards.
Do not operate the trimmer in case the safeguards are damaged.
* Clear the work area before each use. Remove all objects such as stones, metal pieces, roots, other hard objects and plastic bags, nylon ropes and other objects that cannot be cut.
Prior to startup of the trimmer, make sure the nylon string does not touch stones or debris.
Do not place your arms and legs to the cutting area; especially not when starting up the motor.
* Protect yourselves from injuries caused by the trimmer string. After you fixed a new cutting string, return the string trimmer to the standard operation position.
Do not use damaged or cracked cutting elements.
Do not use spare parts or accessories not delivered or not recommended by the string trimmer manufacturer.
* Always clean the debris from the ventilation slots.
Do not carry the trimmer with your finger on the trigger; you will avoid the accidental startup of the machine.
- Keep the balanced and safety position when mowing.
- Clean the work area from wires, stones and debris.
Do not cut hard objects. Imminent danger of an injury or damage of the trimmer.
⚠ WARNING! Cutting elements keep rotating for a certain time after the motor was switched off!
Do not attempt to stop the cutting element (nylon string) by your hands. Let it stop by itself.
Do not use the string trimmer to cut grass which is not in contact with the ground i. e. grass on low walls, rockeries, etc.
Do not cross the roads or gravel paths with the string trimmer still running.
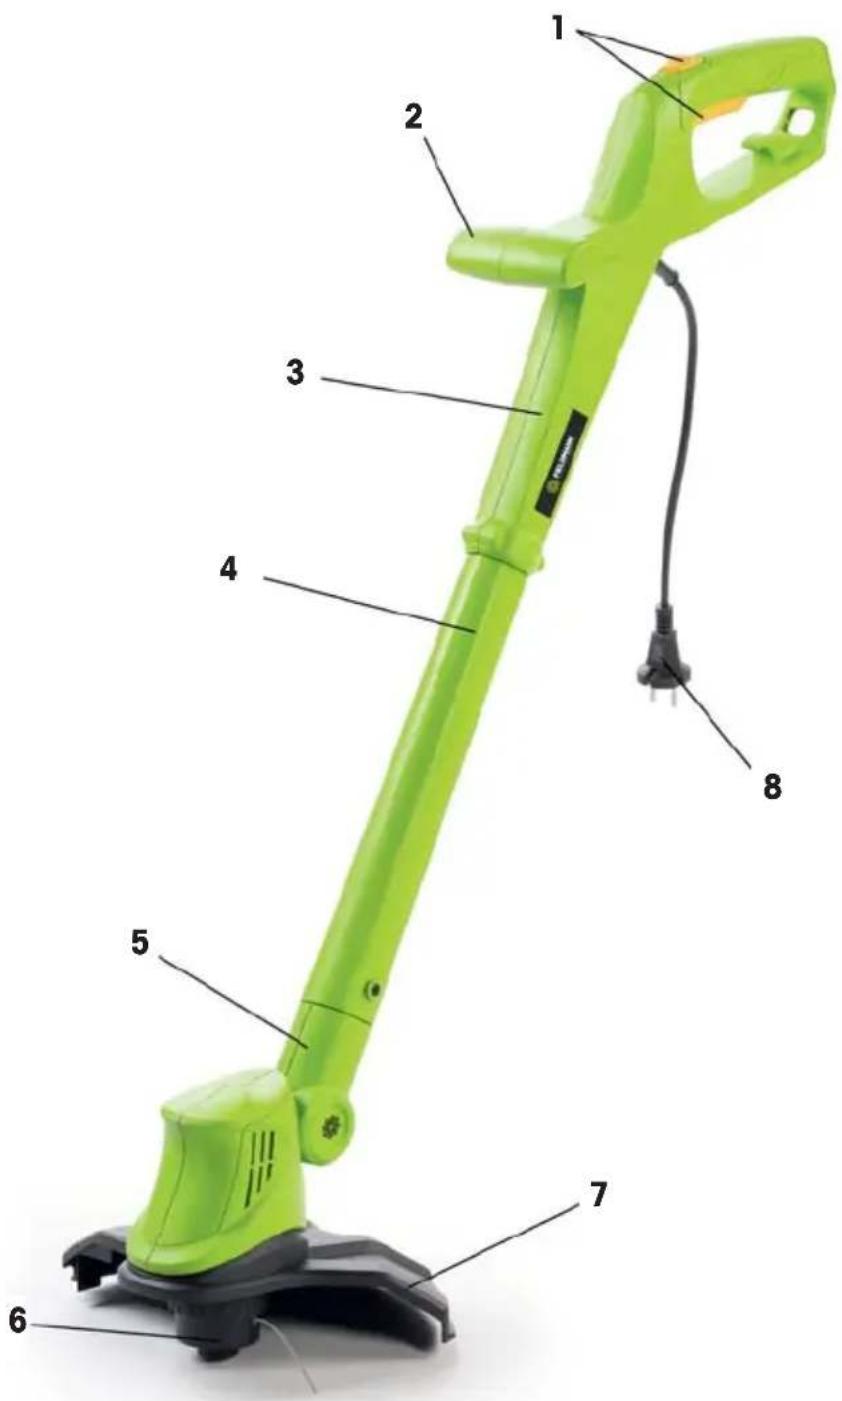
4. MACHINE DESCRIPTION AND ITEMS DELIVERED
Machine Description (See fig. 1)
- Switch
- Lower part of the string trimmer
- Handle
- Coil
- Upper part of the string trimmer
- Coil cover
- Middle part of the string trimmer
- Power cord
Items Delivered
Remove the machine carefully from the packaging and check the completeness of the following parts:
Electric garden string trimmer - top, middle and bottom part
Bolts connecting lower and upper parts of the trimmer
* Protective guard of the string
* Handle with attachment bolt.
Operating instructions
If some parts are missing or are damaged, please contact your dealer.
5. APPLICATION
The electric string trimmer is intended for grass mowing.
Use for other purposes is strictly forbidden.
The string trimmer is intended for domestic use only.
6. ASSEMBLY OF STRING TRIMMER
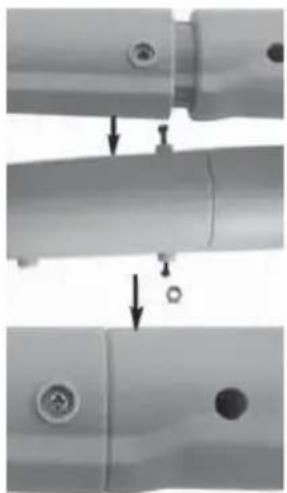
Join the top, middle and bottom part of the mower (Fig. 2) and secure all 3 parts with bolts (Fig. 3).
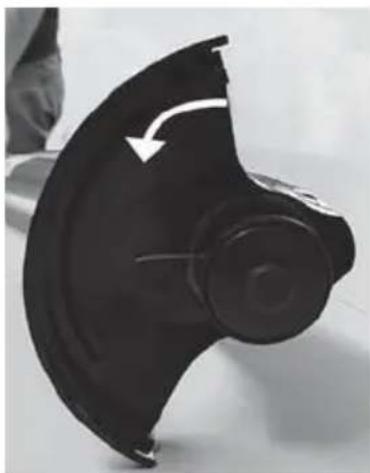
* Insert the guard into grooves in the motor housing (Fig. 4) and fix the housing using the bolt attached (Fig. 5)
Plug the power cord to an approved extension cable.
Then create a loop on the power cord and insert it into an opening in the handle and hitch it onto the hook (Fig. 6)
7. OPERATION
Connection to power source
ATTENTION!
Before connecting the machine to power source, always check whether the switch is off.
Plug the machine to a power source protected by a residual-current device.
Starting the string trimmer
The trimmer can only be started after pressing firmly the handle (A) (Fig. 9) and pressing the switch (B) (Fig. 9).
After the switch (B) is released (Fig. 9), the tool is switched off automatically to prevent accidental movement and/or injury.
Note:
Before starting the string trimmer, check the length of nylon strings.
Note:
The string trimmer is suitable for cutting grass up to 15 cm. When cutting higher grass, do so gradually in several phases.
ATTENTION! Warning:
- Keep your feet in sufficient distance from the mowing mechanism
After switching off, the tool keeps running for approx. 5 sec.
Before putting down, always switch off the tool.
Do not carry the machine by holding the cable or keeping the switch pressed.
Cutting string extension
If the cutting string is shortened during operation as a result of its wear, by applying a reasonable pressure onto the reel flange against the ground the string is pulled out automatically (Fig. 10). The string is then automatically cut at maximum possible length by a blade (C) integrated in the trimmer cover (Fig. 10).
ATTENTION! Warning:
If you need to pull out the string manually, switch off the trimmer, unplug it from the socket and wait until the string stops moving completely.
String replacement / supplementation
Turn the machine upside down.
Turn the upper cover of the string head counter-clockwise (while holding the lower part).
Remove the disengaged cover and remove the reel. Remove all remnants of the old string from the reel.
Prepare two strings of equal length (approx. 4 m). Secure the ends of the strings into the prepared holes. Reel up both reels clockwise and pull the ends of the strings through openings in the reel cover. Then reattach the reel cover.
The head contains a spring - make sure the spring is in place under the reel.
8. MAINTENANCE
The trimmer string can dry out in the process of time. To keep the nylon string in a perfect condition, store the spare pre-wound spools or loose string in a plastic bag with a spoon of water.
While cleaning the string trimmer, disconnect the power cord and use a mild soap and a damp cloth only. Do not immerse the trimmer in water, nor hose it down. Avoid any liquid to get inside the string trimmer. Do not use pressurized water when cleaning the machine.
The line-cutting blade on the safeguard side can get blunt. Regular sharpening of the blade with a file is recommended.
9. TECHNICAL SPACIFICATION
| Type Electric garden string trimmer | FZS 2107-E |
| Rated voltage 230 V AC | |
| Rated frequency 50 Hz | |
| Rated input | 250 W |
| Number of revolutions | 12,500 rpm |
| Width of cut | 230 mm |
| String diameter | 1.2 mm |
| Guaranteed noise level | 96 dB(A) |
| Weight | 1.3 kg |
| Noise level | L_pA (acoustic pressure) 82.2 dB(A) K=3 dB(A) L_wA (acoustic power level) 90.82 dB(A) K=3 dB(A)Guaranteed sound power level ( L_wA max) conforms to the Noise Directive 2000/14: L_wA MAX 96 dB(A)Vibrations: max. 2.69 m/s ^2 K=1.5 m/s ^2 |
Instructions Manual - language version only.
10.DISPOSAL
The machine and its accessories are made of various materials, e.g. of metal and plastics. Hand-over damaged components to sorted waste. Get yourselves informed at a respective authority.
INSTRUCTIONS AND INFORMATION ON DISPOSAL OF USED PACKAGING.
Put any used package material to the place determined by the municipality for waste disposal.
DISPOSAL OF USED ELECTRIC AND ELECTRONIC EQUIPMENT
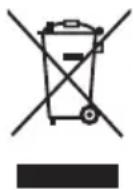
This symbol on products or accompanying documents means that used electric or electronic products must not be put to ordinary municipal waste. Hand over such products to determined collection points for proper disposal, restoration and recycling. Alternatively, in some countries of the European Union or other European countries you can return your products to your local dealer when you buy an equivalent new product. By dutiful disposal of this product you can preserve precious natural resources and you help prevent any potential adverse effects on the environment and human health which could be the results of wrong waste disposal. Ask your local authority or the nearest collection point for additional details. In case of improper disposal of this waste kind penalties can be imposed in accordance with national regulations.
For companies in the European Union countries
Should you want to dispose of electric and electronic devices, ask your dealer or vendor for necessary information. Disposal in other countries outside the European Union. Should you want to dispose of this product, ask your local authorities or your dealer for necessary information about disposal method.

This product fulfils all basic requirements of the EU directives that apply to it.
Text, design and technical specifications can change without prior notice and we reserve the right for their change.
EU DECLARATION OF CONFORMITY
Product / brand: Electric Lawn Trimmer / FIELDMANN
Type / model: FZS 2107-E as factory model YA9202A AC 230-240V; 50 Hz; 250W; Class II; IPX0 L PA = 80,1 dB(A), L WA = 96 dB(A)
Manufacturer: FAST ČR, a.s. U Sanitasu 1621, 251 01 Říčany, Czech Republic VAT no: CZ24777749
This declaration of conformity is issued under the sole responsibility of the manufacturer. Person in charge of completing the technical documentation: FAST ČR, a.s.
The object of the declaration described above is in conformity with the relevant Union harmonization legislation:
Directive MD 2006/42/EC Directive EMC 2014/30/EU Directive NEOE 2000/14/EC Directive RoHS 2011/65/EU
The relevant harmonized standards and the other technical specifications: EN 60335-1:2012+AC+A11+A13+A1+A14+A2+A15 EN IEC 55014-1:2021 EN 50636-2-91:2014 EN IEC 55014-2:2021
EN IEC 61000-3-2:2019+A1 EN 61000-3-3:2013+A1+A2

Place of issuance: Prague Date of issuance: 24.10.2023
Name: Miroslav Vácha - Responsible Person Signature:
natural_image
Silhouette icon of a person wearing glasses inside a circle (no text or symbols)natural_image
Icon of two gloves inside a dark circle (no text or symbols)natural_image
Silhouette of a boot inside a circular frame (no text or symbols)natural_image
Gray circular icon with a white headset silhouette (no text or symbols)natural_image
Simple icon showing a person standing next to a vertical bar with bidirectional arrow (no text or symbols)U Sanitasu 1621, 251 01 Ríčany, Czech Republic
VAT no: CZ24777749
natural_image
Green electric tool with black base and power plug, isolated on white background (no text or symbols)
FIELDMANN®
Home & Garden Performance

- FIELDMANN®
- Home & Garden Performance
- Electric String Trimmer
- INSTRUCTION MANUAL
- CONTENTS
- GENERAL SAFETY INSTRUCTION
- Important safety warnings
- Packaging
- Instructions for use
- SYMBOLS AND WARNINGS ON MACHINE
- SAFETY INSTRUCTION
- MACHINE DESCRIPTION AND ITEMS DELIVERED
- Machine Description (See fig. 1)
- Items Delivered
- APPLICATION
- ASSEMBLY OF STRING TRIMMER
- OPERATION
- Connection to power source
- ATTENTION!
- Starting the string trimmer
- Note:
- ATTENTION! Warning:
- Cutting string extension
- String replacement / supplementation
- MAINTENANCE
- TECHNICAL SPACIFICATION
- 10.DISPOSAL
- INSTRUCTIONS AND INFORMATION ON DISPOSAL OF USED PACKAGING.
- DISPOSAL OF USED ELECTRIC AND ELECTRONIC EQUIPMENT
- For companies in the European Union countries
- EU DECLARATION OF CONFORMITY
Brand : Fieldmann
Model : FZS 2107-E
Category : Lawn mower