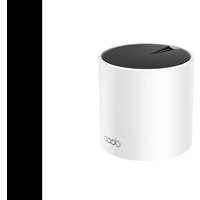
TP-LINK Deco X55 Pro - Network

Deco X55 Pro - Network TP-LINK - Free user manual and instructions

Find the device manual for free Deco X55 Pro TP-LINK in PDF.

📄 108 pages English EN Download 💬 AI Question 10 questions ⚙️ Specs
Notice TP-LINK Deco X55 Pro - page 5
Pick your language and provide your email: we'll send you a specifically translated version.
Product Type Mesh WiFi System
Brand TP-Link
Model Deco X55 Pro
WiFi Standard IEEE 802.11ax (WiFi 6) dual-band
Frequency Bands 2.4 GHz and 5 GHz
Data Rates Up to 574 Mbps on 2.4 GHz, up to 2402 Mbps on 5 GHz
Coverage Up to 6,000 sq ft (3-pack)
Ethernet Ports 2 Gigabit Ethernet ports per unit
Dimensions (Each) 97.5 x 97.5 x 97.5 mm (3.8 x 3.8 x 3.8 in)
Weight (Each) Approximately 200 g (7.05 oz)
Power Supply DC 12V / 1.0A
Antenna Type Internal dual-band antennas
Security WPA3, WPA2, WPA, WEP, IEEE 802.1X
Key Functions Seamless roaming, adaptive routing, parental controls, QoS, antivirus
Management Via TP-Link Deco app (iOS/Android)
Maintenance Clean with a soft, dry cloth; keep vents unobstructed
Spare Parts Not user-replaceable; contact TP-Link support for replacement
Certifications CE, FCC, RoHS
Operating Temperature 0°C to 40°C (32°F to 104°F)
Package Contents Deco units, power adapters, Ethernet cables, quick setup guide

Frequently Asked Questions - Deco X55 Pro TP-LINK

How do I set up the Deco X55 Pro?
Download the TP-Link Deco app from your app store, create an account, and follow the in-app instructions to add your Deco units.
What is the coverage of a 3-pack?
A 3-pack covers up to 6,000 square feet with a strong WiFi signal.
Can I use the Deco X55 Pro with an existing modem?
Yes, connect one Deco unit to your modem via Ethernet, then set up the rest wirelessly.
Does it support WiFi 6?
Yes, the Deco X55 Pro is a dual-band WiFi 6 (802.11ax) system, offering faster speeds and better efficiency.
How many devices can it support?
It can handle over 150 connected devices simultaneously without performance degradation.
Can I use the Deco X55 Pro with other Deco models?
Yes, it is compatible with all Deco models for mesh expansion, though performance may vary.
Does it have parental controls?
Yes, the Deco app provides parental controls to manage internet access, block content, and set time limits.
How do I reset the Deco X55 Pro?
Press and hold the Reset button on the bottom for about 5 seconds until the LED flashes amber.
What security protocols does it support?
It supports WPA3 for the latest security, as well as WPA2/WPA and WEP.
Can I mount the Deco X55 Pro on a wall?
No, the device is designed to sit on a flat surface. Ensure adequate ventilation.

User questions about Deco X55 Pro TP-LINK

0 question about this device. Answer the ones you know or ask your own.

Ask a new question about this device

The email remains private: it is only used to notify you if someone responds to your question.

No questions yet. Be the first to ask one.

Download the instructions for your Network in PDF format for free! Find your manual Deco X55 Pro - TP-LINK and take your electronic device back in hand. On this page are published all the documents necessary for the use of your device. Deco X55 Pro by TP-LINK.

USER MANUAL Deco X55 Pro TP-LINK

Simple. Easy. Yet Powerful.

Contents

Get Started 1

About This Guide 2

Introduction to Deco App 3

Set Up 5

Set Up Your Deco Network....6

Network 10

Create a New Network....11

Switch Between Deco Networks 13

Add More Decos 15

Replace Main Deco 16

Manage Deco Network 17

Manage Deco Units 18

Manage Network Clients 19

Deco Smart Home 22

Add Smart Devices 23

Quickly Do Tasks with Shortcut 24

Automate Your Smart Devices 26

Parental Controls 28

Create Profiles 29

Manage Your Kids' Activities 30

View Online Usage Data 36

Set Up Family Time 37

Grant Rewards 40

Network Protections 42

Enable Security+ Protection 43

Device Isolation 47

Camera Security 48

More Features 51

Test Features at the Deco Lab 52

Check Network Reports 58

Block/Unblock Specific Devices 59

QoS 60

Change Wi-Fi Settings 61

Create a Guest Network 63

Create a IoT Network 65

WPS 66

Change Internet Settings 67

Network Optimization 68

Create Static Routes 69

Set Up VPN Server/Client 71

Advanced Features 90

Configure Connection Alerts 94

Control the Light on Decos 95

Upgrade Your Deco 96

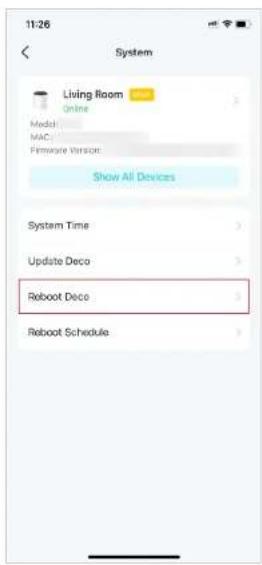
Reboot Your Deco 97

Reboot Schedule 98

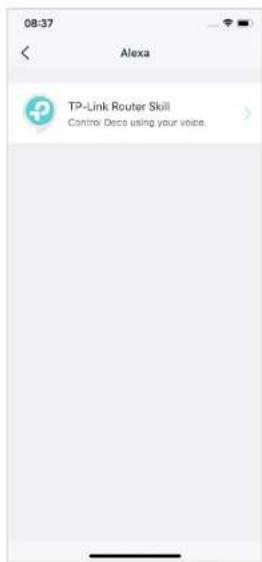
Control Your Deco with Alexa 99

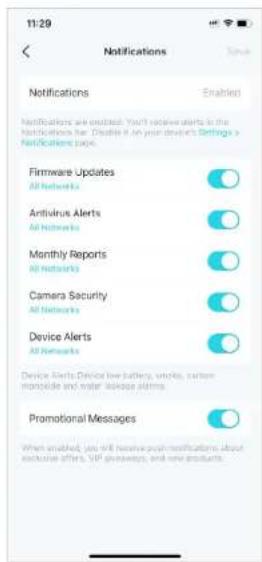
Enable App Notifications 100

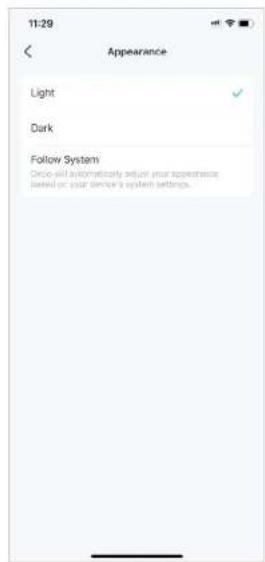
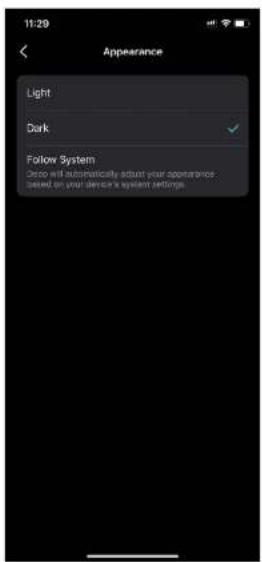
Change App Appearance 101

Change Account Information 102

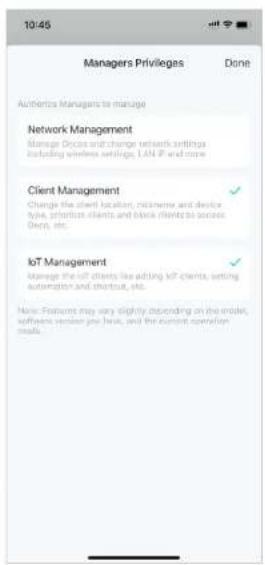
Add Managers 103

Upgrade Your HomeShield 104

Subscribe to HomeShield Service 105

Get Started

About This Guide

This guide provides a brief introduction to the Deco app.

Features available in Deco may vary by model and software version. Deco availability may also vary by region or ISP. All images, steps, and descriptions in this guide are only examples and may not reflect your actual Deco experience.

Conventions

In this guide, the following conventions are used:

Convention Description
UnderlineHyperlinks are in teal and underlined. You can click to redirect to a website or a specific section.
TealKey information appears in teal, including management page text such as menus, items, buttons and so on.
■ Note: Ignoring this type of note might result in a malfunction or damage to the device.
◦ Tips: Indicates important information that helps you make better use of your device.

IoT Compatibility Disclaimer

IoT compatibility refers only to smart devices that can be controlled via the Deco app. Other wireless devices can still connect to Deco for normal Wi-Fi use.

Seamless Roaming Disclaimer

Clients need to support 802.11k/v/r and may require additional set up. Performance may vary depending on the client device.

HomeShield Disclaimer

HomeShield includes the Free Basic Plan. Fees apply for the Pro Plan. Visit https://www.tp-link.com/homeshield/ for more information.

Introduction to Deco App

TP-Link Deco app is the perfect way to set up your Deco mesh Wi-Fi in minutes and control your whole-home network. You can monitor your home Wi-Fi from anywhere, and make changes right from the palm of your hand.

Your network at-a-glance

Easily access what you use most in the reorganized dashboard. View the network topology and status, manage clients, and more.

Safeguard your network

Power up your protection against intrusions and attacks, stay updated on security details, and get network recommendations.

Maintain healthy digital habits

Easily control your kids' online time and content. Receive intuitive charts and detailed statistics concerning your kids' online usage.

More features within reach

Test the in-development features at the Deco Lab, receive intuitive network reports, set up networks for dedicated needs, and more.

10:53 Deco Change Network Wi-Fi Settings Guest Network Everything looks good. 679 kbps 257 kbps Living Room Dedroom Online Clients (3) 3 Online Clients Smart Home Add your smart devices and ended home off from the Divee

10:36 3 Security Tips. Scan Details Wi-Fi Access Control Rock Lost Mode Device Isolation Disordered Camera Security Q1 Security+ Stop giving away your personal info! Web Protection occurs all internet connections, blocking millions of malicious links worldwide everyday to safeguard your personal data and property.

Parental Controls Son 1 day cc online Block Adjust 14h 37m 33 0m user@0h 0m

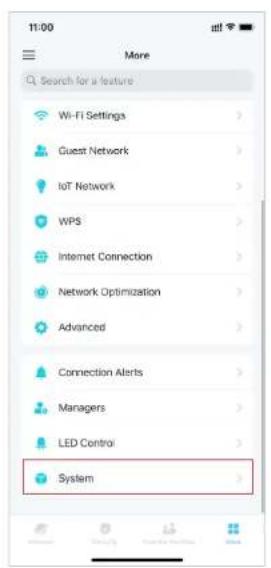
11:11 More Search for a feature Docs Lab Reports Black List Ops Wi-Fi Settings Guest Network IoT Network WPS Internet Connection Network Optimization Advanced

Link your Deco with different accounts for more flexible management.

Customize app settings

Get app versions and configure basic app settings such as notifications and appearance.

Get help instantly

Find all ways in Support Center to solve the problems you encountered.

11:28 Link Account IFTTT Alexa Google Assistant

11:29 < App Settings Notifications > Appearance > About >

11:29 < × Support Center Q Search for FAQs FAQs Set up Deco > Improve Speed > Improve Network Stability > Feature Related > Others > Visit Community

Set Up

Before using your Deco devices, you need to set it up first. Follow the quick setup process on the Deco app to set up your Deco and unlock various features.

* Features available in Deco may vary by model and software version. Deco availability may also vary by region or ISP.

Set Up Your Deco Network

First let's start by setting up the Deco network. Get the TP-Link Deco app for iOS or Android, then follow the app to walk through the setup.

1. Get the Deco app

Scan the QR code below or go to Google Play or the App Store to download the Deco app. Install the app on your Android or iOS smartphone or tablet.

or GET IT ON Google Play Download on the App Store

Open the app and log in with your TP-Link ID. If you don't have a TP-Link ID, create one first.

Tip: If you forgot your login password, tap Forget Password. The app will help you reset your password.

09:51 Welcome to Deco TP-Link ID (Email) Password Forgot Password? Log In Don't have an account?

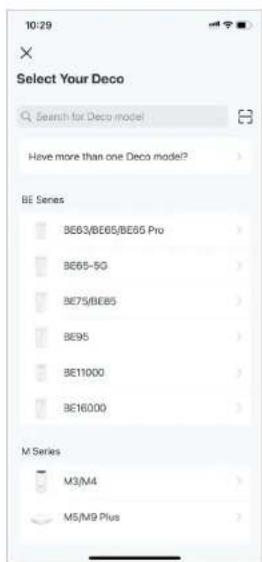
3. Select your Deco model

Search for and select your Deco model. If you have more than one Deco model, tap the question below the search box to check how to maximize the overall network.

10:29 × Select Your Deco Search for Deco model? Have more than one Deco mode? BE Series BE63/BE65/BE65 Pro BE65-5G BE75/BE85 BE95 BE11000 BE16000 M Series M3/M4 M5/M9 Plus

4. Plug in your devices

Power off your modem, connect your Deco to the modem and power them both on.

If you don't have a modem, connect your Deco directly to the Ethernet outlet.

10:30 Plug in your devices Connect your modem's LAN port to either Ethernet port on Deco and power them both on.

5. Wait until your Deco is ready for setup

Wait until your Deco's LED pulses blue, indicating that your Deco is ready for setup. Connect your phone/tablet to the Deco's default Wi-Fi.

10:30 Wait until Deco's LED pulses blue Solid Yellow: Deco is starting up, please wait. Pulsing Blue: Deco is ready for setup. Why is my LED not pulling blue?

6. Specify your Deco's location

Select or custom a location for your Deco. The location will be used as the name of your Deco.

Where have you placed this Deco? The location will be used as this Deco name. Living Room Bedroom Main Bedroom Office Kitchen Hallway Study Room Basement Garage Family Room Custom

7. Connect your Deco to the internet

Select the internet connection type and enter the information. If you are not sure, contact your internet service provider.

8. Create your Wi-Fi network

Set a network name and a password. These will be the name and password you use to connect your devices to Wi-Fi.

9. Keep your Deco up-to-date (Optional)

Set auto update time. This allows your Deco to automatically update to the latest firmware which provides better network experience.

10:33 × Connect your Deco to the internet Enter the information provided by your ISP (internet service provider). If you are unsure, contact your ISP. Interrupt Connection Type Dynamic IP IPTV/VLAN Settings Off > Need to change MAC address? Next

10:33 Create your Wi-Fi Network This will be the name and password you'll call to create your networks. Your password must be at least it characters. Network Number (500) At least 6 characters. It is then switched to sell a password using a combination of letters, numbers, and symbols. Next

10:34 Skip Keep your Deco up-to-date. Auto update allows your Deco to automatically update to the latest firmware which provides better network performance. Update Schedule 3:00 AM - 5:00 AM 1:00 AM - 2:00 AM 2:00 AM - 4:00 AM 3:00 AM - 5:00 AM 4:00 AM - 6:00 AM 5:00 AM - 7:00 AM If the Deco selects anyone is using the internet at the time, the update will be rescheduled for the next day.

10. Connect to your Wi-Fi network

Connect your phone/tablet to the Deco's Wi-Fi.
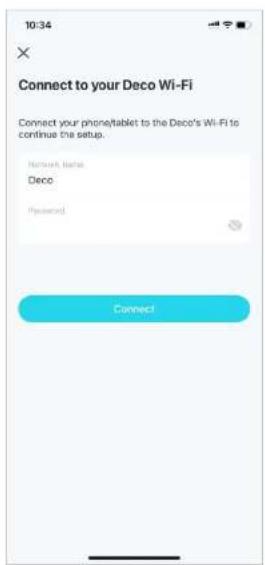
10:34 × Connect to your Deco Wi-Fi Connect your phone/tablet to the Deco's Wi-Fi to continue the setup. Network Name: Deco Password: Connect

11. Setup complete

Your Deco network is now up. You can connect your devices to the Deco network. Plug in the other included Decos, and they will automatically join the network within 2 minutes.

10:35 Your Deco network is now up This Deco is ready to use. Please connect all devices to the Deco network for better connections. Add Another Deco Dana

Network

After setting up your Deco network, you can easily access what you use most in the dashboard. Create a new network, switch between networks, view the network topology and status, manage clients, and more.

Create a New Network

In the Deco app, you can create different Deco networks with your TP-Link ID and manage them conveniently from the Deco app with one account. Two methods are provided as below to create a new network.

Method 1. Via Home Page

  1. On the home page, tap + and select Create a Network.

10:53 Deco Add a Deco Unit Change Network Create a Network 46. Ft Settings Replace Main Deco Share This Network Everything looks good. 679 kbps 257 kbps Living Room Bedroom Online Clients (3) 3 Online Clients Smart Home Add your smart dishess and cooked shares all from the Deco

  1. Search for and select your Deco model. Then follow app instructions to create the network.
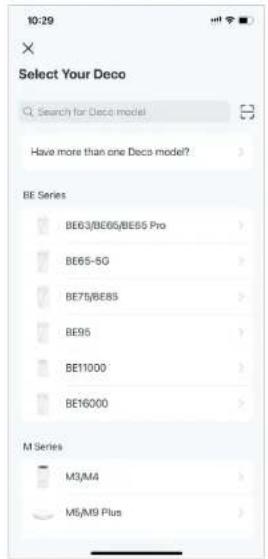
10:29 × Select Your Deco Search for Deco model Have more than one Deco model? BE Series BE63/BE65/BE65 Pro BE65-5G BE75/BE85 BE95 BE11000 BE16000 M Series M3/M4 M5/M9 Plus

Method 2. Via Side Menu

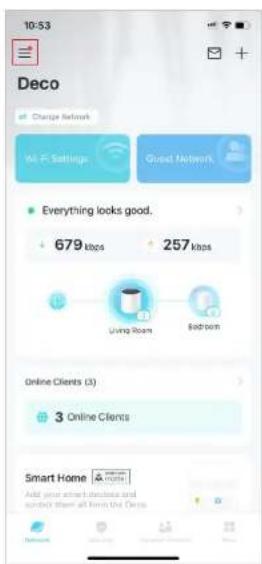
  1. Tap to open the side menu.

10:53 Deco Change Network M F Settings Good Network Everything looks good. 679 kbps 257 kbps Living Room Bedroom Online Clients (3) 3 Online Clients Smart Home Add your smart devices and sponsor than all from the CDs

  1. Tap = .

10:38 View Account Deco Owner HomeShield Submitted Link Account Discover * Support Center App Settings

  1. Tap Create New Network.

10:38 Select a Network Deco Selected AC-16-A2-44-DC-08 123 DC-08-35-F7-85-84 Deco AC-16-A2-16-A1-08 Deco 00-F1-03-20-F7-40 + Create New Network

  1. Search for and select your Deco model. Follow app instructions to create the network.

10:29 Select Your Deco Search for Deco model Have more than one Deco model? BE Series BE63/BE65/BE65 Pro BE65-5G BE75/BE85 BE95 BE11000 BE16000 M Series M3/M4 M5/M9 Plus

Switch Between Deco Networks

If you have created multiple Deco networks with your TP-Link ID, you can switch between them conveniently on the Deco app.

Method 1. Via Home Page

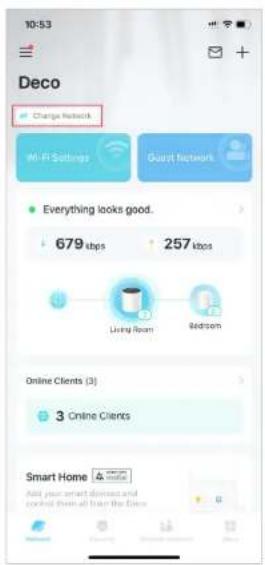
  1. On the home page, tap Change Network.

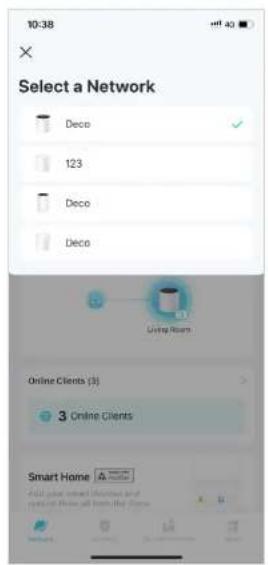
  2. Select a network to switch to.

10:53 Deco Change Network Wi-Fi Settings Guest Network Everything looks good. 679 kbps 257 kbps Living Room Redcom Online Clients (3) 3 Online Clients Smart Home Add your smart devices and cooked them all from the Deco

10:38 Select a Network Deco 123 Deco Deco Online Room Online Clients (3) 3 Online Clients Smart Home

Method 2. Via Side Menu

  1. Tap to open the side menu.

  2. Tap = .

  3. Select a network to switch to.

10:53 Deco Change Network NE P Settings Good Networks Everything looks good. 679 kbps 257 kbps Living Room Bedroom Online Clients (3) 3 Online Clients Smart Home Add your smart clinics and and/or them all from the Close

10:38 View Account Deco Owner HomeShield * Subscribed Link Account Discover * Support Center App Settings

10:38 Select a Network Deco Connected AC-15-42-44-50-68 123 SC-E3-31-FT-85-84 Deco AC-15-42-74-87-88 Deco 00-F1-05-20-F7-40 + Create New Network

Add More Decos

After creating a Deco network, you can add more Decos to the network to expand the Wi-Fi coverage and manage them easily on your Deco app.

  1. On the home page, tap + and select Add a Deco Unit.

  2. Search for and select your Deco model. Then follow app instructions to add the Deco.
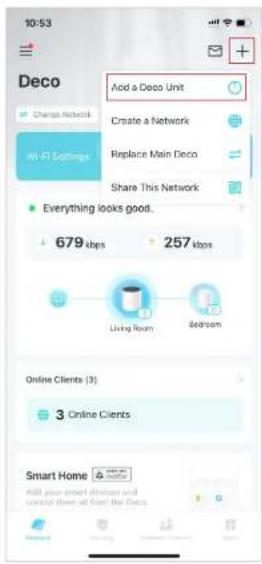
10:53 Deco Add a Deco Unit Change Network Create a Network Replace Main Deco Share This Network All Fi Settings Everything looks good. 679 kbps 257 kbps Living Room Beckson Online Clients (3) 3 Online Clients Smart Home Add your smart division and control then all from the Deco

10:29 Select Your Deco Search for Deco model Have more than one Deco model? BE Series BE63/BE65/BE65 Pro BE65-5G BE75/BE85 BE95 BE11000 BE16000 M Series M3/M4 M5/M9 Plus

10:52 Find a suitable spot Select the layout that looks like your home. We'll tell you where to place your devices. 1 floor

Plug in your Deco and wait until Deco's LED pulses blue Solid Yellow: Deco is starting up, please wait. Pulsing Blue: Deco is ready for setup. Why is my LED not pulling Blue?

Replace Main Deco

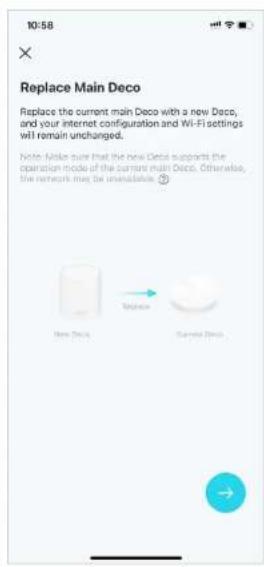
You can replace the current main Deco with a new Deco, and your internet configuration and Wi-Fi settings will remain unchanged. Note: Make sure that the new Deco supports the operation mode of the current main Deco. Otherwise, the network may be unavailable.

  1. On the home page, tap + and select Replace Main Deco.

  2. Follow instructions to complete the settings.

Note: When replacing your Deco, your network will be temporarily unavailable.
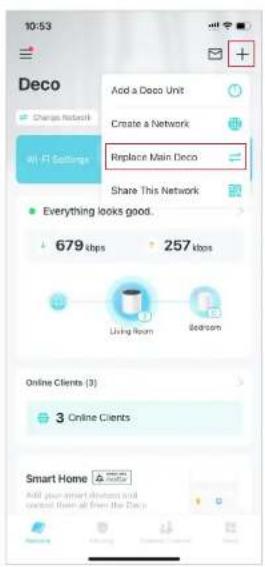
10:53 Deco Add a Deco Unit Create a Network Replace Main Deco Share This Network + Everything looks good. 679 kbps 257 kbps Living Room Season Online Clients (3) 3 Online Clients Smart Home Add your smart devices and control from all the Day

10:58 × Replace Main Deco Replace the current main Deco with a new Deco, and your internet configuration and Wi-Fi settings will remain unchanged. Note: Unlike you that the new Deco supports the operation mode of the current main Deco. Otherwise, the network may be unavailable. New Deco Remove Current Deco

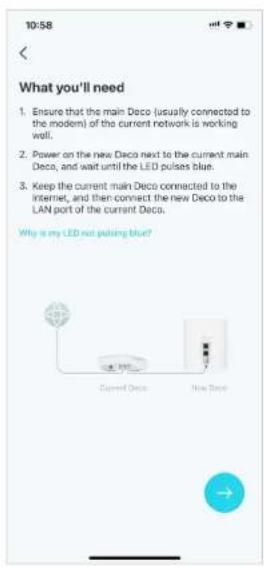
10:58 What you'll need 1. Ensure that the main Deco (usually connected to the modem) of the current network is working well. 2. Power on the new Deco next to the current main Deco, and wait until the LED pulses blue. 3. Keep the current main Deco connected to the internet, and then connect the new Deco to the LAN port of the current Deco. Why is my LED not pushing blue?

Configuring network settings... This may take a few minutes, and the network may be temporarily unstable. Please wait. 1. After using the new Deco as the main Deco, the old Deco will still work normally.

Manage Deco Network

After setting up your Deco network, you can easily manage your whole-home network. Check the network status and speeds, reboot network, change the network owner and main Deco, delete the network, and more.

  1. On the home page, tap the Network module.

10:53 Deco Change Network Wi-Fi Settings Qiao' Networks Everything looks good. 679 kbps 257 kbps Living Room Bedroom Online Clients (3) 3 Online Clients Smart Home Add your smart devices and control them off from the Clock

  1. Check the network status, speeds, and connected devices.

Tap to manage the network,

10:56 < ● Everything looks good. 1 client 6.2 Mbps Download + 103 Mbps Update * Short Map Living Room 4.62 Mbps 103 Mbps Bedroom 0 4.7 Mbps 103 Mbps Reboot Network Set Main Deco Change Network Owner Delete Network Cancel

Change Network Owner Current Owner yinghuilchen@tp-link.com Current Password Enter the password Changing the network owner will doce the network from the current owner, and this owner will no kinger be able to manage this network. Help

12:39 Save Select the Deco that you'd like to set as main Deco. Living Room MAC-40-16-40-44-5C-E9 Bedroom MAC-40-40-30-5B-E7-A0 Note if the new main Deco does not support TP-Link HomeShield, button-up features of HomeShield will be apprehable. Have more than one Deco model?

Manage Deco Units

You can easily manage the Deco units in your network. View Deco connections, check the clients of each Deco, edit the Deco's name, and reboot or remove a Deco.

  1. On the home page, tap the Network module.
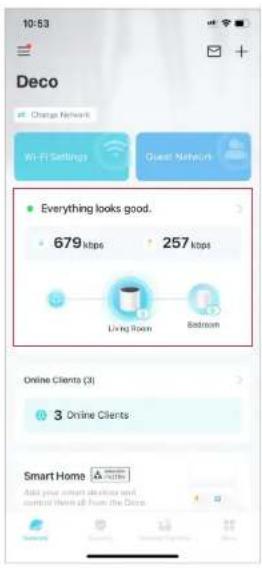
10:53 Deco Change Network Wi-Fi Settings Quest Networks Everything looks good. 679 kbps 257 kbps Living Room Bedroom Online Clients (3) 3 Online Clients Smart Home Add your smart device and control home all from the Dee

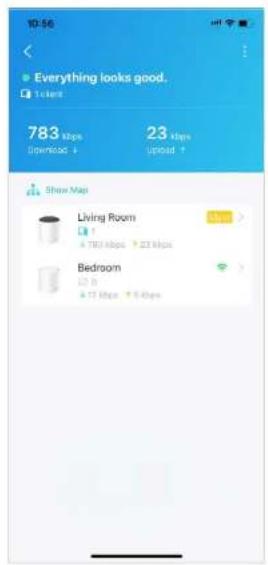
  1. Tap a Deco to view device details.

10:56 < Everything looks good. 10:56 783 kbps Download + 23 kbps upload + Show Map Living Room + 4.783 kbps ↑ 23 kbps Bedroom + 4.11 kbps ↑ 5 kbps

  1. Tap to configure the Deco settings, like rebooting or removing the Deco.
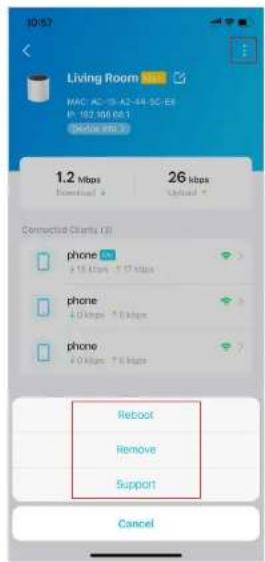
10:57 Living Room MAC AC-25-A2-44-3C-BI P: 192.98.68.1 SAPR 888.0 1.2 Mbps Download + 26 Mbps Upload * Connected Clients (Q) phone + 18 Mbps + 17 Mbps phone + 60 Mbps + 50 Mbps phone + 20 Mbps + 10 Mbps Reboot Remove Support Cancel

Manage Network Clients

You can manage each network client easily. Change the device name, check its connection status, add it to the profile of a family member, enable high priority and Mesh Technology for it, and block the device.

  1. On the home page, tap the Clients module.
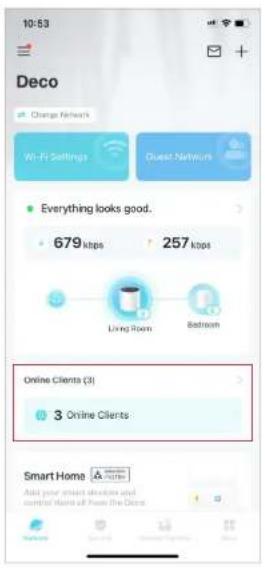
10:53 Deco Change Network Wi-Fi Settings Guest Networks Everything looks good. 679 kbps 257 kbps Living Room Bedroom Online Clients (3) 3 Online Clients Smart Home Add your smart devices and control rights off from the Deco

  1. Tap a client to view the details. 3. Tap the device icon to configure

10:59 Clients Online Clients (3) phone + 0 hours + 0 hours phone + 0 hours + 0 hours phone + 0 hours + 0 hours Offline Clients 0

10:59 phone Connected to: Living Room (5 GHz) MAC: 0A-9E-A1-A8-FB-F2 IP: 192.168.66.57 0 kbps Download: A 0 kbps Upload: 1 Strong Signal Family Member > Connection Preference > High Priority > Mesh Technology > Disabling Mesh Technology will turn off islandes mapping between Glow for this device. Device Isolation Disabled > Block

the device type and name.

10:59 Device Info Device Type Phone Device Name phone

  1. Tap Family Member to check the profile it belongs to.

  2. Tap Connection Preference to configure the preferred Deco and Wi-Fi band for this client.

  3. Enable High Priority for this client.

4:39 Family Member Tom

11:00 Connection Preference Current Connection Linked Deco Living Room Connection Type 5 GHz Preferred Deco Auto (Recommended) ✓ Living Room WAC AG-18-A3-44-6G-BF Bedroom WAC AG-18-A3-44-6G-BF-AC This client will automatically connect to the Deco that provides the Nusier speed. Preferred Wi-Fi Band Auto (Recommended) ✓ 2.4 GHz 5 GHz You client will automatically connect to the next Wi-Fi Band.

10:59 phone Connected to: Living Room (5 GHz) MAC: 0A-9E-A1-AB-FB-F2 IP: 192.168.68.51 0 kbps 0 kbps Strong Signal Family Member Connection Preference High Priority Mesh Technology Disabling Mesh Technology will turn off server- roaming between Office for the device. Device Isolation Disatisfied > Block

  1. Enable Mesh Technology for this client to turn on seamless roaming between Decos for this device.

10:59 phone Connected to: Living Room (5 GHz) MAC: 0A-9E-A1-AB-F8-F2 IP: 192.166.66.51 0 kbps Download + 0 kbps United + Strong Signal Family Member Connection Preference High Priority Mesh Technology Disabling Mesh Technology, All Us of seamless Isolation between Disks for this device. Device Isolation Disabled > Block

  1. Enable Device Isolation to block this device from communicating with other devices on the network to ensure the network security. Refer to Device Isolation for more details.

4:40 Device Isolation Device Isolation When isolated, the device will be blocked from communicating with other devices in your home network to ensure the network security. While isolated, the device can still access the infested and communicates with other isolated devices.

  1. Tap Block to prevent this device from accessing to the network.

10:59 phone Connected to: Living Room (5 GHz) MAC: 0A-9E-A1-A8-F8-F2 P: 192.188.68.51 0 kbps Download & 0 kbps Uploaded T Strong Signal Family Member Connection Preference High Priority Mesh Technology Disabling Mesh Technology will turn-off unless rooming between Devices for this device. Device Isolation Disabled > Black

Deco Smart Home

Deco works as a central controller to manage your smart devices such as smart bulbs, plugs, and switches. It allows you to access the devices in your local area network (LAN) through the Deco app even when your home goes offline.

Add Smart Devices

After creating a Deco network, you can add your smart home devices to the network and manage them conveniently on your Deco app.

  1. On the home page, swipe up and tap the Smart Home module.

11:02 Deco Wi-Fi Settings Guzal Networks Everything looks good. 164 kbps 134 kbps Living Room Bedroom Online Clients (3) 3 Online Clients Smart Home Add your smart devices and control than all from the Door Help Learn More

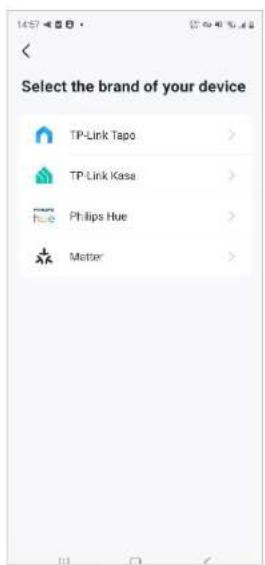
  1. Tap Get Started. 3. Select the brand of your device and follow the instructions to add it to your Smart Home.

12:10 + Smart Home Your Home. One App. Add your smart devices and control them all from the Deco app. Enjoy the convenience of a fully connected smart home. Get Started

Select the brand of your device TP-Link Tapo TP-Link Kasa huo Philips Hue Matter

  1. When finished setup, you can manage your smart devices on Deco Smart Home.

Smart Home Smart Actions > + Add Snout All Devices plug 1 Home plug 2 Home

Quickly Do Tasks with Shortcut

Shortcut lets you execute an action with a simple tap. For example, if you want to power off your living room light at one tap, follow the steps below. Note: If you want to create shortcuts for your smart devices, refer to Add Smart Devices to add the them to your Deco network first.

  1. On the home page, swipe up and tap the Smart module.

4:05 Deco Wi-Fi Settings Cueer Networks Everything looks good. 22 Kbps 2 Kbps Living Room Bathroom Online Clients (1) 1 Online Clients Smart Devices (2) 62% Light1 Light2 1%

  1. Tap + and select Add Shortcut.

13:03 Smart H Add Smart Device Add Shortcut See what's r Home Cente Add Automation Smart Actions + Add Short... All Devices white lamp Lung screen

  1. Tap Add Action.

12:11 New Shortcut Create a shortcut to actions you do every day. + Add Action

  1. Choose the devices you'd like to control.

13:03 Add Action Choose devices you'd like to control Lights > Switches/Plugs/Outlets > Network Devices >

  1. Add an action to be executed with a simple tap.
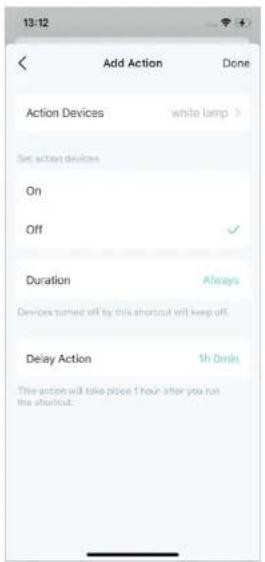
13:12 Add Action Done Action Devices white lamp > Set action devices On Off ✓ Duration Always Devices turned off by this shortcut will keep off. Delay Action 1h Onin This action will take place 1 hour after you run the shortcut.

  1. Name the shortcut and choose an icon for easy identification.

13:13 New Shortcut Done Bedtime Select Icon

Now you can tap to execute the action anytime you like.

13:13 Smart Home See what's new in our Deco Smart Home Center. Smart Actions Bedtime Add Short... All Devices debug white lamp Office

Automate Your Smart Devices

Automation allows you to set interactions between your devices by adding triggers and actions. For example, when you arrive home or when your smartphone is connected to the Deco network (which is a trigger), the living room plug automatically turns on (which is an action). Then the kettle plugged into the living room plug will start to boil water.

Note: If you want to create shortcuts for your smart devices, refer to Add Smart Devices to add the them to your Deco network first.

  1. On the home page, swipe up and tap the Smart module.
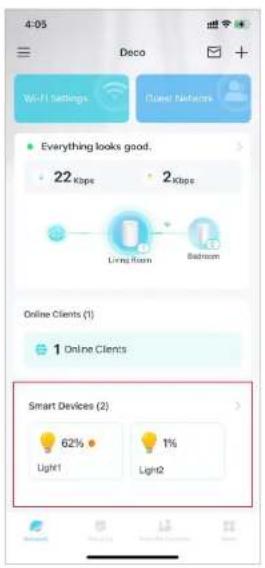
4:05 Deco Wi-Fi Settings Clean Filters Everything looks good. 22 Kbps 2 Kbps Living Room Bedroom Online Clients (1) 1 Online Clients Smart Devices (2) 62% Light1 Lign2 1%

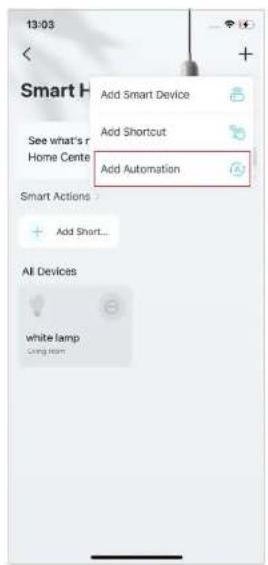
  1. Tap + and select Add Automation.

13:03 Smart H Add Smart Device Add Shortcut Add Automation See what's r Home Cente Smart Actions Add Short... All Devices white lamp Living room

  1. Tap Add Trigger. 4. Set a time or device trigger to activate this automation.

13:14 New Automation Next Automotive your smart devices to do what you want, when you want! When + Add Trigger Then + Add Action

Add Trigger Set a trigger to activate this automation. Time Trigger Time Device Trigger Lights Switches/Plugs/Outlets Network Devices

  1. Add an action to be executed when triggered.

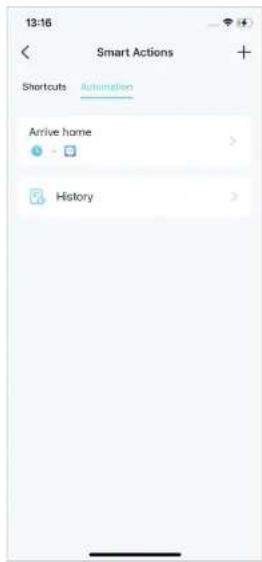
  2. Name the automation. Now the action will be executed when triggered.
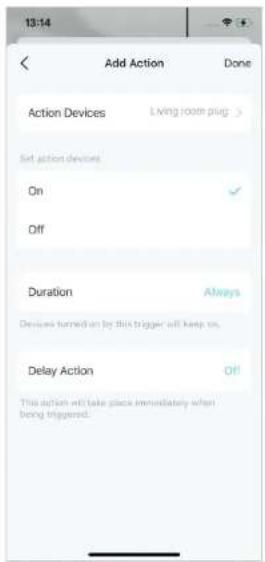
13:14 Add Action Done Action Devices Living room plug > Set action devices On ✓ Off Duration Always Devices turned on by this trigger will keep on. Delay Action Off This action will take place immediately when being triggered.

13:16 New Automation Done Arrive home

13:16 Smart Actions Shortcuts Automation Arrive home History

Parental Controls

Parental Controls helps your kids maintain healthy digital habits.

Easily control your kids' online time and content. Receive intuitive charts and detailed statistics concerning your kids' internet usage.

Create Profiles

To use Parental Controls, let's start by creating profiles for your kids.

  1. On the home page, tap Parental Controls and tap Get Started.
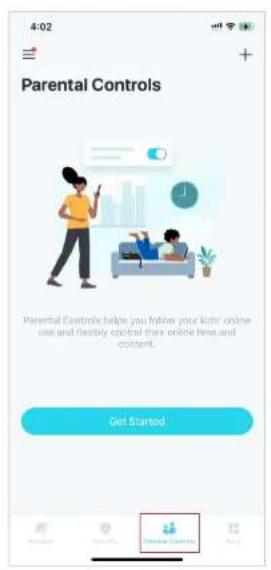
4:02 Parental Controls Parental Controls helps you follow your kids' online use and flexibly control their online time and content. Get Started Parental Controls

  1. Create a profile for your kid. 3. Select the devices belong to your kid.

4:02 New Profile Next Profile Name Select Age We will press the Parental Controller rules based on the selected age. You can always change it in the profile settings. Pick an Avatar

12:19 Select Devices Done(1) Select devices that belong to this profile MyPC BC-54-B1-A8-DA-15 MyPhone 06-14 10-90-TB-98 TIP2 D2-A8-B6-E2-7B-16 My-iPhone C4-B1-B3-CF-BF-32 UNKNOWN 7B-B7-GF-UA-20-E7 W50 FC-AA-14-S5-FB-5D

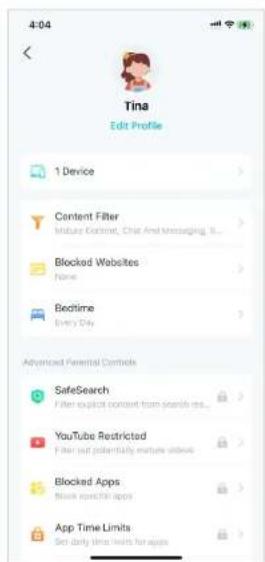
  1. Follow the instructions to complete the settings, then a profile will be created.

Note: Features with is for Advanced Parental Controls users only.

4:04 Tina Edit Profile 1 Device Content Filter Home Content, Chat And Messaging, ... Blocked Websites None Bedtime Every Day Advanced Parental Controls SafeSearch Enter export content from search re... YouTube Restricted Make out potentially mature interest Blocked Apps Block specific apps App Time Limits Set daily time limits for apps

Manage Your Kids' Activities

You can use Parental Controls features to manage your kids online activities such as online time and content. Some features are for HomeShield Subscription Service users only. You need to upgrade to Advanced Parental Controls to use these features. Other features are free for use.

  1. On the home page, tap Parental Controls and select your kid's profile.

  2. Tap the icon ☐.

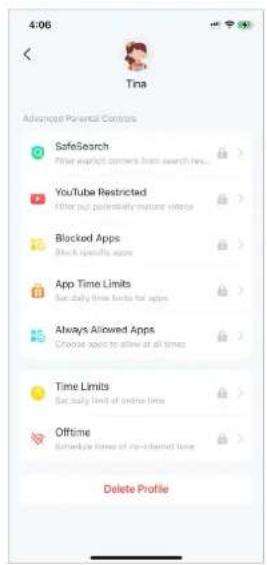
  3. Manage the online activities for your kids.

Note: Features with is for HomeShield Subscription Service users only. Please upgrade to Advanced Parental Controls to unlock more flexible settings.

4:19 Parental Controls Tina 1 doctor online Block Online Time 17m

4:20 Tina 17m online Block Today, Apr 17 Online Time 17m Upgrade to Advanced Parental Contrats to unlock real-time online data. Top Visited Websites gateway.licloud.com.cn 7 times 2 minutes extshort.weixin.qq.com 2 times 3 minutes short.weixin.qq.com

4:04 Tina Edit Profile 1 Device Content Filter Mature Content, Chat And Messaging, S... Blocked Websites None Bedtime Every Day Advanced Parental Controls SafeSearch Filter explicit content from search results... YouTube Restricted Filter out potentially mixture videos Blocked Apps Make up action apps App Time Limits Set daily time limits for apps

4:06 Tina Advanced Potential Controls SafeSearch Filter expect corners front search news... YouTube Restricted Filter out potentially mixture video Blocked Apps Block specificity apps App Time Limits Set daily time limits for apps Always Allowed Apps Choose save to allow at all times Time Limits Set daily level of online times Offtime Schedule times of up-to-Internet time Delete Profile

* Features available in Deco may vary by model and software version. Deco availability may also vary by region or ISP.

Features for all:

- Filter inappropriate content

Tap Content Filter. The categories selected here will be blocked from accessing.

You can add accessible exception sites in Manage Allowed Websites.

4:06 Content Filter Select the categories of web content you want to block profiles from accessing. ✓ Mature Content Gaming Streaming & Media ✓ Chat And Messaging ✓ Social ✓ Online Shopping ✓ File Sharing Manage Allowed Websites

- Block specific websites

Tap Block Websites and enter the websites you want to prevent the profile from accessing.

4:14 Blocked Websites Save + Add a Website game.com

- Set "no internet" bedtime

Tap Bedtime and set a bedtime to prevent the profile from accessing the internet.

To set a more flexible bedtime, upgrade to Advanced Parental Controls.

Note: Features with is for Advanced Parental Controls users only.

Bedtime Set "No Internet" Bedtime to make sure your kids have a full night's sleep. Off Every Day Weekdays & Weekends Custom Days Every Day 08:00 PM - 07:00 AM Upgrade to Advanced Parental Control

More Flexible Settings for Advanced Parental Controls users only:

- Block specific apps

Tap Blocked Apps and select the categories or apps to prevent the profile from accessing.

Note:

  1. If you block an app category, new applications in that category after a firmware upgrade will also be blocked.
  2. Only apps displayed in the list can be blocked. Apps not on the list will be allowed to access.
  3. If you block apps that have been previously added to App Time Limits, the rules you set in App Time Limits will be ignored and these apps will be blocked.

3:36 Blocked Apps Save Search Select which app categories to prevent the profile from accessing the sublocking a category, all apps in the category will be broadcast Gaming All apps blocked Streaming & Media 5 apps blocked Chat & Messaging 8 apps blocked Social Allowed Online Shopping 3 apps blocked File Sharing Allowed App Stores 2 apps blocked Information & Reading Allowed Productivity & Finance Allowed Education Allowed

- Youtueb Restricted

Youtube Restricted Mode filters out potentially mature videos while leaving most videos available.
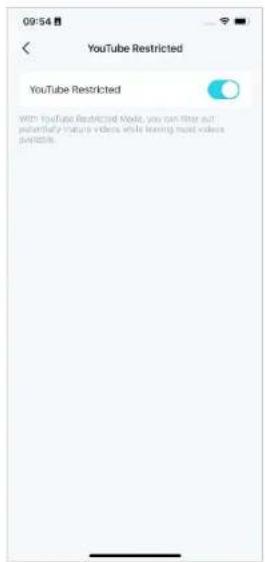
09:54 YouTube Restricted YouTube Restricted With YouTube Restricted Note, you can stop out probably change videos while leaving most videos possible.

- Safesearch

Safesearch helps you filter explicit content from your results.

09:54 SaleSearch SaleSearch SaleSearch now helps you filter Egypt content from your results. Explicit results include sexually explicit content like pornography, violence, and gom. Notes: http://search.my.women Egyptian.org/ Egypt search engines. It wasn't block explicit content you find in other search engines or websites that you go to Egypt.

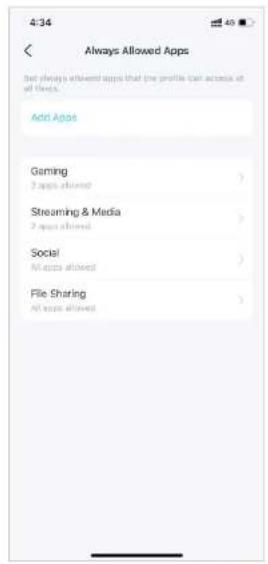
• Always Allowed Apps

1. Tap Add Apps.

  1. Select app categories or specific apps that the profile can access at all times, regardless of whether they were previously added to Blocked Apps or App Time Limits.

4:33 Always Allowed Apps Set always allowed apps that the profile can access as all users. Add Apps

4:34 Select Apps Add Search Gaming 2 apps > Streaming & Media 2 apps > Chat & Messaging None > Social All apps > Online Shopping None > File Sharing All apps > App Stores None > Information & Reading None > Productivity & Finance None > Education

4:34 Always Allowed Apps But always allowed apps that the profile can access all of foods. Add Apps Gaming 2 apps allowed Streaming & Media 2 apps allowed Social All apps allowed File Sharing All apps allowed

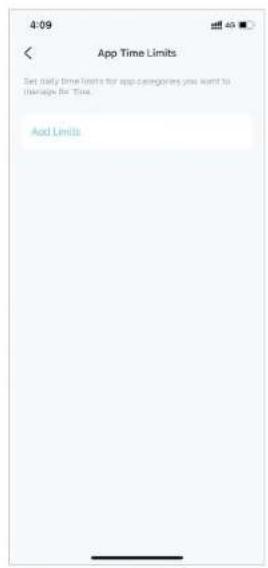
- App Time Limits

  1. Tap Add Limits.

  2. Select app categories or specific apps. 3. Set time limits for the selected apps and tap

Add to save the settings.

Note:

  1. If you set time limits for apps that have been previously added to Blocked Apps, these apps will be unblocked and follow the rules you set in App Time Limits.

  2. Time limits here refer to the time the device uses internet traffic. Activities that don't use traffic, such as single-player gaming and video buffering, are not included.

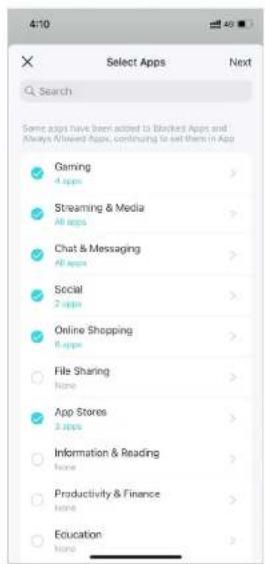
4:09 App Time Limits Set daily time limits for app categories you want to manage for Time Add Limits

410 Select Apps Next Search Some apps have been added to Blacked Apps and Always Allowed Apps, continuing to set them in App Gaming 4 apps > Streaming & Media All apps > Chat & Messaging All apps > Social 2 apps > Online Shopping 6 apps > File Sharing None > App Stores 3 apps > Information & Reading None > Productivity & Finance None > Education None >

4:12 Set Limits Add Every Day Weekdays & Weekends Custom Days Weekdays 2h Weekends 5h 4h 5h 0m 6h 30m 6h Set Weekdays and Weekends

- Time Limits

  1. Tap Add Limits.

4:09 App Time Limits Set daily time limits for app categories you want to manage for Time. Add Limits

  1. Select apps you want to manage for the profile.

4:10 Select Apps Next Search Some apps have been added to Blocked Apps and Always Advanced Apps, continuing to set them in Apps Gaming 4 apps Streaming & Media All apps Chat & Messaging All apps Social 2 apps Online Shopping 6 apps File Sharing None App Stores 2 apps Information & Reading None Productivity & Finance None Education None

  1. Set time limits for the selected apps and tap Add to save the settings.
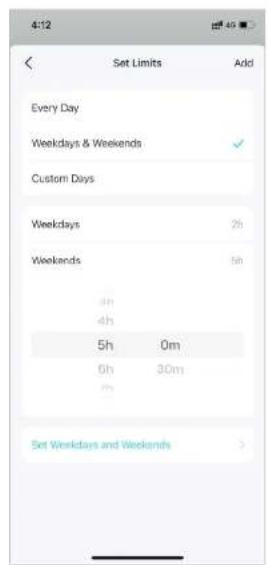
4:12 Set Limits Add Every Day Weekdays & Weekends Custom Days Weekdays 2h Weekends 5h 4h 5h 0m 6h 30m 2h Set Weekdays and Weekends

View Online Usage Data

With the created profiles, you can view intuitive charts and real-time detailed statistics concerning your kids' online usage. Note: App usage data is for HomeShield Subscription Service users only. Upgrade to Advanced Parental Controls to see what apps your kids use and how much time they spend.

• 1. On the home page, tap Parental Controls.

Parental Controls Son 3 devices online Block Adjust 14h 37m 33 Offline Block Adjust 0m used/Off Gen

• 2. Tap a profile to check the online usage data such as most visited websites and most used apps, block history, and more.

TP-LINK Deco X55 Pro - View Online Usage Data - 2

bar | Time | Usage (g) | |---|---| | 0 | 0 | | 1 | 20 | | 2 | 40 | | 3 | 60 | | 4 | 80 | | 5 | 100 | | 6 | 120 | | 7 | 140 | | 8 | 160 | | 9 | 180 | | 10 | 200 | | 11 | 220 | | 12 | 240 | | 13 | 260 | | 14 | 280 | | 15 | 300 | | 16 | 320 | | 17 | 340 | | 18 | 360 | | 19 | 380 | | 20 | 400 | | 21 | 420 | | 22 | 440 | | 23 | 460 | | 24 | 480 | | 25 | 500 | | 26 | 520 | | 27 | 540 | | 28 | 560 | | 29 | 580 | | 30 | 600 | | 31 | 620 | | 32 | 640 | | 33 | 660 | | 34 | 680 | | 35 | 700 | | 36 | 720 | | 37 | 740 | | 38 | 760 | | 39 | 780 | | 40 | 800 | | 41 | 820 | | 42 | 840 | | 43 | 860 | | 44 | 880 | | 45 | 900 | | 46 | 920 | | 47 | 940 | | 48 | 960 | | 49 | 980 | | 50 | 1000 | | 51 | 1020 | | 52 | 1040 | | 53 | 1060 | | 54 | 1080 | | 55 | 1100 | | 56 | 1120 | | 57 | 1140 | | 58 | 1160 | | 59 | 1180 | | 60 | 1200 | | 61 | 1220 | | 62 | 1240 | | 63 | 1260 | | 64 | 1280 | | 65 | 1300 | | 66 | 1320 | | 67 | 1340 | | 68 | 1360 | | 69 | 1380 | | 70 | 1400 | | 71 | 1420 | | 72 | 1440 | | 73 | 1460 | | 74 | 1480 | | 75 | 1500 | | 76 | 1520 | | 77 | 1540 | | 78 | 1560 | | 79 | 1580 | | 80 | 1600 | | Note: The actual values may vary due to the use of the data on the chart. The provided values are just an example from the code execution.
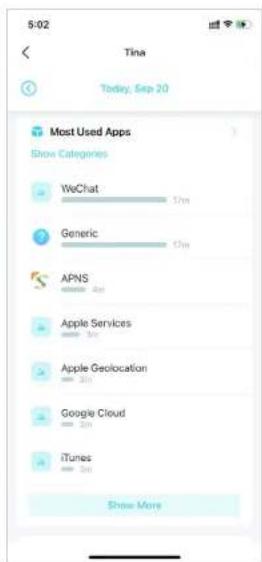
5:02 Tina Today, Sep 20 Most Used Apps Show Categories WeChat 12m Generic 6m APNS Apple Services Apple Geolocation Google Cloud iTunes Show More

5:04 Tina Today, Sep 20 Top Visited Websites 1 extahort.weixin.qq.com 6 times 11 minutes 2 weixin.qq.com 5 times 9 minutes 3 short.weixin.qq.com 5 times 7 minutes 4 dne.weixin.qq.com 3 times 3 minutes 5 gsp85-cn-ssl.ls.apple.com 3 times 3 minutes Block History 1 is1-ssl.mzstatic.com 48 times 2 is2-ssl.mzstatic.com 19 times 3 mask.licloud.com 16 times

Set Up Family Time

Family time lets you enjoy a nice dinner, or share a fun movie with your family together by pausing the internet with one tap. Family Time is for HomeShield Subscription Service users only.

  1. On the home page, swipe right to open the menu and select HomeShield.

  2. Select a desired network to apply Advanced Parental Controls.
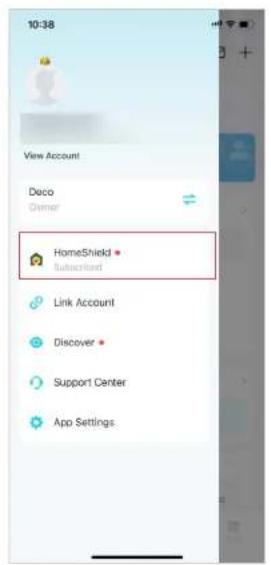
10:38 View Account Deco Owner HomeShield Subscribed Link Account Discover Support Center App Settings

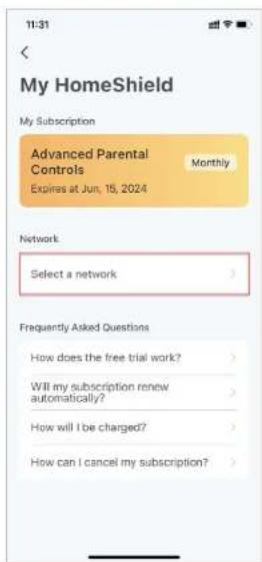
11:31 < My HomeShield My Subscription Advanced Parental Controls Monthly Expires at Jun, 15, 2024 Network Select a network Frequently Asked Questions How does the free trial work? Will my subscription renew automatically? How will I be charged? How can I cancel my subscription?

11:33 Select a network Please select a network to apply your subscriptions. Deco MAC: AC-15-A2-7A-41-B6 PoE MAC: SC-E9-31-BF-77-F8 Deco MAC: E4-FA-C4-15-7F-6C 123 MAC: SC-E9-31-F7-52-B4 Confirm

11:34 Subscribed Successfully Enjoy premium protection of your network with Advanced Parental Controls. Enjoy Now

  1. Open Deco app. Go to the Parental Controls tab and tap + > Set up Family Time. Then tap Set Up Now.

Parental C Create a Profile Set up Family Time Get Started

11:35 Family Time Pause the internet to enjoy time with your family. Family Time is a premium feature and won't be available after the tree trial ends. Upgrade now to continue its use without limits... Set Up Now

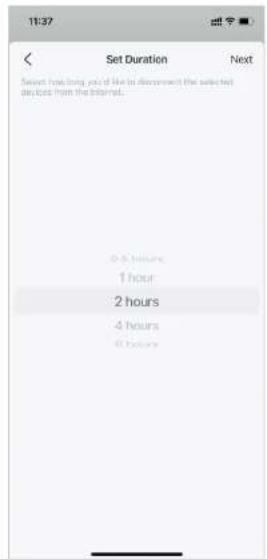
  1. Add devices of the family member who you want to cut the internet and then set the time duration you want to have your family together without internet distractions.

11:36 Select Devices Next Other's Devices Select All HONOR_V20-59adb427d7 22-38-39-UC-29-77 LIO-AN00 FZ-FI-C9-05-60-88 OPPO-K10-5G A2-48-60-DE-10-A0 iPhone-Hotspot DZ-48-57-83-DA-99 phone 16-3P-2D-8A-8B-88 phone A2-FD-59-EA-C11-C3 phone 12-BC-39-ALY-14-DC

11:37 Set Duration Next Select how long you'd like to disconnect the selected minutes from the Internet. 0-5 hours 1 hour 2 hours 4 hours 0+ hours

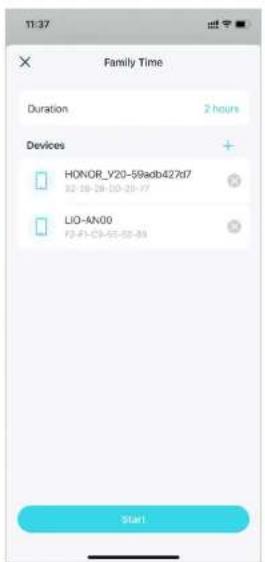
  1. Tap Start anytime you want to activate the family time. Tap Stop anytime when finished.

11:37 Family Time Duration 2 hours Devices HONOR_Y20-59adb427d7 LIO-AN00 F2-F1-C3-55-52-83 Start

1:59:57 Family Time Devices HONOR_V20-59adb427d7 12-38-28-00-26-77 LIO-AN00 F2-41-09-05-00-89 Stop

* Features available in Deco may vary by model and software version. Deco availability may also vary by region or ISP.

Grant Rewards

You can add extra online time as a reward for you kid's good behavior. This feature is for HomeShield Subscription Service users only.

  1. On the home page, swipe right to open the menu and select HomeShield.

  2. Select a desired network to apply Advanced Parental Controls.

10:38 View Account Deco Owner HomeShield Subscribed Link Account Discover Support Center App Settings

11:31 < My HomeShield My Subscription Advanced Parental Controls Monthly Expires at Jun, 15, 2024 Network Select a network > Frequently Asked Questions How does the free trial work? Will my subscription renew automatically? How will I be charged? How can I cancel my subscription?

11:33 Select a network Please select a network to apply your subscriptions. Deco MAC: AC-15-A2-7A-41-6E PoE MAC: SC-E9-31-BF-77-F8 Deco MAC: E4-FA-C4-15-7F-6C 123 MAC: SC-E9-31-F7-53-84 Confirm

11:34 Subscribed Successfully Enjoy premium protection of your network with Advanced Parental Controls. Enjoy Now

  1. Go to the Parental Controls tab and select a profile.
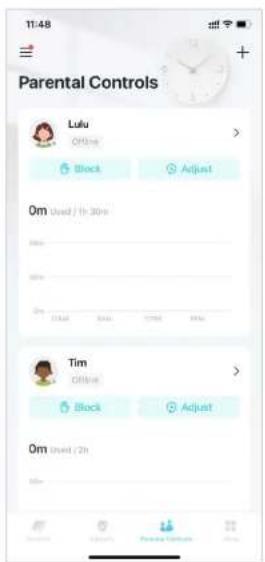
T1:48 Parental Controls Lulu OFFsite Block Adjust 0m Used / 1h 30m Tim OFFsite Block Adjust 0m Used / 2h

  1. Tap Adjust and select the allowed time you want to add for today.
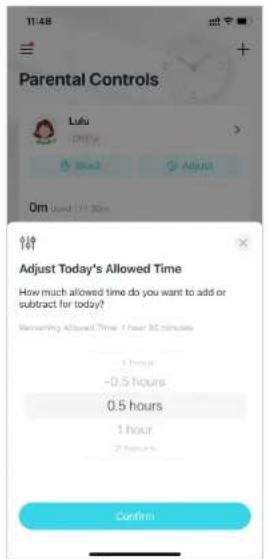
Parental Controls Lulu PMX Add Adjust Om Used 11:30pm Adjust Today's Allowed Time How much allowed time do you want to add or subtract for today? Remembered Allowed Time: 1 hour 30 minutes 1 hour -0.5 hours 0.5 hours 1 hour 2 hours Confirm

Network Protections

Real-Time Protection is for HomeShield Security+ users only. After subscribing to HomeShield Security+, you can protect your network safe from attacks by blocking malicious websites, identify potential threats, and blocking hackers from access your devices.

Enable Security+ Protection

Real-Time Protection is for HomeShield Security+ users only. Before using this, refer to Subscribe to HomeShield Service to update to HomeShield Security+ Service.

  1. In the homepage, swipe right to open the menu and select HomeShield.

10:38 View Account Deco Owner HomeShield Subscribed Link Account Discover Support Center App Settings

  1. Select a desired network to apply Security+.

11:30 < My HomeShield My Subscription Security+ Monthly Expires at Mar, 12, 2024 Advanced Parental Controls Monthly Expires at Jun, 15, 2024 Network Select a network > Frequently Asked Questions How does the free trial work? Will my subscription renew automatically? How will I be charged? How can I cancel my subscription?

11:33 Select a network Please select a network to apply your subscriptions. Deco MAC: AC-15-A2-7A-41-6E PoE MAC: SC-E9-31-6F-77-F8 Deco MAC: E4-FA-04-11-7F-6C 123 MAC: SC-E9-31-F7-50-94 Confirm

10:36 Subscribed Successfully Enjoy premium protection of your network with HomeShield Subscription Service. Enjoy Now

  1. Go to the Security tab. Your Deco will scan automatically. You can tap Scan Details to check the security details such as wireless security or blocked threats and optimize the settings.

Scanning Your Network... Scan Details Device Isolation Disordered Camera Security CH+ Security+ Stop giving away your personal info! Web Protection secures all Internet connections, blocking millions of malicious links worldwide everyday to safeguard your personal data and property. • Upgrade

3 Security Yes Scan Details Device Isolation Disabled Camera Security CFI Security+ Stop giving away your personal info! Web Protection secures all Internet connections, blocking millions of malicious links worldwide everyday to safeguard your personal data and property. • • Upgrade

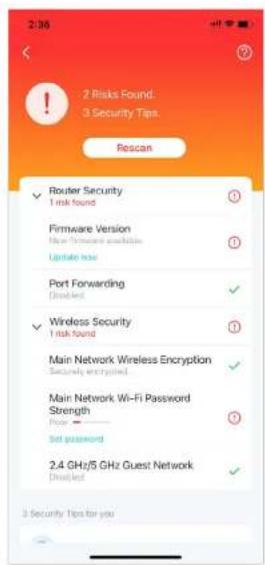
2 Risks Found. 3 Security Tips Rescan ✓ Router Security 1 risk found Firmware Version New Software passwords Update Note Port Forwarding Download ✓ Wireless Security 1 risk found Main Network Wireless Encryption Security encrypted Main Network Wi-Fi Password Strength Power Set password 2.4 GHz/5 GHz Guest Network Download 3 Security Tips for you

  1. Upgrade to Security+ for more protections as below.

11:04 2.4 GHz/5 GHz Guest Network Disabled 3 Security Tips for you Web Protection Upgrade to Security+ for Web Protection. Replace access to malicious settings to avoid dangerous links and personal information disclosure. Upgrade Ignore Intrusion Prevention Upgrade to Security+ for Intrusion Prevention. Identifies potential threats and keeps your network safe from attacks. Upgrade Ignore IoT Protection Upgrade to Security+ for IoT Protection. Blocks networks from accessing your IoT devices. Upgrade Ignore

- Web Protection • Intrusion Prevention

Turn on Web Protection to block access to malicious websites to avoid dangerous links and personal information disclosure.

You can add clients to Exceptions to opt out of the protection.

10:43 Web Protection Web Protection is disabled. Turn on is block access to multiple websites to assist personal links and personal information disclosures. Turn on

10:44 Exceptions Clients in the Exception will not be protected by Web Protection. Please add their loyalty. HONOR_V20-59adb427M7 Add by MAC Address Select Clients Add by MAC Address Cancel

Turn on Intrusion Prevention to identify potential threats and keep your network safe from attacks.

You can add clients to Exceptions to opt out of the protection.

10:50 Intrusion Prevention Intrusion Prevention is disabled. Turn on to identify potential threats and keep your network safe from attacks. Turn on

10:52 Exceptions Clients in the Exception will not be protected by inclusion prevention. Please add them carefully. No clients add Add clients Select Clients Add by MAC Address Cancel

- IoT Protection

Turn on IoT Protection to block hackers from accessing your IoT devices.

You can add clients to Exceptions to opt out of the protection.

10:52 IoT Protection IoT Protection is disabled. To turn on the block switches from an existing your IoT devices. Turn on

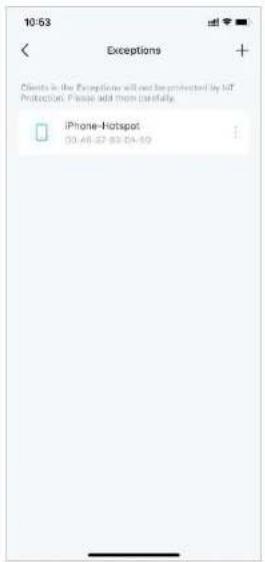
10:53 Exceptions Clients in the Exceptional will not be protected by IoT Protection. Please add them carefully. iPhone-Hotspot 03:48:27 03:04:59

Device Isolation

Isolating Your Devices will minimize the potential for potential third parties to gain access to data or devices on your network and will limit the impact of a breach or malware to only some devices. Also, some IoT devices may often consume large portions of your network's bandwidth. Isolating these devices will prevent them from affecting the overall performance of the devices connected to your home network and will allow your router to better allocate and manage bandwidths for the connections.

  1. In the homepage, go to the Security tab and tap Device Isolation,

  2. Enable Device Isolation. Then tap + to add the devices that you would like to be isolated from your main network.

Then the device will appear in the Isolated Devices list. While isolated, the devices can still access the internet and are able to communicate with other isolated devices. However, isolated devices cannot transfer data with devices on your home network, including managing gateway devices, accessing USB devices, etc.

Scanning Your Network... Scan Details Device Isolation Disordered Camera Security Security+ Stop giving away your personal info! Web Protection secures all internet connections, blocking millions of malicious links worldwide everyday to safeguard your personal data and property Upgrade

4:50 Device Isolation Device Isolation Isolate devices to protect your network from security threats. While isolated, these devices can still access the internet and communicate with other isolated devices. However, these devices cannot transfer data with devices on your home network. Isolated Devices Add devices which are most important to you. 4:52 Select Devices Add Main Network (1/2) OPPO-K10-5G 88-F3-28-CE-BF phone 83-56-04-07-09-02 4:52 Device Isolation Device Isolation Isolate devices to protect your network from security threats. While isolated, these devices can still access the internet and communicate with other isolated devices. However, these devices cannot transfer data with devices on your home network. Isolated Devices OPPO-K10-5G 86-F3-28-DE-BF

* Features available in Deco may vary by model and software version. Deco availability may also vary by region or ISP.

Camera Security

Camera Security ensures your privacy at home by blocking your camera from accessing the internet at certain times or all the time.

  1. In the homepage, go to the Security tab and tap Camera Security.
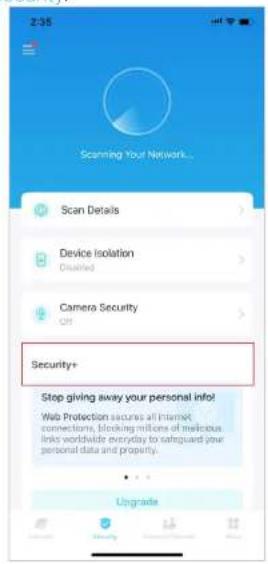
Scanning Your Network... Scan Details Device Isolation Disabled Camera Security CH Security+ Stop giving away your personal info! Web Protection secures all Internet connections, blocking millions of malicious links worldwide everyday to safeguard your personal data and property. Upgrade

  1. Choose a mode and add cameras to apply the mode.

3:39 Camera Security Home Mode When you are at home and do not want certain cameras connected to the internet for privacy and security, you can add them to Home Mode and set Black Times. During Black Times, these cameras will be unable to access the internet. Add Cameras Local Only Mode When you want certain cameras to remain offline, you can add them to Local Only mode. Cameras added to this mode will only work on the local network and will be unable to access the internet at any time. Add Cameras

3:42 Add Cameras Devices (2) LIO-AN00 73-FT/CH-68-50-BI OPPO-K10-5G A2-40-80 DE-10-AI Add(1)

Home Mode

Cameras in Home Mode cannot access the internet during block times. You can set block times in the following two ways:

  • Set a Block Schedule: Set times when the cameras will be blocked from the internet.
  • Block Upon Arrival: Set mobile phones that once connected to Deco's Wi-Fi, the cameras will be blocked from accessing the internet.

Set Block Rule There are two methods for blocking. Except at least one to cut the time to block the camera front connecting to the internet. Block Schedule Please set a block schedule. The camera will be unloaded from accessing the internet within the set time. Set Schedule Block Upon Arrival Please select specific mobile phones as triggers for Block Upon Arrival. When the triggers connect to the Docus (V-F), you will be considered at home, and the cameras will be blocked from accessing the internet. Once all the triggers are disconnected, the camera will no triggers blocked. Select Mobile Phones Complete Complete without setting Block Rule

3:43 Block Schedule Done The camera will be blocked from accessing the internet within the last hour. Off Every Day ✓ Weekdays & Weekends From 8:00 PM To 7:30 AM(Next Day)

Block Upon Arrival Please select specific mobile phones as triggers for Block Upon Arrival. When the trigger is correct to the Case, A-F1, you will be uncontrolled at Home, and the Camera will be blocked from accessing the Internet. Once all the triggers are discontinued, the camera will no longer be blocked. Added mobile phones (T) Add phone 12-8C-29-33-14-8C

Local Only Mode

Cameras in Local Only mode will only work on the local network and cannot access the internet all the time. You can turn it off at any time to let the camera connect to the internet again.

3:45 Add Cameras Add(1) Devices (1) A2-49-B0-DE-10-A5

3:45 Local Only Mode 1 camera was blocked from accessing the internet. Local Only Mode Adder Cameras (1) Add A2-A3-B2-DC+10-A5

More Features

More features are within reach. Test the in-development features at the Deco Lab, receive intuitive network reports, configure network and account settings for dedicated needs, and more.

Tip: You can use the search box on the More page to quickly find the features you need.

Test Features at the Deco Lab

Deco app includes a built-in Deco Lab, which is committed to trying experimental features. It keeps updating the lab according to the actual performance to provide even better experiences.

  1. Go to More > Deco Lab.
    TP-LINK Deco X55 Pro - Test Features at the Deco Lab - 1
  1. Check and test the in-development features. Now Wi-Fi Assistant and VPN Client are available for use.
    TP-LINK Deco X55 Pro - Test Features at the Deco Lab - 2

Wi-Fi Assistant

Use Wi-Fi Assistant for your Wi-Fi diagnostics and network device scan. You can also check how other Wi-Fi networks are impacting your Wi-Fi, the surrounding cameras, the vendor information for a known MAC address, and ISP information for a known IP address.

- Wi-Fi Diagnostics: Run Wi-Fi Diagnostics to access your network security and performance. The Deco app will automatically check your network's signal strength, security, Ping result, wireless interference, etc.

11:43 Wii-Fi Assistant Deco Run Wi-Fi Diagnostics to assess your network's security and performance. Run Wi-Fi Diagnostics For safe browsing, stick with HTTPS. Make sure you always betwe... HTTPS availability as HTTP browsing messages & relatively easy for teachers to switch what you're online. Get it Detect Camera Scan For Devices Ping Test Pub to IP Lookup MAC Lookup Open Port Checker

11:45 Deco The Wi-Fi is probably true Network Security Secured No DMS hijacking Pling Timed Out Gateway 12:58 ms www.google.com Timed Out Wi-Fi Info IP Address 192.168.68.50 MAC EE-RA/C4317/CF Gateway 192.168.69.1 DNS 192.168.0.1 Service Provider Chinaslem Golden Plaza Hello more features? Top is download all at https://wi-fi/speed.html and more.

- Detect Camera: The Deco app can automatically scan all the cameras in your network. You can also follow app instructions to detect camera manually to check if there are any cameras in your house.
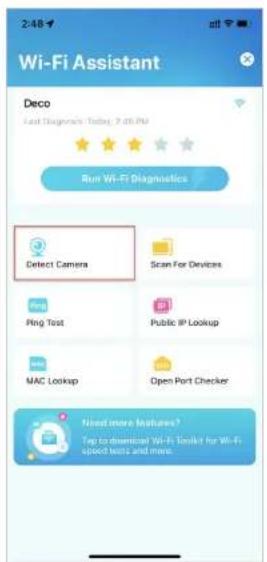
Wi-Fi Assistant Deco Last Diagnostics Today, 2:00 PM Run Wi-Fi Diagnostics Detect Camera Scan For Devices Ping Test Public IP Lookup MAC Lookup Open Port Checker Need more features? Top to download Wi-Fi Toolkit for Wi-Fi speech tests and more.

Deco 20% Detecting camera... Detect Camera Mutually

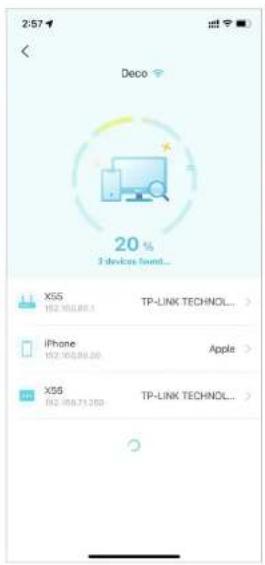
- Scan for Devices: Let Deco app scan all the connected devices in your network.
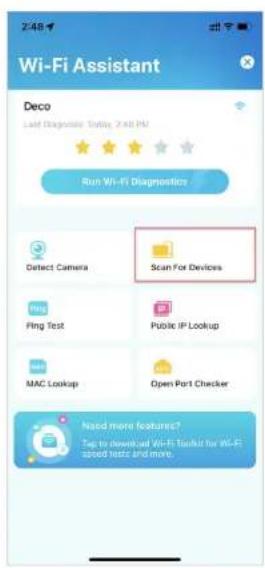
Wi-Fi Assistant Deco Last Diagnolator Today, 2:48 PM Run Wi-Fi Diagnostics Detect Camera Scan For Devices Ping Ping Test Public IP Lookup MAC Lookup Open Port Checker Need more features? Step to download Wi-Fi Toolkit for Wi-Fi succeed tests and more.

2:57 Deco 20% 3 devices found... X55 162 163.88.1 TP-LINK TECHNOL... iPhone 162 163.88.20 Apple > X55 162 163.71.20 TP-LINK TECHNOL... >

- Public IP Lookup: Query tool to query the network information of the current network or the network information of a specific IP address. You can type in a specific IP address to check the location and the ISP information or click Lookup Current IP to check the information of your network if the Internet address of your network is a public address. In the upper right corner of this page, you can view the history.

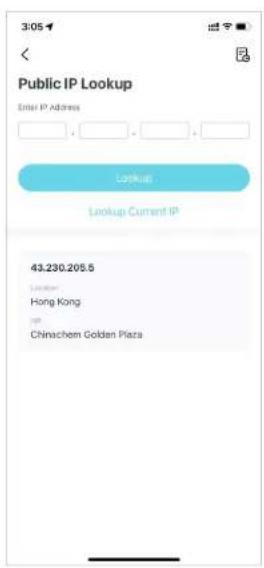
2:48 Wi-Fi Assistant Deco Last Diagnosis Today 3-49 PIs Run Wi-Fi Diagnostics Detect Camera Scan For Devices Ping Test Public IP Lookup MAC Lookup Open Port Checker Need more features? Tap to download Wi-Fi Toolkit for Wi-Fi speed tests and more.

3:05 Public IP Lookup Enter IP Address Lookup Lookup Current IP 43.230.205.5 Lisioter Hong Kong ip Chinachem Golden Plaza

- Ping Test: Ping test on the specified server to view real-time packet loss and latency data. In the upper right corner of this page, you can set the send interval and packet size or view the history.
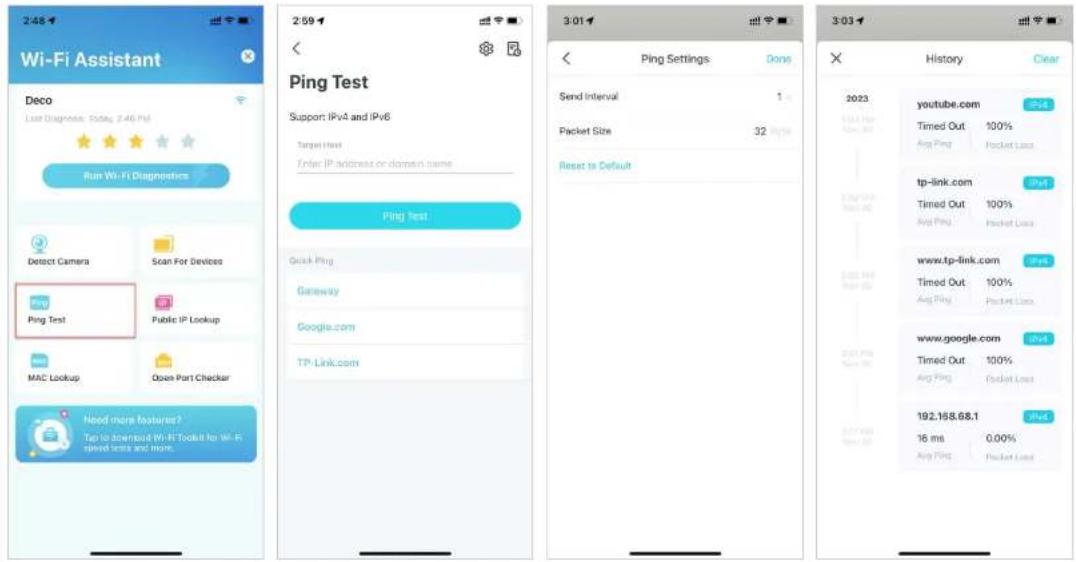
2:48 Wi-Fi Assistant Deco Last Diagnosis: Today, 2:46 PM Run Wi-Fi Diagnostics Detect Camera Scan For Devices Ping Test Public IP Lookup MAC Lookup Open Port Checker Need more features? Tap to download Wi-Fi Tools for Wi-Fi spread time and more. 2:59 Pling Test Support: IPv4 and IPv6 Target Test Enter IP address or domain name Ping Test Quick Ping Gateway Google.com TP-Link.com 3:01 Ping Settings Done Send Interval 1.0 Packet Size 32 Bytes Reset to Default 3:03 History Clear 2023 youtube.com Timed Out 100% Avg Ping Packet Loss tp-link.com Timed Out 100% Avg Ping Packet Loss www.tp-link.com Timed Out 100% Avg Ping Packet Loss www.google.com Timed Out 100% Avg Ping Packet Loss 192.158.68.1 16 ms 0.00% Avg Ping Packet Loss

- MAC Lookup: Query tool for relevant vendor information based on MAC address. You can type in a specific MAC address (first six letters) to check the vendor information of the device.
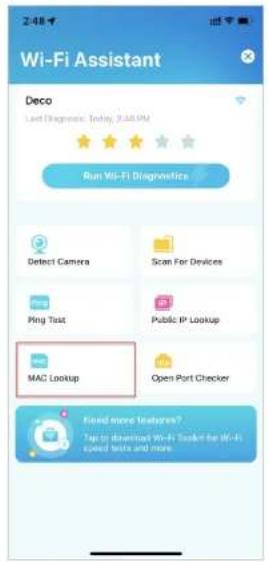
2:48 Wi-Fi Assistant Deco Last Diagnosis: Today, 9:30 PM Run Wi-Fi Diagnostics Detect Camera Scan For Devices Ping Test Public IP Lookup MAC Lookup Open Port Checker Find more examples? Tap to download Wi-Fi Tools for Wi-Fi speed tests and more.

3:07 MAC Address Lookup Enter the first 6 digits of the MAC address 28 - EE - 52 Lookup 28-EE-52 Company: TP-LINK TECHNOLOGIES CO.,LTD. Building 24Floors 1,3,4,5and 28Floors 1-4)Central Science and Technology Park,Sherran Road,Nanshan,Shenzhen Guangdong 618057,CN

- Open Port Checker: You can type in a specific IP address to check the opened ports of this server or click Scan Current Device to check the opened ports of your router.

Wi-Fi Assistant Deco Last Diagnostics Today 2 AM PM ★ ★ ★ ★ ★ Start Wi-Fi Diagnostics Detect Camera Scan For Devices Ping Text Public IP Lookup MAC Lookup Open Port Checker Need more features? Top to download Wi-Fi Toolkit for Wi-Fi speed tests and more

Open Port Checker Target Host Enter IP address or domain name Stop Scan Current Device 192.168.68.1 Checking open port... 80 Imported Transfer Protocol (HTTP) 443 Imported Transfer Protocol over TLS/SSL (HTTP) 3393 Checking...

VPN Client

Get a top-class VPN and encrypt Deco's VPN Client to enhance your network security.

Choose any of the VPN service provider and subscribe the services provided. You can also tap Set up now if you already have one. Customize your own VPN service is also available. Refer to Set Up VPN Server/Client for more setup details.

Note: TP-Link does not provide any guarantee for the services of any third party.

Get a top-class VPN! NordVPN® NordVPN Learn more > Surfshark® Surfshark Learn more > Already subscribed? Set up now Why need a VPN on Deco? Protect your home network 24/7 Once set up, the VPN protects your online network and your online information.

Select your VPN Service NordVPN Surfshark + Custom

Customize VPN Type OpenVPN PFTP L2TP/IPSec

Check Network Reports

The Deco app provides intuitive charts and detailed statistics to help you know your home network better.

  1. Go to More > Reports.
    TP-LINK Deco X55 Pro - Check Network Reports - 1
  1. Check the weekly and monthly reports of your network.
    TP-LINK Deco X55 Pro - Check Network Reports - 2

TP-LINK Deco X55 Pro - Check Network Reports - 3

bar | Event | Time (h) | Time (m) | | :--- | :--- | :--- | | Bu | 87 | 28 | | Jca | 76 | 51 | | K | 8 | 48 | | Raina | 33 | 55 | | Raina (0 h 0 m) | 0 | 0 |
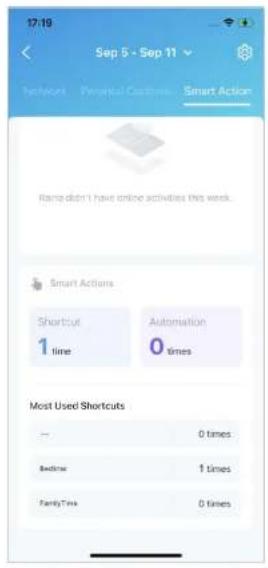
17:19 Sep 5 - Sep 11 Network Parental Custom Smart Action Ramp didn't have online activities this week. Smart Actions Shortcut 1 time Automation 0 times Most Used Shortcuts — 0 times Bedtime 1 times FamilyTime 0 times

Block/Unblock Specific Devices

You can block undesired devices to prevent them from accessing your network or unblock specific devices.

  1. Go to More > Block List.

  2. Tap + and choose a method to block devices.

11:11 More Search for a feature Deco Lab Reports Block List QoS Wi-Fi Settings > Guest Network > IoT Network > WPS > Internet Connection > Network Optimization > Advanced >

11:11 Block List No blocked devices Select Clients Add by MAC Address Cancel

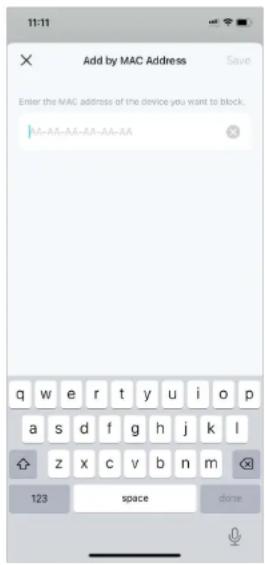
Add by MAC Address Enter the MAC address of the device you want to block. M-AA-AA-AA-AA-AA

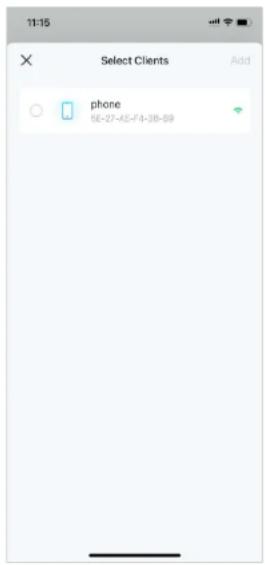
11:15 Select Clients Add phone 96-27-K5-F4-38-B9

QoS

QoS (Quality of Service) allows you to prioritize specific devices. Devices set as high priority will run smoothly even when the network is crowded.

1. Go to More > QoS.

11:11 More Search for a feature Deco Lab Reports Block List QoS Wi-Fi Settings Guest Network IoT Network WPS Internet Connection Network Optimization Advanced

2. Enable QoS.

11:15 QoS QoS (Quality of Service) allows you to prioritize specific devices for a set duration. Devices set as high priority will run smoothly even when the network is created. Enable QoS

3. Set the total bandwidth provided by your ISP.
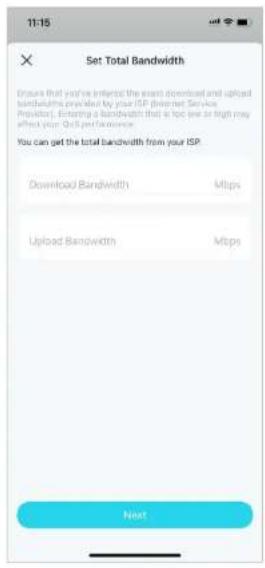
Set Total Bandwidth Ensure that you've inferred the start download and uploaded bandwidths provided by your ISP (Internet Service Provider). Entering a bandwidth that is not one or high may affect your QoS performance. You can get the total bandwidth from your ISP Download Bandwidth Mbps Upload Bandwidth Mbps Next

4. Tap + and add high priority devices.

11:16 QoS Enable QoS (Quality of Services) where you can prioritize specific devices for a set duration. Devices set as high priority will not temporarily even when the network is increased. Total bandwidth Edit ↓ 1000 Mbps ↑ 1000 Mbps High Priority Devices No prioritized devices

Change Wi-Fi Settings

You can change the network name and password of your main network at any time and share the network easily with family and friends.

1. Go to More > Wi-Fi Settings.

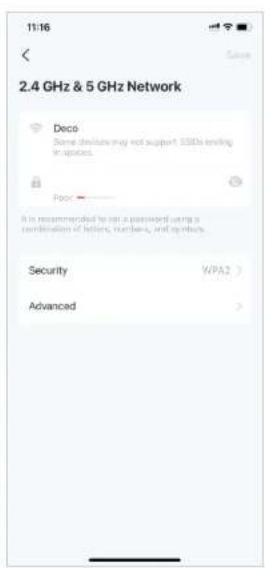
  1. Select the Wi-Fi network and you can change the Wi-Fi network name, password and security.

11:11 More Search for a feature Deco Lab Reports Black List QoS Wi-Fi Settings Guest Network IoT Network WPS Internet Connection Network Optimization Advanced

11:16 Wi-Fi Settings 2.4 GHz & 5 GHz Network Network Name (SDD) Deco Password Share

11:16 Save 2.4 GHz & 5 GHz Network Deco Some devices may not support SSDs ending in space. Poor A is recommended to put a password using a combination of letters, numbers, and options. Security WPA2 Advanced

11:16 Security WPA2 WPA/WPA2 WPA3 WPA2/WPA3 Personal None WPA2/PSK (AES)

  1. Tap Advanced for more Wi-Fi settings as follow.

11:17 Advanced Band 2.4 GHz and 5 GHz > Channel Width for 5 GHz 160 MHz > Hide Network When enabled, you will need to command enter the SSD and password to link this network, and its MP3 feature will be unavailable.

  1. Select a preferred band to be enabled in this network.

11:16 Band 2.4 GHz and 5 GHz 2.4 GHz Only 5 GHz Only Only, the selected bands will be enabled in this network.

  1. Select a preferred channel width for 5 GHz network.
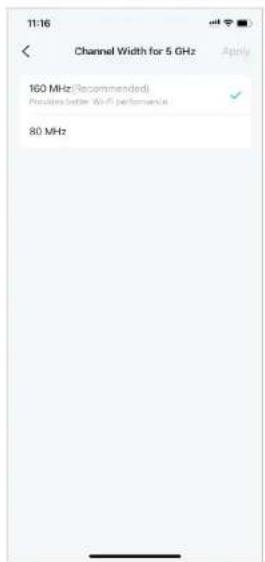
11:16 Channel Width for 5 GHz 160 MHz(Recommended) Precludes better WiFi performance 80 MHz

  1. Enable Hide Network to hide this network from Wi-Fi list.
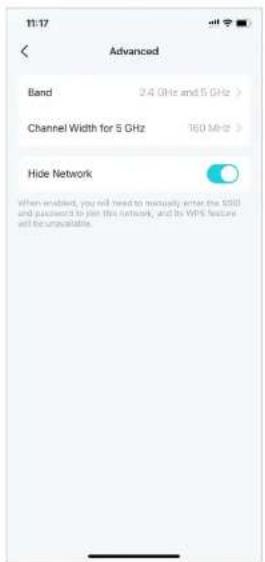
11:17 Advanced Band 2.4 GHz and 5 GHz > Channel Width for 5 GHz 160 MHz > Hide Network When enabled, you will need to manually enter the SDD and puzzlekit to join this network, and to WPS feature set for upregulated.

Create a Guest Network

You can create and share a separate network for guests to guarantee the security and privacy of your main network.

  1. Go to More > Guest Network.

  2. Turn on Guest Network and set a Wi-Fi network name and password for it.

  3. Select a Wi-Fi security protocol for this network.

  4. Select a preferred band to be enabled in this network.

11:11 More Search for a feature Deco Lab Reports Black List QoS Wi-Fi Settings Guest Network IoT Network WPS Internet Connection Network Optimization Advanced

11:17 Guest Network Guest Network 2.4 GHz and 9 GHz Deco _Guest If is recommended to set a presented using a combination of letters, numbers, and symbols. Security WPA2 > Band 2.4 GHz and 6 GHz > Duration Always > Advanced >

11:18 Security WPA2 WPA/WPA2 WPA3 WPA2/WPA3 Personal None WPA2-PB8 [AE1]

11:18 Band 2.4 GHz and 5 GHz 2.4 GHz Only 5 GHz Only Only the selected band will be enabled if this network.

  1. Tap Duration to set how long the Guest Network works before it automatically turns off.

11:18 Duration 1 hour 4 hours 24 hours Always Auto Close! Network turn-off automatically if no devices are connected to it for 10 minutes.

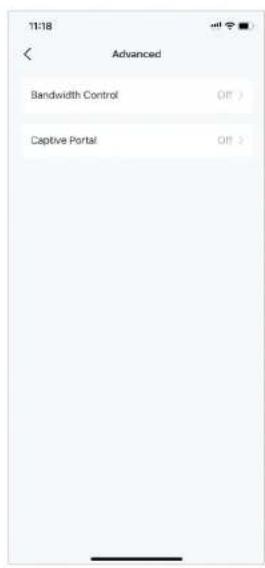
  1. Tap Advanced to set more settings as follow.

11:18 Advanced Bandwidth Control Off > Captive Portal Off >

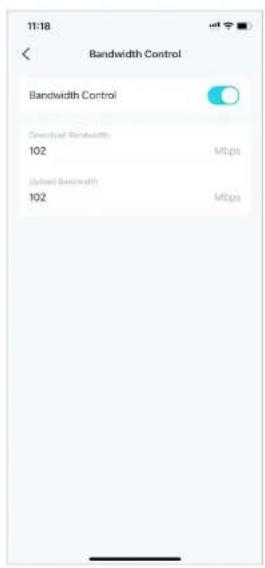
  1. Enable Bandwidth Control and set a download and upload bandwidth for your network.

11:18 Bandwidth Control Bandwidth Control Connectual Bandwidth 102 Mbps Used Bandwidth 102 Mbps

  1. Enable Captive Portal to customize a professional captive portal within minutes.

11:18 Captive Portal Save Captive Portal Authentication Type None > Time Limit Always > Redirect Off > Login Page > Customize your login page, lags, and more.

Create a IoT Network

Create a dedicated and wireless network to manage all your IoT devices, such as smart lights and cameras.

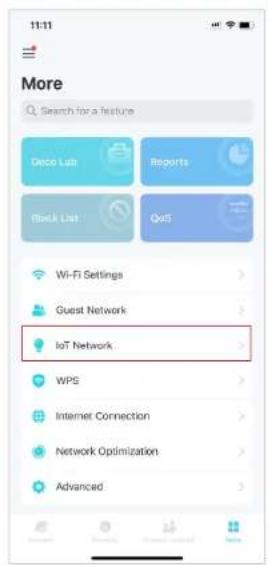
  1. Go to More > IoT Network.

  2. Turn on IoT Network. Set a Wi-Fi network name and password for this network.

  3. Select a Wi-Fi security protocol for this network.

  4. Select a preferred band to be enabled in this network.

11:11 More Search for a feature Delco Lab Reports Block List QoS Wi-Fi Settings Guest Network IoT Network WPS Internet Connection Network Optimization Advanced

11:19 Save IoT Network IoT Network Create a dedicated wireless network to manage your IoT device together, such as smart lights and cameras. Deco _IoT Poor It is recommended to set a password using a combination of letters, numbers, and symbols. Security WPA(WPA2 > Bands 2.4 GHz Only >

11:19 Security WPA2 WPA/WPA2 None WPA2-PSA (ASS) + WPA/PSA (TRIP)

11:19 Band 2.4 GHz Only 2.4 GHz and 5 GHz Most let us remote support 2.4 GHz only. When both 2.4 GHz and MHz are enabled, your 2.4 GHz only, it's devices might be unable to connect to this network.

WPS

WPS (Wi-Fi Protected Setup) helps you to quickly and securely connect a client to the network with a tap without entering any password.

1. Go to More > WPS.

11:11 More Search for a feature Deco Lab Reports Black List QoS Wi-Fi Settings Guest Network IoT Network WPS Internet Connection Network Optimization Advanced

2. Tap the WPS icon on Deco app and then on your client.
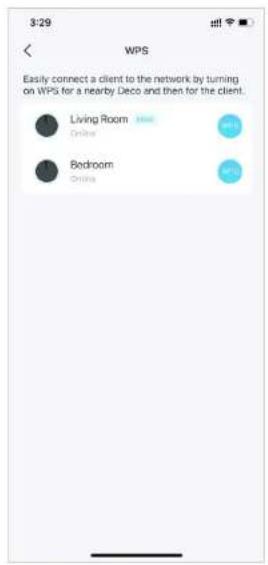
WPS Easily connect a client to the network by turning on WPS for a nearby Deco and then for the client. Living Room Online Bedroom Online

Change Internet Settings

You can change internet settings if needed.

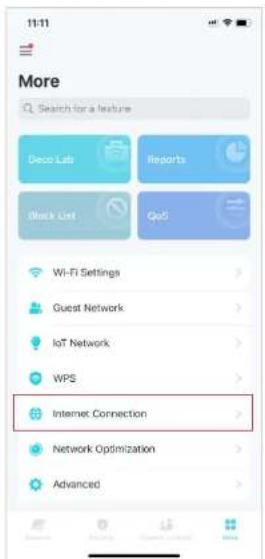
  1. Go to More > Internet Connection.

11:11 More Search for a feature Deco Lab Reports Black List QoS Wi-Fi Settings Guest Network IoT Network WPS Internet Connection Network Optimization Advanced

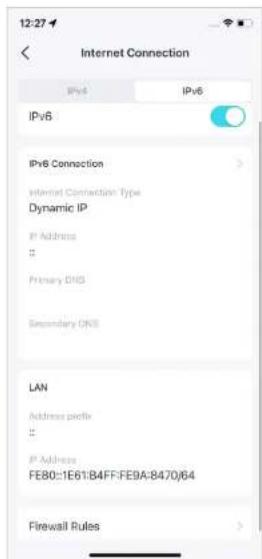
  1. Tap IPv4 for IPv4 settings. 3. Tap IPv6 and enable it for IPv6 settings.

3:31 Internet Connection IPv4 IPv8 Ignore Ping from WAN IPv4 Connection Internet Connection Type Dynamic IP IP Address 10.0.0.15 Subnet Mask 255.255.255.0 Default Gateway 10.0.0.1 Primary DNS 10.0.1 Secondary DNS To configure the IPv4 settings, command your device to the Data WiFi network E-mail and then map the IPv4 app.

12:27 Internet Connection IPv6 IPv6 IPv6 Connection Internet Connection Type Dynamic IP IP Address # Primary DNS Secondary DNS LAN Address profile # IP Address FE80::IE61:B4FF:FE9A:8470)64 Firewall Rules

  1. Tap Firewall Rules to add rules if you want to allow specific devices to access specific services.

11:21 Firewall Rules Add iPod Firewall Rules to allow specific devices to access the specified services. Add Firewall Rule

Network Optimization

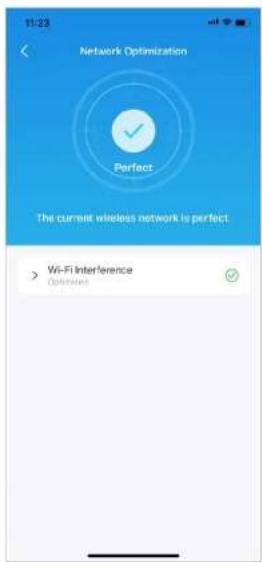
Network Optimization analyzes the quality of the Deco wireless network by scanning the interference signals in the environment and improves your wireless experience by optimizing the Deco network's channel.

Optimization.
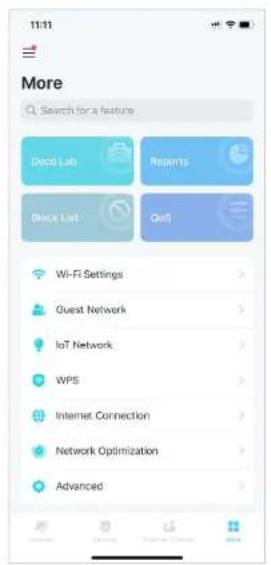
11:11 More Search for a feature Deco Lab Reports Black List QoS Wi-Fi Settings Guest Network IoT Network WPS Internet Connection Network Optimization Advanced

  1. Tap Scan to detect network security and performance.
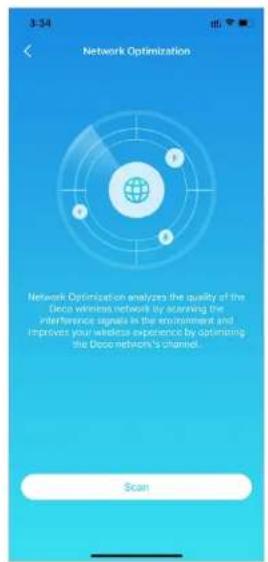
    TP-LINK Deco X55 Pro - Network Optimization - 2
  1. Optimize the network if needed.1. Go to More > Network
    TP-LINK Deco X55 Pro - Network Optimization - 3

11:23 Network Optimization Perfect The current wireless network is perfect. > Wi-Fi Interference Optimization

Create Static Routes

Static routing is a form of routing that is configured manually by a network administrator or a user by adding entries into a routing table. The manually-configured routing information guides the router in forwarding data packets to the specific destination.

  1. Go to More > Advanced> Static Routing, and tap Add Static Route.

11:11 More Search for a feature Deco Lab Reports Block List QoS Wi-Fi Settings Guest Network IoT Network WPS Internet Connection Network Optimization Advanced

11:23 Advanced Operation Mode Wii-Fi Router Static Routing IPTV/WLAN Disabled > MAC Clone Disabled > DDNS Disabled > LAN IP DHCP Server Address Reservation VPN Server VPN Client Fast Roaming Disabled > NAT Forwarding

3:09 Static Routing + Static route is used to predetermine a Fixed route for network packets to reach a specific host or network. Add Static Route System Routes

* Features available in Deco may vary by model and software version. Deco availability may also vary by region or ISP.

  1. Fill in the necessary information.

• Description: Specify a description for the routing entry.
• Network Destination: The network destination is the address of the network of host that you want to assign to a static route.

- Subnet Mask: The Subnet Mask divides the network portion and the host portion of an IP address.

- Default Gateway: This is the IP address of the default gateway device that allowing for the contact between the router and the network or host.

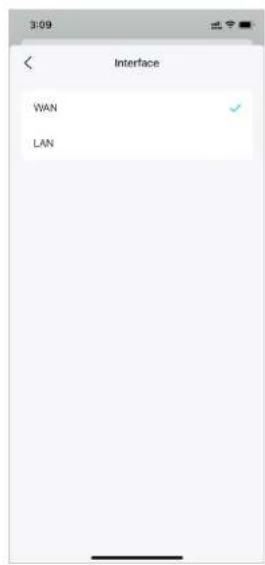
- Interface: Select the interface to specify the type of the network destination.

3:09 Add Static Route Description Static Route 1 Routing Settings Network Destination Subnet Mask Default Gateway Interface WIN >

Interface WAN LAN

  1. After you save the settings, if the entry you have set appear on the screen, the static routing is set successfully.
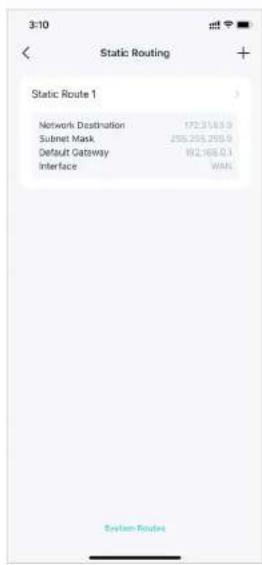
Static Route 1 Network Destination 172.31/43.9 Submit Mask 255.255.255.9 Default Gateway 102.165.0.1 Interface WAN System Routes

* Features available in Deco may vary by model and software version. Deco availability may also vary by region or ISP.

Set Up VPN Server/Client

Use Open VPN, PPTP VPN, or L2TP/IPSec VPN to access your home network, and use VPN Client to access a remote VPN server.

Use OpenVPN to Access Your Home Network

OpenVPN Server is used to create an OpenVPN connection for remote devices to access your home network.

To use the VPN feature, you need to enable OpenVPN Server on your Deco router, and install and run VPN client software on remote devices. Please follow the steps below to set up an OpenVPN connection.

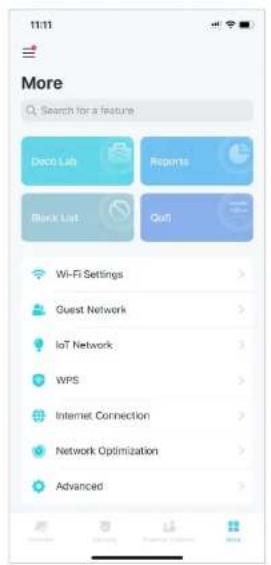
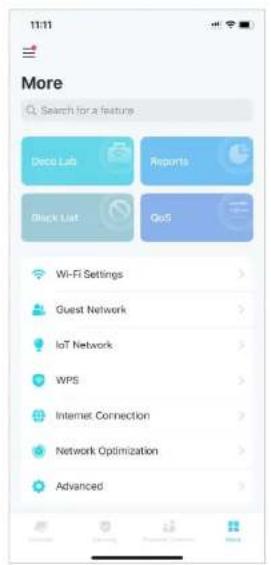
  1. Go to More > Advanced > VPN Server.

11:11 More Search for a feature Deco Lab Reports Black List Qu5 Wi-Fi Settings Guest Network IoT Network WPS Internet Connection Network Optimization Advanced

11:23 Advanced Operation Mode Wi-Fi Router > Static Routing IPTV/VLAN Disabled > MAC Clone Disabled > DDNS Disabled > LAN IP > DHCP Server > Address Reservation > VPN Server VPN Client > Fast Roaming Disabled > NAT Forwarding >

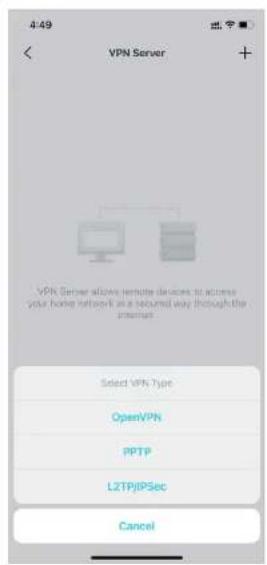
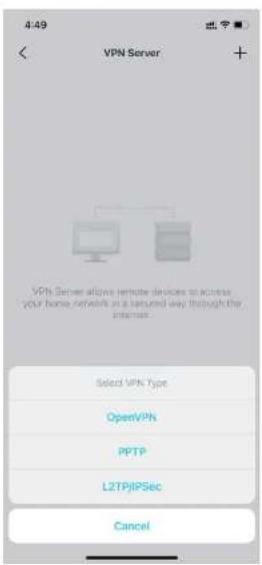
  1. Tap Add VPN Server and select OpenVPN.

4:49 VPN Server + VPN Server allows remote devices to access your home network in a secured way through the internet. Add VPN Server

4:49 VPN Server + VPN Server allows remote devices to access your home network in a secured way through the internet Select VPN Type OpenVPN PPTP LZTP/IPSec Cancel

* Features available in Deco may vary by model and software version. Deco availability may also vary by region or ISP.

  1. Enter the necessary information and save the settings.

• Description: Enter a name for this OpenVPN.
• Service Type: Select the service type (UDP/TCP) for OpenVPN.
• VPN Port: Enter a VPN service port to which a VPN device connect, and the port number should be between 1024 and 65535.
• VPN Subnet/Netmask: Enter the range of IP addresses that can be leased to the device by the OpenVPN server.
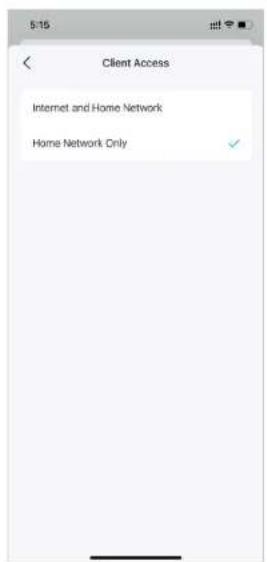
- Client Access: Select your client access type. Select Home Network Only if you only want the remote device to access your home network. Select Internet and Home Network if you also want the remote device to access internet through the VPN server.

5:13 Add OpenVPN Description OpenVPN Service Type UOP > VPN Port Required VPN Subnet Required Netmask Required Client Access Home Network Only >

5:14 Service Type UDP TCP

5:15 Client Access Internet and Home Network Home Network Only

* Features available in Deco may vary by model and software version. Deco availability may also vary by region or ISP.

  1. Tap the VPN you have saved and tap Export Config File to save the OpenVPN configuration file which will be used by the remote device to access your router.
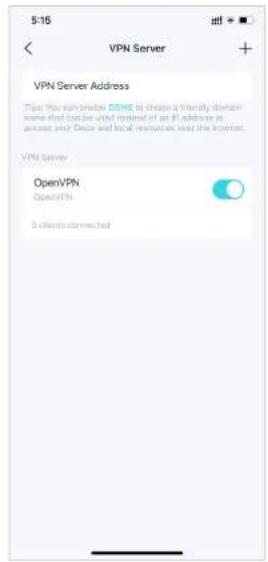
5:16 FTP Server + VPN Server Address This You can provide COME is designed a friendly domain name that can be used instead of an IP address in access your Dece and local resources near the license. VPN Server OpenVPN OpenVPN 8 clients connected

Edit Server Service Type UDP-3 VFN Port 1025 VFN Subnet 172.31.53.1 Netmask 255.255.256.0 Client Access Home Network Only > Export Config File Delete q w e r t y u i o p a s d f g h j k l z x c v b n m 123 space next

  1. Now you need to configure OpenVPN connection on your remote device.

(1) Visit https://openvpn.net/community-downloads/ to download the OpenVPN software, and install it on your device where you want to run the OpenVPN client utility.
Note: You need to install the OpenVPN client utility on each device that you plan to apply the VPN function to access your Deco router. Mobile devices should download a third-party app from Google Play or Apple App Store.
(2) After the installation, copy the file exported from your router to the OpenVPN client utility's "config" folder (for example, C:\Program Files\OpenVPN\config on Windows). The path depends on where the OpenVPN client utility is installed.
(3) Run the OpenVPN client utility and connect it to OpenVPN Server.

Use PPTP VPN to Access Your Home Network

PPTP VPN Server is used to create a PPTP VPN connection for remote devices to access your home network.

To use the VPN feature, you need to set up PPTP VPN Server on your Deco router, and configure the PPTP connection on remote devices.

Please follow the steps below to set up a PPTP VPN connection.

  1. Go to More > Advanced > VPN Server.

  2. Tap Add VPN Server and select PPTP.

11:11 More Search for a feature Deco Lab Reports Black List Qu5 Wi-Fi Settings Guest Network IoT Network WPS Internet Connection Network Optimization Advanced

11:23 Advanced Operation Mode Wi-Fi Router > Static Routing IPTV/VLAN Disabled > MAC Clone Disabled > DDNS Disabled > LAN IP > DHCP Server > Address Reservation > VPN Server > VPN Client > Fast Roaming Disabled > NAT Forwarding >

4:49 VPN Server + VPN Server allows remote devices to access. your home network in a secured way through the internet. Add VPN Server

4:49 VPN Server + VPN Server allows remote devices to access your home network as a secured way through the internet. Select VPN Type OpenVPN PPTP LZTPJPSec Cancel

* Features available in Deco may vary by model and software version. Deco availability may also vary by region or ISP.

  1. Enter the necessary information and save the settings.

• Description: Enter a name for this VPN.
- Client IP Address: Enter the range of IP addresses (up to 10) that can be leased to the devices by the PPTP VPN server.
- Allow NetBIOS passthrough: Enable it to allow your VPN device to access your Samba server using NetBIOS name.
- Allow unencrypted connections: Enable it to allow unencrypted connections to your VPN server.
• Account List: Add the PPTP VPN connection account (user name and password) for the remote device. You can create up to 16 accounts.

Add PPTP VPN Description Client IP Address Allow NetBIOS passthrough Allow unencrypted connections Account List Note: Add at least one account to access the VPN.

4:54 Client IP Address Save I - q w e r t y u i o p a s d f g h j k l z x c v b n m 123 space next

4:55 Account List + Add at least one account to access the (20%) Add Account

Add Account Username Password

* Features available in Deco may vary by model and software version. Deco availability may also vary by region or ISP.

  1. Now you need to configure PPTP VPN on your remote device. The remote device can use the Windows built-in PPTP software or a third-party PPTP software to connect to PPTP Server. Here we use the Windows built-in PPTP software as an example.

(1) Go to Start > Control Panel > Network and Internet > Network and Sharing Center and select Set up a new connection or network.

(2) Select Connect to a workplace and click Next.

Network and Sharing Center For quick access, place your bookmarks here on the bookmarks box. Control Panel Network and Broadcast Network and Sharing Center View your basic network information and set up connections V800-PC (This computer) Network Internet Set up map View your active networks Network Work network Access type: Connections Internet Local Area Connection Change your networking settings: Set up a wireless connection or network set up a wireless, broadband, dial-up, ad-hoc, or VPN connection; or set up a router or access point. Connect to a network Connect or connect to a wireless, wind, dial-up, or VPN network connection. Choose homogeneity and sharing options Assess files and problems located as other network computers, or change sharing settings. Troubleshooting problems Diagnose and repair network problems, or get troubleshooting information.

Set Up a Connection or Network Choose a connection option Connect to the Internet Set up a wireless, broadband, or dial-up connection to the Internet. Set up a new network Configure a new router or access point. Connect to a workplace Set up a dial-up or VPN connection to your workplace. Set up a dial-up connection Connect to the Internet using a dial-up connection. Next Cancel

* Features available in Deco may vary by model and software version. Deco availability may also vary by region or ISP.

(3) Select Use my Internet connection (VPN).

Connect to a Workplace How do you want to connect? Use my Internet connection (VPN) Connect using a virtual private network (VPN) connection through the Internet. Dial directly Connect directly to a phone number without going through the Internet. What is a VPN connection? Cancel

(4) Enter the internet IP address of the router in the Internet address field. Click Next.

Connect to a Workplace Type the Internet address to connect to Your network administrator can give you this address. Internet address: 218.18.1.73 Destination name: VPN Connection Use a smart card Allow other people to use this connection This option allows anyone with access to this computer to use this connection. Don't connect now just set it up so I can connect later Next Cancel

* Features available in Deco may vary by model and software version. Deco availability may also vary by region or ISP.

(5) Enter the User name and Password you have set for the PPTP VPN server on your router, and click Connect.

(6) Click Connect Now when the VPN connection is ready to use.

Connect to a Workplace Type your user name and password User name: Password: Show characters Remember this password Domain (optional): Connect Cancel

Connect to a Workplace The connection is ready to use Connect now Close

* Features available in Deco may vary by model and software version. Deco availability may also vary by region or ISP.

Use L2TP/IPSec VPN to Access Your Home Network

L2TP/IPSec VPN Server is used to create a L2TP/IPSec VPN connection for remote devices to access your home network.

To use the VPN feature, you need to set up L2TP/IPSec VPN Server on your Deco router, and configure the L2TP/IPSec connection on remote devices.

Please follow the steps below to set up the L2TP/IPSec VPN connection.

  1. Go to More > Advanced > VPN Server.

  2. Tap Add VPN Server and select L2TP/IPSec.

11:11 More Search for a feature Deco Lab Reports Black List Qu5 Wi-Fi Settings Guest Network IoT Network WPS Internet Connection Network Optimization Advanced

11:23 Advanced Operation Mode Wi-Fi Router > Static Routing IPTV/VLAN Disabled > MAC Clone Disabled > DDNS Disabled > LAN IP > DHCP Server > Address Reservation > VPN Server > VPN Client > Fast Roaming Disabled > NAT Forwarding >

4:49 VPN Server + VPN Server allows remote devices to access. your home network in a secured way through the internet. Add VPN Server

4:49 VPN Server + VPN Server allows remote devices to access your home network as a secured way through the internet. Select VPN Type OpenVPN PPTP LZTPJPSec Cancel

* Features available in Deco may vary by model and software version. Deco availability may also vary by region or ISP.

  1. Enter the necessary information and save the settings.

• Description: Enter a name for this VPN.
- Client IP Address: Enter the range of IP addresses (up to 10) that can be leased to the devices by the L2TP/IPSec VPN server.
- IPSec Encryption/ IPSec Pre-Shared Key: Keep IPSec Encryption as Encrypted and create an IPSec Pre-Shared Key.
• Account List: Add the L2TP/IPSec VPN connection account (user name and password) for the remote device. You can create up to 16 accounts.

5:16 Add L2TP/IPSec VPN Description Client IP Address IPSec Encryption IPSec Pre-Shared Key Account List Note: Add of local and account to access the VPN

5:27 IPSec Pre-Shared Key Done Please enter your key q w e r t y u i o p a s d f g h j k l z x c v b n m 123 space done

4:55 Account List + Add at least one account to access the VPN. Add Account

Add Account Username Password

* Features available in Deco may vary by model and software version. Deco availability may also vary by region or ISP.

  1. Now you need to configure L2TP/IPSec on your remote device. The remote device can use the Windows or Mac OS built-in L2TP/IPSec software or a third-party L2TP/IPSec software to connect to L2TP/IPSec Server. Here we use the Windows built-in L2TP/IPSec software as an example.

(1) Go to Start > Control Panel > Network and Internet > Network and Sharing Center and select Set up a new connection or network.

(2) Select Connect to a workplace and click Next.
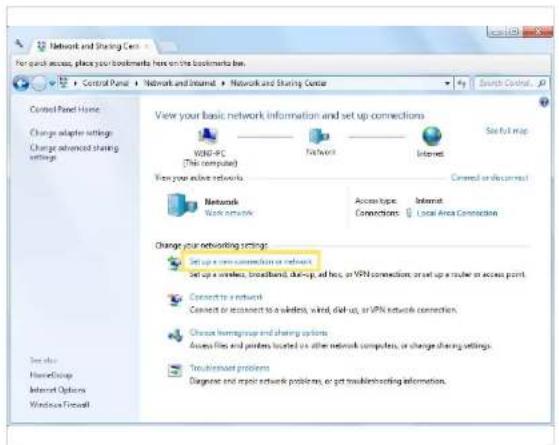
Network and Sharing Center For quick access, place your bootnotes here on the bootnotes box. Control Panel Network and Internet Network and Sharing Center Search Control Control Panel Home Change adapter settings Change advanced sharing settings View your basic network information and set up connections V800-PC (This computer) Network Network Access type: Internet Connections: Local Area Connection View your active networks Networks Work network Access or document Change your networking settings: Set up a new connection to networks Set up a wireless broadband, start-up, add fees, at VPN connection start-up a router or access point. Connect to a network Connect or treatment to a wireless, wind, start-up, or VPN network connection. Choose homeowner and sharing options Access files and printers located on other network computers, or change sharing settings. Troubleshooting problems Diagnose and repair network problems, or get trouble/nositing information.

Set Up a Connection or Network Choose a connection option Connect to the Internet Set up a wireless, broadband, or dial-up connection to the Internet. Set up a new network Configure a new router or access point. Connect to a workplace Set up a dial-up or VPN connection to your workplace. Set up a dial-up connection Connect to the Internet using a dial-up connection. Next Cancel

* Features available in Deco may vary by model and software version. Deco availability may also vary by region or ISP.

(3) Select Use my Internet connection (VPN).

Connect to a Workplace How do you want to connect? Use my Internet connection (VPN) Connect using a virtual private network (VPN) connection through the Internet. Dial directly Connect directly to a phone number without going through the Internet. What is a VPN connection? Cancel

(4) Enter the internet IP address of the router in the Internet address field. Select Don't connect now, just set it up so I can connect later. Then click Next.

Connect to a Workplace Type the Internet address to connect to Your network administrator can give you this address. Internet address: 218.18.1.73 Destination name: VPN Connection Use a smart card Allow other people to use this connection This option allows anyone with access to this computer to use this connection. Don't connect now just set it up so I can connect later Next Cancel

* Features available in Deco may vary by model and software version. Deco availability may also vary by region or ISP.

(5) Enter the User name and Password you have set for the L2TP/IPSec VPN server on your router, and click Connect.

(6) Click Close when the VPN connection is ready to use.

Connect to a Workplace Type your user name and password User name: Password: **** Show characters Remember this password Domain (optional): Connect Cancel

Connect to a Workplace The connection is ready to use Connect now Close

* Features available in Deco may vary by model and software version. Deco availability may also vary by region or ISP.

(7) Go to Network and Sharing Center and click Change Adapter Settings.

Network and Sharing Center For quick access, place your booklets here on the booklets box. Control Panel Network and Internet Network and Sharing Center Cooled Panel Home Change adapter settings Change advanced sharing settings View your basic network information and set up connections: WINI-PC (This computer) Canport Internet See Full map View your active networks Connect to disconnect Network Work network Access type Connectors Inknot Local Area Connection Change your networking settings Setup a new networking or network set up a network, connected, down-up, and here, or VPN connection, or set up a router to access point Connect to a network Connect or connect to a wireless, wind, dial-up, or VPN network connections. Choose home manual and sharing options. Access Film and pointers located in other network computers, or change sharing settings. Troubleshoot problems Diagnose and repair network problems, or get troublechecking information. See our HomeGroup Internet Options Windows Firewall

(8) Find the VPN connection you created, then double-click it.
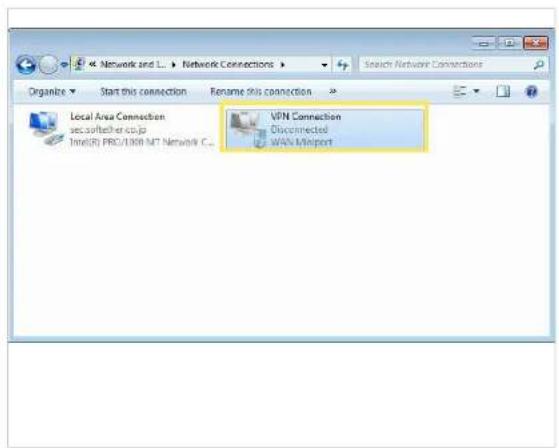
Network and L. > Network Connections Organize Start this connection Rename this connection Local Area Connection sec softisher c-up Intel(R) PRO/LOM MT Network C. VPN Connection Disconnected WAN Import

* Features available in Deco may vary by model and software version. Deco availability may also vary by region or ISP.

(9) Enter the Username and Password you have set for the L2TP/IPSec VPN server on your router, and click Properties.

Connect VPN Connection User name: Password: Domain: Save this user name and password for the following users: Me only Anyone who uses this computer Connect Cancel Properties Help

(10) Switch to the Security tab, select Layer 2 Tunneling Protocol with IPsec (L2TP/IPSec) and click Advanced settings.
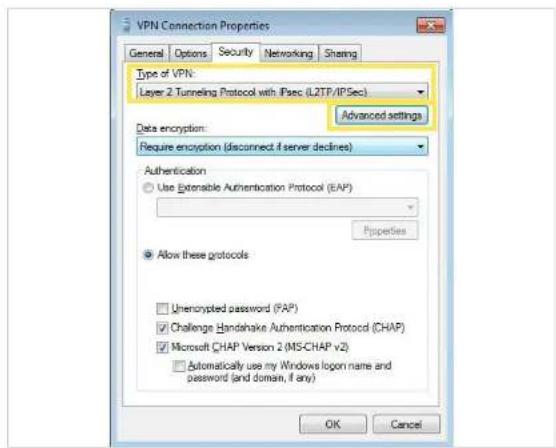
VPN Connection Properties General Options Security Networking Sharing Type of VPN: Layer 2 Tunneling Protocol with IPsec (LZTP/IPSec) Advanced settings Data encryption: Require encryption (disconnect if server declines) Authentication Use Extensible Authentication Protocol (EAP) Properties Allow these protocols Unencrypted password (FAP) Challenge Handshake Authentication Protocol (CHAP) Microsoft CHAP Version 2 (MS-CHAP v2) Automatically use my Windows logon name and password (and domain, if any) OK Cancel

* Features available in Deco may vary by model and software version. Deco availability may also vary by region or ISP.

(11) Select Use preshared key for authentication and enter the IPSec Pre-Shared Key you have set for the L2TP/IPSec VPN server on your router. Then click OK.
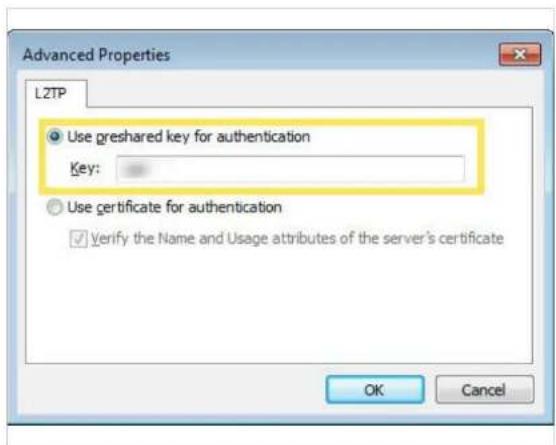
Advanced Properties L2TP Use greshared key for authentication Key: Use certificate for authentication ✓ Verify the Name and Usage attributes of the server's certificate OK Cancel

(12) Switch to the Security tab, select Layer 2 Tunneling Protocol with IPsec (L2TP/IPSec) and click Advanced settings.

Connect VPN Connection User name: Password: Domain: ✓ Save this user name and password for the following users: ● Me only ○ Anyone who uses this computer Connect Cancel Properties Help

Done! Click Connect to start VPN connection.

* Features available in Deco may vary by model and software version. Deco availability may also vary by region or ISP.

Use VPN Client to Access a Remote VPN Server

VPN Client is used to create VPN connections for devices in your home network to access a remote VPN server.

To use the VPN feature, simply configure a VPN connection and choose your desired devices on your Deco router, then these devices can access the remote VPN server. Please follow the steps below:

  1. Go to More > Advanced > VPN Client.

11:11 More Search for a feature Deco Lab Reports Block List QuS Wi-Fi Settings Guest Network IoT Network WPS Internet Connection Network Optimization Advanced

11:23 Advanced Operation Mode W-Fi Router > Static Routing IPTV/VLAN Disabled > MAC Clone Disabled > DDNS Disabled > LAN IP > DHCP Server > Address Reservation > VPN Server > VPN Client > Fast Roaming Disabled > NAT Forwarding

  1. Tap Add VPN Server. 3. Select your VPN service and

follow instructions to complete the settings.

5/23 VPN Client VPN Client VHNServe + Add VPN Server

5:23 VPN Client VPN Client + Add VPN Server

* Features available in Deco may vary by model and software version. Deco availability may also vary by region or ISP.

  1. Tap Custom and customize the VPN type. Then enter the VPN information provided by your VPN provider and save the settings.

  2. OpenVPN: Enter the VPN username and password if required by your VPN provider, otherwise simply leave them empty. Then import the configuration file provided by your VPN provider.

  3. PPTP: Enter the VPN server address and the VPN username and password provided by your VPN provider.
    • L2TP/IPSec: Enter the VPN server address, VPN username and password, and IPSec pre-shared key provided by your VPN provider.

5:24 VPN Client VPN Client VPN Server + Add VPN Server Select VPN Type OpenVPN PPTP LZTP/IPSec Cancel 5:24 VPN Client VPN Client VPN Server + Add VPN Server Select VPN Type OpenVPN PPTP LZTP/IPSec Cancel 5:24 Add OpenVPN Name Description OpenVPN Username Optional Password Optional Config File Browse File 5:26 Add PPTP Server Save Description PPTP VPN Server IP Address/Domain Name Username Default Password Optimize Encryption Auto > 5:27 Add LZTP/IPSec Server Save Description LZTP VPN Server IP Address/Counish Note Username Default Password Optimize IPSec Pre-Shared Key Please enter your key >

  1. Tap Client List and + to add devices that will use the VPN function

9:34 VPN Client VPN Client VPN Server Switch VPN PPTP Connecting VPN Type: PPTP Server IP: 102.3133.7 Server OPG Access Permission Client List > Client List Add Clients

9:37 Client List phone 08-04-16-18-F9

9:36 Select Devices Add phone 08-80-84-16-16-F3

  1. Tap Access Permission to allow all devices connected to your Deco to use the VPN function or only allow devices on the Client List to use VPN function.

9:38 Access Permission All Clients Allow all devices connected to your device to use VPN function. Client List Only allow devices on the Client List to use VPN Function

Done! Now the devices you specified can access the VPN server you enabled.

Advanced Features

The Deco app offers a list of advanced features to fulfill diverse network needs.

Tip: You can use the search box on the More page to quickly find the features you need.

Tap More > Advanced to access advanced features.

Note: Features available on this page are based on the current operation mode of the network.

11:11 More Search for a feature Deco Lab Reports Block List QoS Wi-Fi Settings Guest Network IoT Network WPS Internet Connection Network Optimization Advanced

11:23 Advanced Operation Mode Wi-Fi Router > Static Routing > IPTV/VLAN Disabled > MAC Clone Disabled > DDNS Disabled > LAN IP > DHCP Server > Address Reservation > VPN Server > VPN Client > Fast Roaming Disabled > NAT Forwarding >

Change the operation mode.

11:23 Operation Mode Apply Wi-Fi Router (Default) In Wi-Fi router mode, Cisco connects to the interest directly via Dynamic IP, Blade IP, Webpage, etc., and branch internet access to multiple wired air windows devices. TCP and DHCP server are enabled by default. Access Point In account point mode, Cisco contains to be wired to Wi-Fi router via an Ethernet cable and extends the wireless coverage of your existing network. Functions like Wi-Fi, Parental Controls, QoS, Device resolution, and Connection Alerts are not supported in this mode.

Create Static Routes to visit multiple networks and servers at the same time.

11:23 Static Routing + Static route is used to predetermine a fixed route for network packets to reach a specific host or network. Add Static Route System Routes

Tip: You can use the search box on the More page to quickly find the features you need.

Enable IPTV/VLAN mode to support IPTV services.
11:30 IPTV/VLAN Save IPTV/VLAN ISP Profile Sitsus! When IPTV is configured, the selected port of the Cisco can only be used to open the IPTV service.

Enable MAC Clone if your ISP only allows specific MAC addresses.
11:30 MAC Clone MAC Clone Use Client MAC Address Use Custom MAC Address MAC Address Please select 1): Make sure you select or enter the MAC address specified by your TSR.

Register a TP-Link DDNS domain name to access your Decos and local resources over the internet.
11:31 DDNS Save DDNS DDNS (Dykeris) [DOS] where you to create a friendly domain name that can be used instead of an IP address to access your local resources at the Dopp networks over the Internet. Learn now. Service Provider TP-Link Register Domain Name Domain Name: tplinkdns.com Your domain name should meet the following criteria: • Start with a letter in number; • Contain only letters, numbers and hyperlinks; • Not exceed 20 characters in length.

Modify LAN IP to avoid IP address conflict.
12:29 LAN IP Save LAN IP 192.168.68.1 Subnet Mask 255.255.252.0 >

Tip: You can use the search box on the More page to quickly find the features you need.

Change DHCP Server settings.

Reserve IP addresses for specific devices to recognize and manage them more easily.

Set Up VPN Server/Client to allow remote access to your home network in a secured way and share the VPN service in your network.

12:29 DHCP Server Save 4 IP addresses assigned. Start IP 192.168.68.50 End IP 192.168.71.250 Default Gateway 192.168.68.1 Primary DNS (Optional) Secondary DNS (Optional)

11:31 Address Reservation + IP Address Reservation allows you to reserve an IP address for a device. This device will always receive the same IP address when it connects to Deco, which makes administering and troubleshooting the device easier. Add Address Reservation Select from Client Custom Cancel

11:50 VPN Server + VPN Server allows remote devices to access your home network in a secured way through the internet. Select VPN Type OpenVPN PFTP L2TPJIPSec Cancel

11:54 VPN Client Set up VPN Client for: • Share VPN service in your network • No need to configure VPN client for each device • Easy and quick setup • Various VPN servers • Support for leading VPN providers Learn More-> Add VPN Server

Tip: You can use the search box on the More page to quickly find the features you need.

Enable Fast Roaming to further reduce roaming delays for your wireless devices.

12:29 Fast Roaming Fast Roaming Fast roaming with IEEE 802, the allows wireless devices to switch connection to efficient Devices seamlessly. Note: 1. Turning on this feature may result in space elder wireless device being disconnected from the Dee Network. 2. If some devices are disconnected from Dee networks after turning scyoff this feature, by forgetting the Dee network on these devices and that join the network again.

Set up port forwarding rules to enable devices in your network accessible over the internet with safety.

11:32 Port Forwarding Port Forwarding allows you to make computers and devices on your local network accessible to other devices over the internet, whilst ensuring your network remains protected. Add Port Forwarding Rule

Enable SIP ALG to communicate with SIP (Session Initiation Protocol) servers via NAT.

10:35 SIP ALG SIP ALG When enabled clients can communicate with SIP (Sesaton Initiative Protocol) servers via FAT.

Enable UPNP to allow your local network to dynamically open ports for applications like gaming.

11:32 UPNP UPNP When installed, devices to your social network are allowed to dynamically open ports for applications such as multiplayer, gaming and real-time communications.

Configure Connection Alerts

You can configure Connection Alerts so you can get alerts when new devices connect to your network or when the devices you care about go online or offline.

Go to More > Connection Alerts to enable notifications of new or known clients.

11:00 More Search for a feature Wi-Fi Settings > Guest Network > IoT Network > WPS > Internet Connection > Network Optimization > Advanced > Connection Alerts Managers > LED Control > System 11:25 Connection Alerts New Device Alerts Push Notifications > Known Device Alerts Off > 11:25 New Device Alerts New Device Alerts Get alerts when new device connects to your network. Get Alerts Via Push Notifications dications are installed. You're receive alerts in the Notchospital bus. Email Alerts Send alerts to the registered email address linked to this website. 11:25 Known Device Alerts Know Device Alerts Get alerts when this device goes online/offline. Connection Alerts + There's an connection alert, Tips + to create a new alert. 11:25 Create Alert Done When Device Does Online Offline Online and Offline Get alerts when this device goes online/offline. Get Alerts Via Push Notifications dications are installed. You're receive alerts in the Notchospital bus. Email Alerts You'll receive alerts via the registered email address linked to this network.

* Features available in Deco may vary by model and software version. Deco availability may also vary by region or ISP.

Control the Light on Decos

You can turn on or off the light on your Decos immediately or at specific period.

Go to More > LED Control to turn on or off the light on your Decos or specify a period during which the light will go off.

11:00 More Search for a feature Wi-Fi Settings > Guest Network > IoT Network > WPS > Internet Connection > Network Optimization > Advanced > Connection Alerts > Managers > LED Control > System >

12:32 LED Control Save LED LED Off Time From 22:00 To 07:00 (Next Day)

Upgrade Your Deco

TP-Link is dedicated to improving product features and providing a better customer experience. An up-to-date firmware provides better and more stable network performance. Always update your Deco to the latest firmware version when prompted in the Deco app.

1. Go to More > System > Update Deco.
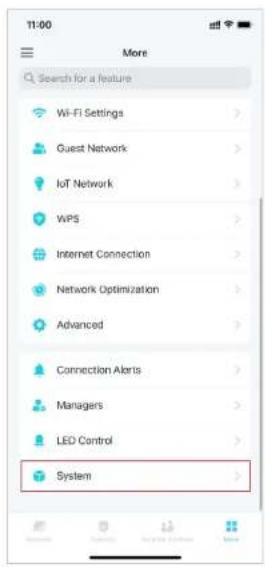
T1:00 More Search for a feature Wi-Fi Settings Guest Network IoT Network WPS Internet Connection Network Optimization Advanced Connection Alerts Managers LED Control System

11:26 System Living Room Online Model: MAC: Firmware Version: Show All Devices System Time Update Deco Reboot Deco Reboot Schedule

2. Download and install the latest firmware (if any).

11:27 Update Deco Auto Update Disabled > ● Auto Update is disabled for your Deco, and some new features may be unavailable. We recommend enabling Auto Update for optional network experience. Firmware update available for Deco. Deco Location Bedroom New Firmware Version: What's New: Enable Auto Update while downloading. Download Firmware

3. All Decos in your network will be updated.

4:11 Update Deco Your Deco Home Wi-Fi System is currently up-to-date. Enjoy! Deco Location: Bedroom,Living Room Runtime Version:

Reboot Your Deco

Reboot your Deco at any time when needed.

  1. Go to More > System > Reboot Deco.

11:00 More Search for a feature Wi-Fi Settings Guest Network IoT Network WPS Internet Connection Network Optimization Advanced Connection Alerts Managers LED Control System

11:26 System Living Room Online Model: MAC: Firmware Version: Show All Devices System Time Update Deco Reboot Deco Reboot Schedule

  1. Select the Deco you need to reboot and tap Reboot. You will lose your internet connection temporarily during the reboot.
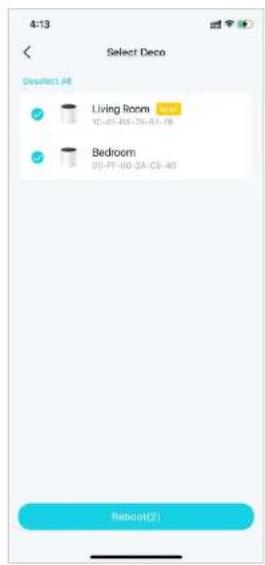
4:13 Select Deco Desinfect AR Living Room 10-FF-00-2A-CE-40 Bedroom 10-FF-00-2A-CE-40 Rebcot(2)

* Features available in Deco may vary by model and software version. Deco availability may also vary by region or ISP.

Reboot Schedule

With Reboot Schedule, you can set when and how often the Deco reboots regularly, which may improve the network stability.

  1. Go to More > System > Reboot Schedule.

11:00 More Search for a feature Wi-Fi Settings Guest Network IoT Network WPS Internet Connection Network Optimization Advanced Connection Alerts Managers LED Control System

11:26 System Living Room online Model: MAC: Firmware Version: Show All Devices System Time Update Deco Roboot Deco Roboot Schedule

  1. Enable Reboot Schedule and set when and how often to reboot the Deco regularly.

3:16 Reboot Schedule Save Reboot Schedule Repeat Every Monday > Reboot Time 03:00 AM 1 08 2 59 3 00 AM 4 01 PM 5 02 Next reboot is scheduled for next Monday at 13:00 AM.

3:16 Repeat Every Day Every Week

* Features available in Deco may vary by model and software version. Deco availability may also vary by region or ISP.

Control Your Deco with Alexa

Alexa Integration allows you to control your Deco using Amazon's Alexa voice service. You can control and customize your home network by giving simple voice commands to Alexa, such as enabling the Guest Network, turning off your Deco LEDs, and more.

Follow the steps below to use Alexa voice commands to control your Deco network.

Note: This feature is currently available in English (US), English (UK), German and Japanese.

On the homepage, swipe right to open the side menu and tap Link Account > Alexa > TP-Link Router Skill, then follow the app instructions to complete the setup.

10:38 View Account Delco Chimer HomeShield Subscribed Link Account Discover Support Center App Settings

08:37 Link Account IFTTT Alexa Google Assistant

08:37 Alexa TP-Link Router Skill Control Deco using your voice.

* Features available in Deco may vary by model and software version. Deco availability may also vary by region or ISP.

Enable App Notifications

You can enable notifications of what you care most.

On the homepage, swipe right to open the side menu and tap App Settings > Notifications to enable notifications.
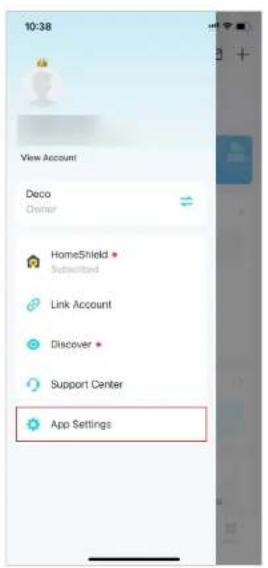
10:38 View Account Deco Owner HomeShield Subscribed Link Account Discover Support Center App Settings

11:29 App Settings Notifications Appearance About

11:29 Notifications Enabled Notifications are enabled. You'll receive alerts in the Notifications list. Disable it on your device's Settings > Notifications page. Firmware Updates All Networks Antivirus Alerts All Networks Monthly Reports All Networks Camera Security All Networks Device Alerts All Networks Device Alerts: Device low-battery, shocks, carbon monoxide and water leakage alarms. Promotional Messages When enabled, you will receive post-notifications about exclusive offers, VIP generators, and new products.

Change App Appearance

Deco app now support Dark Mode. You can easily change the appearance preference on the app.

On the homepage, swipe right to open the side menu and tap App Settings > Appearance. Select the preferred appearance for your app.
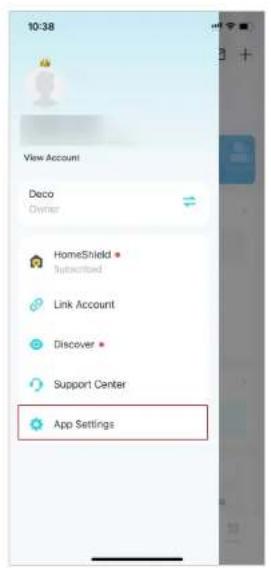
10:38 View Account Deco Owner HomeShield Subscribed Link Account Discover Support Center App Settings

11:29 App Settings Notifications Appearance About

11:29 Appearance Light Dark Follow System Once will automatically adjust your appearance based on your device's system settings.

11:29 Appearance Light Dark Follow System Deep will automatically adjust your appearance based on your device's system settings.

Change Account Information

More security methods such as Two-Step Verification and FACE ID are now supported on the Deco app. You can change your account information easily on the app.

On the homepage, swipe right to open the side menu and tap View Account. Then you can check and edit your account settings.

10:38 View Account Deco Owner HomeShield Subscribed Link Account Discover Support Center App Settings

11:30 Account Email yinghui.chend@tp-fink.com Profile Photo Name yinghui.chen Change Password Login Security Face ID Log out

11:33 Login Security Two-Step Verification With Two-Step Verification, you'll need to keep your passwords and a verification code where logging is from an unrecognized device. Login Activity

11:33 Face ID Face ID With Face ID enabled, you can use face recognition to publicly authenticate login. This only has a effect on the current iPhone. To modify the Face ID, so is the system setting of your iPhone.

Add Managers

The Owner creates the Deco network and has full authority to manage the network. The Owner can add one or multiple Managers to help manage the network as permitted.

Add friends and family members to help manage your network. Each manager should have their own TP-Link ID.

Note: Managers cannot modify the Owner account, add other accounts, or set manager privileges.

1. Go to More > Managers.

11:11 More Search for a feature Wi-Fi Settings Guest Network IoT Network WPS Internet Connection Network Optimization Advanced Connection Alerts Managers LED Control System

10:44 Managers yinghui.chen Managers Add friends and family members to help you manage your Deco network. Each manager should have their own TP-Link IS. Add a Manager

10:45 Managers yinghui.chen Managers zenobia.zeng + Add a Manager

3. Tap to set manager privileges.

10:45 Managers Privileges Done Authentic Managers to manage Network Management Manage Devices and change network settings including wireless settings, LAN P and rope Client Management Change the client location, nickname and device type, prefixes clients and black clients to access Deep, etc. IoT Management Manage the IoT clients like adding IoT clients, setting automation and hotspot, etc. Music Features may very slightly depending on the mobile, software version you best, and the current operation media.

* Features available in Deco may vary by model and software version. Deco availability may also vary by region or ISP.

Upgrade Your HomeShield

HomeShield is a home networking protection kit that covers all security scenarios with its network security, parental controls, QoS, and comprehensive reports. It provides two subscription options, Advanced Parental Controls and Security+.

  • Advanced Parental Controls helps you manage your kids' online time and bedtime and regulate the content and apps they have access to, letting them develop healthy digital habits.
  • Security+ provides you with comprehensive and professional network security protection to protect your Wi-Fi network and all connected devices from virus attacks.

Subscribe to HomeShield Service

HomeShield provides two subscription options, Advanced Parental Controls and Security+. Subscribe to TP-Link HomeShield for more advanced features.

  1. In the homepage, swipe right to open the menu and select HomeShield.

10:38 View Account Deco Owner HomeShield Submitted Link Account Discover Support Center App Settings

  1. In HomeShield Center, select the subscription service as needed and then follow app instructions to subscribe to the service.

HomeShield Center Security+ 30-Day Free Trial Add an extra layer of security for your network Advanced Parental Controls 80-Day Free Trial Let children explore more safely 5:50 TrustRight 5:51 TrustRight Advanced Parental Controls What is Advanced Parental Controls? A constant chaperone for your kids' digital activities. Subscribe Now Yearly 30-Day Free Trial Monthly 30-Day Free Trial Comments Easy to block content I don't want my 5:50 TrustRight Security+ What is Security+? Provides simple tools to enhance security for all your devices. Security+ Yearly 30-Day Free Trial Monthly 30-Day Free Trial Total Security Package Yearly First Year Offer

Table of contents Click a title to access it
Manual assistant
Powered by Anthropic
Waiting for your message
Product information

Brand : TP-LINK

Model : Deco X55 Pro

Category : Network