
TSA8024 - Household Fan Teesa - Free user manual and instructions
Find the device manual for free TSA8024 Teesa in PDF.


| Product Type | Domestic Fan |
| Brand | Teesa |
| Model | TSA8024 |
| Dimensions | 40 x 40 x 120 cm |
| Weight | 2.8 kg |
| Power Supply | 220-240 V ~ 50/60 Hz |
| Power Consumption | 50 W |
| Number of Speed Settings | 3 |
| Oscillation | Yes (90° horizontal) |
| Timer | Yes (up to 8 hours) |
| Remote Control | Yes |
| Adjustable Tilt | Manual (up/down) |
| Safe Grid Guard | Yes |
| Overheat Protection | Yes |
| Tip-over Safety Switch | Yes |
| Cleaning | Wipe with damp cloth; do not immerse |
| Spare Parts Available | Fan blades, guard, remote control |
| Repairability | User replaceable parts (blade, guard) |
| Warranty | 2 years |
Frequently Asked Questions - TSA8024 Teesa
User questions about TSA8024 Teesa
0 question about this device. Answer the ones you know or ask your own.
Ask a new question about this device
Download the instructions for your Household Fan in PDF format for free! Find your manual TSA8024 - Teesa and take your electronic device back in hand. On this page are published all the documents necessary for the use of your device. TSA8024 by Teesa.
USER MANUAL TSA8024 Teesa
natural_image
Simple line drawing of a mechanical lever with downward and upward arrows indicating motion (no text or symbols)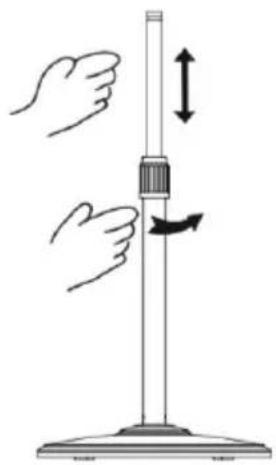
natural_image
Illustration of a hand using a tool to lift a vertical rod, with arrows indicating motion direction (no text or symbols)Thank you for purchasing TEESA appliance. Please read this operation instruction carefully before use, and keep it for future use. Distributor does not take responsibility for damages caused by inappropriate handling and use of the product.
SAFETY INSTRUCTIONS
In order to reduce the injuries or damages, follow basic safety precautions applied when using any electrical device, including the following:
- Read this instruction manual carefully, even if you are familiar with the appliance. Keep the manual for future reference.
- Before connecting the device to power supply socket, make sure the voltage indicated on the appliance corresponds to the voltage in the power supply socket.
- Place the device on flat, stable surface.
- Protect this device from shock and being dropped.
- Clean this device in accordance to instructions listed in "Cleaning and Maintenance" section.
- ALWAYS turn off the device and disconnect it from the mains supply:
• if it's not operating correctly,
- if there's an uncommon voice when using,
• before disassembling the device,
• before cleaning,
- when not in use.
-
When you disconnect the power cord of the device, grasp and pull the plug, not the cord/cable.
-
This appliance may be used by children who are above 8 years old and by persons with reduced physical, sensory or mental capabilities, or lack of experience and knowledge, if they are supervised and guided by a person who is responsible for their safety in a cautious manner, and all the safety precautions are understood and followed. Children should not play with this device. Children should not perform cleaning and servicing of the device unsupervised.
-
Fixed power cable may only be replaced in an authorized service point.
-
Keep the device and its cord/cable away from heat, water, moisture, sharp edges and any other factor which may damage the appliance or its cord.
-
Do not place the appliance in water or any liquid; nor handle/use it with wet or moist hands.
-
Do not use the product for purposes different from displayed in this operating manual.
-
Do not use unauthorized accessories.
-
Appliance for home use; do not use it for commercial or industrial purposes. Device for indoor use only.
-
DO NOT use this device if the cord or the plug is damaged, or the appliance is broken.
-
Do not attempt to repair this appliance yourself. Only authorized and qualified personnel may repair this device. Never disassemble this device.
-
Never place the fan near any gas appliances, fire or flammable liquids.
-
Do not turn on the device if the guard is not mounted properly.
-
Do not plug the device to power mains before completing the installation.
-
Never insert fingers, pencils, or any other object through the guard when the fan is running.
-
Never cover or obstruct the air inlet or outlet to prevent overheating.
-
Improper installation may result in the risk of fire, electric shock, or injury to persons.
PRODUCT DESCRIPTION
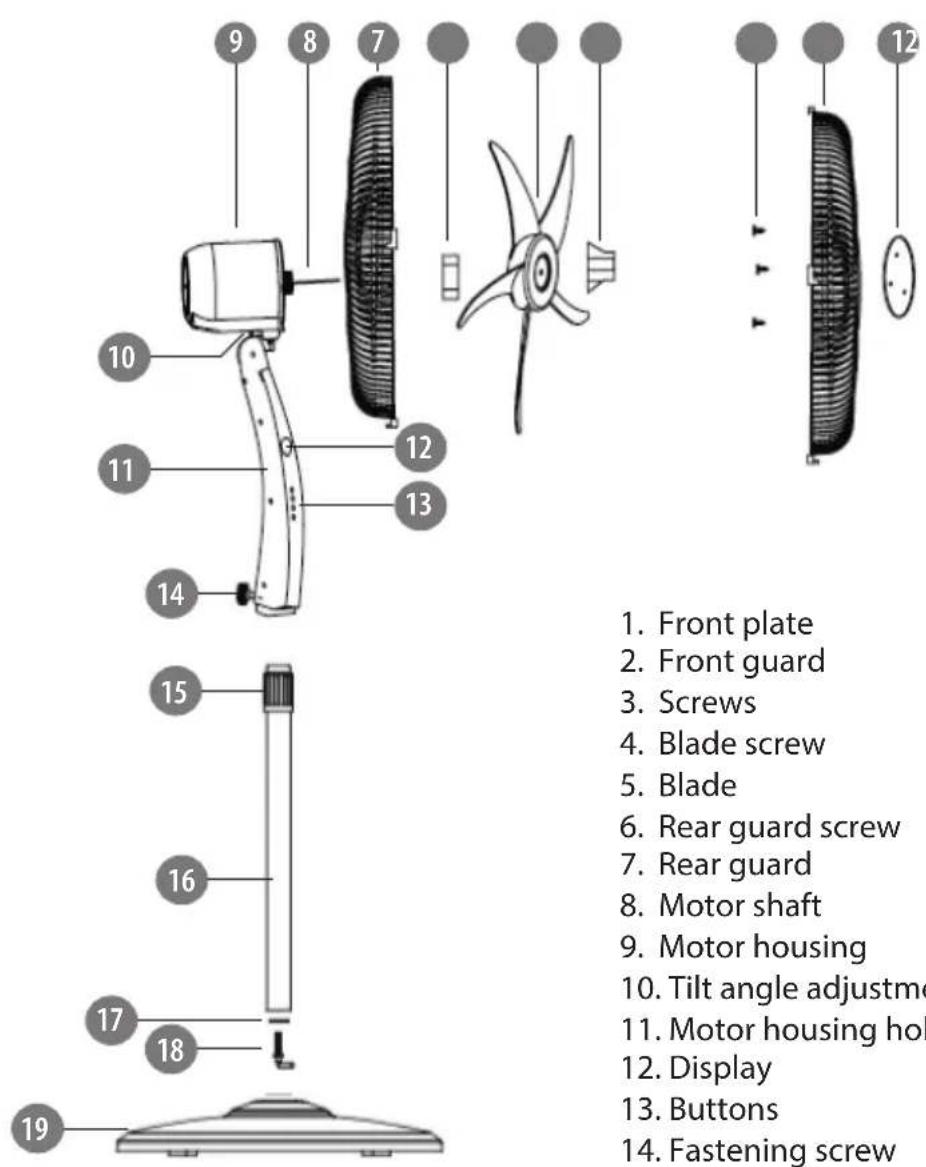
- Front plate
- Front guard
- Screws
- Blade screw
- Blade
- Rear guard screw
- Rear guard
- Motor shaft
- Motor housing
- Tilt angle adjustment screw
- Motor housing holder
- Display
- Buttons
- Fastening screw
- Height adjustment nut
- Stand
- Washer
- 7-shape bolt
- Base
ASSEMBLY
BASE
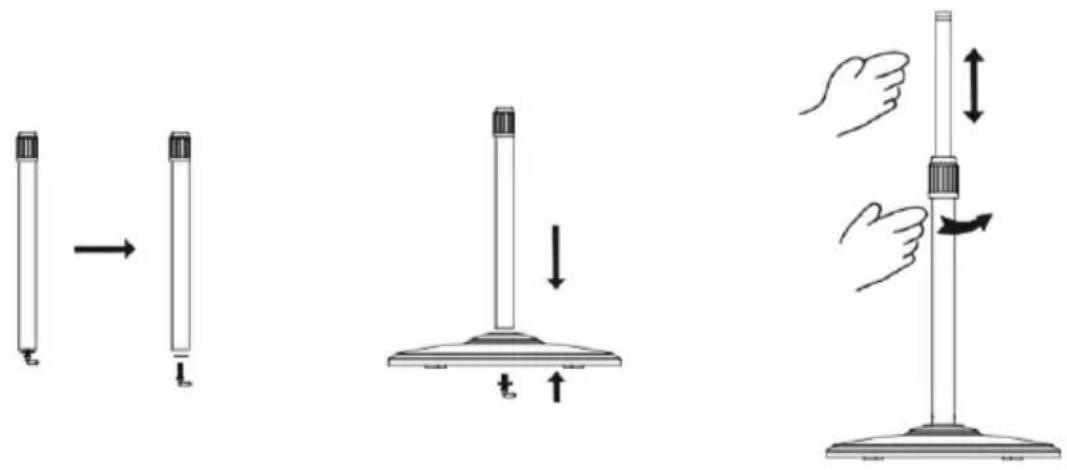
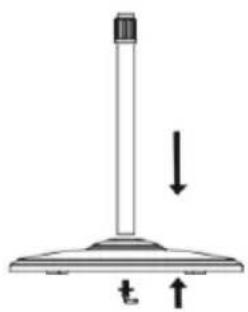
| FIG.1 FIG.2 FIG.3 | ||
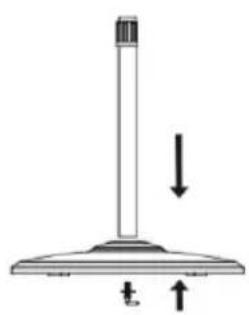
| 1. Unscrew the bolt and washer from the stand. | 2. Insert the stand into the base, attach the washer and tighten the bolt. | 3. Loosen the height adjustment nut and adjust the telescopic tube to the desired height.NOTE: If you cannot see the telescopic tube, it may has slid inside the stand. If such case pull it out from the stand. |
EN
BLADE AND GUARDS
- Remove the rear guard screw from the motor shaft.
- Position the rear guard against the front of the motor housing through the motor shaft. Ensure that the handle at the rear guard is facing up and that all guiding pegs on the motor housing are lined up with the cutouts on the rear guard.
- Secure the read guard with the rear guard screw. Fasten it onto the motor housing by tightening it in a clockwise direction.
- Install the blade onto the motor shaft with the cutouts fitted.
- Fasten it into place by tightening the blade screw counter-clockwise.
- Attach the front plate to the front guard by tightening the screws.
- Attach the front guard to the rear guard with the clamps.
- Check the correct rotation of the blade.
BATTERY INSTALLATION
- Open the battery cover.
- Insert two 1,5 V AAA batteries with correct polarization (+/-).
- Close the battery cover.
Notes:
- Do not mix old and new batteries or batteries of different type.
• Always point the IR sensor of the remote control towards control panel of the fan.
OPERATION
Note: Make sure the product is fully assembled before plugging it into power supply socket.
- Place the fan on a flat stable surface.
- Plug the fan into power mains.
- If you want to adjust the tilt angle, loosen the screw underneath the motor housing, set the desired tilt angle and tighten the screw.
- Press the ON/SPEED button to turn on the device.
- Keep pressing the ON/SPEED button to switch between three available speed modes.
- Press the SWING button to start or stop oscillation.
- Keep pressing the TIMER button to set the timer in 30 minute time intervals. After the timer runs out, the fan will automatically turn off.
- Keep pressing the MODE button on the remote control to switch between three available work modes:
• NORMAL: Normal mode of fan operation.
• NATURAL: Simulation of air flow under natural conditions.
• SLEEP: Fan gradually decreases and increases speed.
- Press the OFF button to turn off the device.
CLEANING AND MAINTENANCE
• Prior to cleaning, disconnect the device from power mains.
- Clean this device with soft, slightly damp cloth. Do not use any chemical agents to clean the fan.
• Dry the fan with a dry cloth after cleaning.
SPECIFICATION
FUNCTIONS
8 speed modes
3 working modes: normal, natural, sleep
Timer: 0,5-7,5 h
Automatic oscillation: 90°
Adjustable height: 114-130,5 cm
Adjustable tilt angle
Metal blade guard
TECHNICAL DATA
Power: 50 W
Grill diameter: 43 cm
Blade diameter: 38 cm
Power cable length: 1,5 m
Power supply: 220 - 240 V, 50/60 Hz
In set: remote control, user's manual

English
Correct Disposal of This Product
(Waste Electrical & Electronic Equipment)

(Applicable in the European Union and other European countries with separate collection systems) This marking shown on the product or its literature, indicates that it should not be disposed with other household wastes at the end of its working life. To prevent possible harm to the environment or human health from uncontrolled waste disposal, please separate this from other types of wastes and recycle it responsibly to promote the sustainable reuse of material resources. Household users should contact either the retailer where they purchased this product, or their local government office, for details of where and how they can take this item for environmentally safe recycling. Business users should contact their supplier and check the terms and conditions of the purchase contract This product should not be mixed with other commercial wastes for disposal.
Made in China for LECHPOL ELECTRONICS Sp. z o.o. Sp.k., ul. Garwolińska 1, 08-400 Miętne.
natural_image
Simple diagram of a vertical pole with an arrow indicating downward motion, no text or symbols present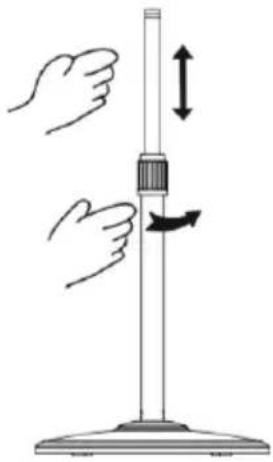
natural_image
Illustration of a hand holding a vertical tube with an arrow indicating upward motion (no text or symbols)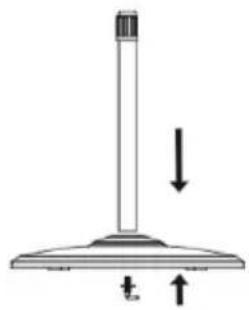
natural_image
Simple line drawing of a vertical pole with an arrow indicating downward motion, no text or symbols present.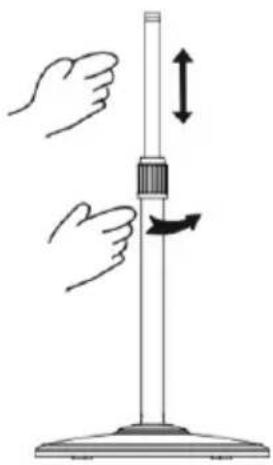
natural_image
Illustration of a hand pulling a cylindrical object with an arrow indicating motion (no text or symbols)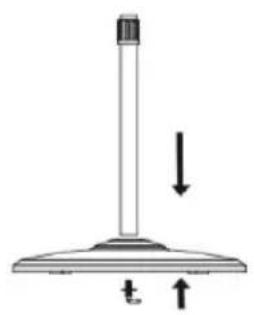
natural_image
Simple line drawing of a vertical pole with an arrow indicating downward motion, labeled 't' and '↑' (no text or symbols on the diagram itself)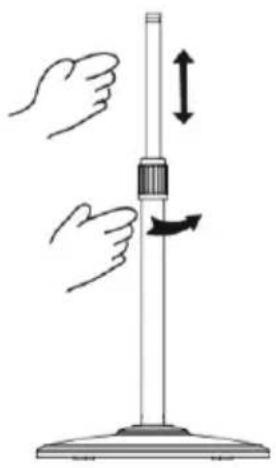
natural_image
Illustration of a hand holding a vertical tube with an arrow indicating upward motion (no text or symbols)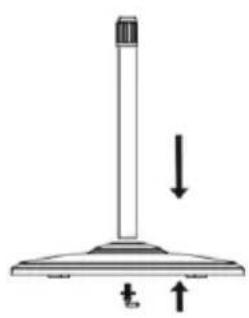
natural_image
Simple line drawing of a pole with a downward arrow and base, no text or symbols present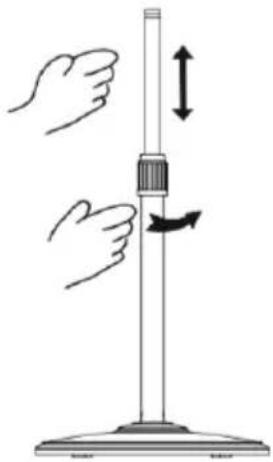
natural_image
Illustration of a hand using a tool to lift a vertical rod, with arrows indicating motion direction (no text or symbols)| OBR.1 OBR.2 OBR.3 | ||
| 1. Odskrutkujte skrutku a podložku zo stípika. | 2. Vložte stípik do podstavca, nasad'te podložku a následne dotiahnite skrutku. | 3. Uvol'nite maticu pre nastavenie výšky, upravte výšku ventilátora a maticu dotiahnite.POZNÁMKA: Ak teleskopická trubica nie je viditelná, pravdepodobne je zasunutá v stípiku. V takomto prípade ju zo stípika vytiahnite. |
VRTULA A KRYTY

Brand : Teesa
Model : TSA8024
Category : Household Fan