Wallbox

Onyx - Battery charger Wallbox - Free user manual and instructions

Find the device manual for free Onyx Wallbox in PDF.

📄 20 pages English EN Download 💬 AI Question 10 questions ⚙️ Specs
Notice Wallbox Onyx - page 1
Pick your language and provide your email: we'll send you a specifically translated version.
Product Type EV Charger Pedestal
Brand Wallbox
Model Onyx
Compatibility Works with Wallbox chargers (e.g., Pulsar Plus, Copper SB)
Power Supply 220-240V AC single phase or 380-415V AC three-phase
Charging Power Up to 22 kW (depending on charger configuration)
Number of Chargers Supported Single or dual charger configuration
Mounting Floor-standing pedestal
Material Steel with powder coating
Dimensions (H x W x D) 1000 x 500 x 300 mm (estimated)
Weight 20 kg (estimated)
Torque Specification 75 Nm for connections
Installation Type Pedestal assembly with electric box configuration (monophase/triphase)
Cable Connection L1, L2, L3, N, Pe from pedestal frame and door
Protection Rating IP54 (weatherproof, estimated)
Operating Temperature -30°C to +50°C (estimated)
Certifications CE, UKCA (assumed)
Warranty 2 years (standard)
Package Contents Screws, bolts, and washers (quantities vary: x7, x14, x4 for single/double config)
User Manual Included in PDF format
Maintenance Clean with dry cloth; avoid water and solvents
Safety Features Overcurrent protection, ground fault protection (common)
Smart Features Compatible with Wallbox app for monitoring and control (assumed)
Color Black (sleek design)

Frequently Asked Questions - Onyx Wallbox

How do I install the Wallbox Onyx pedestal?
Follow the step-by-step assembly instructions in the manual. Ensure the pedestal is mounted on a flat, solid surface. Connect the cables as per the electric box configuration (single or dual charger, monophase or triphase). Tighten connections to 75 Nm torque.
What is the power requirement for the Onyx pedestal?
It supports 220-240V AC single phase or 380-415V AC three-phase. The charging power can go up to 22 kW depending on the installed charger.
Can I use the Onyx pedestal indoors or outdoors?
Yes, it is designed for both indoor and outdoor use with an estimated IP54 protection rating, making it weather-resistant.
Which Wallbox chargers are compatible with the Onyx pedestal?
The Onyx pedestal is compatible with Wallbox chargers such as the Pulsar Plus and Copper SB. Refer to the compatibility list on the Wallbox website.
How many chargers can I install on a single Onyx pedestal?
The pedestal supports either a single charger or dual charger configuration. The package contents vary accordingly.
What maintenance does the Onyx pedestal require?
Clean the exterior with a dry cloth. Do not use water, solvents, or abrasive cleaners. Periodically check connections for tightness.
What are the dimensions and weight of the Onyx pedestal?
Approximate dimensions: 1000 mm high, 500 mm wide, 300 mm deep. Weight: around 20 kg. Exact specifications may vary; refer to the manual.
What safety features does the Onyx pedestal include?
It includes overcurrent protection and ground fault protection as standard. Always ensure proper grounding and follow local electrical codes.
How do I troubleshoot if the charger does not start?
Check the power supply and connections. Ensure the electric box is configured correctly (monophase/triphase). Verify that the torque on all connections is 75 Nm. If the issue persists, contact Wallbox support.
Is the Onyx pedestal covered by a warranty?
Yes, it comes with a standard 2-year warranty. Extended warranty options may be available. Register your product on the Wallbox website for warranty validation.

User questions about Onyx Wallbox

0 question about this device. Answer the ones you know or ask your own.

Ask a new question about this device

The email remains private: it is only used to notify you if someone responds to your question.

No questions yet. Be the first to ask one.

Download the instructions for your Battery charger in PDF format for free! Find your manual Onyx - Wallbox and take your electronic device back in hand. On this page are published all the documents necessary for the use of your device. Onyx by Wallbox.

USER MANUAL Onyx Wallbox

natural_image Exterior view of a car charging at a wallbox station, with a blue pool and parked cars in the background (no signage visible)

wallbox

plug & drive

CLIENT MANUAL

This manual will help you understanding all the steps needed in order to install the Onyx Pedestal and configure it depending on your electrical network.

ONYX PEDESTAL

ASSEMBLIES

Assembly Step by Step

Onyx Pedestal

Assembly Step by Step

Wallbox Onyx - Assembly Step by Step - 1

Installation Procedure

pages 2-16

Wallbox Onyx - Assembly Step by Step - 2

Items Supplied with Product

page 17

Wallbox Onyx - Assembly Step by Step - 3

Further Steps

page 18

Wallbox Onyx - Assembly Step by Step - 4

natural_image Top-down schematic view of a mechanical or electrical enclosure with internal components and mounting feet (no text or symbols visible)

Wallbox Onyx - Assembly Step by Step - 5

natural_image Four vertical cylindrical objects with circular holes, arranged in a row (no text or symbols)

Needed:

Wallbox Onyx - Assembly Step by Step - 6

natural_image Four vertical brown arrows pointing upward, arranged horizontally (no text or symbols)

Rev. 0

Wallbox Onyx - Assembly Step by Step - 7

natural_image Interior view of an electronic device showing cable structure and wiring details (no text or symbols)

Wallbox Onyx - Assembly Step by Step - 8

natural_image Cross-sectional diagram of a vertical cylindrical device with internal components and wiring (no text or symbols)

Wallbox Onyx - Assembly Step by Step - 9

natural_image Cross-sectional diagram of a vertical electronic device showing internal components and wiring (no text or symbols)

Torque with 75 Nm

Wallbox Onyx - Assembly Step by Step - 10

natural_image Interior view of an electrical cabinet showing internal components and wiring (no text or symbols visible)

Configure the electric box regarding the number of chargers and the type of your electrical network as seen on the next pages.

Electric box configuration 1

Single charger monophase

Cable from Pedestal Frame and Door L1 Brown N Blue Pe Yellow/Green

Electric box configuration 2

Dual charger monophase

Cable from Pedestal Frame and Door L1 Brown N Blue Pe Yellow/Green

Electric box configuration 3

Single charger triphase

Cable from Pedestal Frame and Door

Wallbox Onyx - Single charger triphase - 1

L1

Wallbox Onyx - Single charger triphase - 2

L2

Wallbox Onyx - Single charger triphase - 3

L3

Wallbox Onyx - Single charger triphase - 4

N

Wallbox Onyx - Single charger triphase - 5

Pe

and Door

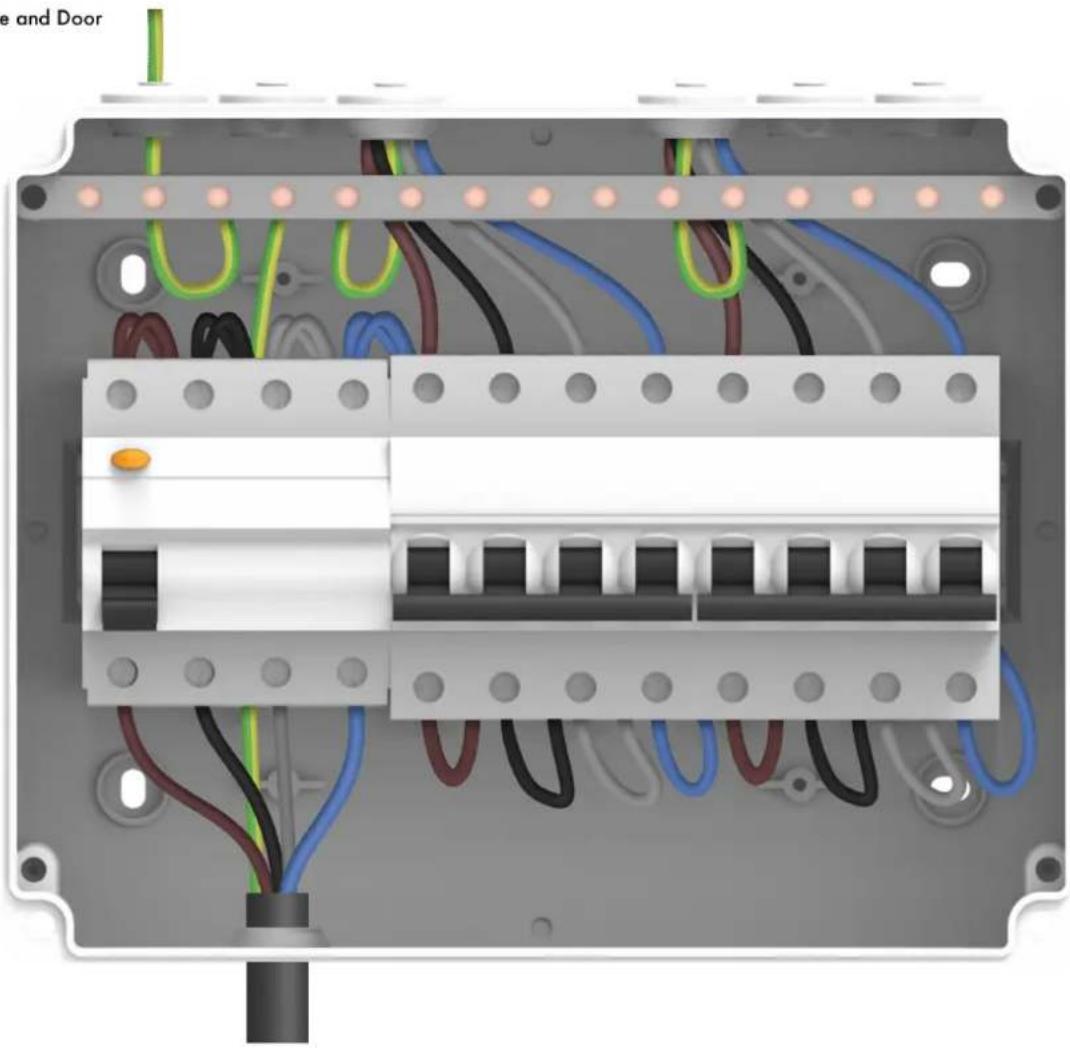
Electric box configuration 4

Dual charger triphase

Cable from Pedestal Frame and Door

Wallbox Onyx - Dual charger triphase - 1

L1

Wallbox Onyx - Dual charger triphase - 2

L2

Wallbox Onyx - Dual charger triphase - 3

L3

Wallbox Onyx - Dual charger triphase - 4

N

Wallbox Onyx - Dual charger triphase - 5

Pe

Wallbox Onyx - Dual charger triphase - 6

natural_image Interior view of an electronic control panel with visible wiring and components (no text or symbols)
Wallbox Onyx - Dual charger triphase - 7

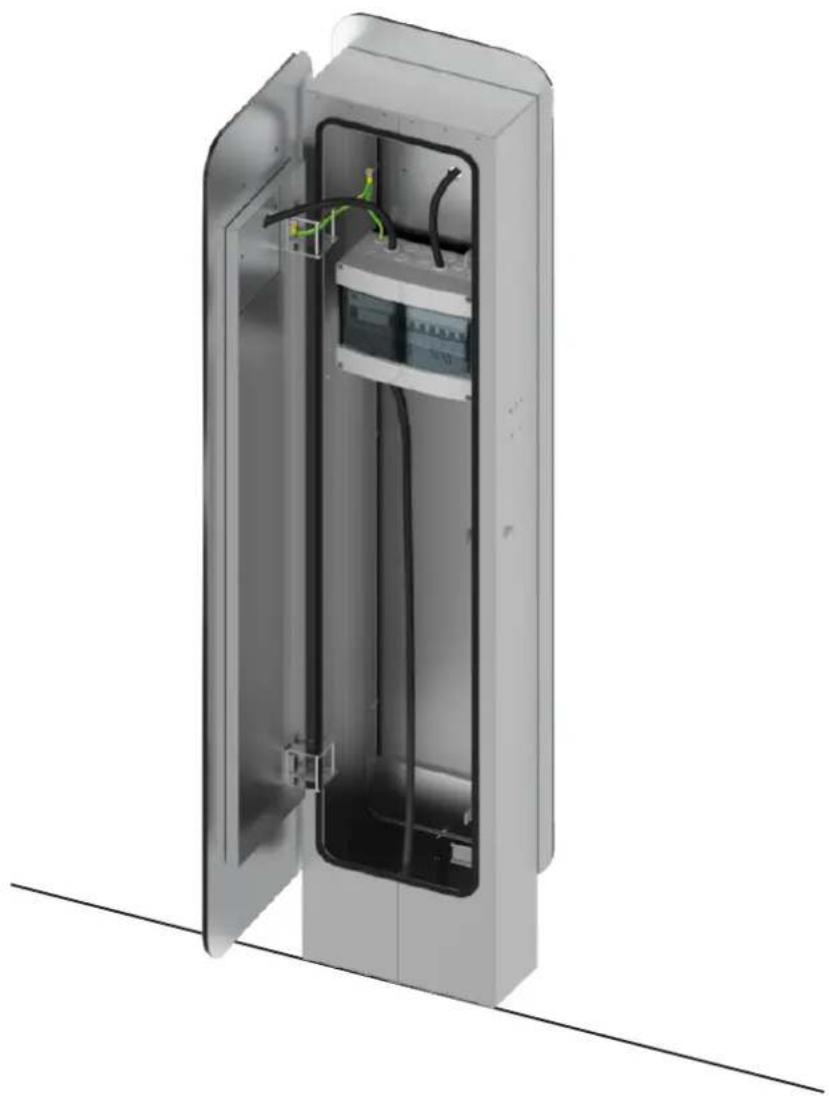
natural_image 3D cutaway view of an open electrical enclosure showing internal wiring and components (no text or symbols)

Wallbox Onyx - Dual charger triphase - 8

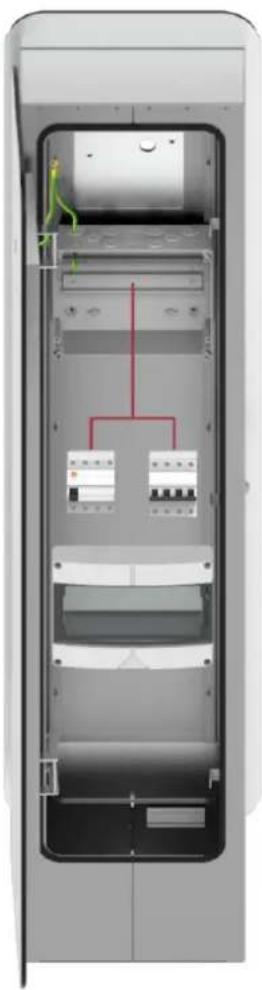
natural_image Diagram of a device interior with two connected devices and a red wire, no visible text or symbols

Wallbox Onyx - Dual charger triphase - 9

natural_image Close-up of a black industrial cabinet with red indicator lights and a transparent door, showing no visible text or symbols.
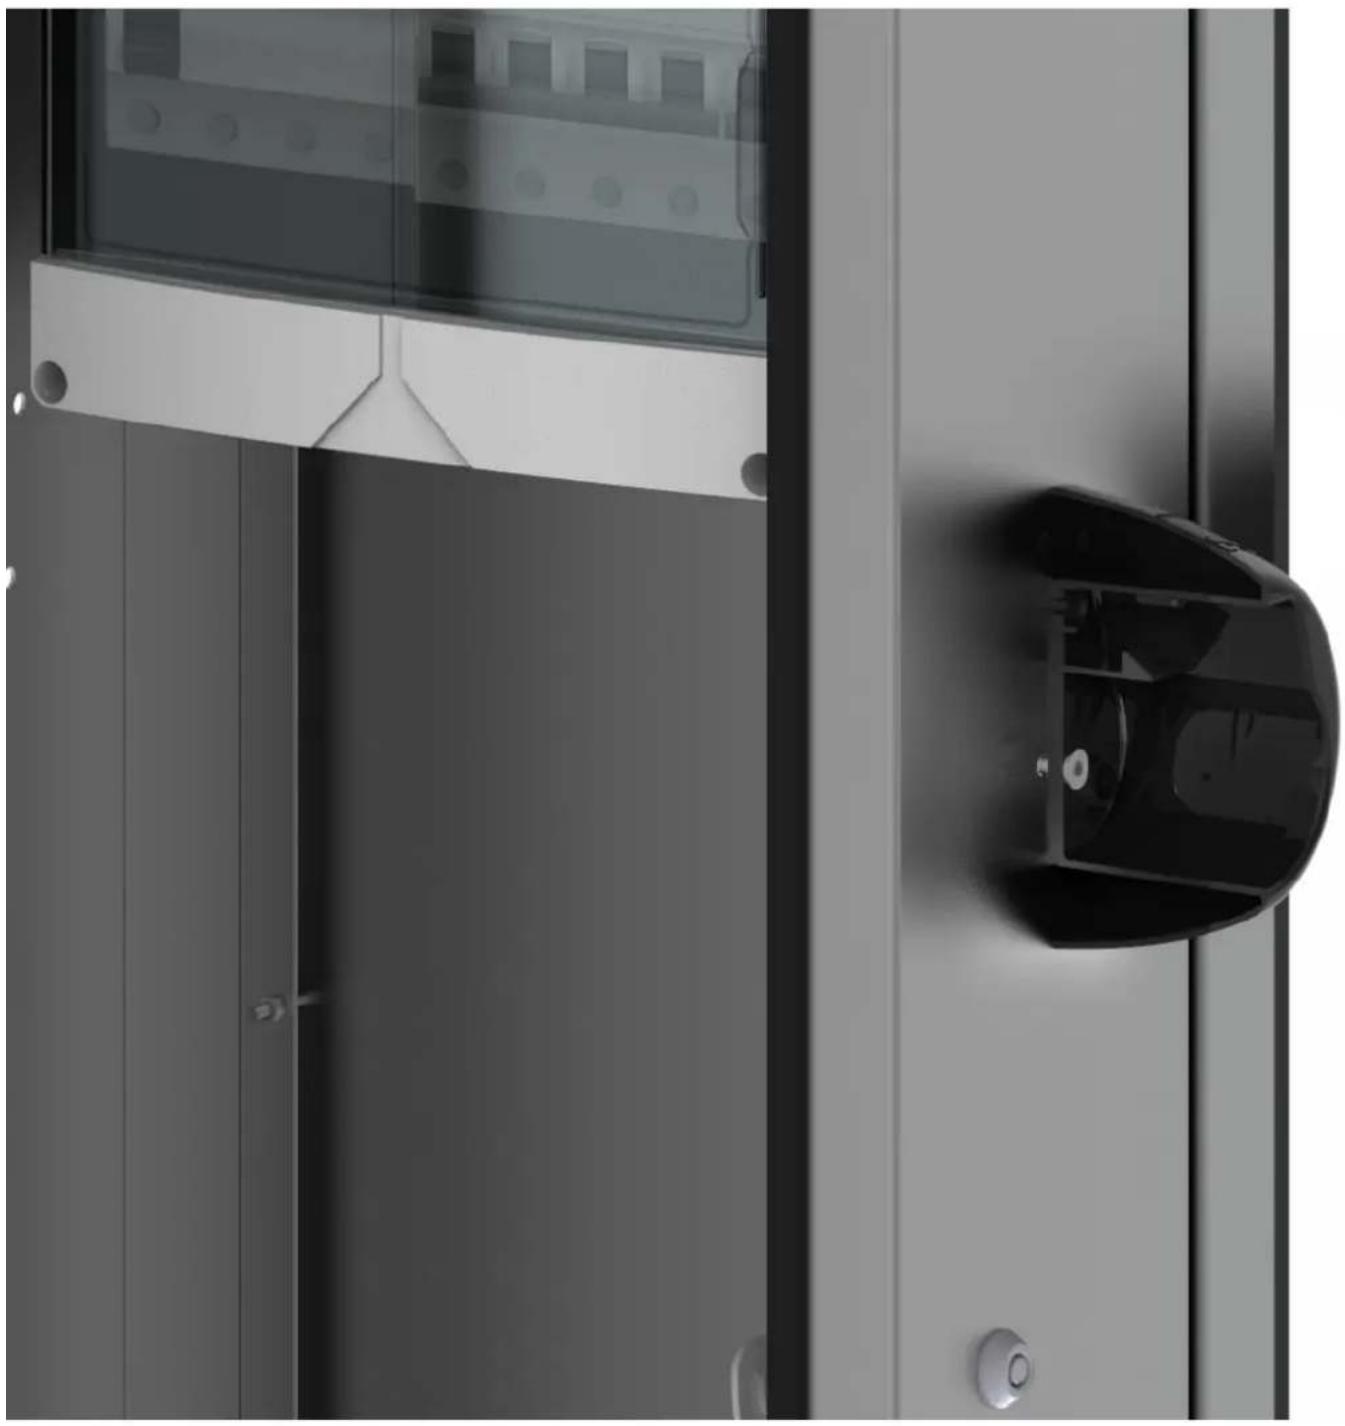
Wallbox Onyx - Dual charger triphase - 10

natural_image Close-up of a metallic door with a black handle and glass panel, no visible text or symbols

Wallbox Onyx - Dual charger triphase - 11

Items Supplied with Product

Single Configuration Double Configuration

Wallbox Onyx - Single Configuration Double Configuration - 1

x7 x14

x7 x14

x7 x14

x4

x4

Wallbox Onyx - Single Configuration Double Configuration - 2

To connect the cable to the charger you should check the chargers' installation guides.

You can find them in: https://www.wallbox.com/installation/
wallbox plug & drive COPPER INSTALLATION GUIDE wallbox

PRODUCT DESCRIPTION SN: 0000 PN: WBCP-0-2-4-0-001-A 32A 230/400VAC 50Hz 3P-N-PE IP 54 Made in SPAIN CE Serial Number Product Number Network settings Oil code ICE marking Deposed information The Wireless charger components discussed must comply the following list: • Nellbox Copper • Washer • Inboardable Fluids • Drilling templates • Air Emission System • Air Diver Ablanchion • Air Leasing Infection® • Air Page Powered by: • Flippie head connected by Two-sweptower After connected Drilling machine plus Connected Cubes in order to the each cable. "Any of the banks described in Pricing, please contact www.efflon.com/support" or www.efflon.com

DRILL & MOUNT DRILLING TEMPLATE PROCEDURE • Use the double sleeve as a guide to mark the location on the wall for the mounting screen. Play special attention when stepping the template. The use of a target level is highly recommended. • Drill the mechanical mounting tools with the diameter specified for the installed installation hardware and check the pool lowing of blocks. For installation on concrete brick and wood walls, use the included installation hardware. Make sure the power supply in tunnel off during all mounting clips OPENING THE DEVICE 1. Create the two screens on the bottom side of the screen and replace 4 2. Remove the edges of the first cover 3. Open specifically the cover 4. Decorate the power communication cable BACKER MOUNTING IMPORTANT: Use your buttons in using a lapelike wall cable connection, (Close) flange steps 5 and step 10 if not using such cable connection, please go up to step Store in the backhole of the buttons charger you will find an insertion with a timer and use a button relay or a socket grid and carefully make an motion into the cable opening. Please manually remove off shape tiles. Take a flange or belching and install it. Step 10: My capacity three must your cable supply through the opening, then fix waiting together for a range that can use from it to then which falls within the standard for cables that can party up to 200k. CORNER MOUNTING Step 1: Use the switches on the covers to choose their circuit operating current of the supply connection. Couchette 10/10/10 1/10/10 1/10/10 1/10/10 1/10/10 1/10/10 1/10/10 Couchette 10/10/10 1/10/10 1/10/10 1/10/10 1/10/10 1/10/10 Step 2: Pressed to be any charge in the wall. Insert the screen in the problems marked, starting with the top case and continuing clockwise. Only first your buttons are fully attached and insert the plug to complete this process. COOPER = installation engine

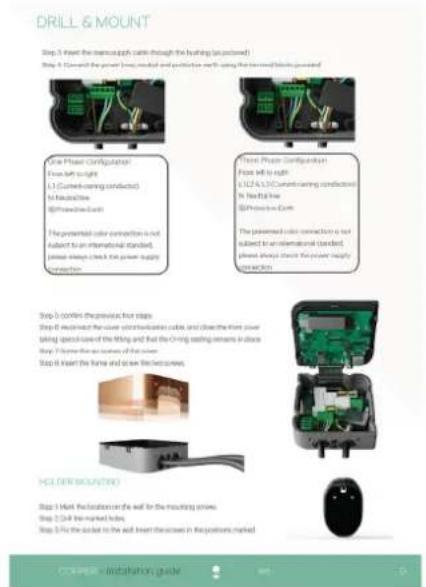
DRILL & MOUNT Step 3 Insert the transcaprylic cable through the heating (in pocket) Step 4. Remove the power line, rated and protected wire using the moving blocks powered One Phase Configuration Flow left to right L1 (Current-carrying conductor) In installation @Protection Each The presented color connection is not subject to an international standard. Please always check the power supply connection Three Phase Configuration Flow left to right (L1/L2) (Current-carrying conductor) In installation @Protection Each The presented color connection is not subject to an international standard. Please always check the power supply connection Step 5 confers the previous four steps Step 6 recommend the user-communication cable, and draw the main power tiring speed range of the lifting and that the Driving setting remains in place Step 7. Show the main system of the power Step 8. Insert the force and save the fixtures. HOLDER BOUNTED Step 9. Hold reallocation on the wall for the mounting prims. Step 10. Cut line-marked hole, Step 11. Fix the socket to the wall insert the increases in the positions marked

ONYX PEDESTAL

Manual assistant
Powered by Anthropic
Waiting for your message
Product information

Brand : Wallbox

Model : Onyx

Category : Battery charger