
208 (9999) - Automobile PEUGEOT - Free user manual and instructions
Find the device manual for free 208 (9999) PEUGEOT in PDF.


| Product Type | Automobile |
| Brand | Peugeot |
| Model | 208 (9999) |
| Dimensions (L x W x H) | 4.05 m x 1.74 m x 1.46 m |
| Curb Weight | 1,050 kg |
| Fuel Type | Petrol / Diesel |
| Engine | 1.2L PureTech 3-cylinder |
| Transmission | 5-speed manual / 6-speed automatic |
| Number of Seats | 5 |
| Number of Doors | 5 |
| Safety Systems | ABS, ESP, multiple airbags |
| Fuel Tank Capacity | 44 liters |
| Battery | 12V lead-acid |
| Tire Pressure (Front / Rear) | 2.3 bar / 2.1 bar |
| Maintenance Interval | Oil change every 15,000 km |
| Manual Format | PDF, 304 pages, English |
| Download Service | Free PDF download on notice-facile.com |
Frequently Asked Questions - 208 (9999) PEUGEOT
User questions about 208 (9999) PEUGEOT
0 question about this device. Answer the ones you know or ask your own.
Ask a new question about this device
Download the instructions for your Automobile in PDF format for free! Find your manual 208 (9999) - PEUGEOT and take your electronic device back in hand. On this page are published all the documents necessary for the use of your device. 208 (9999) by PEUGEOT.
USER MANUAL 208 (9999) PEUGEOT
PEUGEOT 208

PEUGEOT

Access to the online Handbook

The Handbook is available on the PEUGEOT website, in the "Personal space" section or at the following address: http://public.servicebox.peugeot.com/ddb/
Select:
- the language,
- the vehicle, its body style,
- the print edition of your handbook appropriate for the date of 1 registration of your vehicle.
Direct access to the Handbook.

This symbol indicates the latest information available.

Welcome
Thank you for choosing a Peugeot 208.
This document presents the information and recommendations required for you to be able to explore your vehicle in detail.
Your vehicle will be fitted with only some of the equipment described in this document, depending on its trim level, version and the specification for the country in which it was sold.
The descriptions and illustrations are given without any obligation. Automobiles PEUGEOT reserves the right to modify the technical specifications, equipment and accessories without having to update this edition of the guide.
If ownership of your vehicle is transferred, please ensure this Complete Handbook is passed on to the new owner.
In this document, you will find all of the instructions and recommendations on the use that will allow you to enjoy your vehicle to the fullest. It is strongly recommended that you familiarise yourself with it as well as the Warranty and Maintenance Record which will provide you with information about warranties, servicing and roadside assistance associated with your vehicle.
Key

Safety warning

Additional information

Contributes to the protection of the environment

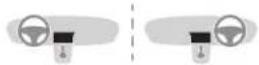
Left-hand drive vehicle

Right-hand drive vehicle
Contents
Overview
Instruments and controls
4
Access
Remote control 36
Doors
Locking - Key 37
Central locking 40
Boot
Alarm
Electric windows 43
2
Lighting and visibility
Lighting control stalk
Direction indicators
Automatic illumination of headlamps
Daytime running lamps/Sidelamps
Headlamp adjustment
Cornering lighting
Wiper control stalk
4
67
68
69
71
71
71
72
Dashboard instruments
Instrument panels 7
Warning and indicator lamps 10
Indicators
Trip computer 30
Date and time adjustment 33
Lighting dimmer 34
23
Ease of use and comfort
PEUGEOT i-Cockpit 45
Steering wheel adjustment 46
Mirrors
Front seats 48
One-piece bench seat 53
2/3 - 1/3 split rear bench seat 53
Head restraints 54
Recommendations for ventilation
and air conditioning
Heating
Manual air conditioning
Dual-zone automatic air conditioning
Recirculation of interior air
Demisting – defrosting
Courtesy lamp
Interior ambient lighting
Sunroof blind
Interior fittings
Boot fittings
Rear shelf
3
Safety
General safety recommendations
Hazard warning lamps
Emergency or assistance call
Electronic stability control (ESC)
Seat belts
Airbags
Child seats 88
Deactivating the passenger's front airbag
ISOFIX mountings and child seats
Child lock
5
75
76
76
78
81
84
[Non-Text]
89
97
103
Driving
Eco-driving
Driving recommendations 105
Starting - Switching off the engine 108
Parking brake 110
Manual gearbox 111
Electronic gearbox 112
Automatic gearbox 114
Gear shift indicator 116
Hill start assist 117
Stop & Start 118
Speed limiter 121
Cruise control 123
Memorising speeds 126
Active City Brake 127
Parking sensors
Reversing camera
Park Assist
Under-inflation detection
6
104
Fuel tank
Misfuel prevention (Diesel)
Compatibility of fuels
Snow chains
Towing a trailer
Load reduction mode
Energy economy mode
Changing a window wiper 144
Fitting roof bars
Bonnet
Engines
Checking levels
Checks
AdBlue® (BlueHDi engines)
Advice on care
Practical information
7
138
139
140
141
142
143
143
[Non-Text]
144
145
147
148
150
152
156
Technical data
9
Characteristics of engines and towed loads 184
Petrol engines 185
Diesel engines 188
LPG engines 190
Dimensions 191
Identification markings 192
Audio equipment and telematics
PEUGEOT Connect Nav
PEUGEOT Connect Radio
Audio system / Bluetooth
Audio system
In the event of a breakdown
Warning triangle
Running out of fuel (Diesel)
Temporary puncture repair kit
Spare wheel
Changing a bulb
Changing a fuse
12 V battery 178
Towing
8
157
157
158
162
167
172
[Non-Text]
181
Alphabetical index
Overview
Instruments and controls

| 1 |
| Door mirrorsElectric windows |
| 2 |
| Opening the bonnet |
| 3 |
| Dashboard fuses |
| 4 |
| Rear view mirrorCourtesy lampAmbient lightingEmergency or assistance callActive City Brake |
| 5 |
| Touch screenAudio systemBluetooth audio systemAdjusting the date/time |
| 6 |
| VentilationHeatingManual air conditioningAutomatic air conditioningFront demisting/defrostingRear screen demisting/defrosting |
| 7 |
| USB port / Auxiliary socket |
| 8 |
| Manual gearboxElectronic gearboxAutomatic gearboxGear shift indicator |
| 9 |
| Parking brake |
| 10 |
| Glove boxFuses |
Instruments and controls (continued)
Steering mounted controls

1
Lighting control stalk Direction indicators
2
Steering mounted controls for the touch screen: volume, source change
3
Cruise control Speed limiter Memorising speeds
4
"-" Changing down gears (with an electronic gearbox)
5
Steering wheel adjustment Audible warning (horn)
6
Wiper control stalk Trip computer
7
Steering mounted controls for the touch screen
8
Steering mounted controls for the audio system
9
"+" Changing up gears (with an electronic gearbox)
Overview
Side switch panel
(Depending on version.)


Activation of Park Assist
or

Deactivation of the rear parking sensors

Deactivation of the DSC/ASR system

Deactivation of Stop & Start

Reinitialisation of the tyre under-inflation detection (without the touch screen)

Deactivating the volumetric monitoring

Turning on the electric child lock

Headlamp beam height adjustment
Central switch panel

Central locking

Hazard warning lamps
Instrument panels

Rev counter
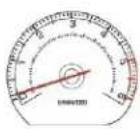
Rev counter (x 1,000 rpm), graduation depends on the engine.
Indicator

Engine coolant temperature indicator.

Control button

Servicing reminder.
Setting the time.
Reset the function selected (service indicator or trip recorder).
Depending on version:
- Setting the time.
- Digital speedometer.
Instrument panel lighting

Adjusting the intensity of the general lighting.


Speedometer

Analogue speedometer (mph or km/h).
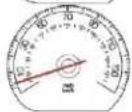
Gauge
Fuel gauge.

Dashboard instruments
Displays


13855km
570.6 mph km/h km/h
OIL

Cruise control settings.
Speed limiter settings.
Service indicator.
Total distance recorder (miles or km).
Trip distance recorder (miles or km).
Engine oil level indicator (depending on version).
Gear shift indicator with a manual gearbox.

Selector position and gear with an electronic gearbox. Selector position and gear with an automatic gearbox.
28 mph km/h
Display / hide the digital speedometer. (Depending on version.)

Hold this button down. "- -" or "0" is displayed.

Press this button to display or hide the digital speedometer.
Trip computer
Time counter of the Stop & Start.

Remaining driving range.


Current or average fuel consumption.

Average speed of the vehicle.

Distance travelled by the vehicle.
Gearbox

Park position (Park).

Reverse gear (Rear).

Neutral.

Automatic mode (Drive).

Sequential mode.


Trip recorder reset


19 100km 00000km
1 1800 ml 00000 ml
With the trip distance displayed, press the button for a few seconds.
Dashboard instruments
Warning and indicator lamps
Visual identifiers informing the driver that a system is in operation, switched off (on/off indicator lamps) or has developed a fault (warning lamp).
When the ignition is switched on
Certain warning lamps come on for a few seconds when the vehicle's ignition is switched on.
When the engine is started, these same warning lamps should go off. If they remain on, before driving refer to the information on the warning lamp concerned.
Associated warnings
Certain warning lamps may come on in one of two modes: fixed (continuous) or flashing. Only by relating the type of lighting to the operating status of the vehicle can it be ascertained whether the situation is normal or whether a fault has occurred. In the event of a fault, the illumination of the warning lamp may be accompanied by an audible signal and/or a message.
Warning lamps
When the engine is running or the vehicle is being driven, illumination of one of the following warning lamps indicates a fault which requires action on the part of the driver.
Any fault resulting in the illumination of a warning lamp must be investigated further using the associated message. If you encounter any problems, contact a PEUGEOT dealer or a qualified workshop.

Operation indicator lamps
The lighting of one of the following indicator lamps confirms that the corresponding system is on.

Deactivation indicator lamp
If this indicator lamp comes on, this confirms that the corresponding system has been switched off intentionally. This may be accompanied by an audible signal and a message being displayed.

| Warning / indicator lamp State | Cause Action / Observations | |||
| STOP | STOP Fixed, associated with another warning lamp, accompanied by an audible signal and a message. | Illumination of this warning lamp is related to a serious fault detected with the engine, the braking system, the power steering, etc., or a major electrical fault. | You must stop as soon as it is safe to do so. Park, switch off the ignition and call a PEUGEOT dealer or a qualified workshop. | |
| (●) | Parking brake Fixed. The parking brake is applied or not properly released. | Release the parking brake to extinguish the warning lamp; keep your foot on the brake pedal. Observe the safety recommendations. For more information on the Parking brake, refer to the corresponding section. | ||
| (●) | Braking Fixed. The brake fluid level has dropped significantly. | You must stop as soon as it is safe to do so. Top up with brake fluid approved by PEUGEOT. If the problem persists, have the system checked by a PEUGEOT dealer or a qualified workshop. | ||
| (●)+ABS | ||||
| Fixed, associated with the ABS warning lamp. The electronic brake force distribution (EBFD) system is faulty. You must stop as soon as it is safe to do so. Have it checked by a PEUGEOT dealer or a qualified workshop. | ||||
 | Door(s) open Fixed | and associated with a message identifying the door. | Speed below 6 mph (10 km/h), a door or the boot is not properly closed. | Close the door or boot. |
| Fixed, associated with a message identifying the door, together with an audible signal. | Speed above 6 mph (10 km/h), a door or the boot is not properly closed. | |||
 | Seat belt(s) not fastened/ unfastened | Fixed or flashing accompanied by an audible signal. | A belt has not been fastened or has been unfastened. | Pull the strap then insert the tongue into the buckle. |
 | Battery charge Fixed | The battery charging circuit has a fault (dirty or loose terminals, slack or cut alternator belt, etc.). | The warning lamp should go off when the engine is started.If it does not go off, contact a PEUGEOT dealer or a qualified workshop. | |
| Engine oil pressure | Fixed. The engine lubrication system has a fault. | You must stop as soon as it is safe to do so.Park, switch off the ignition and contact a PEUGEOT dealer or a qualified workshop. | ||
 | Maximum coolant temperature | Fixed, with the needle in the red zone. | The temperature of the cooling system is too high. | Stop as soon as it is safe to do so.Wait until the engine has cooled down before topping up to the required level, if necessary.If the problem persists, contact a PEUGEOT dealer or a qualified workshop. |
 | Engine self-diagnosis system | Fixed. The emission control system has a fault. | The warning lamp should go off when the engine is started.If it does not go off, contact a PEUGEOT dealer or a qualified workshop without delay. | |
| Flashing. The engine management system has a fault. | Risk of the catalytic converter being destroyed.Have it checked by a PEUGEOT dealer or a qualified workshop. | |||
 +SERVICE +SERVICE | Fixed, associated with the service warning lamp. | A minor fault in the engine has been detected. | Have it checked by a PEUGEOT dealer or a qualified workshop. | |
 +STOP +STOP | Fixed, associated with the STOP warning lamp. | A major fault in the engine has been detected. | You must stop as soon as it is safe to do so.Park, switch off the ignition and contact a PEUGEOT dealer or a qualified workshop. | |
| Warning / indicator lamp State Cause Action / Observations | ||||
 | Foot on brake Fixed. The brake pedal must be pressed. | With an electronic gearbox, selector in position N, press the brake pedal to start the engine. With an automatic gearbox, with the engine running, press the brake pedal before releasing the parking brake to unlock the lever and come out of position P. If you wish to release the parking brake without pressing the brake pedal, this warning lamp will remain on. | ||
| Use the brake pedal and/or the parking brake. | ||||
 | Anti-lock Braking System (ABS) | Fixed. The anti-lock braking system has a fault. | The vehicle retains conventional braking. Drive carefully at reduced speed and contact a PEUGEOT dealer or a qualified workshop without delay. | |
| Warning / indicator lamp State | Cause Action / Observations | |||
| [5A3S] | Under-inflation Fixed | Fixed, accompanied by an audible signal and a message. | One or more wheels has insufficient pressure. | Check the pressure of the tyres as soon as possible.This check should preferably be carried out when the tyres are cold.You must reinitialise the system after adjusting one or more tyre pressures and after changing one or more wheels.For more information on Tyre under-inflation detection, refer to the corresponding section. |
 SERVICE SERVICE | Flashing then fixed, accompanied by the Service warning lamp. | The system is faulty: tyre pressures are no longer monitored. | Check the tyre pressures as soon as possible.Have the system checked by a PEUGEOT dealer or a qualified workshop. | |
 | Dynamic stability control (DSC/ASR) | Flashing. The DSC/ASR | regulation is operating. | The system optimises traction and improves the directional stability of the vehicle in the event of loss of grip or trajectory. |
| Fixed. The DSC/ASR system has a fault. Have the system checked by a PEUGEOT dealer or a qualified workshop. | ||||
 | Airbags Temporarily on. This warning lamp comes on for a few seconds when you turn on the ignition, then goes off. | This warning lamp should go off when the engine is started.If it does not go off, contact a PEUGEOT dealer or a qualified workshop. | ||
| Warning / indicator lamp State | Cause Action / Observations | |||
 | Passenger's airbag system | Fixed. The control switch, located in the glove box, is set to the "OFF" position.The passenger's front airbag is deactivated.You can install a "rearward" facing child seat, unless there is a fault with the airbags (airbag warning lamp on). | To activate the passenger front airbag, turn the control to the "ON" position.In this case, do not fit a child seat in the "rearward" facing position. | |
 | Min fuel level Fixed, with the needle in the red zone. | Approximately 5 litres of fuel remain in the tank.You are now starting to use the fuel reserve. | You must refuel as soon as possible to avoid running out of fuel.This warning lamp will come on every time the ignition is switched on, until sufficient fuel is added.Capacity of the tank:- approximately 50 litres (petrol engines).- approximately 50 litres (Diesel engines).- approximately 45 litres (Diesel BlueHDi engines)Never continue to drive until you run out of fuel, as this could damage the emission control and injection systems. | |
| Flashing with the needle in the red zone. | Very little fuel remains in the tank. | |||
 | Foot on the clutch | Fixed. In STOP mode of | the Stop & Start, the transition to START mode has been rejected because the clutch pedal is not fully pressed down. | With a manual gearbox, you must depress the clutch fully to allow the change to engine START mode. |
| Warning / indicator lamp State | Cause Action / Observations | |||
| AdBlue | AdBlue 1.6 litre BlueHDIEuro 6.1 | Fixed, on switching on the ignition, accompanied by an audible signal and a message indicating the remaining driving range. | The remaining driving range is between 370 miles (600 km) and 1,500 miles (2,400 km). | |
| Flashing, accompanied by an audible signal and a message indicating the remaining driving range. | The remaining driving range is between 0 and 370 miles (0 and 600 km). | |||
| Flashing, accompanied by an audible signal and a message indicating that starting is prevented. | The AdBlue tank is empty: the starting inhibition system required by legislation prevents starting of the engine. | |||
| Warning / indicator lamp State | Cause Action / Observations | |||
| AdBlue | AdBlue®1.5 litre BlueHDIEuro 6.2 | Fixed, for around 30 seconds when switching on the ignition, accompanied by an audible signal and a message indicating the remaining driving range. | The remaining driving range is between 1,500 miles (2,400 km) and 500 miles (800 km). | Top up the AdBlue®.You can add up to 10 litres of AdBlue®to its tank. |
| Fixed, on switching on the ignition, accompanied by an audible signal and a message indicating the remaining driving range. | The remaining driving range is between 500 miles (800 km) and 60 miles (100 km). | As soon as possible, top up the AdBlue®.You can add up to 10 litres of AdBlue®to its tank. | ||
| Flashing, accompanied by an audible signal and a message indicating the remaining driving range. | The driving range is less than 60 miles (100 km). | You must refuel AdBlue®to avoid running out.You can add up to 10 litres of AdBlue®to its tank. | ||
| Flashing, accompanied by an audible signal and a message indicating that starting is prevented. | The AdBlue®tank is empty: the starting inhibition system required by legislation prevents starting of the engine. | To be able to start the engine, you must top up the AdBlue®.It is essential to add at least 4 litres of AdBlue®to its tank. | ||
| Warning / indicator lamp State | Cause Action / Observations | ||
| AdBlue+SERVICE+ | SCR emissions control system (BlueHDi Diesel) | Fixed, on switching on the ignition, associated with the service and engine diagnostic warning lamps, accompanied by an audible signal and a message. | A fault with the SCR emissions control system has been detected. |
| Flashing, on switching on the ignition, associated with the service and engine diagnostic warning lamps, accompanied by an audible signal and a message indicating the remaining driving range. | After confirmation of the fault with the emissions control system, you can drive for up to 680 miles (1,100 km) before the engine starting inhibition system is triggered. | ||
| Flashing, on switching on the ignition, associated with the service and engine diagnostic warning lamps, accompanied by an audible signal and a message. | You have exceeded the authorised driving limit following confirmation of a fault with the emissions control system: the engine starting inhibition system prevents starting of the engine. | ||
For topping up or for more information on the AdBlue ® (BlueHDi engines), refer to the corresponding section.
| Warning / indicator lamp State Cause Action / Observations | ||||
 | Service Temporarily on, with a message displayed. | One or more minor faults for which there is no specific warning lamp have been detected. | Identify the cause of the fault using the message displayed in the instrument panel.You can deal with some problems yourself, such as a door open or the start of saturation of the particle filter (as soon as the traffic conditions allow, regenerate the filter by driving at a speed of at least 40 mph (60 km/h), until the warning lamp goes off).For any other problems, such as a fault with the tyre under inflation detection system, contact a PEUGEOT dealer or a qualified workshop. | |
| Fixed, accompanied by the display of a message. | One or more major faults for which there is no specific warning lamp have been detected. | |||
 +- +- | Fixed, associated with the flashing and then fixed display of the service indicator spanner. | The servicing interval has been exceeded. | Only on BlueHDi Diesel versions.Your vehicle must be serviced as soon as possible. | |
| Warning / indicator lamp State | Cause Action / Observations | |||
| Diesel engine pre-heating | Fixed. The key is at position 2 (ignition on) in the ignition switch. | Wait until the warning lamp goes off before starting. The period of illumination of the warning lamp is determined by the ambient conditions (up to about thirty seconds in extreme conditions). If the engine does not start, switch the ignition off and then on, wait until the indicator lamp goes off again, then start the engine. | ||
| Power steering | Fixed. | The power steering has a fault. | Drive carefully at reduced speed. Have the vehicle checked by a PEUGEOT dealer or a qualified workshop. | |
| Rear foglamp Fixed. | The rear foglamp has been switched on using the ring on the lighting control stalk. | Turn the ring on the lighting control stalk to the rear to switch off the rear foglamp. | ||
| ECO | Stop & Start Fixed. | When the vehicle stops (red lights, traffic jams, etc.), the Stop & Start system puts the engine into STOP mode. | The warning lamp goes off and the engine restarts automatically in START mode, as soon as you want to move off. | |
| Flashes for a few seconds, then goes off. | STOP mode is temporarily unavailable. or START mode is triggered automatically. | For more information on Stop & Start, refer to the corresponding section. | ||
| Warning / indicator lamp State Cause Action / Observations | ||||
 | Automatic wiping | Fixed. The wiper control | stalk has been pushed down. | Automatic front wiping is activated.To deactivate automatic wiping, operate the control stalk downwards or put the stalk into another position. |
 | Left-hand direction indicator | Flashing with audible signal. | The lighting control stalk has been moved down. | |
 | Right-hand direction indicator | Flashing with audible signal. | The lighting control stalk has been moved up. | |
 | Sidelamps Fixed. The lighting control stalk is in the "Sidelamps" position. | |||
| [z7GX] | Front foglamps Fixed. The front foglamps are switched on using the ring on the lighting control stalk. | Turn the ring on the lighting control stalk rearward once to switch off the front foglamps. | ||
| [cswy] | Dipped beam headlamps | Fixed. The lighting lever is in the "Dipped beam headlamps" position. | ||
 | Main beam headlamps | Fixed. The lighting lever has been pulled towards you. | Pull the lever to return to dipped beam headlamps. | |
Indicators
Engine coolant temperature

With the engine running, when the needle is:
- in zone A, the temperature of the engine coolant is correct,
- in zone B, the temperature of the engine coolant is too high; the maximum temperature and the central STOP warning lamps come on, accompanied by an audible signal and a warning message in the screen.
You must stop as soon as it is safe to do so.
Wait a few minutes before switching off the engine.
Contact a PEUGEOT dealer or a qualified workshop.
Dashboard instruments
Service indicator
| Warning / indicator lamp State | Cause Actions / Observations | |||
| [27]W | Service spanner Fixed, temporary when the ignition is switched on. | There are between approximately 620 miles (1,000 km) and approximately 1,860 miles (3,000 km) before the next service is due. | The service indicator is displayed for a few seconds on the instrument panel. Depending on version:- the distance recorder display line indicates the distance remaining (in kilometres or miles) before the next service is due.- an alert indicates the distance remaining (in kilometres or miles) as well as the period before the next service is due.The service spanner goes off after a few seconds.The alert may be triggered close to the due date. | |
| [4]YD | Fixed, when the ignition is switched on. | Less than approximately 620 miles (1,000 km) remain before the next service is due. | The service indicator is displayed for a few seconds on the instrument panel. Depending on version:- the distance recorder display line indicates the distance remaining before the next service is due.- an alert message indicates the distance remaining as well as the period before the next service is due.The service spanner remains on to indicate that the service is required very soon.The alert may be triggered close to the due date. | |
 | Service spanner Flashing then fixed, when the ignition is switched on. | The servicing interval has been exceeded. | The service indicator is displayed for a few seconds on the instrument panel. Depending on version:- the total distance recorder display line indicates the distance travelled since the due date was reached. Value preceded by the "-" sign.- an alert message indicates that the due date has passed.The service spanner remains on until the service has been performed.The alert is triggered when the due date has passed. | |
 + + | Flashing then fixed, when the ignition is switched on, associated with the service warning lamp. | The servicing interval has been exceeded for Diesel BlueHDi versions. | The service indicator is displayed for a few seconds on the instrument panel. Depending on version:- the total distance recorder display line indicates the distance travelled since the due date was reached. Value preceded by the "-" sign.- an alert message indicates that the due date has passed.The service spanner remains on until the service has been performed.The alert is triggered when the due date has passed. | |
The distance indicated (in kilometres or miles) is calculated according to the mileage covered and the time elapsed since the last service.
Resetting the service indicator Retrieving the service information
After each service, the service indicator must be reset to zero.
If you have carried out the service on your vehicle yourself:
switch off the ignition,

press and hold the trip distance recorder reset button,
switch on the ignition; the distance recorder display begins a countdown,
when the display indicates "=0", release the button; the spanner disappears.
If you have to disconnect the battery following this operation, lock the vehicle and wait at least 5 minutes for the reset to be registered.
You can access the service information at any time.
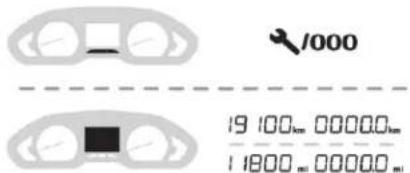
- Press the trip distance recorder reset button.
The service information is displayed for a few seconds, then disappears.
Engine oil level indicator
(depending on version)
On versions fitted with an electric oil level indicator, the state of the engine oil level is displayed in the instrument panel for a few seconds, after the servicing information.
The level read will only be correct if the vehicle is on level ground and the engine has been off for more than 30 minutes.
Oil level incorrect
This is indicated by the display of the message "Oil level incorrect" in the instrument panel screen, accompanied by the service warning lamp and an audible signal.
If the low oil level is confirmed by a check using the dipstick, the level must be topped up to avoid damage to the engine.
For more information on Checking levels, refer to the corresponding section.
Oil level indicator fault
This is signalled by the display of the message "Oil level measurement invalid" in the instrument panel.
Contact a PEUGEOT dealer or a qualified workshop.
In the event of a fault with the electric indicator, the oil level is no longer monitored. If the system is faulty, you must check the engine oil level using the manual dipstick located under the bonnet. For more information on Checking levels, refer to the corresponding section.
AdBlue® range indicators
These range indicators are present only on BlueHDi Diesel versions. Once the AdBlue ® tank is on reserve or after detection of a fault with the SCR emissions control system, when the ignition is switched on, an indicator displays an estimate of the distance that can be covered, the range, before engine starting is prevented.
In the event of the risk of non-starting related to a lack of AdBlue®
! The engine start prevention system required by regulations is activated automatically once the AdBlue ® tank is empty.
Range of the 1.6 BlueHDi engine (Euro 6.1)
Range greater than 1,500 miles (2,400 km) When switching on the ignition, there is no automatic display of range in the instrument panel.

Pressing this button temporarily displays the driving range with the message "AdBlue: Range greater than 1,500 miles (2,400 km)" followed, if the tank level of AdBlue permits, with a message indicating that you can top it up.
Remaining range between 1,500 and 375 miles (2,400 and 600 km) (1.6 BlueHDi Euro 6.1)

When switching on the ignition, the warning lamp comes on, accompanied by an audible signal and the display of a message (e.g. "Top up AdBlue: Start-up not possible in x miles") indicating the remaining range expressed in miles or kilometres. When driving, the message is displayed every 200 miles (300 km) until the level is topped up. The reserve level has been reached; it is recommended that you top up as soon as possible.
Dashboard instruments
Remaining range less than 375 miles (600 km) (1.6 BlueHDi Euro 6.1)

When switching on the ignition, this warning lamp flashes, accompanied by the permanent lighting of the service warning lamp, an audible signal and the display of a message (e.g. "Top up AdBlue: Start-up not possible in x miles") indicating the remaining range expressed in miles or kilometres.
When driving, this message is displayed every 30 seconds until the AdBlue level has been topped up.
It is essential to top up as soon as possible and before the tank is completely empty; otherwise it will not be possible to restart the engine after the next stop.
Breakdown related to a lack of AdBlue 10

When switching on the ignition, this warning lamp flashes, associated with an audible signal and the display of the message "Top up AdBlue: Starting impossible".
The AdBlue ® tank is empty: the starting inhibition system required by legislation prevents starting of the engine.
! To be able to restart the engine, it is essential to add at least 4 litres of AdBlue ® to its tank.
Range of the 1.5 BlueHDi engine (Euro 6.2)
Range greater than 1,500 miles (2,400 km)
When switching on the ignition, there is no automatic display of range in the instrument panel.

Pressing this button temporarily displays the driving range with the message "AdBlue: Range greater than 1,500 miles (2,400 km)" followed, if the tank level of AdBlue permits, with a message indicating that you can top it up.
Remaining range between 1,500 and 500 miles (2,400 and 800 km) (1.5 BlueHDi Euro 6.2)

When switching on the ignition, this warning lamp comes on for about 30 seconds, accompanied by an audible signal and the display of a message (e.g. "Top up AdBlue: Start-up not possible in x miles") indicating the remaining range expressed in miles or kilometres.
The reserve level has been reached; it is recommended that you top up as soon as possible.
These messages are accompanied by the recommendation to not top up with more than 10 litres of AdBlue.
Remaining range between 500 and 60 miles (800 and 100 km) (1.5 BlueHDi Euro 6.2)

When switching on the ignition, the warning lamp comes on, accompanied by an audible signal (1 beep) and the display of a message (e.g. "Top up AdBlue: Start-up not possible in x miles") indicating the remaining range expressed in miles or kilometres.
When driving, the audible signal and the message display are triggered every 60 miles (100 km) until the level is topped up. It is essential to top up as soon as possible and before the tank is completely empty; otherwise it will not be possible to restart the engine after the next stop.
Remaining range less than 60 miles (100 km) (1.5 BlueHDi Euro 6.2)

When switching on the ignition, this warning lamp flashes, accompanied by an audible signal (1 beep) and the display of a message (e.g. "Top up AdBlue: Starting impossible in x miles") indicating the remaining range expressed in miles or kilometres.)
When driving, the audible signal and the message display are triggered every 6 miles (10 km) until the AdBlue tank is topped up. It is essential to top up as soon as possible and before the tank is completely empty; otherwise it will not be possible to restart the engine after the next stop.
Breakdown related to a lack of AdBlue 10

When switching on the ignition, this warning lamp flashes, associated with an audible signal and the display of the message "Top up AdBlue: Starting impossible".
The AdBlue ® tank is empty: the starting inhibition system required by legislation prevents starting of the engine.
To be able to restart the engine, it is essential to add at least 4 litres of AdBlue ® to its tank.
In the event of a fault with the SCR emissions control system
An engine immobiliser is activated automatically after you have driven a further 650 miles (1,100 km) following confirmation of a fault with the SCR emissions control system. Have the system checked by a PEUGEOT dealer or a qualified workshop as soon as possible.
In the event of the detection of a fault

The warning lamps come on, accompanied by an audible signal and the display of the message "Emissions fault". The alert is triggered while driving as soon as the fault is detected for the first time, then when switching on the ignition for subsequent journeys, while the fault persists.
If it is a temporary fault, the alert disappears during the next journey, after self-diagnostic checks of the SCR emissions control system.
Dashboard instruments
During the permitted driving phase (between 685 and 0 miles (1,100 km and 0 km))

If a fault with the SCR system is confirmed (after 30 miles (50 km) covered with the permanent display of the message signalling a fault), these warning lamps come on and the AdBlue warning lamp flashes, accompanied by an audible signal and the display of a message (e.g. "Emissions fault: Starting prevented in 200 miles (300 km") indicating the remaining range expressed in miles or kilometres.
While driving, the message is displayed every 30 seconds while the fault with the SCR emission control system persists. The alert is repeated when switching on the ignition.
You should go to a PEUGEOT dealer or a qualified workshop as soon as possible. Otherwise you will not be able to restart the vehicle.
Starting prevented

Each time the ignition is switched on, these warning lamps come on and the AdBlue warning lamp flashes, accompanied by an audible signal and the display of the message "Emissions fault: Starting prevented".
You have exceeded the authorised driving limit: the starting prevention system does not allow the engine to be started.
To be able to restart the engine, you must call on a PEUGEOT dealer or a qualified workshop.
Trip computer
Instrument panel display screen

Each press on the end of the wiper control stalk displays the information in turn.


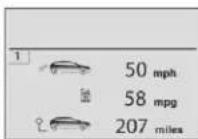
- Trip 1 showing:
• the average speed,
• the average fuel consumption,
• the distance travelled,
for the first trip.
- Trip 2 showing:
- the average speed,
• the average fuel consumption,
• the distance travelled,
for the second trip.
- Current information showing:
- the range,
• the current fuel consumption,
• the Stop & Start time counter.
Reset trip

When the trip required is displayed, press the control for more than 2 seconds or use the left-hand thumb wheel of the steering mounted controls.
Trips 1 and 2 are independent but their use is identical.
For example, trip 1 can be used for daily figures and trip 2 for monthly figures.
Touch screen

The information is accessible in the Driving / Vehicle menu.
Display of information in the touch screen

Permanent display:
Select the "Applications" menu then the "Vehicle Apps" tab then "Trip computer".

The information of the trip computer is displayed in tabs.
Press one of the buttons to display the desired tab.
Temporary display in a new window:
Press the end of the wiper control stalk for access to the information and to display the different tabs.
The current fuel consumption tab with:
- Range.
- The current instantaneous fuel consumption.
- The Stop & Start time counter,
Dashboard instruments
The trip "1" tab with:
- Average speed for the first trip.
- Average fuel consumption.
- Distance travelled.
The trip "2" tab with:
- Average speed for the second trip.
- Average fuel consumption.
- Distance travelled.
Trip reset


When the desired trip is displayed, press the reset button or on the end of the wiper control stalk.
Trips "1" and "2" are independent and are used identically.
Trip "1" allows daily calculations to be carried out, for example, and trip "2" allows monthly calculations.
A few definitions
Range
(miles or km)

The distance which can still be travelled with the fuel remaining in the tank (related to the average fuel consumption over the last few miles (kilometres) travelled).

This value may fluctuate if a change of driving style or terrain results in a significant change in the current fuel consumption.
Dashes are displayed when the range falls below 20 miles (30 km).
After filling with at least 5 litres of fuel, the range is recalculated and is displayed if it exceeds 60 miles (100 km).

If dashes instead of figures continue to be displayed when driving, contact a PEUGEOT dealer or a qualified workshop.
Current fuel consumption
(mpg or l/100 km or km/l)

Calculated over the last few seconds.

This function is only displayed from 20 mph (30 km/h).
Average fuel consumption
(mpg or l/100 km or km/l)

Calculated since the last trip computer reset.
Distance travelled
(miles or km)
Calculated since the last trip computer reset.
Average speed
(mph or km/h)

Calculated since the last trip computer reset.
Total time in stop mode
(minutes / seconds or hours / minutes)


If your vehicle is fitted with the Stop & Start, a time counter adds up the time spent in STOP mode during a journey.
It resets to zero every time the ignition is switched on.
Date and time adjustment
Instrument panel


Each press of this button moves between the following settings:
- hour.
- minutes,
- 12 or 24 hour format.
With PEUGEOT Connect Radio
Select the Settings menu.

Select "Date and time".
Select "Date" or "Time".
Choose the display formats.
Change the date and/or time using the numeric keypad.
Confirm with "OK".
Dashboard instruments
The system does not automatically manage the change between winter and summer time (depending on country).
With PEUGEOT Connect Nav
Adjustment of the time and date is only available if synchronisation with GPS is deactivated.
Select the Settings menu.
Press the "OPTIONS" button to go to the secondary page.

Select "Setting the time-date".
Select the "Date" or "Time" tab.
Adjust the date and/or time using the numeric keypad.
Confirm with "OK".
Additional adjustments
You can choose:
- To change the display format of the date and time (12h/24h).
- To change the time zone.
- To activate or deactivate synchronisation with the GPS (UTC).
The system does not automatically manage the change between winter and summer time (depending on country). The change between winter and summer time is done by changing the time zone.
Lighting dimmer

System for the manual adjustment of the brightness of the instrument panel and the touch screen to suit the ambient light level.
With two buttons
Lights switched on:

Press this button to raise the level of brightness.

Press this button to lower it.
Release the button once the desired level of brightness is reached.
With one button

Press this button to adjust the brightness.
As soon as the lighting reaches the required level of brightness, release the button.
When the vehicle lighting is off, or in day mode (daytime running lamps on), pressing the button does not have any effect.
With touch screen

In the Settings menu, select "Brightness".
Adjust the brightness by pressing the arrows or moving the cursor.
The brightness can be adjusted differently for day mode (lighting control stalk in position "0") and night mode (lighting control stalk in any other position).
Dashboard instruments
Access
Remote control
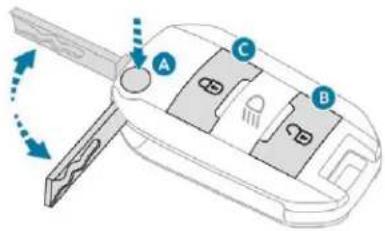
A. Unfolding / Folding.
B. Unlocking.
Disarming the alarm.
C. Locking
Locating the vehicle. Arming the alarm.
Doors
Complete unlocking
With the key
Turn the key towards the front of the vehicle.
Using the remote control

Press.
Selective unlocking
Complete unlocking is selected by default.
MENU
It is possible to activate or deactivate the selective unlocking with the touch screen from the menu Driving / Vehicle.

With the remote control

To unlock the driver's door only, press this button once.

To unlock the other doors and the boot, press this button briefly twice.

Unlocking is confirmed by rapid flashing of the direction indicators for around 2 seconds.
According to the version you have, the electric door mirrors fold at the same time.
Locating your vehicle

A press switches on the vehicle's lighting and flashes the direction indicators for a few seconds to help you locate your vehicle in a car park.
Guide-me-home lighting

Make a long press on this button to operate the guide-me-home lighting (switching on the sidelamps, dipped beams and number plate lamps).
A second press before the end of the timed period cancels the guide-me-home lighting.
Locking – Key
Locking
With the key
Turn the key towards the rear of the vehicle.
With the remote control

Press.

Maintaining the lock (key or remote control) automatically closes the windows.
Locking is confirmed by fixed lighting of the direction indicators for approximately 2 seconds. According to the version you have, the electric door mirrors fold at the same time. The automatic folding and unfolding of the door mirrors can be deactivated by a PEUGEOT dealer or a qualified workshop.
If one of the doors or the boot is still open, the central locking does not take place. When the vehicle is locked, if it is unlocked inadvertently, it will lock itself again automatically after about 30 seconds unless a door is opened.
As a safety measure (children on board), never leave the vehicle without taking your key, even for a short period.
Folding the key

Press this button before folding the key.
! If you do not press the button, you risk damaging the remote control.
Back-up door locking
For mechanically locking and unlocking the doors in the event of a fault with the central locking system or a battery failure.
Driver's side
Insert the key in the door lock to lock or unlock the door.
Passenger side
On the rear doors, check that the child lock is not on.
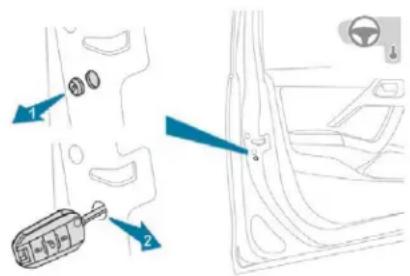
Access

Remove the black cap located on the edge of the door, using the key.
Insert the key in the socket without forcing it, then without turning it, move the latch sideways towards the inside of the door.
Remove the key and refit the cap.
Deadlocking
! Deadlocking renders the exterior and interior door controls inoperative. It also deactivates the manual central control button. You must therefore never leave anyone inside the vehicle when it is deadlocked.
With the key
Turn the key to the rear in the driver's door lock.
Turn the key to the rear again within 5 seconds to deadlock the vehicle.
Using the remote control

Press.

Press this button again within 5 seconds to deadlock the vehicle.
i Deadlocking is confirmed by fixed lighting of the direction indicators for approximately 2 seconds. According to the version you have, the electric door mirrors fold at the same time.
Remote control problem
Following disconnection of the vehicle battery, replacement of the remote control battery or in the event of a remote control malfunction, you can no longer unlock, lock or locate your vehicle.
- First of all, use the key in the door lock to unlock or lock your vehicle.
- Then reinitialise the remote control. If the problem persists, contact a PEUGEOT dealer as soon as possible.
Reset
Switch off the ignition.
Turn the key to position 2 (Ignition).

Immediately press the closed padlock button for a few seconds.
Switch off the ignition and remove the key from the switch. The remote control is now fully operational again.
Changing the battery
Battery ref.: CR1,620 / 3 volts.

If the battery is flat, you are informed by lighting of this warning lamp in the instrument panel, an audible signal and a message in the screen.

Unclip the cover using a small screwdriver at the cut-out.
Remove the cover.
Remove the discharged battery from its housing.
Fit the new battery into its housing observing the polarity.
Clip the cover onto the casing.

Do not throw away the remote control batteries, they contain metals which are harmful to the environment.
Take them to an approved collection point.
Lost keys
Go to a PEUGEOT dealer, taking with you the vehicle's registration certificate, your personal identification documents and if possible, the label bearing the key code. The PEUGEOT dealer will be able to look up the key code and the transponder code required to order a new key.
Remote control
The high frequency remote control is a sensitive system; do not operate it while it is in your pocket as there is a possibility that it may unlock the vehicle, without you being aware of it.
Do not repeatedly press the buttons of your remote control out of range and out of sight of your vehicle. It may become inoperative. It will then be necessary to reinitialise it again.
No remote control can operate when the key is in the ignition switch, even when the ignition is switched off, except for reinitialisation.
Closed vehicle
Driving with the doors locked could make it difficult for the emergency services to enter the vehicle in an emergency.
As a safety precaution, never leave children alone in the vehicle, except for a very short period.
In all cases, it is essential to remove the key from the ignition switch when leaving the vehicle.
Anti-theft protection
Do not make any modifications to the electronic engine immobiliser system; this could cause malfunctions.
Second-hand vehicle
Have the pairing of all of the keys in your possession checked by a PEUGEOT dealer, to ensure that only your keys can be used to open and start the vehicle.
Access
Central locking
This function allows the doors and boot to be locked or unlocked simultaneously from inside the vehicle.
Locking

Press this button.
This locks the doors and the boot.

The indicator lamp comes on.
If one of the doors is open, the central locking from the inside does not take place.
Release
Press this button again.

The indicator lamp goes off.
When locking / deadlocking from the outside
When the vehicle is locked or deadlocked from outside, the switch does not operate.
After normal locking, pull one of the interior door levers to unlock the vehicle.
After deadlocking, it is necessary to use the remote control, or the key to unlock the vehicle.
Automatic central locking
The doors lock automatically while driving (speed above 6 mph [10 km/h]).

To activate or deactivate this function (activated by default), press this button until a buzzer sounds and/or a message appears in the screen.
! Driving with the doors locked may render access by the emergency services to the interior difficult in an emergency.
Boot
Opening

Unlock the vehicle.
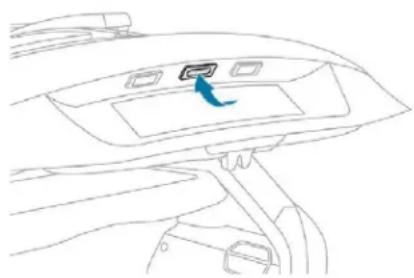
Press the tailgate opening button to release it, and then guide it open.
Closing
2 Lower the tailgate using the interior grab handle.
If necessary, press down on the tailgate to fully close it.
Boot still open

With the engine running, this is signalled by:
- this warning lamp coming on,
- an alert message displayed for a few seconds.
Vehicle moving (speed above 6 mph (10 km/h)), this is signalled by:
- this warning lamp coming on.
- an alert message displayed for a few seconds,
- an audible signal.
Back-up release
System for mechanically unlocking the boot in the event of a battery or central locking fault.
Release
Fold back the rear seats to gain access to the lock from inside the boot.

Insert a small screwdriver into hole A of the lock to unlock the tailgate.
Move the latch to the left.
Alarm

The alarm provides the following types of monitoring:
- Perimeter monitoring
The system checks for opening of the vehicle. The alarm is triggered if anyone tries to open a door, the boot, the bonnet, etc.
- Volumetric monitoring
The system checks for any variation in the volume in the passenger compartment.
The alarm is triggered if anyone breaks a window, enters the passenger compartment or moves inside the vehicle.
- Anti-tilt (GTi version)
The system checks for any change in the attitude of the vehicle.
The alarm is triggered if the vehicle is lifted, moved or knocked.
Access

Self-protection function
The alarm is triggered if the battery, the central control or the siren wiring are put out of service or damaged.
For all work on the alarm system, contact a PEUGEOT dealer or a qualified workshop.
Total protection
Switching on
Switch off the ignition and get out of the vehicle.

Press the locking button on the remote control.

The alarm monitoring system is activated (armed): the indicator lamp in the button flashes once per second.
The exterior perimeter monitoring is activated after 5 seconds. Interior volumetric monitoring is activated after 45 seconds.
If an opening (door, boot, etc.) is incorrectly closed, the vehicle is not locked but the exterior perimeter monitoring will be activated after 45 seconds at the same time as the interior volumetric monitoring.
Deactivation

Press the unlocking button on the remote control.

The alarm system is deactivated: the indicator lamp in the button goes off.
Automatic activation (depending on version)
The system is activated automatically 2 minutes after the last door or the boot is closed.

To avoid triggering the alarm on entering the vehicle, first press the unlocking button on the remote control before opening.
Protection – exterior perimeter monitoring alone
Deactivate the interior volumetric monitoring (and anti-tilt monitoring if your vehicle has it) to avoid unwanted triggering of the alarm in certain cases such as:
- when a pet is in the vehicle,
- a window is open,
- washing your vehicle.
Deactivating the volumetric monitoring
The anti-tilt alarm is also deactivated, if your vehicle has one.
Switch the ignition off.

Within ten seconds, press the button until the indicator lamp is on fixed.
Get out of the vehicle.

Immediately press the locking button on the remote control.

The exterior perimeter monitoring alone is activated: the indicator lamp flashes once per second.
To be effective, the deactivation must be carried out each time the ignition is switched off.
Locking the vehicle without activating the alarm

Lock or deadlock the vehicle using the key in the driver's door lock.
Triggering of the alarm
When the alarm is triggered, the siren sounds and the direction indicators flash for thirty seconds.
The monitoring functions remain active until the alarm has been triggered eleven times consecutively.

When the vehicle is unlocked using the remote control, rapid flashing of the indicator lamp in the button informs you that the alarm was triggered during your absence. Upon ignition, this flashing stops immediately.
Deactivate the monitoring functions
To stop the alarm, for example if the remote control is not working:
Unlock the vehicle using the key in the driver's door lock.
open the door; the alarm is triggered.
Switch on the ignition; this stops the alarm. The indicator lamp goes off.
Malfunction

When the ignition is switched on, fixed illumination of the button's indicator lamp indicates a fault in the system.
Have it checked by a PEUGEOT dealer or a qualified workshop.
Electric windows
Manual mode

Open

Press the control, without passing the point of resistance. The window stops as soon as you release the switch.
Close

Pull the control without going past the point of resistance. The window stops as soon as you release the switch.
Access
Automatic mode
(depending on version)
Open

Press the control, beyond the resistance point: the window opens completely when the switch is released. Pressing the switch again stops the movement of the window.
Close

Pull the control, beyond the resistance point: the window closes completely when the switch is released. Pressing the switch again stops the movement of the window.

The electric window controls remain operational for approximately 1 minute after the key has been removed. Once this time has elapsed, the electric windows will not operate. To reactivate them, switch the ignition on again.
Anti-pinch
(depending on version)
When the window rises and meets an obstacle, it stops and immediately partially lowers again.

In the event of unwanted opening of the window when closing automatically, press the switch until the window opens completely, then pull the switch immediately until the window closes. Continue to hold the control for approximately 1 second after the window has closed.
The safety anti-pinch function is not active during this operation.
Deactivating the rear door electric windows

For the safety of your children, press the switch to prevent operation of the electric windows of the rear doors, irrespective of their position.
With the warning lamp on, the rear switches are deactivated. With the warning lamp off, the switches are active.
Reinitialisation
Following reconnection of the battery, the safety anti-pinch function must be reinitialised. The safety anti-pinch is not active during these operations:
- bring the window down completely, then bring it back up. It will go up by a few centimetres with each press. Repeat the operation until the window is fully closed,
- continue to pull the switch upwards for at least 1 second after reaching this position, window closed.

Always remove the key when leaving the vehicle, even for a short time.
In the event of contact during operation of the windows, you must reverse the movement of the window. To do this, press the switch concerned.
When operating the passenger electric window switches, the driver must ensure that no one is preventing correct closing of the windows.
The driver must ensure that the passengers use the electric windows correctly.
Be aware of children when operating the windows.
PEUGEOT i-Cockpit
Before going out on the road and to benefit from the ergonomic layout of the PEUGEOT
i-Cockpit, adjust in the following order:
- height of the head restraint,
- backrest angle,
- cushion height,
- longitudinal position of the seat,
- reach and then height of the steering wheel,
- rear view mirror and door mirrors.
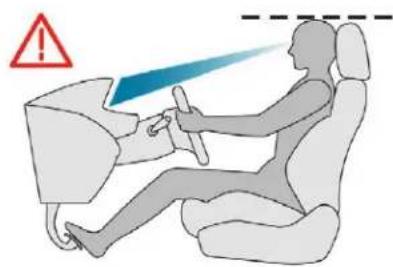
Once these adjustments have been made, check the "head up" instrument panel can be viewed correctly over the smaller diameter steering wheel.
Sitting comfortably
Whether or not your vehicle has certain seat adjustments described in this section depends on the trim level and country of sale.
Driver's side

Sit fully back in the seat with your pelvis, back and shoulders in contact with the seat backrest. The cushion height should be set so your eyes are looking at the centre of the windscreen. The head room should be at least 4 in (10 cm).
Adjust the longitudinal position of the seat so you can fully press the pedals with legs slightly flexed.
The knee room should be at least 4 in (10 cm) from the dashboard for access to the dashboard controls.
Adjust the backrest angle to as vertical a position as possible; never tilt it more than 25° . Adjust the head restraint so that its upper edge is level with the top of your head.
Adjust the length of the seat cushion to support your thighs.
Adjust the lumbar support so that it conforms to the shape of your spine.
Adjust the steering wheel so that it is at least 10 in (25 cm) from your sternum and your arms are slightly bent.
The steering wheel should not hide the instrument panel.
As a safety precaution, adjust the seats only when the vehicle is stationary.
If your vehicle has electric seats, the ignition must be on to adjust them.
Ease of use and comfort
Passenger's side
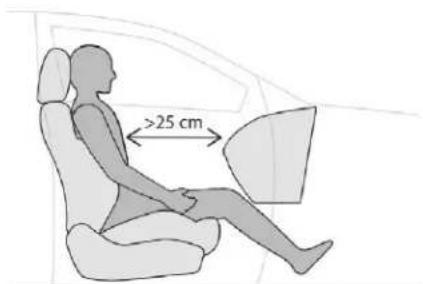
Sit fully back in the seat with your pelvis, back and shoulders in contact with the seat backrest. Adjust the longitudinal position of the seat so that you are at a distance of at least 10 in (25 cm) from the dashboard.
Adjust the head restraint so that its upper edge is level with the top of your head.
Steering wheel adjustment

When stationary, pull the control lever to release the steering wheel adjustment mechanism.
Adjust the height and reach to suit your driving position.
Push the control lever to lock the steering wheel adjustment mechanism.
! For safety reasons, these adjustments must only be made with the vehicle stationary.
Mirrors
Door mirrors
As a safety measure, the mirrors should be adjusted to reduce the "blind spot".
Manual adjustments

Operate the lever in the four directions to adjust the angle of the mirror glass.
Folding
Fold the mirror manually to protect it when the vehicle is parked.
Unfold it before moving off again. They do not have automatic demisting.
Electric adjustments

- Move control A to the right or to the left to select the corresponding mirror.
Move control B in any of the four directions to adjust.
Return control A to its home position (centre).
Folding / unfolding

When locking the vehicle, the mirrors fold automatically.

When unlocking the vehicle, the mirrors unfold automatically.
With the ignition on, pull control A rearwards to fold the mirrors.
Pull it again to unfold them.
If the mirrors are folded using control A, they will not unfold when the vehicle is unlocked. Pull again on control A.
! Objects seen in the mirror are in reality closer than they appear.
Take this into account when assessing the distance of vehicles approaching from behind.
The folding and unfolding of the door mirrors using the remote control can be deactivated by a PEUGEOT dealer or a qualified workshop. Fold the mirrors when putting your vehicle through an automatic car wash. If necessary, the mirrors can be folded manually.
Rear view mirror
Equipped with an anti-dazzle system, which darkens the mirror glass and reduces the nuisance to the driver caused by the sun, headlamps from other vehicles, etc.
Manual model
Adjustment
Adjust the mirror so that the mirror is directed correctly in the "day" position.
Day / night position

Pull the lever to change to the "night" anti-dazzle position.
"Push the lever to change to the normal "day" position.
Ease of use and comfort
Automatic "electrochrome" model

This system automatically and progressively changes between day and night use by means of a sensor measuring the light coming from the rear of the vehicle.
In order to ensure optimum visibility during your manoeuvres, the mirror lightens automatically when reverse gear is engaged.
Front seats
Before moving the seat backwards, ensure that there is no object or person in the way, preventing full travel of the seat. There is a risk of trapping or pinching passengers if present in the rear seats or jamming the seat if large objects are placed on the floor behind the seat.
Standard seats
Longitudinal adjustment
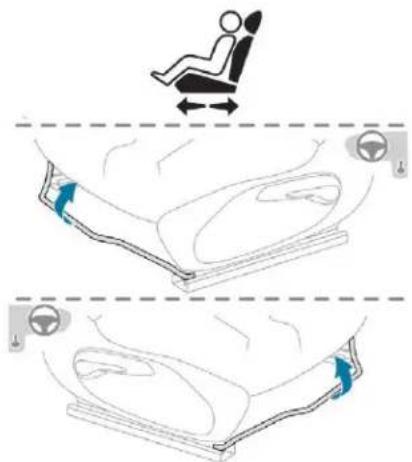
Raise the control and slide the seat forwards or backwards.
Height adjustment

Pull the control upwards to raise or push it downwards to lower, as many times as necessary to obtain the position required.
Backrest angle

→ Push the control backwards.
Head restraints

To raise a head restraint, pull it upwards.
To remove the head restraint, press the lug A and pull the head restraint upwards.
To put it back in place, engage the head restraint rods in the apertures keeping them in line with the seat backrest.
To lower it, press on the lug A and on the head restraint at the same time.
Ease of use and comfort
The head restraint has support rods with notches which prevent it from lowering; this is a safety device in case of impact. The adjustment is correct when the upper edge of the head restraint is level with the top of the head. Never drive with the head restraints removed; they must be fitted and correctly adjusted.
Bucket seats
Longitudinal adjustment

Raise the control and slide the seat forwards or backwards.
Height adjustment

Pull the control upwards to raise or push it downwards to lower, as many times as necessary to obtain the position required.
Backrest angle

Push the handle towards the rear and move the seat backrest forwards or backwards.
Heated seats
With the engine running, the front seats can be heated separately.


Use the adjustment wheel, select the level of heating required:
0: Off.
1: Low.
2: Medium.
3: High.

Do not use the function when the seat is not occupied.
Reduce the intensity of the heating as soon as possible.
When the seat and passenger compartment have reached an adequate temperature, you can stop the function; reducing the consumption of electrical current reduces fuel consumption.
Ease of use and comfort
! Prolonged use at the highest setting is not recommended for those with sensitive skin.
There is a risk of burns for people whose perception of heat is impaired (illness, taking medication, etc.).
There is a risk of overheating the system if material with insulating properties is used, such as cushions or seat covers.
Do not use the system:
- if wearing damp clothing,
- if child seats are fitted.
To avoid breaking the heating element in the seat:
- do not place heavy objects on the seat,
- do not kneel or stand on the seat,
- do not place sharp objects on the seat,
- do not spill liquids onto the seat.
To avoid the risk of short-circuit:
- do not use liquid products for cleaning the seat,
- never use the heating function when the seat is damp.
Ease of use and comfort
Armrest
Comfort and storage system for the driver and front passenger.
Cover with opening lever

Lift the lever to raise the lid.
Storage space in the console

Pull the armrest fully up.
Access to rear seats (3-door)
Folding the front seat forward
Standard model
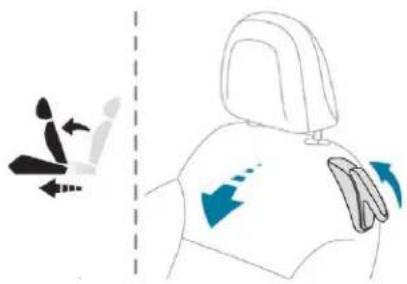
Pull only this control upwards to fold the backrest and slide the whole seat forward. The front seat returns to its original position when straightening the backrest.
Sport model

Pull only this control forward to fold the seat backrest and move the whole seat forward. The front seat returns to its original position when straightening the backrest.
! Ensure that no object or person might prevent the seat runners returning to their original position; the return to this position is necessary to secure the seat. Ensure that the seat belt has reeled in correctly so as to not impede passengers' access to the rear seats.
One-piece rear bench
Bench seat with fixed one-piece cushion and folding one-piece backrest.
Folding the backrest
- Move the front seats forward if necessary.

Position the outer seat belts on the backrest and buckle them.
Lower the head restraints to the lowest position.

Release the seat backrest 2 by pressing controls 1 simultaneously.
Fold the seat backrest 2 on to the fixed cushion.
Raising the seat backrest
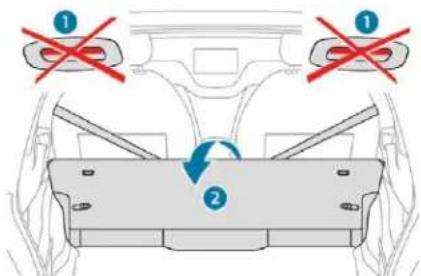
Raise the seat backrest 2.
Latch the backrest in place, the red indicators on each control 1 are no longer visible.
Unbuckle and return the outer seat belts to their normal positions ready for use.
2/3 – 1/3 split rear bench seat
Bench seat with fixed one-piece cushion and split backrest (left-hand 2/3, right-hand 1/3) which can be folded individually to adapt the load space in the boot.
Folding the backrest
Move the corresponding front seat forwards if necessary.
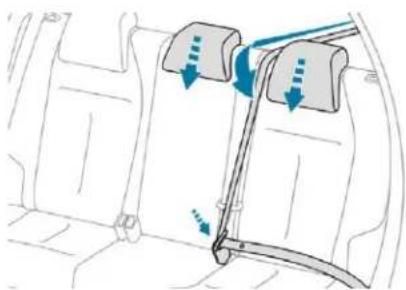
Position the corresponding outer seat belt against the backrest and buckle it.
Fully lower or remove the head restraint.
Ease of use and comfort

Release the backrest by pressing control 1 of backrest 2.
Fold the seat backrest 2 on to the fixed cushion.
The rear cushion is not removable.
Returning the backrest to the normal position

Raise the seat backrest 2.
Secure it, the red indicator in the control 1 is no longer visible.
Unbuckle and reposition the seat belts ready for use.
Refit the head restraint(s).
When folding the seat, the centre seat belt should not be fastened but laid out flat along the seat.
When repositioning the seat backrest, take care not to trap the seat belts.
The rear seat cushion does not fold, only the seat backrest can be folded in order to increase the boot loading space.
Head restraints
These have one position for use (up) and a stowed position (down).
They can be removed and are interchangeable side to side.
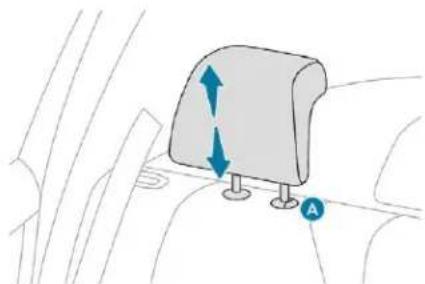
To remove a head restraint:
pull the head restraint fully upwards,
then, press the lug A.
! Never drive with the head restraints removed; they must be fitted and correctly adjusted.
Recommendations for ventilation and air conditioning
In order for these systems to be fully effective, follow the operation and maintenance guidelines below:
To ensure that the air is distributed evenly, keep the external air intake grilles at the base of the windscreen, the nozzles, the vents, the air outlets and the air extractor in the boot free from obstructions.
Do not cover the sunshine sensor, located on the dashboard; this is used for regulation of the automatic air conditioning system.
Operate the air conditioning system for at least 5 to 10 minutes, once or twice a month to keep it in perfect working order.
- Ensure that the passenger compartment filter is in good condition and replace the filter elements periodically. We recommend the use of a combined passenger compartment filter. Thanks to its special active additive, it helps both to purify the air breathed by the occupants and to keep the passenger compartment clean (reduction of allergic symptoms, bad odours and greasy deposits).
To ensure correct operation of the air conditioning system, you are also advised to have it checked regularly as recommended in the Warranty and Maintenance Record.
If the system does not produce cold air, switch it off and contact a PEUGEOT dealer or a qualified workshop.
When towing the maximum load on a steep gradient in high temperatures, switching off the air conditioning increases the available engine power and so improves the towing ability.
To avoid the windows misting up and deterioration in the quality of the air:
- do not drive for too long with the ventilation switched off.
- do not keep air recirculation set for an extended period.
If after an extended stop in sunshine, the interior temperature is very high, first ventilate the passenger compartment for a few moments.
Put the air flow control at a setting high enough to quickly change the air in the passenger compartment.
The condensation created by the air conditioning results in a discharge of water under the vehicle which is perfectly normal.
i Stop & Start The heating and air conditioning systems only work when the engine is running.
To maintain a comfortable temperature in the passenger compartment, you may temporarily deactivate the Stop & Start system.
For more information on Stop & Start, refer to the corresponding section.
Heating Manual air conditioning

- Adjusting the temperature.
- Adjusting the air flow.
- Adjusting the air distribution.
Temperature

Turn the knob from blue (cold) to red (hot) to adjust the temperature to your wishes.
Air flow

Turn the knob from position 1 to position 6, to obtain the desired air flow for your comfort.
If you place the air flow control at position 0 (off), the temperature in the vehicle will no longer be maintained. A slight flow of air can still be felt, resulting from the forward movement of the vehicle.
Adjusting the air distribution

Windscreen and side windows.

Windscreen, side windows and footwells.

Footwells.

Central and side air vents.

The air distribution can be modulated by placing the knob at an intermediate position.

- Temperature adjustment.
- Air flow adjustment.
- Air distribution adjustment.
- Air conditioning on/off.
Temperature

Turn the knob from blue (cold) to red (hot) to adjust the temperature to your wishes.
Air flow

Turn the knob from position 1 to position 6, to obtain the desired air flow for your comfort.

If you place the air flow control at position 0 (off), the temperature in the vehicle will no longer be maintained. A slight flow of air can still be felt, resulting from the forward movement of the vehicle.
Adjusting the air distribution

Windscreen and side windows.

Windscreen, side windows and footwells.

Footwells.

Central and side air vents.

The air distribution can be modulated by placing the knob at an intermediate position.
Ease of use and comfort
Air conditioning On/Off
The air conditioning is designed to operate effectively in all seasons, with the windows closed.
It enables you to:
- in summer, to lower the temperature,
- increase the effectiveness of the demisting in winter, above 3°C.
Switching on

Press the "A/C" button, the button's indicator lamp comes on.

The air conditioning does not operate when the air flow adjustment control is in position "0".
To obtain cool air more quickly, you can use recirculation of the interior air for a few moments. Then return to the intake of exterior air.
Switching off

Press the "A/C" button again, the button's indicator lamp goes off.
Switching the system off could result in discomfort (humidity, condensation).
Dual-zone automatic air conditioning

- Temperature adjustment for left/right side.
- Automatic comfort program.
- Air conditioning on/off.
- Air distribution adjustment.
- Air flow adjustment.
AUTO mode

Press the "AUTO" button successively. The indicator lamp comes on at the first press; the activated mode appears in the digital air conditioning screen:
SOFT AUTO
Provides soft and quiet operation by limiting air flow.
AUTO
Offers the best compromise between a comfortable temperature and quiet operation.
AUTO FAST
Provides strong and effective air flow.
Ease of use and comfort
Switching off

Press the "empty fan" air flow button until the fan symbol disappears.
When the engine is cold, the air flow will only reach its optimum level gradually to prevent too much cold air being distributed. In cold weather, it favours the distribution of warm air to the windscreen, the side windows and the footwells only.
Temperature
The driver and front passenger can each set the temperature to suit their requirements. The value shown on the display is a level of comfort, not a temperature in Celsius or Fahrenheit.

- Push the button down (blue) to reduce the value or up (red) to increase it.
A setting of around 21 provides optimum comfort. Depending on your requirements, a setting between 18 and 24 is normal. In addition, it is recommended that you avoid a left/right setting difference of more than 3.
For maximum cooling or heating of the passenger compartment, it is possible to exceed the minimum value 14 or the maximum value 28.

Push the button down until "LO" is displayed or up until "HI" is displayed.
On entering the vehicle, if the interior temperature is much colder or warmer than the comfort value setting, there is no need to alter the value displayed in order to reach the required level of comfort. The system compensates automatically and corrects the temperature difference as quickly as possible.
Air conditioning
The air conditioning is designed to operate efficiently in all seasons, with the windows closed.
It allows you:
- in summer, to lower the temperature, - in winter, above 3°C, to improve demisting.
Switching on

Press the "A/C" button, the associated indicator lamp comes on.
The air conditioning cannot operate when the air flow is set to off.
Switching off

Press the "A/C" button again; the associated indicator lamp goes off.
Switching off the air conditioning may result in some discomfort (humidity, misting).
Air distribution

Press this button successively to direct the air flow alternatively towards:
- windscreen, side windows and foot wells,
- windscreen and side windows (demisting or defrosting),
- the centre and side vents,
- the central vents, the side vents and the footwells,
- the footwells.
Manual mode
If desired, you can choose settings different to those offered by the system, by adjusting a setting manually. The other functions are still managed automatically.
When you modify a setting, the indicator lamp in the "AUTO" button goes off.

Press the "AUTO" button again to return to the automatic comfort programme.
Avoid driving for too long with the system switched off (risk of misting and of deterioration of the air quality).

Pressing the "full fan" button reactivates the system with the values in use at the time it was switched off.
Air flow

Press this "full fan" button to increase the air flow.
The air flow symbol (a fan) appears in the screen. It is filled in progressively in relation to the value required.

Press this "empty fan" button to reduce the air flow.
Deactivating the system

Press the "empty fan" air flow button until the fan symbol disappears and "----" appears.
This action deactivates all functions of the air conditioning system. Temperature is no longer regulated. A slight air flow can still be felt however, resulting from the forward movement of the vehicle.
Ease of use and comfort
Recirculation of the interior air
The intake of exterior air prevents the formation of condensation on the windscreen and side windows.
The recirculation of interior air isolates the passenger compartment from exterior odours and smoke.

This allows hot or cold air to be delivered quickly when required.

Press this button to recirculate the interior air; the symbol appears or its indicator lamp comes on (depending on version).

Press this button again to allow exterior air into the passenger compartment. The symbol disappears or the indicator lamp goes off (depending on version).

Avoid prolonged use of air recirculation – Risk of condensation and deterioration of air quality!
Front demisting — defrosting
With Heating

Put the air flow, temperature and distribution controls to the appropriately marked position.
With manual air conditioning
Switching on

Put the air flow, temperature and distribution controls to the appropriately marked position.

Press the A/C button for air conditioning; the indicator lamp in the button comes on.
Switching off

Press the A/C button again, the button's indicator lamp goes off.
With automatic dual-zone air conditioning
Visibility programme
Switching on

Press the "visibility" button to demist or defrost the windscreen and side windows as quickly as possible.
The system automatically manages the air conditioning, air flow and air intake, and provides optimum distribution towards the windscreen and side windows.
Switching off

Press the "visibility" button again or "AUTO"; the indicator lamp in the button goes off and the indicator lamp in the "AUTO" button comes on.

The system reverts to the previous settings.

With Stop & Start, when demisting - defrosting has been activated, STOP mode is not available.
Rear screen demist – defrost
The control button is located on the air conditioning or heating system control panel. Rear screen demisting – defrosting can only be operated when the engine is running.
Switching on

Press this button to demist/defrost the rear screen and, depending on version, the electric door mirrors. The indicator lamp associated with the button comes on.
Switching off
Demisting / defrosting switches off automatically to prevent excessive electrical consumption.

It is possible to stop the demisting/defrosting operation before it is switched off automatically by pressing the button again. The indicator lamp associated with the button goes off.

To demist or defrost the electric door mirrors, with the engine running press the heated rear window switch.

Switch off the demisting/defrosting of the rear screen and electric door mirrors as soon as appropriate, as lower current consumption results in reduced fuel consumption.
Courtesy lamp

- Courtesy lamp
- Map reading lamps

In this position, the light comes on gradually:
- when you unlock the vehicle,
- when the key is removed from the ignition,
- when opening a door,
- when unlocking remotely.
Ease of use and comfort
It switches off gradually:
- when the vehicle is locked,
- when the ignition is switched on,
- 30 seconds after the last door is closed.

Permanently off.

Permanent lighting.
In "permanent lighting" mode, the lighting time varies according to the circumstances:
- when the ignition is off, approximately ten minutes,
- in energy economy mode, approximately 30 seconds,
- with the engine running, unlimited.
Map reading lamps

With the ignition on, press the corresponding switch.
Take care not to put anything in contact with the courtesy lamp.
Interior ambient lighting


Switching on
At night, panoramic sunroof light-emitting diodes (LEDs) come on automatically when the sidelamps are switched on.
Switching off
The interior ambient lighting switches off automatically when the sidelamps are switched off.
MENU
The guide-me-home lighting can be configured in the menu Driving / Vehicle.

Sunroof blind
Opening


Take the blind by its handle and push it rearward to the desired position.
Locking
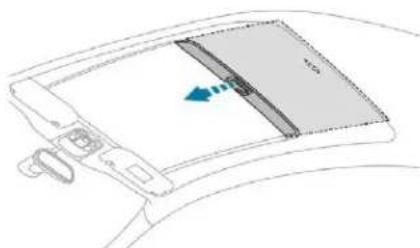
Take the blind by its handle and pull it forward to the desired position.
Interior fittings
Mats
Fitting

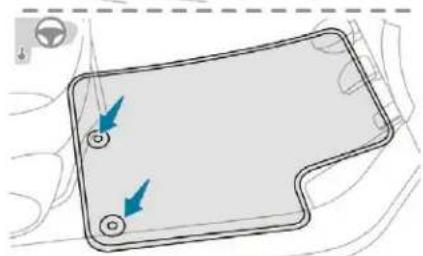
3
When fitting the mat for the first time, on the driver's side use only the fixings provided in the wallet attached.
The other mats are simply placed on the carpet.
Ease of use and comfort
Removal
To remove the mat on the driver's side:
move the seat as far back as possible,
unclip the fixings,
remove the mat.
Refitting
To refit the mat on the driver's side:
or position the mat correctly,
put on the fixings again by pressing,
check that the mat is secured correctly.
To avoid any risk of jamming of the pedals:
- only use mats which are suited to the fixings already present in the vehicle; these fixings must be used,
- never place one mat on top of another. The use of mats not approved by PEUGEOT may interfere with access to the pedals and hinder the operation of the cruise control / speed limiter.
The mats approved by PEUGEOT have two fixings located below the seat.
12 V accessory socket
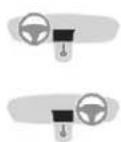

To connect a 12 V accessory (maximum power: 120 Watts), lift the cover and connect a suitable adaptor.
Do not exceed the maximum power rating of the socket (risk of damage to your device).
The connection of an electrical device not approved by PEUGEOT, such as a USB charger, may adversely affect the operation of vehicle electrical systems, causing faults such as poor telephone reception or interference with displays in the screens.
USB port/Jack auxiliary socket


This connection box, consisting of a USB port and a JACK auxiliary socket is located on the centre console.
You can connect a portable device, such as a digital audio player e.g. iPod ® or USB memory stick.
It reads the audio files which are transmitted to your audio system and played via the vehicle's speakers.
You can manage these files using the steering mounted controls or the audio system control panel and display them on the screen.
When the USB port is used, the portable device charges automatically.
While charging, a message is displayed if the power consumption of the portable device exceeds the amperage supplied by the vehicle.
Boot fittings

Ease of use and comfort
- Rear shelf
- Hooks
- Boot lamp
- Stowing rings (depending on version)
Rear shelf

3
To remove the shelf:
unhook the two cords,
gently lift the shelf, then remove it.
Ease of use and comfort
To stow it:

- vertically behind the rear seats,
- vertically behind the front seats.
To refit the shelf:
engage it on each side of the supports and slide it until it reaches the notches,
raise it to refit the two cords.
When sharp deceleration occurs, objects placed on the load space cover can turn into projectiles.
Lighting control stalk
In some weather conditions (e.g. low temperature or humidity), the presence of misting on the internal surface of the glass of the headlamps and rear lamps is normal; it disappears after the lamps have been on for a few minutes.
i Travelling abroad
If planning to use your vehicle in a country that drives on the other side of the road, the headlamp dipped beams must be adjusted to avoid dazzling oncoming drivers. Contact a PEUGEOT dealer or a qualified workshop.
Selection of main lighting mode
Turn the ring to align the desired symbol with the marking.

Lighting off (ignition off) / Front daytime running lamps (engine running). Sidelamps only.

Sidelamps only.

Dipped or main beam headlamps.

Automatic illumination of headlamps.
Dipping the headlamps
Pull the lever to switch the lighting between dipped and main beam headlamps. In the lighting off and sidelamps modes, the driver can switch on the main beam headlamps temporarily ("headlamp flash") by keeping the lever pulled.
Display
Illumination of the corresponding indicator lamp in the instrument panel confirms that the lighting selected is on.
Foglamps
The foglamps operate with dipped or main beam headlamps on.
Rear foglamp only

To switch it on, turn the ring forwards. When the lighting is switched off automatically (version with AUTO lighting), the foglamp and the dipped beam headlamps will remain on. To switch it off, turn the ring rearwards.
Front foglamps and rear foglamp
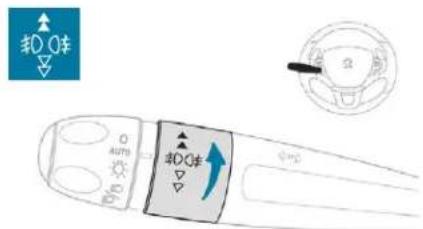
Rotate and release the ring:
once forwards to switch on the front foglamps,
forwards a second time to switch on the rear foglamp,
once rearwards to switch off the rear foglamp,
nearwards a second time to switch off the front foglamps.
If the lighting is switched off automatically (version with AUTO lighting) or the dipped beams are switched off manually, the foglamps and sidelamps remain on.
Turn the ring rearwards to switch off the foglamps, the sidelamps will then switch off.
In good or rainy weather, both day and night, using the front foglamps and the rear foglamp is prohibited. In these situations, the power of their beams may dazzle other drivers. They should only be used in fog or falling snow. In these weather conditions, it is your responsibility to switch on the foglamps and dipped beam headlamps manually as the sunshine sensor may detect sufficient light. Do not forget to turn off the front foglamps and the rear foglamp as soon as they are no longer necessary.
Switching off of the lighting when the ignition is switched off On switching off the ignition, all of the lighting turns off immediately, except for dipped beam if automatic guide-me-home lighting is activated.
Switching on the lighting after the ignition is switched off To reactivate the lighting control, set the ring to 0 – lamps off, then to the desired position. When the driver's door is opened, a temporary audible signal warns you that the vehicle's lighting is on. The lamps, with the exception of the sidelamps, switch off automatically after a maximum duration of 30 minutes to prevent discharging of the battery.
Direction indicators
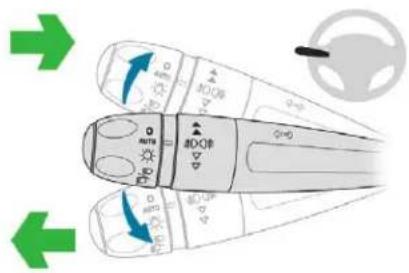
Lower the lighting control stalk fully when turning left.
Raise the lighting control stalk fully when turning right.
If you forget to cancel the direction indicators for more than 20 seconds, the volume of the audible signal will increase if the speed is above 40 mph (60 km/h).
Three flashes
Move the stalk briefly upwards or downwards, without going beyond the point of resistance; the corresponding direction indicators will flash three times.
This function can be used at any speed, but it is particularly useful for changing lane on fast roads.
Automatic illumination of headlamps
When a low level of ambient light is detected by a sunshine sensor, the number plate lamps, sidelamps and dipped beam headlamps are switched on automatically, without any action on the part of the driver. They can also come on if rain is detected, at the same time as automatic operation of the windscreen wipers. As soon as the brightness returns to a sufficient level or after the windscreen wipers are switched off, the lamps are switched off automatically.
Switching on
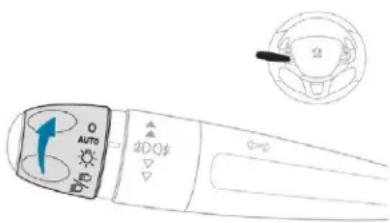
Turn the ring to the AUTO position. Activation of the function is accompanied by a message in the screen.
Switching off
Turn the ring to another position. Deactivation of the function is accompanied by a message in the screen.
In fog or snow, the sunshine sensor may detect sufficient light. In this case, the lighting will not come on automatically. Do not cover the sunshine sensor, linked with the rain sensor and located in the centre of the windscreen behind the rear view mirror; the associated functions would no longer be controlled.
Automatic guide-me-home lighting
Association with automatic illumination of headlamps provides the guide-me-home lighting with the following additional options:
- selection of the lighting duration of 15, 30 or 60 seconds,
- automatic activation of guide-me-home lighting when the automatic illumination of headlamps is in operation.
Lighting and visibility
MENU
The guide-me-home lighting can be configured in the menu Driving / Vehicle.


In the event of a malfunction of the sunshine sensor, the lighting comes on, this warning lamp is displayed in the instrument panel and/or a message appears in the screen, accompanied by an audible signal. Contact a PEUGEOT dealer or a qualified workshop.
Manual guide-me-home lighting
Temporarily keeping the dipped beam headlamps on after the vehicle's ignition has been switched off makes the driver's exit easier when the light is poor.
Switching on

With the ignition off, "flash" the headlamps using the lighting stalk.
A further "headlamp flash" switches the function off.

Manual guide-me-home lighting is also available from the remote control lighting button.
Switching off
Manual guide-me-home lighting goes off automatically at the end of a given period of time.
Parking lamps
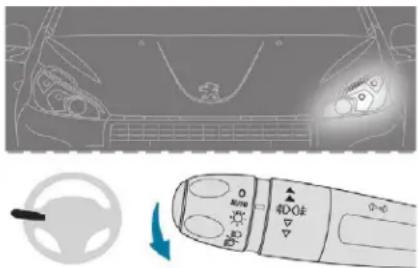
Side markers for the vehicle by illumination of the sidelamps on the traffic side only.
Within one minute after switching off the ignition, operate the lighting control stalk up or down depending on the traffic side (example: parked on the right; lighting control stalk downwards; the left-hand sidelamp comes on).
This is confirmed by an audible signal and illumination of the corresponding direction indicator warning lamp in the instrument panel.
To switch off the parking lamps, return the lighting control stalk to the middle position or switch on the ignition.
Daytime running lamps/ Sidelamps

The front and rear lamps light up automatically when the engine starts.
They provide the following functions:
- Daytime running lamps (lighting control stalk at position "0" or "AUTO" with adequate light level).
- Sidelamps (lighting control stalk in "AUTO" position with low light levels or "Sidelamps only" or "dipped/main beam headlamps").
Headlamp adjustment
To avoid causing a nuisance to other road users, the height of the headlamp beams should be adjusted according to the load in the vehicle.
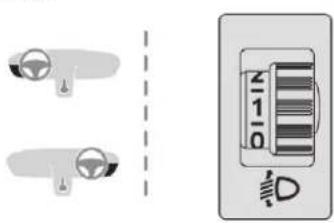
-
1 or 2 people in the front seats.
-
Intermediate setting.
1.5 people.
-. 5 people + maximum authorised load. - Driver + maximum authorised load.
Cornering lighting

With dipped or main beams, this system makes use of the beam from a front foglamp to illuminate the inside of a bend, when the vehicle speed is below 25 mph (approximately 40 km/h) (urban driving, winding road, intersections, parking manoeuvres, etc.).
In daytime running lamps, the diodes are brighter.
The initial setting is position 0.
Lighting and visibility
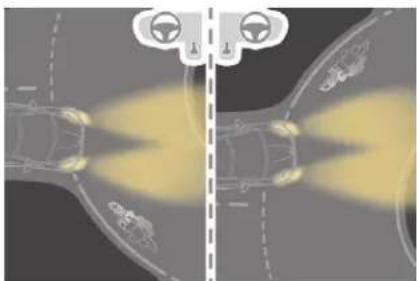
Without cornering lighting

With cornering lighting
Activation
This function operates:
- when the corresponding direction indicator is switched on.
or
- from a certain angle of rotation of the steering wheel.
Deactivation
The system does not operate:
- below a certain angle of rotation of the steering wheel.
- above 25 mph (40 km/h).
- when reverse gear is engaged.
Programming
MENU
It is possible to activate or deactivate the cornering lighting from the Driving / Vehicle menu. This function is activated by default.

Wiper control stalk
In wintry conditions, remove snow, ice or frost present on the windscreen, around the wiper arms and blades and the windscreen seal, before operating the wipers.
Do not operate the wipers on a dry windscreen. Under extremely hot or cold conditions, ensure that the wiper blades are not stuck to the windscreen before operating the wipers.
Front wipers


Fast (heavy rain).

Normal (moderate rain).

Intermittent (proportional to the speed of the vehicle).

Off.

Single wipe (press down and release).
Automatic rain sensitive windscreen wipers

The windscreen wipers operate automatically, without any action on the part of the driver, when rain is detected (sensor behind the rear view mirror), adapting their speed to the intensity of the rainfall.
Switching on

Give a short downwards push to the control. A wiping cycle confirms that the instruction has been accepted.

This warning lamp comes on in the instrument panel and a message is displayed.
Switching off

Give the control stalk a brief push downwards or shift the control stalk to a different position (Int, 1 or 2).

This warning lamp goes off in the instrument panel and a message is displayed.
The automatic rain sensitive windscreen wipers must be reactivated by pushing the control stalk downwards, if the ignition has been off for more than 1 minute.
If the wipers operate in intermittent mode when in AUTO mode, have the system checked by a PEUGEOT dealer or a qualified workshop.
Lighting and visibility
Do not cover the rain sensor combined with the sunshine sensor, located at the top of the windscreen behind the rear view mirror. When using an automatic car wash, switch off the automatic rain sensitive wipers. In winter, it is advisable to wait until the windscreen is completely clear of ice before activating the automatic rain sensitive wipers.
Front screenwash
Pull the wiper control stalk towards you. The screenwash and then the wipers operate for a preset time.
Rear wiper


Off.
Intermittent wipe.
Wash-wipe (set duration).
If a significant accumulation of snow or ice is present, or when using a bicycle carrier on the boot, deactivate the automatic rear wiper via the vehicle configuration menu or touch screen.
Reverse gear
When reverse gear is engaged, the rear wiper will come into operation if the windscreen wiper is operating.
MENU
From the Driving / Vehicle menu, it is possible to activate or deactivate operation of the rear wiper when reversing.
General safety recommendations
! Labels are attached in different places on your vehicle. They include safety warnings as well as identification information for your vehicle. Do not remove them: they are an integral part of your vehicle.
For any work on your vehicle, use a qualified workshop that has the technical information, skills and equipment required, all of which a PEUGEOT dealer is able to provide.
! We draw your attention to the following points:
- The fitting of electrical equipment or accessories not approved by PEUGEOT may cause excessive current consumption and faults and failures with the electrical system of your vehicle. Contact a PEUGEOT dealer for information on the range of recommended accessories.
- As a safety measure, access to the diagnostic socket, used for the vehicle's electronic systems, is reserved strictly for PEUGEOT dealers or qualified workshops, equipped with the special tools required (risk of malfunctions of the vehicle's electronic systems that could cause breakdowns or serious accidents). The manufacturer cannot be held responsible if this advice is not followed.
- Any modification or adaptation not intended or authorised by PEUGEOT or carried out without meeting the technical requirements defined by the manufacturer will result in the suspension of the legal and contractual warranties.
! Installation of accessory radio communication transmitters
Before installing a radio communication transmitter, you must contact a PEUGEOT dealer for the specification of transmitters which can be fitted (frequency, maximum power, aerial position, specific installation requirements), in line with the Vehicle Electromagnetic Compatibility Directive (2004/104/EC).
Depending on country regulations, some safety equipment may be compulsory: high visibility safety vests, warning triangles, breathalysers, spare bulbs, spare fuses, fire extinguisher, first aid kit, mud flaps at the rear of the vehicle, etc.
Safety
Hazard warning lamps
Visual warning with all of the direction indicators flashing to alert other road users to a vehicle breakdown, recovery or accident.

When you press this button, all of the direction indicators flash. It can operate with the ignition off.
Automatic operation of hazard warning lamps
When braking in an emergency, depending on the deceleration, the hazard warning lamps come on automatically.
They switch off automatically the first time you accelerate.
You can also switch them off by pressing the button.
Emergency or assistance call

Peugeot Connect SOS

In an emergency, press this button for more than 2 seconds. The flashing green LED and the voice message confirm that the call has been made to the "Peugeot Connect SOS call centre".
* In accordance with the general conditions of use for the service available from dealers and subject to technological and technical limitations.
Pressing this button again immediately cancels the call. The green LED goes off.
The green LED remains on (without flashing) when communication is established. It goes off at the end of the call.
"Peugeot Connect SOS" immediately locates your vehicle, contacts you in your own language**, and – if necessary – requests the relevant emergency services be dispatched. In countries where the service is not available, or when the locating service has been expressly declined, the call is sent directly to the emergency services (112) without the vehicle location.
If an impact is detected by the airbag control unit, and independently of the deployment of any airbags, an emergency call is made automatically.
** As per the geographic coverage of "Peugeot Connect SOS", "Peugeot Connect Assistance" and the official national language chosen by the owner of the vehicle. The list of countries covered and PEUGEOT CONNECT services is available from dealers or on the website for your country.
If you benefit from the Peugeot Connect Packs offer with the SOS and assistance pack included, there are additional services available to you in your personal space, via the Internet website for your country.
Operation of the system

When the ignition is switched on, the green indicator lamp comes on for 3 seconds indicating that the system is operating correctly.
The orange indicator lamp flashes then goes off: the system has a fault.
The orange indicator lamp is permanently on: the back-up battery should be replaced.
In both cases, the emergency and assistance calls service may not work.
Contact a qualified repairer as soon as possible.
The system's fault does not prevent the vehicle from being driven.
Peugeot Connect Assistance

Press this button for more than 2 seconds to request assistance if the vehicle breaks down.
A voice message confirms that the call has been made**.

Pressing this button again immediately cancels the request.
The cancellation is confirmed by a voice message.
Geo-location

You can deactivate geo-location by simultaneously pressing the "Peugeot Connect SOS" and "Peugeot Connect Assistance" buttons, followed by a press on "Peugeot Connect Assistance" to confirm.

To reactivate geo-location, simultaneously press the "Peugeot Connect SOS" and "Peugeot Connect Assistance" buttons again, followed by a press on "Peugeot Connect Assistance" to confirm.
** As per the geographic coverage of "Peugeot Connect SOS", "Peugeot Connect Assistance" and the official national language chosen by the owner of the vehicle. The list of countries covered and PEUGEOT CONNECT services is available from dealers or at www.peugeot.co.uk.
Safety
If you purchased your vehicle outside the Brand network, we invite you to have the configuration of these services checked and, if desired, have a dealer change it to suit your wishes. In a multilingual country, configuration is possible in the official national language of your choice.
For technical reasons, particularly to improve the quality of PEUGEOT CONNECT services to customers, the manufacturer reserves the right to carry out updates to the vehicle's on-board telematic system.
Electronic stability control (ESC)
Electronic stability control (ESC) comprising the following systems:
- anti-lock braking system (ABS) and electronic brake force distribution (EBFD),
- emergency braking assistance (EBA),
- wheel anti-slip regulation (ASR) or traction control,
- dynamic stability control (DSC).
Definitions
Anti-lock braking system (ABS) and electronic brake force distribution (EBFD)
This system improves the stability and manoeuvrability of your vehicle when braking and contributes towards improved control on corners, in particular on poor or slippery road surfaces. The ABS prevents wheel lock in the event of emergency braking. The electronic brake force distribution system manages the braking pressure wheel by wheel.
Emergency braking assistance (EBA)
In an emergency, this system enables you to reach the optimum braking pressure more quickly and therefore reduce the stopping distance.
It is triggered in relation to the speed at which the brake pedal is pressed. This is felt by a reduction in the resistance of the pedal and an increase in the effectiveness of the braking.
Anti-slip regulation (ASR)
The ASR system (also known as Traction Control) optimises traction in order to limit wheel slip by acting on the brakes of the driving wheels and on the engine. It also improves the directional stability of the vehicle on acceleration.
Dynamic stability control (DSC)
If there is a difference between the path followed by the vehicle and that required by the driver, the DSC monitors each wheel and automatically acts on the brake of one or more wheels and on the engine to return the vehicle to the required path, within the limits of the laws of physics.
Anti-lock braking system (ABS) and electronic brake force distribution (EBD)

When lit up fixed, this warning lamp indicates a fault with the ABS.
The vehicle retains conventional braking. Drive carefully at moderate speed.

If this warning lamp comes on, in conjunction with the STOP and ABS warning lamps, an audible signal and a message, it means that the electronic brake force distribution (EBD) is defective.
You must stop the vehicle as soon as it is safe to do so.
In both cases, have the system checked by a PEUGEOT dealer or a qualified workshop as soon as possible.

When changing wheels (tyres and rims), ensure that these are approved for your vehicle.
When operating under normal conditions, the ABS may cause the brake pedal to vibrate slightly.
In emergency braking, press the brake pedal hard and maintain this pressure.
Anti-slip regulation (ASR) / Dynamic stability control (DSC)
Operation

These systems are activated automatically every time the vehicle is started.
They come into operation in the event of a problem with grip or trajectory.

This is indicated by this warning lamp flashing in the instrument panel.
Deactivation
In exceptional conditions (starting a vehicle which is bogged down, stuck in snow, on soft ground, etc.), it may be advisable to deactivate these systems, so that the wheels can turn freely and regain grip.
Reactivate the systems as soon as the level of grip permits.
Deactivating using the button


Press this button.
The button indicator lamp comes on.
The ASR and DSC systems will no longer have an effect on engine operation or the brakes in the event of an involuntary change of trajectory.
Safety
Deactivating using the touch screen
MENU
Deactivation can be configured in the Driving / Vehicle menu.

firmed by the display of a message.
The systems no longer have an effect on engine operation.
Reactivation
These systems are reactivated automatically each time the ignition is switched back on or above 30 mph (50 km/h). Below 30 mph (50 km/h), you can reactivate them manually.

For the 1.6 THP 165 and THP 208 petrol engines, the reactivation must always be carried out manually.
Reactivating using the button

Press this button again to reactivate manually.
The indicator lamp in the button goes off.
Reactivating using the touch screen
MENU
Reactivation can be configured in the Driving / Vehicle menu.

It is confirmed by the display of a message.
Operating fault

Illumination of this warning lamp, accompanied by the display of a message and an audible signal, indicates a fault with the system.
Contact a PEUGEOT dealer or a qualified workshop to have the systems checked.

ASR / DSC
These systems offer increased safety in normal driving, but they should not encourage the driver to take extra risks or drive at high speed.
It is in conditions of reduced grip (rain, snow, black ice) that the risk of loss of grip increases. It is therefore important for your safety to keep these systems activated in all conditions, and particularly in difficult conditions.
The correct operation of these systems depends on observation of the manufacturer's recommendations regarding as much the wheels (tyres and rims), braking and electronic components as the assembly and repair procedures used by PEUGEOT dealers.
The use of snow tyres is recommended, in order to be able to benefit from the efficiency of these systems in winter conditions.
In this case, it is essential to equip the four wheels with tyres approved for your vehicle.
Safety
Seat belts
At the front

The front seat belts are fitted with a pretensioning and force limiting system.
This system improves safety in the front seats in the event of a front or side impact.
Depending on the severity of the impact, the pretensioning system instantly tightens the seat belts against the body of the occupants.
The pretensioning seat belts are active when the ignition is on.
The force limiter reduces the pressure of the seat belt on the passenger's chest, thus improving their protection.
Locking

Pull the strap then insert the tongue in the buckle.
Check that the seat belt is fastened correctly by pulling the strap.
Release
Press the red button on the buckle.
Guide the seat belt as it reels in.
Height adjustment (5-door)
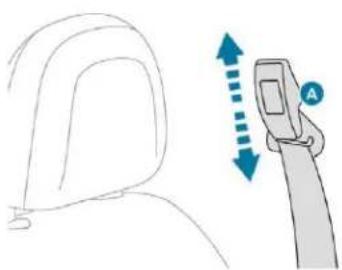
To lower the attachment point, squeeze control A and slide it downwards.
To raise the attachment point, slide control A upwards.
Safety
Warning lamp

Not fastened / unfastened.
When the ignition is switched on, this warning lamp comes on in the instrument panel.
It remains on for a certain time if the front passenger has not fastened their seat belt. Once this period has elapsed, the warning lamp goes off if the driver's seat belt is fastened. From approximately 12 mph (20 km/h) this warning lamp flashes for 2 minutes accompanied by an audible signal of increasing volume. Once these 2 minutes have elapsed, this warning lamp remains on until the driver and/or the front passenger fastens their seat belt.
At the rear
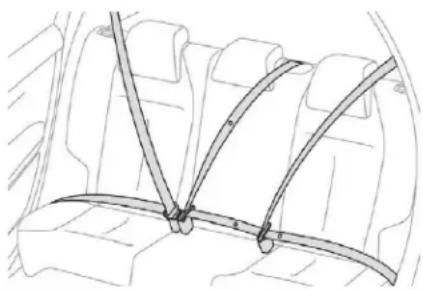
The rear seats are each fitted with a three-point seat belt equipped, for the outer seats, with a force limiter.
Locking
Pull the strap then insert the tongue in the buckle.
Check that the seat belt is fastened correctly by pulling the strap.
Release
Press the red button on the buckle.
Guide the seat belt as it reels in.
On the outer seat belts, raise the bar to the top of the backrest to prevent the tongue from knocking against the side trim.
Warning lamp

Unfastened.
From approximately 12 mph (20 km/h) and for 2 minutes, this warning lamp flashes, accompanied by an audible signal of increasing volume, when one or more rear passengers unfasten their seat belt.
Once these two minutes have elapsed, this warning lamp remains on until the one or more rear passengers fasten their seat belt.
Advice
! The driver must ensure that passengers use the seat belts correctly and that they are all fastened before setting off.
Wherever you are seated in the vehicle, always fasten your seat belt, even for short journeys.
Do not interchange the seat belt buckles as they will not fulfil their role fully.
The seat belts are fitted with an inertia reel permitting automatic adjustment of the length of the strap to your size. The seat belt is stowed automatically when not in use. Before and after use, ensure that the seat belt is reeled in correctly.
The lower part of the strap must be positioned as low as possible on the pelvis.
The upper part must be positioned in the hollow of the shoulder.
The inertia reels have an automatic locking device at the time of a collision, during sudden braking or if the vehicle turns over.
You can release the device by pulling the strap firmly and then releasing it so that it
reels in slightly.
In order to be effective, a seat belt must: - be tightened as close to the body as possible,
- be pulled in front of you with a smooth movement, checking that it does not twist,
- be used to restrain only one person,
- not show any signs of cuts or fraying,
- not be converted or modified to avoid affecting its performance.
In accordance with current safety regulations, for all repairs on your vehicle's seat belts, go to a qualified workshop with the skills and equipment needed, which a PEUGEOT dealer
is able to provide.
Have your seat belts checked regularly by a PEUGEOT dealer or a qualified workshop, particularly if the straps show signs of damage.
Clean the seat belt straps with soapy water or a textile cleaning product, sold by PEUGEOT dealers.
After folding or moving a seat or rear bench seat, ensure that the seat belt is positioned
and reeled in correctly.
Recommendations for children
Use a suitable child seat if the passenger is less than 12 years old or shorter than one and a half metres.
Never use the same seat belt to secure more than one person.
Never allow a child to travel on your lap.
For more information on Child seats, refer to
the corresponding section.
In the event of an impact
Depending on the nature and seriousness of the impact, the pyrotechnic device may be deployed before and independently of the airbags. Deployment of the pretensioners is accompanied by a slight discharge of harmless smoke and a noise, due to the activation of the pyrotechnic cartridge incorporated in the system.
In all cases, the airbag warning lamp comes on.
Following an impact, have the seat belts system checked, and, if necessary, replaced, by a PEUGEOT dealer or a qualified workshop.
Safety
Airbags
General points
System designed to contribute towards improving the safety of the occupants (with the exception of the centre rear passenger) in the event of violent collisions. The airbags supplement the action of the seat belts fitted with force limiters (with the exception of the centre rear passenger belt).
If a collision occurs, the electronic detectors record and analyse the front and side impacts sustained in the impact detection zones:
- in the case of a serious impact, the airbags are deployed instantly and contribute towards better protection of the occupants of the vehicle (with the exception of the centre rear passenger); immediately after the impact, the airbags deflate rapidly so that they do not hinder visibility or the exit of the occupants;
- in the case of a minor or rear impact or in certain roll-over conditions, the airbags may not be deployed; the seat belt alone contributes towards ensuring your protection in these situations.
! The airbags do not operate when the ignition is switched off. This equipment will only deploy once. If a second impact occurs (during the same or a subsequent accident), the airbag will not be deployed again.
Impact detection zones
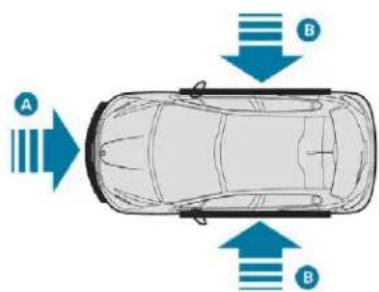
A. Frontal impact zone.
B. Side impact zone.
Airbag deployment generates slight smoke emissions and a noise, due to the activation of the pyrotechnic cartridge incorporated in the system. Although this smoke is not harmful, sensitive individuals may experience slight irritation. The noise generated by the deployment of one or more airbags (detonation) may result in mild and temporary loss of hearing.
Safety
Front airbags
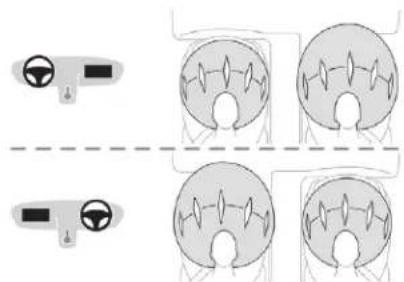
This system protects the driver and front passenger in the event of a severe frontal impact in order to limit the risk of injury to the head and chest.
The driver's airbag is fitted in the centre of the steering wheel; the front passenger's airbag is fitted in the dashboard above the glove box.
Deployment
The airbags are deployed, except the passenger's front airbag if it has been deactivated, in the event of a serious front impact to all or part of the front impact zone A, in the longitudinal centreline of the vehicle on a horizontal plane and directed from the front to the rear of the vehicle.
The front airbag inflates between the thorax and head of the front occupant of the vehicle and the steering wheel, driver's side, and the dashboard, passenger's side, to cushion their forward movement.
Deactivation
Only the passenger's front airbag can be deactivated.

With the ignition off, insert the key into the passenger airbag deactivation switch.
Turn it to the "OFF" position.
Remove the key keeping the switch in this position.

When the ignition is on, this warning lamp comes on in the instrument panel and stays on while the airbag is deactivated.
To assure the safety of your child, the passenger's front airbag must be deactivated when you install a "rearward facing" child seat on the front passenger seat. Otherwise, the child risks being seriously injured or killed if the airbag is deployed.
Reactivation
When you remove the rearward facing child seat, with the ignition off, turn the switch to the ON position to reactivate the airbag and so assure the safety of your front passenger in the event of an impact.
Malfunction
If this warning lamp on the instrument panel comes on, you must contact a PEUGEOT dealer or a qualified workshop to have the system checked. The airbags may no longer be deployed in the event of a serious impact.
Safety
Lateral airbags

This system protects the driver and front passenger in the event of a severe side impact to minimise the risk of injury to the chest, between hip and shoulder.
Each lateral airbag is fitted in the seat backrest frame, door side.
Deployment

A lateral airbag is deployed unilaterally in the event of a severe side impact applied to all or part of side impact zone B, perpendicular to the longitudinal centreline of the vehicle on a horizontal plane and directed from the outside towards the inside of the vehicle.
The lateral airbag inflates between the hip and shoulder of the front occupant and the corresponding door trim panel.
Curtain airbags
System contributing towards greater protection for the driver and passengers (with the exception of the rear centre passenger) in the event of a serious side impact in order to limit the risk of injury to the side of the head.
Each curtain airbag is built into the pillars and the upper passenger compartment area.
Deployment
The curtain airbag is deployed at the same time as the corresponding lateral airbag in the event of a serious side impact applied to all or part of the side impact zone B, perpendicular to the longitudinal centreline of the vehicle on a horizontal plane and directed from the outside towards the inside of the vehicle.
The curtain airbag inflates between the front or rear occupant of the vehicle and the windows.
Operating fault

If this warning lamp on the instrument panel comes on, you must contact a PEUGEOT dealer or a qualified workshop to have the system checked. The airbags may no longer be deployed in the event of a serious impact.
In the event of a minor impact or bump on the side of the vehicle or if the vehicle rolls over, the airbag may not be deployed. In the event of a rear or front collision, the airbag is not deployed.
Advice
! For the airbags to be fully effective, observe the safety recommendations below.
Adopt a normal and upright sitting position.
Wear a correctly adjusted seat belt.
Do not leave anything between the occupants and the airbags (a child, pet, object, etc.), nor fix or attach anything close to or in the way of the airbag release trajectory; this could cause injuries during their deployment.
Never modify the original definition of your vehicle, particularly in the area directly around the airbags.
After an accident or if the vehicle has been stolen, have the airbag systems checked. All work on the airbag system must be carried out by a PEUGEOT dealer or a qualified workshop.
Even if all of the precautions mentioned are observed, a risk of injury or of minor burns to the head, chest or arms when an airbag is deployed cannot be ruled out. The bag inflates almost instantly (within a few milliseconds) then deflates within the same time discharging the hot gas via openings provided for this purpose.
Front airbags
Do not drive holding the steering wheel by its spokes or resting your hands on the centre part of the wheel.
Passengers must not place their feet on the dashboard.
Do not smoke as deployment of the airbags can cause burns or the risk of injury from a cigarette or pipe.
Never remove or pierce the steering wheel or hit it violently.
Do not fit or attach anything to the steering wheel or dashboard, this could cause injuries in case of airbag deployment.
Curtain airbags
Do not attach anything or hang anything to the roof, as this could cause head injuries when the curtain airbag is deployed.
If fitted to your vehicle, do not remove the grab handles installed on the roof, they play a part in securing the curtain airbags.
Lateral airbags
Use only approved covers on the seats, compatible with the deployment of the lateral airbags. For information on the range of seat covers suitable for your vehicle, you can contact a PEUGEOT dealer.
Do not attach or hang anything to the seat backrests (clothes, etc.) as this could cause injuries to the thorax or arm when the lateral airbag is deployed.
Do not sit with the upper part of the body any nearer to the door than necessary.
The vehicle's front door panels include side impact sensors.
A damaged door or any unauthorised or incorrectly executed work (modification or repair) on the front doors or their interior trim could compromise the operation of these sensors – Risk of malfunction of the lateral airbags!
Such work must only be done by a PEUGEOT dealer or a qualified workshop.
Safety
General points relating to child seats
Although one of the main criteria of PEUGEOT when designing your vehicle, the safety of your children also depends on you.
For maximum safety, please observe the following recommendations:
- In accordance with European regulations, all children under the age of 12 or less than one and a half metres tall must travel in an approved child seat suited to their weight and installed on a vehicle seat fitted with a seat belt or ISOFIX mountings*.
- Statistically, the safest seats in your vehicle for carrying children are the rear seats.
- A child weighing less than 9 kg must travel in the rearward facing position both in the front and in the rear.
PEUGEOT recommends that children should travel on the rear seats of your vehicle:
- "rearward facing" up to the age of 3,
- "forward facing" over the age of 3.
Child seat at the front
(Refer to the current legislation in your country before installing your child on this seat.)
Rearward facing
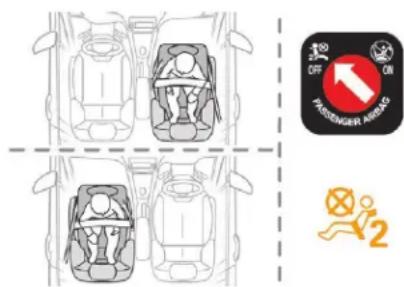
When a rearward facing child seat is installed on the front passenger seat, adjust the vehicle's seat to the rearmost longitudinal position, with the backrest straightened.
! The passenger's front airbag must be deactivated. Otherwise, the child would risk being seriously injured or killed if the airbag were deployed.
Forward facing

When a forward facing child seat is installed on the front passenger seat, adjust the vehicle's seat to the rearmost longitudinal position with seat backrest straightened and leave the passenger's front airbag activated.
Ensure that the seat belt is correctly tensioned. For child seats with a support leg, ensure that the latter is in firm contact with the floor. If necessary, adjust the passenger seat.
* The legislation on carrying children is specific to each country. Consult the legislation in force in your country.

Passenger seat adjusted to the highest position and in the maximum longitudinal rear position.
Deactivating the passenger's front airbag
Never install a rearward facing child restraint system on a seat protected by an active front airbag. This could cause the death of the child or serious injury.
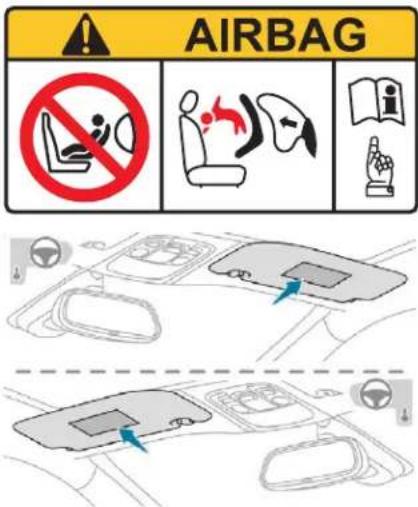
The warning label present on both sides of the passenger's sun visor repeats this advice.
Safety
In line with current legislation, the following tables contain this warning in all of the languages required.
Passenger airbag OFF

Safety
Deactivating the passenger's front airbag

With the ignition off, insert the key in the passenger airbag deactivation switch.
Turn it to the OFF position.
Remove the key keeping the switch in the new position.

When the ignition is switched on, this warning lamp comes on in the instrument panel. It stays on while the airbag is deactivated.
To assure the safety of your child, the passenger's front airbag must be deactivated when you install a rearward facing child seat on the front passenger seat. Otherwise, the child would risk being seriously injured or killed if the airbag were deployed.
Reactivating the passenger's front airbag
When you remove a rearward facing child seat, with the ignition off, turn the switch to the ON position to reactivate the airbag and so assure the safety of your front passenger in the event of an impact.

When the ignition is switched on, this warning lamp comes on in the instrument panel, for approximately one minute to signal that the front airbag is activated.
Safety
| AR | لايجب婴幼儿 تركب عنظام إجلاس الط Qatar LinkedIn باتجاه الوراء على مقد سبارة محير بوسالة أمان هرائية ألمية مفظة، قد يويدي هذا إلى التسب ب Sucوت الط Qatar أو在一صابات خطيرة Toyota. |
| BG | НИКОГА НЕ инсталирайте детско столче на седалка с АКТИВИРАНА предна ВЪЗДУШНА ВЪЗГЛАВНИЦА. Това може да причини СМЪРТ или СЕРИОЗНО НАРАНЯВАНЕ на детето. |
| CS | NIKDY neumistujte dëtské zádržné zařízení orientované směrem dozadu na sedadlo chráněné AKTIVOVANÝM čelním AIRBAGEM. Hrozí nebezpečí SMRTI DÍTĚTE nebo VÁŽNÉHO ZRANĚNÍ. |
| DA | Brug ALDRIG en bagudvendt barnestol på et sæde, der er beskyttet af en AKTIV AIRBAG. BARNET risikerer at blive ALVORLIGT KVÆSTET eller DRÆBT. |
| DE | Montieren Sie auf einem Sitz mit AKTIVIERTEM Front-Airbag NIEMALS einen Kindersitz oder eine Babyschale entgegen der Fahrtrichtung, das Kind könnte schwere oder sogar tödliche Verletzungen erleiden. |
| EL | Μη χρησιμοποιείτε ΠΟΤΕ παιδικό κάθισμα με την πλάτη του προς το εμπρός μέρος του autokivήτου, σε μια θέση που προστατεύεται από ΜΕΤΩΠΙΚΟ αερόσακο που είναι ΕΝΕΡΓΟΣ. Autó μπορεί να έχει σαν συνέπεια το ΘΑΝΑΤΟ ή το ΣΟΒΑΡΟ ΤΡΑΥΜΑΤΙΣΜΟ του ΠΑΙΔΙΟΥ |
| EN | NEVER use a rearward facing child restraint on a seat protected by an ACTIVE AIRBAG in front of it, DEATH or SERIOUS INJURY to the CHILD can occur |
| ES | NO INSTALAR NUNCA un sistema de retención para niños de espaldas al sentido de la marcha en un asiento protegido mediante un AIRBAG frontal ACTIVADO, ya que podría causar lesiones GRAVES o incluso la MUERTE del niño. |
| ET | Ärge MITTE KUNAGI paigaldage "seljaga söidusuunas" lapseistet juhi körvalistmele, mille ESITURVAPADI on AKTIVEERITUD. Turvapadja avanemine vöib last TŐSISELT vöi ELUOHTLIKULT vigastada. |
| FI | ÄLÄ KOSKAAN aseta lapsen turvaistuinta selkä ajosuuntaan istuimelle, jonka edessä suojana on käyttöön aktivoitu TURVATYYNY. Sen laukeaminen voi aiheuttaa LAPSEN KUOLEMAN tai VAKAVAN LOUKKAANTUMISEN. |
| FR | NE JAMAIS installer de système de retenue pour enfants faisant face vers l'arrière sur un siège protégé par un COUSSIN GONFLABLE frontal ACTIVÉ. Cela peut provoquer la MORT de l'ENFANT ou le BLESSER GRAVEMENT. |
| HR | NIKADA ne postavljati dječju sjedalicu ledima u smjeru vožnje na sjedalo zaštićeno UKLJUČENIM prednjim ZRAČNIM JASTUKOM. To bi moglo uzrokovati SMRT ili TEŠKU OZLJEDU djeteta. |
| HU | SOHA ne használjon menetiránynak háttal beszerelt gyermekülést AKTIVÁLT (BEKAPCSOLT) FRONTLÉGZSÁKKAL védett ülésen. Ez a gyermek HALÁLÁT vagy SÚLYOS SÉRÜLÉSÉT okozhatja. |
| IT | NON installare MAI seggiolini per bambini posizionati in senso contrario a quello di marcia su un sedile protetto da un AIRBAG frontale ATTIVATO. Ciò potrebbe provocare la MORTE o FERITE GRAVI al bambino. |
Safety
| LT | NIEKADA nejrenkite vaiko prilaikymo priemonės su atgal atgrežtu vaiku ant sėdynės, kuri saugoma VEIKIANČIOS priekinės ORO PAGALVĖS. Išsiskleidus oro pagalvei vaikas gali būti MIRTINAI arba SUNKIAI TRAUMUOTAS. |
| LV | NEKAD NEUZSTĂDIET uz aizmuguri vērstu bērnu sėdekliti priekšėjā pasažiera sėdvietā, kurā ir AKTIVIZĖTS priekšėjais DROŠĪBAS GAISA SPILVENS. Tas var izraisīt BĒRNA NĂVI vai radīt NOPIETNUS IEVAINOJUMUS. |
| MT | Qatt m'ghandek thalli tifel/tifla marbut f'siggu dahru lejn l-Airbag attiva, ghaliex tista' tikkawza korriment serju jew anke mewt lit-tifel/tifla |
| NL | Plaats NOOIT een kinderzitje met de rug in de rijrichting op een zitplaats waarvan de AIRBAG is INGESCHAKELD. Bij het afgaan van de airbag kan het KIND LEVENSGEVAARLIJK GEWOND RAKEN |
| NO | Installer ALDRI et barnesete med ryggen mot kjøreretningen i et sete som er beskyttet med en frontal AKTIVERT KOLLISJONSPUTE, BARNET risikerer â bli DREPT eller HARDT ŠKADET. |
| PL | NIGDY nie instalować fotelika dziecięcego w pozycji "tyłem do kierunku jazdy" na siedzeniu wyposażonym w CZOŁOWĄ PODUSZKĘ POWIETRZNĄ w stanie AKTYWNYM. Może to doprowadzić do ŚMIERCI DZIECKA lub spowodować u niego POWAŽNE OBRAŽENIA CIAŁA. |
| PT | NUNCA instale um sistema de retenção para crianças de costas para a estrada num banco protegido por um AIRBAG frontal ACTIVADO. Esta instalação poderá provocar FERIMENTOS GRAVES ou a MORTE da CRIANÇA. |
| RO | Nu instalati NICIODATA un sistem de retinere pentru copii, dispus cu spatele in directia de mers, pe un loc din vehicul protejat cu AIRBAG frontal ACTIVAT. Aceasta ar putea provoca MOARTEA COPILULUI sau RANIREA lui GRAVA. |
| RU | BO BCEX СЛУЧАЯХ ЗАПРЕЩАЕТСЯ использовать обращенное назад детское удерживающее устройство на сиденье, защищенном ФУНКЦИОНИРУЮЩЕЙ ПОДУШКОЙ БЕЗОПАСНОСТИ, установленной перед этим сиденьем. Это может привести к ГИБЕЛИ РЕБЕНКА или НАНЕСЕНИЮ ЕМУ СЕРЬЕЗНЫХ ТЕЛЕСНЫХ ПОВРЕЖДЕНИЙ |
| SK | NIKDY neinštalujte detské zádržné zariadenie orientované smerom dozadu na sedadlo chránené AKTIVO VANÝM čelným AIRBAGOM. Mohło by dôjsť k SMRTELNĚMU alebo VÁŽNEMU PORANENIU DIETĂTA. |
| SL | NIKOLI ne nameščajte otroškega sedeža s hrbtom v smeri vožnje, če je VARNOSTNA BLAZINA pred sprednjim sopotnikovim sedežem AKTIVIRANA. Takšna namestitev lahko povzroči SMRT OTROKA ali HUDE POŠKODBE. |
| SR | NIKADA ne koristite dečje sedište koje se okreće unazad na sedištu zaštićenim AKTIVNIM VAZDUŠNIM JASTUKOM ispred njega, jer mogu nastupiti SMRT ili OZBILJNA POVREDA DETETA. |
| SV | Passagerarkrockkudden fram MÄSTE vara avaktiverad om en bakåtvänd bilbarnstol installeras på denna plats. Annars riskerar barnet att DÕDAS eller SKADAS ALLVARLIGT. |
| TR | KESÍNLÍKLE HAVA YASTIĞI AKTÍF olan ön koltuğa yüzü arkaya dônük bir çocuk koltuğu yerleştirmeyiniz. Bu ÇOCUĞUN ÖLMESÍNE veya ÇOK AĞIR YARALANMASINA sebep olabilir. |
Safety
Child seat at the rear
Rearward facing

When a "rearward facing" child seat is installed on a rear passenger seat, move the vehicle's front seat forward and straighten the backrest so that the rearward facing child seat does not touch the vehicle's front seat.
Forward facing
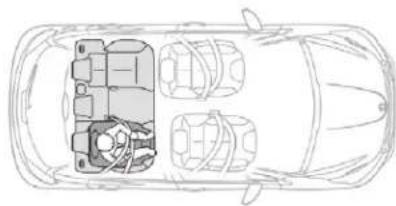
When a "forward facing" child seat is installed on a rear passenger seat, move the vehicle's front seat forward and straighten the backrest so that the legs of the child in the forward facing child seat do not touch the vehicle's front seat.
Centre rear seat
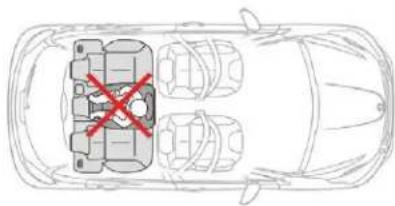
A child seat with a support leg must never be installed on the centre rear passenger seat.
i Ensure that the seat belt is correctly tensioned. For child seats with a support leg, ensure that the latter is in firm contact with the floor. If necessary, adjust the front seat of the vehicle.
Safety
Child seats recommended by PEUGEOT
PEUGEOT offers a range of recommended child seats which are secured using a three point seat belt.
Group 0+: from birth to 13 kg

L1
"RÖMER Baby-Safe Plus" Installed in the rearward facing position.
Groups 2 and 3: 15-36 kg
L5
"RÖMER KIDFIX XP" Can be fitted to the vehicle's ISOFIX mountings. The child is restrained by the seat belt.
Groups 2 and 3: 15-36 kg

L6
"BOOSTER GRACO" The child is restrained by the seat belt.
Safety
Installing a child seat attached with the seat belt
In accordance with European regulations, this table indicates the options for installing child seats secured using the seat belt and universally approved (a) in relation to the weight of the child and the seat in the vehicle.
| Seat | Weight of the child / indicative age | |||||
| Under 13 kg(groups 0 (b)and 0+)Up to about 1 year old | 9-18 kg(group 1)From about 1 to3 years old | 15-25 kg(group 2)From about 3 to6 years old | 22-36 kg(group 3)From about 6 to10 years old | |||
| Front passengerseat (c), (e) | With height adjustment | U(R) U(R) U(R) U(R) | ||||
| Without height adjustment | U^* U^* U^* U^* | |||||
| Outer rear seats (d) U U U U | ||||||
| Centre rear seat (d) | U (f) | U (f) | U | U | ||
Safety
U: seat suitable for the installation of a child seat secured using the seat belt and universally approved for "rearward facing" and/or "forward facing" use.
U(R): as for U, the vehicle seat must be adjusted to the highest and fully back position.
U*: as for U, straightening the backrest.
(a) Universal child seat: child seat that can be installed in all vehicles using the seat belt.
(b) Group 0: from birth to 10 kg. Infant car seats and "car cots" cannot be installed on the front passenger seat.
(c) Refer to the current legislation in your country before installing your child on this seat.
(d) To install a child seat at the rear, rearward or forward facing, move the front seat forward, then adjust the backrest to an upright position to allow enough room for the child seat and the child's legs.
(e) When a "rearward facing" child seat is installed in the front passenger seat, the passenger airbag must be deactivated. Otherwise, the child would risk being seriously injured or killed if the airbag were deployed. When a "forward facing" child seat is installed on the front passenger seat, the passenger's airbag must remain activated.
(f) A child seat with support leg must never be installed on this passenger seat.
Remove and stow the head restraint before installing a child seat with backrest on a passenger seat. Refit the head restraint once the child seat has been removed.
Safety
"ISOFIX" mountings
Your vehicle has been approved in accordance with the latest ISOFIX regulations.
The seats, shown below, are fitted with ISOFIX compliant mountings:
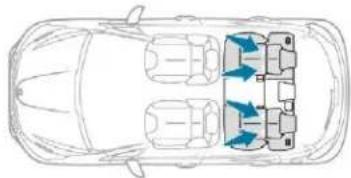
There are three rings for each seat:

- two rings A, located between the vehicle's seat backrest and cushion, indicated by a marking,

- a ring B, behind the seat, indicated by a marking, called Top Tether, for securing the upper strap.
This arrangement reduces forward tipping of the child seat in the event of a front impact. This ISOFIX mounting system provides fast, reliable and safe fitting of the child seat in your vehicle.
ISOFIX child seats are fitted with two latches which are secured on the two rings A.
Some seats also have an upper strap which is attached to ring B.
To secure the child seat to the TOP TETHER:
remove and stow the head restraint before installing the child seat in this position (refit it once the child seat has been removed),
pass the strap of the child seat over the seat backrest, centring it between the openings for the head restraint rods,
fix the hook of the upper strap to ring B,
tighten the upper strap.
When fitting an ISOFIX child seat to the left-hand rear position of the bench seat, before fitting the seat, first move the centre rear seat belt towards the middle of the vehicle, so as to avoid interference with the operation of the seat belt.
! The incorrect installation of a child seat in a vehicle compromises the child's protection in the event of an accident. Strictly follow the fitting instructions provided in the user guide supplied with the child seat.
For information on the possibilities for installing ISOFIX child seats in your vehicle, refer to the summary table.
Safety
ISOFIX child seats recommended by PEUGEOT
PEUGEOT offers a range of ISOFIX child seats recommended and type approved for your vehicle.

Also consult the installation notes from the child seat's manufacturer to find out how to install and remove the seat.
"RÖMER Baby-Safe Plus and its ISOFIX base"
(size category: E)
Group 0+: from birth to 13 kg
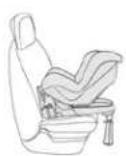

Installed rearward facing using an ISOFIX base which is attached to the rings A.
The base has a support leg, height adjustable, which rests on the vehicle's floor. This child seat can also be secured with a seat belt. In this case, only the shell is used and must be attached to the vehicle seat using the three-point seat belt.
"FAIR G 0/1 S and its RWF B ISOFIX base" (size category: C)
Group 0+ and 1: from birth to 18 kg


Installed in the rearward facing position. Is installed using an ISOFIX base attached to the rings A.
6 seat body angles.
Use the type B ISOFIX base: rearward facing (RWF).
This child seat can also be used in a forward facing position on seating positions not equipped with ISOFIX mountings. In this case, the child seat body must be attached to the seat of the vehicle by the three point seat belt.
Safety
"Baby P2C Midi and its ISOFIX base"
(size categories: D, C, A, B, B1)
Group 1: from 9 to 18 kg
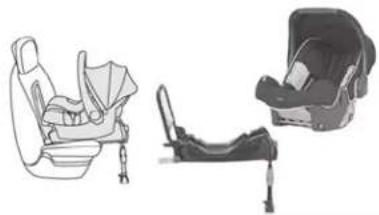
Installed rearward facing using an ISOFIX base which is attached to the rings A.
The base has a support leg, height adjustable, which rests on the vehicle's floor. This child seat can also be used forward facing.
This child seat cannot be secured with a seat belt.
We recommend that you use the seat in the rearward facing position up to the age of 3 years.
"RÖMER Duo Plus ISOFIX"
(size category: B1)
Group 1: from 9 to 18 kg

Installed only in the forward facing position.
Attaches to rings A and ring B, referred to as the Top Tether, using an upper strap.
3 seat body angles: sitting, reclining and lying down.
This child seat can also be used on seats not equipped with ISOFIX mountings.
In this case, it must be secured to the vehicle's seat by the three-point seat belt.
Adjust the front seat of the vehicle so that the child's feet do not touch the backrest.
Summary table of locations for ISOFIX child seats
In line with European regulations, this table indicates the options for installing ISOFIX child seats on the vehicle seats fitted with ISOFIX mountings. In the case of universal and semi-universal ISOFIX child seats, the ISOFIX size category, determined by a letter from A to G, is indicated on the child seat next to the ISOFIX logo.
| Weight of the child / indicative age | ||||||||||
| Under 10 kg (group 0) Up to about 6 months | Under 10 kg (group 0) Under 13 kg (group 0+) Up to about 1 year | 9-18 kg (group 1) From about 1 to 3 years old | ||||||||
| Type of ISOFIX child seat | Cot | Rearward facing | Rearward facing | Forward facing | ||||||
| ISOFIX size category F G C D E C D A B B1 | ||||||||||
| Front passenger seat Not |  | |||||||||
| Side rear seats |  | X | IL-SU* | IL-SU | IL-SU* | IL-SU | IUF IL-SU | |||
| Centre rear seat |  | Not ISOFIX | ||||||||
* vehicle seat in a special position: move the seats in front of the child seat forward.
Safety
IUF: seat suitable for the installation of an Isofix Universal seat, "Forward facing", secured using the upper strap.
IL-SU: seat suitable for the installation of an Isofix Semi-Universal seat which is either:
- "rearward facing" fitted with an upper strap or a support leg,
- "forward facing" fitted with a support leg,
- a cot fitted with an upper strap or a support leg.
For securing the upper strap, refer to the "ISOFIX Mountings" section.
X: seat not suitable for the installation of a child seat of the weight group indicated.
Remove and stow the head restraint before installing a child seat with backrest on a passenger seat. Refit the head restraint once the child seat has been removed.
Advice
The incorrect installation of a child seat in a vehicle compromises the child's protection in the event of an accident.
Check that there is no seat belt or seat belt buckle under the child seat as this could make it unstable.
Remember to fasten the seat belts or the child seat harnesses keeping the slack relative to the child's body to a minimum, even for short journeys.
When installing a child seat using the seat belt, ensure that the seat belt is tightened correctly on the child seat and that it secures the child seat firmly on the seat of your vehicle. If your passenger seat is adjustable, move it forwards if necessary.
At rear seating positions, always leave sufficient space between the front seat and:
- a "rearward facing" child seat,
- the feet of a child seated in a "forward facing" child seat.
For this, move the seat forward and if necessary straighten its backrest too.
For optimal installation of the "forward facing" child seat, verify that its backrest is as close as possible to the backrest of the vehicle seat, if possible in contact with it.
The head restraint must be removed before installing a child seat with a backrest on a passenger seat.
Ensure that the head restraint is stored or attached securely to prevent it from being thrown around the vehicle in the event of sharp braking. Refit the head restraint once the child seat has been removed.
Children in front
The legislation on carrying children on the front passenger seat is specific to each country. Refer to the legislation in force in your country.
Deactivate the passenger's front airbag when a rearward facing child seat is installed on the front passenger seat.
Otherwise, the child risks being seriously injured or killed if the airbag is deployed.
Installing a booster seat
The chest part of the seat belt must be positioned on the child's shoulder without touching the neck.
Ensure that the lap part of the seat belt passes correctly over the child's thighs.
PEUGEOT recommends using a booster seat with a backrest, equipped with a belt guide at shoulder level.
As a safety precaution, do not leave:
- a child or children alone and unattended in a vehicle,
- a child or an animal in a vehicle exposed to the sun, with the windows closed,
- the keys within the reach of children inside the vehicle.
To prevent accidental opening of the doors and rear windows, use the child lock.
Take care not to open the rear windows by more than one third.
To protect young children from the rays of the sun, fit side blinds on the rear windows.
Child lock
Manual system
Mechanical system to prevent opening of a rear door using its interior control.
The control is located on the edge of each rear door.
Locking

Using the ignition key, turn the red control as far as it will go:
- to the left on the left-hand rear door,
- to the right on the right-hand rear door.
Release
Using the ignition key, turn the red control as far as it will go:
- to the right on the left-hand rear door,
- to the left on the right-hand rear door.
Electrical system
Electric system, with the control located at the front, for locking the rear doors so that they cannot be opened using their interior controls.
Activation
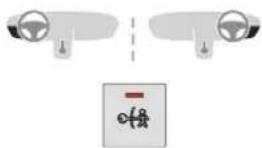
With the ignition on, press this button.
The indicator lamp in the button comes on, accompanied by a message confirming activation.
This indicator lamp remains on all the time that the child lock is activated
It is still possible to open the doors from the outside and operate the rear electric windows from the driver's control panel.
Deactivation
With the ignition on, press this button again. The indicator lamp in the button goes off, accompanied by a message to confirm deactivation.
This indicator lamp remains off while the child lock is switched off.
! Any other state of the indicator lamp indicates a fault with the electric child locks. Have it checked by a PEUGEOT dealer or a qualified workshop.
This system is independent and in no circumstances does it take the place of the central locking control. Check the status of the child lock each time you switch on the ignition. Always remove the key from the ignition when leaving the vehicle, even for a short time.
Driving
Eco-driving
Eco-driving is a range of everyday practices that allow the motorist to optimise their fuel consumption and CO2 emissions.
Optimise the use of your gearbox
With a manual gearbox, move off gently and change up without waiting. During acceleration change up early.
With an automatic or electronic gearbox, give preference to automatic mode and avoid pressing the accelerator pedal heavily or suddenly.
The gear shift indicator invites you to engage the most suitable gear: as soon as the indication is displayed in the instrument panel, follow it straight away.
For vehicles fitted with an electronic or automatic gearbox, this indicator appears only in manual mode.
Drive smoothly
Maintain a safe distance between vehicles, use engine braking rather than the brake pedal, and press the accelerator progressively. These practices contribute towards a reduction in fuel consumption and CO2 emissions and also help reduce the background traffic noise.
If your vehicle has cruise control, make use of the system at speeds above 25 mph (40 km/h) when the traffic is flowing well.
Control the use of your electrical equipment
Before moving off, if the passenger compartment is too warm, ventilate it by opening the windows and air vents before using the air conditioning.
Above 30 mph (50 km/h), close the windows and leave the air vents open.
Consider using equipment that can help keep the temperature in the passenger compartment down (sunroof and window blinds, etc.).
Unless it has automatic regulation, switch off the air conditioning as soon as the desired temperature has been reached.
Switch off the demisting and defrosting controls, if not automatic.
Switch off the heated seat as soon as possible.
Switch off the headlamps and front foglamps when the ambient light level does not require their use.
Avoid running the engine before moving off, particularly in winter; your vehicle will warm up much faster while driving.
As a passenger, if you avoid connecting your multimedia devices (film, music, video game etc.), you will contribute towards limiting the consumption of electrical energy, and so of fuel.
Disconnect your portable devices before leaving the vehicle.
Limit the causes of excess consumption
Spread loads throughout the vehicle; place the heaviest items in the bottom of the boot, as close as possible to the rear seats.
Limit the loads carried in the vehicle and reduce wind resistance (roof bars, roof rack, bicycle carrier, trailer, etc.). Use a roof box in preference.
Remove roof bars and roof racks after use.
At the end of winter, remove snow tyres and refit your summer tyres.
Driving
Observe the recommendations on maintenance
Check the tyre pressures regularly, when cold, referring to the label in the door aperture, driver's side.
Carry out this check in particular:
- before a long journey,
- at each change of season,
- after a long period out of use.
Do not forget the spare wheel and the tyres on any trailer or caravan.
At the wheel of your new vehicle, it is only after the first 1,800 miles (3,000 kilometres) that you will see the fuel consumption settle down to a consistent average.
Have your vehicle serviced regularly (engine oil, oil filter, air filter, cabin filter, etc.) and observe the schedule of operations in the manufacturer's service schedule.
With a BlueHDi Diesel engine, if the SCR system is faulty, your vehicle becomes polluting. Visit as soon as possible a PEUGEOT or a qualified workshop to make your vehicle's level of nitrogen oxide emissions compliant to the standard.
When filling the tank, do not continue after the 3rd cut-off of the nozzle to avoid overflow.
Driving recommendations
Observe the driving regulations and remain vigilant whatever the traffic conditions.
Pay close attention to the traffic and keep your hands on the wheel so that you are ready to react at any time to any eventuality.
As a safety measure, the driver should only carry out any operations that require close attention when the vehicle is stationary.
On a long journey, a break every two hours is strongly recommended.
In bad weather, drive smoothly, anticipate the need to brake and increase the distance from other vehicles.
Never leave the engine running in an enclosed area without adequate ventilation: internal combustion engines emit toxic exhaust gases, such as carbon monoxide. There is a risk of poisoning and death!
In very severe wintry conditions (temperatures below -23°C), to guarantee correct operation and the longevity of the mechanical elements of your vehicle, engine and gearbox, the engine must be left running for 4 minutes before driving.
Driving
Important!
! Never drive with the parking brake applied – Risk of overheating and damage to the braking system!
As the exhaust system of your vehicle is very hot, even several minutes after switching off the engine, never park or run the engine on inflammable surfaces (dry grass, fallen leaves, etc.): Risk of fire!
Never leave a vehicle unsupervised with the engine running. If you have to leave your vehicle with the engine running, apply the parking brake and put the gearbox into neutral or position N or P, depending on the type of gearbox.
Driving on flooded roads
We strongly advise against driving on flooded roads, as this could cause serious damage to the engine or gearbox, as well as to the electrical systems of your vehicle.
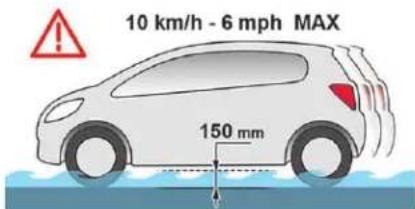
If you are obliged to drive through water:
- check that the depth of water does not exceed 15 cm, taking account of waves that might be generated by other users,
- deactivate the Stop & Start system,
- drive as slowly as possible without stalling. In all cases, do not exceed 6 mph (10 km/h),
- do not stop and do not switch off the engine.
On leaving the flooded road, as soon as circumstances allow, make several light brake applications to dry the brake discs and pads.
If in doubt about the state of your vehicle, contact a PEUGEOT dealer or a qualified workshop.
In case of towing
! Driving with a trailer places greater demands on the towing vehicle and requires extra care from the driver.
Distribution of loads
Distribute the load in the trailer so that the heaviest items are as close as possible to the axle and the nose weight approaches the maximum permitted without exceeding it.
Air density decreases with altitude, thus reducing engine performance. The maximum towed load must be reduced by 10% for every 1,000 metres of altitude.
i Please respect the maximum towable weights.
Side wind
Take into account the increased sensitivity to wind.
Cooling
Towing a trailer on a slope increases the temperature of the coolant.
As the fan is electrically controlled, its cooling capacity is not dependent on the engine speed.
To lower the engine speed, reduce your speed.
The maximum towable load on an incline depends on the gradient and the exterior temperature.
In all cases, keep a check on the coolant temperature.

If this warning lamp and the STOP warning lamp come on, stop the vehicle and switch off the engine as soon as possible.

New vehicle
Do not pull a trailer before having driven at least 600 miles (1,000 kilometres).
Braking
Towing a trailer increases the braking distance. To avoid overheating of the brakes, the use of engine braking is recommended.
Tyres
Check the tyre pressures of the towing vehicle and of the trailer, observing the recommended pressures.
Lighting
Check the electrical lighting and signalling on the trailer and the headlamp beam height of your vehicle.

For more information on Adjusting the headlamp beam height, refer to the corresponding section.

The rear parking sensors will be deactivated automatically to avoid the audible signal if a genuine PEUGEOT towbar is used.

If the exterior temperature is high, it is recommended that the engine be allowed to idle for 1 to 2 minutes after the vehicle comes to a stop, to facilitate its cooling.
Driving
Starting – Switching off the engine
Ignition switch

- Stop position.
- Ignition on position.
- Starting position.
Avoid attaching heavy objects to the key or the remote control, which would weigh down on its blade in the ignition switch and could cause a malfunction.
Starting


With a manual gearbox, place the gear selector in neutral then fully depress the clutch pedal.
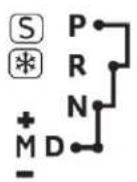
With an automatic gearbox, place the gear selector at P or N then press the brake pedal firmly.
Insert the key into the ignition switch. The system recognises the starting code.
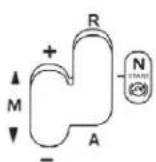

With an electronic gearbox, place the gear selector at N then press the brake pedal firmly.

Unlock the steering column by simultaneously turning the steering and the key.
In some cases, you may have to apply some force to turn the steering (if the wheels are on lock against a kerb, for example).
Turn the key towards the dashboard to position 3 (Starting).
When the engine starts, release the key.
Electronic immobiliser
The original key contains a coded electronic chip. When the ignition is switched on, starting is only possible if the code is detected and recognised.
This protection against theft locks the engine management system a few moments after the ignition is switched off and prevents starting of the engine following a break-in.

In the event of a fault, you are informed by lighting of this warning lamp in the instrument panel, an audible signal and a message in the screen.
In this case, your vehicle will not start; contact a PEUGEOT dealer as soon as possible.
Switching off
Stop the vehicle.
Turn the key towards you to position 1 (Stop).
Remove the key from the ignition switch.
To lock the steering column, turn the steering until it locks.
! Coasting For safety reasons, do not free-wheel. Otherwise, some vehicle functions will no longer be active.
To facilitate unlocking of the steering column, the front wheels should be straight before switching off the engine.
! Switching off the engine leads to a loss of braking assistance.
Key left in If the key has been left in the ignition switch at position 2 (Ignition on), the ignition will be switched off automatically after one hour. To switch the ignition back on, turn the key to position 1 (Stop), then back to position 2 (Ignition on).
Driving
Parking brake
Releasing

Pull the parking brake lever up slightly, press the release button then lower the lever fully.

When the vehicle is being driven, if this warning lamp and the STOP warning lamp come on, accompanied by an audible signal and a message on the screen, this indicates that the parking brake is still on or has not been fully released. Remember to fully lower the parking brake lever.
Applying
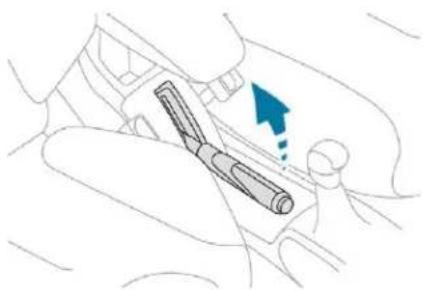
Pull the lever up to immobilise your vehicle.
When parking on a steep slope, direct your wheels against the kerb, apply the parking brake, engage a gear opposite to the direction the vehicle is facing and switch off the ignition. On return to the vehicle, remember that a gear had been engaged before starting the engine.
If excessive travel or a loss of effectiveness of this system is noticed, the parking brake must be checked, even between two services. Checks of this safety-related system must be carried by a PEUGEOT dealer or a qualified workshop.
Driving
Manual gearbox
5-speed
Move the gear lever fully to the right to engage 5 th gear.
Engaging reverse gear

Move the gear lever to the right then pull it back.
! Only engage reverse gear when the vehicle is stationary with the engine at idle.
6-speed
Move the lever fully to the right to engage 5 th or 6 th gear.
Engaging reverse gear
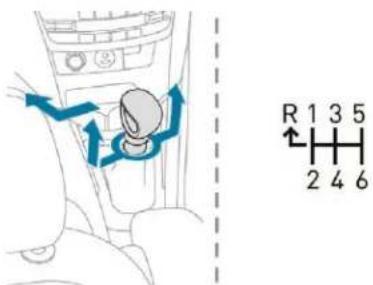
a Raise the collar below the gear lever knob, then push the lever fully to the left and then forward.
! Only engage reverse gear when the vehicle is stationary with the engine at idle.
As a safety precaution and to aid engine start-up: - always select neutral, - press the clutch pedal.
The gear shift indicator is displayed on the instrument panel.
Driving
Electronic gearbox
5-speed
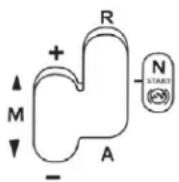
R. Reverse.
N. Neutral.
A. Automatic mode.
M. Manual mode.
6-speed
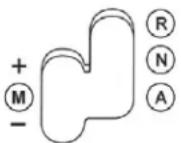
R. Reverse.
N. Neutral.
A. Automatic mode.
M. Manual mode.
You can change from position A to M and from M to A at any time.
Automatic mode

This mode allows gear changing without action by the driver.
Moving off
Lever at position N.
Press the brake pedal firmly.

Start the engine.
Place the lever at A or R.
Release the brake pedal and press the accelerator pedal progressively.
If the engine does not start:
- If N is flashing in the instrument panel, move the gear lever to position A then to position N.
- If the Foot on the brake message is displayed, press the brake pedal firmly.
The A, R or N position of the lever is indicated in the display.
Stopping - Moving off on a slope
Do not use the accelerator to hold the vehicle, but apply the parking brake.
Stopping – Parking
Place the lever at N and apply the parking brake.
Manual gear change
This one-off gear change makes it possible to overtake, for example, while remaining in automated mode.

Operate the steering mounted control paddles + or -.
The gearbox engages the gear selected if engine speed allows it. AUTO remains displayed on the instrument panel. After a few moments with no action on the control paddles, the gearbox returns to automatic operation.
Manual mode
M


This mode allows manual sequential gear changing.
Move the selector lever to M.

Push the lever forward to change up.

Pull the lever back to change down.
Steering mounted control paddles

Pull the "+" paddle to change up.
Pull the "-" paddle to change up.
The gear engaged is indicated in the display.
Creep function
Depending on the engine, the vehicle moves without pressing the accelerator.
Assistance with low-speed manoeuvres
With the engine running at idle, parking brake released and the lever placed at A, M or R, the vehicle moves off when your release the brake pedal.
It stops on opening the driver's door. Closing the door, and putting your foot on the brake or accelerator pedal allows movement of the vehicle again.
Following disconnection of the battery, you have to reinitialise the gearbox.
Switch on the ignition.

AUTO and – appear in the instrument panel.
Select position N.
Press the brake pedal firmly.

Wait around 30 seconds until N or a gear appears in the instrument panel.
Release the brake pedal.
The gearbox is operational again.

With the ignition on, if this warning lamp comes on and AUTO flashes, accompanied by an audible signal and a message in the screen, this indicates a gearbox fault.
Have it checked by a PEUGEOT dealer or a qualified workshop.
Driving
Automatic gearbox

P. Parking.
R. Reverse.
N. Neutral.
D. Drive (automatic driving).
M. Manual mode.
S. Sport – more active driving.
* Snow – for driving on snowy roads.
Display in the instrument panel

When you select a position with the lever, the corresponding lamp is displayed in the instrument panel.
Foot on the brake warning

Press the brake pedal when this comes on in the instrument panel.
Automatic mode

This mode allows gear changing without action by the driver.
Moving off
Parking brake applied.
Start the engine.
∞ Lever at position P or N.

Press the brake pedal firmly.
Release the parking brake.
Place the selector at D or R.
Release the brake pedal and press the accelerator pedal progressively.
The vehicle then moves off.
! Never leave children unattended in the vehicle when the engine is running.

Select position D for automatic changing of the gears.
The gearbox then operates in auto-adaptive mode, without any intervention on the part of the driver. It continuously selects the most suitable gear according to the style of driving, the profile of the road and the load in the vehicle.
For maximum acceleration without touching the lever, press the accelerator pedal down fully (kick down). The gearbox shifts down automatically or holds the gear selected until the maximum engine speed is reached.
When braking, the gearbox shifts down automatically to provide effective engine braking.
If you release the accelerator sharply, the gearbox will not shift to a higher gear for safety reasons.
Manual mode

This mode allows manual sequential gear changing.
Move the gear lever to M.

Push the lever forward to change up.

Pull the lever back to change down.
Invalid value

This symbol is displayed if a gear is not engaged correctly (selector between two positions).

You can change from position D to M and M to D at any time.

If position R, D or M is selected when the engine is running at idle, with the brakes released, the vehicle moves even without the accelerator being pressed. Never leave children unattended in the vehicle when the engine is running. When carrying out maintenance with the engine running, apply the parking brake and select position P.

Never select position N while the vehicle is moving. Never select position P or R unless the vehicle is completely stationary.

If position N is selected inadvertently while driving, allow the engine to return to idle, then select position D to accelerate. If the temperature is below -23°C , the engine should be left at idle for four minutes, to ensure the correct operation and life of the engine and gearbox.
Sport programme
This special programme completes the automatic operation of the gearbox in certain circumstances.

With the engine running, press button S.
The gearbox automatically favours a dynamic style of driving. S appears on the instrument panel.
Driving
Snow program
This special program completes the automatic operation and makes it easier to move off and make progress in conditions of poor grip.

With the engine running, press the Ⓧ button.
The gearbox adapts to driving on slippery roads. ※ appears on the instrument panel.
Return to automatic operation

Press the button again at any time to quit the program and return to auto-adaptive mode.

Stopping – Parking
Before switching off the engine.
Move the lever to position P or N.
Apply the parking brake.
Immobilise the vehicle.
Driving
If the lever is not in position P, a message appears in the screen on opening the driver's door or approximately 45 seconds after switching off the ignition.
Place the lever at position P; the message disappears.
When driving on flooded roads or when crossing a ford, proceed at walking pace.

When the ignition is on, the lighting of this warning lamp, associated with an audible signal and a message on the screen, indicates a gearbox fault.
In this case, the gearbox switches to back-up mode and is locked in 3rd gear. You may feel a substantial knock when changing from P to R and from N to R . This will not cause any damage to the gearbox.
Do not exceed 60 mph (100 km/h), local speed restrictions permitting.
Contact a PEUGEOT dealer or a qualified workshop as soon as possible.
There is a risk of damage to the gearbox:
if you press the accelerator and brake pedals at the same time,
if you force the movement of the lever from position P to another position with a flat battery.
To reduce fuel consumption during prolonged stops with the engine running (traffic jams, etc.), position the gear lever at N and apply the parking brake.
Gear shift indicator
(Depending on engine.)
This system reduces fuel consumption by recommending the most appropriate gear.
Depending on the driving situation and your vehicle's equipment, the system may advise you to skip one (or more) gear(s). You can follow this instruction without engaging the intermediate gears.
Gearshift recommendations should not be considered obligatory. The configuration of the road, the amount of traffic and safety remain determining factors when choosing the best gear. The driver thus remains responsible for deciding whether to follow or ignore the system's instructions.
This function cannot be deactivated.
With an electronic or automatic gearbox, the system is only active in manual mode.
On BlueHDi Diesel versions with manual gearbox, in certain driving conditions the system may suggest changing into neutral so that the engine can go into standby (STOP mode with Stop & Start). In this case, N is displayed in the instrument panel.
Example:
- You are in third gear.
- You press the accelerator pedal.
- The system may suggest that you engage a higher gear.


The information appears on the instrument panel in the form of an arrow.
The system adapts its gear shift recommendation according to the driving conditions (slope, load, etc.) and the driver's requirements (power, acceleration, braking, etc.).
The system never suggests:
- engaging first gear,
- engaging reverse gear,
- engaging a lower gear.
On vehicle fitted with a manual gearbox, the arrow may be accompanied by the gear recommended.
Hill start assist
System that holds your vehicle for around 2 seconds, the time to move your foot from the brake pedal to the accelerator.
! The hill start assist function cannot be deactivated. However, use of the parking brake to immobilise the vehicle interrupts its function.
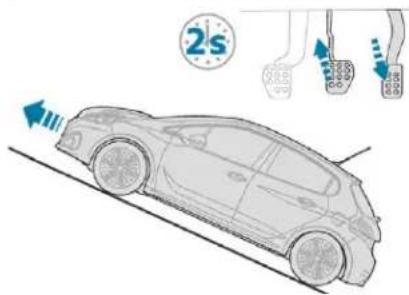
Uphill, with the vehicle stationary, it will briefly stop the vehicle from rolling back when you release the brake pedal.
With an electronic gearbox, if you are in position A.
With an automatic gearbox, if you are in D.
Driving

Downhill, with the vehicle stationary and reverse gear engaged, the vehicle is held for a short time when you release the brake pedal.
Hill start assist is only available when:
- your foot on the brake pedal fully immobilises the vehicle,
- certain conditions of gradient are met,
- with the driver's door closed.

Do not leave the vehicle while it is being held temporarily by hill start assist. If you need to leave the vehicle with the engine running, apply the parking brake manually. Then ensure that the parking brake warning lamp lights up constantly on the instrument panel.
Operating fault


The fixed illumination of these warning lamps indicates a fault with the system.
Have the system checked by a PEUGEOT dealer or a qualified workshop.
Stop & Start
The system puts the engine temporarily into standby – STOP mode – during stops in the traffic (red lights, traffic jams, etc.). The engine restarts automatically – START mode – as soon as you wish to leave again. Restarting occurs instantaneously, quickly and silently. Perfect for urban use, the Stop & Start system reduces fuel consumption and exhaust emissions as well as the noise level when stationary.
STOP mode

The "ECO" warning lamp illuminates in the instrument panel and the engine goes into standby.
With e-HDI or BlueHDI Diesel and an electronic gearbox:
- Speed below 4 mph (6 km/h).
- Gear lever in position N.
Or
- Brake pedal pressed.
With BlueHDi Diesel and a manual gearbox:
- As soon as the vehicle stops or the speed is less than 2 mph (3 km/h) (with 1.5 Blue HDi engine).
- Gear lever in neutral and clutch pedal released.
With PureTech petrol and a manual, electronic or automatic gearbox:
- As soon as the vehicle stops or the speed is less than 2 mph (3 km/h) (with manual gearbox and depending on which version you have).
- Gear lever in neutral and clutch pedal released (manual gearbox).
- Brake pedal pressed or gear lever in position N (electronic or automatic gearbox).
Special cases: STOP mode not available
STOP mode is not invoked when:
- the driver's door is open,
- the driver's seat belt is not fastened,
- the vehicle has not exceeded 6 mph (10 km/h) since the last engine start using the key,
- the engine is needed to maintain a comfortable temperature in the passenger compartment,
- demisting is active,
- some special conditions (battery charge, engine temperature, braking assistance, exterior temperature, etc.) where the engine is needed to control the system.
ECO
The ECO warning lamp flashes for a few seconds, then goes off.
This operation is perfectly normal.
ECO
A time counter sums up the time periods spent in STOP mode during a journey. It resets every time the ignition is switched on using the key.
For your comfort, during parking manoeuvres, STOP mode is not available for a few seconds after coming out of reverse gear. The Stop & Start system does not affect the functionality of the vehicle, such as for example, braking, power steering,
With a manual gearbox in STOP mode, if a gear is engaged without fully depressing the clutch pedal, a warning lamp comes on or an alert message is displayed asking you to depress the clutch pedal to restart the engine.
! Never refuel with the engine in STOP mode; you must switch off the ignition using the key.
START mode
ECO
The ECO warning lamp goes off and the engine starts:
With a manual gearbox:
- Clutch pedal depressed.
With an electronic / automatic gearbox:
- Gear lever in position A / D or M.
- Brake pedal released.
or
Driving
- Gear lever in position N.
- Brake pedal released.
- Then gear lever in position A / D or M.
or
- Reverse gear engaged.
Special cases: START invoked automatically
As a safety measure and for your comfort, START mode is invoked automatically when:
- you open the driver's door,
- you unfasten the driver's seat belt,
- some special conditions (battery charge, engine temperature, braking assistance, air conditioning setting, etc.) where the engine is needed for control of the system or vehicle.

The ECO warning lamp flashes for a few seconds, then goes off.
This operation is perfectly normal.
Manual deactivation
In certain circumstances, such as the need to maintain a comfortable temperature in the passenger compartment, it may be preferable to deactivate the Stop & Start system.
The system can be deactivated at any time, once the ignition is switched on.

This control switches off the Stop & Start system.
- Press.
- The indicator lamp in the control remains on.
- A message is displayed. If you are stationary in Stop mode, the engine restarts immediately.
Manual reactivation
- Press.
- The indicator lamp in the control goes off.
- A confirmation message is displayed.
If the engine is in STOP mode, it restarts immediately.
The Stop & Start system is reactivated automatically every time the ignition is switched on.
! Opening the bonnet

Before doing anything under the bonnet, deactivate the Stop & Start system to avoid the risk of injury related to an automatic change to START mode.
! Driving on flooded roads
Before driving in a flooded area, it is strongly recommended that you deactivate the Stop & Start system. For more information on Driving advice, particularly on flooded roads, refer to the corresponding section.
Driving
Operating fault

In the event of a fault with the system, the ECO OFF switch warning lamp flashes then comes on fixed.
Have it checked by a PEUGEOT dealer or a qualified workshop.
If a fault occurs in STOP mode, the vehicle may stall. All of the instrument panel warning lamps come on. It is then necessary to switch the ignition off and to restart the engine using the key.
! The Stop & Start system requires a 12 V battery of specific technology and specification.
All work on this type of battery must be carried out only by a PEUGEOT dealer or a qualified workshop.
For more information on the 12 V battery, refer to the corresponding section.
Speed limiter "LIMIT"
The system prevents the vehicle from exceeding the speed setting programmed by the driver.
Steering mounted controls
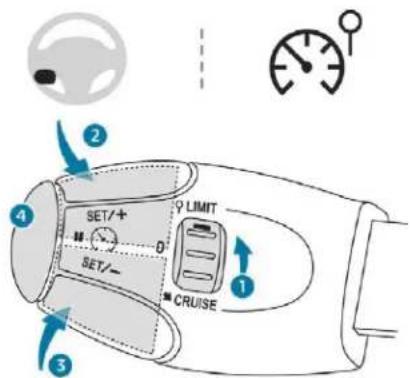
- Speed limiter mode selection / off.
- Increases the set value.
- Decreases the set value.
- Speed limiter On / Pause.
The speed setting is selected with the engine running, stationary or when driving. The minimum speed setting possible is 20 mph (30 km/h).
The vehicle responds to the accelerator until resistance is felt in the pedal, which signifies that the vehicle has reached the limiter speed setting.
However, pressing the pedal beyond this point of resistance to the floor permits exceeding of the programmed speed. To resume use of the limiter, simply reduce the pressure on the accelerator pedal gradually and return to a speed below that programmed.
Setting and operation of the system can be done stationary with the engine running or when driving.
Selection

Place the thumbwheel at the "LIMIT" position: the speed limiter mode is selected but is not switched on (PAUSE).
Switching the speed limiter on is not required to set the speed limit.
Driving
Registering a limit speed

This can be done without switching the limiter on, but the engine must be running.
To register a speed higher than the previous setting:

Press the SET + button.
A short press increases the speed setting by 1 mph (km/h).
Pressing and holding increases the setting in steps of 5 mph (km/h).
To register a speed lower than the previous setting:

Press the SET – button.
A short press decreases the setting by 1 mph (km/h).
Pressing and holding decreases the setting in steps of 5 mph (km/h).
On / Pause
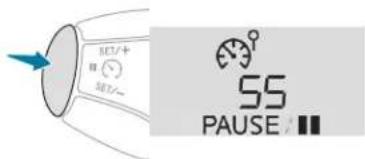
A first press on this button switches the speed limiter on, a second press pauses it.
Exceeding the registered limit speed

Pressing the accelerator pedal to exceed the registered speed will not have any effect, unless you press the pedal firmly past the point of resistance.
The speed limiter is deactivated temporarily and the registered speed setting flashes, accompanied by an audible signal.
To return to normal operation of the speed limiter, reduce your speed to below the registered speed setting.
Flashing of the speed setting

It flashes:
- after forcing the accelerator pedal past the point of resistance,
- when the limiter cannot prevent the speed of the vehicle increasing, because of the profile of the road or when going down a steep hill.
- under sharp acceleration.
Switching the system off
Place the thumbwheel at the 0 position or switch off the ignition to stop the system.
The last speed registered stays in memory.
Operating fault
The registered speed is erased, then replaced by three dashes.
Have it checked by a PEUGEOT dealer or a qualified workshop.
In any event, the speed limiter cannot replace the need to observe speed limits, nor can it replace the need for vigilance on the part of the driver.
Always pay attention to the profile of the road and sharp acceleration and stay in complete control of your vehicle.
To avoid any jamming under the pedals:
- ensure that the mat is positioned and secured to the floor correctly,
- never place one mat on top of another.
Cruise control "CRUISE"
System which automatically maintains the speed of the vehicle at the value programmed by the driver, without any action on the accelerator pedal.
Steering mounted controls

- Cruise control mode selection / off.
- Increases the set value.
- Decreases the set value.
- Pause / Resume cruise control.
This driving assistance system, for use when the traffic is flowing, allows a speed set by the driver to be maintained, except on a steep gradient.
With a manual gearbox
In order for it to be programmed or activated, the vehicle speed must be greater than 25 mph (40 km/h) with 4th gear or higher engaged.
With an electronic gearbox
To be registered or activated, the speed of the vehicle must be above 25 mph (40 km/h) with 2nd gear or higher engaged in manual mode, or position A selected.
With an automatic gearbox
To be registered or activated, the speed of the vehicle must be above 25 mph (40 km/h) with 2nd gear or higher engaged in manual mode, or position D selected.
Selection

Place the thumbwheel at the "CRUISE" position: the cruise control mode is selected but is not switched on (PAUSE).
Driving
Driving
Registering a cruise speed setting
- Bring the vehicle up to the desired speed by pressing the accelerator.
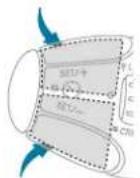
- Press the SET – or SET + button.
The speed setting is registered/activated and the vehicle will maintain this speed.
Temporarily exceeding the programmed speed

It is possible to accelerate and temporarily drive at a speed higher than the registered speed setting. The cruise speed setting value flashes.

When the accelerator pedal is released, the vehicle will return to the registered speed setting.
Pause (OFF)
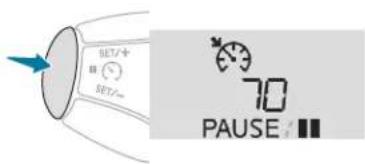
- Press this button or the brake or clutch pedal (depending on the version).
With 1.2 PureTech 82 and 110 (Euro 6.2) or 1.5 BlueHDi (Euro 6.2) engines, a manual gearbox and the Stop & Start, pressing the clutch pedal does not pause the cruise control, the cruise control remains active after changing gears.
Resume

- After the cruise control has been paused, press this button. The vehicle returns to the last registered speed. Alternatively, you can also resume the procedure for "Registering a cruise speed setting".
Driving
Changing the registered speed setting

To register a speed higher than the previous setting, there are two possibilities.
Without using the accelerator

Press the SET + button.
A short press increases the speed setting by 1 mph (km/h).
Pressing and holding increases the setting in steps of 5 mph (km/h).
By using the accelerator

- Exceed the saved speed until you reach the desired speed.

Press the SET – or SET + button.
To register a speed lower than the previous setting:

Press the SET - button.
A short press decreases the setting by 1 mph (km/h).
Pressing and holding decreases the setting in steps of 5 mph (km/h).
Switching the system off
- Place the thumbwheel at the 0 position: cruise control mode is deselected. The display returns to the total mileage recorder.
After switching off the ignition, all registered speed settings are lost.
Operating fault

The registered speed is erased, then replaced by three dashes.
Have it checked by a PEUGEOT dealer or a qualified workshop.
Driving
When changing the programmed reference speed by means of a maintained press, pay attention as the speed can increase or decrease rapidly.
Do not use the cruise control on slippery roads or in heavy traffic.
On a steep descent, the cruise control will not be able to prevent the vehicle from exceeding the registered speed.
The cruise control system cannot in any circumstances replace the need to observe speed limits or the need for vigilance on the part of the driver.
To avoid any risk of jamming the pedals:
- ensure that the mat is positioned and secured to the floor correctly,
- never place one mat on top of another.
Memorising speeds
This function allows speeds to be saved, which can then be offered to set the two systems: the speed limiter (to limit the speed of the vehicle) or the cruise control (for a vehicle cruising speed).
You can memorise up to five settings in the system for each of the two systems.
By default, some speed settings are already memorised.
With touch screen
MENU
This memorisation can be configured from the menu Driving / Vehicle.

Select the "Driving functions" tab.
Select the "Adjusting Speeds" function.
Press "ON" to activate the function.
Select the speed setting 1 to 5 that you want to change.
Select the speed setting value you want to change.
Enter the new value using the numerical keypad and confirm and click on "OK" to confirm.
As a safety measure, the driver must carry out these operations when stationary.
Selection

To select a memorised speed:
Press and hold the "+" or "-" button; the system stops at the nearest memorised speed.
Press and hold again the "+" or "-" button to select another memorised speed.
A reminder of the speed and the state of the system (on / off) is displayed in the instrument panel.
Active City Brake

A preventive driving assistance system that, using a sensor located at the top of the windscreen, automatically applies the vehicle's brakes if driving behind a vehicle that is slowing down rapidly, stopping or is stationary. The objective is to avoid a collision or reduce the speed of impact. This system has been designed to improve driving safety. It remains the driver's responsibility to continuously monitor the state of the traffic and to assess the distances and relative speeds of other vehicles.
Active City Brake cannot in any circumstances replace the need for vigilance on the part of the driver.
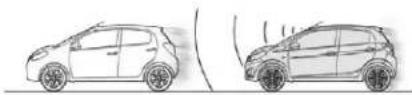
When your vehicle is too close to or approaches the vehicle ahead too quickly, the system automatically applies the brakes to avoid a collision.
If operation is triggered:
- Display of a message.
- Illumination of the brake lamps.
The automatic braking is triggered as a last resort, if the driver fails to apply the brakes sufficiently firmly or at all, or to take avoiding action.
! The laser beam is invisible. Never look at the laser sensor with an optical instrument (magnifying glass, microscope, etc.): risk of eye injury.

Conditions for operation:
- Vehicles driving in the same lane.
- Not in too sharp a bend.
- Speed of your vehicle between 3 and 18 mph (5 and 30 km/h).
- Braking assistance systems (ABS, EBFD, EBA) in working order.
- Trajectory control systems (ASR, DSC) in working order and not deactivated.
- Operation of Active City Brake not triggered in the previous 10 seconds.

The automatic braking triggered:
- can be even more effective if the driver presses the brake pedal more firmly,
Driving
- may stop the vehicle, holding the brakes on for around 1.5 seconds when stationary to allow the driver time to take back control of the vehicle,
- may cause the engine to stall,
- may give rise to a pumping noise, due to the pressurisation of the braking system.
! The collision can be automatically avoided if the speed difference between your vehicle and the one ahead is not more than 9 mph (15 km/h). Above this threshold, the system will do what is possible to avoid or reduce the seriousness of the accident by lowering the speed of impact.
Activation / Deactivation
MENU
It is possible to activate or deactivate the Active City Brake from the Driving / Vehicle menu.

The system state remains in memory when the ignition is switched off. Each subsequent time the ignition is switched on, if the automatic emergency braking function is deactivated, a temporary message will be displayed indicating the speed threshold (6 mph (10 km/h)).
! Please deactivate the Active City Brake:
- Following impact damage to the windscreen close to sensor,
- When towing a trailer,
- When the vehicle is being towed,
- When the vehicle is about to cross a toll barrier.
- When the vehicle is passing through an automatic car wash,
Operating limits
Not detected are:
- Pedestrians, animals, motorcyclists, cyclists.
- Fixed and non-reflective materials and objects (cardboard box, wall, etc.).
- Vehicles not travelling in the same direction. This system will not trigger or intervene if the driver:
- presses the accelerator pedal firmly,
- turns the wheel sharply (avoiding manoeuvre).
Operating faults
Clean or clear any dirt, mist or objects (stickers, leaves, etc.) from the top of the windscreen that could obstruct the laser's field of vision.
Misting of the windscreen or accumulations of snow on the bonnet could interfere with the operation of the laser. A message appears if the laser is obstructed.
Use windscreen demisting and regularly clean the area of the windscreen in front of the sensor.
Be particularly vigilant when driving in poor weather (very heavy rain, hail, fog, snow, etc.). This is because braking distances increase while the laser's calculation parameters remain the same.
In the following cases, you should have the system checked by a PEUGEOT dealer or a qualified workshop:
- The message "Automatic braking system" fault detected accompanied by an audible signal indicates that a fault has been detected.
- Following an impact, the system is automatically put out of service, it no longer works. The system detects the deployment of airbags.
! Do not attempt to remove, adjust or test the sensor.
Only a PEUGEOT dealer or a qualified workshop is able to work on the system.
Parking sensors

The audible (front and rear) and visual (rear) parking sensor system consists of proximity sensors, installed in the rear bumper.
The sensors detect any obstacle which enters its field of operation (person, vehicle, tree, fence, etc.) behind the vehicle during the manoeuvre.
Certain objects detected at the beginning of the manoeuvre will no longer be detected at the end of the manoeuvre due to the blind spots between and below the sensors.
Examples: stake, roadworks cone or pavement post.
Engage reverse gear

An audible signal confirms the activation of the system on engaging reverse gear.
The proximity information is indicated by an audible signal which becomes more rapid as the vehicle approaches the obstacle.
When the distance between the rear of the vehicle and the obstacle is less than approximately 30 centimetres, the audible signal becomes continuous.
Display in the screen


Driving
The audible signal is supplemented by the display of bars in the screen which move progressively nearer to the vehicle. When the obstacle is very close, the "Danger" symbol is displayed in the screen.
Stopping the assistance
N
Change to neutral.
Switching off the assistance

Press; the indicator lamp comes on.
The state of the system is stored when the vehicle is switched off.
Resuming assistance
Press again; the indicator lamp goes off.

If this warning lamp comes on when reverse gear is engaged, accompanied by a message and/or an audible signal, a fault has been detected.
Contact a PEUGEOT dealer or a qualified workshop.
Driving
In bad or wintry weather, ensure that the sensors are not covered with mud, ice or snow.
The system will be deactivated automatically if a trailer is being towed or if a bicycle carrier is fitted (vehicle fitted with a towbar or bicycle carrier recommended by PEUGEOT).
! The parking sensor system cannot in any circumstances replace the need for vigilance on the part of the driver.
Reversing camera
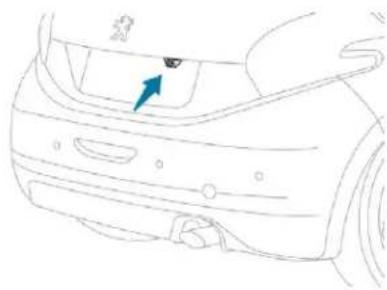
The reversing camera is activated automatically when reverse gear is engaged.
The image is displayed on the touch screen.
The reversing camera function may be supplemented with parking sensors.

The superimposed representation of guide lines helps with the manoeuvre.
They are represented by lines marked "on the ground" and do not allow the position of the vehicle to be determined relative to tall obstacles (for example: other vehicles, etc.). Some deformation of the image is normal.
The blue lines represent the general direction of the vehicle (the gap represents the width of your vehicle except for the door mirrors).
The red lines represent a distance of about 30 cm beyond the edge of your vehicle's rear bumper.
The green lines represent distances of about 1 and 2 metres beyond the edge of your vehicle's rear bumper.
! The reversing camera cannot, in any circumstances, replace the need for vigilance on the part of the driver.
i High pressure jet wash
When washing your vehicle, do not direct the lance within 30 cm of the camera lens.
Opening the tailgate causes the display to disappear.
Clean the reversing camera regularly using a soft, dry cloth.
Park Assist
The system detects a parking space and then provides assistance with the parallel parking manoeuvres.
It controls the steering and provides visual and audible information to the driver.
The driver manages the accelerator, brakes, gears and the clutch in the case of a manual gearbox.
The driver can take control at any time by gripping the steering wheel.
! The Park Assist system cannot in any circumstances replace the need for vigilance on the part of the driver. The driver must remain in control of their vehicle ensuring that the space remains clear during the manoeuvre. In some circumstances, the sensors may not detect small obstacles located in their blind spots.
! During manoeuvring phases, the steering wheel performs rapid turns: do not hold the steering wheel, do not put your hands between the spokes of the steering wheel. Watch out for any object that could block the manoeuvre (loose clothing, scarves, ties, etc.) – Risk of injury!
For entry into a parallel parking space the system does not detect spaces which are clearly much smaller or larger than the size of the vehicle.
The "Parking sensors" function activates automatically during the manoeuvres, it is possible that a warning lamp illuminates on the screen, accompanied by an audible signal, without affecting the parking.
i Changing tyre sizes (out-size tyres, winter tyres, etc.) can interfere with the correct operation of the parking assistance system.
When the Park Assist is active, it prevents the Stop & Start going into STOP mode. In STOP mode, activating Park Assist restarts the engine.
Driving
![graph TD A["Start"] --> B{Decision} B -->|Yes| C["Car 1"] B -->|No| D["Car 2"] C --> E["Car 3"] D --> F["Car 4"]](/content/2026/05/848065/images/623ca87f70b3494d90de067611d225053046ea4fadf060fd52a60d9531810a31.jpg)
The system provides assistance in entering and exiting a parking space when parallel parking.
Entering a parallel parking space
Once you have detected an available space, limit the speed of the vehicle to 12 mph (20 km/h).
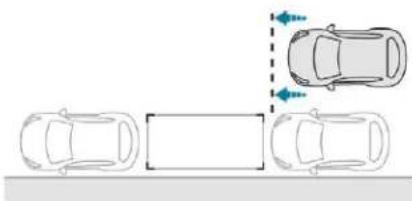
Position your vehicle before this space.
Driving
To activate the Park Assist system:
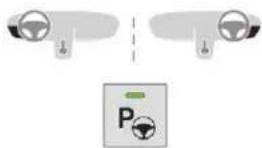
Press this control.
The indicator lamp in the control remains off.
A message is displayed in the screen.
Select the enter parking space manoeuvre.
The indicator lamp in the control comes on.

Operate the direction indicator on the parking side.

Move forwards alongside the parking space at a speed below 12 mph (20 km/h) to measure it, keeping at a distance of between 0.5 and 1.5 metres from the row of parked vehicles.
Once measurement is complete, if the space is large enough a message indicates that parking is possible.

Move your vehicle forward until a new message is displayed.

Select reverse and release the steering wheel.
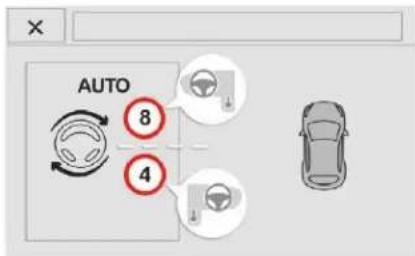
The assisted parking manoeuvre is in progress. Without exceeding 5 mph (8 km/h), continue the manoeuvres following the information given by the "parking assistance" system, until the end of manoeuvre message is displayed. The indicator lamp in the control goes off, accompanied by an audible signal.
Driving

The driver takes back control of the vehicle's steering.
Exit from a parallel parking space
When you want to exit from a parallel parking space, start the engine.
With the vehicle stationary, to activate the Park Assist system:

Press this control. The indicator lamp in the control remains off.
A message is displayed in the screen.
Select the exit parking space manoeuvre. The indicator lamp in the control comes on.
Operate the direction indicator on the exit from parking side.
The direction indicator flashes throughout the manoeuvre, whatever the position of the control stalk.
Select a forward or reverse gear then release the steering wheel.

The assisted exit from parking manoeuvre is in progress.
Without exceeding 3 mph (5 km/h), continue the manoeuvres following the information given by the "parking assistance" system, until the end of manoeuvre message is displayed. The manoeuvre is complete once the front wheels of the vehicle are out of the parking space.
The indicator lamp in the control goes off, accompanied by an audible signal.
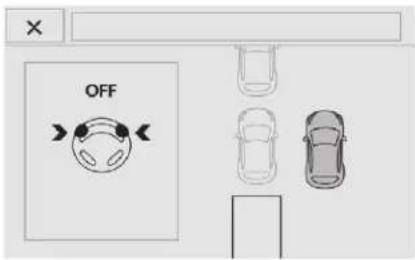
The driver takes back control of the vehicle's steering.
Deactivation
The system is deactivated automatically:
- on switching off the ignition,
- if the engine stalls,
- if no manoeuvre is performed within 5 minutes of selecting the type of manoeuvre,
- after a prolonged stop of the vehicle during a manoeuvre,
- if the road wheel anti-slip regulation (ASR) is triggered,
- if the speed of the vehicle exceeds the stated limit,
- when the driver interrupts movement of the steering wheel,
- if the driver presses the Park Assist control,
Driving
- if the vehicle cannot be properly positioned (too many manoeuvres to get the vehicle in or out),
- if the driver's door is opened,
- if one of the front wheels encounters an obstacle.
If the system is deactivated during a manoeuvre, the driver should reactivate it manually to repeat the measurement.
A message is displayed in the screen.

The driver then takes back control of the vehicle's steering.
Deactivation
The system is switched off automatically:
- when towing a trailer,
- if the driver's door is opened,
- if the speed of the vehicle is above 42 mph (70 km/h).
To switch the system off for a prolonged period, contact a PEUGEOT dealer or a qualified workshop.

This warning lamp comes on in the instrument panel and/or a message appears on the screen, accompanied by an audible signal (short beep).
The indicator lamp flashes for a few seconds. If the problem occurs while using the system, the indicator lamp goes off.

These warning lamps indicate a fault with the power steering.
Contact a PEUGEOT dealer or a qualified workshop.
If the lateral distance between your vehicle and the space is too great, the system may not be able to measure the space. Anything projecting beyond the dimensions of the vehicle is not taken into account by the Park Assist system during a manoeuvre.
In bad weather and in winter, ensure that the sensors are not covered by road dirt, ice or snow.
In the event of a fault, have the system checked by a PEUGEOT dealer or a qualified workshop.
In bad weather and in winter, ensure that the sensors are not covered by road dirt, ice or snow.
In the event of a fault, have the system checked by a PEUGEOT dealer or a qualified workshop.
Under-inflation detection
This system automatically monitors the tyre pressure while driving.
The system monitors the pressure in all four tyres, once the vehicle is moving. It compares the information given by the wheel speed sensors with reference values, which must be reinitialised after every tyre pressure adjustment or wheel change. The system triggers an alert as soon as it detects a drop in the pressure of one or more tyres.
! The tyre under-inflation detection system does not replace the need for vigilance on the part of the driver. This system still requires you to check the tyre inflation pressure (including the spare wheel) every month as well as before a long journey. Driving with under-inflated tyres impairs handling, extends braking distances and causes early tyre wear, particularly in adverse conditions (heavy loads, high speeds, long journeys).

Driving with under-inflated tyres increases fuel consumption.
! The tyre pressure specifications for your vehicle can be found on the tyre pressure label. For more information on Identification markings, including in particular the tyre pressure label, refer to the corresponding section. Tyre pressures should be checked when the tyres are "cold" (vehicle stopped for 1 hour or after a journey of less than 6 miles (10 km) at moderate speeds). In the contrary case(hot), add 0.3 bar to the values indicated on the label.
Under-inflation alert

This is indicated by fixed illumination of this warning lamp, an audible signal and, depending on the equipment installed, a message displayed on the screen.
Reduce speed immediately, avoid excessive steering movements and sudden braking.
Stop the vehicle as soon as it is safe to do so.
! The loss of pressure detected does not always cause visible bulging of the tyre. Do not be satisfied with just a visual check.
In the event of a puncture, use the temporary puncture repair kit or the spare wheel (depending on equipment). or if you have a compressor, such as the one in the temporary puncture repair kit, check the pressures of the four tyres when cold, or if it is not possible to make this check immediately, drive carefully at reduced speed.
The alert is kept active until the system is reinitialised.
The under-inflation alert can only be relied on if the reinitialisation of the system has been done with the pressures in the four tyres correctly adjusted.
Driving
Reinitialisation
The system must be reinitialised after any adjustment to the pressures of one or more tyres, and after changing one or more wheels.

Before reinitialising the system, ensure that the pressures of the four tyres are correct for the use of the vehicle and in line with the recommendations on the tyre pressure label. The under-inflation alert can only be relied on if the reinitialisation of the system has been done with the pressures in the four tyres correctly adjusted. The under-inflation detection system does not give a warning if a pressure is incorrect at the time of reinitialisation.
Without touch screen

With the ignition on and the vehicle stationary, press this button for about 3 seconds then release it, an audible signal confirms the reinitialisation.
With touch screen
Initialisation of the system is done with the ignition on and the vehicle stationary.
MENU
The guide-me-home lighting can be configured in the menu Driving / Vehicle.

! The new pressure parameters saved are treated as reference values by the system.

Snow chains
The system does not have to be reinitialised after fitting or removing snow chains.
Operating fault


The flashing and then fixed illumination of the under-inflation warning lamp accompanied by illumination of the Service warning lamp indicates a fault with the system.
In this case, under-inflation monitoring of the tyres is no longer assured. Have the system checked by a PEUGEOT dealer or a qualified workshop.

After carrying out any work on the system, the pressures of the four tyres must be checked and the system reinitialised.

PEUGEOT & TOTAL A PARTNERSHIP FOR PERFORMANCE!
The PEUGEOT TOTAL team knows how to push back the limits of performance to win victories in the most difficult conditions, as confirmed by the first three places achieved in 2017.
To obtain these exceptional results, the PEUGEOT Sport teams chose TOTAL QUARTZ for the PEUGEOT 3008 DKR, a high-tech lubricant that protects the engine in the most severe conditions.
TOTAL QUARTZ protects your engine against the effects of time.
TOTAL QUARTZ Ineo First is an ultra-high performance lubricant, the result of collaboration between Peugeot and Total's R&D teams. Specially formulated for Peugeot engines, its innovative technology significantly reduces CO2 emissions and keeps your engine clean.
Practical information
Fuel tank
Capacity of the tank:
- approximately 50 litres (petrol engines).
- approximately 50 litres (Diesel engines).
- approximately 45 litres (Diesel BlueHDi engines).
Low fuel level

When the low fuel level is reached this warning lamp comes on in the instrument panel. There remains approximately 5 litres of fuel in the tank. When the warning lamp flashes, there is very little fuel left.
Refuel as soon as possible to avoid running out.
For more information on Running out of fuel (Diesel), refer to the associated section.

With Stop & Start, never refuel with the system in STOP mode; you must switch off the ignition with the key.
Refuelling
A label on the inside of the fuel filler flap reminds you of the type of fuel to use, depending on your engine type.
Additions of fuel must be of at least 5 litres, in order to be registered by the fuel gauge.
To refuel in complete safety:
You must switch off the engine.

Open the fuel filler flap 1.
Insert the key in the cap 2, then turn it to the left.

Remove the cap and hook it onto the clip located on the inside of the flap 3.
Fill up the tank but do not continue after the 3 rd cut-off of the nozzle; this could cause malfunctions.
When you have finished filling the tank:
Refit the filler cap.
Turn the key to the right, then remove it from the cap.
Close the fuel filler flap.
The key cannot be removed from the lock until the cap is refitted.
Opening the filler cap may result in an inrush of air. This is entirely normal and results from the sealing of the fuel system.
! If you have added the wrong fuel for your vehicle, the fuel tank must be drained and filled with the correct fuel before starting the engine.
Fuel cut-off
Your vehicle is equipped with a safety device which cuts off the fuel supply in the event of a collision.
Misfuel prevention (Diesel)
(Depending on the country of sale.) Mechanical device which prevents filling the tank of a Diesel vehicle with petrol. It helps avoid the risk of engine damage that can result from filling with the wrong fuel.
Operation
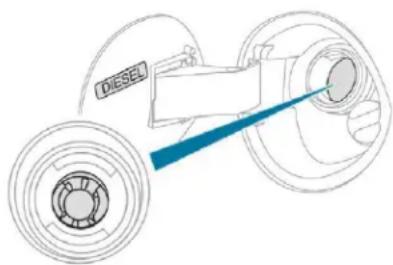
When a petrol filler nozzle is introduced into the fuel filler neck of a Diesel vehicle, it comes into contact with the flap. The system remains closed and prevents filling.
Do not continue trying but introduce a Diesel filler nozzle instead.
It is still possible to use a fuel can to fill the tank.
To ensure a good flow of fuel, do not place the nozzle of the fuel can in direct contact with the flap of the misfuel prevention device and pour slowly.
i Travelling abroad
As Diesel fuel pump nozzles may be different in other countries, the presence of the misfuel prevention device may make refuelling impossible.
Not all Diesel vehicles are fitted with misfuel protection, so before travelling abroad, we recommend that you check with the PEUGEOT dealer network, whether your vehicle is suitable for the fuel pumps in the country in which you intend to travel.
Practical information
Compatibility of fuels
Fuel used for petrol engines
The petrol engines are compatible with biofuels that conform to current and future European standards and which can be obtained from filling stations:

Petrol that meets standard EN228 mixed with a biofuel that meets standard EN15376.

The only petrol additives authorised for use are those that meet the B715001 standard.
Fuel used for Diesel engines
The Diesel engines are compatible with biofuels that conform to current and future European standards and which can be obtained from filling stations.




Diesel fuel that meets standard EN590 mixed with a biofuel that meets standard EN14214 (possibly containing up to 7% Fatty Acid Methyl Ester),

Diesel fuel that meets standard EN16734 mixed with a biofuel that meets standard EN14214 (possibly containing up to 10% Fatty Acid Methyl Ester),

Paraffinic Diesel fuel that meets standard EN15940 mixed with a biofuel that meets standard EN14214 (possibly containing up to 7% Fatty Acid Methyl Ester).

The use of B20 or B30 fuel that meets the standard EN16709 is possible with your Diesel engine. However, this use, even occasional, requires strict application of the

special servicing conditions referred to as "Arduous conditions".

The use of any other type of (bio)fuel (vegetable or animal oils, pure or diluted, domestic fuel, etc.) is strictly prohibited (risk of damage to the engine and fuel system).

The only Diesel additives authorised for use are those that meet the B715000 standard.
Diesel at low temperature
At temperatures below 0° C ( +32° F), the formation of paraffins in summer-type Diesel fuels could entail an abnormal operation of the fuel supply circuit. To avoid this, we recommend using winter-type Diesel fuel and keeping the fuel tank more than 50% full. If, despite this, at temperatures below -15° C ( +5° F) the engine has problems starting, just leave the vehicle in a garage or heated workshop for a little while.
For more information, contact a PEUGEOT dealer or a qualified workshop.
Travelling abroad
Certain fuels could damage the engine of your vehicle. In certain countries, the use of a particular fuel may be required (specific octane rating, specific trade name, etc.) to ensure correct operation of the engine. For any additional information, contact a dealer.
Snow chains
In wintry conditions, snow chains improve traction as well as the behaviour of the vehicle when braking.

! The snow chains must be fitted only to the front wheels. They must never be fitted to "space-saver" type spare wheels.
Take account of the legislation in force in your country on the use of snow chains and the maximum running speed authorised.
Installation tips
If you have to fit the chains during a journey, stop the vehicle on a flat surface on the side of the road.
Apply the parking brake and if necessary put wheel chocks against the wheels to prevent your vehicle from sliding.
Fit the chains following the instructions provided by the manufacturer.
Move off gently and drive for a few seconds, without exceeding 30 mph (50 km/h).
Stop your vehicle and check that the snow chains are correctly tightened.
It is strongly recommended that before you leave, you practise fitting the snow chains on a level and dry surface.
Avoid driving with snow chains on roads that have been cleared of snow, to avoid damaging your vehicle's tyres and the road surface. If your vehicle is fitted with alloy wheels, check that no part of the chain or its fixings is in contact with the wheel rim.
Practical information
Only use the chains designed to be fitted to the type of wheels fitted to your vehicle:
| Original tyre size Maximum link size | |
| 185/65 R15 | 9 mm |
| 195/55 R16 | |
| 205/45 R17 7 mm | |
For more information on snow chains, contact a PEUGEOT dealer or a qualified workshop.
Towing a trailer

Your vehicle is primarily designed for transporting people and luggage, but it may also be used for towing a trailer.
We recommend the use of genuine PEUGEOT towbars and their harnesses that have been tested and approved from the design stage of your vehicle, and that the fitting of the towbar is entrusted to a PEUGEOT dealer or a qualified workshop. If the towbar is not fitted by a PEUGEOT dealer, it must still be fitted in accordance with the vehicle manufacturer's instructions.
! Driving with a trailer places greater demands on the towing vehicle and the driver must take particular care. For more information on Driving advice, particularly when towing, refer to the corresponding section.
Please respect the maximum authorised towable weights, indicated on the registration certificate or in your vehicle's technical data.
For more information on Weights (and the towed loads which apply to your vehicle) refer to the corresponding section.
! Observe the legislation in force in the country in which you are driving.
Load reduction mode
System which manages the use of certain functions according to the level of charge remaining in the battery.
When the vehicle is being driven, the load reduction function temporarily deactivates certain functions, such as air conditioning, heated rear screen, etc.
The deactivated functions are reactivated automatically as soon as conditions permit.
Energy economy mode
System which manages the duration of use of certain functions to conserve a sufficient level of charge in the battery.
After the engine has stopped, you can still use functions such as the audio and telematics system, windscreen wipers, dipped beam headlamps, courtesy lamps, etc. for a maximum combined duration of about forty minutes.
Switching to this mode
A message appears in the instrument panel screen indicating that the vehicle has switched to economy mode and the active functions are put on standby.
If a telephone call is being made at this time, it will be maintained for around 10 minutes with the Bluetooth hands-free system of your audio system.
Exiting the mode
These functions will be automatically restored the next time the vehicle is used.
In order to restore the use of these functions immediately, start the engine and let it run:
- for less than ten minutes, to use the equipment for approximately five minutes,
- for more than ten minutes, to use the equipment for up to approximately thirty minutes.
Let the engine run for the duration specified to ensure that the battery charge is sufficient.
Do not repeatedly and continuously restart the engine in order to charge the battery.
A flat battery prevents the engine from starting. For more information on the 12 V battery, refer to the corresponding section.
Practical information
Changing a window wiper
This position permits release of the windscreen wiper blades.
It is used for cleaning or replacing the wiper blades. It can also be useful, in winter, to release the wiper blades from the windscreen.
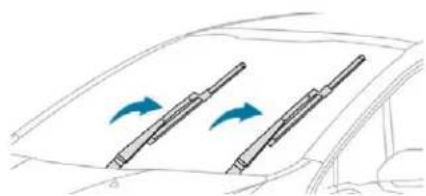
To move the wiper blades to the vertical position:
Operate the wiper stalk within one minute after switching off the ignition to position the wiper blades vertically on the windscreen.
To return them to the park position:
Switch on the ignition and operate the wiper stalk.
Removing a wiper blade
Lift the corresponding wiper arm.
Unclip and remove the wiper blade.
Fitting the new wiper blade
Put the corresponding new wiper blade in place and clip it.
Fold down the wiper arm carefully.
To maintain the effectiveness of the wiper blades, it is advisable to:
- handle them with care.
- clean them regularly using soapy water,
- avoid using them to retain cardboard on the windscreen.
- replace them at the first signs of wear.
Fitting roof bars

When fitting transverse roof bars, take care to position them correctly on the retaining pins located in the door apertures.
For more information, contact a PEUGEOT dealer or a qualified workshop. If the height exceeds 40 cm, adapt the speed of the vehicle to the profile of the road to avoid damaging the roof bars and the vehicle's anchorage points. For transporting objects which are longer than the vehicle, refer to local legislation.
As a safety measure and to avoid damaging the roof, it is essential to use the transverse bars approved for your vehicle.
Observe the instructions on fitting and use contained in the guide supplied with the roof bars.
! Recommendations
Distribute the load uniformly, taking care to avoid overloading one of the sides.
Arrange the heaviest part of the load as close as possible to the roof.
Lash the load securely.
Drive gently: the vehicle will be more susceptible to the effects of side winds and the stability of the vehicle may be affected.
On a long journey, check the security of the load at every stop.
Remove the roof bars once they are no longer needed.
Bonnet


Before doing anything under the bonnet, deactivate the Stop & Start system to avoid the risk of injury related to an automatic change to START mode.

The location of the interior bonnet release lever prevents opening of the bonnet when the left-hand front door is shut.

When the engine is hot, handle the exterior safety catch and the stay with care (risk of burns), using the protected area. When the bonnet is open, take care not to damage the safety catch. Do not open the bonnet under very windy conditions.
! The cooling fan may start after switching off the engine: take care with articles and clothing that might be caught by the fan blades.
Because of the presence of electrical equipment under the bonnet, it is recommended that exposure to water (rain, washing, etc.) be limited.
Opening
Open the left-hand front door.


7
Pull the release lever A, located at the bottom of the door aperture, towards you.
Practical information

- Lift the safety catch B and raise the bonnet.

- Unclip the stay C from its housing and place it in the support slot to hold the bonnet open.
Closing
Take the stay out of the support slot.
Clip the stay in its housing.

Lower the bonnet and release it near the end of its travel.
Pull on the bonnet to check that it is fully latched.
Engines
Petrol

Diesel

Practical information
These engines are examples provided as a guide.
The positions of the following elements may change:
- Air filter.
- Engine oil dipstick.
- Engine oil filler cap.
-
Priming pump.
-
Screenwash fluid reservoir.
- Engine coolant reservoir.
- Brake fluid tank.
- Battery.
- Fusebox.
- Air filter.
- Engine oil dipstick.
- Engine oil filler cap.
- Priming pump*.
• Depending on engine.
! The Diesel circuit is under very high pressure. All work on this circuit must be carried out only by a PEUGEOT dealer or a qualified workshop.
Checking levels
Check all of these levels regularly, in line with the manufacturer's service schedule. Top them up if necessary, unless otherwise indicated. If a level drops significantly, have the corresponding system checked by a PEUGEOT dealer or a qualified workshop.
! The fluid must comply with the manufacturer's recommendations and with the vehicle's engine.
Take care when working under the bonnet, as certain areas of the engine may be extremely hot (risk of burns) and the cooling fan could start at any time (even with the ignition off).
Used products
Avoid prolonged contact of used oil or fluids with the skin. Most of these fluids are harmful to health or indeed very corrosive.

Do not discard used oil or fluids into sewers or onto the ground.
Take used oil to a PEUGEOT dealer or a qualified workshop and dispose of it in the containers reserved for this purpose.
Engine oil level

The check is carried out either when the ignition is switched on using the oil level indicator in the instrument panel for vehicles equipped with an electric gauge, or using the dipstick.
To ensure that the reading is correct, your vehicle must be parked on a level surface with the engine stopped for more than 30 minutes.
It is normal to top up the oil level between two services (or oil changes). PEUGEOT recommends that you check the level, and top up if necessary, every 3,000 miles (5,000 km).
Checking using the dipstick
The location of the dipstick is shown in the corresponding underbonnet layout view.
Take the dipstick by its coloured grip and pull it out completely.
Wipe the end of the dipstick using a clean non-fluffy cloth.
Refit the dipstick and push fully down, then pull it out again to make the visual check: the correct level is between marks A and B.

If you find that the level is above the A mark or below the B mark, do not start the engine.
- If the level is above the MAX mark (risk of damage to the engine), contact a PEUGEOT dealer or a qualified workshop.
- If the level is below the MIN mark, you must top up the engine oil.
Oil grade
Before topping up the oil or changing the oil, check that the oil is the correct grade for your engine and conforms to the manufacturer's recommendations.
Topping up the engine oil level
The location of the oil filler cap is shown in the corresponding underbonnet layout view.
Unscrew the oil filler cap to access the filler opening.
Add oil in small quantities, avoiding any spills on engine components (risk of fire).
Wait a few minutes before checking the level again using the dipstick.
Add more oil if necessary.
After checking the level, carefully refit the oil filler cap and the dipstick in its tube.

After topping up the oil, the check when switching on the ignition with the oil level indicator in the instrument panel is not valid during the 30 minutes after topping up.
Engine oil change
Refer to the manufacturer's service schedule for details of the interval for this operation. In order to maintain the reliability of the engine and emissions control system, never use additives in the engine oil.
Brake fluid level

The brake fluid level should be close to the "MAX" mark. If it is not, check the brake pad wear.
Changing the coolant
Refer to the manufacturer's service schedule for details of the interval for this operation.
Fluid specification
This fluid must conform to the manufacturer's recommendations.
Coolant level

Check the coolant level regularly. It is normal to top up the fluid between two services.
The check and top-up must only be done with the engine cold.
A low coolant level presents a risk of serious damage to your engine.
The coolant level should be close to the "MAX" mark but should never exceed it.
If the level is close to or below the "MIN" mark, it is essential to top up.
When the engine is hot, the temperature of the coolant is regulated by the fan.
In addition, as the cooling system is pressurised, wait at least one hour after switching off the engine before carrying out any work.
To avoid the risk of scalding when you need to top up in an emergency, place a cloth around the cap and unscrew the cap by two turns to allow the pressure to drop.
Once the pressure has dropped, remove the cap and top up to the required level.
! The cooling fan may start after switching off the engine: take care with articles and clothing that might be caught by the fan blades.
Fluid specification
This fluid must conform to the manufacturer's recommendations.
Practical information
Screenwash fluid level

Top up to the required level when necessary.
Fluid specification
The screenwash fluid must be topped up with a ready for use mix.
In winter (temperatures below zero), a liquid with antifreeze must be used that is appropriate for the prevailing conditions, in order to preserve the elements of the system (pump, tank, ducts, etc.).
Filling with pure water is prohibited under all circumstances (risk of freezing, limestone deposits, etc.).
Diesel fuel additive level (Diesel with particle filter)

The additive reservoir low level is indicated by fixed illumination of this warning lamp, accompanied by an audible signal and a message that the particle filter additive level is too low.
Topping up
The reservoir must be topped up without delay by a PEUGEOT dealer or a qualified workshop.
Level of AdBlue
An alert is triggered once the reserve level is reached.
To avoid the vehicle being immobilised as per regulations, you must top up with AdBlue.
For more information on AdBlue® and the SCR system, and in particular topping it up, refer to the corresponding section.
Checks
Unless otherwise indicated, check these components in accordance with the manufacturer's service schedule and according to your engine.
Otherwise, have them checked by a PEUGEOT dealer or a qualified workshop.
12 V battery

The battery does not require any maintenance.
However, check regularly that the terminals are correctly tightened (versions without quick release terminals) and that the connections are clean.
For more information and the precautions to take before starting work on the 12 V battery, refer to the corresponding section.
! Versions equipped with Stop & Start are fitted with a 12 V lead-acid battery of specific technology and specification. Its replacement should be carried out only by a PEUGEOT dealer or a qualified workshop.
Air filter and passenger compartment filter

Refer to the manufacturer's service schedule for details of the replacement intervals for these components.
Depending on the environment (e.g. dusty atmosphere) and the use of the vehicle (e.g. city driving), replace them twice as often if necessary.
A clogged passenger compartment filter may have an adverse effect on the performance of the air conditioning system and generate undesirable odours.
Oil filter

Change the oil filter each time the engine oil is changed. Refer to the manufacturer's service schedule for details of the replacement interval for this component.
Particle filter (Diesel)

The start of saturation of the particle filter is indicated by the constant illumination of this warning lamp accompanied by an alert message.
As soon as the traffic conditions permit, regenerate the filter by driving at a speed of at least 40 mph (60 km/h) until the warning lamp goes off.
If the warning lamp stays on, this indicates a low additive level.
For more information on Checking the levels and particularly on the level of Diesel additive, refer to the corresponding section.
On a new vehicle, the first particle filter regeneration operations may be accompanied by a "burning" smell, which is perfectly normal.
Following prolonged operation of the vehicle at very low speed or at idle, you may, in exceptional circumstances, notice the emission of water vapour at the exhaust on acceleration. This does not affect the behaviour of the vehicle or the environment.
Manual gearbox

The gearbox does not require any maintenance (no oil change).
Electronic gearbox

The gearbox does not require any maintenance (no oil change).
Automatic gearbox

The gearbox does not require any maintenance (no oil change).
Brake pads

Brake wear depends on the style of driving, particularly in the case of vehicles used in town, over short distances. It may be necessary to have the condition of the brakes checked, even between vehicle services.
Unless there is a leak in the circuit, a drop in the brake fluid level indicates that the brake pads are worn.
Brake disc wear

For information on checking brake disc wear, contact a PEUGEOT or a qualified workshop.
Practical information
Parking brake

If excessive travel or a loss of effectiveness of this system is noticed, the parking brake must be checked, even between two services.
Checking this system must be done by a PEUGEOT dealer or a qualified workshop.
Only use products recommended by PEUGEOT or products of equivalent quality and specification. In order to optimise the operation of units as important as those in the braking system, PEUGEOT selects and offers very specific products. After washing the vehicle, dampness, or in wintry conditions, ice can form on the brake discs and pads: braking efficiency may be reduced. Make light brake applications to dry and defrost the brakes.
AdBlue® (BlueHDi engines)

To respect the environment and ensure compliance with the new Euro 6 standard, without adversely affecting the performance or fuel consumption of Diesel engines, PEUGEOT has taken the decision to equip its vehicles with system that associates SCR (Selective Catalytic Reduction) with a particle filter (DPF) for the treatment of exhaust gases.
SCR system
Using a liquid called AdBlue ® that contains urea, a catalytic converter turns up to 85% of nitrogen oxide (NOx) into nitrogen and water, which are harmless to health and the environment.
The AdBlue ® is contained in a special tank with a capacity of around 17 litres. An alert system is triggered automatically once the reserve level is reached: you can then drive for a further 1,500 miles (2,400 km) before the tank is emptied completely.
Once the AdBlue® tank is empty, a system required by regulations prevents starting of the engine. If the SCR system is defective, the level of emissions from your vehicle will no longer meet the Euro 6 standard: your vehicle becomes polluting. In the event of a confirmed fault with the SCR system, you must go to a PEUGEOT dealer or a qualified workshop as soon as possible: after a running distance of 685 miles (1,100 km), a system will be triggered automatically to prevent engine starting. In either case, a range indicator gives you the distance you can travel before the vehicle is immobilised. For more information on the warning lamps and the associated alerts, refer to the corresponding section.

Freezing of the AdBlue ®
AdBlue ® freezes at temperatures below around -11°C.
The SCR system includes a heater for the AdBlue ® tank, allowing you to continue driving in all weather conditions.
Precautions for use
AdBlue ® is a urea-based solution. This liquid is non-flammable, colourless and odourless (store in a cool place).
In the event of contact with the skin, wash the affected area with soap and running water. In the event of contact with the eyes, immediately rinse the eyes with large amounts of water or with an eye wash solution for at least
15 minutes. If a burning sensation or irritation persists, get medical attention.
If swallowed, immediately wash out the mouth with clean water and then drink plenty of water. In certain conditions (high ambient
temperature, for example), the risk of releasing ammonia cannot be discounted: do not inhale the fluid. Ammonia vapour has an irritant effect on mucous membranes (eyes, nose and throat).

Keep AdBlue ® out of the reach of children, in its original container or bottle. Never transfer AdBlue ® to another container: it would lose its purity.
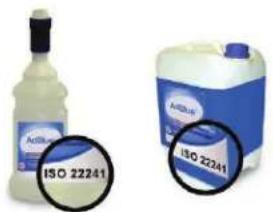
Use only AdBlue 20 fluid that meets the ISO 22241 standard.

Never dilute AdBlue ® with water. Never pour AdBlue ® into the Diesel fuel tank.
Containers are available from a PEUGEOT dealer or a qualified workshop.

Never top up from an AdBlue ® dispenser reserved for heavy goods vehicles.
Recommendations on storage
AdBlue® freezes below around -11°C and deteriorates above 25°C. It is recommended that bottles or containers be stored in a cool place and protected from direct sunlight.
Under these conditions, the fluid can be kept for at least a year.
If the additive has frozen, it can be used once it has completely thawed out.

Never store containers or bottles of AdBlue® in your vehicle.

Do not dispose of AdBlue ® bottles or containers in the household waste. Place them in a container provided for this purpose or take them to your dealer.
Topping up with AdBlue®
If you wish to top up yourself, please read the following warnings carefully.
In cold weather, before performing the top-up ensure that the temperature is above -11°C. Otherwise the AdBlue® may be frozen and so cannot be poured into the tank.
Park your vehicle in a warmer area for a few hours to allow the top-up to be carried out.
Before topping up, ensure that the vehicle is parked on a flat and level surface.
Switch off the ignition to stop the engine and remove the key from the switch.
Access through the boot (1.6 litre BlueHDi Euro 6.1)
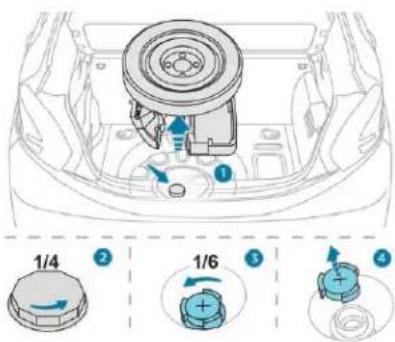
- Raise the boot carpet then, depending on equipment, lift out the spare wheel and/or the storage box.
Without pressing, turn the black cap a quarter turn anti-clockwise and lift it off.
Turn the blue cap a 6th of a turn anti-clockwise.
Lift off the cap.
Access through the fuel filler flap (1.5 litre BlueHDi Euro 6.2)


With the vehicle unlocked, open the fuel filler flap; the blue filler cap for the AdBlue ® tank is located to the right of the black fuel filler cap.
Turn the blue cap a 6 th of a turn anticlockwise.
Remove the blue cap.
Refilling

Obtain an AdBlue ® container or bottle. After first checking the use-by date, read the instructions on the label carefully before pouring the contents of the container or bottle into your vehicle's AdBlue ® tank.
Important: if your vehicle's AdBlue® tank is completely empty – which is confirmed by the alert messages and the impossibility of starting the engine – you must add at least 4 litres and no more than 10 litres.
After emptying the container or bottle, wipe away any spillage around the tank filler using a damp cloth.
! If any fluid is spilt or splashed, wash immediately with cold water or wipe with a damp cloth.
If the fluid has crystallised, clean it off using a sponge and hot water.
After refilling
Through the boot (1.6 litre BlueHDi Euro 6.1)
Refit the blue cap to the tank filler and turn it a 6th of a turn clockwise, to its stop.
Refit the black cap and turn it a quarter of a turn clockwise without pressing. Check that the cap indicator lamp is facing the support indicator lamp.
Depending on equipment, return the spare wheel and/or the storage box to the bottom of the boot.
Refit the boot carpet and close the tailgate.
Through the fuel filler flap (1.5 litre BlueHDi Euro 6.2)
Refit the blue cap to the tank filler and turn it a 6th of a turn clockwise, to its stop.
Close the fuel filler flap.
Practical information
Advice on care
General recommendations on the care and maintenance of your vehicle are given in the Warranty and Maintenance Record.
Matt paint
If your vehicle is coated with a clear, matt varnish, it is essential that you take the following instructions into account to avoid damaging the paint, following an inappropriate treatment. These instructions are also valid for the alloy wheels coated in a clear, matt varnish.
Textured paint
The textured paint reacts to light with variations of appearance and finish that emphasise the car's lines and form. This paint coating has particles that remain visible and create a unique satin relief effect. Its lightly granulated texture gives it a surprising feel.
! Observe the following recommendations to avoid damaging the paint finish:
- Never clean the vehicle without water.
- Never clean your vehicle in an automatic roller-brush car wash.
- Never select the program with hot wax finish.
- Never use a high pressure jet washer fitted with a brush as this may scratch the paint surface.
- Never polish the body or the alloy wheels. This makes the paint bright.
- Do not use paint restorers, abrasive or polishing products, or bright paint preservers (wax polish, for example). These products are only suitable for bright finishes. Using them on vehicles finished with matt paint seriously damages the surface finish of the vehicle, resulting in particular in the appearance of irreversible bright or stained areas.
On the other hand:
- Choose a high pressure wash, or at least a high-flow water jet.
- Rinse the vehicle with demineralised water.
- Gently wipe the body with a clean microfibre cloth.
- Carefully wipe off any fuel spilt on the body using a soft cloth, then allow to dry.
- Clean off minor marks (for example, finger marks), using the maintenance product recommended by PEUGEOT.
It is always preferable to have paint repairs carried out by a PEUGEOT dealer or a qualified workshop.
Warning triangle
Before leaving your vehicle to set up and install the triangle, switch on the hazard warning lamps and put on your high visibility vest.
Refer to the manufacturer's instructions on using the triangle.
Placing the triangle on the road

Place the triangle behind the vehicle, as required by the legislation in force in your country.
The triangle is available as an accessory; contact a PEUGEOT dealer or a qualified workshop.
Running out of fuel (Diesel)
On vehicles fitted with Diesel engines, the fuel system must be primed if you run out of fuel. For all versions other than BlueHDi, refer to the corresponding engine compartment view.
For more information on Diesel misfuel prevention, refer to the corresponding section.
! If the engine does not start first time, do not keep trying but start the procedure again from the beginning.
1.6 BlueHDi engine (Euro 6.1)
Fill the fuel tank with at least 5 litres of Diesel.
Switch on the ignition (without starting the engine).
Wait around 6 seconds and switch off the ignition.
Repeat the operation 10 times.
Operate the starter to run the engine.
1.5 BlueHDi (Euro 6.2) engine
Fill the fuel tank with at least 5 litres of Diesel.
Switch on the ignition (without starting the engine).
Wait around 1 minute and switch off the ignition.
Operate the starter to run the engine.
If the engine does not start, repeat the procedure.
Other engines
Fill the fuel tank with at least five litres of Diesel.
Open the bonnet.
If necessary, unclip the cover to access the priming pump.

Operate the priming pump repeatedly until resistance is felt (there may be resistance at the first press).
In the event of a breakdown
Operate the starter to start the engine (if the engine does not start at the first attempt, wait around 15 seconds before trying again).
If the engine does not start after a few attempts, operate the priming pump again then start the engine.
Put the cover in place and clip it in.
Close the bonnet.
Temporary puncture repair kit
The temporary puncture repair kit consists of a compressor and a sealant cartridge, it allows the temporary repair of a tyre so that you can drive to the nearest garage. It is designed to repair most punctures which could affect the tyre, located on the tyre tread or shoulder.
You can also use the compressor, without injecting sealant, to check and occasionally adjust the tyre pressures.
Access to the kit

This kit is installed in the under floor storage, under the boot floor.
The vehicle's electric system allows the connection of the compressor for long enough to inflate a tyre after a puncture repair.
Kit contents

- 12 V compressor, with built-in pressure gauge.
- Bottle of sealant, with built-in hose.
- Speed limit sticker.
! The speed limit sticker must be secured to the interior of the vehicle in the driver's field of vision, to remind you that a wheel is in temporary use.
In the event of a breakdown
Do not exceed a speed of 50 mph (80 km/h) when driving with a tyre repaired using this type of kit.
Repair procedure
Switch off the ignition.
Secure the speed limit sticker inside the vehicle.
- Uncoil the pipe stowed under the compressor.

Connect the pipe from the compressor to the bottle of sealant.
Avoid removing any foreign bodies which have penetrated into the tyre.

Turn the sealant bottle and secure it in the cut-out provided on the compressor.
Remove the valve cap from the tyre to be repaired, and place it in a clean area.
Turn the sealant bottle and secure it in the cut-out provided on the compressor. Remove the valve cap from the tyre to be repaired, and place it in a clean area.

Connect the hose from the bottle of sealant to the valve of the tyre to be repaired and tighten firmly.
Check that the compressor switch is at the "O" position.
- Uncoil fully the electric cable, stowed under the compressor.

Connect the compressor's electrical connector to the vehicle's 12 V socket.
Switch on the ignition.
In the event of a breakdown
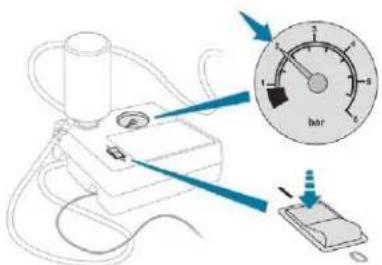
Start the compressor by turning the switch to the "I" position until the pressure of the tyre reaches 2.0 bars. The sealant product is injected under pressure into the tyre; do not disconnect the hose of the valve during this operation (risk of blowback).
If after around 5 to 7 minutes the pressure of 2 bars is not attained, this indicates that the tyre is not repairable; contact a PEUGEOT dealer or a qualified workshop for assistance.
Place the switch in the "O" position.
Remove the kit.

- Drive immediately for approximately three miles (five kilometres), at reduced speed (between 12 and 37 mph (20 and 60 km/h)), to plug the puncture.
- Stop to check the repair and the tyre pressure using the kit.
Take care, the sealant product is harmful if swallowed and causes irritation to the eyes. Keep this product out of the reach of children. The use-by date is marked on the bottle. After use, do not discard the bottle by the roadside, take it to a PEUGEOT dealer or an authorised waste disposal site. Do not forget to obtain a new bottle of sealant, available from a PEUGEOT dealer or a qualified workshop.
Checking / adjusting tyre pressures
You can also use the compressor, without injecting sealant, to check and, if necessary, adjust the tyre pressures
Remove the valve cap from the tyre and place it in a clean area.
- Uncoil the pipe stowed under the compressor.
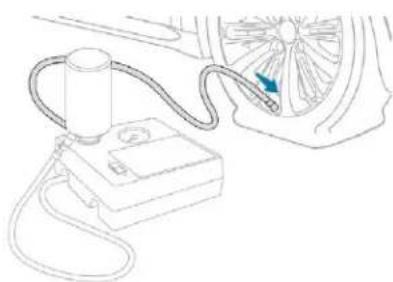
Screw the pipe onto the valve and tighten firmly.
In the event of a breakdown
Check that the compressor switch is at the "O" position.
Uncoil fully the electric cable, stowed under the compressor.

Connect the compressor's electric plug to the vehicle's 12 V socket.
Switch on the ignition.
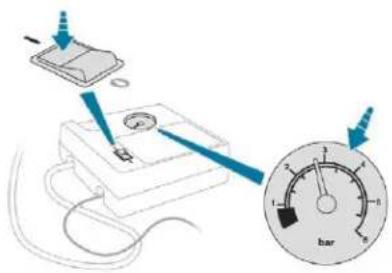
Switch on the compressor by moving the switch to the position "I" and adjust the pressure as shown on the vehicle tyre pressure label. To deflate: press the black button on the compressor hose by the valve connector.
Once the correct pressure is reached, put the switch to the "O" position.
Remove the kit then stow it.
Should the pressure of one or more tyres be adjusted, it is necessary to reinitialise the under-inflation detection system. For more information on Under-inflation detection, refer to the corresponding section.


The tyre inflation pressures are given on this label.
In the event of a breakdown
Spare wheel
Procedure for changing a damaged wheel with the spare wheel using the tools provided with the vehicle.
Access to the tools
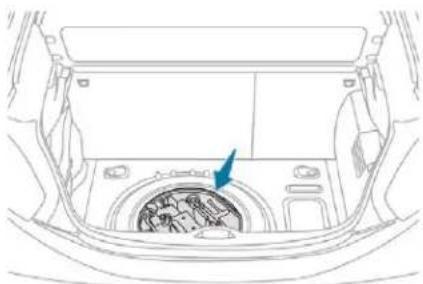
The tools are installed in the boot under the floor.
To gain access:
open the boot,
lift the floor and remove it,
remove the carrier box containing the tools.
List of tools

- Wheelbrace.
For removing the wheel trim and the wheel fastening bolts.
- Jack with integrated crank.
Used to raise the vehicle.
- "Bolt cover" tool.
For removing the bolt protectors (covers) on alloy wheels.
- Socket for the security bolts.
For adapting the wheelbrace to the special "security" bolts.
- Towing eye.
For more information on Towing, refer to the associated section.

All of these tools are specific to your vehicle and may vary depending on the level of equipment.
Do not use them for any other purposes.

The jack must only be used to change a wheel with a damaged or punctured tyre. Do not use any jack other than the one supplied with this vehicle.
If the vehicle does not have its original jack, contact a PEUGEOT dealer or a qualified workshop to obtain the correct jack for it.
The jack meets European standards, as defined in the Machinery Directive 2006/42/EC.
The jack does not require any maintenance.

Wheel with hub cap
When refitting the wheel, refit the hub cap starting by placing its notch facing the valve and press around its edge with the palm of your hand.
Access to the spare wheel

The spare wheel is installed in the boot under the floor.
According to country, the spare wheel may be steel, alloy or of the "space-saver" type.
Taking out the wheel

- Unscrew the central nut.
In the event of a breakdown
Remove the fixing parts (nut and bolt).
- Raise the spare wheel towards you from the rear.
Take the wheel out of the boot.
Putting the wheel back in place
Put the wheel back in its housing.

Give the bolt a few turns to loosen it.
Position the fixing parts (nut and bolt) in the middle of the wheel.
Tighten fully until the central nut clicks, to retain the wheel correctly.
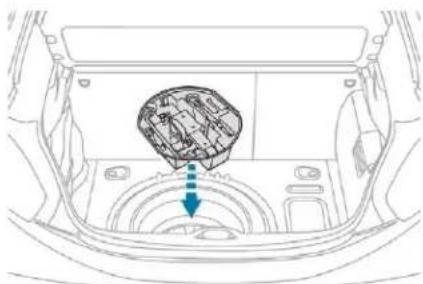
Put the box back in place in the centre of the wheel and clip it.
If there is no wheel in the well, the fastening device (nut and bolt) cannot be refitted.
In the event of a breakdown
Removing a wheel

Parking the vehicle
Park the vehicle where it does not block traffic: the ground must be level, stable and non-slippery.
Apply the parking brake. Switch the ignition off.
With a manual gearbox, engage first gear to block the wheels.
With an electronic gearbox, place the lever in position R to block the wheels.
With an automatic gearbox, place the lever in position P to block the wheels.
Check for fixed illumination of the parking brake warning lamps in the instrument panel.
Make absolutely certain that all the occupants have left the vehicle and are waiting in a safe area.
Never go underneath a vehicle raised using a jack; use an axle stand.
List of operations
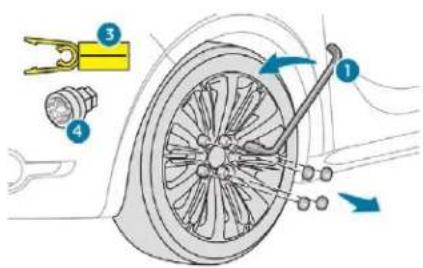

Remove the bolt cover from each of the bolts using the tool 3 (depending on equipment).
Fit the security socket 4 on the wheelbrace 1 to slacken the security bolt (if fitted).
Slacken the other bolts using wheelbrace 1 only.

Place the foot of jack 2 on the ground and ensure that it is directly below the front A or rear B jacking point provided on the underbody, whichever is closest to the wheel to be changed.
Ensure that the jack is stable on a surface that is not loose or slippery and positioned only at jacking points A or B under the vehicle, making sure that the jack head is centred at the contact point on the vehicle. Otherwise, there is a risk of damage to the vehicle and/or the jack collapsing or slipping – Risk of injury!
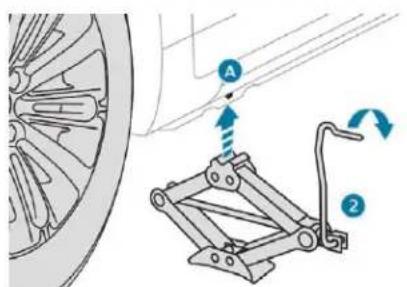


Remove the bolts and store them in a clean place.
Remove the wheel.
Fitting a wheel

Fitting a steel or "space-saver" spare wheel
If your vehicle is fitted with alloy wheels, when tightening the bolts on fitting it is normal to notice that the washers do not come into contact with the steel or "space-saver" spare wheel. The wheel is secured by the conical contact of each bolt.
Extend the jack 2 until its head comes into contact with the jacking point A or B, whichever is used; the contact area A or B on the vehicle must be correctly inserted into the central part of the head of the jack.
Raise the vehicle until there is sufficient space between the wheel and the ground to admit the spare (not punctured) wheel easily.
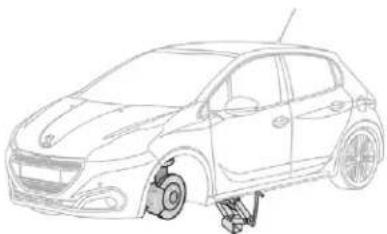
In the event of a breakdown
List of operations

Put the wheel in place on the hub.
Screw in the bolts by hand to the stop.
Pre-tighten the security bolt using the wheelbrace 1 fitted with the security socket 4 (if your vehicle has them).
Pre-tighten the other bolts using the wheelbrace 1 only.
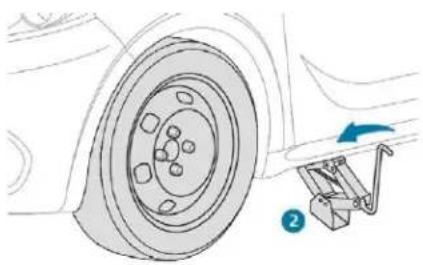
Lower the vehicle again fully.
Fold the jack 2 and detach it.
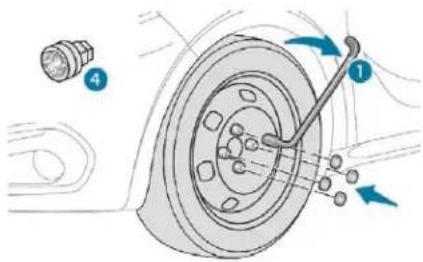
Tighten the security bolt using the wheelbrace 1 fitted with the security socket 4 (if your vehicle has them).
Tighten the other bolts using wheelbrace 1 only.
Refit the bolt covers on each of the bolts (according to equipment).
Store the tools in the box.
After changing a wheel
To store the punctured wheel in the boot correctly, first remove the central cover. If your vehicle has a "standard" 15-inch spare wheel, do not exceed 50 mph (80 km/h).
If your vehicle is fitted with 16 or 17-inch wheels, use the "space-saver" type spare wheel and do not exceed 50 mph (80 km/h).
Visit a PEUGEOT dealer or a qualified workshop as soon as possible to have the tightness of the bolts and the pressure of the spare wheel checked.
Have the punctured tyre examined. After inspection, the technician will advise you on whether the tyre can be repaired or if it must be replaced.
Changing a bulb
! The headlamps have polycarbonate lenses with a protective coating:
do not clean them using a dry or abrasive cloth, nor with a detergent or solvent product,
use a sponge and soapy water or a pH neutral product,
when using a high pressure washer on persistent marks, do not keep the lance directed towards the lamps or their edges for too long, so as not to damage their protective coating and seals.
Changing a bulb must only be done with the ignition off and after the headlamp has been switched off for several minutes – Risk of serious burns!
Do not touch the bulb directly with your fingers, use a lint-free cloth.
It is essential only to use anti-ultraviolet (UV) type bulbs, so as not to damage the headlamp.
Always replace a failed bulb with a new bulb with the same type and specification.
In some weather conditions (e.g. low temperature or humidity), the presence of misting on the internal surface of the glass of the headlamps and rear lamps is normal; it disappears after the lamps have been on for a few minutes.
Front lamps
A. Model with light guide

- Main beam headlamps (H7-55W).
- Dipped beam headlamps (H7-55W).
- Daytime running lamps / sidelamps (light emitting diodes – LEDs).
- Direction Indicators (PWY-24W).
- Front foglamps (directional according to version) (H11-55W).
In the event of a breakdown
B. Model without light guide

- Main beam headlamps (H7-55W).
- Dipped beam headlamps (H7-55W).
- Daytime running lamps / sidelamps (W5-5W).
- Direction indicators (PWY-24W).
- Front foglamps (directional according to version) (H11-55W).
In the event of a breakdown
C. GTi model
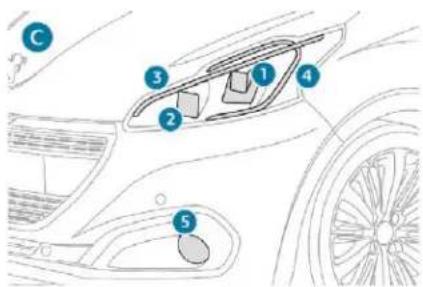
- Main beam headlamps (H7-55W).
- Dipped beam headlamps (H7-55W).
- Daytime running lamps / sidelamps (light emitting diodes – LEDs).
- Direction indicators (light-emitting diodes – LEDs).
- Front foglamps (directional according to version) (H11-55W).
Direction indicators
i Quicker flashing of the direction indicator lamp (left or right) indicates that one of the bulbs on the corresponding side has failed.

Turn the bulb holder a quarter turn and pull it out.
Pull out the bulb and replace it.
To reassemble, proceed in reverse order.
Amber colour bulbs, such as the direction indicators, must be replaced by bulbs with identical colour and specifications. To refit, close the protective cover very carefully to guarantee the leak-tightness of the lamp.
Dipped beam headlamps


Remove the protective cover by pulling on the tab.
7 Disconnect the bulb connector.
Spread the spring to release the bulb (model A).
Pull the bulb out and change it.

To reassemble, carry out these operations in reverse order, positioning the alignment lug at the bottom (model A) or at the top (model B).
Main beam headlamps
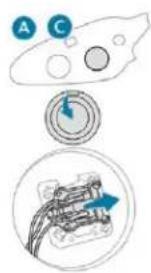
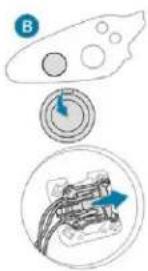
Disconnect the main headlamp connector.
Remove the protective cover by pulling on the tab.
Disconnect the bulb connector.
Pull the bulb out and change it.
Daytime running lamps/sidelamps

Turn the bulb holder a quarter turn and pull it out.
Pull out the bulb and replace it.
To refit, carry out these operations in reverse order.
Daytime running lamps / sidelamps (light emitting diodes – LEDs)

For the replacement of this type of diode lamp, contact a PEUGEOT dealer or a qualified workshop.

To reassemble, carry out these operations in reverse order, positioning the alignment lug at the bottom.
In the event of a breakdown
Foglamps / directional lamps

Access to the front foglamp is through the aperture below the bumper.
127 Disconnect the bulb holder connector by pressing on the top of the tongue.
Extract the bulb holder by pressing on the two clips (top and bottom).
Replace the module.
To refit, carry out these operations in reverse order.
Contact a PEUGEOT dealer or a qualified workshop to obtain the module.
You can also contact a PEUGEOT dealer or a qualified workshop for the replacement of these bulbs.
Integrated direction indicator side repeaters
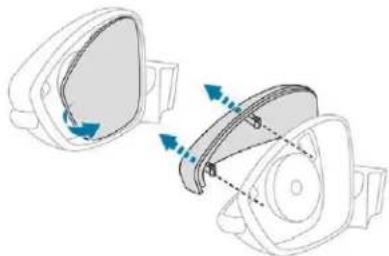
Insert a flat screwdriver between the door mirror glass and its base.
Tilt the screwdriver and use it as a lever to extract the glass.
Unclip the shell of the door mirror by pressing on the two fixing clips.

Press the central tongue and remove the side repeater.
Pull out the bulb holder and replace the faulty bulb.
To refit, carry out these operations in reverse order.
To replace this type of bulb, you can also contact a PEUGEOT dealer or a qualified workshop.
Rear lamps

- Brake lamps (light emitting diodes – LEDs).
- Reversing lamps (P21W).
- Direction indicators (PY21W amber)
- Sidelamps (light emitting diodes – LEDs).
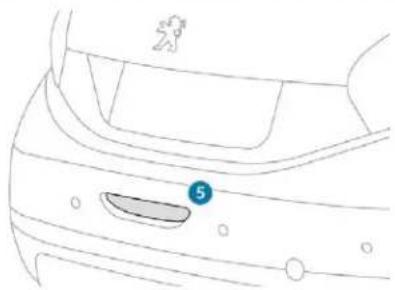
- Foglamp (P21W).
Light-emitting diodes – LEDs

For replacement, contact a PEUGEOT dealer or a qualified workshop.
Reversing lamps and direction indicators
These two bulbs are changed from inside the boot:
Open the boot.

Remove the access grille from the corresponding side trim panel.
Unscrew and remove the nut.
Disconnect the lamp unit connector.
Unclip the lamp unit and carefully extract it pulling straight towards you.
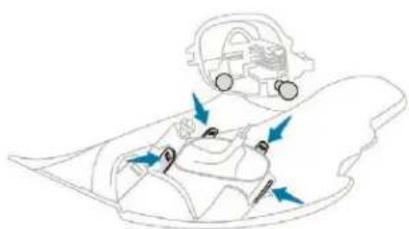
Press the four tabs and remove the bulb holder.
Turn the bulb a quarter turn, pull it out and fit a new bulb.
In the event of a breakdown
To reassemble, proceed in reverse order. Make sure to engage the lamp unit in its guides while keeping it in line with the vehicle. Tighten sufficiently to ensure sealing, but without damaging the lamp.
Third brake lamp

Unscrew the fixing pins on each side of the lamp, without removing them completely.
Push on the screws to unclip the lamp unit.
Disconnect the lamp unit connector.
Remove the lamp unit from the outside.
Turn the bulb holder corresponding to the faulty lamp a quarter turn and pull it out.
Pull the bulb out and change it.
To reassemble, proceed in reverse order.
In the event of a breakdown
Licence plate lamps

For easier removal, perform this procedure with the tailgate half open.
Insert a thin screwdriver into the cut-out located outside the lens.
Push it outwards.
Remove the lens.
Change the faulty bulb.
To refit, press on the lens to clip it in place.
Foglamp
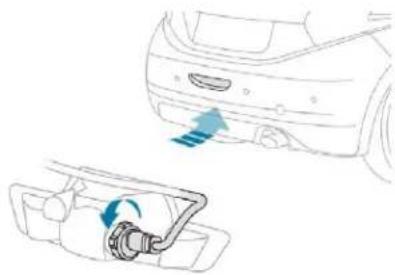
For access, pass your hand under the bumper.
Turn the bulb holder a quarter turn and pull it out.
Disconnect the lamp unit connector.
Pull the bulb out and change it.
To refit, carry out these operations in reverse order.
To replace this type of bulb, you can also contact a PEUGEOT dealer or a qualified workshop.
Changing a fuse
Access to the tools
The extraction tweezers are fitted to the back of the dashboard fusebox cover or glovebox.
Dashboard

Unclip the cover by pulling at the top left, then right.
- Disengage the cover completely and turn it over.
Remove the carrier on which the tweezers are fitted.
Glove box
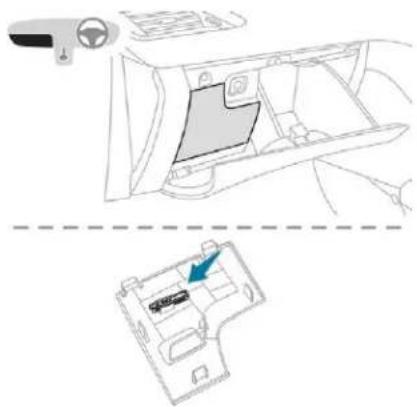
Open the glove box lid.
- Unclip the fusebox cover by pulling at the top right.
Disengage the cover completely and turn it over.
Remove the carrier on which the tweezers are fitted.
Before changing a fuse, it is necessary that:
the vehicle must be stationary with the ignition off,
switch off all electrical consumers,
the defective fuse must be identified using the allocation tables and the diagrams in the following pages.
To work on a fuse, you must:
use the special tweezers to extract the fuse from its housing and check the condition of its filament,
always replace the defective fuse with a fuse of the same rating (same colour); using a different rating could cause a malfunction (risk of fire).
If the fault recurs after replacing a fuse, have the electrical system checked by a PEUGEOT dealer or a qualified workshop.
The replacement of a fuse not shown in the allocation tables opposite may cause a serious malfunction of your vehicle. Contact a PEUGEOT dealer or a qualified workshop.
In the event of a breakdown
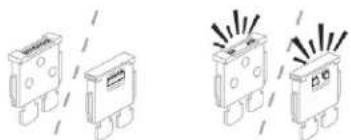
OK Failed

Tweezers
Professional repairers: for full information on the fuses and relays, consult the wiring information and diagrams available at a PEUGEOT dealer.
The fuse allocation tables and corresponding diagrams are available on the website: http://public.servicebox.peugeot.com/ddb/ You can go to a PEUGEOT dealer or a qualified workshop.
In the event of a breakdown
Installing electrical accessories
Your vehicle's electrical system is designed to operate with standard or optional equipment. Before installing other electrical equipment or accessories on your vehicle, contact a PEUGEOT dealer or a qualified workshop.
PEUGEOT accepts no responsibility for the cost incurred in repairing your vehicle or for rectifying malfunctions resulting from the installation of accessories not supplied and not recommended by PEUGEOT and not installed in accordance with specifications, in particular when the combined power consumption of all of the additional equipment connected exceeds 10 milliamperes.
On the left

| Fuse no. Rating Functions | ||
| F1 (GPL) 10 A | Ignition + (positive). | |
| F2 5 A | Exterior mirrors, headlamps, diagnostic socket. | |
| F9 5 A | Alarm. | |
| F10 | 5 A | Independent telematic unit, trailer interface unit. |
| F11 5 A | Electrochrome interior rear-view mirror, additional heating. | |
| F13 5 A | Hi-Fi amplifier, parking sensors. | |
| F16 15 A | Front 12 V socket. | |
| F17 15 A | Audio system, after-market audio system. | |
| F18 20 A | Touch screen. | |
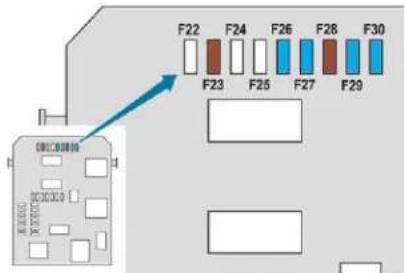
| Fuse no. Rating Functions | |
| F23 5 A Courtesy mirrors, map reading lamp. | |
| F26 15 A Horn. | |
| F27 15 A Screenwash pump. | |
| F28 5 A Anti-theft. | |
| F29 15 A Air conditioning compressor. | |
| F30 15 A Rear wiper. | |
In the event of a breakdown
In the event of a breakdown
On the right

| Fuse no. Rating Functions | |
| F01 40 A Heated rear window. | |
| F02 10 A Heated door mirrors. | |
| F03 30 A Front one-touch windows. | |
| F04 - Not used. | |
| F05 30 A Rear one-touch windows. | |
| F06 10 A Folding door mirrors. | |
| F07 10 A Folding door mirrors. | |
| F08 - Not used. | |
| F09 15 A Front heated seats. | |
| F10 20 A Hi-Fi amplifier. | |
| F11 - Not used. | |
| F12 - Not used. |
In the event of a breakdown
Underbonnet
The fusebox is placed in the engine compartment near the battery (left-hand side).
Access to the fuses

Unclip the cover.
Change the fuse.
When you have finished, close the cover very carefully to ensure correct sealing of the fusebox.

| Fuse no. Rating Functions | |
| F16 15 A Front foglamps. | |
| F18 10 A Right-hand main beam | headlamp. |
| F19 10 A Left-hand main beam | headlamp. |
| F25 30 A Headlamp washer relay (after-market). | |
| F26 (GPL) 20 A Battery + (positive). | |
| F29 40 A Front wiper motor. | |
In the event of a breakdown
12 V battery
Procedure for starting the engine using another battery or charging a discharged battery.
General points
Lead-acid starter batteries

Batteries contain harmful substances such as sulphuric acid and lead.
They must be disposed of in accordance with regulations and must not, in any circumstances, be discarded with household waste.
Take used remote control batteries and vehicle batteries to a special collection point.

Protect your eyes and face before handling the battery.
All operations on the battery must be carried out in a well ventilated area and away from naked flames and sources of sparks, so as to avoid the risk of explosion or fire.
Wash your hands afterwards.
Access to the battery
The battery is located under the bonnet.
To gain access:
Open the bonnet using the interior release lever, then the exterior safety catch.
Secure the bonnet stay.

Remove the plastic cover on the (+) terminal.
The battery (-) terminal is not accessible. A remote earth point is located on the engine.
Starting using another battery
When your vehicle's battery is discharged, the engine can be started using a backup battery (external or from another vehicle) and jump leads or a battery booster.

Never try to start the engine by connecting a battery charger.
Never use a 24 V or higher battery booster.
Check beforehand that the backup battery has a nominal voltage of 12 V and a capacity at least equal to that of the discharged battery.
The two vehicles must not be in contact with each other.
Switch off all the electrical consumers on both vehicles (audio system, wipers, lighting, etc.).
Make sure that the jump leads are not close to moving parts of the engine (fan, belts, etc.).
Do not disconnect the (+) terminal while the engine is running.
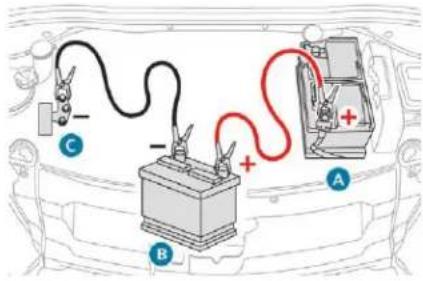
Lift the plastic cover on the (+) terminal, if your vehicle has one.
Connect the red cable to the positive terminal (+) of flat battery A (at the metal elbow) then to the positive terminal (+) of backup battery B or the booster.
Connect one end of the green or black cable to the negative terminal (-) of backup battery B or the booster (or an earth point on the other vehicle).
Connect the other end of the green or black cable to earth point C on the broken down vehicle.
Start the engine of the vehicle with the good battery and leave it running for a few minutes.
Operate the starter on the broken down vehicle and let the engine turn. If the engine does not start straight away, switch off the ignition and wait a few moments before trying again.
Wait until the engine returns to idle then disconnect the jump lead cables in the reverse order.
Refit the plastic cover to the (+) terminal, if your vehicle has one.
Allow the engine to run for at least 30 minutes, by driving or with the vehicle stationary, so that the battery reaches an adequate state of charge.
i Some functions, including Stop & Start, are not available if the battery is not sufficiently charged.
Charging the battery using a battery charger
For optimum service life of the battery, it is essential to maintain an adequate state of charge.
In some circumstances it may be necessary to charge the battery:
- if you only use your vehicle for short journeys,
- if the vehicle is to be taken off the road for several weeks.
Contact a PEUGEOT dealer or a qualified workshop.
In the event of a breakdown
If you plan to charge your vehicle's battery yourself, use only a charger compatible with lead-acid batteries of a nominal voltage of 12 V.
! Follow the instructions provided by the manufacturer of the charger. Never reverse polarities.
It is not necessary to disconnect the battery.
Switch off the ignition.
Switch off all electrical consumers (audio system, lighting, wipers, etc.).
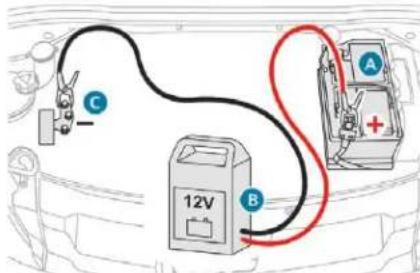
In the event of a breakdown
Switch off the charger B before connecting the cables to the battery, so as to avoid any dangerous sparks.
58 Ensure that the charger cables are in good condition.
Raise the plastic cover, if your vehicle has one, on the (+) terminal.
Connect the charger B cables as follows:
- the positive (+) red cable to the (+) terminal of the battery A,
- the negative (-) black cable to the earth point C on the vehicle.
At the end of the charging operation, switch off the charger B before disconnecting the cables from the battery A.
i Some functions, including Stop & Start, are not available if the battery is not sufficiently charged.

If this label is present, it is essential to use only a 12 V charger to avoid causing irreversible damage to the electrical components related to the Stop & Start system.
Never try to charge a frozen battery – risk of explosion! If the battery has frozen, have it checked by a PEUGEOT dealer or by a qualified workshop who will check that the internal components have not been damaged and that the container has not cracked, which would mean a risk of toxic and corrosive acid leaking.
Disconnecting the battery
In order to maintain an adequate state of charge for starting the engine, it is recommended that the battery be disconnected if the vehicle is taken out of service for a long period.
Before disconnecting the battery:
close all openings (doors, boot, windows, roof),
switch off all electrical consumers (audio system, wipers, lighting, etc.),
switch off the ignition and wait for four minutes.
At the battery, detach the (+) terminal only.
Quick-release terminal clamp
Disconnecting the (+) terminal

- Raise lever A fully to release clamp B.
Remove clamp B by lifting it off.
Reconnecting the (+) terminal

Raise lever A fully.
Refit open clamp B on the (+) terminal.
Push clamp B fully down.
Lower lever A to lock clamp B.
Do not force the lever as locking will not be possible if the clamp is not positioned correctly; start the procedure again.
Following reconnection of the battery
Following reconnection of the battery, switch on the ignition and wait 1 minute before starting to permit initialisation of the electronic systems. If minor problems nevertheless persist following this operation, contact a PEUGEOT dealer or a qualified workshop.
Referring to the corresponding section, you must yourself reinitialise (depending on version):
- the remote control key,
- etc.
The Stop & Start system may not be operational during the trip following the first engine start. In this case, the system will only be available again after a continuous period of immobilisation of the vehicle, a period which depends on the exterior temperature and the state of charge of the battery (up to about 8 hours).
Towing
Procedure for having your vehicle towed or for towing another vehicle using the towing eye.
General recommendations
Observe the legislation in force in your country.
Ensure that the weight of the towing vehicle is higher than that of the towed vehicle.
The driver must remain at the wheel of the towed vehicle and must have a valid driving licence.
When towing a vehicle with all four wheels on the ground, always use an approved towing arm; rope and straps are prohibited.
The towing vehicle must move off gently. When the vehicle is towed with its engine off, there is no longer braking and steering assistance.
In the following cases, you must always call on a professional recovery service:
- vehicle broken down on a motorway or main road,
- four-wheel drive vehicle.
- when it is not possible to put the gearbox into neutral, unlock the steering, or release the parking brake,
- towing with only two wheels on the ground,
- where there is no approved towbar available.
Access to the tools

The towing eye is installed in the boot under the floor.
To gain access:
open the boot,
lift the floor and remove it,
remove the towing eye from the holder.
Towing your vehicle
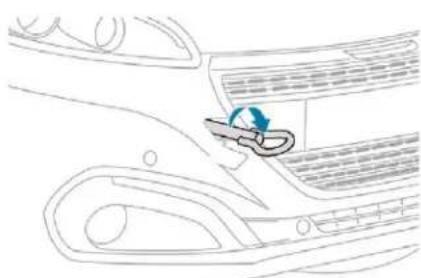
In the front bumper, unclip the cover by pressing at bottom right.
Screw the towing eye in fully, until it reaches a stop.
Install the towbar.
With a manual gearbox, place the gear lever in neutral.
With an electronic gearbox, place the gear lever in position N.
With an automatic gearbox, place the gear lever in position N.
In the event of a breakdown
Failure to follow this instruction may cause damage to some components (braking, transmission, etc.) and the absence of braking assistance when the engine is restarted.
127 Unlock the steering by turning the ignition key one notch and release the parking brake.
Switch on the hazard warning lamps on both vehicles.
Set off gently, drive slowly and for a short distance.
Towing another vehicle

On the rear bumper, unclip the cover by pressing at the bottom.
Screw the towing eye completely.
Install the towing bar.
Switch on the hazard warning lamp on both vehicles.
Set off gently, drive slowly and for a short distance.
Technical data
Characteristics of engines and towed loads
Engines
The engine characteristics are given in the vehicle's registration document, as well as in sales brochures.
The maximum power corresponds to the value type-approved on a test bed, under conditions defined in European legislation (Directive 1999/99/EC).
For more information, contact a PEUGEOT dealer or a qualified workshop.
Weights and towed loads
The maximum weights and towed loads for your vehicle are given in the registration document, as well as in sales brochures.
These values are also given on the manufacturer's plate or label.
For more information, contact a PEUGEOT dealer or a qualified workshop.
The GTW values and the towable loads listed are valid for a maximum altitude of 1,000 metres. The towable load must be reduced by steps of 10% for each additional 1,000 metres.
The recommended nose weight is the vertical load on the towbar ball (removable, with or without tools).
GTW: Gross train weight.
! High exterior temperatures may result in a reduction in the performance of the vehicle to protect the engine. When the exterior temperature is higher than 37° C, limit the towed weight.
! Towing using a lightly loaded vehicle can adversely affect roadholding. Braking distances are increased when towing a trailer. When using a vehicle to tow, never exceed a speed of 60 mph (100 km/h) (observe the local legislation in force).
If the exterior temperature is high, it is recommended that the engine be allowed to idle for 1 to 2 minutes after the vehicle comes to a stop, to facilitate its cooling.
Engines and towed loads – PETROL
| Engine 1.2 PureTech 68 1.2 PureTech 82 1.2 PureTech 82 | |||
| Gearboxes | Manual 5-speed (BVM5) | Manual 5-speed (BVM5) | Electronic (5-speed) (ETG5) |
| Code QA5 (EB2FB MA) KQ5 (EB2F MA) KQP (EB2F MAPS) | |||
| CC..., CA... model codes | HMP6 | HMZ6 – HMZ0 | HMZ6/P – HMZ0/P |
| Cubic capacity ( cm3 ) 1,199 1,199 1,199 | |||
| Max. power: EU standard (kW) 50 60 60 | |||
| Fuel | Unleaded | Unleaded | Unleaded |
| Braked trailer (within the GTW limit) on a 12% slope (Kg) | 450 (VP)485 (VASP) | 820 (VP/VASP)920 (LUV) | 820 |
| Unbraked trailer (kg) | 450 | 520 | 520 |
| Recommended nose weight (kg) | 46 46 46 |
VP: Private Vehicle.
VASP: Specialised Motor Vehicle.
LUV: Light Utility Vehicle.

Technical data
| Engine | 1.2 PureTech 82 S&S | 1.2 PureTech 82 S&S | 1.2 PureTech 110 S&S | 1.2 PureTech 110 S&S |
| Gearboxes | Electronic 5-speed STT (ETG5) | Manual 5-speed STT (BVM5) | Manual 5-speed STT (BVM5) | Automatic 6-speed STT (EAT6) |
| Code | KQV (EB2F MAPS STT) | LEJ (EB2FA MA STT) | CQJ / CZJ (EB2DT/ DTM BE STT) | CQQ / CZQ (EB2DT/ DTM AT6III STT) |
| CC..., CA... model codes HMZ6/PS HMRP/S | HNZ6/S – HNV6/S HNV0/DS | HNZT/S -HNVT/S HNVA/DS | ||
| Cubic capacity ( cm3 ) 1,199 1,199 1,199 1,199 | ||||
| Max. power: EU standard (kW) 60 60 80 80 | ||||
| Fuel | Unleaded | Unleaded | Unleaded | Unleaded |
| Braked trailer (within the GTW limit) on a 12% slope (Kg) | 500 | 820 | 960 (EB2DT)450 (EB2DTM) | 960 (EB2DT)450 (EB2DTM) |
| Unbraked trailer (kg) | 500 | 520 | 570 (EB2DT)450 (EB2DTM) | 560 (EB2DT)450 (EB2DTM) |
| Recommended nose weight (kg) | 33 | 46 | 46 | 46 |
Technical data
| Engine 1.6 VTi 120 1.6 VTi 120 1.6 THP 165 S&S | 1.6 THP 208 S&S | |||
| Gearboxes | Manual 5-speed (BVM5) | Automatic 4-speed (BVA4) | Manual 6-speed STT (BVM6) | Manual 6-speed STT (BVM6) |
| Code CA5 (EP6C MA) CAL (EP6C AL4) | KHK (EP6FDT MCM STT) | KJK (EP6FDTX MCM STT) | ||
| CC..., CA... model codes | 5FS0 – 5FS0/D | 5FS9 – 5FS9/D | 5GZM | 5GRM |
| Cubic capacity ( cm3 ) 1,598 1,598 1,598 1,598 | ||||
| Max. power: EU standard (kW) | 88 | 88 | 115 | 147 |
| Fuel | Unleaded | Unleaded | Unleaded | Unleaded |
| Braked trailer (within the GTW limit) on a 12% slope (Kg) | 960 | 950 | 920 | 930 |
| Unbraked trailer (kg) | 580 | 580 | 580 | 580 |
| Recommended nose weight (kg) | 46 | 46 | 46 | 46 |
Engines and towed loads – DIESEL
| Engine | 1.6 HDi 75 | 1.6 BlueHDi 75 | 1.6 BlueHDi 75 S&S | 1.6 HDi 92 |
| Gearboxes | Manual 5-speed (BVM5) | Manual 5-speed (BVM5) | Manual 5-speed STT (BVM5) | Manual 5-speed (BVM5) |
| Code BX5 (DV6EM BE) KM5 (DV6FE BE) KMJ (DV6FE BE STT) | BF5 / BW5 (DV6D/DM BE) | |||
| Model codes | 9HKC | BHW6 | BHW6/1S | 9HP0 – 9HJC |
| Cubic capacity ( cm3 ) | 1,560 | 1,560 | 1,560 | 1,560 |
| Max. power: EU standard (kW) | 55 | 55 | 55 | 68 |
| Fuel | Diesel | Diesel | Diesel | Diesel |
| Braked trailer (within the GTW limit) on a 10 or 12% slope (kg) | 970 | 660 | 410 | 970 |
| Unbraked trailer (kg) | 570 | 570 | 410 | 570 |
| Recommended nose weight (kg) | 46 | 46 | 46 | 46 |
Technical data
| Engine | 1.5 BlueHDi 100 S&S | 1.6 BlueHDi 100 | 1.6 BlueHDi 100 S&S | 1.6 BlueHDi 100 S&S | 1.6 BlueHDi 120 S&S |
| Gearboxes | Manual 6-speed STT (BVM6) | Manual 5-speed (BVM5) | Manual 5-speed STT (BVM5) | Electronic 6-speed STT (ETG6) | Manual 6-speed STT (BVM6) |
| Code | MDK (DV5RD MB6 STT) | KE5 (DV6FD BE) | KEJ (DV6FD BE STT) | KES (DV6FD MCP STT) | KDK (DV6FC MCM STT) |
| Model codes | YHYS/S | BHY6 | BHY6/1S | BHYM/PS | BHZM/S |
| Cubic capacity (cm3) 1,499 1,560 1,560 1,560 1,560 | |||||
| Max. power: EU standard (kW) | 75 | 70 | 70 | 70 | 88 |
| Fuel Diesel Diesel Diesel Diesel Diesel | |||||
| Braked trailer (within the GTW limit) on a 10 or 12% slope (kg) | 975 | 970 | 970 1,100 (LUV) | 970 | 960 |
| Unbraked trailer (kg) | 570 | 570 | 570 | 570 | 570 |
| Recommended nose weight (kg) | 46 | 46 | 46 | 46 | 46 |
LUV: Light Utility Vehicle.
Technical data
Engines and towed loads – LPG
| Engine 1.2 PureTech 82 LPG | |
| Gearboxes | Manual 5-speed (BVM5) |
| Code KQ5 (EB2F MA LPG) | |
| Model codes HMX5/GPL | |
| Cubic capacity ( cm3 ) 1,199 | |
| Max. power: EU standard (kW) 60 | |
| Fuel Dual fuel petrol/LPG | |
| Braked trailer (within the GTW limit) on a 10 or 12% slope (kg) 720 | |
| Unbraked trailer (kg) 520 | |
| Recommended nose weight (kg) 46 |
Technical data
Dimensions (in mm)
These dimensions have been measured on an unladen vehicle.

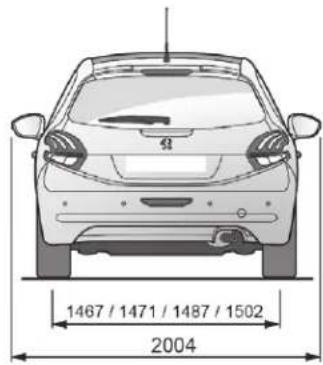


3-door 5-door
Technical data
Commercial version
Number of seats: 2 people.
Effective boot volume: 1.062 m 3
Effective floor length: 1.335 m.
Effective width for wheel arches: 1.042 m.
Effective width in the centre: 1.061 m.
Effective height in the centre: 0.857 m.
Identification markings
Different visible markings for the identification and localisation of your vehicle.
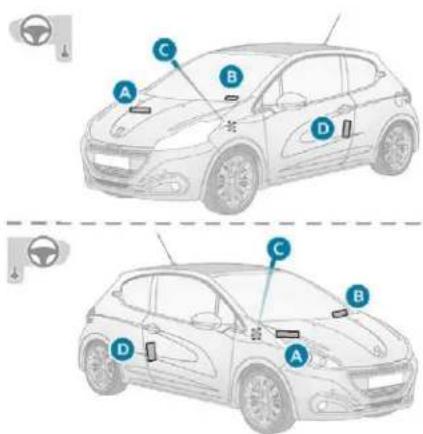
3-door

5-door
A. Vehicle Identification Number (VIN) under the bonnet.
This number is engraved on the bodywork near the suspension damper mounting.
B. Vehicle identification number (VIN), on the dashboard.
This number is recorded on a label, visible through the windscreen.
C. Manufacturer's label.
This tamper proof label is affixed to the front pillar, driver's side.
It bears the following information:
- the name of the manufacturer,
- the European Whole Vehicle Type Approval number,
- the vehicle identification number (VIN),
- the maximum authorised vehicle weight (the Gross Vehicle Weight or GVW),
- the maximum authorised vehicle + trailer weight (the Gross Train Weight or GTW),
- the maximum weight on the front axle,
- the maximum weight on the rear axle.
D. Tyre/paint label.
This label is affixed to the centre pillar on the driver's side.
It bears the following information on the tyres:
- the tyre inflation pressures with and without load,
- the tyre specification, made up of the dimensions and type as well as the load and speed indices,
- the spare tyre pressure.
It also indicates the paint colour code.
The vehicle may be originally equipped with tyres with higher load and speed indices than those indicated on the label, without affecting inflation pressure.
Checking tyre pressures
The tyre pressures should be checked when cold at least monthly.
The pressures given on the label are valid for cold tyres. If you have driven for more than 10 minutes or more than 6 miles (10 kilometres) at more than 30mph (50km / h) , the tyres will be warm; in this case 0.3 bar (30kPa) should be added to the pressures given on the label.
! Never reduce the pressure of a warm tyre.
Low tyre pressures increase fuel consumption.
PEUGEOT Connect Nav

GPS satellite navigation – Applications – Multimedia audio system – Bluetooth® telephone
Contents
First steps 2
Steering mounted controls 3
Menus 4
Voice commands 5 Navigation 11
Connected navigation 15
Applications 18
Radio 23
DAB radio (Digital Audio Broadcasting) 25
Media 26
Telephone 28
Configuration 33
Frequently asked questions 37
PEUGEOT Connect Nav
The different functions and settings described vary according to the version and configuration of your vehicle.
As a safety measure and because it requires sustained attention by the driver, the pairing of a Bluetooth mobile telephone with the Bluetooth hands-free system of your audio system must be done with the vehicle stationary and the ignition on.
The system is protected in such a way that it will only operate in your vehicle. The display of the Energy Economy Mode message signals that a change to standby is imminent.
The link below gives access to OSS (Open Source Software) codes for the system. https://www.groupe-psa.com/fr/oss/ https://www.groupe-psa.com/en/oss/
PEUGEOT Connect Nav
First steps

With the engine running, a press mutes the sound.
With the ignition off, a press turns the system on.

Adjustment of the volume.
Use the buttons either side of or below the touch screen for access to the menus, then press the virtual buttons in the touch screen.
Depending on the model, use the "Source" or "Menu" buttons either side of the touch screen for access to the menus, then press the virtual buttons in the touch screen.
You can display the menu at any time by pressing the screen briefly with three fingers.
All of the touch areas of the screen are white.
Press the cross to go back a level.
Press "OK" to confirm.
! The touch screen is of the "capacitive" type.
To clean the screen, use a soft, non-abrasive cloth (spectacles cloth) with no additional product.
Do not use sharp objects on the screen. Do not touch the screen with wet hands.
Certain information is displayed permanently in the upper band of the touch screen:
- Repeat of the air conditioning information (depending on version), and direct access to the corresponding menu.
- Go directly to the selection of the audio source, to the list of radio stations (or list of titles depending on the source).
- Go to the message notifications, emails, map updates and, depending on the services, the navigation notifications.
- Go to the settings for the touch screen and the digital instrument panel.
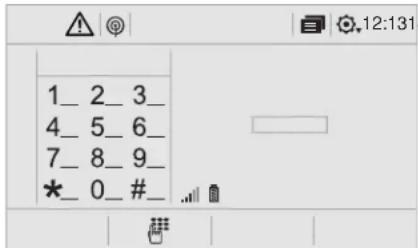
Selecting the audio source (depending on version):
- FM / DAB radio stations* / AM*.
- USB key.
- CD player (depending on model).
- Media player connected via the auxiliary socket (depending on model).
- Telephone connected via Bluetooth and Bluetooth multimedia broadcast* (streaming).
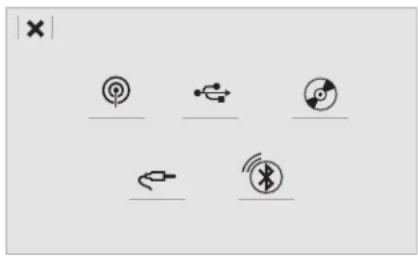
In the "Settings" menu you can create a profile for just one person or a group of people with common points, with the possibility of entering a multitude of settings (radio presets, audio settings, navigation history, contact favourites, etc.); these settings are taken into account automatically.
In very hot conditions, the volume may be limited to protect the system. It may go into standby (screen and sound off) for at least 5 minutes
The return to normal takes place when the temperature in the passenger compartment has dropped.
Steering mounted controls
Depending on model.

Voice commands:
This control is located on the steering wheel or at the end of the lighting control stalk (depending on model).
Short press, system voice commands.
Long press, smartphone voice commands via the system.
Increase volume.

or


or

Mute / Restore the sound. Or
Mute by pressing the volume increase and decrease buttons simultaneously.
Restore the sound by pressing one of the two volume buttons.
Decrease volume.

or

PEUGEOT Connect Nav

Media (short press): change the multimedia source.
Telephone (short press): start telephone call.
Call in progress (short press): access telephone menu.
Telephone (long press): reject an incoming call, end call; when no call is in progress, access telephone menu.

Radio (rotate): automatic search for the previous / next station.
Media (rotate): previous / next track, move in a list.
Short press: confirm a selection; if nothing selected, access to presets.

Radio: display the list of stations.
Media: display the list of tracks.
Radio (press and hold): update the list of stations received.
PEUGEOT Connect Nav
Menus
Depending on model / Depending on version
Air conditioning

Manage the different temperature and air flow settings.

Radio Media

Select an audio source, a radio station, display photographs.
or
MEDIA

Applications

Operate certain applications on a smartphone connected via CarPlay ® , MirrorLink ™ or Android Auto. Check the state of the Bluetooth ® and Wi-Fi connections.
APPS
Connected navigation

or
Enter navigation settings and choose a destination. Use services available in real time, depending on equipment.
NAV
Telephone

Connect a telephone via Bluetooth ® , read messages and emails and send quick messages.
or
TEL
Voice commands 21,523°C
Steering mounted controls

Pressing this button activates the voice commands function.

Vehicle

Activate, deactivate or configure certain vehicle functions.
or
DRIVE
! To ensure that voice commands are always recognised by the system, please observe the following recommendations:
- speak in a normal tone without breaking up words or raising your voice.
- always wait for the "beep" (audible signal) before speaking.
- for best operation, it is recommended that the windows and sunroof be closed to avoid extraneous interference (according to version).
23°C before making a voice command, ask other passengers not to speak.
Configuration

Configure a personal profile and/or configure the sound (balance, ambience, etc.) and the display (language, units, date, time, etc.).
or

3,5 21,523°C before making a voice command, ask other passengers not to speak.
First steps

Example of a "voice command" for navigation:
"Navigate to address, 11 Regent Street, London".
Example of a "voice command" for the radio and media:
"Play artist" "Madonna".
Example of a "voice command" for the telephone:
"Call David Miller".
! The voice commands, with a choice of 12 languages (English, French, Italian, Spanish, German, Dutch, Portuguese, Polish, Turkish, Russian, Arabic, Brazilian), are made using the language previously chosen and set in the system. For some voice commands, there are alternative synonyms. Example: Guide to / Navigate to / Go to /... The voice commands in Arabic for "Navigate to address" and "Display POI in the city" are not available.
Information – Using the system

Press the Push To Talk voice control button and tell me what you'd like after the tone. Remember you can interrupt me at any time by pressing this button. If you press it again while I'm waiting for you to speak, it'll end the conversation. If you need to start over, say "cancel". If you want to undo something, say "undo". And to get information and tips at any time, just say "help". If you ask to me do something and there's some information missing that I need, I'll give you some examples or take you through it step by step. There's more information available in "novice" mode. You can set the dialogue mode to "expert" when you feel comfortable.
Global voice commands
These commands can be made from any screen page after pressing the "Voice command" or "Telephone" button located on the steering wheel, as long as there is no telephone call in progress.
| Voice commands Help messages |  |
| Help There are lots of topics I can help you with. | You can say: "help with phone", "help with navigation", "help with media" or "help with radio". For an overview on how to use voice controls, you can say "help with voice controls". |
| Voice command help | |
| Navigation help | |
| Radio help | |
| Media help | |
| Telephone help | |
| Set dialogue mode as <...> Choose "beginner" or "expert" mode. | |
| Select profile <...> Select profile 1, 2 or 3. | |
| Yes Say "yes" if I got that right. Otherwise, say "no" and we'll start that again. | |
| No | |
"Navigation" voice commands
These commands can be made from any screen page after pressing the "Voice command" or "Telephone" button located on the steering wheel, as long as there is no telephone call in progress.
Voice commands Help messages |  |
| Navigate home To start guidance or add a stopover, say | "navigate to" and then the address or contact name. For example, "navigate to address 11 Regent Street, London", or "navigate to contact, John Miller". You can specify if it's a preferred or recent destination. For example, "navigate to preferred address, Tennis club", "navigate to recent destination, 11 Regent Street, London". Otherwise, just say, "navigate home". To see points of interest on a map, you can say things like "show hotels in Banbury" or "show nearby petrol station". For more information you can ask for "help with route guidance". |
| Navigate to work | |
| Navigate to preferred address | |
| Navigate to contact | |
| Navigate to address | |
| Show nearby POI | |
| Remaining distance To get information about your current route,you can say "tell me the remaining time","distance" or "arrival time". Try saying "help with navigation" to learn more commands. | |
| Remaining time | |
| Arrival time | |
| Stop route guidance | |
"Radio Media" voice commands
These commands can be made from any screen page after pressing the "Voice command" or "Telephone" button located on the steering wheel, as long as there is no telephone call in progress.
Depending on the country, give the destination instructions (address) in the language used by the system.
Voice commands Help messages |  |
| Tune to channel <...> You can pick a radio station by saying "tuneto" and the station name or frequency. Forexample "tune to channel Talksport" or "tune to98.5 FM". To listen to a preset radio station, say "tune to preset number". For example "tune topreset number five". | |
| What's playing To display the details of the current "track","artist" and "album", you can say "What'splaying". | |
| Play song <...> Use the command "play" or "listen to" to selectthe type of music you'd like to hear. You canpick by "song", "artist", or "album". Just saysomething like "play artist, Madonna", "playsong, Hey Jude", or "play album, Thriller". | |
| Play artist <...> | |
| Play album <...> | |
Media voice commands are available only for a USB connection.
"Telephone" voice commands
If a telephone is connected to the system, these voice commands can be issued from any main screen page after pressing the "Telephone" button on the steering wheel, as long as there is no telephone call in progress. If there is no telephone connected by Bluetooth, a voice message announces: "Please first connect a telephone" and the voice session will be closed.
Voice commands Help messages |  |
| Call contact <...>* To make a phone call, say "call" followed by the contact name, for example: "Call David Miller". You can also include the phone type, for example: "Call David Miller at home". To make a call by number, say "dial" followed by the phone number, for example, "Dial 107776 835 417". You can check your voicemail by saying "call voicemail". To send a text, say "send quick message to", followed by the contact, and then the name of the quick message you'd like to send. For example, "send quick message to David Miller, I'll be late". To display the list of calls, say "display calls". For more information on SMS, you can say "help with texting". | |
| Dial <...>* | |
| Display contacts* | |
| Display calls* | |
| Call (message box | voicemail)* | |
"Text message" voice commands
If a telephone is connected to the system, these voice commands can be issued from any main screen page after pressing the "Telephone" button on the steering wheel, as long as there is no telephone call in progress. If there is no telephone connected by Bluetooth, a voice message announces: "Please first connect a telephone" and the voice session will be closed.
* This function is available only if the telephone connected to the system supports downloading of contacts and recent calls and if the download has been done.
Voice commands Help messages |  |
| Send text to <...> To hear your messages, you can say "listen to most recent message". When you want to send a text, there's a set of quick messages ready for you to use. Just use the quick message name and say something like "send quick message to Bill Carter, I'll be late". Check the phone menu for the names of the supported messages.Please say "call" or "send quick message to", and then select a line from the list. To move around a list shown on the display, you can say "go to start", "go to end", "next page" or "previous page". To undo your selection, say "undo". To cancel the current action and start again, say "cancel". | |
| Listen to most recent message* | |
Navigation
Choice of destination
To a new destination

Press Navigation to display the primary page.
or
NAV
Press the "MENU" button to go to the secondary page.

Select "Enter address".

Select the "Country".

Enter the "City", the "Street" and the "Number" and confirm by pressing on the suggestions displayed.
The system only sends pre-recorded "Quick messages".
* This function is available only if the telephone connected to the system supports downloading of contacts and recent calls and if the download has been done.
PEUGEOT Connect Nav
OK
Press "OK" to select the "Guidance criteria".
And / Or

Select "See on map" to select the "Guidance criteria".
OK
Press "OK" to start navigation.
Zoom out / zoom in using the touch buttons or with two fingers on the screen.
In order to be able to use the navigation, it is necessary to fill in the "City", the "Street" and the "Number" on the virtual keyboard or take it from the list in "Contact" or in the "History" of addresses.
i Without confirmation of the street number, you will be guided to one end of the street.
To a recent destination

Press Navigation to display the primary page.
or
NAV
Press the "MENU" button to go to the secondary page.

Select "My destinations".
Select the "Recent" tab.
Select the address chosen in the list to display the "Guidance criteria".
Press "OK" to start navigation.
OK
i Select "Position" to visualise the arrival point geographically.
To "My home" or "My work"

Press Navigation to display the primary page.
or
NAV
Press the "MENU" button to go to the secondary page.

Select "My destinations".
Select the "Preferred" tab.

Select "My home".
Or

Select "My work".
Or
Select a preset favourite destination.
Towards a contact

Press Navigation to display the primary page.
or
NAV
Press the "MENU" button to go to the secondary page.

Select "My destinations".
Select the "Contact" tab.
Select a contact in the list to start navigation.
Towards points of interest (POI)
Points of Interest (POI) are listed in different categories.

Press Navigation to display the primary page.
or
NAV
Press the "MENU" button to go to the secondary page.

Select "Points of interest".

Select the "Travel", or "Leisure" or "Commercial" or "Public" or "Geographic" tab.
Or

Select "Search" to enter the name and address of a POI.
OK
Press "OK" to start calculation of the route.
To a point on the map

Press Navigation to display the primary page.
or
NAV
Explore the map by sliding a finger on the screen.
Select the destination by pressing on the map.

Tap the screen to place a marker and display the sub-menu.

Press this button to start navigation.
Or

Press this button to save the address displayed.
A long press on an item opens a list of POIs nearby.
PEUGEOT Connect Nav
Towards GPS coordinates

Press Navigation to display the primary page.
or
NAV
Explore the map by sliding a finger on the screen.

Press this button to display the world map. Using the grid, select by zoom the desired country or region.

Press this button to enter the GPS coordinates.

A marker is displayed in the middle of the screen, with the "Latitude" and "Longitude" coordinates.

Press this button to start navigation.
Or

Press this button to save the address displayed.
OR

Press this button to enter the value for "Latitude" using the virtual keypad.
And

Press this button to enter the value for "Longitude" using the virtual keypad.
TMC (Traffic Message Channel)

TMC (Traffic Message Channel) messages are linked to a European standard on the broadcasting of traffic information via the RDS system on FM radio, transmitting traffic information in real time. The TMC information is then displayed on a GPS Navigation system map and taken into account straight away during navigation, so as to avoid accidents, traffic jams and closed roads.

The display of danger zones depends on the legislation in force and subscription to the service.
Connected navigation
According to version
Depending on the equipment level of the vehicle
Network connection provided by the vehicle

OR
Network connection provided by the user

Connected navigation connection
As a safety measure and because it requires sustained attention by the driver, using a smartphone when driving is prohibited. All operations must be done with the vehicle stationary.
For access to connected navigation, you can use the connection provided by the vehicle via the "Emergency or assistance call" services or use your smartphone as a modem. Activate and enter settings for sharing the smartphone connection.
Network connection provided by the vehicle

The system is automatically connected to the modem included for the "Emergency or assistance calls" services and does not require a connection provided by the user via their smartphone.
Network connection provided by the user
USB connection

Connect a USB cable. The smartphone charges when connected by a USB cable.
Bluetooth connection

Activate the Bluetooth function on the telephone and ensure that it is visible to all (see the "Connect-App" section).
WI-FI connection

Select a Wi-Fi network found by the system and connect to it (see the "Connect-App" section).

Restrictions of use:
- With CarPlay ® , connection sharing is only with a Wi-Fi connection.
- With MirrorLink TM , connection sharing is only with a USB connection.
The quality of services depends on the quality of the network connection.

OMTOM RAFFIC
With the arrival of "TOMTOM TRAFFIC", the services are available.
PEUGEOT Connect Nav
i The services offered with connected navigation are as follows.
A Connected Services pack:
- Weather,
- Filling stations,
- Car park,
- Traffic,
- POI local search.
A Danger zone pack (option).
The principles and standards are constantly changing; for the communication process between the smartphone and the system to work correctly, we recommend that you update the operating system of the smartphone as well as the date and time of the smartphone and the system.
Settings specific to connected navigation
In the "Settings" menu you can create a profile for just one person or a group of people with common points, with the possibility of entering a multitude of settings (radio presets, audio settings, navigation history, contact favourites, etc.); these settings are taken into account automatically.

Press Navigation to display the primary page.
or
NAV
Press the "MENU" button to go to the secondary page.

Select "Settings".
Select "Map".

Activate or deactivate:
- "Allow declaration of danger zones".
- "Guidance to final destination on foot"
- "Authorize sending information"
These settings must be made according to each profile.
Select "Alerts".

Activate or deactivate "Warn of danger zones".

Select this button.
Activate: Give an audible warning

! For access to connected navigation, you have to select the option: "Authorize sending information".
The display of danger zones depends on the legislation in force and subscription to the service.
Declaration of "Danger zones"
! To distribute information on the declaration of danger zones, you should check the option: "Allow declaration of danger zones".

Press Navigation to display the primary page.
or
NAV

Press the "Declare a new danger zone" button located in the upper bar of the touch screen

Select the option "Type" to choose the type of "Danger zone".

Select the "Speed" option and enter it using the virtual keypad.
OK
Press "OK" to save and distribute the information.
"Danger zones" pack updates

Press Settings to display the primary page.
Press the "OPTIONS" button to go to the secondary page.

Select "System settings".
Select the "System info" tab.


Select "View" to display the versions of the different modules installed in the system.

Select "Update(s) due".
You can download the system and map updates from the Brand's website. The update procedure can also be found on the website.
Display the weather

Press Navigation to display the primary page.
or
NAV

Press this button to display the list of services.

Select "View map".

Select "Weather".

Press this button to display primary information.

Press this button to display the detailed weather information.
The temperature displayed at 6 a.m. will be the maximum temperature for the day. The temperature displayed at 6 p.m. will be the minimum temperature for the night.
PEUGEOT Connect Nav
Applications
Internet Browser

Press Applications to display the primary page.
or
APPS
Press "Connectivity" to go to the "Internet Browser" function.
Press "Internet Browser" to display the browser home page.
Select your country of residence.

Press "OK" to save and start the browser.

i Connection to the internet is via one of the network connections provided by the vehicle or the user.
Connectivity

Press Applications to display the primary page.
or
APPS
Press "Connectivity" to go to the CarPlay ® , MirrorLink TM or Android Auto functions.
Applications

Press Applications to display the primary page.
or
APPS
Press "Applications" to display the applications home page.
CarPlay® smartphone connection

As a safety measure and because it requires sustained attention by the driver, using a smartphone when driving is prohibited. All operations must be done with the vehicle stationary.

The synchronisation of a personal smartphone allows users to display applications adapted for the smartphone's CarPlay® technology on the vehicle screen when the smartphone's CarPlay® function has been previously activated. As the principles and standards are constantly changing, it is recommended that you keep your smartphone's operating system updated. For the list of eligible smartphones, go to the Brand's internet website in your country.

Connect a USB cable. The smartphone charges when connected by a USB cable.

Press on "Telephone" to display the CarPlay® interface.
or
TEL
Or

Connect a USB cable. The smartphone charges when connected by a USB cable.

From the system, press "Applications" to display the primary page.
or
APPS
Press "Connectivity" to go to the CarPlay function.

Press on "CarPlay" to display the CarPlay® interface.

On connecting the USB cable, the CarPlay ® function deactivates the system's Bluetooth ® mode.
PEUGEOT Connect Nav
MirrorLink™ smartphone connection
As a safety measure and because it requires sustained attention by the driver, using a smartphone when driving is prohibited. All operations must be done with the vehicle stationary.
The synchronisation of a personal smartphone allows users to display applications adapted for the smartphone's MirrorLink™ technology on the vehicle screen. The principles and standards are constantly changing, for the communication process between the smartphone and the system to operate, it is essential that the smartphone is unlocked; update the operating system of the smartphone as well as the date and time of the smartphone and the system. For the list of eligible smartphones, go to the Brand's internet website in your country.
As a safety measure, applications can only be viewed with the vehicle stationary; display is interrupted once the vehicle is moving.
The "MirrorLink™" function requires the use of a compatible smartphone and applications.

When connecting a smartphone to the system, it is recommended that Bluetooth ® be started on the smartphone

Connect a USB cable. The smartphone charges when connected by a USB cable.

From the system, press "Applications" to display the primary page.
or
APPS
Press "Connectivity" to go to the MirrorLink TM function.

Press "MirrorLink™" to start the application in the system.
PEUGEOT Connect Nav
Depending on the smartphone, it may be necessary to activate the "MirrorLink TM" function.
OK
During the procedure, several screen pages relating to certain functions are displayed. Accept to start and complete the connection.
Once connection is established, a page is displayed with the applications already downloaded to your smartphone and adapted to MirrorLink ™ technology.
Access to the different audio sources remains accessible in the margin of the MirrorLink ™ display, using touch buttons in the upper bar. Access to the menus for the system is possible at any time using the dedicated buttons.
There may be a wait for the availability of applications, depending on the quality of your network.
Android Auto smartphone connection
As a safety measure and because it requires sustained attention by the driver, using a smartphone when driving is prohibited. All operations must be done with the vehicle stationary.
The synchronisation of a personal smartphone allows users to display applications adapted for the smartphone's Android Auto technology on the vehicle screen. The principles and standards are constantly changing, for the communication process between the smartphone and the system to operate, it is essential that the smartphone is unlocked; update the operating system of the smartphone as well as the date and time of the smartphone and the system. For the list of eligible smartphones, go to the Brand's internet website in your country.
As a safety measure, applications can only be viewed with the vehicle stationary; display is interrupted once the vehicle is moving.
The "Android Auto" function requires the use of a compatible smartphone and applications.

Connect a USB cable. The smartphone charges when connected by a USB cable.

From the system, press "Applications" to display the primary page.
or
APPS
Press "Connectivity" to go to the "Android Auto" function.

Press "Android Auto" to start the application in the system.
OK
During the procedure, several screen pages relating to certain functions are displayed. Accept to start and complete the connection.
Different audio sources remain accessible in the margin of the Android Auto display, using touch buttons in the upper bar.
Access to the menus for the system is possible at any time using the dedicated buttons.
In Android Auto mode, the function to display the menu by pressing the screen briefly with three fingers is deactivated.
There may be a waiting time for the availability of applications, depending on the quality of your network.
Bluetooth® connection
As a safety measure and because they require prolonged attention on the part of the driver, the operations for pairing of the Bluetooth mobile telephone with the Bluetooth hands-free system of your audio system must be carried out with the vehicle stationary and the ignition on.
i Activate the Bluetooth function on the telephone and ensure that it is "visible to all" (telephone configuration).
Procedure from the telephone

Select the system name in the list of devices detected.
In the system, accept the connection request from the telephone.
To complete the pairing, whichever procedure used (from the telephone or from the system), ensure that the code is the same in the system and in the telephone.
Procedure from the system

Press Connect-App to display the primary page.
or
APPS
Press the "OPTIONS" button to go to the secondary page.

Press "Bluetooth connection".

Select "Search".
The list of telephones detected is displayed.
If the pairing procedure fails, it is recommended that you deactivate and then reactivate the Bluetooth function in your telephone.

Select the name of the chosen telephone in the list.
Depending on the type of telephone, you may be asked to accept or not the transfer of your contacts and messages.
PEUGEOT Connect Nav
Connection sharing
The system offers to connect the telephone with 3 profiles:
- "Telephone" (hands-free kit, telephone only),
- "Streaming" (streaming: wireless playing of the audio files on the telephone),
- "Mobile internet data".
The "Mobile internet data" profile must be activated for connected navigation (where the vehicle does not have "Emergency and assistance call" services), having first activated sharing of this connection on your smartphone.
Select one or more profiles.

Press "OK" to confirm.

Wi-Fi connection
Network connection by the smartphone Wi-Fi.

Press Connect-App to display the primary page.
or
APPS
Press the "OPTIONS" button to go to the secondary page.

Select "Wi-Fi network connection".

Select the "Secured" or "Not secured" or "Stored" tab.

Select a network.

Using the virtual keypad, enter the "Key" for the Wi-Fi network and the "Password".
Press "OK" to start the connection.

The Wi-Fi connection and the sharing of the Wi-Fi connection are exclusive.
Wi-Fi connection sharing
Creation of a local Wi-Fi network by the system.

Press Connect-App to display the primary page.
or
APPS
Press the "OPTIONS" button to go to the secondary page.

Select "Share Wi-Fi connection".
Select the "Activation" tab to activate or deactivate sharing of the Wi-Fi connection.
And / Or
Select the "Settings" to change the name of the system network and the password.
OK
Press "OK" to confirm.
To protect against unauthorised access and make your systems as secure as possible, the use of a complex security code or password is recommended.
Manage connections

Press Connect-App to display the primary page.
or
APPS
Press the "OPTIONS" button to go to the secondary page.

Select "Manage connection".
With this function you can view the access to connected services, the availability of connected services and modify the connection mode.
PEUGEOT Connect Nav
Radio
Selecting a station

Press Radio Media to display the primary page.
or
MEDIA
Press "Frequency".

Press one of the buttons for an automatic search for radio stations.
Or

Move the cursor for a manual search for frequencies up or down.
Or

Press Radio Media to display the primary page.
or
MEDIA
Press the "OPTIONS" button to go to the secondary page.

Select "Radio stations" in the secondary page.
Press "Frequency".

Enter the values using the virtual keypad. First enter the units then click on the decimals zone to enter the figures after the decimal point.
Press "OK" to confirm.
OK
! Radio reception may be affected by the use of electrical equipment not approved by the Brand, such as a USB charger connected to the 12 V socket. The external environment (hills, buildings, tunnels, basement car parks, etc.) may block reception, including in RDS mode. This is a normal effect of the way in which radio waves are transmitted and does not indicate any failure of the audio equipment.
PEUGEOT Connect Nav
Presetting a station
Select a radio station or frequency. (refer to the corresponding section)
Press "Presets".

Make a long press on one of the buttons to preset the station.
Activating / Deactivating RDS

Press Radio Media to display the primary page.
or
MEDIA
Press the "OPTIONS" button to go to the secondary page.

Select "Radio settings".
Select "General".

Activate / Deactivate "Station follow".
Press "OK" to confirm.
OK
RDS, if activated, allows you to continue listening to the same station by automatic retuning to alternative frequencies. However, in certain conditions, coverage of an RDS station may not be assured throughout the entire country as radio stations do not cover 100% of the territory. This explains the loss of reception of the station during a journey.
Display text information
The "Radio Text" function allows information transmitted by the radio station and related to the station or the song playing to be displayed.

Press Radio Media to display the primary page.
or
MEDIA
Press the "OPTIONS" button to go to the secondary page.

Select "Radio settings".
Select "General".

Activate / Deactivate "Display radio text".
Press "OK" to confirm.
OK
Play TA messages
! The TA (Traffic Announcement) function gives priority to TA alert messages. To operate, this function needs good reception of a radio station that carries this type of message. While traffic information is being broadcast, the current media is automatically interrupted so that the TA message can be heard. Normal play of the media previously playing is resumed at the end of the message.
Select "Announcements".

Activate / Deactivate "Traffic announcement".

Press "OK" to confirm.
DAB (Digital Audio Broadcasting) radio
Terrestrial Digital Radio
Digital radio provides higher quality reception. The different multiplexes offer a choice of radio stations arranged in alphabetical order.

Press Radio Media to display the primary page.
or
MEDIA

Select the audio source.
Press "Band" to select the "DAB" waveband.
DAB-FM auto tracking
"DAB" does not cover 100% of the territory. When the digital radio signal is poor, "DAB-FM auto tracking" allows you to continue listening to the same station, by automatically switching to the corresponding "FM" analogue station (if there is one).

Press Radio Media to display the primary page.
or
MEDIA
Press the "OPTIONS" button to go to the secondary page.

Select "Radio settings".
Select "General".
PEUGEOT Connect Nav

Activate / Deactivate "Station follow".
Press "OK".
OK
If "DAB-FM auto tracking" is activated, there is a difference of a few seconds when the system switches to "FM" analogue radio with sometimes a variation in volume. Once the digital signal quality is restored, the system automatically changes back to "DAB".
! If the "DAB" station being listened to is not available on "FM" ("DAB-FM" option greyed out), or "DAB/FM auto tracking" is not activated, the sound will cut out while the digital signal is too weak.
Media
USB port

Insert the USB memory stick in the USB port or connect the USB device to the USB port using a suitable cable (not supplied).
! To protect the system, do not use a USB hub.
The system builds playlists (in temporary memory), an operation which can take from a few seconds to several minutes at the first connection.
Reduce the number of non-music files and the number of folders to reduce the waiting time. The playlists are updated every time the ignition is switched off or a USB memory stick is connected. The lists are memorised: if they are not modified, the subsequent loading time will be shorter.
Auxiliary socket (AUX)
(depending on model / depending on equipment)

This source is only available if "Auxiliary input" has been checked in the audio settings.
Connect the portable device (MP3 player, etc.) to the auxiliary jack socket using an audio cable (not supplied).
First adjust the volume on your portable device (to a high level). Then adjust the volume of your audio system.
Display and management of the controls are via the portable device.
CD player
(depending on model / depending on equipment) Insert the CD in the player.
Selecting the source

Press Radio Media to display the primary page.
or
MEDIA

Select "Source".
Choose the source.
Bluetooth® audio streaming
Streaming allows you to listen to music from your smartphone.
The Bluetooth profile must be activated, first adjust the volume on your portable device (to a high level).
Then adjust the volume of your audio system.
If play does not start automatically, it may be necessary to start the audio playback from the telephone.
Control is from the portable device or by using the system's touch buttons.
Once connected in streaming mode, the telephone is considered to be a media source.
Connecting Apple® players
Connect the Apple ® player to the USB port using a suitable cable (not supplied). Play starts automatically.
Control is via the audio system.
The classifications available are those of the portable device connected (artists / albums / genres / playlists / audiobooks / podcasts). The default classification used is by artists. To modify the classification used, return to the first level of the menu then select the desired classification (playlists for example) and confirm to go down through the menu to the desired track.
The version of software in the audio system may not be compatible with the generation of your Apple ® player.
Information and advice
! The system supports USB mass storage devices, BlackBerry® devices or Apple® players via USB ports. The adapter cable is not supplied. Device management is done by the audio system controls. Other peripherals, not recognised on connection, must be connected to the auxiliary socket using a Jack cable (not supplied) or via Bluetooth streaming, depending on compatibility.
! To protect the system, do not use a USB hub.
The audio equipment will only play audio files with ",".aac",".flac",".ogg" and ".mp3" file extensions and with a bit rate of between 32 Kbps and 320 Kbps.
It also supports VBR (Variable Bit Rate) mode. No other file types (.mp4, etc.) can be read. ".wma" files must be of the standard wma 9 type.
The sampling rates supported are 32, 44 and 48 kHz.
PEUGEOT Connect Nav
It is advisable to restrict file names to 20 characters, without using special characters (e.g. " "?; ù) in order to avoid any reading or display problems.
Use only USB keys in FAT32 format (File Allocation Table).
It is recommended that the original USB cable for the portable device is used.
In order to be able to play a burned CDR or CDRW, select standards ISO 9660 level 1, 2 or Joliet if possible when burning the CD. If the disc is burned in another format, it may not be played correctly. It is recommended that the same burning standard is always used on an individual disc, with the lowest speed possible (4x maximum) for the best acoustic quality. In the particular case of a multi-session CD, the Joliet standard is recommended.
Telephone
Pairing a Bluetooth® telephone
As a safety measure and because it requires sustained attention by the driver, the pairing of a Bluetooth mobile telephone with the Bluetooth hands-free system of your audio system must be done with the vehicle stationary and the ignition on.
i Activate the Bluetooth function on the telephone and ensure that it is "visible to all" (telephone configuration).
Procedure from the telephone

Select the system name in the list of devices detected.
In the system, accept the connection request from the telephone.
To complete the pairing, whichever procedure used (from the telephone or from the system), ensure that the code is the same in the system and in the telephone.
Procedure from the system

Press Telephone to display the primary page.
or
TEL

Press "Bluetooth search".
Or

Select "Search". The list of telephones detected is displayed.
If the pairing procedure fails, it is recommended that you deactivate and then reactivate the Bluetooth function in your telephone.

Select the name of the chosen telephone in the list.
Connection sharing
The system offers to connect the telephone with 3 profiles:
- "Telephone" (hands-free kit, telephone only),
- "Streaming" (streaming: wireless playing of the audio files on the telephone),
- "Mobile internet data".

Activation of the profile; "Mobile internet data" is obligatory for connected navigation having first activated sharing of this connection on your smartphone.

Select one or more profiles.

Press "OK" to confirm.

Depending on the type of telephone, you may be asked to accept or not the transfer of your contacts and messages.
Automatic reconnection

On return to the vehicle, if the last telephone connected is present again, it is automatically recognised and within about 30 seconds of switching on the ignition, the connection is established without any action on your part (Bluetooth activated).
To modify the connection profile:

Press Telephone to display the primary page.
or
TEL
Press the "OPTIONS" button to go to the secondary page.

Select "Bluetooth connection" to display the list of paired devices.

Press the "details" button.
PEUGEOT Connect Nav

Select one or more profiles.

Press "OK" to confirm.

The ability of the system to connect to just one profile depends on the telephone. All three profiles may connect by default.

The services available depend on the network, the SIM card and the compatibility of the Bluetooth devices used. Check the instructions for your telephone and with your service provider for the services to which you have access.

The profiles compatible with the system are: HFP, OPP, PBAP, A2DP, AVRCP, MAP and PAN.
Go to the Brand's website for more information (compatibility, additional help, etc.).
PEUGEOT Connect Nav
Managing paired telephones

This function allows the connection or disconnection of a peripheral device as well as the deletion of a pairing.

Press Telephone to display the primary page.
or
TEL
Press the "OPTIONS" button to go to the secondary page.

Select "Bluetooth connection" to display the list of paired devices.

Press on the name of the telephone chosen in the list to disconnect it. Press again to connect it.
Deleting a telephone

Select the basket at top right of the screen to display a basket alongside the telephone chosen.

Press the basket alongside the telephone chosen to delete it.
Receiving a call
An incoming call is announced by a ring and a superimposed display in the screen.

Make a short press on the steering mounted TEL button to accept an incoming call.
And

Make a long press

on the steering mounted TEL button to reject the call.
or
Select "End call".

Making a call

Using the telephone is not recommended while driving.
Park the vehicle.
Make the call using the steering mounted controls.
Calling a new number

Press Telephone to display the primary page.
or
TEL

Enter the phone number using the digital keypad.

Press "Call" to start the call.
Calling a contact

Press Telephone to display the primary page.
or
TEL

Or make a long press

on the steering mounted TEL button.
Select "Contact".
Select the desired contact from the list offered.

Select "Call".
Calling a recently used number

Press Telephone to display the primary page.
or
TEL
Or

Make a long press
on the steering mounted button.

Select "Calls".
Select the desired contact from the list offered.
It is always possible to make a call directly from the telephone; as a safety measure, first park the vehicle.
Managing contacts / entries

Press Telephone to display the primary page.
or
TEL
Select "Contact".

Select "Create" to add a new contact.
In the "Telephone" tab, enter the telephone numbers for the contact.
In the "Address" tab, enter the addresses for the contact.
In the "Email" tab, enter the email addresses for the contact.
The "Email" function allows email addresses to be entered for a contact, but the system is not able to send emails.
Managing messages

Press Telephone to display the primary page.
or
TEL
Press the "OPTIONS" button to go to the secondary page.

Select "Messages" to display the list of messages.

Select the "All" or "Sent" or "Incoming" tab.

Select the detail of the message chosen in one of the lists.

Press "Answer" to send a quick message stored in the system.

Press "Call" to start the call.
Press "Play" to hear the message.

! Access to "Messages" depends on the compatibility of the smartphone and the integral system. Depending on the smartphone, access to your messages or email may be slow.
The services available depend on the network, the SIM card and the compatibility of the Bluetooth devices used. Check in the manual for your smartph and with your service provider for the services available to you.
Managing quick messages

Press Telephone to display the primary page.
or
TEL
Press the "OPTIONS" button to go to the secondary page.

Select "Quick messages" to display the list of messages.

Select the "Delayed" or "My arrival" or "Not available" or "Other" tab with the possibility of creating new messages.

Press "Create" to write a new message.

Select the message chosen in one of the lists.

Press "Transfer" to select the addressee(s).

Press "Play" to start playing the message.
Managing email

Press Telephone to display the primary page.
or
TEL
Press the "OPTIONS" button to go to the secondary page.

Select "Email" to display the list of messages.

Select the "Incoming" or "Sent" or "Not read" tab.
Select the message chosen in one of the lists.

Press "Play" to start playing the message.
! Access to "Email" depends on the compatibility of the smartphone and the integral system.
Configuration
Audio settings

Press Settings to display the primary page.
or
SETUP

Select "Audio settings".
Select "Ambience".
Or
"Position".
Or
"Sound".
Or
"Voice".
Or
"Ringtone".
Press "OK" to save the settings.
OK
PEUGEOT Connect Nav
The sound distribution (or spatialisation with the Arkamys ® system) is audio processing that allows the quality of the sound to be adapted according to the number of passengers in the vehicle. Available only with the front and rear speakers configuration.
The audio settings Ambience (6 optional ambiences) and Bass, Medium and Treble are different and independent for each audio source. Activate or Deactivate "Loudness". The settings for "Position" (All passengers, Driver and Front only) are common to all sources. Activate or Deactivate "Touch tones", "Volume linked to speed" and "Auxiliary input".
Onboard audio: Arkamys® Sound Staging optimises the distribution of sound in the passenger compartment.
Profile settings
As a safety measure and because it requires the sustained attention of the driver, changes to settings must only be done with the vehicle stationary.

Press Settings to display the primary page.
or
SETUP
Press the "OPTIONS" button to go to the secondary page.

Select "Setting of the profiles".
Select "Profile 1" or "Profile 2" or "Profile 3" or "Common profile".

Press this button to enter a name for the profile using the virtual keypad.
OK

Press "OK" to confirm.
Press this button to add a photograph to the profile.
[NO TEXT]
Insert a USB memory stick containing the photograph in the USB port. Select the photograph.
Press "OK" to accept the transfer of the photograph.
OK
Press "OK" again to save the settings.
OK
The location for the photograph is square; the system reshapes the original photograph if in another format.
00.0
Press this button to initialise the profile selected.
! Initialisation of the profile selected activates the English language by default.
Select a "Profile" (1 or 2 or 3) to associate the "Audio settings" with it.

Select "Audio settings".
Select "Ambience".
Or
"Position".
Or
"Sound".
Or
"Voice".
Or
"Ringtone".
Press "OK" to save the settings.
OK
Modifying system settings

Press Settings to display the primary page.
or
SETUP
Press the "OPTIONS" button to go to the secondary page.

Select "Screen configuration".
Select "Animation".

Activate or deactivate: "Automatic scrolling".
Select "Brightness".
●●●●
Move the cursor to adjust the brightness of the screen and/or of the instrument panel.
PEUGEOT Connect Nav

Press Settings to display the primary page.
or
SETUP
Press the "OPTIONS" button to go to the secondary page.

Select "System settings".
Select "Units" to change the units of distance, fuel consumption and temperature.
Select "Factory settings" to return to the initial settings.
! Returning the system to factory settings activates the English language by default.
Select "System info" to display the versions of the different modules installed in the system.
PEUGEOT Connect Nav
Select the language

Press Settings to display the primary page.
or
SETUP
Press the "OPTIONS" button to go to the secondary page.

Select "Languages" to change the language.
Setting the date

Press Settings to display the primary page.
or
SETUP
Press the "OPTIONS" button to go to the secondary page.

Select "Setting the time-date".
Select "Date".

Press on this button to define the date.
OK
Press "OK" to confirm.
Select the display format of the date.

Adjustment of the time and date is only available if "GPS synchronisation" is deactivated. The change between winter and summer time is done by changing the time zone.
Setting the time

Press Settings to display the primary page.
or
SETUP
Press the "OPTIONS" button to go to the secondary page.

Select "Setting the time-date".
Select "Time".

Press this button to adjust the time using the virtual keypad.
OK
Press "OK" to confirm.

Press this button to define the time zone.
PEUGEOT Connect Nav
Select the display format for the time (12h / 24h).

Select "Colour schemes".
Activate or deactivate synchronisation with GPS (UTC).

Select a colour scheme in the list then press "OK" to confirm.
Frequently asked questions
The following information groups together the answers to the most frequently asked questions concerning your audio system.
OK
Press "OK" to confirm.
The system does not automatically manage the change between winter and summer time (depending on country).
Every time the colour scheme is changed, the system restarts, temporarily displaying a black screen.
Colour schemes
As a safety measure, the procedure for changing the colour scheme is only possible when the vehicle is stationary.

Press Settings to display the primary page.
or
SETUP
Navigation
| QUESTION RESPONSE SOLUTION | ||
| The route calculation is not successful. | The guidance criteria may be in conflict with the current location (exclusion of toll roads on a toll road). | Check the route settings in the "Navigation" menu. |
| The POIs do not appear. | The POIs have not been selected. | Select the POIs in the list of POIs. |
| The audible warning of "Danger areas" does not work. | The audible warning is not active or the volume is too low. | Activate the audible warning in the "Navigation" menu and check the voice volume in the audio settings. |
| The system does not suggest a detour around an incident on the route. | The guidance criteria do not take account of TMC messages. | Select setting for the "Traffic info " function in the list of route settings (Without, Manual or Automatic). |
| I receive a "Danger zone" alert which is not on my route. | Other than guidance, the system announces all "Danger zones" positioned in a cone located in front of the vehicle. It may provide an alert for "Danger zones" located on nearby or parallel roads. | Zoom in on the map to see the exact position of the "Danger zone". Select "On the route" to no longer receive alerts other than navigation instructions or to reduce the time for the announcement. |
| Certain traffic jams along the route are not indicated in real time. | On starting, it is several minutes before the system begins to receive the traffic information. | Wait until the traffic information is being received correctly (display of the traffic information icons on the map). |
| In certain countries, only major routes (motorways, etc.) are listed for the traffic information. | This is perfectly normal. The system is dependent on the traffic information available. | |
| The altitude is not displayed. On starting, the initialisation of the GPS may take up to 3 minutes to receive more than 4 satellites correctly. | Wait until the system has started up completely so that there is GPS coverage by at least 4 satellites. | |
| Depending on the geographical environment (tunnel, etc.) or the weather, the conditions of reception of the GPS signal may vary. | ||
| My navigation is no longer connected. | During start-up and in certain geographical areas, the connection may be unavailable. | Check that the connected services are activated (settings, contract). |
Radio
| QUESTION RESPONSE SOLUTION | ||
| The reception quality of the tuned radio station gradually deteriorates or the stored stations are not working (no sound, 87.5 MHz is displayed, etc.). | The vehicle is too far from the transmitter of the station or no transmitter is present in the geographical area. | Activate the "RDS" function by means of the short-cut menu to enable the system to check whether there is a more powerful transmitter in the geographical area. |
| The environment (hills, buildings, tunnels, basement car parks, etc.) block reception, including in RDS mode. | This phenomenon is normal and does not indicate a failure of the audio equipment. | |
| The aerial is absent or has been damaged (for example when going through a car wash or into an underground car park). | Have the aerial checked by a franchised dealer. | |
| I cannot find some radio stations in the list of stations received.The name of the radio station changes. | The station is not received or has changed its name in the list.Some radio stations send other information in place of their name (the title of the song for example).The system interprets these details as the station name. | Press on the "Update list" button in the "Radio stations" secondary menu. |
Media
| QUESTION RESPONSE SOLUTION | ||
| Playback of my USB memory stick starts only after a very long wait (around 2 to 3 minutes). | Some files supplied with the memory stick may greatly slow down access to reading the memory stick (multiplication by 10 of the catalogue time). | Delete the files supplied with the memory stick and limit the number of sub-folders in the file structure on the memory stick. |
| The CD is ejected every time or is not played. The | CD is upside down, cannot be read, does not contain audio files or contains audio files of a format not recognised by the audio system. The CD has been recorded in a format that is not compatible with the player (udf, etc.). The CD is protected by an anti-pirating system not recognised by the audio system. | Check that the CD is inserted in the player the right way up.Check the condition of the CD: the CD cannot be played if it is too badly damaged.Check the content in the case of a recorded CD: consult the advice in the "AUDIO" section. The audio system CD does not read DVDs. Due to insufficient quality, certain burned CDs will not be read by the audio system. |
| There is a long waiting period following the insertion of a CD or connection of a USB memory stick. | Upon insertion of a new key, the system reads a certain amount of data (directory, title, artist, etc.). This may take from a few seconds to a few minutes. | This is perfectly normal. |
| The CD sound is of poor quality. The CD used in | scratched or of poor quality. Insert good quality CDs and store them in suitable conditions. | |
| The audio settings (bass, treble, ambience) are unsuitable. | Return bass and treble settings to 0, without selecting an ambience. | |
| Some information characters in the currently playing media are not displayed correctly. | The audio system does not display some types of characters. | Use standard characters to name tracks and folders. |
| Playback of streaming files does not start. The connected device does not automatically launch playback. | To start playback from the device. | |
| Names of tracks and playing time are not displayed on the audio streaming screen. | The Bluetooth profile does not allow the transfer of this information. | |
Telephone
| QUESTION RESPONSE SOLUTION | ||
| I cannot connect my Bluetooth telephone. The telephone's Bluetooth function may be switched off or the telephone may not be visible. | Check that your telephone has Bluetooth switched on.Check in the telephone settings that it is "visible to all". | |
| The volume of the telephone connected in Bluetooth mode is inaudible. | The sound depends on both the system and the telephone. | Increase the volume of the audio system, to maximum if required, and increase the volume of the telephone if necessary. |
| Ambient noise affects the quality of the telephone call. | Reduce the ambient noise level (close the windows, reduce the booster fan speed, slow down, etc.). | |
| Some contacts are duplicated in the list. The options for synchronising contacts are synchronising the contacts on the SIM card, the contacts on the telephone, or both. When both synchronisations are selected, some contacts may be duplicated. | Select "Display SIM card contacts" or "Display telephone contacts". | |
| The contacts are listed in alphabetical order. Some telephones offer display options. Depending on the settings chosen, contacts can be transferred in a specific order. | Modify the telephone directory display settings. | |
| The system does not receive SMS. The Bluetooth mode does not permit sending SMS text messages to the system. | ||
Settings
| QUESTION RESPONSE SOLUTION | ||
| When changing the setting of treble and bass the equalizer setting is deselected.When changing the equalizer setting, the treble and bass settings are reset. | The selection of an equalizer setting imposes the settings for treble and bass and vice-versa. | Modify the treble and bass or equalizer settings to obtain the desired musical ambience. |
| When changing the balance setting, distribution is deselected.When changing the distribution setting, the balance setting is deselected. | The selection of a distribution setting imposes the balance settings and vice-versa. | Modify the balance setting or the distribution setting to obtain the desired sound quality. |
| There is a difference in sound quality between the different audio sources. | To allow for optimal listening quality, the audio settings can be tailored to different sound sources, which can generate audible differences when changing source. | Check that the audio settings are adapted to the sources listened to. It is recommended that the audio settings (Bass:, Treble:, Balance) be adjusted to the middle position, select the "None" musical ambience and set the loudness correction to the "Active" position in CD mode or to the "Inactive" position in radio mode. |
| When the engine is off, the system stops after several minutes of use. | When the engine is switched off, the system's operating time depends on the state of charge of the battery.In normal off state, the system automatically goes into energy economy mode to maintain an adequate charge in the battery. | Turn the ignition on to increase the charge of the battery. |
| The date and time cannot be set. Setting of the date and time is only availableif the synchronisation with the satellites is deactivated. | Settings menu / Options / Time-Date setting.Select the "Time" tab and deactivate the "GPS synchronisation" (UTC). | |
Manufacturer: Continental Automotive Czech Republic, s.r.o.
Europe
1999/5/EC Directive regulatory notices
This device has been evaluated against the essential requirements of the 1999/5/EC Directive.
| Bulgarian | Снастоветр "Continental Automotive Czech Republic, s.r.o." декларяра, не "NAC EUR WAVE2" отворя на существените намискания и другие приложними изномання на Директиве 1999/5/EC. |
| Croatian | Овлие "Continental Automotive Czech Republic, s.r.o." Iztjavljaje da je ovai "NAC EUR WAVE2" je u skladu s osnovim zahtljima i drugim relevantnim odredbama Directive 1999/5/EC. |
| Czech | "Continental Automotive Czech Republic, s.r.o." timto prohlisije, že tento "NAC EUR WAVE2" je ve sklade se zaktadnem podadavky a dalism prislavinyme ustanovenni simnice 1999/5/EC. |
| Danish | Undertegnede "Continental Automotive Czech Republic, s.r.o." erklærer herved, at feigende udstyr "NAC EUR WAVE2"overholder de väsentlige krav og øvrige relevante krav i direktiv 1999/5/EC. |
| Dutch | Hierbij verklaart "Continental Automotive Czech Republic, s.r.o." dat het toesta! "NAC EUR WAVE2" in overeenstemming is met de essentiële eisen en de andere relevante bepaaling van richtlijn 1999/5/EG. |
| English | Hereby, "Continental Automotive Czech Republic, s.r.o." declares that this "NAC EUR WAVE2" is in compliance with the essential requirements and other relevant provisions of Directive 1999/5/EC. |
| Estonian | Käseslevaga kinnitab "Continental Automotive Czech Republic, s.r.o." seadme "NAC EUR WAVE2" vastavust direktliv 1999/5/EÜ pöhinöustele ja nimetatud direktlivist tulenevatele teistele sjäjokhastele sätetele. |
| German | Hiermit erklärt "Continental Automotive Czech Republic, s.r.o.", dass sich das Gerät "NAC EUR WAVE2" in Übereinstimmung mit den grundlegenden Anforderungen und den Übrigen einschlägigen Bestimmungen der Richtlinie 1999/5/EG befindet. |
| Greek | ME THIN TAPOYZA "Continental Automotive Czech Republic, s.r.o." AHANONEI OTI "NAC EUR WAVE2" EYMMOMPODNETA ПРОЗ ТІЕ ОУЖДЕЕ АРАТИТЕЕИ КАТ ЛІЕ АОНПЕЕ ЭХЕТИКЕ АМАТЕЕИ THE ÖGHTIA 1999/5/EK. |
| Hungarian | Akulrott, "Continental Automotive Czech Republic, s.r.o." nyilatlorom, hogy a "NAC EUR WAVE2" megelel a vonatkož olatvető követelményelnek és az 1999/5/EC irányeh egyéb előirásainat. |
| Flinish | "Continental Automotive Czech Republic, s.r.o." vakauuttaa tâten että "NAC EUR WAVE2" typpinen laite ondirektivin 1999/5/EY oleellisten vastinusten ja sită loskevlen direktivin muiden ehtojenmukainen. |
| French | Par la presente "Continental Automotive Czech Republic, s.r.o." declare que l'appareli "NAC EUR WAVE2" est conforme aux exigences essentielles et aux autres dispositions pertinentes de la directive 1999/5/EC. |
| Icelandic | Hér moë lýsir "Continental Automotive Czech Republic, s.r.o." yír þvíl að "NAC EUR WAVE2" er i samrami við grunkrořur og adrar krófur, sam gerðar eru i tilakipun 1999/5/EC |
| Italian | Con la presente "Continental Automotive Czech Republic, s.r.o." dichiara che questo "NAC EUR WAVE2" è conforme al requisiti essentioli ed alle altre disposizioni pertinenti stabilite dalla direttiva 1999/5/CE. |
| Latvian | Ar so "Continental Automotive Czech Republic, s.r.o." delkáre, ka "NAC EUR WAVE2" atbilst Direktivas 1999/5/EK bötkisajam prasibám un citiem ar to salsitiziem notekuniem. |
| Lithuanian | Sluo "Continental Automotive Czech Republic, s.r.o." deklaruojla, kad ës "NAC EUR WAVE2" stitinka esminius reikalvimus ir lotas 1999/5/EB Direktyvos nuostatas. |
| Maltese | Hawnhelik, "Continental Automotive Czech Republic, s.r.o." jiddikjara li dan "NAC EUR WAVE2" jikkonforma mal-tihijlet essenzjali u ma provvedimenti ohraje relevanti li homem fid-Direttiva 1999/5/EC. |
| Norwegian | "Continental Automotive Czech Republic, s.r.o." erklærer herved at utstyret "NAC EUR WAVE2" er i samvar med le grunnleggende krav og øvrige relevante kravi direktiv 1999/5/EF. |
| Polish | Niniejszym "Continental Automotive Czech Republic, s.r.o." owiadcza, že "NAC EUR WAVE2" jest, jeguly z beschrileczyni wyringami neos pouzotatymi klosowynini postanowieniami Dyrektywy 1999/5/EC. |
| Portuguese | "Continental Automotive Czech Republic, s.r.o." declara que este "NAC EUR WAVE2" está conforme com os requisits essenciais e outras disposições da Direktiva 1999/5/CE. |
| Slovak | "Continental Automotive Czech Republic, s.r.o." týmco vyhlasuje, že "NAC EUR WAVE2" splíta szákladne pošiadavky a všeky prisluše ustanovenia Smernice 1999/5/ES. |
| Slovenian | "Continental Automotive Czech Republic, s.r.o." trjavlja, da je ta "NAC EUR WAVE2" v skladu z bistvenimi zahtevami in ostalni relevantnimi določili direktive 1999/5/ES. |
| Spanish | Por medio de la presente "Continental Automotive Czech Republic, s.r.o." declara que "NAC EUR WAVE2" cumple con los requisitos esenciales y calesquiera otras disposiciones aplicables o exigibles de la Direktiva 1999/5/CE. |
| Swedish | Härmed intugar "Continental Automotive Czech Republic, s.r.o." att denna "NAC EUR WAVE2" står I överensstämmelve mod de väsentliga egenskapskrav och övriga relevanta bestämmlser som framgr av direktiv 1999/5/EG. |
PEUGEOT Connect Nav
In order to satisfy the essential requirements of 1999/5/EC Directive, the product is compliant with the following standards:
| RF spectrum use (R&TTE art. 3.2) | ETSI EN 300 328 V1.9.1 (2015-02) |
| EMC (R&TTE art. 3.1b) | ETSI EN 301 489-1 V1.9.2 (2011-09)ETSI EN 301 489-17 V2.2.1 (2012-09)ETSI EN 300 440-2 V1.4.1 (2010-08)EN 55013 (2013)EN 55020 (2007) |
| Health & Safety (R&TTE art. 3.1a) | EN 60950-1:2006 + A11:2009+ A12:2011 + A1:2010 + AC:2011+ A2:2013 |
| RcHS | 2011/65/UE, 2014/UE to 2014/6/UE, 20:4/8/UE to 2014/16/UE |
The conformity assessment procedure referred to in Article 10 and detailed in Annex IV of Directive 1999/5/EC has been followed with the involvement of the following Notified Body:
AT4 wireless, S.A.
Parque Tecnologico de Andaluca
C/ Severo Ochoa 2
29590 Campanillas - Málaga
SPAIN
Notified Body No: 1909
Thus, the following marking is included in the product (Label on top):
C€ 1909
There is no restriction for the commercialization of this device in all the countries of the European Union. Specific instructions of installation and proper use of the equipment
This Multimedia System Equipment must be fixed in a car dashboard.
This Equipment is intended to be installed by service persons or qualified operators in a
restricted access location that
The external devices and accessories connected to the equipment shall comply its product standard in order to prevent fire risks.
Fuse characteristics:
MINI AUTO FUSE W Yellow 20:
Voltage rated: 32V (Volts)
Current rated: 20A (Amperes)
| 600 | 0.30 seconds | 0.100 seconds |
| 350 | 0.080 seconds | 0.250 seconds |
| 200 | 0.15 seconds | 5 seconds |
| 135 | 0.75 seconds | 600 seconds |
| 110 | 100 hours | - |
| % of rating | Minimum | Maximum |
| Blow Time | ||
List of countries within the EU or geographical zones where it can be used.
There is no restriction for the commercialization of this device in all the countries of the European Union:
Austria, Belgium, Bulgaria, Croatia, Cyprus, Czech Republic, Denmark,
Estonia, Finland, France, Germany, Greece, Hungary, Ireland, Italy,
Latvia, Lithuania, Luxembourg, Malta, Netherlands, Poland, Portugal, Romania, Slovakia, Slovenia, Spain, Sweden, United Kingdom
Romania, Castania, Slovenia, Spain, 61.
Information about the licenses that apply to it
Inflation about the license that There is no specific license.
➢ Restrictions or possible additional restrictions when trying to achieve the authorisation of use of the equipment.
There is no specific restriction to achieve the authorisation of use of the equipment.
USA - Federal Communications Commission (FCC)
FCC ID: ZFW-NACEUR2
1. Modification Statement
"Continental Automotive Rambouillet France S.A.S." has not approved any changes or modifications to this device by the user. Any changes or modifications could void the user's authority to operate the equipment.
2. Interference statement
This device complies with part 15 of the FCC Rules. Operation is subject to the following two conditions:
(1) This device may not cause harmful interference, and
(2) This device must accept any interference received, including interference that may cause undesired operation.
3. Wireless notice:
This device complies with FCCC radiation exposure limits set forth for an uncontrolled
environment and meets the FCC radio frequency (RF) Exposure Guidelines. This transmitter must not be co-located or operating in conjunction with any other antenna or transmitter.
4. FCC Class A/B digital device or peripheral notice - Class
This equipment has been tested and found to comply with the limits for a Class B digital
device, pursuant to part 15 of the FCC Rules. These limits are designed to provide reasonable
protection against harmful interference in a residential installation. This equipment
generates, uses and can radiate radio frequency energy and, if not installed and used in
accordance with the instructions, may cause harmful interference to radio communications.
However, there is no guarantee that interference will not occur in a particular installation. If
this equipment does cause harmful interference to radio or television reception, which can be determined by turning the equipment off and on, the user is encouraged to trade correct
be determined by turning the equipment on and on, the use of the interference by one or more of the following measures:
—Reorient or relocate the receiving antenna.
—Increase the separation between the equipment and receiver.
—Connect the equipment into an outlet on a circuit different from that to which the receiver is connected.
—Consult the dealer or an experienced radio/TV technician for help.
PEUGEOT Connect Radio

Multimedia audio system – Applications – Bluetooth® telephone
Contents
First steps 2
Steering mounted controls 3
Menus 4
Applications 6
Radio 7
DAB radio (Digital Audio Broadcasting) 9
Media 10
Telephone 12
Configuration 18
Frequently asked questions 21
PEUGEOT Connect Radio
The different functions and settings described vary according to the version and configuration of your vehicle.
As a safety measure and because it requires sustained attention by the driver, the pairing of a Bluetooth mobile telephone with the Bluetooth hands-free system of your audio system must be done with the vehicle stationary and the ignition on.
The system is protected in such a way that it will only operate in your vehicle. The display of the Energy Economy Mode message signals that a change to standby is imminent.
The link below gives access to OSS (Open Source Software) codes for the system. https://www.groupe-psa.com/fr/oss/ https://www.groupe-psa.com/en/oss/
PEUGEOT Connect Radio
First steps

With the engine running, a press mutes the sound. With the ignition off, a press turns the system on.

Adjustment of the volume.
Use the buttons either side of or below the touch screen for access to the menus, then press the virtual buttons in the touch screen.
Depending on the model, use the "Source" or "Menu" buttons either side of the touch screen for access to the menus, then press the virtual buttons in the touch screen.
You can display the menu at any time by pressing the screen briefly with three fingers.
All of the touch areas of the screen are white. Press in the grey zone to go back a level or confirm.
Press the back arrow to go back a level or confirm.
* Depending on equipment.
! The touch screen is of the "capacitive" type. To clean the screen, use a soft, non-abrasive cloth (spectacles cloth) with no additional product. Do not use sharp objects on the screen. Do not touch the screen with wet hands.
Certain information is displayed permanently in the upper band of the touch screen:
- Repeat of the air conditioning information (depending on version), and direct access to the corresponding menu.
- Reminder of the Radio Media and Telephone menu information.
- Access to the Settings of the touch screen and digital instrument panel.

Selecting the audio source (depending on version):
- FM / DAB radio stations* / AM*.
- Telephone connected via Bluetooth and multimedia broadcast Bluetooth* (streaming).
- CD player (depending on model).
- USB key.
- Media player connected via the auxiliary socket (depending on model).

In the "Settings" menu you can create a profile for just one person or a group of people with common points, with the possibility of entering a multitude of settings (radio presets, audio settings, ambiences, etc.); these settings are taken into account automatically.

In very hot conditions, the volume may be limited to protect the system. It may go into standby (screen and sound off) for at least 5 minutes
The return to normal takes place when the temperature in the passenger compartment has dropped.
PEUGEOT Connect Radio
Steering mounted controls Steering mounted controls – Type 1

Radio:

Select the previous / next preset radio station.
Select the previous / next item in a menu or a list.
Media:
Select the previous / next track.
Select the previous / next item in a menu or a list.

Radio:
Short press: display the list of radio stations.
Long press: update the list.
Media:
Short press: display the list of folders.
Long press: display the available sorting options.

Change audio source (radio; USB; AUX if equipment connected; CD; streaming).

Confirm a selection.

Increase volume.

Decrease volume.

Mute / Restore sound by simultaneously pressing the increase and decrease volume buttons.
Steering mounted controls - Type 2

Depending on model.

Voice commands:
This control is located on the steering wheel or at the end of the lighting control stalk (depending on model).
Short press, smartphone voice commands via the system.
PEUGEOT Connect Radio

or


or

Increase volume.
Mute / Restore the sound. Or
Mute by pressing the volume increase and decrease buttons simultaneously.
Restore the sound by pressing one of the two volume buttons.
Decrease volume.

or


or
SRC

Media (short press): change the multimedia source.
Telephone (short press): start telephone call.
Call in progress (short press): access telephone menu.
Telephone (long press): reject an incoming call, end call; when no call is in progress, access telephone menu.

or

Radio (rotate): previous / next preset.
Media (rotate): previous / next track, move in a list.
Short press: confirm a selection; if nothing selected, access to presets.
LIST
Radio: display the list of stations.
Media: display the list of tracks. Radio (press and hold): update the list of stations received.
Menus
Depending on model / Depending on version
Air conditioning

Manage the different temperature and air flow settings.

Applications

Access configurable equipment.

Radio Media

Select an audio source or radio station.

Telephone

Connect a telephone by Bluetooth ® . Operate certain applications on a smartphone connected via MirrorLink ™ , CarPlay ® or Android Auto.

Settings

Configure a personal profile and/or configure the sound (balance, ambience, etc.) and the display (language, units, date, time, etc.).
Driving

Activate, deactivate or configure certain vehicle functions.

Insert a USB memory stick in the USB port.
! To protect the system, do not use a USB hub.
The system can read folders and image files in the formats: .tiff;.gif;.jpg/jpeg;.bmp;.png.

Press Applications to display the primary page.

Press "Photos".

Select a folder.

Select an image to view.

Press this button to display the details of the photo.

Press the back arrow to go back a level.
Managing messages

Press Applications to display the primary page.
Press "SMS".

Select the "SMS" tab.

Press this button to select the display settings for messages.

Press this button to search for a contact.

Select the "Quick messages" tab.

Press this button to select the display settings for messages.
Radio
Selecting a station

Press Radio Media to display the primary page.

Press one of the buttons for an automatic search for radio stations.
Or

Move the cursor for a manual search for frequencies up or down.
Or

Press the frequency.

Enter the FM and AM waveband values using the virtual keypad.
OK
! Radio reception may be affected by the use of electrical equipment not approved by the Brand, such as a USB charger connected to the 12 V socket. The external environment (hills, buildings, tunnels, basement car parks, etc.) may block reception, including in RDS mode. This is a normal effect of the way in which radio waves are transmitted and does not indicate any failure of the audio equipment.
Changing waveband

Press Radio Media to display the primary page.
Press the "OPTIONS" button to go to the secondary page.

Press "Band" to change waveband.

Press in the grey zone to confirm.
Presetting a station
Select a radio station or frequency.

Make a short press on the star outline. If the star is solid, the radio station is already preset.
Or
Select a radio station or frequency.
Press "Preset".

Make a long press on one of the buttons to preset the station.
Activating / Deactivating RDS

Press Radio Media to display the primary page.
Press the "OPTIONS" button to go to the secondary page.
Activate / Deactivate "RDS".

Press in the grey zone to confirm.

PEUGEOT Connect Radio
The RDS, if activated, enables you to continue listening to the same station by automatically retuning to alternative frequencies. However, in certain conditions, coverage of this RDS station may not be assured throughout the entire country as radio stations do not cover 100% of the territory. This explains the loss of reception of the station during a journey.
Display text information
The "Radio Text" function allows information transmitted by the radio station and related to the station or the song playing to be displayed.

Press Radio Media to display the primary page.
Press the "OPTIONS" button to go to the secondary page.

Activate / Deactivate "News".

Press in the grey zone to confirm.
Play TA messages
The TA (Traffic Announcement) function gives priority to TA alert messages. To operate, this function needs good reception of a radio station that carries this type of message. While traffic information is being broadcast, the current media is automatically interrupted so that the TA message can be heard. Normal play of the media previously playing is resumed at the end of the message.

Press Radio Media to display the primary page.
Press the "OPTIONS" button to go to the secondary page.
Activate / Deactivate "TA".

Press in the grey zone to confirm.

Audio settings

Press Radio Media to display the primary page.
Press the "OPTIONS" button to go to the secondary page.

Press "Audio settings".

Select the "Tone" or "Balance" or "Ringtones" or "Sound" tab to configure the audio settings.

Press the back arrow to confirm.
In the tab "Tone", the Ambience audio settings, as well as Bass, Medium and Treble are different and independent for each audio source. On the "Balance" tab, the All passengers, Driver and Front only settings are common to all sources. On the "Sound" tab, activate or deactivate "Volume linked to speed", "Auxiliary input" and "Touch tones".
The sound distribution (or spatialisation with the Arkamys ® system) is audio processing that allows the quality of the sound to be adapted according to the number of passengers in the vehicle.
Onboard audio: the Sound Staging of Arkamys® optimises the distribution of sound in the passenger compartment.
DAB (Digital Audio Broadcasting) radio
Terrestrial Digital Radio
Digital radio provides higher quality reception.
The different multiplexes offer a choice of radio stations arranged in alphabetical order.

Press Radio Media to display the primary page.
Press the "OPTIONS" button to go to the secondary page.

Press "Waveband" to select the "DAB band".

Press in the grey zone to confirm.
PEUGEOT Connect Radio
FM-DAB Follow-up
"DAB" does not cover 100% of the territory. When the digital radio signal is poor, the "FM-DAB Follow-up" allows you to continue listening to the same station, by automatically switching to the corresponding "FM" analogue station (if there is one).

Press Radio Media to display the primary page.
Press the "OPTIONS" button to go to the secondary page.

Activate / Deactivate "FM-DAB Follow-up".

Press in the grey zone to confirm.
PEUGEOT Connect Radio
If "FM-DAB Follow-up" is activated, there is a difference of a few seconds when the system switches to "FM" analogue radio with sometimes a variation in volume. When the digital signal quality becomes good, the system automatically switches back to "DAB".
If the "DAB" station being listened to is not available on "FM", or if the "FM-DAB Follow-up" is not activated, the sound will cut out while the digital signal is too weak.
Media
USB port

Insert the USB memory stick in the USB port or connect the USB device to the USB port using a suitable cable (not supplied).
! To protect the system, do not use a USB hub.
The system builds playlists (in temporary memory), an operation which can take from a few seconds to several minutes at the first connection. Reduce the number of non-music files and the number of folders to reduce the waiting time. The playlists are updated every time the ignition is switched off or a USB memory stick is connected. The lists are memorised: if they are not modified, the subsequent loading time will be shorter.
Auxiliary socket (AUX)
(depending on model / depending on equipment)
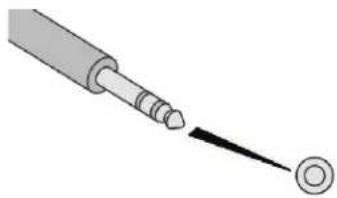
This source is only available if "Auxiliary input" has been checked in the audio settings.
Connect the portable device (MP3 player, etc.) to the auxiliary jack socket using an audio cable (not supplied).
First, adjust the volume on your portable device (to a high level). Then adjust the volume of your audio system. Display and management of the controls are via the portable device.
Selecting the source

Press Radio Media to display the primary page.
Press the "SOURCES" button.
Choose the source.
Bluetooth® streaming
Streaming allows you to listen to music from your smartphone.
The Bluetooth profile must be activated, first adjust the volume on your portable device (to a high level).
Then adjust the volume of your system.
If play does not start automatically, it may be necessary to start the audio playback from the smartphone.
Control is from the portable device or by using the system's touch buttons.
Once connected in Streaming mode, the smartphone is considered to be a media source.
Connecting Apple® players
Connect the Apple ® player to the USB port using a suitable cable (not supplied). Play starts automatically.
Control is via the audio system.
The classifications available are those of the portable device connected (artists / albums / genres / playlists / audiobooks / podcasts), you can also use a classification structured in the form of a library. The default classification used is by artist. To modify the classification used, return to the first level of the menu then select the desired classification (playlists for example) and confirm to go down through the menu to the desired track.
The version of software in the audio system may not be compatible with the generation of your Apple ® player.
Information and advice
! The system supports USB Mass Storage devices, BlackBerry ® devices or Apple ® players via USB ports. The adapter cable is not supplied. Device management is done by the audio system controls. Other peripherals, not recognised on connection, must be connected to the auxiliary socket using a Jack cable (not supplied) or via Bluetooth streaming, depending on compatibility.
To protect the system, do not use a USB hub.
The audio equipment will only play audio files with ".wav", ".wma", ".aac", ".ogg and ".mp3" file extensions and with a bit rate of between 32 Kbps and 320 Kbps. It also supports VBR (Variable Bit Rate) mode. No other file types (.mp4, etc.) can be read. ".wma" files must be of the standard wma 9 type. Sampling frequencies supported are 11, 22, 44 and 48 kHz.
PEUGEOT Connect Radio
It is advisable to restrict file names to 20 characters, without using special characters (e.g. " "?; ù) so as to avoid any reading or display problems.
Use only USB keys in FAT32 format (File Allocation Table).
It is recommended that the original USB cable for the portable device is used.
In order to be able to play a burned CDR or CDRW, select standards ISO 9660 level 1, 2 or Joliet if possible when burning the CD. If the disc is burned in another format, it may not be played correctly. It is recommended that the same burning standard is always used on an individual disc, with the lowest speed possible (4x maximum) for the best acoustic quality. In the particular case of a multi-session CD, the Joliet standard is recommended.
Telephone
MirrorLink™ smartphone connection
As a safety measure and because it requires sustained attention by the driver, using a smartphone when driving is prohibited. All operations must be done with the vehicle stationary.
The synchronisation of a personal smartphone allows users to display applications adapted for the smartphone's MirrorLink™ technology on the vehicle screen. The principles and standards are constantly changing, for the communication process between the smartphone and the system to operate, it is essential that the smartphone is unlocked; update the operating system of the smartphone as well as the date and time of the smartphone and the system. For the list of eligible smartphones, go to the Brand's internet website in your country.
As a safety measure, applications can only be viewed with the vehicle stationary; display is interrupted once the vehicle is moving.
The "MirrorLink™" function requires a compatible smartphone and applications.
Telephone not connected by Bluetooth®

Connect a USB cable. The smartphone charges when connected by a USB cable.

From the system, press "Telephone" to display the primary page.

Press "MirrorLink™" to start the application in the system.
Depending on the smartphone, it may be necessary to activate the "MirrorLink™" function.
OK
During the procedure, several screen pages relating to certain functions are displayed. Accept to start and complete the connection.

When connecting a smartphone to the system, it is recommended that Bluetooth ® be started on the smartphone.
Telephone connected by Bluetooth®

From the system, press "Telephone" to display the primary page.
Press the "PHONE" button to display the secondary page.

Press "MirrorLink™" to start the application in the system.
Once the connection is established, a page is displayed with the applications already downloaded to your smartphone and adapted to MirrorLink™ technology.
Access to the different audio sources remains accessible in the margin of the MirrorLink ™ display, using touch buttons in the upper bar. Access to the menus for the system is possible at any time using the dedicated buttons.
There may be a wait for the availability of applications, depending on the quality of your network.
CarPlay® smartphone connection
As a safety measure and because it requires sustained attention by the driver, using a smartphone when driving is prohibited. All operations must be done with the vehicle stationary.
The synchronisation of a personal smartphone allows users to display applications adapted for the smartphone's CarPlay® technology on the vehicle screen when the smartphone's CarPlay® function has been previously activated. As the principles and standards are constantly changing, it is recommended that you keep your smartphone's operating system updated. For the list of eligible smartphones, go to the Brand's internet website in your country.

Connect a USB cable. The smartphone charges when connected by a USB cable.

From the system, press CarPlay ® to display the Telephone interface.
Or

If the smartphone is already connected by Bluetooth ® .
PEUGEOT Connect Radio

Connect a USB cable. The smartphone charges when connected by a USB cable.

From the system, press "Telephone" to display the primary page.
Press the "PHONE" button to go to the secondary page.

Press on "CarPlay" to display the CarPlay® interface.

On connecting the USB cable, the CarPlay ® function deactivates the system's Bluetooth ® mode.

You can go to the CarPlay® navigation at any time by pressing the system's Navigation button.
Android Auto smartphone connection
As a safety measure and because it requires sustained attention by the driver, using a smartphone when driving is prohibited. All operations must be done with the vehicle stationary.

On your smartphone, download the Android Auto application.
The synchronisation of a personal smartphone allows users to display applications adapted for the smartphone's Android Auto technology on the vehicle screen. The principles and standards are constantly changing, for the communication process between the smartphone and the system to operate, it is essential that the smartphone is unlocked; update the operating system of the smartphone as well as the date and time of the smartphone and the system. For the list of eligible smartphones, go to the Brand's internet website in your country.
As a safety measure, applications can only be viewed with the vehicle stationary; display is interrupted once the vehicle is moving.
The "Android Auto" function requires the use of a compatible smartphone and applications.
Telephone not connected by Bluetooth®

Connect a USB cable. The smartphone charges when connected by a USB cable.

From the system, press "Telephone" to display the primary page.

Press "Android Auto" to start the application in the system.
Depending on the smartphone, it may be necessary to activate the "Android Auto" function.
OK
During the procedure, several screen pages relating to certain functions are displayed. Accept to start and complete the connection.

When connecting a smartphone to the system, it is recommended that Bluetooth ® be started on the smartphone
Telephone connected by Bluetooth®

From the system, press "Telephone" to display the primary page.
Press the "PHONE" button to display the secondary page.

Press "Android Auto" to start the application in the system.
Different audio sources remain accessible in the margin of the Android Auto display, using touch buttons in the upper bar. Access to the menus for the system is possible at any time using the dedicated buttons.
There may be a wait for the availability of applications, depending on the quality of your network.
Pairing a Bluetooth® telephone
As a safety measure and because it requires sustained attention by the driver, the pairing of a Bluetooth mobile telephone with the Bluetooth hands-free system of your audio system must be done with the vehicle stationary and the ignition on.
i Activate the Bluetooth function on the telephone and ensure that it is "visible to all" (telephone configuration).
Procedure from the telephone

Select the name of the system in the list of devices detected.
In the system, accept the connection request from the telephone.
To complete the pairing, whichever procedure used (from the telephone or from the system), ensure that the code is the same in the system and in the telephone.
Procedure from the system

Press "Telephone" to display the primary page.

Press "Bluetooth search". The list of telephones detected is displayed.

Select the name of the chosen telephone in the list.
PEUGEOT Connect Radio
If the pairing procedure fails, it is recommended that you deactivate and then reactivate the "Bluetooth" function in your telephone.
Depending on the type of telephone, you may be asked to accept or not the transfer of your contacts and messages.
Automatic reconnection
On return to the vehicle, if the last telephone connected is present again, it is automatically recognised and within about 30 seconds of switching on the ignition, the connection is established without any action on your part (Bluetooth activated).
To modify the connection profile:

Press "Telephone" to display the primary page.
Press the "PHONE" button to go to the secondary page.

Press "Bluetooth connection" to display the list of paired devices.

Press the "details" button of a paired device.
The system offers to connect the telephone with 3 profiles:
- "Telephone" (hands-free kit, telephone only),
- "Streaming" (streaming: wireless playing of the audio files on the telephone),
- "Internet data".

Select one or more profiles.
Press "OK" to confirm.
OK
! The ability of the system to connect to just one profile depends on the telephone. All three profiles may connect by default.
The services available depend on the network, the SIM card and the compatibility of the Bluetooth devices used. Check the instructions for your telephone and with your service provider for the services to which you have access.
The profiles compatible with the system are: HFP, OPP, PBAP, A2DP, AVRCP, MAP and PAN.
Go to the Brand's website for more information (compatibility, additional help, etc.).
Managing paired telephones
This function allows the connection or disconnection of a peripheral device as well as the deletion of a pairing.

Press "Telephone" to display the primary page.
Press the "PHONE" button to go to the secondary page.
PEUGEOT Connect Radio

Press "Bluetooth connection" to display the list of paired devices.

Press on the name of the telephone chosen in the list to disconnect it. Press again to connect it.
Deleting a telephone

Press the basket at the top right of the screen to display a basket alongside the telephone chosen.

Press the basket alongside the telephone chosen to delete it.
Receiving a call
An incoming call is announced by a ring and a superimposed display in the screen.

Make a short press on the steering mounted PHONE button to accept an incoming call.
And

Make a long press

on the steering mounted PHONE button to reject the call.
Or
Press "End call".

Making a call
! Using the telephone is not recommended while driving. Park the vehicle. Make the call using the steering mounted controls.
Calling a new number

Press "Telephone" to display the primary page.

Enter the phone number using the digital keypad.

Press "Call" to start the call.
Calling a contact

Press "Telephone" to display the primary page.

Or make a long press

on the steering mounted PHONE button.
Press "Contacts".
Select the desired contact from the list offered.

Press "Call".
PEUGEOT Connect Radio
Calling a recently used number

Press "Telephone" to display the primary page.
Or

Make a long press

on the steering mounted button.
Press "Recent calls".
Select the desired contact from the list offered.
It is always possible to make a call directly from the telephone; as a safety measure, first park the vehicle.
Setting the ringtone

Press "Telephone" to display the primary page.
Press the "OPTIONS" button to go to the secondary page.

Press "Ring volume" to display the volume bar.

Press the arrows or move the cursor to set the ring volume.
Configuration
Profile settings

As a safety measure and because it requires the sustained attention of the driver, changes to settings must only be done with the vehicle stationary.

Press "Settings" to display the primary page.

Press "Profiles".
Select "Profile 1" or "Profile 2" or "Profile 3" or "Common profile".

Press this button to enter a name for the profile using the virtual keypad.
OK
Press "OK" to save.

Press the back arrow to confirm.

Press this button to activate the profile.

Press the back arrow again to confirm.

Press this button to initialise the profile selected.
Adjust brightness

Press "Settings" to display the primary page.

Press "Brightness".

Move the cursor to adjust the brightness of the screen and/or of the instrument panel (according to version).
Press in the grey zone to confirm.

Modifying system settings

Press "Settings" to display the primary page.

Press "Configuration" to go to the secondary page.

Press "System configuration".
Select "Units" to change the units of distance, fuel consumption and temperature.
Press "Factory settings" to return to the initial settings.

Returning the system to factory settings activates the English language by default (according to version).
Select "System info" to display the versions of the different modules installed in the system.

Press the back arrow to confirm.

Press "Settings" to display the primary page.

Press "Configuration" to go to the secondary page.

Press "Screen configuration".
Press "Brightness".
●●●●
Move the cursor to adjust the brightness of the screen and/or of the instrument panel (according to version).
Press "Animation".

Activate or deactivate: "Automatic scrolling".

Select "Animated transitions".

Press the back arrow to confirm.
PEUGEOT Connect Radio
Select the language

Press "Settings" to display the primary page.

Press "Configuration" to go to the secondary page.

Select "Language" to change the language.

Press the back arrow to confirm.
Setting the time

Press "Settings" to display the primary page.

Press "Configuration" to go to the secondary page.

Press "Date and time".
Select "Time".

Press this button to adjust the time using the virtual keypad.
Press "OK" to save the time.
OK

Press this button to define the time zone.
Select the display format for the time (12h / 24h).

Activate or deactivate synchronisation with GPS (UTC).

Press the back arrow to save the settings.

The system does not automatically manage the change between winter and summer time (depending on the country of sale).
Setting the date

Press "Settings" to display the primary page.

Press "Configuration" to go to the secondary page.

Press "Date and time".
Select "Date".

Press on this button to define the date.

Press the back arrow to save the date.

Select the display format of the date.

Press the back arrow again to confirm.

Adjustment of the time and date is only available if "GPS Synchronisation" is deactivated.
The change between winter and summer time is done by changing the time zone.
Frequently asked questions
The following information groups together the answers to the most frequently asked questions concerning your audio system.
PEUGEOT Connect Radio
Radio
| QUESTION RESPONSE SOLUTION | ||
| The reception quality of the tuned radio station gradually deteriorates or the stored stations are not working (no sound, 87.5 MHz is displayed, etc.). | The vehicle is too far from the transmitter of the station or no transmitter is present in the geographical area. | Activate the "RDS" function by means of the upper band to enable the system to check whether there is a more powerful transmitter in the geographical area. |
| The environment (hills, buildings, tunnels, basement car parks, etc.) block reception, including in RDS mode. | This phenomenon is normal and does not indicate a failure of the audio equipment. | |
| The aerial is absent or has been damaged (for example when going through a car wash or into an underground car park). | Have the aerial checked by a dealer. | |
| I cannot find some radio stations in the list of received stations.The name of the radio station changes. | The station is not received or has changed its name in the list. | Press the round arrow on the "List" tab of the "Radio" page. |
| Some radio stations send other information in place of their name (the title of the song for example).The system interprets these details as the station name. |
Media
| QUESTION RESPONSE SOLUTION | ||
| Playback of my USB memory stick starts only after a very long wait (around 2 to 3 minutes). | Some files supplied with the memory stick may greatly slow down access to reading the memory stick (multiplication by 10 of the catalogue time). | Delete the files supplied with the memory stick and limit the number of sub-folders in the file structure on the memory stick. |
| Some information characters in the currently playing media are not displayed correctly. | The audio system does not display some types of characters. | Use standard characters to name tracks and folders. |
| Playback of streaming files does not start. The connected device does not automatically launch playback. | Start playback from the device. | |
| Names of tracks and playing time are not displayed on the audio streaming screen. | The Bluetooth profile does not allow the transfer of this information. | |
Telephone
| QUESTION RESPONSE SOLUTION | ||
| I cannot connect my Bluetooth telephone. The telephone's Bluetooth function may be switched off or the telephone may not be visible. | Check that your telephone has Bluetooth switched on.Check in the telephone settings that it is "visible to all". | |
| The Bluetooth telephone is not compatible with the system. | You can check the compatibility of your telephone at the Brand's website (services). | |
| The volume of the telephone connected in Bluetooth mode is inaudible. | The sound depends on both the system and the telephone. | Increase the volume of the audio system, to maximum if required, and increase the volume of the telephone if necessary. |
| Ambient noise affects the quality of the telephone call. | Reduce the ambient noise level (close the windows, reduce the booster fan speed, slow down, etc.). | |
| The contacts are listed in alphabetical order. Some telephones offer display options.Depending on the settings chosen, contacts can be transferred in a specific order. | Modify the telephone directory display settings. | |
Settings
| QUESTION RESPONSE SOLUTION | ||
| When changing the setting of treble and bass the equalizer setting is deselected.When changing the equalizer setting, the treble and bass settings are reset. | The selection of an equalizer setting imposes the settings for treble and bass and vice-versa. | Modify the treble and bass or equalizer settings to obtain the desired musical ambience. |
| When changing the balance setting, distribution is deselected.When changing the distribution setting, the balance setting is deselected. | The selection of a distribution setting imposes the balance settings and vice-versa. | Modify the balance setting or the distribution setting to obtain the desired sound quality. |
| There is a difference in sound quality between the different audio sources. | To allow for optimal listening quality, the audio settings can be tailored to different sound sources, which can generate audible differences when changing source. | Check that the audio settings are adapted to the sources listened to. Adjust the audio functions to the middle position. |
| When the engine is off, the system stops after several minutes of use. | When the engine is switched off, the system's operating time depends on the state of charge of the battery.In normal off state, the system automatically goes into energy economy mode to maintain an adequate charge in the battery. | Turn the ignition on to increase the charge of the battery. |
| Česky [Czech] | Robert Bosch Car Multimedia GmbH timto prohlăšuje, že tento "PSA RCC", "PSA RCC" je ve shodě se základními požadavky a dašimi příslušnými ustanoveními směrnice 1999/5/ES. |
| Dansk [Danis] | Undertegnede Robert Bosch Car Multimedia GmbH Herklerer herved, at følgende udstyr "PSA RCC", "PSA RCC" overholder de væsentlige krav og øvrige relevante krav i direktiv 1999/5/EF. |
| Deutsch [German] | Hiermit erklärt Robert Bosch Car Multimedia GmbH, dass sich das Gerät "PSA RCC", "PSA RCC" in Übereinstimmung mit den grundlegenden Anforderungen und den übrigen einschlägigen Bestimmungen der Richtlinie '999/5/EG befindet. |
| Eesti [Estonan] | Kæsolevaga kinnitab Robert Bosch Car Multimedia GmbH seadme "PSA RCC", "PSA RCC" vastavust direktiivi 1999/5/EÜpôhinõutele ja nimetatud direktiivist tuenevatele teistele asjakohastele sätetele. |
| English | Hereby, Robert Bosch Car Multimedia GmbH, declares that this "PSA RCC", "PSA RCC" is in compliance with the essential requirements and other relevant provisions of Directive 1999/5/EC. |
| Español [Spanish] | Por medio de la presente Robert Bosch Car Multimedia GmbH declara que el "PSA RCC", "PSA RCC" cumple con los requisites esenciales y cualesquiera otras disposiciones aplicables o exigibles de la Directiva 1999/5/CE. |
| Ελληνοι [Greek] | ME THN ΠΑΡΟΥΣΑ "PSA RCC" ΔΗΛΩΝΕΙ OTI "PSA RCC" ΣΥΜΜΟΡΦΩΝΕΤΑΙ ΠΡΟΣ ΤΙΣ ΟΥΣΙΩΔΕΙΣ ΑΠΑΙΤΗΣΕΙΣ ΚΑΙ ΤΙΣ ΛΟΙΠΕΣ ΣΧΕΤΙΚΕΣ ΔΙΑΤΑΞΕΙΣ ΤΗΣ ΟΔΗΠΑΣ 1999/5/ΕΚ. |
| Françis [French] | Par la présente Robert Bosch Car Multimedia GmbH declare que l'appareil "PSA RCC", "PSA RCC" est conforme aux exigences essentielles et aux autres dispositions pertinentes de la directive 1999/5/CE. |
| Italianc [Italian] | Con la presente Robert Bosch Car Multimedia GmbH dichiara che questo "PSA RCC", "PSA RCC" è conforme ai requisiti essenziai ed alle altre disposizioni pertinenti stabilite dalla direttiva 1999/5/CE. |
| Latvish [Latvian] | Ar šo Robert Bosch Car Multimedia GmbH deklaré, ka "PSA RCC", "PSA RCC" atbilst Direktivas 1999/5/EK bółiskajäm prasibám un citiem ar to saistitajiem noteikumiam. |
| Lietuvi i [Lithuanian] | Šiuo Robert Bosch Car Multimedia GmbH deklaruja, kad šis "PSA RCC", "PSA RCC" atitinka esminius reikalavimus ir kitas 1999/5/EB Direktyvos nuostatas. |
| Nederlands [Dutch] | Hierbij verklaart Robert Bosch Car Multimedia GmbH dat het toestel "PSA RCC", "PSA RCC" in overeenstemming is met de essentiële eisen en de andere relevante bepalingen van richtlijn 1999/5/EG. |
| Malti [Maltese] | Hawnhekk, Robert Bosch Car Multimedia GmbH, jiddikjara li dan "PSA RCC", "PSA RCC" jikkonforma mal-ħitigijiet esserzjali u ma provvedimenti ohrajn relevanti li hemm fid-Direttiva 1999/5/EC. |
| Magyar [Hungarian] | Alulirott, Robert Bosch Car Multimedia GmbH nyilatkozom, hogy a "PSA RCC", "PSA RCC" megfelel a vonatkozó alapvető követelményeknek és az 1999/5/EC irányel egréb előirásainak. |
| Polski [Polish] | Niniejszym Robert Bosch Car Multimedia GmbH oświadcza, že "PSARCC", "PSA RCC" jest zgodny z zasadniczymi wymogami oraz pozostałymi stosownymi postanowieriami Dyrektywy 1999/5/EC. |
| Português [Portuguese] | Robert Bosch Car Multimedia GmbH declara que este "PSA RCC", "PSA RCC" está conforme com os requisitos essenciais e outras disposições da Directiva 1999/5/CE. |
| Sloversko [Slovenian] | Robert Bosch Car Multimedia GmbH izjavla, da je ta "PSA RCC", "PSA RCC" v skladu z bistvenimi zahtevami in ostalimi relevantrimi določili direktive 1999/5/ES. |
| Sloversky [Slovak] | Robert Bosch Car Multimedia GmbH týmto vyhlasuje, že "PSA RCC", "PSA RCC" splňa základné požiadavky a všetky prislušné ustanovenia Smernice 1999/5/ES. |
| Suomi [Finnish] | Robert Bosch Car Multimedia GmbH vakuuttaa täten etta "PSA RCC", "PSA RCC" laite on direktiivin 1999/5/EY oleelisten vaatimusten ja sita koskevien direktiivin muidenehtojen mukainen. |
| Svenska [Swedish] | Härmed intygar Robert Bosch Car Multimedia GmbH att denna "PSA RCC", "PSA RCC" står I överensstämmelse med de väsentliga egenskapskrav och övriga relevanta bestämmelser som framgår av direktiv 1999/5/EG. |
| Islenska [Icelandic] | Hér með lysir Robert Bosch Car Multimedia GmbH yfir pvi ao "PSA RCC", "PSA RCC" er i samræmi við grunnkröfur og aðrar kröfur, sem gerðar eru i tilskipun 1999/5/EC. |
| Norsk [Norwegian] | Robert Bosch Car Multimedia GmbH erklærer herved at utstyret "PSA RCC", "PSA RCC" er i samsvar med de grunnleggende krav og øvrige relevante krav i direktiv 1999/5/EF. |
| ECE type-approval certificate No. is 057902(concerning the type-approval of an electric/electronic sub-assembly under Regulation No. 10) | |
| emitted frequency range and power:Frequency band Radiated Power [EIRP] Hints / Restriction2402 MHz - 2480 MHz WiFi < 51mW Antenna internal for PSA RCC A22412 MHz - 2472 MHz Bluetooth < 2,6 mW Antenna internal for PSA RCC A1 & A2Antenna configuration: internal antennaInternal antenna not accessible by user. Any change of the user will violate the legal approval of this product. | |
| Brazil | "Este equipamento opera em caráter secundário, isto é, não tem direito a proteção contrainterferência prejudicial, mesmo de estações do mesmotipo, e não pode causarinterferência a sistemas operando em caráter primário." |
| Canada | This device complies with part 15 of the FCC Rules and Industry Canada license-exempt RSS standard(s). Operation is subject to the following two condition:(1) This device may not cause harmful interference, and(2) this device must accept any interference received,including interference that may cause undesired operation. |
| Japan | R= Radio Type Approval Number: BBBBBBBBBBBTT= Terminal Equipment Approval number: X JJ-5NNN AAA |
| Mexico | NOM-121-SCT1-2009La operación de este equipo está sujeta a las siguientes dos condiciones:(1) es posible que este equipo o dispositivo no cause interferencia perjudicial y(2) este equipo o dispositivo debe aceptar cualquier interferescia, incluyendo la que puedacausar su operación no deseada. |
| South Korea | 해당 무선 설비는 운용 중 전파 혼신 가능성이 있음. |
| Taiwan | 本產品符合低功率電波輻射性電機管理辦法第十二條、第十四條等條文規定1.經型式認證合格之低功率射頻電機,非經許可,公司、商號或使用者均不得擅自變更頻率、加大功率或變更原設計之特性及功能。2.低功率射頻電機之使用不得影響飛航安全及干擾合法通信;經發現有干擾現象時,應立即停用,並改善至無干擾時方得繼續使用。前項合法通信,指依電信法規定作業之無線電通信。低功率射頻電機頻忍受合法通信或工業、科學及醫療用電波輻射性電機設備之干擾。 |
| USA / Canada | This device complies with Part 15 of the FCC Rules and with Industry Canada licence-exempt RSS standard(s).Operation is subject to the following two conditions:(1) this device may not cause harmful interference, and(2) this device must accept any interference received, including interference that maycause undesired operation.Changes or modifications made to this equipment not expressly approved by (Robert Bosch Car Multimedia GmbH) may void the FCC and IC Canada authorization to operatethis equipment. |
Audio system / Bluetooth®
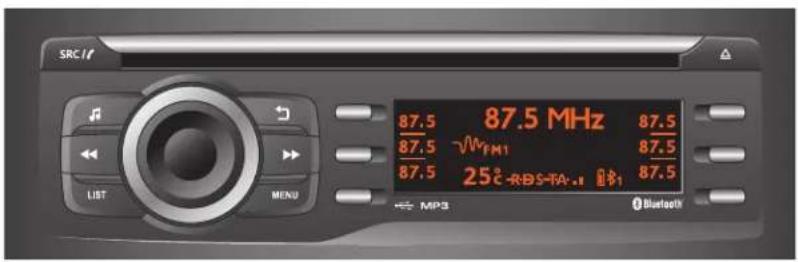
Contents
First steps 2
Steering mounted controls 2
Radio 3
Media 5
Telephone 8
Audio settings 12
Configuration 12
Frequently asked questions 12
Audio system / Bluetooth®
For safety reasons, the vehicle must always be stationary for the driver to perform operations that require close attention.
When the engine is switched off and to prevent discharging of the battery, the system switches off after activation of energy economy mode.
Audio system / Bluetooth®
First steps

On/Off, volume adjustment.

Adjust audio options: sound ambience, treble, bass, loudness, distribution, left/right balance, front/rear balance, automatic volume.

Automatic search for a lower radio frequency. Select the previous CD, USB track. Scroll in a list. Press and hold: rewind.
LIST
Display the list of stations received, the CD/USB tracks or folders. Press and hold: update the list of stations received.

Cancel the current operation. Go up one level (menu or folder).

Automatic search for a higher radio frequency. Select the next CD, USB track. Scroll in a list. Press and hold: fast forward.
Access to the main menu.
MENU

Select preset radio station. Radio, press and hold: store a station. Other than radio: see the associated sections.
Eject CD.

SRC 17
Select the source: Radio: FM1, FM2, AM, CD, USB, AUX, Streaming. Telephone: accept an incoming call. Telephone, press and hold: end a call, access the calls log for the connected telephone.
Steering mounted controls

Radio: select the previous / next preset radio station. CD / USB: select the genre / artist / folder / playlist from the list depending on classification. Select the previous / next item in a menu.

Radio: automatic search for a higher frequency. CD / MP3 / USB: select the next track. CD / USB: press and hold: fast forward.

Change the audio source. Confirm a selection. Call/end call on the telephone. Press and hold: access to the calls list.

Radio: automatic search for lower frequency. CD / MP3 / USB: selection of the previous track. CD / USB: press and hold: rewind.

Increase volume.

Decrease volume.

Mute on: cut the sound by simultaneously pressing the volume up and down buttons. Mute off: press one of the two volume buttons.
Radio
Presetting a station
Press SRC/TEL repeatedly to select the FM1, FM2 or AM waveband.

Press and hold a button to preset the station being listened to. The name of the station is displayed and an audible signal confirms that it has been preset.
The external environment (hills, buildings, tunnels, basement car parks, etc.) may block reception, including in RDS tracking mode. This is a normal effect of the way in which radio waves are transmitted and does not indicate any failure of the audio equipment.
Selecting a station

Press a button to listen to the corresponding preset station.
Managing a list
LIST Press LIST to display the list of stations received in alphabetical order.

Select the desired radio station using one of the buttons.

Confirm with "OK".

Briefly press one of the buttons to change to the next or previous letter.

Press and hold LIST to build or update the list of stations; audio reception is cut momentarily.
Entering a frequency
Press MENU.
MENU
Audio system / Bluetooth®

Select "Radio".

Select "Write freq.".

Press +,
or

press – to select the desired frequency.
OK
Confirm with "OK".
RDS
i RDS, if activated, allows you to continue listening to the same station by automatically retuning to alternative frequencies. However, in certain conditions, coverage of an RDS station may not be assured throughout the entire country as radio stations do not cover 100% of the territory. This explains the loss of reception of a station that can occur during a journey.
With source FM1 or FM2, press MENU MENU.

Select "Radio".

Select or deselect "RDS" to switch RDS on or off.
OK
Confirm with "OK" to save the setting.
Receiving TA messages
The TA (Traffic Announcement) function gives priority to TA alert messages. To operate, this function needs good reception of a radio station transmitting this type of message. When a traffic report is transmitted, the current audio source (radio, CD, USB, etc.) is interrupted automatically to play the TA message. Normal playback resumes at the end of the transmission of the message.
MENU Press MENU.

Select "Radio".

Select or deselect "TA" to activate or deactivate the reception of traffic messages.
OK
Confirm with "OK" to save the setting.
Displaying RADIO TEXT
Radio Text is information transmitted by the radio station related to the current programme or song.
MENU
With the radio displayed on the screen, press MENU.

Select "Radio".

Select or deselect "TXT" to activate or deactivate the display of Radio Text.
OK
Confirm with "OK" to save the setting.
Audio system / Bluetooth®
Media
USB player

This unit comprises a USB port and a jack socket, depending on model.
At the first connection, the order suggested is by folder. When connecting again, the previously chosen order is retained.
Insert the USB memory stick into the USB port or connect the USB device to the USB port using a suitable cable (not supplied).
Press SRC/TEL repeatedly to select SRC // "USB".
The system builds playlists (in temporary memory), an operation which can take from a few seconds to several minutes at the first connection. Limiting the number of non-music files and the number of folders reduces this waiting time. The playlists are updated every time the ignition is switched off or a USB memory stick is connected. The lists are memorised: if they are not modified, the subsequent loading time will be shorter.

Press one of these buttons to select the previous or next track in the list.

Press one of these buttons to select the previous or next folder according to the category chosen.

Press and hold one of these buttons for fast forward or rewind.
LIST
Press LIST to display the structure of the folders in the compilation.
Audio system / Bluetooth®

Select a line in the list.

Confirm with "OK".

Up a level in the menu.
MENU Press MENU.

Select "Media".

Select or deselect "TA" to activate or deactivate the reception of traffic messages.

Select the play mode: "Normal", "Random", "Random all" or "Repeat".
Auxiliary socket (AUX)
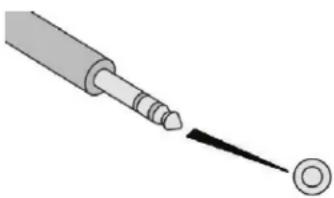
Connect the portable device (MP3 player, etc.) to the jack socket using an audio cable (not supplied).
Press SRC/TEL repeatedly to select SRC // "AUX".
First adjust the volume of your portable device (to a high level). Then adjust the volume of your audio system. The controls are operated from the portable device.
Do not connect a device to both the jack socket and the USB port at the same time.
CD player
Insert a CD in the player; play begins automatically.
Insert an MP3 compilation in the CD player. The audio system searches for all of the music tracks, which may take anything between a few seconds and several tens of seconds, before play begins.
SRC1
Press the SRC/TEL button repeatedly to select "CD".

Press one of these buttons to go to the previous / next track in the list.

Press one of these buttons to select the previous or next folder in the order chosen.

Press and hold one of these buttons for fast forward or rewind.
LIST
Press LIST to display the folder structure of the compilation.

Select a line in the list.
OK
Confirm with "OK".
Return to the top level of the folder structure to select the type of tracks.
- By Folders (CD or USB): all folders containing audio files recognised on the peripheral device, in alphabetical order without following the folder structure.
- By Artist (USB only): all of the artist names defined in the ID3 Tags, in alphabetical order.
- By Genre (USB only): all of the genres defined in the ID3 Tags.
- By Playlist (CD or USB): if playlists have been saved.
Information and advice
The audio system will only play files with ".mp3", ".wma" and ".wav" extensions on a CD and can play files with ".ogg" extension only on USB.
To avoid any playback or display issues, it is advisable to create file names that have less than 20 characters and without using any special characters (e.g. «?; ù).
In order to be able to play a recorded CDR or CDRW, it is preferable to select the ISO 9660 level 1, 2 or Joliet standard when recording the CD.
If the disc is burned in another format, it may not be played correctly.
It is recommended that the same recording standard is always used for a given disc, with as low a speed as possible (4x maximum) for optimum sound quality.
In the particular case of a multi-session CD, the Joliet standard is recommended.
The playlists accepted on CD, MP3, iPod and USB connection are types ".m3u" and ".wpl". The system can recognise up to 5,000 files in 500 folders on 8 levels.
On a single disc, the CD player can read up to 255 MP3 files spread over 8 folder levels with a maximum of 192 folders. However, it is recommended that the number of levels is limited to 2 so as to reduce the time taken to access and play the CD.
The folder structure is not observed during playback.
Audio system / Bluetooth®
Do not connect a hard disk or USB device other than audio players to the USB port. This may cause damage to your installation.
Use only USB memory sticks formatted FAT32 (File Allocation Table).
It is recommended that you use genuine Apple® USB cables for correct operation.
Bluetooth® audio streaming
Streaming allows music files on the telephone to be played through the vehicle's speakers.
Connect the telephone: see the "Telephone" section.
In the "Bluetooth: Audio" menu, select the telephone to be connected.
The audio system connects to a newly paired telephone automatically.
Audio system / Bluetooth®
SRC 1/
Activate the streaming source by pressing the SRC/TEL* button.
The control of common tracks is possible via the audio system control buttons and the steering mounted controls**. The contextual information can be displayed in the screen.
The audio quality depends on the quality of the transmission from the telephone.
Connecting Apple® players

Connect the Apple ® player to the USB port using a suitable cable (not supplied). Play starts automatically.
* In certain cases, play of the audio files must be initiated from the keypad.
** If the telephone supports the function.
Management of the device is via the audio system controls.
The classifications available are those of the portable device connected (artists / albums / genres / playlists / audio books / podcasts).
The version of software in the audio system may not be compatible with the generation of your Apple® player.
Telephone
Pairing a Bluetooth® telephone
As a safety measure and because it requires sustained attention by the driver, the pairing of a Bluetooth mobile telephone with the Bluetooth hands-free system of your audio system must be done with the vehicle stationary and the ignition on.
Visit www.peugeot.co.uk for more information (compatibility, more help, etc.).
Activate the telephone's Bluetooth function and ensure that it is set as visible to all (refer to the telephone user guide).
Press the MENU button.
MENU

Select "Bluetooth".

Select "Search".
A window is displayed with "Searching device".
The services available depend on the network, the SIM card and the compatibility of the Bluetooth telephone used. Check the instructions for your telephone and with your service provider for the services to which you have access.

In the list, select a telephone to pair.

Confirm with "OK".
Only one telephone can be paired at a time.
In some cases, the Bluetooth address of the telephone may appear instead of the name of the telephone.

A virtual keypad is displayed on the screen: choose a 4-digit code.
Confirm with "OK".
OK
A message is displayed on the screen of the telephone: enter the same code and confirm.
If pairing fails, the number of attempts is not restricted.
A message appears in the screen to confirm the result of the connection.

Pairing can also be initiated from the telephone by searching for detected Bluetooth devices.

The directory and the call list can be accessed after the necessary synchronisation period (if the telephone is compatible).
Automatic connection must be configured in the telephone to allow the connection each time the vehicle is started.
Managing connections
Press the MENU button.
MENU

Select "Bluetooth".

Select "BT management" and confirm. The list of paired telephones is displayed.

Indicates connection of the audio profile.

Indicates the hands-free telephone profile.

In the list, select a telephone to pair.
OK
Confirm with "OK".
Audio system / Bluetooth®

Select or deselect:
- "Tel.": hands-free connection
- "Audio": play audio files
OK
"OK" to confirm the choice.
"Delete" to delete the pairing.


It is not possible to pair more than 5 telephones. Press MENU and select "Bluetooth". Select "BT management". If 5 telephones are already paired, select the telephone to delete by pressing "OK" and selecting "Delete" (refer to the "Managing connections" section).
Making a call
From the directory
Press the MENU button.
MENU

Select "Telephone".
Select "Call".

Select "Directory".


Select the desired number.
Confirm with "OK" to start the call.
OK
Making a call
Recently called numbers
(Depending on the compatibility of the phone)
Press and hold SRC/TEL to display the calls list.
SRC //

For access to the call list, it is also possible to press MENU, select "Telephone", then select "Call" and finally select "Calls list".

In the list of calls, select from: "Missed calls", "Dialled calls" or "Answered calls".

Scroll through the calls list.
OK
Confirm with "OK".

Press one of these buttons to go to the previous or next page in the list.
OK
"OK" starts the call.
The calls list includes calls sent and received in the vehicle using the connected telephone. It is possible to make a call directly from the telephone; park the vehicle first as a safety measure.
Receiving a call
An incoming call is announced by a ring and a superimposed display in the screen.
Press SRC/TEL.
SRC 11
or
select "YES" to accept the call,

or

select "NO" to reject the call.

Pressing and holding the back button,
or
SRC 11
SRC/TEL also rejects an incoming call.
Managing calls
Hang up

In the contextual menu, select "Hang up" to end the call.
SRC 18
Pressing and holding SRC/TEL also ends the call.
Secret – Mute
(so that the caller cannot hear)
In the contextual menu:

Select "Micro OFF" to switch off the microphone.

Select "Micro OFF" to switch the microphone on again.
Combined mode
(to leave the vehicle without ending the call)
In the contextual menu:

Select "Combined mode" to transfer the call to the telephone.

Select "Combined mode" to transfer the call to the vehicle.
In some cases, the combined mode has to be activated from the telephone. The Bluetooth connection will be restored automatically if the ignition has been switched off, then on again (depending on the compatibility of the telephone).
Audio system / Bluetooth®
Audio settings

Press 📂 to display the audio settings menu.
Press ♪ to go to the next setting.
The settings available are:
- AMBIANCE: BASS, TREBLE and LOUDNESS.
- BALANCE (left/right balance). FADER (front/rear balance)
- SOUND DIST. (driver or passenger).
- AUTO VOLUME.
The distribution, or spatialisation of sound, is an audio process which allows the sound quality to be improved according to the setting chosen, corresponding to the position of the listeners in the vehicle.
The AMBIANCE, TREBLE and BASS audio settings are different and independent for each sound source.
Configuration
Display and language settings
Press the MENU button.
MENU

Select "Config.".
Select "Displaying" to activate or deactivate scrolling text.

Select "Language" to modify the display language.

Select "Version" for information on the software.

Select "System" when you want to install an update. Information can be obtained from a PEUGEOT dealer.

Select "Unit" to modify the units for temperature (Celsius, Fahrenheit).
Frequently asked questions
The following information groups together the answers to the most frequently asked questions concerning your audio system.
| QUESTION RESPONSE SOLUTION | ||
| There is a difference in sound quality between the different audio sources (radio, CD, etc.). | For optimum sound quality, the audio settings (volume, bass, treble, ambience, loudness) can be adapted to the different sound sources, which may result in audible differences when changing source (radio, CD, etc.). | Check that the audio settings (volume, bass, treble, ambience, loudness) are adapted to the sources being listened to. It is advisable to set the AUDIO functions (bass, treble, front-rear balance, left-right balance) to the middle position, select the musical ambience and set the loudness correction to the "Active" position in CD mode or to the "Inactive" position in radio mode. |
| When changing the settings for treble and bass, the ambience setting is deselected.When changing the ambience setting, treble and bass are reset to zero. | Choosing an ambience imposes settings for treble and bass. Modifying one without the other is only possible with a personalised ambience. | Modify the treble and bass settings or the ambience setting to obtain the desired sound quality. |
| When changing the balance setting, distribution is deselected. | Choosing the "driver" distribution setting imposes a balance setting. | Modify the balance or distribution settings to obtain the desired sound quality. |
| The reception quality of the tuned radio station gradually deteriorates or the stored stations are not working (no sound, 87.5 MHz is displayed, etc.). | The vehicle is too far from the transmitter of the station or no transmitter is present in the geographical area. | Activate the RDS function to enable the system to check whether there is a more powerful transmitter in the geographical area. |
| The surroundings (hills, buildings, tunnels, underground parking, etc.) are blocking reception, including in RDS tracking mode. | This phenomenon is normal and does not indicate a failure of the audio equipment. | |
| The aerial is missing or has been damaged (for example when going through a car wash or into an underground car park). | Have the aerial checked by a PEUGEOT dealer. | |
| Sound cut-outs of 1 to 2 seconds in radio mode. During this brief sound cut-out, the RDS searches for any frequency permitting better reception of the station. | Deactivate the RDS function if the phenomenon is too frequent and always on the same route. | |
| Traffic announcement TA is displayed. I do not receive any traffic information. | The radio station does not broadcast traffic information. | |
| The stored stations are not found (no sound, 87.5 MHz is displayed, etc.). | An incorrect waveband is selected. Press the SRC/TEL button to return to the waveband (FM1 or FM2) on which the stations are stored. | |
| The CD is ejected every time or is not played. The CD is upside down, cannot be read, does not contain audio files or contains audio files of a format that cannot be played by the audio system.The CD is protected by an anti-pirating system not recognised by the audio system. | - Check that the CD is inserted in the player the right way up.- Check the condition of the CD: the CD cannot be played if it is too badly damaged.- Check the content in the case of a recorded CD: consult the advice in the "Audio" section.- The audio system's CD player does not play DVDs.- Because of low quality, certain burned CDs will not be read by the audio system. | |
| The CD sound is of poor quality. The CD used is scratched or of poor quality. Insert good quality CDs and store them in suitable conditions. | ||
| The audio settings (bass, treble, ambiences) are unsuitable. | Return bass and treble settings to 0, without selecting an ambience. | |
| The Bluetooth connection is cut. The battery of the peripheral may not be sufficiently charged. | Charge the battery of the peripheral device. | |
| The "USB peripheral error" or "Peripheral not recognised" message appears on the screen. | The USB memory stick is not recognised. Use only | USB memory sticks formatted to FAT 32 (28-bit file allocation table). |
| A telephone connects automatically, disconnecting another telephone. | Automatic connection overrides manual connection. | Modify the telephone settings to remove automatic connection. |
| The iPod is not recognised when connecting to the USB port. | The iPod is of a generation that is not compatible with the USB. | |
| The hard disk or device is not recognised when connecting to the USB socket. | Some hard disks and devices need a power supply greater than is provided by the audio system. | Connect the peripheral to the 230 V socket, the 12 V socket or an external power supply.Caution:ensure that the device does not transmit a voltage greater than 5 V (risk of destruction of the system). |
| When streaming, the sound cuts momentarily. Some telephones prioritise connection of the "hands-free" profile. | Delete the "hands-free" connection profile to improve streaming. | |
| In "Random all" play, not all of the tracks are played. | In "Random all" play, the system can only take into account up to 999 tracks. | |
| With the engine off, the audio system switches off after a few minutes of use. | When the engine is switched off, the audio system operating time depends on the battery charge.The switch-off is normal: the audio system switches to economy mode and switches off to prevent discharging the vehicle's battery. | Start the vehicle's engine to increase the battery charge. |
| The message "the audio system is overheated" appears on the display. | In order to protect the installation if the surrounding temperature is too high, the audio system switches to an automatic thermal protection mode leading to a reduction of the volume or stopping of the playing of the CD. | Switch the audio system off for a few minutes to allow the system to cool. |
Audio system
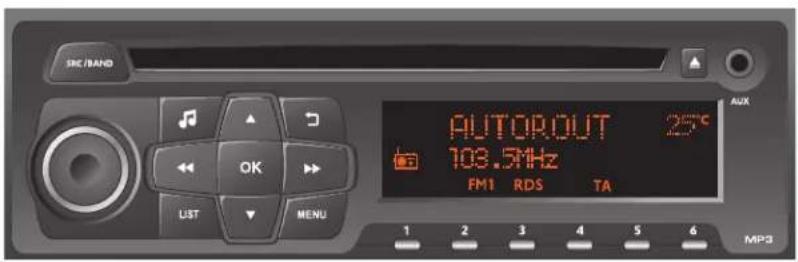
Audio system
! For safety reasons, the vehicle must always be stationary for the driver to perform operations that require close attention.
When the engine is switched off and to prevent discharging of the battery, the system switches off after activation of energy economy mode.
Contents
First steps 2
Steering mounted controls 2
Radio 3
Media 5
Audio settings 7
Frequently asked questions 7
Audio system
First steps

On/Off, volume adjustment.
SRC/BAND
Select the source: FM1, FM2, AM, CD, AUX.

Adjust audio settings: sound ambience, treble, bass, loudness, left/right balance, automatic volume.

Automatic search for a lower radio frequency. Select the previous CD track. Scroll in a list. Press and hold: rewind.
LIST
Display the list of stations received, the CD/MP3 tracks or folders. Press and hold: update the list of stations received.

Manual search step by step for a higher radio frequency. Select the next MP3 folder. Scroll in a list.

Manual search step by step for a lower radio frequency. Select the previous MP3 folder. Scroll in a list.

Cancel the current operation. Go up one level (menu or folder).

Automatic search for a higher radio frequency. Select the next CD track. Scroll in a list. Press and hold: fast forward.
MENU
Access to the main menu.

Select a preset radio station. Radio, press and hold: store a station.

Eject CD.
Steering mounted controls

Radio: select the previous / next preset radio station. Select the previous / next item in a menu.

Radio: automatic search for a higher frequency. CD / MP3: select the next track. CD: press and hold: fast forward.

Change the audio source. Confirm a selection.

Radio: automatic search for a lower frequency. CD / MP3: select the previous track. CD: press and hold: rewind.

Increase volume.

Decrease volume.

Mute on: cut the sound by simultaneously pressing the volume up and down buttons.
Mute off: press one of the two volume buttons.
Radio
Presetting a station
Press the SRC/BAND button SRC/BAND repeatedly to select the FM1, FM2 or AM waveband.

Press and hold a button to preset the station being listened to. The name of the station is displayed and an audible signal confirms that it has been preset.
The external environment (hills, buildings, tunnels, basement car parks, etc.) may block reception, including in RDS tracking mode. This is a normal effect of the way in which radio waves are transmitted and does not indicate any failure of the audio equipment.
Managing the list
LIST Press LIST to display the list of stations received in alphabetical order.

Select the desired radio station by pressing one of the buttons.
OK
Confirm with OK.

Briefly press one of the buttons to change to the next or previous letter.
LIST
Press and hold LIST to build or update the list of stations; audio reception is cut momentarily.
Selecting a station

Press a button to listen to the corresponding preset station.
Audio system
RDS
i RDS, if displayed, allows you to continue listening to the same station by automatically retuning to alternative frequencies. However, in certain conditions, coverage of an RDS station may not be assured throughout the entire country as radio stations do not cover 100% of the territory. This explains the loss of reception of a station during a journey.
Press MENU
MENU

Select "Radio".
Confirm with OK.
OK

Select "RDS".
Confirm with OK.
OK

Select "On" or "Off" to switch RDS on or off.
Confirm with OK.
OK
Receiving TA messages
The TA (Traffic Announcement) function gives priority to TA alert messages. To operate, this function needs good reception of a radio station transmitting this type of message. When a traffic report is transmitted, the current audio source (radio, CD, etc.) is interrupted automatically to play the TA message. Normal playback resumes at the end of the transmission of the message.
Press MENU.
MENU
Select "Radio".

OK
Confirm with OK.

Select "Traffic TA".
Confirm with OK.
OK

Select "On" or "Off" to activate or deactivate the reception of traffic messages.
Confirm with OK.
OK
Displaying RADIO TEXT

Radio Text is information transmitted by the radio station related to the current programme or song.
Audio system
| MENU | Press MENU. | MediaAuxiliary socket (AUX) |
| ▲ | Select "Radio". | |
| ▼ | ||
| OK | Confirm with OK. |  |
| ▲ | Select "INFO TEXT". | Connect the portable device (MP3 player, etc.) to the jack socket using an audio cable (not supplied). |
| ▼ | ||
| OK | Confirm with OK. | Press the SRC/BAND buttonSRC /BAND repeatedly until the "AUX" source is displayed. |
| ◀◀◀ | Select "On" or "Off" to switch Radio Text on or off. | First adjust the volume of your portable device (to a high level). Then adjust the volume of your audio system. The controls are operated from the portable device. |
| OK | Confirm with OK. |
CD player
Insert a CD in the player; play begins automatically.
Insert an MP3 compilation in the CD player.
The audio system searches for all of the music tracks, which may take anything between a few seconds and several tens of seconds, before play begins.
Press the SRC/BAND button SRC/BAND repeatedly to select "CD".

Press one of these buttons to go to the previous / next track in the list.

Press one of these buttons to select the previous or next folder in the order chosen.

Press and hold one of these buttons for fast forward or rewind.
Audio system
Playing a compilation
LIST
Press LIST to display the folder structure of the compilation.

Select a line in the list.
OK
Confirm with "OK".
Jump a page.

Select a folder / Playlist.

Start play of the chosen track.
OK

Go up one level.
Go back to the first level to select the track classification:
- By Folders: all folders containing audio files recognised on the peripheral device, in alphabetical order, ignoring the folder structure.
- By Playlist: depending on the playlists saved.
Play mode
Press MENU.
MENU

Select "Media".
Confirm with OK.
OK

Select the desired play mode.
OK
Confirm with OK to save the changes.
The play modes available are:
- Normal: the tracks are played in order, depending on the classification of the selected files.
- Random: the tracks in an album or folder are played in a random order.
- Random all: all of the tracks saved in the media are played in random order.
- Repeat: the tracks played are only those from the current album or folder.
Information and advice
The audio system can only play files with ".mp3", ".wma" or ".wav" extensions.
To avoid any playback or display issues, it is advisable to create file names that have less than 20 characters and without using any special characters (e.g. “?.; ù).
In order to be able to play a recorded CDR or CDRW, it is preferable to select the ISO 9660 level 1, 2 or Joliet standard when recording the CD.
If the disc is burned in another format, it may not be played correctly.
Audio system
It is recommended that the same recording standard is always used for a given disc, with as low a speed as possible (4x maximum) for optimum sound quality. In the particular case of a multi-session CD, the Joliet standard is recommended.
Playlists accepted are ".m3u" and ".pls" types. The system can recognise up to 5,000 files in 500 folders on 8 levels.
On a given disc, the CD player can read up to 255 MP3 files spread over 8 levels. However, it is recommended that this be kept to 2 levels so as to limit the time taken to access and play the CD.
The folder structure is not observed during playback.
Audio settings

Press 📂 to display the audio settings menu.
The settings available are:
- AMBIANCE,
- BASS,
- TREBLE,
- LOUDNESS,
- BALANCE,
- AUTO VOLUME.

Select the setting to adjust.
Confirm with OK.

Adjust the setting.

Confirm with OK.


The AMBIANCE, TREBLE and BASS audio settings are different and independent for each sound source.
Frequently asked questions
The following information groups together the answers to the most frequently asked questions concerning your audio system.
Audio system
| QUESTION RESPONSE SOLUTION | ||
| There is a difference in sound quality between the different audio sources (radio, CD, etc.). | To allow for optimal listening quality, the audio settings (Volume, Bass, Treble, Ambience, Loudness) can be tailored to different sound sources, which can generate audible differences when changing source (radio, CD, etc.). | Check that the audio settings (Volume, Bass, Treble, Ambience, Loudness) are adapted to the sources listened to. It is advisable to set the AUDIO functions (Bass, Treble, Front-Rear Fader, Left-Right Balance) to the middle position, select the musical ambience "None" and set the loudness correction to the "Active" position in CD mode or to the "Inactive" position in radio mode. |
| When changing the settings for treble and bass, the ambiance setting is deselected.When changing the ambience setting, treble and bass are reset to zero. | Choosing an ambience imposes settings for treble and bass. Modifying one without the other is not possible. | Modify the treble and bass settings or the ambience setting to obtain the desired sound quality. |
| The reception quality of the tuned radio station gradually deteriorates or the stored stations are not working (no sound, 87.5 MHz is displayed, etc.). | The vehicle is too far from the transmitter of the station or no transmitter is present in the geographical area. | Activate the RDS mode and start a new search for the station so that the system can check whether a stronger transmitter is available in the geographic area. |
| The environment (hills, buildings, tunnels, basement car parks, etc.) block reception, including in RDS tracking mode. | This phenomenon is normal and does not indicate a failure of the audio equipment. | |
| The aerial is missing or has been damaged (for example when going through a car wash or into an underground car park). | Have the aerial checked by a PEUGEOT dealer. |
Audio system
| Sound cut-outs of 1 to 2 seconds in radio mode. During this brief sound cut-out, the RDS searches for any frequency permitting better reception of the station. | Switch off the RDS function if the phenomenon is too frequent and always on the same route. |
| The traffic announcement (TA) is displayed. I do not receive any traffic information. | The radio station does not broadcast traffic information. |
| The stored stations are not found (no sound, 87.5 MHz is displayed, etc.). | An incorrect waveband is selected. Press the SRC button to return to the waveband (AM, FM1, FM2) on which the stations are stored. |
| The CD is ejected every time or is not played. The CD is upside down, cannot be read, does not contain audio files or contains audio files of a format that cannot be played by the audio system.The CD is protected by an anti-pirating system not recognised by the audio system. | - Check that the CD is inserted in the player the right way up.- Check the condition of the CD: the CD cannot be played if it is too badly damaged.- Check the content in the case of a recorded CD: consult the advice in the "Audio" section.- The audio system's CD player does not play DVDs.- Because of low quality, certain burned CDs will not be read by the audio system. |
| The CD sound is of poor quality. The CD used is scratched or of poor quality. Insert good quality CDs and store them in suitable conditions. | |
| The audio settings (bass, treble, ambiences) are unsuitable. | Return bass and treble settings to 0, without selecting an ambience. |
Audio system
| In "Random all" play, not all of the tracks are played. | In "Random all" play, the system can only take into account up to 999 tracks. | |
| With the engine off, the audio system switches off after a few minutes of use. | When the engine is switched off, the audio system operating time depends on the battery charge.The switch-off is normal: the audio system switches to economy mode and switches off to prevent discharging the vehicle's battery. | Start the vehicle's engine to increase the battery charge. |
| The message "the audio system is overheated" appears on the display. | In order to protect the installation if the surrounding temperature is too high, the audio system switches to an automatic thermal protection mode leading to a reduction of the volume or stopping of the playing of the CD. | Switch the audio system off for a few minutes to allow the system to cool. |
A
Accessories 75
Access to rear seats 50-52
Active City Brake....127-128
AdBlue® additive 17, 27, 152-154
Adjusting headlamps 71
Adjusting head restraints 49
Adjusting seats....48, 50-52
Adjusting the air distribution 57-60
Adjusting the air flow.... 57-60
Adjusting the date 33, 36, 20
Adjusting the height and reach
of the steering wheel 46
Adjusting the seat belt height 81-82
Adjusting the temperature 57-60
Adjusting the time 33-34, 36, 20
Advice on driving 105-107
Airbags 15,84,89
Airbags, curtain 86-87
Airbags, front....85, 87, 90
Airbags, lateral....86-87
Air conditioning 104
Air conditioning, automatic 55, 57-60
Air conditioning, digital 57-60
Air conditioning, manual 55-57, 60
Air intake 57-60
Alarm 41-43
Anti-lock braking system (ABS)....78
Anti-slip regulation (ASR) 78
Anti-theft 109
Armrest....63
Armrest, front 52
Assistance, emergency braking 78
Assistance call 76-77
Audio streaming (Bluetooth) 27, 11, 7
Auxiliary 26-27, 10-11
Battery....143, 150, 178, 180-181
Battery, charging....179-180
Battery, remote control 38-39
Blind, panoramic roof....63
BlueHDi 27,152,157
Bluetooth (hands-free) 28-29, 15-16, 8
Bluetooth (telephone)....28-30, 15-17
Bonnet 145-146
Boot 40-41
Brake discs.... 110, 151-152
Brake lamps 170-171
Brakes 11, 110, 151-152
Braking, automatic emergency 127-128
Brightness....19
Bulbs (changing) 167, 170-171
C
Cable, audio 26, 10
Cable, jack 26, 10
Cap, fuel filler 139
Capacity, fuel tank 138-139
CarPlay connection....18, 13
CD 26-27,11
CD, MP3....26-27, 11, 5-7
Central locking 37,40
Changing a bulb.... 167, 170-171
Changing a fuse....172, 174, 176-177
Changing a wheel 162-163
Changing a wiper blade....144
Changing the remote control battery......38-39
Checking the engine oil level....26
Checking the levels....148-150
Checking tyre pressures (using the kit).....158-160
Checks 110, 147, 150-152
Child lock....103
Children 95, 97-100
Children (safety)......103
Child seats 83, 88-89, 93-95, 102
Child seats, conventional....94
Child seats, ISOFIX 97-100
Closing the boot 40-41
Closing the doors....37
Connection, Bluetooth .....21-22, 28-30, 15-17
Connection, MirrorLink 19, 12-14
Connection, Wi-Fi network 22
Control, electric windows....43-44
Control, emergency boot release 41
Control, heated seats....51
Controls, at steering....2
Control stalk, lighting 22, 67, 70
Control stalk, wipers 72-74
Courtesy lamp....61-62
Cruise control....123-126
Cup holder....63
D
DAB (Digital Audio
Broadcasting) – Digital radio....25, 9
Date (setting).... 33, 36, 20
Daytime running lamps....71, 167-169
Deactivating the passenger airbag.....85, 89-90
Deadlocking 38
Demisting - defrosting .....56-57, 60-61
Dials and gauges 7-8
Dimensions 191
Dipstick 26,148-149
Direction indicators .....22, 68-70, 167-168, 170-171
Display screen, instrument panel .....7-8, 116
Door pockets....63
Driving 45-46
Driving economically....104
Dynamic stability control (DSC)....15, 78-80
Alphabetical index
E
Earth point, remote....147
Eco-driving (advice)....104
Economy mode 143
Electronic brake force distribution (EBFD).....78
Electronic stability control (ESC)....78
Emergency braking assistance (EBA)......78
Emergency call 76-77
Energy economy mode....143
Engine, Diesel....21, 140, 157
Engine, petrol 140, 147
Engine compartment 147
Engines 184-185, 188, 190
Environment 39,104
F
Filling the fuel tank....138-140
Filter, air 151
Filter, Diesel fuel 147
Filter, oil 151
Filter, particle 150-151
Filter, passenger compartment....151
Fitting a wheel....164-166
Fitting roof bars....144-145
Fittings, boot 65
Fittings, interior 63
Flap, fuel filler....138-139
Foglamp, rear....21, 67-68, 170-171
Foglamps 167-168
Foglamps, front..... 22, 67-68, 71-72, 170, 172
Frequency (radio) 24-25
Fuel....104, 140
Fuel consumption....32, 104
Fuel tank....138-139
Fusebox, dashboard 172, 174, 176-177
Fusebox, engine
compartment 172, 174, 176-177
Fuses....172, 174, 176-177
G
Gauge, fuel....138-139
Gearbox, automatic 104, 114-115, 151
Gearbox, electronic .....104, 112-113, 118-121, 151
Gearbox, manual ..... 104, 111, 118-121, 151
Gear lever 104
Gear lever, electronic gearbox ....151
Gear lever, manual gearbox .... 111
Gear shift indicator \~ Gear
efficiency indicator 116
GPS....14
Grab handles 50-52
Guide-me-home....69
H
Hazard warning lamps....76, 157
Hazard warning lamps, automatic operation.....76
Headlamps, automatic illumination .....67, 69
Headlamps, dipped beam....22, 67, 167-169
Headlamps, halogen....167-168
Headlamps, main beam....22, 67, 167-169
Head restraints, front 49
Head restraints, rear 54
Heating 56-57, 104
Hill start assist....117-118
Indicators, direction 68-69, 168
Inflating tyres 104, 193
Inflating tyres (using the kit)....158-160
Input, auxiliary....5
Instrument panels 7-8
Internet browser....18
ISOFIX 98-99
Isofix mountings....97
J
Jack....162-163, 26, 10
Jump starting 178
K
Key 36-37
Key with remote control 39, 109
Kit, hands-free 28-29, 15-16, 8
Kit, temporary puncture repair....158-160
L
Labels, identification....192
Lamps, parking 70
LEDs – light-emitting diodes......169, 171
Level, brake fluid....149
Level, Diesel additive....150
Level, engine coolant....23, 149
Level, engine oil 26, 148-149
Level, screenwash fluid 150
Levels and checks 147-150
Light-emitting diodes – LEDs .... 71, 171
Lighting, ambient....62
Lighting, cornering....71-72
Lighting, guide-me home 36, 69-70
Lighting, interior 61-62
Lighting dimmer 34-35
Loading 104, 144
Load reduction mode....143
Locating your vehicle 36
Locking from the inside....40
Locking the boot.... 40-41
Low fuel level 138-139
M
Maintenance, routine 104
Map reading lamps 61-62
Markings, identification....192
Mat 63-64
Menu 13
Menus (audio) 4-5, 4-6
Messages....32
Messages, quick....32
Mirror, rear view 47-48
Mirrors, door 46-47
Misfuel prevention....139
Mountings, Isofix....97
MP3 CD 5-7
N
Number plate lamps....172
O
Oil, engine 148-149
Oil change 148-149
Oil consumption 148-149
Opening the bonnet 145-146
Opening the boot 40-41
Opening the doors 36
Opening the fuel filler flap....138
Opening the panoramic roof blind ....63
P
Pads, brake.... 110, 151-152
Paint colour code 192
Parcel shelf, rear....65
Park Assist....131
Parking brake....11, 110, 151-152
PEUGEOT Connect Nav....1
PEUGEOT Connect Radio 1
Plates, identification....192
Player, Apple ® 27, 11
Player, MP3 CD....26, 5-7
Player, USB....26, 10, 5, 5
Port, USB 64, 26, 10, 5, 7, 5
Pre-heater, Diesel....21
Pressures, tyres....161, 192-193
Pre-tensioning seat belts....83
Priming the fuel system 157
Profiles 34, 18
Protecting children.....85, 88-90, 93, 95, 97-100
Puncture 158-160
Radio 23-24, 27, 7, 11, 3, 3
Radio, digital (Digital Audio
Broadcasting – DAB)......25, 9
Range 32
Range, AdBlue 27-29
RDS 24-25,7
Rear screen, demisting - defrosting .....61
Recharging the battery 179-180
Recirculation, air 57-60
Reduction of electrical load 143
Regeneration of the particle filter 151
Reinitialisation of the under-inflation detection system....136
Reinitialising the remote control 38-39
Reminder, key in ignition....109
Reminder, lighting on 68
Remote control.... 36-37, 39
Removing a wheel 164-166
Removing the mat....63-64
Replacing bulbs 167, 170-171
Replacing fuses 172, 174, 176-177
Replacing the air filter....151
Replacing the oil filter 151
Replacing the passenger compartment filter .....151
Reservoir, screenwash 150
Resetting the service indicator....26
Reversing camera....130
Reversing lamp 170
Reversing lamps 171
Roof, panoramic....63
Roof bars....144-145
Running out of fuel (Diesel) 157
Alphabetical index
S
Safety, children .....85, 88-90, 93, 95, 97-100
SCR (Selective Catalytic Reduction) system .....152
Screen, instrument panel....30-31
Screen menu map....13
Screenwash 74
Screenwash, rear 74
Seat, rear bench 53
Seat belts 81-83, 94
Seats, front....48, 50-52
Seats, heated....51
Seats, rear....53-54
Serial number, vehicle 192
Service indicator 24
Servicing 24,104
Settings, system....35, 19
Sidelamps 67, 70-71, 167-171
Side repeater 170
Snow chains....141
Socket, 12 V accessory....64
Socket, auxiliary....26, 10
Socket. JACK....64, 26, 10
Sockets, audio 64, 5
Sockets, auxiliary....5
Speed limiter 121-123, 126
Stability control (ESC)....78
Starting a Diesel engine 140
Starting the engine .....105, 108-109, 112-115
Starting using another battery 178
Station, radio 23-25, 7, 3, 3
Stay, bonnet 145-146
Steering mounted controls, audio ....3, 3
Steering wheel, adjustment 46
Stop (warning lamp)....11
Stop & Start....21, 33, 55, 60, 118-121,
131, 138, 145, 150, 181
Storage....52, 63
Stowing rings 65
Switching off the engine 105, 108-109
Synchronising the remote control....38-39
T
Tables of fuses.... 172, 174, 176-177
Tank, fuel....138-139
Telephone 28-33, 15-18
Temperature, coolant....23
Textured Paint 156
Third brake lamp....171
Three flashes (direction indicators) 68-69
Time (setting) 33-34, 36, 20
TMC (Traffic info) 14
Tools..... 162, 162-163, 172, 174, 176-177, 182-183
Touch screen....136, 1, 1
Towbar....106-107, 142
Towed loads 184
Towing 181-183
Traction control (ASR) 15, 78-80
Traffic information (TA) 4
Traffic information (TMC)....14
Trailer 106-107, 142
Triangle, warning....157
Trip computer 30-33
Tyres....104, 193
Tyre under-inflation detection .....15, 135-136, 161
U
Under-inflation (detection) 135
Unlocking 36
Unlocking from the inside 40
Unlocking the boot....40-41
Updating the date.... 33, 36, 20
Updating the time....33-34, 36, 20
USB 26-27, 10-11, 5, 5
Ventilation 55-57, 60, 104
Voice commands 5-10
W
Warning and indicator lamps....10
Warning lamp, braking system ....11
Warning lamp, Diesel engine pre-heater .....21
Warning lamp, Service....20
Warning lamp, Stop 11
Warning lamps....10
Weights 184-185, 188, 190
Wheel, spare 162-163, 193
Window controls 43-44
Wiper, rear....74
Wiper blades (changing)....144
Wipers 22, 72-73
Wipers, automatic rain sensitive....73
- [Non-Text]
[Non-Text]
[Non-Text]
[Non-Text]
[Non-Text]
[Non-Text]
[Non-Text]
[Non-Text]
[Non-Text]
[Non-Text]
[Non-Text]
[Non-Text]
[Non-Text]
[Non-Text]
[Non-Text]
[Non-Text]
[Non-Text]
[Non-Text]
[Non-Text]
[Non-Text]
[Non-Text]
[Non-Text]
[Non-Text]
[Non-Text]
[Non-Text]
[Non-Text]
[Non-Text]
[Non-Text]
[Non-Text]
The Ground Truth image displays a single, solid horizontal line. According to Rule 2 (UNDERSCORE & LINE RULES), this is a stylistic or background line, not a placeholder underscore. Therefore, the OCR result must ignore it and output nothing or only meaningful text. The provided OCR content is "____", which consists of four underscores. This is an incorrect interpretation of the line as a placeholder, violating the rule that stylistic lines must be ignored. The OCR has hallucinated placeholder underscores where none should exist in the GT. Hence, the OCR result is inconsistent with the Ground Truth.
The Ground Truth image displays a single, solid horizontal line. According to Rule 2 (UNDERSCORE & LINE RULES), this is a stylistic or background line, not a placeholder underscore. Therefore, the OCR result must ignore it and output nothing or only meaningful text. The provided OCR content is "____", which consists of four underscores. This is an incorrect interpretation of the line as a placeholder, violating the rule that stylistic lines must be ignored. The OCR has hallucinated underscores where none should exist based on the GT's visual context. Hence, the OCR result is inconsistent with the Ground Truth.
[Non-Text]
[Non-Text]
[Non-Text]
[Non-Text]
[Non-Text]
[Non-Text]
[Non-Text]
[Non-Text]
[Non-Text]
[Non-Text]
[Non-Text]
[Non-Text]
[Non-Text]
[Non-Text]
[Non-Text]
[Non-Text]
[Non-Text]
[Non-Text]
[Non-Text]
[Non-Text]
[Non-Text]
[Non-Text]
[Non-Text]
[Non-Text]
[Non-Text]
[Non-Text]
[Non-Text]
[Non-Text]
[Non-Text]
[Non-Text]
[Non-Text]
[Non-Text]
[Non-Text]
[Non-Text]
[Non-Text]
[Non-Text]
[Non-Text]
[Non-Text]
[Non-Text]
[Non-Text]
[Non-Text]
[Non-Text]
[Non-Text]
[Non-Text]
[Non-Text]
[Non-Text]
[Non-Text]
[Non-Text]
[Non-Text]
[Non-Text]
[Non-Text]
[Non-Text]
[Non-Text]
[Non-Text]
[Non-Text]
[Non-Text]
[Non-Text]
[Non-Text]
[Non-Text]
[Non-Text]
[Non-Text]
[Non-Text]
[Non-Text]
[Non-Text]
[Non-Text]
[Non-Text]
[Non-Text]
[Non-Text]
Automobiles PEUGEOT declares, by application of the provisions of the European legislation (Directive 2000/53) relating to End of Life Vehicles, that it achieves the objectives set by this legislation and that recycled materials are used in the manufacture of the products that it sells.
Reproduction or translation of all or part of this document is prohibited without written authorisation from Automobiles PEUGEOT.



Printed in the EU
Anglais
3-17



- ACCESS TO THE ONLINE HANDBOOK
- SELECT
- WELCOME
- CONTENTS
- OVERVIEW
- ACCESS
- 2
- LIGHTING AND VISIBILITY
- 4
- DASHBOARD INSTRUMENTS
- EASE OF USE AND COMFORT
- 3
- SAFETY
- 5
- DRIVING
- 6
- PRACTICAL INFORMATION
- 7
- TECHNICAL DATA
- 9
- AUDIO EQUIPMENT AND TELEMATICS
- IN THE EVENT OF A BREAKDOWN
- 8
- INSTRUMENTS AND CONTROLS (CONTINUED)
- STEERING MOUNTED CONTROLS
- SIDE SWITCH PANEL
- CENTRAL SWITCH PANEL
- INSTRUMENT PANELS
- REV COUNTER
- INDICATOR
- CONTROL BUTTON
- INSTRUMENT PANEL LIGHTING
- SPEEDOMETER
- GAUGE
- TRIP COMPUTER
- GEARBOX
- TRIP RECORDER RESET
- WARNING AND INDICATOR LAMPS
- WHEN THE IGNITION IS SWITCHED ON
- ASSOCIATED WARNINGS
- WARNING LAMPS
- OPERATION INDICATOR LAMPS
- DEACTIVATION INDICATOR LAMP
- INDICATORS
- ENGINE COOLANT TEMPERATURE
- RESETTING THE SERVICE INDICATOR RETRIEVING THE SERVICE INFORMATION
- ENGINE OIL LEVEL INDICATOR
- OIL LEVEL INCORRECT
- OIL LEVEL INDICATOR FAULT
- ADBLUE® RANGE INDICATORS
- IN THE EVENT OF THE RISK OF NON-STARTING RELATED TO A LACK OF ADBLUE®
- RANGE OF THE 1.6 BLUEHDI ENGINE (EURO 6.1)
- REMAINING RANGE LESS THAN 375 MILES (600 KM) (1.6 BLUEHDI EURO 6.1)
- BREAKDOWN RELATED TO A LACK OF ADBLUE 10
- RANGE OF THE 1.5 BLUEHDI ENGINE (EURO 6.2)
- REMAINING RANGE BETWEEN 1,500 AND 500 MILES (2,400 AND 800 KM) (1.5 BLUEHDI EURO 6.2)
- REMAINING RANGE BETWEEN 500 AND 60 MILES (800 AND 100 KM) (1.5 BLUEHDI EURO 6.2)
- REMAINING RANGE LESS THAN 60 MILES (100 KM) (1.5 BLUEHDI EURO 6.2)
- IN THE EVENT OF A FAULT WITH THE SCR EMISSIONS CONTROL SYSTEM
- IN THE EVENT OF THE DETECTION OF A FAULT
- INSTRUMENT PANEL DISPLAY SCREEN
- TOUCH SCREEN
- PERMANENT DISPLAY
- TEMPORARY DISPLAY IN A NEW WINDOW
- A FEW DEFINITIONS
- RANGE
- CURRENT FUEL CONSUMPTION
- AVERAGE FUEL CONSUMPTION
- DISTANCE TRAVELLED
- AVERAGE SPEED
- TOTAL TIME IN STOP MODE
- DATE AND TIME ADJUSTMENT
- INSTRUMENT PANEL
- WITH PEUGEOT CONNECT RADIO
- WITH PEUGEOT CONNECT NAV
- ADDITIONAL ADJUSTMENTS
- LIGHTING DIMMER
- WITH TWO BUTTONS
- WITH ONE BUTTON
- WITH TOUCH SCREEN
- DOORS
- COMPLETE UNLOCKING
- WITH THE KEY
- USING THE REMOTE CONTROL
- SELECTIVE UNLOCKING
- MENU
- WITH THE REMOTE CONTROL
- LOCATING YOUR VEHICLE
- GUIDE-ME-HOME LIGHTING
- LOCKING – KEY
- LOCKING
- FOLDING THE KEY
- BACK-UP DOOR LOCKING
- DRIVER'S SIDE
- PASSENGER SIDE
- DEADLOCKING
- REMOTE CONTROL PROBLEM
- RESET
- CHANGING THE BATTERY
- LOST KEYS
- REMOTE CONTROL
- CLOSED VEHICLE
- ANTI-THEFT PROTECTION
- SECOND-HAND VEHICLE
- CENTRAL LOCKING
- RELEASE
- WHEN LOCKING / DEADLOCKING FROM THE OUTSIDE
- AUTOMATIC CENTRAL LOCKING
- BOOT
- OPENING
- CLOSING
- BOOT STILL OPEN
- BACK-UP RELEASE
- ALARM
- PERIMETER MONITORING
- VOLUMETRIC MONITORING
- ANTI-TILT (GTI VERSION)
- SELF-PROTECTION FUNCTION
- TOTAL PROTECTION
- SWITCHING ON
- DEACTIVATION
- AUTOMATIC ACTIVATION (DEPENDING ON VERSION)
- PROTECTION – EXTERIOR PERIMETER MONITORING ALONE
- DEACTIVATING THE VOLUMETRIC MONITORING
- LOCKING THE VEHICLE WITHOUT ACTIVATING THE ALARM
- TRIGGERING OF THE ALARM
- DEACTIVATE THE MONITORING FUNCTIONS
- MALFUNCTION
- ELECTRIC WINDOWS
- MANUAL MODE
- OPEN
- CLOSE
- AUTOMATIC MODE
- ANTI-PINCH
- DEACTIVATING THE REAR DOOR ELECTRIC WINDOWS
- REINITIALISATION
- PEUGEOT I-COCKPIT
- SITTING COMFORTABLY
- PASSENGER'S SIDE
- STEERING WHEEL ADJUSTMENT
- MIRRORS
- DOOR MIRRORS
- MANUAL ADJUSTMENTS
- FOLDING
- ELECTRIC ADJUSTMENTS
- FOLDING / UNFOLDING
- REAR VIEW MIRROR
- MANUAL MODEL
- ADJUSTMENT
- DAY / NIGHT POSITION
- FRONT SEATS
- STANDARD SEATS
- BUCKET SEATS
- BACKREST ANGLE
- HEATED SEATS
- ARMREST
- ACCESS TO REAR SEATS (3-DOOR)
- FOLDING THE FRONT SEAT FORWARD
- ONE-PIECE REAR BENCH
- FOLDING THE BACKREST
- RAISING THE SEAT BACKREST
- 2/3 – 1/3 SPLIT REAR BENCH SEAT
- RETURNING THE BACKREST TO THE NORMAL POSITION
- HEAD RESTRAINTS
- RECOMMENDATIONS FOR VENTILATION AND AIR CONDITIONING
- HEATING MANUAL AIR CONDITIONING
- TEMPERATURE
- AIR FLOW
- ADJUSTING THE AIR DISTRIBUTION
- AIR CONDITIONING ON/OFF
- SWITCHING OFF
- DUAL-ZONE AUTOMATIC AIR CONDITIONING
- AUTO MODE
- SOFT AUTO
- AUTO
- AUTO FAST
- AIR CONDITIONING
- AIR DISTRIBUTION
- DEACTIVATING THE SYSTEM
- RECIRCULATION OF THE INTERIOR AIR
- FRONT DEMISTING — DEFROSTING
- WITH HEATING
- WITH MANUAL AIR CONDITIONING
- WITH AUTOMATIC DUAL-ZONE AIR CONDITIONING
- VISIBILITY PROGRAMME
- REAR SCREEN DEMIST – DEFROST
- COURTESY LAMP
- MAP READING LAMPS
- INTERIOR AMBIENT LIGHTING
- SUNROOF BLIND
- INTERIOR FITTINGS
- MATS
- FITTING
- REMOVAL
- REFITTING
- 12 V ACCESSORY SOCKET
- USB PORT/JACK AUXILIARY SOCKET
- LIGHTING CONTROL STALK
- SELECTION OF MAIN LIGHTING MODE
- DIPPING THE HEADLAMPS
- DISPLAY
- FOGLAMPS
- FRONT FOGLAMPS AND REAR FOGLAMP
- ROTATE AND RELEASE THE RING
- DIRECTION INDICATORS
- THREE FLASHES
- AUTOMATIC ILLUMINATION OF HEADLAMPS
- AUTOMATIC GUIDE-ME-HOME LIGHTING
- MANUAL GUIDE-ME-HOME LIGHTING
- PARKING LAMPS
- DAYTIME RUNNING LAMPS/ SIDELAMPS
- HEADLAMP ADJUSTMENT
- CORNERING LIGHTING
- ACTIVATION
- PROGRAMMING
- WIPER CONTROL STALK
- FRONT WIPERS
- AUTOMATIC RAIN SENSITIVE WINDSCREEN WIPERS
- FRONT SCREENWASH
- REAR WIPER
- REVERSE GEAR
- GENERAL SAFETY RECOMMENDATIONS
- WE DRAW YOUR ATTENTION TO THE FOLLOWING POINTS
- INSTALLATION OF ACCESSORY RADIO COMMUNICATION TRANSMITTERS
- HAZARD WARNING LAMPS
- AUTOMATIC OPERATION OF HAZARD WARNING LAMPS
- EMERGENCY OR ASSISTANCE CALL
- PEUGEOT CONNECT SOS
- OPERATION OF THE SYSTEM
- PEUGEOT CONNECT ASSISTANCE
- GEO-LOCATION
- ELECTRONIC STABILITY CONTROL (ESC)
- DEFINITIONS
- ANTI-LOCK BRAKING SYSTEM (ABS) AND ELECTRONIC BRAKE FORCE DISTRIBUTION (EBFD)
- EMERGENCY BRAKING ASSISTANCE (EBA)
- ANTI-SLIP REGULATION (ASR)
- DYNAMIC STABILITY CONTROL (DSC)
- ANTI-LOCK BRAKING SYSTEM (ABS) AND ELECTRONIC BRAKE FORCE DISTRIBUTION (EBD)
- YOU MUST STOP THE VEHICLE AS SOON AS IT IS SAFE TO DO SO
- ANTI-SLIP REGULATION (ASR) / DYNAMIC STABILITY CONTROL (DSC)
- DEACTIVATING USING THE TOUCH SCREEN
- REACTIVATION
- REACTIVATING USING THE BUTTON
- REACTIVATING USING THE TOUCH SCREEN
- OPERATING FAULT
- ASR / DSC
- SEAT BELTS
- AT THE FRONT
- HEIGHT ADJUSTMENT (5-DOOR)
- WARNING LAMP
- AT THE REAR
- ADVICE
- RECOMMENDATIONS FOR CHILDREN
- IN THE EVENT OF AN IMPACT
- AIRBAGS
- GENERAL POINTS
- FRONT AIRBAGS
- DEPLOYMENT
- CURTAIN AIRBAGS
- FOR THE AIRBAGS TO BE FULLY EFFECTIVE, OBSERVE THE SAFETY RECOMMENDATIONS BELOW
- LATERAL AIRBAGS
- GENERAL POINTS RELATING TO CHILD SEATS
- CHILD SEAT AT THE FRONT
- DEACTIVATING THE PASSENGER'S FRONT AIRBAG
- PASSENGER AIRBAG OFF
- REACTIVATING THE PASSENGER'S FRONT AIRBAG
- CHILD SEAT AT THE REAR
- REARWARD FACING
- FORWARD FACING
- CENTRE REAR SEAT
- CHILD SEATS RECOMMENDED BY PEUGEOT
- INSTALLING A CHILD SEAT ATTACHED WITH THE SEAT BELT
- ISOFIX" MOUNTINGS
- ISOFIX CHILD SEATS RECOMMENDED BY PEUGEOT
- SUMMARY TABLE OF LOCATIONS FOR ISOFIX CHILD SEATS
- CHILDREN IN FRONT
- INSTALLING A BOOSTER SEAT
- CHILD LOCK
- MANUAL SYSTEM
- ELECTRICAL SYSTEM
- ECO-DRIVING
- OPTIMISE THE USE OF YOUR GEARBOX
- DRIVE SMOOTHLY
- CONTROL THE USE OF YOUR ELECTRICAL EQUIPMENT
- LIMIT THE CAUSES OF EXCESS CONSUMPTION
- OBSERVE THE RECOMMENDATIONS ON MAINTENANCE
- DRIVING RECOMMENDATIONS
- IMPORTANT
- DRIVING ON FLOODED ROADS
- IN CASE OF TOWING
- DISTRIBUTION OF LOADS
- SIDE WIND
- COOLING
- NEW VEHICLE
- BRAKING
- TYRES
- LIGHTING
- STARTING – SWITCHING OFF THE ENGINE
- ELECTRONIC IMMOBILISER
- PARKING BRAKE
- MANUAL GEARBOX
- 5-SPEED
- 6-SPEED
- ELECTRONIC GEARBOX
- MOVING OFF
- STOPPING - MOVING OFF ON A SLOPE
- STOPPING – PARKING
- MANUAL GEAR CHANGE
- STEERING MOUNTED CONTROL PADDLES
- CREEP FUNCTION
- ASSISTANCE WITH LOW-SPEED MANOEUVRES
- AUTOMATIC GEARBOX
- DISPLAY IN THE INSTRUMENT PANEL
- FOOT ON THE BRAKE WARNING
- INVALID VALUE
- SPORT PROGRAMME
- SNOW PROGRAM
- RETURN TO AUTOMATIC OPERATION
- GEAR SHIFT INDICATOR
- EXAMPLE
- HILL START ASSIST
- STOP & START
- STOP MODE
- WITH E-HDI OR BLUEHDI DIESEL AND AN ELECTRONIC GEARBOX
- WITH BLUEHDI DIESEL AND A MANUAL GEARBOX
- WITH PURETECH PETROL AND A MANUAL, ELECTRONIC OR AUTOMATIC GEARBOX
- SPECIAL CASES: STOP MODE NOT AVAILABLE
- ECO
- THIS OPERATION IS PERFECTLY NORMAL
- START MODE
- WITH A MANUAL GEARBOX
- WITH AN ELECTRONIC / AUTOMATIC GEARBOX
- OR
- SPECIAL CASES: START INVOKED AUTOMATICALLY
- MANUAL DEACTIVATION
- MANUAL REACTIVATION
- OPENING THE BONNET
- SPEED LIMITER "LIMIT
- SELECTION
- REGISTERING A LIMIT SPEED
- ON / PAUSE
- EXCEEDING THE REGISTERED LIMIT SPEED
- FLASHING OF THE SPEED SETTING
- SWITCHING THE SYSTEM OFF
- CRUISE CONTROL "CRUISE
- WITH AN ELECTRONIC GEARBOX
- WITH AN AUTOMATIC GEARBOX
- REGISTERING A CRUISE SPEED SETTING
- TEMPORARILY EXCEEDING THE PROGRAMMED SPEED
- PAUSE (OFF)
- RESUME
- CHANGING THE REGISTERED SPEED SETTING
- WITHOUT USING THE ACCELERATOR
- BY USING THE ACCELERATOR
- MEMORISING SPEEDS
- ACTIVE CITY BRAKE
- CONDITIONS FOR OPERATION
- ACTIVATION / DEACTIVATION
- PLEASE DEACTIVATE THE ACTIVE CITY BRAKE
- OPERATING LIMITS
- NOT DETECTED ARE
- OPERATING FAULTS
- PARKING SENSORS
- ENGAGE REVERSE GEAR
- DISPLAY IN THE SCREEN
- STOPPING THE ASSISTANCE
- SWITCHING OFF THE ASSISTANCE
- RESUMING ASSISTANCE
- REVERSING CAMERA
- PARK ASSIST
- ENTERING A PARALLEL PARKING SPACE
- EXIT FROM A PARALLEL PARKING SPACE
- UNDER-INFLATION DETECTION
- UNDER-INFLATION ALERT
- WITHOUT TOUCH SCREEN
- SNOW CHAINS
- PEUGEOT & TOTAL A PARTNERSHIP FOR PERFORMANCE
- FUEL TANK
- LOW FUEL LEVEL
- REFUELLING
- FUEL CUT-OFF
- MISFUEL PREVENTION (DIESEL)
- I TRAVELLING ABROAD
- COMPATIBILITY OF FUELS
- FUEL USED FOR PETROL ENGINES
- FUEL USED FOR DIESEL ENGINES
- DIESEL AT LOW TEMPERATURE
- TRAVELLING ABROAD
- INSTALLATION TIPS
- TOWING A TRAILER
- LOAD REDUCTION MODE
- ENERGY ECONOMY MODE
- SWITCHING TO THIS MODE
- EXITING THE MODE
- CHANGING A WINDOW WIPER
- REMOVING A WIPER BLADE
- FITTING THE NEW WIPER BLADE
- FITTING ROOF BARS
- BONNET
- ENGINES
- CHECKING LEVELS
- USED PRODUCTS
- ENGINE OIL LEVEL
- CHECKING USING THE DIPSTICK
- OIL GRADE
- TOPPING UP THE ENGINE OIL LEVEL
- ENGINE OIL CHANGE
- BRAKE FLUID LEVEL
- CHANGING THE COOLANT
- FLUID SPECIFICATION
- COOLANT LEVEL
- SCREENWASH FLUID LEVEL
- DIESEL FUEL ADDITIVE LEVEL (DIESEL WITH PARTICLE FILTER)
- TOPPING UP
- LEVEL OF ADBLUE
- CHECKS
- 12 V BATTERY
- AIR FILTER AND PASSENGER COMPARTMENT FILTER
- OIL FILTER
- PARTICLE FILTER (DIESEL)
- BRAKE PADS
- BRAKE DISC WEAR
- ADBLUE® (BLUEHDI ENGINES)
- SCR SYSTEM
- FREEZING OF THE ADBLUE ®
- PRECAUTIONS FOR USE
- RECOMMENDATIONS ON STORAGE
- TOPPING UP WITH ADBLUE®
- ACCESS THROUGH THE BOOT (1.6 LITRE BLUEHDI EURO 6.1)
- ACCESS THROUGH THE FUEL FILLER FLAP (1.5 LITRE BLUEHDI EURO 6.2)
- REFILLING
- AFTER REFILLING
- THROUGH THE BOOT (1.6 LITRE BLUEHDI EURO 6.1)
- THROUGH THE FUEL FILLER FLAP (1.5 LITRE BLUEHDI EURO 6.2)
- ADVICE ON CARE
- MATT PAINT
- TEXTURED PAINT
- WARNING TRIANGLE
- RUNNING OUT OF FUEL (DIESEL)
- 1.6 BLUEHDI ENGINE (EURO 6.1)
- 1.5 BLUEHDI (EURO 6.2) ENGINE
- OTHER ENGINES
- TEMPORARY PUNCTURE REPAIR KIT
- REPAIR PROCEDURE
- CHECKING / ADJUSTING TYRE PRESSURES
- SPARE WHEEL
- WHEEL WITH HUB CAP
- PUTTING THE WHEEL BACK IN PLACE
- REMOVING A WHEEL
- PARKING THE VEHICLE
- LIST OF OPERATIONS
- FITTING A WHEEL
- AFTER CHANGING A WHEEL
- CHANGING A BULB
- FRONT LAMPS
- MODEL WITH LIGHT GUIDE
- MODEL WITHOUT LIGHT GUIDE
- GTI MODEL
- DIPPED BEAM HEADLAMPS
- MAIN BEAM HEADLAMPS
- DAYTIME RUNNING LAMPS/SIDELAMPS
- DAYTIME RUNNING LAMPS / SIDELAMPS (LIGHT EMITTING DIODES – LEDS)
- LIGHT-EMITTING DIODES – LEDS
- REVERSING LAMPS AND DIRECTION INDICATORS
- THIRD BRAKE LAMP
- CHANGING A FUSE
- ACCESS TO THE TOOLS
- INSTALLING ELECTRICAL ACCESSORIES
- ON THE LEFT
- UNDERBONNET
- LEAD-ACID STARTER BATTERIES
- ACCESS TO THE BATTERY
- STARTING USING ANOTHER BATTERY
- CHARGING THE BATTERY USING A BATTERY CHARGER
- DISCONNECTING THE BATTERY
- RECONNECTING THE (+) TERMINAL
- FOLLOWING RECONNECTION OF THE BATTERY
- TOWING
- GENERAL RECOMMENDATIONS
- TOWING YOUR VEHICLE
- TOWING ANOTHER VEHICLE
- CHARACTERISTICS OF ENGINES AND TOWED LOADS
- WEIGHTS AND TOWED LOADS
- DIMENSIONS (IN MM)
- COMMERCIAL VERSION
- IDENTIFICATION MARKINGS
- CHECKING TYRE PRESSURES
- PEUGEOT CONNECT NAV
- FIRST STEPS
- VOICE COMMANDS
- MENUS
- RADIO MEDIA
- APPLICATIONS
- CONNECTED NAVIGATION
- TELEPHONE
- VOICE COMMANDS 21,523°C
- VEHICLE
- CONFIGURATION
- INFORMATION – USING THE SYSTEM
- GLOBAL VOICE COMMANDS
- NAVIGATION" VOICE COMMANDS
- RADIO MEDIA" VOICE COMMANDS
- TELEPHONE" VOICE COMMANDS
- TEXT MESSAGE" VOICE COMMANDS
- NAVIGATION
- CHOICE OF DESTINATION
- TO A NEW DESTINATION
- NAV
- OK
- TO A RECENT DESTINATION
- TO "MY HOME" OR "MY WORK
- TOWARDS A CONTACT
- TOWARDS POINTS OF INTEREST (POI)
- TO A POINT ON THE MAP
- TOWARDS GPS COORDINATES
- TMC (TRAFFIC MESSAGE CHANNEL)
- NETWORK CONNECTION PROVIDED BY THE VEHICLE
- NETWORK CONNECTION PROVIDED BY THE USER
- CONNECTED NAVIGATION CONNECTION
- BLUETOOTH CONNECTION
- WI-FI CONNECTION
- SETTINGS SPECIFIC TO CONNECTED NAVIGATION
- DECLARATION OF "DANGER ZONES
- DANGER ZONES" PACK UPDATES
- DISPLAY THE WEATHER
- INTERNET BROWSER
- APPS
- CONNECTIVITY
- CARPLAY® SMARTPHONE CONNECTION
- TEL
- MIRRORLINK™ SMARTPHONE CONNECTION
- ANDROID AUTO SMARTPHONE CONNECTION
- BLUETOOTH® CONNECTION
- PROCEDURE FROM THE TELEPHONE
- PROCEDURE FROM THE SYSTEM
- CONNECTION SHARING
- WI-FI CONNECTION SHARING
- MANAGE CONNECTIONS
- RADIO
- SELECTING A STATION
- MEDIA
- PRESETTING A STATION
- ACTIVATING / DEACTIVATING RDS
- DISPLAY TEXT INFORMATION
- PLAY TA MESSAGES
- DAB (DIGITAL AUDIO BROADCASTING) RADIO
- TERRESTRIAL DIGITAL RADIO
- DAB-FM AUTO TRACKING
- USB PORT
- AUXILIARY SOCKET (AUX)
- CD PLAYER
- SELECTING THE SOURCE
- BLUETOOTH® AUDIO STREAMING
- CONNECTING APPLE® PLAYERS
- INFORMATION AND ADVICE
- PAIRING A BLUETOOTH® TELEPHONE
- AUTOMATIC RECONNECTION
- TO MODIFY THE CONNECTION PROFILE
- MANAGING PAIRED TELEPHONES
- DELETING A TELEPHONE
- RECEIVING A CALL
- MAKING A CALL
- CALLING A NEW NUMBER
- CALLING A CONTACT
- CALLING A RECENTLY USED NUMBER
- MANAGING CONTACTS / ENTRIES
- MANAGING MESSAGES
- MANAGING QUICK MESSAGES
- MANAGING EMAIL
- AUDIO SETTINGS
- SETUP
- PROFILE SETTINGS
- [NO TEXT]
- 00.0
- MODIFYING SYSTEM SETTINGS
- SELECT THE LANGUAGE
- SETTING THE DATE
- SETTING THE TIME
- FREQUENTLY ASKED QUESTIONS
- COLOUR SCHEMES
- C€ 1909
- USA - FEDERAL COMMUNICATIONS COMMISSION (FCC)
- MODIFICATION STATEMENT
- INTERFERENCE STATEMENT
- WIRELESS NOTICE
- FCC CLASS A/B DIGITAL DEVICE OR PERIPHERAL NOTICE - CLASS
- PEUGEOT CONNECT RADIO
- MULTIMEDIA AUDIO SYSTEM – APPLICATIONS – BLUETOOTH® TELEPHONE
- STEERING MOUNTED CONTROLS STEERING MOUNTED CONTROLS – TYPE 1
- STEERING MOUNTED CONTROLS - TYPE 2
- SETTINGS
- CHANGING WAVEBAND
- FM-DAB FOLLOW-UP
- BLUETOOTH® STREAMING
- TELEPHONE NOT CONNECTED BY BLUETOOTH®
- TELEPHONE CONNECTED BY BLUETOOTH®
- SETTING THE RINGTONE
- ADJUST BRIGHTNESS
- LIST
- SRC 17
- MANAGING A LIST
- ENTERING A FREQUENCY
- RDS
- RECEIVING TA MESSAGES
- DISPLAYING RADIO TEXT
- USB PLAYER
- SRC1
- SRC 1
- MANAGING CONNECTIONS
- FROM THE DIRECTORY
- RECENTLY CALLED NUMBERS
- SRC
- SRC 11
- MANAGING CALLS
- HANG UP
- SECRET – MUTE
- COMBINED MODE
- DISPLAY AND LANGUAGE SETTINGS
- AUDIO SYSTEM
- MANAGING THE LIST
- PLAYING A COMPILATION
- PLAY MODE
- THE PLAY MODES AVAILABLE ARE
- A
- C
- D
- ALPHABETICAL INDEX
- E
- F
- G
- H
- J
- K
- L
- M
- N
- O
- P
- S
- T
- U
- W
Brand : PEUGEOT
Model : 208 (9999)
Category : Automobile