
406 C (2002) - Automobile PEUGEOT - Free user manual and instructions
Find the device manual for free 406 C (2002) PEUGEOT in PDF.


| Brand | Peugeot |
| Model | 406 C (2002) |
| Category | Automobile |
| Product Type | Coupe |
| Dimensions (L x W x H) | 4615 x 1781 x 1359 mm |
| Kerb Weight | 1400 - 1500 kg (approx.) |
| Engines Available | 2.0L 16V Petrol (99 kW), 2.2L 16V Petrol (116 kW), 3.0L 24V V6 Petrol (152 kW), 2.2L 16V HDI Diesel (98 kW) |
| Transmission | 5-speed Manual / 4-speed Automatic |
| Fuel Type | Unleaded Petrol or Diesel |
| Fuel Tank Capacity | 70 litres (15.4 gallons) |
| Service Interval | 20,000 miles / 2 years for petrol; 12,000 miles / 2 years for diesel |
| Safety Systems | Airbags (front, side), ABS, ESP/ASR, electronic immobiliser |
| Central Locking | Remote control key with deadlocking |
| Cruise Control | Yes, with memorisable speed |
| Air Conditioning | Automatic climate control |
| Audio System | RM2 or RD3 radio, CD changer optional, JBL Hi-Fi |
| Navigation System | Satellite navigation (optional, CD-ROM based) |
| Electrical System | 12V, battery charging and economy mode |
| Fuse Box Locations | Under fascia and in engine compartment |
| Tyres (standard) | 205/55 R16 or 215/55 R16 |
Frequently Asked Questions - 406 C (2002) PEUGEOT
User questions about 406 C (2002) PEUGEOT
0 question about this device. Answer the ones you know or ask your own.
Ask a new question about this device
Download the instructions for your Automobile in PDF format for free! Find your manual 406 C (2002) - PEUGEOT and take your electronic device back in hand. On this page are published all the documents necessary for the use of your device. 406 C (2002) by PEUGEOT.
USER MANUAL 406 C (2002) PEUGEOT
Infotec 01-07-2002
YOUR 406 COUPE AT A GLANCE
1 - Speaker (tweeter) location.
2 - Window demisting vent.
3 - Side adjustable heating/ventilation vents and air flow regulation.
4 - Glove box.
5 - Passenger airbag.
6 - Windscreen demisting vents.
7 - Central adjustable heating/ventilation vents and air flow regulation.
8 - Hazard warning lights switch.
9 - Lights and direction indicators stalk.
01-07-2002
10 -Instrument dials.
11 - Driver's airbag.
Horn.
12 -Windscreen wash-wipe stalk. Trip computer stalk.
13 -Radio remote control stalk.
14 -Steering lock and ignition.
15 -Electric mirror controls. Window controls.
16 -ASR/ESP switch.
Coin storage.
Passenger airbag disarming
switch.
Alarm button.
17 -Headlamp height adjustment.
18 - Fuse box.
19 -Steering wheel adjustment.
20 - Cruise control.
21 -Rear ashtray.
22 - Cup-holder.
23 -Handbrake.
24 -Heated seat switches.
25 -Lighter.
26 -Rear footwell heating vent.
27 -Front ashtray.
28 -Gear lever.
29 -Radio.
30 - Heating/ventilation controls.
31 -Multi-function display.
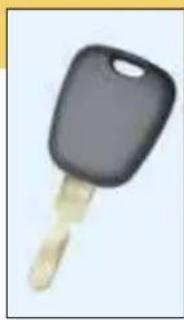
Normal key

Remote control key
THE KEYS
The keys allow you to switch on the ignition and to independently operate the locks on the driver's door, the fuel filler cap, the glove box and the passenger air bag disarming switch.
Central locking
From the driver's door, the keys allow you to lock, deadlock or unlock the doors and the boot, as well as fold back the exterior mirrors.
If one of the front doors is open, it is impossible to operate the central locking. A bleep indicates this when locking by means of the remote control.
The remote control performs the same functions at a distance.
YOUR 406 COUPE AT A GLANCE
The remote control key
Locking
Press button A to lock the vehicle.
This is confirmed by fixed lighting of the direction indicators for approximately two seconds.
Note: a long press on button A, in addition to locking, automatically closes the windows and the sun-roof.
Deadlocking
Deadlocking renders the internal and external and internal door locking controls inoperative.
Press button A to deadlock the vehicle.
This is confirmed by fixed lighting of the direction indicators for approximately two seconds.
Note : A long press on button A, in addition to deadlocking, automatically closes the windows and the sunroof.
A second press on button A in the five seconds following dead-locking, changes deadlock to normal locking. This is confirmed by fixed lighting of the direction indicators for approximately two seconds, accompanied by a brief sound of the horn.
Unlocking
Press button B to unlock the vehicle.
This is confirmed by rapid flashing of the direction indicators.
ELECTRONIC ENGINE IMMOBILISER
This locks the engine control system a few moments after the ignition has been switched off and therefore prevents starting of the vehicle by anyone who does not have the key.
Operation
Each key has an electronic chip, which has a special code.
When the ignition is switched on, the key code is recognised and starting is possible.
If the key does not have a code or has a different code from that stored in the system memory, the vehicle will not start.

YOUR 406 COUPE AT A GLANCE

STARTING
STOP position:
The ignition is off.
1st notch, Accessories position:
The ignition is off but the accessories can be used.
2nd notch, Running position:
The ignition is on.
Starting position:
Operates the starter.
Steering lock
Before starting, unlock the steering if necessary, by gently turning the steering wheel at the same time as you turn the key.
It is advisable to press the clutch pedal while operating the starter to make starting easier.
Starting a petrol engine
Do not press the accelerator.
Operate the starter, without releasing the key, until the engine turns.

Starting a diesel engine
Do not press the accelerator.
Turn the key to position "M".
If the engine is warm enough, the pre-heat indicator light does not come on and you can start immediately.
If the indicator light does come on, wait for it to go out before operating the starter.
If the engine stalls, it is necessary to return the key to position "S" before restarting.

Never race a cold engine.
Never run the engine in a confined space.
Do not make any modifications to the steering lock.
YOUR 406 COUPE AT A GLANCE

STEERING WHEEL STALKS LIGHTS
Front and rear lights (ring A)

Lights off.

Side lights.

Dipped / main beam headlamps.

Automatic switching on of lights.

Front and rear fog lamps (ring B)
Turn the ring forwards to switch on and backwards to switch off. The status is shown by the indicator light on the instrument panel.

Front fog lamps (first turn of the ring for-

Front and rear fog l a m p s (2nd turn
of the ring forwards).

WINDSCREEN WIPERS
2 Rapid wipe (heavy rain). 1 Normal wipe (moderate rain).
AUTO Automatic wipe. 0 Off.
↓↓ Single wipe.
Windscreen wash/wipe: pull the stalk towards you.
Automatic wipe
In the AUTO position, the wipers operate automatically and adjust their speed to the intensity of the rainfall.


YOUR 406 COUPE AT A GLANCE
SEATS
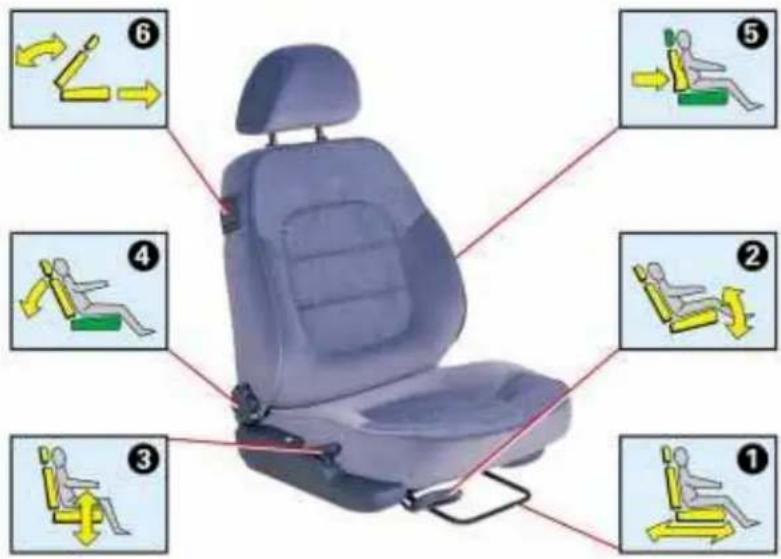
Manual front seats
1 - Forwards/backwards adjustment.
2 - Seat cushion angle adjustment.
3 - Seat height adjustment.
4 - Seat back angle adjustment.
5 - Lumbar adjustment.
6 - Seat back tilt adjustment.

Electric front seats
A - Forwards/backwards adjustment.
B - Seat cushion angle adjustment.
C - Seat height adjustment.
D - Seat back angle adjustment.
M - Memorises the settings.
Switch on the ignition and adjust the seat and the mirrors.
Press button "M" and button "1" for the first driving position, or "M" and "2" for the second driving position.
1 - Recalls the first memorised position.
2 - Recalls the second memorised position.
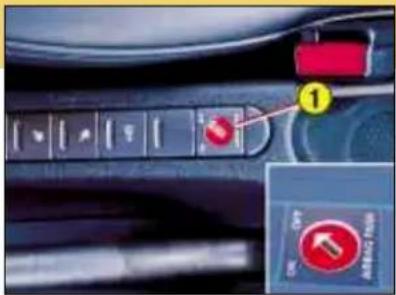
FRONT AIR BAGS
Disarming the passenger air bag*
Insert the ignition key in switch 1 and turn it to:
- the "ON" position, the passenger air bag is armed.
- the "OFF" position, the passenger air bag is disarmed.

Operating check
With the ignition switched on (2nd notch) illumination of this warning light, accompanied by an audible signal and the message "Passenger air bag disarmed" on the multi-function display indicates that the passenger air bag is disarmed (switch in the "OFF" position).
The warning light remains on throughout the disarming process.
YOUR 406 COUPE AT A GLANCE
Precautions regarding the passenger air bag
For a vehicle fitted with a dis- arming switch:
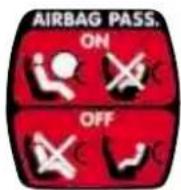
- disarm the air bag if you install a rear-facing child seat.
- arm the airbag for an adult passenger.
For a vehicle not fitted with a dis- arming switch:

- do not install rear-facing child seats on the front passenger seat.
Never place your feet or any object on the fascia.
SIDE AIR BAGS
These are incorporated into the front seat back, on the door side.
They are triggered independently, on the side on which the collision occurs.

Operating check
This is by means of the warning light on the instrument panel.
It comes on for six seconds when the ignition is switched on.
If the warning light:
- does not come on when the ignition is switched on or,
- does not switch off after six seconds or,
- flashes for five minutes then remains on,
consult your PEUGEOT dealer.
* According to destination.

YOUR 406 COUPE AT A GLANCE
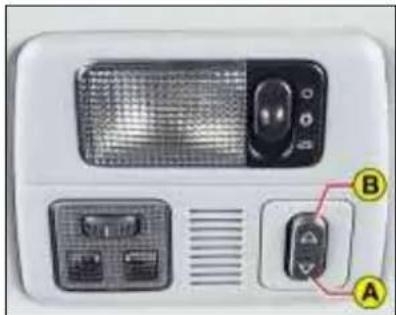
1 - SUNROOF
• To tilt
Press part A of the switch. To close, press part B of the switch until the sunroof is completely closed.
• To open
Press part B of the switch. To close, press part A of the switch until the sunroof is completely closed.
2 - COURTESY LIGHT

Off.

Lights when one of the doors is opened.

Permanently lit, with the key in the accessories position or with the ignition on.
3 - MAP READING LIGHTS
With the ignition switched on or the key in the accessories position, operate the relevant switch.

STEERING WHEEL HEIGHT AND DEPTH ADJUSTMENT
Pull handle A to unlock the steering wheel.
Adjust the height and depth of the steering wheel, then lock it by pushing handle A in fully.



YOUR 406 COUPE AT A GLANCE
ELECTRIC WINDOWS
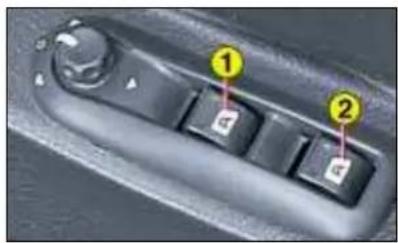
1 - Driver's electric window.
2 - Passenger's electric window.
Manual mode:
Press or pull the switch lightly. The window stops as soon as the switch is released.
Automatic mode:
Press or pull the switch firmly. One touch completely opens or closes the window.
Safety auto-reverse:
when the driver's window is closing and meets an obstacle, it stops and lowers again.

ELECTRIC MIRRORS
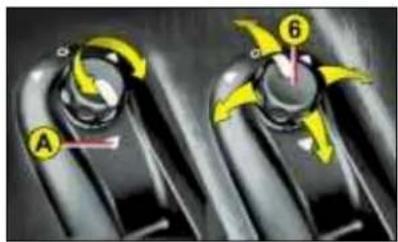
Turn button 6 to the right or left to select the corresponding mirror.
Move the button in all four directions to adjust.
Fold-back electric mirros
With the ignition on, turn knob 6 to position A.

YOUR 406 COUPE AT A GLANCE
AUTOMATIC AIR CONDITIONING


| N° | Symbol Function | |
| 1 | Temperature adjustment. | |
| 2 | Automatic visibility programme. | |
| 3 | Automatic comfort programme. | |
| 4 | Demisting the rear screen. | |
| 5 | Setting the air distribution. | |
| 6 | Air conditioning switch. | |
| 7 | Air flow adjustment. | |
| 8 | Air intake control. | |
YOUR 406 COUPE AT A GLANCE
THE AUTOMATIC AUTOADAPTIVE GEARBOX
Starting
With the engine running, to start the vehicle from position P :
press the brake pedal to change out of position P (shift lock),
select the required position (R, D, 3, 2 or 1) then gradually release the brake pedal; the vehicle moves off automatically.
You can also start from position N :
release the handbrake, keeping your foot on the brake,
select the required position (R, D, 3, 2 or 1) then gradually release the brake pedal; the vehicle moves off automatically.
The four speed automatic gearbox offers a choice between the comfort of integral automatic operation, enhanced by a sport programme (switch A) and a snow programme (switch B).
Gear selection gate
Move the lever in the gate to select a position.
Once the position has been selected, the corresponding indicator light illuminates on the instrument panel display.
Park: for immobilising the vehicle and for starting the engine, with the handbrake on or off.
Reverse: for reversing (select this position with the vehicle stationary, engine at idle).
Neutral: for starting the engine and for parking, with the handbrake on.
Drive: for driving in autoadaptive mode (automatic changing of the four gears).
3 - for urban driving or for driving on winding roads (automatic changing of the first three gears only).
2 - for driving on mountain roads or for towing a trailer (automatic changing of the first two gears only).

V6 engine
Infotec 01-07-2002

2 litre engine
1 - for tackling steep gradients (selection of first gear only).
Special feature of the gearbox (2 litre engine).
Selection of first gear is by pressing switch C with the selector lever in position 2.
To change out of first gear, press switch C again or move the gear lever.

YOUR 406 COUPE AT A GLANCE
CRUISE CONTROL
Cruise control makes it possible to maintain a steady speed programmed by the driver, regardless of the road characteristics and without the driver having to touch the accelerator or brake pedals.
In order to be memorised, the vehicle speed must be greater than approximately 25 mph (40 km/h).
Operation
Place knob 1 inthe ON position.
A speed can now be memorised.
Place knob 1 in the OFF position to deactivate the system.
Memorising a speed
When you reach the required speed, press button 2 or 3. The speed is memorised and will be maintained automatically.
Note: it is possible to accelerate temporarily without disarming the cruise control.
Deactivating the memorised speed
If you wish to deactivate the memorised speed:
press button 4 or the brake or clutch pedal.
Recalling the memorised speed
Following deactivation, press button 4. Your vehicle resumes the last memorised speed.

Modifying a memorised speed
To memorise a speed greater than the previous one:
press button 3 ;
release it when you have reached the chosen speed.
To memorise a speed lower than the previous one:
press button 2 ;
release it when you have reached the required speed.
Switching off the cruise control
Place knob 1 in the OFF position or switch off the ignition.


Do not use the control control on slippery roads or in heavy traffic.

FUEL FILLER FLAP
To open: firmly pull the handle on the floor to the right of the driver's seat.
To close: from outside the vehicle, push back the flap and check that it is secured correctly.
YOUR 406 COUPE AT A GLANCE
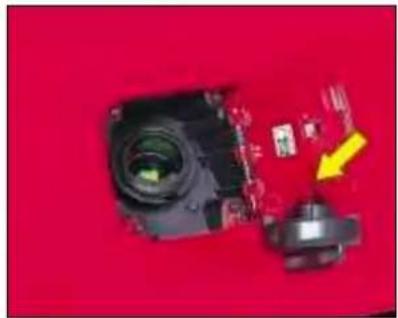
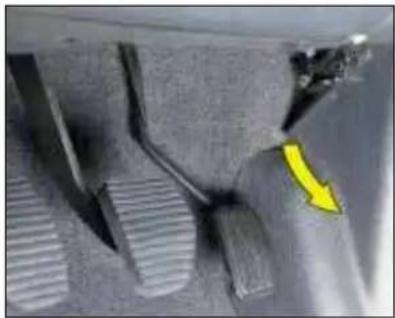
OPENING THE BONNET
Inside the vehicle: Pull the handle.
Filling with fuel
Switch off the engine.
A filler cap hook is provided.
A label on the inside of the flap shows which fuels are permitted and which are not.
The capacity of the tank is approximately 15.4 gallons (70 litres).

Low fuel level warning light
From the time this light comes on, the range remaining is approximately 30 miles (50 km).

Outside the vehicle: Lift the catch and raise the bonnet.


Your vehicle benefits from extended service intervals.
- For petrol engines: every 20,000 miles (30 000 km) or every two years.
- For direct injection diesel engines: every 12,000 miles (20 000 km) or every two years.
The extension of the service intervals means that the engine oil must be checked regularly: topping up of the oil between two oil changes is normal.
It is for this reason, and for your complete peace of mind, that your Peugeot dealer will carry out a levels check and top-up midway between two routine services, at the time or distance intervals specified.
This will be undertaken free of charge, provided that the maintenance of your vehicle has been carried out within the PEUGEOT network.
At the same time, your Peugeot dealer will offer you a Peugeot safety check, for a nominal fee.
A Peugeot professional will carry out a quick check, and will top up the levels if necessary (oil up to 1 litre, coolant and screen wash).
The date of the intermediate visit is not shown by the service indicator. It is to be carried out at least every 10,000 miles (15 000 km) for petrol engines and every 6,000 miles (10 000 km) for direct injection diesel engines.
If the oil level is too low there is a risk of serious damage to the engine: check the engine oil level at least every 2,000 miles (3 000 km) or 3,000 miles (5 000 km), depending on the conditions of use.
The extended service intervals have been made possible by technical modifications to the vehicles and lubricants: THUS IT IS ESSENTIALTO ONLY USE ENGINE LUBRICANTS WHICH ARE APPROVED AND RECOMMENDED BY THE MANUFACTURER
Some of your vehicle's vital components have specific servicing schedules.
The air bags and the pretensioning seat belts must be replaced every 10 years.
The brake fluid must be replaced every 36/40,000 miles (60 000 km) or every 2 years.
The pollen filter must be checked at each visit to the PEUGEOT dealer (intermediate visits and regular services).
Replacement of the timing belt: consult your Peugeot dealer.
Arduous conditions of use
If the vehicle is used in certain particularly arduous conditions:
- Continuous door-to-door use.
- Town use (e.g. taxi).
- Repeated short journeys, with the engine cold in low temperatures.
or for long stays in the following conditions:
- Hot countries with temperatures often above 30°C .
- Cold countries with temperatures often below minus 15°C .
- Countries with a dusty atmosphere.
- Countries whose lubricants or fuels do not conform to our recommendations,
it is necessary to follow an "Arduous conditions" servicing schedule, which includes special operations and shorter service intervals:
• Every 12,000 miles (20 000 km) or every year for petrol engine vehicles.
- Every 9,000 miles (15 000 km) or every year for Direct Injection Diesel engine vehicles.
Some of your vehicle's vital components have specific servicing schedules.
The air bags and the pretensioning seat belts must be replaced every 10 years.
The brake fluid must be replaced every 36/40,000 miles (60 000 km) or every 2 years.
The pollen filter must be checked at each visit to the PEUGEOT dealer (intermediate visits and regular services).
Replacement of the timing belt: consult your Peugeot dealer.
Arduous conditions of use
If the vehicle is used in certain particularly arduous conditions:
- Continuous door-to-door use.
- Town use (e.g. taxi).
- Repeated short journeys, with the engine cold in low temperatures.
or for long stays in the following conditions:
- Hot countries with temperatures often above 30°C .
- Cold countries with temperatures often below minus 15°C .
- Countries with a dusty atmosphere.
- Countries whose lubricants or fuels do not conform to our recommendations,
it is necessary to follow an "Arduous conditions" servicing schedule, which includes special operations and shorter service intervals:
• Every 12,000 miles (20 000 km) or every year for petrol engine vehicles.
- Every 9,000 miles (15 000 km) or every year for Direct Injection Diesel engine vehicles.
YOUR 406 COUPE IN DETAIL
SERVICE INDICATOR
This is a visual reminder of when the next service is due. This service is to be carried out according to the manufacturer's servicing schedule.
Operation
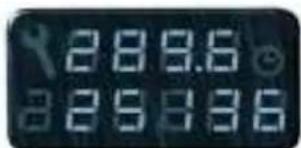
As soon as the ignition is switched on and for 5 seconds, the spanner symbolising "service operation" is lit. The trip recorder display shows you the distance remaining (in round figures) before the next service.
Example: 4,800 km remain before the next service is due. When the ignition comes on and for 5 seconds the display indicates:

5 seconds after the ignition is switched on, the total distance recorder resumes normal operation and the display shows the total or trip distances.
The distance remaining before the next service is less than 1,000 km.
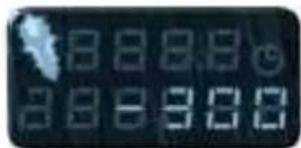
Example: 900 km remain before the next service is due.
When switching on the ignition and for 5 seconds, the display shows:

5 seconds after the ignition is switched on, the total distance recorder resumes normal operation and the symbol remains lit.
This indicates that a service should be carried out shortly. The display shows the total or trip distances.

The service is overdue
Each time the ignition is switched on and for 5 seconds, the symbol and the excess distance flash.
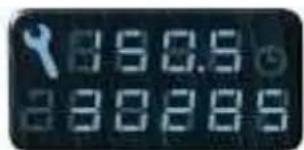
Example: the service is overdue by 300 km. The service should be carried out very shortly.
When the ignition is switched on and for 5 seconds, the display shows:
5 seconds after the ignition is switched on, the total distance recorder resumes normal operation and the symbol remains lit. The display shows the total or trip distances.
YOUR 406 COUPE IN DETAIL
Resetting the service indicator
Your PEUGEOT dealer carries out this operation after each service. However, if you carry out the service yourself, the reset procedure is as follows:
- Switch off the ignition.
- Press and hold button 1.
- Switch on the ignition.
The display begins a 10 second countdown.
- Keep button 1 pressed for 10 seconds.
The display shows [=0] and the service symbol disappears.
Each vehicle has its own servicing cycle, based upon the engine type.
The servicing cycle consists of alternating 2 types of service A and C, intermediate visits, and a few additional operations depending on your vehicle; these correspond to key stages in the life of your 406 Coupé.
Level B service is designed for less recent vehicles.
When the first service is carried out and at each subsequent service, your dealer will advise you of the type and content of the next service due.
These fixed operations are carried out with synthetic based oil; Fuel Economy oil or synthetic oil may also be used.
* Whichever comes first.

Intermediate visit.
V6 24V Petrol injection Engine: Service every 20,000 miles (30 000 km) or 2 years
| MILES (KM) 20,000 | (30 000) 40,000 (60 000) | 60,000 (90 000) | |
| 1st service at 6,000 miles(10 000 km) or 6 months*.This is necessaryin order to benefitfrom the warranty. | [IMAGE] | [IMAGE]+ replacement ofair filter+ replacement offuel filter | [IMAGE] |
| 80,000 (120 000) 100,000 (150 000) 120,000 (180 000) 140,000 (210 000) 160,000 (240 000) | |||
 |  |  |  |
 | |||
 | |||
 | |||
 | |||
 | |||
These fixed operations are carried out with synthetic based oil; Fuel Economy oil or synthetic oil may also be used.
* Whichever comes first.
Infotec 01-07-2002

Intermediate visit.
| MILES (KM) 12,000 (20 000) 24,000 (40 000) 36,000 (60 000) 48,000 (80 000) | |||||||
| 1st service at 6,000 miles(10,000 km) or 6 months*.This is necessaryin order to benefitfrom the warranty |  |  |  |  |  |  |  |
| + maintenance of particulate emission filter | |||||||
| 60,000 (100 000) 72,000 (120 000) 84,000 (140 000) 96,000 (160 000) 108,000 (180 000) | |||||||
 |  |  |  |  |  |  |  |
| + maintenance of particulate emission filter |  | ||||||

These fixed operations are carried out with synthetic oil. Warning: only use 5W 40 oil.
* Whichever comes first.
Infotec 01-07-2002

Intermediate visit.
| Operation Description of Operation First Service | Level | ||||
| A C | Intermediate | ||||
| DRAIN and REFILL | - Engine oil | ● | ● | ||
| - Bleed fuel filter (diesel only) | ● | ● | ● | ||
| REPLACE | - Oil filter | ● | ● | ||
| - Fuel filter(Petrol) | ● | ||||
| - Fuel filter element (diesel only). | ● | ||||
| - Air filter element | ● | ||||
| - Spark plugs (petrol only) | ● | ||||
| LEVELS | - Engine oil (check + top-up) | ● | ● | ||
| - Gearbox oil (check + top-up) | ● | ● | |||
| - Battery (check + top-up) | ● | ● | |||
| - Front/rear screen wash (check + top-up ) | ● | ● | ● | ● | |
| - Coolant (check + top-up) | ● | ● | ● | ● | |
| - Brake fluid (check + top-up) | ● | ● | ● | ||
| - Power steering fluid (check + top-up according to specification) | ● | ● | ● | ||
| CHECK | - Operation of lights and indicators | ● | ● | ● | |
| - Condition of glass, headlamp & light lenses and mirrors | ● | ● | |||
| - Horn | ● | ● | |||
| - Windscreen washer jets | ● | ● | |||
| - Condition of wiper blades | ● | ● | |||
| - Condition and tension of the ancillary drive belts | ● | ● | |||
| - Handbrake | ● | ● | |||
| - Condition of hydraulic circuits (hoses and covers) | ● | ● | |||
| - Condition of rubber boots and gaiters | ● | ● | ● | ||
| - Brake pads | ● | ● | ○ | ||
| - Play in hubs, link rods, ball joints, flexible mountings | ● | ||||
| - Shock absorbers | ● | ||||
| - Rear drum brake lining wear | ● | ||||
| - Condition and pressure of tyres (including spare wheel) | ● | ● | ● | ||
| - Emission control check according to current legislation (petrol only) | ● | ● | ● | ||
| - Smoke opacity (diesel only) | ● | ● | |||
| - Pollen filter (according to specification) | ● | ● | ○ | ||
| - Visual check of the whole vehicle by a Peugeot technician | ● | ● | |||
| SERVICE | - Courtesy vehicle | ● | |||
| ROAD TEST | ● | ● | |||

TRADE NAMES OF APPROVED AND RECOMMENDED LUBRICANTS IN EUROPE (1)

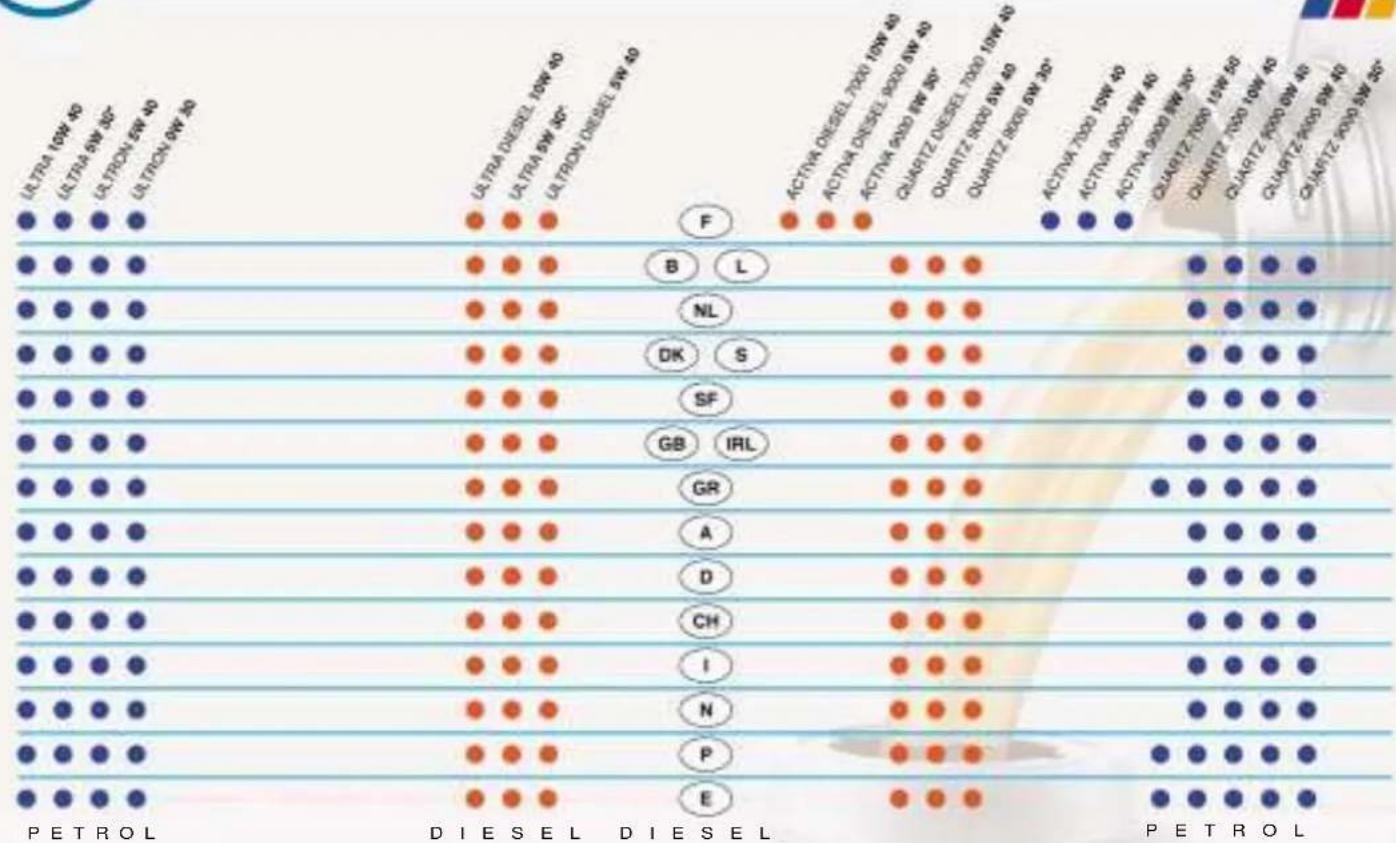
(1) Minimum quality standard: Petrol engines ACEA A3 and API SH/SJ; Diesel engines: ACEA B3 and API CF/CD - ACEA = Association des Constructeurs Europeens Automobiles
(Association of European Automobile Manufacturers) - API = American Petroleum Institute. If oil is used which does not conform to the ACEA A3 B3 standard,
this requires the "Arduous Conditions" servicing schedule to be followed, which involves shorter intervals between services.
*This Fuel Economy oil can only be used in engines designed for its use (from 2000 Model Year). Use only 5W40 oil for the 2.2 litre HDI engine.
Fuel Economy oil may not be used for the 2.2 litre 16 valve petrol engine
Recommendations for approved lubricants
The oils which appear in the table opposite are suitable for most purposes.
The diagram opposite states the optimum range of viscosity depending on the temperatures at which the oils are to be used.
It is also possible to use synthetic oils of "superior quality".
In the absence of semi-synthetic or synthetic oils, oils of API SH/SJ quality (for petrol engines) or CD/CF quality (for diesel engines) may be used by following the "Arduous Conditions" maintenance schedule, which specifies shorter service intervals.
Do not hesitate to ask for advice from a PEUGEOT dealer to maintain driving pleasure and to minimise the maintenance cost of your vehicle.
For countries outside Europe, please contact a local PEUGEOT dealer.

 |  | |
| Manual Gearbox | ONLY ONLYESSO GEAR OIL BV TOTAL TRANSMISSION BV75W-80W PR 9736.41 75W-80W | |
| Automatic Gearbox | ONLYATF 4HP20 – AL44HP20-AL4 PR 9736.22 | |
| Power steering ESSO | ATF D TOTAL FLUIDE AT42PR 9730.94 | |
Other approved products
| Power steering FLUIDE DA PR9730. A1* | |
| Brake fluid PEUGEOT DOT4 | |
| Coolant | PROCOR TM108/GLYSANTIN G33 or REVKOGEL 2000 ONLY protection to minus 35C |
* Only for extremely cold countries.
YOUR 406 COUPE IN DETAIL

INSTRUMENT PANEL DIALS: PETROL / DIESEL
1 - Fuel filler cap warning light.
2 - Door open warning light.
3 - Dipped beam headlamps indicator light.
4 - Main beam headlamps indicator light.
5 - Rev. counter.
6 - Left-hand direction indicator.
7 - Central (STOP) warning light.
8 - Low fuel level warning light.
9 - Fuel gauge.
10 -Service indicator, oil level indicator and total distance recorder.
11 - Right-hand direction indicator.
12 -Speedometer.
13 - Clogging of the particulate emission filter warning light (Diesel).
14 -Front fog lamps indicator light.
15 -Rear fog lamp indicator light.
16 - Dynamic stability control (ASR/ESP) warning light (petrol versions only).
17 -Low coolant level warning light.
18 -Coolant temperature indicator.
19 -Trip recorder zero reset button.
20 -Handbrake and low brake fluid level warning light.
21 -Seat belt not fastened warning light.
22 -Air bags warning light.
23 -ABS system warning light.
24 -Engine diagnostics warning light.
25 -Battery charge warning light.
26 -Diesel engine preheating indicator light.
27 - Passenger air bag disarming warning light.
28 -Water in diesel filter warning light.
29 -Front brake pad wear warning light.
30 -Engine oil pressure warning light.
31 -Electronic immobiliser warning light.
32 -Lighting rheostat.
33 -Engine oil temperature indicator.
YOUR 406 COUPE IN DETAIL

INSTRUMENT PANEL DIALS: AUTOMATIC GEARBOX
1 - Fuel filler cap warning light.
2 - Door open warning light.
3 - Dipped beam headlamps indicator light.
4 - Main beam headlamps indicator light.
5 - Rev. counter.
6 - Left-hand direction indicator.
7 - Central (STOP) warning light.
8 - Low fuel level warning light.
9 - Fuel gauge.
10 -Service indicator, oil level indicator and total distance recorder.
11 - Right-hand direction indicator.
12 -Speedometer.
13 -Front fog lamps indicator light.
14 -Rear fog lamp indicator light.
15 - Dynamic Stability Control (ASR/ESP) warning light.
16 -Low coolant level warning light.
17 -Coolant temperature indicator.
18 -Trip recorder zero reset button.
19 -Handbrake and low brake fluid level warning light.
20 -Seat belt not fastened warning light.
21 - Air bags warning light.
22 -ABS system warning light.
23 -Engine diagnostics warning light.
24 -Battery charge warning light.
25 - Passenger air bag disarming warning light.
26 -Front brake pad wear warning light.
27 -Engine oil pressure warning light.
28 -Operating programmes.
29 -Gear lever position indicator.
30 -Electronic immobiliser warning light.
31 -Lighting rheostat.
32 -Engine oil temperature indicator.
YOUR 406 COUPE IN DETAIL
WARNING LIGHTS AND INDICATORS
A permanently lit warning light, or flashing with the engine running, is an indication of a malfunction in the relevant unit. Some warning lights may be linked to buzzers and a message on the multi-function display. Do not ignore this warning: contact a PEUGEOT dealer as quickly as possible.
If the Central (STOP) warning light comes on when you are driving, stop your vehicle immediately where it is safe to do so.

Central (STOP) warning light
Linked to the "engine oil pressure", "the low brake fluid level", "the coolant temperature gauge" and "electronic brake force distribution system fault" warning lights. It comes on each time the ignition is switched on.
Stop immediately if it flashes with the engine running.
Contact a PEUGEOT dealer.

Engine oil pressure warning light
Linked to the central (STOP) warning light.
Stop immediately if it comes on with the engine running.
It indicates either:
- insufficient oil pressure,
– lack of oil in the lubrication circuit. Top up the oil level.
Contact a PEUGEOT dealer as soon as possible.

Low coolant level warning light
Stop immediately.
Allow the engine to cool before topping up.
The cooling system is pressurised.
In the event of a breakdown and to prevent the risk of scalding, turn the cap to the first notch to allow the pressure to drop.
Once the pressure has dropped, remove the cap and top up the level.
Contact a PEUGEOT dealer.

Fuel filler cap warning light
This comes on if the fuel cap is not correctly screwed
on or is missing.
YOUR 406 COUPE IN DETAIL

ESP Electronic Stability Programme operation indicator light
This flashes when the system is operating.
It is lit continuously if disarmed or if there is a fault.

Clogging of the particulate emission filter warning light (diesel engine)
Display of this warning light is accompanied by an audible signal.
The flashing of this light while the engine is running is caused either by the particulate emission filter being overloaded or by the engine running too long at idle (white smoke from the exhaust). There is a risk of the filter clogging if the same conditions of operation are maintained.
As soon as possible, drive for at least three minutes at a speed exceeding 37 m.p.h. (60 km/h), if driving conditions allow this.
If the light comes on, contact a PEUGEOT dealer as soon as possible.

Handbrake, low brake fluid level and electronic brake force distribution warning light.
This comes on each time the ignition is switched on.
It indicates either:
- that the handbrake is on or has not been released correctly, and when coupled with the central (STOP) warning light:
- an excessive drop in the brake fluid level (if the light remains on even with the handbrake released),
- lit at the same time as the ABS warning light, it indicates a malfunction of the electronic brake force distribution system.
Stop immediately.
Contact a PEUGEOT dealer.

Anti-lock braking system (ABS) warning light
This comes on for 3 seconds each time the ignition is switched on.
If it comes on at over 8 m.p.h. (12 km/h), it indicates a malfunction of the ABS.
However, the vehicle retains conventional servo-assisted braking.
Contact a PEUGEOT dealer.

Front brake pad wear warning light
For your safety, have the pads replaced as soon as this light comes on.
YOUR 406 COUPE IN DETAIL

Battery charge warning light
This comes on each time the ignition is switched on.
If it comes on with the engine running it can indicate:
– faulty operation of the charging circuit,
- loose battery or starter terminals,
- a cut or slack alternator belt,
- an alternator fault.
Contact a PEUGEOT dealer.

Engine diagnostics warning light
This comes on each time the ignition is switched on.
If it is lit continuously with the engine running, this indicates a fault in the emission control system.
If it flashes with the engine running, this indicates a malfunction in the injection or ignition system. There is a risk of damage to the catalytic converter (petrol engine only).
Contact a PEUGEOT dealer as soon as possible.

Diesel pre-heating indicator light
If the engine is warm enough, the light will not come on and you can start the engine without waiting.
If the light comes on, wait until it goes out before trying the starter.

Water in diesel filter warning light (according to destination)
Contact a PEUGEOT dealer as soon as possible.
There is a risk of damage to the injection system.

Passenger air bag disarming warning light
Illumination of this warning
light is accompanied by an audible signal and a message on the multifunction display. If the passenger air bag is disarmed, the indicator light comes on when the ignition is switched on and remains on.
In all cases, if the warning light flashes, contact a PEUGEOT dealer.

Air bag warning light
The warning light comes on for 6 seconds when the ignition is switched on.
Illumination of this warning light, with the engine running, is accompanied by an audible signal and a message on the multi-function display indicating the cause of the front, side or curtain air bag fault.
Contact a PEUGEOT dealer.
YOUR 406 COUPE IN DETAIL

Seat belt not fastened warning light
With the engine running, the indicator light comes on when the driver's seat belt is not fastened.

Door open warning light
When the engine is running, the warning light indicates that a door has not been
closed properly or that the boot is open.

Electronic immobiliser warning light
This indicates a malfunction of the electronic immobiliser.
Contact a PEUGEOT dealer.


Low fuel level warning light.
When this warning light comes on, you
have enough fuel to drive at least 30 miles (50 km). The tank capacity is approximately 70 litres (15.4 gallons).
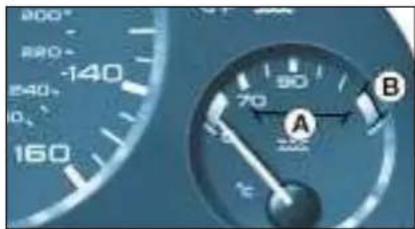
Coolant temperature indicator
When the needle is in zone A, the temperature is correct.
When the needle is in zone B, the temperature is too high. The central (STOP) warning light flashes.
You must stop immediately.
Contact a PEUGEOT dealer.
YOUR 406 COUPE IN DETAIL

Seat belt not fastened warning light
With the engine running, the indicator light comes on when the driver's seat belt is not fastened.

Door open warning light
When the engine is running, the warning light indicates that a door has not been
closed properly or that the boot is open.

Electronic immobiliser warning light
This indicates a malfunction of the electronic immobiliser.
Contact a PEUGEOT dealer.


Low fuel level warning light.
When this warning light comes on, you
have enough fuel to drive at least 30 miles (50 km). The tank capacity is approximately 70 litres (15.4 gallons).

Coolant temperature indicator
When the needle is in zone A, the temperature is correct.
When the needle is in zone B, the temperature is too high. The central (STOP) warning light flashes.
You must stop immediately.
Contact a PEUGEOT dealer.
YOUR 406 COUPE IN DETAIL

Lighting rheostat
With the lights on, press the button to vary the intensity of the lighting of the instruments and controls. When the lighting reaches the minimum (or maximum) setting, release the button then press it again to increase (or reduce) the brightness.
As soon as the lighting is of the required brightness, release the button.

Trip recorder zero reset
With the ignition on, press the button.
Instrument panel display
After switching on the ignition, three functions are shown in succession:
- engine oil level indicator,
- service indicator,
- total distance recorder.
Engine oil level
When the ignition is switched on, the engine oil level indicator is displayed for approximately five seconds, then the service indicator is displayed for five seconds.
Maximum
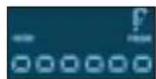
Use the dipstick to confirm the level on the indicator; a surplus of oil can cause damage to the engine.
Contact a PEUGEOT dealer as soon as possible.
Minimum

Check the level with the dipstick and top it up. The indication is only correct if the vehicle has been on stable, level ground, with the engine stopped, for 10 minutes.
No oil
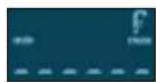
It is essential to top up the oil to the correct level, otherwise there is a risk engine will be damaged.
YOUR 406 COUPE IN DETAIL
Display B
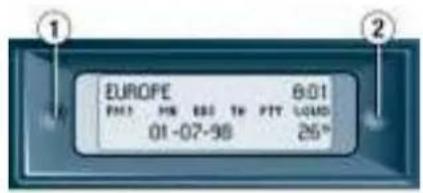
This enables the following information to be displayed:
- the time,
- the date,
- the outside temperature (the °C symbol flashes when there is a risk of ice),
- the radio displays,
- the status of the doors. The display shows you whether a door, the boot or the bonnet is open and if the fuel filler cap is missing.
- the warning messages (e.g. "battery low") or information messages (e.g. "top up fuel tank"), displayed temporarily, can be cleared by pressing button 1 or 2.
- the trip computer.
Setting the parameters
Press button 1 for two seconds to access the settings. The information flashes to show it is ready to be modified.
Then, individual presses on button 1 allow you to scroll through the various data in the following sequence:
- language in which the information is displayed,
- unit of distance (kms or miles),
- unit of temperature (Celsius or Fahrenheit),
- time format (12 then 24 hour mode)
- hour,
- minutes,
- year,
- month,
-day,
Pressing button 2 allows you to change the information selected. Maintain the pressure for rapid scrolling.
After ten seconds without action, the display returns to the main screen and the modified data are recorded.
YOUR 406 COUPE IN DETAIL
Display C This enables the following information to be displayed:

- the time,
- the date,
- the outside temperature (the °C symbol flashes when there is a risk of ice),
- the radio displays,
- the status of the doors. The display shows you whether a door, the boot or the bonnet is open,
- the warning messages are displayed temporarily (e.g. "top up fuel tank") and can be cleared using the remote control,
- the trip computer (see following page),
the satellite navigation system (see corresponding section).
Setting the parameters
The remote control allows you to access the settings. Accessing the different menus is described in the section on the Satellite Navigation System.
YOUR 406 COUPE IN DETAIL
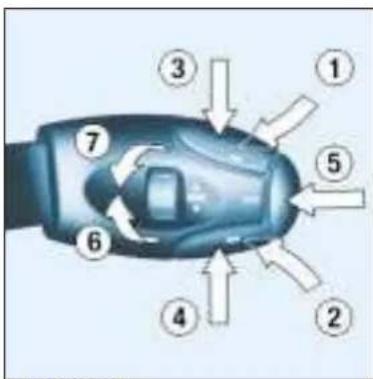
AUDIO RM2

Infotec
01-07-2002
| Stalk movement Functionion | |
| 1 – Press (behind) Increase volume. | |
| 2 – Press (behind) Decrease volume. | |
| 1+2 – Simultaneous press | Cutting off of the sound (mute); restoring of the sound by pressing any button. |
| 3 – Press | Automatic search of upper frequencies (radio) - Selection of the following track (CD). |
| 4 – Press | Automatic search of lower frequencies (radio) - Selection of the previous track (CD). |
| 5 – Press the end | Change of source (radio/cassette/CD changer). |
| 6 – Rotation (clockwise) Selection of | Selection of next memorised station (radio) - following CD. |
| 7 – Rotation Selection of (anti-clockwise) Selection of previous CD. | |
YOUR 406 COUPE IN DETAIL
| Button Function | ||
| A ON/VOL Radio On/Off. Volume adjustment. | ||
| B Radio selection. Selection of FM1, FM2, FMast and AM wavebands.Press for more than 2 seconds: automatic storing of stations in the memory (autostore). | ||
| C Cassette selection. Reversal of the direction of play of the cassette.Press for more than 2 seconds: noise reduction. | ||
| D CD changer selection.Press for more than 2 seconds: shuffle. | ||
| E ▲ | — | Ejection of the cassette. |
| F | T | A Traffic information priority on/off.Press for more than 2 seconds: PTY function on/off. |
| G RDS RDS function on/off.Press for more than 2 seconds: regional following mode on/off. | ||
| H ▲ | Increase bass/treble setting. | |
| I ▼ | Decrease bass/treble setting. | |
| J AUDIO Adjustment of bass, treble, loudness, sound distribution and automatic volume correction. | ||
| K | ▶▶▶ | Automatic search of higher frequency.Selection of following track - cassette and CD. |
| L | MAN | Manual/automatic operation of buttons K and M in radio mode. |
| M | ◀◀◀ | Automatic search of lower frequency.Selection of previous track - cassette and CD. |
| 1 to 6 | 12 34 56 | Selection of station stored in the memory.Press for more than 2 seconds: storing of a station in the memory.Selection of a disc in the CD changer. |
YOUR 406 COUPE IN DETAIL
GENERAL FUNCTIONS
On/off

With the ignition key in the ACCESSORIES or IGNITION position, press button A to switch the set on or off. The set can operate for 30 minutes without the vehicle ignition being switched on.
Anti-theft system
The audio system is coded in such a way that it can operate only on your vehicle. It would not function if fitted to another vehicle.
The anti-theft system is automatic and requires no action on your part.
ADJUSTING THE VOLUME
Turn button A to increase or decrease the volume.
AUDIO SETTINGS

Press the "AUDIO" button several times in succession to access the bass (BASS), treble (TREB), loudness (LOUD), fader (FAD), balance (BAL) and the automatic volume correction. Exit from audio mode is automatic after a few seconds without pressing any button, or by pressing the "AUDIO" button after configuration of the automatic volume correction. Note: bass and treble settings are specific to each source. It is possible to set them differently for radio, cassette and CD changer.
Infotec 01-07-2002
YOUR 406 COUPE IN DETAIL
Adjusting the bass

When "BASS" is displayed, press button H or I to vary the setting.
- "BASS -9" for a minimum bass setting,
- "BASS 0" for a normal setting,
- "BASS +9" for a maximum bass setting.
Adjusting the treble
When "TREB" is displayed, press button H or I to vary the setting.
- "TREB -9" for a minimum treble setting,
- "TREB 0" for a normal setting,
- "TREB +9" for a maximum treble setting.
Adjusting the loudness
This function automatically emphasises bass and treble tones when the volume is low.
Press button H or I to switch the function on or off.
Adjusting the front/rear sound distribution (Fader)
When "FAD" is displayed, press button H or I.
Button H increases the volume in the front.
Button I increases the volume in the rear.
Adjusting the right/left sound distribution (Balance)
When "BAL" is displayed, press button H or I.
Button H increases the volume on the right-hand side.
Button I increases the volume on the left-hand side.
Automatic Volume Correction (CAV)
This function enables the volume to be adjusted automatically according to the level of noise produced by the speed of the vehicle. Press buttons H or I to switch the function on or off.
YOUR 406 COUPE IN DETAIL
RADIO
Notes on radio reception
Your radio is subject to phenomena which do not affect domestic radio sets. Both MW/LW and FM reception are subject to various forms of interference. This is no reflection on the quality of the equipment, but is due to the nature of the signals and the way in which they are transmitted.
On MW/LW, interference may be noticed when passing under high voltage power lines or bridges, or in tunnels.
On FM, interference may be the result of increasing distance from the transmitter, deflection of the signals by obstacles (mountains, hills, buildings etc), or of being in an area which is not covered by a transmitter.
Selecting radio mode

Press button B.
Selecting a waveband

Briefly press button B to select the FM1, FM2, FMast and AM wavebands.
Automatic station search

Briefly press button K or M to search for the station immediately above or below. By continuing to press the button in the direction selected, you will obtain continuous scrolling of the frequency.
The scrolling stops at the first station found as soon as the button is released.
If the TA traffic programme is selected, only stations broadcasting this type of programme are selected.
Searching for a station occurs first in "LO" sensitivity (selection of the most powerful transmitters) during scanning of the waveband, then in "DX" sensitivity (selection of the weakest and most distant transmitters).
To make a direct search in "DX" sensitivity, press button K or M twice.
YOUR 406 COUPE IN DETAIL
Manual station search

Press the "MAN" button.
Briefly press button K or M to increase or decrease the frequency displayed.
By continuing to press the button in the direction selected, you will obtain continuous scrolling of the frequency.
The scrolling stops at the first station found as soon as the button is released.
Pressing the "MAN" button again returns you to automatic station search.
Manual storing of stations in the memory

Select the station required.
Press one of the buttons 1 to 6 for more than two seconds.
The sound stops then becomes audible again, confirming that the station has been stored in the memory.
Automatic storing of FM stations in the memory (autostore)
Press button B for more than two seconds, to automatically store the 6 stations with the strongest signal in FM. These stations are stored in the FMast waveband.
- If it is not possible to find 6 stations, the remaining memories are empty.
Recalling stations stored in the memory
For each waveband, briefly press buttons 1 to 6 to recall the corresponding stored station.
The list of the 6 stations stored in the memory on the waveband is displayed each time one of the buttons 1 to 6 is pressed.
YOUR 406 COUPE IN DETAIL
RDS
Using the RDS (Radio Data System) function on FM
Radio Data System allows you to continue listening to the same station, whatever frequency it is using for the region you are going through.
Briefly press the "RDS" button to switch the function on or off.
The display will show:
- "RDS" if the function is selected.
- "(RDS)" if the function is selected but not available.
RDS station following
The display indicates the name of the station selected. The radio is continually searching for the station which has the best reception and which is transmitting the same programme.
Traffic information programme
Press the "TA" button to switch the function on or off.
The display will show:
- "TA" if the function is selected,
- "(TA)" if the function is selected but not available.
Any traffic information flash will be given priority, whatever source is in use (radio, cassette or CD changer).
If you wish to interrupt a message, press the "TA" button; this switches the function off.
Note: the volume of traffic information announcements is independent of the volume of normal radio listening. You can adjust it using the volume button. The setting will be stored and will be used when the next messages are broadcast.
YOUR 406 COUPE IN DETAIL
Regional following mode
When they are part of a network, certain stations broadcast regional programmes in the various areas they serve. With regional following mode you can keep listening to the same programme.
Press the "RDS" button for more than two seconds to switch the function on or off.
PTY function

This allows you to listen to stations broadcasting a specific type of programme (news, culture, sport, rock etc.).
With FM selected, press the "TA" button for two seconds to switch this function on or off.

To search for a PTY programme:
- select the PTY function,
- briefly press button K or M to scroll down the list of the various types of programmes offered.
- when the programme of your choice is displayed, keep one of the buttons K or M pressed for two seconds to carry out an automatic search (after an automatic search the PTY function is switched off).

In PTY mode, the different types of programmes can be stored in the memory. To do this, press the preselection buttons 1 to 6 for more than two seconds. To recall the type of programme stored in the memory, briefly press the corresponding button.
EON system
This connects stations which are part of the same network. It allows the broadcast of traffic information, by a station that is part of the same network as the station to which you are listening.
This service is available when you have selected the TA traffic information programme or the PTY function.
YOUR 406 COUPE IN DETAIL
CASSETTE
Selecting cassette mode
When a cassette is inserted, the cassette player will start automatically.
If a cassette is already inserted, press button C.
Ejecting the cassette
Press button E to eject the cassette from the player.
Direction of play
The player will play sides 1 and 2 of the cassette alternately, by automatically reversing the direction of play at the end of a side. To manually reverse the direction of play, press button C.
Selecting a track on a cassette (blank search)

Press button K to select the following track.
Press button M to return to the start of the current track or to select the previous track.
Fast forward/rewind
Press and hold button K or M to fast forward or rewind the cassette. At the end of the fast forward/rewind, the set plays the current side.
Noise reduction (Dolby B NR system)
Press button C for more than two seconds to switch the function on or off.
Dolby noise reduction manufactured under licence from Dolby Laboratories Licensing Corporation
"Dolby" and the double D symbol are trade marks of Dolby Laboratories Licensing Corporation.
Recommendations for the use of cassettes
- Use good quality cassettes.
- Avoid using cassettes of a duration of more than 90 minutes.
- Never expose the cassettes to heat or direct sunlight.
- If necessary, tighten the tape before inserting the cassette into the player.
- Clean the play heads regularly using a damp-type cleaning cassette.
YOUR 406 COUPE IN DETAIL
CD CHANGER
Selecting CD changer mode

Press button D.
Selecting a disc

Press one of the buttons 1 to 6 to select the corresponding disc.
Selecting a track

Press button K to select the following track.
Press button M to return to the start of the current track or to select the previous track.
Accelerated play
Press and hold button K or M for forwards or backwards accelerated play.
Accelerated play stops as soon as the button is released.
Shuffle

When the CD changer is selected, keep button D pressed for two seconds. The tracks will be played in random sequence. Pressing button D again for two seconds returns you to normal play.
YOUR 406 COUPE IN DETAIL
RM2 CD CHANGER
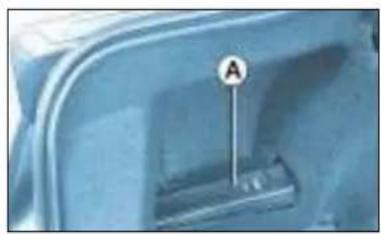
This is located inside the boot on the left hand side. It holds up to 6 discs.

To insert a disc into the changer:
- open sliding panel A,
- press button B to eject the cartridge C,
- open one of the six compartments of the cartridge by pulling tab D,
- insert the disc with the printed face upwards and close the compartment,
- insert the cartridge into the changer,
- close the sliding panel A.

The use of copied compact discs can cause malfunctions.
YOUR 406 COUPE IN DETAIL
AUDIO SYSTEM

Presentation
Your 406 Coupé is fitted with a JBL Audio Hi-Fi system, designed specifically for the vehicle's passenger compartment.
At the heart of the system, a 240 Watt multifunction amplifier (1), located in the boot, independently controls 10 high acoustic definition speakers.
These speakers make it possible to obtain optimum reproduction and distribution of the sound in the vehicle, in the front and in the rear.
The speakers are located:
- in the fascia: two Micro Tweeters (3) fitted in two Mediums (4) for clear and head-on reproduction of the sound, favouring listening in the front.
- in the front doors: two Woofers (5) for reproduction of the bass (low frequencies) in the front.
- in the passenger pillars: two Tweeters (2) for reproduction of the treble (high frequencies) in the rear.
- on the rear shelf: two Subwoofers (6) for reproduction of the extreme bass sounds (low and very low frequencies) throughout the passenger compartment; you will appreciate the impact and depth, noticing that the sound fills the vehicle perfectly.
Adjustment in CD mode
The basic functions remain those of the audio equipment.
No additional adjustment is required. However, to benefit fully from your JBL audio system, you are advised to adjust the AUDIO functions (BASS, TREB, FAD, BAL) to position "0" (zero) and the Loudness (LOUD) to the "ON" position.

YOUR 406 COUPE IN DETAIL
AUDIO RD3


Infotec
01-07-2002
| Stalk movement Function | |
| 1 – Press (behind) Increase volume. | |
| 2 – Press (behind) Decrease volume. | |
| 1+2 – Simultaneous press | Cutting off of the sound (mute); restoring of the sound by pressing any button. |
| 3 – Press | Automatic search of upper frequencies (radio) - Selection of the following track (CD). |
| 4 – Press | utomatic search of lower frequencies (radio) - Selection of the previous track (CD). |
| 5 – Press the end | Change of source (radio/CD changer). |
| 6 – Rotation (clockwise) Selection | Selection of next memorised station (radio) - of following CD. |
| 7 – Rotation (anti-clockwise) Selection | Selection of previous memorised station (radio) - of previous CD. |
YOUR 406 COUPE IN DETAIL
| Button Function | on | |
| A ON/VOL Radio On/Off. Volume adjustment. | ||
| B Radio selection. Selection of FM1, FM2, FMast and AM wavebands.Press for more than 2 seconds: automatic storing of stations in the memory (autostore). | ||
| C CD selection. | Press for more than 2 seconds: shuffle. | |
| D CD changer selection. | Press for more than 2 seconds: shuffle. | |
| E ▲ Ejection of the CD. | ||
| F | T | A Traffic information priority on/off.Press for more than 2 seconds: PTY function on/off. |
| G RDS RDS function on/off.Press for more than 2 seconds: regional following mode on/off. | ||
| H ▲ Increase bass/treble setting. | ||
| I ▼ Decrease bass/treble setting. | ||
| J AUDIO Selection of bass, treble, loudness, sound distribution and automatic volume correction. | ||
| K | ▶▶ | Automatic search of higher frequency.Selection of following CD track. |
| L | MAN | Manual/automatic operation of buttons K and M in radio mode. |
| M | ◀◀ | Automatic search of lower frequency.Selection of previous CD track. |
| 1 to 6 | 12 34 56 | Selection of station stored in the memory.Press for more than 2 seconds: storing of a station in the memory.Selection of a disc in the CD changer. |
YOUR 406 COUPE IN DETAIL
GENERAL FUNCTIONS
On/off

With the ignition key in the ACCESSORIES or IGNITION position, press button A to switch the set on or off.
The set can operate for 30 minutes without the vehicle ignition being switched on.
ANTI-THEFT SYSTEM
The audio system is coded in such a way that it can operate only on your vehicle. It would not function if fitted to another vehicle.
The anti-theft system is automatic and requires no action on your part.
ADJUSTING THE VOLUME

Turn button A to increase or decrease the volume of the set.
Note:
If you have a telephone fitted with a "mute" signal output connected to the set, the set will automatically change to "mute" when the telephone is used.
AUDIO SETTINGS

Press the "AUDIO" button several times in succession to access the bass (BASS), treble (TREB), loudness (LOUD), fader (FAD), balance (BAL) and the automatic volume correction.
Exit from audio mode is automatic after a few seconds without pressing any button, or by pressing the "AUDIO" button after configuration of the automatic volume correction.
Note: the bass and treble settings are specific to each source. It is possible to set them differently for radio, CD, or CD changer.
Infotec 01-07-2002
YOUR 406 COUPE IN DETAIL
Adjusting the bass

When "BASS" is displayed, press button H or I to vary the setting.
- "BASS -9" for a minimum bass setting,
- "BASS 0" for a normal setting,
- "BASS +9" for a maximum bass setting.
Adjusting the treble
When "TREB" is displayed, press button H or I to vary the setting.
- "TREB -9" for a minimum treble setting,
- "TREB 0" for a normal setting,
- "TREB +9" for a maximum treble setting.
Adjusting the loudness
This function automatically emphasises bass and treble tones when the volume is low.
Press button H or I to switch the function on or off.
Adjusting the front/rear sound distribution (Fader)
When "FAD" is displayed, press button H or I to vary the setting
Button H increases the volume in the front.
Button I increases the volume in the rear.
Adjusting the right/left sound distribution (Balance)
When "BAL" is displayed, press button H or I to vary the setting.
Button H increases the volume on the right-hand side.
Button I increases the volume on the left-hand side.
Automatic Volume Correction
This function enables the volume to be adjusted automatically according to the level of noise produced by the speed of the vehicle.
Press buttons H or I to switch the function on or off.
Infotec
01-07-2002
YOUR 406 COUPE IN DETAIL
RADIO
Notes on radio reception
Your radio is subject to phenomena which do not affect domestic radio sets. Both MW/LW and FM reception are subject to various forms of interference. This is no reflection on the quality of the equipment, but is due to the nature of the signals and the way in which they are transmitted.
On MW/LW, interference may be noticed when passing under high voltage power lines or bridges, or in tunnels.
On FM, interference may be the result of increasing distance from the transmitter, deflection of the signals by obstacles (mountains, hills, buildings etc), or of being in an area which is not covered by a transmitter.
Selecting radio mode
Press button B.
Selecting a waveband

Briefly press button B to select the FM1, FM2, FMast and AM wavebands.
Automatic station search

Briefly press button K or M to search for the station immediately above or below. By continuing to press the button in the direction selected, you will obtain continuous scrolling of the frequency.
The scrolling stops at the first station found as soon as the button is released. If the TA traffic programme is selected, only stations broadcasting this type of pro-
gramme are selected.
Searching for a station occurs first in "LO" sensitivity (selection of the most powerful transmitters) during scanning of the waveband, then in "DX" sensitivity (selection of the weakest and most distant transmitters).
To make a direct search in "DX" sensitivity, press button K or M twice.
YOUR 406 COUPE IN DETAIL
Manual station search

Press the "MAN" button.
Briefly press button K or M to increase or decrease the frequency displayed.
By continuing to press the button in the direction selected, you will obtain
continuous scrolling of the frequency.
The scrolling stops at the first station found as soon as the button is released.
Pressing the "MAN" button again returns you to automatic station search.
Manual storing of stations in the memory

Select the station required.
Press one of the buttons 1 to 6 for more than two seconds.
The sound stops then becomes audible again, confirming that the station has been stored in the memory.
Automatic storing of FM stations in the memory (autostore)

Press button B for more than two seconds, to automatically store the 6 stations with the strongest signal in FM. These stations are stored in the FM3 waveband.
- If it is not possible to find 6 stations, the remaining memories are empty.
Recalling stations stored in the memory
For each waveband, briefly press the buttons 1 to 6 to recall the corresponding stored station.
YOUR 406 COUPE IN DETAIL
RDS
Using the RDS (Radio Data System) function on FM
Radio Data System allows you to continue listening to the same station, whatever frequency it is using for the region you are going through.
Briefly press the "RDS" button to switch the function on or off.
The display will show:
- "RDS" if the function is selected.
- "(RDS)" if the function is selected but not available.
RDS station following
The display indicates the name of the station selected. The radio is continually searching for the station which has the best reception and which is transmitting the same programme.
Traffic information programme

Press the "TA" button to switch the function on or off.
The display will show:
- "TA" if the function is selected,
- "(TA)" if the function is selected but not available.
Any traffic information flash will be given priority, whatever source is in use (radio, CD or CD changer).
If you wish to interrupt a message, press the "TA" button; this switches the function off.
Note: the volume of traffic information announcements is independent of the volume of normal radio listening. You can adjust it using the volume button. The setting will be stored and will be used when the next messages are broadcast.
Regional following mode
When they are part of a network, certain stations broadcast regional programmes in the various areas they serve.
With regional following mode you can keep listening to the same programme.
Press the "RDS" button for more than two seconds to switch the function on or off.
YOUR 406 COUPE IN DETAIL
PTY function

This allows you to listen to stations broadcasting a specific type of programme (news, culture, sport, rock etc.).
With FM selected, press the "TA" button for two seconds to switch this function on or off.

To search for a PTY programme:
- select the PTY function,
- briefly press button K or M to scroll down the list of the various types of programmes offered.
- when the programme of your choice is displayed, keep button K or M pressed for two seconds to carry out an automatic search (after an automatic search the PTY function is switched off).

In PTY mode the different types of programmes can be stored in the memory. To do this, press the preselection buttons 1 to 6 for more than two seconds. To recall the type of programme stored in the memory, briefly press the corresponding button.
EON system
This connects stations which are part of the same network. It allows the broadcast of traffic information, by a station that is part of the same network as the station to which you are listening.
This service is available when you have selected the TA traffic information programme or the PTY function.
YOUR 406 COUPE IN DETAIL
COMPACT DISC
Selecting CD mode

After inserting a disc, with the printed surface upwards, the player starts automatically.
If a disc is already inserted, press button C.
Ejecting a disc

Press button E to eject the disc from the player.
Selecting a track

Press button K to select the following track.
Press button M to return to the start of the current track or to select the previous track.
Accelerated play
Press the "MAN" button.
Press and hold button K or M for forwards or backwards accelerated play.
Accelerated play stops as soon as the button is released.
Buttons K or M resume the "track selection" function when the "MAN" button is pressed again.
Shuffle
When the CD is selected, keep button C pressed for two seconds. The tracks will be played in random sequence. Pressing button C again for two seconds returns you to normal play.
YOUR 406 COUPE IN DETAIL
CD CHANGER
Selecting CD changer mode

Press button D.
Selecting a disc

Press buttons 1 to 6 to select the corresponding disc.
Selecting a track

Press button K to select the following track.
Press button M to return to the start of the current track or to select the previous track.
Accelerated play
Press the "MAN" button.
Press and hold button K or M for forwards or backwards accelerated play.
Accelerated play stops as soon as the button is released.
Buttons K or M resume the "track selection" function when the "MAN" button is pressed again.
Shuffle
When the CD changer is selected, keep button D pressed for two seconds. The tracks will be played in random sequence. Pressing button D again for two seconds returns you to normal play.
Infotec 01-07-2002
YOUR 406 COUPE IN DETAIL
THE SATELLITE NAVIGATION SYSTEM
Introduction
The satellite navigation system guides you to the destination of your choice by means of vocal and visual instructions. The heart of the system lies in the use of a map database and GPS (Global Positioning System). This enables your position to be located by means of several satellites.
The satellite navigation system consists of the following components:
- the remote control,
- the display,
- the control unit,
- the last voice message recall control,
- the CD ROM.
Some functions or services described in this guide may vary depending on the CD ROM version or the country.
Infotec
01-07-2002
The remote control
There is a storage compartment for the remote control in front of the ashtray.
Pointing the remote control at the screen enables the information contained in the various menus to be selected.

Direction arrows:
These enable you to move around the screen and thus select a function.
On the welcome screen only, the Up and Down buttons enable the brightness of the screen to be adjusted.
menu: this button allows access to the main menu. It can be used at any time.
esc : escape button
"Short press": cancels the current operation and returns to the previous screen.
"Press for more than 2 seconds": returns to the welcome screen.
This button can be used in any menu. It is inactive during guidance.
mod : mode button
"Short press": changes between date, navigation and radio.
val : Validation button
Confirms the function selected.
YOUR 406 COUPE IN DETAIL
The display

When the menus are used, the functions which appear at the bottom of the screen are presented in various ways:
- Function selected.
- Function inaccessible in this situation.
- Function accessible.
Note: The "List" function can hold a maximum of 80 addresses.

During guidance, the screen displays different information depending on the manoeuvres to be carried out:
- Distance to next manoeuvre.
- Next manoeuvre to be carried out.
- Next road to take.
- Time.
- Exterior temperature.
- Current road.
- Distance to final destination.
- Manoeuvre to be carried out.
YOUR 406 COUPE IN DETAIL
The control unit
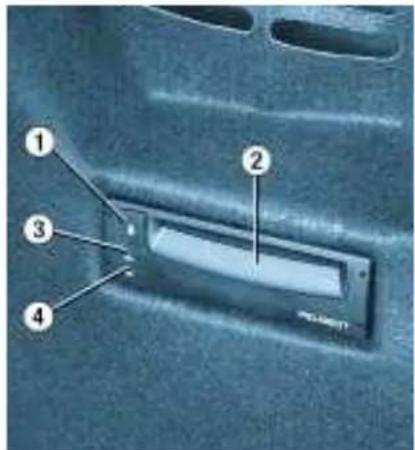
This is located in the boot on the right hand side.
- CD ROM eject button.
- CD ROM compartment.
- The ON indicator light indicates that the control unit is supplied with power.
- The CD indicator light indicates that there is a CD ROM in the control unit.
The last voice message recall control
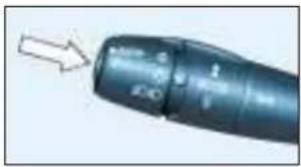
Pressing the button briefly on the end of the lights stalk repeats the last voice message.
The CD ROM

This contains all the mapping data. It must be inserted with the printed face upwards.
Only use CD ROMs approved by PEUGEOT.

The use of copied CDs can cause malfunctions.

The satellite navigation system is active once the globe appears in bold.
YOUR 406 COUPE IN DETAIL
Main menu

Switch on the ignition.
Press the "Menu" button to access the main menu.
Select a function using the direction arrows, then confirm ("VAL" button).
Navigation / Guidance
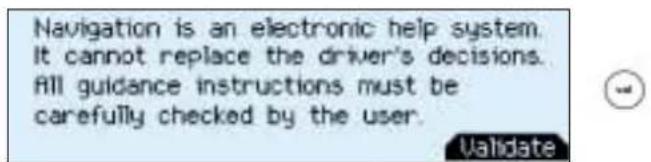
Following selection of the "Navigation/guidance" menu, a screen warns you about the use of the navigation system. Follow the regulations in force and do not use the remote control while driving.
Press the "VAL" button to access the next screen.

The "Navigation/guidance" menu offers various options for selecting guidance:
- By entering the address of a new destination,
- By selecting a service (Hotel, station, airport...) available in a town,
- By selecting an address stored in one of the two directories,
- By resuming previously interrupted guidance or by stopping current guidance. Two messages may be displayed depending on the previous actions: "Resume guidance" or "Stop guidance",
- Radio functions are suspended when the system is in guidance mode.
YOUR 406 COUPE IN DETAIL
Entering a new destination

The last town entered is displayed.
To enter the name of another town, select each letter using the direction arrows then confirm ("VAL" button) for each letter.
If an error is made, the "Correct" function enables the last letter entered to be deleted.
As the name is entered, the "List" function indicates the number of towns beginning with the same letters. If the list contains less than 5 names, these are displayed automatically. Select a town then confirm ("VAL" button).
The "Change" function enables the town entered to be completely cleared.
When the complete name of the town is displayed, select the "Validate" function then press the "VAL" button.
Note: following confirmation of a letter, only those letters which could make up an existing name appear.

Enter the name of the street. Select the "Validate" function then press the "VAL" button.
Note: the guidance can be activated from the time the town is entered, without the name of a street or a number. To do this, select the "Town centre" function.
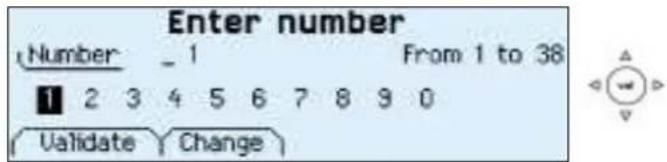
Enter the street number. Select the "Validate" function then press the "VAL" button.
Note: the guidance can be activated as soon as the town and street are entered, without a number. To do this, select the "Validate" function.
YOUR 406 COUPE IN DETAIL

The complete destination is displayed. Select the "Validate" function then press the "VAL" button.
Note: you can also change the destination or store it in one of the two directories (see the section on storing an address in a directory).

The last guidance criterion used is displayed.
Guidance begins automatically, retaining this criterion if there is no action within 5 seconds or following confirmation of the "NO" function.
Follow the instructions.
If you wish to change the guidance criterion, select the "YES" function then press the "VAL" button.
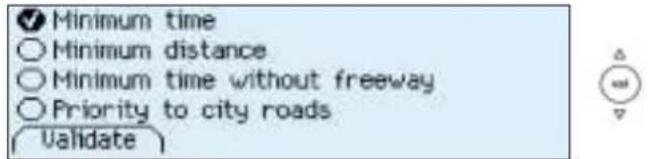
Select a criterion from the list offered then confirm ("VAL" button). When the criterion of your choice is selected, select the "Validate" function then press the "VAL" button. Guidance begins, follow the instructions.
YOUR 406 COUPE IN DETAIL
Selecting a service

The last address entered is displayed.
There are 3 options for defining the location in which you wish to obtain this service:
- repeat the last address entered by means of the "Vall-date" function.
- enter the name of a new town then enter the street (or use the "Town centre" function) by means of the "Change" function.
- automatically enter your current location by using the "Current location" function.

After confirming the address, select a service by scrolling through the list using the direction arrows then press the "VAL" button.
A cursor on the left-hand side of the screen indicates your position in the list.

The address of the required service is displayed.
An indication on the right-hand side of the screen (e.g. 1/50) indicates whether there are any other establishments (50 maximum), which offer the same service within a radius of approximately 30 miles (50 km), as the crow flies.
Use the "Next" or "Previous" functions to consult the list offered.
When the establishment of your choice is displayed, select the "Validate" function then press the "VAL" button. Select a guidance criterion. Guidance begins, follow the instructions.
YOUR 406 COUPE IN DETAIL
Storing an address in a directory
When a new address is entered, you can store it by selecting the "Store" function.

Enter the name for the address. If the name already exists for a different address, you can replace the old address with a new one.
Select the Personal directory or the Professional directory then press the "VAL" button. The address is then stored in the directory of your choice (storage capacity is 100 addresses).
Selecting a stored destination

Using the direction arrows, select the directory in which the address you are looking for is stored, then press the "VAL" button.

The stored addresses are displayed.
A cursor on the left-hand side of the screen indicates your position in the list. Select a name by scrolling through the list using the direction arrows, then press the "VAL" button. The complete address is displayed. Select the "Validate" function then press the "VAL" button. Select a guidance criterion. Guidance begins, follow the instructions.
YOUR 406 COUPE IN DETAIL
Display configuration
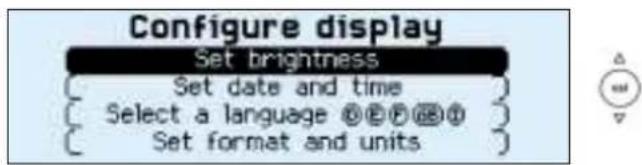
From the general menu, the "Configure display" menu gives access to the following parameters:
- Adjustment of the brightness and the video display
- Adjustment of the date and time.
- Selection of the language of the display and voice information (English, German, Spanish, French, Italian).
- Adjustment of the mode and units. This allows selection of the display in km/h or mph, in degrees Celsius or Fahrenheit and selection of the time format (12 or 24 hour mode).

Navigation options
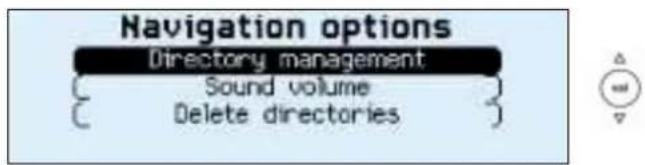
From the main menu, the "Navigation options" menu gives access to the following parameters:
- Management of the directories. It enables an address stored under a name to be renamed or deleted. To do this, select the directory and the name to be changed.
- Voice synthesis volume adjustment.
- Deletion of all data stored in the two directories.
YOUR 406 COUPE IN DETAIL
Guidance tools
![Guidance tools Guidance criteria [ Programmed destination ] [ Sound volume ] [ Stop guidance ]](/content/2026/05/1005459/images/9e70c12e2039c54bec0ffd181d2e078eab738f795dd4ae40a1adb48eecd9e855.jpg)

Access to the "Guidance tools" menu is by pressing the "VAL" button during guidance.
It enables:
- the current guidance criterion to be changed,
- the programmed destination to be displayed or changed,
- the voice synthesis volume to be adjusted,
- the current guidance to be stopped.
YOUR 406 COUPE IN DETAIL

Infotec 01-07-2002
YOUR 406 COUPE IN DETAIL
VENTILATION
1 - Windscreen de-icing or demisting vents.
2 - Front window de-icing or demisting vents.
3 - Side vents.
4 - Central vents.
5 - Air outlet to the front passengers' feet.
6 - Air outlet to the rear passengers' feet.
Recommendations for use
Position the air flow control at a level which allows adequate air circulation inside your vehicle.
Select the air distribution which best suits your requirements and the climatic conditions.
Select a temperature setting and only alter it gradually for your comfort.
For an even air distribution, make sure that you do not block the air inlet grille at the base of the windscreen, the vents, the air passages under the front seats and the air extractor in the boot.
YOUR 406 COUPE IN DETAIL
AUTOMATIC AIR CONDITIONING

Automatic operation

1 - Temperature adjustment
The value requested is displayed (from 15 to 30: comfortable temperature = 22).
Press the up and down arrows to adjust.
Infotec 01-07-2002

2 - Automatic comfort programme
Press the "AUTO" button. The system automatically adjusts the temperature to that selected, by starting the air conditioning if necessary.
It also manages the air flow and intake, to ensure sufficient air circulation inside the vehicle.
Adjustment of the air distribution must be carried out manually when you require it.

3 - Automatic visibility programme
In certain cases, the automatic comfort programme can prove inadequate to de-ice or demist the windows (humidity, many passengers, ice). In such cases, select the automatic visibility programme to rapidly clear the windows.
The system automatically manages the air conditioning, the air flow and the air intake, distributing the air to the windscreen and side windows.
YOUR 406 COUPE IN DETAIL

4 - Setting the air distribution
Successive presses on the top or bottom part of this button allow the air to be directed to:
- the windscreen (de-icing or demisting),
- the windscreen and footwells,
- the central and side vents,
- the central and side vents and footwells,
- the footwells.
Press the top or bottom part of the button to select the previous or next setting from the above list.
Manual operation
You may, if you wish, make a different choice from that offered by the system, by changing one of the settings.
Press the "AUTO" button to return to automatic operation.

5 - Air conditioning
Pressing this button stops the air condi-
tioning. Pressing again returns the air conditioning to automatic operation. The symbol "A/C" is displayed.
6 - Air flow
The air flow may be increased or reduced by pressing the " + "
or " - " button respectively.
7 - Air intake
This button is pressed for recirculation of the interior
air. Recirculation, shown on the display, prevents the entry of unpleasant odours or fumes into the passenger compartment from outside.
Avoid prolonged operation of the recirculation of interior air. A second press returns the system to automatic intake of air.
Used in humid conditions, recirculation risks misting up the windows.

8 - Demisting the rear screen
With the engine running, pressing the
switch demists the rear screen and the mirrors.
It switches off automatically after approximately fifteen minutes.
Press again to resume demisting. It is possible to stop the demisting operation before it goes off automatically, by pressing the switch again.
Note: The condensation created by air conditioning causes a normal flow of water under the vehicle when stationary.
YOUR 406 COUPE IN DETAIL

YOUR 406 COUPE IN DETAIL
SEATS
Manual adjustment of the front seats
1 - Forwards-backwards adjustment
Lift the lever and slide the seat forwards or backwards.
2 - Adjusting the seat cushion angle
Lift the lever to set the best angle.
3 - Adjusting the driver's seat height
Pull the telescopic handle forwards and pivot it up or down.
4 - Adjusting the seat back angle
Turn the knob to obtain the best angle.
5 - Tilting the seat back
To gain access to the rear seats, pull the handle, tilt the seat back as much as possible, and move the seat forwards. On repositioning, the seat will resume its original settings.
Note: never reposition the seat using the forwards-backwards adjustment control.
6 - Head restraint height and angle adjustment
Adjustment is correct when the top of the head restraint is level with the top of the head.
To raise the head restraint, pull it upwards.
To lower the head restraint, it is necessary to push simultaneously:
- the button located on the left guide on top of the seat back,
– the head restraint downwards.
The head restraint has a frame with notches which prevent it from dropping down (safety device in case of impact).
To remove the head restraint, press the tab.

Never drive with the head restraints removed; they must be in place and correctly adjusted.
7 - Lumbar adjustment
To obtain better back support, turn the knob.
Passenger seat
To gain access to the rear seats, there are two ways to tilt the seat back:
– pull the handle at the top right of the seat, or
- lift the handle at the bottom left of the seat.
YOUR 406 COUPE IN DETAIL

Infotec 01-07-2002
Electrical adjustment of the front seats
A - Forwards-backwards adjustment
Push the switch forwards or backwards to slide the seat.
B - Adjusting the seat cushion angle
Tilt the front part of the switch up or down.
C - Adjusting the driver's seat height
Push the switch up or down.
D - Seat back angle adjustment
Tilt the switch forwards or backwards
E - Tilting the seat back
Pull the lever and tilt the seat back forwards.
As long as you hold the seat back in the tilted position, the seat moves forward automatically (when the door is closed, the ignition must be switched on in order to move the seat forwards).
On repositioning, the seat resumes its original settings.
YOUR 406 COUPE IN DETAIL
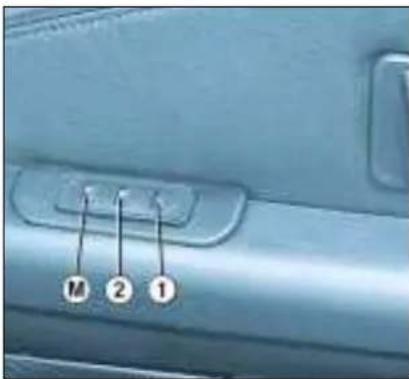
Memorising the seat and mirror positions
Two driving positions can be memo- rised.
To memorise:
- place the ignition key in the accessories position;
- adjust your seat and mirrors;
- simultaneously press button "M" and button "1" for the first driving position or button "2" for the second driving position.
When the position has been memorised, you will hear two bleeps.
Memorising a new position cancels the previous one.
Recalling a memorised position
- Door open and ignition off Within ten minutes of switching off the ignition and opening the door, a short press on button 1 or 2 recalls the memorised position of the seat, then of the exterior mirrors.
- Door closed or ignition on:
- keeping the button pressed adjusts the seat and the exterior mirrors. When adjustment is completed a bleep will sound.
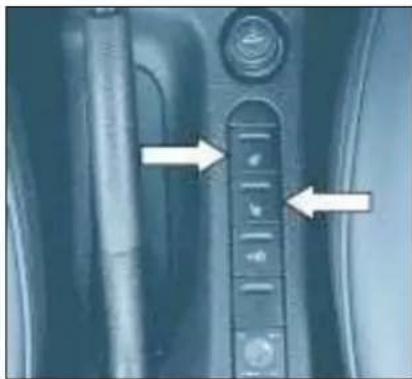
Heated seat controls
Press the switch.
The temperature is controlled automatically.
Pressing a second time stops operation.
YOUR 406 COUPE IN DETAIL

REAR SEATS
Rear seat with fold-down backs
Before carrying out any operation, in order to prevent damage to the seat belts, place them in the locations provided.
The rear seat back folds down in two sections.
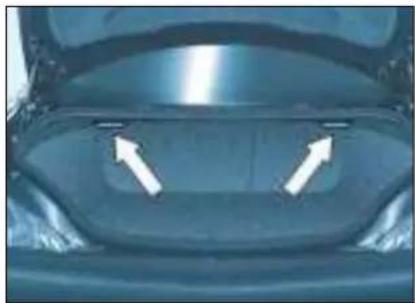
To fold down the seat back
The release controls are situated in the boot.
Pull the control corresponding to the part of the seat back that you wish to fold down.
When returning the seat back to its original position, ensure that it is locked correctly to guarantee your safety.

Ski flap
Lower the arm rest to access the ski flap.
YOUR 406 COUPE IN DETAIL



CHILD SEATS
Although one of PEUGEOT's main concerns when designing your vehicle, the safety of your children also depends on you. For maximum safety, please follow these precautions:
- All children under the age of 10 must travel in a special approved child seat*, adapted to their weight, in a seat fitted with a seat belt.
- Front passenger seat*: children under the age of 10 must not travel in the forwards facing position**. The rearwards facing position is permitted. In this position, it is compulsory to disarm the passenger air bag.
After carrying out numerous tests, PEUGEOT recommends the following systems:
Up to 18 months (up to 13 kg)
① "Britax Babysure": installed with its back to the engine in the front or in the rear using a three-point seat belt. In the front, the passenger seat must be in the 'mid-way' position on the slide.
From 9 months to 3 or 4 years (9 to 18 kg)
② "Römer Prince": installed in the rear using a three-point seat belt. For the safety of your child, the seat and the restraining cushion must never be separated.
From 3 to 6 years (15 to 25 kg)
③ "Römer Vario": installed in the rear with a three point seat belt.
* According to current legislation in the country of destination. ** Unless the rear seats are already occupied by other children or the rear seats cannot be used (because they are missing or folded down). In this case, adjust the front passenger seat to the rear-most position and leave the air bag active.
YOUR 406 COUPE IN DETAIL
From 3 to 10 years (15 to 36 kg)
④ "Recaro Start": installed in the rear with a three-point seat belt.
The height and width of the seat back must be adjusted according to the age and build of your child.
⑤ "Klippan Optima": installed in the rear with a three-point seat belt. From the age of 6 years (approximately 22 kg), the booster is used on its own.
Remember, even for short journeys, to fasten the three-point seat belts or the child seat straps, keeping the slack in relation to the child's body to a minimum. To prevent the doors from opening accidentally, use the child-lock.

Never leave a child or an animal in a vehicle which is exposed to the sun and has the windows closed.
Never leave the keys within reach of children inside the car.


Disarm the passenger air bag when installing a rear-facing child seat in the front; there is a risk of the child being killed or seriously injured if the air bag were to inflate.
Observe strictly the assembly recommendations as shown in the child seat instructions.
YOUR 406 COUPE IN DETAIL
Summary of options for the installation of child restraints, depending on the weight range and the position in the vehicle. (in accordance with Directive 2000/3):
| Seat | Weight range | |||
| < 13 kg | 9 - 18 kg | 15 - 25 kg | 22 - 36 kg | |
| Front passengerFixed seat and booster | L1, L6 | L2, L7 | L3, L4, L5 | L4, L5 |
| Rear passengerSide | UL1, L6 | UL2, L7 L3, L4 | U | UL4 (recline position), L5 |
U : universal category
According to destination:
L1 : BRITAX Babysure E11 0344117 Universal (birth to 13 kg).
L2 : ROMER Prince E1 03301058 Universal (9 to18 kg).
L3 : ROMER Vario E1 03301120 Universal (15 to 25 kg).
L4 : RECARO Start E1 03301108 Universal (15 to 36 kg).
L5 : KLIPPAN Optima E17 030007 Universal (15 to 36 kg).
L6 : KIDDY Isofix Rearwards facing E1 03301123 and
L7 : KIDDY Isofix Forwards facing E2 030011
Universal (birth to 13 kg).
Universal (9 to 18 kg).
YOUR 406 COUPE IN DETAIL

SEAT BELTS
To adjust the height of the front seat belts
Pinch control 1 and slide it.
To lock the seat belts
Pull the strap, then insert the buckle into the stalk.
Pre-tensioning and force-limiting front seat belts
Safety in the event of a frontal impact has been improved by the introduction of pre-tensioning and force-limiting front seat belts. Depending on the seriousness of the impact, the pre-tensioning system instantly tightens the seat belt firmly against the body of the occupant.
The pre-tensioning seat belts are active when the ignition is on.
The force-limiting device reduces the pressure of the seat belt against the occupant's body in the event of an accident.
Rear seat belts
The rear seats are fitted with two three-point inertia reel belts.

To be effective, a seat belt must be tightened as close to the body as possible.
Depending on the nature and the seriousness of the impact, the pre-tensioners may be triggered before and independently of the air bags.
In all cases, the air bag warning light comes on.
Following a collision, have the system checked by a PEUGEOT dealer.
The system has been designed to be fully operational for ten years.
Have it replaced after this period.
YOUR 406 COUPE IN DETAIL
THE KEYS
The keys allow you to switch on the ignition and to independently operate the locks on the doors, the fuel filler cap, the glove box and the passenger air bag disarming switch.
Central locking
From the doors the keys allow you to lock, deadlock and unlock the doors and the boot, as well as fold back the exterior mirrors.
If one of the front doors or the boot is open, central locking is not possible. In this case a bleep indicates locking by remote control.
The remote control performs the same functions at a distance.

The remote control
Locking
Press button A to lock the vehicle.
This is confirmed by fixed lighting of the direction indicators for approximately 2 seconds.
Note: in addition to locking, pressing button A automatically closes the windows and the sunroof.
Deadlocking
Deadlocking renders the internal and external door controls inoperative.
Press button A to deadlock the vehicle. This is confirmed by fixed lighting of the direction indicators for approximately two seconds.
Note : a long press on button A, in addition to deadlocking, automatically closes the windows and the sun-roof.
Another press on button A, within five seconds of deadlocking, changes this to normal locking.
This is confirmed by fixed lighting of the direction indicators for approximately two seconds, accompanied by a brief sound of the horn.
Unlocking
Press button B to unlock the vehicle. This is confirmed by rapid flashing of the direction indicators.
Note: avoid handling the button of your remote control when out of range of your vehicle. You run the risk of stopping it from working. It would then be necessary to reprogramme the remote control.
ELECTRONIC ENGINE IMMOBILISER
This locks the engine management system as soon as the ignition has been switched off and therefore prevents starting of the vehicle by anyone who does not have the key.
The ignition key has an electronic chip which has a special code. When the ignition is switched on, the code is recognised and starting is possible.
If the system does not function correctly, an audible signal sounds, accompanied by a message on the multi-function display.
WARNING: your vehicle is no longer protected in this event.
Contact a PEUGEOT dealer as soon as possible.
YOUR 406 COUPE IN DETAIL

Confidential card
The confidential card contains the identification code necessary for any work carried out by a PEUGEOT dealer on the system. This code is hidden by a film, which should be removed only if necessary.
Keep your card in a safe place, never inside the vehicle.
Key in ignition
A buzzer sounds on opening the driver's door, if the key has been left in the ignition.
Locating your car
To locate your car, if you have locked it, in a car park:
press button A. The courtesy lights come on and the direction indicators flash for a few seconds.

Changing the battery of the remote control
The information 'battery flat' is given by an audible signal accompanied by a message on the multi-function display.
To replace the battery, unclip the casing using a coin at the ring (CR2016/3 volt battery).
If the remote control does not work after the battery has been changed, reprogramme the remote control.
Reprogramming the remote control
Switch off the ignition.
Switch the ignition on again.
Press button A immediately.
Switch off the ignition and remove the remote control key from the ignition. The remote control is now working again.
YOUR 406 COUPE IN DETAIL

Make a careful note of the number of each key. This number is coded on the label attached to the key. If the key is lost, your PEUGEOT dealer can rapidly supply you with new keys.
The high frequency remote control is a sensitive system.
Do not operate it while it is in your pocket as there is a possibility that it may unlock your vehicle.
The remote control cannot operate while the key is in the ignition, even if the ignition is off, except for reprogramming.
However, do not operate the deadlocking system if there is someone inside the vehicle.
As a safety measure (when there are children on board), remove the key from the ignition when you leave the vehicle, even for a short time.
Avoid operating the remote control buttons out of range of your vehicle; you run the risk of stopping it from working. It would then be necessary to reprogramme it.
When buying a second-hand vehicle:
- check that you have been given the confidential card;
- have the keys memorised by a PEUGEOT dealer to be sure that the keys in your possession are the only ones which can start the vehicle.
Do not make any modifications to the electronic engine immobiliser system.
SPECIAL FEATURES
THE ALARM SYSTEM
Setting and deactivating the alarm
The alarm completes the security equipment for your vehicle. It offers two types of protection.
- exterior protection: when it is set, the alarm sounds if a door, the boot or the bonnet is opened;
- interior protection: when it is set, the alarm sounds if the sensors detect a variation in the air movement inside the vehicle (breaking of a window) or movement inside the vehicle.
The alarm is also equipped with an anti-tamper function.
If an attempt is made to tamper with the wires to the siren, control unit or the battery, the alarm is triggered: the siren sounds and the headlamps come on.
Setting the alarm
(interior and exterior protection)
Switch the ignition off and get out of the vehicle.
Press the locking button of the remote control key.
The doors lock.
The direction indicators light for two seconds.
The red light on the switch flashes once a second.
5 seconds later, exterior protection is set.
50 seconds later, interior protection is set.
Note: when the alarm is triggered, the siren sounds for thirty seconds. After the thirty seconds it stops, but the alarm remains set.
Warning: If, on setting the alarm, a door, the boot or the bonnet are not closed correctly, the siren sounds for a moment. If the vehicle is closed correctly in the following 45 seconds, the alarm is set and the direction indicators remain on for two seconds. In all cases, the alarm is set after 45 seconds.
Disarming the alarm
(interior and exteriorl protection)
Press the unlocking button of the remote control key.
The doors unlock.
The direction indicators flash for two seconds.
The red warning light on the switch goes out.
Note: if the warning light continues to flash after disarming the alarm, it is a sign that the alarm has been triggered. The flashing will stop when the ignition is switched on.
SPECIAL FEATURES

Emergency cut-off
(If the remote control is not working)
Unlock the doors with the key.
Open the door.
The alarm is triggered. You have ten seconds in which to switch it off.
- Switch on the ignition.
- Immediately press interior protection button 1.
• The siren stops and the alarm is disarmed.
Selecting the type of protection Locking without setting the alarm
Special precautions
To set the alarm with exterior protection only.
If, while you are away from the vehicle, you wish to leave a window partially open or a pet inside the vehicle, you need to select exterior protection only:
- Switch off the ignition.
- Within the next ten seconds, press the interior protection button 1 until the light comes on continuously.
• Get out of the vehicle. - Press the locking button of the remote control.
• The doors lock. - The direction indicators come on for two seconds.
• The red light on the switch flashes once a second.
To disarm exterior protection only
Press the unlocking button on the remote control.
The doors unlock and the courtesy lights come on.
The direction indicators flash for two seconds.
The red light on the switch goes out.
To lock the vehicle without setting the alarm
It is the remote control which sets the alarm.
Therefore, to lock the vehicle without setting the alarm: use the key.
To recharge or replace the battery:
- Switch on the ignition.
- You have 10 seconds after switching on the ignition to press the interior protection button 1 and hold it down for two seconds.
- The indicator light flashes rapidly for three seconds.
- You can now disconnect the battery.
After reconnecting the battery:
- Lock, then unlock the vehicle using the remote control.
The alarm will be set the next time the vehicle is locked.

Do not make any modifications to the alarm system.
YOUR 406 COUPE IN DETAIL

THE DOORS
Opening the doors from outside
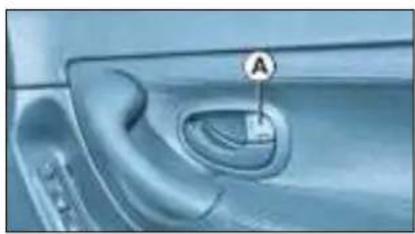
Opening the doors from inside
Locking from the inside
To lock, press button A.
Locking the front doors locks the front doors and the boot.

To make opening of the door easier, the window automatically lowers by a few centimetres.
It rises and automatically adjusts itself on closing the door to ensure perfect sealing.
Before carrying out any work which involves disconnection of the battery, lower the windows to permit opening and closing of the doors.
Warning: If the battery is disconnected, the doors can still be opened. However, it is imperative that the door is not slammed on closing.
Consult your PEUGEOT dealer as soon as possible.

SUNROOF
• To tilt
Press part A of the switch. To close, press part B of the switch until the sunroof is completely closed.
• To open
Press part B of the switch. To close, press part A of the switch until the sunroof is completely closed.
YOUR 406 COUPE IN DETAIL

BOOT
Simultaneous locking or unlocking of the boot and the doors
Turn the key a quarter turn from A to B.
The boot is then controlled by the remote control or the driver's door lock.
Locking the boot only
Turn the key a quarter of a turn from A to C. The boot is then locked, whatever the action of the remote control or the driver's door lock.
To return to simultaneous operation with the doors: turn the key from A to B.

OPENING THE BONNET
From inside: pull the handle on the left-hand side under the fascia.
From outside: lift the catch and raise the bonnet.
Bonnet struts
These open the bonnet and hold it open.
To close
Lower the bonnet and release it at the end of its travel. Check that the bonnet is properly locked.

FILLING WITH FUEL
Fill with fuel with the engine switched off.
To open the fuel filler flap, firmly pull the handle on the floor on the outside of the driver's seat.
If you are filling up your tank, do not continue after the 3rd cut-off of the pump; this could cause your vehicle to malfunction.
The capacity of the tank is approximately 15.4 gallons (70 litres).
A filler cap hook is provided on the inside of the fuel filler flap.
YOUR 406 COUPE IN DETAIL

THE LIGHTS STALK
Front and rear lights
Selection is by turning ring A.

Lights off

Side lights

Dipped / main beam headlamps

Automatic switching on of lights
Dipped/main beam change
Pull the stalk fully towards you.
Note: with the ignition off, if the driver's door is left open, a buzzer sounds if you have left your lights on.
Front fog lamps and rear fog lamp (ring B)
Rotate the ring forwards to switch on and backwards to switch off. The status is confirmed by the indicator light on the instrument panel.

Front fog lamps (first rotation of the ring forwards)
These operate with the side lights and the dipped/main beam head-lamps.

Front and rear fog lamps (2nd rotation of the ring forwards)
These operate with the side lights and the dipped/main beam head-lamps.
Note: to switch off the rear fog lamp and the front fog lamps, turn the ring backwards twice in succession.

Direction indicators (flashers)
Left: downwards.
Right: upwards.

In good or rainy weather, both day and night, the rear fog lamp is dazzling and is prohibited.
Do not forget to switch the fog lamp off when it is no longer needed.
YOUR 406 COUPE IN DETAIL
AUTOMATIC SWITCHING ON OF THE LIGHTS
Side lights and dipped beam head-lamps switch on automatically if the light is poor, or during continuous operation of the windscreen wipers. They switch off as soon as the light becomes bright enough or the windscreen wipers stop.
This function is active when the vehicle is supplied to the customer.
To disarm or activate the function:
Place the key in the accessories position (1st notch),
Press the end of the lights stalk for more than two seconds.
Note: In foggy weather, the brightness sensor can detect sufficient light. Because of this, the lights do not come on automatically.
Do not cover the brightness sensor connected to the rain sensor, located in the windscreen behind the mirror. It is used for automatic switching on of the lights.
Operating check
Activation
Activation of this function is accompanied by an audible signal and the message "Automatic lighting of the headlamps activated" on the multi-function display.
Note: Always operate the lighting controls manually where this is possible.
Disarming
Disarming of the function is accompanied by an audible signal.
When driving, if this function is switched off when the headlamps would switch on in automatic mode, the lights remain on.
It is however possible to disarm this function and switch off the lights by:
- manually switching off the lights using the lights stalk,
- switching off the engine.
If the brightness sensor does not function correctly, the system activates the function (the lights come on).
The driver is alerted by the flashing of the "dipped beam" warning light on the instrument panel.
Contact a PEUGEOT dealer to have the system checked.
Follow me Home
When there is a low level of brightness or at night, if you leave your vehicle, the side lights and the dipped beam lights may remain on for approximately one minute.
To do this:
place the lights stalk in the AUTO position,
place the key in the accessories position (first notch),
press the end of the lights stalk for more than two seconds,
place the lights stalk in the 0 position,
flash the headlamps,
get out of the car and lock it.
YOUR 406 COUPE IN DETAIL

THE WIPER STALK
Windscreen wipers
2 Fast wipe (heavy rain).
- Normal wipe (moderate rain).
AUTO Automatic wipe.
- O f f .
↓: Single wipe (press the stalk downwards).
Operation
In position 1 or 2, when the vehicle stops, the windscreen wiper changes to a lower wiping speed, then resumes its initial speed when the vehicle starts again.
When the ignition has been switched off for more than a minute with the stalk in the AUTO position, it is necessary to reactivate this function. To do this, move the stalk to any position, then move it back to the AUTO position.
Automatic wipe
In the AUTO position, the wiper operates automatically and adjusts its speed to the intensity of the rainfall.
Operating check
Activation
Activation of the function is accompanied by the message "Automatic wiper activated" on the multi-function display.
In the event of malfunction in the AUTO position, the windscreen wiper will operate in down-grade mode.
Have the system checked by a PEUGEOT dealer.

Do not cover the rain detector located on the windscreen behind the interior mirror.
When using an automatic car wash, switch off the ignition or check that the wiper stalk is not in the automatic position.
In winter, it is advisable to wait for the windscreen to completely clear of ice before operating the automatic wipe.
Windscreen and headlamp wash
Pull the windscreen wiper stalk towards you.
The windscreen wash then the windscreen wipers operate for a fixed period. The windscreen wash and headlamp wash operate simultaneously for a few seconds, only if the dipped beam or main beam headlamps are on.
YOUR 406 COUPE IN DETAIL
THE TRIP COMPUTER
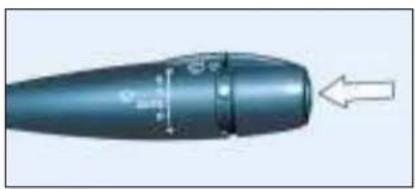
Each successive press of the button on the end of the wiper stalk displays in turn:

Display B Display

- the date,
- the range,
- the distance travelled,
- the average consumption,
- the current consumption,
- the average speed.
Zero reset
Press the button for more than two seconds.
Infotec 01-07-2002
- the current consumption and the range,
- the average consumption, the distance travelled and the average speed calculated over a period "1",
- the average consumption, the distance travelled and the average speed calculated over a period "2".
Periods "1" and "2" are defined by the frequency of the zero reset. They allow, for instance, daily calculations over period "1" and monthly calculations over period "2".
Zero reset
When the required period is displayed, press the stalk for more than two seconds.
YOUR 406 COUPE IN DETAIL
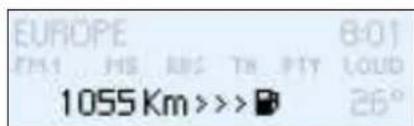
Range
The display shows the distance that can still be covered with the fuel remaining in the tank.
Note: this figure may rise if there is a change in driving style or road surface, causing a significant drop in current fuel consumption.
If there are less than 3 litres of fuel in the tank, only three segments will be displayed.

Current fuel consumption
This gives the fuel consumption recorded during the last two seconds. This function is only displayed when the vehicle is travelling at more than 12 m.p.h. (20 km/h).
The display stops at 30 l/100km.
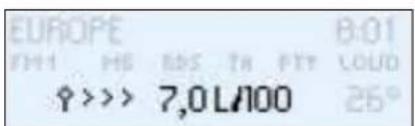
Average consumption
This is the ratio between the amount of fuel consumed and the distance travelled since the computer was last reset to zero.
The display stops at 30 l/100km.

Average speed
This is obtained by dividing the distance travelled by the period of time the vehicle has been in use (with the ignition on), since the computer was last reset to zero.

Distance travelled
This shows the distance travelled since the computer was last reset to zero.
After the trip computer has been reset to zero, the range data becomes meaningful only after the vehicle has been in use for a certain period.
If horizontal segments are displayed instead of figures when driving, contact a PEUGEOT dealer.
YOUR 406 COUPE IN DETAIL
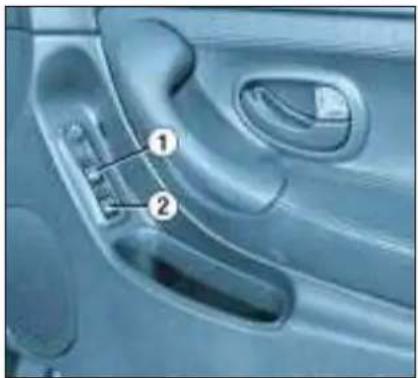
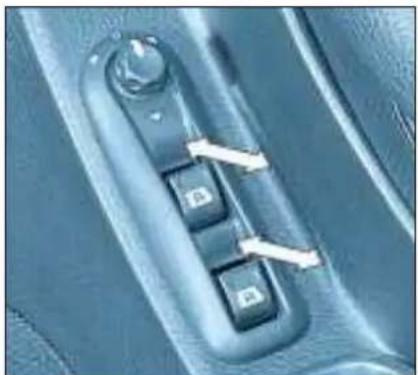
Infotec 01-07-2002
ELECTRIC WINDOWS
1 - Driver's electric window switch.
2 - Passenger's electric window switch.
You have two options:
Manual operation: press or pull switch 1 gently.
The window stops as soon as the switch is released.
Automatic operation: press or pull switch 1 fully.
One touch completely opens or closes the window.
Safety auto-reverse
When the window on the driver's side rises and meets an obstacle, it stops and lowers again.
Cancelling the safety auto-reverse
In the case of frost, for example, if the window will not rise and goes into safety auto-reverse mode, lower it completely and raise it again immediately, by pulling the switch until the window closes completely.
YOUR 406 COUPE IN DETAIL

Rear windows
To open the rear windows, tilt the lever and push the window.
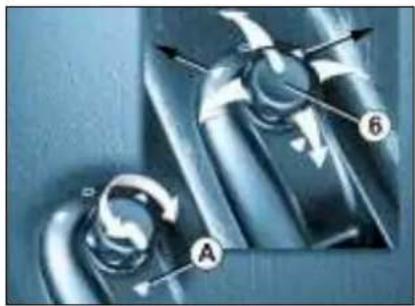
EXTERIOR MIRRORS
Electric rear view mirrors
Turn knob 6 to the right or to the left to select the corresponding mirror.
Move knob 6 in all four directions to adjust.
When parked, the mirrors can be folded back manually.
Fold-back electric mirrors With the ignition on, turn knob 6 to position A.

The outside of the mirror on the driver's side is convex (area at edge defined by dotted line) in order to eliminate the 'blind spot'.
Objects observed in the driver's and passenger's mirrors are in reality closer than they appear.
This must be taken into account to judge correctly the distance of vehicles approaching from behind.
YOUR 406 COUPE IN DETAIL

Automatic day/night interior mirror
This automatically and gradually changes between the day and night positions. To prevent dazzling, the glass of the mirror darkens automatically depending on the intensity of the light from behind. It clears as the light (headlamps of following vehicles, sunlight) decreases, ensuring maximum visibility.
Operation
Switch on the ignition and press switch 1 :
- Indicator light 2 lit (switch pressed): automatic operation.
- Indicator light 2 off: automatic system off. The mirror remains at its most clear.
Special feature
To ensure maximum visibility during manoeuvres, the mirror clears automatically when reverse gear is engaged.
Interior mirror
The interior mirror has two positions:
- day (normal),
- night (anti-dazzle).
To change from one to the other, push or pull the lever on the lower edge of the mirror.

Areas for toll cards / car park tickets
The athermic windscreen has two non-reflective zones located either side of the base of the interior mirror.
They are intended for affixing toll cards and/or car park tickets.
YOUR 406 COUPE IN DETAIL
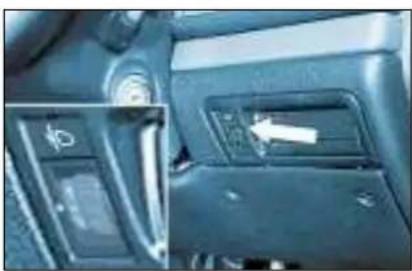
Headlamp adjustment
Depending on the load in your vehicle, adjusting the beam of the head-lamps is recommended as follows.
-
- 1 or 2 people in the front seats.
-- people.
-
- 4 people.
-
- 4 people + maximum authoriseload.
-
- Driver + maximum authorised load.
Initial setting is position 0.

Hazard warning lights
Press the button, the direction indicators flash.
They can operate with the ignition off.
Automatic lighting of hazard warning lights*
When braking in an emergency, depending on the force of deceleration, the hazard warning lights come on automatically. They switch off automatically the first time you accelerate.
It is also possible to switch them off by pressing the button.
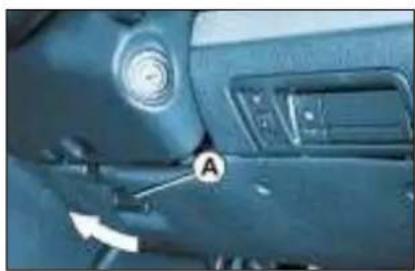
STEERING WHEEL HEIGHT AND DEPTH ADJUSTMENT
When the vehicle is stationary, unlock the steering wheel by pulling handle A.
Adjust the height and depth of the steering wheel, then lock it by pushing handle A down fully.

HORN
Press one of the spokes or the centre of the steering wheel.
* According to destination.
YOUR 406 COUPE IN DETAIL

COURTESY LIGHTS


Off.

On when one of the doors is opened.

Permanently on when the ignition key is in the accessories position or the ignition is on.
1 - Front courtesy light.
2 - Rear courtesy light.
3 - Map-reading lights.
With the key in the accessories position or the ignition on, operate the relevant switch.

Sun visor with illuminated courtesy mirror
With the ignition on, the mirror is automatically lit up when the flap is opened.

Coat hook
Press the lower section to extract the hook from its housing.
YOUR 406 COUPE IN DETAIL
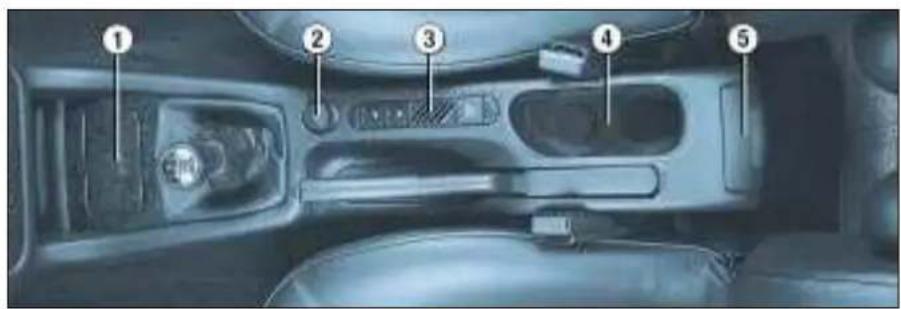
CENTRE CONSOLE
① Front ashtray
Press the cover to open the ashtray.
To empty it, after opening, push the cover forwards.
② Lighter
Push in and wait a few moments until it springs out automatically.
③ Coin storage
④ Cup holder
⑤ Rear ashtray
Release to empty, by pulling it sharply towards you.
To refit the ashtray, push it into its housing.

Rear shelf compartment
This is provided for the storage of a first aid kit.
The catch on the lid is designed to withstand a weight of 9lbs (4 kg) on impact.

Storage compartment between the rear seats
This also contains a cup holder.
DRIVING YOUR 406 COUPE

V6 engine

2 litre engine
Infotec 01-07-2002
AUTOMATIC AUTOADAPTIVE GEARBOX
The 4-speed automatic gearbox offers the comfort of integral automatic operation, enhanced by a sport programme (switch A) and a snow programme (switch B).
Gear selection gate
Move the lever in the gate to select one of the positions. Once the position is selected, the indicator light for that position illuminates on the instrument panel display.
P Park: for immobilising the vehicle and for starting the engine, with the handbrake on or off.
R Reverse: this must be engaged when the vehicle is stationary and the engine at idle.
N Neutral: for starting the engine and for parking, with the handbrake on.
D Drive: for driving in autoadaptive mode (automatic changing of the four gears).
-
For driving in town or on winding roads (automatic changing of the first three gears only).
-
For driving in the mountains or for towing a trailer (automatic changing of the first two gears only).
-
For use on steep gradients (selection of first gear only).
Special feature of the gearbox (2 litre petrol engine)
Selection of first gear is by pressing button C with the lever in position 2.
To exit first gear, press button C again or move the selector lever.
DRIVING YOUR 406 COUPE
Moving Off
With the engine running, to move off from position P:
It is essential to press the brake pedal to exit position P (shift lock),
Select the required position (R, D, 3, 2 or 1) then gradually release the brake pedal: the vehicle moves off immediately.
You can also move off from position N:
Release the handbrake with your foot on the brake pedal,
Select the required position (R, D, 3, 2 or 1) then gradually release the brake pedal: the vehicle moves off immediately.
Automatic Operation
Automatic changing of the four gears:
Move the selector lever to position D.
The gearbox continuously selects the most suitable gear according to the following parameters:
– driving style,
- road characteristics,
- vehicle load.
The gearbox functions in autoadaptive mode without any action on your part.
Note:
For immediate maximum acceleration without touching the gear lever, press the accelerator pedal down as far as it will go (kickdown). The gearbox will change down automatically or stay in the gear selected, up to maximum engine speed.
When braking, the gearbox changes down automatically to provide efficient engine braking.
If you take your foot off the accelerator suddenly, the gearbox will not change up for reasons of safety.

When the engine is idling with position R, D, 3, 2 or 1 selected and the brakes off, the car will move even you accelerating.
For this reason, do not leave children unsupervised inside the vehicle when the engine is running.
If work needs to be done with the engine running, apply the handbrake and select position P.
Never select position N when the vehicle is moving.
Never select position P or R unless the vehicle is stationary.
Do not change from one position to another to optimise braking on slippery roads.
In the event of battery failure, if the lever is in position P it will not be possible to change to another position.
DRIVING YOUR 406 COUPE
Sport and Snow programmes
In addition to the autoadaptive programme, two special programmes are available. The indicator light corresponding to the programme selected lights up on the instrument panel.
Sport programme
Once the vehicle has been started and position D selected, press the S button.
The gearbox automatically favours dynamic driving.
Snow programme
This programme makes starting easier and offers smooth driving in conditions when traction is poor.
Once the vehicle has been started and position D selected, press the button.
The gearbox adapts to driving on slippery roads.
Note: You can return to the autoadaptive programme at any time.
Press the S or * button again to cancel the current programme.
Operating anomaly
Any disruption of the system is indicated by the alternate flashing of the sport and snow lights on the instrument panel.
In such a case, the gearbox will operate in downgrade mode (locked in 3rd gear). You may feel a substantial knock when reverse is selected from position P or N (this does not damage the gearbox).
Do not exceed 60 m.p.h. (100 km/h), if regulations permit this.
Contact a PEUGEOT dealer without delay.

MANUAL GEARBOX
Reverse
To change to reverse gear, lift the ring under the gear lever knob and push the gear lever to the left then to the front.
Reverse gear can only be engaged when the vehicle is stationary with the engine idling.
DRIVING YOUR 406 COUPE
Sport and Snow programmes
In addition to the autoadaptive programme, two special programmes are available. The indicator light corresponding to the programme selected lights up on the instrument panel.
Sport programme
Once the vehicle has been started and position D selected, press the S button.
The gearbox automatically favours dynamic driving.
Snow programme
This programme makes starting easier and offers smooth driving in conditions when traction is poor.
Once the vehicle has been started and position D selected, press the button.
The gearbox adapts to driving on slippery roads.
Note: You can return to the autoadaptive programme at any time.
Press the S or * button again to cancel the current programme.
Operating anomaly
Any disruption of the system is indicated by the alternate flashing of the sport and snow lights on the instrument panel.
In such a case, the gearbox will operate in downgrade mode (locked in 3rd gear). You may feel a substantial knock when reverse is selected from position P or N (this does not damage the gearbox).
Do not exceed 60 m.p.h. (100 km/h), if regulations permit this.
Contact a PEUGEOT dealer without delay.
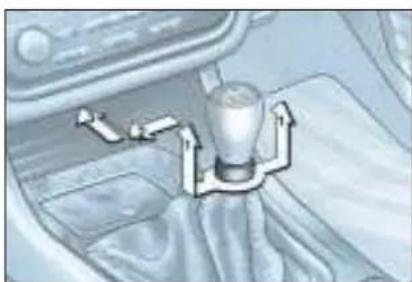
MANUAL GEARBOX
Reverse
To change to reverse gear, lift the ring under the gear lever knob and push the gear lever to the left then to the front.
Reverse gear can only be engaged when the vehicle is stationary with the engine idling.
DRIVING YOUR 406 COUPE
TRACTION CONTROL (ASR) AND DYNAMIC STABILITY CONTROL (ESP)
These systems are linked and complement the ABS system.
The ASR system optimises drive to prevent the wheels skidding, by acting on the brakes of the drive wheels and on the engine. It also allows the directional stability of the vehicle to be improved on acceleration. If there is a variation between the trajectory followed by the vehicle and that required by the driver, the ESP system automatically acts on the engine and the brake of one or more wheels, in order to put the vehicle back on course.
Operation of the ASR and ESP systems

When one of these two systems is operating, this light flashes.
Disarming the ESP / ASR systems
In certain conditions (vehicle stuck in mud or snow, or on loose ground...), it could prove useful to disarm the ASR system to make the wheels spin and regain grip.
Press the switch "ESP OFF", situated to the left of the steering wheel.
The switch lights up and the indicator lights come on, accompanied by the message "ASR/ESP de-activated" on the multi-function display: the ESP and ASR systems no longer affect the operation of the engine or the brakes.
They engage again:
Automatically when the ignition is switched off,
manually by pressing the switch again.
Operating check

When a system malfunction occurs, the switch light flashes and the indicator light comes on. Contact a PEUGEOT dealer to check
the system.

The ESP system offers increased safety during normal driving, but should not incite the driver to take
risks or to drive at high speed. The operation of the system is assured to the extent to which the recommendations of the manufacturer regarding the wheels (tyres and wheel rims), the braking components, the electronic components and the assembly and repair procedures within the PEUGEOT network are respected.
After an accident or impact, have the system checked by a PEUGEOT dealer.
Handbrake
Applying
When parking, pull the handbrake to immobilise your vehicle.
Warning: when parking on a slope, direct your wheels towards the pavement and apply the handbrake.
Releasing
Pull the handle and press the button to release the handbrake.
DRIVING YOUR 406 COUPE

CRUISE CONTROL
Cruise control enables the vehicle to maintain a steady speed programmed by the driver, regardless of the road characteristics and without the driver having to touch the accelerator or brake pedals.
In order for it to be memorised, the vehicle speed must be greater than approximately 25 mph (40 km/h).
Operation
Place switch 1 in the ON position. A speed can be memorised.
Place switch 1 in the OFF position to cancel.
Memorising a speed
As soon as you reach the chosen speed, press button 2 or 3. This memorises the speed, which will be maintained automatically.
Note: It is possible to accelerate momentarily without disarming the cruise control.
Cancelling the memorised speed
If you wish to cancel the memorised speed:
Press button 4 or the brake or clutch pedal.
Recalling the memorised speed
After cancellation, press button 4. Your vehicle will return to the last memorised speed.
Changing a memorised speed
To memorise a speed higher than the previous one:
press button 3;
release it when you have reached the required speed.
To memorise a speed lower than the previous one:
press button 2;
release it when you have reached the required speed.
Cancelling the cruise control
place switch 1 in the OFF position or switch off the ignition.

Do not use cruise control on slippery roads or in heavy traffic.

When used with approved tyres in good condition, the ABS increases the stability and manoeuvrability of your vehicle, particularly on poor or slippery road surfaces.
The anti-lock braking system comes into operation automatically when there is a risk of wheel lock.
The normal operation of the ABS may make itself felt by slight vibrations of the brake pedal.
In emergency braking, press very firmly without releasing the pressure.
In an emergency, this system enables the optimum braking pressure to be reached more quickly, thus reducing the stopping distance. It is triggered according to the speed of activation of the brake pedal. The effect of this is a reduction in the resistance of the pedal and an increase in braking efficiency.
DRIVING YOUR 406 COUPE
AIR BAGS
The air bags have been designed to maximise the safety of the occupants in the event of serious collisions. They work in conjunction with the force-limiting seat belts.
The electronic detectors register and analyse any abrupt deceleration of the vehicle: if the triggering threshold is reached, the air bags inflate instantly and protect the occupants of the vehicle.
Immediately after the impact, the air bags deflate rapidly so that they do not hinder the visibility of the occupants nor their exit if necessary from the vehicle.
The air bags are not deployed in the case of collisions which are not serious, for which the seat belt is sufficient to ensure maximum protection. The seriousness of a collision depends on the nature of the obstacle and the speed of the vehicle at the moment of the collision.
Air bags only operate when the ignition is switched on.
Note: the gas escaping from the air bags can be a minor irritant.

FRONT AIR BAGS
These are folded in the centre of the steering wheel for the driver and in the fascia for the front passenger. They are deployed simultaneously, except in cases where the passenger air bag is disarmed.

Front air bag fault
If this warning light comes on, accompanied by an audible signal and the mes-
sage "Air bag fault" on the multi-function display, contact a PEUGEOT dealer to have the system checked.
Passenger air bag precautions
For a vehicle fitted with a passenger air bag disarming switch:
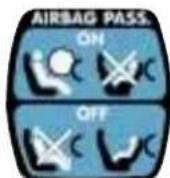
- disarm the air bag if you install a rear-facing child seat on the front passenger seat,
- arm the air bag for an adult passenger.
For a vehicle not fitted with a passenger air bag disarming switch:

- do not install a rear-facing child seat on the front passenger seat.
Never place your feet or any object on the fascia.
DRIVING YOUR 406 COUPE

Disarming the passenger air bag*
To ensure the safety of your child, it is essential to disarm the passenger air bag when you install a rear-facing child seat on the front passenger seat.
With the ignition switched off, insert the key into the passenger air bag disarming slot 1, turn it to the "OFF" position, then remove it keeping the slot in this position.
The air bag warning light on the instrument panel is lit throughout the disarming process.
In the "OFF" position, the passenger air bag will not be triggered in the event of an impact.
As soon as the child seat is removed, turn the air bag slot to the "ON" position to re-activate the air bag and thus ensure the safety of your passenger in the event of an impact.

Operating check
This is confirmed by an indicator light, accompanied by an audible signal and a message on the multi-function display.
With the ignition on (2nd notch), illumination of this warning light accompanied by an audible signal and the message "Passenger air bag disarmed" on the multi-function display, indicates that the passenger air bag is disarmed (slot in the "OFF" position).
* According to destination.
Infotec 01-07-2002
SIDE AIR BAGS
The side air bags are incorporated into the backs of the front seats, on the door side.
They are deployed independently of each other, on whichever side the collision occurs.
Operating check
This is confirmed by an indicator light, accompanied by an audible signal and a message on the multifunction display.

If this indicator light comes on, accompanied by an audible signal and the message "Air bag fault" on the multi-function display, con-
tact a PEUGEOT dealer to have the system checked.
DRIVING YOUR 406 COUPE

For the front and side air bags to be fully effective, observe the following safety rules:
- Wear a correctly adjusted seat belt.
- Sit in a normal upright position (passengers must not place their feet on the fascia).
- Do not leave anything between the occupants of the front seats and the air bags.
This could hamper the operation of the air bags or injure the occupants. - All work on the air bag system is strictly forbidden unless it is carried out by qualified personnel of the PEUGEOT network.
• After an accident or if the vehicle has been stolen or broken into, have the air bag systems checked. - The air bag systems have been designed to be fully operational for 10 years after the vehicle has been registered. Have them replaced by a PEUGEOT dealer after this period.
Front air bags
- Do not drive holding the steering wheel by its spokes or resting your hands on the centre part of the wheel.
- Never remove or pierce the steering wheel or hit it violently.
- Smoke as little as possible; deployment of the air bags can cause burns or the risk of injury from a cigarette or pipe.
Side air bags
- Do not fix or glue anything to the front seat backs. This could cause injury to the chest or arms when the side air bag inflates.
- Do not sit with the upper part of the body any nearer to the door than necessary.
- Never put covers on the front seats. Contact your PEUGEOT dealer.
DRIVING YOUR 406 COUPE

Disarming the passenger air bag*
To ensure the safety of your child, it is essential to disarm the passenger air bag when you install a rear-facing child seat on the front passenger seat.
With the ignition switched off, insert the key into the passenger air bag disarming slot 1, turn it to the "OFF" position, then remove it keeping the slot in this position.
The air bag warning light on the instrument panel is lit throughout the disarming process.
In the "OFF" position, the passenger air bag will not be triggered in the event of an impact.
As soon as the child seat is removed, turn the air bag slot to the "ON" position to re-activate the air bag and thus ensure the safety of your passenger in the event of an impact.

Operating check
This is confirmed by an indicator light, accompanied by an audible signal and a message on the multi-function display.
With the ignition on (2nd notch), illumination of this warning light accompanied by an audible signal and the message "Passenger air bag disarmed" on the multi-function display, indicates that the passenger air bag is disarmed (slot in the "OFF" position).
* According to destination.
Infotec 01-07-2002
SIDE AIR BAGS
The side air bags are incorporated into the backs of the front seats, on the door side.
They are deployed independently of each other, on whichever side the collision occurs.
Operating check
This is confirmed by an indicator light, accompanied by an audible signal and a message on the multifunction display.

If this indicator light comes on, accompanied by an audible signal and the message "Air bag fault" on the multi-function display, con-
tact a PEUGEOT dealer to have the system checked.
DRIVING YOUR 406 COUPE

For the front and side air bags to be fully effective, observe the following safety rules:
- Wear a correctly adjusted seat belt.
- Sit in a normal upright position (passengers must not place their feet on the fascia).
- Do not leave anything between the occupants of the front seats and the air bags.
This could hamper the operation of the air bags or injure the occupants. - All work on the air bag system is strictly forbidden unless it is carried out by qualified personnel of the PEUGEOT network.
• After an accident or if the vehicle has been stolen or broken into, have the air bag systems checked. - The air bag systems have been designed to be fully operational for 10 years after the vehicle has been registered. Have them replaced by a PEUGEOT dealer after this period.
Front air bags
- Do not drive holding the steering wheel by its spokes or resting your hands on the centre part of the wheel.
- Never remove or pierce the steering wheel or hit it violently.
- Smoke as little as possible; deployment of the air bags can cause burns or the risk of injury from a cigarette or pipe.
Side air bags
- Do not fix or glue anything to the front seat backs. This could cause injury to the chest or arms when the side air bag inflates.
- Do not sit with the upper part of the body any nearer to the door than necessary.
- Never put covers on the front seats. Contact your PEUGEOT dealer.
2 litre 16 valve petrol engine
1 - Power steering reservoir.
2 - Coolant reservoir.
Infotec 01-07-2002
3 - Windscreen and headlamp wash reservoir.
4 - Battery.
5 - Air filter.
6 - Brake and clutch fluid reservoir.
7 - Engine oil filler cap.
8 - Dipstick.
2.2 litre 16 valve petrol engine
1 - Power steering reservoir.
2 - Coolant reservoir.
Infotec
01-07-2002
3 - Windscreen and headlamp wash reservoir.
4 - Battery.
5 - Air filter.
6 - Brake and clutch fluid reservoir.
7 - Engine oil filler cap.
8 - Dipstick.
3 litre 24 valve V6 petrol injection engine
1 - Power steering reservoir.
2 - Coolant reservoir.
Infotec
01-07-2002
3 - Windscreen and headlamp wash reservoir.
4 - Battery.
5 - Air filter.
6 - Brake and clutch fluid reservoir.
7 - Engine oil filler cap.
8 - Dipstick.
3 - Windscreen and headlamp wash reservoir.
4 - Battery.
5 - Air filter.
6 - Brake and clutch fluid reservoir.
7 - Engine oil filler cap.
8 - Dipstick.
Checking the oil level
Check the level regularly and top up between changes. Maximum consumption is 0.5 litres per 600 miles (1 000 km).
The oil level should be checked with the vehicle level and the engine cold.

There are two marks on the dipstick:
A = maximum
B = minimum
Oil change: according to the manufacturer's servicing schedule.
- Dipstick. Never fill past the maximum mark A.
- Oil level gauge on the instrument panel.
Viscosity selection
In all cases, the oil selected must meet the manufacturer's requirements.
Infotec 01-07-2002
Oil filter
Change the filter regularly according to the servicing schedule.
Used oil
Prevent used oil from coming into prolonged contact with the skin.
Do not dispose of used oil into drains or onto the ground.
To maintain the reliability of engines and emission control systems, the use of additives in the engine oil is prohibited.
Brakes and clutch
Checking the brake and clutch fluid level:
- The level should always be above the DANGER mark on the reservoir.
- If the level drops substantially, contact a PEUGEOT dealer immediately.
Fluid change
- must be carried out according to the manufacturer's servicing schedule.
- use fluids approved by the manufacturer, which fulfil DOT 4 standards.
Cooling system
Use the fluid approved by the manufacturer.
When the engine is warm, the temperature of the coolant is controlled by the engine fan. Because this fan can operate with the ignition key removed and because the cooling system is pressurised, wait for at least one hour after the engine has stopped before carrying out any work.
In the event of a breakdown and to avoid any risk of burns, slacken the cap to the first notch to release the pressure. When the pressure has dropped, remove the cap and top up the level.
Power steering reservoir
Open the reservoir with the engine cold. The level should always be above the MINI mark, close to the MAXI mark.
Windscreen and headlamp wash reservoir
For best quality cleaning and for your safety, we recommend that you use products approved by PEUGEOT (capacity 4.5 litres or 9 litres with headlamp wash).
Battery
At the start of winter, have your battery checked by a PEUGEOT dealer.
Air filter
Regular replacement of the filter element is essential. If you drive in very dusty conditions, change it twice as often.
Brake pads
Brake pad wear depends on the style of driving, in particular for vehicles that are used in town, for short journeys. It may be necessary to check the thickness of the pads even between services.
Handbrake
Where the handbrake travel is too great or there is a reduction in the performance of the system, the handbrake should be adjusted, even between services. Have the system checked by a PEUGEOT dealer.
Manual gearbox
This does not need an oil change. Check the level according to the manufacturer's servicing schedule.
Automatic autoadaptive gearbox
This does not need an oil change. Have the level checked by a PEUGEOT dealer according to the manufacturer's servicing schedule.

Only use products approved by Automobiles PEUGEOT.
To ensure best performance from components as important as the power steering and the braking system, PEUGEOT selects and offers quite specific products.
Power steering reservoir
Open the reservoir with the engine cold. The level should always be above the MINI mark, close to the MAXI mark.
Windscreen and headlamp wash reservoir
For best quality cleaning and for your safety, we recommend that you use products approved by PEUGEOT (capacity 4.5 litres or 9 litres with headlamp wash).
Battery
At the start of winter, have your battery checked by a PEUGEOT dealer.
Air filter
Regular replacement of the filter element is essential. If you drive in very dusty conditions, change it twice as often.
Brake pads
Brake pad wear depends on the style of driving, in particular for vehicles that are used in town, for short journeys. It may be necessary to check the thickness of the pads even between services.
Handbrake
Where the handbrake travel is too great or there is a reduction in the performance of the system, the handbrake should be adjusted, even between services. Have the system checked by a PEUGEOT dealer.
Manual gearbox
This does not need an oil change. Check the level according to the manufacturer's servicing schedule.
Automatic autoadaptive gearbox
This does not need an oil change. Have the level checked by a PEUGEOT dealer according to the manufacturer's servicing schedule.

Only use products approved by Automobiles PEUGEOT.
To ensure best performance from components as important as the power steering and the braking system, PEUGEOT selects and offers quite specific products.
CHANGING A WHEEL
Access to the spare wheel and jack
Lift the boot carpet using the lifting hook. Secure the hook behind the boot seal.

Tools
1 - Wheel brace.
2 - Centralising tool.
3 - Trim remover/wheel brace extension.
4 - Jack.
5 - Removable towing eye.
6 - Chrome trim tool
The tool holder supports the boot floor. Reposition it to prevent any deformation of the floor when loaded.
Tighten the spare wheel securing strap to prevent noise and for your safety in the event of a frontal impact.
Removal
- Park the vehicle on level, stable and non-slippery ground.
- Apply the handbrake, engage first or reverse gear (position P for the automatic gearbox).
- Remove the centre trim.
- Loosen the wheel bolts.
For vehicles fitted with alloy wheels, remove the chrome trims beforehand (see the section in this chapter entitled 'Special features of alloy wheels').
- The jack is fitted with a system which enables it to be folded or unfolded rapidly.
- Take the jack from the toolkit and close it by pressing the ends A.
- Place the jack at one of the locations E underneath the vehicle, as close as possible to the wheel to be changed. Unfold it by pulling the ends A.
- Extend the jack using the wheel-brace 1 and the extension 3.
- Take out a wheel bolt at the top and fit the centralising tool 2.
- Loosen the wheel bolts and remove the wheel.
Fitting a wheel
- Position the wheel using the centralising tool to assist you.
- Tighten the bolts by hand, and remove the centralising tool.
- Partly tighten the bolts using the wheelbrace.
- Fold the jack and remove it.
- Fully tighten the wheel bolts using the wheelbrace.
- Replace the centre trim by pressing it with the palm of your hand.

For your safety, always change the wheel:
- on level, stable, non-slippery ground,
- with the handbrake applied,
- with first or reverse gear engaged (position P for the automatic gearbox).
Never go underneath a vehicle which is supported only by a jack (use a ramp).
After changing the wheel
- have the tightening of the bolts and the tyre pressure checked by a PEUGEOT dealer as soon as possible,
- have the punctured tyre repaired and refit it to the vehicle as soon as possible.
Special features of alloy wheels
Bolt covers
Alloy wheel bolts are covered by chrome trims.
Use tool 6 to remove the trims before slackening the bolts.

Fitting the spare wheel
If your vehicle is fitted with a steel spare wheel, when fitting it, it is normal, when tightening the bolts, to notice that the washers do not come into contact with the rim. The spare wheel is secured by the cone shape of each bolt.
Fitting snow tyres
If you fit snow tyres mounted on steel wheels, it is essential to use special bolts available from your PEUGEOT dealer.
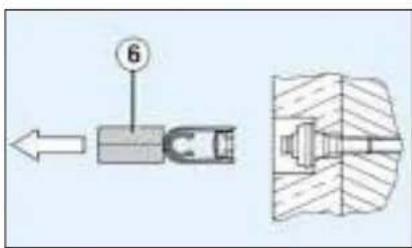
Anti-theft bolts*
If your wheels are fitted with an anti-theft bolt (one per wheel), the chrome trim and then the plastic cover must be removed using tool 6, before unscrewing the bolt using one of the two anti-theft sockets (which were given to you on delivery of your vehicle along with the duplicate keys and the confidential card) and the wheel brace 1.
Note: make a careful note of the code number engraved on the head of the anti-theft socket. This will enable you to obtain duplicate anti-theft sockets from a Peugeot dealer.
* According to model and destination.
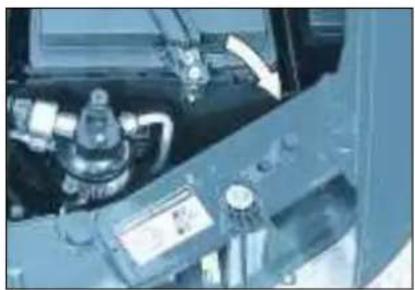
CHANGING A BULB
1 - Dipped beam headlamps
2 - Main beam headlamps
Two bulbs (H7-55W).
- Remove the red plastic cover.
- Press the tab and remove the protective cover corresponding to the faulty bulb.
- Disconnect the connector.
- Press the end of the securing clip to remove it. Change the bulb.
- When fitting, ensure that the direction notches are positioned correctly and that the securing clip is correctly fixed.
- Reconnect the connector.
- Replace the protective cover.
3 - Side lights (W 5 W)
Turn the socket using the lever and remove it. Change the bulb.
4 - Direction indicators (PY 21 W)
Turn the bulb holder a quarter turn and remove it. Change the bulb.
Notes: only handle H7 bulbs using a dry cloth.
To replace the left-hand bulbs, remove the battery protective cover.
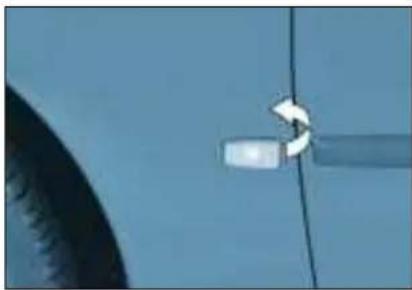
Direction indicator repeater (W 5 W)
- Pull the rear section of the transparent cover and release the assembly.
- Turn the connector a quarter turn and remove it.
- Change the bulb.

Amber bulbs must be replaced by bulbs of identical specification and colour.
In certain climatic conditions (low temperatures, humidity), the presence of condensation on the inside of the headlamp glass is normal; it disappears a few minutes after the lights switch on.

Rear lights
1 - Direction indicators (P 21 W).
2 - Reversing lights (P 21 W).
3 - Brake lights/Side lights (P 21/5 W).
4 - Side lights (P 21/5 W).
5 - Fog lamp (P 21 W).
These 5 bulbs are changed from inside the boot:
- remove the retaining clips then release the carpet,
- remove the connector by pressing the tab A,
- remove the bulb holder by squeezing the tabs,
- change the faulty bulb.
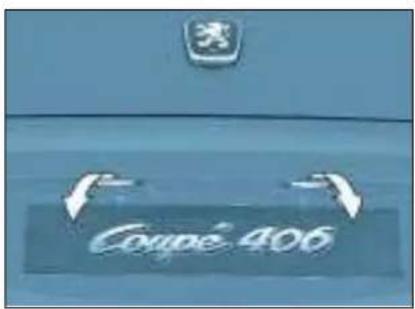
Number plate lights (W 5 W)
Remove the translucent protector.
Change the faulty bulb.
CHANGING A FUSE
The fuse boxes are under the fascia and in the engine compartment.
Fascia fuse box
Undo the three screws a quarter turn with a coin.
Pull switch A and tilt the cover to access the fuses.
Removing and changing a fuse
Before changing a fuse you must find out the cause of the fault and have it put right. The fuse numbers are indicated on the fuse box.
Use the special pliers A attached to the box.
Always change a faulty fuse for one of the same rating.
Correct Incorrect Pliers A


| Fuse no. | Rating Functions |
| A 20 A | Locking/Unlocking.. |
| B 10 A | Rear fog lamps. |
| C 40 A | Demisting the mirrors. |
| D - Not used. | |
| E 30 A | Electric windows. |
| F 15 A | Supply to instrument panel -Display - Audio equipment -Satellite navigation system - Air conditioning. |
Remove the instrument panel lower trim to access the built-in systems interface.
Engine compartment fuses
Fuse box
To access the fuse box in the engine compartment (beside the battery), unclip the cover.
Carefully close the cover when you have finished.
| Fuse N° Rating Functions | |
| 1* 10 A | Reversing lights - Double injection relay - Engine oil temperature - Oil level - Air conditioning compressor. |
| 2* 15 A | Fuel pump - Canister solenoid valve. |
| 3* 10 A | Control unit. |
| 4* 10 A | Engine control unit and automatic gearbox. |
| 5 10 A | Particulate emission filter control unit. |
| 6 15 A | Front fog lamps. |
| 7 20 A | Headlamp wash. |
| 8* 20 A | Direct injection petrol engine control unit - Clutch pedal. |
| 9* 15 A | Left-hand dipped beam. |
| 10* 15 A | Right-hand dpped beam. |

The electrical system of your vehicle is designed to operate with standard or optional equipment.
Before installing other electrical equipment or accessories on your vehicle, contact a PEUGEOT dealer.
Some electrical accessories or the way in which they are fitted can have damaging effects on the operation of your vehicle; the electronic control circuits, the audio circuit and the battery charging circuit.
PEUGEOT will not accept responsibility for the cost incurred in repairing your vehicle or for rectifying malfunctions resulting from the installation of accessories not supplied and not recommended by PEUGEOT and not installed in accordance with its instructions, in particular where the equipment in question consumes more than 10 milliamperes.
* The maxi-fuses provide additional protection for the electrical systems. All work must be carried out by a PEUGEOT dealer.
| Fuse N° Rating Functions | ||
| 11* 10 A | Left-hand main beam. | |
| 12* 10 A | Right-hand main beam. | |
| 13* 15 A | Horn. | |
| 14 10 A | Front screen wash pump. | |
| 15* | 30 A | Ignition coil - Windscreen wiper - Oxygen sensor - Oil pressure - Injection system. |
| 16* | 30A | Air pump and oil temperature - Oil level - Brake lights operation - Alternator - Water in diesel detector - Injection relay control. |
| 17* 30 A | Passenger electric seat. | |
| 18 40 A | Heater blower - Starter - Windscreen wiper slow speed. | |

* The maxi fuses provide additional protection for the electrical systems. All work must be carried out by a PEUGEOT dealer
CHANGING A FUSE
The fuse boxes are under the fascia and in the engine compartment.
Fascia fuse box
Undo the three screws a quarter turn with a coin.
Pull switch A and tilt the cover to access the fuses.
Removing and changing a fuse
Before changing a fuse you must find out the cause of the fault and have it put right. The fuse numbers are indicated on the fuse box.
Use the special pliers A attached to the box.
Always change a faulty fuse for one of the same rating.
Correct Incorrect Pliers A

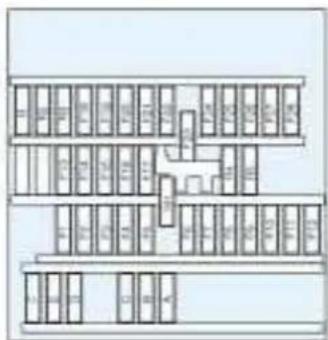
| Fuse no. | Rating Functions |
| A 20 A | Locking/Unlocking.. |
| B 10 A | Rear fog lamps. |
| C 40 A | Demisting the mirrors. |
| D - Not used. | |
| E 30 A | Electric windows. |
| F 15 A | Supply to instrument panel -Display - Audio equipment -Satellite navigation system - Air conditioning. |
Remove the instrument panel lower trim to access the built-in systems interface.
| Fuse N° Rating Functions | ||
| 1 shunt | Central air bag. | |
| 2 | 5 | A Ventilation controls. |
| 3 10 A | instrument panel. | |
| 4 | 5 | A Ignition +ve signal for Built-in Systems Interface. |
| 5 | - | Not used. |
| 6 10 A | Steering wheel controls. | |
| 7 15 A | Alarm siren. | |
| 8 10 A | Satellite navigation system. | |
| 9 | 5 | A Battery +ve signal for Built-in Systems Interface. |
| 10 15 A | Audio equipment. | |
| 11 10 A | Third brake light. | |
| 12 10 A | Right-hand brake light. | |
| 13 20 A | Driver's one-touch electric window. | |
| 14 30 A | Passenger's one-touch electric window. | |
| 15 – Battery +ve towing socket. | ||
| 16 20 A | Seat memorisation. | |
| 17 20 A | Passenger's electric seat. | |
| 18 | 10 A | Display – Lighting for lighter, switches and ash tray - Automatic gearbox selector lever. |
| Fuse N° Rating Functions | ||
| 19 10 A | Rear fog lamps. | |
| 20 10 A | Rear right and front left side light. | |
| 21 10 A | Rear left and front right side light. | |
| 22 | 10 A | Lighting for glove box– Map reading light - Courtesy mirror - Front and rear courtesy lights – Lighting for electric window control pad and electrochrome rear view mirror. |
| 23 20 A | Lighter. | |
| 24 - Not used. | ||
| 25 20 A | Audio equipment. | |
| 26 - Not used. | ||
| 27 5 A | Accessories +ve. | |
| 28 15 A | Heated seats. | |
| R | 5 | A Replacement fuse. |
| R2 10 A | Replacement fuse. | |
| R3 30 A | Replacement fuse. | |
| R4 20 A | Replacement fuse. | |
| R5 15 A | Replacement fuse. | |
To charge the battery using a battery charger:
- Disconnect the battery,
- Follow the instructions for use given by the battery charger manufacturer,
- Reconnect starting with the negative (−) terminal,
- Check that the terminals and connectors are clean. If they are covered with sulphate (white or greenish deposit), disconnect them and clean them.
To start the vehicle from another battery:
- Connect the red cable to the positive (+) terminals of the two batteries,
- Connect one end of the green or black cable to the negative (−) terminal of the slave battery,
- Connect the other end of the green or black cable to an earth point on the broken down vehicle, as far as possible from the battery,
Operate the starter, let the engine run.
Wait for the engine to return to idle, then disconnect the cables.
It is advisable to disconnect the battery if the vehicle is not to be used for a period of more than one month.

- Never disconnect a terminal when the engine is running.
- Never charge a battery without first disconnecting the terminals.
- Close the sunroof before disconnecting the battery. If it does not operate normally following re-connection of the battery, you must re-initialise
it by turning the control to the maximum tilt position and pressing it for an extended period.
- After every reconnection of the battery, switch on the ignition and wait 1 minute before starting to allow the electronic systems to be initialised. If slight difficulties are experienced after this, please contact a PEUGEOT dealer.
Economy mode
With the engine switched off and the ignition key in the "running" or "accessories" position for about half an hour, certain electrical equipment (displays, instrument panel, warning lights, courtesy lights, electric windows, wipers etc.) will switch off automatically to avoid draining the battery.
Once the electrical equipment goes into economy mode, it is necessary to start the engine to enable the equipment to work again.
Your vehicle is equipped with certain factory-fitted audio equipment:
- roof aerial,
- coaxial aerial cable,
- basic interference suppression,
- supply to front speakers,
- supply to rear speakers and tweeters,
- two 8-way connectors.
FITTING THE SPEAKERS
The factory-fitted equipment allows you to fit:
- 165 mm diameter speakers to the front doors,
- 55 mm diameter tweeters to the fascia,
- special elliptical shaped speakers on the rear shelf,
- 65 mm diameter tweeters on the rear panels.
Contact your PEUGEOT dealer.

Wiring positions and functions
A1 : Mute.
A2 : Do not use.
A3 : Do not use.
A4 : Do not use.
A5 : Spare.
A6 : (+ve) Accessories.
A7 : (+ve) Permanent.
A8 : Earth.
B1 : (+ve) Rear right loud-speaker and tweeter.
B2 : (-ve) Rear right loud-speaker and tweeter.
B3 : (+ve) Front right loud-speaker and tweeter.
B4 : (-ve) Front right loud-speaker and tweeter.
B5 : (+ve) Front left loud-speaker and tweeter.
B6 : (-ve) Front left loud-speaker and tweeter.
B7 : (+ve) Rear left loud-speaker and tweeter.
B8 : (-ve) Rear left loud-speaker and tweeter.

TOWING YOUR VEHICLE
Without lifting (4 wheels on the road)
You should always use a tow bar.
The towing eye is inside the spare wheel.
From the front:
Unclip the upper section of the cover and tilt it.
Screw in the towing eye until it locks.
From the rear:
Unclip the cover by passing your hand behind the bumper and pushing.
Screw in the towing eye until it locks.
Lifting (2 wheels on the road only)
It is preferable to raise the vehicle by the wheels.
Never use the radiator crossmember.
Special features of the automatic gearbox
When towing with four wheels on the ground, the following rules must be obeyed:
- gear lever in position N,
- tow the vehicle at less than 30 m.p.h. (50 km/h) over a maximum distance of 30 miles (50 km).
- do not add oil to the gearbox.
Towing a trailer, caravan, boat etc.
Only use original PEUGEOT tow bars that have been tested and approved from the design stage of your vehicle. The tow bar must be fitted by a PEUGEOT dealer.
Your vehicle is basically designed for transporting people and luggage but it may also be used for towing a trailer.
Driving with a trailer subjects the towing vehicle to more significant stress and its driver must be particularly careful.
Air density decreases with altitude, thus reducing engine performance. Above 1000 metres, the maximum towing load must be reduced by 10% and so on for every 1000 metres of altitude.
Driving advice
Distribution of loads
Distribute the load in the trailer so that the heaviest items are as close as possible to the axle and the nose weight approaches the maximum permitted without exceeding it.
Cooling
Towing a trailer on a slope increases the temperature of the coolant.
As the fan is electrically controlled, its cooling capacity is not dependent on the engine speed.
On the contrary, use a high gear to lower the engine speed, and reduce your speed.
The maximum towing load on a long slope depends on the gradient and the outside temperature.
In all cases, pay attention to the coolant temperature.
If the warning light comes on, stop the vehicle and switch off the engine as soon as possible.
Tyres
Check the tyre pressures of the towing vehicle and of the trailer, observing the recommended pressures.
Braking
Towing increases the braking distance.
Lights
Check the electrical signalling on the trailer.
Side wind
Take into account the increased sensitivity to side wind.
Boot luggage carrier
A boot luggage carrier is available from your PEUGEOT dealer. This equipment is not compatible with the fitting of a rear spoiler. When it is used, take care not to conceal the third brake light.
Follow the manufacturer's recommendations.

Removing the mat
When removing the mat on the driver's side, move the seat as far back as possible and remove the fixings.
When refitting the mat, position it and replace the fixings by turning them a quarter of a turn.
For your PEUGEOT only use accessories and original parts approved by the manufacturer.
These accessories and parts are all adapted to your PEUGEOT, after being tested and approved for reliability and safety, which PEUGEOT cannot guarantee for other products.
A wide choice of original accessories, approved by PEUGEOT, is available through the dealer network. They all carry the PEUGEOT guarantee.
- Security : Alarms, window engraving, wheel anti-theft devices, first aid kit etc.
- Protection : Carpets, door sill protector, boot tray mat, styling strips, seat covers compatible with side air bags.
- Communication : Telephone, satellite navigation, audio equipment, CD changer, speakers.
- Customisation : Alloy wheels, spoiler, sports exhaust.
- Comfort : Sunroofs*, storage facilities, portable refrigerator, luggage net, telephone console, armrest.
* The fitting of a sunroof may necessitate cutting of the roof strengthener. It is essential that only original PEUGEOT products be used.
– Leisure pursuits : Tow bar, boot rack, snow chains.
- Children : Booster seats and child seats.
- Maintenance products: Windscreen wash fluid, internal and external cleaning and maintenance products.
TECHNICAL DATA
| MODELS:Model codes | PETROL ENGINES | |||
| 8CRFR 8C3FZ 8CXFX | ||||
| ENGINES | 2 Litre 16V 2.2 litre | 16V 3 litre 24V V6 Injection | ||
| Capacity (cm3) | 1 997 2 230 2 946 | |||
| Bore x stroke | 85 x 88 86 x 96 87 x 82.6 | |||
| Number of valves | 16 16 24 | |||
| Max. power: EU standard (KW) | 99 116 152 | |||
| Max. power at engine speed (r.p.m) | 6 000 5 650 6 000 | |||
| Max. torque: EU standard (Nm) | 190 217 285 | |||
| Max. torque at engine speed (r.p.m) | 4 100 3 900 3 750 | |||
| Fuel | Unleaded Unleaded | Unleaded | ||
| Catalytic converter | Yes | Yes | Yes | |
| Electronic injection | Yes | Yes | Yes | |
| GEARBOX | Automatic Manual(4-speed) (5-speed) | Manual(5-speed) | Automatic(4-speed) | |
| CAPACITIES (in litres) | ||||
| Engine (with filter replacement) | 4.25 | 4.25 | - | - |
| Gearbox - Final drive | - | 1.85 | 1.85 | - |
TECHNICAL DATA
| MODELS:Model codes | DIESEL ENGINES |
| 8C4HX | |
| ENGINES | Turbo Diesel2.2 litre 16V Turbo Diesel HDI |
| Capacity (cm3) | 2179 |
| Bore x stroke | 85 x 96 |
| Number of valves | 16 |
| Max. power: EU standard (KW) | 98 |
| Max. power at engine speed (r.p.m) | 4000 |
| Max. torque: EU standard (Nm) | 314 |
| Max. torque at engine speed (r.p.m) | 2000 |
| Fuel | Diesel |
| Catalytic converter | Yes |
| Electronic injection | Yes |
| GEARBOX | Manual(5-speed) |
| CAPACITIES (in litres) | |
| Engine (with filter replacement) | - |
| Gearbox - Final drive | - |
TECHNICAL DATA
| CONSUMPTION As per directive | 99/100 in m.p.g. (litres/100 km) | ||||||
| Engine | Gearbox | Model codes | Urban driving | Inter-urban driving | Mixed CO | Emission of 2 by mass | |
| 2 litre 16V Automatic RFR 23.0 | (12.3) 43.5 (6.5) | 32.8 (8.6) | 206 g/km | ||||
| 2.2 litre 16V | Manual | 3FZ | 22.0 (12.8) | 43.5 (6.5) | 32.0 (8.8) | 210 g/km | |
| 3 litre 24V V6 | Manual | XFX | 19.6 (14.4) | 38.2 (7.4) | 28.2 (10) | 238 g/km | |
| 3 litre 24V V6 | Automatic | XFX | 19.2 (14.7) | 36.2 (7.8) | 27.2 (10.4) | 248 g/km | |
| 2.2 litre 16V HDI | Manual | 4HX | - | - | - | - | |
Fuel consumption values correct at time of printing.
TECHNICAL DATA
Towing weights and loads (in kg)
| Engines | 2 litre 2.216 valve 16 | litre 3 litre 31valve 24V V6 | tre 2.2 litre24V V6 16V HDI | ||
| Gearboxes | Automatic Manual Manua | Automatic Manual | |||
| Model codes: 8C | RFR 3FZ | XFX XFX 4HX | |||
| Kerb weightGross vehicle weight (GVW)Gross train weight (GTW)*Braked trailer weight (within GTW limit)Recommended nose weight | 1400 1 371 800 1 93 000 3 111 300 1 5080 | 1 458 1 4810 1 827 1 8500 3 127 3 1500 1 300 1 30080 | 1 4101 8353 1351 30080 | 80 | 80 |
* The speed of a towing vehicle is limited to 60 m.p.h. (100 km/h).
TECHNICAL DATA

WARNING
Drive carefully over kerbs, speed humps, access ramps and dirt tracks.
The 406 Coupé has a reduced ground clearance.
TECHNICAL DATA
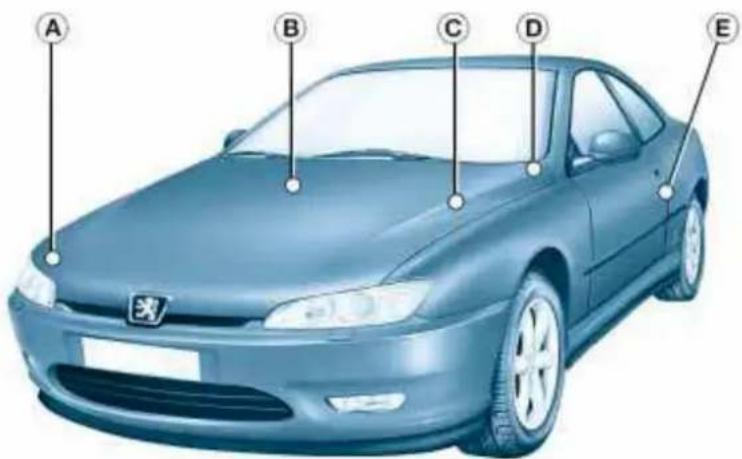
THE IDENTIFICATION FEATURES OF YOUR 406 COUPE
A. Manufacturer's plate.
B. Model serial number on the bodywork.
C. Paint colour reference.
D. Serial number on the fascia.
E. Tyre pressure label.
Tyres
The tyre pressure label E on the driver's door pillar, near the hinges, gives:
– the wheel and tyre sizes,
– the brands of tyres approved by the manufacturer,
– the tyre pressures.
The tyre pressure must be checked when cold, at least once a month.
Tyre sizes fitted as standard:
- 215/55 R 16 V for vehicles fitted with the 2.2 litre 16V and 3 litre 24V V6 petrol engines and the 2.2 litre 16V HDI diesel engine.
- 205/55 R 16 for vehicles fitted with the 2 litre 16V petrol engine.
- winter tyres for all engines: Michelin Pilot Alpin 205/55 R 16.


- YOUR 406 COUPE AT A GLANCE
- THE KEYS
- CENTRAL LOCKING
- THE REMOTE CONTROL KEY
- LOCKING
- DEADLOCKING
- UNLOCKING
- ELECTRONIC ENGINE IMMOBILISER
- OPERATION
- STARTING
- STOP POSITION
- 1ST NOTCH, ACCESSORIES POSITION
- 2ND NOTCH, RUNNING POSITION
- STARTING POSITION
- STEERING LOCK
- STARTING A PETROL ENGINE
- STARTING A DIESEL ENGINE
- AUTOMATIC WIPE
- MANUAL FRONT SEATS
- ELECTRIC FRONT SEATS
- DISARMING THE PASSENGER AIR BAG
- PRECAUTIONS REGARDING THE PASSENGER AIR BAG
- SIDE AIR BAGS
- IF THE WARNING LIGHT
- SUNROOF
- TO TILT
- TO OPEN
- COURTESY LIGHT
- MAP READING LIGHTS
- ELECTRIC WINDOWS
- ELECTRIC MIRRORS
- THE AUTOMATIC AUTOADAPTIVE GEARBOX
- GEAR SELECTION GATE
- SPECIAL FEATURE OF THE GEARBOX (2 LITRE ENGINE)
- CRUISE CONTROL
- MEMORISING A SPEED
- DEACTIVATING THE MEMORISED SPEED
- RECALLING THE MEMORISED SPEED
- MODIFYING A MEMORISED SPEED
- SWITCHING OFF THE CRUISE CONTROL
- FUEL FILLER FLAP
- OPENING THE BONNET
- FILLING WITH FUEL
- ARDUOUS CONDITIONS OF USE
- YOUR 406 COUPE IN DETAIL
- SERVICE INDICATOR
- THE SERVICE IS OVERDUE
- RESETTING THE SERVICE INDICATOR
- RECOMMENDATIONS FOR APPROVED LUBRICANTS
- INSTRUMENT PANEL DIALS: PETROL / DIESEL
- INSTRUMENT PANEL DIALS: AUTOMATIC GEARBOX
- WARNING LIGHTS AND INDICATORS
- CENTRAL (STOP) WARNING LIGHT
- ENGINE OIL PRESSURE WARNING LIGHT
- LOW COOLANT LEVEL WARNING LIGHT
- STOP IMMEDIATELY
- FUEL FILLER CAP WARNING LIGHT
- ESP ELECTRONIC STABILITY PROGRAMME OPERATION INDICATOR LIGHT
- CLOGGING OF THE PARTICULATE EMISSION FILTER WARNING LIGHT (DIESEL ENGINE)
- HANDBRAKE, LOW BRAKE FLUID LEVEL AND ELECTRONIC BRAKE FORCE DISTRIBUTION WARNING LIGHT
- ANTI-LOCK BRAKING SYSTEM (ABS) WARNING LIGHT
- FRONT BRAKE PAD WEAR WARNING LIGHT
- BATTERY CHARGE WARNING LIGHT
- ENGINE DIAGNOSTICS WARNING LIGHT
- DIESEL PRE-HEATING INDICATOR LIGHT
- WATER IN DIESEL FILTER WARNING LIGHT (ACCORDING TO DESTINATION)
- PASSENGER AIR BAG DISARMING WARNING LIGHT
- AIR BAG WARNING LIGHT
- SEAT BELT NOT FASTENED WARNING LIGHT
- DOOR OPEN WARNING LIGHT
- ELECTRONIC IMMOBILISER WARNING LIGHT
- LOW FUEL LEVEL WARNING LIGHT
- COOLANT TEMPERATURE INDICATOR
- YOU MUST STOP IMMEDIATELY
- LIGHTING RHEOSTAT
- TRIP RECORDER ZERO RESET
- INSTRUMENT PANEL DISPLAY
- ENGINE OIL LEVEL
- SETTING THE PARAMETERS
- GENERAL FUNCTIONS
- ANTI-THEFT SYSTEM
- ADJUSTING THE VOLUME
- AUDIO SETTINGS
- ADJUSTING THE BASS
- ADJUSTING THE TREBLE
- ADJUSTING THE LOUDNESS
- ADJUSTING THE FRONT/REAR SOUND DISTRIBUTION (FADER)
- ADJUSTING THE RIGHT/LEFT SOUND DISTRIBUTION (BALANCE)
- AUTOMATIC VOLUME CORRECTION (CAV)
- RADIO
- NOTES ON RADIO RECEPTION
- SELECTING RADIO MODE
- SELECTING A WAVEBAND
- AUTOMATIC STATION SEARCH
- MANUAL STATION SEARCH
- MANUAL STORING OF STATIONS IN THE MEMORY
- AUTOMATIC STORING OF FM STATIONS IN THE MEMORY (AUTOSTORE)
- RECALLING STATIONS STORED IN THE MEMORY
- RDS
- USING THE RDS (RADIO DATA SYSTEM) FUNCTION ON FM
- RDS STATION FOLLOWING
- TRAFFIC INFORMATION PROGRAMME
- REGIONAL FOLLOWING MODE
- PTY FUNCTION
- EON SYSTEM
- CASSETTE
- SELECTING CASSETTE MODE
- EJECTING THE CASSETTE
- DIRECTION OF PLAY
- SELECTING A TRACK ON A CASSETTE (BLANK SEARCH)
- FAST FORWARD/REWIND
- NOISE REDUCTION (DOLBY B NR SYSTEM)
- RECOMMENDATIONS FOR THE USE OF CASSETTES
- CD CHANGER
- ACCELERATED PLAY
- AUDIO SYSTEM
- PRESENTATION
- ADJUSTMENT IN CD MODE
- AUTOMATIC VOLUME CORRECTION
- COMPACT DISC
- THE SATELLITE NAVIGATION SYSTEM
- INTRODUCTION
- THE REMOTE CONTROL
- DIRECTION ARROWS
- THE DISPLAY
- MAIN MENU
- NAVIGATION / GUIDANCE
- ENTERING A NEW DESTINATION
- SELECTING A SERVICE
- STORING AN ADDRESS IN A DIRECTORY
- SELECTING A STORED DESTINATION
- DISPLAY CONFIGURATION
- NAVIGATION OPTIONS
- GUIDANCE TOOLS
- VENTILATION
- RECOMMENDATIONS FOR USE
- AUTOMATIC OPERATION
- TEMPERATURE ADJUSTMENT
- SETTING THE AIR DISTRIBUTION
- MANUAL OPERATION
- AIR CONDITIONING
- AIR FLOW
- AIR INTAKE
- DEMISTING THE REAR SCREEN
- SEATS
- MANUAL ADJUSTMENT OF THE FRONT SEATS
- HEAD RESTRAINT HEIGHT AND ANGLE ADJUSTMENT
- LUMBAR ADJUSTMENT
- PASSENGER SEAT
- ELECTRICAL ADJUSTMENT OF THE FRONT SEATS
- MEMORISING THE SEAT AND MIRROR POSITIONS
- TO MEMORISE
- RECALLING A MEMORISED POSITION
- DOOR CLOSED OR IGNITION ON
- HEATED SEAT CONTROLS
- CHILD SEATS
- UP TO 18 MONTHS (UP TO 13 KG)
- FROM 9 MONTHS TO 3 OR 4 YEARS (9 TO 18 KG)
- FROM 3 TO 6 YEARS (15 TO 25 KG)
- FROM 3 TO 10 YEARS (15 TO 36 KG)
- SEAT BELTS
- PRE-TENSIONING AND FORCE-LIMITING FRONT SEAT BELTS
- REAR SEAT BELTS
- CONFIDENTIAL CARD
- KEY IN IGNITION
- LOCATING YOUR CAR
- CHANGING THE BATTERY OF THE REMOTE CONTROL
- REPROGRAMMING THE REMOTE CONTROL
- SPECIAL FEATURES
- THE ALARM SYSTEM
- SETTING AND DEACTIVATING THE ALARM
- SETTING THE ALARM
- SWITCH THE IGNITION OFF AND GET OUT OF THE VEHICLE
- DISARMING THE ALARM
- EMERGENCY CUT-OFF
- SELECTING THE TYPE OF PROTECTION LOCKING WITHOUT SETTING THE ALARM
- SPECIAL PRECAUTIONS
- TO DISARM EXTERIOR PROTECTION ONLY
- TO LOCK THE VEHICLE WITHOUT SETTING THE ALARM
- TO RECHARGE OR REPLACE THE BATTERY
- AFTER RECONNECTING THE BATTERY
- BOOT
- LOCKING THE BOOT ONLY
- BONNET STRUTS
- TO CLOSE
- DIPPED/MAIN BEAM CHANGE
- FRONT FOG LAMPS AND REAR FOG LAMP (RING B)
- AUTOMATIC SWITCHING ON OF THE LIGHTS
- OPERATING CHECK
- ACTIVATION
- DISARMING
- FOLLOW ME HOME
- THE WIPER STALK
- WINDSCREEN WIPERS
- WINDSCREEN AND HEADLAMP WASH
- DISPLAY B DISPLAY
- ZERO RESET
- RANGE
- CURRENT FUEL CONSUMPTION
- AVERAGE CONSUMPTION
- AVERAGE SPEED
- DISTANCE TRAVELLED
- SAFETY AUTO-REVERSE
- CANCELLING THE SAFETY AUTO-REVERSE
- AUTOMATIC DAY/NIGHT INTERIOR MIRROR
- SPECIAL FEATURE
- INTERIOR MIRROR
- AREAS FOR TOLL CARDS / CAR PARK TICKETS
- HEADLAMP ADJUSTMENT
- HAZARD WARNING LIGHTS
- AUTOMATIC LIGHTING OF HAZARD WARNING LIGHTS
- STEERING WHEEL HEIGHT AND DEPTH ADJUSTMENT
- HORN
- CENTRE CONSOLE
- REAR SHELF COMPARTMENT
- STORAGE COMPARTMENT BETWEEN THE REAR SEATS
- DRIVING YOUR 406 COUPE
- AUTOMATIC AUTOADAPTIVE GEARBOX
- SPECIAL FEATURE OF THE GEARBOX (2 LITRE PETROL ENGINE)
- MOVING OFF
- NOTE
- SPORT AND SNOW PROGRAMMES
- SPORT PROGRAMME
- SNOW PROGRAMME
- OPERATING ANOMALY
- MANUAL GEARBOX
- REVERSE
- TRACTION CONTROL (ASR) AND DYNAMIC STABILITY CONTROL (ESP)
- OPERATION OF THE ASR AND ESP SYSTEMS
- DISARMING THE ESP / ASR SYSTEMS
- THEY ENGAGE AGAIN
- HANDBRAKE
- APPLYING
- RELEASING
- CANCELLING THE MEMORISED SPEED
- CHANGING A MEMORISED SPEED
- CANCELLING THE CRUISE CONTROL
- AIR BAGS
- FRONT AIR BAGS
- FRONT AIR BAG FAULT
- PASSENGER AIR BAG PRECAUTIONS
- FOR THE FRONT AND SIDE AIR BAGS TO BE FULLY EFFECTIVE, OBSERVE THE FOLLOWING SAFETY RULES
- 2 LITRE 16 VALVE PETROL ENGINE
- 2.2 LITRE 16 VALVE PETROL ENGINE
- 3 LITRE 24 VALVE V6 PETROL INJECTION ENGINE
- CHECKING THE OIL LEVEL
- VISCOSITY SELECTION
- OIL FILTER
- USED OIL
- BRAKES AND CLUTCH
- CHECKING THE BRAKE AND CLUTCH FLUID LEVEL
- FLUID CHANGE
- COOLING SYSTEM
- POWER STEERING RESERVOIR
- WINDSCREEN AND HEADLAMP WASH RESERVOIR
- BATTERY
- AIR FILTER
- BRAKE PADS
- CHANGING A WHEEL
- ACCESS TO THE SPARE WHEEL AND JACK
- TOOLS
- REMOVAL
- FITTING A WHEEL
- AFTER CHANGING THE WHEEL
- BOLT COVERS
- FITTING THE SPARE WHEEL
- FITTING SNOW TYRES
- ANTI-THEFT BOLTS
- CHANGING A BULB
- DIPPED BEAM HEADLAMPS
- MAIN BEAM HEADLAMPS
- SIDE LIGHTS (W 5 W)
- DIRECTION INDICATORS (PY 21 W)
- DIRECTION INDICATOR REPEATER (W 5 W)
- REAR LIGHTS
- NUMBER PLATE LIGHTS (W 5 W)
- FASCIA FUSE BOX
- REMOVING AND CHANGING A FUSE
- ENGINE COMPARTMENT FUSES
- FUSE BOX
- TO CHARGE THE BATTERY USING A BATTERY CHARGER
- TO START THE VEHICLE FROM ANOTHER BATTERY
- ECONOMY MODE
- FITTING THE SPEAKERS
- WIRING POSITIONS AND FUNCTIONS
- TOWING YOUR VEHICLE
- WITHOUT LIFTING (4 WHEELS ON THE ROAD)
- FROM THE FRONT
- FROM THE REAR
- LIFTING (2 WHEELS ON THE ROAD ONLY)
- SPECIAL FEATURES OF THE AUTOMATIC GEARBOX
- TOWING A TRAILER, CARAVAN, BOAT ETC
- DRIVING ADVICE
- DISTRIBUTION OF LOADS
- COOLING
- TYRES
- BRAKING
- LIGHTS
- SIDE WIND
- BOOT LUGGAGE CARRIER
- REMOVING THE MAT
- TECHNICAL DATA
- WARNING
- THE IDENTIFICATION FEATURES OF YOUR 406 COUPE
Brand : PEUGEOT
Model : 406 C (2002)
Category : Automobile