
308 Dag (2007) - Automobile PEUGEOT - Free user manual and instructions
Find the device manual for free 308 Dag (2007) PEUGEOT in PDF.


| Product Type | Automobile (Passenger Car) |
| Brand | Peugeot |
| Model | 308 Dag (2007) |
| Body Style | 5-door hatchback |
| Dimensions (L x W x H) | Approx. 4,276 mm x 1,815 mm x 1,498 mm |
| Wheelbase | 2,608 mm |
| Kerb Weight | Approx. 1,290 - 1,440 kg (depending on engine) |
| Fuel Types | Petrol and Diesel |
| Engine Options | Multiple: 1.4L, 1.6L, 2.0L (petrol); 1.6L, 2.0L (diesel) |
| Transmission | 5-speed manual / 4-speed automatic (depending on variant) |
| Safety Features | ABS, ESP, multiple airbags (front, side, curtain) |
| Fuel Capacity | Approx. 60 liters |
| Tire Size | 195/65 R15 or 205/55 R16 (depending on trim) |
| Maintenance Interval | Oil change every 20,000 km or 1 year; timing belt replacement at 120,000 km |
| Battery | 12V lead-acid, typically 60-70 Ah |
| Emissions Standard | Euro 4 / Euro 5 (depending on engine) |
| Warranty | 2 years unlimited mileage (original factory warranty) |
| Key Features | Power windows, central locking, air conditioning, radio/CD player |
| Towing Capacity | Up to 1,500 kg (braked trailer) |
Frequently Asked Questions - 308 Dag (2007) PEUGEOT
User questions about 308 Dag (2007) PEUGEOT
0 question about this device. Answer the ones you know or ask your own.
Ask a new question about this device
Download the instructions for your Automobile in PDF format for free! Find your manual 308 Dag (2007) - PEUGEOT and take your electronic device back in hand. On this page are published all the documents necessary for the use of your device. 308 Dag (2007) by PEUGEOT.
USER MANUAL 308 Dag (2007) PEUGEOT
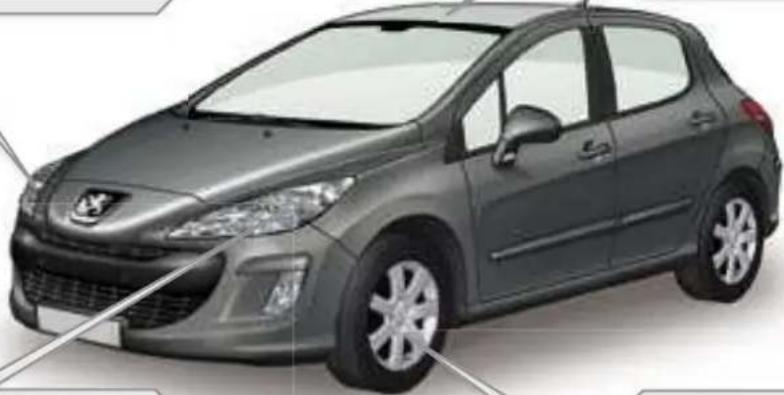
This additional exterior and interior lighting, controlled remotely, makes your approach to the vehicle easier when the light is poor
79,86
natural_image
Side view illustration of a modern car with visible headlights and grille (no text or symbols)Glass panoramic roof
This roof provides incomparable visibility and light in the passenger compartment.
75
Directional lighting
This lighting automatically provides additional visibility when cornering.
81
Lane departure warning system
This equipment warns you if you inadvertently cross a longitudinal marking on the ground.
127
OPEN
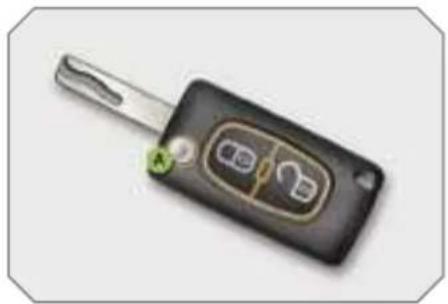
Remote control key
natural_image
Close-up of a black key with four car icons on its body, no visible text or symbols.A. Unfolding/Folding of the key.

Normal locking (press once)
(fixed lighting of the directio indicators).
or

Deadlocking of the vehicle (press twice in succession)
(fixed lighting of the direction indicators).

Complete or selective unlocking of the vehicle
(rapid flashing of the direction indicators).
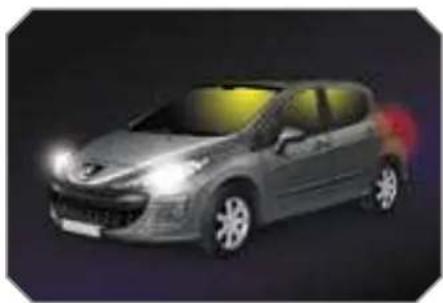
When the light is poor, detected by a sensor, the remote switching on o the dipped headlamps and side light makes your approach to the vehicle easier
79
natural_image
Exterior view of a modern silver car with illuminated headlights and red accents (no visible text or symbols)In the same way, the passenger compartment lighting, such as the courtesy lights, the sill lights and the footwell lights, comes on.
Fuel tank
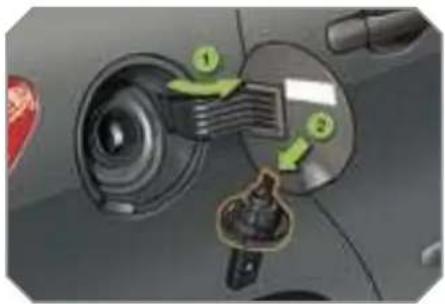
- Opening of the fuel filler flap.
- Opening and hooking of the fuel tank cap.
Capacity of the tank: approximately 60 litres.
63
▶86
76
FAMILIARISATION
INTERIOR
Ambient lighting
This dimmed lighting of the passenger compartment facilitates visibility inside the vehicle when the light is poor.
▶ 86
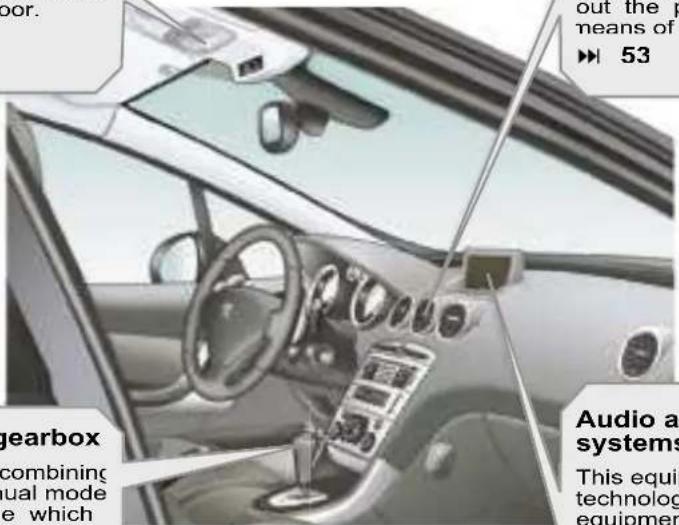
Fragrance diffuser
This fragrance diffuser diffuses the fragrance that you have selected throughout the passenger compartment by means of its location in the central vent
53
6-speed piloted manual gearbox
This equipment offers driving combining a fully automatic mode, a manual mode and an auto-sequential mode which combines the advantages of the other two modes.
116
Audio and communication systems
This equipment benefits from the latest technology: MP3 compatible RD4 audio equipment, Bluetooth hands-free kit, RT4 GPS audio/telephone with retract-abe colour screen, JBL audio system auxiliary sockets.
RT4 ▶▶171
RD4 ▶ 201
FAMILIARISATION
INSTRUMENTS AND CONTROLS
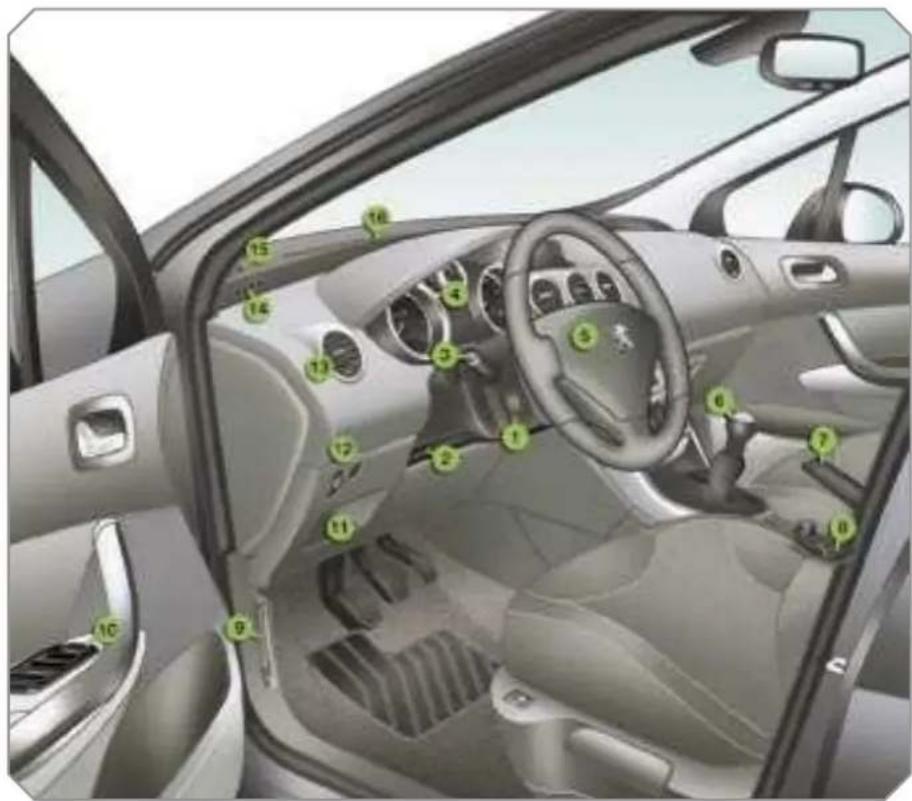
- Cruise control/speed limiter switch.
- Steering wheel adjustment control.
- Lights and direction indicators controls.
- Instrument panel.
- Driver's air bag. Horn
-
Gear lever.
-
Handbrake.
- Panoramic roof shutter control.
- Bonnet release.
- Exterior mirror controls. Electric window controls.
- Fuse box.
- Manual headlamp height adjustment Lane departure warning system button.
- Side adjustable and closing vent
- Front side window demisting vent
- Speaker (tweeter).
- Windscreen demisting vent.
FAMILIARISATION
INSTRUMENTS AND CONTROLS
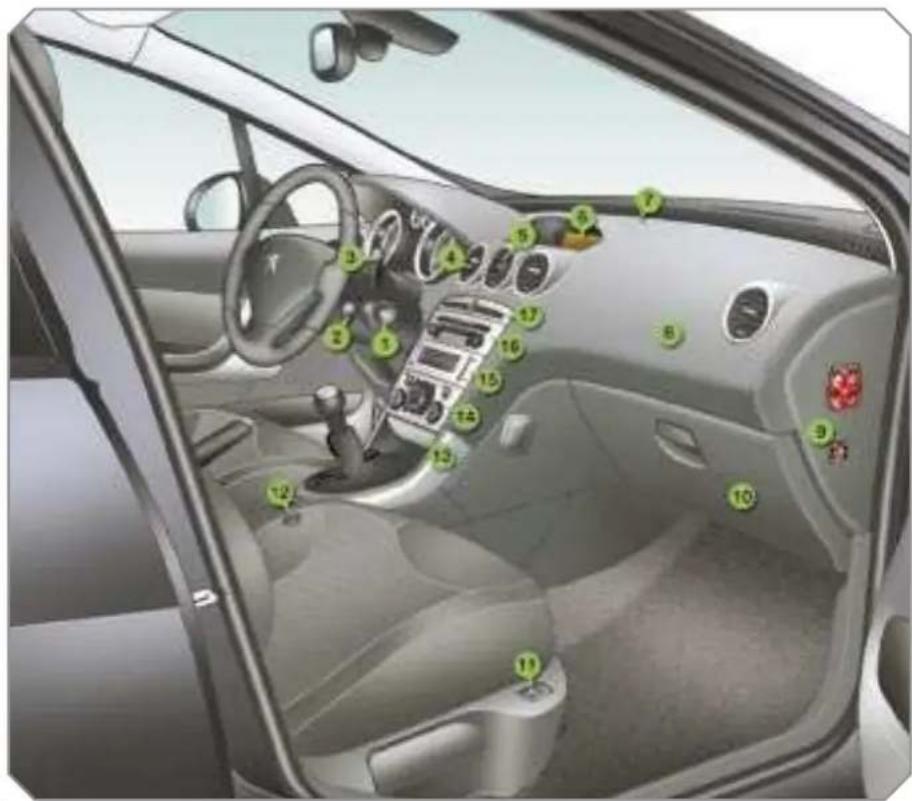
-
Steering lock and ignition.
-
Audio equipment steering wheel control.
-
Wipers/wash-wipe/trip computer controls.
-
Central adjustable and closing vents.
-
Fragrance diffuser.
-
Multifunction display.
-
Sunshine sensor.
-
Passenger air bag.
-
Passenger air bag disarming.
-
Glove box/Audio/video sockets
-
Heated seat control.
-
Lighter
-
Front ashtray
-
Heating/air conditioning controls
-
CD changer
-
Audio RD4 or RT4 GPS audio/telephone.
-
Alarm button. Central locking button.
Hazard warning lights button.
Dynamic stability control (ESP/ASR) button.
Parking assistance button.
FAMILIARISATION
SIT COMFORTABLY
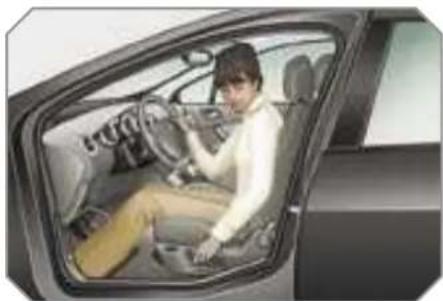
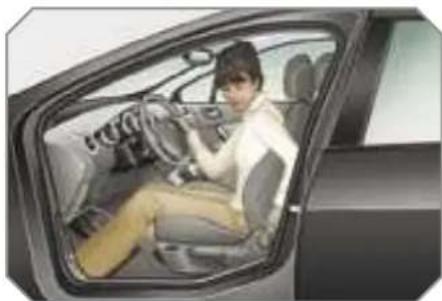
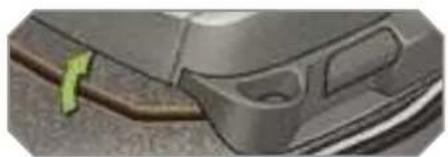
Driver's seat adjustment
Forwards-backwards
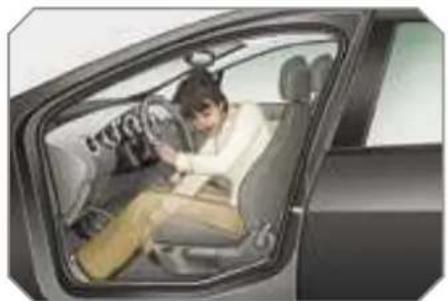
natural_image
Interior view of a car showing a person seated in the driver's seat, with no visible text or symbols.Height
natural_image
Interior view of a car showing a person seated in the driver's seat, with dashboard and steering wheel visible (no text or symbols)Seat back angle
natural_image
Interior view of a car showing a person seated in the driver's seat, with dashboard and steering wheel visible (no text or symbols)54
Manua
natural_image
Close-up of a car's side profile showing the front wheel and dashboard (no text or symbols visible)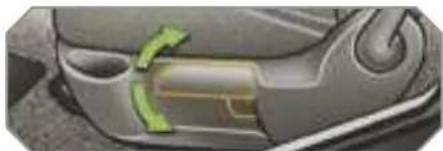
natural_image
Close-up of a car's side panel showing internal components with a green arrow indicating rotation (no text or symbols)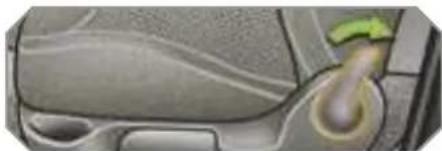
natural_image
Close-up of a car's side panel showing the wheel and handle (no text or symbols visible)55
Electric
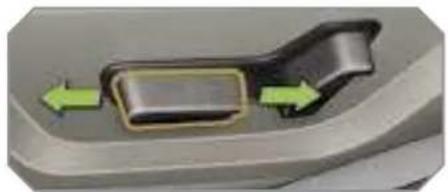
natural_image
Close-up of a car door handle with green arrows indicating left and right motion (no text or symbols)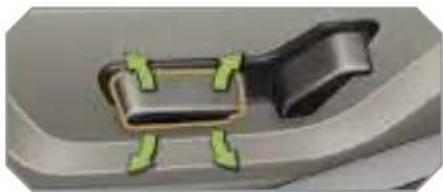
natural_image
Close-up of a black plastic clip with green decorative elements, no visible text or symbols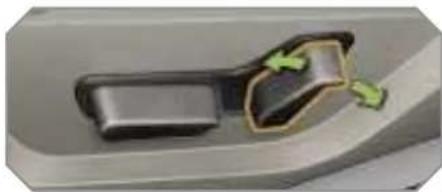
natural_image
Close-up of a car door handle with green arrows indicating motion or movement (no text or symbols)FAMILIARISATION
SIT COMFORTABLY
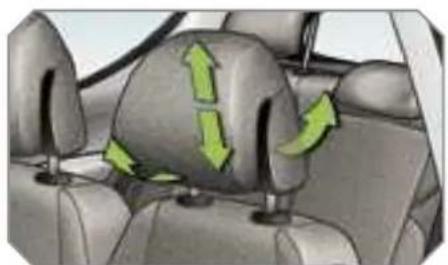
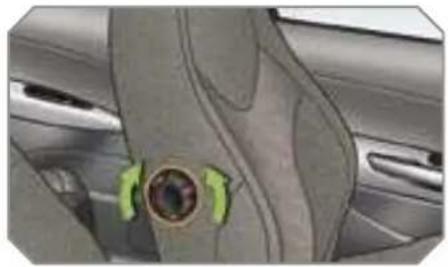
Front seat manual and additional adjustments
Head restraint height and angle
natural_image
Interior view of a car showing seatbelt and dashboard with green directional arrows indicating movement (no text or symbols)Lumbar
natural_image
Close-up of a car interior showing a circular component with green arrows pointing to it, no visible text or symbols.56

Also...
Access to the rear seats (3-door). Heated seat.
Storing of driving positions (electric seat).
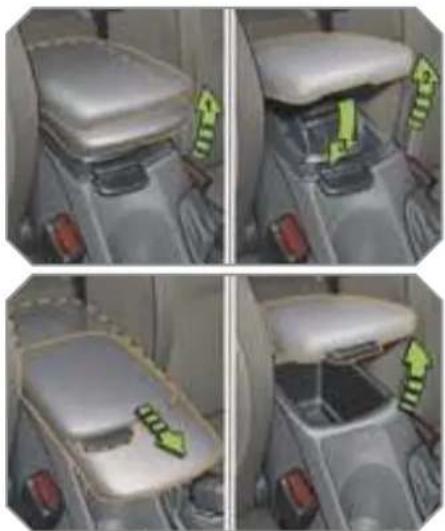
Front armrest
natural_image
Four-panel photo collage showing a car seat with a white top, highlighting a green traffic sign and yellow directional arrows (no text or symbols)▶ 90
Steering wheel adjustment
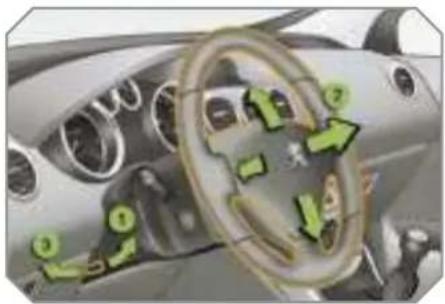
- Unlocking of the control.
- Adjustment of the height and depth
- Locking of the control.
FAMILIARISATION
SIT COMFORTABLY
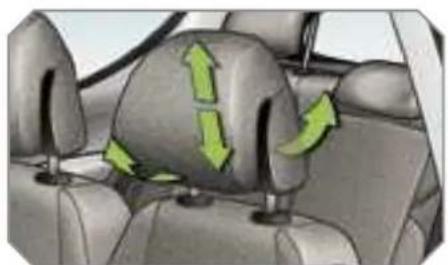
Front seat manual and additional adjustments
Head restraint height and angle
natural_image
Interior view of a car showing seatbelt and dashboard with green directional arrows indicating movement (no text or symbols)Lumbar
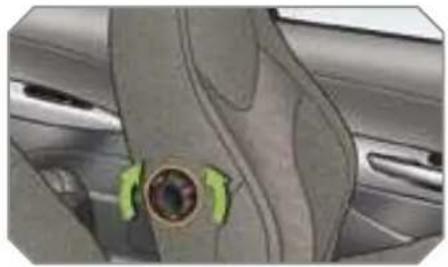
natural_image
Close-up of a car interior showing a circular component and a green arrow pointing to it (no text or symbols visible)56

Also...
Access to the rear seats (3-door). Heated seat.
Storing of driving positions (electric seat).
Front armrest
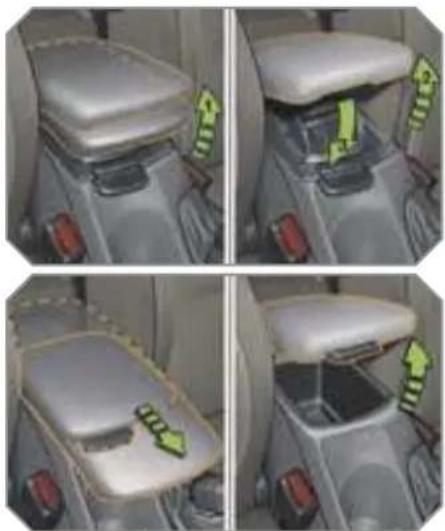
natural_image
Four-panel photo collage showing a car seat with a white top, highlighting a green traffic sign and yellow directional arrows (no text or symbols)▶ 90
Steering wheel adjustment
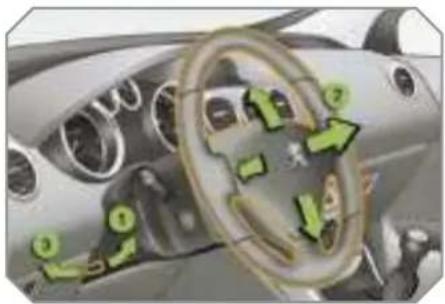
- Unlocking of the control.
- Adjustment of the height and depth
- Locking of the control.
FAMILIARISATION
SIT COMFORTABLY
Exterior mirror adjustment
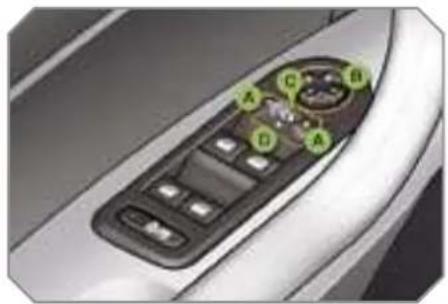
A. Selection of the mirror.
B. Adjustment of the position of the mirror
C. De-selection of the mirror.
60
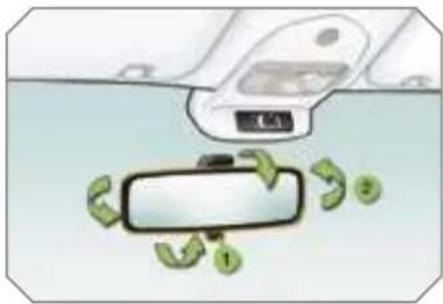
Interior mirror adjustment
natural_image
Diagram showing a car interior with a mirror and directional arrows indicating flow or movement (no text or symbols)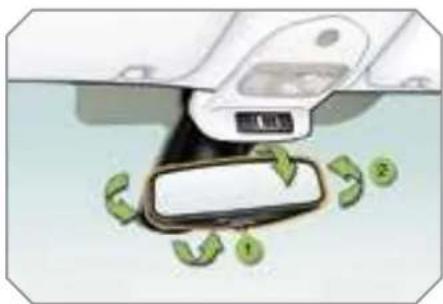
natural_image
Diagram of a car interior showing a door, seatbelt, and directional arrows indicating movement (no text or symbols)- Selection of the "day" position of the mirror
- Directing of the mirror.
61
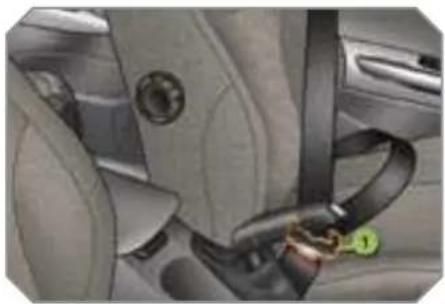
Front seat belt
natural_image
Close-up of a car seatbelt buckle and seat, showing no text or symbols on the vehicle itself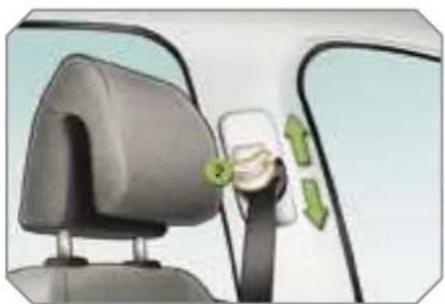
natural_image
Interior view of a car showing a person inside the windshield with directional arrows indicating movement (no text or symbols)- Fastening.
- Height adjustment.
108

Also...
D. Folding/Unfolding.
Automatic tilting in reverse gear.
FAMILIARISATION
SEE CLEARLY
Lighting
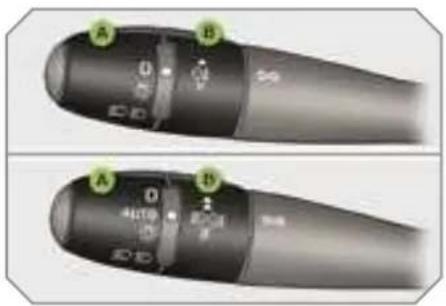
King A
0 Lights off.

Automatic switching on of the lights.

Side lights.

Dipped/main beam headlamps.
Ring B

Rear fog lamp.
or

Front and rear fog lamps.

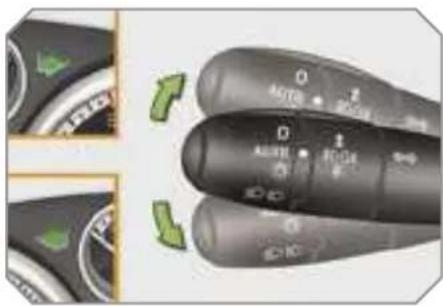
Direction indicators
natural_image
Close-up of a camera control knob with adjustment knobs and green arrows indicating rotation (no text or symbols)"Motorway" function
Press up or down once, without passing the point of resistance; the corresponding direction indicators will flash three times
104
Wipers

_ever A: windscreen wipers
82
Switching on "AUTO"
Press the lever down and release it.
Switching off "AUTO"
Push the lever up and return it to position '0".
84
Ring B: rear wiper

Park.

Intermittent wipe.

Wash-wipe.
▶▶ 83
VENTILATION
Recommended interior settings
| I require.. | Heating or Manual Air Conditioning | ||||
| Air distribution | Air flow | Air recirculation/Intake of outside air | Temperature | Manual A/C | |
| HOT | 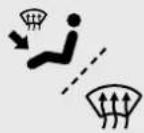 |  |  |  |  |
| COLD |  |  |  |  |  |
 |  |  |  |  | ON |
Automatic air conditioning: we recommend use of the fully automatic mode by pressing the "AUTO" button.
FAMILIARISATION
MONITOR THOROUGHLY
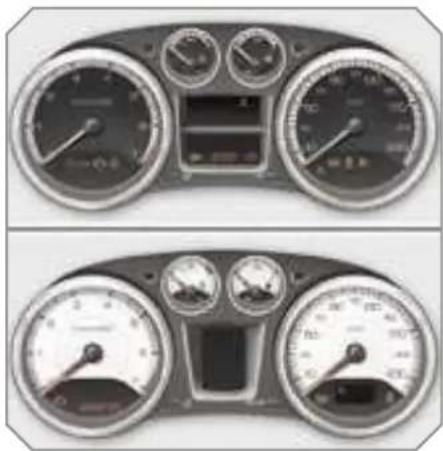
Instrument panel

A. With the ignition on, the needle should indicate the level of fuel remaining
B. With the engine running, its associated low level warning light should switch off
C. With the ignition on, the oil level indicator should display "OIL OK" for a few seconds.
If the levels are not correct, top up the levels which are low
17
Warning lights
natural_image
Two identical car dashboard gauges with no visible text or labels, showing front and side views (no readable text or symbols)- With the ignition on, the orange and red warning lights come on.
- With the engine running, these warning lights should switch off. f warning lights remain on, refer to the page concerned.
19
Controls bar
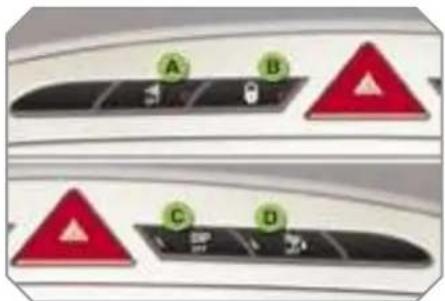
Lighting of the indicator light indicate the status of the corresponding function
A. Disarming of the interior protection alarm
68
B. Central locking.
73
C. Deactivation of the ESP/ASR system.
107
D. Deactivation of the visual and audible parking assistance.
128
KEEP YOUR PASSENGERS SAFE
Passenger's front air bag
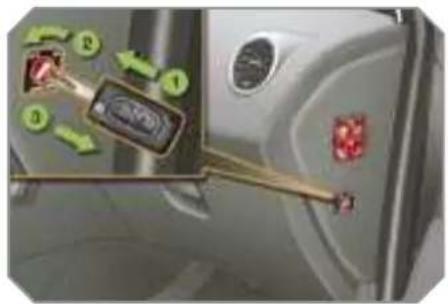
- Insertion of the key.
- Selection of the position: "OFF" (disarming), with "rear facing" child seat, "ON" (activation), with front passenger or "forwards facing" child seat.
- Removal of the key keeping the switch in this position.
111
Seat belts and passenger's front air bag
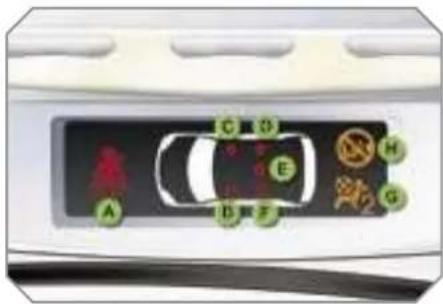
A. Front and/or rear seat belts not fastened/unfastened warning light.
B. Front left seat belt warning light.
C. Front right seat belt warning light.
D. Rear right seat belt warning light.
E. Rear centre seat belt warning light.
F. Rear left seat belt warning light.
G. Passenger's front air bag disarmed warning light.
H. Passenger's front air bag activated warning light.
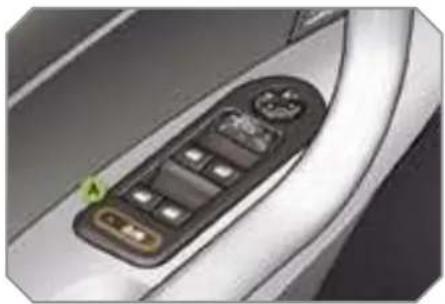
Electric child lock
natural_image
Close-up of a car's interior control panel with buttons and a green indicator light (no text or symbols visible)Lighting of the indicator light indicate the status of the corresponding function
A. Activation of the electric child lock.
103
108, 112
FAMILIARISATION
DRIVE SAFELY
Speed limiter "LIMIT"
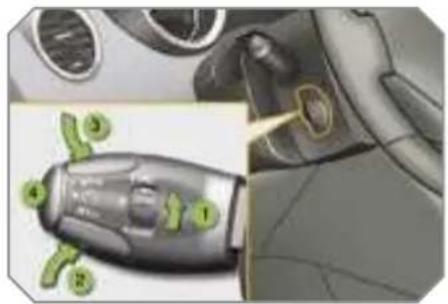
1 Limiter mode Selection/Off.
2. Decreasing of the programmed value
3. Increasing of the programmed value
4. Speed limiter On/Off.
The values must be set with the engine running.
Cruise control "CRUISE"
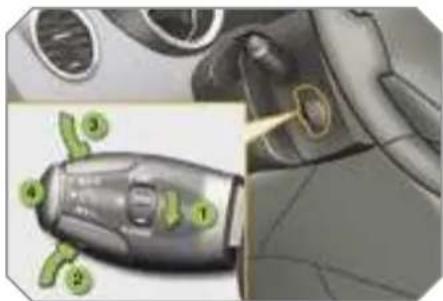
1 Cruise control mode Selection/Off.
2. Programming a speed/Decreasing of the programmed value.
3. Programming a speed/Increasing of the programmed value.
4. Cruise control Off/Resume.
In order to be programmed or activated the vehicle speed must be higher than 25 mph (40 km/h), with at least four gear engaged on the manual gearbox (second gear for the 6-speed piloted manual or automatic gearbox).
Display on the instrument panel
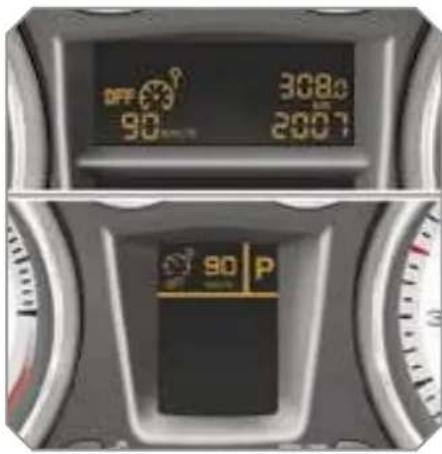
The cruise control or speed limiter model appears on the instrument panel when it is selected.

Cruise control

Speed limiter
123
125
INSTRUMENTS AND CONTROLS
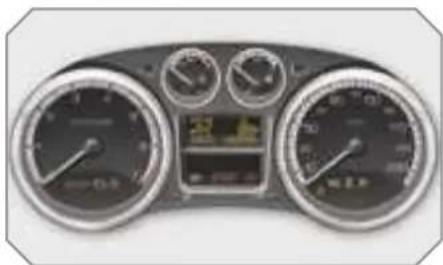
PETROL - DIESEL MANUAL GEARBOX INSTRUMENT PANELS
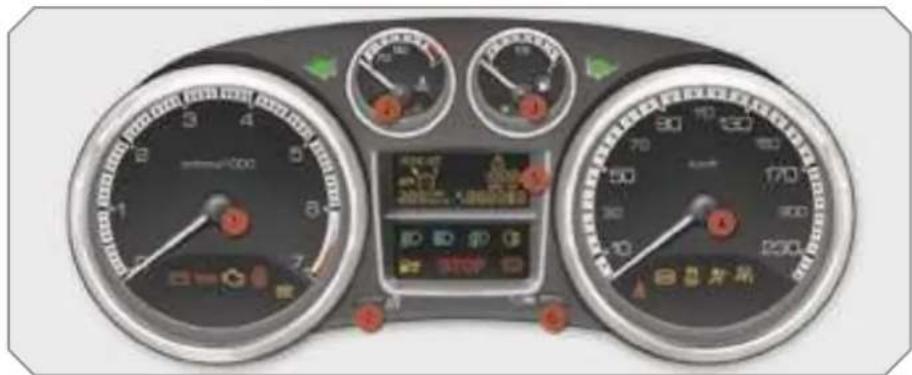
Panel grouping together the vehicle operation indication dials and warning lights.
Dials
1. Rev counter.
Indicates the speed of rotation of the engine (x 1 000 rpm).
2. Coolant temperature.
Indicates the temperature of the engine coolant (°Celsius).
3. Fuel level.
Indicates the quantity of fuel remaining in the tank.
4. Vehicle speed.
Indicates the current speed of the moving vehicle (km/h or mph).
5. Display
6. Display zero reset button.
Resets the selected function to zero (trip distance recorder or service indicator).
7. Instrument panel lighting button.
Adjusts the brightness of the lighting of the instruments and controls.

For further information, refer to the paragraph relating to the button or function and its associated display.
Display

A. Speed limiter
or
Cruise control.
(km/h or mph)
B. Trip distance recorder.
(km or miles)
The following three functions are displayed in succession when the ignition is switched on.
C. Service indicator.
(km or miles) then,
Engine oil level indicator.
then
Distance recorder.
(km or miles)
INSTRUMENTS AND CONTROLS
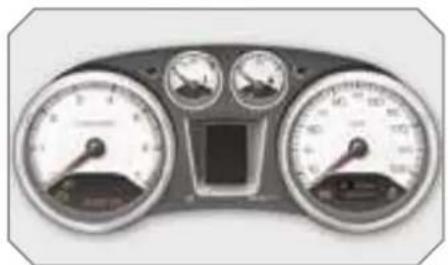
PETROL - DIESEL MANUAL OR 6-SPEED PILOTED MANUAL OR AUTOMATIC GEARBOX INSTRUMENT PANELS
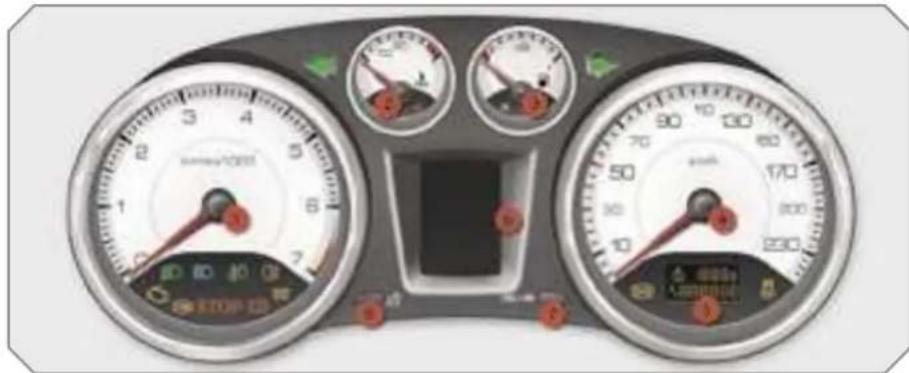
Panel grouping together the vehicle operation indication dials and warning lights.
Dials
1. Rev counter.
Indicates the speed of rotation of the engine (x 1 000 rpm).
2. Coolant temperature.
Indicates the temperature of the engine coolant (°Celsius).
3. Fuel level.
Indicates the quantity of fuel remaining in the tank.
4. Vehicle speed.
Indicates the current speed of the moving vehicle (km/h or mph).
5. Small display.
6. Large display.
7. CHECK/display zero reset button.
Starts a manual CHECK.
Resets the function selected to zero (trip distance recorder or service indicator).
8. Instrument panel lighting button.
Adjusts the brightness of the lighting of the instruments and control:

For further information, refer to the paragraph which relates to the button or function and its associated display.
Displays
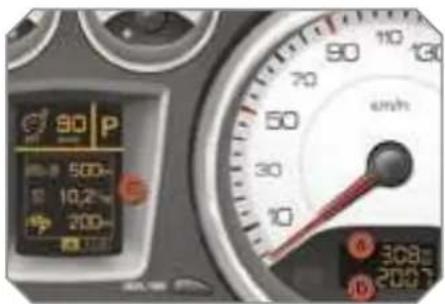
A. Trip distance recorder.
(km or miles)
B. Distance recorder.
(km or miles)
The following two functions are displayed in succession when the ignition is switched on.
C. Service indicator.
(km or miles) then,
Engine oil level indicator.
The following functions are displayed in accordance with the selection.
- Warning lights/CHECK.
- Tyre under-inflation detection.
- Speed limiter/Cruise control.
- 6-speed piloted manual or automatic gearbox.
- Navigation - Guidance/Trip computer information.
INSTRUMENTS AND CONTROLS
Indicator and warning lights
Visual indicators informing the driver that a system is in operation (operation or deactivation indicator lights) or of the occurrence of a fault (warning light).
When the ignition is switched on
The warning lights come on for a few seconds when the vehicle's ignition is switched on.
When the engine is started, these warning lights should switch off.
If they remain on, before moving off, consult the warning light concerned.
Associated warnings
The switching on of certain warning lights may be accompanied by an audible signal and a message on the multifunction display

The warning lights may come on continuously or flash.
Certain warning lights may come on in two different modes. Only by relating the type of lighting to the operating status of the vehicle can it be ascertained whether the situation is normal or whether a fault has occurred.
natural_image
Front view of a car dashboard with multiple gauges and a digital display (no visible text or symbols)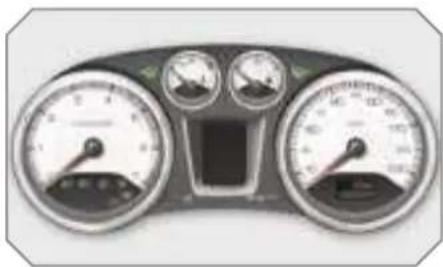
natural_image
Front view of a car dashboard with multiple gauges and a central touchscreen (no visible text or symbols)Operation indicator lights
If one of the following indicator lights cc on, this confirms that the correspond system has come into operatic
Common operation indicator lights

Left-hand direction indicator.

Dipped headlamps.

Main beam headlamps.

Handbrake applied.

Right-hand direction indicator.

Front fog lamps.

Rear fog lamp.

Diesel engine pre-heating
Wait until this is switched off be fore operating the starter.
INSTRUMENTS AND CONTROLS
Specific operation indicator lights
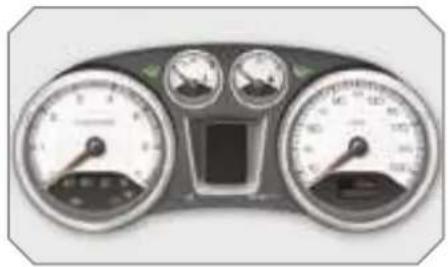
natural_image
Front view of a car dashboard with multiple gauges and a central touchscreen (no visible text or symbols)Foot on brake.

Press the brake pedal to sta the engine with the 6-speed piloted manual gearbox or automatic gearbox.
The other indicator lights appear on the large display, located in the centre of the instrument panel

Automatic locking.
If this is displayed, it indicates that you have activated the automatic locking of the doors and boot while driving.

Automatic wiping.
If this is displayed, it indicate that you have activated the automatic windscreen wiping.

Automatic lighting.
If this is displayed, it indicates that you have activated the automatic switching on of the headlamps
Speed limiter
If this is displayed, it indicates that you have activated the speed limiter mode If this is displayed, it indicates that you can set the speed limiter speed value to be stored

Cruise control.
If this is displayed, it indicates that you have activated the cruise control mode. If this is displayed it indicates that you can set the cruise control speed value to be stored.

6-speed piloted manual gearbox.

This display indicates the position that you have select on the gear selection gate (R, N, A or M)

This display indicates the gear engaged in automatic or manual operating mode (1 to 6)

This display indicates the operating mode selected (automatic or sport)
Automatic gearbox.

This display indicates the position that you have selected on the gear selection gate (P, R, or D)

This display indicates the gear engaged in the automatic or manual operation programme

This display indicates the operating programme selected (automatic, sport, snow or manual)
INSTRUMENTS AND CONTROLS
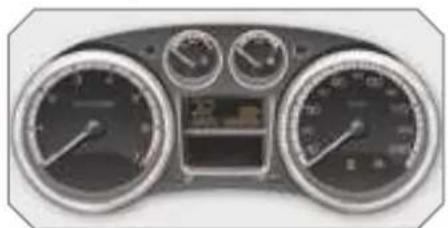
Deactivation warning lights
If one of the following warning lights comes on, this confirms that the corresponding system has been switched off intentionally
natural_image
Front view of a car dashboard with multiple gauges and a central display (no visible text or symbols)Common deactivation warning lights

Passenger's air bag system deactivation.
The passenger's air bag system is put into service automatically when the vehicle is started.
A specific control, located on
the passenger's side of the fascia, permits deactivation of the system. This is confirmed by continuous lighting of this warning light on the instrument panel or on the seat belt and passenger's front air bag warning lights display

Dynamic stability control (ESP/ASR) deactivation
The ESP/ASR system is put into service automatically when the vehicle is started.
A specific button, located in the centre of the fascia, permits deactivation of the system. This is confirmed by continuous lighting of this warning light and of the indicator light on the button.
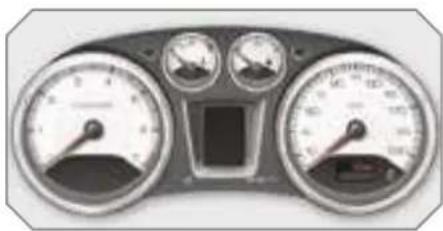
Specific deactivation warning lights
natural_image
Front view of a car dashboard with multiple gauges and a central control panel (no visible text or symbols)The other warning lights appear on the large display, located in the centre of the instrument panel.

Automatic locking.
If this is displayed, it indicates that you have deactivated the automatic locking of the door and boot while driving.

Automatic wiping.
If this is displayed, it indicates that you have deactivated the automatic windscreen wiping.

Automatic lighting.
If this is displayed, it indicates that you have deactivated the automatic switching on of the headlamps.

90
Speed limiter
If this is displayed, it indicates that you have deactivated the speed limiter.

110
Cruise control.
If this is displayed, it indicates that you have deactivated the cruise control.
INSTRUMENTS AND CONTROLS
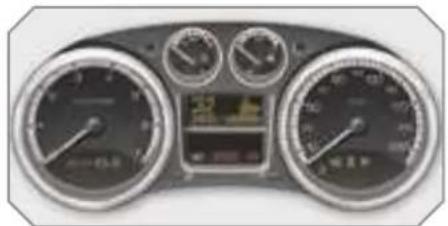
Warning lights
When the engine is running or the vehicle is moving, the lighting of one of the following warning lights indicates the occurrence of a fault requiring intervention on the part of the driver.
natural_image
Front view of a car dashboard with multiple gauges and a digital display (no visible text or symbols)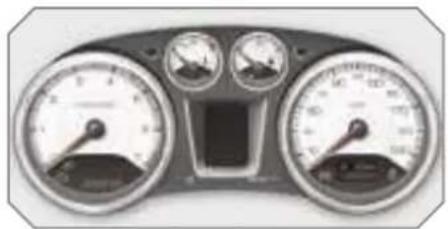
natural_image
Front view of a car dashboard with analog gauges and a central display (no visible text or symbols)
Any fault resulting in the displaying of a warning light must be the subject of further diagnostics by reading the associated message on the multifunction display.
Should you encounter any problems, do not hesitate to contact a PEUGEOT dealer.
Common warning lights
STOP
Central alert.
Lighting is associated with the displaying of another warning light
- punctured wheel
- braking
- power steering
- engine oil pressure
- coolant temperature
stop the vehicle immediately and as safely as possible.

Service.
If this comes on, it indicates the occurrence of a problem in one of the systems which does not have a specific warning light.
In order to identify it, consult the message on the multifunction display
After checking:
- that the doors, boot and bonnet all closed,
- the engine oil level
- the screenwash fluid level
- the remote control battery
- the pressure of the tyres
- the end of saturation of the particle emission filter (Diesel).
for any other situations, contact a PEUGEOT dealer.

Braking.
If this comes on, it indicates the occurrence of a fault in one of the braking systems:
- significant drop in the level in the circuit.
- electronic brake force distribution (EBFD) faulty (simultaneous lighting of the ABS warning light),
stop the vehicle immediately and as safely as possible.
When the vehicle is moving, check that the handbrake is fully released.

Anti-lock braking system (ABS).
If this comes on, it indicates the occurrence of a fault in the anti-aking system
However, this does not prevent operation of the vehicle's assisted braking.

Dynamic stability control (ESP/ASR).
The ESP/ASR system is put into service automatically when
the vehicle is started.
Unless the system has been deactivated, if this warning light and the indicator light on the button come on continuously, this indicates the occurrence of a fault in the ESP/ASR system or in the hill start assistance
INSTRUMENTS AND CONTROLS
Specific warning lights

Engine autodiagnostics system.
If this comes on, it indicates the occurrence of a fault in the en-
gine management system
If it flashes, it indicates the occurrence of a fault in the emission control system

Low fuel level.
If this comes on, it indicates that you only have enough fuel le to drive approximately 30 miles.
(50 km).
The capacity of the tank is approximately 60 litres

Maximum coolant temperature.
If this comes on, it indicates that the temperature in the cooling system is too high. Stop the vehicle immediately and as safely as possible.
natural_image
Front view of a car dashboard with multiple gauges and a digital display (no visible text or symbols)
Engine oil pressure
If this comes on, it indicates the occurrence of a fault in the engine lubrication circuit. Stop the
vehicle immediately and as safely as possible.

Battery charge
If this comes on, it indicates the occurrence of a fault in the battery charging circuit (dirty or
loose terminals, slack or cut alternator belt, ...).

Door open.
A door, the boot or the bonnet* is open:
- if the speed is below 6 mph (10 km/h) this warning light comes on continuous
- if the speed is higher than 6 mph (10 kr this warning light comes on continuous accompanied by an audible sigr

Air bags.
If this comes on, it indicates the occurrence of a fault in one of the air bag or seat belt preten-
sioner systems

Seat belt not fastened/unfastened
If this comes on, it indicates that the driver and/or the fro
passenger has not fastened or has un- fastened his seat belt.
It also indicates that one or more real passengers have unfastened their seat belt.

Water in diesel.
If this comes on, it indicates the presence of water in the diesel filter
There is a risk of damage to the injection system on Diesel engines
* Only with alarm.
INSTRUMENTS AND CONTROLS
Specific warning lights
natural_image
Front view of a car dashboard with analog gauges and a central touchscreen (no visible text or symbols)
Directional headlamps.
If this flashes, it indicates the occurrence of a fault in the directional headlamps system
The other warning lights appear on the large display, located in the centre of the instrument panel
Depending on the seriousness of the fault, they may be displayed in orange or red

The displaying of certain warning lights may be accompanied by an audible signal and a message on the multifunction display.

Certain warning lights may be linked with those of the instrument panel.
If they are linked with the STOP warning light, stop the vehicle immediately and as safely as possible.

Service.
If this is displayed, it indicates the occurrence of a fault in one of the following
- the engine management system
- the emission control system
- the lane departure warning system

Engine autodiagnostics system.
If this is displayed, it indicates the occurrence of a fault in the engine management system.

Battery charge
If this is displayed, it indicates the occurrence of a fault in the battery charging circuit (dirty or
loose terminals, slack or cut alternator belt, ...)

Engine oil pressure.
If this is displayed, it indicates the occurrence of a fault in the engine lubrication circuit. Stop
the vehicle immediately and as safel as possible

Engine oil level
If this is displayed, it indicates an insufficient level of oil in the engine. Stop the vehicle imme-
diately and as safely as possible.

Coolant temperature.
If this is displayed, it indicates that the temperature in the cooling system is too high. Stop
the vehicle immediately and as safel as possible

Coolant level.
If this is displayed, it indicates an insufficient level of coolant in the circuit. Stop the vehicle im-
mediately and as safely as possible
INSTRUMENTS AND CONTROLS

Screenwash fluid level.
If this is displayed, following an action on the wipers stalk, it indicates an insufficient level o
fluid.
Fill the screenwash/headlamp wash fluid reservoir when you stop

Fuel level.
If this is displayed, it indicates that there is only enough fuel remaining to drive approximate
ly 30 miles (50 km)
The capacity of the tank is approximately 60 litres

Electronic immobiliser.
If this is displayed, it indicates the occurrence of a fault in the electronic engine immobiliser
system or that the remote control ba tery is flat

Door open
A door, the boot or the bonnet* is open
- if the speed is below 6 mph (10 km/h) this warning light is displayed in o ange
- if the speed is higher than 6 mph (10 ki this warning light is displayed in red

Air bags.
If this is displayed, it indicates the occurrence of a fault in one of the air bag or pretensionin
seat belt systems.

Braking.
If this is displayed, it indicates the occurrence of a fault in one of the braking systems:
- significant drop in the level in the circuit,
- electronic brake force distribution (EBFD) faulty (simultaneous lighting of the ABS warning light).
Stop the vehicle immediately and as safely as possible.
If the vehicle is moving, check that the handbrake is released fully

Handbrake.
If this is displayed, while the vehicle is moving, it indicates that the handbrake has not been re-
leased fully

Anti-lock braking system (ABS).
If this is displayed, it indicates the occurrence of a fault in the anti-lock braking system.
However, this does not prevent operation of the vehicle's assisted braking.

Dynamic stability control (ESP/ASR).
The ESP/ASR system is put into service automatically when uncle is started.
Unless the system has been deactivated, if this warning light and the indicator light on the button come on, this indicates the occurrence of a fault in the ESP/ASR system or in the hill start assistance.

Ice warning.
If this is displayed, it indicates that there is risk of the formation of ice on the road below a nature of 3 °C
Drive carefully

Power steering.
If this is displayed, it indicates the occurrence of a fault in the power steerin. Stop the vehicle
immediately and as safely as possible
INSTRUMENTS AND CONTROLS

6-speed piloted manual gearbox or automatic gearbox.
If this is displayed, it indicates the occurrence of a fault in the 6-speed piloted manual gearbox or automatic gearbox. The gearbox will then operate in down-grade mode, locked on 3rd gear

Position P or N.
If this is displayed, it indicates that the gear lever must be placed in position P or N in order to start the engine.
Invalid value.
If this is displayed, it indicates the occurrence of a fault in the programme of the 6-speed piloted manual gearbox or automatic gearbox

Visual and/or audible parking assistance.
If this comes on, in forward and or reverse gear, it indicates
fault in the parking assistance system.

Deflated wheel.
If this is displayed, it indicates an insufficient pressure in on or more wheels.
Check the pressure of the tyres as soon as possible

Punctured wheel.
If this is displayed, it indicates that one or more wheels are punctured. Stop the vehicle imely and as safely as possible.
Change the damaged wheel and have repaired by a PEUGEOT dealer

Iyre under-inflation detection.
If this is displayed, it indicates the occurrence of a fault on one sensor or in the tyre under-inflation system
It may also indicate the absence of sensor when the spare wheel, which does not have a sensor, is fitted in place of a puntured wheel

Automatic switching on of the lights.
If this comes on, it indicates the occurrence of a fault in the au-switching on of the lights.
Use the other positions of the lights stalk

Automatic headlamp adjustment.
If this is displayed, it indicates the occurrence of a fault in the automatic headlamp adjustment.

Water in diesel.
If this is displayed, it indicates the presence of water in the diesel filter.
There is a risk of damage to the injection system on Diesel engines.

Particle emission filter (Diesel).
If this is displayed, linked with the service warning light, it indi- he start of saturation of the parti- sission filter or a low diesel additiv air level
As soon as traffic conditions permit, regenerate the filter by driving at a speed of at least 40 mph (60 km/h) until the service warning light is switched off.
If the service warning light is still di played, the additive level is low. Have it topped up by a PEUGEOT dealer without delay
INSTRUMENTS AND CONTROLS
Manual CHECK
System which informs the driver of the warnings present and of the activate or deactivated status of the functions.

With the engine running, to start a manual check, press the "CHECK/000" button on the instrument panel. If no "major" faults have been detected, "CHECK OK" appears on the large instrument panel display.
If a "minor" fault has been detected, the warning lights concerned ther "CHECK OK" appear on the large instrument panel display. Contact a PEUGEOT dealer as soon as possible.
If a "major" fault has been detected, on the warning lights concerned appear on the large instrument panel display. Contact a PEUGEOT dealer without delay
Coolant temperature indicator
System which informs the driver of the changes in the temperature of the engine coolant while driving
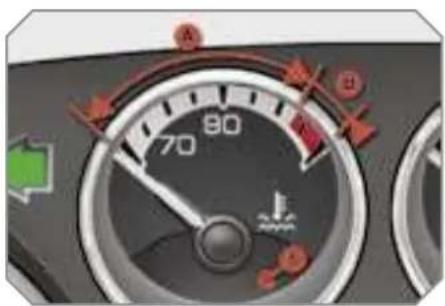
With the engine running, when the needle is
- in zone A, the temperature is correct, - in zone E, the temperature is too high the max temperature warning light 1 and the central STOP warning light come on, accompanied by an audible signal and a message on the mult function display
You MUST stop as soon as it is safe to do so.
Wait a few minutes before switching off the engine.
Contact a PEUGEOT dealer
After driving for a few minutes, the temperature and pressure in the cooling system increase
To top up the level
wait for the engine to cool,
unscrew the cap by two turns to allow the pressure to drop
when the pressure has dropped, remove the cap.
top up the level to the "MAX" mark.

INSTRUMENTS AND CONTROLS
Service indicator
System which informs the driver when the next service is due, in accordance with the manufacturer's servicing schedule.
The point at which the service is due is calculated from the last indicator zero reset. It is determined by two parameters
- the distance travelled
- the time elapsed since the last service
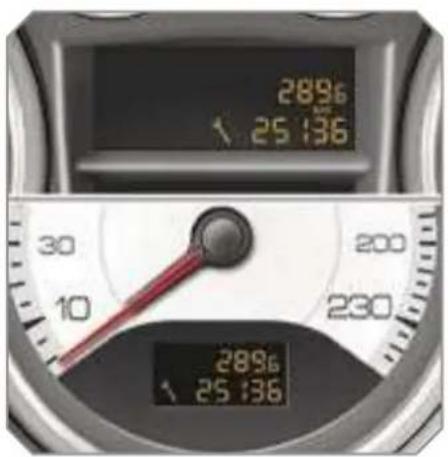
More than 1 800 miles (3 000 km remain before the next service is du When the ignition is switched on, no service information appears on the display
Between 600 miles (1 000 km) and 1 800 miles (3 000 km) remain before the next service is due
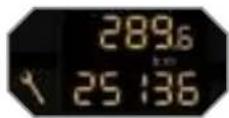
For 5 seconds after the ignition is switched on, the spanner symbolising the service operations comes on. The distance recorder display line indicates the distance remaining before the next service is due.
Example: 2 800 km remain before the next service is due
For 5 seconds after the ignition is switched on, the display indicates:
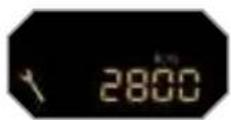
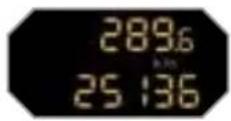
5 seconds after the ignition is switched on, the spanner is switched o; the distance recorder resumes its norma operation. The display then indicates the total and trip distances
Less than 600 miles (1 000 km remain before the next service is due. Example: 900 km remain before the next service is due.
For 5 seconds after the ignition is switched on, the display indicates:
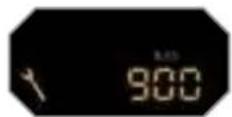
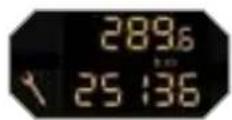
5 seconds after the ignition is switched on, the distance recorder resumes it normal operation. The spanner remains on to indicate that a service must be carried out soon.
INSTRUMENTS AND CONTROLS
Service overdue
For 5 seconds after the ignition is switched on, the spanner flashes to indicate that the service must be carried out as soon as possible.
Example: the service is overdue by 300 miles (km)
For 5 seconds after the ignition is switched on, the display indicates:
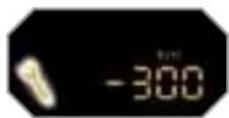
5 seconds after the ignition is switched on, the distance recorder resumes its normal operation. The spanner remains lit.

The distance remaining may be weighted by the time factor, depending on the driver's driving habits. Therefore, the spanner may also come on if you have exceeded the two year service interval.
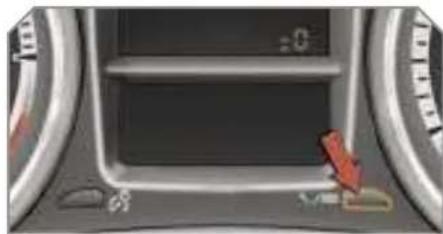
Service indicator zero reset
natural_image
Interior view of a car dashboard with no visible text or symbols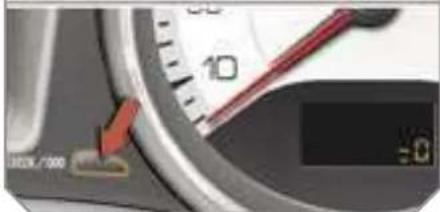
After each service, the service indicator must be reset to zero.
To do this, carry out the following procedure:
switch off the ignition,
press and hold the trip distance recorder zero reset button,
switch on the ignition; the distance recorder display begins a count-down,
when the display indicates "=0", release the button; the spanner disappears

Following this operation, if you wish to disconnect the battery, lock the vehicle and wait at least five minutes for the zero reset to be taken into account.
Retrieving the service information
You can access the service information at any time.
Press the trip distance recorder zero reset button.
The service information is displayed for a few seconds, then disappears.
INSTRUMENTS AND CONTROLS
Engine oil level indicator
System which informs the driver of the validity or invalidity of the engine oil level.
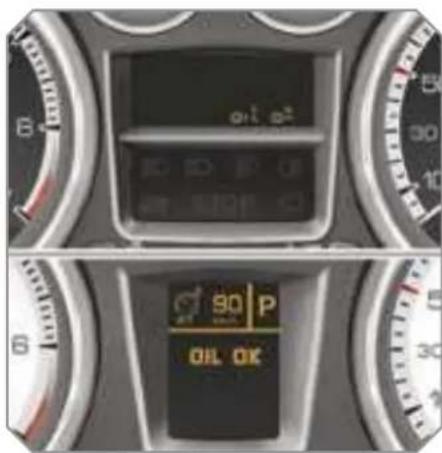
This information is indicated for a fe seconds when the ignition is switche on, after the service information.

The level read will only be correct if the vehicle is on level ground and the engine has been off for more than 15 minutes.
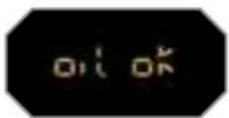
Oil level correct
Lack of oil

This is indicated by the flashing ("OIL", linked with the service warning light, accompanied by an audible signal and message on the multifunction display) If the lack of oil is confirmed by a check using the dipstick, it is essential that the level is topped up to prevent damage to the engine.
Oil level gauge fault
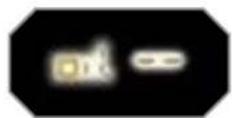
This is indicated by the flashing "OIL --". Contact a PEUGEOT deal
Dipstick
Refer to the "Checks" section to locate the dipstick and the oil filler cap on your engine.
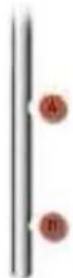
There are 2 marks on the dipstick
- A = max; never exceed this level,
- B = min; top up the level via the oil filler cap, using the type of oil suited to your engine
INSTRUMENTS AND CONTROLS
Total distance recorder
System which measures the total distance travelled by the vehicle during its life
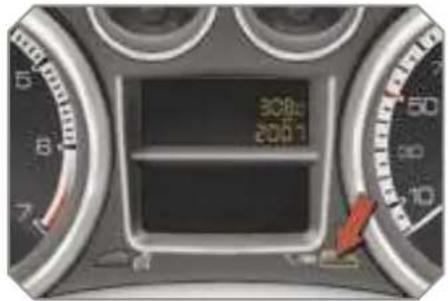
The total and trip distances are displayed for thirty seconds when the ignition is switched off, when the driver's door is opened and when the vehicle is locked or unlocked
Trip distance recorder
System which measures a distance travelled during a day or other period until it is reset to zero by the driver
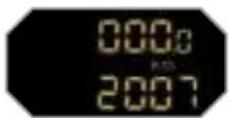
With the ignition on, press the button until zeros appear
Lighting rheostal
System for manual adjustment of the brightness of the instruments and controls in relation to the exterior brightness
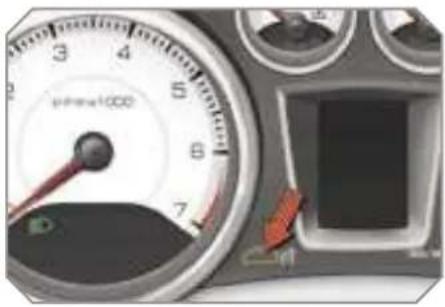
Activation
When the lights are on:
press the button to change the brightness of the instruments and controls.
when the lighting reaches the minimum setting, release the button, then press again to increase it,
or
when the lighting reaches the maximum setting, release the button, then press again to reduce it,
when the lighting reaches the level of brightness required, release the button.
Deactivation
When the lights are off, or in day mode on vehicles fitted with daytime lights pressing the button does not have any effect.
MULTIFUNCTION DISPLAYS
MONOCHROME SCREEN A (without RD4 audio equipment)
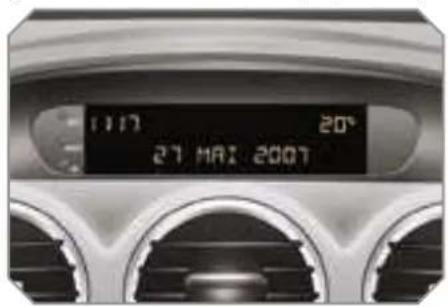
Displays on the screen
This displays the following information:
- the time
- the date
- the outside temperature ^™ (this flashes if there is a risk of ice),
- the status of the accesses (doors, boot, ...),
- the trip computer (refer to the end of the section).
Warning messages (e.g.: "Emission control system faulty") or information messages (e.g.: "Boot open") may appear temporarily. These can be cleared by pressing the "ESC" button.
Controls
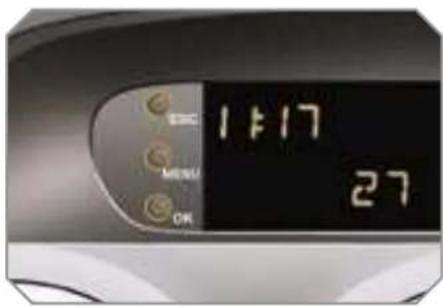
There are three display control buttons
- "ESC' to abandon the operation in progress
- "MENU" to scroll through the menus or sub-menus.
- "OK" to select the menu or sub-menu required
General menu
![[ MENU ] VEHICLE CONFIG](/content/2026/05/791470/images/f32a3252416099c5bb358bfcd236279ad883d8f08526f1894abb4ae842491aa9.jpg)
Press the "MENU" button to scroll through the various menus of the general menu:
- vehicle configuration,
- options,
- display settings,
- languages,
- units.
Press the "OK" button to select the menu required.
MULTIFUNCTION DISPLAYS
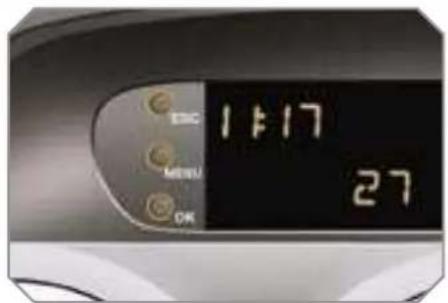
Vehicle configuration
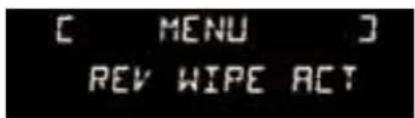
Once the "Vehicle configuration" menu has been selected, you can activate or deactivate the following equipment:
- selective unlocking (refer to the "Access" section)
- wiper linked with reverse gear (refer the "Visibility" section).
- "follow-me-home" and welcome lighting (refer to the "Visibility" section).
- daytime lights (refer to the "Visibility section).
Options
Once the "Options" menu has been selected, you can start diagnostics of the status of the equipment (active, not active, faulty).
Display settings
Once the "Display settings" menu has been selected, you can gain access to the following settings:
- year
- month
-day - hour
- minutes
- 12 or 24 hour mode
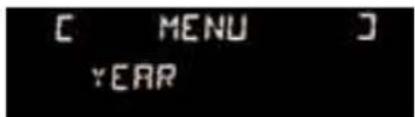
Once you have selected a setting press the "OK" button to change its value.
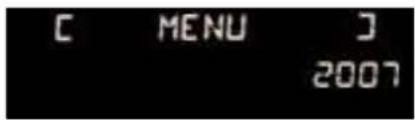
Wait for approximately ten seconds without any action to allow the changed data to be recorded or press the "ESC" button to cancel.
The display then returns to the norma display
Languages
Once the "Languages" menu has been selected, you can change the language used by the display (Français, Italiano, Nederlands, Portugues, Portugues-Brasil, Deutsch, English, Espanol).
Units
Once the "Units" menu has been selected, you can change the units of the following parameters:
- temperature (°C or °F)
- fuel consumption (l/100 km, mpg o km/l).

For safety reasons, it is imperative that configuration of the multifunction displays by the driver takes place when stationary.
MULTIFUNCTION DISPLAYS
MONOCHROME SCREEN A
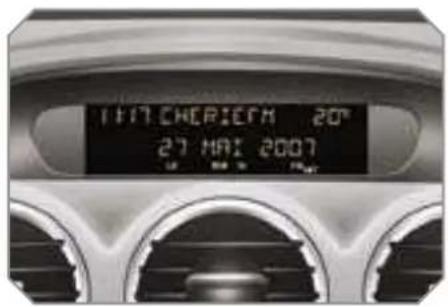
Displays on the screen
This displays the following information:
- the time
- the date
- the outside temperature* (this flashes if there is a risk of ice),
- the status of the accesses (doors, boot, ...),
- the audio sources (radio, CD, ...)
- the trip computer (refer to the end of the section).
Warning messages (e.g.: "Emission control system faulty") or information messages (e.g.: "Boot open") may appear temporarily. These can be cleared by pressing the "ESC" button.
Controls
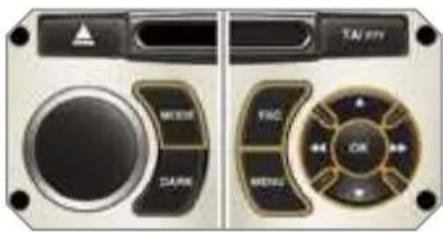
From the RD4 audio equipment control panel, you can:
press the "MENU" button to gain access to the general menu,
press the "▲" or "▼" buttons to scroll through the items on the screen.
press the 'MODE" button to change the permanent application (trip computer, audio source, ...).
press the "◀" or "▶" buttons to change a setting value,
press the 'OK' button to confirm, or
press the "ESC" button to abandon the operation in progress.
General menu
![[ MENU ] VEHICLE CONFIG](/content/2026/05/791470/images/c8c97cb9edb47e0c64269eaf1038c4ddd26bef0504f9b84ac3277873f9b5864b.jpg)
Press the "MENU" button to gain access to the general menu, then press the "▲" or "▼" buttons to scroll through the various menus:
- radio-CD,
- vehicle configuration,
- options,
- display settings,
- languages,
- units.
Press the "OK" button to select the menu required.
Radio-CD
With the RD4 audio equipment switched on, once the "Radio-CD" menu has been selected you can activate or deactivate the functions linked with use of the radio (RDS, REG), the CD or the CD changer (introscan, shuffle, CD repeat).
For further details concerning the "Radio-CD" application, refer to the RD4 part of the "Audio and Telematics" section.
MULTIFUNCTION DISPLAYS
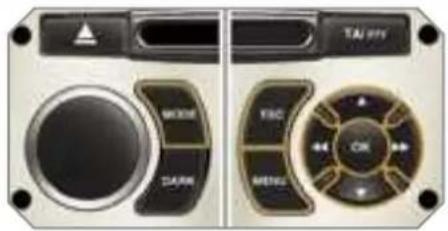
Vehicle configuration
![[ MENU ] REV WIPE ACT](/content/2026/05/791470/images/0c59551cda78355242d5164ab65c38b2c7f7c3025100979c1d746b2e5e3008aa.jpg)
Once the "Vehicle Configuration" menu has been selected, you can activate or deactivate the following equipment:
- selective unlocking (refer to the "Access" section),
- wiper linked with reverse gear (refer to the "Visibility" section).
- "follow-me-home" and welcome lighting (refer to the "Visibility" section),
- daytime lights (refer to the "Visibilit section).
Options
Once the "Options" menu has been selected, you can start diagnostics of the status of the equipment (active, not active, faulty).
Display settings
Once the "Display settings" menu has been selected, you can gain access to the following settings:
- year
- month
-day - hour
- minutes
- 12 or 24 hour mode
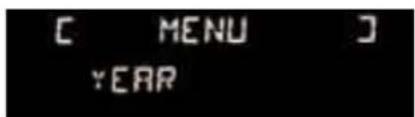
Once you have selected a setting press the "◀" or "▶" buttons to change its value.
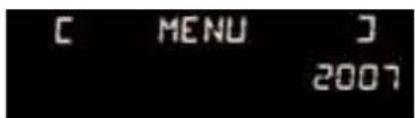
Press the "▲" or "▼" buttons to switch respectively to the previous or next setting.
Press the "OK" button to record the change and return to the normal display or press the "ESC" button to cancel.
Languages
Once the "Languages" menu has been selected, you can change the language used by the display (Français, Italiano, Nederlands, Portugues, Portugues-Brasil, Deutsch, English, Espanol)
Units
Once the "Units" menu has been selected, you can change the units the following parameters:
- temperature (°C or °F)
- fuel consumption (l/100 km, mpg or kn

For safety reasons, it is imperative that configuration of the multifunction displays by the driver takes place when stationary.
MULTIFUNCTION DISPLAYS
MONOCHROME SCREEN C AND COLOUR SCREEN C
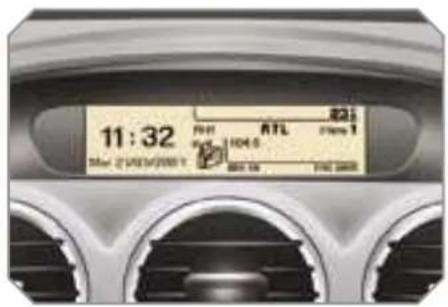
Displays on the screen
This displays the following information:
- the time
- the date
- the outside temperature* (this flashes if there is a risk of ice),
- the status of the accesses (doors, boot, ...),
- the audio sources (radio, CD, ...)
- the trip computer (refer to the end of the section).
Warning messages (e.g.: "Emission control system faulty") or information messages (e.g.: "Automatic switching on of the headlamps activated") may appear temporarily. These can be cleared by pressing the "ESC" button.
Controls
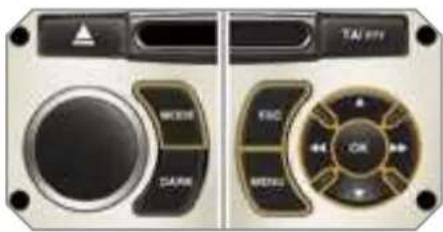
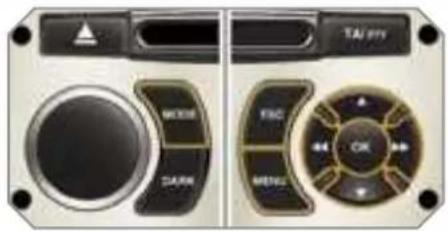
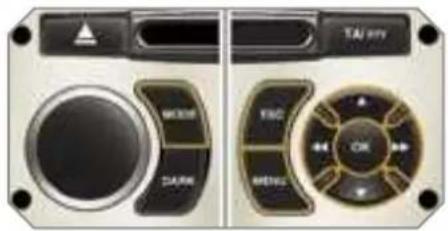
From the RD4 audio equipment control panel, you can
press the "MENU" button to gain access to the general menu,
press the "▲" or "▼" buttons to scroll through the items on the screen.
press the "MODE" button to change the permanent application (trip computer, audio source, ...).
press the "◀" or "▶" buttons to change a setting value,
press the 'OK" button to confirm, or
press the 'ESC' button to abandon the operation in progress.
General menu
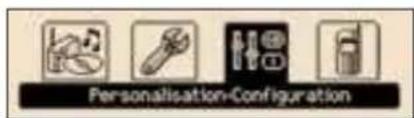
Press the "MENU" button to gain access to the general menu:
- audio functions,
- vehicle diagnostics,
- personalisation-configuration,
- telephone (hands-free kit).
Press the "▲" or "▼" buttons to select the menu required, then confirm by pressing the 'OK' button.

"Audio functions" menu
With the RD4 audio equipment switched on, once this menu has been selected you can activate or deactivate the functions linked with use of the radio (RDS, REG, RadioText), the CD or the CD changer (introscan, shuffle, CD repeat
For further details concerning the "Audio functions" application, refer to the RD4 part of the "Audio and Telematics" section.
MULTIFUNCTION DISPLAYS

"Vehicle diagnostics" menu
Once this menu has been selected, you can consult information concerning the status of the vehicle, such as the warnings log.
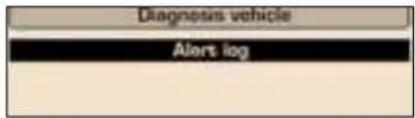
Warnings log
This summarises the active warning messages, displaying them in success on the multifunction display
Press the "MENU" button to gain access to the general menu.
Press the arrows, then the "OK" button to select the "Vehicle diag nostics" menu.
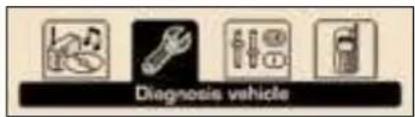
On the "Vehicle diagnostics" menu, select the following application:

"Personalisation-Configuration" menu
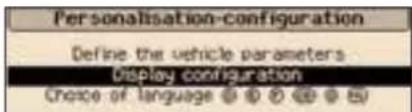
Once this menu has been selected, you can gain access to the following fun tions:
- define the vehicle parameters
- display configuration
- selection of the language
Define the vehicle parameters
Once this menu has been selected, you can activate or deactivate the following equipment:
- selective unlocking (refer to the "Access" section),
- wiper linked with reverse gear (refer the "Visibility" section).
- "follow-me-home" and welcome light (refer to the "Visibility" section
- ambient lighting (refer to the "Visibility section)
- daytime lights (refer to the "Visibili section).
MULTIFUNCTION DISPLAYS
Example: setting of the duration of the "follow-me-home" lighting
Press the "▲" or "▼" buttons, then the "OK" button to select the menu required.
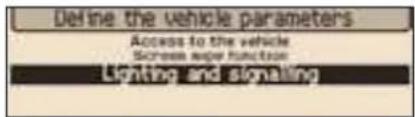
Press the "▲" or "▼" buttons, then the "OK" button to select the "Folow-me-home lighting" line.
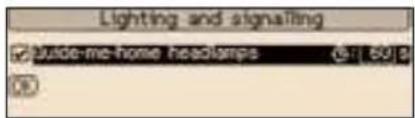
Press the "◀" or "▶" buttons to set the value required (15, 30 or 60 seconds), then press the 'OK' button to confirm.
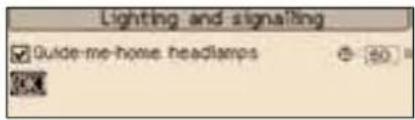
Press the "▲" or "▼" buttons, then the "OK" button to select the "OK" box and confirm or press the 'ESC' button to cancel.
Display configuration
Once this menu has been selected, you can gain access to the following settings:
- brightness-video setting
- date and time setting
- selection of the units
Selection of the language
Once this menu has been selected, you can change the language used by the display (Deutsch, English, Espanol, Français, Italiano, Nederlands, Portugues, Portugues-Brasil).

"Telephone" menu
With the RD4 audio equipment switched on, once this menu has been selected you can configure your Bluetooth hands-free kit (matching), consult the various telephone directories (calls log, services, ...) and manage your communications (pick up, hang up, call waiting, secret mode, ...).
For further details concerning the "Telephone" application, refer to the RD4 par of the "Audio and Telematics" section

For safety reasons, it is imperative that configuration of the multifunction displays by the driver takes place when stationary.
MULTIFUNCTION DISPLAYS
RETRACTABLE 16/9 COLOUR SCREEN
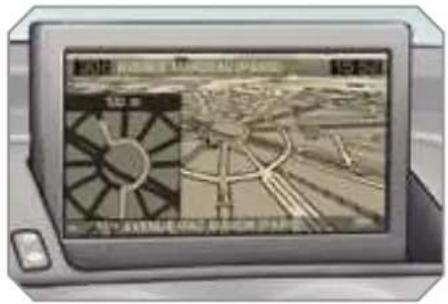
Displays on the screen
When the screen is open, it displays the following information automatically and directly:
- the time
- the date
- the outside temperature (if there is a risk of ice, you are warned by a message)
Warning messages (e.g.: "Fuel level low") and vehicle function status messages (e.g.: "Automatic lighting active") may appear temporarily. These can be cleared by pressing the "ESC" button.
General menu
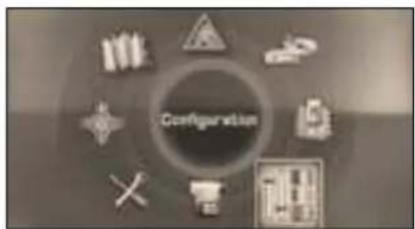
When the RT4 GPS audio/telephone is switched on, select the menu which corresponds to the following applications:
- the satellite navigation system
- the guidance on the map
- the traffic information
- the audio sources (radio, CD, ...)
- the telephone and the phonebooks
- the configuration of the screen and the setting of the vehicle equipment parameters.
- the displaying of videos
- the vehicle diagnostics
Controls
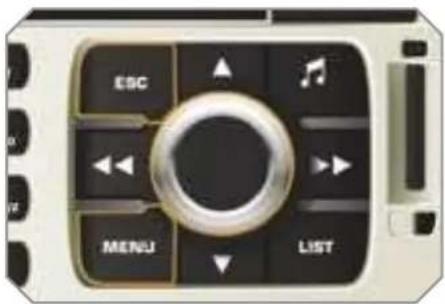
From the RT4 GPS audio/telephone control panel, to select one of the applications
press the "MENU" button to gain access to the general menu,
turn the navigator to move the select
press the navigator to confirm the selection.
or
press the "ESC" button to abandon the operation in progress and return to the previous display
For further details regarding these applications, refer to the RT4 part of the "Audio and Telematics" section
MULTIFUNCTION DISPLAYS
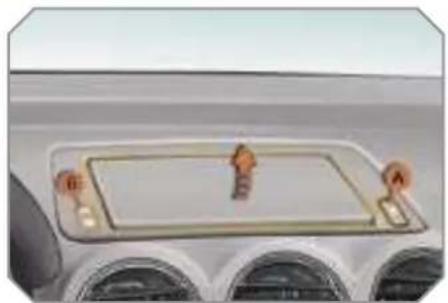
natural_image
Top-down view of a car air conditioning unit with labeled buttons (A, B) and a hand pointing to the dashboard area (no text or symbols beyond labels)Access to the screen
This screen is opened and stored automatically
However, you can also open it, store it and adjust it using the various manual controls:
- opening or storing by means of control A.
- angle adjustments by means of control B.
It is also fitted with safety auto-reverse protection.
Opening the screen
With the screen stored, press control A to open it.
The screen opens automatically whe the ignition is switched on, when the audio/telephone is switched on, when an outgoing telephone call is made, when a voice command is given and when a warning message linked with the STOP warning light is received.

If you close the screen during operation of the audio/telephone, it will only re-open automatically when an outgoing telephone call is made, when a voive command is given or when a warning message linked with the STOP warning light is received.
Closing the screen
With the screen open, press control A to store it.
The screen is stored automatically when the ignition is switched off, after approximately three seconds, if the audio/telephone is off.
Safety auto-reverse
If the screen meets an obstacle as opens or closes, the movement stop immediately and is reversed by a fe millimetres.
After clearing the obstacle, issue the command required again.

If you wish the screen to continue to open or close automatically when the audio/telephone is switched on or off, the screen must not be closed when the audio/telephone is operating.
Adjusting the position of the screen
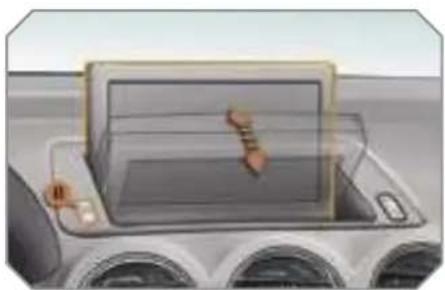
natural_image
Interior view of a car dashboard with a transparent display case and control panel (no visible text or symbols)When the screen is open, you can adjust it precisely in different ways:
press the corresponding part of control B to move the screen toward you or towards the windscreen
or
push or pull the screen gently by hand
Storing the position of the screen
The system has four pre-set position in its memory
Each time the screen is closed, the system stores the last position of the screen.
Each time the screen is re-opened, the system returns the screen to the pre-se position closest to that stored
MULTIFUNCTION DISPLAYS
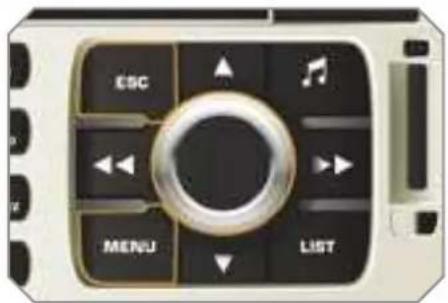

"Configuration" menu
Press the "MENU" button on the RT4 GPS audio/telephone to gain access to the general menu.
Turn the navigator to select the "Configuration" menu, then press the navigator to confirm.
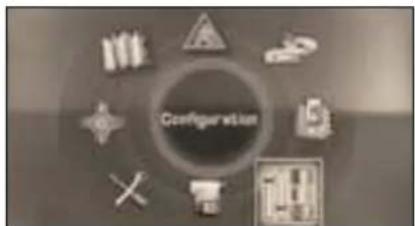
Once this menu has been selected, you can gain access to the following fur tions:
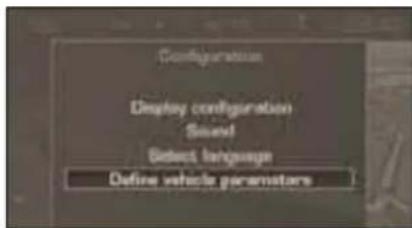
Define the vehicle parameters
Once the "Define the vehicle parameter menu has been selected, you can activ or deactivate certain driving and com equipment"
- selective unlocking (refer to the "Access" section)
- wiper linked with reverse gear (refer the "Visibility" section).
- follow-me-home and welcome lighting (refer to the "Visibility" section)
- ambient lighting (refer to the "Visibility" section)
- daytime lights (refer to the "Visibility section),
- directional headlamps (refer to the "Visibility" section).
Example: setting the duration of the follow-me-home lighting
Turn the navigator to select the "Lighting configuration" menu, then press the navigator to confirm.
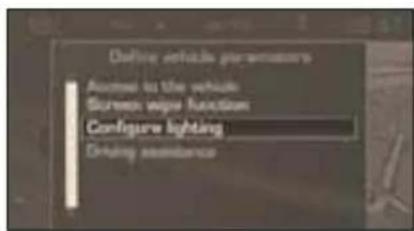
Select the line "Duration of follow-me-home lighting" then confirm.
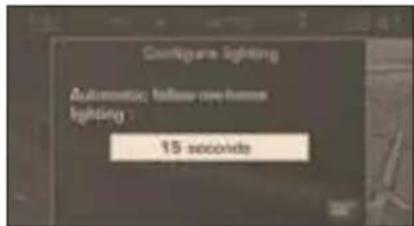
Select the duration then press the navigator.
Turn the navigator to set the value required (15, 30 or 60 seconds), then press the navigator.
Select the "OK" box, then confirm.
MULTIFUNCTION DISPLAYS
Display configuration
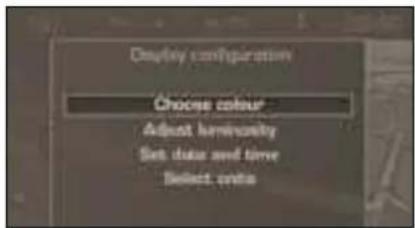
Once the "Display configuration" menu has been selected, you gain access to the following parameters:
- selection of the palette of colours available for the display
- setting of the brightness and brilliance of the display
- setting of the date and time (12 or 24 hour mode, adjustment of the minutes on GPS).
- selection of the units (temperature in °Celsius or °Fahrenheit; consumption in l/100 km or mpg or km/l).
Selecting the the language
Once the "Language selection" menu has been selected, you gain access to the following parameters:
- selection of the display language (Français, English, Italiano, Portugues Espanol, Deutsch, Nederlands
- selection of the language used for the information and voice commands (Français, English, Italiano, Portugues Espanol, Deutsch, Nederlands).
Sounds
Once the "Sounds" menu has been selected, you gain access to the following parameters:
- setting of the voice commands
- setting of the voice synthesiser (volum male or female
- activation of the auxiliary input AUX

For safety reasons, it is imperative that configuration of the multifunctions displays by the driver takes place when stationary.
MULTIFUNCTION DISPLAYS

"Vehicle diagnostics" menu
Press the "MENU" button to gain access to the general menu
Turn the navigator and press it to select the "Vehicle diagnostics" menu
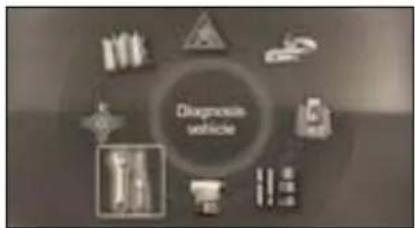
On the "Vehicle diagnostics" menu, select one of the following applications:
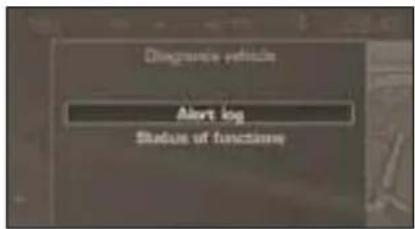
Warnings log
This summarises the active warning messages, displaying them in success on the multifunction display.
Status of the functions
This summarises the active or inactive status of the functions present on the vehicle.
2
MULTIFUNCTION DISPLAYS
TRIP COMPUTER
System which provides current information concerning the route travellec (range, consumption, ...).
Monochrome screen A
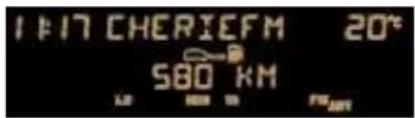
Data displays
natural_image
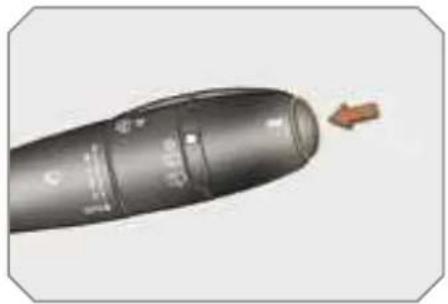
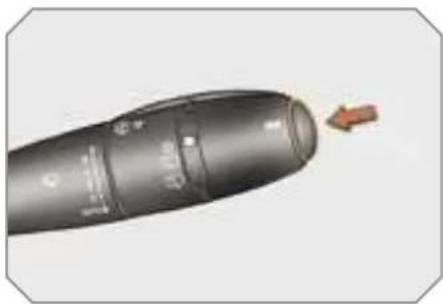
Illustration of a black cylindrical object with a small orange arrow pointing to it (no text or symbols)Press the button, located at the end of the wipers stalk, to display the various items of trip computer data in succession
The trip computer data is the following:
- the range
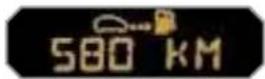
- the current consumption

- the distance travelled
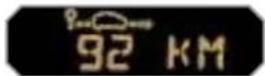
- the average consumption

- the average speed
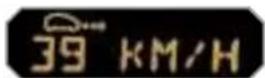
The next press then returns you the normal display
Zero reset
natural_image
Close-up of a black cylindrical device with a plus sign and arrow, no visible text or symbols on the device itself.Press the control for more than two seconds to reset the distance travelled, the average consumption and the average speed to zero
MULTIFUNCTION DISPLAYS
A few definitions...
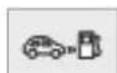
Range
(km or miles)
This indicates the distance which can still be travelled
with the fuel remaining in the tank is relation to the average consumption over the last few miles (kilometres) travelled.

This figure may increase following a change in the style of driving or the relief, resulting in a significant change in the current consumption.
When the range falls below 20 miles (30 km), dashes are displayed. After filling with at least 5 litres of fuel, the range is recalculated and is displayed when it exceeds 60 miles (100 km).

If dashes are displayed continuously while driving in place of the digits, contact a PEUGEOT dealer.

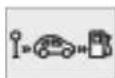
Current consumption
(l/100 km or km/l or mpg)
This is the average quantity of fuel consumed during the last few seconds.

This function is only displayed from 20 mph (30 km/h).
Average consumption
(l/100 km or km/l or mpg)
This is the average quantity of fuel consumed since the last trip computer zero reset.

Average speed
(km/h or mph)
This is the average speed calculated since the last trip computer zero reset (ignition on).
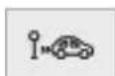
Distance travelled
(km or miles)
This indicates the distance travelled since the last trip computer zero reset.

Distance remaining to
destination
(km or miles)
This is the distance remaining to be travelled to the final destination. It is either calculated instantly by the navigation system, if guidance is activated, or entered by the user
If the distance is not entered, dash are displayed in place of the digits.
MULTIFUNCTION DISPLAYS
TRIP COMPUTER
System which provides current information concerning the route travelled (range, consumption, ...).
Monochrome screen C and colour screen C
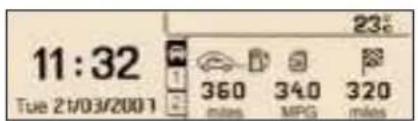
Instrument panel large display
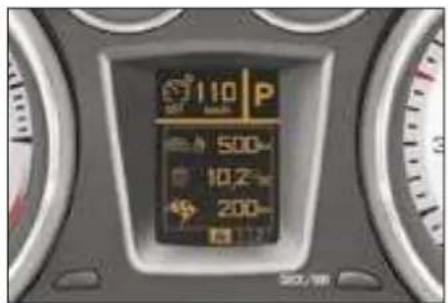

Depending on your vehicle's equipment, the trip computer information appears on the screen or on the large display on the instrument panel.
Data displays
natural_image
Close-up of a black cylindrical object with a small orange arrow pointing to it, no visible text or symbols.Press the button, located at the end of the wipers stalk, to display the various trip computer tabs in successio
- the current information ta with:
- the range,
• the current consumption
• the distance remaining to be travelled,

- the route "1" tab with:
• the distance travelled, - the average consumption,
• the average speed, for the first route.

- the route "2" tab with:
• the distance travelled,
• the average consumption,
• the average speed, for the second route.
Pressing the button again returns you to the normal display.
Route zero reset
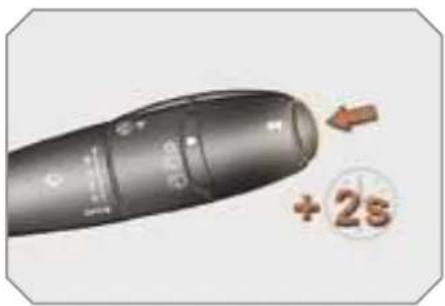
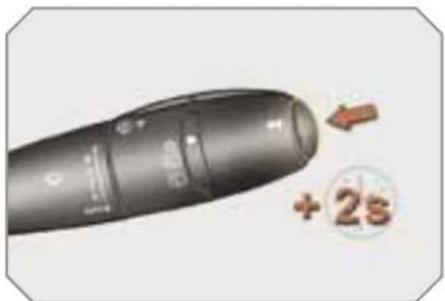
natural_image
Close-up of a black handheld device with a circular inset showing a brown arrow and the text '+ 2s' (no readable text or symbols on the device itself)When the route required is displayed press the control for more than tw seconds.
Routes "1" and "2" are independent but their use is identical.
Route "1" permits, for example, daily calculations, and route "2" monthly calculations.
MULTIFUNCTION DISPLAYS
A few definitions...
Range
(km or miles)
This indicates the distance which can still be travelled
with the fuel remaining in the tank is relation to the average consumption over the last few miles (kilometres) travelled.

This figure may increase following a change in the style of driving or the relief, resulting in a significant change in the current consumption.
When the range falls below 20 miles (30 km), dashes are displayed. After filling with at least 5 litres of fuel, the range is recalculated and is displayed when it exceeds 60 miles (100 km).

If dashes are displayed continuously while driving in place of the digits, contact a PEUGEOT dealer.

Current consumption
(l/100 km or km/l or mpg)
This is the average quantity of fuel consumed during the last few seconds.

This function is only displayed from 20 mph (30 km/h).
Average consumption
(l/100 km or km/l or mpg)
This is the average quantity of fuel consumed since the last trip computer zero reset.

Average speed
(km/h or mph)
This is the average speed calculated since the last trip computer zero reset (ignition on).
Distance travelled
(km or miles)
This indicates the distance travelled since the last trip computer zero reset.

Distance remaining to
destination
(km or miles)
This is the distance remaining to be travelled to the final destination. It is either calculated instantly by the navigation system, if guidance is activated, or entered by the user
If the distance is not entered, dash are displayed in place of the digits.
COMFORT
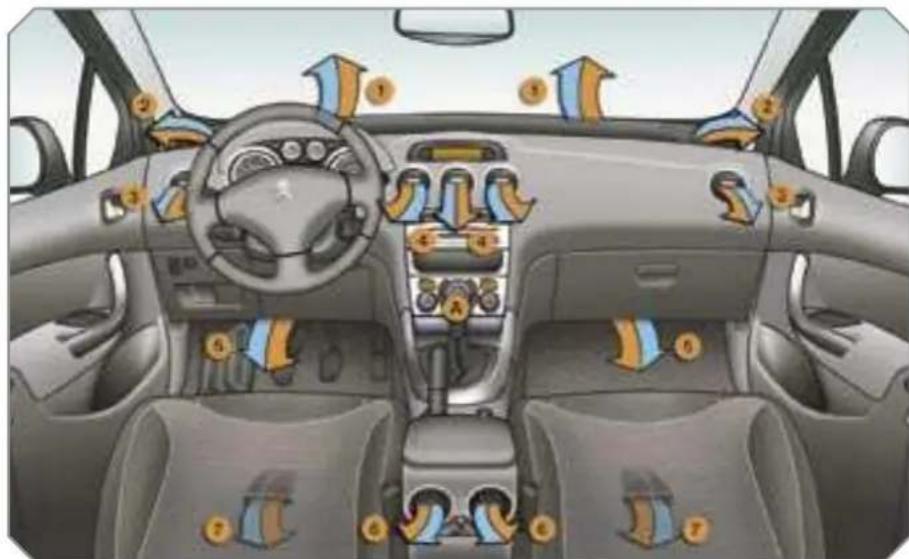
VENTILATION
System which creates and maintains comfortable conditions in the vehicle passenger compartment.
Air intake
The air circulating in the passenger compartment is filtered and originates either from the outside via the grille located at the base of the windscreen or from the inside in air recirculation mode.
Air treatment
The incoming air follows various routes depending on the controls selected by the driver:
- direct arrival in the passenger compartment (air intake)
- passage through a heating circuit (heating)
- passage through a cooling circuit (air conditioning).
The temperature control enables you to obtain the level of comfort required by mixing the air of the various circuits
The air distribution control enables you to diffuse the air in the passenger compartment combining several air vents
The air flow control enables you to increase or reduce the speed of the ventilation blower
Control panel
The controls of this system are grouped together on control panel A on the centre console. Depending on the mode the functions offered are:
- the level of comfort required
- the air flow
- the air distribution
- the de-icing and demisting
- the manual or automatic air conditioni controls
Air diffusion
1 Windscreen de-icing or demisting vents
2. Front side window de-icing or demisting vents.
3. Side adjustable and closing vents.
4. Central adjustable and closing vents
5. Air outlets to the front footwells.
6. Adjustable and closing vents for the rear passengers.
7. Air outlets to the rear footwells.
COMFORT

RECOMMENDATIONS FOR VENTILATION AND AIR CONDITIONING
In order for these systems to be fully effective, follow the operation and maintenance rules below:
If the interior temperature remains very high after the vehicle has been parked in the sun for a considerable time, do not hesitate to ventilate the passenger compartment for a few minutes.
Place the air flow control at a sufficient level to provide an adequate renewal of air in the passenger compartment.
To obtain an even air distribution, take care not to obstruct the exterior air intake grilles located at the base of the windscreen, the nozzles, the vents and the air outlets, as well as the air extractor located in the boot.
Do not cover the sunshine sensor, located on the fascia; this is used for regulation of the air conditioning system.
Operate the air conditioning system for 5 to 10 minutes, once or twice a month to keep it in perfect working order.
Ensure that the passenger compartment filter is in good condition and have the filter elements replaced regularly (refer to the "Checks" section).
We recommend the use of a combined passenger compartment filter. Thanks to its second special active filter, it contributes to the purification of the air breathed by the occupants and the cleanness of the passenger compartment (reduction of allergic symptoms, bad odours and greasy deposits).
To guarantee correct operation of the air conditioning system, you are also advised to have it checked regularly.
If the system does not produce cold air, do not use it and contact a PEUGEOT dealer.
When towing the maximum load on a steep gradient in high temperatures, switching off the air conditioning permits the recovery of engine power and therefore improvement of the towing capacity.
The condensation created by the air conditioning results in a discharge of water under the vehicle which is perfectly normal.

The air conditioning system does not contain chlorine and does not present any danger to the ozone layer.
COMFORT
HEATING/VENTILATION
natural_image
Three circular industrial control knob holders with labeled buttons (1, 2, 3) and no visible text or symbols on the surfaces.MANUAL AIR CONDITIONING
natural_image
Three circular industrial control knobs with yellow indicator lights, no visible text or symbolsThe heating/ventilation or air conditizing systems can only operate with the engine running.
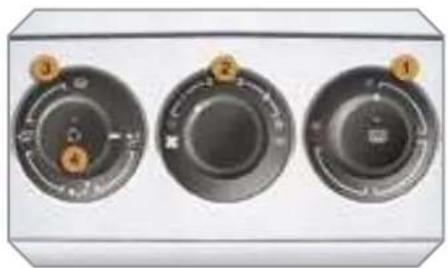
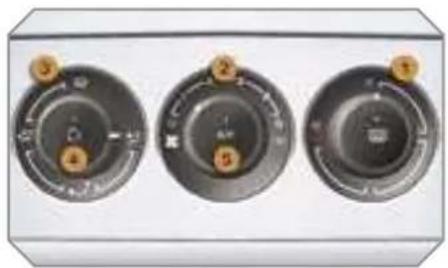
1. Temperature adjustment

Turn the dial from blue (cold) to red (hot) to adjust the temperature to your requirements.
2. Air flow adjustment

Turn the dial from position 1 to position 5 to obtain comfortable air flow

If you place the air flow control in position 0 (deactivation of the system), the temperature is no longer maintained at a comfortable level. However, a slight flow of air, due to the movement of the vehicle, can still be felt.
3. Air distribution adjustment

Windscreen and side window

Windscreen, side windows an footwells

Footwells. (vents closed)

Central and side vents.

The air distribution can be adapted by placing the dial in an intermediate position.
4. Air intake/Air recirculation
The intake of exterior air prevents mistill of the windscreen and side windows
The recirculation of interior air insulates the passenger compartment from exterior odours and smoke
Return to exterior air intake as soon as possible to prevent deterioration of the the air quality and avoid misting.

Press the button to recirculate the interior air. The indicator light comes on to confirm this
Press the button again to permit the intake of exterior air. The indicator light switches off to confirm this.
COMFORT
De-icing - Demisting
To quickly de-ice or demist the wind green and side windows:
place the air intake contro 4 in the "Exterior air intake" position
place the air distribution dial 3 in the "Windscreen position"
place the temperature 1 and air flow 2 dials at maximum,
close the central vents,
above 0 °C, switch on the air con-
tioning by pressing th "A/C" button
5. Air conditioning On/Off

The air conditioning is designed to operate effectively in all seasons, with the windows closed.
It enables you to:
- lower the temperature, in summer
- increase the effectiveness of the demisting in winter, above 0 °C
Switching on
Press the "A/C" button, the associated indicator light comes on
The air conditioning does not operate when the air flow adjustmen control 2 is in position "0".
Switching off
Press the "A/C" button again, the associated indicator light switches c
REAR SCREEN DE-ICING

The control button is located on the heating or air conditioning system control panel.
Switching on
The rear screen de-icing can only operate when the engine is running
Press this button to de-ice the re-screen and the exterior mirrors. The indicator light associated with the button comes on.
Switching off
The de-icing switches off automatically to prevent an excessive consumption of current
It is possible to stop the de-icing operation before it is switched off a tomatically by pressing the button again. The indicator light associated with the button switches off.

If the engine is switched off before the de-icing is switched off automatically, de-icing will resume next time the engine is switched on.

Switch off the de-icing of the rear screen and exterior mirrors as soon as you consider this necessary as lower current consumption results in reduced fuel consumption.
COMFORT
De-icing - Demisting
To quickly de-ice or demist the wind green and side windows:
place the air intake contro 4 in the "Exterior air intake" position
place the air distribution dial 3 in the "Windscreen position"
place the temperature 1 and air flow 2 dials at maximum,
close the central vents,
above 0 °C, switch on the air con-
tioning by pressing th "A/C" button
5. Air conditioning On/Off

The air conditioning is designed to operate effectively in all seasons, with the windows closed.
It enables you to:
- lower the temperature, in summer
- increase the effectiveness of the demisting in winter, above 0 °C
Switching on
Press the "A/C" button, the associated indicator light comes on
The air conditioning does not operate when the air flow adjustmen control 2 is in position "0".
Switching off
Press the "A/C" button again, the associated indicator light switches c
REAR SCREEN DE-ICING

The control button is located on the heating or air conditioning system control panel.
Switching on
The rear screen de-icing can only operate when the engine is running
Press this button to de-ice the re-screen and the exterior mirrors. The indicator light associated with the button comes on.
Switching off
The de-icing switches off automatically to prevent an excessive consumption of current
It is possible to stop the de-icing operation before it is switched off a tomatically by pressing the button again. The indicator light associated with the button switches off.

If the engine is switched off before the de-icing is switched off automatically, de-icing will resume next time the engine is switched on.

Switch off the de-icing of the rear screen and exterior mirrors as soon as you consider this necessary as lower current consumption results in reduced fuel consumption.
DUAL ZONE AUTOMATIC AIR CONDITIONING
natural_image
Front view of a dual-chamber air conditioner unit with digital dials and rotary buttons (no visible text or symbols)The air conditioning only operates when the engine is running
Automatic operation
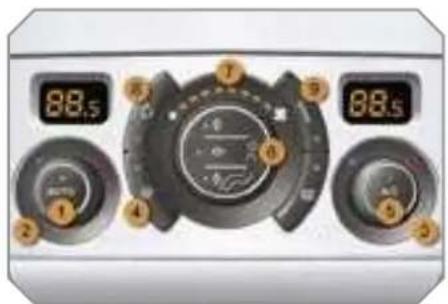
1. Automatic comfort programme

Press the "AUTO" button. The indicator light on the button comes on.
We recommend the use of this mod it permits automatic and optimised adjustment of all of the functions, passenger compartment temperature, air flow, air distribution and air recirculation, in accordance with the comfort value that you have chosen.
This system is designed to operate effectively in all seasons, with the windows closed.

When the engine is cold, to prevent too great a distribution of cold air, the air flow will reach its optimum level gradually.
In cold weather, it favours the distribution of warm air to the windscreen, side windows and footwells only.
2. Driver's side adjustment
3. Passenger side adjustment

The driver and his front passenger can each adjust the temperature to their requirements
The value indicated on the display corresponds to a level of comfort and not to a temperature in degrees Celsius or Fahrenheit.
Turn control 2 or 3 to the left or 1 the right respectively to decrease or increase this value.
A setting around the value 21 provides optimum comfort. However, depending on your requirements, a setting between 18 and 24 is normal.
You are advised to avoid a left/right setting difference of more than 3.

On entering the vehicle, if the interior temperature is much colder or warmer than the comfort value, there is no need to change the value displayed in order to obtain the comfort required. The system corrects the difference in temperature automatically and as quickly as possible.
4. Automatic visibility programme

The automatic comfort programme may not be sufficient to quickly demist or de-ice the windscreen and side windows (humidity, several passen-
etc.).
In this case, select the automatic visibility programme.
The system automatically controls the air conditioning, the air flow and the air intake and provides optimum distribution of the ventilation to the windscreen and side windows.
To switch it off, press the "visibility" button again or press the "AUTO" button, the indicator light on the button switches off and the indicator light on the "AUTO" button comes on.
COMFORT
Manual operation
If you wish, you can make a different choice from that offered by the system by changing a setting. The other functions will still be controlled automatically
Pressing the "AUTO" button returns the system to completely automatic operation.

For maximum cooling or heating of the passenger compartment, it is possible to exceed the minimum value 14 or the maximum value 28.
Turn control 2 or 3 to the left until "LO" is displayed or to the right until "HI" is displayed.
5. Air conditioning On/Off

Press this button to switch off the air conditioning.
Switching the system off could result in discomfort (humidity, condensation)
Press this button again to return 1 automatic operation of the air cor ditioning. The indicator light on th "A/C" button comes on
6. Air distribution adjustment

Press one or more buttons to direct the air flow towards:
- the windscreen and side windows (de-icing or demisting)
- the windscreen, the side windows and the vents
- the windscreen, the side windows, the vents and the footwells.
- the vents and the footwells
- the vents
- the footwells
- the windscreen, the side windows and the footwells.
7. Air flow adjustment

Turn this control to the left to decrease the air flow or to the right to increase the air flow
The air flow indicator lights, between the two fans, come on progressively in relation to the value requested.
8. Air intake/Air recirculation

Press this button for reculation of the interior air The indicator light on the button comes on
Air recirculation enables the passenger compartment to be isolated from exterior odours and smoke.
As soon as possible, press this button again to permit the intake of outside air and prevent condensation The indicator light on the button swit ches off.

Avoid prolonged recirculation of interior air (risk of condensation and deterioration of the air quality).
9. Mono zone/Dual zone
Press this button to equal se the comfort value on the passenger side with that on the driver's side (mono zone). The indicator light on the button comes on
Switching the system off
Turn the air flow control to the le until all of the indicator lights switch off.
This action switches off all of the functions of the system.
Temperature related comfort is no longer guaranteed but a slight flow of air due to the movement of the vehicle, car still be felt.
Turn the air flow dial to the right press the "AUTO" button to reactivate the system with the values set before it was switched off.

Avoid driving for prolonged periods with the system off.
COMFORT
FRAGRANCE DIFFUSER
System permitting the diffusion of a fragrance in the passenger compartment in accordance with your requirements by means of the adjustment dial and the various fragrance cartridges available.
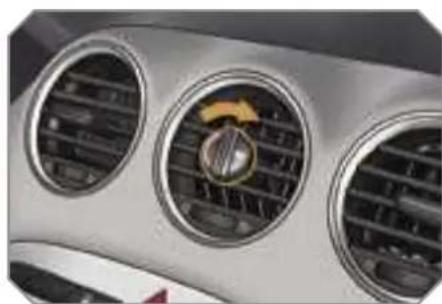
natural_image
Close-up of a car's air vent grille with three circular fans (no visible text or symbols)Adjustment dial
This dial permits adjustment of the intensity of diffusion of the fragrance.
Turn the dial to the right to permi diffusion of the fragrance (horizontal position)
Turn the dial to the left to stop diffusion of the fragrance (vertical position

Leave the central vents open. The intensity of diffusion of the fragrance may depend on the ventilation or air conditioning settings.
Fragrance cartridge
This cartridge can be removed easily. You can change it at any time and store it in the sealed case which keeps it closed once it has been opened.
You can obtain different fragrance cartridges from PEUGEOT dealers.

Do not discard the original cartridge as this serves as a closer when no fragrance cartridge is in use.
In order to preserve the service life of the cartridge, turn the dial to the left when you no longer wish to diffuse the fragrance in the passenger compartment.

As a safety precaution, do not carry out any action on the cartridge while driving.
Do not dismantle the cartridges. Do not attempt to refill the fragrance diffuser or the cartridges. Use original PEUGEOT cartridges only.
Avoid all contact with the skin and eyes.
Keep out of reach of children and animals.
Removing the cartridge
Turn the dial a quarter of a turn fully to the left.
Remove the cartridge from the fascia
Refit its sealing case.
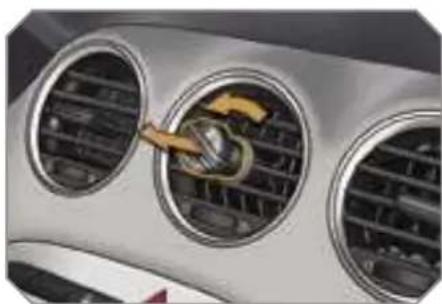
natural_image
Close-up of a car's air vent with three circular windows showing internal airflow (no text or symbols visible)Fitting the cartridge
Remove the cartridge from the sealir case
Install the cartridge in the fascia (flower at top right)
Press the dial and turn it a quarter of a turn to the right.
COMFORT
FRONT SEATS
Seat consisting of a seat cushion, a seat back and a head restraint which can all be adjusted to adapt your position for ease of driving and comfort.
Manual adjustments
Forwards-backwards adjustment
Raise the control and slide the seat forwards or backwards.
Driver's or passenger's seat height adjustment
Pull the control upwards to raise o push it downwards to lower, as many times as necessary, to obtain the position required.
Seat back angle adjustment
→ Push the control rearwards.

natural_image
Interior view of a car showing a person seated in the driver's seat, with dashboard and steering wheel visible (no text or symbols)
natural_image
Close-up of a car's front wheel and side panel, showing no visible text or symbols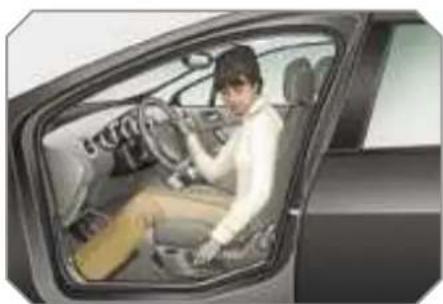
natural_image
Interior view of a car showing a person seated in the driver's seat, with dashboard and steering wheel visible (no text or symbols)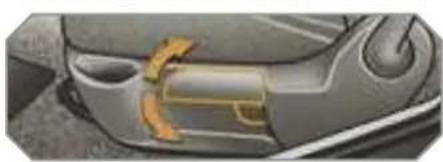
natural_image
Close-up of a car's side panel showing a highlighted component (no text or symbols visible)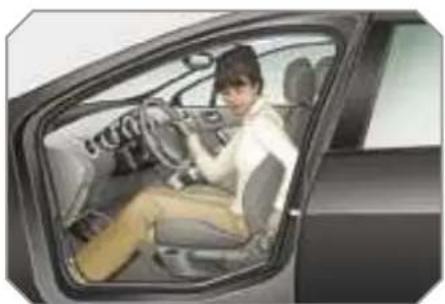
natural_image
Interior view of a car showing a person seated in the driver's seat, with dashboard and steering wheel visible (no text or symbols)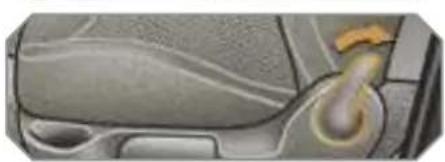
natural_image
Close-up of a car interior showing steering wheel and dashboard (no text or symbols visible)COMFORT
FRONT SEATS
Seat consisting of a seat cushion, a seat back and a head restraint which can all be adjusted to adapt your position for ease of driving and comfort.
Driver's seat electric adjustments
Forwards-backwards adjustment
Push the control forwards or rearwards to slide the seat.
Seat cushion height and angle adjustment
Tilt the rear part of the control upwards or downwards to obtain the required height.
Tilt the front part of the control upwards or downwards to obtain the required angle.
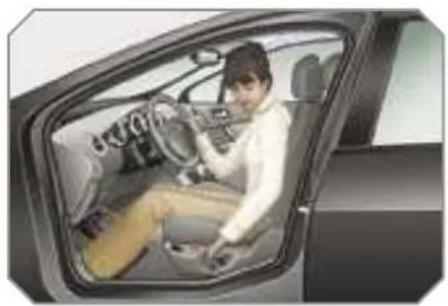
natural_image
Interior view of a car showing a person seated in the driver's seat, with dashboard and steering wheel visible (no text or symbols)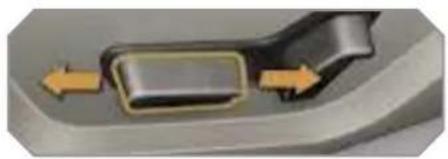
natural_image
Close-up of a mechanical component with directional arrows indicating movement or force (no text or symbols)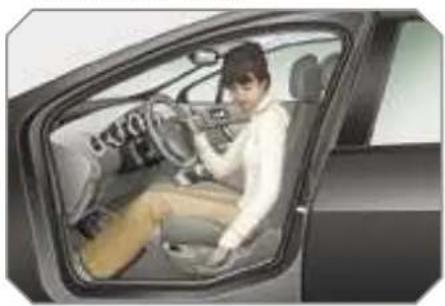
natural_image
Interior view of a car showing a person seated in the driver's seat, with dashboard and steering wheel visible (no text or symbols)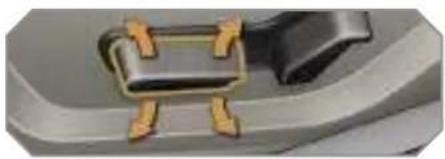
natural_image
Close-up of a metallic mechanical component with gold contacts, no visible text or symbols
The electrical functions of the driver's seat are deactivated approximately one minute after the ignition is switched off.
To reactivate them, switch on the ignition.
Seat back angle adjustment
Tilt the control forwards or rearwards to adjust the angle of the seat back.
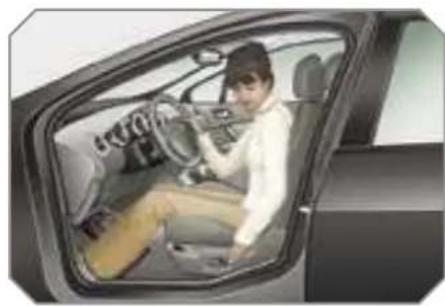
natural_image
Interior view of a car showing a person seated in the driver's seat, with dashboard and steering wheel visible (no text or symbols)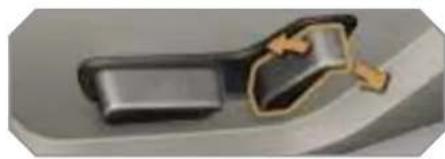
natural_image
Illustration of a mechanical component with a highlighted section and arrow (no text or symbols)COMFORT
Additional adjustments
Head restraint height and angle adjustment
To raise the head restraint, pull it forwards and upwards at the same time
To remove the head restraint, press the lug A and pull the head restraint upwards.
To put the head restraint back in place, engage the head restraint stems in the openings keeping them in line with the seat back.
To lower the head restraint, press the lug A and the head restraint a the same time.
To adjust the angle of the head restraint, tilt its lower part forward or rearwards.
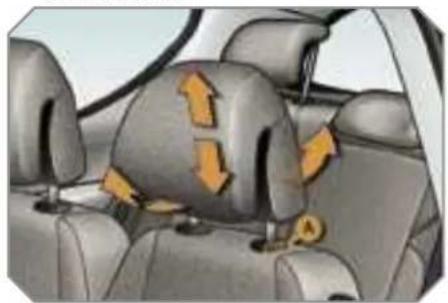
natural_image
Interior view of a car showing seatbelt and seatbelt with directional arrows indicating movement (no text or symbols)
The head restraint is fitted with a frame with notches which prevents it from lowering; this is a safety device in case of impact.
The adjustment is correct when the upper edge of the head restraint is level with the top of the head.
Never drive with the head restraints removed; they must be in place and adjusted correctly.
Lumbar adjustment
Turn the dial to obtain the correct lumbar position.
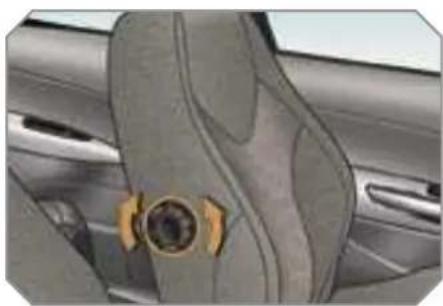
natural_image
Close-up of a car interior showing a seatbelt and dashboard (no text or symbols visible)Access to the rear seats (3-door)
Pull the control upwards to fold the seat back and move the seat forward. When put back in place, the seat returns to its initial position.
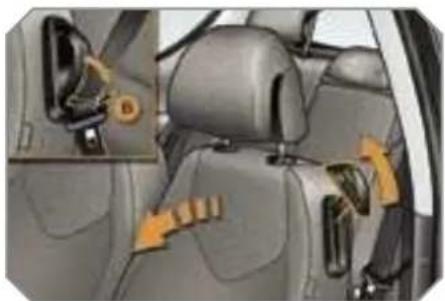
natural_image
Interior view of a car showing seatbelt, dashboard, and rear seats with orange arrows indicating movement or change (no text or symbols visible)Lower the support E incorporated in the control to rest the seat belt on it. It enables you to retrieve the seat belt more easily when you need put it back on

No person or object should prevent the seat slide from returning to its initial position; the return to this position is necessary for longitudinal locking.
COMFORT
Heated seats control
With the engine running, the front seats can be heated separately
Use the adjustment dial, placed on the side of each front seat, to switch on and select the level of heating required:
0: Off.
1: Low.
2: Medium.
3: High.
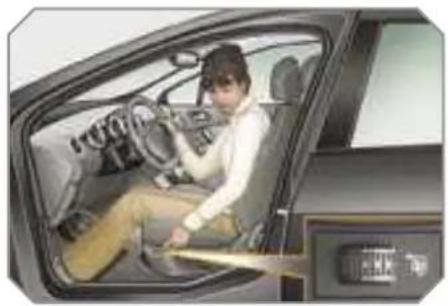
natural_image
Interior view of a car showing a person seated in the driver's seat, with dashboard and steering wheel visible (no text or symbols)Storing driving positions
System which takes into account the electrical settings of the driver's seat and exterior mirrors. It enables you store up to two positions using the buttons on the side of the driver's seat and two further driving positions using the two remote control keys.

natural_image
Interior view of a car showing a person seated in the driver's seat, with dashboard and steering wheel visible (no text or symbols)Storing a position
Using buttons M/1/2
Switch on the ignition.
Adjust your seat and your exterior mirrors
Press button N, then press button 1 or 2 within four seconds.
An audible signal is heard indicating that the storing has been taken into account.
Using the remote control keys
When the vehicle is locked, the remote control key stores the position of the driver's seat and exterior mirrors.
Each remote control key can store one specific setting

Storing a new position cancels the previous position.
Recalling a stored position
When the vehicle is unlocked, the driver's seat and the exterior mirrors return to the position stored by the remote control key
Ignition or
Briefly press buttor 1 or 2 to recall the corresponding position.
An audible signal is heard indicating the end of the adjustment.
Vehicle moving
Press and hold buttor 1 or 2 until the audible signal is heard indicating the end of the adjustment

When the ignition is off, after a few consecutive position recalls, the function will be deactivated until the engine is started, to prevent discharging of the battery.
COMFORT
REAR SEATS
Bench seat the left-hand (2/3) or right-hand (1/3) section of which can be folded to adapt the boot load space.
Rear head restraints
These have a high position (comfort and safety) and a low position (rear visibility).
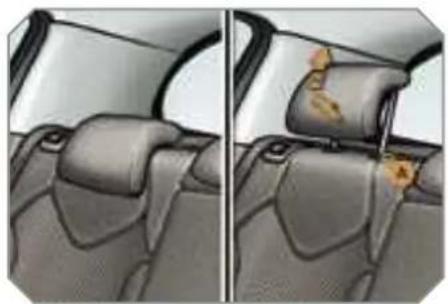
natural_image
Interior view of a car showing two side-view scenarios with no visible text or symbolsThey can also be removed; to remove them:
pull the head restraint fully forwards and upwards at the same time.
then, press the lug A.

Never drive with the head restraints removed; they must be in place and in the high position when passengers are seated in the rear.
Removing the seat cushion
Move the corresponding front seal forwards
Pull the handle 1 forwards to raise the seat cushion 2.
Tilt the seat cushion 2 fully against the front seat.
Remove the seat cushion 2 from its fixings by pulling upwards.
Refitting the seat cushion
Position the seat cushion 2 vertically in its fixings.
Fold down the seat cushion 2.
Press on the seat cushion to secure
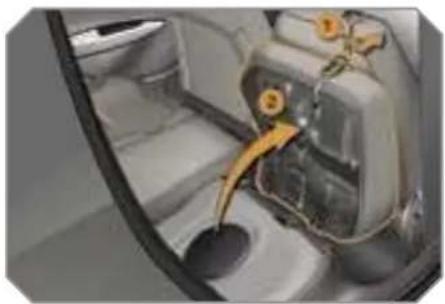
natural_image
Interior view of a car showing the dashboard and seatbelt mechanism (no visible text or symbols)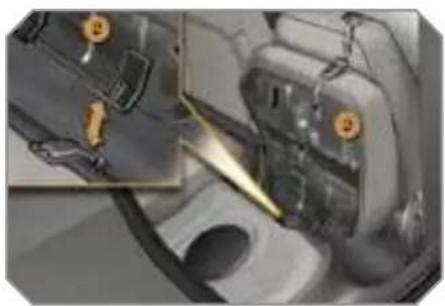
natural_image
Close-up of a mechanical component with a highlighted section showing a tool or fixture (no visible text or symbols)COMFORT
Folding the seat
In order to fold a rear seat without any risk of damage, always start with the seat cushion, never with the seat back:
move the corresponding front seat forwards if necessary.
pull the handle 1 forwards to raise the seat cushion 2.
tilt the seat cushion 2 fully against the front seat,
check that the seat belt is positioned correctly on the side of the seat back,
remove the head restraints,
pull the control 3 forwards to release the seat back 4,
tilt the seat back 4.
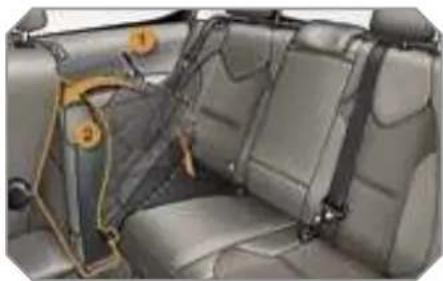
natural_image
Interior view of a car showing two seats with seatbelt covers and numbered components (no visible text or symbols)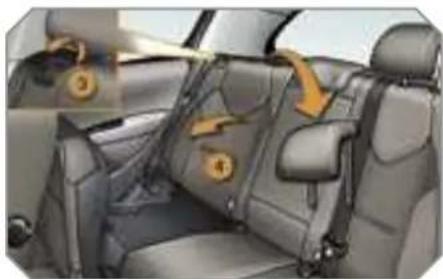
natural_image
Interior view of a car showing seatbelt and dashboard components (no text or symbols visible)
The seat cushion 2 can be removed to increase the loading volume.
Returning the seat back to its original position
When returning the rear seat back to its original position:
put the seat back 4 in the upright position and secure it.
fold the seat cushion 2,
put the head restraints back in place
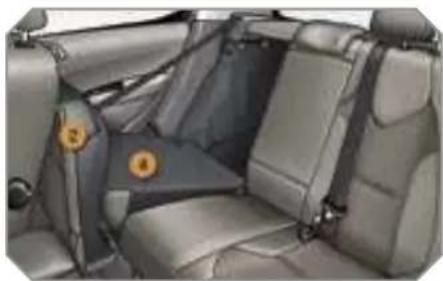
natural_image
Interior view of a car showing two seatbelt covers and a highlighted orange belt (no text or symbols visible)
When returning the rear seat back to its original position, take care not to trap the seat belts and ensure that their buckles are positioned correctly.
COMFORT
MIRRORS
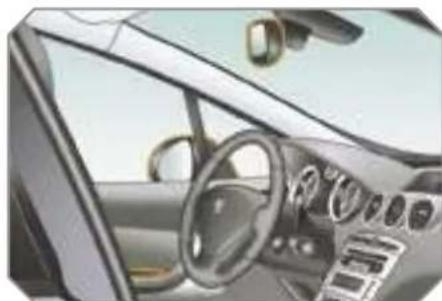
natural_image
Interior view of a car dashboard and steering wheel (no visible text or symbols)Exterior mirrors
Each fitted with an adjustable mirror permitting the lateral rearward vision necessary for overtaking or parking. They can also be folded for parking in confined spaces.
Adjustment
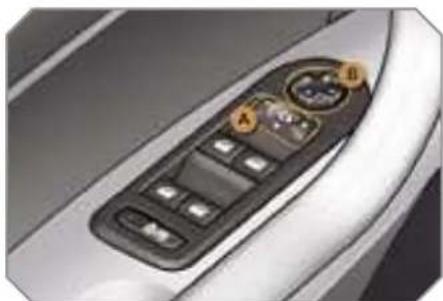
natural_image
Close-up of a car's front panel with control buttons and a highlighted dial (no text or symbols visible)Move control A to the right or to the left to select the corresponding mirror.
Move control E in all four directions to adjust.
Return contrc A to the central positio
Folding
from outside; lock the vehicle using the remote control or the key
from inside; with the ignition on, pull control A rearwards.

If the mirrors are folded using control A, they will not unfold when the vehicle is unlocked. Control A must be pulled again.
Unfolding
from outside; unlock the vehicle using the remote control or the key
from inside; with the ignition on, pull control A rearwards.

The folding and unfolding of the exterior mirrors using the remote control can be deactivated by a PEUGEOT dealer.

The objects observed are, in reality, closer than they appear.
Take this into account in order to correctly judge the distance of vehicles approaching from behind.
COMFORT
Automatic tilting in reverse gear
System which provides a view of the ground during parking manoeuvres in reverse gear.
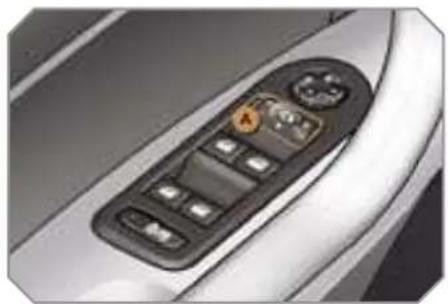
natural_image
Close-up of a car's front panel with control buttons and a rotary knob (no visible text or symbols)Programming
With the engine running, engage reverse gear.
Select and adjust the left-hand an right-hand mirrors in succession.
The adjustment is stored immediately
Switching on
With the engine running, engage reverse gear.
Move control A to the right or to the left to select the corresponding mirror.
The glass of the mirror selected tilts downwards, in accordance with its programming.
Switching off
Exit reverse gear and wait twenty seconds.
or
Return control A to the central position.
The mirror glass returns to its initial position.
The mirror glass also returns to its initia position:
- if the speed exceeds 6 mph (10 km/h) - if the engine is switched off
Interior mirror
Adjustable mirror providing a central rearward view
Manual model
The mirror is fitted with a night-time anti-dazzle device.
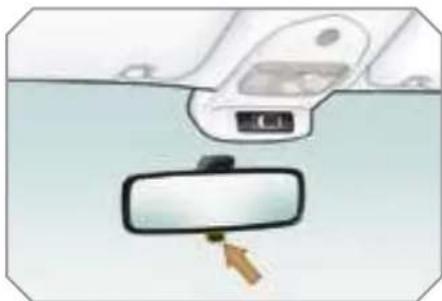
natural_image
Diagram showing a car's rearview mirror and dashboard, with no visible text or symbolsAdjustment
Adjust the mirror so that the glass is rected correctly in the "day" positc
Day/night position
Pull the lever to change to the "night" anti-dazzle position.
Push the lever to change to the norm "day" position

As a safety precaution, the mirrors must be adjusted to reduce the "blind spot".
COMFORT
Automatic tilting in reverse gear
System which provides a view of the ground during parking manoeuvres in reverse gear.
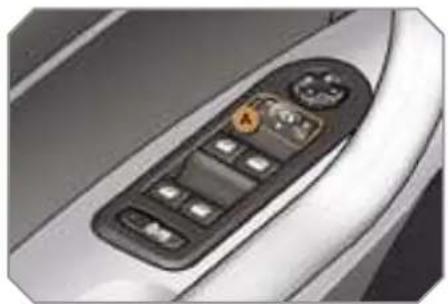
natural_image
Close-up of a car's front panel with control buttons and a rotary knob (no visible text or symbols)Programming
With the engine running, engage reverse gear.
Select and adjust the left-hand an right-hand mirrors in succession.
The adjustment is stored immediately
Switching on
With the engine running, engage reverse gear.
Move control A to the right or to the left to select the corresponding mirror.
The glass of the mirror selected tilts downwards, in accordance with its programming.
Switching off
Exit reverse gear and wait twenty seconds.
or
Return control A to the central position.
The mirror glass returns to its initial position.
The mirror glass also returns to its initia position:
- if the speed exceeds 6 mph (10 km/h) - if the engine is switched off
Interior mirror
Adjustable mirror providing a central rearward view
Manual model
The mirror is fitted with a night-time anti-dazzle device.
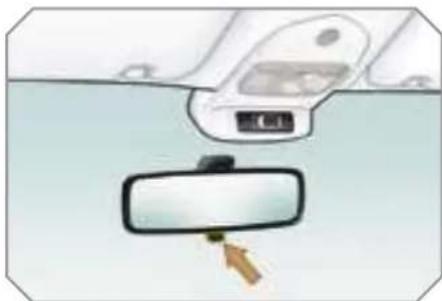
natural_image
Diagram showing a car's rearview mirror and dashboard, with no visible text or symbolsAdjustment
Adjust the mirror so that the glass is rected correctly in the "day" positc
Day/night position
Pull the lever to change to the "night" anti-dazzle position.
Push the lever to change to the norm "day" position

As a safety precaution, the mirrors must be adjusted to reduce the "blind spot".
COMFORT
Automatic day/night model
System which automatically and progressively changes between the day and night uses.
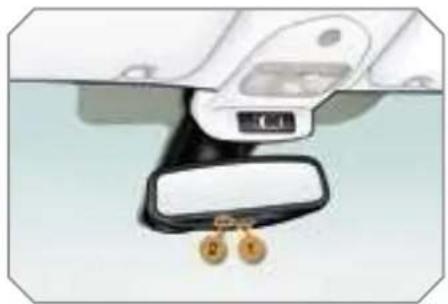
natural_image
Diagram of a car's side mirror and dashboard with labeled parts (no text or symbols present)In order to prevent dazzle, the interi mirror glass darkens automatically in relation to the intensity of the light from the rear.
It lightens when the light (light beam of following vehicles, sun...) decreases, so guaranteeing optimum visibility
Switching on
Switch on the ignition and press switch 1.
The indicator light 2 comes on and the mirror operates automatically.
Switching off
Press switch 1.
The indicator light 2 switches off and the mirror remains in its lightest state.

In order to guarantee optimum visibility during your manoeuvres, the mirror lightens automatically when reverse gear is engaged.
STEERING WHEEL ADJUSTMENT
The height and depth of the steering wheel can be adjusted to adapt the driving position to the size of the driver.
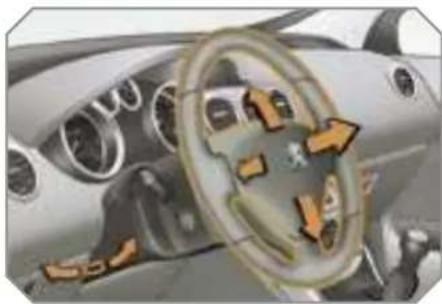
natural_image
Interior view of a car dashboard with steering wheel and dashboard (no visible text or symbols)Adjustment
When stationary, pull the control to unlock the steering wheel.
Adjust the height and depth.
√ Push the control to lock the steering wheel.

As a safety precaution, it is imperative that these operations are carried out while the vehicle is stationary.
COMFORT
Automatic day/night model
System which automatically and progressively changes between the day and night uses.
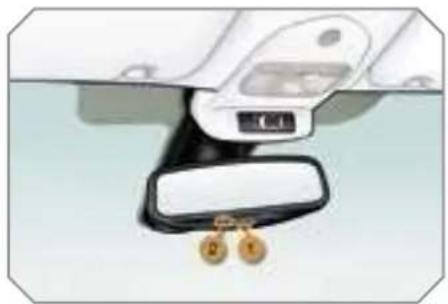
natural_image
Diagram of a car's side mirror and dashboard with labeled parts (no text or symbols present)In order to prevent dazzle, the interi mirror glass darkens automatically in relation to the intensity of the light from the rear.
It lightens when the light (light beam of following vehicles, sun...) decreases, so guaranteeing optimum visibility
Switching on
Switch on the ignition and press switch 1.
The indicator light 2 comes on and the mirror operates automatically.
Switching off
Press switch 1.
The indicator light 2 switches off and the mirror remains in its lightest state.

In order to guarantee optimum visibility during your manoeuvres, the mirror lightens automatically when reverse gear is engaged.
STEERING WHEEL ADJUSTMENT
The height and depth of the steering wheel can be adjusted to adapt the driving position to the size of the driver.
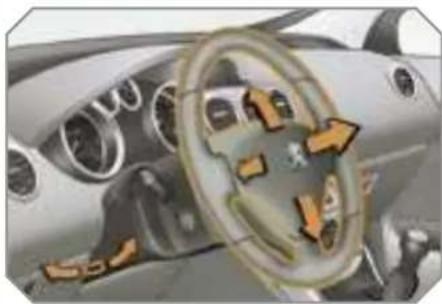
natural_image
Interior view of a car dashboard with steering wheel and dashboard (no visible text or symbols)Adjustment
When stationary, pull the control to unlock the steering wheel.
Adjust the height and depth.
→ Push the control to lock the steering wheel.

As a safety precaution, it is imperative that these operations are carried out while the vehicle is stationary.
ACCESSES
REMOTE CONTROL KEY
System which permits central unlocking or locking of the vehicle using the lock or from a distance. It is also used to locate and start the vehicle, as well as providing protection against theft.
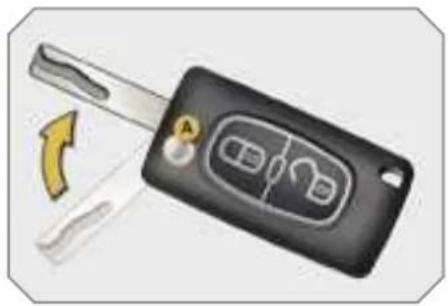
natural_image
Illustration of a black key with four car icons and a yellow curved arrow indicating rotation (no text or symbols)Unlocking the vehicle
Unfolding the key
First press button A to unfold the key
Complete unlocking using the remote control

Press the open padlock to unlock the vehicle.
Complete unlocking using the key
Turn the key to the left in the driver's door lock to unlock the vehicle.
Unlocking is confirmed by rapid flashing of the direction indicators for approximately two seconds
According to version, the exterior mirrors unfold at the same time
Selective unlocking using the remote control

Press the open padlock once to unlock the driver's door only
Press the open padlock again to unlock the other doors and the boot.
Selective unlocking using the key
Turn the key to the left in the driver's door lock once to unlock the driver's door only.
Turn the key to the left in the driver's door lock again to unlock the oth doors and the boot.
Each unlocking is confirmed by rapid flashing of the direction indicators for approximately two seconds.
According to version, the exterior mirrors unfold at the same time as the first unlocking action.

The complete or selective unlocking parameter is set via the multifunction display configuration menu
Complete unlocking is activated by default.
Locking the vehicle
Normal locking using the remote control

Press the closed padlock to lock the vehicle completely
Press the closed padlock for more than two seconds to close the windows automatically in addition to locking
4
ACCESSES
Normal locking using the key
Turn the key to the right in the c ver's door lock to lock the vehicle completely
Locking is confirmed by fixed lighting of the direction indicators for approximatel two seconds
According to version, the exterior mirrors fold at the same time
Deadlocking using the remote control

Press the closed padlock to lock the vehicle completely or press the closed padlock for more than two seconds to close the windows automatically in addition to locking.
Press the closed padlock again within five seconds to deadlock the vehicle.
!
Deadlocking renders the exterior and interior door controls inoperative.
It also deactivates the manual central control button.
Therefore, never leave anyone inside the vehicle when it is dead-locked.
i
If one of the doors or the boot is still open, the central locking does not take place.
When the vehicle is locked, if it is unlocked inadvertently, it will relock automatically after thirty seconds unless a door is opened.
Deadlocking using the key
Turn the key to the right in the cover's door lock to lock the vehicle completely and hold it in this position for more than two seconds to contain the windows automatically in addition to locking.
Turn the key to the right again within five seconds to deadlock the vehicle
Deadlocking is confirmed by fixed lighting of the direction indicators for approximately two seconds
According to version, the exterior mirrors fold at the same time
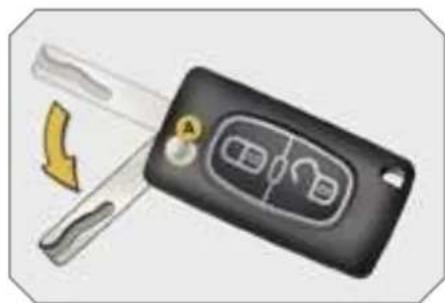
natural_image
Illustration of a black car key with a yellow directional arrow and a lock icon, no text or symbols present.Folding the key
First press button A to fold the key.
i
The folding and unfolding of the exterior mirrors using the remote control can be deactivated by a PEUGEOT dealer.
Locating your vehicle
Press the closed padlock to locate your locked vehicle in a car park.
This is indicated by lighting of the courtesy lights and dipped headlamps ar flashing of the direction indicators for a few seconds.
Anti-theft protection
Electronic engine Immobiliser
The key contains an electronic chip which has a special code. When the ignition is switched on, this code must be recognised in order for starting to be possible.
This electronic engine immobiliser locks the engine management system a few minutes after the ignition is switched off and prevents starting of the engine by anyone who does not have the key
Confidential card
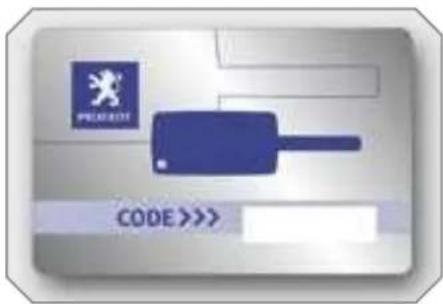
This is given to you with the duplica keys on delivery of your vehicle
It bears the identification code necessary for any work on the electronic engine in mobiliser by a PEUGEOT dealer
This code is hidden by a film which should not be removed until necessary

In the event of a malfunction you are informed by lighting of this warning light, an audible signal and a message on the multifunction display
In this case, your vehicle does not start contact a PEUGEOT dealer as soon as possible.

Keep this card in a safe place, never in the vehicle.
Carry this card with you, in the same way as your personal papers.
ACCESSES
Starting the vehicle
Insert the key in the ignition switch.
The system recognises the starting code
Turn the key fully towards the fascia to position 3 (Starting).
When the engine starts, release the key
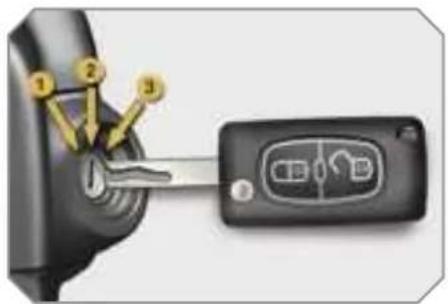
Switching the vehicle off
Immobilise the vehicle.
Turn the key fully towards you to position 1 (Stop).
Remove the key from the ignition swit

Key reminder
If the key is left in the ignition switch, an audible signal sounds when the driver's door is opened.
Remote control problem
Following disconnection of the vehicle battery, replacement of the remote control battery or in the event of a remote control malfunction, you can no longer unlock, lock or locate your vehicle.
First of all, use the key in the lock to unlock or lock your vehicle.
Then, reinitialise the remote control. If the problem persists, contact a PEUGEOT dealer as soon as possible
Reinitialisation
Switch off the ignition.
Turn the key to position 2 (Ignition).
Press the closed padlock immediately for a few seconds.
Switch off the ignition and remove the key from the ignition switch.
The remote control is fully operation again.
Changing the battery
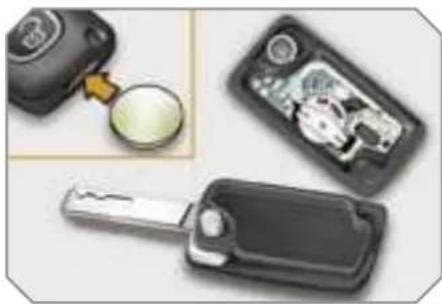
natural_image
Close-up of a car key with a highlighted internal circuit board and a close-up of its open key (no text or symbols visible)Battery ref.: CR1620/3 volts.

If the battery is flat, you are informed by lighting of this warning light, an audible signal and a message on the multifunction display
- Unclip the casing using a coin at the notch.
Slide the flat battery out of its location.
Slide the new battery into its location observing the original direction.
Clip the casing.
Reinitialise the remote control.
ACCESSES

Keys
Make a careful note of the number of each key. This number is coded on the label attached to the key.
If the keys are lost, your PEUGEOT dealer can rapidly supply you with new keys.
Remote control
The high frequency remote control is a sensitive system; do not operate it while it is in your pocket as there is a possibility that it may unlock the vehicle, without you being aware of it.
Do not repeatedly press the buttons of your remote control out of range and out of sight of your vehicle. You run the risk of stopping it from working and the remote control would have to be reprogrammed.
The remote control does not operate when the key is in the ignition, even when the ignition is switched off, except for reprogramming.
Locking the vehicle
Driving with the doors locked may make access to the passenger compartment by the emergency services more difficult in an emergency.
As a safety precaution (with children on board), remove the key from the ignition when you leave the vehicle, even for a short time.
Anti-theft protection
Do not make any modifications to the electronic engine immobiliser system, this could cause malfunctions.
When purchasing a second-hand vehicle
Ensure that you are given the confidential card.
Have the key codes memorised by a PEUGEOT dealer, to ensure that the keys in your possession are the only ones which can start the vehicle.

Do not throw the remote control batteries away, they contain metals which are harmful to the environment.
Take them to an approved collection point.
Locating your vehicle
Press the closed padlock to locate your locked vehicle in a car park.
This is indicated by lighting of the courtesy lights and dipped headlamps ar flashing of the direction indicators for a few seconds.
Anti-theft protection
Electronic engine Immobiliser
The key contains an electronic chip which has a special code. When the ignition is switched on, this code must be recognised in order for starting to be possible.
This electronic engine immobiliser locks the engine management system a few minutes after the ignition is switched off and prevents starting of the engine by anyone who does not have the key
Confidential card
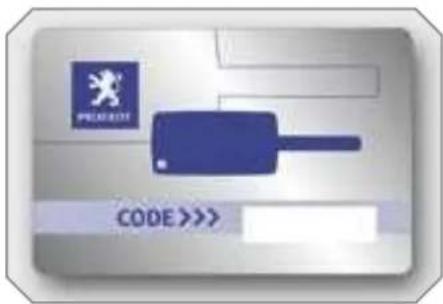
This is given to you with the duplica keys on delivery of your vehicle
It bears the identification code necessary for any work on the electronic engine in mobiliser by a PEUGEOT dealer
This code is hidden by a film which should not be removed until necessary

In the event of a malfunction you are informed by lighting of this warning light, an audible signal and a message on the multifunction display
In this case, your vehicle does not start contact a PEUGEOT dealer as soon as possible.

Keep this card in a safe place, never in the vehicle.
Carry this card with you, in the same way as your personal papers.
ACCESSES

Keys
Make a careful note of the number of each key. This number is coded on the label attached to the key.
If the keys are lost, your PEUGEOT dealer can rapidly supply you with new keys.
Remote control
The high frequency remote control is a sensitive system; do not operate it while it is in your pocket as there is a possibility that it may unlock the vehicle, without you being aware of it.
Do not repeatedly press the buttons of your remote control out of range and out of sight of your vehicle. You run the risk of stopping it from working and the remote control would have to be reprogrammed.
The remote control does not operate when the key is in the ignition, even when the ignition is switched off, except for reprogramming.
Locking the vehicle
Driving with the doors locked may make access to the passenger compartment by the emergency services more difficult in an emergency.
As a safety precaution (with children on board), remove the key from the ignition when you leave the vehicle, even for a short time.
Anti-theft protection
Do not make any modifications to the electronic engine immobiliser system, this could cause malfunctions.
When purchasing a second-hand vehicle
Ensure that you are given the confidential card.
Have the key codes memorised by a PEUGEOT dealer, to ensure that the keys in your possession are the only ones which can start the vehicle.

Do not throw the remote control batteries away, they contain metals which are harmful to the environment.
Take them to an approved collection point.
ACCESSES
Starting the vehicle
Insert the key in the ignition switch.
The system recognises the starting code
Turn the key fully towards the fascia to position 3 (Starting).
When the engine starts, release the key
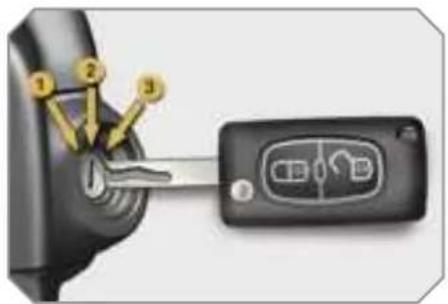
Switching the vehicle off
Immobilise the vehicle.
Turn the key fully towards you to position 1 (Stop).
Remove the key from the ignition swit

Key reminder
If the key is left in the ignition switch, an audible signal sounds when the driver's door is opened.
Remote control problem
Following disconnection of the vehicle battery, replacement of the remote control battery or in the event of a remote control malfunction, you can no longer unlock, lock or locate your vehicle.
First of all, use the key in the lock to unlock or lock your vehicle.
Then, reinitialise the remote control. If the problem persists, contact a PEUGEOT dealer as soon as possible
Reinitialisation
Switch off the ignition.
Turn the key to position 2 (Ignition).
Press the closed padlock immediately for a few seconds.
Switch off the ignition and remove the key from the ignition switch.
The remote control is fully operation again.
Changing the battery
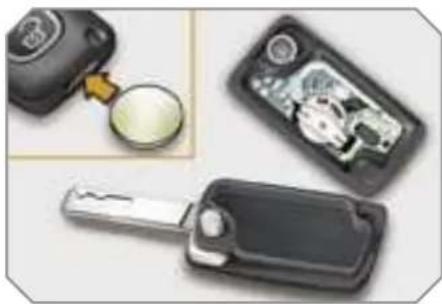
natural_image
Close-up of a car key with a highlighted internal circuit board and a close-up of its open key (no text or symbols visible)Battery ref.: CR1620/3 volts.

If the battery is flat, you are informed by lighting of this warning light, an audible signal and a message on the multifunction display
- Unclip the casing using a coin at the notch.
Slide the flat battery out of its location.
Slide the new battery into its location observing the original direction.
Clip the casing.
Reinitialise the remote control.
ACCESSES
ALARM
System which protects and dissuade against the theft of your vehicle. It provides two types of protection, exterior and interior, as well as an anti-tamp function.
Exterior protection
The system detects opening of the vehicle.
The alarm is triggered if anyone tries to enter the vehicle by forcing a door, the boot or the bonnet.
Interior protection
The system detects any variation in the volume in the passenger compartment. The alarm is triggered if anyone breaks a window or moves inside the vehicle.
If you wish to leave a pet in the vehicle or a window partially open, deactivat the interior protection.
Anti-tamper function
The system detects the putting out of service of its components.
The alarm is triggered if anyone trie to put the wires of the siren, the central control or the battery out of service.

Do not make any modifications to the alarm system, this could cause malfunctions.
Locking the vehicle with full alarm
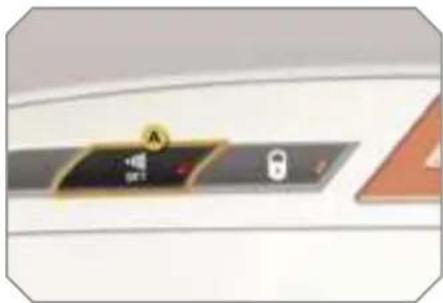
Activation
Switch off the ignition and get out of the vehicle.
Lock or deadlock the vehicle using the locking button on the remote control.
The alarm is activated; the indicator light on button A flashes once per second.
Deactivation
Unlock the vehicle using the unlock king button on the remote control
The alarm is deactivated; the indicator light on button A switches off.
Locking the vehicle with exterior protection alarm only
Deactivation of the interior protection
Switch off the ignition.
Within ten seconds, press butt·A until the indicator light is lit continuous
Get out of the vehicle.
Lock or deadlock the vehicle using the locking button on the remote control.
The exterior protection alarm alone remains activated; the indicator light o button A flashes once per second.

In order to be taken into account, this deactivation must be carried out each time the ignition is switched off.
Reactivation of the interior protection
Unlock the vehicle using the unlocking button on the remote control.
- Relock the vehicle using the remote control.
The alarm is activated again with both types of protection; the indicator light or button A switches off.
ACCESSES
Triggering
This is indicated by sounding of the si- ren and flashing of the direction indica- tors for approximately thirty seconds.
After it has been triggered, the alarm is again operational.
!
If the alarm is triggered ten times in succession, the eleventh time will result in it becoming inactive.
If the indicator light on button A flashes rapidly, this indicates that the alarm was triggered during your absence. When the ignition is switched on, this flashing stops immediately.
To avoid triggering the alarm when washing your vehicle, lock it using the key.
Do not activate the alarm before disconnecting the battery, otherwise the siren will sound.
Failure of the remote control
Unlock the vehicle using the key the driver's door lock.
Open the door; the alarm is triggered
Switch on the ignition; the alarm stops.
Locking the vehicle without alarm
Lock or deadlock the vehicle using the key in the driver's door lock.
Malfunction
When the ignition is switched on, lighting of the indicator light on button A for ten seconds indicates a siren fault.
Contact a PEUGEOT dealer as soon as possible
Automatic operation\*
Depending on the legislation in force in your country, one of these cases may occur:
- 45 seconds after the vehicle is locked using the remote control, the alarm is activated, regardless of the status the doors and boot.
- 2 minutes after the last door or th boot is closed, the alarm is activated.
To avoid triggering the alarm on entering the vehicle, first press th unlocking button on the remote control.
4
ACCESSES
ELECTRIC WINDOWS
System intended to open or close a window manually or automatically. Fitted with a safety auto-reverse system and a system for deactivation in the event of misuse of the rear controls.
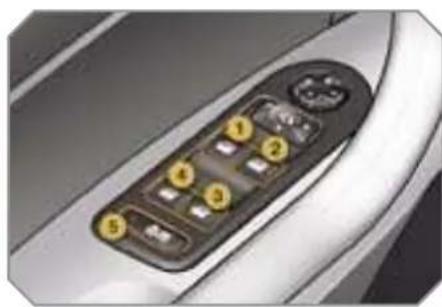
natural_image
Close-up of a car air conditioner panel with numbered buttons (1-5) and control buttons, no visible text or symbols beyond labels.- Driver's electric window control.
- Passenger's electric window control.
- Rear right electric window control.
- Rear left electric window control.
- Deactivation of the rear electric window and door controls.
One-touch electric windows
There are two options:
- manual mode
Press or pull the control gently. The window stops when the control is released
- automatic mode
Press or pull the control firmly. The window opens or closes fully when the control is released.
Pressing the control again stops the movement of the window
i
The electric window controls remain operational for approximately 45 seconds after the ignition is switched off or until the vehicle is locked after a door is opened.
If a window cannot be operated from the driver's door control pad, carry out the operation from the control pad of the door concerned, and vice versa.
!
After approximately ten consecutive complete opening/closing movements of the window, a protection function is activated which only authorises closing of the window to prevent damage to the electric window motor.
Once the window is closed, the controls will become available again after approximately 40 minutes.
Safety auto-reverse
When the window rises and meets a obstacle, it stops and partially lowers again.
i
If the window cannot be closed (for example, in the presence of ice), immediately after the movement is reversed:
press and hold the control until the window opens fully,
then pull the control immediately and hold it until the window closes,
continue to hold the control for approximately one second after the window has closed.
The safety auto-reverse function is not operational during these operations.
ACCESSES
Reinitialisation
If a window does not rise automatically, its operation must be reinitialised:
pull the control until the window stops,
release the control and pull it again until the window closes fully
continue to hold the control for approximately one second after the window has closed,
press the control to lower the window automatically to the low position,
when the window has reached the low position, press the control again for approximately one second.
The safety auto-reverse function is not operational during these operations.
Deactivation of the rear electric window and door controls
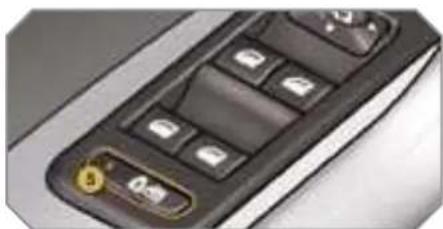
natural_image
Close-up of a black remote control with buttons and a small yellow knob (no visible text or symbols)For the safety of your children, press control 5 to deactivate the rear electric window controls regardless of their position.
Indicator light on, the rear controls are deactivated.
Indicator light off, the rear controls are activated.
!
Always remove the key from the ignition when leaving the vehicle, even for a short time.
If an obstacle is encountered during operation of the electric windows, you must reverse the movement of the window. To do this, press the control concerned.
When the driver operates the controls for the passengers' electric windows, he must ensure that no one is preventing correct closing of the windows.
The driver must ensure that the passengers use the electric windows correctly.
Be aware of children when operating the windows.
i
This control also deactivates the interior controls for the rear doors (refer to the section "Child safety - § Electric child lock").
!
Any other status of the indicator light indicates a malfunction of the electric child lock. Contact a PEUGEOT dealer to have the system checked.
4
ACCESSES
DOORS
Opening
From outside
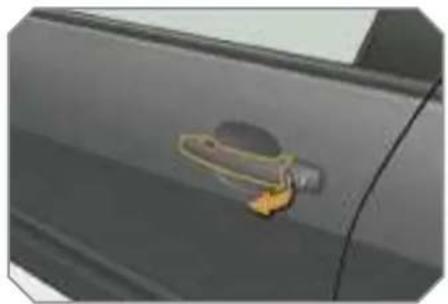
natural_image
Close-up of a car's side panel with a small yellow object on the door (no visible text or symbols)After unlocking the vehicle completely using the remote control or the key, pull the door handle
From inside
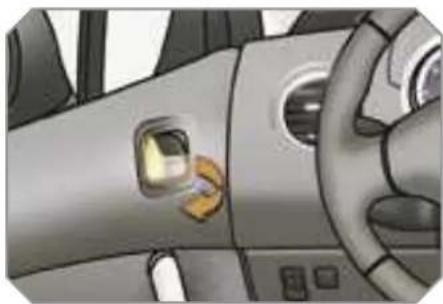
natural_image
Interior view of a car showing the steering wheel, dashboard, and driver's seat (no text or symbols visible)Pull the front door control to open the door; this unlocks this vehicle completely
Pull the rear door control to open the door; this unlocks the door concened only
!
The interior door controls do not operate when the vehicle is dead-locked.
Closing
When a door is not closed correctly:

- when the engine is running, this warning light comes on accompanied by a message on the multifunction display for a few seconds,
- when the vehicle is moving (speed higher than 6 mph (10 km/h)), this warning light comes on, accompanied by an audible signal and a messa on the multifunction display for a few seconds.
i
When the selective unlocking is activated, the first press of the remote control unlocking button permits unlocking of the driver's door only.
i
With the selective unlocking activated:
- the driver's door control unlocks the driver's door only.
- the other door controls unlock the other doors and the boot.
Manual centralised control
System which provides full manual locking or unlocking of the doors from the inside.
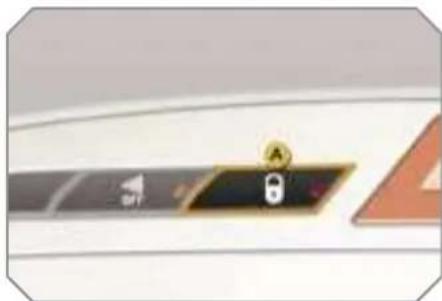
natural_image
Close-up of a computer monitor with a lock icon and navigation icons (no readable text)Locking
Press button A to lock the vehicle The red indicator light on the button comes on.

If one of the doors is open, the central locking from the inside does not take place.
Unlocking
Press button A again to unlock the vehicle.
The red indicator light on the button switches off

If the vehicle is locked or dead-locked from the outside, the red indicator light flashes and button A is inactive.
In this case, use the remote control or the key to unlock the vehicle.
Automatic centralised control
System which provides full automatic locking or unlocking of the doors an boot while driving
You can activate or deactivate this function.
Locking
When the speed exceeds 6 mph (10 km/h), the doors and boot lock automatically

If one of the doors is open, the automatic central locking does not take place.
If the boot is open, the automatic central locking of the doors is active.
Unlocking
Above 6 mph (10 km/h), press button A to unlock the doors and boc temporarily
Activation
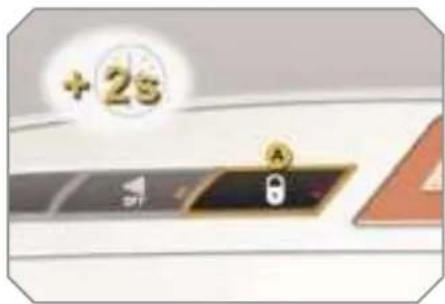
Press button A for more than two seconds.
A confirmation message appears on the multifunction display, accompanied by an audible signal
Deactivation
Press button A again for more than two seconds.
A confirmation message appears on the multifunction display, accompanied by an audible signal
ACCESSES
Emergency control
System which locks or unlocks the doors mechanically in the event of a malfunction of the battery or of the central locking.
Locking the driver's door
Insert the key in the lock, then turn it to the right.
Unlocking the driver's door
Insert the key in the lock, then turn it to the left.
Locking the front and rear passenger doors
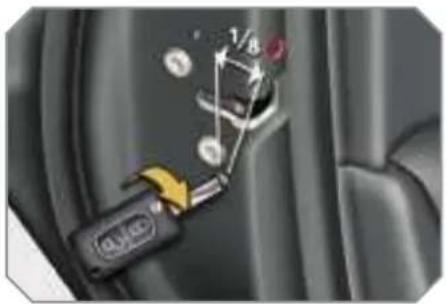
natural_image
Close-up of a car's seatbelt mechanism with a yellow arrow indicating motion (no text or symbols visible)Insert the key in the lock, located on the edge of the door, then turn if one eighth of a turn.
Unlocking the front and rear passenger doors
Pull the interior door opening control.
BOOT
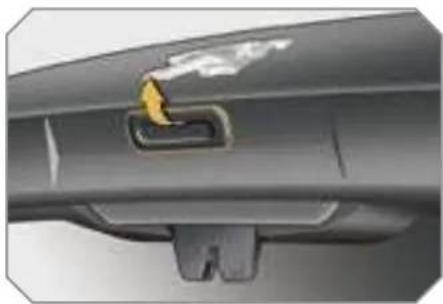
natural_image
Close-up of a car's side panel showing a handle and lock mechanism (no text or symbols visible)Opening
After unlocking the vehicle completely using the remote control or the key, pull the handle and raise the tailgate.
Closing
Lower the tailgate using the interior grab handle.
If the tailgate is not closed correctly

- when the engine is running, this warning light comes on accompanied by a message on the multifunction display for a few seconds.
- when the vehicle is moving (speed above 6 mph (10 km/h)), this warning light comes on, accompanied by an audible signal and a message on the multifunction display for a few seconds

When the selective unlocking is activated, the boot can be opened at the second press of the unlocking button on the remote control.
Tailgate release
System for mechanical unlocking of the boot in the event of a battery or central locking malfunction.
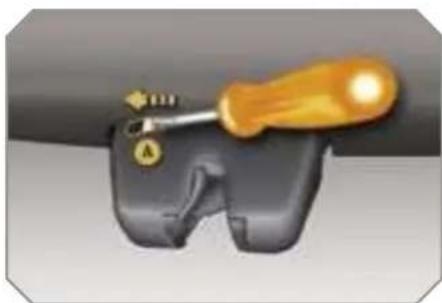
natural_image
Close-up of a screwdriver tool inserted into a mechanical clamp or bracket (no text or symbols visible)Unlocking
Fold back the rear seats to gain access to the lock from inside the boot.
Insert a small screwdriver into hole A of the lock to unlock the tailgate.
ACCESSES
Emergency control
System which locks or unlocks the doors mechanically in the event of a malfunction of the battery or of the central locking.
Locking the driver's door
Insert the key in the lock, then turn it to the right.
Unlocking the driver's door
Insert the key in the lock, then turn it to the left.
Locking the front and rear passenger doors

natural_image
Close-up of a car's seatbelt mechanism with a yellow arrow indicating motion (no text or symbols visible)Insert the key in the lock, located on the edge of the door, then turn if one eighth of a turn.
Unlocking the front and rear passenger doors
Pull the interior door opening control.
BOOT
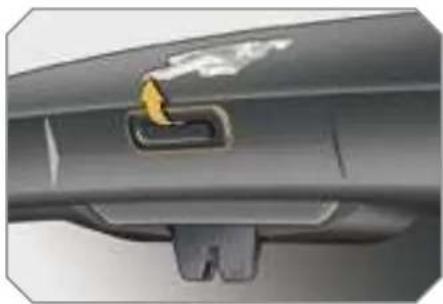
natural_image
Close-up of a car's side panel showing a handle and lock mechanism (no text or symbols visible)Opening
After unlocking the vehicle completely using the remote control or the key, pull the handle and raise the tailgate.
Closing
Lower the tailgate using the interior grab handle.
If the tailgate is not closed correctly

- when the engine is running, this warning light comes on accompanied by a message on the multifunction display for a few seconds.
- when the vehicle is moving (speed above 6 mph (10 km/h)), this warning light comes on, accompanied by an audible signal and a message on the multifunction display for a few seconds

When the selective unlocking is activated, the boot can be opened at the second press of the unlocking button on the remote control.
Tailgate release
System for mechanical unlocking of the boot in the event of a battery or central locking malfunction.
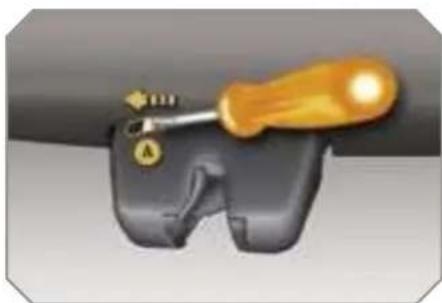
natural_image
Close-up of a screwdriver tool inserted into a mechanical clamp or bracket (no text or symbols visible)Unlocking
Fold back the rear seats to gain access to the lock from inside the boot.
Insert a small screwdriver into hole A of the lock to unlock the tailgate.
GLASS PANORAMIC ROOF
Component which has a tinted glass panoramic surface to increase the light and visibility in the passenger compartment. Fitted with an electric shutter several sections to improve temperature and noise related comfort.
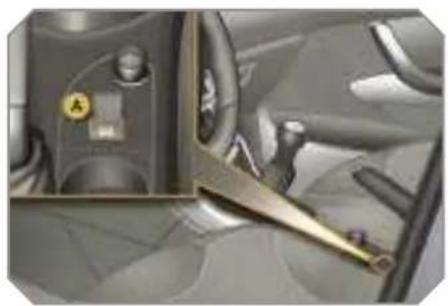
natural_image
Interior view of a vehicle showing dashboard, steering wheel, and steering wheel (no visible text or symbols)One-touch electric shutter
There are two options for opening and closing:
- manual mode
Pull or press control A gently The shutter stops when you release the control.
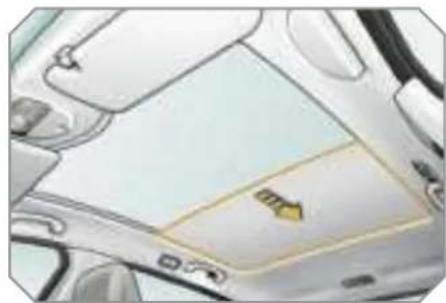
natural_image
Interior view of a car showing the roof and dashboard (no visible text or symbols)- automatic mode
Pull or press control A firmly. One press opens or closes the shuttle completely Pressing the control again stops the shutter.
Safety auto-reverse
In automatic mode and at the end of its travel, if the shutter meets an obstacle while closing it stops and moves ba slightly
i
If the shutter's supply is cut off, the safety auto-reverse must be reinitialised:
press the control until the shutter is fully closed.
If the shutter re-opens during the closing manoeuvre, and immediately after it stops:
pull the control until the shutter is fully open,
press the control until the shutter is fully closed.
The safety auto-reverse function is not operational during these operations.
!
If the shutter meets an obstacle during operation, you must reverse the movement of the shutter. To do this, press the control concerned. When the driver operates the shutter control, he must ensure that no one is preventing correct closing of the shutter. The driver must ensure that passengers use the shutter correctly. Be aware of children when operating the shutter.
ACCESSES
FUEL TANK
Capacity of the tank: approximately 60 litres.
Low fuel level

When the fuel tank minimum level is reached, this warning light comes on on the instrument panel, accompanied by
an audible signal and a message on the multifunction display
You have enough fuel left to drive approximately 30 miles (50 km).
If you run out of fuel, refer to the "Practical information" section also.
Operating fault
A fuel gauge malfunction is indicated by the return of the fuel level indicator needle to zero.
Contact a PEUGEOT dealer

The key cannot be removed from the lock until the cap is put back on the tank.
Filling
A label affixed to the inside of the flap reminds you of the type of fuel to be used according to your engine.
To fill the tank safely
it is essential that the engine is switched off,
open the fuel filler flap,
insert the key in the cap, then turn it to the left,
remove the cap and secure it on the hook, located on the inside of the flap,
fill the tank, but do not continue after the 3rd cut-off of the nozzle; this could cause malfunctions.
When filling is complete:
put the cap back in place,
turn the key to the right, then remove it from the cap.
close the flap.
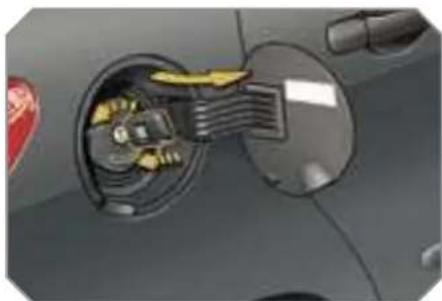
natural_image
Close-up of a car's internal components, showing internal parts and a highlighted section (no text or symbols visible)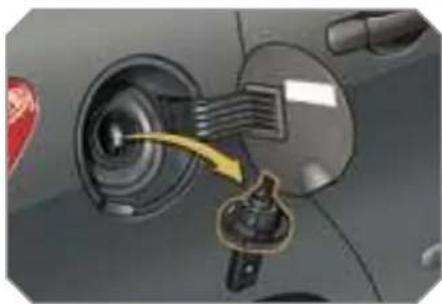
natural_image
Close-up of a car's engine compartment showing a yellow arrow pointing to the lock mechanism (no text or symbols visible)LIGHTING CONTROLS
System for selection and control of the various front and rear lights providing the vehicle's lighting.
Main lighting
The various front and rear lights of the vehicle are designed to adapt the driver's visibility progressively in relation to the climatic conditions:
- side lights, to be seen
- dipped headlamps to see without daz zling other drivers.
- main beam headlamps to see clearly when the road is clear.
- directional headlamps for improved visibility when cornering.
Additional lighting
Other lights are installed to fulfil the requirements of particular driving conditions:
- rear fog lamps to be seen from a distance.
- front fog lamps for even better visibility
- daytime lights to be seen during tl day.
Programming
Various automatic lighting control modes are also available according to the following options:
- follow-me-home lighting
- automatic lighting
- directional lighting
Model without AUTO lighting
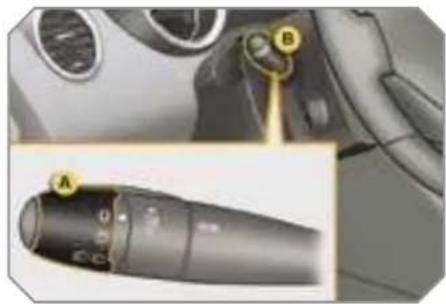
natural_image
Close-up of a car dashboard with labeled parts (A, B) and a close-up of the intake manifold (no readable text or symbols)Model with AUTO lighting
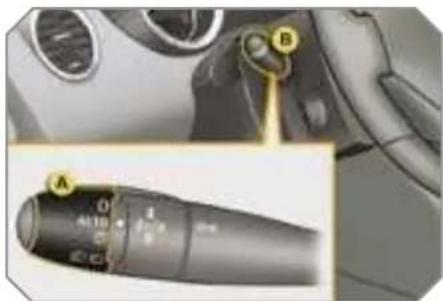
Manual controls
The lighting commands are issued directly by the driver by means of the ring A and the lever E.
A. main lighting mode selection ring with:

lights off,

automatic switching on o the lights,

side lights only


dipped headlamps or main beam headlamps.
B. lever for inversion of the lights by pulling: dipped headlamps/main beam headlamps.
In the lights off and side lights modes, the driver can switch on the main beam headlamps directly ("headlamp flash" for as long as he pulls the lever
Displays
Lighting of the corresponding indicator light on the instrument panel confirm the selective switching on of the lighting selected.
VISIBILITY
Model with rear fog lamp only
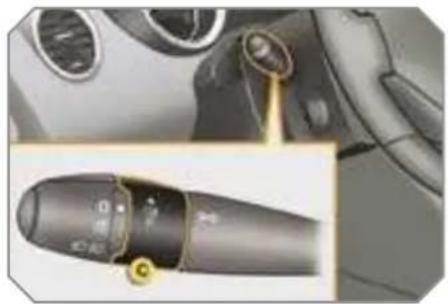
natural_image
Close-up of a car interior showing the steering wheel and dashboard (no visible text or symbols)Model with front and rear fog lamps
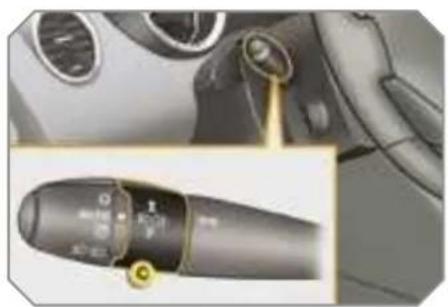
natural_image
Interior view of a car showing the steering wheel and dashboard (no visible text or symbols)C. fog lamps selection ring.
The fog lamps operate with the dipped and main beam headlamps.

rear fog lamp
To switch on the fog lamp, turn t ring C forwards.
When the lights are switched off automatically (with AUTO model), the fog lamp and the dipped headlamps will remain on
To switch off all of the lights, turn the ring C rearwards.

front and rear fog lamps
To switch on the fog lamps, turn the ring C forwards.
To switch off the rear fog lamp, turn the ring C rearwards twice in succession.
When the lights are switched off automatically (with AUTO model) or whe the dipped headlamps are switched off manually, the fog lamps and the sid lights will remain on.
Turn the ring rearwards to switch off the fog lamps, the side lights will then switch off.

In good or rainy weather, both day and night, the front fog lamps and the rear fog lamp are prohibited. In these situations, the power of their beams may dazzle other drivers.
Do not forget to switch off the front fog lamps and the rear fog lamp when they are no longer necessary.

Lights on buzzer
The triggering of an audible signal when a front door is opened warns the driver that he has forgotten to switch off his vehicle's lights, with the ignition off and in manual lights mode.
In this case, switching off the lights stops the audible signal.
With the ignition off, if the dipped headlamps remain on, they will switch off automatically after thirty minutes to prevent discharging of the battery.
Daytime lights
On vehicles fitted with daytime lights the corresponding lights comes on when the vehicle is started*.
The instruments and controls (instrument panel, multifunction display, air conditioning control panel, ...) are not lit, except on switching to the automatic switching on of the lights mode or when the lights are switched on manually
Programming
The function is activated or deactivated via the multifunction display configuration menu
In countries in which this function is imposed by regulations*, it is activated by default.
The side lights and the number plate lights are also switched on

In other countries, this function is deactivated by default.
Only the daytime lights, incorporated in the side light bulbs, come on when the function is activated.
* According to country.
Follow-me-home lighting
The temporary maintaining of the dipped headlamps lighting after the vehicle's ignition has been switched of makes the driver's exit easier when the light is poor
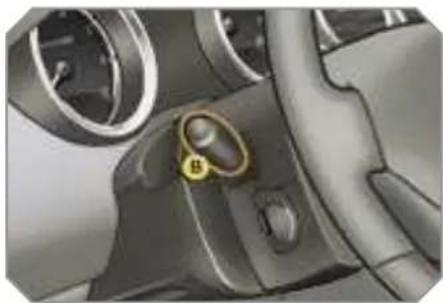
natural_image
Close-up of a car interior showing a golden circular button labeled 'B' (no text or symbols beyond the label)Switching on
With the ignition off, "flash" the head-lamps using the lever B.
A second "headlamp flash" switches the function off again.
Switching off
The follow-me-home lighting switches off automatically after a set time.
Exterior welcome lighting
The remote switching on of the light makes your approach to the vehicle easier in poor light when in automat switching on of the lights mode.
Switching on
Press the open padlock on the remote control.
The dipped headlamps and the side lights come on; your vehicle is also unlocked.
Switching off
The exterior welcome lighting switches off automatically after a set time, when the ignition is switched on or on locking the vehicle.
Programming

The duration of maintaining of the lighting is selected via the multifunction display configuration menu

The duration of the welcome lighting is associated with and identical to that of the automatic follow-me-home lighting.
VISIBILITY
Automatic lighting
The side lights and dipped headlamps are switched on automatically, without any action on the part of the driver, when a low level of external light is detected or in certain cases of activation of the windscreen wipers.
As soon as the brightness returns to a sufficient level or after the windscrew wipers are switched off, the lights are switched off automatically
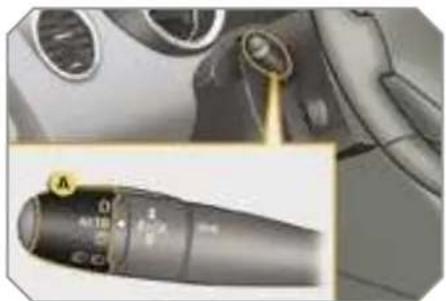
natural_image
Close-up of a car interior showing the steering wheel and dashboard (no visible text or symbols)Activation
Turn ring A to the "AUTO" position. The automatic lighting is accompanied by a message on the multifunction display
Deactivation
Turn ring A to a position other than "AUTO". Deactivation is accompanied by a message on the multifunction display
Coupling with the "Follow-me-home" lighting
Association with the automatic lightin provides the "follow-me-home" lightin with the following additional options:
- selection of the duration of maintaining of the lighting for 15, 30 or 60 seconds in the vehicle parameters on the multi
- automatic activation of "follow-me-home" lighting when automatic lighting is in operation.
Operating fault
In the event of a malfunction of the brightness sensor, the lights come on, this warning light is displayed on the instrument panel and/or a message appears on the multifunction display, accompanied by an audible signal
In this case, contact a PEUGEOT deal

In fog or snow, the brightness sensor may detect sufficient light. Therefore, the lights will not come on automatically.
Do not cover the brightness sensor, coupled with the rain sensor and located in the centre of the windscreen behind the interior mirror; the associated functions would no longer be controlled.
MANUAL HEADLAMP ADJUSTMENT
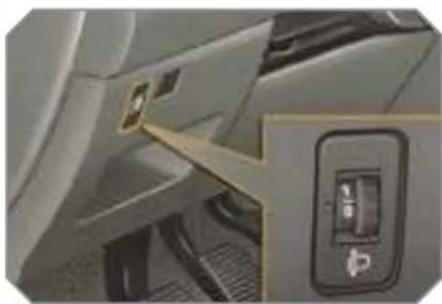
natural_image
Close-up of a car seatbelt with a directional control panel and a small lock icon (no text or symbols visible)To avoid causing a nuisance to other road users, the height of the haloge headlamps should be adjusted in relation to the load in the vehicle.
- 1 or 2 people in the front seats.
- 3 people.
1 5 people. - 5 people + maximum authorised load.
- Driver + maximum authorised load.

The initial setting is position "0".
Daytime lights
On vehicles fitted with daytime lights the corresponding lights comes on when the vehicle is started*.
The instruments and controls (instrument panel, multifunction display, air conditioning control panel, ...) are not lit, except on switching to the automatic switching on of the lights mode or when the lights are switched on manually
Programming
The function is activated or deactivated via the multifunction display configuration menu
In countries in which this function is imposed by regulations*, it is activated by default.
The side lights and the number plate lights are also switched on

In other countries, this function is deactivated by default.
Only the daytime lights, incorporated in the side light bulbs, come on when the function is activated.
* According to country.
Follow-me-home lighting
The temporary maintaining of the dipped headlamps lighting after the vehicle's ignition has been switched of makes the driver's exit easier when the light is poor
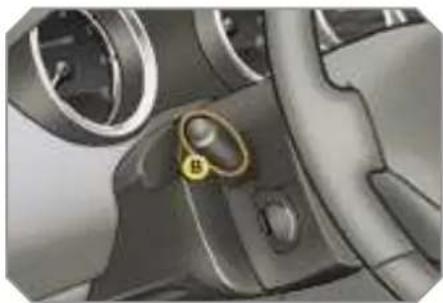
natural_image
Close-up of a car interior showing a golden circular button labeled 'B' (no text or symbols beyond the label)Switching on
With the ignition off, "flash" the head-lamps using the lever B.
A second "headlamp flash" switches the function off again.
Switching off
The follow-me-home lighting switches off automatically after a set time.
Exterior welcome lighting
The remote switching on of the light makes your approach to the vehicle easier in poor light when in automat switching on of the lights mode.
Switching on
Press the open padlock on the remote control.
The dipped headlamps and the side lights come on; your vehicle is also unlocked.
Switching off
The exterior welcome lighting switches off automatically after a set time, when the ignition is switched on or on locking the vehicle.
Programming

The duration of maintaining of the lighting is selected via the multifunction display configuration menu

The duration of the welcome lighting is associated with and identical to that of the automatic follow-me-home lighting.
VISIBILITY
Automatic lighting
The side lights and dipped headlamps are switched on automatically, without any action on the part of the driver, when a low level of external light is detected or in certain cases of activation of the windscreen wipers.
As soon as the brightness returns to a sufficient level or after the windscrew wipers are switched off, the lights are switched off automatically

natural_image
Close-up of a car interior showing the steering wheel and dashboard (no visible text or symbols)Activation
Turn ring A to the "AUTO" position. The automatic lighting is accompanied by a message on the multifunction display
Deactivation
Turn ring A to a position other than "AUTO". Deactivation is accompanied by a message on the multifunction display
Coupling with the "Follow-me-home" lighting
Association with the automatic lightin provides the "follow-me-home" lightin with the following additional options:
- selection of the duration of maintaining of the lighting for 15, 30 or 60 seconds in the vehicle parameters on the multi
- automatic activation of "follow-me-home" lighting when automatic lighting is in operation.
Operating fault
In the event of a malfunction of the brightness sensor, the lights come on, this warning light is displayed on the instrument panel and/or a message appears on the multifunction display, accompanied by an audible signal
In this case, contact a PEUGEOT deal

In fog or snow, the brightness sensor may detect sufficient light. Therefore, the lights will not come on automatically.
Do not cover the brightness sensor, coupled with the rain sensor and located in the centre of the windscreen behind the interior mirror; the associated functions would no longer be controlled.
MANUAL HEADLAMP ADJUSTMENT
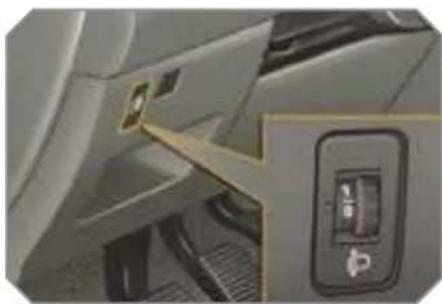
natural_image
Close-up of a car seatbelt with a directional control panel and a small lock icon (no text or symbols visible)To avoid causing a nuisance to other road users, the height of the haloge headlamps should be adjusted in relation to the load in the vehicle.
- 1 or 2 people in the front seats.
- 3 people.
1 5 people. - 5 people + maximum authorised load.
- Driver + maximum authorised load.

The initial setting is position "0".
VISIBILITY
Automatic lighting
The side lights and dipped headlamps are switched on automatically, without any action on the part of the driver, when a low level of external light is detected or in certain cases of activation of the windscreen wipers.
As soon as the brightness returns to a sufficient level or after the windscrew wipers are switched off, the lights are switched off automatically
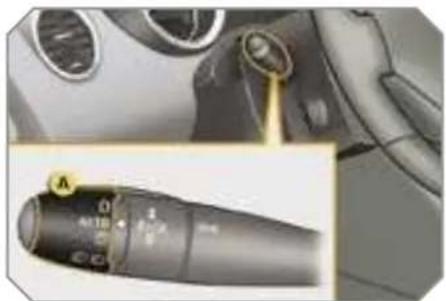
natural_image
Close-up of a car dashboard with a rotary knob and control knob (no visible text or symbols)Activation
Turn ring A to the "AUTO" position. The automatic lighting is accompanied by a message on the multifunction display
Deactivation
Turn ring A to a position other than "AUTO". Deactivation is accompanied by a message on the multifunction display
Coupling with the "Follow-me-home" lighting
Association with the automatic lightin provides the "follow-me-home" lightin with the following additional options:
- selection of the duration of maintaining of the lighting for 15, 30 or 60 seconds in the vehicle parameters on the multi
- automatic activation of "follow-me-home" lighting when automatic lighting is in operation.
Operating fault
In the event of a malfunction of the brightness sensor, the lights come on, this warning light is displayed on the instrument panel and/or a message appears on the multifunction display, accompanied by an audible signal
In this case, contact a PEUGEOT deal

In fog or snow, the brightness sensor may detect sufficient light. Therefore, the lights will not come on automatically.
Do not cover the brightness sensor, coupled with the rain sensor and located in the centre of the windscreen behind the interior mirror; the associated functions would no longer be controlled.
MANUAL HEADLAMP ADJUSTMENT
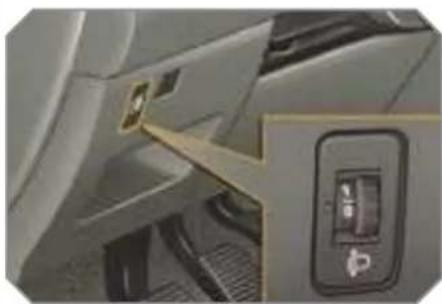
natural_image
Close-up of a car seatbelt with a directional control panel and a small lock icon (no text or symbols visible)To avoid causing a nuisance to other road users, the height of the haloge headlamps should be adjusted in relation to the load in the vehicle.
- 1 or 2 people in the front seats.
- 3 people.
1 5 people. - 5 people + maximum authorised load.
- Driver + maximum authorised load.

The initial setting is position "0".
AUTOMATIC ADJUSTMENT OF THE DIRECTIONAL HEADLAMPS
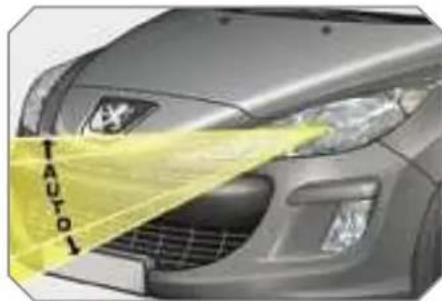
natural_image
Front view of a car with visible exhaust plume and 'AUTO' logo on the side (no other text or symbols)In order to avoid causing a nuisance to other road users, this system correct the height of the xenon headlamps beam automatically and when stationary, in relation to the load in the vehicle

If a malfunction occurs, this warning light and/or the service warning light is displayed on the instrument panel, accompanied
by an audible signal and a message on the multifunction display.
The system then places your head-lamps in the lowest position.

Do not touch the xenon headlamps. Contact a PEUGEOT dealer.
DIRECTIONAL LIGHTING
When the dipped or main beam head-lamps are on, this function enables the light beam to follow the direction of the road
The use of this function, coupled with the xenon headlamps only, considerably improves the quality of your lighting when cornering.
with directional lighting
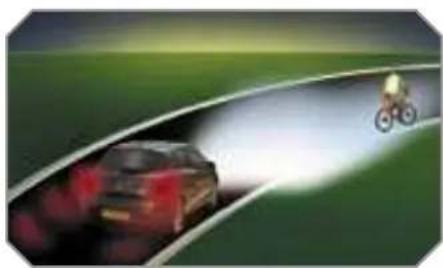
natural_image
Illustration of a car on a curved road with a bicycle riding nearby, set against a green landscape background (no text or symbols)without directional lighting
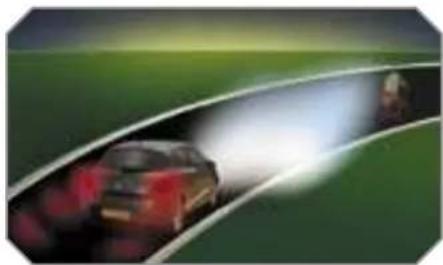
natural_image
Illustration of a red car driving on a curved road with green background (no text or symbols)Programming
The function is activated or deactivated via the multifunction display configuration menu.
Operating fault

If a malfunction occurs, this warning light flashes on the instrument panel, accompanied by a message on the multifunction display
Contact a PEUGEOT dealer

When stationary or moving at very low speed or when reverse gear is engaged, the function is inactive. The status of the function remains in the memory when the ignition is switched off.
AUTOMATIC ADJUSTMENT OF THE DIRECTIONAL HEADLAMPS
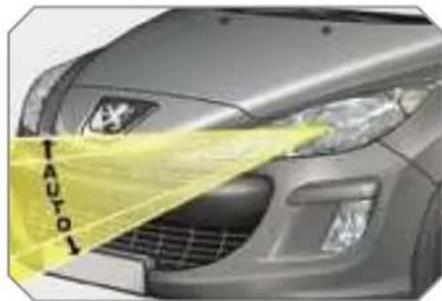
natural_image
Front view of a car with visible exhaust plume and 'AUTO' logo on the side (no other text or symbols)In order to avoid causing a nuisance to other road users, this system correct the height of the xenon headlamps beam automatically and when stationary, in relation to the load in the vehicle

If a malfunction occurs, this warning light and/or the service warning light is displayed on the instrument panel, accompanied
by an audible signal and a message on the multifunction display.
The system then places your head-lamps in the lowest position.

Do not touch the xenon headlamps. Contact a PEUGEOT dealer.
DIRECTIONAL LIGHTING
When the dipped or main beam head-lamps are on, this function enables the light beam to follow the direction of the road
The use of this function, coupled with the xenon headlamps only, considerably improves the quality of your lighting when cornering.
with directional lighting
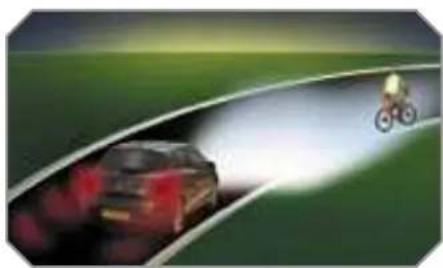
natural_image
Illustration of a car on a curved road with a cyclist in motion, set against a green landscape background (no text or symbols)without directional lighting
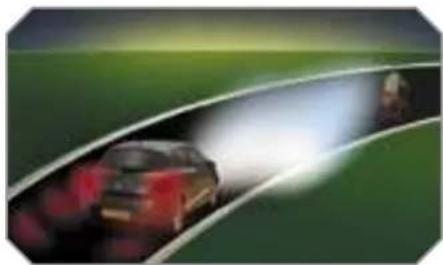
natural_image
Illustration of a red car driving on a curved road with green background (no text or symbols)Programming
The function is activated or deactivated via the multifunction display configuration menu.
Operating fault

If a malfunction occurs, this warning light flashes on the instrument panel, accompanied by a message on the multifunction display
Contact a PEUGEOT dealer

When stationary or moving at very low speed or when reverse gear is engaged, the function is inactive. The status of the function remains in the memory when the ignition is switched off.
VISIBILITY
WIPER CONTROLS
System for selection and control of the various front and rear wiping modes for the elimination of rain and cleaning.
The vehicle's various front and rear wipers are designed to improve the driver's visibility progressively in relation to the climatic conditions.
Programming
Various automatic wiper control modes are also available according to the following options.
- automatic wiping for the windscree wipers.
- rear wiping on engaging reverse gear
Model with intermittent wiping
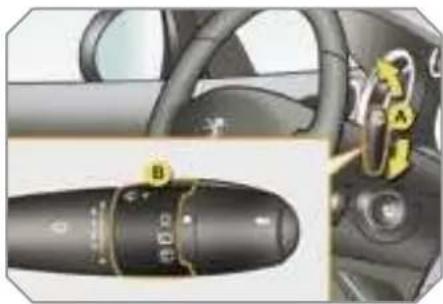
Model with AUTO wiping
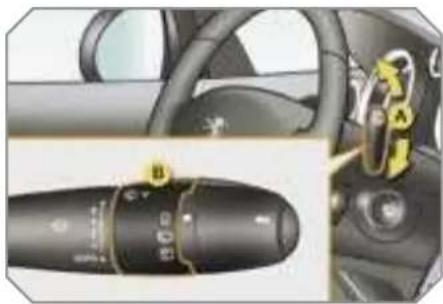
natural_image
Close-up of a car's steering wheel and dashboard with a rotary knob (no visible text or symbols)Manual controls
The wiper commands are issued directly by the driver by means of the lever A and the ring B.
Windscreen wipers
A. wiping speed selection lever

fast (heavy rain)
normal (moderate rain).
intermittent (proportional to the speed of the vehicle).
park.
single wipe (press downwards).
or
AUTO

automatic, then single wipe (see following page).
Rear wiper
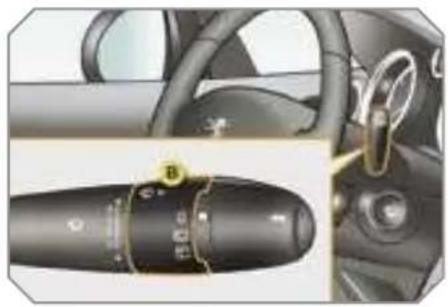
natural_image
Close-up of a car's steering wheel and dashboard with a close-up of the caliper (no visible text or symbols)B. rear wiper selection ring

park.

intermittent wipe.

wash-wipe (set duration).
Reverse gear
When reverse gear is engaged, the rear wiper will come into operation if the windscreen wipers are operating.
Programming
The function is activated or deactivated via the multifunction display configuration menu.
This function is activated by default.
Windscreen and headlamp wash
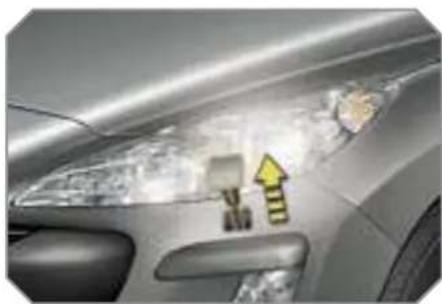
natural_image
Close-up of a car's head with visible headlights and decorative arrows (no text or symbols)Pull the windscreen wiper stalk towards you. The windscreen wash then the windscreen wipers operate for a fixed period.
If the dipped headlamps are on, the headlamp washers operate at the same time.
Screenwash/headlamp wash low

In the case of vehicles fitted with headlamp washers, when the minimum level of the reservoir i reached, this warning light and/
the service warning light is displayed the instrument panel, accompanied by a audible signal and a message on the m tifunction displa
Next time you stop, fill the screenwa headlamp wash reserve
The warning light is displayed when the nition is switched on, or every time the is operated, until the reservoir is fill
!
If a significant accumulation of snow or ice is present, or when using a tailgate bicycle carrier, deactivate the automatic rear wiper via the multifunction display configuration menu.
VISIBILITY
Automatic windscreen wiping
The windscreen wipers operate automatically, without any action on the part of the driver, if rain is detected (sensor behind the interior mirror), adapting their speed to the intensity of the rainfall.
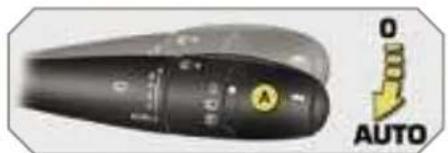
Activation
This is controlled manually by the driver by pushing lever A to the "AUTO" position.
It is accompanied by a message on the multifunction display
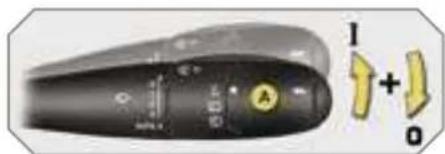
Switching off
This is controlled manually by the driver by moving lever A upwards and returning it to position "0".
It is accompanied by a message on the multifunction display

The automatic wiping must be re-activated if the ignition has been off for more than one minute, by pushing lever A downwards.
Operating fault
If an automatic wiping malfunction occurs, the wipers will operate in intermittent mode.
Contact a PEUGEOT dealer to have the system checked

Do not cover the rain sensor, coupled with the brightness sensor and located in the centre of the wind-screen behind the interior mirror.
Switch off the automatic wiping when using an automatic car wash.
In winter, it is advisable to wait until the windscreen is completely clear of ice before activating the automatic wiping.
Special position of the windscreen wipers
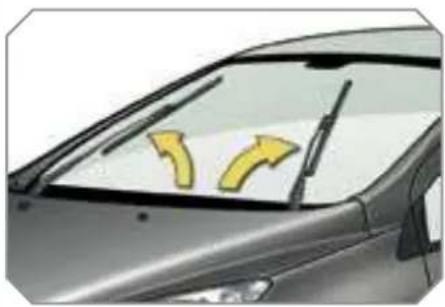
natural_image
Side view of a car with two yellow directional arrows pointing to the windshield (no text or symbols)In the minute following switching off of the ignition, any action on the stalk positions the wipers in the centre of the windscreen.
This action enables you to position the wiper blades for winter parking, cleaning or replacement.
To park the wipers after this has been done, switch on the ignition and operate the stalk.

For optimum and lasting wiping of the "flat-blade" wiper blades, it is advisable to:
- handle them with care,
- clean them regularly using soapy water,
- change them approximately every 6 months,
- avoid using them to retain cardboard on the windscreen.
VISIBILITY
Automatic windscreen wiping
The windscreen wipers operate automatically, without any action on the part of the driver, if rain is detected (sensor behind the interior mirror), adapting their speed to the intensity of the rainfall.
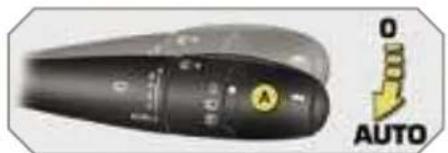
Activation
This is controlled manually by the driver by pushing lever A to the "AUTO" position.
It is accompanied by a message on the multifunction display
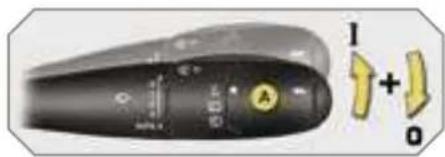
Switching off
This is controlled manually by the driver by moving lever A upwards and returning it to position "0".
It is accompanied by a message on the multifunction display

The automatic wiping must be re-activated if the ignition has been off for more than one minute, by pushing lever A downwards.
Operating fault
If an automatic wiping malfunction occurs, the wipers will operate in intermittent mode.
Contact a PEUGEOT dealer to have the system checked

Do not cover the rain sensor, coupled with the brightness sensor and located in the centre of the wind-screen behind the interior mirror.
Switch off the automatic wiping when using an automatic car wash.
In winter, it is advisable to wait until the windscreen is completely clear of ice before activating the automatic wiping.
Special position of the windscreen wipers
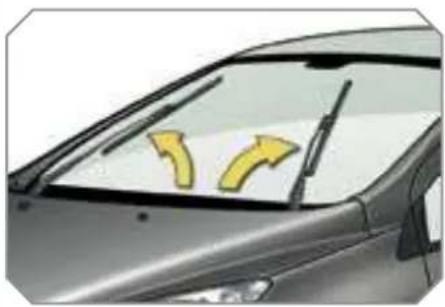
natural_image
Side view of a car with two yellow directional arrows pointing to the windshield (no text or symbols)In the minute following switching off of the ignition, any action on the stalk positions the wipers in the centre of the windscreen.
This action enables you to position the wiper blades for winter parking, cleaning or replacement.
To park the wipers after this has been done, switch on the ignition and operate the stalk.

For optimum and lasting wiping of the "flat-blade" wiper blades, it is advisable to:
- handle them with care,
- clean them regularly using soapy water,
- change them approximately every 6 months,
- avoid using them to retain cardboard on the windscreen.
COURTESY LIGHTS
Selection and control of the various passenger compartment lights.
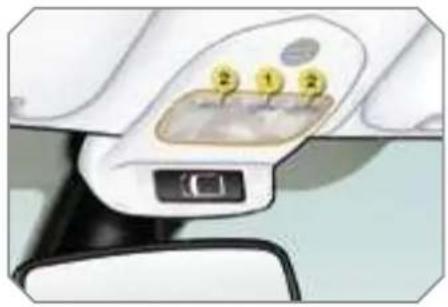
natural_image
Close-up of a car interior panel with buttons and a central touchscreen display (no visible text or symbols)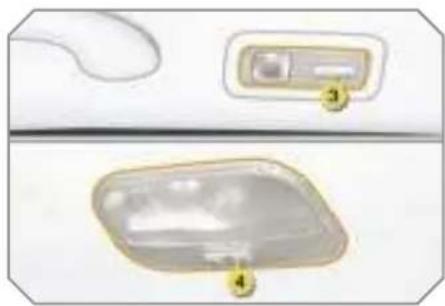
- Front courtesy light
- Map reading lights
- Rear side reading lights
- Rear courtesy light
Front and rear courtesy lights

In this position, the courtesy light comes on gradually:
- when the vehicle is unlocked
- when the key is removed from the ignition
- when a door is opened
- when the remote control locking buttc activated, in order to locate your vehi
It switches off gradually:
- when the vehicle is locked
- when the ignition is switched on
- 30 seconds after the last door is clos

Permanently off

Permanent lighting

In permanent lighting mode, different lighting times are available:
- with the ignition off, approximately ten minutes,
- in energy economy mode, approximately thirty seconds,
- with the engine running, unlimited.

When the front courtesy light is in the "permanent lighting" position, the rear courtesy light will also come on, unless it is in the "permanently off" position.
To switch off the rear courtesy light, place it in the "permanently off" position.
Map reading lights
With the ignition on, press the co responding switch.
Rear side reading lights
With the ignition on, the first press of the corresponding switch switches on the reading light concerned in permanent lighting mode.
Following a second press, it comes
- when the vehicle is unlocked,
- when the key is removed from the ignition,
- when a door is opened,
- when the remote control locking button is pressed, in order to locate your vehicle
It switches off gradually:
- when the vehicle is locked
- when the ignition is switched on
- 30 seconds after the last door is closed.

Take care not to place anything in contact with the courtesy lights.
VISIBILITY
AMBIENT LIGHTING
The dimmed passenger compartment lighting improves visibility in the vehicle when the light is poor.
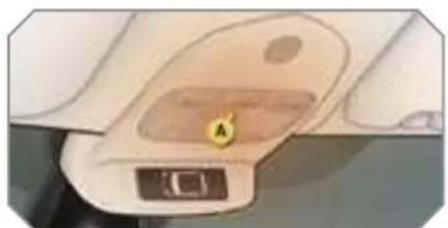
natural_image
Close-up of a car interior showing a door, seatbelt, and control panel (no visible text or symbols)Switching on
At night, the footwell lighting and the front courtesy light ambient lamp A come on automatically when the side lights are switched on.
Switching off
The ambient lighting switches off automatically when the dipped headlamp are switched off.
Programming
The function is activated or deactivated via the multifunction display configuration menu
This function is activated by default
INTERIOR WELCOME LIGHTING BOOT LIGHTING
The remote switching on of the passenger compartment lighting makes your approach to the vehicle easier in poor light when automatic switching on of the lights mo
Switching on
Press the open padlock on the remote control.
The front and rear door sill lighting, the footwell lighting and the courtesy lights come on; your vehicle is also unlocked.
Switching off
The interior welcome lighting switche off automatically after a set time or whe one of the doors is opened.
Programming

The duration of maintaining of the lighting is selected via the multifunction display configuration menu.

The duration of the welcome lighting is associated with and identical to that of the automatic follow-me-home lighting.
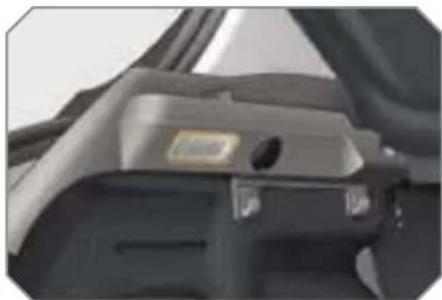
natural_image
Close-up of a mechanical component with a small circular feature and mounting bracket (no visible text or symbols)This comes on automatically when the boot is opened and switches off automatically when the boot is closed

Different lighting times are available:
- when the ignition is off, approximately ten minutes,
- in energy economy mode, approximately thirty seconds,
- when the engine is running, no limit.
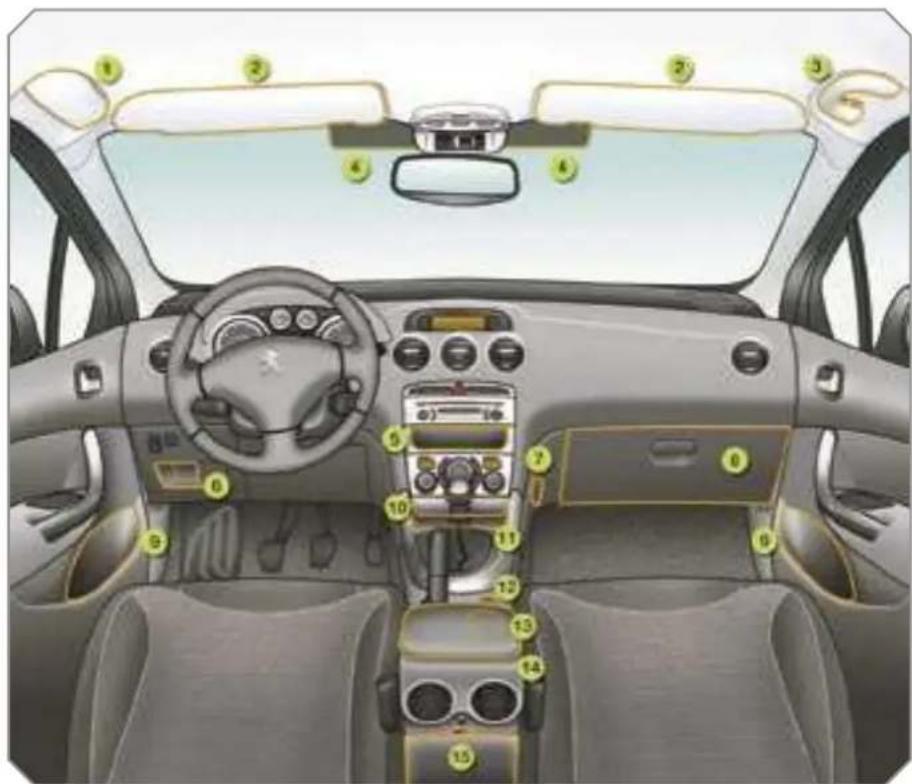
INTERIOR LAYOUT
- Spectacles storage
- Sun visor
(see details on following page)
- Grab handle with coat hook
- Toll card/car park ticket windows
(see details on following page)
- Storage compartment
- Storage compartment
- Bag hook
- Glove box with light
(see details on following page)
- Door trays
- Ashtray with light
(see details on following page)
- Storage compartment with non-slip carpet
- Lighter/12 V accessories socke
(see details on following page)
- Can holder
- Front armrest
(see details on following page)
- Storage box
LAYOUT
SUN VISOR
Component which protects against sunlight from the front or the side, also equipped with an illuminated courtesy mirror.
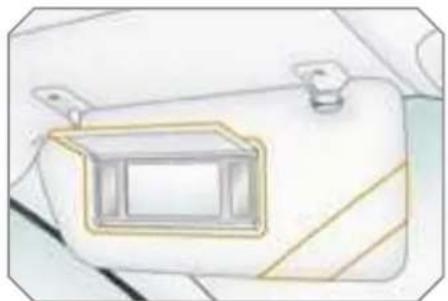
natural_image
Illustration of a car front view with a rectangular grille and attached seat (no text or symbols)With the ignition on, raise the cor cealing flap; the mirror is lit automati cally
This sun visor is also equipped with ticket holder.
TOLL CARD/CAR PARK TICKET WINDOWS
Facility for affixing toll cards and/or car park tickets.
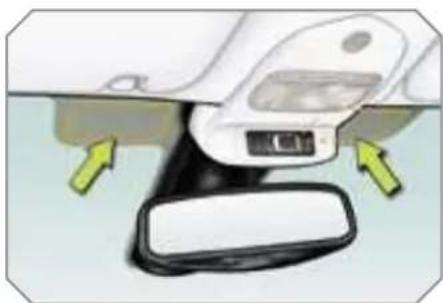
natural_image
Diagram of a car interior showing a vehicle with a sensor and a mirror, with green arrows indicating directional movement (no text or symbols)These windows are located on each side of the base of the interior mirror. They are two non-reflective areas of the athermic windscreen.

The athermic windscreen limits heating of the passenger compartment by reducing the effects of the sun's rays (ultra-violet). It consists of a reflective layer, which also blocks certain radio-electric signals (toll card payments, ...).
natural_image
Interior view of a car showing the door, seatbelt, and dashboard (no visible text or symbols)This has areas for storing a bottle of water, the vehicle's handbook, ..
Its lid has areas for storing a pen, a pai of spectacles, tokens, cards, a can, fragrance cartridges, ..
To open the glove box, raise the hand. The light comes on when the lid is opened.
If the vehicle is fitted with air conditioning, it provides access to the air vent A, which can be opened or closed, distributing the same conditioned air as the vents in the passenger compartment.
BAG HOOK
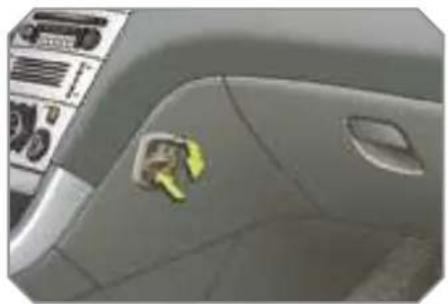
natural_image
Interior view of a car dashboard with steering wheel and dashboard (no visible text or symbols)Press the lower part of the hook to unfold it.
Hang the strap of your bag on th hook to secure it
ASHTRAY WITH LIGHT
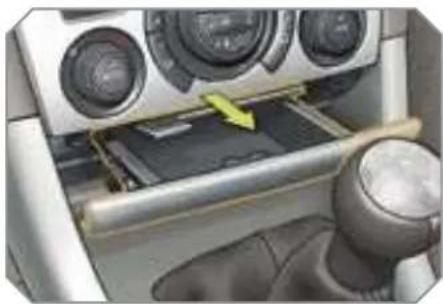
natural_image
Interior view of a car showing dashboard, steering wheel, and battery tray with a yellow arrow indicating direction (no text or symbols visible)Pull the drawer to gain access to the ashtray
To empty the ashtray, after opening, press the tab and remove the as tray
LIGHTER/12 V ACCESSORIES SOCKET
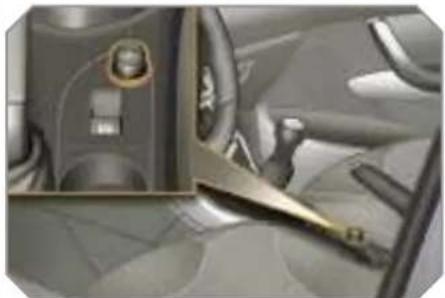
natural_image
Interior view of a car dashboard with steering wheel and dashboard (no visible text or symbols)To use the lighter, press it in and wait a few seconds until it pops out automatically
To connect a 12 V accessory (ma power: 100 Watts), remove the light-er and connect a suitable adaptor
LAYOUT
FRONT ARMREST
Comfort and storage device for the drive and front passenger
The height and longitudinal position of the armrest cover can be adjusted for greater comfort.
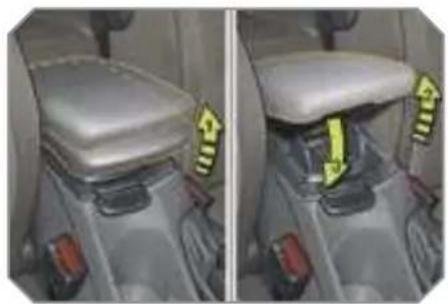
natural_image
Side-by-side comparison of a car interior showing the seat and dashboard (no text or symbols visible)Height adjustment
Raise the cover to the required position (low, intermediate or high).
If you raise the cover slightly beyond the high position, guide it when lowering it to the low position.
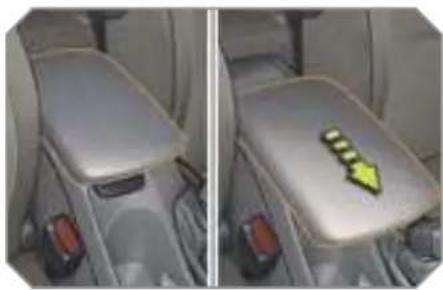
natural_image
Side-by-side comparison of a car seat with a highlighted yellow arrow pointing to the lid (no text or symbols visible)Longitudinal adjustment
Slide the cover fully forwards or rearwards.
Storage
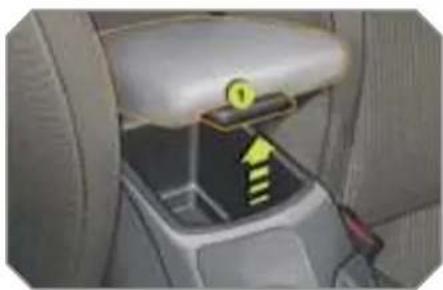
natural_image
Interior view of a car seatbelt with a highlighted lever (no text or symbols visible)The armrest's compartment can hold up to 6 CDs.
Raise the lever 1.
Raise the cover fully.
STORAGE BOX
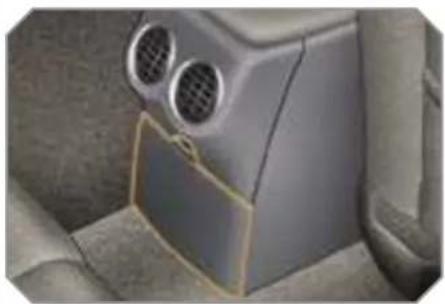
natural_image
Interior view of a car showing a gray vehicle hood with two ventilation grilles and a yellow trim (no text or symbols visible)To empty the box, after opening, press the tab and remove it.
MAT
Removable component which protects the carpet against exterior dirt.
Fitting
When fitting the mat for the first tim use only the fixings provided in the wallet attached.
Removal
To remove the mat on the driver's side:
move the seat as far back as possible,
unclip the fixings,
remove the mat.
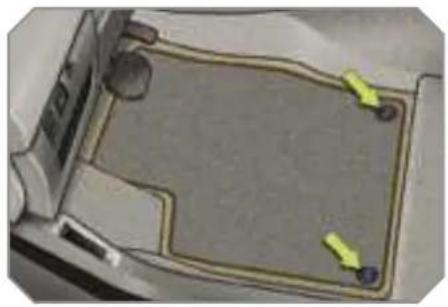
natural_image
Interior view of a car dashboard with highlighted buttons and control points (no text or symbols visible)Refitting
To refit the mat on the driver's side
or position the mat correctly,
refit the fixings by pressing,
check that the mat is secured correctly.

To avoid any risk of jamming of the pedals:
- only use mats which are suited to the fixings already present in the vehicle; it is imperative that these are used,
- never fit one mat on top of another.
STORAGE DRAWERS\*

natural_image
Interior view of a car showing the seat, dashboard, and steering wheel (no text or symbols visible)Opening
F Raise the front of the drawer and pul
Removal
Bring the drawer to the end of its tray
Press the ends of the slides.
Raise the drawer and pull it fully.
Refitting
Engage the drawer in its slides.
At the end of its travel, press on the top of the drawer to secure it.

Do not place heavy objects in the drawers.
* Except on electric seat.
LAYOUT
REAR ARMREST
Comfort and storage device for the rear passengers.
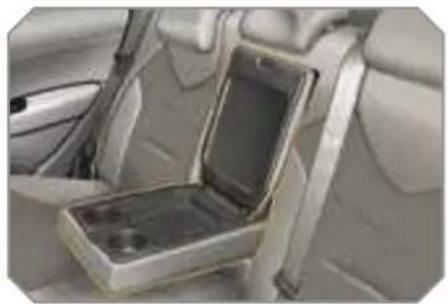
natural_image
Interior view of a car showing a metallic car trunk with an open compartment (no visible text or symbols)Lower the rear armrest for a more comfortable position.
- Raise the cover to gain access to its storage compartment
This has a storage tray, two can holders and two pen holders.
SKI FLAP
Device for storing and transporting long objects.
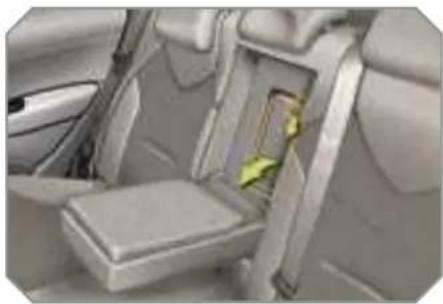
natural_image
Interior view of a car showing the seat, rear seats, and dashboard (no visible text or symbols)Opening
Lower the rear armrest.
Pull the flap handle downwards.
Lower the flap.
Load the objects from inside the boc
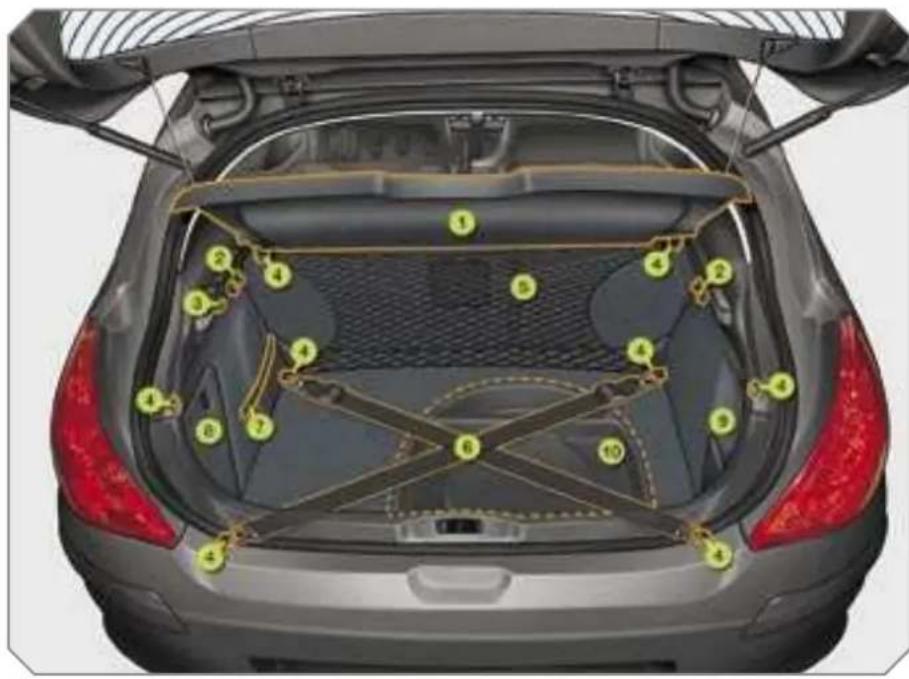
BOOT LAYOUT
- Rear shelf or shelf with integrated storage compartment (see details on following page)
- Hooks (see details on following page)
- 12 V accessories socket (see details on following page)
- Stowing rings
- Luggage retaining net (see details on following page)
- Movable straps (see details on following page)
- Luggage retaining strap
- Enclosed storage tray
- Open storage tray
- Storage box (see details on following page)
Rear shell
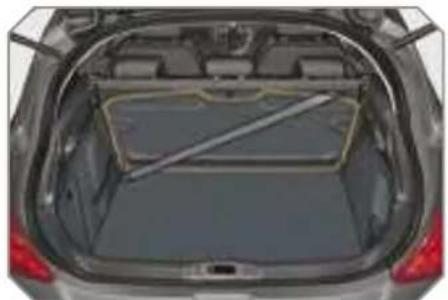
natural_image
Top-down view of a car trunk with visible rear seats and a diagonal stripe on the back (no text or symbols)To remove the shelf
unhook the two cords,
raise the shelf slightly, then remove
There are several options for storing the shelf
- either upright behind the front seats
- or upright behind the rear seats using one of the movable straps.
Shelf with integrated storage compartment
This permits the storage of any object s that it cannot be seen from the outside and without hindering rearward visibility
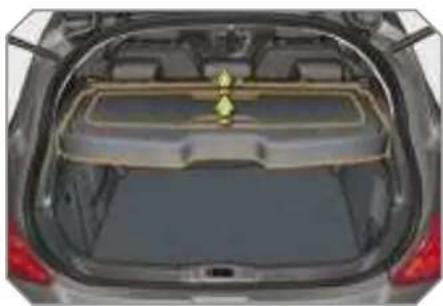
natural_image
Top-down view of a car trunk with a covered storage tray and a golden emblem on the roof (no visible text or symbols)To remove the shelf:
unhook the two cords,
raise the shelf slightly, then remove
There are several options for storing the shelf:
- either upright behind the front seats
- or upright behind the rear seats using one of the movable straps.
To open the cover, from inside or outside, raise one of the two handles.
To close the cover, first raise the handle.
To remove the cover, raise both handles at the same time
Hooks
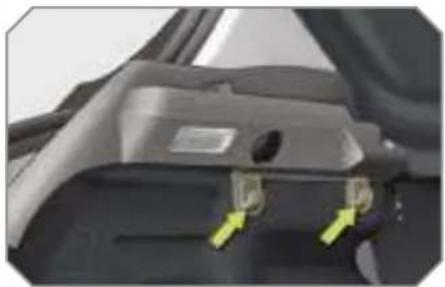
natural_image
Close-up of a car rear bumper with yellow arrows pointing to specific components (no visible text or symbols)The hooks permit the securing of shopping bags.
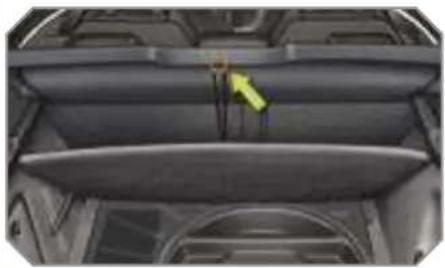
natural_image
Interior view of a car showing the roof, seats, and dashboard (no visible text or symbols)
When changing a wheel
An additional hook, under the shelf, permits easy access to the spare wheel by retaining the boot carpet by means of its cord.
12 V accessories socket
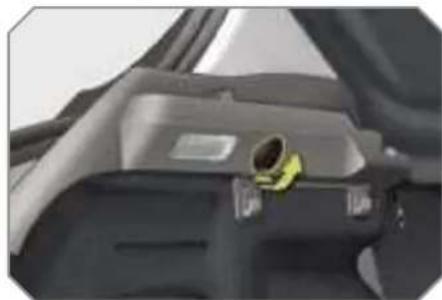
natural_image
Close-up of a mechanical component with a yellow connector and a label on the side (no visible text or symbols)In order to connect a 12 V accessory (max power: 100 Watts), remove the cap and connect the appropriate adaptor
Turn the key to the ignition position.
Movable straps
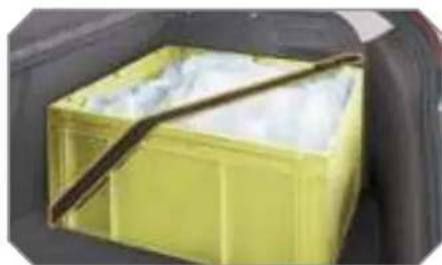
natural_image
Yellow plastic recycling bin with a brown handle, placed inside a car trunk (no visible text or symbols)Hooked onto the stowing rings, they permit securing of your luggage.
Luggage retaining net
Hooked onto the stowing rings, this enables you to secure your luggage.
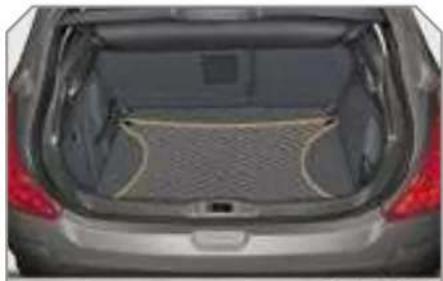
natural_image
Top-down view of a silver car trunk showing its rear canopy and side grille (no text or symbols visible)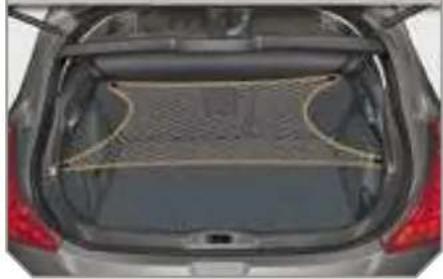
natural_image
Top-down view of a car trunk with visible mesh ventilation and side-mounted roof (no text or symbols)There are three possible positions:
- flat at the bottom of the boot
- horizontal at the rear shelf
- vertical at the back of the rear seats
Storage box
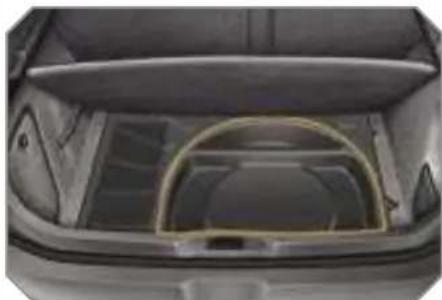
natural_image
Interior view of a car trunk with a yellow hose partially visible (no text or symbols)- Raise the boot carpet to gain access to the storage box.
This has areas for storing a box of spar bulbs, a first aid kit, a puncture repa kit, two warning triangles, ...
CHILD SAFETY
GENERAL POINTS RELATING TO CHILD SEATS
Although one of PEUGEOT's main criteria when designing your vehicle, the safety of your children also depends on you.
For maximum safety, please follow these precautions:
- in accordance with Directive 2003/20, all children under the age of 12 or less than one metre fifty tall must travel in approved child seats suite to their weight, on seats fitted with a seat belt or ISOFIX mountings*.
- statistically, the safest seats in your vehicle for the transportation of children are the rear seats,
- a child weighing less than 9 kg mu: travel in the "rearwards-facing" positio both in the front and in the rear
INSTALLING A CHILD SEAT USING A THREE POINT SEAT BELT
"Rearwards-facing"
When a "rearwards-facing" child seat is installed on the front passenger seat, it is essential that the passenger air bag is disarmed. Otherwise the child would risk being seriously injured or killed if the air bag were to inflate.
"Forwards-facing"
When a "forwards-facing" child seat installed on the front passenger seat, adjust the vehicle's seat to the intermediate longitudinal position with the seat back upright and leave the passenger air bag armed.
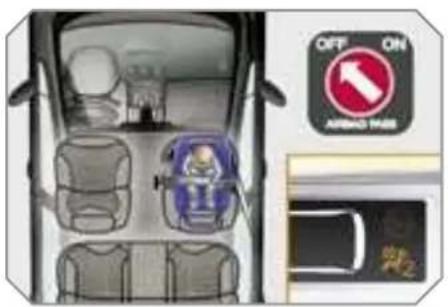
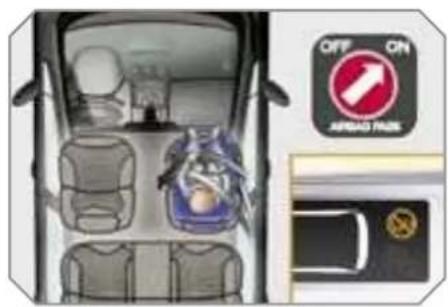
Intermediate longitudinal position

PEUGEOT recommends that children should travel in the rear seats of your vehicle:
- "rearwards-facing" up to the age of 2,
- "forwards-facing" over the age of 2.
* The rules for transporting children are specific to each country. Consult the current legislation in your country.
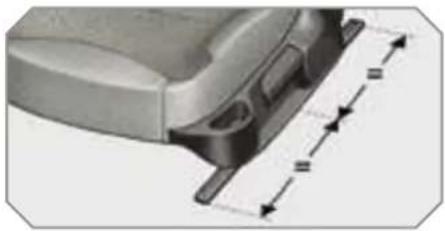
natural_image
Mechanical component diagram showing a bracket and mounting base with dimension lines (no text or symbols)CHILD SAFETY

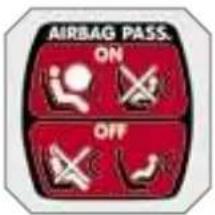
Passenger air bag OFF
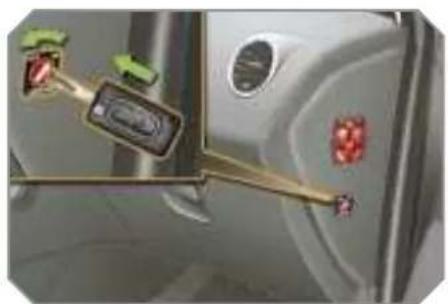
natural_image
Close-up of a car interior showing a hand holding a small object near the door, with no visible text or symbols.CHILD SEATS RECOMMENDED BY PEUGEOT
PEUGEOT offers a complete range of recommended child seats which are secured using a three point seat belt:
Group 0: from birth to 10 kg Group 0+: from birth to 13 kg
Groups 1, 2 and 3: from 9 to 36 kg
L1 "ROMER Baby-Safe Plus" Installed in the rear-facing position.
L2 KIDDY Life' or the safety young children (om 9 to 18 kg). PEUGEOT recommends use the restraining cushion
Groups 2 and 3: from 15 to 36 kg
L3 "RECARO Start"
"KLIPPAN Optima' From the age of 6 years (approximately 22 kg), the booster is used on its own.
CHILD SAFETY

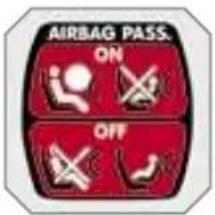
Passenger air bag OFF
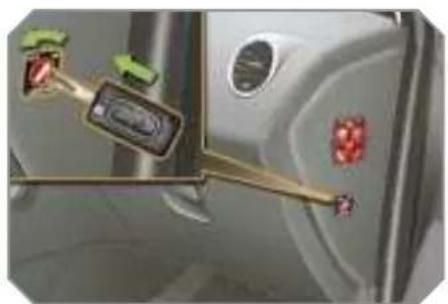
natural_image
Close-up of a car interior showing a hand holding a small object near the door, with no visible text or symbols.CHILD SEATS RECOMMENDED BY PEUGEOT
PEUGEOT offers a complete range of recommended child seats which are secured using a three point seat belt:
Group 0: from birth to 10 kg Group 0+: from birth to 13 kg
Groups 1, 2 and 3: from 9 to 36 kg
L1 "ROMER Baby-Safe Plus" Installed in the rear-facing position.
L2 KIDDY Life' or the safety young children (om 9 to 18 kg). PEUGEOT recommends use the restraining cushion
Groups 2 and 3: from 15 to 36 kg
L3 "RECARO Start"
"KLIPPAN Optima' From the age of 6 years (approximately 22 kg), the booster is used on its own.
CHILD SAFETY
LOCATION OF CHILD SEATS SECURED USING THE SEAT BELT
In accordance with European regulations (Directive 2005/40), this table indicates the options for installing child seats secured using the seat belt and universally approved (a) in relation to the weight of the child and the seat in the vehicle.
| Seal | Weight of the child/indicative age | ||||
| Less than 13 kg (groups 0 (b) and 0+) Up to ≈ 1 year | From 9 to 18 kg (group 1) From 1 to ≈ 3 years | From 15 to 25 kg (group 2) From 3 to ≈ 6 years | From 22 to 36 kg (group 3) From 6 to ≈ 10 years | ||
| Front passenger seat (c): | |||||
| - fixec |  | U (R1) | U (R1) | U (R1) | U (R1) |
| - height adjustable | U (R2) | U (R2) | U (R2) | U (R2) | |
| Rear side seats |  | U | U* | U* | U* |
| Rear centre seal |  | U | U*(except L2) | U*L3 | U*L3 |
(a) Universal child seat: child seat which can be installed in all vehicles using the seat belt
(b) Group 0: from birth to 10 kg
(c) Consult the legislation in force in your country before installing your child on this seat.
U: seat suitable for the installation of a child seat secured using the seat belt and universally approved "rear facing" and/or "forward facing"
U (R1): identical to U, with the vehicle's seat adjusted to the intermediate longitudinal position
U (R2): identical to U, with the vehicle's seat adjusted to the highest position
L-: only the child seats indicated can be installed on the seat concerned (according to country).
* The seat's head restraint must be removed and stored.

ADVICE ON CHILD SEATS
The incorrect installation of a child seat in a vehicle compromises the child's protection in the event of an accident.
Remember to fasten the seat belts or the child seat harnesses keeping the slack in relation to the child's body to a minimum, even for short journeys.
For optimum installation of the "forward facing" child seat, ensure that the back of the child seat is in contact with the back of the vehicle's seat and that the head restraint does not cause any discomfort.
If the head restraint has to be removed, ensure that it is stored or attached securely to prevent it from being thrown around the vehicle in the event of sharp braking.
Children under the age of 10 must not travel in the "forward facing" position on the front passenger seat, unless the rear seats are already occupied by other children, cannot be used or are absent.
Disarm the passenger air bag when a "rear facing" child seat is installed on the front seat. Otherwise, the child would risk being seriously injured or killed if the air bag were to inflate.
Installing a booster seat
The chest part of the seat belt must be positioned on the child's shoulder without touching the neck.
Ensure that the lap part of the seat belt passes correctly over the child's thighs.
PEUGEOT recommends the use of a booster seat which has a back, fitted with a seat belt guide at shoulder level.
As a safety precaution, do not leave:
- one or more children alone and un-supervised in a vehicle,
- a child or an animal in a vehicle which is exposed to the sun, with the windows closed,
- the keys within reach of children inside the vehicle.
To prevent accidental opening of the doors and rear windows, use the "Child lock".
Take care not to open the rear windows by more than one third.
To protect young children from the rays of the sun, fit side blinds on the rear windows.
CHILD SAFETY
"ISOFIX" MOUNTINGS
Your vehicle has been approved in accordance with the new ISOFIX regulation. The seats, represented below, are fitted with regulation ISOFIX mountings:
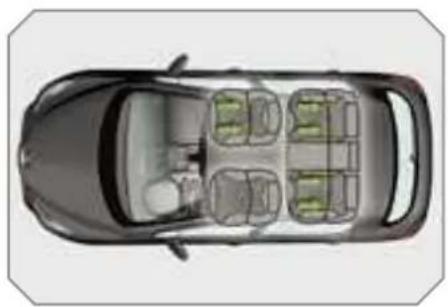
natural_image
Top-down view of a car showing its four-quarter interior layout with no visible text or symbols
The incorrect installation of a child seat in a vehicle compromises the child's protection in the event of an accident.

For information regarding the ISOFIX child seats which can be installed in your vehicle, consult the summary table for the location of the ISOFIX child seats.
The Isofix mountings are three rings for each seat:
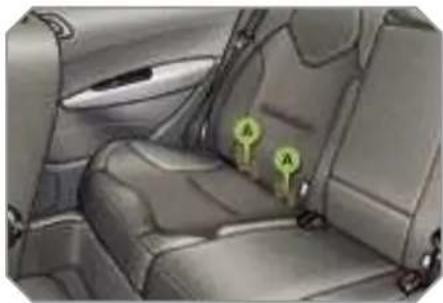
natural_image
Interior view of a car showing two green location pins labeled 'A' on the backrest seat (no text or symbols beyond labels)- two rings A located between the vehicle seat back and cushion, indicated by a label,
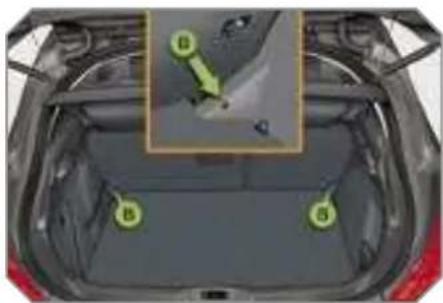
natural_image
Top-down view of a car trunk with highlighted car interior (no text or symbols visible)- a ring B, for fixing the upper strap referred to as the TOP TETHER.
This ISOFIX mounting system guarantees you fast, reliable and safe fitting of the child seat in your vehicle.
The ISOFIX child seats are fitted with two locks which are secured easily or the two rings A.
Some also have an upper strap which is attached to ring B.
To attach this strap, raise the vehicle seat's head restraint then pass the hook between its rods. Then fix the hook on ring B and tighten the upper strap.
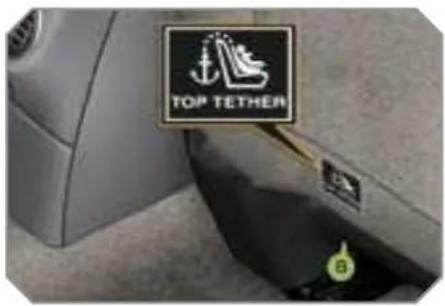
ISOFIX CHILD SEAT RECOMMENDED BY PEUGEOT AND APPROVED FOR YOUR VEHICLE
ISOFIX RÖMER Duo Plus (size category B1)
Group 1: from 9 to 18 kg
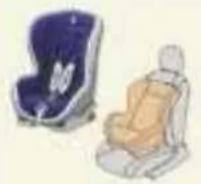
Installed in the forward facing position. Fitted with an upper strap to be secured on the ISOFIX upper ring, referred to as the TOP TETHER. Three seat body angles: sitting, reclining, lying.

This child seat can also be used on seats which are not fitted with ISOFIX mountings. In this case, it must be attached to the vehicle seat using the three point seat belt. Follow the instructions for fitting the child seat given in the seat manufacturer's installation guide.
CHILD SAFETY
SUMMARY TABLE FOR THE LOCATION OF ISOFIX CHILD SEATS
In accordance with European Regulations (ECE 16), this table indicates the options for installing ISOFIX child seats on seats in the vehicle fitted with ISOFIX mountings.
In the case of universal and semi-universal ISOFIX child seats, the ISOFIX size category, determined by a letter from A to G, is indicated on the child seat next to the ISOFIX logo.
| Weight of the child/indicative age | ||||||||||
| Less than 10 kg (group 0) Up to approx. 5 months | Less than 10 kg (group 0) Less than 13 kg (group 0+) Up to approx. 1 year | From 9 to 18 kg (group 0) From approx. 1 to 3 years | ||||||||
| Type of ISOFIX child seat | Infant car seat | "rear facing" | "rear facing" | "forward facing" | ||||||
| ISOFIX size category | F | G | C | D | E | C | D | A | B | B1 |
| ISOFIX child seats universal and semi-universal which can be installed on the: | ||||||||||
| - front passenger seat | X | IL-SU | IL-SU | IUF | ||||||
| - rear side seats | IL-SU* | IL-SU | IL-SU | IUF | ||||||
IUF: seat suitable for the installation of an Isofix Universal seat, "Forward facing" secured using the "Top Tether" upper strap
IL-SU: seat suitable for the installation of an Isofix Semi-Universal seat either:
- "rear facing" fitted with a "Top Tether" upper strap or a support
- "forward facing" fitted with a support.
- an infant car seat fitted with a "Top Tether" upper strap or a support
For advice on securing of the "Top Tether" upper strap, refer to the "Isofix mountings section"
X: seat not suitable for the installation of an ISOFIX seat of the size category indicated.
* The ISOFIX infant car seat, secured on the lower rings of a vehicle ISOFIX seat, occupies two rear seats.
CHILD SAFETY
MANUAL CHILD LOCK
Mechanical system to prevent opening of the rear door using its interior control. The control is located on the edge of each rear door.
Locking
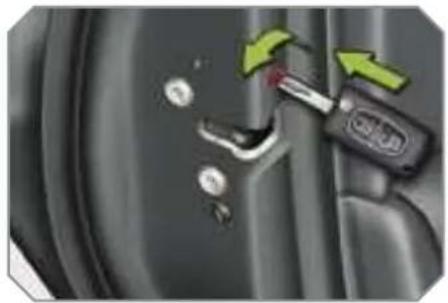
natural_image
Close-up of a car key inserted into a door, showing red and green arrows indicating movement (no text or symbols)Turn the red control one quarter (a turn to the right using the ignition key.
Unlocking
Turn the red control one quarter of a turn to the left using the ignition key.
ELECTRIC CHILD LOCK
Remote control system to prevent opening of the rear doors using their interior controls and use of the rear electric windows.
The control is located on the driver's door, with the electric window controls.
Activation
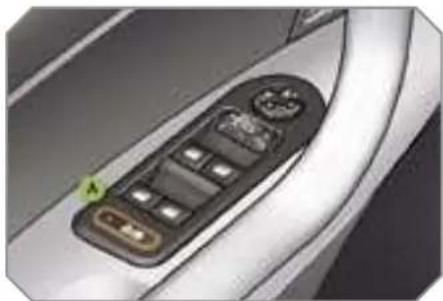
natural_image
Close-up of a car's dashboard with a control panel and buttons (no visible text or symbols)Press button A.
The indicator light on button A comes on, accompanied by a message on the multifunction display.
This indicator light remains on until the child lock is deactivated.
Deactivation
Press button A again.
The indicator light on button A switches off, accompanied by a message on the multifunction display.
This indicator light remains off until the child lock is activated.
!
Any other status of the indicator light indicates a malfunction of the electric child lock. Contact a PEUGEOT dealer to have the system checked.
!
This system is independent and in no circumstances does it take the place of the central locking control. Check the status of the child lock each time you switch on the ignition. Always remove the key from the ignition when leaving the vehicle, even for a short time.
In the event of a serious impact, the electric child lock is deactivated automatically to permit the exit of the rear passengers.
SAFETY
DIRECTION INDICATORS
Selection of the left or right direction indicators to signal a change of direction of the vehicle.
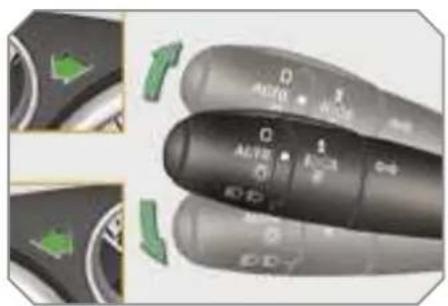
natural_image
Close-up of a black automotive control knob with green directional arrows indicating rotation (no text or symbols visible)Lower the lights stalk fully when moving to the left.
Raise the lights stalk fully when moving to the right.

If you forget to cancel the direction indicators for more than twenty seconds, the volume of the audible signal will increase if the speed is above 40 mph (60 km/h).
HAZARD WARNING LIGHTS
A visual warning by means of the direction indicators to alert other road users to a vehicle breakdown, towing or accident.
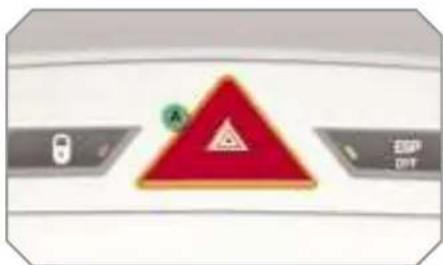
Press button A, the direction indicators flash.
They can operate with the ignition off.
Automatic lighting of hazard warning lights
When braking in an emergency, depending on the deceleration, the hazard warning lights come on.
They will switch off automatically the first time you accelerate.
If they do not, press button A to switch the direction indicators off.

As a safety precaution in a traffic jam, switch on the hazard warning lights if you are the last in the queue.
HORN
Audible warning to alert other road users to an imminent danger.
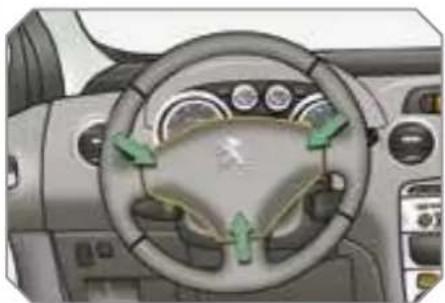
natural_image
Interior view of a car dashboard with steering wheel and directional arrows (no text or symbols)Press one of the spokes of the steering wheel.

Use the horn moderately and only in the following cases:
- immediate danger,
- when overtaking a cyclist or a pe- destrian,
- when approaching an area where there is no visibility.
TYRE UNDER-INFLATION DETECTION
System which automatically checks the pressure of the tyres while driving.
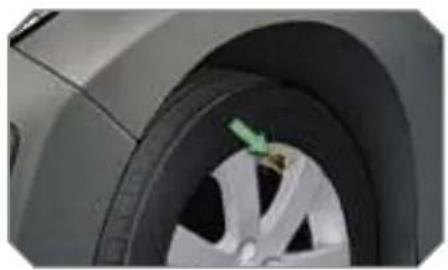
natural_image
Close-up of a car wheel rim with a green arrow pointing to the center (no visible text or symbols)Sensors fitted in each valve trigger a warning in the event of malfunction (speed above 12 mph (20 km/h)).

The tyre under-inflation detection system is an aid to driving which does not replace the need for the driver to be vigilant or to drive responsibly.
Flat tyre

This warning light is displayed on the instrument panel and/or a message appears on the multifunction display, accompanied by an aud
ble signal, to locate the wheel concern Check the tyre pressures as soon as possit This check must be carried out when the tyres are cold.
Puncture

The STOP warning light comes on and/or this warning light is displayed on the instrument panel, accompanied by an audible signal and a message on the multifunction of play locating the wheel concern.
Stop immediately, avoiding any sudden movement of the steering wheel and the brakes.
Change the damaged wheel (punctured or very deflated tyre), and have the tyre pressure checked as soon as possible.
Sensor(s) not detected or faulty

This warning light is displayed on the instrument panel and/or a message appears on the multifunction display, accompanied audible signal, to locate the wheelels which are not detected or to be a fault in the system.
Contact a PEUGEOT dealer to replace the faulty sensor(s).

This message is also displayed when one of the wheels is away from the vehicle (being repaired) or when one or more wheels without a sensor are fitted.
The spare wheel is not fitted with a sensor.

All repairs and changing of tyres on a wheel fitted with this system must be carried out by a PEUGEOT dealer.
If, when changing a tyre, you install a wheel which is not detected by your vehicle (example: fitting of snow tyres), you must have the system reinitialised by a PEUGEOT dealer.

This system does not eliminate the need to have the tyre pressure checked regularly (refer to the "Identification features" paragraph) to ensure that the optimum dynamic performance of the vehicle is maintained and prevent premature wear of the tyres, particularly in arduous driving conditions (heavy load, high speed).
The tyre pressures must be checked cold, at least once a month. Remember to check the pressure of the spare wheel.
The tyre under-inflation detection system may experience temporary interference due to radioelectric emissions on a frequency close to that used by the system.
SAFETY
Group of supplementary systems which help you to obtain optimum braking complete safety in emergency situations:
- the anti-lock braking system (ABS)
- the electronic brake force distribution (EBFD),
- the emergency braking assistance (EBA).
Anti-lock braking system and electronic brake force distribution
Linked systems which improve the stability and manoeuvrability of your vehicle when braking, in particular on poor or slippery surfaces.
Activation
The anti-lock braking system comes into operation automatically when there is a risk of wheel lock.
Normal operation of the ABS may make itself felt by slight vibration of the brake pedal.

When braking in an emergency, press very firmly without releasing the pressure.
Operating fault

If this warning light comes of accompanied by an audible signal and a message on the multifunction display, it indicates a malfunction of the anti-lock braking system which could result in loss of control of the vehicle when braking.

If this warning light comes on together with the STOP and ABS warning lights, accompanied by an audible signal and a message on the multifunction display, it indicates a malfunction of the electronic brake force distribution which could result in loss of control of the vehicle when braking.
You MUST stop as soon as it is safe to do so.
In both cases, contact a PEUGEOT dealer.

When replacing wheels (tyres and rims), ensure that they conform to the manufacturer's recommendations.
Emergency braking assistance
System which, in an emergency, enables you to obtain the optimum braking pressure more quickly, thus reducing the stopping distance.
Activation
It is triggered by the speed at which the brake pedal is pressed.
The effect of this is a reduction in t resistance of the pedal and an increase in braking efficiency.
Associated systems which guarantee the directional stability of the vehicle within the limits of the laws of physics:
- the anti-skid regulation (ASR)
- the electronic stability programme (ESP).
Anti-skid regulation and electronic stability programme
The anti-skid regulation optimises traction to prevent skidding of the wheels by acting on the brakes of the drivir wheels and on the engine.
The electronic stability programme acts on the brake of one or more wheels and on the engine to keep the vehicle on the trajectory required by the driver.
Activation
These systems are activated automatically each time the vehicle is started.
They come into operation in the event of a grip or trajectory problem.

This is indicated by flashing o this warning light on the instrument panel
Disarming
In exceptional conditions (starting a vehicle which is bogged down, stuck in snow, on soft ground, ...), it may be advisable to disarm the ASR and ESP systems, so that the wheels can move freely and regain grip.
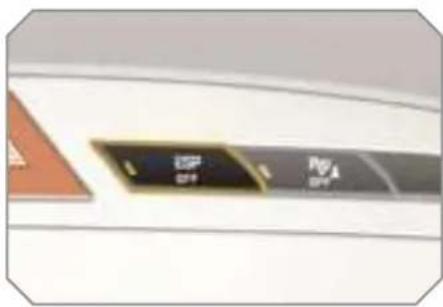
Press the "ESP OFF" button, located in the centre of the fascia.

If this warning light comes on the instrument panel and the indicator light of the button comes on, this indicates the ASR and ESP systems are disarm
Reactivation
These systems are reactivated automatically each time the ignition is switched back on or from 30 mph (50 km/h).
Press the "ESP OFF" button again to reactivate them manually
Operating fault

If this warning light comes o accompanied by an audible signal and a message on the multifunction display, this indicates
a malfunction of these systems. Contact a PEUGEOT dealer to have the systems checked.

The ESP/ASR systems offer exceptional safety in normal driving, but this should not encourage the driver to take extra risks or drive at high speed.
The correct functioning of these systems depends on observation of the manufacturer's recommendations regarding the wheels (tyres and rims), the braking components, the electronic components and the PEUGEOT assembly and operation procedures.
After an impact, have these systems checked by a PEUGEOT dealer.
SEAT BELTS
Front seat belts
The front seat belts are fitted with a pre-tensioning and force limiting system.
This system improves safety in the front seats in the event of a front impact. Depending on the severity of the impact the pretensioning system instantly tightens the seat belts against the body the occupants.
The pretensioning seat belts are active when the ignition is on.
The force limiter reduces the pressure of the seat belt on the chest of the occupant, so increasing his protection.
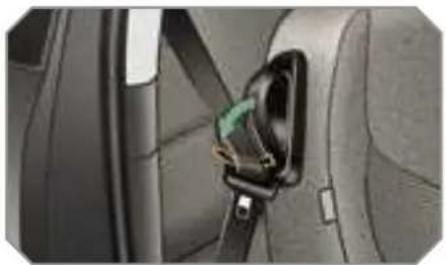
natural_image
Close-up of a car seatbelt buckle and side panel (no text or symbols visible)On the 3-door versions, lower the support incorporated in the control to re the seat belt on it. This enables you to retrieve the seat belt more easily when you have to put it back on.
Fastening
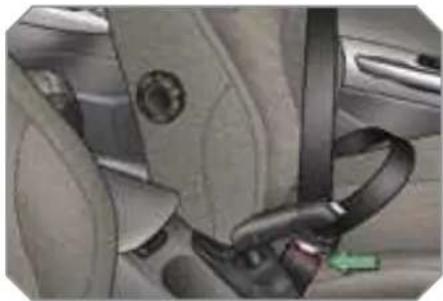
natural_image
Close-up of a car seatbelt and belt assembly (no visible text or symbols)Pull the strap, then insert the tongue in the buckle.
Check that the seat belt is fastened correctly by pulling the strap.
Unfastening
Press the red button on the buckle.
Height adjustment
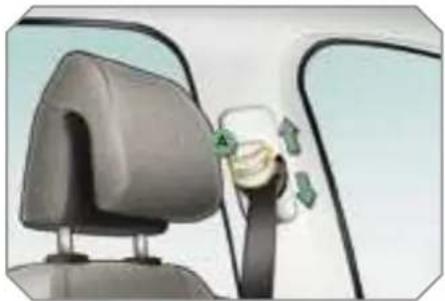
natural_image
Interior view of a car showing a person's seat and dashboard with a green leaf on the windshield (no text or symbols visible)To lower the attachment point, squeeze the control A and slide it downwards.
To raise the attachment point, slide the control A upwards.
Seat belt not fastened/unfastened warning light

When the ignition is switched on, this warning light comes on, either on the instrument pane or on the seat belt and passen-
display, if the driver and/or the front passenger has not fastened his seat belt.
From approximately 12 mph (20 km/h) t warning light flashes for two minutes ad accompanied by an audible signal of increasing volume. Once these two minutes had elapsed, this warning light remains on the driver and/or the front passenger fastens his seat bel
Seat belt not fastened/unfastened warning lights display
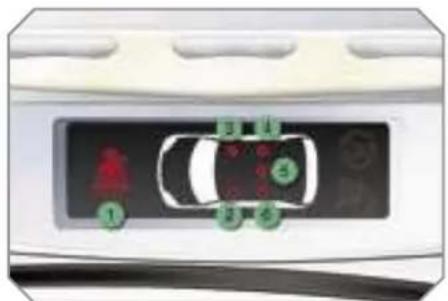
- Front and/or rear seat belts not fastened/unfastened warning light.
- Front left seat belt warning light.
- Front right seat belt warning light.
- Rear right seat belt warning light.
- Rear centre seat belt warning light.
- Rear left seat belt warning light.
The corresponding warning light 2 or 3 comes on in red on the seat belt at passenger's front air bag warning lights display if the seat belt is not fastened on is unfastened
Rear seat belts
The rear seats are each fitted with three-point inertia reel seat belt with force limiter (with the exception of th rear centre seat)
Fastening
Pull the strap, then insert the tongue in the buckle.
Check that the seat belt is fastened correctly by pulling the strap.
Unfastening
Press the red button on the buckle.
Seat belt unfastened warning light

This warning light comes on, either on the instrument pane or on the seat belt and passenger's front air bag warning lights display, when one or more rear passen gers unfasten their seat belt.
From approximately 12 mph (20 km) this warning light flashes for two minutes accompanied by an audible signal of creasing volume. Once these two minutes have elapsed, this warning light remains on until the one or more rear passenger fasten their seat be
Seat belt unfastened warning lights display
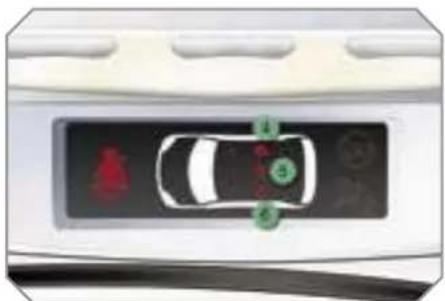
When the ignition is switched on, th corresponding warning lights 4, 5 and 6 come on in red for approximately 30 seconds, if the seat belt is not fastened.
When the engine is running or the vehicle is moving, the corresponding warning light 4, 5 or 6 comes on in red, accompanied by an audible signal and a message on the multifunction display, if a rear passenger has unfastened his seat bell
SAFETY
i
Wherever you are seated in the vehicle, always fasten your seat belt, even for short journeys.
Do not invert the seat belt buckles as they will not fulfil their role fully.
The seat belts are fitted with an inertia reel permitting automatic adjustment of the length of the strap to your size. The seat belt is stored automatically when not in use.
Before and after use, ensure that the seat belt is rolled up correctly.
The lower part of the strap must be positioned as low as possible on the pelvis.
The upper part must be positioned in the hollow of the shoulder.
The inertia reels are fitted with an automatic locking device which comes into operation in the event of a collision, emergency braking or if the vehicle rolls over. You can release the device by pulling rapidly on the strap and releasing it.
In order to be effective, a seat belt:
- must be tightened as close to the body as possible,
- must restrain one person of adult size only,
- must not bear any trace of cuts or fraying,
- must be pulled in front of you with a smooth movement, checking that it does not twist,
- must not be transformed or modified to avoid altering its performance.
In accordance with current safety regulations, all repairs and checks must be carried out by a PEUGEOT dealer who guarantees that the work is carried out correctly.
Have your seat belts checked regularly by a PEUGEOT dealer and particularly if the straps show signs of damage.
Clean the seat belt straps with soapy water or a textile cleaning product, sold by PEUGEOT dealers.
After folding or moving a seat or rear bench seat, ensure that the seat belt is positioned and rolled up correctly.
Recommendations for children
Use a suitable child seat if the passenger is less than 12 years old or shorter than one metre fifty.
Never use the same seat belt to secure more than one person.
Never allow a child to travel on your lap.
Depending on the nature and seriousness of the impacts, the pretensioning device may be triggered before and independently of the air bags. Triggering of the pre-tensioners is accompanied by a slight discharge of harmless smoke and a noise, due to the activation of the pyrotechnic cartridge incorporated in the system.
In all cases, the air bag warning light comes on.
Following an impact, have the seat belts system checked, and if necessary replaced, by a PEUGEOT dealer.
AIR BAGS
System designed to maximise the safety of the occupants (with the exception of the rear centre passenger) in the event of violent collisions. It supplements the action of the force-limiting seat belts (with the exception of the rear centre passenger).
If a collision occurs, the electronic d tectors record and analyse the front and side impacts sustained in the impact detection zones:
- in the case of a serious impact, the air bags are triggered instantly and protect the occupants of the vehicle (with the exception of the rear centre passenger); immediately after the impact, the air bags deflate rapidly so that they do not hinder visibility or the exit of the occupants,
- in the case of a minor or rear impact or in certain roll-over conditions, the air bags will not be triggered; the seat belt alone is sufficient to provide optimum protection in these situations.

The air bags do not operate when the ignition is switched off.
This equipment will only operate once. If a second impact occurs (during the same or a subsequent accident), the air bag will not operate.
Impact detection zones
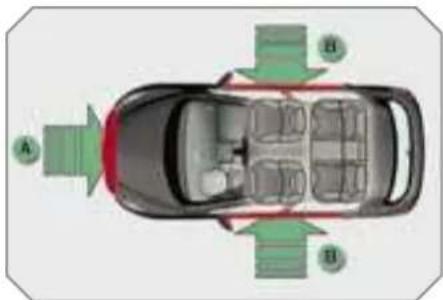
A. Front impact zone.
B. Side impact zone.
Triggering of the air bag(s) is accompanied by a slight emission of harmless smoke and a noise, due to the activation of the pyrotechnic cartridge incorporated in the system.
This smoke is not harmful, but sensitive individuals may experience slight irritation.
The noise of the detonation may result in a slight loss of hearing for a short time.
Front air bags
System which protects the driver and front passenger in the event of a serious front impact in order to limit the risk of injury to the head and chest.
The driver's air bag is incorporated in the centre of the steering wheel; the front passenger's air bag is incorporated in the fascia above the glove box.
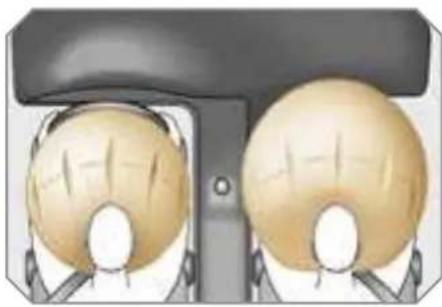
natural_image
Illustration of two identical mechanical components with circular heads and a central shaft, no text or symbols present.Activation
The air bags are triggered simultane pusly, unless the passenger's front a bag is disarmed, in the event of a serious front impact applied to all or part of the front impact zone A in the longitudinal centreline of the vehicle on a horizontal plane and directed from the front to the rear of the vehicle.
The front air bag inflates between the front occupant of the vehicle and the fascia to cushion his forward movement.
SAFETY
Deactivation
Only the passenger's front air bag can be disarmed:
with the ignition off, insert the key in the passenger air bag disarmin switch 1.
turn it to the "OFF" position.
then, remove the key keeping the switch in this position.
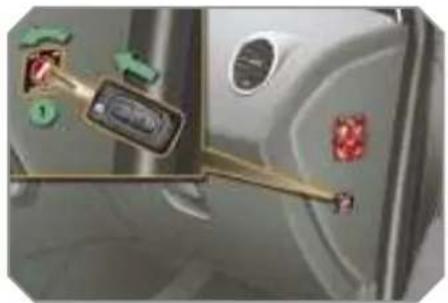
natural_image
Illustration of a car interior with a highlighted vehicle and directional arrows (no text or symbols)
According to version, this warning light comes on either on the instrument panel or on the seat belt and passenger's front
air bag warning lights display when the ignition is on and until the air bag is re-armed.

To guarantee the safety of your child, it is imperative that the passenger's front air bag is disarmed when you install a "rear facing" child seat on the front passenger seat.
Otherwise, the child would risk being seriously injured or killed if the air bag were triggered.
Reactivation
When you remove the child seat, turn switch 1 to the "ON" position to re-arm the air bag and so guarantee the safety of your front passenger in the event of an impact.

With the ignition on, this warning light comes on on the seat belt and passenger's front air bag warning lights display for mately one minute, if the pass front air bag is activated.
Operating fault

If this warning light comes on of the instrument panel, accompanied by an audible warning and a message on the multifunction
display, contact a PEUGEOT dealer to have the system checked. The air bags may no longer be triggered in the event of a serious impact.

f this warning light flashes, contact a PEUGEOT dealer. The passenger's front air bag may no longer be triggered in the event of a serious impact.

If at least one of the two air bag warning lights come on continuously, do not install a child seat on the front passenger seat. Contact a PEUGEOT dealer.
Steering column air bag\*
System which protects the driver's knees in the event of a serious front impact.
This air bag is incorporated in the fascia below the steering column.
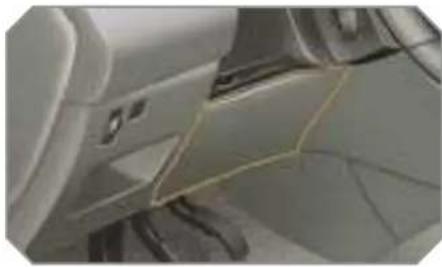
natural_image
Close-up of a white car interior with visible seatbelt and window (no text or symbols)Activation
It is deployed at the same time as the front air bags.
Side air bags
System which protects the driver and passengers (with the exception of the rear centre passenger) in the event of a serious side impact in order to limit the risk of injury to the chest.
Each side air bag is incorporated:
- in the front, in the seat back frame, or the door side,
- in the rear, in the side trim (except on 3-door models).
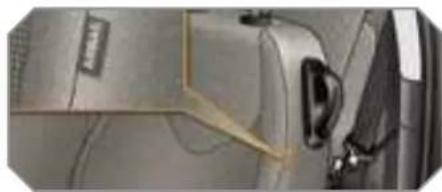
natural_image
Close-up of a car's front panel with visible wiring and sensors (no text or symbols)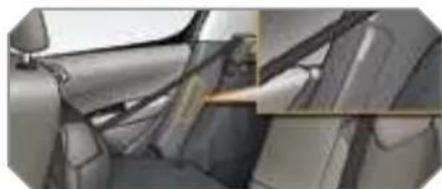
natural_image
Interior view of a car showing dashboard and seatbelt components (no visible text or symbols)Activation
The side air bags are triggered unilaterally in the event of a serious side impact applied to all or part of the side impact zone B, perpendicular to the longitudinal centreline of the vehicle on a horizontal plane and directed from the outside towards the inside of the vehicle.
The side air bag inflates between the front or rear occupant of the vehicle and the corresponding door trim pad.
Impact detection zones
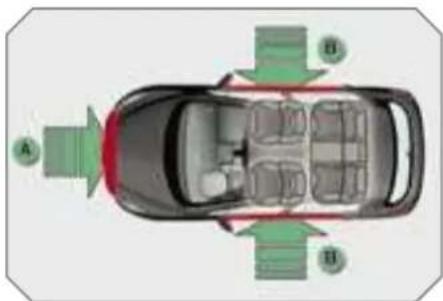
A. Front impact zone.
3. Side impact zone.
Curtain air bags
System which protects the driver and passengers (with the exception of the year centre passenger) in the event of a serious side impact in order to limit the risk of injury to the head.
Each curtain air bag is incorporated in the pillars and the upper section of the passenger compartment.
Activation
The curtain air bag is triggered at the same time as the corresponding side air bags in the event of a serious side impa applied to all or part of the side impact zone B, perpendicular to the longitudinal centreline of the vehicle on a horizontal plane and directed from the outside towards the inside of the vehicle
The curtain air bag inflates between the front or rear occupant of the vehicle and the windows.

In the event of a minor impact or bump on the side of the vehicle or if the vehicle rolls over, the air bag may not be triggered.
In the event of a rear or front collision, the air bag is not triggered.
Operating fault

f this warning light comes on or the instrument panel, accompanied by an audible signal and a message on the multifunction
display, contact a PEUGEOT dealer to have the system checked. The air bags may no longer be triggered in the event of a serious impact.
SAFETY

For the air bags to be fully effective, observe the following safety rules:
Sit in a normal upright position.
Wear a correctly adjusted seat belt.
Do not leave anything between the occupants and the air bags (a child, pet, object...). This could hamper the operation of the air bags or injure the occupants.
After an accident or if the vehicle has been stolen or broken into, have the air bag systems checked.
All work on the air bag system is strictly forbidden unless it is carried out by qualified personnel of the PEUGEOT network.
Even if all of the precautions mentioned are observed, a risk of injury or of minor burns to the head, chest or arms when an air bag is triggered cannot be ruled out. In fact, the bag inflates almost instantly (within a few milliseconds) then deflates within the same time discharging the hot gas via openings provided for this purpose.
Front air bags
Do not drive holding the steering wheel by its spokes or resting your hands on the centre part of the wheel.
Passengers must not place their feet on the fascia.
Smoke as little as possible as deployment of the air bags can cause burns or the risk of injury from a cigarette or pipe.
Never remove or pierce the steering wheel or hit it violently.
Steering column air bag\*
Do not sit with your knees any nearer to the steering wheel than necessary.
Side air bags
Put approved covers only on the seats. These will not hinder inflation of the side air bags. Contact a PEUGEOT dealer.
Do not fix or glue anything to the seat backs. This could cause injury to the chest or arms if the side air bag is triggered.
Do not sit with the upper part of the body any nearer to the door than necessary.
Curtain air bags
Do not fix or glue anything to the roof. This could cause injury to the head if the curtain air bag is triggered.
Do not remove the grab handles installed on the roof, they play a part in securing the curtain air bags.
* According to country.
HANDBRAKE
Mechanical brake to hold the vehicle when stationary.
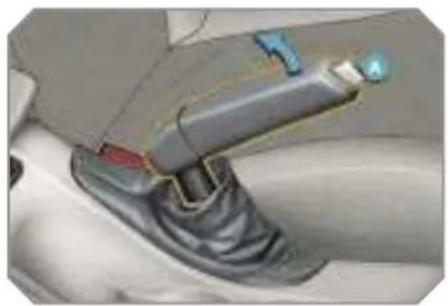
natural_image
Close-up of a car's side gear shift lever and wheel (no text or symbols visible)Applying
Pull the handbrake to immobilise your vehicle.
Releasing
Pull on the handle and press the button A to release the handbrake.

When the vehicle is being driven, if this warning light and the STOP warning light come on accompanied by an audible
signal and a message on the multifunction display, this indicates that the handbrake is still on or has not bee properly released.

When parking on a slope, direct your wheels towards the pavement to immobilise them, pull the hand-brake and engage a gear.
Engaging reverse gear
Raise the ring under the knob an push the gear lever to the left the forwards.
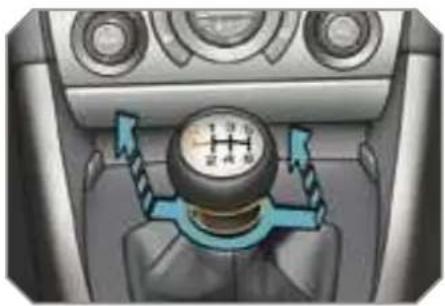
natural_image
Interior view of a vehicle headset with a circular dial indicator (no text or symbols visible)
Only engage reverse gear when the vehicle is stationary with the engine at idle.

As a safety precaution and to facilitate starting of the engine:
- always select neutral,
- press the clutch pedal.
DRIVING
6-SPEED PILOTED MANUAL GEARBOX
Six-speed piloted manual gearbox which offers a choice between the comfort of fully automatic operation or the pleasure of manual gear changing.
Therefore, three driving modes are offered:
- the automatic mode for automatic control of the gears by the gearbox,
- the sequential mode for manual changing of the gears by the driver,
- the auto sequential mode to overtake, for example, remaining in automatic mode while using the functions of the sequential mode.
A Sport function is available in automatic or sequential mode for a more dynamic style of driving.
The use of this gearbox enables you to benefit from an additional function: the hill start assistance.
Gear lever
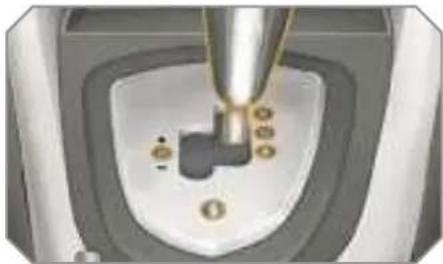
natural_image
Close-up of a mechanical device with a tool inserted into a control panel (no visible text or symbols)R. Reverse
With your foot on the brake, mov he lever upwards to select this position.
N. Neutral.
With your foot on the brake, select his position to start.
A. Automatic mode.
Move the lever downwards to select this mode.
VI. +/- Sequential mode with manua changing of the gears.
Move the lever downwards then to the left to select this mode, then:
- push the lever forwards to change up a gear,
-
or pull the lever rearwards to change down a gear.
-
Sport function.
Press this button to activate or deactivate this function.
Steering wheel controls
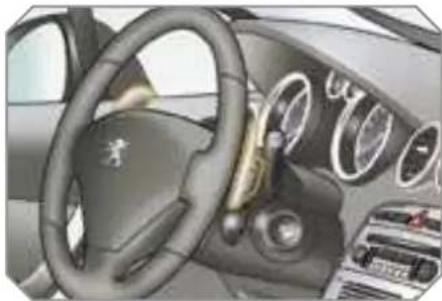
natural_image
Interior view of a car dashboard and steering wheel (no visible text or symbols)+. Change up control to the right of the steering wheel.
Press the back of the "+" steering wheel control to change up a gear.
- Change down control to the left of the steering wheel.
Press the back of the "-" steering wheel control to change down a gear.

The steering wheel controls do not permit the selection of neutral or the engaging or disengaging of reverse gear.
Displays on the instrument pane
Gear lever positions
N. Neutral
R. Reverse
1, 2, 3, 4, 5, 6. Gears in sequential mode
AUTO. This comes on when the automatic mode is selected. It switches off on changing to sequential mode.
S. Sport (Sport function)

Place your foot on the brake when this warning light flashes (e.g.: when starting the engine).

An audible signal is heard when reverse gear is engaged.
Moving off
Select position N.
Press the brake pedal down fully.
Start the engine.

N appears on the instrumer panel display

N flashes on the instrument panel, accompanied by an audible signal and a message on the multifunction display, if the gear lever is not in position N on starting.
Foot on brake flashes on the instrument panel, accompanied by an audible signal and a message on the multifunction display, if the brake pedal is not pressed on starting.
Select first gear (position M or A) or reverse (position R).
Release the handbrake.
Take your foot off the brake peda then accelerate.

AUTO and 1 or R appear or the instrument panel display.
Hill start assistance
This is an additional function associated with this gearbox. It permits the temporary immobilisation of your vehicle.
t maintains the pressure of the brakes briefly, long enough for you to move your foot from the brake pedal to the accelerator pedal.
t coms into operation if the vehicle immobilised by pressing the brake pedal and in accordance with the gradient:
- on an ascending gradient, with the vehicle stationary, gear lever in position A or M the vehicle is kept immobil briefly when the brake pedal is released.
- on a descending gradient, with the vehicle stationary, gear lever in position R, the vehicle is kept immobile briefly when the brake pedal is released.

Do not keep the vehicle immobile using the accelerator.

Never leave the vehicle during a hill start assistance phase.
DRIVING
Sequential mode
When the vehicle has moved off, select position M to change to sequential mode.

AUTO disappears and the gears engaged appear in succession on the instrument panel display.
The gear change requests are only carried out if the engine speed permits.
It is not necessary to release the accelerator during gear changes.
When braking or slowing down, the gearbox changes down automatically to permit reacceleration of the vehicle i the correct gear.

At very low speed, if reverse gear is requested, this will only be taken into account when the vehicle is immobilised. The Foot on brake warning light may flash on the instrument panel to prompt you to brake.
At high speed, if reverse gear is requested, the N indicator light will flash and the gearbox will change to neutral automatically. To engage a gear again, return the lever to position A or M.

On sharp acceleration, the gearbox will not change up unless the driver acts on the gear lever or the steering wheel controls.
Never select neutral N while the vehicle is moving.
Only engage reverse gear R when the vehicle is immobilised with the brake pedal pressed.
Automatic mode
Following use of the sequential mode, select position A to return to the automatic mode.

AUTO and the gear engaged appear on the instrument panel display.
The gearbox is then operating in auto-active mode, without any action on the part of the driver. It continuously selects the most suitable gear in relation to the following parameters:
- style of driving
- profile of the road
For optimum acceleration, for example when overtaking another vehicle, press the accelerator pedal firmly past the point of resistance.
"Auto sequential mode"
This mode enables you to overtake, for example, remaining in automatic mode while using the functions of the sequential mode.
- Activate steering wheel control position + or -.
The gearbox engages the gear requested if the engine speed permits AUTO is still displayed on the instrument panel.
After a few moments without any action on the controls, the gearbox resume: automatic control of the gears.
Sport function
Following selection of the sequential mode or automatic mode, press button S to activate the Sport functic which offers you a more dynamic style of driving.

S appears next to the gear engaged on the instrument panel display.
Press button S again to deactivate the function.
S is then cleared from the instrumen panel display

The Sport function is deactivated each time the ignition is switched off.
Stopping the vehicle
Before switching off the engine, you can choose to:
- move to position N to engage neutral,
- leave the gear engaged; in this case, it will not be possible to move the vehicle.
In both cases, it is essential that yo apply the handbrake to immobilise the vehicle.
Operating fault

With the ignition on, if this warning light comes on an AUTO flashes, accompanied by an audible signal and a message on
the multifunction display, this indicate a malfunction of the gearbox.
Contact a PEUGEOT dealer without delay.

With the ignition on, if the warning light above and this warning light come on, accompanied by an audible signal and a mes
sage on the multifunction display, this indicates a malfunction of the hill sta assistance.
Contact a PEUGEOT dealer without delay.

When immobilising the vehicle, with the engine running, it is essential to place the gear lever in neutral N.
Before carrying out any work in the engine compartment, check that the gear lever is in neutral N and that the handbrake is applied.

It is essential to press the brake pedal when starting the engine.
When parking, is it essential to apply the handbrake to immobilise the vehicle, whatever the circumstances.
"PORSCHE TIPTRONIC SYSTEM" AUTOMATIC GEARBOX
Four or six speed automatic gearbox which offers a choice between the comfort of fully automatic operation, enhanced by sport and snow programmes or manual gear changing.
Therefore, four driving modes are offered:
- automatic operation for electronic management of the gears by the gear box.
- sport programme for a more dynamic style of driving,
- snow programme to improve drivin when traction is poor.
- manual operation for sequential changing of the gears by the driver.
Gear selection gate
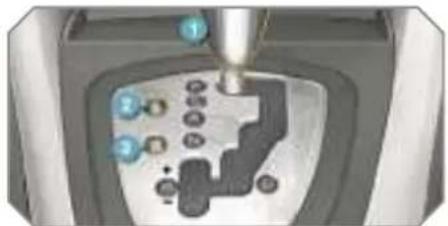
natural_image
Close-up of a mechanical assembly with blue circular components and a metallic tool (no visible text or symbols)- Gear lever
- Button "S" (sport)
- Button "※" (snow).
Gear lever
natural_image
Close-up of a mechanical device with a central tool and internal components (no visible text or symbols)P. Park
- Immobilisation of the vehicle, hand-brake on or off.
- Starting the engine.
R. Reverse
- Reversing manoeuvres, vehicle stationary, engine at idle.
V. Neutral. - Immobilisation of the vehicle, hand-brake on.
- Starting the engine.
J. Automatic operation.
M. +/- Manual operation with sequential changing of the four or six gears.
Press forwards to change up through the gears.
川
Press rearwards to change down through the gears.
Displays on the instrument pane
natural_image
Close-up of a black square button with a gold letter 'D' and a horizontal line above it, no readable text or symbols beyond the lettering.When you move the lever in the gat to select a position, the corresponding indicator light is displayed on the instrument panel.
P. Park
R. Reverse
N. Neutral
D. Drive (Automatic driving)
S. Sport programme
*. Snow programme
1 to 4. Gear engaged during
1 to 6. manual operation
- Invalid value during manual operation
Foot on brake

Press the brake pedal when his indicator light flashes (e.g.: starting the engine).
Moving off
Apply the handbrake.
Select position P or N.
Start the engine.
If this procedure is not followed, an audible signal is heard, accompanied by a message on the multifunction display.
With the engine running, press the brake pedal.
Release the handbrake.
Select position R, D or M,
Gradually release the brake pedal.
The vehicle moves off immediately.

If position N is engaged inadvertently while driving, allow the engine to return to idle then engage position D to accelerate.

When the engine is running at idle, with the brakes released, if position R, D or M is selected, the vehicle moves even without the accelerator being pressed.
When the engine is running, never leave children in the vehicle without supervision.
When carrying out maintenance with the engine running, apply the handbrake and select position P.
Automatic operation
Select position D for automatic changing of the four or six gears.
The gearbox then operates in auto-adaptive mode, without any intervention on the part of the driver. It continuously selects the most suitable gear according to the style of driving, the profile of the road and the load in the vehicle.
For maximum acceleration without touching the lever, press the accelerator pedal down fully (kick down). The gearbox changes down automatically or maintains the gear selected until the maximum engine speed is reached.
On braking, the gearbox changes down automatically to provide efficient engine braking.
If you release the accelerator sharply, the gearbox will not change to a higher gear for safety reasons.

Never select position N while the vehicle is moving.
Never select positions P or R unless the vehicle is completely stationary.
Sport and snow programmes
These two special programmes supplement the automatic operation in very specific conditions of use.
Sport programme "S"
Press button "S", after starting the engine.
The gearbox automatically favours a dynamic style of driving.

S appears on the instrument panel.
Snow programme "※"
Press button "*", after starting the engine.
The gearbox adapts to driving on slip pery roads.
This programme improves starting and drive when traction is poor.

* appears on the instrument panel.
Return to automatic operation
At any time, press the button selected again to quit the programme engaged and return to auto-adaptive mode.
DRIVING
Manual operation
Select position M for sequential changing of the four or six gears.
Push the lever towards the + sign to change up a gear.
Pull the lever towards the - sign to change down a gear.
It is only possible to change from on gear to another if the vehicle speed and engine speed permit; otherwise, the gearbox will operate temporarily in automatic mode.

D disappears and the gears engaged appear in succession on the instrument panel. In the event of under-revving or over-revving, the gear se
lected flashes for a few seconds, then the actual gear engaged is displayed.
It is possible to change from position D (automatic) to position M (manual) at any time.
When the vehicle is stationary or moving very slowly, the gearbox selects gear M1 automatically
The sport and snow programmes do not operate in manual mode.
Invalid value during manual operation

This symbol is displayed if gear is not engaged correctly (selector between two positions).
Stopping the vehicle
Before switching off the engine, you can engage position P or N to place the gearbox in neutral.
In both cases, apply the handbrake immobilise the vehicle.

If the lever is not in position P, when the driver's door is opened or approximately 45 seconds after the ignition is switched off, an audible signal is heard and a message appears.
Return the lever to position P; the audible signal stops and the message disappears.
Operating fault

When the ignition is on, the lighting of this warning light, accompanied by an audible signal and a message on the multi-
function display, indicates a gearbox malfunction.
In this case, the gearbox switches to emergency mode and is locked in 3rd gear. You may feel a substantial knock when changing from P to R and from N to R. This will not cause any damage to the gearbox.
Do not exceed 60 mph (100 km/h), loca speed restrictions permitting.
Contact a PEUGEOT dealer as soon as possible.

If the battery is flat and the lever is in position P, it will not be possible to change to another position.
Above all, do not force the lever as this could damage the gearbox.
SPEED LIMITER
System which prevents the vehicle from exceeding the speed programmed by the driver.
When the programmed speed limit is reached, pressing the accelerator pedal no longer has any effect.
The speed limiter is switched on manually: it requires a programmed speed of at least 20 mph (30 km/h).
The speed limiter is switched off by manual operation of the control.
The programmed speed can be exceeded temporarily by pressing the accelerator firmly.
To return to the programmed speed, simply slow down to a speed below the programmed speed.
The programmed speed remains in the memory when the ignition is switched off.
Steering wheel controls
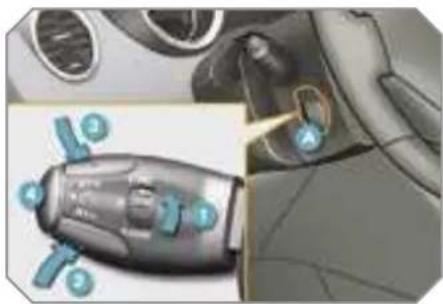
natural_image
Illustration of a car interior showing a hand valve and a close-up of the valve (no text or symbols present)The controls of this system are grouped together on stalk A.
- Speed limiter mode selection dial
- Value decrease button
- Value increase button
- Speed limiter on/off button
Displays on the instrument pane
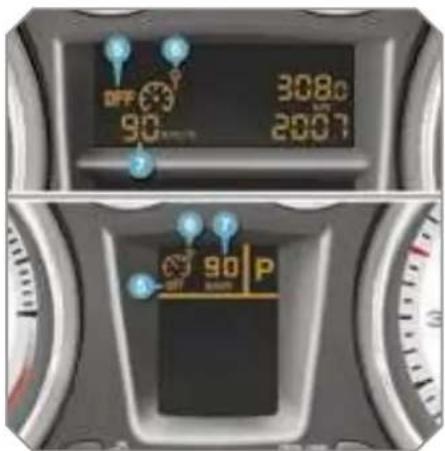
The programmed information is grouped together on the instrument panel display.
- Speed limiter on/off indication
- Speed limiter mode selection indication
- Programmed speed value
i
The speed limiter cannot, in any circumstances, replace the need to respect speed limits, nor can it replace the need for vigilance and responsibility on the part of the driver.

natural_image
Close-up of a robotic hand with blue control buttons and a numbered dial (no text or symbols visible)Programming
Turn dial 1 to the "LIMIT" position: the speed limiter mode is selected but is not switched on (OFF).
You do not have to switch the speed limiter on in order to set the speed
Set the speed value by pressing button 2 or 3 (e.g.: 55 mph (90 km/h))
You can then change the programmed speed using butons 2 and 3:
- by + or - 1 mph (km/h) = short press
- by + or - 5 mph (km/h) = long press
- in steps of + or - 5 mph (km/h) = maintained press
Switch the speed limiter on by pressing button 4.
Switch the speed limiter off by pressing button 4: the display confirms that it has been switched off (OFF)
Switch the speed limiter back on by pressing butt 4 again
Exceeding the programmed speed
Pressing the accelerator pedal to exceed the programmed speed will not have any effect unless you press the peda firmly past the point of resistance.
The speed limiter is deactivated temporarily and the programmed speed, which is still displayed, flashes. Returning to the programmed speed, by means of intention al or unintentional deceleration of the vehicle, automatically cancels the flashing of the programmed speed.
Return to normal driving
Turn dial 1 to the "0" position: the speed limiter mode is deselected. The display returns to the distance recorder
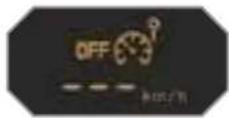
Operating fault
In the event of a speed limiter malfunction, the speed is cleared resulting in flashing of the dashes.
Contact a PEUGEOT dealer to have the system checked.
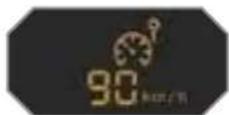
On a steep descent or in the event of sharp acceleration, the speed limiter will not be able to prevent the vehicle from exceeding the programmed speed.
To avoid any risk of jamming of the pedals:
- ensure that the mat is positioned correctly,
- do not fit one mat on top of another.
CRUISE CONTROL
System which automatically maintains the speed of the vehicle at the value programmed by the driver, without any action on the accelerator pedal.
The cruise control is switched on manually: it requires a minimum vehicle speed of 25 mph (40 km/h) and the engaging:
- of fourth gear on the manual gear-box.
- of second gear on the piloted manual or automatic gearbox, in sequential driving mode,
- of position A on the piloted manua gearbox or D on the automatic gearbox.
The cruise control is switched off manually or by pressing the brake or clutch pedal or on triggering of the ESP system for safety reasons.
It is possible to exceed the programmed speed temporarily by pressing the accelerator pedal.
To return to the programmed speed, simply release the accelerator pedal.
Switching off the ignition cancels any programmed speed value.
Steering wheel controls
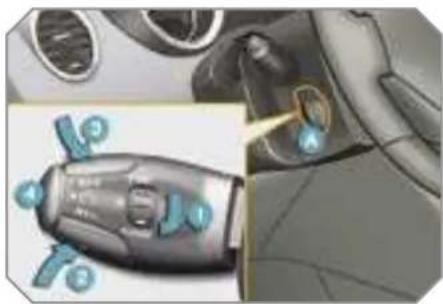
natural_image
Interior view of a car showing a hand valve and gear shift (no text or symbols visible)The controls of this system are grouped together on lever A.
- Cruise control mode selection dial
- Speed programming/value decrease button
- Speed programming/value increase button
- Cruise control off/resume button

The cruise control cannot, in any circumstances, replace the need to respect speed limits, nor can it replace the need for vigilance and responsibility on the part of the driver.
Displays on the instrument pane
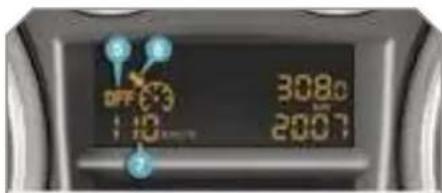
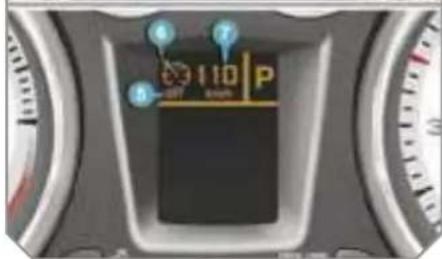
The programmed information is grouped together on the instrument panel display.
- Cruise control off/resume indication
- Cruise control mode selection indication
- Programmed speed value
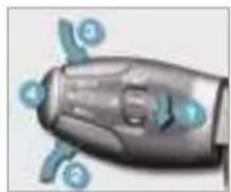
natural_image
Close-up of a robotic hand with blue circular buttons and a finger pointing to the fingers (no text or symbols visible)Programming
Turn dial 1 to the "CRUISE" position: the cruise control mode is selected but is not switched on (OFF).
Set the programmed speed by accelerating to the required speed then press button 2 or 3 (e.g.: 70 mph (110 km/h))
You can then change the programmed speed using butons 2 and 3:
- by + or - 1 mph (km/h) = short press
- by + or - 5 mph (km/h) = long press
- in steps of + or - 5 mph (km/h) = maintained press
Switch off the cruise control by pressing button 4: the display confirms that it has been switched off (OFF)
Switch the cruise control back on by pressing button 4 again
Exceeding the programmed speed
Intentional or unintentional exceeding of the programme speed results in flashing of this speed on the display Return to the programmed speed, by means of intentional c unintentional deceleration of the vehicle, automatically cancels the flashing of the speed.
Return to normal driving
Turn dial 1 to the "0" position: the cruise control mode is deselected. The display returns to the distance recorder
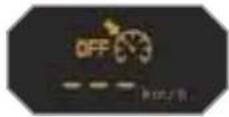
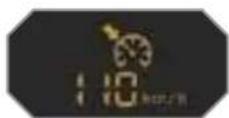
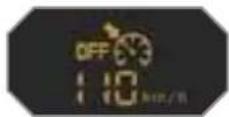
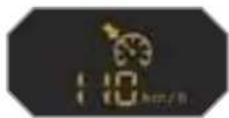
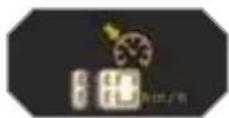
Operating fault
In the event of a cruise control malfunction, the speed is cleared resulting in flashing of the dashes.
Contact a PEUGEOT dealer to have the system checked.
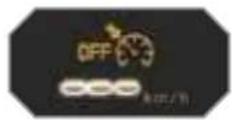
When the cruise control is switched on, be careful if you maintain the pressure on one of the programmed speed changing buttons: this may result in a very rapid change in the speed of your vehicle.
Do not use the cruise control on slippery roads or in heavy traffic.
On a steep descent, the cruise control will not be able to prevent the vehicle from exceeding the programmed speed.
To avoid any risk of jamming of the pedals:
- ensure that the mat is positioned correctly,
- never fit one mat on top of another.
LANE DEPARTURE WARNING SYSTEM
System which detects the involuntary crossing of longitudinal traffic lane markings on the ground (continuous or discontinuous line).
Sensors, fitted below the front bumper, trigger a warning if the vehicle drifts (speed higher than 50 mph (80 km/h)).
This system operates to its full potential above all when used on motorways and main roads.
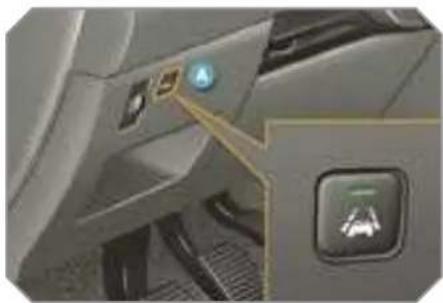
natural_image
Interior view of a car dashboard with a highlighted control panel (no text or symbols visible)Activation
Press button A, the indicator light comes on.
Deactivation
Press button A again, the indicator light switches off.
Detection
You are warned by vibration of the driver's seat cushion:
- on the right-hand side, if the marking on the ground has been crossed on the right,
- on the left-hand side, if the marking of the ground has been crossed on the le
No warning is transmitted while the rection indicator is active and for approximately 20 seconds after the direction indicator is switched off
A warning may be transmitted if a direction marking (arrow) or non-standard marking (graffiti) is crossed.
Operating fault
If the indicator light on the button switch off while the system is active, this ir cates a malfunction
Contact a PEUGEOT dealer.

The lane departure warning system cannot, in any circumstances, replace the need for vigilance and responsibility on the part of the driver.

The status of the system remains in the memory when the ignition is switched off.

The detection may be disrupted:
- if the sensors are dirty (mud, snow, ...),
- if the markings on the ground are worn,
- if there is little contrast between the markings on the ground and the road surface.
DRIVING
VISUAL AND AUDIBLE FRONT AND/OR REAR PARKING ASSISTANCE
System consisting of four proximity sensors, installed in the front and/or rea bumper.
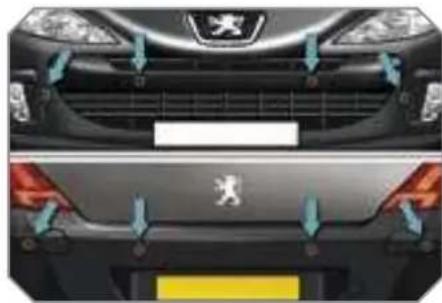
natural_image
Front and rear view of a car's grille and side panel, showing engine and seat components (no text or symbols visible)It detects any obstacle (person, vehicle, tree, barrier...) located behind the vehicle, however, it will not be able to detect obstacles located immediately below the bumper.

An object, such as a stake, a road-works cone or any other similar object may be detected at the start of the manoeuvre but may no longer be detected when the vehicle moves nearer to it.
The parking assistance is switched on:
- by engaging reverse gear - at a speed below 6 mph (10 km/h) in forward gear.
This is accompanied by an audible signal and/or displaying of the vehicle on the multifunction display.
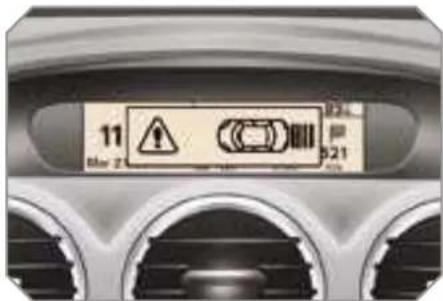
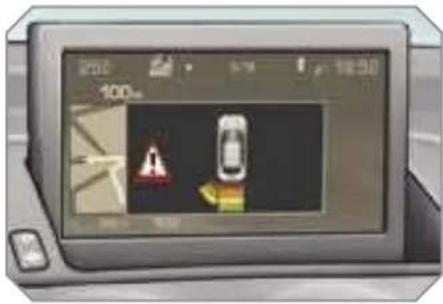
The proximity information is indicated by:
- an audible signal which becomes more rapid as the vehicle approaches the obstacle,
- a diagram on the multifunction display with blocks which move closer to the vehicle.
The obstacle is located in relation to the emission of the audible signal by the speakers; front or rear and right or left.
When the distance between the vehicle and the obstacle is less than approximately twenty-five centimetres, the audible signal becomes continuous and/or the "Danger" symbol appears, depending on the multifunction display version.
The parking assistance is switched off:
- when you exit reverse gear
- when the speed is higher than 6 mph (10 km/h) in forward gear,
- when the vehicle has been stationary for more than three seconds in forward gear.

The parking assistance system cannot, in any circumstances, replace the need for vigilance and responsibility on the part of the driver.
Deactivation
Operating fault
If an operating fault occurs, this warning light is displayed on the instrument panel and/or a message appears on the multifunc-
tion display, accompanied by an audible signal (short beep), when reverse gear is engaged.
Contact a PEUGEOT dealer.

Press button A, the warning light comes on, the system is fully deactivated.

Reactivation
Press button A again, the warning light switches off, the system is reactivated.
BONNET
Protects the components of the engi and provides access for checking level
Opening
Open the front left door.
Pull the interior control A located at the bottom of the door frame
→ Push the exterior control 3 to the left and raise the bonnet.
natural_image
Close-up of a mechanical component with textured surfaces and a small metallic object (no visible text or symbols)
The location of the interior control prevents opening of the bonnet while the front left door is closed.
natural_image
Close-up of a car interior showing a hand holding a blue object near the window (no visible text or symbols)Unclip the strut C from its housing
Fix the strut in the notch to hold the ponnet open.
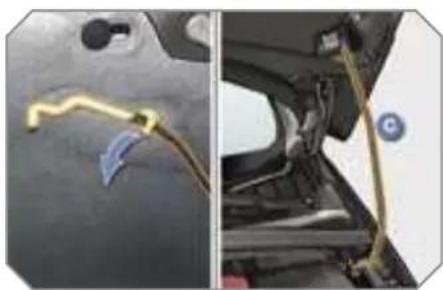
natural_image
Two-panel image showing a car interior with visible wiring and components, no text or symbols present.Closing
Take the strut out of the support notch.
Clip the strut in its housing.
Lower the bonnet and release it at the end of its travel
Pull on the bonnet to check that it is secured correctly
CHECKS
RUNNING OUT OF FUEL (DIESEL)
If your vehicle is fitted with an HDI engine, the fuel circuit must be reprimed if you run out of fuel.
This system consists of a repriming pump, a transparent pipe and a degas screw under the bonnet (refer to the corresponding graphic).
1.6 litre Turbo HDI 16V engine
Fill the fuel tank with at least five itres of diesel.
Open the bonnet.
Unclip the style cover to gain access to the repriming pump.
Squeeze and release the repriming pump until fuel appears in the transparent pipe with the green connector
Operate the starter until the engine starts.
Put the style cover back in position and clip it in place.
Close the bonnet.
2 litre Turbo HDI 16V engine
Fill the fuel tank with at least five litres of diesel.
Open the bonnet.
Unclip the style cover to gain access to the repriming pump.
Slacken the degas screw.
Squeeze and release the reprimin pump until fuel appears in the transparent pipe with the green connector
Retighten the degas screw.
Operate the starter until the engin starts.
Put the style cover back in position and clip it in place.
Close the bonnet.

If the engine does not start at the first attempt, do not try again. Operate the repriming pump again, then the starter.

If the engine does not start at the first attempt, do not try again. Operate the repriming pump again, then the starter.
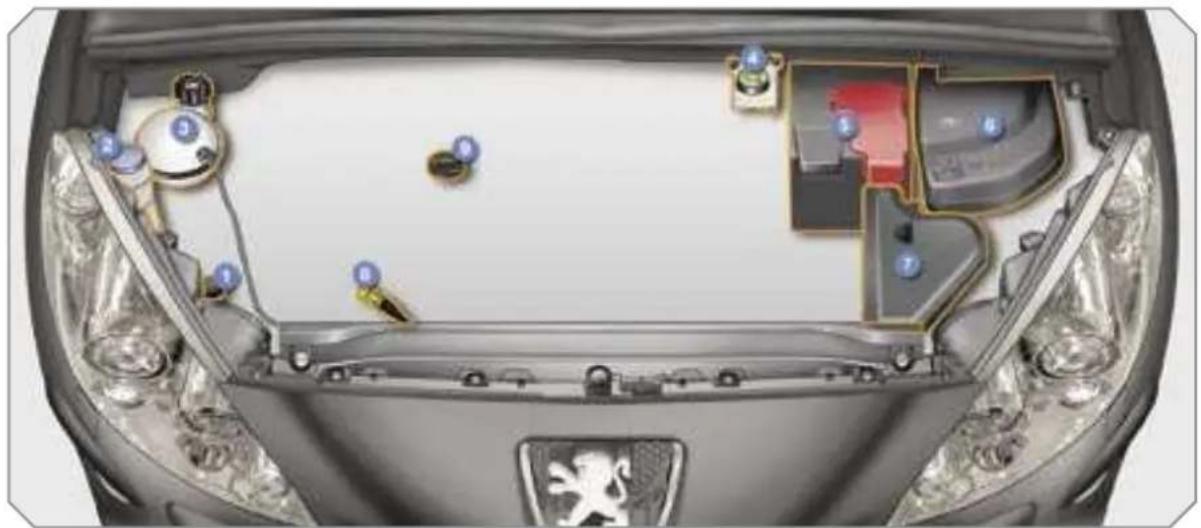
natural_image
Top-down view of a car's front dashboard and engine compartment, showing internal components like sensors, motors, and control panels (no text or symbols visible)PETROL ENGINES
They allow you access for checking the level of the various fluids and for replacing certain components.
-
Power steering reservoir.
-
Brake fluid reservoir.
-
Air filter.
-
Screenwash and headlamp wash reservoir.
-
Battery.
-
Dipstick.
-
Coolant reservoir.
-
Fuse box.
-
Engine oil filler cap.
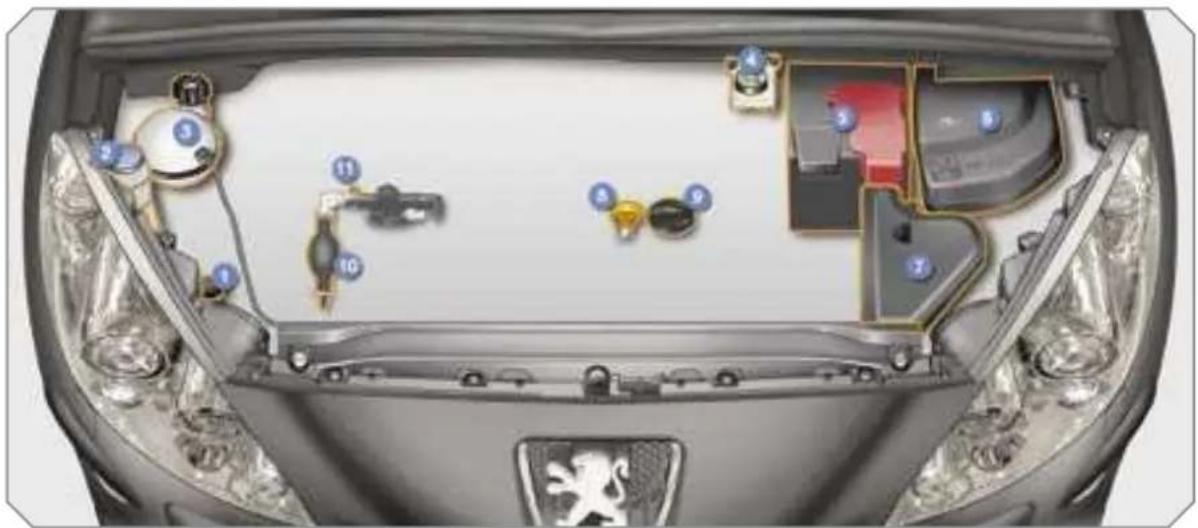
DIESEL ENGINES
They allow you access for checking the level of the various fluids, for replacing certain components and for repriming the fuel.
-
Power steering reservoir.
-
Brake fluid reservoir.
-
Dipstick.
-
Screenwash and headlamp wash reservoir.
-
Battery.
-
Engine oil filler cap.
-
Coolant reservoir.
-
Fuse box.
-
Repriming pump.
-
Air filter.
-
Degas screw*.
* According to engine.
CHECKING LEVELS
Check all of these levels regularly and top them up if necessary, unless otherwise indicated.
If a level drops significantly, have th corresponding circuit checked by a PEUGEOT dealer.
Oil level

The reading will only be correct if the vehicle is on level ground and the engine has been off for more than 15 minutes.
The check is carried out either when the ignition is switched on using the oil level indicator on the instrument panel, or using the dipstick.
Between two oil changes, the consumption should not exceed 0.5 litre per 600 miles (1,000 km).
Draining the engine
Refer to the servicing booklet for details of the interval for this operation.
In order to maintain the reliability of the engine and emission control system, the use of additives in the engine oil is prohibited.
Oil specification
The oil must correspond to your engine and conform to the manufacturer's recommendations.
Brake fluid level

The brake fluid level should be close to the "MAX" mark. If it is not, check the brake pad wear.
Draining the circuit
Refer to the servicing booklet for details of the interval for this operation.
Fluid specification
The brake fluid must conform to the manufacturer's recommendations and fulfil the DOT4 standards.
Power steering fluid level

The power steering fluid level should be close to the "MAX mark. Unscrew the cap, with the engine cold, to check the leve
Coolant level

The coolant level should be close to the "MAX" mark but should never exceed it.
When the engine is warm, the temperature of the coolant is regulated by the fa This can operate with the ignition of
On vehicles which are fitted with particle emission filter, the fan may operate after the vehicle has been switched off, even if the engine is cold.
In addition, as the cooling system is pressurised, wait at least one hour after switching off the engine before carrying out any work.
To avoid any risk of scalding, unscrew the cap by two turns to allow the pressure to drop. When the pressure ha dropped, remove the cap and top up the level.
Draining the circuit
The coolant does not have to be changed.
Fluid specification
The coolant must conform to the manufacturer's recommendations.
Screenwash and headlamp wash fluid

n the case of vehicles fitted with headlamp washers, the minimum level of this fluid is indicated by an audible signa
and a message on the multifunction display.
Top up the level when you stop the vehicle.
Fluid specification
For optimum cleaning and to avoid freezing, this fluid must not be topped up or replaced with water.
CHECKS
Diesel additive level (Diesel with particle emission filter)
A low additive level is indicated by lighting of the service warning light, accompanied by an audible warning and a message on the multifunction display.
Topping up
This additive must be topped up by PEUGEOT dealer without delay.
Used products

Avoid prolonged contact of used oil or fluids with the skin.
Most of these fluids are harmful to health or indeed very corrosive.

Do not discard used oil or fluids into sewers or onto the ground.
Empty used oil into the containers provided for this purpose in the PEUGEOT network.
CHECKS
Unless otherwise indicated, check these components in accordance with the servicing booklet and in relation to your engine.
Otherwise, have them checked by a PEUGEOT dealer.
Battery

The battery does not require any maintenance.
However, check that the terminals are clean and correctly tightened, particularly in sum-
mer and winter.
When carrying out work on the battery, refer to the "Practical information" section for details of the precautions to be taken before disconnecting the battery and following its reconnection
Air filter and passenger compartment filter

Refer to the servicing booklet for details of the replacement intervals for these components: Depending on the environment (dusty atmosphere...) and the
use of the vehicle (city driving...replace them twice as often if necessary (refer to the "Engines" paragraph).
A clogged passenger compartment filte may have an adverse effect on the performance of the air conditioning system and generate undesirable odours.
Oil filter

Replace the oil filter each time the engine oil is changed.
Refer to the servicing booklet for details of the replacement interval for this component.
Particle emission filter (Diesel)
It is imperative that the maintenance of the particle emission filter is carried out by a PEUGEOT dealer.

Following prolonged operation of the vehicle at very low speed or at idle, you may, in exceptional circumstances, notice the emission of water vapour at the exhaust on acceleration. This does not affect the behaviour of the vehicle or the environment.
CHECKS
Diesel additive level (Diesel with particle emission filter)
A low additive level is indicated by lighting of the service warning light, accompanied by an audible warning and a message on the multifunction display.
Topping up
This additive must be topped up by PEUGEOT dealer without delay.
Used products

Avoid prolonged contact of used oil or fluids with the skin.
Most of these fluids are harmful to health or indeed very corrosive.

Do not discard used oil or fluids into sewers or onto the ground.
Empty used oil into the containers provided for this purpose in the PEUGEOT network.
CHECKS
Unless otherwise indicated, check these components in accordance with the servicing booklet and in relation to your engine.
Otherwise, have them checked by a PEUGEOT dealer.
Battery

The battery does not require any maintenance.
However, check that the terminals are clean and correctly tightened, particularly in sum-
mer and winter.
When carrying out work on the battery, refer to the "Practical information" section for details of the precautions to be taken before disconnecting the battery and following its reconnection
Air filter and passenger compartment filter

Refer to the servicing book for details of the replacement intervals for these components: Depending on the environment (dusty atmosphere...) and the
use of the vehicle (city driving...replace them twice as often if necessary (refer to the "Engines" paragraph).
A clogged passenger compartment filte may have an adverse effect on the performance of the air conditioning system and generate undesirable odours.
Oil filter

Replace the oil filter each time the engine oil is changed.
Refer to the servicing booklet for details of the replacement interval for this component.
Particle emission filter (Diesel)
It is imperative that the maintenance of the particle emission filter is carried out by a PEUGEOT dealer.

Following prolonged operation of the vehicle at very low speed or at idle, you may, in exceptional circumstances, notice the emission of water vapour at the exhaust on acceleration. This does not affect the behaviour of the vehicle or the environment.
Manual gearbox

The gearbox does not require any maintenance (no oil change).
Refer to the servicing book let for the details of the lev checking interval for this component.
6-speed piloted manual gearbox

The gearbox does not require any maintenance (no oil change).
Refer to the servicing booklet for details of the checking interval for this component.
Automatic gearbox

The gearbox does not require any maintenance (no oil change).
Refer to the servicing booklet for details of the checking interval for this component.
Brake pads

Brake wear depends on the style of driving, particularly in the case of vehicles used in town, over short distances. may be necessary to have the
condition of the brakes checked, eve between vehicle services.
Unless there is a leak in the circuit, drop in the brake fluid level indicate that the brake pads are worn.
Brake disc wear status

For information relating to checking the brake disc wear status, contact a PEUGEOT dealer.
Handbrake

If the handbrake travel is to long or if a loss of effectiveness of this system is noticed, the handbrake must be adjusted even between two services
This system must be checked by a PEUGEOT dealer.

Only use products recommended by PEUGEOT or products of equivalent quality and specifications.
In order to optimise the operation of units as important as the braking system, PEUGEOT selects and offers very specific products.
To avoid damaging the electrical units, the use of a high pressure washer in the engine compartment is strictly prohibited.
PRACTICAL INFORMATION
CHANGING A WHEEL
Procedure for changing a faulty wheel for the spare wheel using the tools provided with the vehicle.
Access to the tools
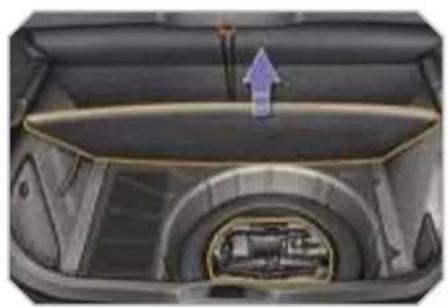
natural_image
Interior view of a car showing the hood and engine compartment with an upward arrow indicating motion (no text or symbols present)The tools are installed in the boot under the floor.
To gain access to them
open the boot,
raise the floor,
secure it by hooking its cord on the book on the rear shelf support,
remove the polystyrene storage box
unclip and remove the box containing the tools.
List of tools
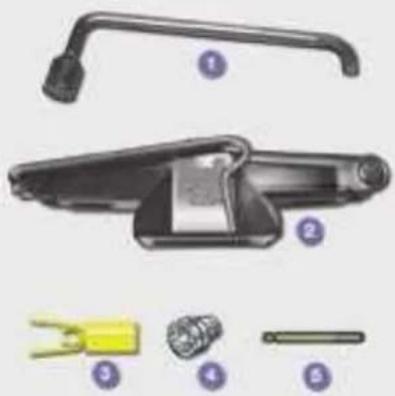
natural_image
Exploded view diagram of a mechanical clamp device with labeled parts (no text or symbols beyond numbered labels)- Wheelbrace.
Permits removal of the wheel trim and removal of the wheel fixing bolts. - Jack with integral handle.
Permits raising of the vehicle. - 'Bolt cover' tool.
Permits removal of the bolt protectors (covers) on alloy wheels -
Socket for the anti-theft bolts (located in the glove box).
Permits adaptation of the wheelbrace to the special 'anti-theft" bolts. -
Centring guide.
Permits the refitting of an alloy wheel on the hub.
Other accessories
- Removable towing eye.
Refer to the paragraph "I owing the vehicle".

Wheel with trim
When removing the wheel, detach the trim first using the wheelbrace 1 pulling at the valve passage hole.
When refitting the wheel, refit the trim starting by placing its notch facing the valve and press around its edge with the palm of your hand.
Access to the spare wheel
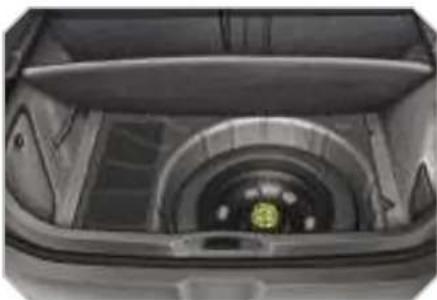
natural_image
Interior view of a vehicle showing a circular tunnel or chamber with a central green object (no visible text or symbols)The spare wheel is installed in the boot under the floor.
According to country, the spare wheel may be steel, alloy or of the "space saving" type.
To gain access to it, refer to the paragraph "Access to the tools" on the previous page.

Fixing the steel or "space-saving" type spare wheel
If your vehicle is fitted with alloy wheels, it is normal to notice, when tightening the bolts on fitting, that the washers do not come into contact with the steel or "space-saving" type spare wheel. The wheel is secured by the conical contact of each bolt.
Taking out the wheel
Unscrew the yellow central bolt.
Raise the spare wheel towards you from the rear.
Take the wheel out of the boot.
Putting the wheel back in place
Put the wheel back in its housing.
Unscrew the yellow central bolt by a few turns then put it in place in the centre of the wheel
Tighten fully until the central bolt clicks to retain the wheel correctly
Put the box back in place in the centre of the wheel and clip it
Put the polystyrene storage box back n place.

Tyre under-inflation detection
The spare wheel is not fitted with a sensor. The punctured wheel must be repaired by a PEUGEOT dealer.
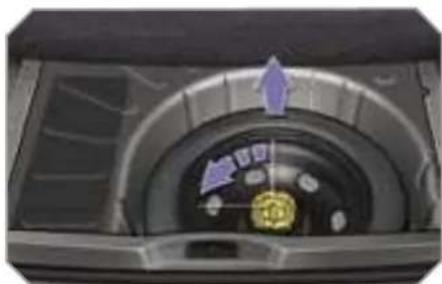
natural_image
Interior view of a vehicle showing a circular engine and dashboard with no visible text or symbols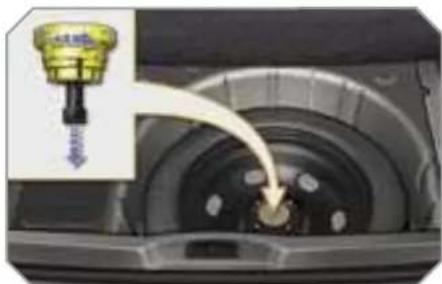
natural_image
Close-up of a car engine component with a yellow connector inserted, showing fluid flow direction (no text or symbols visible)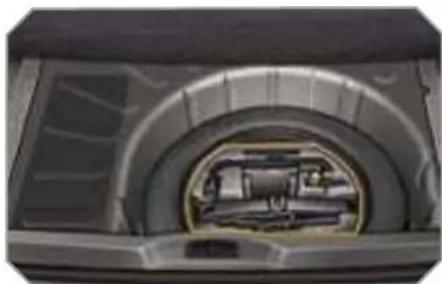
natural_image
Cross-sectional view of a mechanical component or housing (no visible text or symbols)PRACTICAL INFORMATION
Removing the wheel
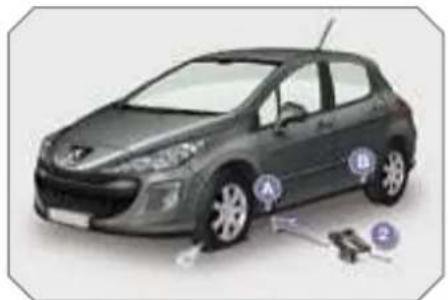
natural_image
Side view of a car with labeled parts (A, B, C) and mechanical components, no visible text or symbols on the car itself.i
Parking the vehicle
Immobilise the vehicle where it does not block traffic: if possible, park the vehicle on level, stable and non-slippery ground.
Apply the handbrake, switch off the ignition and engage first gear* to lock the wheels.
If necessary, place a chock under the wheel diagonally opposite the wheel to be changed.
Never go underneath a vehicle raised using a jack; use an axle stand.
* position R for the piloted manual gearbox; P for the automatic gearbox.
List of operations
Remove the chromed bolt cover from each of the bolts using the tool 3.
Fit the anti-theft socket 4 on the wheelbrace 1 to unlock the anti-theft bolt.
Unlock the other bolts using the wheelbrace 1 only
Place the jack 2 in contact with one of the two front A or rear B locations provided on the underframe, whichever is closest to the wheel to be changed.
Extend the jack 2 until its base plate is in contact with the ground. Ensure that the centreline of the jack base plate is directly below the location A or B used.
- Raise the vehicle until there is sufficient space between the wheel and the ground to admit the spare (no punctured) wheel easily.
Remove the bolts and store them in a clean place.
Remove the wheel.
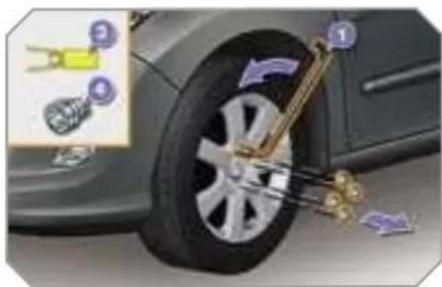
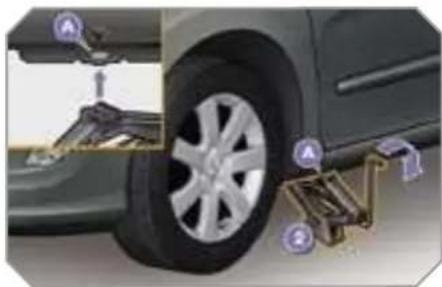
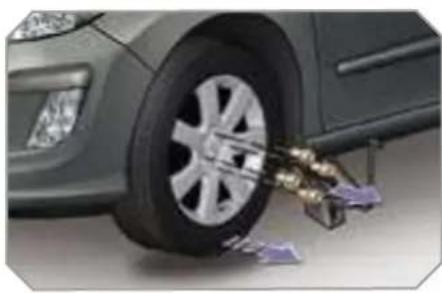
natural_image
Close-up of a car tire being adjusted for a mechanical component, with no visible text or symbolsPRACTICAL INFORMATION
Fitting the wheel
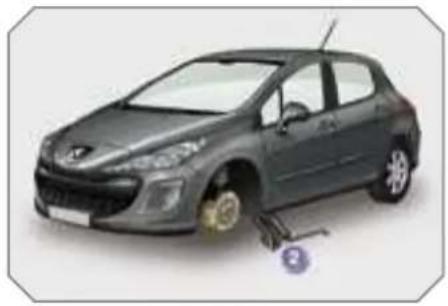
natural_image
Illustration of a car with visible suspension and wheel impact (no text or symbols)List of operations
Put the wheel in place on the hub.
Screw in the bolts by hand to the stop.
Pre-tighten the anti-theft bolt using the wheelbrace 1 fitted with the anti-theft socket 4.
Pre-tighten the other bolts using the wheelbrace 1 only
Lower the vehicle fully.
Fold the jack 2 and detach it.
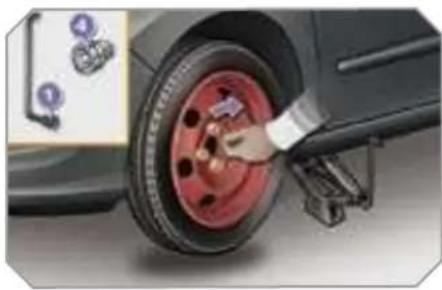
natural_image
Close-up of a car tire being adjusted for a hand, with no visible text or symbols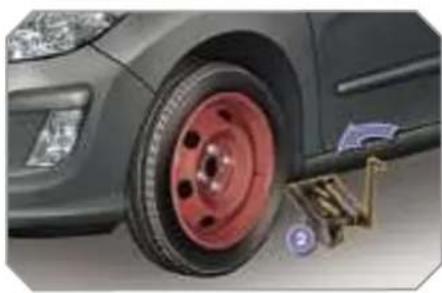
natural_image
Close-up of a car tire mounted on a wheel with a visible suspension mechanism (no text or symbols)
After changing a wheel
To store the punctured wheel in the boot correctly, first remove the central cover.
When using the "space-saving" type spare wheel, do not exceed 50 mph (80 km/h).
Have the tightening of the bolts and the pressure of the spare wheel checked by a PEUGEOT dealer without delay.
Have the punctured wheel repaired and replace it on the vehicle as soon as possible.
Lock the anti-theft bolt using the wheelbrace 1 fitted with the anti-theft socket 4.
Lock the other bolts using the wheel-brace 1 only
Refit the chromed bolt covers on each of the bolts.
Store the tools in the box.
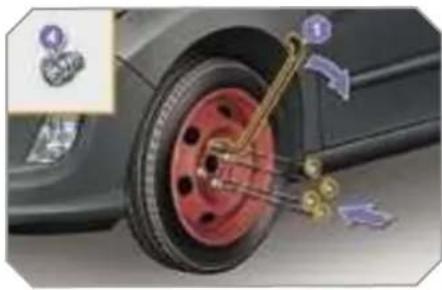
natural_image
Close-up of a car tire with mechanical components and a magnified inset showing a blue object (no text or symbols visible)PRACTICAL INFORMATION
CHANGING A BULB
Procedure for replacing a faulty bulb with a new bulb without the use of tools
Front lights
Model with halogen lights
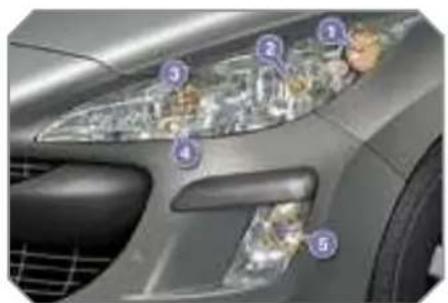
- Direction indicators (PY 21 W amber).
- Dipped headlamps (H7-55 W).
- Main beam headlamps (H1-55 W).
- Daytime*/side lights (P 21/5 W).
- Fog lamps (H8-35 W).
Model with xenon lights and directional headlamps
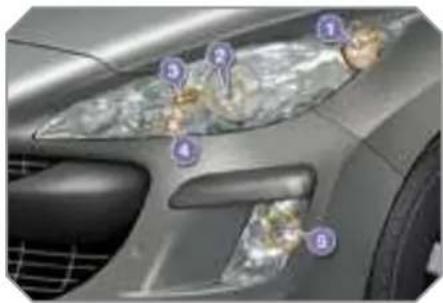
- Direction indicators (PY 21 W SV silver).
- Dipped/main beam headlamps (D1S-35 W).
- Additional main beam headlamps (H1-55 W).
- Daytime*/side lights (P 21/5 W).
- Fog lamps (H8-35 W).

Risk of electrocution
Xenon bulbs (D1S-35 W) must be replaced by a PEUGEOT dealer.

In certain climatic conditions (low temperature, humidity), the presence of condensation on the inside of the headlamp and light glass is normal; it disappears a few minutes after the lights are switched on.

Handle the bulbs using a dry cloth.
The headlamps are fitted with polycarbonate lenses, coated with a protective varnish:
do not clean them with a dry or abrasive cloth or using a detergent or solvent product,
use a sponge and soapy water,
when using a high pressure washer on stubborn dirt, do not spend too long on the head-lamps, lights and their surrounds to avoid damaging their varnish and their seals.
PRACTICAL INFORMATION
Changing direction indicator bulbs
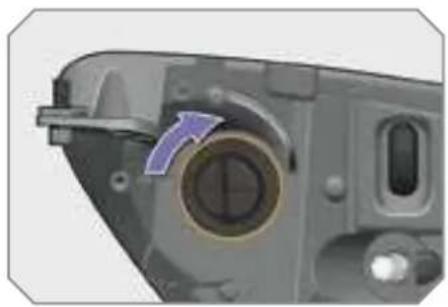
natural_image
Close-up of a mechanical component with a circular dial and directional arrow (no text or symbols visible)Turn the bulb holder a quarter of turn and extract it.
Pull the bulb and change it.
To refit, carry out these operations in reverse order.

Amber or silver coloured bulbs, such as the direction indicators, must be replaced with bulbs of identical specifications and colour.

When refitting, close the plastic cover carefully to guarantee the sealing of the headlamp.
Changing dipped headlamp bulbs
Remove the protective plastic cover by pulling on the tab.
Disconnect the bulb connector.
Compress the springs to release the bulb.
Extract the bulb and change it.
To refit, carry out these operations i reverse order.
Changing main beam headlamp bulbs
Remove the protective plastic cover by pulling on the tab.
Disconnect the bulb connector.
Compress the springs to release the bulb.
Remove the bulb and change it.
To refit, carry out these operations i reverse order.
Changing daytime/side light bulbs
Remove the protective plastic cover by pulling on the tab.
Disconnect the bulb connector.
Turn the bulb holder a quarter of turn and extract it.
Pull the bulb and change it.
To refit, carry out these operations i reverse order.
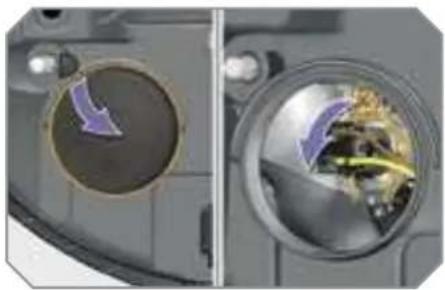
natural_image
Close-up of a mechanical component with internal components and directional arrows (no visible text or symbols)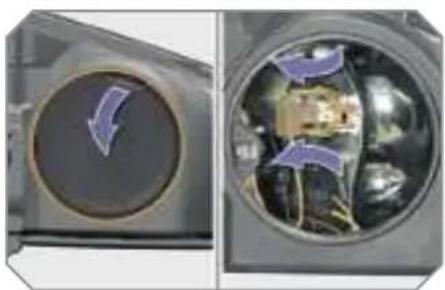
natural_image
Two-panel image showing a circular component with a purple arrow and a close-up of internal wiring or components (no visible text or symbols)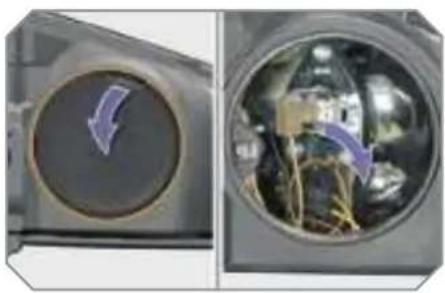
natural_image
Close-up of a circular device with a purple arrow pointing left and a circular window showing internal components (no text or symbols visible)11
PRACTICAL INFORMATION
Changing integrated direction indicator side repeaters
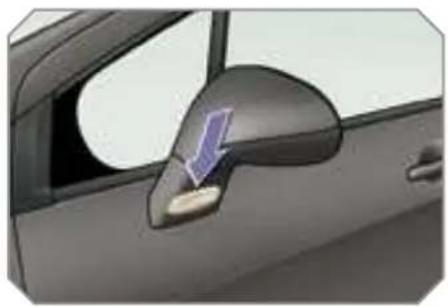
natural_image
Close-up of a car's side mirror showing the nose and jaw area, with a purple arrow pointing to the nose (no text or symbols)Insert a screwdriver towards the centre of the repeater between the repeater and the base of the mirror.
Tilt the screwdriver to extract the repeater and remove it.
Disconnect the repeater connector. To refit, carry out these operations i reverse order.
Contact a PEUGEOT dealer to obtain replacement repeaters.
Changing fog lamp bulbs
Turn the wheel fully towards the inside for easy access to the flap
Open the access flap, located in the wheelarch.
Disconnect the bulb holder connector.
Turn the bulb holder a quarter of turn and extract it.
Pull the bulb and change it.
To refit, carry out these operations in reverse order.
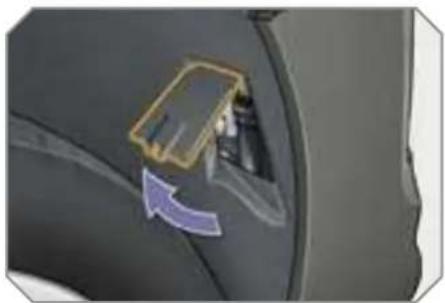
natural_image
Close-up of a car's side panel with a highlighted rectangular component and a purple arrow indicating rotation (no text or symbols)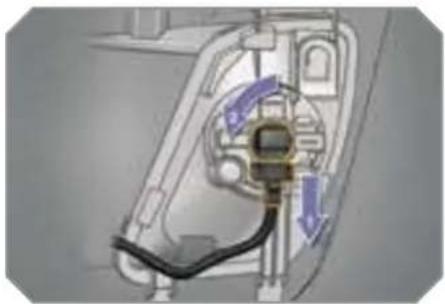
natural_image
Mechanical component diagram showing internal parts with directional arrows (no text or symbols)
To replace these bulbs you may also consult a PEUGEOT dealer.
Rear lights
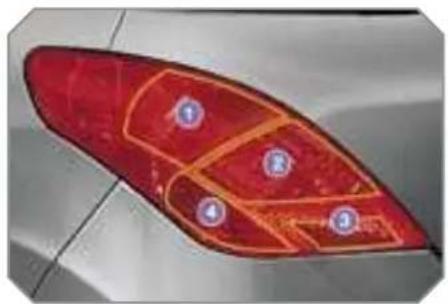
- Brake/side lights (P 21/5 W).
- Side lights (P 21/5 W).
- Fog lamp, left-hand side (P 21 W). Reversing light, right-hand side (P 21 W).
- Direction indicators (P 21 W).
Changing bulbs
These five bulbs are changed from outside the boot:
on the right-hand side; remove the access flap,
on the left-hand side; turn the fixing bolt a quarter of a turn and remove the storage box cover,
unclip the storage box,
remove the two light fixing nuts,
extract the light carefully from the outside,
disconnect the light connector,
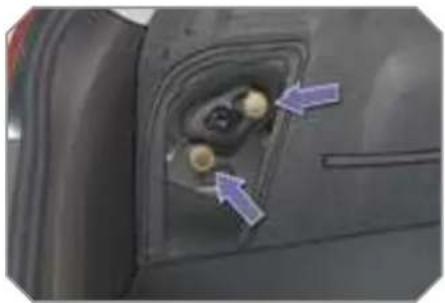
natural_image
Close-up of a car's side window with two buttons and directional arrows indicating movement (no text or symbols)press the four tabs and remove the bulb holder,
turn the bulb a quarter of a turn and change it
To refit, carry out these operations i reverse order.
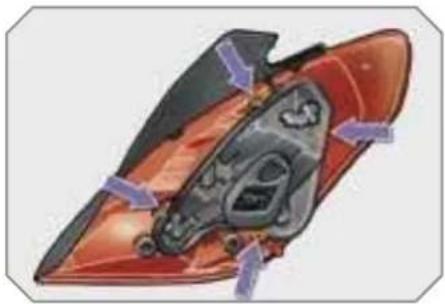
natural_image
Cross-sectional diagram of a red and black object with internal components, no visible text or symbols
If the vehicle is fitted with the JBL audio system, on the right-hand side, first remove the three fixing bolts, then move the box.
11
PRACTICAL INFORMATION
Changing third brake light bulbs (4 bulbs W 5 W)
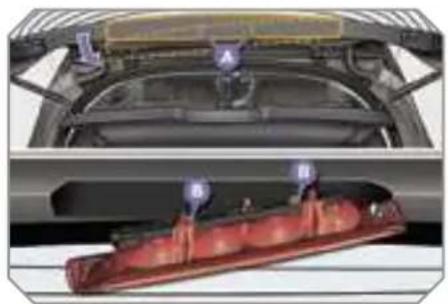
natural_image
Diagram of a car engine showing internal components and exhaust manifold (no text or symbols)Unclip the tailgate upper trim from eft to right.
Unscrew the two light fixing nuts A.
Unclip the light's central pin.
Extract the light from the outside.
Disconnect the bulb holder connector and the wash-wipe pipe.
Unclip the bulb holder from the light by pressing on the two tabs B.
Pull the bulb and change it.
To refit, carry out these operations i 'reverse order.
Do not apply force to the light when tightening the nuts.
Changing the number plate light bulbs (W 5 W)
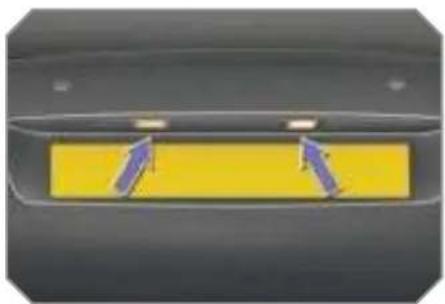
natural_image
Close-up of a yellow rectangular object with two white arrows pointing to it, against a dark gray background (no text or symbols)Insert a thin screwdriver into one of the outer holes of the lens.
→ Push it outwards to unclip.
Remove the lens.
Pull the bulb and change it.
PRACTICAL INFORMATION
CHANGING A FUSE
Procedure for replacing a faulty fuse with a new fuse to rectify a failure of the corresponding function.
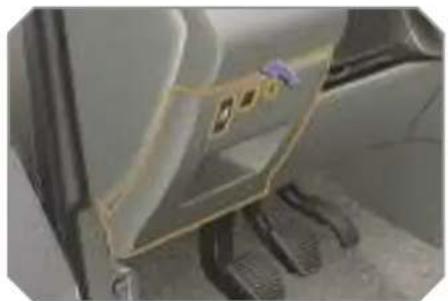
natural_image
Close-up of a car interior showing a white door panel and black footprints (no visible text or symbols)Access to the tools
The extraction pliers and the spare fuses are installed on the back of the fasci fuse box cover.
To gain access to them
turn the screw a quarter of a turn to the left,
unclip the cover by pulling at the top right,
remove the cover completely,
remove the pliers.
Changing a fuse
Before changing a fuse, the cause of the failure must be identified and rectified.
Identify the faulty fuse by checkin the condition of its filament.
Correct
Incorrect
Use the special pliers to extract the fuse from its housing.
Always replace the faulty fuse with a fuse of the same rating.
Check the correspondence between the number etched on the box, the rating etched on the fuse and the tables below

Installing electrical accessories
Your vehicle's electrical system is designed to operate with standard or optional equipment.
Before installing other electrical equipment or accessories on your vehicle, contact a PEUGEOT dealer.

PEUGEOT will not accept responsibility for the cost incurred in repairing your vehicle or for rectifying malfunctions resulting from the installation of accessories not supplied and not recommended by PEUGEOT and not installed in accordance with its instructions, in particular in the case of equipment the consumption of which exceeds 10 milliamperes.
PRACTICAL INFORMATION
Fascia fuses
The fuse box is placed in the lower section of the fascia (left-hand side).
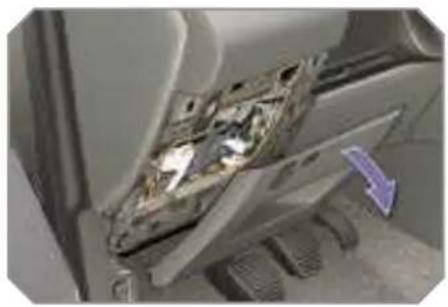
natural_image
Close-up of a mechanical component with a metallic housing and a purple arrow indicating direction (no visible text or symbols)Access to the fuses
refer to the paragraph "Access to the tools".
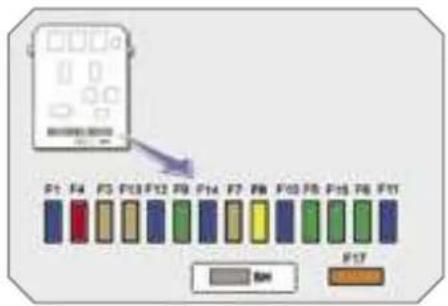
Fuse tables
| =use N° | Rating | Functions |
| G36 | 30 A | Driver and passenger heated seats. |
| G37 | 5 A | Trailer fuse box |
| G38 | 30 A | Driver's seat memory unit. |
| G39 | 30 A | Trailer fuse box supply |
| G40 | 30 A | Hi-Fi amplifier. |
| -use N° | Rating | Functions |
| F1 | 15 A | Rear wiper. |
| F2 | - | Not used. |
| F3 | 5 A | Air bags and pretensioners control unit. |
| F4 | 10 A | Clutch pedal and dual-function brake switches, electrochromatic interior mirror, air conditioning, steering wheel angle sensor, automatic gearbox, switching and protection unit. |
| F5 | 30 A | Front one-touch electric windows, folding mirrors supply, glass panoramic roof shutter |
| F6 | 30 A | Rear one-touch electric windows. |
| F7 | 5 A | Front and rear courtesy lights, map reading lights, rear reading lights, sun visor lighting, glove box lighting. |
PRACTICAL INFORMATION
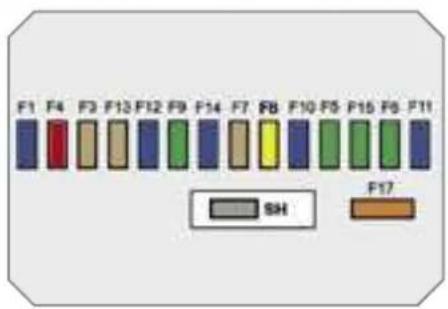
| =use N° | Rating | Functions |
| F8 | 20 A | Audio equipment, audio/telephone, CD changer, multifunction display, tyre under-inflation detection. |
| F9 | 30 A | Front 12 V socket, lighter. |
| F10 | 15 A | Steering wheel controls, alarm siren, alarm control unit. |
| F11 | 15 A | Low current ignition switch. |
| F12 | 15 A | Instrument panel, seat belt and passenger's front air bag warning lights display, air conditioning, driver's seat memory unit, driving school module. |
| F13 | 5 A | Engine fuse box, air bags, piloted manual gearbox gear lever. |
| F14 | 15 A | Multifunction display, amplifier, hands-free kit, rain/ brightness sensor, parking assistance control unit, trailer fuse box, lane departure warning system. |
| F15 | 30 A | Locking and deadlocking. |
| F17 | 40 A | Rear screen and exterior mirrors de-icing. |
| SH | - | PARC shunt. |
PRACTICAL INFORMATION
Engine compartment fuses
The fuse box is placed in the engine compartment near the battery (left-hand side).
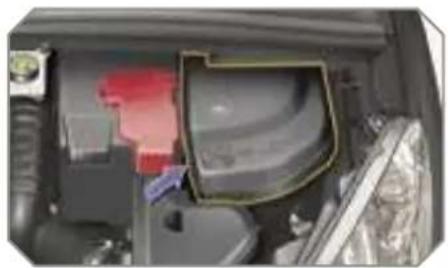
natural_image
Interior view of a vehicle showing dashboard, rear seats, and internal components (no visible text or symbols)Access to the fuses
Unclip the cover.
Change the fuse (see corresponding paragraph).
When you have finished, close the cover carefully to guarantee the sealing of the fuse box.
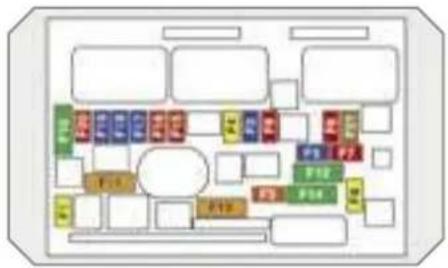
Fuse table
| =use N° | Rating | Functions |
| F1 | 20 A | Engine control unit supply, injection pump and EGR solenoid valves (2 I HDI 16V), injectors (2 I HDI 16V). |
| F2 | 15 A | Horn. |
| F3 | 10 A | Front/rear wash-wipe. |
| F4 | 20 A | Headlamp wash. |
| F5 | 15 A | Fuel pump (petrol), purge canister, turbine discharge and Turbo pressure regulation solenoid valves (1.6 I THP 16V), oil vapour heater (1.6 I THP 16V), diesel heater (1.6 I HDI 16V). |
| F6 | 10 A | Vehicle speed sensor, ABS/ESP control unit |
| F7 | 10 A | Power steering control unit, automatic gearbox, engine coolant level detector |
| F8 | 25 A | Starter control. |
| F9 | 10 A | Diagnostic socket, directional headlamps, air flow sensor (Diesel), particle emission filter pump (Diesel). |
| F10 | 30 A | Engine control unit actuators (petrol: ignition coils, solenoid valves, oxygen sensors, injectors, heaters, fuel pump, controlled thermostat) (Diesel: solenoid valves, heaters). |
| F11 | 40 A | Air conditioning blower. |
PRACTICAL INFORMATION
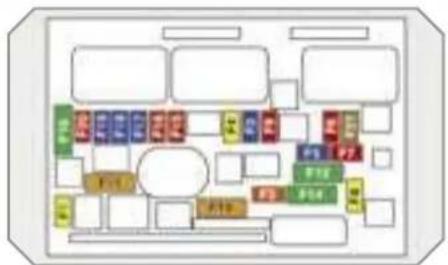
| =use N° | Rating | Functions |
| F12 | 30 A | Windscreen wipers slow/fast speed. |
| F13 | 40 A | Built-in systems interface supply (ignition positive). |
| F14 | 30 A | Air pump. |
| F15 | 10 A | Right-hand main beam headlamp. |
| F16 | 10 A | Left-hand main beam headlamp. |
| F17 | 15 A | Left-hand dipped headlamp. |
| F18 | 15 A | Right-hand dipped headlamp. |
| F19 | 15 A | Oil vapour heater (1.4 | 16V and 1,6 | VTi 16V), purge canister solenoid valve (1.4 | 16V and 1.6 | VTi 16V), oxygen sensors (petrol), air cooling solenoid valves (Diesel). |
| F20 | 10 A | Controlled thermostat, variable timing solenoid valves, Turbo pressure regulation solenoid valve (Diesel), engine coolant level detector (Diesel). |
| F21 | 5 A | Fan assembly relay supply, Valvetronic relay control (1.4 | 16V and 1.6 | VTi 16V), Turbo cooling (1.6 | THP 16V), air flow sensor (1.6 | HDI 16V). |
PRACTICAL INFORMATION
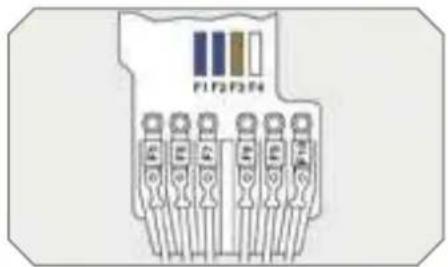
natural_image
Diagram of a connector pinout with color-coded indicators (no text or symbols)Table of mini and midi-fuses above the battery
| Fuse N° | Rating | Functions |
| F1 | 15 A | Gearbox (piloted manual or automatic). |
| F2 | 15 A | Diagnostic socket, daytime lights. |
| F3 | 5 A | Dual-function brake switch. |
| F4 | - | Not used. |
| F5* | 80 A | Power steering electropump assembly. |
| F6* | 70 A | Heating unit (Diesel). |
| F7* | 100 A | Switching and protection unit. |
| F8 | - | Not used. |
| F9* | 30 A | Piloted manual gearbox electropump assembly. |
| F10* | 30 A | Valvetronic electric motor (1.6 I THP 16V) |
Table of maxi-fuses
| =use N° | Rating | Functions |
| MF1* | 50 A | Fan assembly. |
| MF2* | 50 A | Passenger compartment fuse box. |
| MF3* | 80 A | Built-in systems interface. |
| MF4* | - | Not used. |
| MF5* | 50 A | ABS/ESP control unit. |
| MF6* | 30 A | ABS/ESP control unit. |
| MF7* | 80 A | Built-in systems interface. |
| MF8* | - | Not used. |
* The maxi-fuses provide additional protection for the electrical systems. All work on the maxi-fuses must be carried out by a PEUGEOT dealer
BATTERY
Procedure for charging your battery when it is flat or for starting the engine using another battery.
Access to the battery
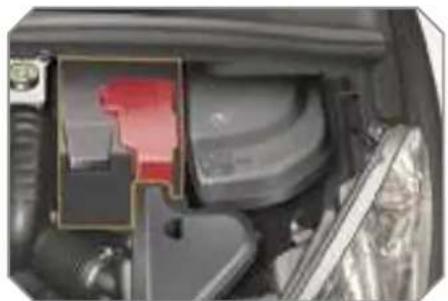
natural_image
Interior view of a car showing internal components with highlighted areas (no visible text or symbols)The battery is located under the bor net.
To gain access to it:
open the bonnet using the interior ever, then the exterior lever,
^f secure the bonnet strut,
remove the plastic cover to gain access to the two terminals.
unclip the fuse box to remove the battery, if necessary.
Starting using another battery
Connect the red cable to the positive terminal (+) of the flat battery A, then to the positive terminal (+) of the slave battery B.
Connect one end of the green or black cable to the negative terminal (-) of the slave battery 3.
Connect the other end of the green or black cable to an earth point C on the broken down vehicle.
Operate the starter, let the engine run.
Wait until the engine returns to id and disconnect the cables
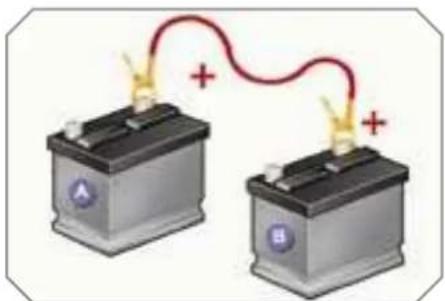
natural_image
Two batteries connected by a red wire with plus signs, no text or symbols present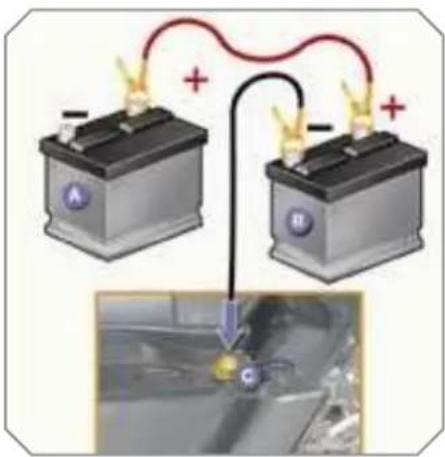
PRACTICAL INFORMATION
Charging the battery using a battery charger
Disconnect the battery from the vehicle
Follow the instructions for use provided by the manufacturer of the charger
Reconnect starting with the negative terminal (-).
Check that the terminals and connectors are clean. If they are covered with sulphate (whitish or greenish deposit), remove them and clean them

The batteries contain harmful substances such as sulphuric acid and lead. They must be disposed of in accordance with regulations and must not, in any circumstances, be discarded with household waste. Take used remote control batteries and vehicle batteries to a special collection point.

It is advisable to disconnect the battery if the vehicle is to be left unused for more than one month.

Do not disconnect the terminals while the engine is running.
Do not charge the batteries without disconnecting the terminals first.
Do not push the vehicle to start the engine if it is fitted with a 6-speed piloted manual gearbox.
Before disconnecting the battery
Wait 2 minutes after switching off the ignition before disconnecting the battery. Close the windows and the doors before disconnecting the battery.
Following reconnection of the battery
Following reconnection of the battery, switch on the ignition and wait 1 minute before starting to permit initialisation of the electronic systems. However, if slight difficulties are encountered following this operation, contact a PEUGEOT dealer.
Referring to the corresponding section, you must yourself reinitialise:
- the remote control key,
- the glass panoramic roof shutter,
- the GPS satellite navigation system.
LOAD REDUCTION MODE
System which manages the use of certain functions in relation to the level of charge remaining in the battery.
When the vehicle is being driven, the load reduction function temporarily deactivates certain functions, such as the air conditioning, the rear screen de-icing.
The deactivated functions are reactivated automatically as soon as conditions permit.

At the risk of discharging the battery, the deactivated functions can be reactivated manually.
PRACTICAL INFORMATION
Charging the battery using a battery charger
Disconnect the battery from the vehicle
Follow the instructions for use provided by the manufacturer of the charger
Reconnect starting with the negative terminal (-).
Check that the terminals and connectors are clean. If they are covered with sulphate (whitish or greenish deposit), remove them and clean them

The batteries contain harmful substances such as sulphuric acid and lead. They must be disposed of in accordance with regulations and must not, in any circumstances, be discarded with household waste. Take used remote control batteries and vehicle batteries to a special collection point.

It is advisable to disconnect the battery if the vehicle is to be left unused for more than one month.

Do not disconnect the terminals while the engine is running.
Do not charge the batteries without disconnecting the terminals first.
Do not push the vehicle to start the engine if it is fitted with a 6-speed piloted manual gearbox.
Before disconnecting the battery
Wait 2 minutes after switching off the ignition before disconnecting the battery. Close the windows and the doors before disconnecting the battery.
Following reconnection of the battery
Following reconnection of the battery, switch on the ignition and wait 1 minute before starting to permit initialisation of the electronic systems. However, if slight difficulties are encountered following this operation, contact a PEUGEOT dealer.
Referring to the corresponding section, you must yourself reinitialise:
- the remote control key,
- the glass panoramic roof shutter,
- the GPS satellite navigation system.
LOAD REDUCTION MODE
System which manages the use of certain functions in relation to the level of charge remaining in the battery.
When the vehicle is being driven, the load reduction function temporarily deactivates certain functions, such as the air conditioning, the rear screen de-icing.
The deactivated functions are reactivated automatically as soon as conditions permit.

At the risk of discharging the battery, the deactivated functions can be reactivated manually.
PRACTICAL INFORMATION
ENERGY ECONOMY MODE
System which manages the duration of use of certain functions to conserve sufficient level of charge in the battery After the engine has stopped, you can still use functions such as the audio equipment, windscreen wipers, dipper headlamps, courtesy lights, etc. for a maximum combined duration of thirty minutes.
Switching to economy mode
Once the thirty minutes are over, a message appears on the multifunctio display indicating that the vehicle has switched to economy mode and the active functions are put on standby.

If the telephone is being used at this time:
- it will be maintained for 5 minutes with the RD4 audio equipment hands-free kit,
- it will still be possible to finish the call with the RT4 GPS audio/telephone.
Exiting economy mode
These functions are reactivated automatically next time the vehicle is driven
In order to resume the use of these functions immediately, start the engine and let it run for a few minutes.
The time available to you will then I double the duration for which the engine is left running. However, this period will always be between five and three minutes.

A flat battery prevents the engine from starting (refer to the corresponding paragraph).
CHANGING A WIPER BLADE
Procedure for replacing a worn wiper blade with a new one without the use of tools.
Before removing a front wiper blade
Within one minute after switching off the ignition, operate the wipers stalk to position the wiper blades in the centre of the windscreen.
Removing a front or rear wiper blade
Raise the corresponding wiper arm.
Unclip the wiper blade and remove
Fitting a front or rear wiper blade
At the front, check the size of the wiper blade as the shorter blade is fitted on the right-hand side of the vehicle
Put the corresponding new wiper blade in place and clip it.
Fold down the wiper arm carefully.
After fitting a front wiper blade
Switch on the ignition.
Operate the wipers stalk again to bark the wiper blades.
PRACTICAL INFORMATION
TOWING THE VEHICLE
Procedure for having your vehicle towed or for towing another vehicle using a removable towing eye.
Access to the tools
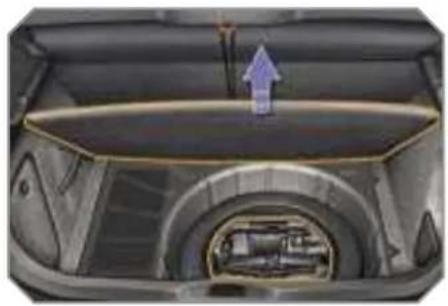
natural_image
Interior view of a car showing the hood and engine compartment with an upward arrow indicating motion (no text or symbols present)The towing eye is installed in the boot under the floor.
To gain access to it:
open the boot,
raise the floor,
secure it by hooking its cord on the book on the shelf support,
remove the polystyrene storage box
remove the towing eye from the hold
Towing your vehicle
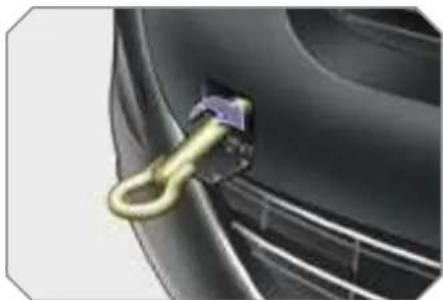
natural_image
Close-up of a car's side panel with a golden handle securing the wheel (no visible text or symbols)On the front bumper, unclip the cove by pressing at the bottom.
Screw the towing eye in fully.
Install the towbar.
Switch on the hazard warning lights on the towed vehicle.

Place the gear lever in neutral (position N on the piloted manual gearbox or automatic gearbox).
Towing another vehicle
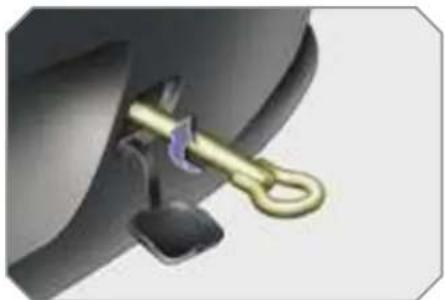
natural_image
Close-up of a mechanical component with a golden handle and purple accent, no visible text or symbolsOn the rear bumper, unclip the cover by pressing at the bottom.
Screw the towing eye in fully.
Install the towbar.
Switch on the hazard warning lights on the towed vehicle.

When towing with all four wheels on the ground, always use a towbar.
When towing with only two wheels on the ground, always use professional lifting equipment.
When towing with the engine off, there is no longer any braking or steering assistance.
PRACTICAL INFORMATION
TOWING A TRAILER, CARAVAN, etc.
Towbar suited to the attachment of trailer or caravan with additional signalling and lighting.
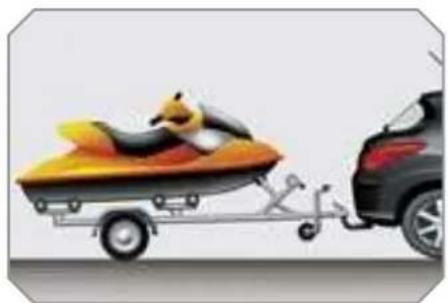
natural_image
Illustration of a jet ski with a dog on a scooter, next to a car (no text or symbols)Your vehicle is primarily designed for transporting people and luggage, but it may also be used for towing a trailer.
We recommend the use of original PEUGEOT towbars that have been tested and approved from the design stage of your vehicle and that the fitting of the towbar is entrusted to a PEUGEOT dealer.
Driving with a trailer subjects the towing vehicle to more significant stress and its driver must be particularly careful.
Driving advice
Distribution of loads
Distribute the load in the trailer so that the heaviest items are as close as possible to the axle and the nose weight approaches the maximum permitted without exceeding it.
Air density decreases with altitude, thus reducing engine performance. Above 1 000 metres, the maximum towing load must be reduced by 10 % and so on for every 1 000 metres of altitude.
Refer to the "Technical Data" section to details of the weights and towing loads which apply to your vehicle.
Side wind
Take into account the increased sensitivity to side wind.
Cooling
Towing a trailer on a slope increase the temperature of the coolant.
As the fan is electrically controlled, its cooling capacity is not dependent on the engine speed.
To lower the engine speed, reduc your speed.
The maximum towing load on a long slope depends on the gradient and the outside temperature.
In all cases, pay attention to the coolant temperature.

If the warning light and the STOP warning light come on, stop the vehicle and switch off the engine as soon as possible
Braking
Towing a trailer increases the brakin distance.
Tyres
Check the tyre pressures of the towing vehicle and of the trailer, observing the recommended pressures.
\_ights
Check the electrical signalling on the trailer

The rear parking assistance will be deactivated automatically if a genuine PEUGEOT towbar is used.
PRACTICAL INFORMATION
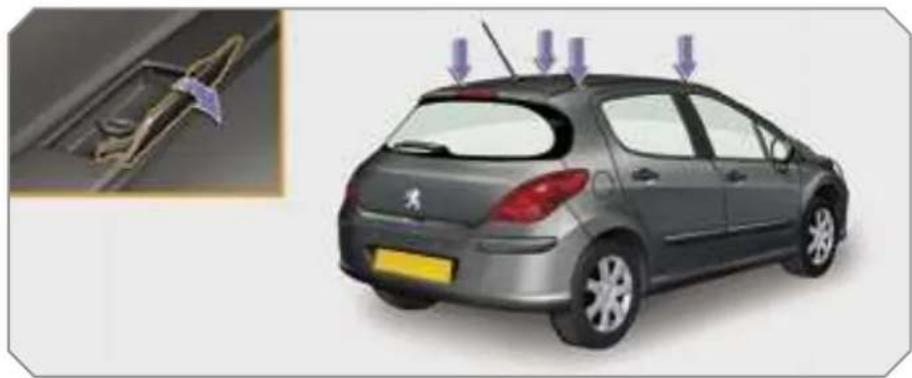
natural_image
Side view of a car with roof-mounted sensors and a close-up of its exterior panel (no visible text or symbols)FITTING ROOF BARS
When fitting transverse root bars, us the four quick-fit fixings provided for this purpose:
lift the concealing flaps,
open the fixing covers on each ba using the spanner,
put each fixing in place and lock them on the roof one by one,
close the fixing covers on each bar using the spanner.

Maximum authorised weight on the roof rack, for a loading height not exceeding 40 cm (with the exception of bicycle carriers): 80 kg.
If the height exceeds 40 cm, adapt the speed of the vehicle to the profile of the road to avoid damaging the roof bars and the fixings on the roof.
Be sure to refer to national legislation in order to comply with the regulations for transporting objects which are longer than the vehicle.
* According to country.
VERY COLD CLIMATE SCREEN
Removable device which prevents the accumulation of snow at the radiator cooling fan
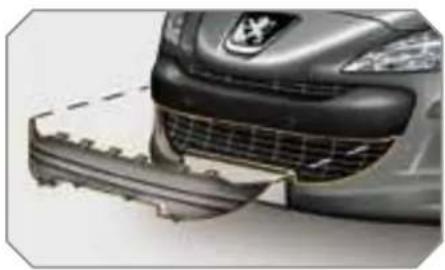
natural_image
Close-up of a car's front bumper and side bumper, showing grille and dashboard details (no text or symbols visible)Fitting
Offer up the very cold climate screen in 1 of the lower section of the front bump
Press on its periphery to clip its fixing clips one by one.
Removal
Use a screwdriver as a lever to un-clip each fixing clip in turn.

Do not forget to remove the very cold climate screen:
- when the outside temperature exceeds 10 °C,
- when towing,
- at speeds higher than 75 mph (120 km/h).
PRACTICAL INFORMATION
ACCESSORIES
You can obtain a wide range of accessories and original parts from the PEUGEO network
These accessories and parts have been tested and approved for reliability an safety.
They are all adapted to your vehicle and benefit from PEUGEOT's recommendation and warranty.
The product range offered by PEUGEO Accessories is structured around 5 categories: PROTECTION - TOURING - IN-CAR TECHNOLOGY - STYLING - UNIVERSAL
"Protection":

anti-theft alarm, window engraving, wheel locks, first aid kit, warning triangle, safety jacket, stolen vehicle tracking system, snow chains.
'Touring':

mats*, boot tray, luggage net, fixed coat hook on head restraint, aluminium or PVC doo sills, fragrance cartridges.
For leisure pursuits: roof bars, bicycle carrier on towbar, bicycle carrier on roof bars, ski carrier, roof box, booster seats and child seats, side blinds and real blind, front centre armrest, CD storage, under shelf storage.
Trailer towbar which must be fitted by the PEUGEOT network
* To avoid any risk of jamming of the pe dals:
- ensure that the mat is positioned and secured correctly
- never fit one mat on top of another.
"In-car technology":

audio systems, audio/telephor amplifiers, satellite navigation systems, hands-free kit, CD changer, speakers, DVD player connection kit for MP3 player portable CD player, rear parkin assistance

Installation of radiocommunication transmitters
It is advisable to contact a representative of the PEUGEOT marque before installing accessory radio-communication transmitters with an external aerial on your vehicle.
The PEUGEOT network will provide you with the specifications (frequency band, maximum output power, aerial position, special installation conditions) of the transmitters which can be fitted, in accordance with the Vehicle Electromagnetic Compatibility Directive (2004/104/CE).
PRACTICAL INFORMATION
"Styling":

seat covers compatible with side air bags, aluminium gear lever knob, fog lamps, sun-roof**, door deflectors, spoiler, styling strips, alloy wheels, trims, sport exhaust.

Depending on the country in which the vehicle is sold, it is compulsory to have a safety jacket, warning triangle and spare bulbs available in the vehicle.
"Universal":

screenwash, interior and exterior maintenance and cleaning products.

The fitting of electrical equipment or accessories which are not recommended by PEUGEOT may result in a failure of your vehicle's electronic system.
You can obtain "Van" conversion kits to transform a private vehicle into a van.
Please note this specific warning. You are advised to contact a representative of the Marque to be shown the range of recommended equipment and accessories.
** Sunroof which must be fitted by the PEUGEOT network.
TECHNICAL DATA
| MODELS: | ENGINES AND GEARBOXES | ||||
| Model codes:4C... 4A... 4G... | 8FS-C | 5FW-C | 5FW-F | 5FX-C | 5FX-F |
| PETROL ENGINES | 1.4 litre 16V95 bhp | 1.6 litre VTi 16V120 bhp | 1.6 litre THP 16V150 bhp | ||
| Cubic capacity (cm2) | 1 397 | 1 598 | 1 598 | ||
| Bore x stroke (mm) | 77 x 75 | 77 x 85.8 | 77 x 85.8 | ||
| Max power: EU standard (kW) | 70 | 88 | 110 | 103 | |
| Max power engine speed (rpm) | 6 000 | 6 000 | 5 800 | 6 000 | |
| Max torque: EU standard (Nm) | 136 | 160 | 240 | ||
| Max torque engine speed (rpm) | 4 250 | 4 250 | 1 400 | ||
| Fuel | Unleaded | Unleaded | Unleaded | ||
| Catalytic converter | Yes | Yes | Yes | ||
| GEARBOX | Manual(5-speed) | Manual(5-speed) | Auto.(4-speed) | Manual(5-speed) | Auto.(4-speed) |
| OIL CAPACITIES (in litres) | |||||
| Engine (with cartridge replacement) | 4.25 | 4.25 | 4.25 | 4.25 | 4.25 |
| Gearbox - Final drive | 1.9 | 1.9 | - | 1.9 | - |
4C...: 5-door.
4A...: 3-door.
4G...: 3-door "Van"
TECHNICAL DATA
| MODELS: | ENGINES AND GEARBOXES | ||||
| Model codes:4C... 4A... 4G... | 9HX-C | 9HZ-C | 9HZ-H/P | RHR-H | RHR-J |
| DIESEL ENGINES | 1.6 litre Turbo-HDI 16V90 bhp | 1.6 litre Turbo HDI 16V110 bhp | 2 litre Turbo HDI 16V136 bhp | ||
| Cubic capacity (cm-1) | 1560 | 1560 | 1997 | ||
| Bore x stroke (mm) | 75 x 88.3 | 75 x 88.3 | 85 x 88 | ||
| Max power: EU standard (kW) | 66 | 80 | 100 | ||
| Max power engine speed (rpm) | 4000 | 4000 | 4000 | ||
| Max torque: EU standard (Nm) | 215 | 240 | 320 | ||
| Max torque engine speed (rpm) | 1750 | 1750 | 2000 | ||
| Fuel | Diesel | Diesel | Diesel | ||
| Catalytic converter | Yes | Yes | Yes | ||
| Particle emission filter | No | Yes | Yes | ||
| GEARBOX | Manual'5-speed) | Manual'5-speed) | Piloted manual'6-speed) | Manual'6 speed) | Auto.'6 speed) |
| OIL CAPACITIES (in litres) | |||||
| Engine (with cartridge replacement) | 3.75 | 3.75 | 3.75 | 5.25 | 5.25 |
| Gearbox - Final drive | 1.9 | 1.9 | - | 2.4 | - |
4C...: 5-door.
4A...: 3-door.
4G...: 3-door "Van"
TECHNICAL DATA
| CONSUMPTION | n accordance with directive 80/1268/CEE | |||||
| Petrol engines | Gearbox | Model codes 4C... 4A... 4G.. | Urban driving mpg (litres/100 km) | Inter-urban driving mpg (litres/100 km) | Mixed driving mpg (litres/100 km) | Emission of CO2 by weight (g/km) |
| 1.4 litre 16V 95 bhp | Manual | 8FS-C | - | - | - | - |
| 1.6 litre VTi 16V 120 bhp | Manual | 5FW-C | 9.3 5.2 6.7 159 | |||
| Auto. | 5FW-F | - - - - | ||||
| 1.6 litre THP 16V 150 bhp | Manual | 5FX-C | 9.8 5.6 7.1 167 | |||
| Auto. | 5FX-F | - | - | - | - | |
The consumption figures shown here correspond to the values communicated at the time of printing.
These consumption values were established in accordance with Directive 80/1268/CEE. They may vary depending on the style of driving, traffic conditions, weather conditions, the load in the vehicle, the maintenance of the vehicle and the use of the accessories.
TECHNICAL DATA
| CONSUMPTION | n accordance with directive 80/1268/CEE | |||||
| Diesel engines | Gearbox | Model codes 4C... 4A... 4G... | Urban driving mpg (litres/100 km) | Inter-urban driving mpg (litres/100 km) | Mixed driving mpg (litres/100 km) | Emission of CO2 by weight g/km) |
| 1.6 litre Turbo HDI 16V 90 bhp | Manual | 9HX-C | - | - | - | - |
| 1.6 litre Turbo HDI 16V 110 bhp | Manual | 9HZ-C | 6.2 4.1 4.9 130 | |||
| Piloted manual | 9HZ-H/P | ---- | ||||
| 2 litre Turbo HDI 16V 136 bhp | Manual | RHR-H | 7.2 4.5 5.5 146 | |||
| Auto. | RHR-J | - | - | - | - | |
The consumption figures shown here correspond to the values communicated at the time of printing.
These consumption values were established in accordance with Directive 80/1268/CEE. They may vary depending on the style of driving, traffic conditions, weather conditions, the load in the vehicle, the maintenance of the vehicle and the use of the accessories.
TECHNICAL DATA
WEIGHTS AND TOWED LOADS (in kg)
| Petrol engines | 1.4 litre 16V 95 bhp | 1.6 litre VTI 16V 120 bhp | |
| Gearbox | Manual | Manual | Auto. |
| Model codes:4C... 4A... 4G... | 8FS-C | 5FW-C | 5FW-F |
| - Unladen weigh | 1 271 - 1 262 | 1 287 - 1 277 | 1 312 - 1 302 |
| - Kerb weigh | 1 346 - 1 337 | 1 362 - 1 352 | 1 387 - 1 377 |
| - Payloac | 414 - 412 | 453 - 450 | 437 - 435 |
| - Gross vehicle weight (GVW) | 1 760 - 1 749 | 1 815 - 1 802 | 1 824 - 1 812 |
| - Gross train weight (GTW)on a 12 % gradient | 2 960 - 2 949 | 3 215 - 3 202 | 3 094 - 3 082 |
| - Braked trailer (within GTW limit)on a 10 % or 12 % gradient | 1 200 | 1 400 | 1 270 |
| - Braked trailer(with load transfer within the GTW limit) | 1 450 | 1 650 | 1 520 |
| - Unbraked trailer | 670 - 665 | 680 - 675 | 690 - 685 |
| - Recommended nose weigh | 58 | 76 | 61 |
* The weight of the braked trailer can be increased, within the GTW limit, if the GVW of the towing vehicle is reduced by an equal amount; warning, towing using a lightly loaded towing vehicle may have an adverse effect on its road holding.
The GTW and towed load values indicated are valid up to a maximum altitude of 1 000 metres; the towed load mentioned must be reduced by 10 % for each additional 1 000 metres of altitude.
The speed of a towing vehicle must not exceed 60 mph (100 km/h) (comply with the legislation in force in your country). High exterior temperatures may result in a reduction in the performance of the vehicle to protect the engine; if the exterior temperature is above 37 °C, limit the towed load.
TECHNICAL DATA
WEIGHTS AND TOWED LOADS (in kg)
| Petrol engines | 1.6 litre THP 16V 150 bhp | |
| Gearbox | Manual | Auto. |
| Model codes:4C... 4A... | 5FX-C | 5FX-F |
| - Unladen weigh | 1 327 - 1 314 | 1 355 - 1 343 |
| - Kerb weigh | 1 402 - 1 389 | 1 430 - 1 418 |
| - Payloac | 424 - 426 | 425 - 425 |
| - Gross vehicle weight (GVW) | 1 826 - 1 815 | 1 855 - 1 843 |
| - Gross train weight (MTRA)on a 12 % gradient | 3 226 - 3 215 | 3 255 - 3 243 |
| - Braked trailer (within GTW limit)on a 10 % or 12 % gradient | 1 400 | 1 400 |
| - Braked trailer(with load transfer within the GTW limit) | 1 650 | 1 650 |
| - Unbraked trailer | 700 - 690 | 715 - 705 |
| - Recommended nose weigh | 66 | 66 |
* The weight of the braked trailer can be increased, within the GTW limit, if the GVW of the towing vehicle is reduced by an equal amount; warning, towing using a lightly loaded towing vehicle may have an adverse effect on its road holding.
The GTW and towed load values indicated are valid up to a maximum altitude of 1 000 metres; the towed load mentioned must be reduced by 10 % for each additional 1 000 metres of altitude.
The speed of a towing vehicle must not exceed 60 mph (100 km/h) (comply with the legislation in force in your country). High exterior temperatures may result in a reduction in the performance of the vehicle to protect the engine; if the exterior temperature is above 37 °C, limit the towed load.
TECHNICAL DATA
WEIGHTS AND TOWED LOADS (in kg)
| Diesel engines | 1.6 litre Turbo HDI 16V 90 bhp | 1.6 litre Turbo HDI 16V 110 bhp | |
| Gearbox | Manual | Manual | Piloted manual |
| Model codes:4C... 4A... 4G... | 9HX-C | 9HZ-C | 9HZ-H/P |
| - Unladen weigh | 1 303 - 1 293 | 1 322 - 1 312 | 1 334 - 1 324 |
| - Kerb weigh | 1 378 - 1 368 | 1 397 - 1 387 | 1 409 - 1 399 |
| - Payloac | 426 - 424 | 453 - 450 | 452 - 450 |
| - Gross vehicle weight (GVW) | 1 804 - 1 792 | 1 850 - 1 837 | 1 861 - 1 849 |
| - Gross train weight (GTW)on a 12 % gradient | 3 074 - 3 062 | 3 120 - 3 107 | 3 131 - 3 119 |
| - Braked trailer (within GTW limit)on a 10 % or 12 % gradient | 1 270 | 1 270 | 1 270 |
| - Braked trailer' (with load transfer with the GTW limit) | 1 520 | 1 520 | 1 520 |
| - Unbraked trailer | 685 - 680 | 695 - 690 | /00 - 695 |
| - Recommended nose weigh | 6' | 61 | 61 |
* The weight of the braked trailer can be increased, within the GTW limit, if the GVW of the towing vehicle is reduced by an equal amount; warning, towing using a lightly loaded towing vehicle may have an adverse effect on its road holding.
The GTW and towed load values indicated are valid up to a maximum altitude of 1 000 metres; the towed load mentioned must be reduced by 10 % for each additional 1 000 metres of altitude.
The speed of a towing vehicle must not exceed 60 mph (100 km/h) (comply with the legislation in force in your country).
High exterior temperatures may result in a reduction in the performance of the vehicle to protect the engine; if the exterior temperature is above 37 °C, limit the towed load.
WEIGHTS AND TOWED LOADS (in kg)
| Diesel engines | 2 litre Turbo HDI 16V 136 bhp | |
| Gearbox | Manual | Auto. |
| Model codes:4C... 4A... | RHR-H | RHR-J |
| - Unladen weigh | 1 421 - 1 408 | 1 447 - 1 434 |
| - Kerb weigh | 1 496 - 1 483 | 1 522 - 1 509 |
| - Payloac | 425 - 427 | 425 - 426 |
| - Gross vehicle weight (GVW) | 1 921 - 1 910 | 1 947 - 1 935 |
| - Gross train weight (GTW)on a 12 % gradient | 3 621 - 3 610 | 3 597 - 3 585 |
| - Braked trailer (within GTW limit)on a 10 % or 12 % gradient | 1 700 | 1 650 |
| - Braked trailer(with load transfer within the GTW limit) | 1 700 | 1 650 |
| - Unbraked trailer | 745 - 740 | 750 - 750 |
| - Recommended nose weigh | 68 | 66 |
* The weight of the braked trailer can be increased, within the GTW limit, if the GVW of the towing vehicle is reduced by an equal amount; warning, towing using a lightly loaded towing vehicle may have an adverse effect on its road holding.
The GTW and towed load values indicated are valid up to a maximum altitude of 1 000 metres; the towed load mentioned must be reduced by 10 % for each additional 1 000 metres of altitude.
The speed of a towing vehicle must not exceed 60 mph (100 km/h) (comply with the legislation in force in your country). High exterior temperatures may result in a reduction in the performance of the vehicle to protect the engine; if the exterior temperature is above 37 °C, limit the towed load.
DIMENSIONS (in mm)
308 saloon (3 and 5 door versions)
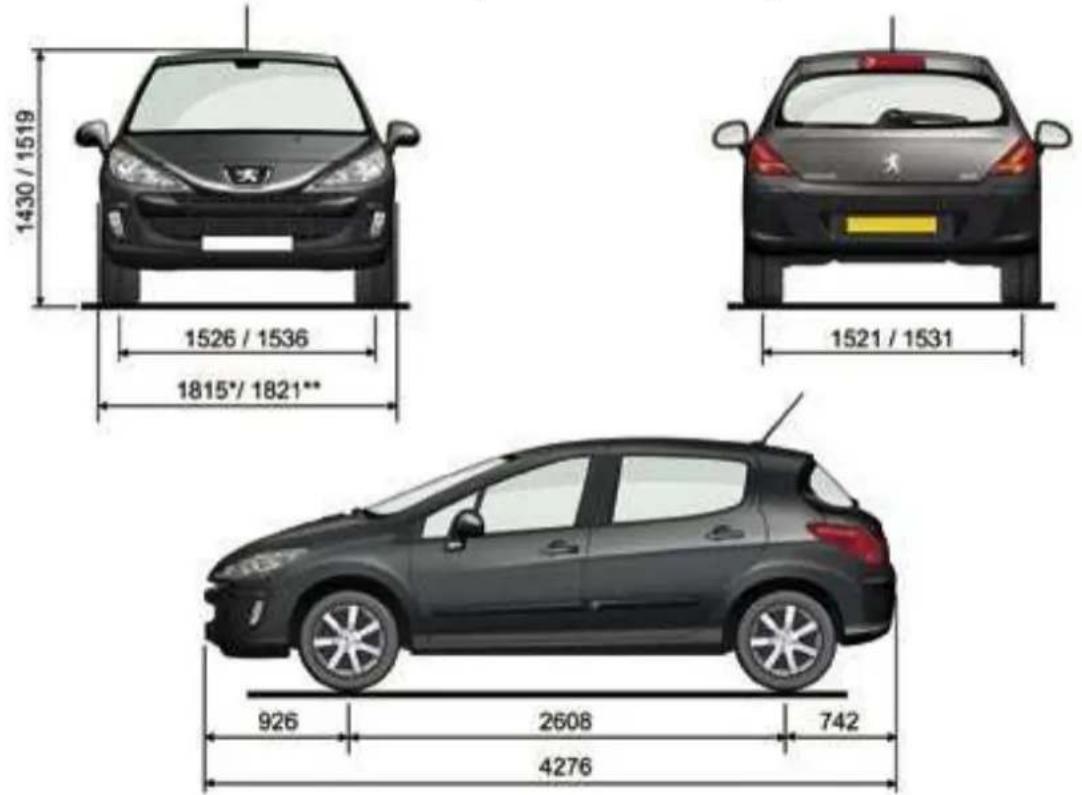
* 3-door.
** 5-door.
TECHNICAL DATA
IDENTIFICATION FEATURES
Various visible marking elements for the identifi cation and tracking of your vehi-cle.
A. Chassis number under the bonnet.
This number is etched on the bodywork near the damper support.
To gain access to it, raise the plastic cover.
B. Chassis number on the windscreen lower crossmember.
This number is indicated on a gummed label which is visible through the wind-screen.
C. Manufacturer's plate.
This plate is riveted onto the engine mounting.
or
D. Manufacturer's label.
This number is indicated on a self-de-stroying label affi xed to the centre pillar, on the passenger side.
E. Tyre/paint label.
This label is affi xed to the front pillar, on the driver's side.
It bears the following information:
- the tyre inflation pressures with and without load,
- the wheel rim and tyre sizes,
- the brands of tyre recommended by the manufacturer,
- the inflation pressure of the spare wheel,
- the paint colour reference.
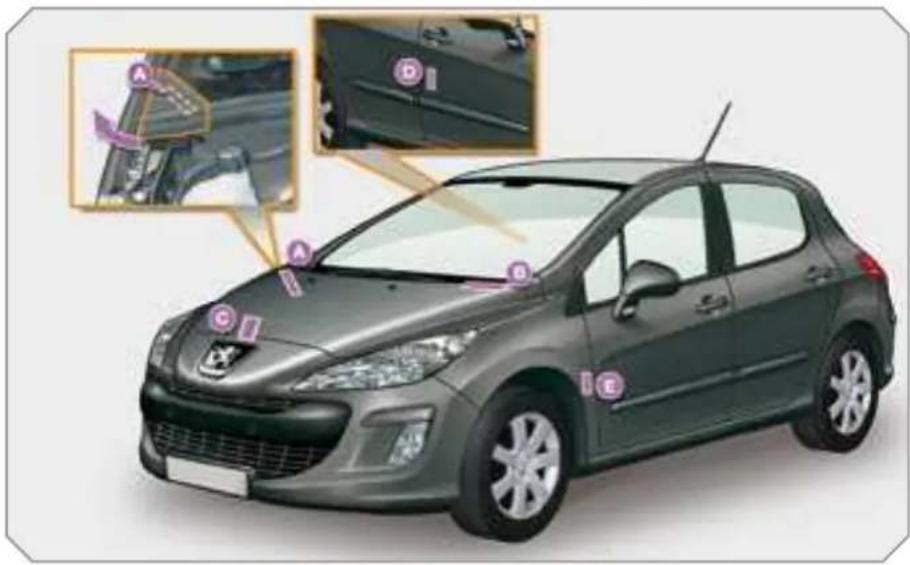

Wheels which are fi tted with 225/45 R17 and 225/40 R18 tyres cannot be fi tted with snow chains. For further information, contact a PEUGEOT dealer.

The inflation pressure must be checked when the tyres are cold, at least once a month.

If the inflation pressure is too low, this increases fuel consumption.
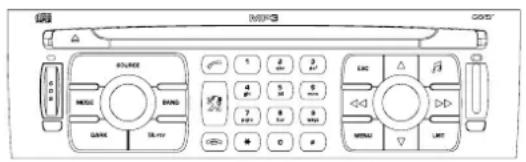
RT4
MULTIMEDIA AUDIO EQUIPMENT/TELEPHONE JUKEBOX FUNCTION (10 GB)/GPS (EUROPE)

Information on the functions offered by this equipment can be found on the site: http://public.servicebox.peugeot.com - access is free. From your vehicle's interactive telemat guide, make your selection, process, follow the action step by step, print

The RT4 GPS audio/telephone is coded in such way that it will only operate in your vehicle. If it is to be installed in another vehicle, contact your PEUGEO dealer for configuration of the system

For safety reasons, it is imperative that the driver carries out operations which require prolonged attention while the vehicle is stationary. When the engine is switched off and to prevent discharging of the battery, the RT4 audio/telephone may switch off after a few minutes
CONTENTS
• 01 First steps pg. 172
• 02 General menu pg. 173
• 03 GPS pg. 174
• 04 Traffic information pg. 182
• 05 Audio/Video pg. 184
• 06 Telephone pg. 191
• 07 Control short-cuts pg. 194
• 08 Configuration pg. 196
• 09 Display flow charts pg. 197
• Frequently asked questions pg. 213
01 FIRST STEPS
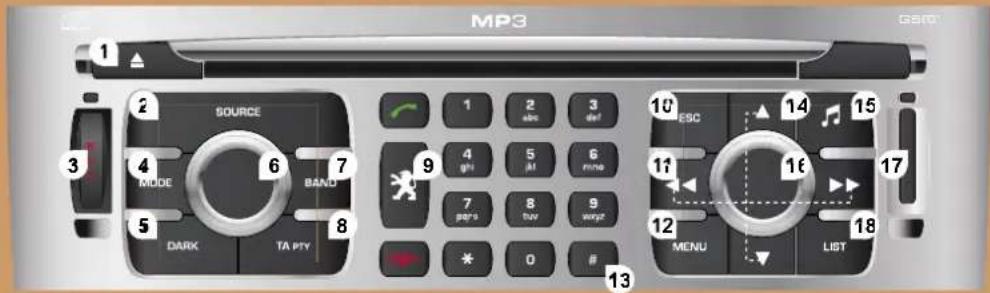
- Ejection of the CD.
- Selection of the source: radio, Jukebox, CD, CD changer and auxiliary (AUX; if activated on the Configuration menu Long press: CD copy to hard disc
-
Long press on the SOS button: emergency call
4 - Selection of the display on the screen from the modes: TRIP TEL, NAV and AUDIC
5 - Modification of the screen display. Long press: reinitialisation of the RT4 GPS audio/telephon
6 · On/Off and Volume adjustment.
7 - Selection of the wavebands FM1, FM2, FMast, AM -
TA (Traffic Announcement) function on/off Long press: access to the PTY (radio Programme TYPE mode
- Access to the "PEUGEOT" services menu
10 Cancellation of the current operation Long press: return to the current application - Automatic search for a lower/higher frequency Selection of the previous/next CD, MP3 or Jukebox track
12 Displaying of the general menu
13 Keypad for entering descriptions by successive presses
14 Selection of the previous/next CD
Selection of the previous/next MP3/Jukebox director
15 Audio option adjustments: front/rear, left/right balance loudness, sound ambience
16 Selection and confirmation
17 SIM card slot.
18 Displaying of the list of local radio stations, of the tracks of the CD or of the MP3/Jukebox directories
Long press: updating of the local radio station
02 GENERAL MENU
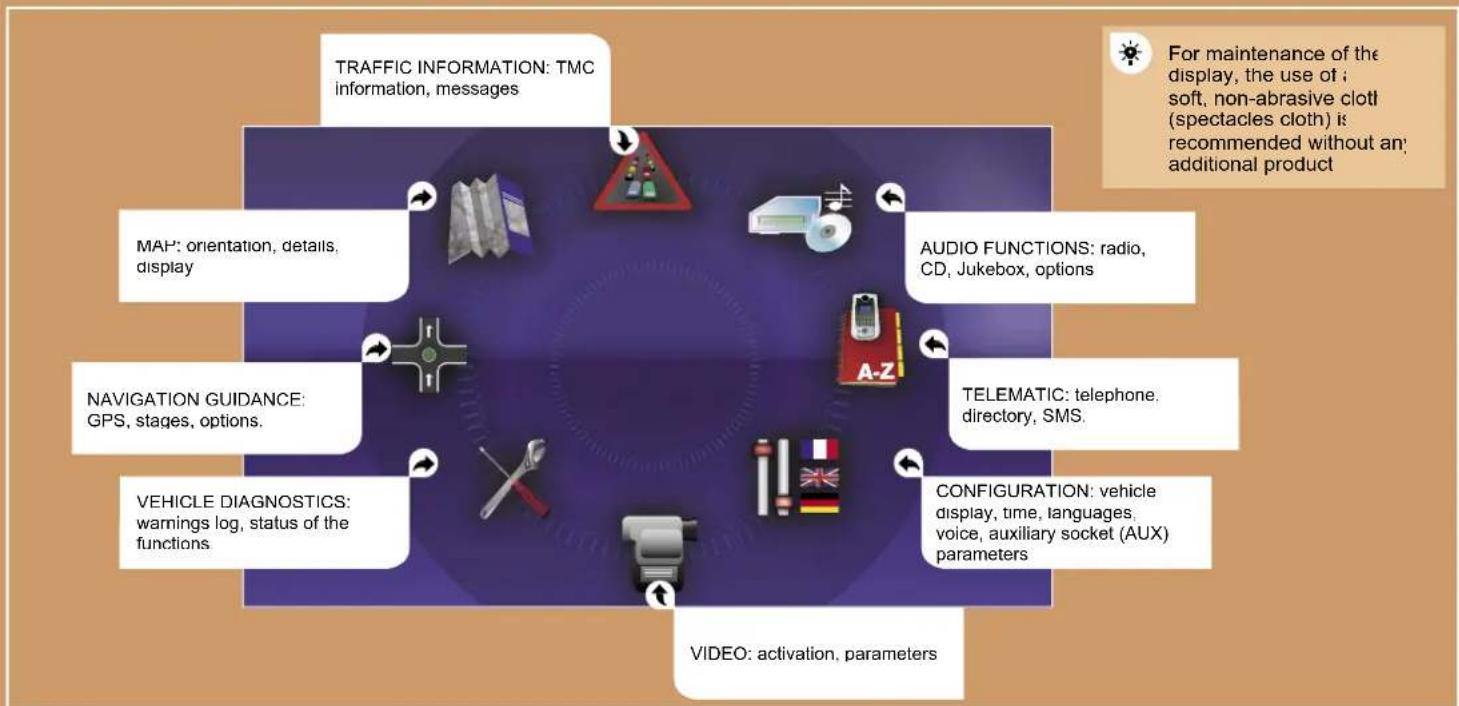
flowchart
graph TD
    A["TRAFFIC INFORMATION: TMC information, messages"] --> B["MAP: orientation, details, display"]
    A --> C["NAVIGATION GUIDANCE: GPS, stages, options."]
    A --> D["VEHICLE DIAGNOSTICS: warnings log, status of the functions."]
    A --> E["AUDIO FUNCTIONS: radio, CD, Jukebox, options"]
    A --> F["TELEMATIC: telephone, directory, SMS."]
    A --> G["CONFIGURATION: vehicle display, time, languages, voice, auxiliary socket (AUX) parameters"]
    A --> H["VIDEO: activation, parameters"]
    I["For maintenance of the display, the use of soft, non-abrasive clotl (spectacles cloth) is recommended without an; additional product"] --> A
03 GPS

SELECTING A DESTINATION
Tip: for a detailed global view of the menus available, refer to the "Display flow charts" section of this RT4 chapter


Press the MENU button
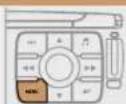


Press the dial to confirm the selection
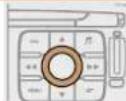


Turn the dial and select the NAVIGATION GUIDANCE function

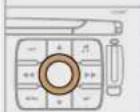


Turn the dial and select the ENTERAN ADDRESS function
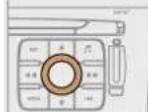
ENTER AN ADDRESS


Press the dial to confirm the selection


Press the dial to confirm the selection


Turn the dial and select the DESTINATION CHOICE function
DESTINATION CHOICI


When the country has been selected turn the dial and select the TOWN function
TOWN

natural_image
Topographic contour map with contour lines and plus signs, no text or labels present
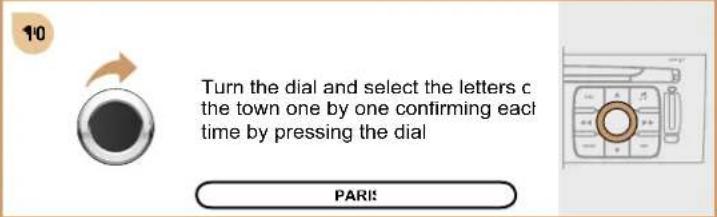
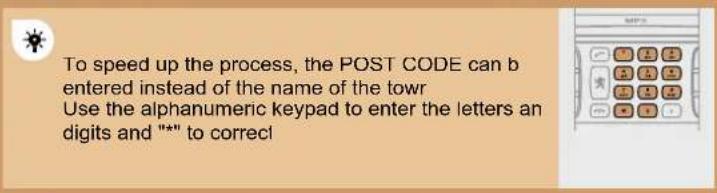
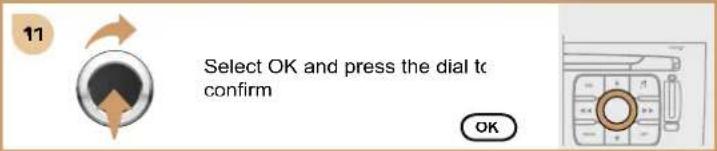
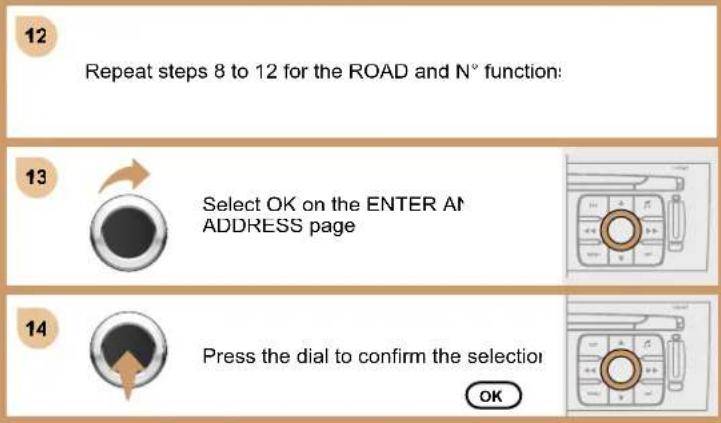
03 GPS

GUIDANCE OPTIONS
The route chosen by the RT4 GPS audio/telephone depends directly on the guidance option. Changing these options may completely change the route


Press the MENU button


Press the dial to confirm the selection


Turn the dial and select the NAVIGATION GUIDANCE function



Turn the dial and select the DEFINE CALCULATION CRITERIA function
DEFINE CALCULATION CRITERI


Press the dial to confirm the selection


Press the dial to confirm the selection


Turn the dial and select the GUIDANCE OPTIONS function
GUIDANCE OPTIONS


Turn the dial and select, for example the DISTANCE/TIME function
DISTANCE/TIMI
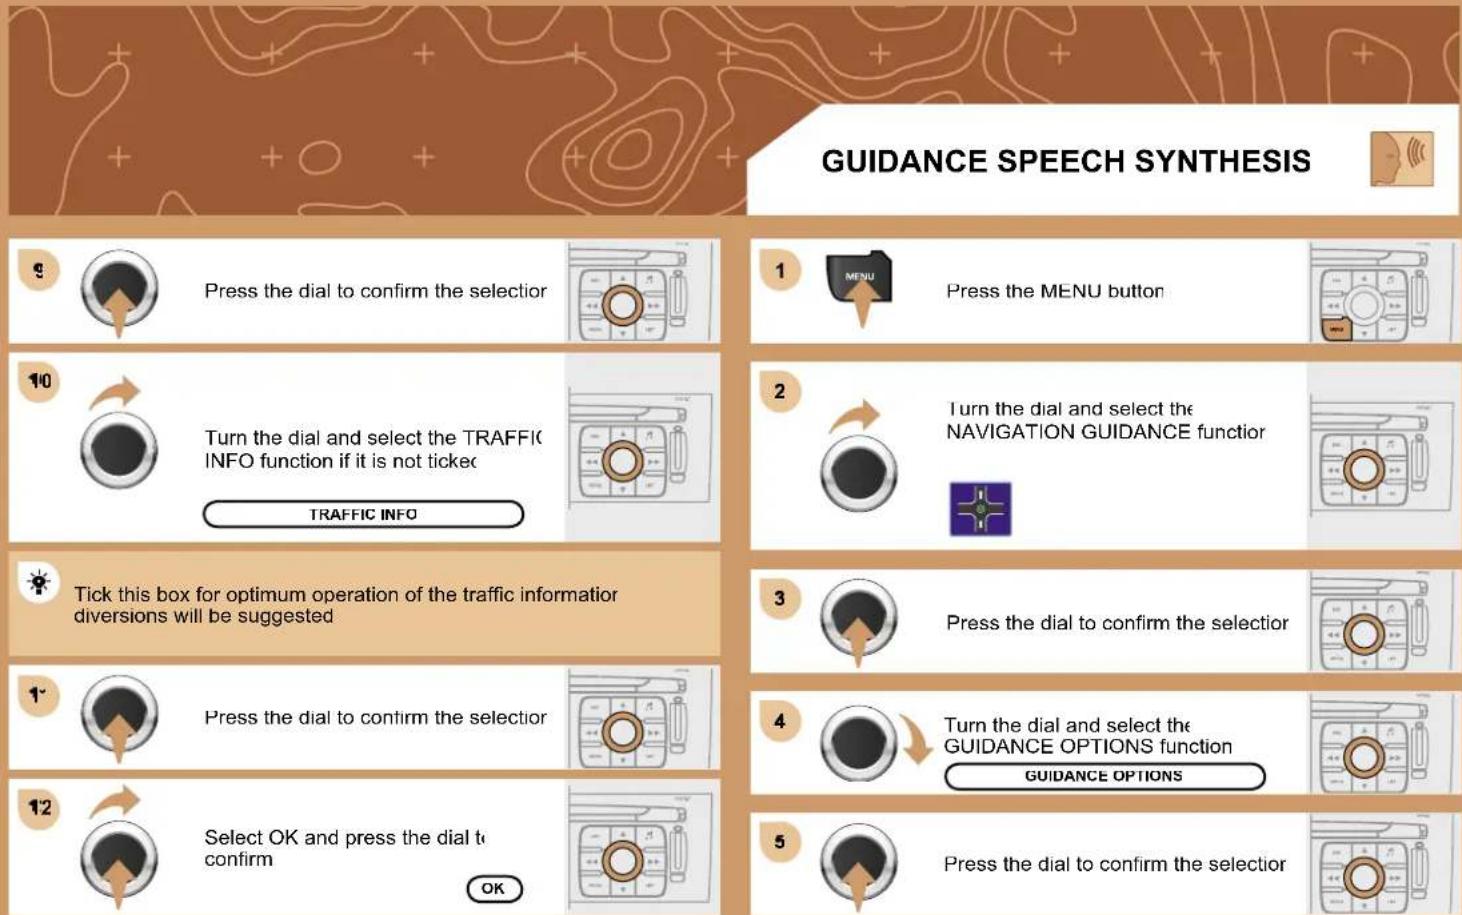
flowchart
graph TD
    A["Press the dial to confirm the selection"] --> B["Turn the dial and select the TRAFFIC INFO function if it is not ticked"]
    B --> C["Traffic Info"]
    D["Press the menu button"] --> E["Turn the dial and select the NAVIGATION GUIDANCE function"]
    E --> F["Tick this box for optimum operation of the traffic information diversions will be suggested"]
    G["Press the dial to confirm the selection"] --> H["Select OK and press the dial to confirm"]
    H --> I["OK"]
    J["Press the dial to confirm the selection"] --> K["Turn the dial and select the GUIDANCE OPTIONS function"]
    K --> L["GUIDANCE OPTIONS"]
    M["Press the dial to confirm the selection"] --> N["Press the dial to confirm the selection"]
03 GPS

GUIDANCE SPEECH SYNTHESIS

ACTIONS ON THE MAP

During the announcements, the volume of each speech synthesis function (guidance, traffic information...) can be adjusted directly


Press the MENU button


Select the ADJUST SPEECH SYNTHESIS function and press the dial to confirm
ADJUST SPEECH SYNTHESIS
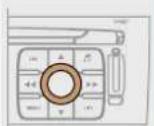


Turn the dial and select the MAF function



Select the DEACTIVATE function and press the dial to confirm
DEACTIVATE
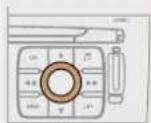


Press the dial to confirm the selection


Select OK and press the dial to confirm
OK
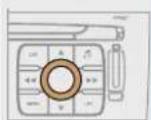


Turn the dial and select the MAF DETAILS function
Permits selection of the services which can be seen on the map (hotels, restaurants...)
MAP DETAILS
03 GPS

3D VIEW
For improved visibility, beyond the scale of 10km, the map automatically switches to North Orientation
1

Press the MENU button
5

Press the dial to confirm the selection
2

Turn the dial and select the MAF function

€

Turn the dial and select the 3D VIEV tab
3

Press the dial to confirm the selection
3D VIEW
4

Turn the dial and select the MAF ORIENTATION functor
MAP ORIENTATIOI
7

Select OK and press the dial to confirm
OK
03 GPS

DISPLAYING THE MAP IN A WINDOW OF IN FULL SCREEN MODE


Press the MENU button
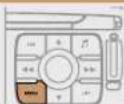


Turn the dial and select the MAF function
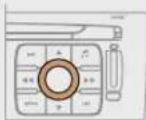


Press the dial to confirm the selection


Turn the dial and select the DISPLA' MAP function

DISPLAY MAF


Press the dial to confirm the selection
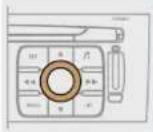


Turn the dial and select the MAP IN WINDOW or FULL SCREEN MAF tab.
MAP IN WINDOW
FULL SCREEN MAF


Select OK and press the dial to confirm
OK
03 GPS

ADDING A STAGE
1

During guidance, press the MEN button
2

Turn the dial and select the NAVIGATION GUIDANCE function
3


Press the dial to confirm the selection
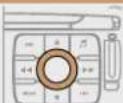
4

Turn the dial and select the JOURNEY LEGS AND ROUTE function
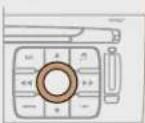
JOURNEY LEGS AND ROUTE
5

Press the dial to confirm the selection
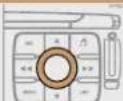
6

Select the ADD A STAGE functio (9 stages maximum) and press the dial to confirm
ADD A STAGE
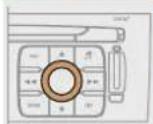
7

Enter for example a new address
ENTER AN ADDRESS
8

When the new address has been entered, select OK and press the dia to confirm
9

Select OK and press the dial to confirm the order of the stages
#
The stage must be completed or deleted before the guidance ca continue to the next destination
Otherwise, the RT4 GPS audio/telephone will always guide yo back to the previous stage
04 TRAFFIC INFORMATIO

ACTIVATING THE FILTER ON THE ROUTE
We recommend a filter on the route and a filter around the vehicle c
- 5 km or 10 km for a region with heavy traffic
- 20 km for a region with a normal level of traffic
- 100 km for long journeys (motorway


Press the MENU button


Press the dial to confirm the selection


Turn the dial and select the TRAFFIC INFORMATION function


Select the GEOGRAPHIC FILTEF function and press the dial to confirm


Press the dial to confirm the selection


Turn the dial and select the ON THI ROUTE tab
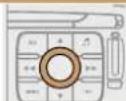


Turn the dial and select the FILTER TRAFFIC INFORMATION function
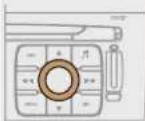


Select OK and press the dial to confirm
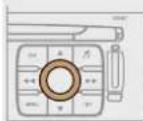
OK
04 TRAFFIC INFORMATIO
CONFIGURING THE TMC MESSAGE ANNOUNCEMENTS
We recommend that you do not tick the NEW MESSAGE DISPLAY tab for regions with heavy traff


Press the MENU button
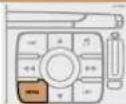


Turn the dial and select the TRAFFIC INFORMATION function

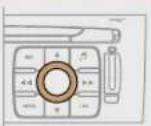


Press the dial to confirm the selection


Turn the dial and select the CONFIGURE MESSAGE ANNOUNCEMENT function
CONFIGURE MESSAGE ANNOUNCEMENT


Press the dial to confirm the selection


Select the READ MESSAGES tab The Traffic Information Messages wi be read by the voice synthesisei
READ MESSAGES


Select the NEW MESSAGE DISPLAY tab
The traffic information messages are extended to the filters selected (geographic...) and can also be displayed when guidance is no active.
NEW MESSAGE DISPLAY


Select OK and press the dial to confirm
OK
05 AUDIO/VIDEO

The external environment (hills, buildings, tunnels, basement car parks, ...) may block reception, including in RDS mode. This is a normal effect of the way in which radio waves are transmitted and does not indicate any failure of the audio equipment.
RADIO SELECTING A STATION
RDS

Press the SOURCE button several times in succession and select the RADIO
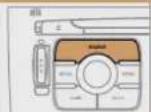


Press the MENU button
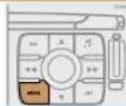


Press the BAND button to select : waveband: FM1, FM2, FMast, AM
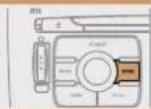


Select AUDIO FUNCTIONS their press OK
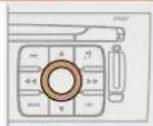


Briefly press one of the buttons to carry out an automatic search of the radio stations
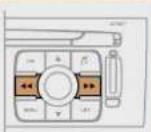


Select the RADIO PREFERENCES function then press OK.
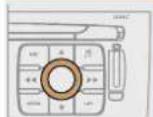


Press one of the buttons to carry out a manual search of the radio stations
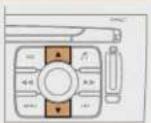


Select ACTIVATE FREQUENCY FOLLOWING (RDS) then press OK RDS appears on the display
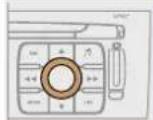


Press the LIST button to display the list of stations received locally (60 maximum) To update this list, press for more than two seconds

The RDS, if displayed, enables you to continue listening to the same station by means of frequency following. However, in certain conditions, this RDS station is not followed throughout the country as radio stations do not cover 100 % of the territory. This explains the loss of reception of the station during a journey
05 AUDIO/VIDEO

MP3 CD INFORMATION AND ADVICE

The MP3 format, an abbreviation of MPEG 1.2 & 2.5 Audio Layer is an audio compression standard which permits the recording of several tens of music files on a single disc.

In order to be able to play a recorded CDR or CDRW, when recording it is preferable to select standards ISO 9660 level 1.2 or Joliet. If the disc is recorded in another format, it may not be played correctly It is recommended that the same recording standard is always used for an individual disc, with as low a speed as possible (4x maximum) for optimum sound quality In the particular case of a multi-session CD, the Joliet standard is recommended

The audio equipment will only play audio files with the extension ".mp3" with a sampling rate of 22.05 KHz or 44.1 KHz. No other type of file (.wma, .mp4, m3u...) can be played.

It is advisable to restrict file names to 20 characters without using special characters (e.g.: " " ? ; ü) to avoid any playing or displaying problems.
CD PLAYING A CD OR AN MP3 COMPILATION

Insert circular compact discs only. Some anti-pirating systems, on original discs or CDs copied using a personal recorder, may generate malfunction regardless of the quality of the original playe
Insert an audio CD or an MP3 compilation in the playe play begins automatically

If the player already contains a disc press the SOURCE button several times in succession and select CD to listen to it


Press one of the buttons to select a track on the CD Press the LIST button to display the list of tracks on the CD or of the directories of the MP3 compilation
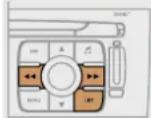

The playing and displaying of an MP3 compilation may depend on the recording programme and/or the parameter settings used. W recommend use of the ISO 9660 recording standard
JUKEBOX FUNCTION
COPYING A CD ONTO THE HARD DISC
1
Insert a CD or an MP3 compilation and press the MENU button
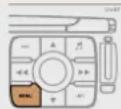
2

Select AUDIO FUNCTIONS and pres: the dial to confirm.

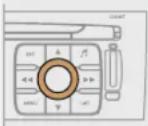
3

Select COPY CD TO JUKEBOX and press the dial to confirm
COPY CD TO JUKEBOX
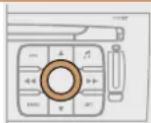
4

Select COMPLETE CD to copy the entire CD and press the dial to confirm
COMPLETE CD
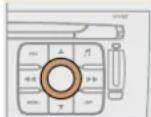
5

Select CREATE ALBUM and pres: the dial to confirm.
CREATE ALBUM
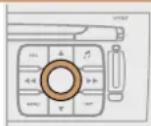

The AUTO CREATION tab automatically copies the CD by default into an album of the type "album n°..."
6

Select the letters one by one and select OK to confirm
OK
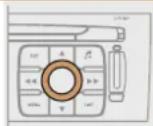

The audio or MP3 CD is copied onto the hard disc. Copying ma take approximately 20 minutes depending on the duration of the CD. During this copying phase, it is not possible to listen to the album previously recorded on the hard disc or the CD.

If it is not an MP3 CD, the Jukebox automatically compresse the CD in MP3 format. The compression may take approximate 20 minutes depending on the duration of the CD. During the compression phase, it is possible to listen to the CD or to album previously recorded on the hard disc

A long press on the SOURCE button starts the copying of the CI
!
When copying an MP3 CD, the Jukebox only retains the last album level. It is not possible to copy files from the Jukebox to a CI. The STOP THE CD COPY action does not delete the files which have already been transferred onto the jukebox hard dis
JUKEBOX FUNCTION
RENAMING AN ALBUM
1

Press the MENU button
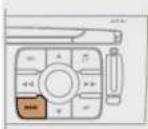
2

Select AUDIO FUNCTIONS and press the dial to confirm

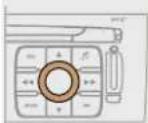
3

Select the JUKEBOX function and press the dial to confirm
JUKEBOX
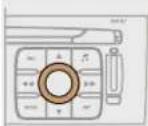
4

Select the JUKEBOX MANAGEMENT function and press the dial to confirm
JUKEBOX MANAGEMENT
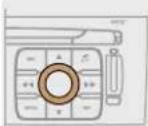
5

Select the album to be renamed and press the dial to confirm
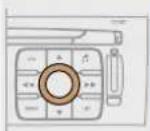
6

Select the RENAME tab and press the dial to confirm
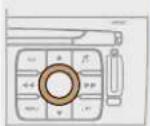
RENAME
7

Turn the dial and select the letters c the album title one by one confirmin each time by pressing the dia
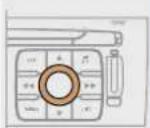
#
Use the alphanumeric keypad to enter the letters of the album title one by one
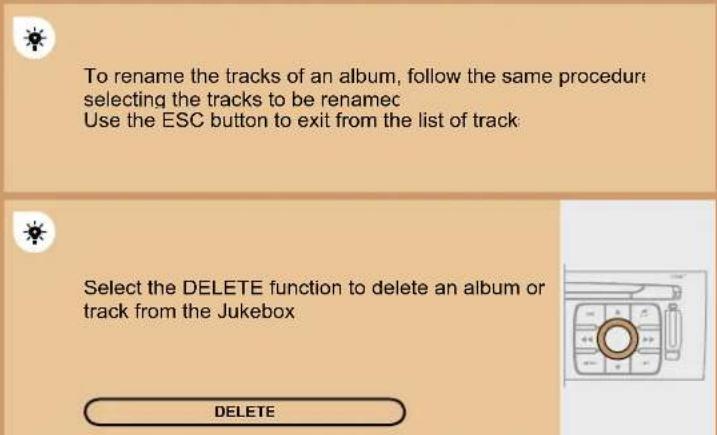
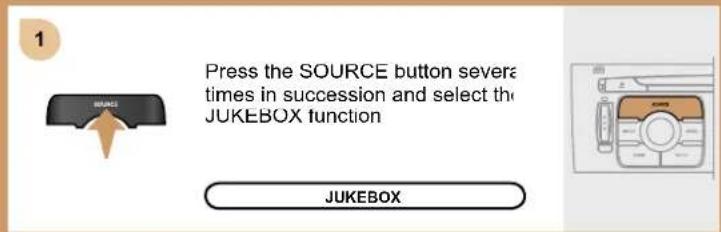
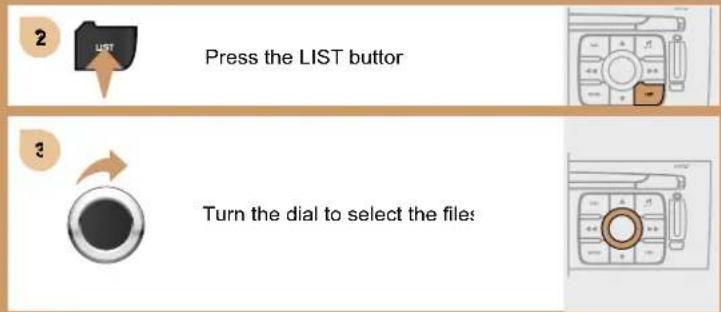

VIDEO MENU
You can connect video equipment (camcorder, digital camera, DVD player...) to the three audio/video sockets, located in the glove box
1

After connecting the video equipment press the MENU button
2

Turn the dial and select the VIDEO function
3

Press the dial to confirm the selection
4

Turn the dial and select the ACTIVATE VIDEO MODE function to activate/deactivate the videc
ACTIVATE VIDEO MODE
5

Press the dial to confirm the selection

Turn the dial and select the VIDEO PARAMETERS function to set the display format, the brightness, the contrast and the colours
VIDEO PARAMETERS

Press the dial to confirm the selection
#
Pressing the "MODE" or "DARK" button disconnects the displayir of the video
#
Pressing the "SOURCE" button several times in succession permi the selection of an audio source other than that of the vide
!
Videos can only be displayed when stationary
USING THE AUXILIARY INPUT (AUX) JACK/RCA AUDIO CABLE NOT SUPPLIED

Press the MENU button then select the CONFIGURATION function then SOUNDS, then ACTIVATE AUXILIARY SOURCE to activate the auxiliary input of the RT4 GPS audio/telephone

Connect the portable equipment (MP; player...) to the audio sockets (white and red, RCA type) located in the glove box using a JACK/RCA audio cable

Press the SOURCE button several times in succession and select AUX

The displaying and management of the commands takes place vi the portable equipment

It is not possible to copy the files onto the hard disc from the auxiliary input
CD CHANGER PLAYING A CD (NOT MP3 COMPATIBLE

Insert one or more CDs in the changer Press the SOURCE button several times in succession and select CD CHANGER.

Press one of the buttons on the alphanumeric keypad to select the corresponding CD


Press one of the buttons to select a track on the CD

It is not possible to copy the files onto the hard disc from the C changer
06 TELEPHONE

INSTALLING YOUR SIM CARD (NOT SUPPLIED)
ENTERING THE PIN CODE
1
Access the slot by pressing the button using the tip of a pen
2

Install the SIM card in the holder and then insert it in the slot.
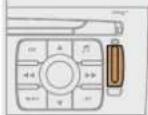
3
To remove the SIM card, repeat step
!
Your SIM card must be installed and removed with the RT4 GF audio/telephone switched off and the ignition of
1
Enter the PIN code on the keypad
PIN CODE
2
Confirm the PIN code by pressing button #
[Non-Text]
When entering your PIN code, tick the STORE PIN tab to gai access to the telephone without having to enter this code when it used subsequently
06 TELEPHONE
CALLING A CONTACT

1

Press the PICK UP button to displa the superimposed telephone menu
2

Turn the dial and select the DIAL function
DIAL
3

Press the dial to confirm the selection
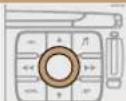
4
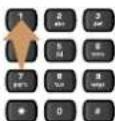
Dial the telephone number of you contact using the alphanumeric keypad
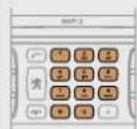
5

Press the PICK UP button to call the number dialled
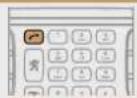
6

Press the HANG UP button to end the call
ACCEPTING OR REFUSING A CALL

Press the PICK UP button to accept a call.

Press the HANG UP button to refuse a call.
#
Press the end of the steering wheel stalk for more than 2 seconds to access the telephone menu calls log, directory, voice mailbo)
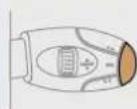
EMERGENCY CALL
In an emergency, press the SOS button until an audible signal is heard and a CONFIRMATION CANCELLATION screen is displayed (if valid SIM card inserted). A call is made to the emergency services (112) In certain countries*, this emergenc call is made directly by the PEUGEOT Emergency team which locates the vehicle and alerts the appropriate emergency services as quickly as possible
* On condition that the PEUGEOT Emergency contract has been signed. This is free and of unlimited duration. Contact, PEUGEOT dealer

When the PEUGEOT Emergency contract has been signed, it is recommended that an initial call is made to the PEUGEOT Emergency team
CONSULTING THE SERVICES
Press the LION button to gain access to the PEUGEOT services*

Select CUSTOMER CONTAC® CENTRE to request any information about the PEUGEOT marque
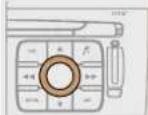
CUSTOMER CONTACT CENTRE

Select PEUGEOT ASSISTANCE to make a breakdown assistance call
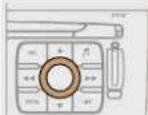
PEUGEOT ASSISTANCE
* These services and options are subject to conditions and availabilit
07 CONTROL SHORT-CUTS
STEERING WHEEL CONTROLS
RADIO: selection of the previous stored station MP3/JUKEBOX: selection of the previous directory CD CHANGER: selection of the previous CD Selection of the previous item on a menu.
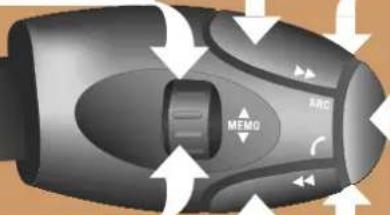
RADIO: automatic search for a higher frequency CD/MP3/JUKEBOX/CD CHANGER: selection of the next track CD/CD CHANGER: continuous press: fast forwards play
Volume increase
- Change of sound source.
- Confirmation of a selection
- Pick up/Hang up the telephone.
- Press for more than 2 seconds: access to the telephone menu
Mute: by pressing the volume increase and decrease buttons simultaneously.
The sound is restored by pressing one of the two volume buttons.
RADIO: selection of the next stored station MP3/JUKEBOX: selection of the next directory CD CHANGER: selection of the next CD Selection of the next item on a menu.
Volume decrease.
RADIO: automatic search for a lower frequency CD/MP3/JUKEBOX/CD CHANGER: selection of the previous track. CD/CD CHANGER: continuous press: fast backwards play
VOICE COMMANDS DISPLAYING THE LIST AND USING THEM


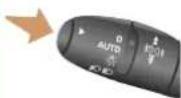
To display the list of available voice commands, press the end of the lights stalk to start the voice recognition, then say HELP or WHAT CAN | SA'


For the same operation, press and hold the MENU button and select the function VOICE COMMANDS LIST
VOICE COMMANDS LIST
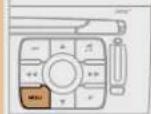

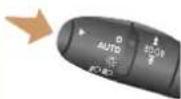
Press the end of the lights stalk to start the voice recognition
Say the words one by one and wait for the audible confirmation signal between each word
The list which follows is exhaustive
| LEVEL 1 | LEVEL 2 | LEVEL 3 |
| display | audioguidancenavigationtrip computertelephone | |
| call | description | |
| changer | disc numberprevious/next discrandom playlisttrack numberprevious/next trackrepeatscan | 1 ... 20 |
| guide totraffic info | description | |
| displayread | ||
| CD player/jukebox | random playlisttrack numberprevious/next trackdirectory (MP3 CD)scan | 1 - 20previous/next repeat |
| navigation | stop/resumedirectoryshowzoom out/in | destinationdescriptiorvehicle |
| radio | autostorelistmemoryprevious/nex | 1 ... € |
| SMS/message | displayread | |
| telephone | voice mailboxlast numbervoice message servicedirectory | description |
08 CONFIGURATION
ADJUSTING THE DATE AND TIME


Press the MENU button
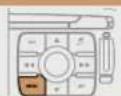


Turn the dial and select the CONFIGURATION function
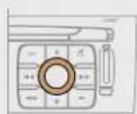


Press the dial to confirm the selection


Turn the dial and select the DISPLA CONFIGURATION function
DISPLAY CONFIGURATION


Press the dial to confirm the selection


Turn the dial and select the ADJUS' THE DATE AND TIME function
ADJUST THE DATE AND TIME


Press the dial to confirm the selection


Adjust the parameters one by one confirming by pressing the dial. Ne select the OK tab on the display the confirm
OK
09 DISPLAY FLOW CHARTS

NAVIGATION - GUIDANCI
SELECT DESTINATION
enter an address
country
town
road
N°/_
curr. loc
Archive
PO
5 near
on the route
5 around current place
5 search by name
GPS coordinates
directory

1 MAIN FUNCTION
2 CHOICE A
3 choice A'
3 choice A2
2 CHOICE B..

previous destinations:

JOURNEY LEGS AND ROUTI

add a stage
4 enter an address
4 directory
4 previous destinations

order/delete journey leg:
6 divert route
3 chosen destination

GUIDANCE OPTIONS

define calculation criteria

fastest

shortest

distance/time

with tolls

with ferry

traffic infc

set speech synthesis

activate/deactivate road name

map data base description

delete last destination:

STOP/RESUME GUIDANCE

MAP

MAP ORIENTATION

vehicle direction

north direction

3D view

MAP DETAILS

administration and safety

town halls, town centre

universities, college:

hospitals

hotels, restaurants and shops

notes

restaurants

vinyards
business centres
4 supermarkets, shopping
3 culture, tourism and shows
4 tourism
4 culture and museum
4 casinos and nightlife
cinemas and theatre
4 shows and exhibitions
3 sports and open air centre
4 sports centres
4 golf courses
4 skating rinks, bowling alleys
4 winter sports resort:
4. parks, gardens
4 theme parks
3 transport and automobile
4 airports, ports
4 stations, bus stations
4 vehicle renta
4 lay-bys, car parks
4 service stations, garage:
2 DISPLAY MAF
3 full screen map
3 map in window
MOVE THE MAF

TRAFFIC INFORMATION
READ MESSAGES
FILTER TRAFFIC INFORMATION
3 geographic filter
around the vehicle
around location
4 on the route
3 road information
traffic information
4 road closure
size lim
road condition
4 weather and visibility
3 urban/city information
4 parking
4 public transport
4 demonstrations
2 CONFIGURE MESSAGE ANNOUNCEMENT
3 read messages
3 new message display
2 SELECT TMC STATION
3 AUTOMATIC TMC
a manual TMC
3 list of TMC stations

AUDIO FUNCTIONS
2 RADIO FAVOURITES
3 enter a frequency
3 activate/deactivate RDS mode
3 activate/deactivate regional mode
3 display/hide radio tex
2 CD, JUKEBOX FAVOURITE
3 activate/deactivate Introscan (SCN
3 activate/deactivate Random mode (RDM
3 activate/deactivate Repeat (RPT
3 activate/deactivate display of CD info
2 STOP THE COPY
COPY CD TO JUKEBO)
3 copy complete CD
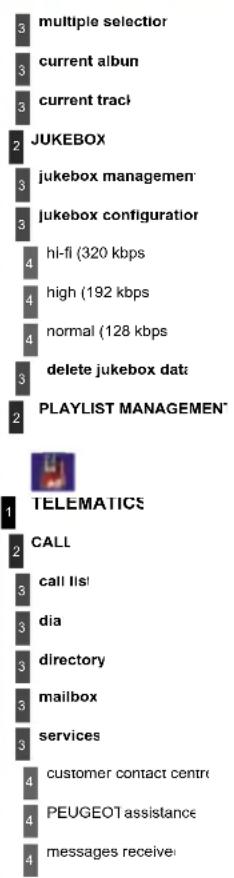
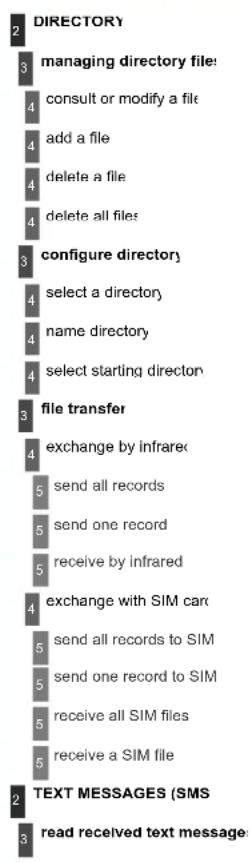
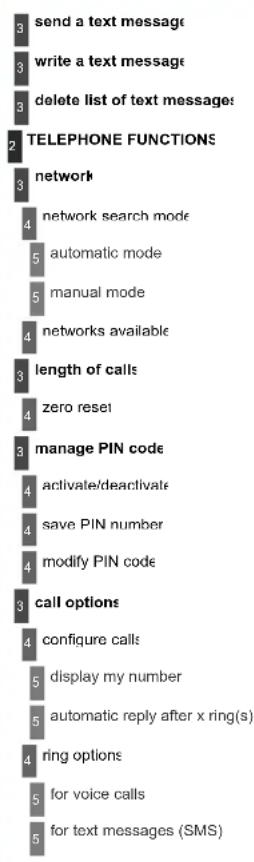
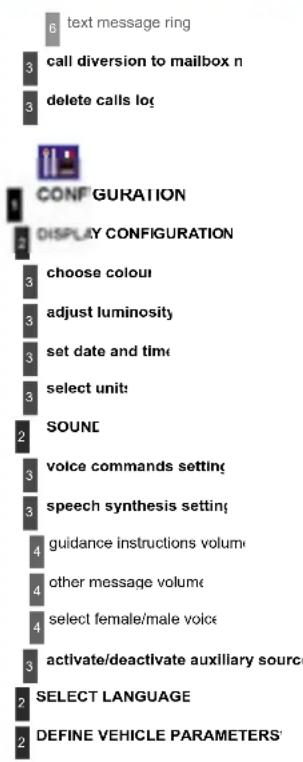
* The parameters vary according to vehicle (refer to the "Multifunction displays" chapter)
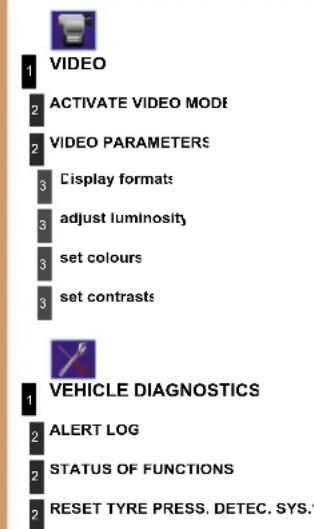
Flow chart version 7.0
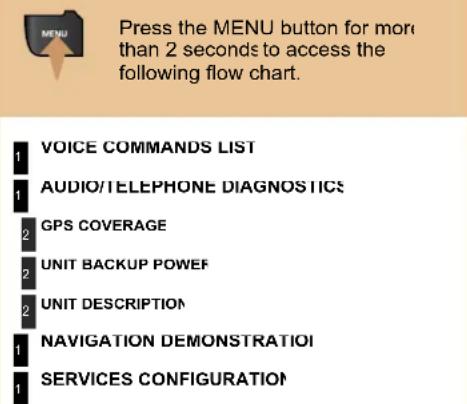
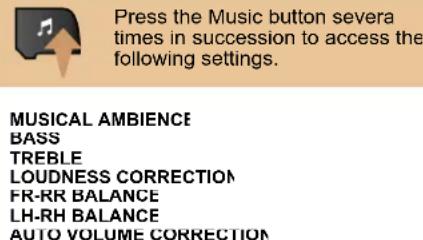

FREQUENTLY ASKED QUESTIONS
The table below groups together the answers to the most frequently asked questions concerning the RD4 audio equipment and the RT4 audio/telephone.
| QUESTION | RESPONSE | SOLUTION |
| There is a difference in sound quality between the different audic sources (radio, CD, CD changer...) | For optimum sound quality, the audio settings (Volume, Bass, Treble Ambience, Loudness) can be adapted to the different sound sources, which may result in audible differences when changing source (radio, CD, CD changer...) | Check that the audio settings (Volume, Bass, Treble, Ambience, Loudness) are adapted to the sources listened to. It is advisable to set the AUDIO functions (Bass, Treble, Front-Rear Balance, Left-Right Balance) to the middle position, select the musical ambience "None" and set the loudness correction to the "Active" position in CD mode or to the "Inactive" position in radio mode |
| The CD is ejected automatically or is not played by the player | The CD is inserted upside down, is unplayable, does not contain any audio data or contains an audio format which the player cannot play.The CD is protected by an anti-pirating protection system which is not recognised by the audio equipment. | - Check that the CD is inserted in the player the right way up.- Check the condition of the CD: the CD can be played if it is too damagec- Check the content in the case of a recorded CD: consult the advice in the Audio sector- The audio equipment's CD player does no play DVDs- Due to inadequate quality, certain recorded CDs will not be played by the audio system- The CD changer does not play MP3 CDs |
| The CD player sounds poor. | The CD used is scratched or of poor quality. | insert good quality CDs and store them in suitable conditions. |
| The audio equipment settings (bass, treble, ambiences) are unsuitable. | Set the treble or bass level to 0, without selecting an ambience. | |
| The stored stations do not function (no sound, 87.5 Mhz is displayed...) | An incorrect waveband is selected. | Press the BAND AST button to return to the waveband (AM, FM1, FM2, FMAST) on which the stations are stored |
| The traffic announcement (TA) is displayed. I can not receive any traffic information | The radio station is not part of the regional traffic information network | Tune to a radio station which broadcasts traffic information |
| The quality of reception of the radio station listened to gradually deteriorates or the stored stations do not function (no sound, 87.5 Mhz is displayed...) | The vehicle is too far from the transmitter used by the station listened to (there is no transmitter in the geographical area through which the vehicle is travelling | Activate the RDS function to enable the system to check whether there is a more powerful transmitter in the geographical area |
| The environment (hills, buildings, tunnels, basement car parks...) block reception, including in RDS mode | This phenomenon is normal and does no indicate a failure of the audio equipment | |
| The aerial is absent or has been damaged (for example when goin through a car wash or into an underground car park | Have the aerial checked by a PEUGEO1 dealer | |
| Sound cut-outs of 'to 2 seconds in radic mode | During this brief sound cut-out, the RDS searches for any frequent permitting better reception of the station | Deactivate the RDS function if the phenomenon is too frequent and always on the same route |
| With the engine off the audio equipmen switches off after a few minutes of use | When the engine is switched off, the audio equipment operating tim depends on the battery chargeThe switch-off is normal: the audio equipment switches to economy mod and switches off to prevent discharging of the vehicle's batter | Start the vehicle's engine to increase the batter charge. |
| The message "the audio system is overheated appears on the display | In order to protect the installation if the surrounding temperature is to high, the audio equipment switches to an automatic thermal protective mode leading to a reduction of the volume or stopping of the playing of tt CD. | Switch the audio system off for a few minutes to allow the system to cool |
The table below groups together the answers to the most frequently asked questions concerning the RT4 audio/telephoi
| QUESTION | RESPONSE | SOLUTION |
| The TRAFFIC INFO box is ticked. However, certain traffic jams along the route are not indicated in real time. | On starting, it is several minutes before the system begins to receive the traffic information | Wait until the traffic information is being received correctly (displaying of the traffic information symbols on the map) |
| In certain countries, only major routes (motorways, ...) are listed for the traffic information | This phenomenon is normal. The system is dependent on the traffic information available. | |
| The time taken to calculate a route sometimes seems longer than usual. | The performance of the system may slow down temporarily if a CD is being copied onto the Jukebox at the same time as a route is being calculated. | Wait until the CD has been copied or stop the copying before starting the guidance function |
| Does the emergency call function work without a SIM card? | No, European regulations impose the presence of a SIM card in order tc make an emergency call | Insert a valid SIM card in the slot on the RT4 GPS audio/telephone. |
| My SIM card is not recognised. | The RT4 accepts 3.3 V SIM cards, the old 5 V and 1.8 V SIM cards are not recognised | Contact your telephone operator |
| After changing a wheel, the system loses its location. | The RT4 GPS audio/telephone uses the wheel rotation information improve the GPS locating function. If a wheel is changed or defla suddenly, the system recalculates the location. For approximal ten minutes, this recalculation may affect the quality of the locating func! | Wait until the system has completed its recalculation. |
| The location on the map is incorrect or inaccurate. The altitude is not displayed. | On starting, the initialisation of the GPS may take up to 3 minutes tc receive more than 3 satellites correctly | Wait until the system has started up completely Check that there is a GPS coverage of at least 3 satellites (long press on the MENU button, then select AUDIO/TELEPHONE DIAGNOSTICS, then GPS COVERAGE) |
| Depending on the geographical environment (tunnel, ...) or the weather the conditions of reception of the GPS signal may var | This phenomenon is normal. The system i dependent on the conditions of reception of th GPS signal |
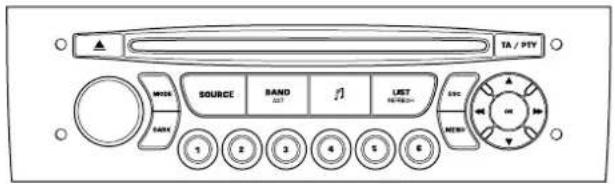
RD4
AUDIO EQUIPMENT/HANDS-FREE KIT

Information on the functions offered by this equipment could be found on the site: http://public.servicebox.peugeot.co - access is free. From your vehicle's interactive telema guide, make your selection, process, follow the action step by step, print

The RD4 audio equipment is coded in such a way that it will only operate in your vehicle. If it is to be installed in another vehicle, contact your PEUGEOT dealer for configuration of the system

For safety reasons, the driver must carry out operation which require prolonged attention while the vehicle i stationary. When the engine is switched off and to prever discharging of the battery, the RD4 audio system ma switch off after a few minutes
CONTENTS
• 01 First steps pg. 202
• 02 General menu pg. 203
• 03 Audio pg. 204
• 04 Hands-free kit pg. 208
• 05 Control short-cuts pg. 209
• 06 Configuration pg. 210
• 07 Display flow charts pg. 211
• Frequently asked questions pg. 213
01 FIRST STEPS
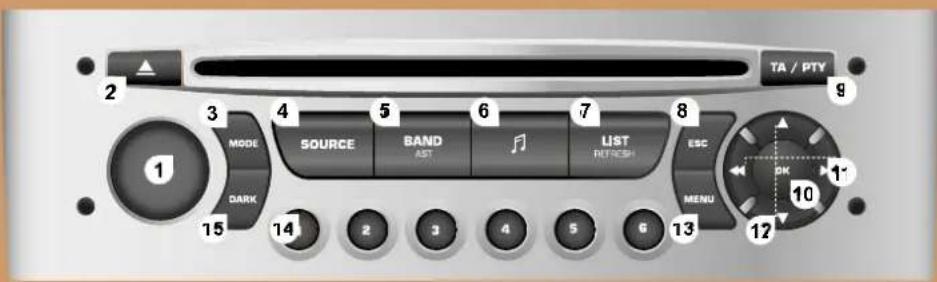
- On/Off and volume adjustment.
2 - CD eject
3 - Selection of the screen display mode.
4 - Selection of the source: radio, CD and CD changer - Selection of the FM1, FM2, FMast and AM wavebands.
6 - Setting the audio options: front/rear balance, left/right balance, loudness, soun ambiances - Displaying of the list of local stations, of the tracks on the CD or of the MP3 directories
8 - Abandon current operation.
9 - TA (Traffic Announcement) function on/off
Long press: access to the PTY (TTypes of radio Programme mode
10 - Confirmation
11 - Automatic search for a lower/higher frequency Selection of previous/next CD or MP3 tracI
12 - Selection of a lower/higher radio frequency
Selection of the previous/next CD
Selection of the previous/next MP3 director
13 · Displaying of the general men.
14 - Buttons 1 to 6
Selection of a stored radio station
Selection of a CD in the CD change
Long press: storing of a station
15 - The DARK button changes the display on the screen I improve driving comfort at night 1st press: lighting of the top banner only 2nd press: black screen display 3rd press: return to the standard display
02 GENERAL MENU
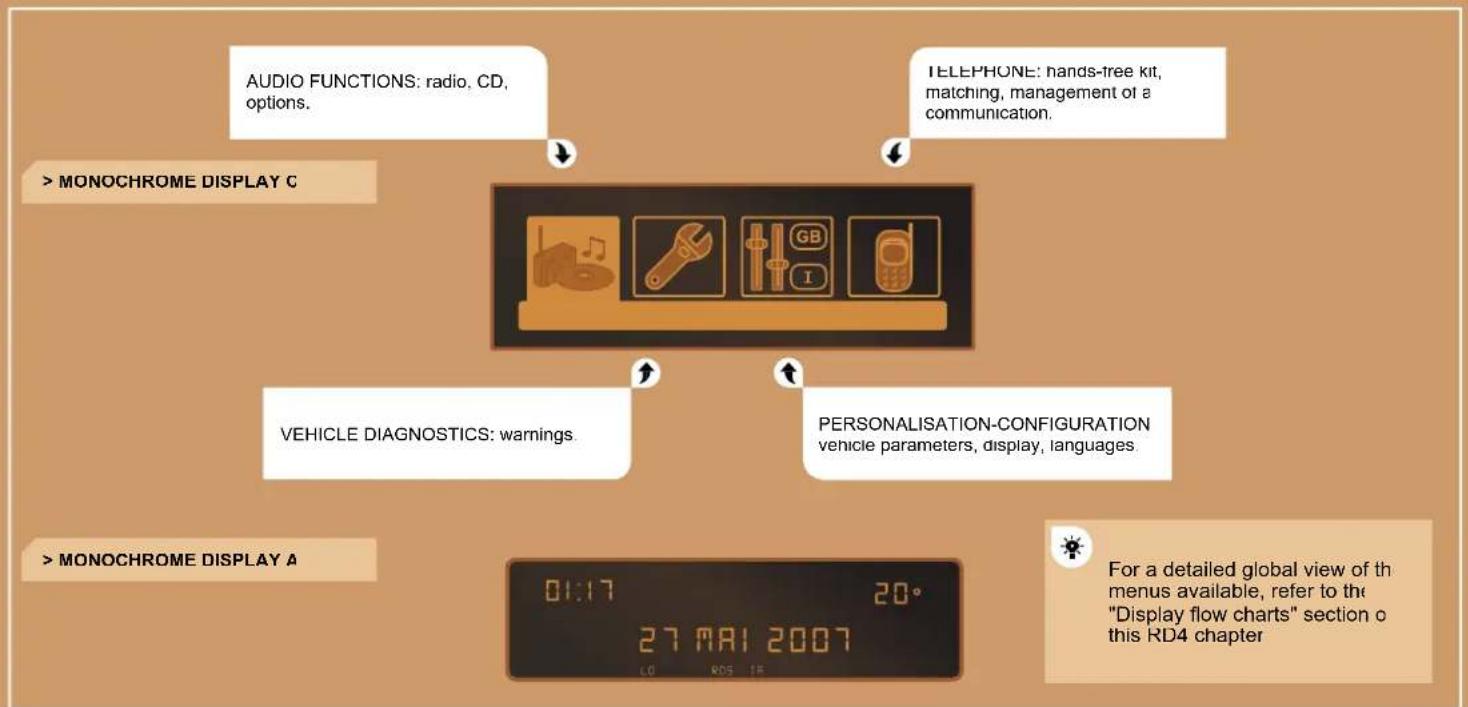
flowchart
graph TD
    A["AUDIO FUNCTIONS: radio, CD, options."] --> B["> MONOCHROME DISPLAY C"]
    C["TELEPHONE: hands-free kit, matching, management of a communication."] --> D["> MONOCHROME DISPLAY A"]
    E["VEHICLE DIAGNOSTICS: warnings."] --> F["> MONOCHROME DISPLAY A"]
    G["PERSONALISATION-CONFIGURATION vehicle parameters, display, languages."] --> H["01:17 20° 27 MAI 2007 L0 RDS 1#"]
    I["For a detailed global view of the menus available, refer to the "Display flow charts" section o this RD4 chapter"] --> J["End"]
03 AUDIO

RADIO SELECTING A STATION
The external environment (hills, buildings, tunnels, basement car parks) may block reception, including in RDS mode. This is a normal effect of the way in which radio waves are transmitted and does not indicate any failure of the audio equipment
RDS


Press the SOURCE button several times in succession and select the radio


Press the BAND AST button to select a waveband: FM1, FM2, FMast, AM


Briefly press one of the buttons to carry out an automatic search of the radio stations

Press one of the buttons to carry out a manual search of the radio stations
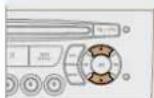


Press the LIST REFRESH button to display the list of stations receive locally (30 stations maximum). To update this list, press for more than two seconds


Press the MENU button

Select AUDIO FUNCTIONS their press OK
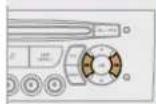

Select the FM WAVEBANC PREFERENCES function then press OK.
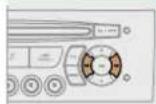
FM WAVEBAND PREFERENCE:


Select ACTIVATE FREQUENCY FOLLOWING (RDS) then press OK RDS appears on the display
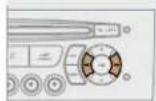
ACTIVATE FREQUENCY FOLLOWING (RE)

The RDS, if displayed, enables you to continue listening to the same station by means of frequency following. However, in certain conditions, this RDS station is not followed throughout the country as radio stations do not cover 100 % of the territory. This explains the loss of reception of the station during a journey
CD CHANGER
PLAYING A CD (NOT MP3 COMPATIBLE
1

Insert the CDs in the changer one by one
Press the SOURCE button several times in succession and select CD CHANGER
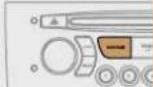
2
Press one of the buttons on the numeric keypad to select the corresponding CD
3
Press one of the buttons to select; track on the CD Press and hold one of the buttons for fast forwards or backwards play
CD
PLAYING A CE
[Non-Text]
Insert circular compact discs only Some anti-pirating systems, on original discs or CD copied using a personal recorder, may cause fault which are no reflection on the quality of the original player
Without pressing the EJECT button, insert a CD in the player, play begins automatically!
1

To play a disc which has already been inserted, press the SOURCE button several times in succession and select CD
2

Press one of the buttons to select a track on the CD Press the LIST REFRESH button to display the list of tracks on the CD
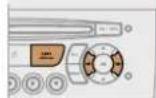
MP3 CD INFORMATION AND ADVICE
! The MP3 format, an abbreviation of MPEG 1.2 & 2.5 Audio Layer is an audio compression standard which permits the recording of several tens of music files on a single disc.
The playing and displaying of an MP3 compilation may depend on the recording programme and/or the parameters used.
In order to be able to play a recorded CDR or CDRW, when recording select standards ISO 9660 level 1.2 or Joliet.
If the disc is recorded in another format, it may not be played correctly
It is recommended that the same recording standard is always used for an individual disc, with as low a speed as possible for optimum sound quality
In the particular case of a multi-session CD, the Joliet standard is recommended.
The audio equipment will only play files with the extension ".mp3". No other type of file (.wma, .mp4...) can be played.
It is advisable to restrict file names to 20 characters without using special characters (e.g.: " " ? ; ù) to avoid any playing or displaying problems.
CD PLAYING AN MP3 COMPILATION
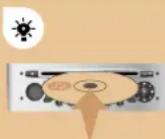
Insert an MP3 compilation in the playe The audio equipment searches for all of the mus tracks, which may take anything between a fe seconds and several tens of seconds, before pla begins
On a single disc, the CD player can read up to 255 MP3 files spread over 8 directory levels. However, it is advisable to keep to a limit two levels to reduce the access time before the CD is playe
To play a disc which has already bee inserted, press the SOURCE button several times in succession and select CD
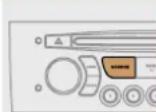
Press one of the buttons to select track on the CD Press the LIST REFRESH button to display the list of directories of the MP3 compilation
USING THE AUXILIARY INPUT (AUX) JACK/RCA CABLE NOT SUPPLIED

The auxiliary input permits the connection of portable equipment (MP3 player...). It is activated by default

Connect the portable equipment (MP; player...) to the audio sockets (white and red, RCA type) located in the glove box using a JACK/RCA audio cable


Press the SOURCE button several times in succession and select AUX
ADJUSTING THE VOLUME OF THE AUXILIARY SOURCE

First adjust the volume of your portable equipment


Then adjust the volume of your RD2 audio equipment

The controls are displayed and managed via the portable equipment

04 HANDS-FREE KIT

MATCHING A TELEPHONE DISPLAY C

The services offered by the hands-free kit depend on the network, the SIM card and the compatibility of the Bluetooth equipment used
Consult your telephone's manual and your operator to find out which services are available to you.
A list of mobile telephones which offer the best range of services is available from the network. Contact a PEUGEOT dealer
!
- or safety reasons and because they require prolonged attention of the part of the driver, the operations for matching of the Bluetooth mobile telephone with the RD4 hands-free kit must be carried out with the vehicle stationary and the ignition or
1
Activate the telephone's Bluetooth function and carry out a search of the Bluetooth accessories present for the telephone.
RECEIVING A CALL
1
An incoming call is announced by a ring and a superimposed display on the multifunction display
2
Select the YES tab on the display using the buttons and confirm by pressing OK.
YES
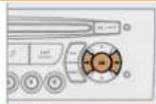
2
Select the accessory which corresponds to the name of the vehicle, a superimposed configuration display appears on the multifunction display.
[Non-Text]
Press the end of the steering wheel stalk to accept the call
![PEUGEOT 308 Dag (2007) - [Non-Text] - 1](/content/2026/05/791470/images/c2c4e45434583bb1193f8f1524b2bdcbc6f60eb481eb97bc1182c8c8a2d6afbc.jpg)
3
Enter the vehicle's authentication code (=1234). Depending on the telephone, you may be asked to enter this code before the superimposed configuration display appears

MAKING A CALL
#
Press the end of the steering wheel stalk for more than two seconds to access your director.
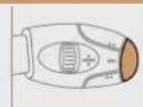
5
Select the YES tab on the display using the buttons then confirm by pressing OK
YES
1
To dial a number, use the keypad on your telephon
05 CONTROL SHORT-CUTS
STEERING WHEEL CONTROLS
RADIO: selection of the previous stored station CD CHANGER: selection of the previous CD. Selection of the previous item on a menu.
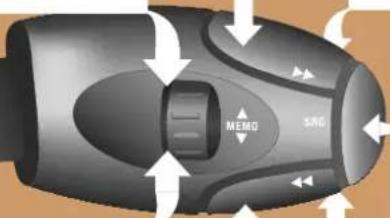
RADIO: automatic search for a higher frequency CD/CD CHANGER/MP3: selection of the next track CD/CD CHANGER: continuous press: fast forwards play Selection of the previous item.
Volume increase.
- Change of sound source.
- Confirmation of a selection.
- Pick up/Hang up the telephone.
- Press for more than 2 seconds: access to the telephone menu
Mute: by pressing the volume increase and decrease buttons simultaneously
The sound is restored by pressing one of the two volume buttons.
Volume decrease.
RADIO: automatic search for a lower frequency CD/CD CHANGER/MP3: selection of the previous track. CD/CD CHANGER: continuous press: fast backwards play Selection of the next item
06 CONFIGURATION
ADJUSTING THE DATE AND TIME DISPLAY C


Press the MENU button


Using the arrows, select the PERSONALISATION CONFIGURATION function

PERSONALISATION CONFIGURATION


Press to confirm the selection


Using the arrows, select the DISPLA CONFIGURATION function
DISPLAY CONFIGURATION


Press to confirm the selection


Using the arrows, select the ADJUS DATE AND TIME functor
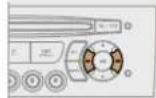
ADJUST DATE AND TIMI


Press to confirm the selection
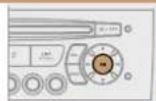

Adjust the parameters one by one confirming by pressing the OK button Next select the OK tab on the display then confirm.
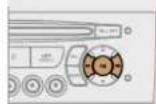
OK
07 DISPLAY FLOW CHART monochrome A
A
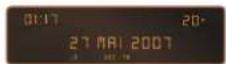

1 MAIN FUNCTION
2 CHOICE A
3 Choice A1
3 Choice A
2 CHOICE B..
1
RADIO-CD
2
RDS SEARCH
3
active
3
inactive
2
REG MODE
3
active
3
Inactive
2
INTROSCAN
3
active
3
Inactive
2
CD REPEAT
3
active
3
inactive
2
RANDOM PLAY
3
active
3
inactive
1
VEHICLE CONFIG*
2
REV WIPE AC1
3
active
3
inactive
2
GUIDE LAMPS
3
active
3
Inactive
1
OPTIONS
2
ABANDON/CONSULT LIST OF FAULT
3
functions activated (or not)
3
warning messages
* The parameters vary according to vehicle.
1
DISPLAY ADJUS
2
YEAR
2
MONTH
2
DAY
2
HOUR
2
MINUTES
2
12 H/24 H MODE
1
LANGUAGES
2
FRANCAIS
2
ITALIANC
2
NEDERLANDS
2
PORTUGUES
2
PORTUGUES-BRASII
2
DEUTSCH
2
ENGLISH
2
ESPANOL
1
UNITS
2
TEMPERATURE: °CELSIUS/°FAHRENHEI
2
FUEL CONSUMPTION: KM/L - L/100 - MP
07 DISPLAY FLOW CHART monochrome C

AUDIO FUNCTIONS
FM BAND PREFERENCES
2 alternative frequencies (RDS
4 activate/deactivate
3 regional mode (REG
4 activate/deactivate
radio-text information (RDTXT
4 activate/deactivate
2 AUDIO CD PREFERENCES
3 cd changer repeat (RPT)
4 activate/deactivate
3 track random play (RDM)
4 activate/deactivate

VEHICLE DIAGNOSTICS
WARNING LOG
3 diagnostics

PERSONALISATION-CONFIGURATION
DEFINE THE VEHICLE PARAMETERS
DISPLAY CONFIGURATION
video brightness adjustmen
normal video
inverse video
brightness (- +) adjustment
date and time adjustmen
day/month/year adjustmen
hour/minute adjustmen
choice of 12 h/24 h mod
choice of units
1/100 km - mpg - km/
* The parameters vary according to vehicle (refer to the "Multifunction displays" section).
** According to compatibility of Bluetooth telephone and service contract.

TELEPHONE
CONSULTING DIRECTORIES*
a telephone directory
call log
3 services directory
4 customer contact centre
breakdown ca
emergency cal
2 CONFIGURATION
3 deletion of a match
4 list of matches
3 consulting matches
4 list of matches
3 choice of a mobile to connec
list of mobiles
2 MANAGEMENT OF A COMMUNICATION
switch**
3 terminate the current cal
secret mode
4 activate/deactivate


- Glass panoramic roof
- Directional lighting
- Lane departure warning system
- OPEN
- FAMILIARISATION
- INTERIOR
- Ambient lighting
- Fragrance diffuser
- 6-speed piloted manual gearbox
- Audio and communication systems
- INSTRUMENTS AND CONTROLS
- SIT COMFORTABLY
- Driver's seat adjustment
- Also...
- SEE CLEARLY
- "Motorway" function
- Switching on "AUTO"
- Switching off "AUTO"
- Ring B: rear wiper
- VENTILATION
- MONITOR THOROUGHLY
- KEEP YOUR PASSENGERS SAFE
- Passenger's front air bag
- Seat belts and passenger's front air bag
- Electric child lock
- DRIVE SAFELY
- Speed limiter "LIMIT"
- Cruise control "CRUISE"
- Display on the instrument panel
- PETROL - DIESEL MANUAL GEARBOX INSTRUMENT PANELS
- Dials
- Rev counter.
- Coolant temperature.
- Fuel level.
- Vehicle speed.
- Display
- Display zero reset button.
- Instrument panel lighting button.
- Speed limiter
- Trip distance recorder.
- Service indicator.
- PETROL - DIESEL MANUAL OR 6-SPEED PILOTED MANUAL OR AUTOMATIC GEARBOX INSTRUMENT PANELS
- Small display.
- Large display.
- CHECK/display zero reset button.
- Instrument panel lighting button.
- Trip distance recorder.
- - Warning lights/CHECK.
- Indicator and warning lights
- When the ignition is switched on
- Associated warnings
- Operation indicator lights
- Common operation indicator lights
- Specific operation indicator lights
- 6-speed piloted manual gearbox.
- Automatic gearbox.
- Deactivation warning lights
- Passenger's air bag system deactivation.
- Dynamic stability control (ESP/ASR) deactivation
- Automatic locking.
- Automatic wiping.
- Automatic lighting.
- Speed limiter
- Cruise control.
- Warning lights
- Common warning lights
- STOP
- Central alert.
- Service.
- Braking.
- Anti-lock braking system (ABS).
- Dynamic stability control (ESP/ASR).
- Specific warning lights
- Engine autodiagnostics system.
- Low fuel level.
- Maximum coolant temperature.
- Engine oil pressure
- Battery charge
- Door open.
- Air bags.
- Seat belt not fastened/unfastened
- Water in diesel.
- Directional headlamps.
- Engine oil pressure.
- Engine oil level
- Coolant temperature.
- Coolant level.
- Screenwash fluid level.
- Fuel level.
- Electronic immobiliser.
- Door open
- Handbrake.
- Ice warning.
- Power steering.
- 6-speed piloted manual gearbox or automatic gearbox.
- Position P or N.
- Invalid value.
- Visual and/or audible parking assistance.
- Deflated wheel.
- Punctured wheel.
- Iyre under-inflation detection.
- Automatic switching on of the lights.
- Automatic headlamp adjustment.
- Particle emission filter (Diesel).
- Manual CHECK
- Coolant temperature indicator
- Service indicator
- Between 600 miles (1 000 km) and 1 800 miles (3 000 km) remain before the next service is due
- Service overdue
- Service indicator zero reset
- Retrieving the service information
- Engine oil level indicator
- Oil level correct
- Lack of oil
- Oil level gauge fault
- Dipstick
- Total distance recorder
- Trip distance recorder
- Lighting rheostal
- Activation
- Deactivation
- MULTIFUNCTION DISPLAYS
- Displays on the screen
- Options
- Display settings
- Languages
- Units
- MONOCHROME SCREEN A
- Controls
- General menu
- Radio-CD
- MONOCHROME SCREEN C AND COLOUR SCREEN C
- "Audio functions" menu
- Warnings log
- Define the vehicle parameters
- Display configuration
- Selection of the language
- "Telephone" menu
- Opening the screen
- Closing the screen
- Safety auto-reverse
- Storing the position of the screen
- Selecting the the language
- Sounds
- Status of the functions
- TRIP COMPUTER
- A few definitions...
- Range
- Current consumption
- Average consumption
- Average speed
- Distance travelled
- Distance remaining to
- Instrument panel large display
- Data displays
- Route zero reset
- COMFORT
- Air intake
- Air treatment
- Control panel
- Air diffusion
- RECOMMENDATIONS FOR VENTILATION AND AIR CONDITIONING
- Temperature adjustment
- Air flow adjustment
- Air distribution adjustment
- Air intake/Air recirculation
- De-icing - Demisting
- Air conditioning On/Off
- Switching on
- Switching off
- REAR SCREEN DE-ICING
- DUAL ZONE AUTOMATIC AIR CONDITIONING
- Automatic operation
- Automatic comfort programme
- Driver's side adjustment
- Passenger side adjustment
- Automatic visibility programme
- Manual operation
- Air distribution adjustment
- Air flow adjustment
- Air intake/Air recirculation
- Mono zone/Dual zone
- Switching the system off
- Adjustment dial
- Fragrance cartridge
- Removing the cartridge
- Fitting the cartridge
- FRONT SEATS
- Manual adjustments
- Forwards-backwards adjustment
- Driver's or passenger's seat height adjustment
- Seat back angle adjustment
- Driver's seat electric adjustments
- Seat cushion height and angle adjustment
- Additional adjustments
- Head restraint height and angle adjustment
- Lumbar adjustment
- Access to the rear seats (3-door)
- Heated seats control
- Storing driving positions
- Storing a position
- Using buttons M/1/2
- Using the remote control keys
- Recalling a stored position
- Ignition or
- Vehicle moving
- REAR SEATS
- Rear head restraints
- Removing the seat cushion
- Refitting the seat cushion
- Folding the seat
- Returning the seat back to its original position
- Folding
- Unfolding
- Automatic tilting in reverse gear
- Programming
- Interior mirror
- Manual model
- Adjustment
- Day/night position
- Automatic day/night model
- STEERING WHEEL ADJUSTMENT
- ACCESSES
- REMOTE CONTROL KEY
- Unlocking the vehicle
- Unfolding the key
- Complete unlocking using the remote control
- Complete unlocking using the key
- Selective unlocking using the remote control
- Selective unlocking using the key
- Locking the vehicle
- Normal locking using the remote control
- 4
- Normal locking using the key
- Deadlocking using the remote control
- !
- i
- Deadlocking using the key
- Folding the key
- Locating your vehicle
- Anti-theft protection
- Electronic engine Immobiliser
- Confidential card
- Starting the vehicle
- Switching the vehicle off
- Key reminder
- Remote control problem
- Reinitialisation
- Changing the battery
- Keys
- Remote control
- When purchasing a second-hand vehicle
- ALARM
- Exterior protection
- Interior protection
- Anti-tamper function
- Locking the vehicle with full alarm
- Locking the vehicle with exterior protection alarm only
- Deactivation of the interior protection
- Reactivation of the interior protection
- Triggering
- Failure of the remote control
- Locking the vehicle without alarm
- Malfunction
- Automatic operation\*
- ELECTRIC WINDOWS
- One-touch electric windows
- - automatic mode
- Deactivation of the rear electric window and door controls
- DOORS
- Opening
- Closing
- Manual centralised control
- Locking
- Unlocking
- Automatic centralised control
- Emergency control
- Locking the driver's door
- Unlocking the driver's door
- Unlocking the front and rear passenger doors
- Tailgate release
- One-touch electric shutter
- - manual mode
- FUEL TANK
- Low fuel level
- Operating fault
- Filling
- To fill the tank safely
- When filling is complete:
- LIGHTING CONTROLS
- Main lighting
- Additional lighting
- Manual controls
- Displays
- VISIBILITY
- Lights on buzzer
- Daytime lights
- Follow-me-home lighting
- Exterior welcome lighting
- Automatic lighting
- Coupling with the "Follow-me-home" lighting
- MANUAL HEADLAMP ADJUSTMENT
- AUTOMATIC ADJUSTMENT OF THE DIRECTIONAL HEADLAMPS
- WIPER CONTROLS
- Windscreen wipers
- Reverse gear
- Screenwash/headlamp wash low
- Automatic windscreen wiping
- Special position of the windscreen wipers
- COURTESY LIGHTS
- Front and rear courtesy lights
- Map reading lights
- Rear side reading lights
- INTERIOR WELCOME LIGHTING BOOT LIGHTING
- INTERIOR LAYOUT
- LAYOUT
- SUN VISOR
- TOLL CARD/CAR PARK TICKET WINDOWS
- BAG HOOK
- ASHTRAY WITH LIGHT
- LIGHTER/12 V ACCESSORIES SOCKET
- FRONT ARMREST
- Height adjustment
- Longitudinal adjustment
- Storage
- STORAGE BOX
- MAT
- Fitting
- Removal
- Refitting
- STORAGE DRAWERS\*
- REAR ARMREST
- SKI FLAP
- BOOT LAYOUT
- Rear shell
- Shelf with integrated storage compartment
- Hooks
- When changing a wheel
- V accessories socket
- Movable straps
- Luggage retaining net
- CHILD SAFETY
- GENERAL POINTS RELATING TO CHILD SEATS
- INSTALLING A CHILD SEAT USING A THREE POINT SEAT BELT
- CHILD SEATS RECOMMENDED BY PEUGEOT
- LOCATION OF CHILD SEATS SECURED USING THE SEAT BELT
- ADVICE ON CHILD SEATS
- Installing a booster seat
- "ISOFIX" MOUNTINGS
- ISOFIX CHILD SEAT RECOMMENDED BY PEUGEOT AND APPROVED FOR YOUR VEHICLE
- SUMMARY TABLE FOR THE LOCATION OF ISOFIX CHILD SEATS
- MANUAL CHILD LOCK
- SAFETY
- DIRECTION INDICATORS
- HAZARD WARNING LIGHTS
- Automatic lighting of hazard warning lights
- HORN
- TYRE UNDER-INFLATION DETECTION
- Flat tyre
- Puncture
- Sensor(s) not detected or faulty
- Anti-lock braking system and electronic brake force distribution
- Emergency braking assistance
- Anti-skid regulation and electronic stability programme
- Disarming
- Reactivation
- SEAT BELTS
- Front seat belts
- Fastening
- Unfastening
- Seat belt not fastened/unfastened warning light
- Seat belt not fastened/unfastened warning lights display
- Rear seat belts
- Seat belt unfastened warning light
- Seat belt unfastened warning lights display
- Recommendations for children
- AIR BAGS
- The air bags do not operate when the ignition is switched off.
- Front air bags
- Steering column air bag\*
- Side air bags
- Curtain air bags
- For the air bags to be fully effective, observe the following safety rules:
- HANDBRAKE
- Applying
- Releasing
- Engaging reverse gear
- DRIVING
- Gear lever
- Reverse
- Steering wheel controls
- Gear lever positions
- Moving off
- Hill start assistance
- Sequential mode
- Automatic mode
- "Auto sequential mode"
- Sport function
- Stopping the vehicle
- "PORSCHE TIPTRONIC SYSTEM" AUTOMATIC GEARBOX
- Foot on brake
- Sport and snow programmes
- Sport programme "S"
- Snow programme "※"
- Return to automatic operation
- Invalid value during manual operation
- Displays on the instrument pane
- Exceeding the programmed speed
- Return to normal driving
- CRUISE CONTROL
- Detection
- VISUAL AND AUDIBLE FRONT AND/OR REAR PARKING ASSISTANCE
- BONNET
- CHECKS
- RUNNING OUT OF FUEL (DIESEL)
- litre Turbo HDI 16V engine
- litre Turbo HDI 16V engine
- PETROL ENGINES
- DIESEL ENGINES
- CHECKING LEVELS
- Oil level
- Draining the engine
- Oil specification
- Brake fluid level
- Draining the circuit
- Fluid specification
- Power steering fluid level
- Coolant level
- Screenwash and headlamp wash fluid
- Diesel additive level (Diesel with particle emission filter)
- Topping up
- Used products
- Battery
- Air filter and passenger compartment filter
- Oil filter
- Particle emission filter (Diesel)
- Manual gearbox
- Automatic gearbox
- Brake pads
- Brake disc wear status
- PRACTICAL INFORMATION
- CHANGING A WHEEL
- Wheel with trim
- Fixing the steel or "space-saving" type spare wheel
- Taking out the wheel
- Putting the wheel back in place
- Parking the vehicle
- List of operations
- After changing a wheel
- CHANGING A BULB
- Front lights
- Risk of electrocution
- Changing direction indicator bulbs
- Changing dipped headlamp bulbs
- Changing main beam headlamp bulbs
- Changing daytime/side light bulbs
- 11
- Changing fog lamp bulbs
- Rear lights
- Changing bulbs
- CHANGING A FUSE
- Access to the tools
- Installing electrical accessories
- Fascia fuses
- Access to the fuses
- Engine compartment fuses
- Starting using another battery
- Charging the battery using a battery charger
- Before disconnecting the battery
- Following reconnection of the battery
- LOAD REDUCTION MODE
- ENERGY ECONOMY MODE
- Switching to economy mode
- Exiting economy mode
- CHANGING A WIPER BLADE
- Before removing a front wiper blade
- Removing a front or rear wiper blade
- Fitting a front or rear wiper blade
- After fitting a front wiper blade
- TOWING THE VEHICLE
- TOWING A TRAILER, CARAVAN, etc.
- Driving advice
- Distribution of loads
- Side wind
- Cooling
- Braking
- Tyres
- \_ights
- FITTING ROOF BARS
- VERY COLD CLIMATE SCREEN
- ACCESSORIES
- "Protection":
- 'Touring':
- "In-car technology":
- Installation of radiocommunication transmitters
- "Styling":
- "Universal":
- TECHNICAL DATA
- IDENTIFICATION FEATURES
- Chassis number under the bonnet.
- Chassis number on the windscreen lower crossmember.
- Manufacturer's plate.
- Manufacturer's label.
- Tyre/paint label.
- RT4
- CONTENTS
- FIRST STEPS
- GENERAL MENU
- GPS
- SELECTING A DESTINATION
- GUIDANCE OPTIONS
- GUIDANCE SPEECH SYNTHESIS
- ACTIONS ON THE MAP
- 3D VIEW
- DISPLAYING THE MAP IN A WINDOW OF IN FULL SCREEN MODE
- ADDING A STAGE
- TRAFFIC INFORMATIO
- ACTIVATING THE FILTER ON THE ROUTE
- CONFIGURING THE TMC MESSAGE ANNOUNCEMENTS
- AUDIO/VIDEO
- RADIO SELECTING A STATION
- RDS
- MP3 CD INFORMATION AND ADVICE
- CD PLAYING A CD OR AN MP3 COMPILATION
- JUKEBOX FUNCTION
- COPYING A CD ONTO THE HARD DISC
- RENAMING AN ALBUM
- VIDEO MENU
- USING THE AUXILIARY INPUT (AUX) JACK/RCA AUDIO CABLE NOT SUPPLIED
- CD CHANGER PLAYING A CD (NOT MP3 COMPATIBLE
- TELEPHONE
- INSTALLING YOUR SIM CARD (NOT SUPPLIED)
- ENTERING THE PIN CODE
- CALLING A CONTACT
- ACCEPTING OR REFUSING A CALL
- EMERGENCY CALL
- CONSULTING THE SERVICES
- CONTROL SHORT-CUTS
- Volume increase
- Volume decrease.
- VOICE COMMANDS DISPLAYING THE LIST AND USING THEM
- CONFIGURATION
- ADJUSTING THE DATE AND TIME
- DISPLAY FLOW CHARTS
- TRAFFIC INFORMATION
- READ MESSAGES
- FILTER TRAFFIC INFORMATION
- geographic filter
- road information
- urban/city information
- CONFIGURE MESSAGE ANNOUNCEMENT
- SELECT TMC STATION
- AUDIO FUNCTIONS
- RADIO FAVOURITES
- CD, JUKEBOX FAVOURITE
- STOP THE COPY
- COPY CD TO JUKEBO)
- FREQUENTLY ASKED QUESTIONS
- RD4
- AUDIO EQUIPMENT/HANDS-FREE KIT
- AUDIO
- CD CHANGER
- PLAYING A CD (NOT MP3 COMPATIBLE
- CD
- PLAYING A CE
- CD PLAYING AN MP3 COMPILATION
- USING THE AUXILIARY INPUT (AUX) JACK/RCA CABLE NOT SUPPLIED
- ADJUSTING THE VOLUME OF THE AUXILIARY SOURCE
- HANDS-FREE KIT
- MATCHING A TELEPHONE DISPLAY C
- 1
- RECEIVING A CALL
- 2
- [Non-Text]
- 3
- MAKING A CALL
- #
- 5
- CONTROL SHORT-CUTS
- CONFIGURATION
- ADJUSTING THE DATE AND TIME DISPLAY C
- DISPLAY FLOW CHART monochrome A
- DISPLAY FLOW CHART monochrome C
- VEHICLE DIAGNOSTICS
- PERSONALISATION-CONFIGURATION
- TELEPHONE
Brand : PEUGEOT
Model : 308 Dag (2007)
Category : Automobile