
Comfort MD Multi-line display - Typewriter OLYMPIA - Free user manual and instructions
Find the device manual for free Comfort MD Multi-line display OLYMPIA in PDF.


| Brand | Olympia |
| Model | Comfort MD Multi-line display |
| Product Type | Electronic typewriter with multi-line display |
| Dimensions (H x W x D) | 135 mm x 498 mm x 426 mm (5.3" x 19.3" x 16.8") |
| Weight | 8 kg (18 lbs) |
| Power Supply | 110-120V / 220-240V, 50-60 Hz, 0.2 A |
| Printing Speed | Max. 20 characters per second at 10 pitch |
| Printwheel | 84 mm (3.3") diameter, 100 characters |
| Paper Width | Max. 360 mm (14.1"), typing width 297 mm (11.7") |
| Display | Multi-line display showing text and status/menu line |
| Memory | Working memory, text memory (22/54 KB), optional disk drive |
| Correction Memory | Approx. 200 characters (multi-line) |
| Standard Pitch Settings | 10, 12, 15 characters per inch, Proportional Spacing (PS) |
| Line Spacing | 1, 1.5, 2, 0.75 lines (selectable in inches or mm) |
| Key Functions | Bold, underline, expanded print, centering, tabulation (standard, right flush, decimal, vertical line), search/replace, justified format, margin memory, paragraph indent |
| Ribbon Cassette | Fabric or single-strike carbon ribbon, lift-off or cover-up correction tape |
| Maintenance | Cleaning, ribbon cassette change, correction tape change, printwheel change, platen removal and cleaning |
| Safety Certifications | Complies with EN60950 (JEC950), GS mark |
| Accessories Included | Printwheels, ribbon cassettes, correction tapes, optional disk drive |
Frequently Asked Questions - Comfort MD Multi-line display OLYMPIA
User questions about Comfort MD Multi-line display OLYMPIA
0 question about this device. Answer the ones you know or ask your own.
Ask a new question about this device
Download the instructions for your Typewriter in PDF format for free! Find your manual Comfort MD Multi-line display - OLYMPIA and take your electronic device back in hand. On this page are published all the documents necessary for the use of your device. Comfort MD Multi-line display by OLYMPIA.
USER MANUAL Comfort MD Multi-line display OLYMPIA
Comfort MD Multi-line display
Operating instructions
on having chosen a typing system from Olympia.
The keyboard layout, and overall product design, give the typewriter an impressive appearance. The keytops clearly indicate the functions available.
The unique sliding cover provides easy access to exchange the ribbon cassette, correction tape and printwheel.
The multi-line display enables you to see and access text over several lines. The bottom display line, the Status/Menu Line, provides permanent status information regarding the current working position and active functions. When a menu is called in, the menu selections appear in the Status/Menu Line for you to make your choices. When you exit from the menu, the status automatically reappears. The text remains in the display the whole time.
This typing system is based on a completely new development in software structure, which includes new, uniform access to menus and functions.
The action to be taken in the case of goods damaged during transport is explained in "Reporting Loss or Damage" at the end of this manual.
Contents
OLYMPIA

Starting Up/Machine View
Function Selection (quick reference)
The Keyboard
General Information ...
Entering Text
Text Functions
Files/Text Blocks: storing, deleting, etc.
Editing Formats and Drafts
Other Helpful Functions
Practical Applications
Maintenance/Disks
Technical Data/Explanation of Terminology
Alphabetical Index











B.1 Starting Up and Machine View
B.3 Chapter contents
B.4 General information
B.5 Transport safety devices
B.6 Connection to the power supply
B.7 Machine view
B.8 Multi-line display
B.8 The display
C.1 Function selection (quick reference)
C.3 Chapter contents
C.4 Function selection
D.1 The Keyboard
D.3 Chapter contents
D.4 Chapter contents
D.5 Keyboard (main area) - UK
D.6 Keyboard (main area) - UK
D.7 Keyboard (left/right area) - UK
D.8 Key entries
D.8 Typing keys - monolingual systems
D.8 Typing keys - bilingual systems
D.8 English keyboard
D.8 Native language keyboard
D.8 Upper case using Caps Lock (capital letters only) - all keyboards
D.9 Special symbols - all keyboards
D.9 Function keys - all keyboards
D.9 Inscriptions in the center or upper left of the keys
D.9 Inscriptions on the front of the keys
D.9 Inscriptions on the bottom right of the keys
D.9 Inscriptions on the housing above the keys
E.1 General Information ...
E.3 Chapter contents
E.4 General information on the operating instructions
E.4 Operating modes
E.4 Function explanation with operating procedure
E.4 Prompts in the display
E.4 Exercises
E.5 General information on the system settings
E.5 Recall Status Menu
E.5 Change status
E.6 Store changed settings
E.6 Exit Status Menu without storing changed settings
E.7 General information to the memory
E.7 Working memory
E.7 Text memory
E.7 Disks (option)
E.8 General information on the operating modes
E.8 Operating mode after turning on
E.8 Switch to Memory Mode
E.8 Line Print on/off
E.9 Typing without storing
E.9 Simultaneous print and display
E.9 Delayed print (line by line)
E.9 Simultaneous printer movement On/Off
E.10 Storing text
E.10 Store text without printing
E.10 Store text and print line by line
E.10 Simultaneous printer movement On/Off
F.1 Entering text
F.3 Chapter contents
F.4 The display when entering text
F.4 Control codes
F.5 Operating mode selection
F.5 Typewriter or Display Mode?
F.5 Typewriter Mode
F.5 Display Mode
F.6 Paper insertion/Paper ejection
F.6 Insert paper
F.6 Draw paper in
F.6 Eject paper
F.7 What text? Which format?
F.7 Create new text or edit existing text
F.7 Edit existing text
F.7 Format selection
F.7 Standard page format
F.7 Recall format from utility disk (option)
F.7 Edited format
F.8 Revise current format
F.9 Positioning the printer/cursor
F.9 Character by character
F.9 Line by line
F.9 Half line
F.9 Microspacing
F.10 Addition cursor movement in Memory Mode
F.11 Deleting/Correcting
F.11 Deleting/Correcting in the display
F.11 Deleting/Correcting printed characters
F.11 Double correction feature
F.11 Correction to the left
F.11 Correcting words or parts of words
F.12 Corrections, in words already typed
F.12 Corrections beyond the correction memory
F.13 Search/Replace
F.13 Search term
F.13 Search/Replace
F.14 Printout from the working memory
F.14 Automatic print stop
F.14 Manual print stop
G.1 Text functions
G.3 Chapter contents
G.4 Margins/Margin memory
G.4 Standard margins
G.4 Change margin settings
G.4 Set margins
G.4 Set margins
G.5 Margin memory
G.5 Recalling/Changing the margins
G.5 Storing margins
G.6 Functions at the right margin
G.6 Automatic returns OFF
G.6 Release margin and continue typing in the same line
G.6 Release margin and continue typing in the next line
G.6 Automatic returns ON
G.7 Unprotected space
G.7 Protected space (required space)
G.7 Automatic returns ON
G.7 Protected space (required space)
G.7 Temporary hyphen
G.8 Pitch
G.8 10/12/15 Pitch
G.8 PS (Proportional spacing)
G.9 Line spacing
G.9 Line spacing in inches/millimeters
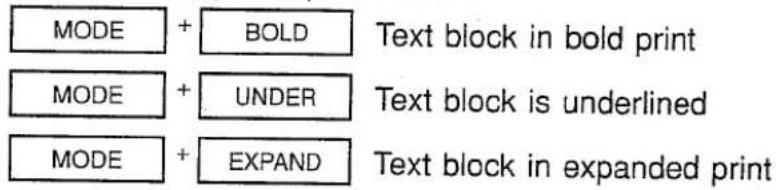
G.10 Bold print/Underlining/Expanded print
G.11 Combining two or more print modes
G.11 Follow-up underlining
G.11 Follow-up allocation of print modes
G.12 Paragraph indent
G.12 Set paragraph indent
G.12 Clear paragraph indent
G.13 Justified format
G.14 Tabulation
G.14 Tab summary
G.15 Standard tab
G.16 Right flush tab
G.16 Decimal tab (point orientated)
G.17 Decimal tab (comma orientated)
G.17 Vertical line tab
G.18 Tab matrix
G.18 Clear single tab
G.18 Clear vertical line tab
G.18 Clear all tabs
G.19 Centering
G.19 Centering between the margins
G.19 Centering between two set tabs (line by line)
G.20 Centering at a any position on a line (line by line)
H.1 Files/Text blocks: storing, deleting, etc.
H.3 Chapter contents
H.4 Menus - general information
H.4 Call in a menu
H.4 Functions ON/OFF
H.4 Activate function and exit menu
H.5 Exit menu without changes
H.5 Exit submenu directly, without changes
H.6 Storing - general information
H.6 Working memory
H.6 Text memory
H.6 Disks (option)
H.7 Storing files
H.7 Store Menu
H.7 Exit Store Menu
H.7 Storing a file
H.7 Overwrite existing file
H.8 Delete text in the display (working memory)
H.8 Delete format from the working memory
H.9 Recall file to the working memory
H.9 The Recall Menu appears
H.9 Exit the Recall Menu
H.9 Recalling a file
H.10 Store and recall phrases
H.10 Storing a phrase
H.10 Recalling a phrase
H.11 File management
H.11 Recall the File Menu
Exit from the File Menu
H.12 Format disk (option)
H.13 Delete file
H.13 Recall Delete Menu
Exit the Delete Menu
H.13 Delete files without request
H.14 Delete with request
H.14 Delete marked files
H.15 Rename file
H.15 Recall the Renaming Menu
Exit from Renaming Menu
H.15 Rename a file
H.16 Copy files (option)
H.16 Recall the Copy Menu
H.16 Exit from Copy menu
H.16 Copy from disk to text memory
H.17 Copy from the text memory to disk
H.17 Copy from disk to disk
H.19 List and transfer files
H.19 Recall Index Menu
H.19 Display file names
H.19 Transfer file from the index
H.20 Select file group
H.20 Print file names
H.21 Exit from Index Menu
H.21 File names
H.22 Text blocks
H.22 Marking
H.22 Move
H.23 Copy
H.23 Delete
H.23 Print
I.1 Editing formats and drafts
1.3 Chapter contents
1.4 Editing formats
1.4 Standard format
1.4 Editing formats
1.5 Vertical positioning set top margin
1.5 Set horizontal positions
1.6 Set line spacing
1.7 Set pitch
1.7 Automatic returns On/Off
1.7 Automatic pagination On/Off
1.7 Justified format On/Off
1.7 Conclude horizontal formatting
1.7 Vertical positioning set bottom margin and page length
1.7 Storing a format
1.8 Recall format
1.8 Change format within a text
1.8 Delete format changes
1.9 Reformat text
1.10 Automatic pagination (page control)
1.10 Protected page break
1.11 Stop code
1.11 Set stop codes
1.12 Completing texts containing stop codes
1.12 Delete stop code
1.12 Printout of text containing stop codes
1.13 Position code
1.13 Set position codes
1.14 Completing position codes
1.14 Delete position code
1.14 Print form with completed position codes
J.1 Other helpful functions
J.3 Chapter contents
J.4 Time/Date
J.4 Display time/date
J.4 Change time/date
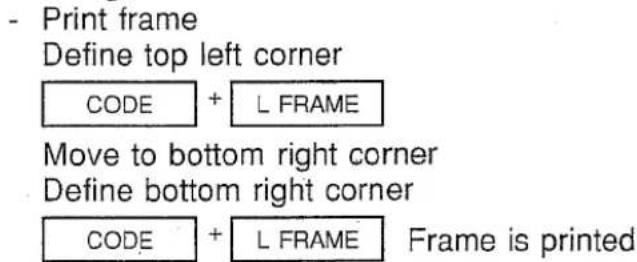
J.5 Framing characters, sentences and texts
J.6 Defining frames
J.6 Recalling a stored frame
J.6 Frames with internal dividing lines
J.6 Create frame
J.7 Vertical lines
J.7 Horizontal lines
J.8 Frames with connecting lines
J.10 Impression strength (impact)
J.11 KB II function
J.12 Acoustic signal
J.12 Acoustic signal On/Off
J.12 Acoustic signal function control
J.13 Standardizing
J.13 Standardization without data retention
J.13 Standardization with data retention
J.14 End of ribbon
J.14 Cancel printout
J.14 Continue printing
J.15 ON LINE
J.15 Clear
J.16 Keystroke counter/timer function (KCT)
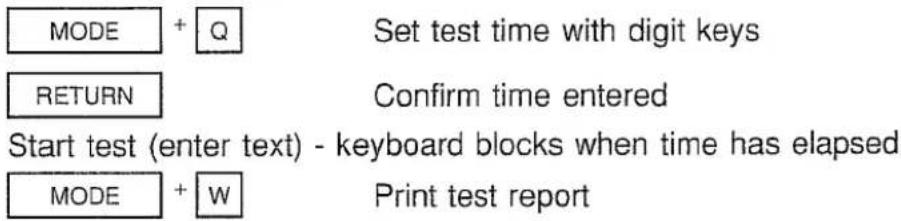
J.16 Activate timer and set test time
J.16 Start test
J.16 Interrupt test
J.16 End of test
J.16 Print test report
K.1 Practical applications
K.3 Chapter contents
K.5 Addressing envelopes
K.7 Writing business letters
K.9 Writing a business letter containing tables
K.11 Aligning figures
L.1 Maintenance
L.2 Cleaning
L.2 Upkeep
L.3 Ribbon cassettes
L.3 Changing the ribbon cassette
L.4 Ribbon cassette selection
L.5 Correction tapes
L.5 Changing the correction tape
L.6 Correction tape selection
L.7 Printwheels
L.7 Changing the printwheel
L.8 Typestyles/Printwheels available
L.8 Inscriptions on the printwheel
L.8 Printwheel selection
L.9 The platen
L.9 Removing and cleaning the platen
L.10 Disks (option)
L.10 Write protection
L.10 Inserting/Removing disks
M.1 Technical Data and Explanation of Terminology
M.2 Technical Data
M.2 FCC text (applies to USA only)
M.3 Explanation of terminology
M.5 Reporting loss or damage
B.1 Starting Up and Machine View
B.3 Chapter contents
B.4 General information
B.5 Transport safety devices
B.6 Connection to the power supply
B.7 Machine view
B.8 Multi-line display
B.8 The display

Information
This chapter contains information on
- positioning your typing system in a suitable place
- removing the transport safety devices
- connecting the typing system to the power supply
The machine view provides a general impression of the typing system.
natural_image
Simple line drawing of a table with two legs and a central horizontal bar (no text or symbols)Protect the system
- from extreme temperatures and humid conditions.
- from direct sunlight.
- from overheating, by ensuring the air vents are free. (The system complies to the VDE regulations concerning overheating).
- from liquids.
- from dusty conditions.
!
If the system is to be used in a dusty environment, it is recommended to have service personnel maintain the system regularly.
Before you start to use the system, remove the transport safety devices in the sequence described below.
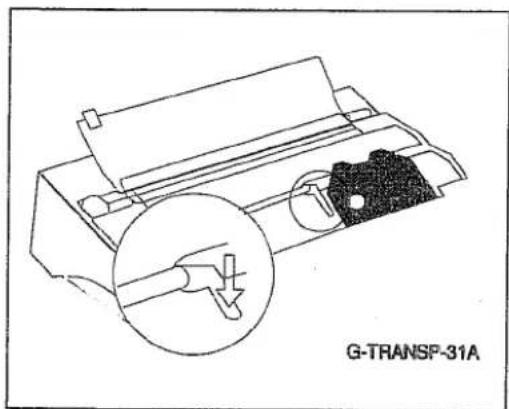
- Slide the cover forward.
- Raise the paper bail.
- Remove the plastic foam from the ribbon cassette.
- Press the clamp in the direction of the arrow.
- Slide the printer to the middle.
- Remove the ribbon cassette.
- Remove the rubber band from the printer.
- Remove the red card by pulling the flap.
- Replace the ribbon cassette and press down until it clicks into place.
- Lower the paper bail.
- Slide the cover back.

Before connecting the system to the power supply, check that the information on the data plate coincides with the local voltage.
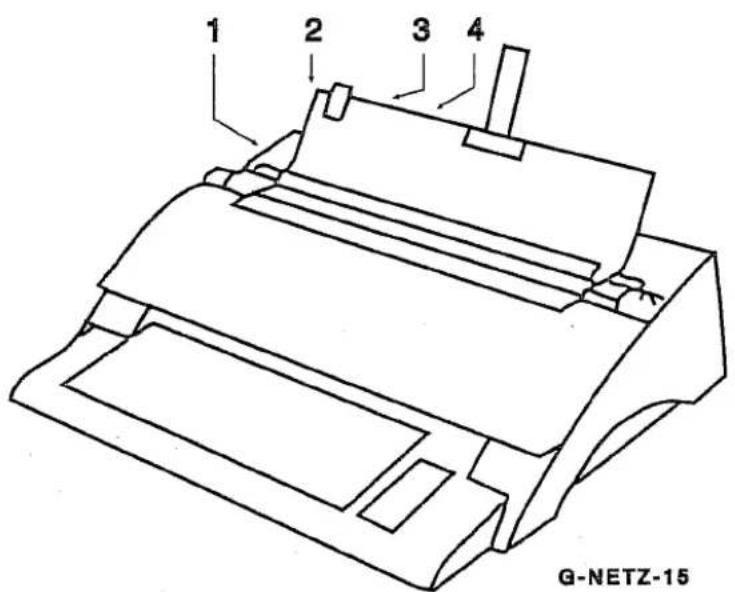
- Typewriter ON/OFF switch
- Cable connection port
- TTL universal interface
- Earthed connection for interface
When you first turn on the machine, press the following key combination to standardize the system; i.e. all the settings are returned to their default (defined standard) values.
The typewriter is turned off.
CODE
Hold down the Code key and turn the typewriter on. The system is standardized.

Note:
If you standardize the system at a later date, data stored in the memory is cleared.

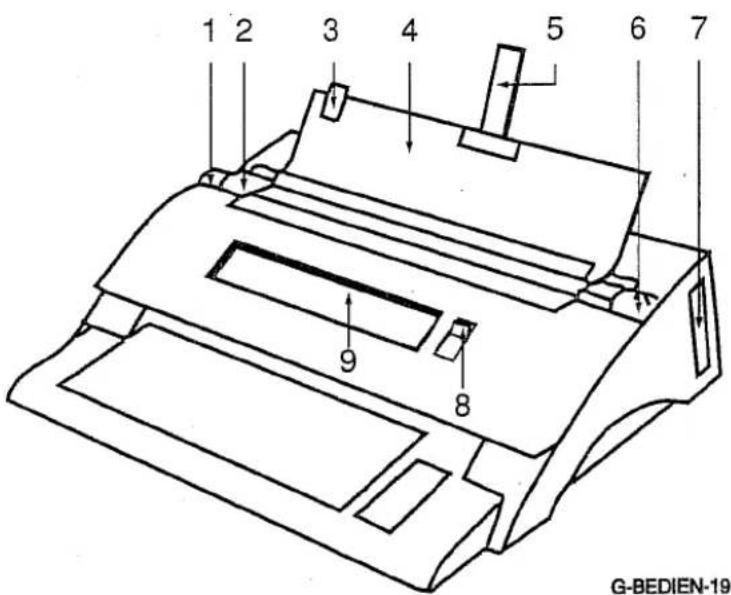
- Variable line spacing knob
By pressing in the core and turning the knob, the paper can be transported manually up or down - Movable paper bail with adjustable rollers
- Movable paper guide
- Paper support
- End of paper indicator
- Paper release lever By turning the knob forwards, pressure on the platen is released and the paper bail is raised. Inserted paper can then be realigned, when necessary
- Disk drive (Option)
- Brightness/Contrast control Slide up or down to adjust the brightness and contrast
- Display
Your system is equipped with a multi-line display.
The upper lines show the text entered. You can move to the text lines with the cursor keys to carry out insertions, corrections, etc.
The bottom line (the Status/Menu Line) is reserved to show either the current machine status or the recalled menu.
When you exit from the menu, the status automatically reappears.
Normally, the Status/Menu Line shows the current system status; e.g.:
The text is shown in the upper lines of the display.....
COLUMN | LINE NO | PAGE 1 | RET | HYPH | PAGE | R JUST | MEMORY | LINE
When you recall a menu, the selections appear in the Status/Menu Line: e.g.:
CODE + STORE The Store Menu appears
The text is shown in the upper lines of the display.....
FILE NAME INDEX MEMORY DISK ASCII
After exiting from the menu, the system status reappears.
C.1 Function selection (quick reference)
C.3 Chapter contents
C.4 Function selection


Information
This chapter provides a list of the system functions in alphabetical order.
It can be used as a quick reference, or reminder of the functions after reading this manual.
The function procedures are described in logical sequence; e.g. Editing Text Blocks:
- from marking the beginning and end of a text block, then
- moving,
- copying,
- deleting,
- printing,
- follow-up centering, and on to
- storing the block as a file
natural_image
Simple line drawing of a table with two legs and a central horizontal bar (no text or symbols)Corrections (lift-off)
![Delete character to the left MODE + [x] Delete character to the right CODE + WORD Delete word to the left Spacebar Interrupt word correction (PD) RELOC Printer moves to pre-correction position](/content/2026/05/847820/images/858f29935a8655060d99d2b3eccd2df9dcc26e3ba5085998552347a59c2e31f1.jpg)
- Outside the correction memory (Pitch 10/12/15)
Move printer to right of incorrect character

- Outside the correction memory (Pitch PS)
Move printer to right of incorrect character

Decimal tab

Delayed print (line by line)

Delete character in the display

Double correction on/off
Turn typewriter off

Hold down the key and turn the typewriter on
Edit format


Edit text blocks
- Mark beginning of text block
Move to the beginning of the block required with the relevant keys

- Mark end of text block
Move to the end of the block required with the relevant keys

Select function required
- Move text block
Select MOVE

Move the cursor to the new location

- Copy text block
Select COPY

Move cursor to copying location

- Store text block
Select COPY


Enter file name
Select function and confirm

- Delete text block
Select DELETE


- Print text block
Select PRINT

- Center text block

- Allocation of special print modes

End of ribbon message
- Deactivate function Turn typewriter off

Hold down the key and turn the typewriter on
- Activate function Turn typewriter off Turn typewriter on
File menu

Format text

Function selection within a menu
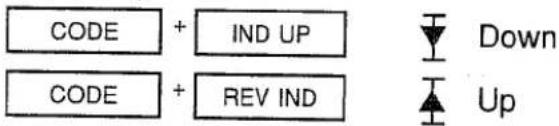
Half-line spacing
Hyphenation - temporary

Impression - heavy

Justified format

- Allocation of special print modes

End of ribbon message
- Deactivate function Turn typewriter off

Hold down the key and turn the typewriter on
- Activate function Turn typewriter off Turn typewriter on
File menu

File menu appears
Format text

Text is formatted
PLEASE WAIT
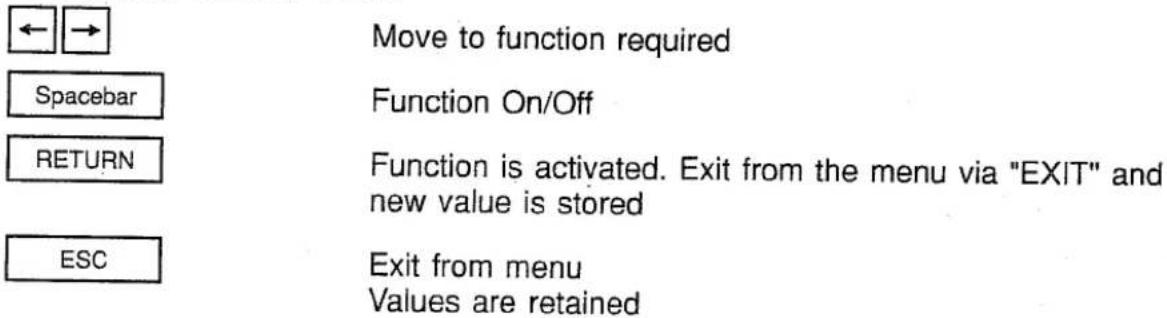
Function selection within a menu
Move to function required
Function On/Off
Function is activated. Exit from the menu via "EXIT" and new value is stored
Exit from menu Values are retained
Half-line spacing
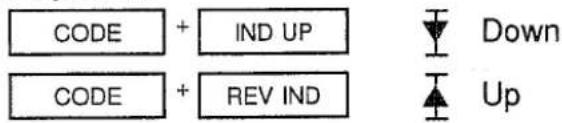
Hyphenation - temporary

Impression - heavy

Justified format

KB II (2nd keyboard)

KCT (Keystroke Counter/Timer)
Line framing
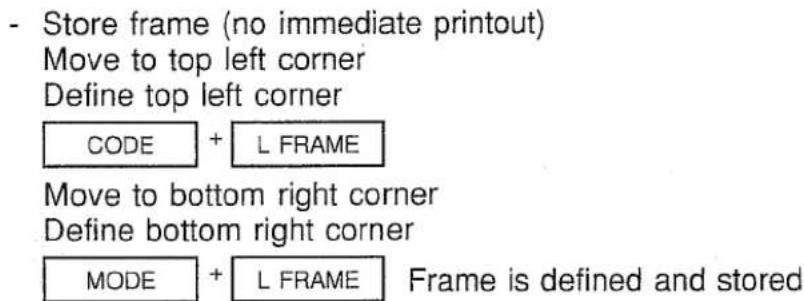

Line spacing

Line spacing - millimeter/inch adjustment

Margins - set (store immediately)

Margin release

Margins - recall from memory
RECALL
Margin memory is accessed
1
Margins from segment 1 are recalled
2
Margins from segment 2 are recalled
ESC
Cancel margin recall function

Margins - store in memory (PD)
CODE
+ STORE
Margin memory is accessed
Microspacing
MODE + MICRO → MODE + MICRO ← MODE + MICRO ↓ MODE + MICRO ↑
To the right < To the left ∨ Down ≡ Up
ON-LINE On
CODE + ONLINE CODE + ONLINE CODE + ON LINE
On
Standby mode; paper can be inserted
CODE + ON LINE
On
ON-LINE Off
CODE + ONLINE CODE + CLEAR
Activate standby mode
Typewriter Mode On
Operating mode
PD ←→ D SPM
Press to change mode
Page break (automatic pagination)
Automatic pagination On/Off Set protected page feed
Paper insertion/ejection
PAGE IN/OUT PAGE IN/OUT
Paper is drawn in
Paper is ejected
Function selection (quick reference)
Function selection
Paragraph indent
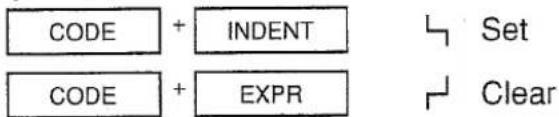
Phrases (constants)
- Store phrase
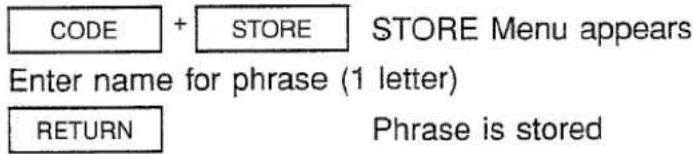
- Recall phrase
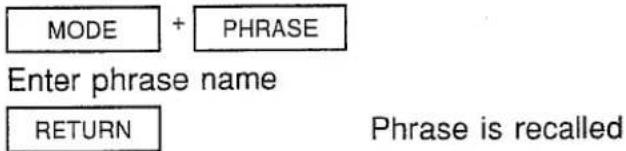
Pitch

Position Code
- Set position code
![CODE + POS Position code is set PLEASE ENTER PROMPT: RETURN Prompt is marked ( [ ] )](/content/2026/05/847820/images/59562801ce43a1e9f443e180dfad709005e434671338a63940144ea3c23b6f3d.jpg)
Set more position codes, if required
- Move to position code

Enter text
Move to other position codes as required.
- Clear position code
![Clear prompt ([ ]) Clear position code ▼](/content/2026/05/847820/images/2c67041bcd2b4a3e8c2cacc21118df948864398c7115c1c46f47e46957ae3482.jpg)
Print from the working memory

Print stop - manual

Print stop - set in text


Recall Menu
Recall Menu appears
Return (without line spacing)

← Printer moves to the left margin
Return (with line spacing)
flowchart
graph TD
    A["RETURN"] --> B["CODE"]
    B --> C["RETURN"]
Search function

» SEARCH TERM: .....
Select the REVERSE search direction, if necessary
Enter search term
Cursor moves to the search term
Search/Replace (forwards)

» SEARCH TERM: .....
Enter the search term

» REPLACEMENT TEXT:
Enter the replacement text
The search term is replaced
Simultaneous printer movement

Off/On
Space
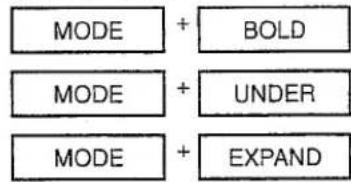
Special print modes On/Off
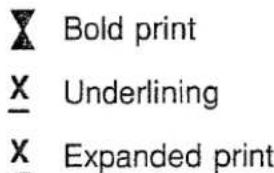
Special print modes - clear

Print modes Off

Standardizing
Warning! All stored data will be cleared
Turn the typewriter off
CODE
Hold down the key and turn the typewriter on
Typewriter is standardized
Status Menu
CODE + STATUS
Status Menu appears
Stop code
Set stop code
CODE + STOP
Stop code is set (▼) PLEASE ENTER PROMPT:
RETURN
Prompt is marked ([ ])
Set more stop codes, if required
Clear stop code
Position the cursor to the right of the stop code
X
Clear prompt ([ ])
X
Stop code (▼) is cleared
Fill in stop code in display
MODE + STOP
Skip to stop code (PROMPT)
Enter text. Stop code and prompt are cleared
Move to other stop codes
Fill in stop code during printout
Printout is stopped (PROMPT)
Enter text. Stop code and prompt are cleared
Printout continues
Store Menu
CODE + STORE
Store Menu appears
Tabulation
| TAB SET | |
| MODE + R FLUSH | |
| MODE + TOT SET | |
| TAB CLR | |
| MODE + TOT CLR | |
| TAB | |

Time/Date
- Display time/date
| CODE + DAY/TIME | On» TIME: ... DATE: ... |
| RETURN | Off |
- Change time/date
| CODE | + | DAY/TIME | On |
| » TIME: ... DATE: ... |
Enter new time
| → | Select DATE |
| TIME: ... »DATE: ... |
Enter new date
| RETURN | Confirm changes. Function off |
| ESC | Changes entered not transferred. Function off |
- Insert date at cursor position
| MODE | + | DAY/TIME |
Vertical line tab
D.3 Chapter contents
D.4 Keyboard (main area) - UK
D.5 Keyboard (main area) - UK
D.6 Keyboard (left/right area) - UK
D.8 Key entries
D.8 Typing keys - monolingual systems
D.8 Typing keys - bilingual systems
D.8 English keyboard
D.8 Native language keyboard
D.8 Upper case using Caps Lock (capital letters only) - all keyboards
D.9 Special symbols - all keyboards
D.9 Function keys - all keyboards
D.9 Inscriptions in the center or upper left of the keys
D.9 Inscriptions on the front of the keys
D.9 Inscriptions on the bottom right of the keys
D.9 Inscriptions on the housing above the keys


Information

This chapter provides a complete description of the keyboard. For clarity, it has been divided into:
- the main keyboard area
- the left keyboard area
- the right keyboard area
There is also information on how to operate the keyboard:
- capital and small letters
- repeat function
- continuous typing of capitals (Caps Lock)
- activation of functions which require the MODE key to be held down e.g. delayed print on/off
- activation of functions which require the CODE key to be held down e.g. storing
natural_image
Simple line drawing of a table with two legs and a central vertical bar (no text or symbols)
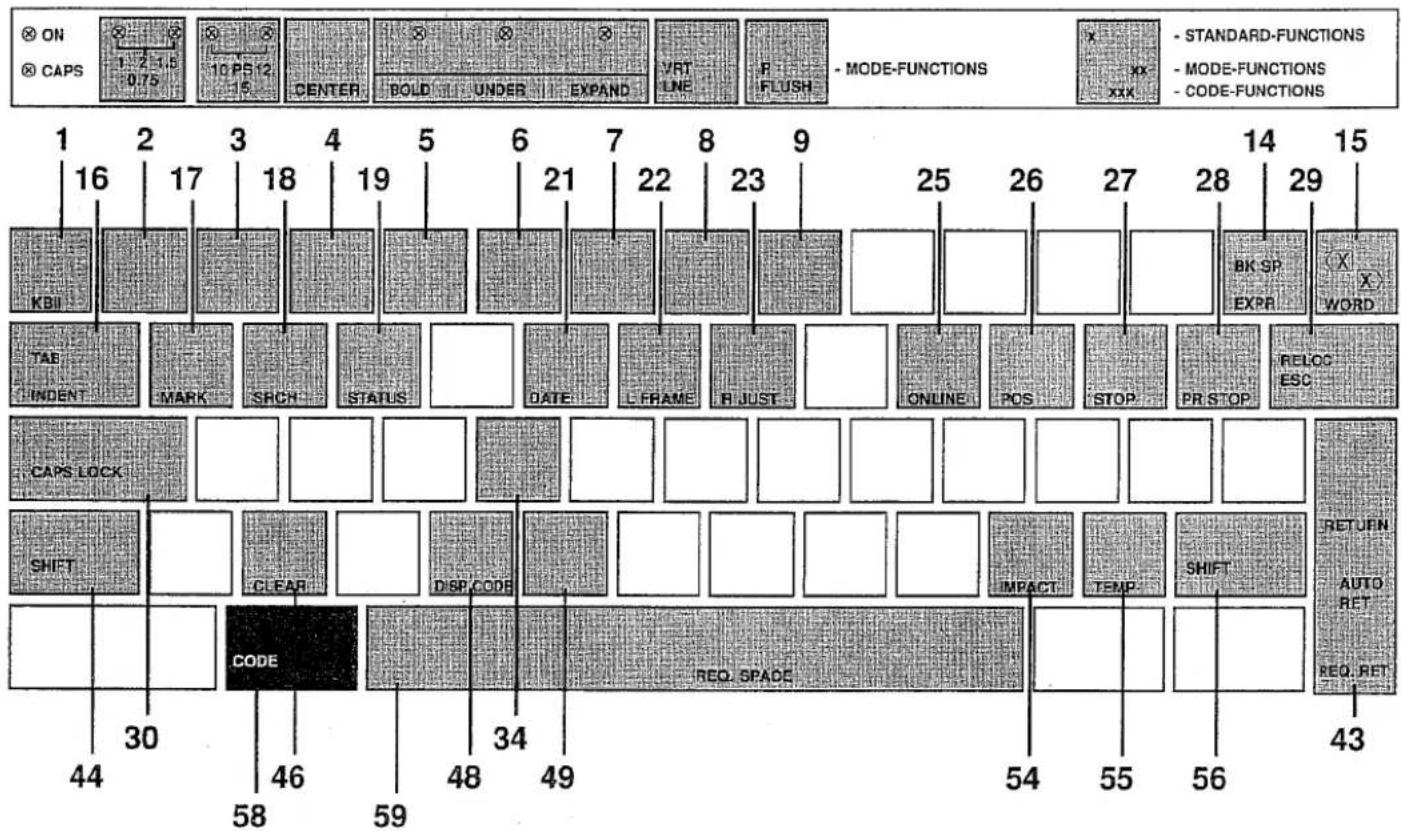
All the keys on the keyboard have been allocated a number, beginning in the top left corner and continuing to the bottom right corner. In the keyboard summary below, only those keys with specific functions have been indicated.
Keys not indicated are purely character keys.
Above the top row of keys are control lamps and graphical information on how functions are activated.

flowchart
graph TD
    A["ON"] --> B["CAPS"]
    B --> C["1 2 3 4 5 6 7 8 9 25 26 27 28 29"]
    C --> D["KBI"]
    C --> E["TAB"]
    C --> F["INDENT"]
    C --> G["MARK"]
    C --> H["SRCH"]
    C --> I["STATUS"]
    C --> J["DATE"]
    C --> K["L FRAME"]
    C --> L["R JUST"]
    C --> M["ONLINE"]
    C --> N["POS"]
    C --> O["STOP"]
    C --> P["PR STOP"]
    C --> Q["X WORD"]
    R["CODE"] --> S["SHIFT"]
    R --> T["OPEN"]
    R --> U["DISP_CODE"]
    R --> V["INPUT"]
    R --> W["IMPACT"]
    R --> X["TEMP"]
    R --> Y["SHIFT"]
    R --> Z["OUTPUT"]
    R --> AA["REQ. RET"]
    R --> AB["REQ. SPACE"]
    R --> AC["54"]
    R --> AD["55"]
    R --> AE["56"]
    R --> AF["43"]
CODE + 1 = KBII option
MODE + 2 = Line spacing
MODE + 3 = Pitch
MODE + 4 = Centering
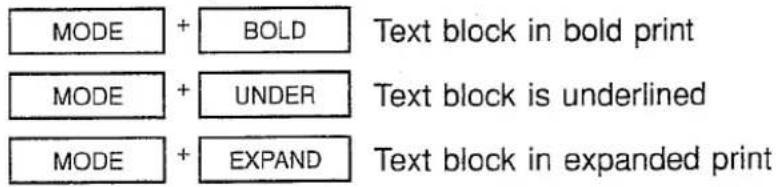
MODE + 5 = Bold print ON/OFF
MODE + 6 = Underlining ON/OFF
MODE + 7 = Expanded print ON/OFF
MODE + 8 = Vertical line tab
MODE + 9 = Right flush tab
14 = Printer moves to the left
14 = Override left margin
CODE + 14 = Printer moves to set left margin
CODE + 14 = Clear paragraph indent
15 = Delete character to the left
CODE + 15 = Delete word to the left
MODE + 15 = Delete character to the right Delete character at cursor position
ON/OFF + 15 = Double correction ON/OFF
16 = Skip to tab stop
CODE + 16 = Paragraph indent
The Keyboard
Keyboard (main area) -UK
CODE + 17 = Marking menu
MODE + 17 = Set school timer
CODE + 18 = Search menu
MODE + 18 = Print test report
CODE + 19 = Status menu
CODE + 21 = Date menu
MODE + 21 = Transfer date
CODE + 22 = Line framing ON/OFF
CODE + 23 = Right justify (justified format) ON/OFF
ON/OFF + 23 = End of ribbon message ON/OFF
CODE + 25 = ON LINE ON/OFF
CODE + 26 = Set position code
MODE + 26 = Skip to position code
CODE + 27 = Set stop code
MODE + 27 = Skip to stop code
CODE + 28 = Stop print
29 = Move to last typing position
Margin release
Exit to previous operating level
30 = Caps Lock ON (letters only upper case)
CODE + 34 = Corrections outside correction memory
43 = Printer moves to left margin of the next line
CODE + 43 = Protected return
MODE + 43 = Automatic return ON/OFF
44 = Upper/lower case
Caps Lock OFF
CODE + 46 = Clear all special print modes
CODE + 48 = Display control codes ON/OFF
ON/OFF + 49 = Line spacing inch/millimeters
CODE + 54 = Impression control (2 levels)
ON/OFF + 54 = BEEP tone ON/OFF
CODE + 55 = Temporary hyphen
56 = Upper/lower case
58 = Access functions indicated on the front of the keys
ON/OFF + 58 = Set system to its initial state
59 = Spacebar
CODE + 59 = Protected space
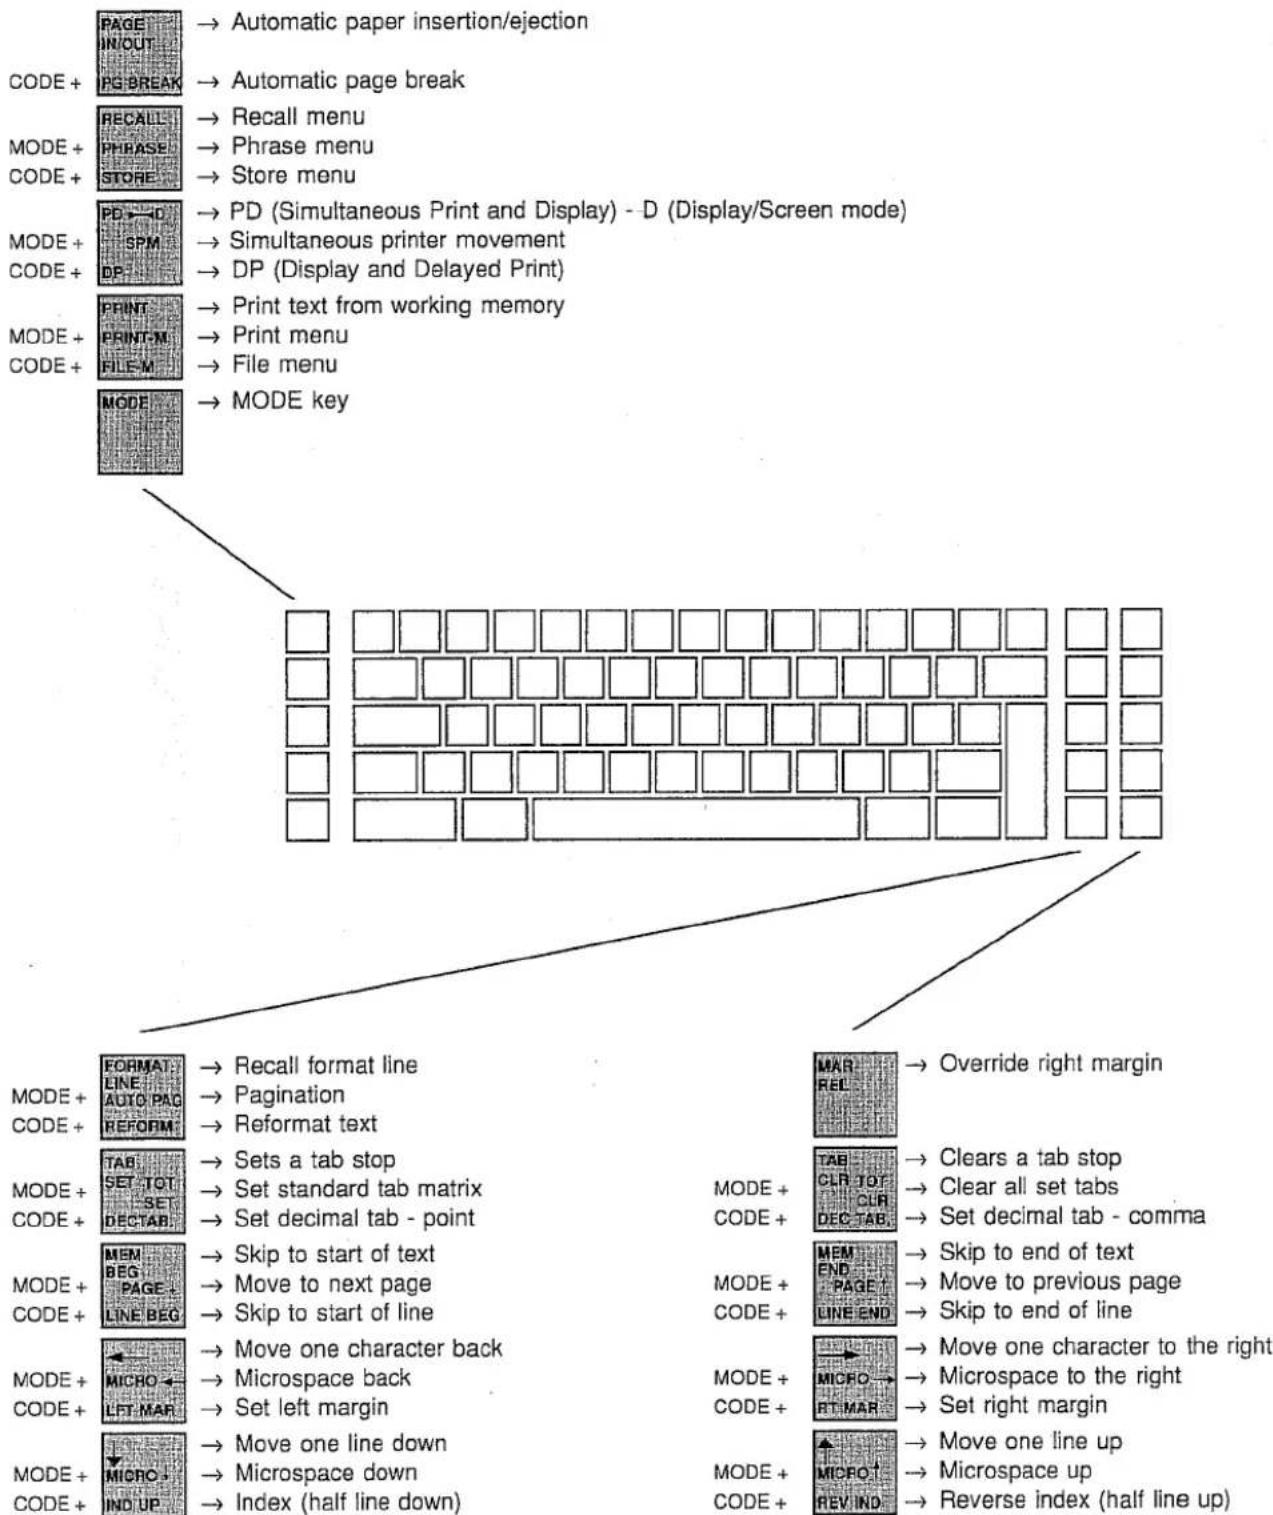
Keyboard (left/right area) -UK
flowchart
graph TD
    A["MODE + CODE + MODE + MODE"] --> B["PAGE IN/OUT"]
    B --> C["PG BREAK"]
    C --> D["→ Automatic paper insertion/ejection"]
    D --> E["→ Automatic page break"]
    E --> F["MODE + MODE + MODE + MODE"]
    F --> G["RECALL PHRASE STORE"]
    G --> H["→ Recall menu"]
    H --> I["→ Phrase menu"]
    I --> J["→ Store menu"]
    J --> K["PD → D SPM DP"]
    K --> L["→ PD (Simultaneous Print and Display) - D (Display/Screen mode)"]
    L --> M["MODE + MODE + MODE + MODE"]
    M --> N["PRINT PRINT-M FILE-M MODE"]
    N --> O["→ Simultaneous printer movement DP (Display and Delayed Print)"]
    O --> P["PD → D SPM DP"]
    P --> Q["→ Print text from working memory"]
    Q --> R["MODE + MODE + MODE + MODE"]
    R --> S["PRINT PRINT-M FILE-M MODE"]
    S --> T["→ Print menu"]
    T --> U["→ File menu"]
    U --> V["MODE key"]

    W["MODE + MODE + MODE + MODE"] --> X["FORMAT LINE AUTO PAC REFORM"]
    X --> Y["→ Recall format line"]
    Y --> Z["→ Pagination"]
    Z --> AA["→ Reformat text"]
    AA --> AB["TAB SET TOT SET DECTAR"]
    AB --> AC["→ Sets a tab stop"]
    AC --> AD["→ Set standard tab matrix"]
    AD --> AE["MODE + MODE + MODE + MODE + MODE + MODE + MODE + MODE + MODE + MODE + MODE + MODE + MODE + MODE + MODE + MODE + MODE + MODE + MODE + MODE + MODE + MODE + MODE + MODE + MODE + MODE + MODE + MODE + MODE + MODE + MODE + MODE + MODE + MODE + MODE + MODE + MODE + MODE + MODE + MODE + MODE + MODE + MODE + MODE + MODE + MODE + MODE + MODE + MODE + MODE + MODE + Mode"]
    W --> Y
    X --> Y
    Y --> Z
    Z --> AA
    AA --> AB
    AB --> AC
    AC --> AD
    AD --> AE
    AE --> AF["MAR REL"]
    AF --> AG["→ Override right margin"]
    AG --> AH["TAB CLR TOF CLR DEC TAB"]
    AH --> AI["→ Clears a tab stop"]
    AI --> AJ["→ Clear all set tabs"]
    AJ --> AK["→ Set decimal tab - comma"]
    AK --> AL["MEM END PAGE LINE END"]
    AL --> AM["→ Skip to end of text"]
    AM --> AN["MICFO RT MAR"]
    AN --> AO["→ Move one character to the right"]
    AO --> AP["MICFO MICRO → Microspace to the right"]
    AP --> AQ["→ Move one line up"]
    AQ --> AR["MICFO MICRO → Microspace up"]
    AR --> AS["MICFO REV IND → Reverse index (half line up)"]

Characters are entered, and functions are selected, by pressing the relevant keys. The keytops depict the various characters, symbols and functions.
■ Typing keys - monolingual systems
All the keys are equipped with single and repeat functions. The repeat function is initiated by holding the key down.
The alphabetical characters, depicted on the top left of the keys are printed out in lower case (small letters) directly, or as capitals when pressed together with the Shift key.
Regarding the other characters, those depicted on the bottom left of the keys are printed out directly, and those on the top left are printed out when the key is pressed together with the Shift key.
■ Typing keys - bilingual systems
All the keys are equipped with single and repeat functions. The repeat function is initiated by holding the key down.

Basically, the left side of the keytops indicate characters and functions available using the English language, and the right of the keys indicate characters and symbols available using the native language.
English keyboard
The alphabetical characters, depicted on the top left of the keys are printed out in lower case (small letters) directly, or as capitals when pressed together with the Shift key.
Regarding the other characters, those depicted on the bottom left of the keys are printed out directly, and those on the top left are printed out when the key is pressed together with the Shift key.
![A SHIFT + A [ ] SHIFT + ! "a" is printed "A" is printed ["" is printed "!" is printed](/content/2026/05/847820/images/45f2886df816280a495a3ba12cdae3644250d3fefc7261ebe25917c58458eed2.jpg)
■ Native language keyboard
The characters depicted on the bottom right are printed directly, and those on the top right are printed out when the key is pressed together with the Shift key.
■ Upper case using Caps Lock (capital letters only) - all keyboards
Alphabetical letters (A, B, C etc.) are printed as capitals, but all other keys print as in lower case (e.g. comma, numbers, etc.).
1. Turn function on
CAPS LOCK
2. Turn function off
SHIFT
■ Special symbols - all keyboards
Special symbols are depicted on the front right of certain keys. (Those on the left with the English keyboard, those on the right with the native language keyboard). To print them, the key must be pressed together with the CODE key.
For example, in order to print "|"
CODE + 1
"|" is printed
Function keys - all keyboards
The function inscriptions are depicted either on the keys, or on the housing directly above the upper row of keys.
■ Inscriptions in the center or upper left of the keys
If the function inscription is in the center or, where the key has several inscriptions, on the top left of the keys, the function is activated directly.
X
Character is deleted
Move to tab
TAB
Move to tab
■ Inscriptions on the front of the keys
Functions which are depicted on the front of the keys are activated by pressing the key together with the CODE key.
For example, to clear all special print modes:
CODE + CLEAR Special print modes are cleared
■ Inscriptions on the bottom right of the keys
Functions which are depicted on the bottom right of the keys are activated by pressing the key together with the MODE key.
For example, to set the tab matrix:
MODE + TOT SET Tab matrix is set
■ Inscriptions on the housing above the keys
Functions depicted on the housing above the top row of keys are activated by pressing the keys directly below the inscription together with the MODE key. Some of these functions have control lamps to indicate the various settings.
For example, to change the pitch setting:
MODE + 2
Press repeatedly to select pitch setting

E.1 General Information ...
E.3 Chapter contents
E.4 General information on the operating instructions
E.4 Operating modes
E.4 Function explanation with operating procedure
E.4 Prompts in the display
E.4 Exercises
E.5 General information on the system settings
E.5 Recall Status Menu
E.5 Change status
E.6 Store changed settings
E.6 Exit Status Menu without storing changed settings
E.7 General information to the memory
E.7 Working memory
E.7 Text memory
E.7 Disks (option)
E.8 General information on the operating modes
E.8 Operating mode after turning on
E.8 Switch to Memory Mode
E.8 Line Print on/off
E.9 Typing without storing
E.9 Simultaneous print and display
E.9 Delayed print (line by line)
E.9 Simultaneous printer movement On/Off
E.10 Storing text
E.10 Store text without printing
E.10 Store text and print line by line
E.10 Simultaneous printer movement On/Off


General information on the operating instructions
The operating procedures (keys to press), display prompts and exercises are each described in a constant form throughout this manual.
Operating modes
Some functions are not available in all operating modes, or function differently in each mode. The symbol depicted at the beginning of the following paragraph (white letter on black background) identifies the relevant modes (D = Display, DP = Delayed Print, PD = Print and Display).
D The Search and Replace function, for instance, is only available in Memory Mode (D mode).
■ Function explanation with operating procedure The functions are first described, then the operating procedure is explained.
- Select line spacing setting
MODE + 1
Line spacing setting is selected
■ Prompts in the display
When you select certain functions, prompts appear in the display requesting you to make a selection or carry out another operation.
For example, before printing, the system requests that you insert a sheet of paper, or when you exit a menu the system asks if the text should be cleared or retained. The prompts are self-explanatory, and are sometimes only partially indicated here.
INSERT NEW PAGE
Exercises
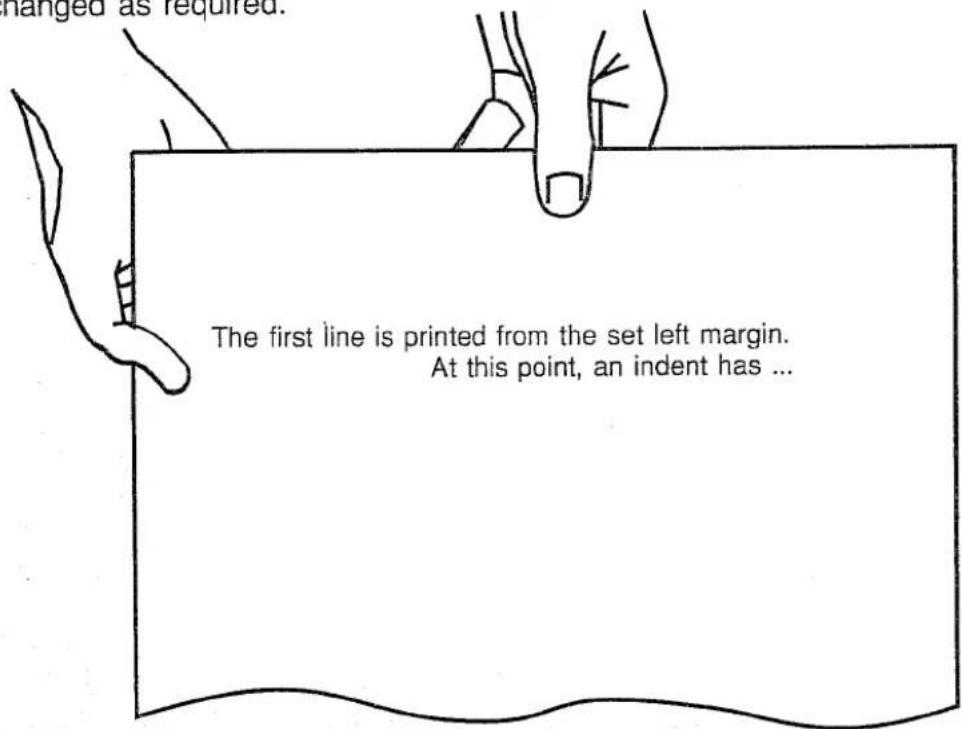
Exercise examples are displayed in as follows. The texts are only suggestions, and can be changed as required.
General information on the system settings

You can check the actual system settings at any time by pressing the Status key and recalling the Status Menu to the display. "Status" refers to the functions and settings currently active.
The functions displayed are described in detail in their individual sections.
Functions which are activated are marked with a □.
DISP CODE 1 SPM IMPACT KB II

DISP CODE
SPM
IMPACT
KB II
- Display control codes
- Simultaneous printer movement
- Impression strength
- Second language (keyboard)
■ Recall Status Menu
.CODE + STATUS
Status Menu appears
Change status
The function on which the cursor stands is marked by an arrow ». Move to the function you wish to change by pressing the Cursor keys, so that the arrow marks that function. Then press the Spacebar to change the setting.
By changing the status within a text (except KB II), the changes are valid for the whole text.
Functions which are on are marked with a □ in front of the function name.
- Move to the function required
- Turn function On/Off
Spacebar
Other functions can be accessed and the settings changed.
Store changed settings
If you want to store the changes in the Status Menu:
- Change the settings as described above.
- Move to EXIT

- Exit from the Status Menu
The new settings are stored and activated
■ Exit Status Menu without storing changed settings
If you do not want to store the changes:
- Exit from the Status menu
The old settings are retained
Here is just a brief explanation of the basic operation of the typing system.
In Typewriter Modes PD and DP, text entered is printed directly onto paper and is not stored.
In operating modes D and DP-D, text is automatically stored in the working memory as it is entered.
The memory functions are described in detail in the section "Storing Documents".

Working memory
This is the memory in which text currently being created or edited is stored. The display shows this text at the actual entry position.
When the system is turned off, the text in the working memory is retained automatically and appears again (at the end of the text) when the system is turned on again.
The text is in exactly the same state as when the system was turned off, i.e. the functions and settings allocated are also retained.
Text memory
Text entered can be allocated a file name and stored in the text memory as a file. When the Store or Recall Menu functions are activated, files are stored in, or recalled from, this memory.
When text is stored in a file in the text memory, the working memory can be cleared and a new text created.
Disks (option)
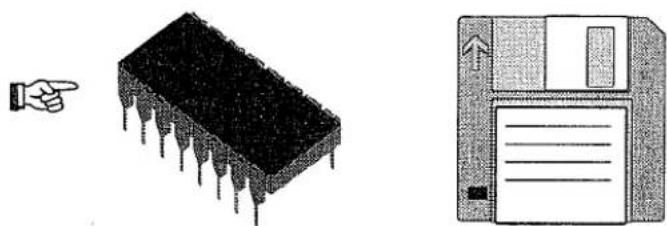
If your system is not equipped with a disk drive, one can be obtained from your sales outlet. The disk drive enables text to be stored as files on disks, thus providing unlimited storage capacity.
When the Disk function is activated from the Store or Recall Menus, texts are stored on, or recalled from, the inserted disk.
General Information ...
General information on the operating modes

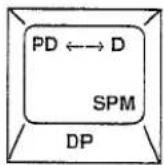
Your typing system has a range of operating modes which can be selected according to the task to be completed.
Study the information provided on the operating modes in order to assess the advantages of each mode, and decide which is best for various typing applications.
Operating mode after turning on
Each time the system is turned on, or after standardization, operating mode PD is automatically activated.
Text entered is printed directly and appears simultaneously in the display. It is not stored.
Switch to Memory Mode
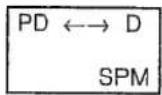
Memory Mode is turned on
If the typing system has already been used in Memory Mode, the following prompt appears:
| DELETE TEXT ? | YES | NO |
Confirm NO
Existing text appears in the display
or
Select YES and confirm

Text is cleared from the display
Line Print on/off
Whether in Typewriter Mode or Memory Mode, you can turn on the Line Print function, whereby a text is printed out line by line, as each line is ended.
| CODE | + | DP |
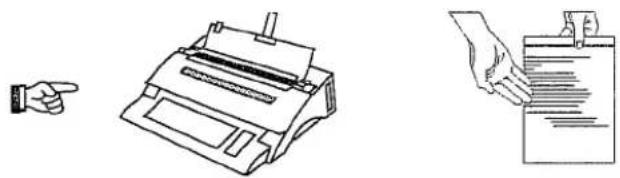
PD or DP appear in the display.
The text appears in the display and is printed simultaneously or after ending each line.
■ Simultaneous print and display
PD appears in the display.
Text is printed directly.
The last (approx. 200) characters are stored in the correction memory and can be corrected immediately.
The text is not stored.
■ Delayed print (line by line)
DP appears in the display.
Text appears initially in the display.
The current line can be edited within the display, and is printed out when the line is ended (e.g. after entering a Return).
The text is not stored.
Simultaneous printer movement On/Off
This function causes the printer to move correspondingly with each entry, without actually printing. This allows accurate printer positioning, which is a great advantage, for example, when creating or filling in forms.
MODE + SPM Simultaneous printer movement On/Off

Note:
If you call in the Status Menu, by pressing CODE + STATUS, the symbol □ indicates whether this function is on, as well as other functions.
You can change the current settings from within this menu.

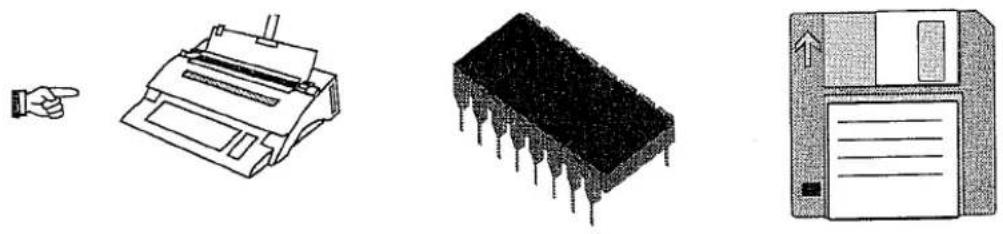
D or DP-D appears in the display.
Text is stored, initially, in the working memory, and can then be stored in the text memory, or on a disk if your system has a disk drive.
Store text without printing
D appears in the display Text entered appears in the display, and can be edited. The text is stored in the working memory.
■ Store text and print line by line
DP-D appears in the display. The text appears, initially, in the display. The current typing line can be edited, and is printed out only after ending the line, e.g. with a Return. The text is stored in the working memory. Corrections in text already typed can be carried out in the display after skipping back to the beginning of the text.
Simultaneous printer movement On/Off When working with forms, even in Memory Mode, you can turn the simultaneous printer movement function on and off.
MODE + SPM Simultaneous printer movement On/Off

Note: If you call in the Status Menu, by pressing CODE + STATUS, the symbol □ indicates whether this function is on, as well as other functions. You can change the current settings from within this menu.
F.1 Entering text
F.3 Chapter contents
F.4 The display when entering text
Control codes
F.5 Operating mode selection
F.5 Typewriter or Display Mode?
F.5 Typewriter Mode
F.5 Display Mode
F.6 Paper insertion/Paper ejection
F.6 Insert paper
F.6 Draw paper in
F.6 Eject paper
F.7 What text? Which format?
F.7 Create new text or edit existing text
Edit existing text
F.7 Format selection
F.7 Standard page format
F.7 Recall format from utility disk (option)
F.7 Edited format
F.8 Revise current format
F.9 Positioning the printer/cursor
F.9 Character by character
F.9 Line by line
F.9 Half line
F.9 Microspacing
F.10 Addition cursor movement in Memory Mode
F.11 Deleting/Correcting
F.11 Deleting/Correcting in the display
F.11 Deleting/Correcting printed characters
F.11 Double correction feature
F.11 Correction to the left
F.11 Correcting words or parts of words
F.12 Corrections, in words already typed
F.12 Corrections beyond the correction memory
F.13 Search/Replace
F.13 Search term
F.13 Search/Replace
F.14 Printout from the working memory
F.14 Automatic print stop
F.14 Manual print stop

Entering text

Information

This chapter contains a summary of descriptions and functions which are relevant when entering text, regardless of the mode.
- The display, and its function when entering text.
- When and how to activate certain operating modes
- Paper insertion and ejection.
- Format possibilities when entering text
After the necessary preparations have been carried out, the following functions are explained:
- Moving the cursor or printer.
- Correcting and deleting errors.
- Searching for, and automatically replacing, specific words.
natural_image
Simple line drawing of a table with two legs and a central vertical bar (no text or symbols)
The text is shown in the upper lines of the display.....
COLUMN LINE NO PAGE1 RET RYPH PAGE R JUST MEMORY LINE
The display is virtually divided into two parts.
The upper area shows the text entered.
The bottom line (the Status/Menu Line) displays either the current system status, as depicted above, or the selection possibilities from the menu recalled. Those functions which are turned on are marked by a □.
COLUMN - Indicates the current typing position, horizontally
LINE NO - Indicates the current typing position, vertically
PAGE: - Indicates the current page
RET - Automatic Returns
HYPH - Automatic Hyphenation
PAGE - Automatic Pagination (page control)
R JUST - Justified Format
MEMORY - Text memory access
LINE - Line Print
■ Control codes
Each function which can be entered via the keyboard has been allocated a symbol, known as a control code. These control codes can be called into the display so that you can see the functions and their locations within a text. Not all the control codes are displayed all the time, as it would then be impossible to read the actual text. The codes are usually called in to control specific functions at specific locations, then turned off again.
Keyboard entries are basically divided into three categories:
- text entries (normal characters) which are always displayed when entered.
- important functions, which always appear as control code symbols when entered (e.g. Return, Space, etc.).
- function symbols, such as Backspace, Tab, etc., which only appear when the control code function is turned on.
CODE + DISP CODE Function is turned On/Off
!
Note
If you call in the Status Menu, by pressing CODE + STATUS, the symbol □ indicates whether this function is on, as well as other functions. You can change the current settings from within this menu.
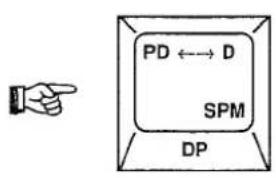
natural_image
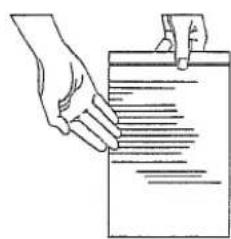
Illustration of a hand pressing down on a document with lines indicating text (no readable text or symbols)
natural_image
Illustration of an integrated circuit chip with multiple pins (no text or symbols)Typewriter or Display Mode?
- Do you want to write a quick note, or address an envelope?
- Do you want to write a text and store it for future use; i.e. the same basic letter which needs only minor revisions to be sent to different people?
- Will your correspondence contain tables and charts?
- Do you want to complete a form which requires varying pitch and line spacing settings?
Your typing system can complete all these tasks quickly and easily.
Typewriter Mode
The typing system works as a normal typewriter in the modes:
- Print and Display (PD)
or - Delayed Print (DP) - line by line print
■ Display Mode
You can edit and store texts in the modes
- Delayed Print and Display (DP-D)
or
- Display only (D) - no printout

The system operates in virtually the same way regardless of the mode used. You can switch between Typewriter and Display Modes at the touch of a key. A major advantage is that when you are creating a text in Display Mode and need to write an urgent letter, simply press the Operating Mode key to switch to Typewriter Mode, write the letter, and press the Operating Mode key again to return to Display Mode. You return to the end of the text you were previously creating, and can continue.

Entering text
Paper insertion/Paper ejection
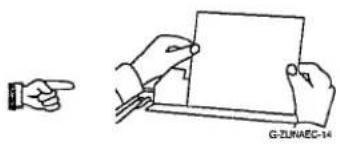
natural_image
Illustration of two hands holding a blank document, one pointing and the other gesturing (no text or symbols present)Insert paper
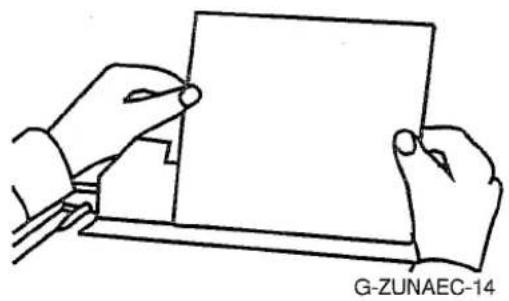
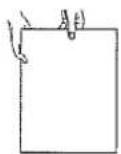
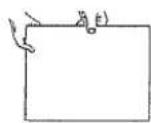
Insert a sheet of paper as shown in the disgram.
Adjust the paper guides, if necessary, to align the paper.
natural_image
Line drawing of two hands holding a blank sheet, no text or symbols presentDraw paper in
Press the Paper Insertion key. The platen turns the wrong way at first, in order to align the paper. It then turns in the right direction and the paper is drawn in to the first typing line.
PAGE IN/OUT
Paper is drawn in
If necessary, the paper can be realigned by turning the paper release knob and adjusting the paper manually. Turn the knob back again before typing.
Eject paper
Press the Paper Insertion key again to eject the paper.
PAGE IN/OUT
Paper is ejected
or
or ...
■ Create new text or edit existing text
D DP-D
If you want to create a new text, continue with the section below "Select Format".
Edit existing text
If you want to revise an existing text, recall the file you have previously created, and stored, to the working memory.
(See "Recall File to the Working Memory").
You can skip the following section "Select Format" as the format is recalled with the stored text.
Format selection
D DP-D
You can use various formats to suit the work you are doing:
- the standard format (A4 portrait).
- a format stored on the utility disk (option) - A4 portrait/landscape, A3 portrait/landscape, A5 portrait/landscape).
- a format you have revised and stored.
- the format currently in the working memory can be revised, if necessary.
Standard page format
The typing system provides a standard page format for general typing requirements:
- top margin (1st typing line) = 6 lines from the top edge
- bottom margin (last typing line) = 64. lines from the top edge
- page length = 70 lines
- left margin (1st typing position) = 10 spaces from the left edge
- right margin (last typing position) = 75 spaces from the left edge (typing width: 65)
- tab raster is set
- pitch = 10
- line spacing = 1
This format automatically activated when the machine is first turned on, after standardisation, and when the current format is cleared from the working memory.
■ Recall format from utility disk (option)
The utility disk contains six different format files. Recall the format file required into the working memory at the beginning of a text. (See "Recalling a Format").
Edited format
When you repeatedly need a text in a format which differs from the standard format, proceed as in "Edit Format" to create and store the format settings as a file.
You can then recall the format into the working memory as and when required. (See "Recall Format" and "Recall Format to the Working Memory").

Entering text
What text? Which format?
■ Revise current format
You can change the margin, tab, pitch and line spacing settings of the format currently in the working memory.
You can move the printer to any position on the page, and the cursor in the display, to any position within a text. Before starting to type, study the printer/cursor movement keys to become acquainted with the functions.
Most of the functions are repeated when the key, or key combination, is held down.
■ Character by character

Line by line
Half line
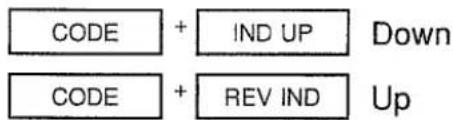
Microspacing
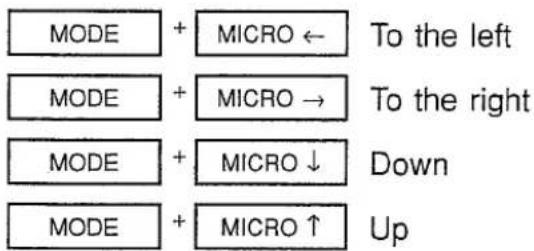
■ Addition cursor movement in Memory Mode

These functions enable direct movement to specific locations within a text.
Positions in the display which contain no text cannot be accessed with the cursor movement keys.
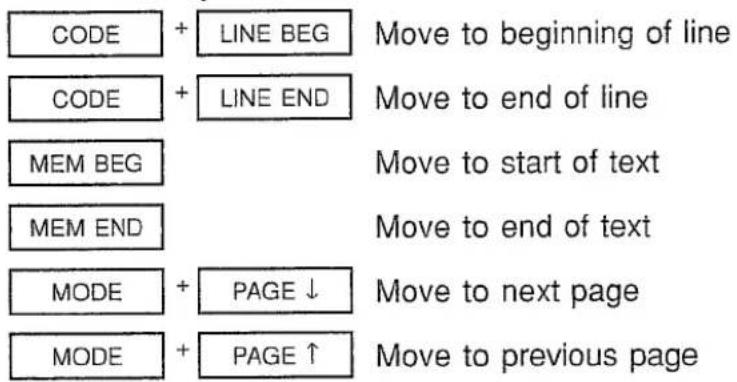

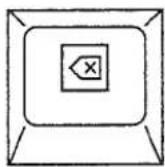
Typing errors can be corrected immediately, either in the display or on the printed page. Printed errors are removed using the lift-off correction feature.
■ Deleting/Correcting in the display
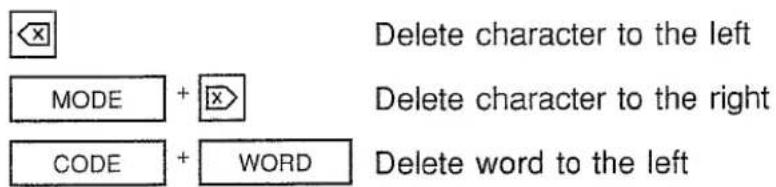

■ Deleting/Correcting printed characters
PD If an incorrect character has already been printed, that character is deleted (lift-off or cover-up) and the correct one inserted. The last characters entered (approx. 200) are stored in the system's correction memory, and can be accessed immediately for correction.
■ Double correction feature
Lift-off correction, whereby incorrect characters are removed from the page, is designed for use with standard consumables (paper, ribbon and correction tape). If, due to the use of special paper, corrections are unsatisfactory, a special "double correction" feature is available. (The incorrect character is automatically "hit" twice).
- Turn the typewriter off
- Hold down the key and turn the typewriter on
Correction to the left
In order to delete a character:
- Move the printer to the incorrect character.
■ Correcting words or parts of words
You can delete words or parts of words. Position the printer to the right of the first character to be corrected. The characters to the left are deleted up to the first space.
- Position the printer to the right of the word or first character to be corrected
- Delete word/characters

■ Corrections, in words already typed
Errors that were not corrected immediately, but are still in the correction memory, can be corrected.
- Move the printer to the required position
- Corrections

Delete character to the left
Delete character to the right

Delete word to the left
- Move the printer to the pre-correction position
Corrections beyond the correction memory
Errors no longer in the correction memory can also be corrected.
Pitch 10/12/15
- Move the printer to the right of the character to be corrected
- Move the printer to the incorrect character
- Type "incorrect" character Character is deleted
- Type "correct" character Character is printed
Pitch PS
- Move the printer to the right of the character to be corrected
- Press until the incorrect character is reached
- Type "incorrect" character Character is deleted
- Type "correct" character Character is printed

D The search function simplifies working with long texts as it enables you to define a location (search term) within a text and move to it directly.
Search term
The search term is the word, or character sequence, you wish to find.
You can move directly, forwards (standard setting) or backwards, from the cursor position to the search term.
- Activate the search function

- Enter the search term exactly as it appears in the text
- If necessary, select the BACKWARDS search direction
- Confirm the search term
RETURN
Cursor moves to the search term
Search/Replace
The search term can be accessed and replaced by another term automatically. The search term is replaced throughout the whole text.
- Activate the search function

- Enter the search term exactly as it appears in the text
- Activate the replacement text

- Enter the replacement text
- Confirm
RETURN
PLEASE WAIT The search term is replaced throughout the whole text automatically


It is possible to print the contents of the working memory. Printout begins from the cursor position. When automatic returns and pagination are on, the text is automatically formatted. If no text is in the working memory, the PRINT selection is rejected.
- Move the cursor to the beginning of the text
MEM BEG
- If necessary, move to the first line required
- Activate the print function
Automatic print stop
When text is being entered, an interruption of the printout can be pre-programmed by:
- Switching languages using the KB II key
- Changing the pitch setting to PS
- Entering a print stop using the PR STOP key
at specific locations within the text.
This enables you to change the printwheel or ribbon cassette, for example.
One of the following messages appears:
or
PLEASE INSERT THE DAISYWHEEL ....
PRINT STOP .....
-
Insert the relevant printwheel or ribbon cassette
-
Continue printing
RETURN
Manual print stop
Printout can be stopped or interrupted during printout.
Stop printout
CODE

PR STOP
PRINT STOP .....
Continue printout
RETURN
Cancel printout
Select and confirm CANCEL

Spacebar
RETURN
G.1 Text functions
G.3 Chapter contents
G.4 Margins/Margin memory
G.4 Standard margins
G.4 Change margin settings
G.4 Set margins
G.4 Set margins
G.5 Margin memory
G.5 Recalling/Changing the margins
G.5 Storing margins
G.6 Functions at the right margin
G.6 Automatic returns OFF
G.6 Release margin and continue typing in the same line
G.6 Release margin and continue typing in the next line
G.6 Automatic returns ON
G.7 Unprotected space
G.7 Protected space (required space)
G.7 Automatic returns ON
G.7 Protected space (required space)
G.7 Temporary hyphen
G.8 Pitch
G.8 10/12/15 Pitch
G.8 PS (Proportional spacing)
G.9 Line spacing
G.9 Line spacing in inches/millimeters
G.10 Bold print/Underlining/Expanded print
G.11 Combining two or more print modes
G.11 Follow-up underlining
G.11 Follow-up allocation of print modes
G.12 Paragraph indent
G.12 Set paragraph indent
G.12 Clear paragraph indent
G.13 Justified format
G.14 Tabulation
G.14 Tab summary
G.15 Standard tab
G.16 Right flush tab
G.16 Decimal tab (point orientated)
G.17 Decimal tab (comma orientated)
G.17 Vertical line tab
G.18 Tab matrix
G.18 Clear single tab
G.18 Clear vertical line tab
G.18 Clear all tabs
G.19 Centering
G.19 Centering between the margins
G.19 Centering between two set tabs (line by line)
G.20 Centering at a any position on a line (line by line)

Text functions

Information

You have learnt, in the previous chapter, how to enter text.
This chapter is concerned with the appearance and layout of text on the page.
This can be for a variety of reasons:
highlighting important text, using:
- Bold Print, Expanded Print and Underlining, - Changing pitch and line spacing
arrangement and organisation of text
- Paragraph indentation, margin settings
or for tables and charts
- Tabulation
natural_image
Simple line drawing of a table with two legs and a central horizontal bar (no text or symbols)
Text functions
Margins/Margin memory
The width of the typing line is determined by the left and right margins. These margins have either the standard settings or your individual settings. The set margins can be overridden, changed and the new settings stored.
Standard margins
When the machine is turned on for the first time, or after it has been standardized, the standard margins are set. The standard settings are dependent on the country for which the machine was initially made.
■ Change margin settings
The left and right margins can be reset. Move the printer or cursor to the required position. If you attempt to set an invalid margin position (e.g. right margin is set to the left of the left margin) a double BEEP! is sounded.
Set margins
PD DP
- Move to margin position required
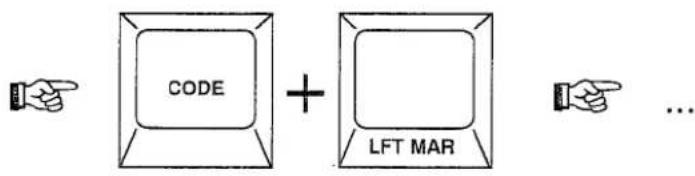
- CODE + LFT MAR Left margin is set
- CODE + RT MAR Right margin is set
■ Set margins
D DP-D
- Move to left margin position
-
CODE + LFT MAR Left margin is set or
-
Move to right margin position
- CODE + RT MAR Right margin is set
Margin memory

The system is equipped with a margin memory, in which six pairs of margins are stored (see table below - settings at 10 pitch). They can be recalled and activated by pressing the corresponding digit key; the memory is divided into segments 1 to 6. These settings are retained in the memory segments until a new set of margins stored; whereby the old settings are overwritten.
| Key | Paper size | Left margin | Right margin |
| 1 | A4 portrait | 10 | 75 |
| 2 | A4 landscape | 10 | 110 |
| 3 | A3 portrait | 10 | 110 |
| 4 | A3 landscape | 0 | 117 |
| 5 | A5 portrait | 8 | 51 |
| 6 | A5 landscape | 8 | 75 |
In addition, you can set and store other margin settings in the margin memory allocated under segments 7 - 0. Besides these stored margins, you can set and work with any other margin settings without storing them.

■ Recalling/Changing the margins
The margins are recalled from margin memory (segments 1-6, or 7-0).
- Move the printer to the left margin
RETURN
- Activate the recall margin function
RECALL
- Recall margins from segment (e.g. 2)
2
Margin settings from segment 2 are recalled
or Cancel the recall margin function
ESC
Storing margins
New pairs of margins can be set and stored in the margin memory.
- Activate the store margins function
CODE
STORE
- Store margins settings in a segment (e.g. 7)
7
Margin settings are stored in segment 7
or Cancel the recall margin function
ESC
Text functions
Functions at the right margin
There are a number of functions available, depending on the operating mode, which define how your system reacts when you reach the right margin. For instance, automatic returns, hyphenation, etc., are not always possible or, in fact, sensible.
■ Automatic returns OFF
PD To make you aware that you are nearing the end of a line, an acoustic signal indicates that you have reached the margin zone. If you continue typing, the keyboard blocks at the right margin.
■ Release margin and continue typing in the same line You can override the right margin in order to continue entering text.
-
MAR REL The right margin is released
-
Continue entering text
■ Release margin and continue typing in the next line If you have typed over the right margin, and the decide against it, correct the text and continue on the next line.
-
Delete characters up to the desired end of line; enter a hyphen, if necessary
-
Move the printer to the left margin
RETURN
- Continue entering text
■ Automatic returns ON
PD One of the most often required typing functions, "printer return with line spacing", can be carried out automatically. Automatic returns are carried out when the first character following a space or hyphen is entered within the margin zone. When a protected (required) space or protected hyphen is entered, an automatic return does not take place.
Automatic returns move the last word of a line into the next line when the right margin is exceeded. If a temporary hyphen is entered in the margin zone, the rest of the word is moved to the next line. Words containing a protected space or protected hyphen are moved as a complete word to the next line.
MODE + AUTO RET The function is turned On/Off
■ Unprotected space
It is possible to enter one or more spaces within the margin zone.
An automatic return occurs when a character is entered after a space, and the character is printed on the next line.
■ Protected space (required space)
In cases where an automatic return is not required, for example, because
Olympia Office should not be separated, enter a protected (required) space
- Enter text into the margin zone
- At the space where a Return is not required
- CODE + Spacebar A space is entered
- Continue entering text
■ Automatic returns ON
D DP-D
One of the most often required typing functions, "printer return with line spacing", can be carried out automatically.
Automatic returns are carried out when the first character following a space or hyphen is entered within the margin zone. When a protected (required) space or protected hyphen is entered, an automatic return does not take place.
If a temporary hyphen is entered in the margin zone, the rest of the word is moved to the next line. Words containing a protected space or protected hyphen are moved as a complete word to the next line.
MODE + AUTO RET The function is turned On/Off
■ Protected space (required space)
In cases where an automatic return is not required, for example, because Olympia Office should not be separated, enter a protected (required) space.
CODE + Spacebar A space is entered
■ Temporary hyphen
If a word, which would extend beyond the right margin, should not be moved completely to the next line, enter a temporary hyphen at a suitable point.
CODE + TEMP-
!
Note
If you call in the Status Menu, by pressing CODE + STATUS, the symbol □ indicates whether this function is on, as well as other functions. You can change the current settings from within this menu.

A variation in pitch (distance between the letters) enables you to improve the appearance of your text on the printed page. It also enables you to use different printwheels (see "Accessories") to highlight certain passages of text, or simplify typing procedures, for instance, when filling out forms.
Pressing the key combination changes the pitch setting. Press the combination as often as required until the setting you need is set.
The control lamps (LEDs) indicate the current setting.
10/12/15 Pitch
| Pitch | Chars./Inch | MM | Control lamps |
| 10 | 10 | 2.54 | 10 on |
| 12 | 12 | 2.12 | 12 on |
| 15 | 15 | 1.69 | off |
MODE + 2
Select the pitch setting
■ PS (Proportional spacing)
Proportional spacing enables you to type documents as if "printed", as each character is given space in proportion to its size.
When using proportional spacing, a printwheel with "PS" on it must be inserted.
Control lamps 10 and 12 ON
MODE + 2
Select the pitch setting

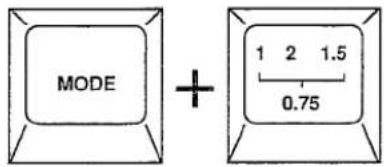
You have a choice of four different line spacing settings to adjust the spacing between the lines, enabling you to arrange your text according to the format of your page.
Pressing the key combination changes the line spacing setting.
The control lamps (LEDs) indicate the current setting.
Line spacing Control lamps
| 1 | 1 on |
| 1.5 | 1.5 on |
| 2 | 2 on |
| 0.75 | 1 and 2 off |
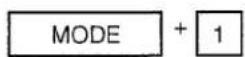
Select the line spacing setting

■ Line spacing in inches/millimeters
The line spacing setting can be set in inches (standard setting) or millimeters. Single line spacing, for example, is switched from 1/6th inch to 5mm.
- Turn the typewriter off
2.

Hold down the key and turn the typewriter on again
Text functions
Bold print/Underlining/Expanded print

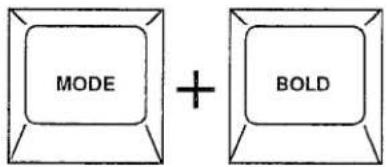
The use of special print modes (enhancements) gives correspondence an individual appearance, and enables important passages of text to be highlighted. They can also serve to simplify the general layout for the reader. Turn on the print mode required before entering the text to be enhanced; the mode remains active, even over several lines, until turned off.
The print modes can be combined, thus increasing the number of possibilities. The control lamps (LEDs) indicate which print modes are currently active.
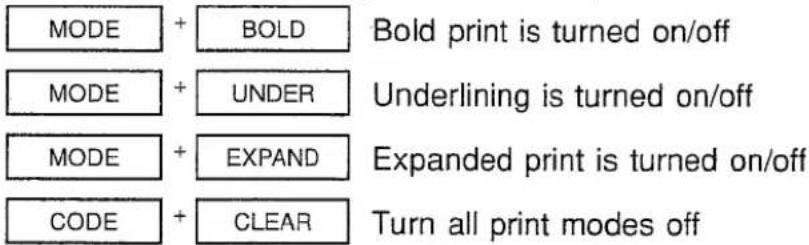
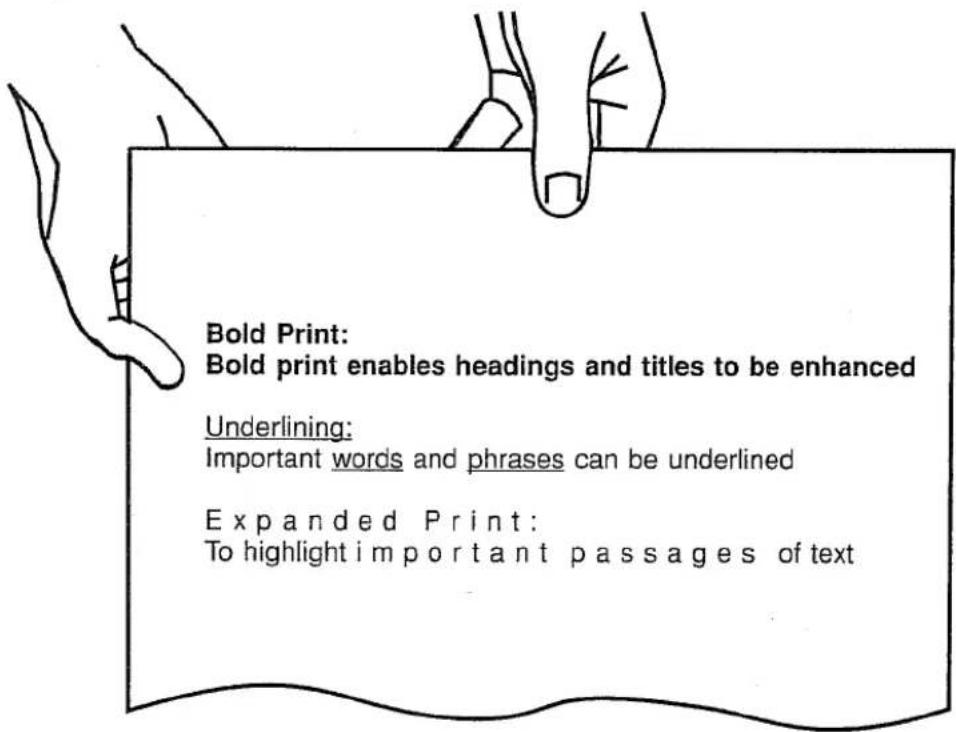
■ Combining two or more print modes
All the print modes can be combined together.
■ Follow-up underlining
PD Words already typed in the current line can be underlined later. Position the printer, DP using the cursor keys, to the right of the last letter of the word to be underlined.
- Move the printer to the right of the relevant word.
- Turn underlining on

- Underline the word

■ Follow-up allocation of print modes
D Existing words and text can be allocated print modes. Move to the relevant locations and turn the modes on and off.


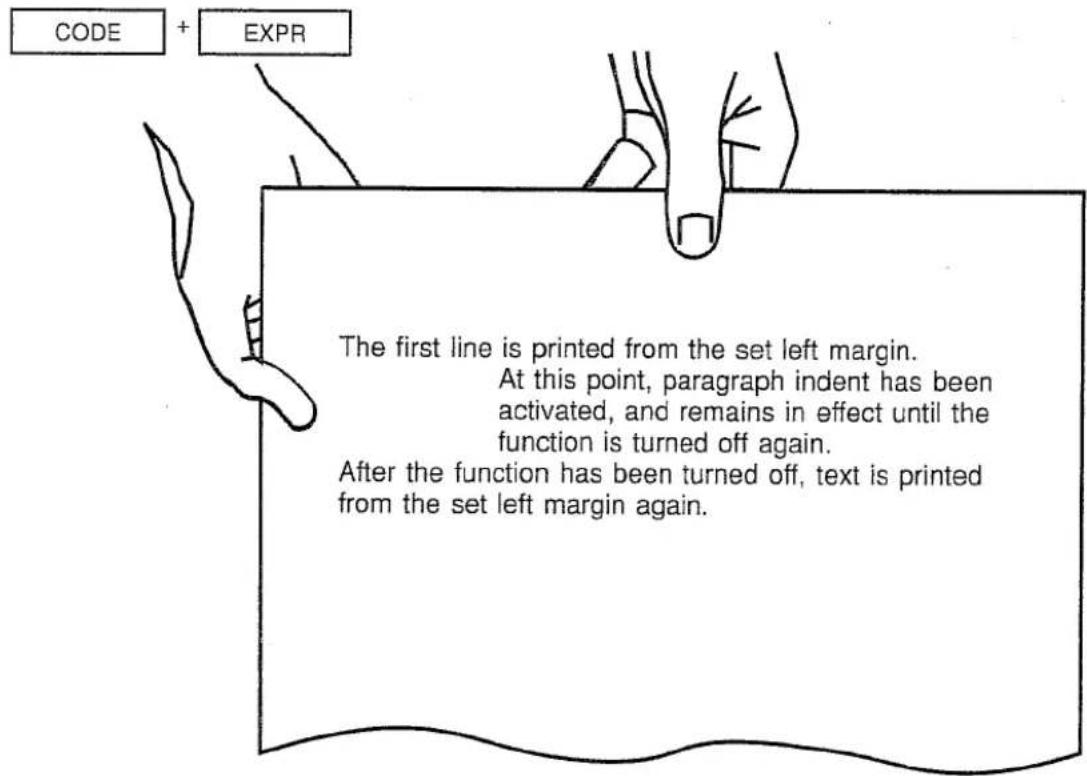
In order to emphasise certain passages of text, you can use the automatic paragraph indent function. The text is then printed with a indented left margin without altering the set left margin.
Set paragraph indent
- Move the cursor to the desired indent position
- Set the indent

Enter your text. End each line with a Return; the printer moves to the indent position on the next line until the function is turned off.
Clear paragraph indent
When the function is turned off, the cursor moves to the left margin.
Turn the function off

When the justified format function is turned on, text is printed with flush left and right margins, except in those lines where a protected space has been entered.
CODE + R JUST
The function is turned on/off
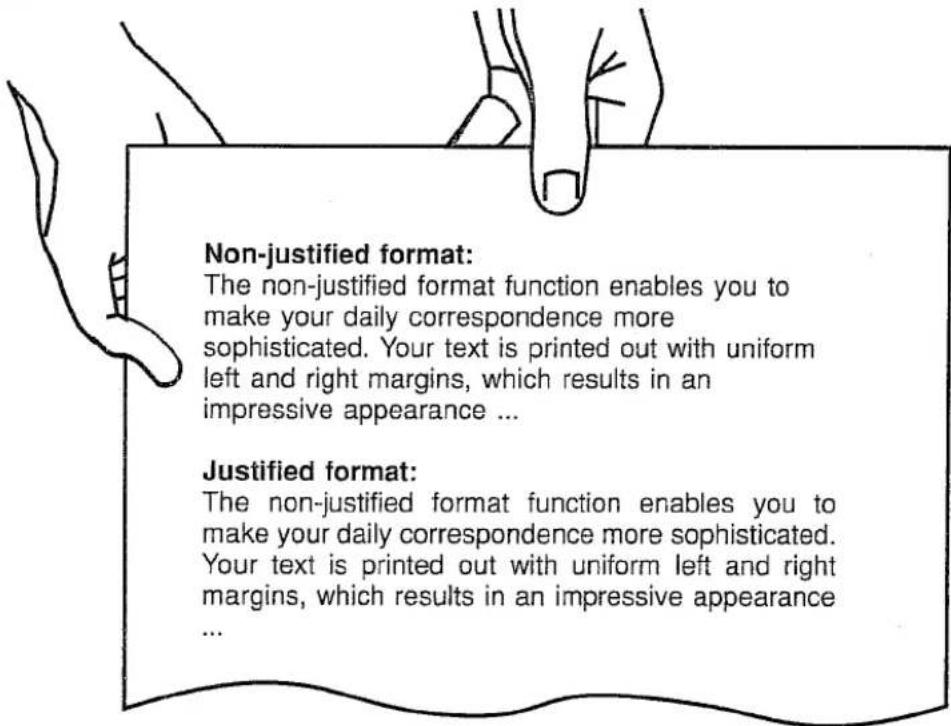



...
The various tab functions enable you to:
- type flush (aligned) to the left
- type flush to the right
- type columns of figures
- print vertical lines
Before setting any new tabs, press the key combination (described below) to clear all tabs currently set.
If tabs are set at the left margin or paragraph indent position, the printer moves to these positions directly after pressing the Return key. (This can be an advantage, for example, when printing a vertical line at these positions).
It is possible to combine all types of tabs within a text.
Exercises explaining the tab functions can be found in the section "Practical Applications".
Tab summary
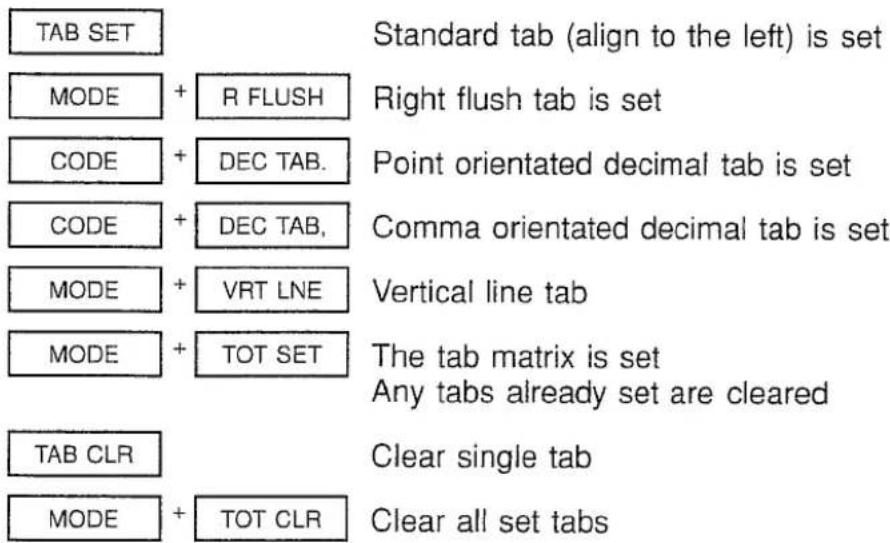
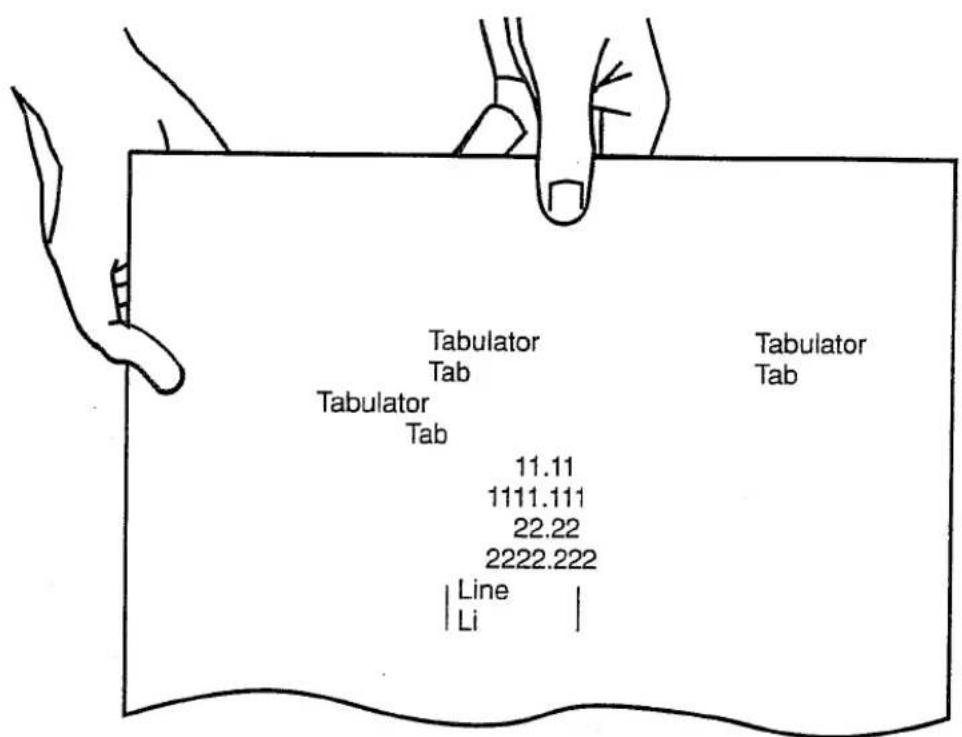

Standard tab
Enables you to type text aligned to the left.
- Move the printer to the desired tab position
- Set the tab
TAB SET
- Repeat the process to set more tabs, if necessary
- Move the printer to the left margin
CODE

EXPR

RETURN
- Move to tab
TAB
Printer moves to the first tab
- Enter text or figures
- Move to other tabs, if necessary
Right flush tab
Enables you to type text aligned to the right, e.g. for annotating graphics depicted on the right of a page.
- Move the printer to the desired tab position
- Set the right flush tab
MODE + R FLUSH
- Repeat the process to set more tabs, if necessary
- Move the printer to the left margin
CODE + EXPR or RETURN
- Move to tab
TAB
Printer moves to the first tab
FLUSH RIGHT ALIGNMENT
- Enter text or figures
- Move to other tabs, if necessary
■ Decimal tab (point orientated)
The decimal tab function enables you to type columns of figures with the decimal point aligned; i.e. the decimal points in the numbers 10.75 and 100.1 are aligned one under the other.
- Move the printer to the desired tab position
- Set the decimal point tab
CODE + DEC TAB.
- Repeat the process to set more tabs, if necessary
- Move the printer to the left margin
CODE + EXPR or RETURN
- Move to the tab
TAB
Printer moves to the first tab
DEC TAB ALIGNMENT (POINT)
- Enter text or figures
The figures are not printed out immediately, but after the complete number has been entered and the Return or Tab keys pressed.
- Move to other tabs, if necessary
■ Decimal tab (comma orientated)
The decimal tab function enables you to type columns of figures with the decimal comma aligned; i.e. the decimal commas in the numbers 10,75 and 100,1 are aligned one under the other.
- Move the printer to the desired tab position
- Set the decimal point tab
CODE + DEC TAB,
- Repeat the process to set more tabs, if necessary
- Move the printer to the left margin
CODE + EXPR or RETURN
- Move to the tab
TAB
Printer moves to tab
DEC TAB ALIGNMENT (COMMA)
- Enter text or figures
The figures are not printed out immediately, but after the complete number has been entered and the Return or Tab keys pressed. - Move to other tabs, if necessary
■ Vertical line tab
The vertical line tab, which automatically prints a vertical line at the set tab position, is a great help when typing tables. The length of the line is such that a continuous vertical line can be printed when single line spacing is used.
- Move the printer to the desired tab position
- Set the vertical line tab
MODE + VRT LNE
- Repeat the process to set more tabs, if necessary
- Move the printer to the left margin
CODE + EXPR or RETURN
- Move to the first tab
TAB
Printer moves to the tab and prints a vertical line
- Enter text or figures
- Move to other tabs, if necessary

Tab matrix
The tab matrix is of great assistance when typing tables, charts and forms, as tabs are automatically set at regular intervals on the line. Turn on the tab matrix, e.g. using 10 pitch, and a tab stop is set at every 5th position.
- Set the tab raster
MODE + TOT SET
Any tabs already set are cleared
- Move to tab
TAB
Clear single tab
- Move the printer to the tab position
TAB
- Clear the tab stop
TAB CLR
■ Clear vertical line tab
- Move to, and print, the vertical line
TAB
- Move to vertical line tab position
BK SP
- Clear the tab stop
TAB CLR
X
DP Clear the vertical line from the display
X
Clear all tabs
MODE + TOT CLR
The centering function enables text, words and characters to be centered:
- between the left and right margins,
- between two tabs,
- at any specified position in a line.
The control lamp illuminates when the function has been turned on.
■ Centering between the margins
The printer, or cursor, must be at the left margin.
The centering function remains on, even over several lines, until turned off.
- Turn centering on

- Enter the text
- Center the text
RETURN
Text is centered between the margins
- Turn the function off

■ Centering between two set tabs (line by line)
- Clear all set tabs

- Move the printer to the required tab position
- Set the tab stop
TAB SET
- Move the printer to the second tab position
- Set the tab stop
TAB SET
- Move the printer to the left margin

- Move to the first tab stop
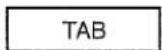
- Turn centering on


Text functions
Centering
- Enter text
- Center the text
RETURN
Text is centered between the tabs
- If necessary, center more text
Centering at a any position on a line (line by line)
- Move to the desired position
- Turn centering on
MODE + CENTER
CENTERING
- Enter the text
- Center the text
RETURN
Text is centered around the specified point
- If necessary, center more text
H.1 Files/Text blocks: storing, deleting, etc.
H.3 Chapter contents
H.4 Menus - general information
H.4 Call in a menu
H.4 Functions ON/OFF
H.4 Activate function and exit menu
H.5 Exit menu without changes
H.5 Exit submenu directly, without changes
H.6 Storing - general information
H.6 Working memory
H.6 Text memory
H.6 Disks (option)
H.7 Storing files
H.7 Store Menu
H.7 Exit Store Menu
H.7 Storing a file
H.7 Overwrite existing file
H.8 Delete text in the display (working memory)
H.8 Delete format from the working memory
H.9 Recall file to the working memory
H.9 The Recall Menu appears
H.9 Exit the Recall Menu
H.9 Recalling a file
H.10 Store and recall phrases
H.10 Storing a phrase
H.10 Recalling a phrase
H.11 . File management
H.11 Recall the File Menu
H.11 Exit from the File Menu
H.12 Format disk (option)
H.13 Delete file
H.13 Recall Delete Menu
H.13 Exit the Delete Menu
H.13 Delete files without request
H.14 Delete with request
H.14 Delete marked files
H.15 Rename file
H.15 Recall the Renaming Menu
H.15 Exit from Renaming Menu
H.15 Rename a file
H.16 Copy files (option)
H.16 Recall the Copy Menu
H.16 Exit from Copy menu
H.16 Copy from disk to text memory
H.17 Copy from the text memory to disk
H.17 Copy from disk to disk
H.19 List and transfer files
H.19 Recall Index Menu

Files/Text blocks: storing, deleting, etc.
| H.19 | Display file names |
| H.19 | Transfer file from the index |
| H.20 | Select file group |
| H.20 | Print file names |
| H.21 | Exit from Index Menu |
| H.21 | File names |
| H.22 | Text blocks |
| H.22 | Marking |
| H.22 | Move |
| H.23 | Copy |
| H.23 | Delete |
| H.23 |
Information
This chapter provides all you you need to know about the menus available:
- how to call them in
- how they are structured
- how to select and activate functions
There is also information on how to use the menus
- how to store a text as a file
- how to read in a file and edit it in the working memory
- how to manage the files; e.g. delete, rename, etc.
- how to mark passages of text (text blocks) and delete, move, copy or store them
natural_image
Simple line drawing of a table with two legs and a central horizontal bar (no text or symbols)

A "menu" is the name given to the range of selections which are automatically displayed when certain functions are activated.
When a menu is recalled, the selection possibilities appear in the Status/Menu Line; the bottom line in the display.
When you select an item from certain menus, a second range of selections appears; this is called a "submenu".
The text is shown in the upper lines of the display.....
FILE NAME INDEX □ MEMORY DISK ASCII
FILE NAME - Enter the relevant file name INDEX - List the files available, and transfer With disk drive: MEMORY - Access to text memory ....

If your system does not have a disk drive, the menu items MEMORY, DISK and ASCII are blanked out.
Call in a menu
Menus are called in via specially allocated function keys, e.g.:
RECALL The Recall Menu appears CODE + STORE The Store Menu appears
Functions can the be activated, or submenus called in.
Functions ON/OFF
Functions which are currently on are marked with a □.
You can move to other functions and activate, or deactivate, them as required.
- Move to the function required
The function on which the cursor currently stands is marked by a >
- Turn the function On/Off
Spacebar
The function is marked, and the menu remains in the display
■ Activate function and exit menu
When a function has been selected, and is marked by a >, you can active the function and exit the menu in one process.
RETURN
Exit the menu, function selected is on
Exit menu without changes
You can exit from the menu without activating any changes made in the function selection.
ESC
■ Exit submenu directly, without changes
You can exit a submenu and return to the Editing Mode without activating any changes made.
CODE
+ ESC
The Editing Mode appears

Files/Text blocks: storing, deleting, etc.
Storing -general information
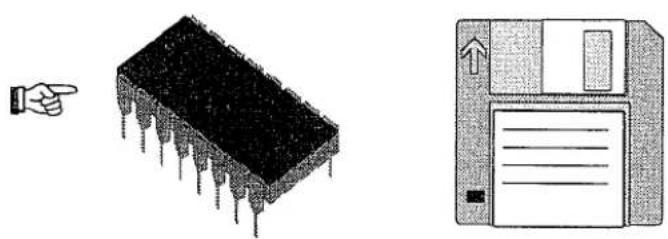
D DP-D You system is equipped with two (three including the disk drive option) memories in which to store text.
Working memory
This is the memory space in which text currently being created or edited is stored.
The display is virtually a window into the working memory.
When you turn the system off, the current text is automatically stored in the working memory.
When you turn the system on again, operating mode PD (Typewriter Mode) is automatically activated. If you then select operating mode D (Memory Mode) and answer the system request "DELETE TEXT" with NO, the text reappears in the display in exactly the same state as when the system was turned off.
Text memory
Texts can be allocated names and stored in the text memory as files.
When the STORE function is activated in the Store or Recall Menus, documents are stored in, or recalled from, this memory.
If your system is not equipped with the disk drive option, the text memory is automatically selected to store files.
The text memory is variable in size. It is part of one memory area which also contains the working memory, and their sizes influence each other. If, for instance, a large number of files are stored in the text memory, there is correspondingly less space in the working memory, and, vice versa, a large text in the working memory reduces the space available in the text memory.
The text memory can be extended. See your sales outlet for details.
Disks (option)
If your system is not equipped with a disk drive, one can be fitted. When a drive is fitted, you can store and recall your documents on disks. The storage capacity is thus unlimited.
When the DISK function is activated in the Store or Recall Menus, texts are stored on, or recalled from, the inserted disk.
■ Store Menu
D DP-D CODE + STORE The Store Menu appears
FILE NAME | INDEX | MEMORY | DISK | ASCII

FILE NAME
INDEX
With disk drive option:
MEMORY
DISK
ASCII
- Enter the relevant file name
- List names of stored files, and transfer selections
- Select access to the text memory
- Select access to the disk
- Select IBM ASCII format
The text is stored as an IBM ASCII file.
Any horizontal format and layout commands (e.g.
centering, tab stops, indents, etc.) are retained. However, vertical format commands (e.g. line spacing, half line movement, etc.) are deleted.

■ Exit Store Menu
ESC
■ Storing a file
- Enter a file name or select "INDEX" (see "List Files and Transfer")
- (Only with disk drive) Select access to memory or drive

- Store the file
RETURN
■ Overwrite existing file
If the file name you enter already exists in that memory, a message appears in the display:
ALREADY EXISTS; OVERWRITE ? ...
Select YES and confirm
The existing file contents are overwritten with the new text
Delete text in the display (working memory)
After storing in the text memory (or on disk), the system asks whether the text should be deleted from the working memory.
DELETE TEXT ? ...
Select YES or NO and confirm

NO - Text remains in the working memory
YES - Working memory is deleted
Delete format from the working memory
If the text you have just stored contains format settings (margins, tabs, etc.) which will not be required for following work, they must be deleted from the working memory.
To do this, the text must be cleared from the display.
- ESC
DELETE FORMAT ? ...
- Select YES or NO and confirm
NO - The format remains in the working memory YES - The set format is deleted; the A4 format is reset

Texts, stored as a file in the text memory or on a disk (option), can be recalled to the working memory and edited.
■ The Recall Menu appears

RECALL
The Recall Menu appear:


FILE NAME: - Enter the relevant file name
INDEX - List names of stored files, and transfer selections
With disk drive option:
MEMORY - Select access to the text memory
DISK - Select access to the disk
Exit the Recall Menu

■ Recalling a file
- Enter a file name or select "INDEX" (see "List Files and Transfer")
- (Only with disk drive) Select access to memory or drive

- Recall the file
If the file cannot be found, the following message appears:
FILE DOES NOT EXIST!
It is possible that you entered the correct file name, but with the wrong extension (letters following the file name).
Press the ESC key and the file name appears with a different, existing extension. Press the cursor keys to scroll through the file name with varying extensions.
When the file you require appears, press the Return key to start the recall process.
Press the ESC key to cancel the function.

D Often required short texts (e.g. "Yours faithfully", "With regard to your letter", etc.) can be stored as "constants". The file names for these constants may only consist of a single letter (A-Z).
When recalled, the constant is read in at the cursor position and formatted, if necessary.
Storing a phrase
- Enter the constant
- Recall the Store Menu
CODE + STORE
The Store Menu appears
- Enter the constant name (single letter), or select INDEX (see "List Files and Transfer")
- Select memory/disk access and confirm
Spacebar
Spacebar
5. Store the constant
RETURN
■ Recalling a phrase
- Move the cursor to the desired location in the text
- Call in the Phrase Menu

ENTER CONSTANT ! | *** RECALL CONSTANT ***
- Enter the file name (single letter), or select INDEX (see "List Files and Transfer")
- Select memory/disk access and confirm

- Recall the constant
RETURN
The constant appears at the cursor position
D This section describes the various menus and submenus available for use with the files you have stored.
You can format disks directly, or call in other menus to speed up or organise your work.
■ Recall the File Menu
- CODE + FILE-M The File Menu appears
) DELETE RENAME COPY FORMAT DISK

DELETE - Call in the Delete Menu RENAME - Call in the Rename Menu With disk drive option: COPY - Call in the Copy Menu FORMAT DISK
Exit from the File Menu
ESC

Files/Text blocks: storing, deleting, etc.
Format disk (option)

The formatting program is contained on the disk supplied and must be loaded into the system. After loading, the formatting program is automatically copied onto the working disk (the disk you will eventually use to store files).
- Insert the disk containing the formatting program in the disk drive.
- Recall the File Menu
CODE + FILE-M
The File Menu appears
- Select FORMAT DISK and confirm
← → RETURN
Formatting program is loaded
INSERT NEW DISK ....
- Remove the disk containing the formatting program
- Insert the new disk to be formatted in the drive
- Select YES and confirm
← → RETURN
PLEASE WAIT
Instructions to be followed appear in the display.
D If they are no longer needed, you can delete files stored in the text memory or on disk (option).
■ Recall Delete Menu
- Recall the File Menu
CODE + FILE-M The File Menu appears
- Select DELETE and confirm
← → RETURN The Delete Menu appears
FILE NAME: | INDEX | ☐ REQUEST | ☐ MEMORY | DISK
(No text)
FILE NAME
- Enter the relevant file name Substitute symbols (? and *) for characters can be used. See "File names" for explanations of their use.
INDEX
- List the names of stored files, and transfer selections
REQUEST
- Activate safety prompting before deletion
With disk drive option:
MEMORY
- Select access to the memory
DISK
- Select access to the disk
Exit the Delete Menu
ESC
■ Delete files without request
-
Enter the relevant file name or substitute characters with * and ? or select INDEX for the file name directory (see "List files and Transfer")
-
Select memory/disk access and confirm
Spacebar
- Confirm entry
RETURN
By entering substitute characters, groups of files can be selected (e.g. by entering *.FOR, all files ending with .FOR are deleted)
- Select YES and confirm
File/File group is deleted
Delete with request
- Enter the relevant file name
or substitute characters with * and ?
or select INDEX for the file name directory (see "List files and Transfer")
- Select memory/disk access and confirm
- Confirm entry
By entering substitute characters, groups of files can be selected (e.g. by entering *.FOR, all files ending with .FOR are deleted)
- Select YES or NO and confirm
YES - File is deleted
NO - File is retained
- Select access to memory/disk (only with disk drive option)
-
Select "INDEX" and mark the relevant files (see "List Files and Transfer")
-
Confirm entry
DELETE MARKED FILES ? ....
- Select YES or NO and confirm
YES - Marked file is deleted
NO - Marked file is retained
D DP-D Files stored in the text memory or on a disk (option) can be renamed.
■ Recall the Renaming Menu
- Recall the File Menu
CODE + FILE-M The File Menu appears
- Select RENAME and confirm
← → RETURN The Renaming Menu appears
OLD FILE NAME INDEX MEMORY DISK
[NO TEXT]
OLD FILE NAME - Enter the relevant file name
INDEX - List the names of stored files, and transfer selections
With disk drive option:
MEMORY - Select access to text memory
DISK - Select access to disk
■ Exit from Renaming Menu
ESC
Rename a file
-
Enter the name of the file you wish to rename, or select INDEX (see "List Files and Transfer")
-
Select access to memory or disk (only with disk drive option)
Spacebar
- Confirm entry
RETURN » NEW FILE NAME:
-
Enter the new file name
-
Confirm the entry
RETURN File is renamed » OLD FILE NAME:
- Rename other files, if necessary

Files/Text blocks: storing, deleting, etc.
Copy files (option)
D Stored files can be copied: DP-D - from a disk to the text memory - from the text memory to a disk - from a disk to another disk
! If you copy to file names which already exist, the existing file content will be overwritten, without a safety prompt.
■ Recall the Copy Menu
- Recall the File Menu
CODE + FILE-M The File Menu appears
- Select COPY and confirm
← → RETURN The Copy Menu appears
FILE NAME INDEX MEMORY DISK

FILE NAME
INDEX
MEMORY
DISK
- Enter the relevant file name
- List the stored file names, and transfer selections
- Select access to the text memory
- Select access to disk
Exit from Copy menu
ESC
■ Copy from disk to text memory
- Select access to DISK and confirm
-
Enter the relevant file name, with or without the substitute characters (? and *), or select INDEX and mark files (see "List Files and Transfer")
-
Confirm entry
RETURN
Destination Menu appears
PLEASE DEFINE DESTINATION
□ MEMORY
DISK
MEMORY
- Copy to the text memory
DISK
- Copy to disk
- Select MEMORY and confirm
PLEASE INSERT ORIGINAL/SOURCE DISK AND CONFIRM
- If necessary, insert original disk
RETURN
File/File group is copied
PLEASE WAIT ...
When copying is completed, the File menu reappears.
■ Copy from the text memory to disk
- Select access to MEMORY and confirm
-
Enter the relevant file name, with or without the substitute characters (? and *), or select INDEX and mark files (see "List Files and Transfer")
-
Confirm entry
PLEASE INSERT DESTINATION DISK AND CONFIRM
- If necessary, insert the desination disk and confirm
File/File group is copied
PLEASE WAIT ...
When copying is completed, the File Menu reappears.
■ Copy from disk to disk
The data is copied, firstly, to the text memory and from there onto another disk.
- Select access to DISK and confirm
-
Enter the relevant file name, with or without the substitute characters (? and *), or select INDEX and mark files (see "List Files and Transfer")
-
Confirm entry
The Destination Menu appears
PLEASE DEFINE DESTINATION
□ MEMORY
DISK
MEMORY
DISK
- Copy to the text memory
- Copy to the disk
- Select DISK and confirm
PLEASE INSERT ORIGINAL/SOURCE DISK AND CONFIRM
- If necessary, insert the original disk and confirm
PLEASE WAIT ... PLEASE INSERT DESTINATION DISK AND CONFIRM
- Insert the destination disk and confirm
PLEASE WAIT ... File/File group is copied
When copying is completed, the File Menu reappears.
If a number of files are to be copied, and the text memory has limited space (i.e. the data to be copied exceeds the amount of space in the text memory) the following message appears:
PLEASE INSERT ORIGINAL/SOURCE DISK AND CONFIRM
Repeat the above procedure until the copying process is completed.
D The Index Menu enables you to print or display the names of the files stored in the text memory or on disk.
■ Recall Index Menu
The Index Menu can be recalled from various menus.
From the Recall Menu:
-
RECALL The Recall Menu appears
-
(Only with disk drive option) Select access to memory or disk
-
Select INDEX and confirm
← → RETURN The directory appears
From the Store Menu:
-
CODE + STORE The Store Menu appears
-
(Only with disk drive option) Select access to memory or disk
-
Select INDEX and confirm
← → RETURN The directory appears
From a subsequent menu:
-
(Only with disk drive option) Select access to memory or disk
-
Select INDEX and confirm

MEMORY AVAILABLE: 19181 (↓)
■ Display file names
The display shows first the memory space available, then the list of file names in four columns.
Scroll line by line, forwards and backwards.
Transfer file from the index
Files can be selected from the index (directory) and transferred to the function which was previously chosen (e.g. to be deleted, renamed, etc.).
In order to delete or copy files, you can mark up to ten files in the first ten lines.
The cursor blinks on the first letter of the file name selected. A marked file name is indicated by a black rectangle beside the file name.

Selection:
Select file name and confirm

File is transferred
The previously selected function is started
Select and mark (delete or copy):
- Select file name
- Mark file name
Black cursor appears to the right of the file name
-
Select and mark other file names
-
Confirm marked file name
File names are transferred
The previously selected function is started
■ Select file group
If you want to select a group of files, instead of file names, call in the File Group Selection function.

The file group selection message appears
FILENAME OR FILEGROUP:
Enter the file name, with substitute characters * or ? for a file group (see "File Names").
Print file names
Two columns are printed showing the file names and sizes. At the end of the printout, information is provided on the number of files, and amount of occupied and free memory space.
The index is printed
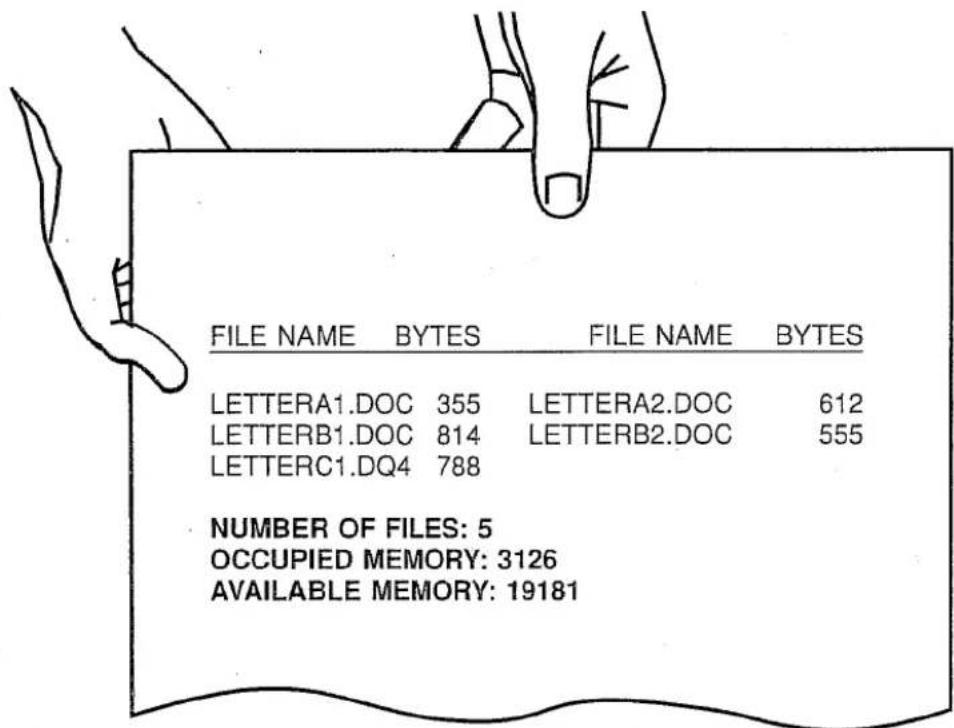
Exit from Index Menu
ESC
FILE NAME:
File names
A file name can be entered with or without an extension.
The extension serves to specify files into certain groups when storing and recalling (e.g. files with .DOC are documents, files with .ACC are accounts, etc.).
The file name can consist of up to 8 characters, followed by a point, then three extension characters (letters or digits). Unallowed characters are rejected and a BEEP is sounded.
Example:
.DOC Documents
.DLF Documents in landscape format
To simplify the selection of file groups, the substitute symbols * and ? can be entered, so that files need not be accessed singularly:
* An asterisk (*) replaces all subsequent characters in a file name. For example, in the following list, the entry LETTER*.* would recall all the files.
| LETTERA1.DOC |
| LETTERA2.DOC |
| LETTERB1.DOC |
| LETTERB2.DOC |
| LETTERC1.DLF |
| LETTERC2.DLF |
| LETTERD1.DLF |
| LETTERD2.DLF |
? A question mark (?) replaces any character at that position within a file name. For example, in the above list, the entry LETTER?1.* would select the following file group:
| LETTERA1.DOC |
| LETTERB1.DOC |
| LETTERC1.DLF |
| LETTERD1.DLF |


D Within a text, a passage of text can be marked with beginning and end markers.
This is called a text block.
After a text block has been marked, the Marking Menu appears, whereby the text block can be moved, copied, stored, deleted or printed.
Furthermore, a marked text block can be allocated print modes or centered.
Press ESC to exit from the Marking Menu.
Marking
The text block must be defined with beginning and end markers.
- Move the cursor to the beginning of the block required
- Set the beginning marker

SET SECOND MARKER
- Move the cursor to the end of the block required
- Set the end marker

The Marking Menu appears:
MOVE COPY
DELETE PRINT
MOVE COPY
- Move the text block to a different location within the text
- Copy (duplicate) the text block in a different location within the text or store as a file
- Delete the text block
- Print the text block
Move
This function enables you to move the text block to a different location within the text.
- Select MOVE and confirm

MOVE - DEFINE DESTINATION
- Move the cursor to the new location
- Activate the function
RETURN
The text block is moved
Copy
A text block can remain in its current location and be copied (duplicated) in another location.
- Select COPY and confirm

COPY - DEFINE DESTINATION OR STORE
-
Move the cursor to the new location
-
Activate the function
RETURN
The text lock is copied
Store text block
A text block can be stored as a file in the text memory or on disk.
- Select COPY and confirm

COPY - DEFINE DESTINATION OR STORE
- Recall the Store Menu

The Store Menu appears


FILE NAME: - Enter the relevant file name
INDEX - List stored file names, and transfer selections
With the disk drive option
MEMORY - Select access to text memory
DISK - Select access to disk
-
Enter the file name or select INDEX (see "List and Transfer Files")
-
(Only with disk drive option) Select access to the memory or disk

- Activate the function
RETURN
The text block is stored
Delete
You can mark a text block and delete it.
- Select DELETE and confirm
DELETE .....
- Activate the function
RETURN
The text block is deleted
A text block can be marked and printed out.
- Select PRINT and confirm

The text block is printed.

Files/Text blocks: storing, deleting, etc.
Text blocks
I.1 Editing formats and drafts
1.3 Chapter contents
1.4 Editing formats
1.4 Standard format
1.4 Editing formats
1.5 Vertical positioning set top margin
1.5 Set horizontal positions
1.6 Set line spacing
1.7 Set pitch
1.7 Automatic returns On/Off
1.7 Automatic pagination On/Off
1.7 Justified format On/Off
1.7 Conclude horizontal formatting
1.7 Vertical positioning set bottom margin and page length
1.7 Storing a format
1.8 Recall format
1.8 Change format within a text
1.8 Delete format changes
1.9 Reformat text
I.10 Automatic pagination (page control)
1.10 Protected page break
1.11 Stop code
1.11 Set stop codes
I.12 Completing texts containing stop codes
1.12 Delete stop code
I.12 Printout of text containing stop codes
I.13 Position code
I.13 Set position codes
I.14 Completing position codes
1.14 Delete position code
1.14 Print form with completed position codes

Editing formats and drafts
Information
This chapter provides information to simplify your work when you frequently need to use different formats.
As a basis, the "standard format" is always available.
When you need to type with varying
- margins,
- tabs,
- pitch settings,
- line spacing settings, etc.
the altered format settings can be stored as a file, and recalled as required before the text is entered.
This chapter also explains how to prepare drafts by using
- stop codes when the same basic letter must be issued to a number of people, whereby only a few passages of text vary
- position codes to prepare or fill out forms, etc., by defining specific positions on a page
natural_image
Simple line drawing of a table with two legs and a central vertical bar (no text or symbols)
Standard format
The standard format settings are always retained in the system. The values comply to specific country requirements; e.g.:
- Top margin 6 (first typing line from the top)
- Bottom margin 64 (last typing line from the top)
- Page length 70
- Left margin 10
- Right margin 75 (i.e. the typing line is 65 characters in 10 pitch)
- Tab matrix set
- Pitch 10
- Line spacing 1
Creation of a new format is based upon recalling these setting too the display, changing the values and storing them, if necessary.
■ Editing formats

In order to define a new format, change the standard format at the beginning of a text. The new settings must be defined; first the vertical settings (e.g. top margin, bottom margin, page length, etc.) then the horizontal settings (e.g. left and right margins, pitch, tabs, etc.).
To simplify entering the new settings, you can insert a master copy of the format required into the typewriter, then move to the format positions and set them. The actual line position is indicated at the right of the Status Line.
FORMAT LINE
TOP MARGIN ....
■ Vertical positioning set "top margin"
Move to the vertical positions with the following keys:
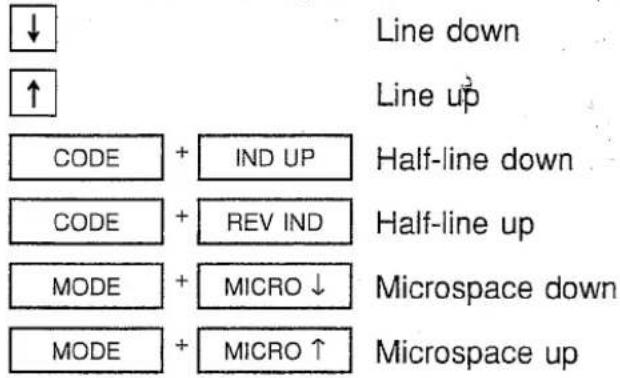
Top margin
- Move to the required vertical position with the above mentioned keys.
- Set the new top margin, or confirm the current setting.
RETURN
The Format Line appears
■ Set horizontal positions
The Format Line provides a visual display of the current tabs and left and right margins. The current cursor position, within the typing line, is indicated by a dark rectangle.
The symbols are explained in the following table.
| Symbol | Function |
| < | Left margin position |
| T_+ | Tab stop |
| D_T | Decimal tab (comma orientated) |
| D_T | Decimal tab (point orientated) |
| T_×| | Right flush tab |
| T_+| | Vertical line tab |
| > | Right margin position |
| Block cursor (printer position) | |
| | | Printer limit |

Move to the horizontal positions with the following keys:

Character to the left

Character to the right
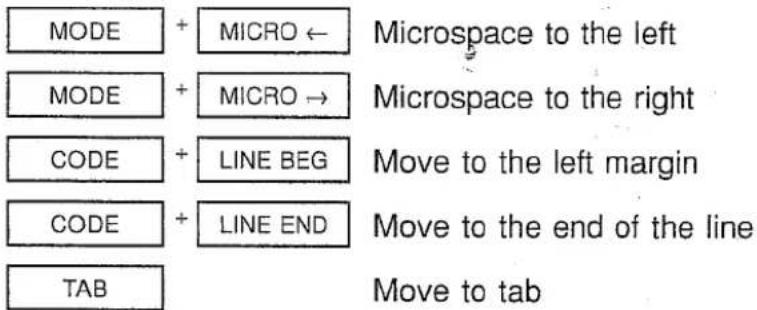
Set left margin
- Move to the required left margin position with the above mentioned keys.
- Set the left margin
CODE + LFT MAR
Set right margin
- Move to the required left margin position with the above mentioned keys.
- Set the right margin
CODE + RT MAR
Tabulation
Move to the desired tab positions with the above mentioned keys. When a tab is set, the corresponding tab symbol appears at that position in the Format Line. Individual tabs, or the preset tab matrix, can be set and cleared as required.
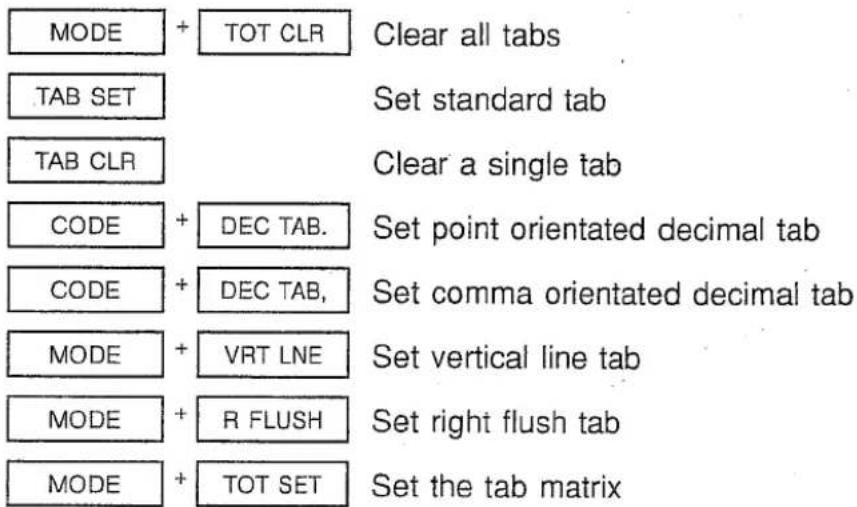
Set line spacing
MODE + 1
Set pitch
MODE + 2
Automatic returns On/Off
MODE + AUTO RET
■ Automatic pagination On/Off
MODE + AUTO PAG
Justified format On/Off
CODE + R JUST
Conclude horizontal formatting
RETURN
BOTTOM MARGIN ...
■ Vertical positioning set "bottom margin" and "page length"
Bottom margin
- Move to the required position with the keys previously described
- Set a new bottom margin, or confirm the current setting
RETURN
PAGE LENGTH ...
Set page length
- Move to the required position with the keys previously described
- Set a new page length, or confirm the current setting
RETURN
STORE FORMAT AS A FILE
YES | NO
Storing a format
The format currently active in the working memory can be stored as a file in the text memory or on a disk (option).
- Activate the store function Select YES and confirm
RETURN
The Store Menu for format files appears
| FILE NAME: | INDEX | □ MEMORY | DISK
(1) AD = BD = 1
FILE NAME - Enter the relevant file name INDEX - Recall the Index Menu
With the disk drive option:
MEMORY - Select access to the text memory DISK - Select access to the disk
- Enter the file name or select INDEX (see "Index")
- Select access to the memory or disk

- Store the format file
■ Recall format
A format can be recalled from the text memory or disk into the working memory. It must be recalled at the beginning of a text. (See "Recalling a File to the Working Memory").
■ Change format within a text
The horizontal format settings (tabs, margins, etc.) can be changed within a text. Changes made are valid from the cursor position, and the position within the text is indicated by the Format Line.
- Move the cursor to the left margin
- FORMAT LINE The Format Line appears
- Change the horizontal format settings
- RETURN Changed settings are transferred and take effect
■ Delete format changes
- Move the cursor to the Format Line
- FORMAT LINE
- DELETE ? ...
- Select YES and confirm ← RETURN The Format Line is cleared

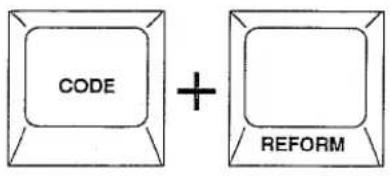

This function formats a complete text (document). It is useful, for example, when a file has been recalled into the new document, as the file content is formatted to comply to the current text.
If automatic returns, hyphenation and pagination are turned on, they are active during the formatting process.

Text is reformatted
PLEASE WAIT

Editing formats and drafts
Automatic pagination (page control)
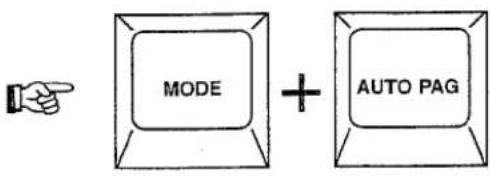
D The pagination function makes sure that the text entered, or text being formatted, conforms to the set page format (top margin, bottom margin, page length, etc.).
MODE + AUTO PAG The function is turned on/off
When the text extends beyond the bottom margin, the pagination function enters an unprotected page feed, indicated by a symbol:
■ Protected page break
If a page feed is required before the bottom margin has been reached, a protected page break must be entered. This is indicated in the display by a ↓ symbol.
CODE + PAGE IN/OUT


It often occurs that documents contain the same basic text, and only certain passages need to be changed (variable text), e.g. name, address, date, price, etc. In such cases, it is advantageous to write the text, and insert stop codes at those locations where variable text must be entered.
The length of text entered at a stop code position is not limited (as opposed to position codes described later).
Before entering stop codes, activate the control code display so you can see where the codes are set.
Set stop codes
- Create a text in the normal way
- At the first location where variable text should be entered, enter a stop code (▼)

-
You can enter a short comment, if necessary. The comment entered is not printed out, but serves as a reminder of the stop code purpose.
-
Mark the comment entered ([])
-
Continue entering text, and other stop codes, if necessary
-
Store the text containing the stop codes
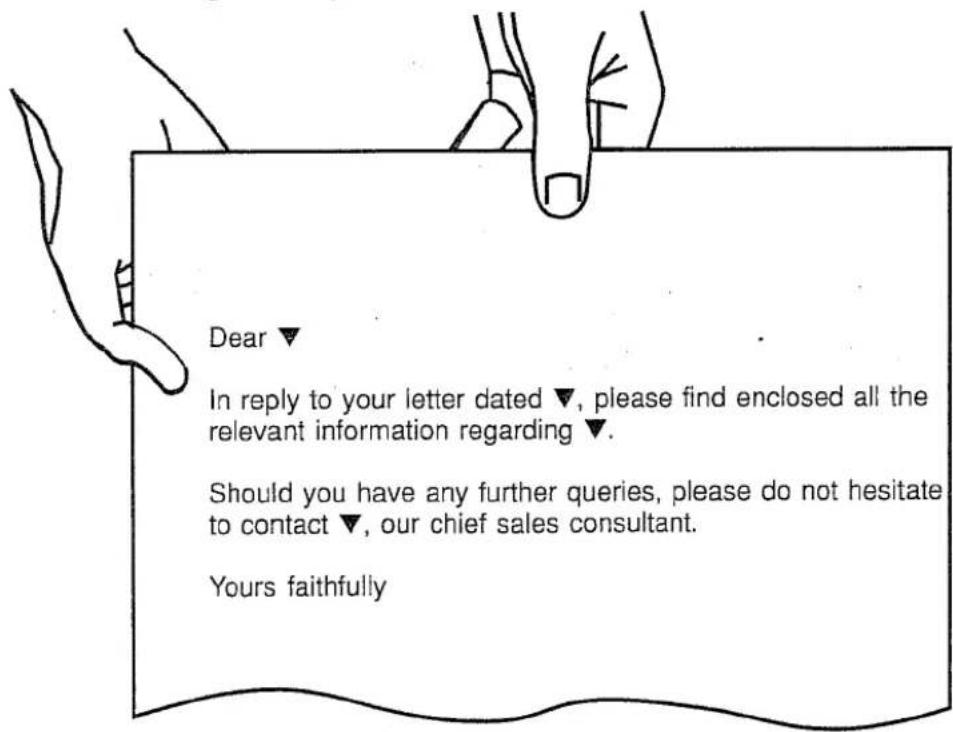

■ Completing texts containing stop codes
- Recall the stored text containing the stop codes
- Move to the stop code

Stop code is cleared

or
POSITION REACHED
- Enter the variable text
- Move to, and complete, other stop codes, if necessary
Delete stop code
- Move the cursor to the right of the stop*code
- Clear the prompt ([ ]), if present

- Delete the stop code (▼)

Printout of text containing stop codes
When a text containing stop codes is printed out, printing stops at the stop codes. The stop code is cleared, and the following message appears:

or
POSITION REACHED
- Enter the variable text
- Continue printing
The text entered is automatically formatted
If the document is printed again, printing does not stop at the stop codes.
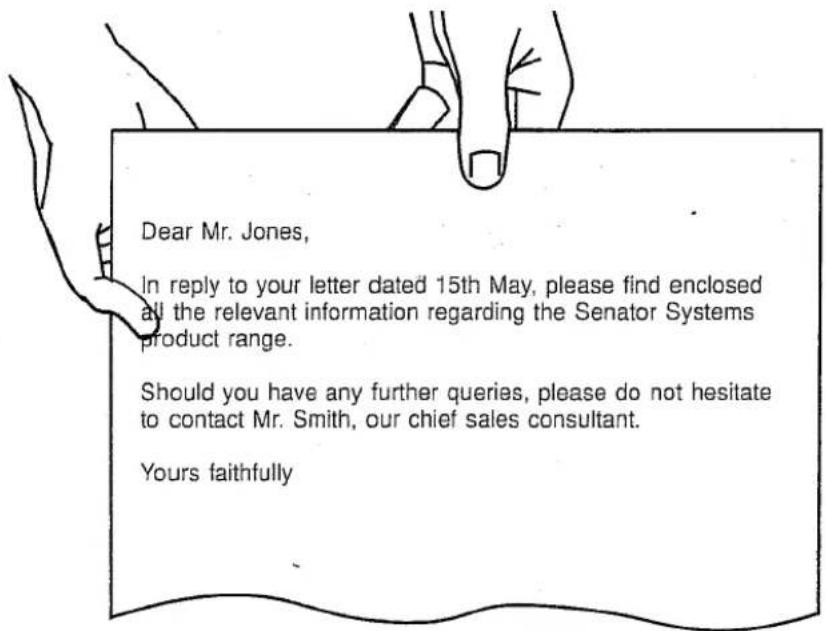

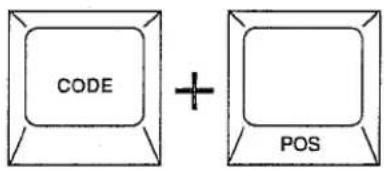
D Position codes define exact printer positions on a page.
They are useful when creating or filling out forms, whereby positions must be accurately set or reached and variable text entered.
Before entering position codes, activate the control code display so you can see where the codes are set, and simultaneous printer movement for accurate printer positioning.
Set position codes
- Insert the relevant form (master copy)
- Start to create the document in the normal way
- Move the printer accurately to the required position
- Set the position code

PLEASE ENTER PROMPT:
- You can enter a short comment, if necessary.
The comment entered is not printed out, but serves as a reminder of the stop code purpose.
- Mark the comment ([ ])
- Enter more position codes, if necessary
- Store the text containing the position codes
Draft form with position code locations
| Application Form-Technical Training- | ...... | |
| ...... | ||
| ...... | ||
| To ...... | ||
| Seminar | .... | |
| ...... | ||
| .... | ||
| From | .... | |
| To | ... | |
| Town | ... | |
| ...... | .... | |

Completing position codes
- Recall the text containing the position codes
- Move to the first position code

-
Enter text
-
Move to other position codes, if necessary
Delete position code
If you have entered a position code by mistake, you can delete it immediately. Avoid follow-up deletion of position codes; it is better to create the whole text/form again and reset the position codes.
- Move the cursor to the right of the position code
- Clear the prompt, if present

- Clear the position code

■ Print form with completed position codes
- Insert the relevant form
-
Recall the file containing the completed position codes or After completing the position codes, move the cursor to the start of the text MEM BEG
-
Start printout
Form with position codes completing
| Application Form-Technical Training- | ...... | |
| ...... | ||
| ...... | ||
| On ...... | ||
| Seminar MS-DOS | ...... | |
| ...... | ||
| ...... | ||
| From 04 02 92 | ...... | |
| To 08 02 92 | ||
| Town Wilhelmshaven | ||
| ...... ... ... | ...... | |
J.1 Other helpful functions
J.3 Chapter contents
J.4 Time/Date
J.4 Display time/date
J.4 Change time/date
J.5 Framing characters, sentences and texts
J.6 Defining frames
J.6 Recalling a stored frame
J.6 Frames with internal dividing lines
J.6 Create frame
J.7 Vertical lines
J.7 Horizontal lines
J.8 Frames with connecting lines
J.10 Impression strength (impact)
J.11 KB II function
J.12 Acoustic signal
J.12 Acoustic signal On/Off
J.12 Acoustic signal function control
J.13 Standardizing
J.13 Standardization without data retention
J.13 Standardization with data retention
J.14 End of ribbon
J.14 Cancel printout
J.14 Continue printing
J.15 ON LINE
J.15 Clear
J.16 Keystroke counter/timer function (KCT)
J.16 Activate timer and set test time
J.16 Start test
J.16 Interrupt test
J.16 End of test
J.16 Print test report
Information
This chapter summarises a variety of functions which, although not required every day, may be occasionally used to speed up certain tasks or suit your personal typing requirements.
For example, you can:
- Set the time and date and transfer them into a text
- Automatically frame a text, create tables with internal horizontal and vertical lines, link frames to produce flowcharts, etc.
- Turn off the acoustic signal, which accompanies certain functions
- Change the impression strength (impact) to suit the number of carbon copies required
- Connect your system to a computer
- Activate a typing test, and print the test report
- ...
natural_image
Simple line drawing of a table with two legs and a central vertical bar (no text or symbols)
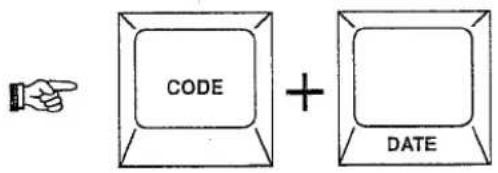
You can recall the time and date into the display, change it (if necessary) and transfer it into a text.
Display time/date
- Call the time/date into the display

- Turn the time/date display off
Change time/date
The time and date can be changed via the digit keys. Incomplete entries in the time are automatically completed with "0"s.
The time is displayed according to the 24-hour clock; e.g. 14:29:30.
This means 14:00 hours (2:00 p.m.): 29 minutes: 30 seconds.
The date is displayed in Day:Month:Year sequence.
Invalid entries are rejected and accompanied by a BEEP!
- Call the time/date into the display

- Enter the new time and/or select Date


-
Enter the date
-
Turn the time/date display off
Changes are confirmed, and take effect
or
Changes are not confirmed, old settings are retained
The date can be transferred into a text at the cursor, or printer, position.
- Move to the location required
- Transfer the date


This function enables characters, sentences, passages of text and tables to be framed.
Move to the corner positions for the frame with the cursor keys.

Also, text can be entered into stored frames, whereby the frame length can be increased with Returns to correspond to the amount of text entered.

aming characters, sentences and texts
The frame is printed flush with the text.
The printer position on turning the line framing function off is taken as a corner coordinate. Therefore, where the text extends over several lines, the last typing line must correspond to the longest line typed. If necessary, "fill out" the last typing line with spaces.
- Turn Line Framing on

-
Enter the text
-
Turn Line Framing off
CODE + L FRAME The text is framed
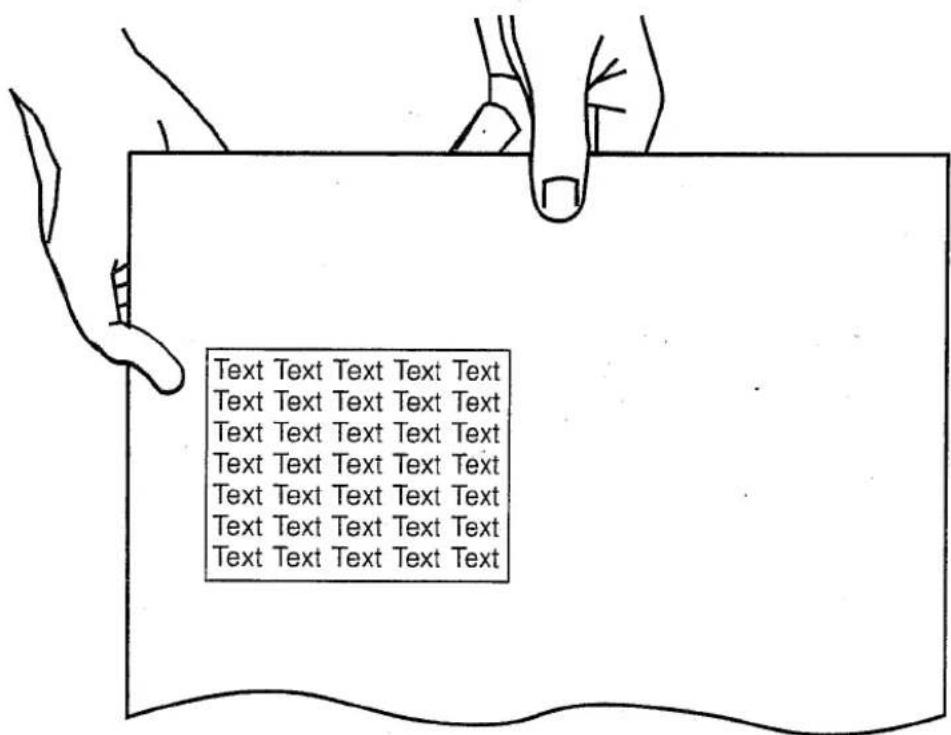

■ Defining frames
Frames are created by defining two coordinates (upper left and bottom right corners). The frame is automatically stored in the typewriter memory, and is retained until a new frame is defined or the paper in the machine is ejected. The stored frame can be printed as often as required on the same page.
- Move the printer to the top left corner position
- Turn Line Framing on

- Define the length of the frame
- Define the width of the frame

- Turn Line Framing off


- Store the defined frame

■ Recalling a stored frame
- Move the printer to the top left corner position
- Recall the defined frame

■ Frames with internal dividing lines

It is possible to draw vertical and horizontal dividing lines within a frame automatically.
■ Create frame
- Turn Line Framing on

- Define the length of the frame
- Define the width of the frame

- Turn Line Framing off

■ Vertical lines
- Move the printer to the desired position for a vertical line
- Turn Line Framing on

- Define a vertical line

- Turn Line Framing off

Horizontal lines
- Move the printer to the desired position for a horizontal line
- Turn Line Framing on

- Define a horizontal line

- Turn Line Framing off

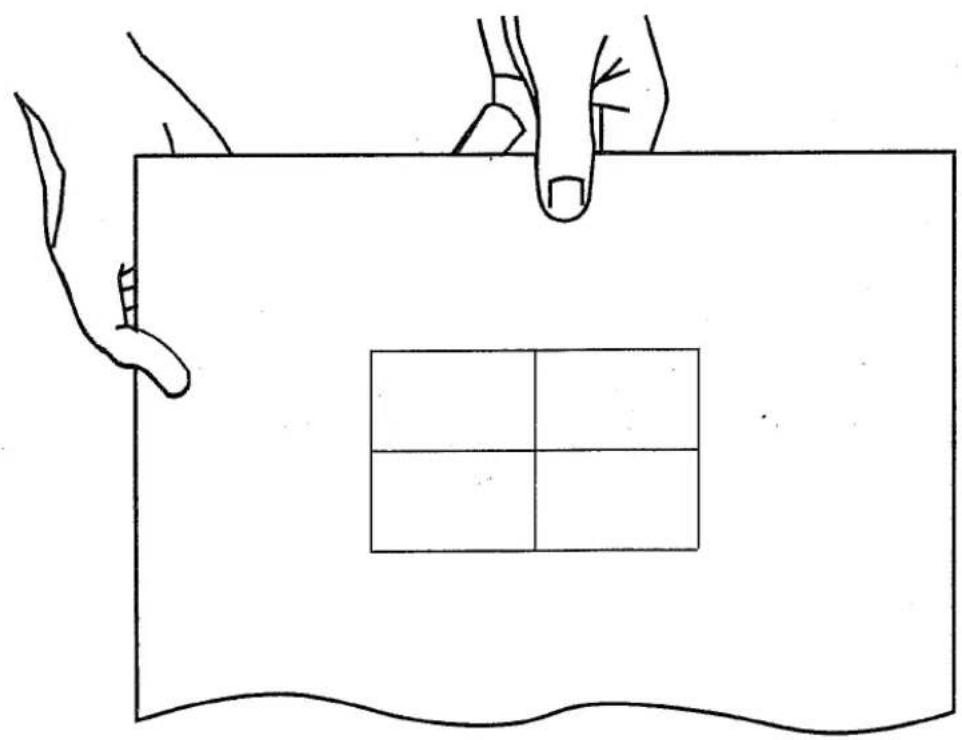
natural_image
Simple line drawing of two hands holding a blank rectangular box with a grid pattern (no text or symbols)
■ Frames with connecting lines
PD DP
- Move the printer to the position required for the first frame
- Turn line framing on

- Define the length of the frame
- Define the width of the frame

- Turn line framing off

Frame is printed
- Move the printer to the position required for the second frame

- Recall the defined frame

The second frame is printed
- Move the printer to the starting position for the horizontal connecting line
- Turn line framing on

- Move the printer to the right side of the first frame
- Turn line framing off

Horizontal line is printed
- Move the printer to the position required for the third frame
- Recall the defined frame

Third frame is printed
- Move the printer to the starting position for the vertical connecting line
- Turn line framing on

- Move the printer to the bottom side of the first frame
- Turn line framing off

Vertical-line is printed
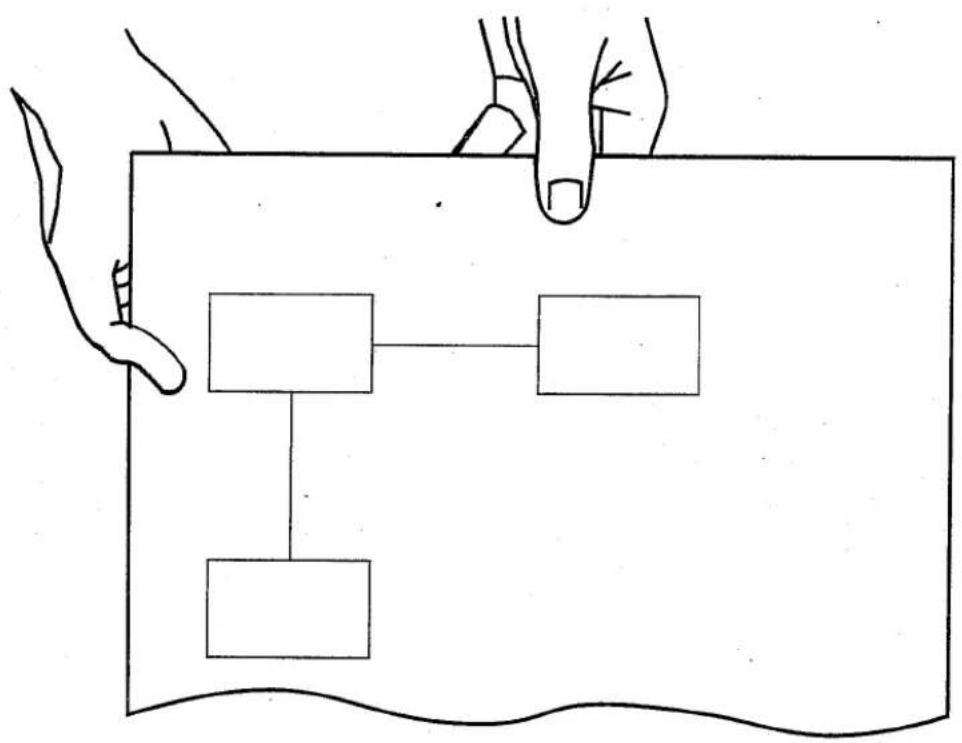
flowchart
graph TD
    A[" "] --> B[" "]
    C[" "] --> D[" "]


To achieve optimum print quality, select the impression suited to the printwheel (typestyle), paper used (hard or soft) and number of copies used.
Press the key combination to change the setting.
CODE + IMPACT Heavy impression on/off

The KB II function enables the keyboard to be used to type using an alternative printwheel (available as an option) which may contain characters from another language, chemical or mathematical symbols etc.
The alternative printwheels offered vary from country to country, so contact your sales outlet for details.
Switch to KB II and enter text
- Turn the KB II function on
CODE + KB II
-
Enter the text. The text appears in the display as a full raster.
-
Turn the KB II function off
CODE + KB II

Note
If you call in the Status Menu, by pressing CODE + STATUS, the symbol □ indicates whether this function is on, as well as other functions. You can change the current settings from within this menu.
Print text with KB II
If, when text was being entered, KB II was turned on or off, the printer stops at that position during printout.
The following message appears:
PLEASE INSERT THE DAISYWHEEL ....
-
Insert the printwheel required
-
Continue printing
RETURN RETURN

Warning:
The printwheel inserted must correspond to the keyboard.

An acoustic signal (BEEP) accompanies certain functions when turned on and off.
Acoustic signal On/Off
The standard setting is on, so that after standardisation the acoustic signal is activated,
Change the setting as follows.
- Turn the typewriter off
- □ Hold the key down and turn the machine on
■ Acoustic signal function control
Long BEEP
- Function is turned on
Short BEEP
- Function is turned off
Double BEEP
- Function selection is rejected
Standardization without data retention

Warning:
After standardizing, the typing system is reset to its so called initial state; i.e. the functions and settings, e.g. tabs, margins, print modes, etc., are the same as when the machine left the factory.
Warning: All files in the memory will be cleared.
-
Turn the typewriter off
-
CODE
Hold the key down and turn the typewriter on again
DELETE MEMORY ? YES NO
- Select YES and confirm
← → Spacebar RETURN
The system is standardised and all data is deleted
Standardization with data retention
After standardizing, the typing system is reset to its so called initial state; i.e. the functions and settings, e.g. tabs, margins, print modes, etc., are the same as when the machine left the factory. However, data in the memory is retained.
After standardisation, the system is in PD. If operating mode D is then activated, the cursor stands at the beginning of the last text entered. Carry out the reformatting function to ensure all the previously set functions are valid in the text.
-
Turn the typewriter off
-
CODE
Hold the key down and turn the typewriter on again
DELETE MEMORY ? YES NO
- Confirm NO
RETURN
The system is standardised and the data is retained

On reaching the end of the ribbon equipped with an end of ribbon sensor, the keyboard automatically blocks and printout stops. All entries (keyboard and communication) are rejected.
CHANGE RIBBON ...
Cancel printout
-
RETURN
-
Insert new ribbon (see section "Changing the Ribbon Cassette").
■ Continue printing
-
Insert new ribbon (see section "Changing the Ribbon Cassette").
-
Select CONTINUE
Spacebar
- Release keyboard, continue printing
RETURN


The typewriter can be connected to a computer via a Communication/Printer Box, which is available as an option.
If the On Line function is selected without a communication/printer box connected, the selection is rejected and two BEEPs are given.
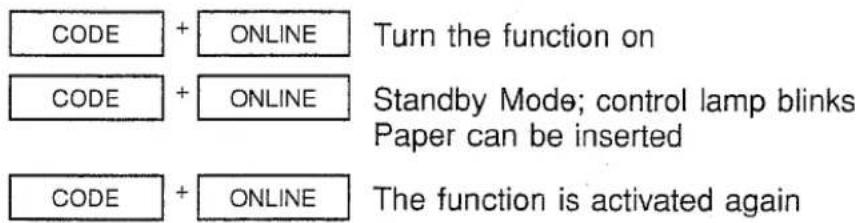
Clear
You can return to Typewriter Mode from the On Line standby mode.


Other helpful functions
Keystroke counter/timer function (KCT)

PD The typing test timer and test report printout functions simplify the analysis of typing tests.
First of all, you must set the test duration time. When started, all entries are registered and can be printed out as a report.
■ Activate timer and set test time
The test time (duration) can be set between 1 and 99 minutes. Enter the time via the digit keys.
- Activate timer function
-
Enter the test duration time
-
Confirm the entry
■ Start test
The test begins when the first function or character key is pressed.
Interrupt test
By pressing the key combination for the test report, the test can be prematurely cancelled.
1.
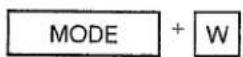
Test is cancelled. Report is printed
■ End of test
When the test time has elapsed, a BEEP is sounded and the keyboard is blocked. The keyboard is released when the test report has been printed.
■ Print test report
The test report is retained until the test timer is reset.
The report is printed in the following sequence, from left to right:
Test time|Strokes|Strokes/min.|Words/min.|Backspaces|Corrections
Example: 00003|00270|00090|00018|00003|00005
- Start printout
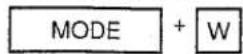
K.1 Practical applications
K.3 Chapter contents
K.5 Addressing envelopes
K.7 Writing business letters
K.9 Writing a business letter containing tables
K.11 Aligning figures

Information
This chapter contains examples so that you can practice using some of the many functions required in everyday work situations:
-addressing an envelope
-writing a business letter
-writing a business letter containing tables
- typing columns of figures
On the left page is a detailed description of the functions used, followed by the sequence in which the text and functions should be entered.
If a function must be used repeatedly, it is indicated by dots. On the right-hand page is the printed result of the text and functions entered.
The first application "Addressing Envelopes" is carried out in Typewriter Mode, the rest in Display Mode, using the standard format. The examples contain only suggested texts and need not be adhered to.
The example addresses and letters may vary from the standard form in your country. The exercises, however, only serve to show the possible uses for practice, and can be revised as required to suit individual needs.
natural_image
Simple line drawing of a table with two legs and a central vertical bar (no text or symbols)
Practical applications
Key entries for .....
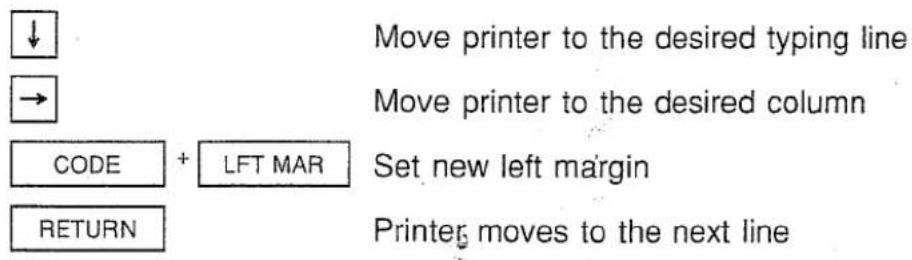
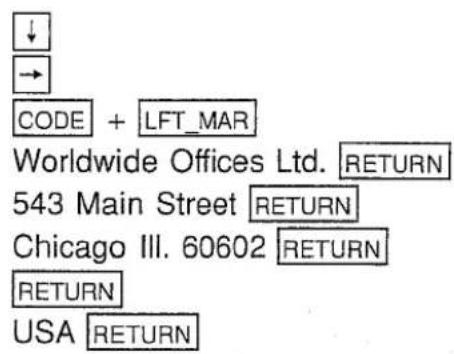
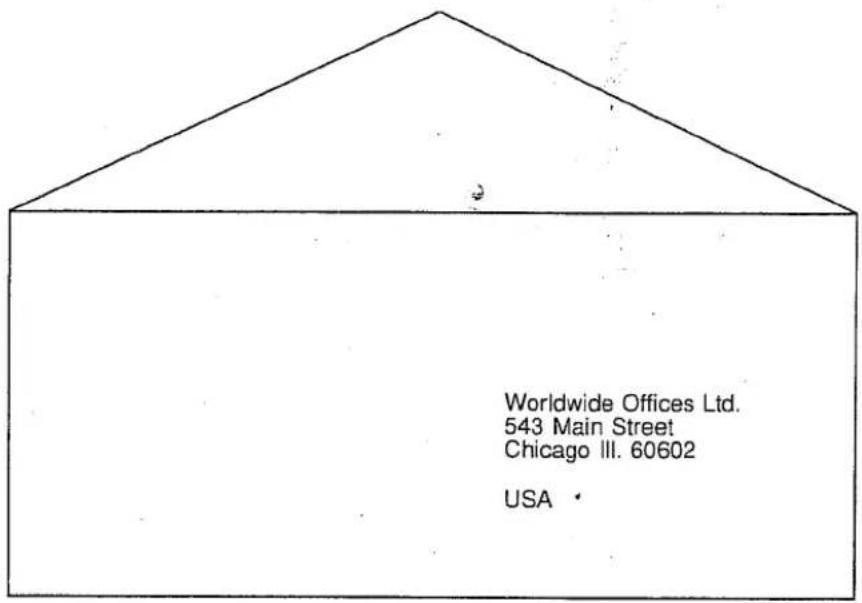

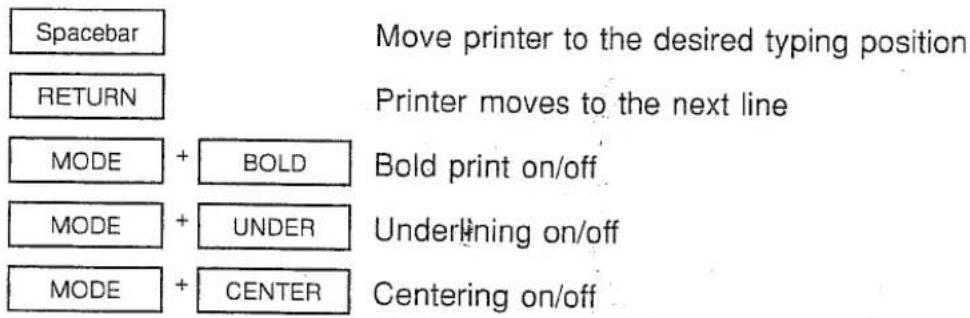
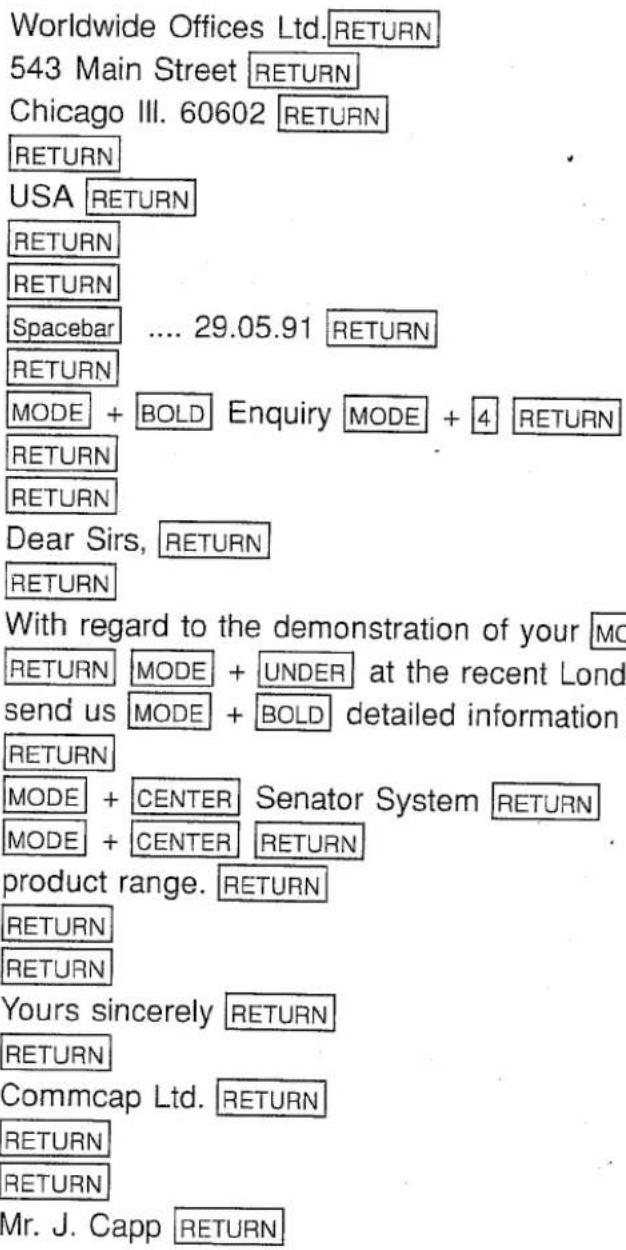
This business letter uses the following functions:
- Bold print
- Underlining
- Centering
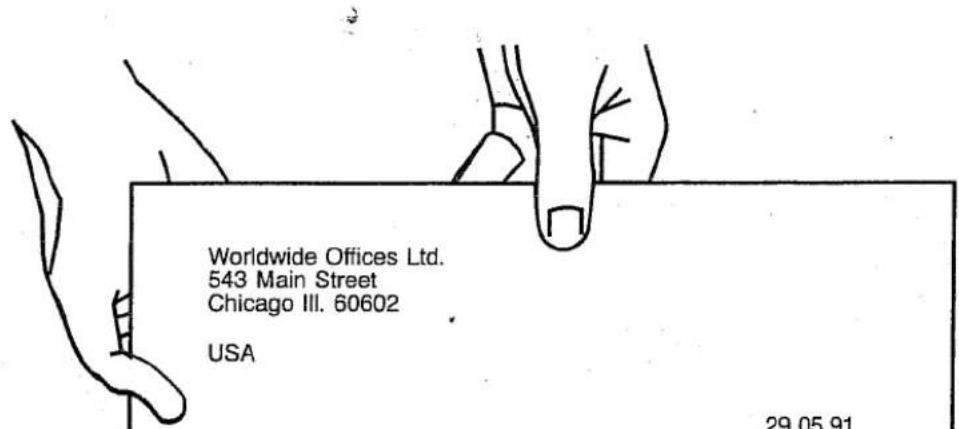
Worldwide Offices Ltd.
543 Main Street
Chicago III. 60602
USA
29.05.91
Enquiry
Dear Sirs,
With regard to the demonstration of your latest office equipment at the recent London exhibition, could you please send us detailed information on the
Senator System
product range.
Yours sincerely
Commcap Ltd.
Mr. J. Capp

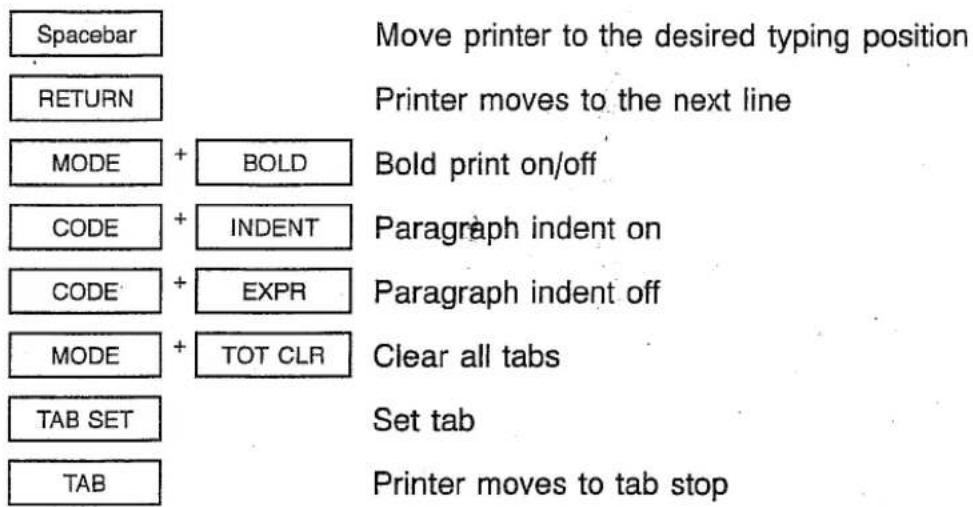
| Cloth Supply Ltd. RETURN |
| 21 High Road RETURN |
| Oldtown RETURN |
| Devon RETURN |
| RETURN |
| England RETURN |
| RETURN |
| Spacebar .... 29.05.91 RETURN |
| RETURN |
| MODE + BOLD Cloth Samples MODE + BOLD RETURN |
| RETURN |
| RETURN |
| Dear Sirs, RETURN |
| RETURN |
| We are very pleased to hear that your representative, Mr. Miller, RETURN will be visiting us this coming Friday. RETURN |
| RETURN |
| Spacebar .... CODE + INDENT Please ensure that he brings the cloth RETURN samples which we requested during his last visit. RETURN |
| As confirmation, they are listed below. CODE + EXPR RETURN |
| RETURN |
| MODE + TOT_CLR MODE + BOLD Cloth Spacebar ... TAB_SET Cloth No. Spacebar ... |
| TAB_SET Colour MODE + BOLD RETURN |
| Jersey TAB 721 TAB Green RETURN |
| Tweed TAB 334 TAB Grey RETURN |
| Flannel TAB 527 TAB Black RETURN |
| RETURN |
| Yours faithfully RETURN |
| RETURN |
| Sew and Sell Shop RETURN |
| RETURN |
| Mrs. A. Tailor RETURN |
This exercise uses the following functions:
- Bold print
- Paragraph indent
- Total tab clearance
- Set tab
- Move to tab
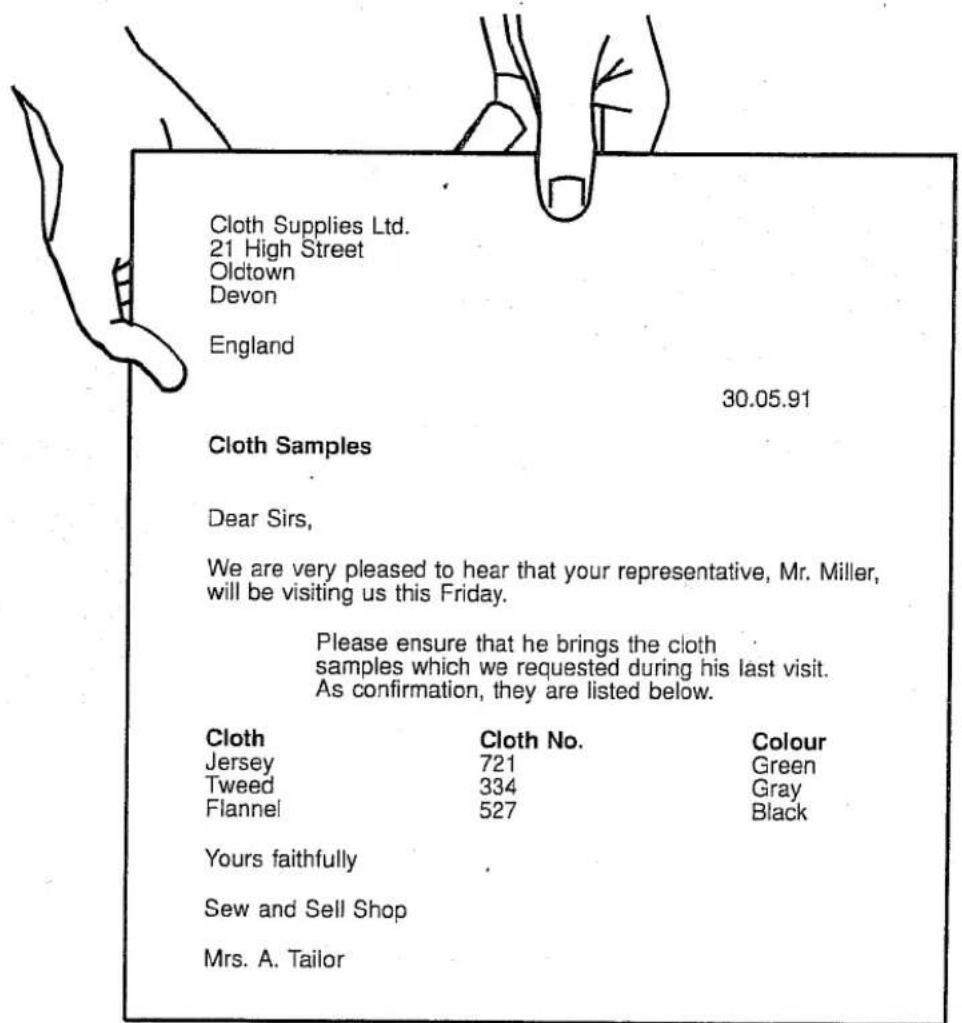

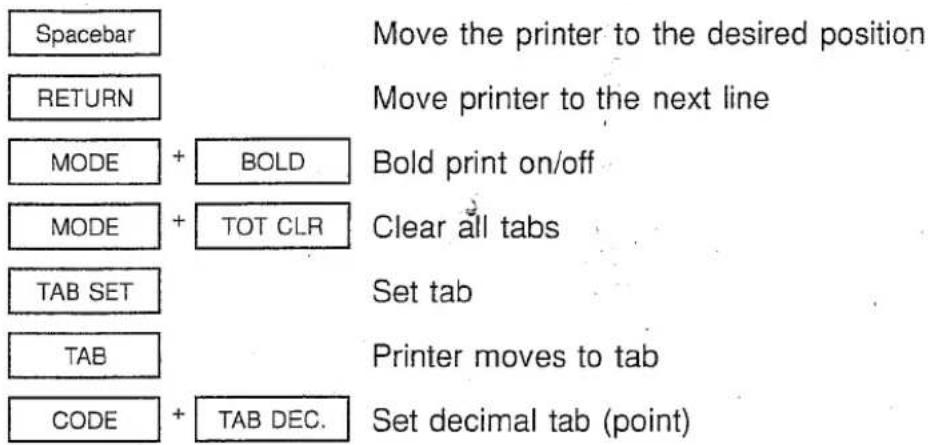
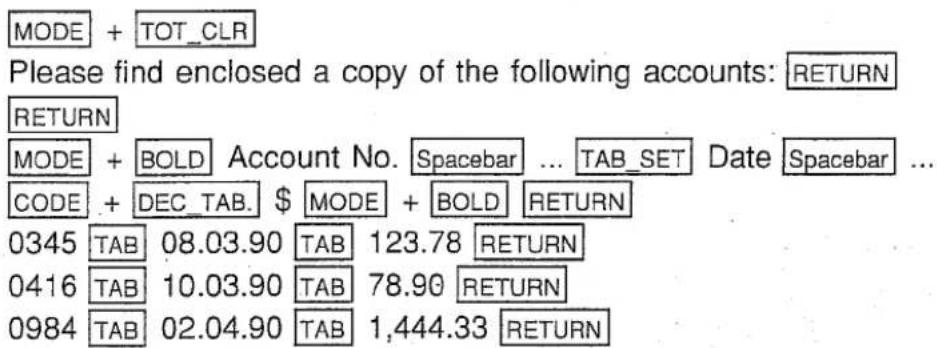
The exercise uses the following functions:
- Total tab clearance
- Bold print
- Set tab
- Set decimal tab (point)
- Move to tab
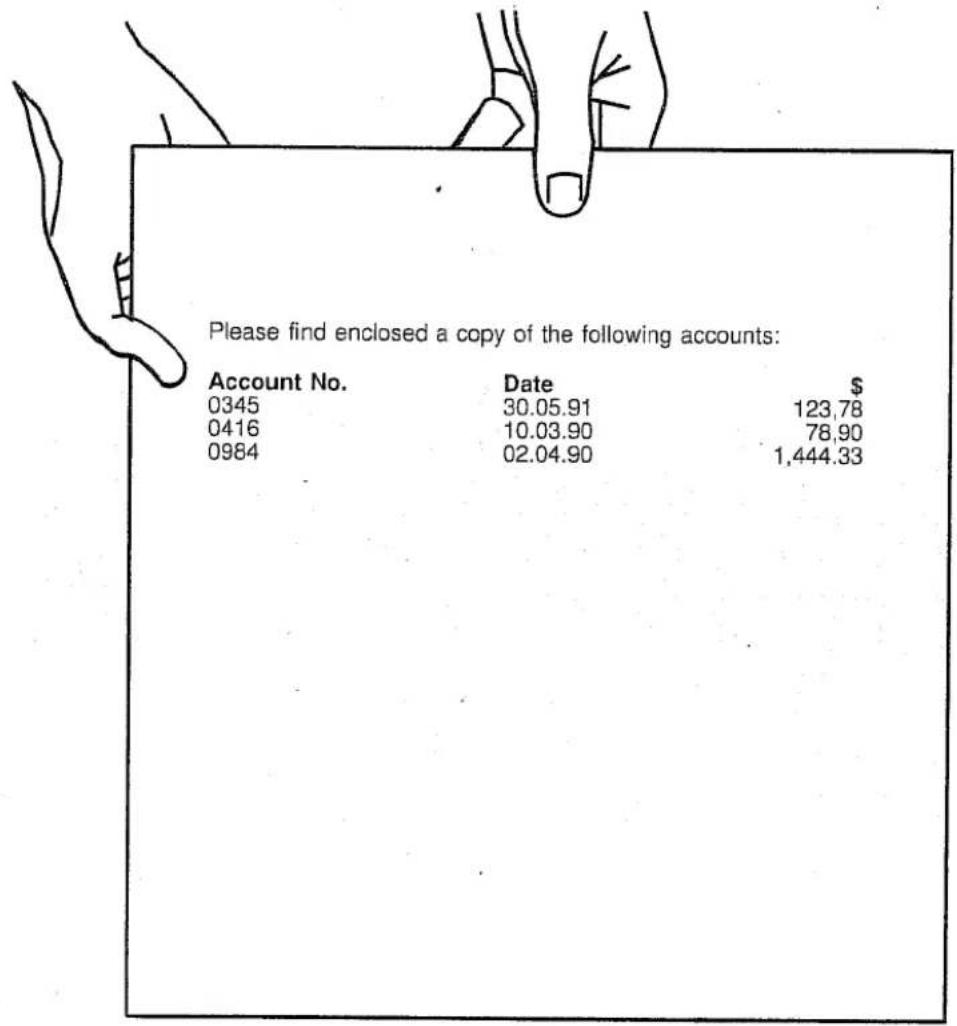

L.1 Maintenance
L.2 Cleaning
L.2 Upkeep
L.3 Ribbon cassettes
L.3 Changing the ribbon cassette
L.4 Ribbon cassette selection
L.5 Correction tapes
L.5 Changing the correction tape
L.6 Correction tape selection
L.7 Printwheels
L.7 Changing the printwheel
L.8 Typestyles/Printwheels available
L.8 Inscriptions on the printwheel
L.8 Printwheel selection
L.9 The platen
L.9 Removing and cleaning the platen
L.10 Disks (option)
L.10 Write protection
L.10 Inserting/Removing disks

Upkeep
Before cleaning the typing system housing, unplug the power cable.
Do not use solvents.
■ Changing the ribbon cassette
Draw the sliding cover forward and raise the paper bail.

It is easier when you first turn the machine off and move the printer to the middle.
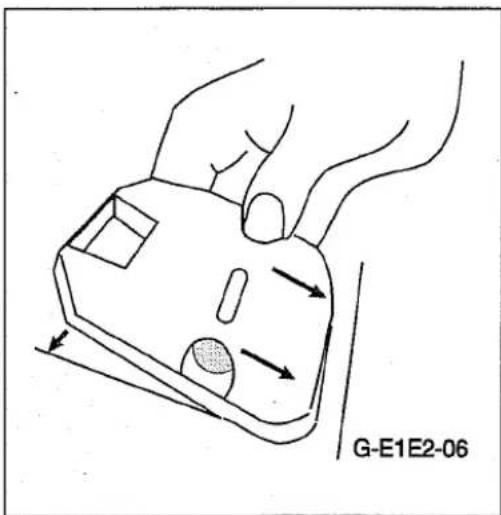
-
Lift up and remove the used cassette.
-
Insert a new ribbon cassette and press into place.
-
Lower the paper bail. Push the cover back into place.

■ Ribbon cassette selection
To guarantee problem-free carbon ribbon movement and high quality printout, we recommend the use of Olympia brand ribbon cassettes. Yields, and types of ribbon available, may vary depending on country 'of sale.
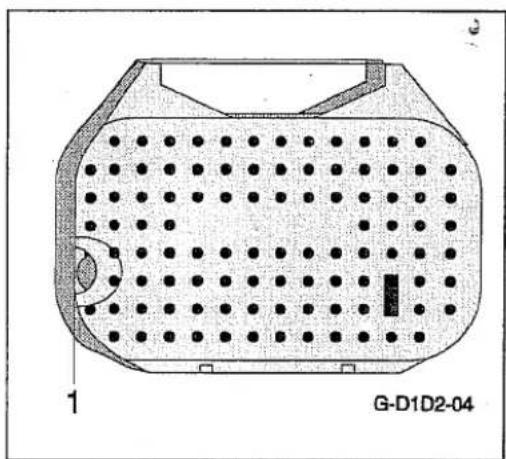
natural_image
Technical diagram of a perforated plastic component with labeled part G-D1D2-04 (no readable text or symbols beyond label)The colour of the winding wheel (1) indicates the type of ribbon.
-
Single-strike ribbon C (1 yellow)
-
for standard paper quality
- correctable (Lift-off)
-
approx. 85,000 keystrokes
-
Single-strike ribbon C -Long Type- (1 yellow)
-
for standard paper quality
- correctable (Lift-off)
-
approx. 105,000 keystrokes
-
Single-strike ribbon (Öko) - (1 yellow)
-
reusable cassette
- for standard paper quality
- correctable (Lift-off)
-
approx. 85,000 keystrokes
-
Single-strike ribbon (1 pink)
-
non-correctable (Lift-off)
- correctable (Cover up)
-
approx. 83,000 keystrokes
-
Multi-strike ribbon (1 blue)
-
non-correctable (Lift-off)
- economical
- correctable (Cover up)
-
approx. 320,000 keystrokes
-
Fabric ribbon (1 black)
-
non-correctable (Lift-off)
- economical
- correctable (Cover up)
- approx. 1,000,000 keystrokes
■ Changing the correction tape
Draw the sliding cover forward and raise the paper bail.

It is easier when you first turn the machine off and move the printer to the middle.
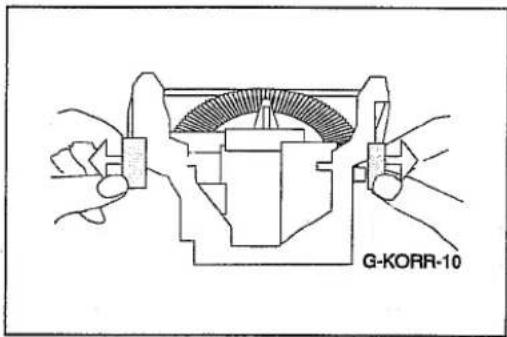
- Remove the ribbon cassette.
- Remove the correction tape spools from the shafts.
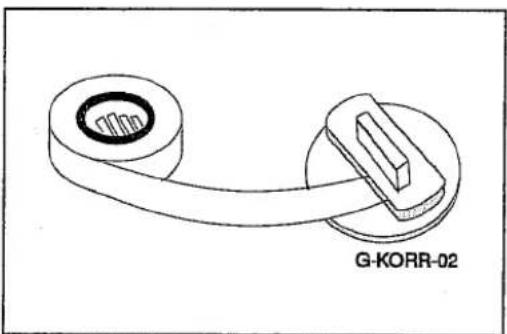
natural_image
Technical line drawing of a mechanical component with a curved arm and circular base (no text or symbols)- Wind out approx. 6 ins. (15 cm) of the new correction tape.

Sticky side to the platen.
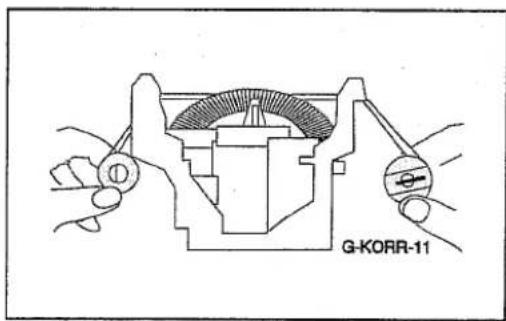
- Thread the tape through the guides (1).
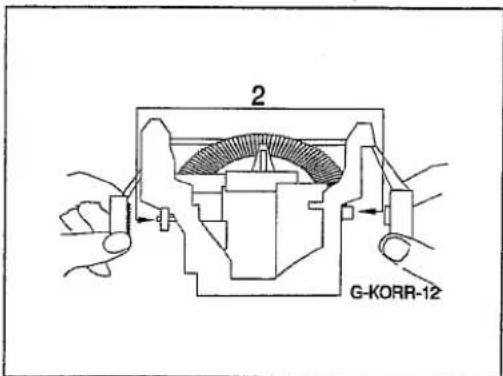
- Fit the spools on the shafts (2) and secure in place. Wind the right spool until the tape is taut.
- Replace the ribbon cassette, lower the paper bail and push the cover back into place.

Correction tape selection
The correction tapes from Olympia are designed for optimum use with the carbon ribbons. Types of tapes available varies depending on country of sale.
Draw the sliding cover forward and raise the paper bail.

It is easier when you first turn the machine off and move the printer to the middle.
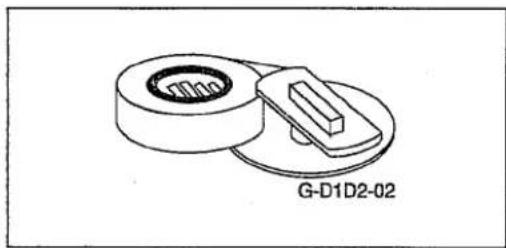
natural_image
Technical line drawing of a mechanical component with a bearing and housing (no text or symbols)- Lift-Off correction tape (for single-strike ribbon C)
-
for lift-off correction
-yellow spool (1) -
Cover-Up correction tape
- for cover-up correction
-
blue spool (1)
-
Cover-Up correction
- for cover-up correction using recycled paper
- blue spool (1)
Changing the printwheel
Draw the sliding cover forward and raise the paper bail.

It is easier when you first turn the machine off and move the printer to the middle.
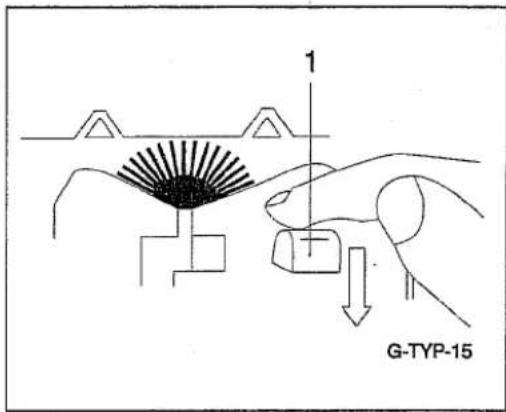
- Remove the ribbon cassette.
- Draw lever (1) forward as far as possible.
- Remove the printwheel.
- Insert the new printwheel:

inscription facing the platen.
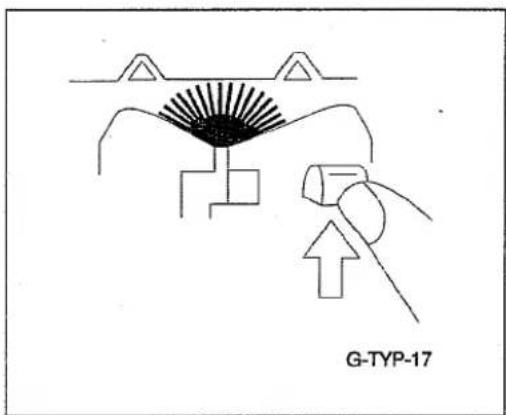
-
Push lever back until it clicks into place.
-
Replace the ribbon cassette, lower the paper bail and push the cover back into place.

■ Typestyles/Printwheels available
The range of printwheels available for your system is constantly being expanded to meet customer needs. Your sales outlet can give you exact details of the current range.
■ Inscriptions on the printwheel
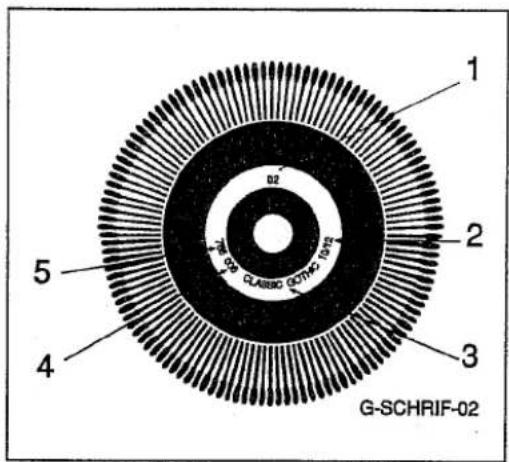
Inscriptions on the printwheel
- Serial number (1)
- Pitch (2)
- Name of typestyle (3)
- Number of typestyle (4)
- Language (5)
■ Printwheel selection
| Typestyle | Print sample | No. |
| Pica | Innovative Technik | 401 |
| Copy-Pica | Innovative office technology | 403 |
| Classic-Gothic | A la pointe des techniques | 408 |
| Carré-Picca | Técnica Innovadora | 410 |
| Micro | Innovativ Technik | 419 |
| Great Script | Innovative office technology | 423 |
| Large Gothic | A la pointe des techniques | 428 |
| Juwel-Congress, PS | Técnica Innovadora | 471 |
| Juwel-Modern, PS | Innovative Technik | 472 |
etc.
■ Removing and cleaning the platen
If, for any reason, you need to clean the typewriter platen, it can be removed very easily.
Draw the sliding cover forward and raise the paper bail.

It is easier when you first turn the machine off and move the printer to the middle.
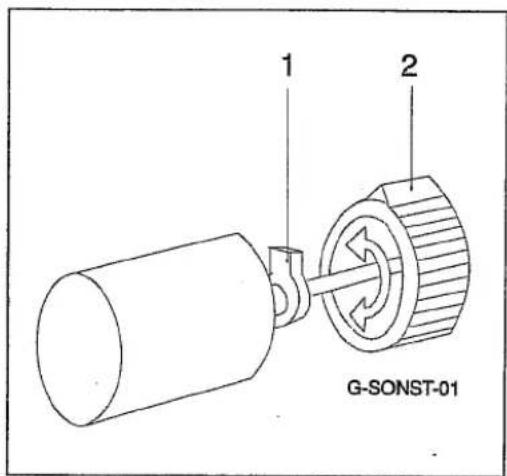
- The paper deflector lifts up with the paper bail.
- Turn the white platen clips (1) on both sides of the platen and turn them up to a vertical position.
- Lift out the platen.
-
After cleaning the platen, re-insert it:
-
Ensure that the platen clips (1) are in a vertical position
- Ensure that the paper release knob notch (2) is in a vertical position
-
Insert the platen.
-
Turn down and fasten the platen clips (1).
- Lower the paper deflector and paper bail.
Push the cover back into place.

The disk supplied with the system, if you have the disk drive option, contains the Formatting Program. In order to store documents, always have formatted disks handy.
When handling disks, take care of the following:
- Always remove disks from the drive after use. Never touch the surface of disks.
- Protect disks from dirt, dust, direct sunlight, extreme temperatures and humid conditions.
- Never expose disks to magnets or magnetic fields, and never place near radios, telephones or similar equipment.
- When the program is accessing the disk (see disk drive control lamp) do not remove the disk, and do not turn off the typewriter.
Write protection
Disks can be write protected, which prevents data being written on the disk but enables data to be read from it, via a small slide.
- Olympia label
- Disk opening "open" = write protected
- Disk opening "closed" = not write protected
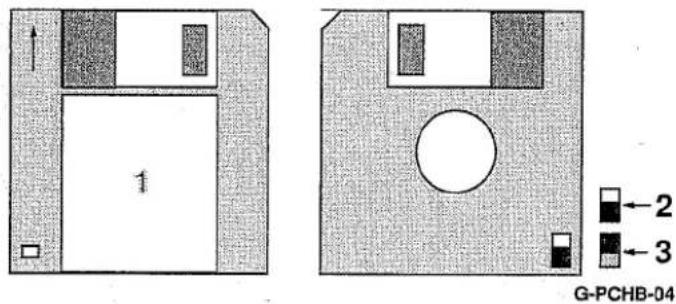
■ Inserting/Removing disks
Insert the disk in the drive and slide in until it clicks into place. Ensure that the disk write protection slide is on the same side as the disk drive control lamp.
To remove the disk, press the ejection button. The disk is partially ejected, and can then be removed by hand.
M.1 Technical Data and Explanation of Terminology
M.2 Technical Data
M.2 FCC text (applies to USA only)
M.3 Explanation of terminology
M.5 Reporting loss or damage
Technical Data and Explanation of Terminology
Technical Data
| Keyboard: | All typing key with repeat function via time loop |
| Printwheel: | 84 mm (3.3") ∅, 100 characters |
| Printing speed: | Max. 20 chars./sec. at 10 pitch |
| Paper feed: | Double coated platenMax. paper width: 360 mm (14.1")Typing width: 297 mm (11.7") |
| Electronics: | Controller electronics with microprocessor for printerVideo controller for display operationCorrection memory: approx. 200 characters (multi-line)Keyboard buffer: 16 characters |
| Data retention: | Storage of functions: margins and tabs,working memory and stored data approx. 5 years |
| Connections: | Olympia communications interface |
| Dimensions/Weight: | Height: 135 mm (5.3")Width: 498 mm (19.3")Depth: 426 mm (16.8")Weight: 8 kg (18 lbs) |
| Memory option: | 32 Kb/64 Kb |
| Text and | |
| Working memory: | 22 Kb/54 Kb |
| Safety tests: | Complies to EN60950(JEC950), GS-Zeichen |
| Voltage: | 110-120V/ 220-240 V |
| Frequency: | 50-60 Hz |
| Current: | 0.2 A |
■ FCC text (applies to USA only)
This Olympia equipment generates, uses and can radiate radio frequency. If it is not installed, and used in accordance with the operating instructions and the service manual it may interfere with radio or television reception. It has been tested and found to comply with the limits for a Class A computing device pursuant to Subpart J of Part 15 of Federal Communication Commission (FCC) rules, which are designed to provide reasonable protection against such interference when operated in a commercial environment. Operating this equipment in a residential area is likely to cause interference. In this case, the user is responsible for correcting the interference.
Technical Data and Explanation of Terminology
Explanation of terminology
| Bold print | Characters are printed twice staggered at 1/120. |
| Caps Lock | The alphabetical letters are locked in upper case (capitals), the other characters and symbols (digits, punctuation, etc) remain in lower case. |
| Centering | Texts and words are centered at a fixed centering position. The printer moves first to the centering stop, the text entered is not printed but aligned in the machine. Document is only printed out centered when either the return or tab keys are pressed. |
| CODE key | When pressed together with another key, certain functions are initiated. |
| Compatible | Fits together; can be combined |
| Cover-up tape | The cover-up correction tape has a layer of color on one side. This color covers the "incorrect" character on pressing the correction key. |
| Expand print | A space is added to each character (also to spaces). |
| Extension | The file name extension follows the actual file name to specify groups; e.g. file name: LETTER.FOR the extension is FOR which stands for the "format" group of files |
| Fabric ribbon | The fabric ribbon is a continuous loop in the ribbon cassette. The fabric ribbon can be used for as long as the user is satisfied with the strength of the imprint. |
| Keyboard buffer | Characters entered simultaneously will be accepted and printed out in the correct sequence. |
| Lift-off tape | The lift-off correction tape has one sticky side and upon impact removes the ink from the surface of the paper. |
| Line spacing | The printer moves to the left margin and to the next line when the RETURN key is pressed. |
| Margins | The margins are set electronically. On setting a new margin (left or right), the previous margin is automatically cleared. |
| Margin zone | A BEEP! is heard indicating that the end of the line is near. |
| Memory | Features which store work done on the system. It is divided into:- an area for the operating system- an area to store files (text memory)- an area to create and edit documents (working memory) |

Technical Data and Explanation of Terminology
Explanation of terminology
| ON LINE | Computer and typewriter are connected electronically to each other. |
| Printer box | The printer box communicates the data from the computer to the typewriter. |
| Proportional spacing | Proportional spacing makes it possible to type documents as if "printed", as each character is spaced in proportion to its size. |
| Relocate | The printer returns automatically to your last typing position after backspacing or making a correction. |
| Shift lock | The shift lock key locks the shift key electronically to allow for typing capitals. |
| Single-strike carbon ribbon | One side of the ribbon has a layer of carbon. The desired characters appear on paper due to this carbon layer. The carbon ribbon can only be used once. |
| Special print modes | To highlight certain passages of text. They consist of bold print, expanded print and underlining. |
| Substitute symbols | The symbols * and ? can be used to substitute characters within a file name (including extension) when you wish to display or print a specific group of files within the directory. A question mark (?) stands for any character at this position within a file name. An asterisk (*) stands for any characters from this position forward within a file name. |
| Tabulator | The printer moves directly to a preset tab. |
| Text/Format memory | Memory space in the system to store files. |
| Variable text | Texts which vary from letter to letter, such as name, address, etc. |
| Vertical line | On skipping to a previously set vertical line tab a vertical line is printed and the printer moves one space to the right. |
| Working memory | Memory area in which texts and formats can be created and edited. |
Instructions to be followed in case of loss or damage
(Failure to comply with these instructions may prejudice any claim under the policy).
Secure rights of recovery from third parties by immediately arranging for said loss or damage to be surveyed and certified by representatives of the transport undertaking concerned.
Externally apparent loss or damage must be certified by means of an appropriate notation in the way-bill before taking delivery of the goods. In the case of transport by rail, a factual report must in addition be requested from the competent railway authorities. In the case of postal sendings, it must be insured prior to taking delivery of damaged parcels, etc. that the damage is certified in writing by the competent postal authorities.
Where loss or damage is not externally apparent, i.e. it is not discovered until unpacking, the goods must be left in the state in which they were found and the transport undertaking concerned immediately requested in writing to certify the loss or damage.
It is imperative that the time-limits stipulated for requesting the transport undertaking to survey and certify loss or damage (lodging of claim) are strictly observed.
The time-limits in the Federal Republic of Germany are as follows:
- Postal sendings
- Rail transport
- Road transport
24 hours following receipt of the goods
7 days following receipt of the goods
6 days following receipt of the goods
In respect of shipments to countries outside the Federal Republic of Germany, the time-limits prescribed in the country of destination for filing claims against third parties - which generally correspond to the time-limits in Germany - must be observed.
As proof of claim, the following documents must be furnished to the insurers without delay:
a) The original invoice, together with the documents of carriage (original way -bill, original consignment note and the like).
b) Report of the competent claims survey agent where necessary.
c) Loss or damage certification by the transport undertaking in whose custody the goods were located at the time the loss or damage occurred, as follows:
-
Transport by rail: Certification by the railway authorities.
-
Postal sendings: Certification by the postal authorities.
-
Transport by road: Report of the driver, accompanied by the remarks of the carriers.
-
Transport by inland waterways: Casualty report of the master of the vessel.
-
Transport by air: Report of the airline company.
-
Storage: Report of the storage point operator.
d) A calculation of the total claim.
e) A written statement of subrogation to the insurers by the beneficiary under the contract of carriage.
Jurisdiction shall be restricted to either the place at which the certificate or policy was issued or the place at which underwriters have their Head Office.

Technical Data and Explanation of Terminology
Reporting loss or damage
Function, page
Acoustic signal, J.12
Acoustic signal function control, J.12
Acoustic signal On/Off, J.12
Activate function and exit menu, H.4
Activate timer and set test time, J.16
Addition cursor movement in Memory Mode, F.10
Automatic pagination (page control), 1.10
Automatic pagination On/Off, 1.7
Automatic print stop, F.14
Automatic returns, G.6,G.7
Automatic returns OFF, G.6
Automatic returns On/Off, 1.7
Block cursor (printer position), 1.5
Bold print, G.10
Bold print, K.7
Bottom margin, 1.7
Call in a menu, H.4
Centering, G.19
Centering, K.7
Centering at a any position on a line, G.20
Centering between the margins, G.19
Centering between two set tabs, G.19
Change format within a text, 1.8
Change margin settings, G.4
Change status, E.5
Change time/date, J.4
Changing the correction tape, L.5
Changing the printwheel, L.7
Changing the ribbon cassette, L.3
Character by character; F.9
Character to the left, 1.6
Character to the right, I.6
Cleaning, L.2
Clear, J.15
Clear all tabs, G.18
Clear single tab, G.18
Clear vertical line tab, G.18
Completing texts containing stop codes, I.12
Connection to the power supply, B.6
Control codes, F.4
Copy, H.23
Copy files (option), H.16
Copy from disk to disk, H.17
Copy from disk to text memory, H.16
Copy from the text memory to disk, H.17
Correcting words or parts of words, F.11
Correction tape selection, L.6
Correction tapes, L.5
Correction to the left, F.11
Corrections, in words already typed, F.12
Create new text or edit existing text, F.7
Decimal tab (comma orientated), G.17
Decimal tab (comma orientated) , 1.5
Decimal tab (point orientated), G.16
Decimal tab (point orientated) , 1.5
Defining frames, J.6
Delayed print (line by line), E.9
Delete, H.23
Delete file, H.13
Function, page
Delete files without request, H.13
Delete format changes, 1.8
Delete format from the working memory, H.8
Delete marked files, H.14
Delete text in the display, H.8
Delete with request, H.14
Deleting/Correcting, F.11
Deleting/Correcting in the display, F.11
Deleting/Correcting printed characters, F.11
Disk drive (Option), B.7
Disks (option), H.6
Disks (option), L.10
Display, B.7
Display file names, H.19
• Display time/date, J.4
Double correction feature, F.11
Draw paper in, F.6
Earthed connection for interface, B.6
Editing formats, 1.4
Editing formats and drafts, I.1
Eject paper, F.6
End of paper indicator, B.7
End of ribbon, J.14
end of text, F.10
Entering text, F.1
Exercise examples , E.4
Exit menu without changes, H.5
Exit Status Menu without storing changed settings, E.6
Exit Store Menu, H.7
Expanded print, G.10
Explanation of terminology, M.3
Fabric ribbon, L.4
FCC text (applies to USA only), M.2
File Group Selection, H.20
File management, H.11
File names, H.21
Files/Text blocks: storing, deleting, etc., H.1
Follow-up allocation of print modes, G.11
Follow-up underlining, G.11
Format disk (option), H.12
Format selection, F.7
ormatting program, H.12
Formatting Program, L.10
Formatting program, H.12
Function explanation with operating procedure, E.4
Function keys, D.9
Function selection, C.4
Function selection (quick reference), C.1
Functions at the right margin, G.6
Functions ON/OFF, H.4
General information, B.4
General Information ..., E.1
General information on the operating modes, E.8
General information to the memory, E.7
half line, F.9
Half-line down, 1.5
Half-line up, 1.5
Impression strength (impact), J.10

Alphabetical index
Function, page
| Inscriptions, D.9 |
| Inscriptions on the printwheel, L.8 |
| Insert paper, F.6 |
| Inserting/Removing disks, L.10 |
| Justified format, G.13 |
| Justified format On/Off, I.7 |
| KB II function, J.11 |
| Key entries, D.8 |
| Keyboard (left/right area) - UK, D.6 |
| Keyboard (main area) - UK, D.4,D.5 |
| Keystroke counter/timer function (KCT), J.16 |
| Left margin, G.4 |
| Left margin is set, G.4 |
| Lift-Off correction tape, L.6 |
| Line by line, F.9 |
| Line framing, J.5 |
| Line Print on/off, E.8 |
| Line spacing, G.9 |
| Line spacing in inches/millimeters, G.9 |
| Machine view, B.7 |
| Maintenance, L.1 |
| Manual print stop, F.14 |
| Margin memory, G.5 |
| Margins/Margin memory, G.4 |
| Mark file name, H.20 |
| Marking, H.22 |
| Menus - general information, H.4 |
| Microspace down, I.5 |
| Microspace to the left, I.6 |
| Microspace to the right, I.6 |
| Microspace up, I.5 |
| Microspacing, F.9 |
| Move, H.22 |
| Multi-strike ribbon, L.4 |
| Non-justified format, G.13 |
| ON LINE, J.15 |
| Operating mode after turning on, E.8 |
| Operating mode selection, F.5 |
| Operating modes, E.4 |
| Other helpful functions, J.1 |
| Overwrite existing file, H.7 |
| Paper bail, B.7 |
| Paper ejection, F.6 |
| Paper guide, B.7 |
| Paper insertion, F.6 |
| Paper release lever, B.7 |
| Paper support, B.7 |
| Pitch, G.8 |
| Position code, I.13 |
| Positioning the printer/cursor, F.9 |
| Practical applications, K.1 |
| Print, H.23 |
| Print file names, H.20 |
| Print sample, L.8 |
| Print test report, J.16 |
| Printer limit, I.5 |
| Printout from the working memory, F.14 |
| Printwheel selection, L.8 |
| Printwheels, L.7 |
Function, page
| Prompts in the display, E.4 |
| Proportional spacing, G.8 |
| Protected page break, I.10 |
| Protected space (required space), G.7 |
| Recall Delete Menu, H.13 |
| Recall format, I.8 |
| Recall Index Menu, H.19 |
| Recall Status Menu, E.5 |
| Recall the Copy Menu, H.16 |
| Recall the File Menu, H.11 |
| Recall the Renaming Menu, H.15 |
| Recalling a phrase, H.10 |
| Recalling/Changing the margins, G.5 |
| Reformat text, I.9 |
| Release margin and continue typing, G.6 |
| Rename a file, H.15 |
| Rename file, H.15 |
| Reporting loss or damage, M.5 |
| Revise current format, F.8 |
| Ribbon cassette selection, L.4 |
| Ribbon cassettes, L.3 |
| Right flush tab, G.16 |
| Right flush tab , I.5 |
| Right margin , G.4 |
| Right margin is set, G.4 |
| Right margin position , I.5 |
| Search term, F.13 |
| Search/Replace, F.13 |
| Select file group, H.20 |
| Select file name, H.20 |
| Set line spacing, I.6 |
| Set margins, G.4 |
| Set pitch, I.7 |
| Simultaneous print and display, E.9 |
| Simultaneous printer movement On/Off, E.9,E.10 |
| Single-strike ribbon, L.4 |
| Special symbols, D.9 |
| Standard format, I.4 |
| Standard margins, G.4 |
| Standard tab, G.15 |
| Standardization with data retention, J.13 |
| Standardization without data retention, J.13 |
| Standardizing, J.13 |
| Start of text, F.10 |
| Starting Up and Machine View, B.1 |
| Stop code, I.11 |
| Store and recall phrases, H.10 |
| Store changed settings, E.6 |
| Store Menu, H.7 |
| Store text and print line by line, E.10 |
| Store text block, H.23 |
| Store text without printing, E.10 |
| Storing a file, H.7 |
| Storing a format, I.7 |
| Storing a phrase, H.10 |
| Storing margins, G.5 |
| Storing text, E.10 |
| Substitute symbols , H.21 |
| Switch to Memory Mode, E.8 |
Function, page
Function, page
System settings, E.5
Tab matrix, G.18
Tab summary, G.14
Tabulation, G.14
Technical Data, M.2
Technical Data and Explanation of Terminology, M.1
Temporary hyphen, G.7
Text blocks, H.22
Text functions, G.1
Text memory, E.7
Text memory, H.6
The display, B.8
The display when entering text, F.4
The Keyboard, D.1
The platen, L.9
Time/Date, J.4
Transfer file from the index, H.19
Transport safety devices, B.5
TTL universal interface, B.6
Typestyle, L.8
Typestyles/Printwheels available, L.8
Typing keys - monolingual systems, D.8
Typing without storing, E.9
Underlining, G.10
Underlining, K.7
Unprotected space, G.7
Upkeep,L.2
Upper case using Caps Lock , D.8
Variable line spacing knob, B.7
Vertical line tab, G.17
Vertical line tab,1.5
Vertical positioning, 1.7
Vertical positioning, 1.5
What text? Which format?, F.7
Working memory, E.7
Working memory, H.6
Write protection, L.10
Alphabetical index
Function, page
Function, page
USA
Copyright © 1992 by Olympia Office Vertriebsgesellschaft mbH. All rights reserved. No part of this publication may be reproduced, transmitted, transcribed, stored in a retrieval system, or translated into any language or computer language, in any form or by any means, electronic, mechanical, magnetic, optical, chemical, manual or otherwise, without the prior written permission of Olympia Office Vertriebsgesellschaft mbH.
Disclaimer
Olympia Office Vertriebsgesellschaft mbH makes no representations or warranties with respect to the contents hereof and specifically disclaims any implied warranties of merchantability or fitness for any particular purpose. Further, Olympia Office Vertriebsgesellschaft mbH reserves the right to revise this publication and to make changes from time to time in the content hereof without obligation of Olympia Office Vertriebsgesellschaft mbH to notify any person of such revision or changes.
Additional copies of this publication can be purchased from Olympia USA Inc.:
Olympia USA Inc.
1330 River Bend
Suite 600
Dallas TX 75247
or in Canada from Olympia Business Machines Canada Ltd.:
Olympia Business Machines Canada Ltd.
58 Prince Andrew Place
Don Mills, Ontario M3C 3A2
United Kingdom
This instruction manual is purely informative. The contents are not part of any offer for sale or contract. The specifications, extensions and options described may differ from country to country.
Olympia Office Vertriebsgesellschaft mbH reserves the right to revise specifications, make modifications and technical changes to the product described herein without notification.
Printed in Mexico
Änderungen vorbehalten . Right of modification reserved . Sous réserve de modifications . Modificaciones reservadas . Modifiche riservate . Wijzigingen voorbehouden . Forandringer forbeholdes . Ret til ændringer forbeholdes . Zmiany zastrzeżone . Oikeus muutoksiin pidätetään . Változtatások joga fenntartva . Změny vyhrazeny . Oi aλλαγές επιφυλάσσονται .
- Comfort MD Multi-line display
- Operating instructions
- Contents
- OLYMPIA
- B.1 Starting Up and Machine View
- C.1 Function selection (quick reference)
- D.1 The Keyboard
- E.1 General Information ...
- F.1 Entering text
- G.1 Text functions
- H.1 Files/Text blocks: storing, deleting, etc.
- I.1 Editing formats and drafts
- J.1 Other helpful functions
- K.1 Practical applications
- L.1 Maintenance
- M.1 Technical Data and Explanation of Terminology
- Information
- Protect the system
- Note:
- Corrections (lift-off)
- Decimal tab
- Delayed print (line by line)
- Delete character in the display
- Double correction on/off
- Edit format
- Edit text blocks
- End of ribbon message
- File menu
- Format text
- Function selection within a menu
- Half-line spacing
- Hyphenation - temporary
- Impression - heavy
- Justified format
- KB II (2nd keyboard)
- KCT (Keystroke Counter/Timer)
- Line framing
- Line spacing
- Line spacing - millimeter/inch adjustment
- Margins - set (store immediately)
- Margin release
- Margins - recall from memory
- Margins - store in memory (PD)
- Microspacing
- ON-LINE On
- ON-LINE Off
- Operating mode
- Page break (automatic pagination)
- Paper insertion/ejection
- Function selection (quick reference)
- Function selection
- Paragraph indent
- Phrases (constants)
- Pitch
- Position Code
- Print from the working memory
- Print stop - manual
- Print stop - set in text
- Recall Menu
- Return (without line spacing)
- Return (with line spacing)
- Search function
- Search/Replace (forwards)
- Simultaneous printer movement
- Space
- Special print modes On/Off
- Special print modes - clear
- Standardizing
- Status Menu
- Stop code
- Store Menu
- Time/Date
- The Keyboard
- Keyboard (main area) -UK
- Keyboard (left/right area) -UK
- ■ Typing keys - monolingual systems
- ■ Typing keys - bilingual systems
- English keyboard
- ■ Native language keyboard
- ■ Upper case using Caps Lock (capital letters only) - all keyboards
- Turn function on
- Turn function off
- ■ Special symbols - all keyboards
- Function keys - all keyboards
- ■ Inscriptions in the center or upper left of the keys
- ■ Inscriptions on the front of the keys
- ■ Inscriptions on the bottom right of the keys
- ■ Inscriptions on the housing above the keys
- General information on the operating instructions
- Operating modes
- General information on the system settings
- ■ Recall Status Menu
- Change status
- Store changed settings
- ■ Exit Status Menu without storing changed settings
- Working memory
- Text memory
- Disks (option)
- General Information ...
- General information on the operating modes
- Operating mode after turning on
- Switch to Memory Mode
- ■ Simultaneous print and display
- ■ Delayed print (line by line)
- Store text without printing
- ■ Store text and print line by line
- ■ Control codes
- Note
- Typewriter or Display Mode?
- Typewriter Mode
- ■ Display Mode
- Entering text
- Paper insertion/Paper ejection
- Insert paper
- Draw paper in
- Eject paper
- ■ Create new text or edit existing text
- D DP-D
- Format selection
- What text? Which format?
- ■ Revise current format
- ■ Character by character
- Line by line
- Half line
- ■ Addition cursor movement in Memory Mode
- ■ Deleting/Correcting in the display
- ■ Deleting/Correcting printed characters
- ■ Double correction feature
- Correction to the left
- ■ Correcting words or parts of words
- ■ Corrections, in words already typed
- Corrections beyond the correction memory
- Pitch 10/12/15
- Pitch PS
- Search term
- Search/Replace
- Text functions
- Margins/Margin memory
- Standard margins
- ■ Change margin settings
- Set margins
- PD DP
- ■ Set margins
- Margin memory
- ■ Recalling/Changing the margins
- Storing margins
- Functions at the right margin
- ■ Automatic returns OFF
- ■ Automatic returns ON
- ■ Unprotected space
- ■ Protected space (required space)
- ■ Temporary hyphen
- ■ PS (Proportional spacing)
- Line spacing Control lamps
- ■ Line spacing in inches/millimeters
- Bold print/Underlining/Expanded print
- ■ Combining two or more print modes
- ■ Follow-up underlining
- ■ Follow-up allocation of print modes
- Set paragraph indent
- Clear paragraph indent
- Tab summary
- Standard tab
- Right flush tab
- ■ Decimal tab (point orientated)
- ■ Decimal tab (comma orientated)
- ■ Vertical line tab
- Tab matrix
- Clear single tab
- ■ Clear vertical line tab
- Clear all tabs
- ■ Centering between the margins
- ■ Centering between two set tabs (line by line)
- Centering
- Centering at a any position on a line (line by line)
- Call in a menu
- Functions ON/OFF
- ■ Activate function and exit menu
- Exit menu without changes
- Storing -general information
- ■ Store Menu
- ■ Storing a file
- ■ The Recall Menu appears
- ■ Recalling a file
- Storing a phrase
- ■ Recalling a phrase
- ■ Recall the File Menu
- Format disk (option)
- ■ Recall Delete Menu
- ■ Delete files without request
- Delete with request
- ■ Recall the Renaming Menu
- Rename a file
- Copy files (option)
- ■ Recall the Copy Menu
- ■ Copy from disk to text memory
- ■ Copy from the text memory to disk
- ■ Copy from disk to disk
- ■ Recall Index Menu
- From the Recall Menu:
- From the Store Menu:
- From a subsequent menu:
- ■ Display file names
- Selection:
- Select and mark (delete or copy):
- File names
- Example:
- Marking
- Move
- Copy
- Store text block
- With the disk drive option
- Delete
- Text blocks
- Chapter contents
- Editing formats
- Reformat text
- I.10 Automatic pagination (page control)
- Stop code
- I.13 Position code
- Standard format
- ■ Editing formats
- ■ Vertical positioning set "top margin"
- Top margin
- ■ Set horizontal positions
- Set left margin
- Set right margin
- Tabulation
- Bottom margin
- Set page length
- Storing a format
- ■ Recall format
- ■ Change format within a text
- ■ Delete format changes
- Editing formats and drafts
- Automatic pagination (page control)
- ■ Protected page break
- Set stop codes
- ■ Completing texts containing stop codes
- Delete stop code
- Printout of text containing stop codes
- D Position codes define exact printer positions on a page.
- Set position codes
- Draft form with position code locations
- Completing position codes
- Delete position code
- ■ Print form with completed position codes
- Display time/date
- Change time/date
- aming characters, sentences and texts
- ■ Defining frames
- ■ Recalling a stored frame
- ■ Frames with internal dividing lines
- ■ Create frame
- ■ Vertical lines
- Horizontal lines
- ■ Frames with connecting lines
- Switch to KB II and enter text
- Print text with KB II
- Warning:
- Acoustic signal On/Off
- ■ Acoustic signal function control
- Standardization without data retention
- Standardization with data retention
- Cancel printout
- ■ Continue printing
- Clear
- Other helpful functions
- Keystroke counter/timer function (KCT)
- ■ Activate timer and set test time
- ■ Print test report
- Practical applications
- Key entries for .....
- Enquiry
- Upkeep
- ■ Changing the ribbon cassette
- ■ Ribbon cassette selection
- ■ Changing the correction tape
- Correction tape selection
- Changing the printwheel
- ■ Typestyles/Printwheels available
- ■ Inscriptions on the printwheel
- ■ Printwheel selection
- ■ Removing and cleaning the platen
- Write protection
- ■ Inserting/Removing disks
- Technical Data and Explanation of Terminology
- Technical Data
- ■ FCC text (applies to USA only)
- Explanation of terminology
- Instructions to be followed in case of loss or damage
- Reporting loss or damage
- Function, page
- Alphabetical index
- USA
- Disclaimer
- United Kingdom
- Printed in Mexico
Brand : OLYMPIA
Model : Comfort MD Multi-line display
Category : Typewriter