
PC7160 - Vacuum Cleaner PROGRESS - Free user manual and instructions
Find the device manual for free PC7160 PROGRESS in PDF.


| Product Type | Bagless Canister Vacuum Cleaner |
| Brand | Progress |
| Model | PC7160 |
| Power Supply | Mains voltage: 220-240V, 50/60Hz (typical) |
| Power Consumption | Approximately 1400 W |
| Dust Container Capacity | Not specified, typical for canister: ~2-3 liters |
| Filter System | Cartridge filter, motor filter, exhaust micro/HEPA filter |
| Cable Length | Approximately 6-8 m (with yellow/red marks for ideal length) |
| Operating Radius | Approximately 8-10 m (cable + hose) |
| Weight | Approximately 5 kg |
| Main Functions | On/off switch, cable rewind, electronic filter indicator, vertical/horizontal parking |
| Included Accessories | Hose, telescopic tubes, dual purpose floor nozzle, crevice nozzle, dusting brush |
| Dust Container Removal | Push button on handle to release |
| Filter Cleaning | Cartridge filter rinseable (dry 24h), other filters replaceable |
| Filter Replacement Interval | At least twice a year or when visibly soiled |
| Cartridge Filter Part Number | ET 407 133 0544 |
| Motor Filter Part Number | ET 407 133 0551 |
| Exhaust Micro Filter Part Number | ET 407 133 0569 (depends on model) |
| HEPA Filter Part Number | ET 407 133 057.7 (depends on model) |
| Safety Features | Auto shut-off if airflow blocked; thermal protection (restart after 20-30 min) |
| Intended Use | Domestic only |
| Environmental Features | Recyclable packaging and appliance; PE bag recycling |
Frequently Asked Questions - PC7160 PROGRESS
User questions about PC7160 PROGRESS
0 question about this device. Answer the ones you know or ask your own.
Ask a new question about this device
Download the instructions for your Vacuum Cleaner in PDF format for free! Find your manual PC7160 - PROGRESS and take your electronic device back in hand. On this page are published all the documents necessary for the use of your device. PC7160 by PROGRESS.
USER MANUAL PC7160 PROGRESS
kiloves.gxd 12/16/03 1:12 PM Page 1

PC7160
PC7170
PC7180
PC7185
natural_image
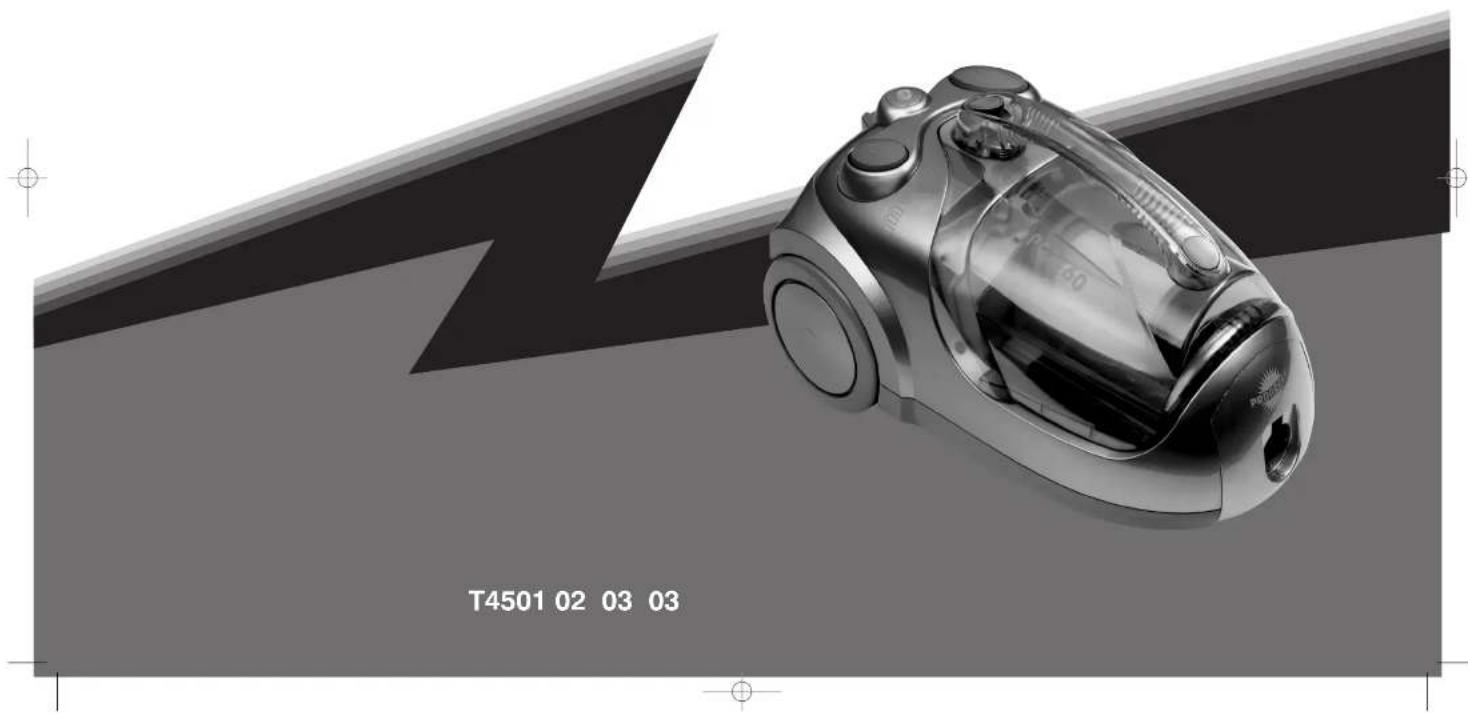
3D rendering of a vacuum cleaner with black lightning bolt background (no text or symbols on device)kiloves.gxd 12/16/03 1:12 PM Page 3

natural_image
Line drawing of a vacuum cleaner device with no visible text or symbols
natural_image
Line drawing of a vacuum cleaner with handle and vent (no text or symbols)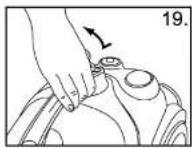




kiloves.gxd 12/16/03 1:12 PM Page 5
PROGRESS PC 7160, 7170, 7180, 7185
Deutsch
English
Francais
Nederlands
Deutsch
PROGRESS PC 7160, 7170, 7180, 7185
BESCHREIBUNG
-
Suction inlet
-
Electronic filter indicator
-
On/off switch
-
Cable rewind button
-
Wheel
-
Dust container
-
Carrying handk
-
Dust container open button
-
Hose
-
Telesopic tubes
-
Dual purpose floor nozzle
-
Hard floor nozzle (PC 7105)
-
Cravide nozzle
-
Dusting brush
-
Cartridge filter
-
Accessory holder (PC 7180, PC 7185)
-
Vertical parking
-
Horizontal parking
IMPORTANT SAFEGUARDS
Read this instruction booklet carefully.
Before using the appliance, check that the mains power voltage corresponds to the voltage shown on the rating plate.
Do not switch the appliance or if it appears to be faulty in any way or it has a damaged cord or plug. Do not try to repair the appliance by yourself. For repairs and accessories we are at your service from Monday to Friday from 8am to 6am Progress Servicing: 01805-306090 (Deutsche Telekom 0.12 Euromin.)
Always remove the plug from the power socket when the appliance is not in use and before carrying out any clearing or maintenance operations.
Never leave the appliance unattended when it is switched on. Keep the appliance cut of reach of children.
This appliance is for domestic use only. Use as described in this instruction booklet.
Do not pull the appliance by the cord. Do not unplug by pulling on the cord
Do not use appliance on wet surfaces or to vacuum liquids, mud, ash and burning cigarette butts. Do not vacuum up any highly flammable or explosive substances or gases.
Do not unplug the vacuum dearer with wet hands.
Do not operate the vacuum cleaner too close to heaters and radiators, stoves etc.
Before you start using the vacuum cleaner, please remove large or sharp objects from the liner to prevent damage to the dust container and hose.
INSTRUCTIONS FOR USE
Before placing into operation make certain that the fibers are in the proper position.
Unwind a sufficient length of cable and insert the plug into the power socket. A YELLOW mark on the power cable shows the ideal cable length. Do not extend the cable beyond the RED mark.
➢ Press the ON-OFF button to switch the appliance on. On initial start up full power is reached after approximately 1-2 seconds.
To rewind the power cable press the rewind button with foot, and guide the cable with hand to ensure that it does not whip causing damage.
MAINTENANCE
REMOVING THE CONTENTS OF THE DUST CONTAINER
Always operate the cleaner with the dust container installed.
Remove the dust container by using the open button on the handle. (Fig. 19)
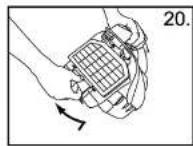
Remove the filter set by pushing the button. (fig. 20)
Remove the contents of the dust container. (Fig. 21)
Insert the filter set back into the dust compartment.
Insert the dust compartment back into the cleaner by pressing it down until it clicks.
LEDIG DE INHOUD VAN DE STOFCONTAINER
REPLACING THE FILTERS
The dust container must be emptied, if the window of the electronic filter indicator is illuminated when the cleaner is operating at maximum power and the nozzle is raised from the floor.
Filters should be replaced at least twice a year or when they become visibly scaled.
Always operate the cleaner with filters installed to avoid recuped suction.
Disconnect from electrical cullet before changing the filters.
Replacing the cartridge filter:
Remove the dust container by using the open button on the handle. (Fig. 19)
Remove the filter set by pushing the button. (Fig. 20)
Remove the cartridge filter by turning it coumer-clockwise (A) and pull it out (B). (Fig. 22)
Rinse it under tap water, (Fig. 23)
Air dry for approximately 24 hours, to ensure it is completely dry before re-using. Avoid direct sunlight and extreme drying circumstances. (Fig. 24)
Insert the cartridge filter into its place (B) and turn it clockwise (A). (Fig. 22)
Insert the filter set back into the dust container.
Inser the dust container back into the dearer by pressing it down until it clicks.
Cartricope über reference number ET 407 133 0544
Replacing the motor filter:
Remove the dust container by using the open button on the handle, (Fig. 19.)
Remove the filter set by opening the button. (Fig.20)
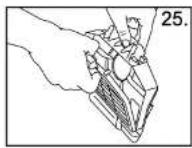
Remove the filter with oril from its holder, (Fig.25.1)
Remove the star from the oil (Dec. 25)
For a new filter into the fiber mill, (Fig. 26)
- Fu: a new hotel delmergim. (Fig. 20) - Dette Houvih milk bank in place. (Se. 25)
For the North West Back Hotspade. (ng.25)
Motorther reference number: ET 407 133 0551
Replacing the exhaust filter:
Open the fiber grill to remove the exhaust filter. (Fig. 27)
Take the filter out of its place.
Put a new filter into its place, then close the filter cell.
Micro filter reference number: ET 407 133 0569 (depends on the model)
HEPA filter reference number: ET 407 133 057.7 (depends on the model)
OPERATING THE HOSE INOUT OF THE SUCTION INLET
To connect the hose into the suction inlet push it until it clicks. (Fig. 28.)
To disconnect the hose from the suction inlet push the button at the end of the hose.
PROTECTING THE ENVIRONMENT
➢ Attempt to recycle packaging material and old appliances.
The cardboard packaging can be placed in the waste paper collection.
➢ Deposit the plastic bag made of polyethylene (PE) at the PE collection point for recycling.
Recycling the Appliance at the end of its life:
The plastic components all carry a material identification marking so that, like the other materials, they can be recycled at the end of the life of the appliance.
Please inquire with your local authority.
Blocked air flow and dirty filters:
The cleaner stops automatically if a blockage occurs in the nozzle/tube/foze or if the filters are blocked with dirt.
Disconnect from mains and allow the plaster to pool for 20-30 minutes. Remove blockage and/or clean filters.
Restart the cleaner.
Brand : PROGRESS
Model : PC7160
Category : Vacuum Cleaner