KACAR12DVRA - Dash cam Kogan - Free user manual and instructions
Find the device manual for free KACAR12DVRA Kogan in PDF.


| Brand | Kogan |
| Model | KACAR12DVRA |
| Product Type | Dash Cam (Vehicle Camcorder) |
| Display | 2.5-inch LCD (swivels 270 degrees) |
| Recording Resolution | VGA (640×480), QVGA (320×240), SXGA (1280×1024) |
| Video Format | AVI |
| Loop Recording | 3, 5, 10, or 15 minutes |
| Power Source | Rechargeable Li-ion battery or 12V/24V car charger |
| Battery | Li-ion (rechargeable) |
| Storage Media | SD/MMC card (1 GB to 32 GB) |
| Audio Recording | Yes (with built-in microphone) |
| Connectivity | USB 2.0 |
| Mounting Type | Suction cup mount |
| Camera Lens | Built-in lens with IR LED for night vision |
| Motion Detection | Yes (selectable On/Off) |
| Time Stamp | Off, Date only, or Date & Time |
| White Balance | Auto, Daylight, Cloudy, Tungsten, Fluorescent |
| EV Compensation | Range: -2.0 to +2.0 in 1/3 steps |
| Built-in Reset | Yes |
| Color | Black |
Frequently Asked Questions - KACAR12DVRA Kogan
User questions about KACAR12DVRA Kogan
0 question about this device. Answer the ones you know or ask your own.
Ask a new question about this device
Download the instructions for your Dash cam in PDF format for free! Find your manual KACAR12DVRA - Kogan and take your electronic device back in hand. On this page are published all the documents necessary for the use of your device. KACAR12DVRA by Kogan.
USER MANUAL KACAR12DVRA Kogan
natural_image
Black rectangular device mounted on a circular base with a camera module (no visible text or symbols)1. Packaging Accessories
①
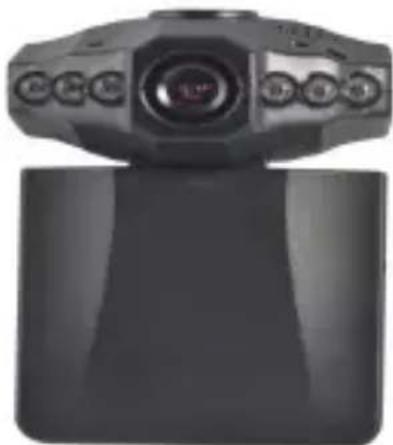
natural_image
Front view of a black rectangular electronic device with circular buttons and a central lens (no visible text or symbols)②
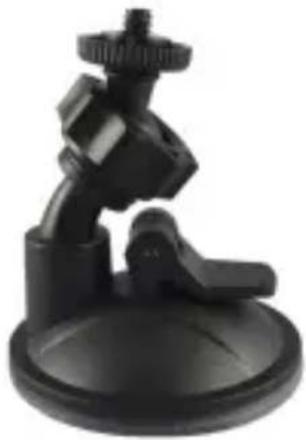
natural_image
Black mechanical clamp mount on a circular base (no text or symbols visible)③
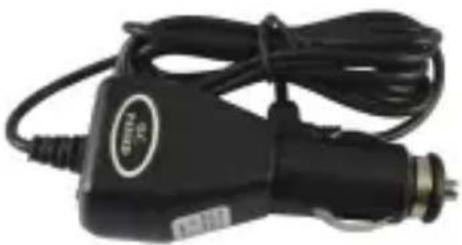
natural_image
Black handheld electric shaver with visible wiring and a small terminal connector (no text or symbols)④
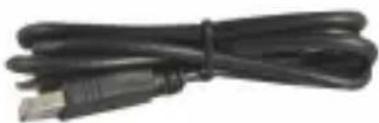
natural_image
Coiled black cable with USB port connector (no text or symbols visible)⑤
-
Vehicle Camcorder
-
Car Charger
-
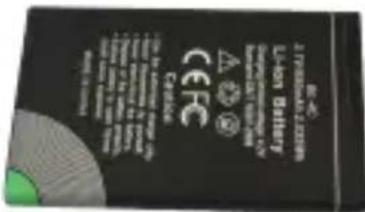
Li-ion Battery
-
Suction Cup
-
USB Cable
2.Product picture and Function
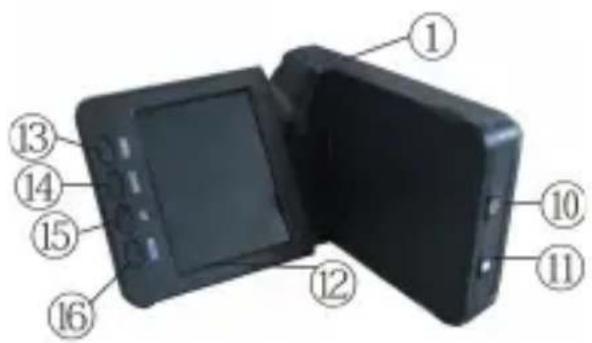
-
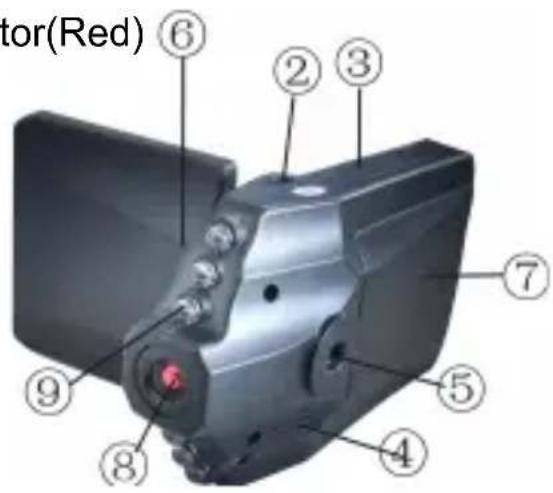
USB Slot
-
5VDirect Current Slot
-
SD/MMC Card Slot
-
Speaker
-
Mount Hole
-
Microphone
-
Battery Cover
-
Lens
-
IR LED
-
Power ON/OFF Button with Charging Indicator(Red)
- REC Button
With working Indicator (Blue)
- 2.5inch LCD
- Menu Button
- Down Button
15.Up Button - Mode Button (Video/Camera/Playback)
3. Operations
Two Power options:
a) Use Li-ion battery
DVR can be activated after it has been placed on the vehicle by pressing the Power on/off for 3 seconds and turned off by pressing it again.
Charging: connect with USB cable or car charger. The Power button indicator shows red and turns off when it is full.
b) Connect with Car Charger
DVR will record automatically when the car starts, then turns off and saves the last file when the car stops.
Note: Just 5V output voltage is required.
4. Operation steps
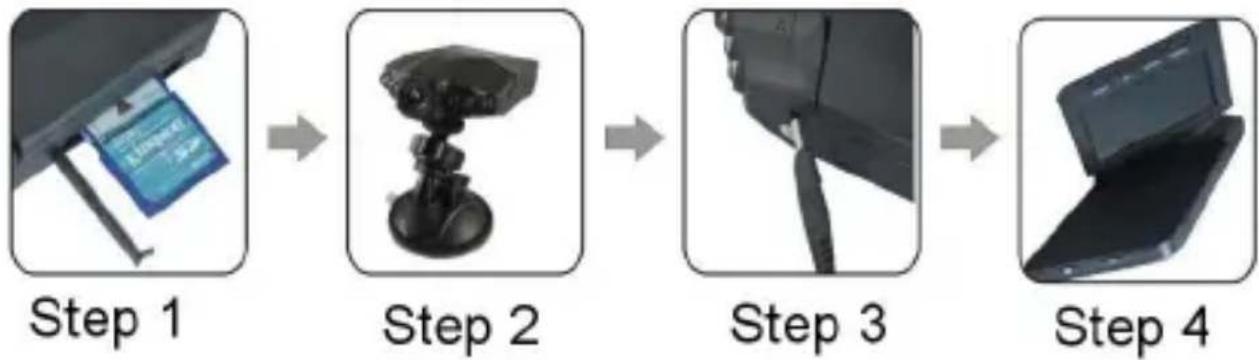
Step 1: Insert an SD memory card into the SD/MMC card slot.
Step 2: Install the mounting bracket into the mount hole, then put the suction cup into a suitable place. Adjust the location and direction.
Step 3: Using the car charger included, plug the unit into the charger port/cigarette lighter in your car.
Step 4: Power on the unit by holding down the "ON/OFF" button for 3 seconds. For specific parameter settings, please refer to the steps as shown below.
5.Function Information
A Video Mode
DVR will enter into default video mode when turned on. The recording file is saved on the SD/MMC Card. To stop recording by pressing REC. (When powered up with a battery-powered, press the record button to start recording)
E Camera mode
Turn on the DVR and press Mode Button to enter into the Camera mode. To take photo by pressing REC Button (the blue button next to power button)
C Playback Mode
Turn on the DVR and press Mode Button twice to enter into Playback Mode, Press Up or Down to select the previewed file, if it is a video file, it can play or stop by pressing REC Button.
Delete
In the playback mode, press Menu button to enter into the delete interface.
Press Up or Down to select the previewed file. If it is video file, it can play or stop by pressing REC Button. If you want to delete it, press Menu button to enter into delete mode, and then select single, all or select by REC Button. Press UP/Down to Confirm and press Rec Button to delete. You can select Thumbnail mode to preview more files. Volume (from 1 to 8) and protect under the Playback Mode.
6. Setting Mode
Turn on the DVR and press Menu Button twice enter to the setting interface,
Confirm by REC Button and press Up/Down button for the following setting,
Press Menu Button again to exit after finished.
A Turn on the DVR and press Menu button twice enter into the setting interface. confirm by REC button and press Up/Down button for the following setting, press menu button again to exit after finished.
- Format; Cancel/Execute
- English, Française, Deutsch, Italiana, Español,
Português,繁體中文,簡体中文,日本語,Русский - Auto Off; 1 Min/ 3 Min/ 5 Min/ Off
- System Reset; Cancel/Execute
- Light Frequency; 60HZ/50HZ
- TV Output ; NTSC/PAL
- Date Input ; Off/Set
E Turn on the DVR and press Menu button enter into the setting interface under the Video mode. confirm by REC button and press Up/Down button for the following setting, press Menu button again to exit after finished.
- Size: VGA/QVGA/SXGA
- EV: +2.0 +5/3 +4/3 +1.0 +2/3 +1/3 +0.0 -1/3 -2/3 -1.0 -4/3 -5/3 -2.0
- White Balance: Auto/Daylight/Cloudy/Tungsten/Fluorescent
- Time Stamp: Off/Date Only/ Date&Time
- Motion Detect; Off/on
- Audio Mode; On/Off
- Video time; 3 Min/5 Min/10 Min/15 Min
- Flip screen; Off/On
- IR LED; On/Off
Turn on the DVR and press Mode button enter into the Capture mode, press Menu button enter into the setting interface. Confirm by REC button and press UP/DOWN button for the following setting, press Menu button again to exit after finished.
- Size; 12M/8M/5M/3M/2M/1.3M/VGA
- Quality; Fine/standard/Economy
- Scene Mode; Auto/Sport/Night/Portrait/Landscape/Backlight
- EV; +2.0 +5/3 +4/3 +1.0 +2/3 +1/3 +0.0 -1/3 -2/3 -1.0 -4/3 -5/3 -2.0
- White Balance: Auto/Daylight/Cloudy/Tungsten/Fluorescent
- ISO; Auto/100/200
- Color; Standard/Vivid/Sepia/Monochrome
8, Saturation; High/Normal/low - Sharpness; Hard/Normal/soft
- Preview; On/Off
- Time Stamp; Off/Date only/Date& Time
12, Burst; On/Off
7. Download files
- Connect DVR with computer via USB cable in the booted up state.
- Removable disk will appear on "My computer"
- The file is stored in Removable Disk/DCIM/100DSCIM.at the moment, the file of the DVR can be downloaded to the computer.
Note;
- Please insert the SD/MMC card before recording.
- This DVR records in cycle if you choose 3/5/10/15 minutes as storage time, When the memory is full, it will record from the beginning again and erase all the last files automatically, It will have 3 seconds to pause, it means events within those 3 seconds will not be recorded.
- When the battery is low, "low battery" will appear on the LCD and power off will occur automatically after 20s.
8. Technical Specifications
- Recording resolution: VGA/QVGA/SXGA
- Video format: AVI
- Loop Recording: 3/5/10/15 minutes
- Power source: rechargeable battery or 12V/24V Car Charger
- Support SD/MMC card (from 1GB up to 32GB)
- Support video with sound
- Out put: USB 2.0
- Built-in reset function
- 2.5 inch LCD can be swiveled 270 degree
Brand : Kogan
Model : KACAR12DVRA
Category : Dash cam