
KADCAML101A - Dash cam Kogan - Free user manual and instructions
Find the device manual for free KADCAML101A Kogan in PDF.


| Product Type | Dashboard Camera |
| Brand | Kogan |
| Model | KADCAML101A |
| Dimensions (approx.) | 60 x 50 x 30 mm |
| Weight (approx.) | 60 g |
| Power Source | 12V/24V DC via car cigarette lighter adapter |
| Battery | Built-in rechargeable battery (approx. 200 mAh) |
| Recording Resolution | 1080p Full HD |
| Field of View | 170° wide angle |
| Loop Recording | Yes, automatic overwrite |
| G-Sensor | Yes, automatic event detection and file protection |
| Night Vision | Yes, with infrared LEDs |
| Display | 2.0 inch LCD screen |
| Memory Card Support | microSD up to 32 GB (Class 10 or higher) |
| Mounting | Suction cup mount on windshield |
| Connection | USB mini port for power and data transfer |
| Audio Recording | Built-in microphone |
| Maintenance | Clean lens with soft cloth; format microSD card periodically |
| Safety | Do not install in area obstructing driver view; operating temperature 0°C to 60°C |
| Spare Parts / Repairability | Spare suction mount and car charger available from Kogan; not user-serviceable internally |
| Included Accessories | Car charger, USB cable, suction mount, user manual |
| Warranty | 1 year limited warranty |
Frequently Asked Questions - KADCAML101A Kogan
User questions about KADCAML101A Kogan
0 question about this device. Answer the ones you know or ask your own.
Ask a new question about this device
Download the instructions for your Dash cam in PDF format for free! Find your manual KADCAML101A - Kogan and take your electronic device back in hand. On this page are published all the documents necessary for the use of your device. KADCAML101A by Kogan.
USER MANUAL KADCAML101A Kogan
KOGAN 9.66" MIRROR DUAL DASH CAMERA
FRONT AND REAR
KADCAML101A
SAFETY & WARNINGS
Read all instructions and warnings in this user guide prior to first use. Retain this user guide for future reference.
- Do not operate the dash camera while driving to avoid possible accidents due to distracted attention.
- If the dash camera needs cleaning, use a soft cloth to gently wipe the product. Do not use any chemical agents to clean the dash camera.
- Do not store or use the dash camera in a humid environment or where there are inflammable, explosive or corrosive gases or liquids.
- Do not remove or insert the SD card when the dash camera is recording.
- Do not disassemble or repair the dash camera yourself. If the dash camera is damaged, stop use immediately and contact help.Kogan.com for assistance.
- This dash camera is intended for use in a motor vehicle only. Do not install the camera where it might block the driver's view of the road (including the mirrors) or the deployment of the airbag.
- Insert the SD card before using the dash camera.
- This dash camera has a small built-in battery used only for saving footage after the external power supply is cut off.
- Ensure there are no obstructions covering the camera lens.
- Do not leave the camera in direct sunlight for a long period of time or where the temperature could go above 75^ C (including the car).
COMPONENTS
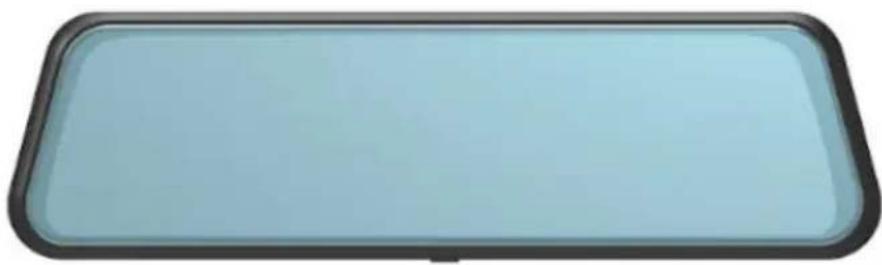
natural_image
Rectangular light blue surface with black border, no text or symbols visibleDash camera

natural_image
Coiled black cable with three blue connectors and a black electrical adapter labeled 'SOSA-1230' (no visible text beyond label)Hardware kit

natural_image
Black electric vehicle with attached cable and power plug (no visible text or symbols)Car charger

natural_image
Black camera lens mounted on a black base (no text or symbols visible)Rear camera

natural_image
Coiled black and red electrical connectors (no text or symbols visible)Rear camera cable

User guide
OVERVIEW

| Function | Description | |
| 1 Power | Press and hold for 3 seconds to manually turn the dash camera on/off. | |
| Press to turn the backlight on/off (this does not impact video recording). | ||
| 2 Reset | Use a pin to press the reset button to reset and power off the dash camera. | |
| 3 Charging port DC 5V. | ||
| 4 | Rear camera port | Connect the rear camera. |
| 5 SD card slot | Insert an SD card (not provided). A 16GB or 32GB SD card with high speed (class 10 or above) is recommended. | |
INSTALLATION
Install the dash camera
Option 1: Car charger
- Mount the dash camera over the original rearview mirror. When the camera is in place, fasten to the mirror using the included rubber rings.
- Adjust the mirror angle according to your driving position to ensure you have a clear view.
- Adjust the angle of the camera lens to ensure you get the best coverage over the bonnet and the road ahead.
- Connect the camera to the cigarette lighter using the car charger.
- Hide the rest of the cord in the gap of the interior trim board.
Option 2: hardware kit
For a more integrated option, install the dash camera using the included hardwire kit.

natural_image
Close-up of a hand pointing at the grille of a car's air vent (no visible text or symbols)Step 1: Open the fuse box. The location of the fuse box will differ depending on the car.
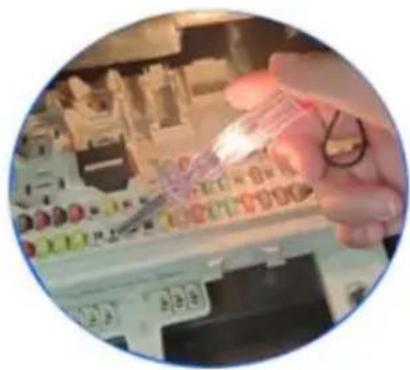
natural_image
Close-up of a hand holding a pen writing on an electronic circuit board (no visible text or symbols)Step 2: Locate the ACC+ and BAT+ fuse slots.

natural_image
Interior view of an automotive electrical panel with visible color-coded buttons and wiring (no readable text or symbols)Step 3: Connect the red wire to the ACC+ fuse slot. For 24 hour surveillance, connect the yellow wire to the BAT+ fuse slot. To only record when the car is on, connect the yellow wire to the ACC+ fuse slot.

natural_image
Close-up of a mechanical component with wires and a central cylindrical component (no visible text or symbols)Step 4: Connect the black wire to a ground.
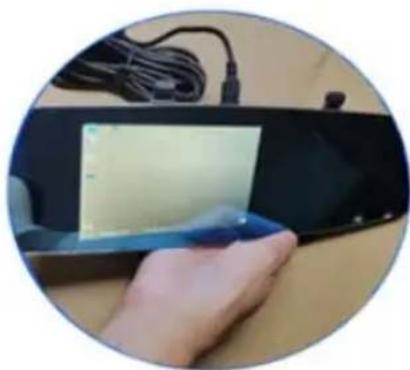
natural_image
Hand holding a small electronic device with a screen, placed on a dark surface with cables and a small object nearby (no visible text or symbols)Step 5: Test the camera.

natural_image
Close-up of hands using a tool to adjust or install a car interior panel (no visible text or symbols)Step 6: Route the camera cable through the trim board.
Note:
The hardware kit must be installed by a licensed auto electrician.
Install the rear camera
- Install the rear camera above the number plate with the bracket facing upward.

natural_image
Line drawing of a camera mounted on a cable, showing no text or symbols- Connect the red wire to the positive reverse signal wire.
- Route the camera cable to the front of the car.
- Connect the black wire from the rear camera into the AV-IN port on the mirror.
Note:
The rear camera must be installed by a licensed auto electrician.

OPERATION
Main menu

| 1 Record Enter the camera menu. | ||
| 2 | Format | Format the SD card. |
| 3 Playback | • Playback videos and photos.• Unlock or delete recorded files. | |
| 4 | Settings | Enter the settings menu. |
| 5 | Record video shortcut | Tap to begin recording. |
| 6 Record audio/mute shortcut | Tap to record audio or mute. | |
Camera menu
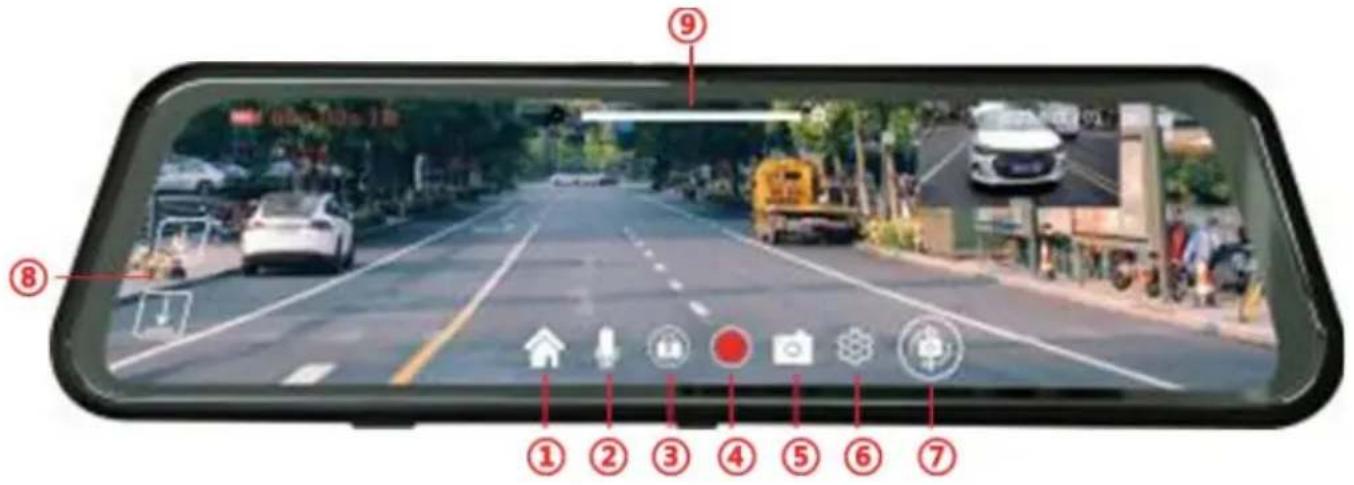
| 1 Home Tap to enter the main menu. | ||
| 2 Audio Tap to mute. | ||
| 3 Lock | Lock the video while recording. Note: a locked video cannot be overridden. It must be deleted manually. | |
| 4 | Video | Tap to start/stop recording footage. |
| 5 Photo | When recording, tap to take a photo.When in standby, tap to enter the photo menu and access photo settings. | |
| 6 | Settings | Enter the video settings menu. |
| 7 | Lens display | Tap to display:Front camera full screen.Rear camera full screen.Split screen. |
| 8 Lens adjusting key | Adjust the lens angle up/down when in full screen display. | |
| 9 | Screen brightness | Adjust the screen brightness. |
Video recording
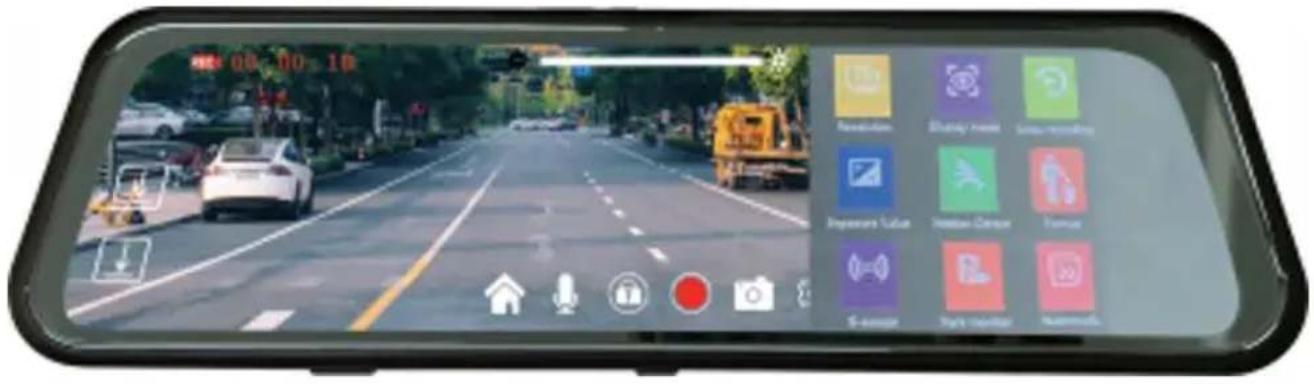
| Resolution | Choose between 1440P, 1296P and 1080P. |
| Display mode | Display front camera, rear camera, or split screen (front and back cameras displayed at the same time). |
| Loop recording | On: Continuously loop over old videos to prevent the SD card from getting full.Off: Old videos will not be looped over, and no new footage will be captured. The SD card will need to be replaced to begin capturing footage again. |
| Exposure Adjust the exposure. | |
| Motion detection | The camera will start recording when motion is detected and will automatically turn off after 30 seconds.Note: If loop recording is disabled and motion detection is enabled, the SD card will fill up quickly. |
| G-sensor | When enabled, the current video will automatically lock during impact. |
| Format Format the SD card. | |
| Parking monitor | When activated, the dash camera will continue to record video footage when the vehicle is parked, and the engine is off. It uses the motion detection function to trigger recording. |
| Watermark | Display a watermark over the video. |
Recording settings

| Auto screen off | When the selected duration is reached without the camera being operated, the screen will automatically turn off. The camera will continue to record as normal. |
| Frequency 50Hz/60Hz. | |
| Key sound Turn the key sound on/off. | |
| Language | Change the language. English is the default. |
| Date & time settings | Adjust the date and time. |
| Format | The SD card will be formatted and the files inside the card will be cleared. |
| Default Restore to factory settings. | |
| Version Version number. | |
Photos
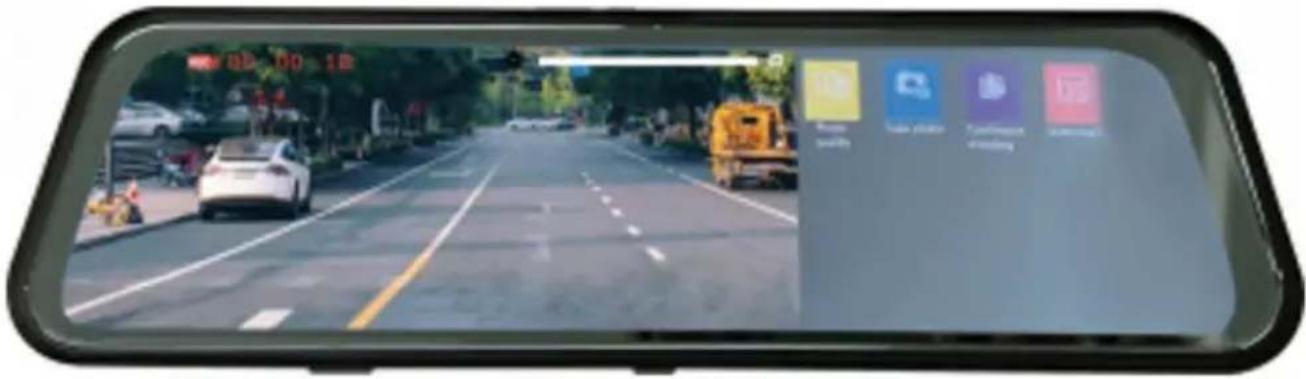
| Photo quality | Adjust the photo quality to suit the photo size. |
| Take photo | Take a normal or timer photo. |
| Continuous shooting | When enabled, photos will be taken in bursts of 3. |
| Watermark | A ‘Day-Month-Year’ watermark will display on the photo. |
Playback
Edit, delete or lock the videos/pictures.

SPECIFICATIONS
Display 9.66 inch HD screen
Lens Full glass and grade high resolution multi-layer filter and wide-angle lens.
Front camera resolution 2304x1296P
Rear camera resolution 1280x720P
Lens perspective 170 degrees
Languages English
Storage SD card up to 64GB (not included)
Photo resolution 12M/8M/5M/2MHD 1.3M/VGA
Video format MOV
Photo format JPG
Storage temperature -30°-70°C
Battery Built-in lithium polymer
Power 5V 2A
TROUBLESHOOTING
| Problem | Possible Cause | Solution |
| The dash camera automatically stops when recording. | The SD card is full. | Replace the SD card.Enable the loop recording function. |
| The SD card is incompatible. | Ensure the SD card is high speed (above C10). | |
| There may be too many locked videos on the SD card, which can prevent loop recording. | Delete locked videos. | |
| The recoded footage is not fluent or is jammed. | The SD card is incompatible. | Format the SD card in the camera.Use a high-quality SD card. |
| There are stripes over the footage or photo. | The frequency is incorrect. | Adjust the frequency to 50HZ or 60HZ. |
| The footage pauses automatically when viewing it on a computer. | The SD card is incompatible. | Use a compatible SD card. |
| The computer is incompatible. | Use a different media player. | |
| The camera battery only lasts for a short time. | The built-in battery is very small for safety reasons and is not designed to work alone. | Keep the camera connected to an external power supply. |
Need more information?
We hope that this user guide has given you the assistance needed for a simple set-up.
For the most up-to-date guide for your product, as well as any additional assistance you may require, head online to help.kogan.com
kogan.com


- KOGAN 9.66" MIRROR DUAL DASH CAMERA
- SAFETY & WARNINGS
- COMPONENTS
- OVERVIEW
- INSTALLATION
- Install the dash camera
- Option 1: Car charger
- Option 2: hardware kit
- Note:
- Install the rear camera
- OPERATION
- Camera menu
- Video recording
- Recording settings
- Photos
- Playback
- SPECIFICATIONS
- TROUBLESHOOTING
- Need more information?
Brand : Kogan
Model : KADCAML101A
Category : Dash cam