
CA-UXS15 - Hi-Fi System JVC - Free user manual and instructions
Find the device manual for free CA-UXS15 JVC in PDF.
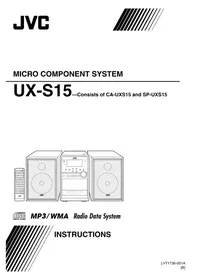


| Product Type | Mini Hi-Fi System |
| Brand | JVC |
| Model | CA-UXS15 |
| Dimensions (W x H x D) | 200 x 250 x 300 mm |
| Weight | 4.5 kg |
| Power Output (RMS) | 20 W per channel (stereo) |
| Frequency Response | 50 Hz - 20 kHz |
| Speaker Impedance | 6 ohms |
| Supported Media | CD, Cassette, FM/AM tuner |
| Inputs | AUX (3.5 mm), USB (Type A) |
| Outputs | Headphone (3.5 mm), Speaker terminals |
| Tuner Bands | FM (87.5 - 108 MHz), AM (530 - 1710 kHz) |
| Preset Stations | 30 (FM/AM) |
| CD Player Features | Programmable play, repeat, random |
| Power Supply | AC 100-240V, 50/60 Hz |
| Power Consumption | 45 W (standby: <1 W) |
| Included Accessories | Remote control, AM loop antenna, FM wire antenna |
| Cleaning Instructions | Wipe with a soft, dry cloth. Do not use solvents. |
| Safety Precautions | Avoid exposure to rain or moisture. Do not block ventilation. |
| Spare Parts Availability | Contact JVC authorized service center |
Frequently Asked Questions - CA-UXS15 JVC
User questions about CA-UXS15 JVC
0 question about this device. Answer the ones you know or ask your own.
Ask a new question about this device
Download the instructions for your Hi-Fi System in PDF format for free! Find your manual CA-UXS15 - JVC and take your electronic device back in hand. On this page are published all the documents necessary for the use of your device. CA-UXS15 by JVC.
USER MANUAL CA-UXS15 JVC
UX-S15—Consists of CA-UXS15 and SP-UXS15


MP3/WMA Radio Data System
INSTRUCTIONS
CAUTION
To reduce the risk of electrical shocks, fire, etc.:
1. Do not remove screws, covers or cabinet.
2. Do not expose this appliance to rain or moisture.
CAUTION
- Do not block the ventilation openings or holes. (If the ventilation openings or holes are blocked by a newspaper or cloth, etc., the heat may not be able to get out.)
- Do not place any naked flame sources, such as lighted candles, on the apparatus.
- When discarding batteries, environmental problems must be considered and local rules or laws governing the disposal of these batteries must be followed strictly.
- Do not expose this apparatus to rain, moisture, dripping or splashing and that no objects filled with liquids, such as vases, shall be placed on the apparatus.
CAUTION — ⏻/I (standby/on) button!
Disconnect the mains plug to shut the power off completely (the STANDBY lamp goes off). When installing the apparatus ensure that the plug is easily accessible. The Ⓗ/1 (Standby/on) button in any position does not disconnect the mains line.
- When the system is on standby, the STANDBY lamp lights red.
- When the system is turned on, the STANDBY lamp goes off.
The power can be remote controlled.
CAUTION
Excessive sound pressure from earphones or headphones can cause hearing loss.
IMPORTANT FOR LASER PRODUCTS
- CLASS 1 LASER PRODUCT
- CAUTION: Do not open the top cover or cabinet. There are no user serviceable parts inside the unit; leave all servicing to qualified service personnel.
- CAUTION: Visible and/or invisible class 1M laser radiation when open. Do not view directly with optical instrument.
- REPRODUCTION OF LABEL: CAUTION LABEL, PLACED INSIDE THE UNIT.
| CAUTIONVISIBLE AND/OR INVISIBLE CLASS 1MLASER RADIATIONWHEN OPEN. DO NOTVIEW DIRECTLY WITHOPTICAL INSTRUMENTS,IEC60825-1:2001(ENG) | ATTENTIONRAYONNEMENT LASERVISIBLE ET/OUINVISIBLE DE CLASSE1M UNE FOS OUVERTNE PAS REGARDERDIRECTMENT AVECDES INSTRUMENTSOPTIQUES.(FRA) | AVISORADIACIÓN LÁSERDE CLASE 1MVISIBLE Y/O INVISIBLECUANDO ESTABAIBITO, NO MIRADIRECTAMENTECON INSTRUMENTALOPTICO.(ESP) | VARNINGSYNUG OCH/ELLEROSYNLIGLASERSTRÁLNING,KLASS 1M, NAR DENNADEL ÁR ÖPPNAD,BETRAKTA EJSTRALEN MED OPTISKAINSTRUMENT.(SWE)(UPN) | 注意ここを開くと不可視及びまたは不可視のクラス1Mレージー放射が出ます。光学国籍で直接見ないでください。(UPN) | CAUTIONVISIBLE AND/ORINVISIBLE CLASS 1MLASER RADIATIONWHEN OPEN.DO NOT STREINTO BEAM.FDA 21 CFR (ENG)LV44603-003A |
Caution: Proper Ventilation
To avoid risk of electric shock and fire, and to prevent damage, locate the apparatus as follows:
- Front: No obstructions and open spacing.
- Sides/ Top/ Back: No obstructions should be placed in the areas shown by the dimensions below.
- Bottom: Place on the level surface. Maintain an adequate air path for ventilation by placing on a stand with a height of 10 cm or more.


Information for Users on Disposal of Old Equipment
[European Union]

This symbol indicates that the electrical and electronic equipment should not be disposed as general household waste at its end-of-life. Instead, the product should be handed over to the applicable collection point for the recycling of electrical and electronic equipment for proper treatment, recovery and recycling in accordance with your national legislation.
By disposing of this product correctly, you will help to conserve natural resources and will help prevent potential negative effects on the environment and human health which could otherwise be caused by inappropriate waste handling of this product. For more information about collection point and recycling of this product, please contact your local municipal office, your household waste disposal service or the shop where you purchased the product.
Attention:
This symbol is only valid in the European Union.
Penalties may be applicable for incorrect disposal of this waste, in accordance with national legislation.
(Business users)
If you wish to dispose of this product, please visit our web page www.jvc-europe.com to obtain information about the take-back of the product.
[Other Countries outside the European Union]
If you wish to dispose of this product, please do so in accordance with applicable national legislation or other rules in your country for the treatment of old electrical and electronic equipment.
Dear Customer,
This apparatus is in conformance with the valid European directives and standards regarding electromagnetic compatibility and electrical safety.
European representative of Victor Company of Japan, Limited is:
JVC Technology Centre Europe GmbH
Postfach 10 05 52
61145 Friedberg
Germany
IMPORTANT for the U.K.
DO NOT cut off the mains plug from this equipment. If the plug fitted is not suitable for the power points in your home or the cable is too short to reach a power point, then obtain an appropriate safety approved extension lead or consult your dealer.
BE SURE to replace the fuse only with an identical approved type, as originally fitted.
If nonetheless the mains plug is cut off ensure to remove the fuse and dispose of the plug immediately, to avoid a possible shock hazard by inadvertent connection to the mains supply.
If this product is not supplied fitted with a mains plug then follow the instructions given below:
IMPORTANT:
DO NOT make any connection to the terminal which is marked with the letter E or by the safety earth symbol or coloured green or green-and-yellow.
The wires in the mains lead on this product are coloured in accordance with the following code:
Blue: Neutral
Brown: Live
As these colours may not correspond with the coloured markings identifying the terminals in your plug proceed as follows:
The wire which is coloured blue must be connected to the terminal which is marked with the letter N or coloured black.
The wire which is coloured brown must be connected to the terminal which is marked with the letter L or coloured red.
IF IN DOUBT - CONSULT A COMPETENT ELECTRICIAN.
SAFETY INSTRUCTIONS "SOME DOS AND DON'TS ON THE SAFE USE OF EQUIPMENT"
This equipment has been designed and manufactured to meet international safety standards but, like any electrical equipment, care must be taken if you are to obtain the best results and safety is to be assured.
Do read the operating instructions before you attempt to use the equipment.
Do ensure that all electrical connections (including the mains plug, extension leads and interconnections between pieces of equipment) are properly made and in accordance with the manufacturer's instructions. Switch off and withdraw the mains plug when making or changing connections.
Do consult your dealer if you are ever in doubt about the installation, operation or safety of your equipment.
Do be careful with glass panels or doors on equipment.
DON'T continue to operate the equipment if you are in any doubt about it working normally, or if it is damaged in any way—switch off, withdraw the mains plug and consult your dealer.
DON'T remove any fixed cover as this may expose dangerous voltages.
DON'T leave equipment switched on when it is unattended unless it is specifically stated that it is designed for unattended operation or has a standby mode.
Switch off using the switch on the equipment and make sure that your family know how to do this.
Special arrangements may need to be made for infirm or handicapped people.
DON'T use equipment such as personal stereos or radios so that you are distracted from the requirements of traffic safety. It is illegal to watch television whilst driving.
DON'T listen to headphones at high volume as such use can permanently damage your hearing.
DON'T obstruct the ventilation of the equipment, for example with curtains or soft furnishings.
Overheating will cause damage and shorten the life of the equipment.
DON'T use makeshift stands and NEVER fix legs with wood screws—to ensure complete safety always fit the manufacturer's approved stand or legs with the fixings provided according to the instructions.
DON'T allow electrical equipment to be exposed to rain or moisture.
ABOVE ALL
- NEVER let anyone, especially children, push anything into holes, slots or any other opening in the case —this could result in a fatal electrical shock.
- NEVER guess or take chances with electrical equipment of any kind—it is better to be safe than sorry!
Contents
Introduction ......2
Precautions 2
How to Read This Manual .... 3
Getting Started ....4
Step 1: Unpack .... 4
Step 2: Prepare the Remote Control 4
Step 3: Hook Up 5
Before Operating the System ....7
Daily Operations—Playback ....8
Listening to the Radio 9
Playing Back a Disc 10
Playing Back a Tape 10
Daily Operations—Sound & Other
Adjustments ......11
Adjusting the Volume 11
Adjusting the Sound 11
Setting the Clock 12
Turning Off the Power Automatically 12
Advanced Radio Operations ....13
Receiving FM Stations with Radio Data System 13
Searching for a Program by PTY Codes 13
Switching Temporarily to a Program of Your Choice Automatically .... 14
Advanced Disc Operations ....15
Programming the Playing Order—Program Play 15
Playing at Random—Random Play 16
Playing Repeatedly—Repeat Play 17
Advanced Tape Operations ....18
Recording on a Tape 18
Synchronized Disc Recording 19
Timer Operations ......20
Setting the Timer 20
Additional Information ......22
Learning More about This System 22
Troubleshooting 23
Maintenance 24
Specifications 24
Parts Index 25
Introduction
Thank you for purchasing a JVC product.
Please read all instructions carefully before operation, to ensure your complete understanding and to obtain the best possible performance from the unit.
Precautions
Installation
- Install in a place which is level, dry and neither too hot nor too cold—between 5°C and 35°C.
- Install the System in a location with adequate ventilation to prevent internal heat buildup inside the System.

DO NOT install the System in a location near heat sources, or in a place subject to direct sunlight, excessive dust or vibration.
- Leave sufficient distance between the System and the TV.
- Keep the speakers away from the TV to avoid interference with TV.
Power sources
- When unplugging the System from the wall outlet, always pull on the plug, not the AC power cord.

DO NOT handle the AC power cord with wet hands.
Moisture condensation
Moisture may condense on the lenses inside the System in the following cases:
• After starting to heat the room - In a damp room - If the System is brought directly from a cold to a warm place
Should this occur, the System may malfunction. In this case, leave the System turned on for a few hours until the moisture evaporates, unplug the AC power cord, then plug it in again.

For safety, observe the following carefully:
- Make sure there is good ventilation around the main unit. Poor ventilation could overheat and damage the System.
- DO NOT block the ventilation openings or holes. If they are blocked by a newspaper or cloth, etc., the heat may not be able to get out.
Others
- Should any metallic object or liquid fall into the System, unplug the AC power cord and consult your dealer before operating any further.

DO NOT disassemble the System since there are no user serviceable parts inside.
- If you are not going to operate the System for an extended period of time, unplug the AC power cord from the wall outlet. If anything goes wrong, unplug the AC power cord and consult your dealer.
How to Read This Manual
To make this manual as simple and easy-to-understand as possible, we have adapted the following methods:
- Button and control operations are explained as listed in the table below. In this manual, the operations using the remote control is mainly explained; however, you can use the buttons and controls on the main unit if they have the same (or similar) name and marks.
- Some related tips and notes are explained later in the sections “Learning More about This System” and “Troubleshooting”, but not in the same section explaining the operations. If you want to know more about the functions, or if you have a doubt about the functions, go to these sections and you will find the answers.
 | Indicates that you press the button briefly. |
 | Indicates that you press the button briefly and repeatedly until an option you want is selected. |
 | Indicates that you press one of the buttons. |
 | Indicates that you press and hold the button for specified seconds.The number inside the arrow indicates the period of press (in this example, 2 seconds).If no number is inside the arrow, press and hold until the entire procedure is complete or until you get a result you want. |
 | Indicates that you push the button to adjust volume level. |
 | Indicates that this operation is only possible using the remote control. |
 | Indicates that this operation is only possible using the buttons and controls on the main unit. |
Getting Started
Step 1: Unpack the package and check the accessories.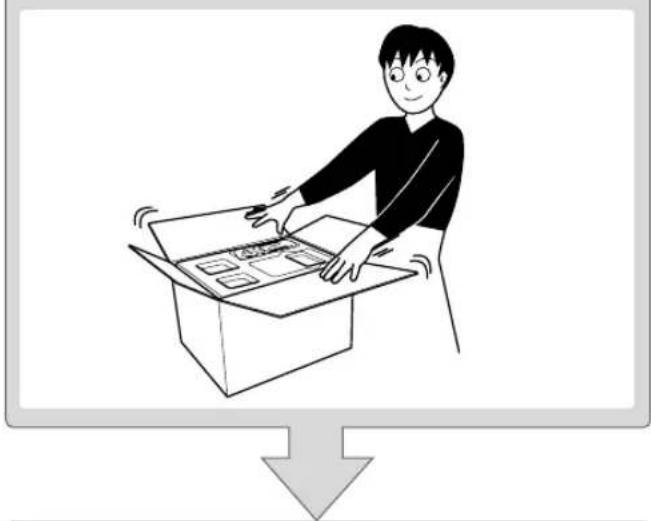
Step 2: Prepare the remote control.
Step 3: Hook up the components such as AM/FM antennas, speakers, etc. (see pages 5 to 6).

Finally plug the AC power cord. Now you can operate the System.
Step 1: Unpack
After unpacking, check to be sure that you have all the following items. The number in parentheses indicates the quantity of each piece supplied.
- FM antenna (1) • AM loop antenna (1)
- Remote control (1)
- Batteries (2)
If any item is missing, consult your dealer immediately.
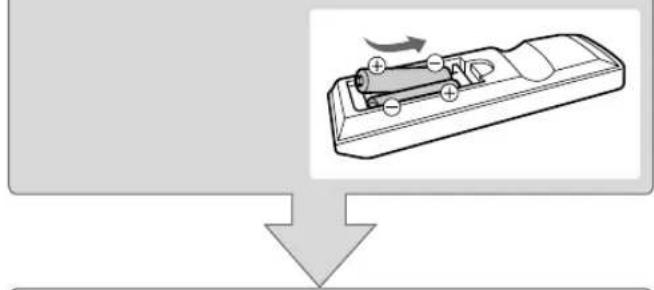
Step 2: Prepare the Remote Control
Insert the batteries into the remote control by matching the polarity (+ and −) correctly.
- If the range or effectiveness of the remote control decreases, replace both batteries.
![graph TD A["Step 1: Internal battery with rotation arrow"] --> B["Step 2: Battery disassembly with + and - polarity"] B --> C["Step 3: Disassembly of battery with + and - polarity"] C --> D["Final state: Internal battery with rotation arrow"]](/content/2026/05/847231/images/b4d8685d66796a83bf1853e727938333140e74a494edfa7cf79d3120397f815a.jpg)
Caution
Battery shall not be exposed to excessive heat such as sunshine, fire or the like.
Step 3: Hook Up
If you need more detailed information, see page 6.
Turn the power off to all components before connections.
![graph TD A["FM antenna (supplied)"] -->|Extend it so that you can obtain the best reception.| B["AM loop antenna (supplied)"] B -->|Turn it until the best reception is obtained.| C["Red"] B -->|Turn it until the best reception is obtained.| D["Black"] C --> E["To a wall outlet\nPlug the AC power cor…](/content/2026/05/847231/images/5660d455b2201224da98f8903e069810d396df8e5536e1e6cacb93b4797234e8.jpg)
To connect the AM loop antenna
Make sure to connect the wire correctly.

For better FM/AM reception
Outdoor FM antenna (not supplied): Disconnect the supplied FM antenna, and connect to an outdoor FM antenna using a 75 Ω wire with coaxial type connector (IEC or DIN45325).
AM loop antenna: Keep it connected.
- Make sure the antenna conductors do not touch any other terminals, connecting cords, and power cord. Also, keep the antennas away from metallic parts of the System, connecting cords, and the AC power cord. This could cause poor reception.
To connect the speaker cords
Make sure both speakers are connected correctly and firmly.
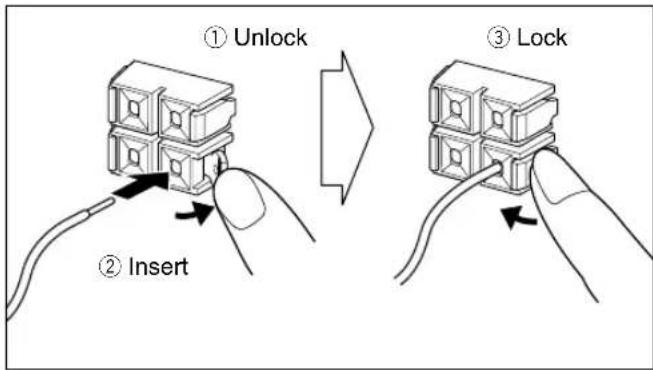
When connecting the speaker cords, match the polarity of the speaker terminals: The black cord to (-), the red cord to (+).

- DO NOT connect more than one speaker to each terminal.
- DO NOT allow the conductor of the speaker cords to be in touch with the metallic parts of the System.

- If the AM loop antenna wire or speaker cords are covered with vinyl, remove the vinyl to expose the tip of the antenna wire or speaker cords by twisting the vinyl.
Before Operating the System
The indications on the display teach you a lot of things while you are operating the System.
Before operating the System, be familiar with when and how the indicator illuminates on the display.

Indications on the main display
- While listening to radio:

- While playing a CD:

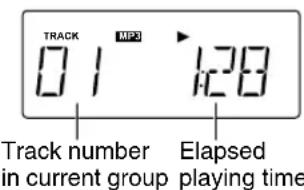
- While playing an MP3:
- While playing a tape:

- While disc play is stopped:
CD:
MP3/WMA:
- While MP3/WMA disc play is stopped:

- Both MP3 and WMA indicators are displayed when both formats contain in one disc. Otherwise each format indicator is displayed.
1 REPEAT mode indicator
- Lights when Repeat Play mode is activated.
2 TRACK indicator
• Audio disc: Lights during playback and stop.
- MP3/WMA disc: Lights during playback.
3 GROUP indicator
- MP3/WMA disc: Lights during stop.
4 MP3/WMA indicator
- Lights when MP3/WMA disc is detected.
5 RANDOM indicator
- Lights when Random Play mode is activated.
6 CD indicator
- Lights when Audio disc is detected.
7 ▶ indicator
- Lights when disc or tape is playing.
• II: Lights when disc or tape is paused.
8 PROG. (Program) indicator
- Lights when preset station is selected.
- Lights when Program Play mode is activated.
9 Tape operation indicator
- Lights when TAPE is selected.
- REC: Lights when recording is progressing.
10 NEWS/INFO indicator
- NEWS/INFO: Lights to indicate the currently selected program type for PTY Standby Reception.
- NEWS/INFO: Flashes when a program is automatically tuned in with PTY Standby Reception.
11 SLEEP indicator
- Lights when the Sleep Timer is activated.
12 HBS indicator
- Lights when HBS (Hyper Bass Sound) mode is activated. (see page 11)
13 SOUND MODE indicator
- Lights the selected sound mode. (see page 11)
14 FM reception indicator
• MONO: Lights while the FM monaural mode is activated.
- ST: Lights while an FM stereo station with sufficient signal strength is tuned in.
15 Frequency indicators
- Lights when frequency is detected.
16 TIMER indicator
- Lights when Daily Timer stands by; flashes while working.
Daily Operations—Playback

![graph TD A["1: ○/I"] --> B["2: ○▶/|| ▶▶/|| FM/AMCDTAPE"] B --> C["3: +VOLUME - VOL 10"] C --> D["4: Handheld with phone icon"]](/content/2026/05/847231/images/0b884201e0d64767447fb69b38c80f956baa91d4285d066335ab402b87e10f89.jpg)
1 Turn on the power.
The STANDBY lamp on the main unit turns off.
2 Select the source.
Playback automatically starts if the selected source is ready to start.
- If you press TAPE, only the source will be selected.
3 Adjust the volume.
4 Operate the target source as explained later.
To turn off (standby) the System

The STANDBY lamp on the main unit lights up.
- A small amount of power is always consumed even while on standby.
For private listening
Connect a pair of headphones to the PHONES jack on the main unit. The sound will no longer come out of the speakers. Be sure to turn down the volume before connecting or putting on the headphones.
- Disconnecting the headphones will activate the speakers again.

DO NOT turn off (stand by) the System with the volume set to an extremely high level; otherwise, the sudden blast of sound can damage your hearing, speakers and/or headphones when you turn on the System or start playback.
How to Select Numbers


Examples:
To select number 5, press 5.
To select number 15, press 1 then 5.
To select number 30, press 0 then 3 then 0.
To select number 125, press
10 twice, then 1, then 2, then 5.
Listening to the Radio
To select the band (FM or AM)
![graph LR A["FM/AM"] --> B["FM FM-MONO"] B --> C["AM"]](/content/2026/05/847231/images/4b02c400c96cac52480a6384dafbc535f85c472005c4a865c6f426f22d9a07d8.jpg)
You can also carry out the same operation using the FM/AM button on the System.
To tune in to a station
While FM or AM is selected...
Remote control: Main unit:
Frequency starts changing on the display.
When a station (frequency) with sufficient signal strength is tuned in, the frequency stops changing.
- When you repeatedly press the button, the frequency changes step by step.
To stop searching manually, press either button.
If the received FM station is hard to listen to, select "FM MONO"
![graph LR A["FM/AM"] --> B["FM FM MONO"] B --> C["AM"]](/content/2026/05/847231/images/d7c31a1ca63188c927cb51dd8222b95a85bed75681ed7ee0c6d009fb42ff931f.jpg)
FM
MONO:
Reception will improve though stereo effect is lost. MONO indicator lights up.
To preset the stations
You can preset 20 FM and 10 AM stations.
1 Tune in to a station you want to preset.
2 Activate the preset number entry mode.


- Finish the following process while the indication on the display is flashing.
3 Select a preset number for the station you store.
• How to Select Numbers, see page 8.
- You can also use the |◀◀/▶▶|.
4 Store the station.
DISPLAY/PROGRAM
To tune in to a preset station
1 Select a band (FM or AM).
![graph LR A["FM/AM"] --> B["FM FM MONOMONO"] B --> C["AM"]](/content/2026/05/847231/images/f7c2c3ee08d5dd69b46c68eb8706b2484b368a4c59553d221262e9797f429967.jpg)
2 Select a number of the preset station you stored.
How to Select Numbers, see page 8.
You can also use the |◀◀/▶▶|.
playable media and files
This system can playback following types of media and files.
| Media | Audio | CD, | CD-R/RW |
| File format MP3, WMA | |||
| Audio CD CD-R CD-RW | ||
- This system may not playback some files even though their formats are listed above.
- Caution for DualDisc playback The Non-DVD side of a “DualDisc” does not comply with the “Compact Disc Digital Audio” standard. Therefore, the use of Non-DVD side of a DualDisc on this product may not be recommended.
- Microsoft and Windows Media are either registered trademarks or trademarks of Microsoft Corporation in the United States and/or other countries.
Playing Back a Disc
To insert a disc

You can insert discs while playing another source.

| To start: To pause: To stop: | ||
 |  |  |
| To release, press again. | ||
To select a track/group
To select a track:

Increases the track numbers.
Decreases the track numbers.
To select a group (MP3/WMA disc only):

Increases the group numbers.
Decreases the group numbers.
To locate a particular portion
While playing a disc, press and hold until the portion you want is reached.
![graph TD A["Start"] --> B{Bidirectional Process} B --> C["Loop Back"] C --> D["End"]](/content/2026/05/847231/images/9b1984533ad3087285d7f38fdc8a461ca4a7e366bdc27964512ce455fcbb6370.jpg)
Fast-forwards the track.
Fast-reverses the track.
No sound is played during this operation on MP3 sources.
To locate a track directly and start play
How to Select Numbers, see page 8.


memo
- When you play MP3/WMA disc, the selectable tracks by using numeric keys are limited to a current group.
To display ID3 tag
While playing MP3/WMA disc.
![graph TD A["DISPLAY/PROGRAM"] --> B["ID3 ON"] A --> C["ID3 OFF"]](/content/2026/05/847231/images/c2f122b170e51c82b037b37fc27cc552627fcbcce2388fd8d17587ff9a453b8c.jpg)
When "ID3 ON" is set, ID3 tag is displayed after the source is indicated.
Playing Back a Tape
To insert a tape
You can play back type I tapes.
Push Insert Close
![graph LR A["Left Panel"] --> B["Control Button"] B --> C["Right Panel"] C --> D["Left Panel with Switch"] D --> E["Right Panel with Switch"]](/content/2026/05/847231/images/5bf484e7f487c9de8ed8e0dd1c6d8b096dcdce76f324b100ce07e06682064087.jpg)
With the tape side facing down
Select the source "TAPE".


Daily Operations—Sound & Other Adjustments
Remote control
Main unit

Adjusting the Volume
You can adjust the volume level from level 0 (VOL MIN) to level 31 (VOL MAX).
Remote control: Main unit:
To drop the volume in a moment


To restore the volume, press again, or adjust the volume level.
Adjusting the Sound

To reinforce the bass sound—HBS
You can enjoy powerful bass sound with the Hyper-Bass Sound effect.
![graph LR A["HBS"] --> B["HBS"] B --> C["Canceled (No indication)"]](/content/2026/05/847231/images/60266fa70f5cf6b8c132605ba0611976e6b7f7a01539761100f1930d27675852.jpg)
Sound Mode
You can select one of 4 SEA (Sound Effect Amplifier) modes. You can use this effect only for playback.
![graph LR A["SOUND MODE"] --> B["ROCK"] B --> C["POP"] C --> D["CLASSIC"] D --> E["JAZZNo indication"] E --> F["(No sound effect)"]](/content/2026/05/847231/images/c7409c829f88e9ceed60352e24204e65e4bcd455b6b2b87ac9c47f219f6b609a.jpg)
ROCK Boosts low and high frequencies.
POP Good for vocal music.
CLASSIC Good for classical music.
JAZZ Accented lower frequencies for jazz-type music.
No indication No sound effect applies.
Setting the Clock
Without setting the built-in clock, you cannot use the Daily Timer (see page 20).
1 Turn off (standby)

2 Activate the clock setting mode.
5 sec.

3 Adjust the hour.


4 Adjust the minute.


The built-in clock starts working.
To check the current time during play
![graph LR A["CLOCK/SLEEP"] --> B["Source information"] B --> C["Clock"]](/content/2026/05/847231/images/df302a5ebe98f5d7942c17ed87fea4d6f7934a6df7a2fa2be30ad428f8ffb439.jpg)
If there is a power failure
The clock loses its settings and blinks. You need to set the clock again.
Turning Off the Power Automatically
To turn off the System after a certain period of time—Sleep Timer
1 Activate the sleep timer mode.
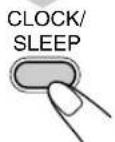
2 sec.
CLOCK/SLEEP

2 Specify the time (in minutes).
![graph LR A["SLEEP"] --> B["10 → 20 → 30 → 40 → 50"] B --> C["OFF ← 90 ← 80 ← 70 ← 60"] C --> D["(Canceled)"]](/content/2026/05/847231/images/885ccb2217e01a43f9d1e42d1c891c0107128fdd776aee214cd2530f92530b22.jpg)
- Sleep timer requires a few seconds to set. The system automatically turns off when the selected count down time is executed.
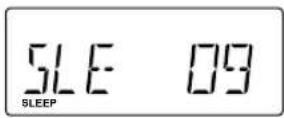
To check the time remaining until the shut-off time
2 sec.
CLOCK/SLEEP

Advanced Radio Operations
Remote control
Receiving FM Stations with
Radio Data System
Radio Data System allows FM stations to send an additional signal along with their regular program signals.
- When tuned to an FM station which provides the Radio Data System service.
This system can receive the following types of Radio Data System signals.
| PS (Program Service) | Shows commonly known station names. |
| PTY (Program Type) | Shows types of broadcast programs. |
| RT (Radio Text) | Shows text messages the station sends. |
| Enhanced Other Networks | Provides the information about the types of the programs broadcast by the Radio Data System stations of the different networks. |
To show the Radio Data System information
While listening to an FM station...
![graph LR A["DISPLAY MODE"] --> B["PS-RTY RT"] B --> C["Station Frequency"]](/content/2026/05/847231/images/efd572ed7f5b80f3714629e7f86a17306a3c738160f1907c0690411155520da7.jpg)
| PS Station names is displayed. “NO PS” will appear if no signal is sent. |
| PTY The broadcast program type is displayed. “NO PTY” will appear if no signal is sent. |
| RT Text messages the station sends is displayed.“NO RT” will appear if no signal is sent. |
Searching for a Program by
PTY Codes

You can locate a particular kind of program from the preset channels (see page 9) by specifying the PTY codes.
To search for a program using the PTY codes
1 While listening to an FM station...
2 Select a PTY code.


See Additional Information about PTY codes (See page 22).
3 Start searching.

SEARCH
The receiver searches 20 preset FM stations, stops when it finds the one you have selected, and tunes in to that station.
- If no program is found, "NO FOUND" appears on the display. • To stop searching any time during search, press PTY SEARCH.
To continue searching after it stops on an unwanted station
While the indications on the display are flashing, press PTY SEARCH again.
Switching Temporarily to a Program of Your Choice Automatically Remote ONLY
The Enhanced Other Networks function allows the System to switch temporarily to a preset FM station broadcasting a program of your choice (NEWS or INFO).
- This function works while listening to an FM station providing the required signals.
While listening to an FM station, select one of the following:
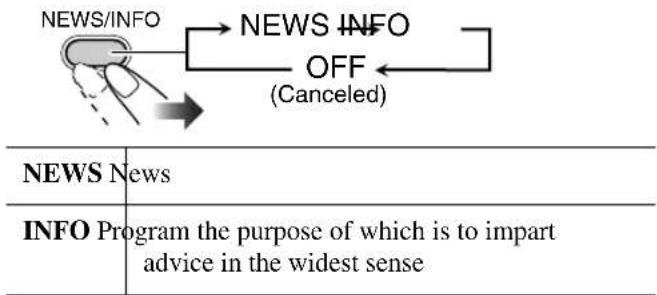
How the Enhanced Other Networks function actually works:
CASE 1
If a station is not broadcasting the program of your choice
The System continues tuning in to the current station.
When a station broadcasting the program of your choice, the System automatically switches to the station. NEWS/INFO indicator starts flashing.
When the program is over, the System goes back to the previously tuned station, but the function still remains active (the indicator stops flashing and remains lit).
CASE 2
If the station currently tuned in is broadcasting the program of your choice
NEWS/INFO indicator starts flashing.
When the program is over, the indicator stops flashing (the function still remains active).
Advanced Disc Operations
Remote control
Main unit

Programming the Playing Order—
Program Play
You can arrange the playing order of the tracks (up to 32) before you start playback.
- You can repeat one programmed track or all the programmed tracks by pressing REPEAT.
1 Before starting playback, press DISPLAY/PROGRAM.

2 Select tracks you want for Program Play.
How to Select Numbers, see page 8.
You can also use the |◀◀/▶▶|.
For CD

For MP3/WMA
Press TUNING/GROUP/PTY to select a group, then select a track.
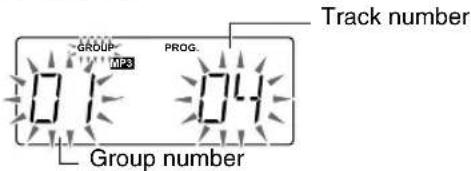
DISPLAY/PROGRAM
Next program step will be indicated when you program tracks on MP3/WMA disc.

3 Repeat step 2 to program the other tracks.
4 Start playback.

The tracks you have selected are played back in the order you have programmed.

- Tracks cannot be selected with the Numeric buttons during Program Play.
To check the programmed contents
While the PROG. indicator is shown on the display and before playback...
DISPLAY/PROGRAM
To modify the program
While the PROG. indicator is shown on the display and before playback...
Edit:
1 Press DISPLAY/PROGRAM repeatedly until displaying the programmed number you want to edit. 2 Repeat the step 2 on page 15.
To add step in the program:
1 Press DISPLAY/PROGRAM repeatedly until displaying “--” on the display. 2 Repeat the step 2 on page 15.
To erase entire program:

Exit from Program mode at the same time. All the programs are also erased under the following actions: opening the CD door, changing other sources, or turning off the unit.
Playing at Random—Random Play

You can play back all the tracks on the disc at random.
1 Press RANDOM.

2 Start playback.

Playback starts in random order. Random Play ends when all tracks have been played.

• Tracks cannot be selected with the Numeric buttons during Random Play.
To exit from Random Play
While the RANDOM indicator is shown on the display...
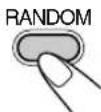
Playing Repeatedly—Repeat Play (Remote Only)
You can repeat playback.
For CD:
During Random Play:
![graph TD A["REPEAT"] --> B["REPEAT1"] B --> C["REPEAT"] C --> D["Canceled\n(No indication)"]](/content/2026/05/847231/images/787fbecc6009480b879a2425a7fb692a5eefb8b7e9aa5aa0e56a5ad290aaf9a3.jpg)
For MP3/WMA disc:
![graph TD A["REPEAT"] --> B["REPEAT1"] B --> C["REPEAT"] C --> D["REPEAT GROUP"] D --> E["Canceled\n(No indication)"]](/content/2026/05/847231/images/2450ad65fac5cd45b691aa8e03ad8331c1737c1d12f2697473cce72e29acc8d5.jpg)
| REPEAT1 Repeats the current track. | |
| REPEAT GROUP | Repeats all the tracks in the current group. |
| REPEAT Repeats all the tracks. Repeats the program. | |
Advanced Tape Operations
Remote control
Main unit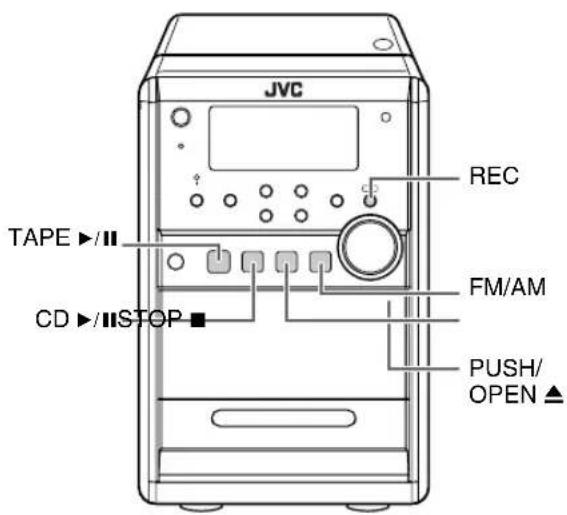
IMPORTANT
It should be noted that it may be unlawful to re-record pre-recorded tapes, records, or discs without the consent of the owner of copyright in the sound or video recording, broadcast or cable program and in any literary, dramatic musical, or artistic work embodied therein.
Recording on a Tape
You can use type I tapes for recording.
• To play a tape, see page 10.
1 Insert a recordable cassette.
Push Insert Close
![graph LR A["Left Panel"] --> B["Right Panel"] B --> C["Left Panel with Lock"] C --> D["Right Panel"]](/content/2026/05/847231/images/f373cbef4d5aa9312018b1d98c5ab5738b37dcd91f4a7f2585bc3ad03898550a.jpg)
With the tape side facing down.
2 Select and start playing the source—"FM," "AM," or "CD".
3 Start recording.
Lights REC indicator on the display.
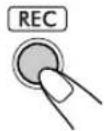
On the main unit
To stop recording:
Synchronized Disc Recording
You can start and stop both disc playback and tape recording at the same time.
To record the entire disc
1. Load a disc and insert a recordable cassette.
- If the current playing source is not the CD player, press CD ▶/■, then ■.
To record Program Play or Random Play
Select Program Play (and make a program: see page 15) or Random Play (see page 16).
2. Start recording.

On the main unit
3. Flip the cassette tape manually to the opposite side.
- When the tape reaches the end before finishing playback of the disc, the tape will stop and the disc will pause. Press REC after flipping the cassette tape to the opposite side track.
- When the disc playback finishes before reaching the end of the tape, the tape will continue running. To stop it, press STOP ■.
- When you press REC while playing back the disc, the current playing track will be started to record from its beginning to the end.
To erase the recorded track, change the source to TAPE then press REC.
To protect your recording
Cassettes have two small tabs on the back to protect from unexpected erasure or re-recording.
To protect your recording, remove these tabs.

To re-record on a protected tape, cover the holes with adhesive tape.
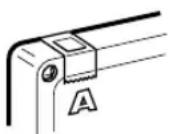
If the beat is heard while recording an AM broadcast
On the back of the main unit

- Select “1” or “2” to reduce the beat.

Timer Operations
Remote control
Main unit
Setting the Timer
Using Timer, you can wake up with music, etc.
- You can set the Timer when the System turns on.
- To exit from the timer setting, press ■ as required.
How Daily Timer actually works
Once the Daily Timer has been set, the timer ( ) indicator is lit on the display. The TIMER lamp on the main unit lights up. The Daily Timer is activated at the same time every day until the timer is turned off manually.
When the on-time comes
The system turns on, tunes in to the specified station, or starts playing the specified source.
- The sound level is gradually turned up until the last time you listened to it. (Maximum volume: 16)
- While the timer is working, the timer ( ) indicator flashes on the display.
- The timer setting remains in memory until you change it.
- Without canceling the timer, you can change the source or adjust the volume after the timer starts playback.
1. To activate the TIMER setting
2. Set On Time![graph TD A["①Set hour"] --> B["PRESET"] B --> C["TIMER"] D["②Set minutes"] --> E["PRESET"] E --> F["TIMER"]](/content/2026/05/847231/images/3f99d679497a1a6c67e5118bee1c15db4aba881b3aaa46eb29c765cdf5648838.jpg)
3. Set Off Time
① Set Off Time setting.

② Set time.
See step 2 ①, ②
You cannot set On time and Off time at the same time setting.
4. Select the playback source.
Select the source.

Select the playback source: “CD”, “TAPE”, or “TUNER”.

When you select "TUNER"
-1 |◀◀/▶▶| Select "AM PRE" or "FM PRE", then press TIMER. -2 |◀◀/▶▶| Select preset number, then press TIMER.
Set TIMER active.

The Timer indicator lights on the display and the TIMER lamp on the main unit.
Set the System to STANDBY.

To inactivate the TIMER.
When the System turns on.
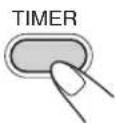
The timer ( ) indicator on the display and the TIMER lamp of the main unit go out.

memo
- When setting both SLEEP TIMER and DAILY TIMER, the timer which turns the unit off earlier takes precedence.
Additional Information
Learning More about This System
Daily Operations—Playback (see pages 8 to 10)
Listening to the Radio:
- If you store a new station into an occupied preset number, the previously stored station in that number will be erased.
- When you unplug the AC power cord or if a power failure occurs, the preset stations will be erased in a few days. If this happens, preset the stations again.
Playing Back a Disc:
- This System cannot play “packet write” discs.
- For MP3/WMA playback...
- MP3/WMA discs require a longer readout time than regular CDs. (It depends on the complexity of the group/file configuration.)
- Some MP3/WMA files cannot be played back and will be skipped. This results from their recording processes and conditions.
- When making MP3/WMA discs, use ISO 9660 Level 1 or Level 2 for the disc format.
- This System can play back MP3/WMA files with the extension code .mp3/.wma (regardless of the letter case—upper/lower).
- Some characters or symbols will not be shown correctly on the display. The maximum character number shown on the display is 30 (without the extension code) for files, and 30 for ID3 tag.
- It is recommended that you make each MP3/WMA file at a sampling rate of 44.1 kHz and at bit rate of 128 kbps.
- This System can recognize a total of 511 tracks and 511 groups on an MP3/WMA disc. Those exceeding the maximum number cannot be recognized.
- If a folder does not include MP3/WMA tracks, they are ignored.
MP3/WMA groups/tracks configuration
This system plays back MP3/WMA tracks as follows. The play order in the figure is for MP3/WMA tracks on the disc.
![graph TD A["ROOT"] --> B["01"] A --> C["02"] B --> D["03"] C --> E["04"] C --> F["05"] D --> G["9"] D --> H["10"] D --> I["8"] D --> J["11"] D --> K["12"] E --> L["Group with its play order"] F --> L G --> L H --> L I --> L J --> L K --> L L --> M["MP3/WMA track with its play order"]](/content/2026/05/847231/images/2458d39aa922e71d6eb1664807729e42f68d21b75b47e6edd91bc66b9d1d93b3.jpg)
Playing Back a Tape:
- It is not recommended to use C-120 or longer tapes. These tapes easily jam in the pinch roller and capstan, and may cause characteristic deterioration.
Daily Operations—Sound & Other Adjustments (see pages 11 and 12)
Adjusting the Volume:
- Be sure to turn down the volume before connecting or putting on the headphones.
- This function also affects the sound through the headphones.
Adjusting the Sound:
Setting the Clock:
- The clock blinks on the display until you set the clock.
- The clock may gain or lose 1 to 2 minutes per month. If this happens, reset the clock.
Advanced Radio Operations (see pages 13 and 14)
Descriptions of the PTY Codes
NEWS: News
AFFAIRS: Topical programs expanding on the current news or affairs
INFO: Programs on medical service, weather forecasts, etc.
SPORT: Sports events
EDUCATE: Educational programs
DRAMA: Radio plays
CULTURE: Programs on national or regional culture
SCIENCE: Programs on natural sciences and technology
VARIED: Other programs like comedies or ceremonies
POP M: Pop music
ROCK M: Rock music
EASY M: Middle-of-the road music (usually called "easy listening")
LIGHT M: Light music
CLASSICS: Classical music
OTHER M: Other music
WEATHER: Weather information
FINANCE: Reports on commerce, trading, the Stock Market, etc.
CHILDREN: Entertainment programs for children
SOCIAL: Programs on social activities
RELIGION: Programs dealing with any aspect of belief or faith, or the nature of existence or ethics
PHONE IN: Programs where people can express their views either by phone or in a public form
TRAVEL: Programs about travel destinations, package tours, and travel ideas and opportunities
LEISURE: Programs concerned with recreational activities such as gardening, cooking, fishing, etc.
JAZZ: Jazz music
COUNTRY: Country music
NATION M: Current popular music from another nation region, in that country's language
OLDIES: Classic pop music
FOLK M: Folk music
DOCUMENT: Programs dealing with factual matters, presented in an investigative style
TEST: Broadcasts for testing emergency equipment or unit
ALARM: Emergency announcement
NONE: No program type, undefined program, or difficult to categorize into particular types
Advanced Disc (see pages 15 to 17)
Programming the Playing Order—Program Play:
- If you try to program a 32nd track, “FULL” appears on the display.
- While programming steps... Your entry will be ignored if you have tried to program an item number that does not exist on the disc (for example, selecting track 14 on a disc that only has 12 tracks).
Advanced Tape Operations (see pages 18 and 19)
Recording on a Tape:
- The recording level is automatically set correctly. Thus, you can adjust the sound you are actually listening to without affecting the recording level.
- There is leader tape which cannot be recorded onto at the start and end of cassette tapes. Thus, when recording CDs or radio broadcasts, wind the leader tape first to ensure that the recording will be made without any music part lost.
- If you start recording with no cassette inserted, "NO TAPE" appears on the display. If a protected tape has been inserted, "PROTECT" appears.
Timer Operations (see pages 20 and 21)
- When you unplug the AC power cord or if a power failure occurs, the timer will be canceled. You need to set the clock first, then the timer again.
- You cannot set On time and Off time on the same time setting.
Troubleshooting
If you are having a problem with your System, check this list for a possible solution before calling for service.
General:
Adjustments or settings are suddenly canceled before you finish.
There is a time limit. Repeat the procedure again.
Operations are disabled.
The built-in microprocessor may malfunction due to external electrical interference. Unplug the AC power cord and then plug it back in.
Reset the System if you don't solve the problem.
Press and hold the RESET button on the rear of the Unit for 3 seconds with something having a sharp point, while the broadcast AC power cord is plugged off.
Resetting causes the unit to restore its factory default settings and results in all the settings made by the user being deleted.

Sharp point
Unable to operate the System from the remote control.
The path between the remote control and the remote sensor on the System is blocked. Point it at the remote sensor on the front panel. Signals cannot reach the remote sensor.
Move closer to the System.
The batteries are exhausted.
No sound is heard from the speakers.
Speaker connections are incorrect or loose (see page 6). Headphones are connected (see page 8).
Radio Operations:
Hard to listen to broadcasts because of noise (see pages 4 to 6).
Antenna connections are incorrect or loose. The AM loop antenna is too close to the System. The FM antenna is not properly extended and positioned.
Disc Operations:
The disc does not play.
The disc is placed upside down. Place the disc with the label side up.
The disc sound is discontinuous.
The disc is scratched or dirty.
Timer Operations:
Daily Timer does not work.
The System has been turned on when the on-time comes. Timer starts working only when the System is turned off. There might have been a power failure. Set the clock first, then the timer again.
"INVALID" is indicated on the display.
Set the Off Time first (see page 21).
Maintenance
To get the best performance of the System, keep your discs and mechanism clean.
Handling discs
- When removing the disc from its case, hold it at the edge while pressing the center hole lightly.
- Do not touch the shiny surface of the disc, or bend the disc.
- Put the disc back in its case after use to prevent warping.
- Be careful not to scratch the surface of the disc.
- Avoid exposure to direct sunlight, temperature extremes, and moisture.
To clean the disc:
Wipe the disc with a soft cloth in a straight line from center to edge.
Handling cassette tapes
- If the tape is loose in its cassette, take up the slack by inserting a pencil in one of the reels and rotate it.
- If the tape is loose, it may get stretched, cut, or caught in the cassette.
- Be careful not to touch the tape surface.
- Avoid the following places to store the tape—in dusty places, in direct sunlight or heat, in moist areas, on a TV or speaker, or near a magnet.
To keep the best recording and playback sound quality
- Use a cotton swab moistened with alcohol to clean the heads, capstans, and pinch rollers.
- Use a head demagnetizer (available at electronics and audio shops) to demagnetize the heads (when the System turned off).
Cleaning the System
- Stains should be wiped off with a soft cloth. If the System is heavily stained, wipe it with a cloth soaked in water-diluted neutral detergent and wrung well, then wipe clean with a dry cloth.
- Since the System may deteriorate in quality, it become damaged or get its paint peeled off, be careful about the following:
- DO NOT wipe it with a hard cloth.
- DO NOT wipe it strongly.
- DO NOT wipe it with thinner or benzine.
- DO NOT apply any volatile substance such as insecticides to it.
- DO NOT allow any rubber or plastic to remain in contact for a long time.
Specifications
Amplifier section
Output Power: 5 W per channel, min. RMS, driven into 4 Ω at 1 kHz with no more than 10% total harmonic distortion. (IEC268-3)
Speakers/Impedance: 4 Ω – 8 Ω
Tuner section
FM tuning range: 87.50 MHz – 108.00 MHz AM (MW) tuning range: 522 kHz – 1629 kHz
CD player section
Dynamic range: 60 dB Signal-to-noise ratio: 60 dB Wow and flutter: Immeasurable
Cassette deck section
Frequency response Normal (type I): 125 Hz – 8 kHz Wow and flutter: 0.35% (WRMS)
General
Power requirement: AC 230 V, 50 Hz Power consumption: 26 W (at operation) 0.9 W (on standby) Dimensions (approx.): 141 mm × 211 mm × 216 mm (W/H/D)
Mass (approx.): 2.6 kg
Speakers
Type: 1-way Bass reflex Speaker units: 10 cm cone × 1 Impedance: 4 Ω Dimensions (approx.): 136 mm × 212 mm × 178 mm (W/H/D)
Mass (approx.): 1.3 kg each
Supplied Accessories
See page 4.
Design and specifications are subject to change without notice.
Parts Index
Refer to the pages to see how to use the buttons and controls.
Remote control
Main unit

JVC

- UX-S15—CONSISTS OF CA-UXS15 AND SP-UXS
- CAUTION
- CAUTION — ⏻/I (STANDBY/ON) BUTTON
- IMPORTANT FOR LASER PRODUCTS
- CAUTION: PROPER VENTILATION
- INFORMATION FOR USERS ON DISPOSAL OF OLD EQUIPMENT
- [EUROPEAN UNION]
- ATTENTION
- (BUSINESS USERS)
- [OTHER COUNTRIES OUTSIDE THE EUROPEAN UNION]
- DEAR CUSTOMER
- IMPORTANT FOR THE U.K
- IMPORTANT
- SAFETY INSTRUCTIONS "SOME DOS AND DON'TS ON THE SAFE USE OF EQUIPMENT
- ABOVE ALL
- CONTENTS
- INTRODUCTION
- GETTING STARTED
- BEFORE OPERATING THE SYSTEM
- DAILY OPERATIONS—PLAYBACK
- DAILY OPERATIONS—SOUND & OTHER
- ADJUSTMENTS
- ADVANCED RADIO OPERATIONS
- ADVANCED DISC OPERATIONS
- ADVANCED TAPE OPERATIONS
- TIMER OPERATIONS
- ADDITIONAL INFORMATION
- PRECAUTIONS
- INSTALLATION
- POWER SOURCES
- MOISTURE CONDENSATION
- FOR SAFETY, OBSERVE THE FOLLOWING CAREFULLY
- OTHERS
- HOW TO READ THIS MANUAL
- STEP 1: UNPACK
- STEP 2: PREPARE THE REMOTE CONTROL
- STEP 3: HOOK UP
- TO CONNECT THE AM LOOP ANTENNA
- FOR BETTER FM/AM RECEPTION
- TO CONNECT THE SPEAKER CORDS
- INDICATIONS ON THE MAIN DISPLAY
- MP3/WMA
- TURN ON THE POWER
- SELECT THE SOURCE
- ADJUST THE VOLUME
- OPERATE THE TARGET SOURCE AS EXPLAINED LATER
- TO TURN OFF (STANDBY) THE SYSTEM
- FOR PRIVATE LISTENING
- HOW TO SELECT NUMBERS
- EXAMPLES
- LISTENING TO THE RADIO
- TO SELECT THE BAND (FM OR AM)
- TO TUNE IN TO A STATION
- IF THE RECEIVED FM STATION IS HARD TO LISTEN TO, SELECT "FM MONO
- TO PRESET THE STATIONS
- TO TUNE IN TO A PRESET STATION
- PLAYABLE MEDIA AND FILES
- PLAYING BACK A DISC
- TO INSERT A DISC
- TO SELECT A TRACK/GROUP
- TO LOCATE A PARTICULAR PORTION
- TO LOCATE A TRACK DIRECTLY AND START PLAY
- MEMO
- TO DISPLAY ID3 TAG
- PLAYING BACK A TAPE
- TO INSERT A TAPE
- DAILY OPERATIONS—SOUND & OTHER ADJUSTMENTS
- ADJUSTING THE VOLUME
- ADJUSTING THE SOUND
- TO REINFORCE THE BASS SOUND—HBS
- SOUND MODE
- SETTING THE CLOCK
- TURN OFF (STANDBY)
- ACTIVATE THE CLOCK SETTING MODE
- ADJUST THE HOUR
- ADJUST THE MINUTE
- TO CHECK THE CURRENT TIME DURING PLAY
- IF THERE IS A POWER FAILURE
- TURNING OFF THE POWER AUTOMATICALLY
- TO TURN OFF THE SYSTEM AFTER A CERTAIN PERIOD OF TIME—SLEEP TIMER
- ACTIVATE THE SLEEP TIMER MODE
- SPECIFY THE TIME (IN MINUTES)
- TO CHECK THE TIME REMAINING UNTIL THE SHUT-OFF TIME
- RECEIVING FM STATIONS WITH
- RADIO DATA SYSTEM
- TO SHOW THE RADIO DATA SYSTEM INFORMATION
- SEARCHING FOR A PROGRAM BY
- PTY CODES
- START SEARCHING
- TO CONTINUE SEARCHING AFTER IT STOPS ON AN UNWANTED STATION
- SWITCHING TEMPORARILY TO A PROGRAM OF YOUR CHOICE AUTOMATICALLY REMOTE ONLY
- WHILE LISTENING TO AN FM STATION, SELECT ONE OF THE FOLLOWING
- HOW THE ENHANCED OTHER NETWORKS FUNCTION ACTUALLY WORKS
- CASE
- IF A STATION IS NOT BROADCASTING THE PROGRAM OF YOUR CHOICE
- IF THE STATION CURRENTLY TUNED IN IS BROADCASTING THE PROGRAM OF YOUR CHOICE
- PROGRAMMING THE PLAYING ORDER
- PROGRAM PLAY
- BEFORE STARTING PLAYBACK, PRESS DISPLAY/PROGRAM
- SELECT TRACKS YOU WANT FOR PROGRAM PLAY
- REPEAT STEP 2 TO PROGRAM THE OTHER TRACKS
- START PLAYBACK
- TO CHECK THE PROGRAMMED CONTENTS
- TO MODIFY THE PROGRAM
- EDIT
- TO ADD STEP IN THE PROGRAM
- TO ERASE ENTIRE PROGRAM
- PLAYING AT RANDOM—RANDOM PLAY
- PRESS RANDOM
- TO EXIT FROM RANDOM PLAY
- PLAYING REPEATEDLY—REPEAT PLAY (REMOTE ONLY)
- FOR CD
- RECORDING ON A TAPE
- SYNCHRONIZED DISC RECORDING
- TO RECORD THE ENTIRE DISC
- LOAD A DISC AND INSERT A RECORDABLE CASSETTE
- TO RECORD PROGRAM PLAY OR RANDOM PLAY
- START RECORDING
- FLIP THE CASSETTE TAPE MANUALLY TO THE OPPOSITE SIDE
- TO PROTECT YOUR RECORDING
- IF THE BEAT IS HEARD WHILE RECORDING AN AM BROADCAST
- SETTING THE TIMER
- HOW DAILY TIMER ACTUALLY WORKS
- WHEN THE ON-TIME COMES
- SET OFF TIME
- SELECT THE PLAYBACK SOURCE
- SET TIMER ACTIVE
- SET THE SYSTEM TO STANDBY
- TO INACTIVATE THE TIMER
- LEARNING MORE ABOUT THIS SYSTEM
- DAILY OPERATIONS—PLAYBACK (SEE PAGES 8 TO 10)
- MP3/WMA GROUPS/TRACKS CONFIGURATION
- DAILY OPERATIONS—SOUND & OTHER ADJUSTMENTS (SEE PAGES 11 AND 12)
- ADVANCED RADIO OPERATIONS (SEE PAGES 13 AND 14)
- DESCRIPTIONS OF THE PTY CODES
- ADVANCED DISC (SEE PAGES 15 TO 17)
- PROGRAMMING THE PLAYING ORDER—PROGRAM PLAY
- ADVANCED TAPE OPERATIONS (SEE PAGES 18 AND 19)
- TIMER OPERATIONS (SEE PAGES 20 AND 21)
- TROUBLESHOOTING
- GENERAL
- ADJUSTMENTS OR SETTINGS ARE SUDDENLY CANCELED BEFORE YOU FINISH
- OPERATIONS ARE DISABLED
- UNABLE TO OPERATE THE SYSTEM FROM THE REMOTE CONTROL
- NO SOUND IS HEARD FROM THE SPEAKERS
- RADIO OPERATIONS
- HARD TO LISTEN TO BROADCASTS BECAUSE OF NOISE (SEE PAGES 4 TO 6)
- DISC OPERATIONS
- THE DISC DOES NOT PLAY
- THE DISC SOUND IS DISCONTINUOUS
- DAILY TIMER DOES NOT WORK
- INVALID" IS INDICATED ON THE DISPLAY
- MAINTENANCE
- HANDLING DISCS
- TO CLEAN THE DISC
- HANDLING CASSETTE TAPES
- TO KEEP THE BEST RECORDING AND PLAYBACK SOUND QUALITY
- CLEANING THE SYSTEM
- SPECIFICATIONS
- AMPLIFIER SECTION
- TUNER SECTION
- CD PLAYER SECTION
- CASSETTE DECK SECTION
- SPEAKERS
- SUPPLIED ACCESSORIES
- PARTS INDEX
- JVC
Brand : JVC
Model : CA-UXS15
Category : Hi-Fi System