
Saugroboter 10028520 - Vacuum Cleaner Klarstein - Free user manual and instructions
Find the device manual for free Saugroboter 10028520 Klarstein in PDF.


| Product Type | Robot Vacuum Cleaner |
| Model | Saugroboter 10028520 (also known as XR510) |
| Brand | Klarstein |
| Dimensions (approx.) | 33 cm diameter; 9 cm height |
| Weight (approx.) | 3 kg |
| Power Supply | Rechargeable battery (adapter included); DC socket |
| Battery Type | Rechargeable NiMH or Li-Ion (specific not stated) |
| First Charge Time | 12 hours for initial use; 16 hours if long unused |
| Charging Method | Manual via adapter or docking station; automatic low-battery return |
| Cleaning Modes | Automatic, Spot (1 m² spiral), Manual direction via remote |
| Remote Control | Wireless remote with speed selection, timer, and full-go function |
| Space Isolator | Includes virtual wall device to restrict cleaning areas |
| Docking Station | Infrared auto-charging station; must be placed against wall with clear area |
| Suction & Mopping | Vacuum cleaning, dust absorption, and mopping (with mob attachment) |
| Sensors | Wall detection, ground detection, cliff sensors |
| Dust Box Capacity | Standard capacity (approx. 0.3-0.5 L) |
| Filter Type | Washable foam filter; clean with cold air or brush |
| Maintenance | Clean brushes, wheels, sensors; replace side brushes and battery as needed |
| Safety Features | Low battery warning, automatic charging search, overheat protection |
| Safety Precautions | Do not use on wet surfaces; keep cords <15 cm; avoid children |
| Repairability | Contact after-sales service; do not disassemble without authorization |
| Compatible Surfaces | Short carpet, wood floor, ceramic tile, etc. |
Frequently Asked Questions - Saugroboter 10028520 Klarstein
User questions about Saugroboter 10028520 Klarstein
0 question about this device. Answer the ones you know or ask your own.
Ask a new question about this device
Download the instructions for your Vacuum Cleaner in PDF format for free! Find your manual Saugroboter 10028520 - Klarstein and take your electronic device back in hand. On this page are published all the documents necessary for the use of your device. Saugroboter 10028520 by Klarstein.
USER MANUAL Saugroboter 10028520 Klarstein
natural_image
Row of white icons representing kitchen appliances and home appliances (no text or symbols)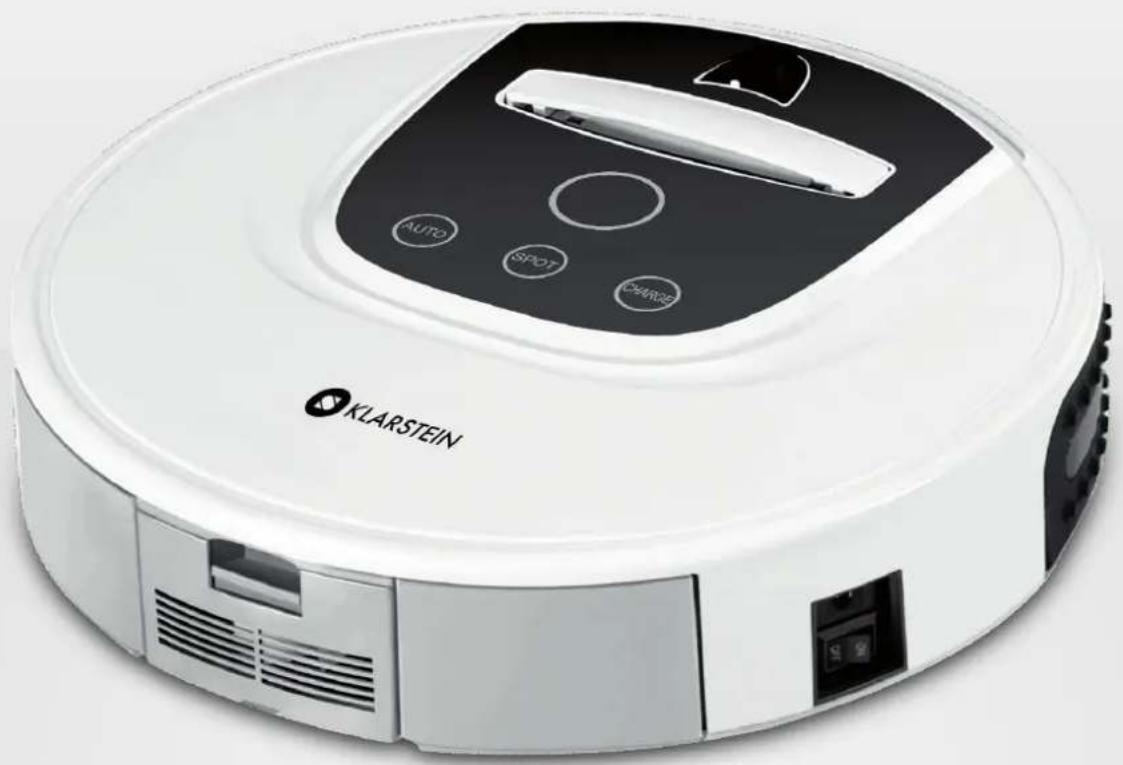
natural_image
White Klarstein vacuum cleaner with control panel and sensor buttons (no visible text or symbols on body)Saugroboter
10009785
natural_image
Pure electrical circuit lines without any symbolsnatural_image
Simple line drawing of two figures interacting near a box, one pulling an arrow and the other running away (no text or symbols)natural_image
Hand holding a small object on a circular base with an arrow indicating direction (no text or symbols)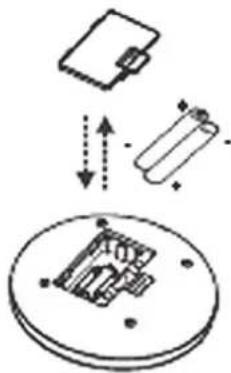
natural_image
Diagram showing battery, resistor, and motor components (no text or labels)Bedienung
natural_image
Line drawing of a hand holding a small object near a circular device (no text or symbols)Abb.1
natural_image
Simple line drawing of a microwave oven and a hand placing a small object (no text or symbols)Abb.2
flowchart
graph LR
    A["Person with battery"] --> B["Device with icon"]
    B --> C["Device with tray"]
    C --> D["Device with brush and scroll"]
natural_image
Technical illustration of a robotic vacuum cleaner with open lid and internal components (no text or symbols)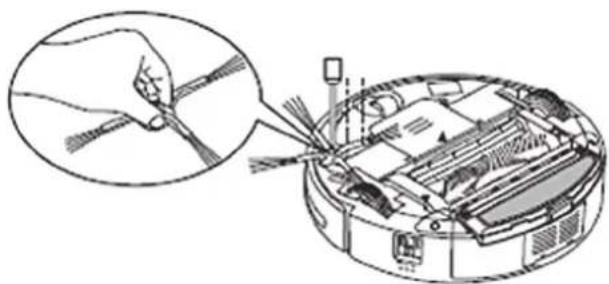
natural_image
Diagram of a robotic vacuum cleaner with a hand inserting wires into the air gap (no text or symbols present)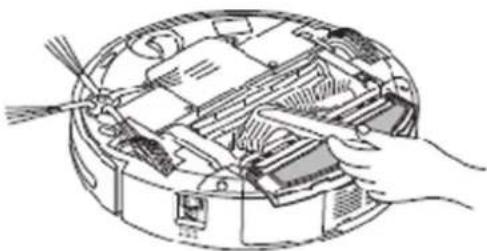
natural_image
Illustration of hands installing or adjusting internal components in a circular device (no text or symbols visible)Fehlerbehebung
natural_image
Simple line drawing of a trash bin with a 'X' symbol crossed out by a horizontal line (no text or labels)The product, mainly applicable to home, hotel rooms and small office, is good for cleaning various short-haired carpet, wood floor, ceramic tile, etc.
Function Introduction
It is the XR510 cleaner with rechargeable battery, controlled by advanced intelligent program, with the following function: automatic vacuum cleaning, dust absorption, mopping, timing cleaning, wireless remote control, speed selection, various identification protection functions, various automatic cleaning modes and automatic charging.
Components of the Robot
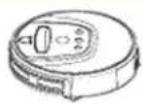
Main Body
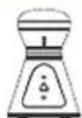
Space Isolator

Docking Station

Remote Control
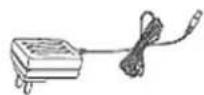
Adapter
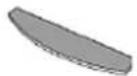
Mob
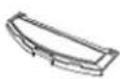
Trailing Bar with Mob
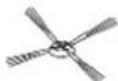
Side Brush (two)

Dust Brush
User Manual

Filter

Rechargeable Battery
Introduction
Structure Introduction
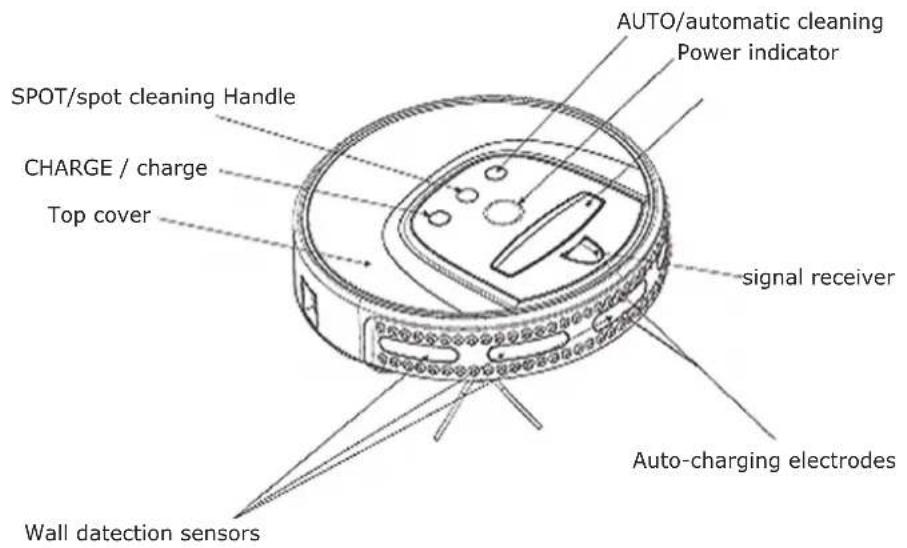
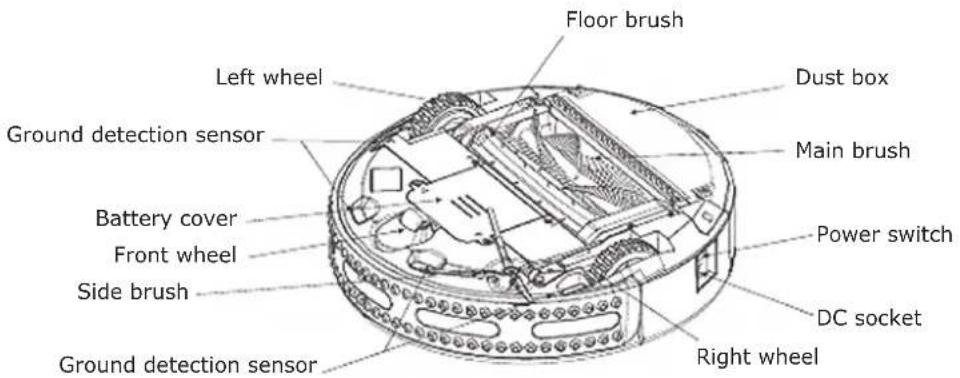
Battery Replacement & Installment
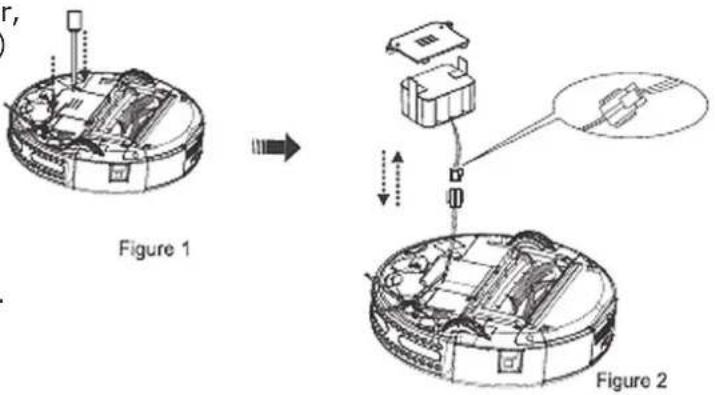
- Release the screw with a screwdriver, open its base plate. (Refer to Figure 1)
- Connect two terminals during battery installation. (Refer to Figure 2)
- Place the positive and negative poles correctly for fear of the damage due to wrong poles.
- Set the cleaner in charging status to keep the best performance of the battery while the cleaner is not in use.
- Ensure using the original battery of the manufacturer for replacement, otherwise there may be damage or accident.
natural_image
Simple line drawing of a trash bin with an 'X' symbol crossed out by a diagonal line (no text or labels)- Take out battery in case of no more use of the machine.
- Power off first, before taking out the battery of the machine.
- Don't put the battery at any environment over 45^ or inside water.
- Don't apply external load to the battery or fall them from height.
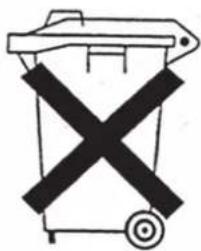
- The battery must be recycled for safe treatment. No free disposal away or into fire is allowed, otherwise there may be explosion.
- In case of leakage, don't let the liquid exposed to skin or clothes but immediately wipe with dry clothes and then send to recycling station or appointed maintenance outlet, rather than free disposal.
- No chargeable battery that from different suppliers is allowed for the machine.
- To extend battery life, make sure charging the battery 12 hours at first use of the robot or if it is long time not in use, otherwise its working time would dramatically lower down, far less than its normal working time.
Battery replacement of the Space Isolator
- Open the cover as per figure 1.
- Please the batteries (not included with correct polarity (+/-) (Refer to Figure 2/3))
- Please take out the battery if it was unused for long.
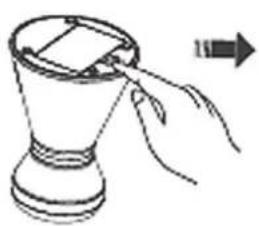
natural_image
Illustration of a hand holding a tray with a handle, next to a cylindrical container (no text or symbols)Figure 1
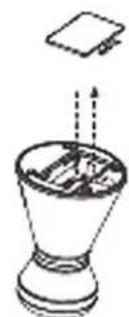
natural_image
Simple line drawing of a container with liquid and a lid, no text or symbols presentFigure 2
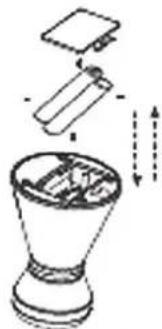
natural_image
Diagram of a blender with liquid being poured into it, showing internal components and directional arrows (no text or symbols)Figure 3
Battery replacement of the remote control
- Open the battery cover and then replace the battery. (Refer to Figure 1)
- Please place the positive and negative poles correctly for fear of the damage due to wrong poles! (Refer to Figure 2)
- Please take out the battery if it was unused for long.
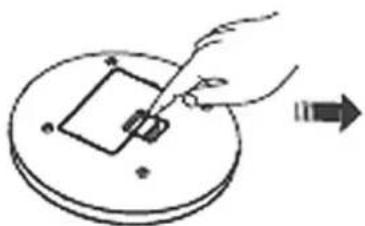
natural_image
Hand holding a pen on a circular object with a small rectangular component, no text or symbols present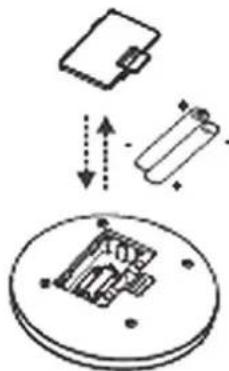
natural_image
Diagram showing battery and resistor components with bidirectional arrows indicating movement (no text or symbols)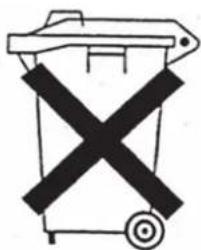
natural_image
Simple line drawing of a trash bin with an X mark and circular base (no text or symbols)- Please don't place the battery in the high-temperature environment above 45^ or in the water.
- Please don't exert external force to the battery or drop them from high place.
- The battery should be recycled with safe disposal. Please don't discard it freely or throw it into fire for fear of explosion!
Functions of Buttons
Power switch:
Switch on the cleaner to enter into a standby status, the indicator would light on;
Tips:
The power indicator lights on when the cleaner is working; The power indicator blinks during charging; When the cleaner is fully charged, the power indicator stops blinking;
AUTO (automatic cleaning):
Press AUTO button to let the cleaner automatically clean. When the battery power is at a low level, it will automatically search for the docking station; Press any button on the machine panel to stop cleaning.
Tips:
In case of low battery during cleaning, the cleaner would toot for 10 times and it automatically searches for the docking station for charging with the CHARGE button light on. Before cleaning, you should clear the clutter on the floor.
SPOT (spot cleaning):
Press SPOT button to automatically enter into an area of 1 square meter and clean in a spiral mode for about 2-3 minutes; Press any button on the machine panel to stop cleaning.
Tip:
In case of low battery during cleaning, the cleaner would toot for 10 times and it automatically searches for the docking station for charging with the CHARGE button light on.
CHARGE (charge):
Press CHARGE button, the machine automatically searches for the docking station. Press any button on the machine panel to stop.
NOTE:
The default setting of the cleaner system is in fast mode, you can select fast or slow mode by remote control.
Charging Method of Main Body:
Manual Charging:
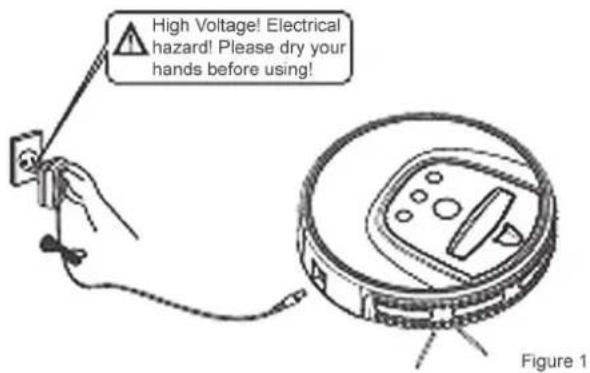
- You can use the adapter or docking station to charge for the main body directly.
- Turn on the cleaner and connect the out put terminal of the adapter with DC socket of the main boby while using the adapter for charging.(Refer to Figure 1)
- Before charging, turn on the cheener and connect the adapter with docking station make sure the cleaner abut against the docking station, and connect the auto-charging electrode well with that of the docking station. (Refer to Figure 2)
- Press the CHARGE button on the remote control or the machine panel and the cleaner will search the docking station for charging in a valid scope.(See Figure 3)
- When the machine is searching for the docking station, press the CHARGE key on the machine's panel or the STOP or CHARGE key on the remote control, to stop the cleaner searching for the docking station immediately.
- During charging, the indicator blinks. When it stops blinking, it indicates the battery is fully charged.
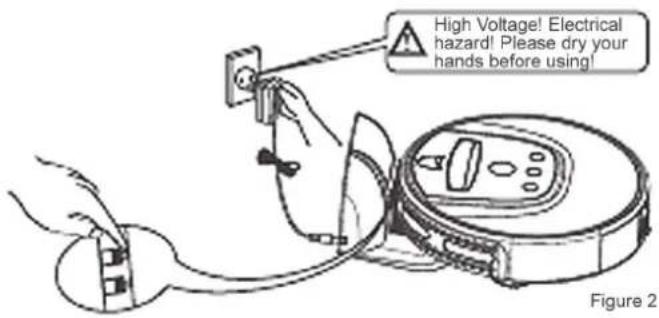
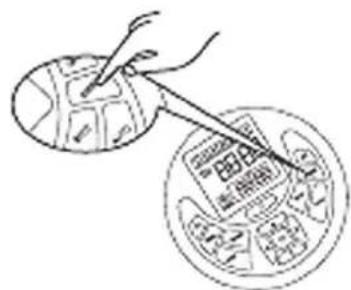
Figure 3
Automatic Charging:
In case of low battery during cleaning, the cleaner would toot for 10 times and it automatically searches for the docking station for charging with the CHARGE button light on.
Tip:
When finish cleaning, the temperature of the battery is a little high, and its charging time will be longer.
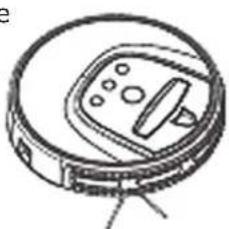
natural_image
Line drawing of a robotic vacuum cleaner (no text or symbols)
Remote Control:
Control Panel of Remote Control:
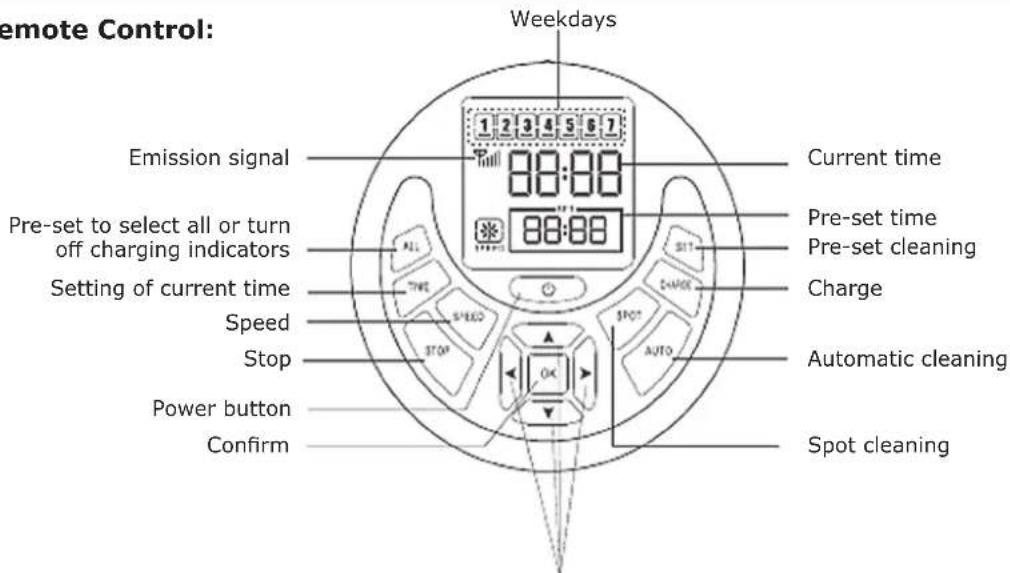
Direction buttons
Tips:
Code check is required before you use the remote control, or it will fail to work.
Steps for code check: Please ensure the power of the remote control & cleaner are enough, and then according to the following steps.
A: Turn off the cleaner;
B: Press and hold the "OK" button on the remote control;
C: Turn on the machine
D: After the cleaner toot twice or 3 times, release the "OK" button, then the code check set is finished successfully.
Note:
If you fail to hear toot twice or 3 times,during the code check,just repeat the above process.
Functions Introduction of Remote Control:
- SPEED selection:
press "SPEED" button on the remote control, you can choose fast or slow speed.

• TIME (Current Time Setting)
Press "TIME" button first and then press ◀▶ buttons, you can see a shining spot on the screen of the remote control switching among hour, minute & weekday (as shown on Pic 1)
Press ▲▼ buttons to change the parameter and set the hour, minute&weekday respectively.
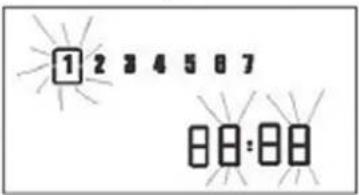
During the setting, press button to quit; press "TIME" button to save the current setting.
- SET (pre-set cleaning):
A: Pre-set time
Press "SET" button first and then press ◀▶ buttons, the shining spot on the screen of the remote control will switch among hour, minute & weekday (as shown on Pic 2)
Press ▲▼ buttons to change the parameter to a idea time that you want the machine work.
B: Pre-set weekday:
During pre-setting, when the shining happens to press "OK" button; the presently shining spot will have a "beam" shining or extinguished; the weekday with the "beam" shining is the present pre-setting.
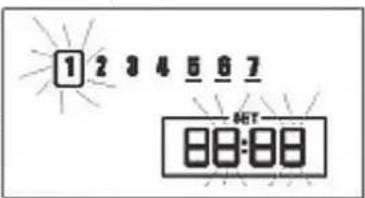
Press „ALL“ button to switch between selection of all 1234507 or no selection of all 1234507
Tip:
During the setting, press the ⏻ button to quit; press the "SET" button to save the present setting.
FULL GO FUNCTION
-
Press the "SET" button, the screen shows a shining spot 6860, then press the "STOP" button, you can see "FF-60" displaying with the first F flashing, press again the "SET" to stop flashing which indicates FULL GO function is activated, so the machine can automatically clean when has been fully charged.
-
To cancel the FULL GO function, first press the SET button to see "FF60" displaying on the screen with the first "F" flashing, then press STOP and after you press the SET button again, the FULL GO function is canceled.
Tip:
When the FULL GO function is set, the pre-setting function is unavailable.
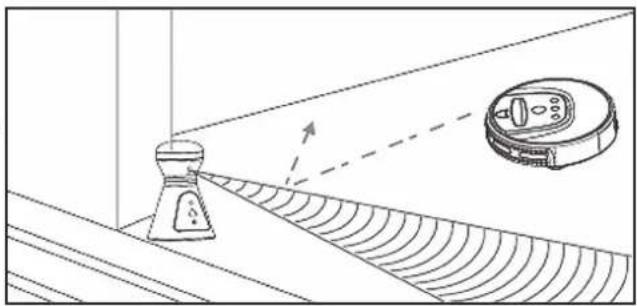
Space Isolator:
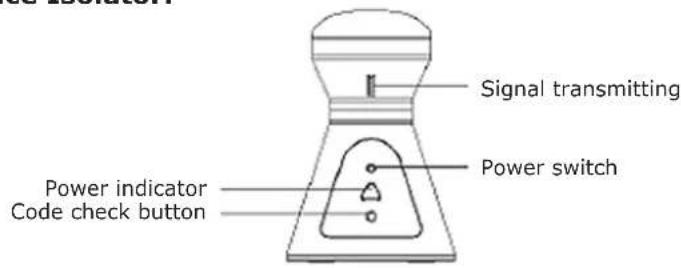
natural_image
Diagram showing a device emitting a beam to a surface with an arrow indicating direction (no text or symbols present)Tip: You should check code before using the Space Isolator; otherwise it will fail to work.
Steps of code check:
A: Turn off the cleaner, and turn on the Space Isolator (with power indicator on);
B: Keep holding the code check button on the Space Isolator; (Tip: the code check button is inside the hole, you need to use auxiliary tools when hold the button)
C: Turn on the cleaner;
D: After the cleaner toots 2 or 3 times, release the code check button, then the code check set is finished successfully.
Note: If you fail to hear toot 2 or 3 times, twice during the code check, just repeat the above process.
Tip: Place the space isolator against the wall, or it might be easily moved by the cleaner from side or back of the space isolator, which would cause the machine cleans the confined area.
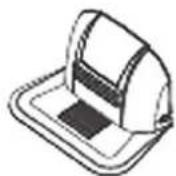
Docking Station
Tips: Before you use the docking station, code check is required; otherwise it will fail in self-charging.
Steps of code check:
A: Turn off the cleaner;
B: Keep holding the code check button of the docking station; (Tip: the code check button is inside the hole, you need to use auxiliary tools when hold the button)
C: Turn on the cleaner;
D: After the cleaner toots 2 or 3 times, release the "OK" button, then the code check set is finished successfully.
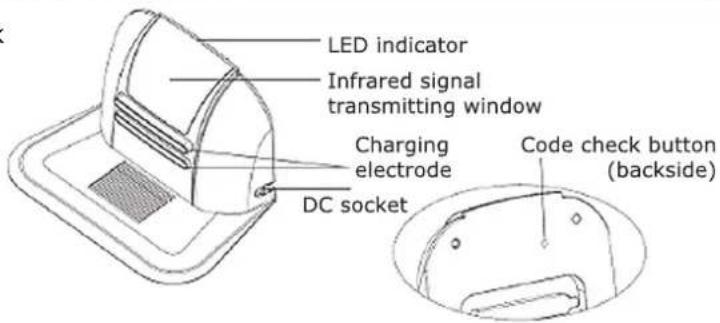
Note: If you fail to hear toot 2 or 3 times, during the code check, just repeat the above process.
Tip: Place the docking station against the wall, or it might be easily moved by the cleaner from side or back of the station, which would make the cleaner take longer time to find the docking station for charging.
Automatic Charging:
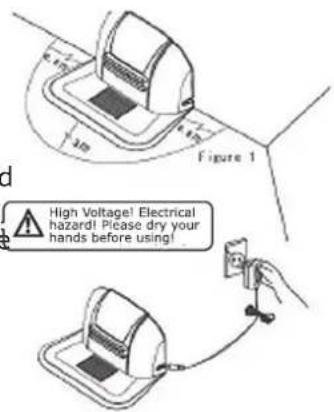
- Position the docking station on a hard, level surface against a wall. (Refer to Figure 1)
- No obstacle or hollow areas 3m away from the docking station in the front and 0.5m on the right and left. (Refer to Figure 1)
- The Robot cannot search the docking station for charging if the infrared signal transmitting window of the docking station is covered.
-
Connect the output terminal of the adaptor with DC socket of the docking station. (Refer to Figure 2)
-
Status of LED indicator:
A: During charging to the main body, the LED light will flash frequently at every 1 second.
B: At standby status, the LED light will light from bright to dark.
Press the "ALL" button on the remote control to turn off the LED light
Maintenance of the Cleaner
Assembly & Disassembly of Dust Box:
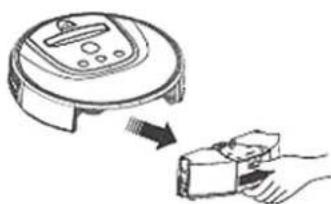
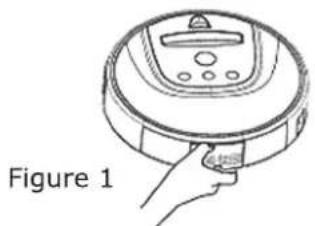
A. Hold the machine bottom with your hand, press the button on the dust box (Refer to Figure 1)
B. Extract the dust box with the backward force.(Refer to Figure 2)
natural_image
Line drawing of a hand holding a circular device labeled 'Figure 1' (no other text or symbols)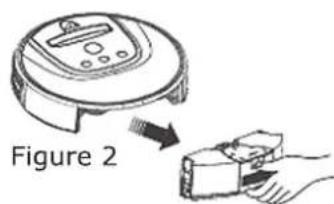
Note: push the dust box inside to reinstall.
Cleaning of Dust Box
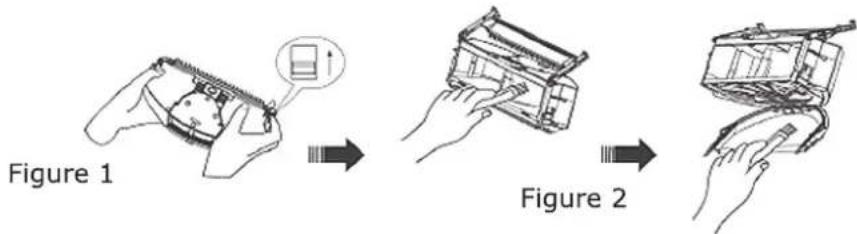
- Move the two side clips of the dust box, open the fencing plate and pour off dust (as shown on Figure 1);
- Clean it with the cleaning brush (as shown on Figure 2).
Filter Replacement & Cleaning
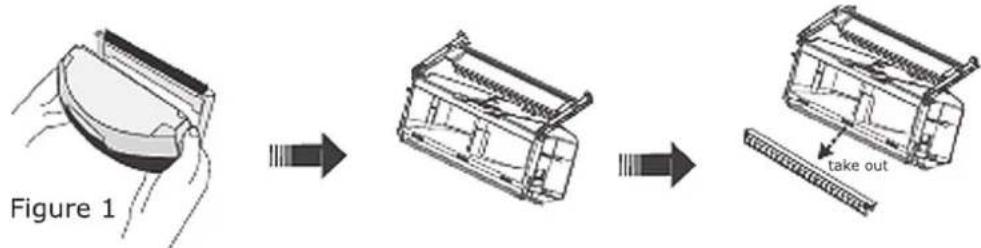
A. Press the two side clips over the dust box to open the fencing plate, If the rubber part which attached the fencing plate was worn out, you need to take out it for replacement. (Refer to figure 1)
B. Press the button on the dust box, the fan assembly will automatically pop up (Refer to Figure 2); Tip: water is not allowed to directly clean the fan assembly.
C. Pop up the blower, take out the filter, and then clean the dust box. (Refer to Figure 3)
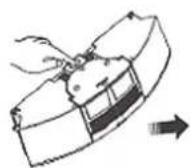
Figure 2


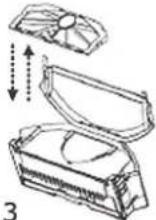
Figure 3
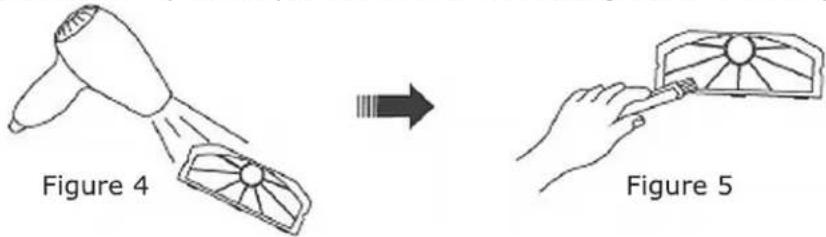
D. Clean the filter by hair dryer with cold wind or using brush cleaner. (Refer to Figure 4 and Figure 5)
E. Reinstall the filter in the original position.
Tip: The rubber cleaning head sometimes might be dropped off when you clean the dustbin, please follow the below instruction to reinstall it..
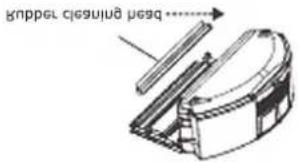
Figure 1
natural_image
Technical diagram showing a mechanical assembly with an inset close-up of layered components (no text or symbols)Figure 2
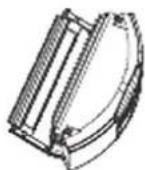
Figure 3
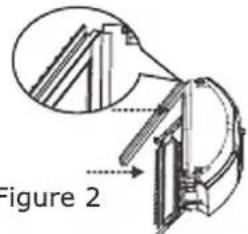
- Position the dustbin and rubber cleaning head as picture 1.
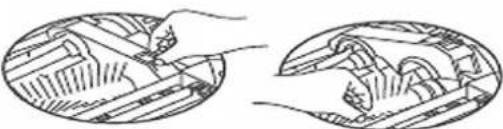
- Place one end of the cleaning head into the dustbin, make sure the cleaning head is upward and connect well with the dustbin. (Refer to picture 2).
- Make the cleaning head completely connect with dustbin by pressing with your hand.
Assembly & Disassembly of Main Brush and Floor Brush:
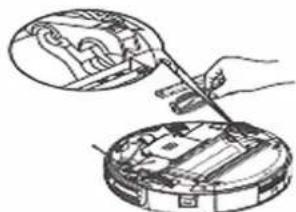
- Force the locking bar forward and raise the cover by your right thumb, then raise rod of the main brush by your left hand. (Refer to Figure 1 and Figure 2)
- Take out the main brush and floor brush.(Refer to Figure 3)
- Insert the main brush and floor brush into the holes before closing the cover in assembly.
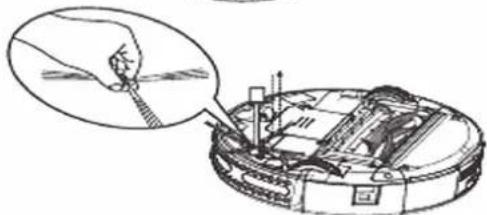
Assembly & Disassembly of Side Brush:
- Release the screw in the main shaft of the side brush before you change a new one.
- Press the side brush against the main shaft and then fasten the screw. (Refer to the figure)
natural_image
Two technical line drawings showing hand positioning of mechanical parts, no text or symbols presentFigure 1
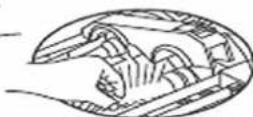
Figure 2
natural_image
Illustration of hands using a tool to adjust or install electronic components on a device (no text or symbols visible)Figure 3
natural_image
Diagram of a robotic arm with a hand holding a tool, showing mechanical components and wiring (no text or labels)Cleaning of Main Brush and Floor Brush:
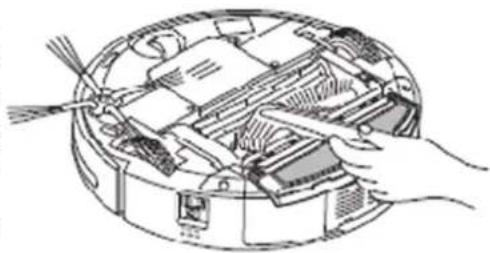
-
Clear the hair or big dust particles on the brushes regularly to improve the cleaning performance. Clean the dust at the air intake. Clean the paper scraps or small particles by cleaning brush directly. Rotate the brush carefully and cut the hair, yarn and other twisted objects by scissors or pull them by hand.
-
The cleaning of the main brush and floor brush can be done by reference to the assembly & disassembly.
natural_image
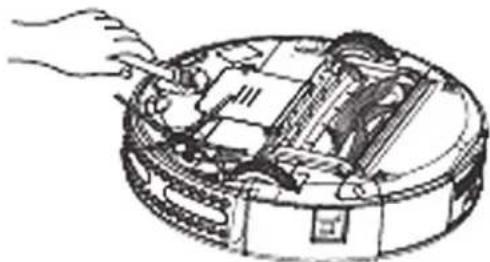
Diagram of a mechanical device with internal components and a hand holding a handle (no text or symbols)Assembly & Disassembly and Cleaning of Front Wheel:
- Clean the front wheel with a clean brush. (Refer to the figure below)
natural_image
Line drawing of a hand inserting a component into a circular device (no text or symbols)Failure information which may appear during using:
| Failure Code | Failure Cause How to solve | |
| E001 Ground | detection sensors | Clean the sensors at the front bottom of the cleaner |
| E002 Middle | brush Clean the rubbish | such as hair, thread wrapped on the brush |
| E003 Power off | Use the adaptor to charge, after full charged, then use again | |
| E004 Left & right | wheel Check the left and right wheels, clean the rubbish on it | |
| E005 Dustin | poor contact Check the dustbin and re-fix the dustbin after cleaning | |
If the failure still exist after the above check, please contact the after-sale service maintenance, professional maintenance staff or the technical center of the company, don't disassemble and maintain it by yourself.
Safety Precautions

Caution
| No one else can disassemble, maintain or transform the product except the maintenance technicians designated by the company, or it may cause fire, electric shock or personal injury. | Don't use  | other charger but the equipped the Robot, or it may cause product damage, electric shock or fire due to high voltage. |  |
| Don't touch high-voltage power cord of the electric appliance with your wet hand, or it may cause electric shock. |  | Don't bend the power cord overly or place weight on it, or it may cause power cord damage, fire or electric shock. |  |
| Don't twist your clothes or any part of your body (head, finger, etc.) into the brush or wheel of the Robot, or it may cause personal injury. |  | Don't approach cigarette, lighter, match and other heat objects or combustible materials such as the gasoline cleaner. |  |

Attention
| Don't forget to turn off the power while transporting or storing the Robot for long, or the battery may be damaged. |  | Insert the power cord of the charger well or it may cause electric shock, short circuit, smoking or fire. |  |
| Check whether the charger and socket is connected well, or it may cause charging failure or even fire. |  | If the machine is long time not in use, remove the battery from the machine and store it in a cool dry place after being fully charged. |  |
| To extend the cleaner's battery life; make sure charging the battery at least 16 hours before you first use the machine or if it is long time not in use. Its cleaning reaches peak performance after 2 or 3 circles of using out the battery power. |  | Remove all easily damaged objects (including luminous objects, fabrics, glass bottles, etc.) before using, or it may cause damage to these objects or affect the using of the Robot. |  |
Please use the Robot cautiously in the presence of the children to avoid c  frightening or harming them. frightening or harming them. | | Don't stand or sit on the Robot, or it may damage to the Robot or personal injury. |  |
| Don't make the Robot take in water and other liquors for fear of the product damage. |  | Don't use the Robot on small tables and chairs or other small space, or the Robot may be damaged. |  |
| Don't use the Robot outdoors, or it may cause the product damage. |  | Don't use the Robot in commercial places, or the Robot may be damaged by excessive use. |  |
| No cord , wire or other objects that longer than 150mm on the floor to avoid entangling with cleaner's brushes. |  | ||
CHAL-TEC Vertriebs- + Handels GmbH; Wallstraße 16; 10179 Berlin, Germany

- Saugroboter
- Bedienung
- Fehlerbehebung
- Function Introduction
- Components of the Robot
- Introduction
- Battery Replacement & Installment
- Battery replacement of the Space Isolator
- Battery replacement of the remote control
- Functions of Buttons
- Power switch:
- Tips:
- AUTO (automatic cleaning):
- SPOT (spot cleaning):
- Tip:
- CHARGE (charge):
- NOTE:
- Charging Method of Main Body:
- Manual Charging:
- Automatic Charging:
- Remote Control:
- Functions Introduction of Remote Control:
- - SPEED selection:
- • TIME (Current Time Setting)
- - SET (pre-set cleaning):
- FULL GO FUNCTION
- Steps of code check:
- Docking Station
- Maintenance of the Cleaner
- Assembly & Disassembly of Dust Box:
- Cleaning of Dust Box
- Filter Replacement & Cleaning
- Assembly & Disassembly of Main Brush and Floor Brush:
- Assembly & Disassembly of Side Brush:
- Cleaning of Main Brush and Floor Brush:
- Assembly & Disassembly and Cleaning of Front Wheel:
- Failure information which may appear during using:
- Safety Precautions
- Caution
- Attention
Brand : Klarstein
Model : Saugroboter 10028520
Category : Vacuum Cleaner