Pacifica Touring (2005) - Automotive Chrysler - Free user manual and instructions
Find the device manual for free Pacifica Touring (2005) Chrysler in PDF.


| Product Type | Automobile |
| Brand | Chrysler |
| Model | Pacifica Touring |
| Year | 2005 |
| Engine | 3.5L V6 (estimation) |
| Transmission | 4-speed automatic (estimated) |
| Drivetrain | Front-wheel drive or All-wheel drive |
| Fuel Type | Gasoline (unleaded) |
| Seating Capacity | 7 (estimated) |
| Number of Doors | 5 (including liftgate) |
| Steering | Tilt column |
| Brakes | Anti-lock (ABS) |
| Airbags | Front, side curtain, driver knee blocker |
| Key System | Sentry Key immobilizer |
| Remote Keyless Entry | Yes |
| Power Windows | Yes |
| Power Door Locks | Yes |
| Mirrors | Power, heated, auto-dimming |
| Climate Control | Automatic |
| Audio System | AM/FM, CD, satellite radio capable |
| Fuel Tank Capacity | 20.5 gallons (estimated) |
| Curb Weight | ~4,500 lbs (estimated) |
| Maintenance Schedule | Refer to owner's manual |
Frequently Asked Questions - Pacifica Touring (2005) Chrysler
User questions about Pacifica Touring (2005) Chrysler
0 question about this device. Answer the ones you know or ask your own.
Ask a new question about this device
Download the instructions for your Automotive in PDF format for free! Find your manual Pacifica Touring (2005) - Chrysler and take your electronic device back in hand. On this page are published all the documents necessary for the use of your device. Pacifica Touring (2005) by Chrysler.
USER MANUAL Pacifica Touring (2005) Chrysler
■VehicleIdentificationNumber. 6
■VehicleModifications/Alterations....7
4 INTRODUCTION
INTRODUCTION
Thismanualhasbeenpreparedwiththeassistanceof serviceandengineeringspecialiststoacquaintyouwith theoperationandmaintenanceofyournewvehicle.Itis supplementedbyaWarrantyInformationBookletand variouscustomerorienteddocuments.Youareurgedto readthesepublicationscarefully.Followingtheinstructionsandrecommendationsinthismanualwillhelp assuresafeandenjoyableoperationofyourvehicle.
NOTE: After you read the manual, it should be stored in the vehicle for convenient reference and remain with the vehicle when sold, so that the new owner will be aware of all safety warnings.
Whenitcomestoservice,rememberthatyourdealer knowsyourvehiclebest,hasthefactory-trainedtechniciansandgenuineMopar®parts,andisinterestedin yoursatisfaction.
WARNING!
Engine exhaust, some of its constituents, and certain vehicle components contain or emit chemicals known to the State of California to cause cancer and birth defects or other reproductive harm. In addition, certain fluids contained in vehicles and certain products of component wear contain or emit chemicals known to the State of California to cause cancer and birth defects or other reproductive harm.
HOWTOUSETHISMANUAL
Consult the table of content stodeterminewhichsection contains the information you desire.
The detailed index, at therearof this manual, contains a complet listing of falls subjects.
Consult the following table for a description of the symbols that may be used on your vehicle or throughout this owner's manual:
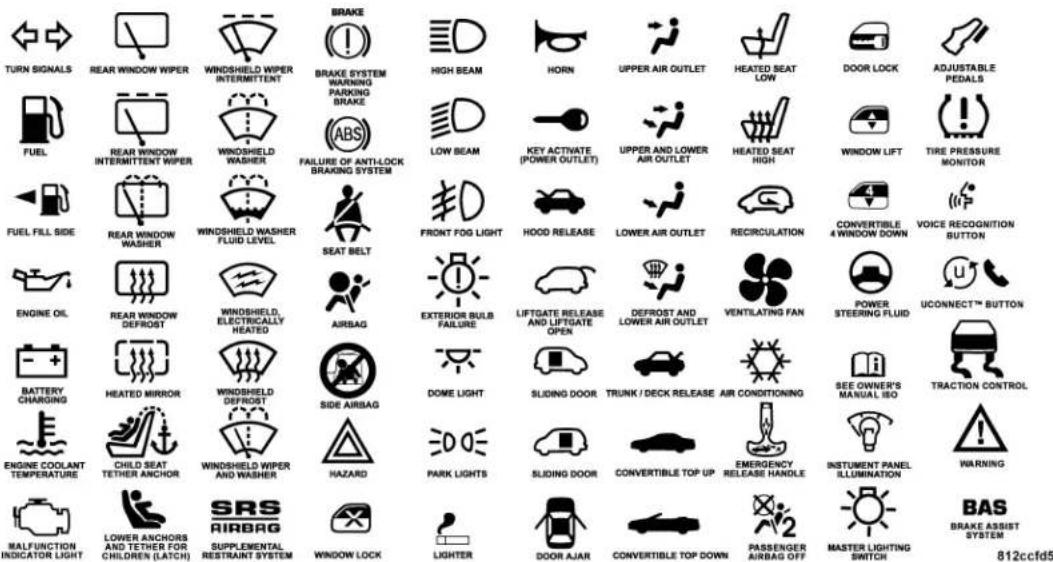
6INTRODUCTION
WARNINGSANDCAUTIONS
ThismanualcontainsWARNINGS againstoperating procedureswhichcouldresultinanaccidentorbodily injury.ItalsocontainsCAUTIONS againstprocedures whichcouldresultindamagetoyourvehicle.Ifyoudo notreadthisentiremanualyoumaymissimportant information.ObserveallWarningsandCautions.
VEHICLEIDENTIFICATIONNUMBER
Thevehicleidentificationnumber(VIN)isfoundonthe leftfrontcorneroftheinstrumentpanel,visiblefrom outsideofthevehiclethroughthewindshield.This numberalsoappearsontheAutomobileInformation DisclosureLabelaffixedtoawindowonyourvehicle. Savethislabelforaconvenientrecordofyourvehicle identificationnumberandoptionalequipment.
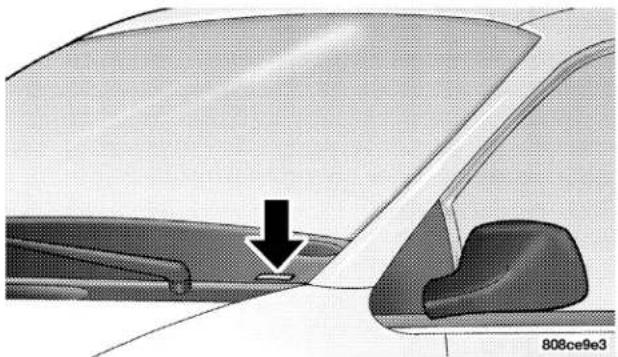
natural_image
Close-up of a car's side panel showing the wheel and seat, with a black arrow pointing to a specific component (no text or symbols visible)NOTE: ItisillegaltoremovetheVINplate.
VEHICLEMODIFICATIONS/ALTERATIONS
WARNING!
Any modifications or alterations to this vehicle could seriously affect its roadworthiness and safety and may lead to an accident resulting in serious injury or death.
THINGSTOKNOWBEFORESTARTINGYOURVEHICLE
CONTENTS
■AWordAboutYourKeys. 1 1
□IgnitionKeyRemoval....1 1
□Key-In-IgnitionReminder....12
■SentryKey....12
□ReplacementKeys. 14
□CustomerKeyProgramming 14
□ General Information .....15
■IlluminatedEntrySystem....15
■DoorLocks 16
□ManualDoorLocks. 16
□PowerDoorLocks 16
□Child Protection Door Lock . . . . . . . . . . . . . . . . . . . . . . . . . . . . . . . . . . . . . . . . . . . . . . . . . . . . . . . . . 18
■RemoteKeylessEntry. 19
□ To Unlock The Doors And Liftgate .....20
□ To Lock The Doors And Liftgate .....21
□ Using The Panic Alarm .....21
□ToProgramTransmitters. 2 1
□ToOpen/ClosePowerLiftgate—IfEquipped..22
□PowerLiftgate—IfEquipped. 27
Windows....29
□PowerWindows. 29
■OccupantRestraints. 30
□Lap/ShoulderBelts. 3 1
□Lap/ShoulderBeltUntwistingProcedure. . . . . 3 7
□SeatBeltPretensioners. 39
□EnhancedDriverSeatBeltReminderSystem (BeltAlert)....39
□SeatBeltsAndPregnantWomen. 4 1
□SeatBeltExtender. 4 1
□DriverAndFrontPassengerSupplemental RestraintSystem-Airbag. 42
□SideAirbagsSupplementalRestraintSystem(SRS)
—IfEquipped. 48
□ChildRestraint. 5 1
■EngineBreak-InRecommendations. . . . . . . . . . 5 9
■SafetyTips. 60
□ExhaustGas. 60
□SafetyChecksYouShouldMakeInside
TheVehicle. 61
☐PeriodicSafetyChecksYouShouldMakeOutside TheVehicle. 62
THINGSTOKNOWBEFORESTARTINGYOURVEHICLE11
AWORDABOUTYOURKEYS
Youcaninsertthedoublesidedkeysintothelockswith eithersideup.
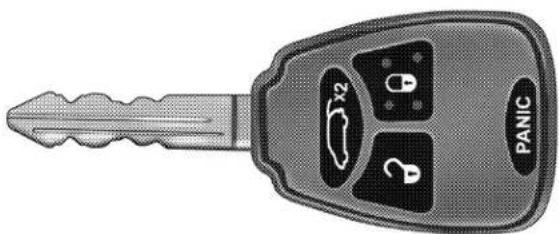
natural_image
Illustration of a black automotive key with labeled buttons and a handle (no text or symbols beyond branding)811b8b06
The dealer thatsoldyouyournewvehiclehasthekey codenumbersforyourvehiclelocks. Thesenumberscan
beusedtoorderduplicatekeysfromyourdealer.Ask yourdealerforthesenumbersandkeeptheminasafe place.
IgnitionKeyRemoval
TheshiftlevermustbeinPARK.Turnthekeytothe LOCKposition,thenremovethekey.
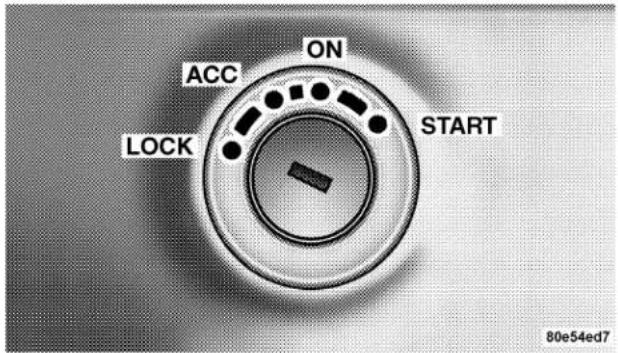
NOTE: Thepowerwindowswitches,radio,power sunroof,andpoweroutletswillremainactiveforupto45 secondsaftertheignitionswitchhasbeenturnedoff. Openingeitherfrontdoorwillcancelthisfeature.
WARNING!
Leaving children in a vehicle unattended is dangerous for a number of reasons. A child or others could be injured. Children should be warned not to touch the parking brake, brake pedal or the gear selector lever. Don't leave the keys in the ignition. A child could operate power windows, other controls, or move the vehicle.
CAUTION!
An unlocked car is an invitation to thieves. Always remove key from the ignition and lock all doors when leaving the vehicle unattended.
Key-In-IgnitionReminder
If you opened the driver's door and the key is in the ignition switch, achimewillsoundtoremindyoutoremovethe key.
SENTRYKEY
The Sentry Key Immobilizer System prevents unauthorized operation of the vehicle by disabling the engine. The system will shut the engine off after 2 seconds of running if an invalid key is used to start the vehicle. This system utilizes ignition keys which have an electronic
chip(transponder)embeddedintothem.Onlykeysthat havebeenprogrammedtothevehiclecanbeusedtostart andoperatethevehicle.
The Sentry Key Immobilizer System does not need to be armed or activated. Operation of the system is automatic regardless of whether or not the vehicle is locked or unlocked. During normal operation, the Theft Alarm / Immobilizer Light will come on three (3) seconds immediately after the ignition switch is turned on for a bulb check. Afterwards, if the bulb remains on, this indicates a problem with the electronics.
If the bulb beginstoflashafterthe bulbcheck, this indicates that an invalid key has been used to start the vehicle. Both of these conditions will result in the engine being shutoff after two (2) second so running.
Keepinmindthatakeywhichhasnotbeenprogrammed isalsoconsideredaninvalidkeyevenifitiscuttofithe ignitionlockcylinderforthatvehicle.
If the Theft Alarm/Immobilizer Light comes on during normal vehicle operation (vehicle has been running for longer than 10 seconds), a faul thas beendetected in the electronics and the vehicles should be serviced as soon as possible.
NOTE:
- The Sentry Key Immobilizer System is not compatible with remotestartingsystems. Use of the systems may result in vehicle starting problems and loss of security protection.
- Exxon/MobilSpeedPass, ^TM additionalSentryKeys,or anyothertransponderequippedcomponentsonthe samekeychainwillnot causeakey-related(transponder)faultunlesstheadditionalpartisphysically held against the ignition key being used when starting the vehicle.Cellphones,pagers,orotherRFelectronics willnotcauseinterferencewiththissystem.
Allofthekeysprovidedwithyournewvehiclehave beenprogrammedtothevehicleelectronics.
ReplacementKeys
NOTE: Onlykeysthathavebeenprogrammedtothe vehicleelectronicscanbeusedtostartthevehicle.Once aSentryKeyhasbeenprogrammedtoavehicle,itcan notbeprogrammedtoanyothervehicle.
Atthetimeofpurchase, the original owner is provided with a four-digit PIN number. This number is required for dealer replacement of keys. Duplication of keys may be performed at an authorized dealer or by using the Customer Key Programming procedure. This procedure consists of programming ablank key to the vehicle electronics. A blank key is one which has never been programmed.
NOTE: When having the Sentry Key Immobilizer System serviced, bring all vehicle keys with you to the dealer.
CustomerKeyProgramming
Youcanprogramnewsentrykeystothesystemifyou havetwovalidsentrykeysbyperformingthefollowing procedure:
- CuttheadditionalSentryKeyTransponderblank(s) to matchtheignitionswitchlockcylinderkeycode.
- Insert the first valid key into the ignitions switch and turn the ignitions switch ON for at least 3 seconds but no longer than 15 seconds. Turn the ignitions switch OFF and removethe first key.
-
Insert these second valid key and turn the ignition switch ON within 15 seconds. After tensecond sachime will sound and the Theft Alarm Light will begin to flash. Turn the ignition switch OFF and remove these second key.
-
Insertablank Sentry Key into the ignition switch and turn the ignition switch ON within 60 seconds. After 10 seconds a single chimewill sound. The Theft Alarm Light will stop flashing, turn on for 3 seconds; thenturn off.
ThenewSentryKeyhasbeenprogrammed. The Keyless Entry Transmitter will also be programmed during this procedure.
Repeat this procedure to program up to total of 8 keys. If you donothave a programmed sentry key, contact your dealer for details.
NOTE: Ifaprogrammedkeyhasbeenlost,seeyour dealertohaveallremainingkeyserasedfromthesystemmemory.Theremainingkeysmustthenreprogrammed.Thiswillpreventthelostkeyfromstarting yourvehicle.Allvehiclekeysmustbetakentothedealer atthetimeofservicetobereprogrammed.
GeneralInformation
The Sentry Keysystemcomplies with FCCrulespart15 and with RSS-210 of Industry Canada. Operation is subject to the following conditions:
• Thisdevicemaynotcauseharmfulinterference.
- Thisdevicemustacceptanyinterferencethatmaybe received,includinginterferencethatmaycauseundesiredoperation.
ILLUMINATEDENTRYSYSTEM
Thecourtesylightswillturnonwhenyouusethekeyless entrytransmitteroropenthedoors.
Thelightswillfadetooffafterabout30secondsorthey willimmediatelyfadetooffoncetheignitionswitchis turnedon.
NOTE: The overhead console, door courtesy, liftgate and reading lights will not operate if the dimmer control is in the "defeat" position (extremedownward position).
natural_image
Interior view of a car dashboard with air vent and control panel (no visible text or symbols)Ifthelockknobisupwhenyoushutthedoor,thedoor willlock.Therefore,makesurethekeysarenotinsidethe vehiclebeforeclosingthedoor.
WARNING!
- For personal security and safety in the event of an accident, lock the vehicle doors as you drive as well as when you park and leave the vehicle.
- When leaving the vehicle always remove the key from the ignition lock, and lock your vehicle. Do not leave children unattended in the vehicle, or with access to an unlocked vehicle. Unsupervised use of vehicle equipment may cause severe personal injuries and death.
PowerDoorLocks
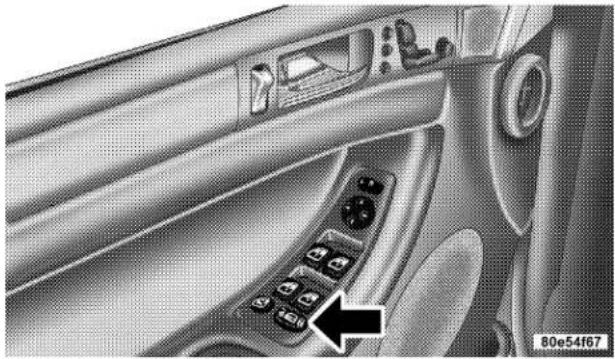
Apowerdoorlockswitchisoneachfrontdoortrim panel. Use this switch to lock or unlock the doors.
THINGSTOKNOWBEFORESTARTINGYOURVEHICLE17
natural_image
Interior view of a car's dashboard and steering wheel, showing the left side with a keypad and control panel (no text or symbols visible)If you press the power door lock switch while the key is in the ignition, and any front door is open, the power lock will not operate. This prevents you from accidentally locking your keys in the vehicle. Removing the key or closing the door will allow the lock to operate. A chimewill sound if the key is in the ignition and a door is open, as are mindertoremovethe key.
Automatic Door Locks
Thedoorswilllockautomaticallyonvehicleswithpower doorlocksif:
- The AutoLock feature is enabled,
2.thetransmissionisingear,
3.alldoorsareclosed
4.thevehiclespeedisabove15mph(24km/h)and
5.thedoorswerenotpreviouslylockedusingthepower doorlockswitchorremotekeylessentrytransmitter.
The Automatic Door Lockscan been enabled or disabled by performing the procedure in the Electronic Vehicle Information Center (EVIC), Customer Programmable Features section.
- The AutoUnlock feature is enabled,
- the transmission wasingear and the vehicles speed returned to 0 mph (0 km/h),
- the transmission is in NEUTRAL or PARK,
- the driverdoor is opened (excluding lift gate),
5.thedoorswerenotpreviously unlocked and
6.thevehiclespeedis0mph(0km/h).
The AutoUnlockfeature can be enabled or disabled by performing the procedure in the Electronic Vehicle Information Center (EVIC), Customer Programmable Features section.
NOTE: UsetheAutoDoorLocksandAutoUnlock featuresinaccordancewithlocallaws.
ChildProtectionDoorLock
Toprovideasaferenvironmentforsmallchildrenriding intherearseats,thereadoorsareequippedwithachild protectiondoorlocksystem.
WARNING!
Avoid trapping anyone in the vehicle in a collision. Remember that the rear doors can only be opened from the outside when the child protection locks are engaged.
THINGSTOKNOWBEFORESTARTINGYOURVEHICLE19
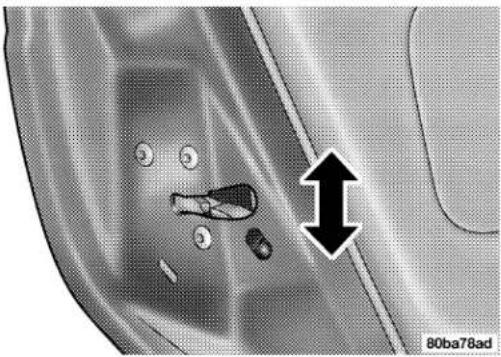
Toactivatethesystem, openthereardoorandmovethe childlockcontrol, locatednearthedoor'srearlatch, to theONposition.
natural_image
Medical imaging scan showing a vascular structure with an arrow indicating a specific region (no text or symbols present)Whenthechildlocksystemisengagedthedoorcanbe openedonlybyusingtheoutsidedoorhandleeven thoughtheinsidedoorlockisintheunlockedposition.
REMOTEKEYLESSENTRY
This system allows outolockorunlockthedoors and liftgate, and activates the anical alarm from distances up to about 23 feet (7 meters) using a handheld radiotransmitter. The transmitter need not be pointed at the vehicle to activate the system.
20THINGSTOKNOWBEFORESTARTINGYOURVEHICLE
NOTE: Ifthekeyisintheignitionswitch,thenall buttonsonthattransmitterwillbedisabled.Thebuttons ontheremainingtransmitterswillwork.Ifthevehicleis shiftedoutofPARK,allthetransmitterbuttonsare disabledforallkeys.
natural_image
Illustration of a car key with labeled buttons and a handle (no text or symbols beyond branding)811b8b06
Tounlockthedoorsandliftgate:
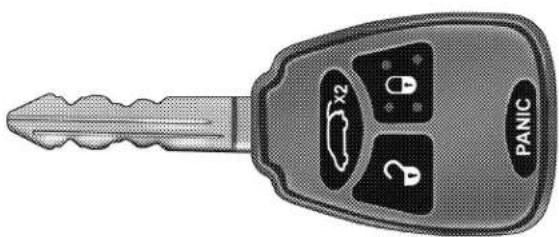
PressandreleasetheUNLOCKbuttononthetransmitter oncetounlockthedriver'sdoor,ortwicetounlockall doorsandliftgate.Theilluminatedentrysystemalso turnson.
NOTE: Ifdesired, the "RemoteUnlockDriver'sDoor 1st" feature can be turned on and off by referring to the Customer Programmable Features of the "Electronic Vehicle Information Center (EVIC)" section or by following these steps.
1.PresstheUNLOCKbuttonfor4to10seconds.
- While the UNLOCK button is pressed, (after 4 seconds) press the LOCK button. Release both buttons.
The "RemoteUnlockDriver'sDoor1st" feature can be reactivated by repeating this procedure.
Tolockthedoorsandliftgate:
PressandreleasetheLOCKbuttononthetransmitterto lockalldoorsandliftgate.Thehornwillchirponceto acknowledgedgethesignal.Ifdesired,the"SoundHornOn Lock"featurecanbeturnedonandoffbyreferringtothe CustomerProgrammableFeaturesofthe"ElectronicVehicleInformationCenter(EVIC)"sectionorbyfollowing thesesteps.
-
PresstheLOCKbuttonfor4to10seconds.
-
While the LOCK button is pressed (after 4 seconds), press the PANIC button. Release both buttons.
The "SoundHornOnLock" feature can be reactivated by repeating this procedure.
UsingThePanicAlarm:
ToturnthepanicalarmfeatureONorOFF,pressand holdthePANICbuttononthetransmitterforatleastone secondandrelease.Whenthepanicalarmison,the headlightsandparklightswillflash,thehornwillpulse onandoffandtheinteriorlightswillturnon.
Thepanicalarmwillstayonfor3minutesunlessyou turnitoffbypassingthePANICbuttonasecondtimeor turntheignitionswitchtotheONposition.
NOTE: Whenyouturnoffthepanicalarmbypressing thePANICbuttonasecondtime,youmayhavetobe closertothevehicleduetotheradiofrequencynoisesof thesystem.
ToProgramTransmitters:
Refer to SENTRY KEY "Customer Key Programming."
If you donothave a programmed transmitter, contact your dealer ford details.
22 THINGSTOKNOWBEFORESTARTINGYOURVEHICLE
ToOpen/ClosePowerLiftgate—IfEquipped
PresstheLIFTGATEbuttontwicewithinfivesecondsto open/closethepowerliftgate. Theliftgatewillbeepfor2 secondsandthenopen/close. Ifthebuttonispushed whiletheliftgateisbeingpowerclosed, theliftgatewill reversetothefullopenposition.
Iftheliftgateislockedandisnotequippedwitha poweredliftgate,pressingthebuttonwillresultinthe liftgatebecomingunlockedfor30secondsallowingyou tomanuallyaccesstheliftgatearea. Theliftgatewill re-lockautomaticallywithin10secondsoncetheliftgate isclosed.
ToTurnOff"FlashLightsOnLock/Unlock"
NOTE: Ifdesired, the "FlashLightsOnLock/Unlock" feature can be turned on and off by referring to the Customer Programmable Features of the "Electronic Vehicle Information Center (EVIC)" section or by following these steps.
- PresstheLOCKbuttonfor4to10seconds.
- While the LOCK button is pressed, (after 4 seconds) press the UNLOCK button. Release both buttons.
The "FlashLightsOnLock/Unlock" feature can be reactivated by repeating this procedure. The table below explains the Lamp Flashoptions.
| Function Which Turn Signal Lamps | Number of Flashes | |
| Lock | All | 1 |
| Unlock1st Press | Driver'sSide | 2 |
| UnlockAll Doors | All | 2 |
| Liftgate | All | 2 |
GeneralInformation
This device complies with part 15 of the FCC rules and RSS210 of Industry Canada. Operation is subject to the following conditions:
- Thisdevicemaynotcauseharmfulinterference.
- This device must accept any interference received, including interference that may cause undesired operation.
If your Remote Keyless Entry transmitter fail to operate from an normal distance, check for the set two conditions.
- A weak battery in the transmitter. The expected life of the battery is a minimum of three years.
- Closenesstolaradiotransmittersuchasaradiostation tower, airporttransmitter, and somemobileor CBradios.
TransmitterBatteryService
Therecommended replacement battery is one CR2032 battery.
NOTE: Donottouchthebatteryterminalsthatareon thebackhousingortheprintedcircuitboard.
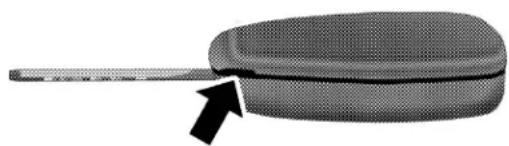
- With the transmitter buttons facing down, use a small screw driver or similar flat object to try the two halves of the transmitter apart. Makes sure not to damage the rubber gasket during removal.
natural_image
Close-up of a textured, oval-shaped object with a protruding rod and arrow pointing to its end (no text or symbols visible)- Remove and replace the battery. Avoid touching the new battery with your fingers. Skinoilsmay cause battery deterioration. If you touch a battery, clean it with rubbing alcohol.
- Toreassemblethetransmittercase, snapthetwo halvestogether. Makesurethereisaneven "gap" betweenthetwohalves. Testtransmitteroperation.
VEHICLETHEFTALARM
Thisystemmonitorsthevehicledoorsandignition switchforunauthorizedentryoroperation.Whenthe alarmisactivated,thesystemprovidesbothaudibleand visualsignals.Thehornwillpulse,headlights/park lightswillflash,theVehicleTheftAlarm/Immobilizer light,locatedontheinstrumentpanelbelowtheElectronicVehicleInformationCenterbuttonswillflash,and thevehiclewillnotstart.Ifthealarmistriggeredandno actionistakentodisarmit,thesystemwillturnoffthe
hornafterthreeminutesandafter15minutesoflight onlyoperationthesystemwillthenrearmitself.
To arm the system: Removethekeyfromtheignition switchandeither:
- Pressapowerdoorlockswitchwhilethedriver'sor passenger'sdoorisopen.
- PresstheLOCKbuttononthekeylessentrytransmitter.
Afterthelastdoorisclosed,orifalldoorsareclosed,the systemwillarmitselfinabout16seconds.Duringthat time,theVehicleTheftAlarm/Immobilizerlightwill flash.Ifitdoesnotilluminate,thesystemisnotarming. Ifyouopenadoorduringthisarmingperiod,thesystem willcancelthearmingprocess.Youmustrepeatoneof thepreviouslydescribedarmingsequencestorearmthe system.
THINGSTOKNOWBEFORESTARTINGYOURVEHICLE25
To disarm the system: PresstheUNLOCKbuttononthe keylessentrytransmitter.Also,usingavalidsentrykey andmovingtheignitionswitchtotheON/STARTpositionwilldisarmthesystem.Ifyoudisarmthesystemand accesstheliftgatearea,thesystemmustberearmed,as describedpreviously,whenclosingtheliftgate.Ifsomethinghastriggeredthesysteminyourabsence,thehorn willsoundthreetimeswhenyoudisarmthesystem. Checkthevehiclefortampering.
NOTE:
- Thedriver'sdoorkeycylinderandtheliftgatebutton onthekeylessentrytransmittercannotarmordisarm thesystem.
- Oncethealarmisset, and the liftgate button on the keylessentry transmitter is pressed, on an on-power liftgate vehicle, you have a 30 secondonetime access
intotheliftgatearea. Iftheliftgateisnotopened within 30secondstheliftgatewillautomaticallyre-lock within10seconds.
- Thesystemremainsarmedduringliftgateentry,pressingtheliftgatebuttonwillnotdisarmthesystem,if someoneentersthevehiclethroughtheliftgateand opensanydoorthealarmwillsound.
- Whenthesystemisarmed, thedoors cannot be unlocked from the interior power door lock switches.
The Vehicle Theft Alarmsystem is designed to protect your vehicle, however, you can create conditions where the system will give you a false alarm. If one of the previously described arming sequences has occurred, the system will alarm regardless of whether you are in the vehicle or not. If you remain in the vehicle and open a door, the alarm will sound. If this occurs, disarm the system.
Thealarmsystemwillbeactivatedwhenthebatteryis connectedifthesystemwaspreviouslyarmed.The exteriorlightswillflash,thehornwillsound,andthe ignitionwillnotstartthevehicle.Ifthisoccurs,disarm thesystem.
LIFTGATE
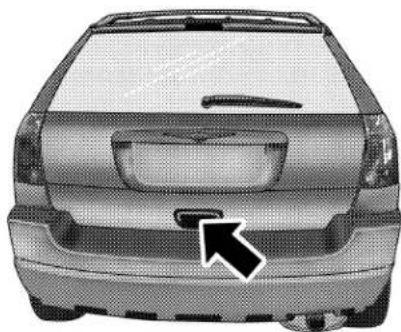
Theliftgatecanbeunlockedusingtheremotekeyless entryorbyactivatingthepowerdoorlockswitches locatedonthefrontdoors.
Once unlocked, the liftgate can be opened or closed. To open the lift gate, depress the lift gatereleases switch located in the exterior handle and pull the lift gate open with one fluid motion.
natural_image
Front view of a car with a black arrow pointing to the side grille (no text or symbols visible)8107301d
Theliftgatewillnotmanuallyopenifthevehicleisin gearorthevehiclespeedisabove0mph(0km/h).
NOTE:
- Ifapowermalfunctiontothepowerliftgatelatch shouldoccur,anemergencyliftgatelatchreleasecan
THINGSTOKNOWBEFORESTARTINGYOURVEHICLE27
beusedtoopentheliftgate. The emergency lift gate latch release can be accessed through asnap-incover located on the lift gatetrimpanel.
- Iftheliftgateislockedandisnotequippedwitha poweredliftgate,pressingthebuttonontheremote keylessentrytransmitterwillresultintheliftgate becomingunlockedfor30secondsallowingyouto manuallyaccesstheliftgatearea. Theliftgate will re-lockautomaticallywithin10secondsoncethelift-gateisclosed.
PowerLiftgate—IfEquipped
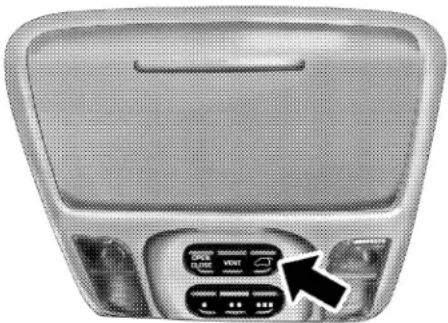
Thepowerliftgate may be opened manually or by using the button on theremote key less entry transmitter. Press the button on theremote key less entry transmitter twice within five seconds, to open the power lift gate. Once the lift gate is fully open, pressing the button twice within five seconds a second time will close the lift gate.
Thepowerliftgatemayalsobeopenedbypressingthe switchlocatedontheoverheadconsole.
natural_image
Interior view of a car air conditioner unit with control panel and fan (no visible text or symbols)81003315
Abeepingsignalwillsoundtwosecondsbeforethe liftgatestartstoopenorclose.
During power operation, personal injury or cargo damage may occur. Ensure the liftgate travel path is clear. Make sure the liftgate is closed and latched before driving away.
NOTE:
- If anything obstruct the power lift gate while it is closing or opening, the lift gate will automatically reverse the closed or open position, provided it meet sufficient resistance.
-
Therearealsopinchsensorsattachedtothesideofthe liftgate.Lightpressureanywherealongthesestrips willcausetheliftgatetoreturntotheopenposition.
-
Thepowerliftgatemustbeinthefullopenpositionfor anyoftheclosebuttonstooperate.Iftheliftgateisnot fullyopen,presstheopenbuttontofullyopenthe liftgateandthenpressclose.
- Iftheliftgatereleaseswitchisactivatedwhilethe powerliftgateisclosing,theliftgatewillreversetothe fullopenposition.
- Thepowerliftgateswitcheswillnotoperateifthe vehicleisingearorthevehiclespeedisabove0mph (0km/h).
- Thepowerliftgatewillnotoperateintemperatures below -22^ (-30^) or temperatures above 150^ (65^) . Besuretoremoveanybuild-upofsnoworice fromtheliftgatebeforepressinganyofthepower liftgateswitches.
- If the power lift gate encounters multiple obstructions within the same cycle, the system will automatically stop and must be opened or closed manually.
WARNING!
- Driving with the liftgate open can allow poisonous exhaust gases into your vehicle. You and your passengers could be injured by these fumes. Keep the liftgate closed when you are operating the vehicle.
- If you are required to drive with the liftgate open, make sure that all windows are closed, and the climate control blower switch is set at high speed. DO NOT use the recirculation mode.
Gaspropssupporttheliftgateintheopenposition. However, because the gas pressured drops with temperature, it may be necessary to assist the props when opening the lift gate in cold weather.
WINDOWS
PowerWindows
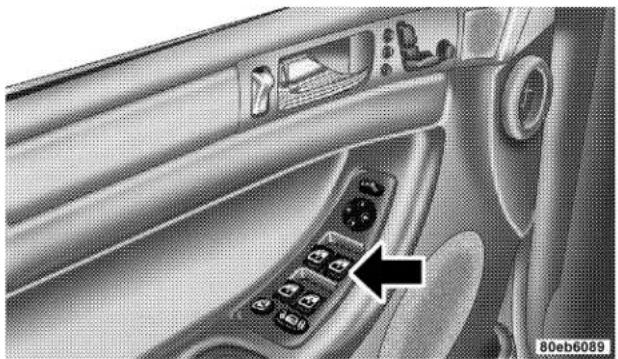
Thewindowcontrolsonthedriver'sdoorcontrolallthe doorwindows.
natural_image
Interior view of a car showing the dashboard and steering wheel (no text or symbols visible)Therearesinglewindowcontrolsoneachpassengerdoor trimpanelwhichoperatethepassengerdoorwindows.
Allthepowerwindowswitcheshaveanautodown feature.Presstthewindowswitchtotheseconddetent, release,andthewindowwillgodownautomatically.
Toopenthewindowpartway, presstehwindowswitch tothefirstdetentandreleaseitwhenyouwantthe windowtostop.
The power windows switches remain active for up to 45 seconds after the ignition switch has been turned off. Opening either front door will cancel this feature.
Wind Buffeting
Windbuffetingcanbedescribedastheperceptionof pressureontheearsorahelicoptertypesoundinthe ears.Yourvehiclemayexhibitwindbuffetingwiththe windowsdown,orthesunroof(ifequipped)incertain openorpartiallyopenpositions.Thisisanormaloccurrenceandcanbeminimized.Ifthebuffetingoccurswith therearwindowsopen,openthefrontandrearwindows togethertominimizethebuffeting.Ifthebuffetingoccurs withthesunroofopen,adjustthesunroofopeningto minimizethebuffeting.
OCCUPANTRESTRAINTS
Someofthemostimportantsafetyfeaturesinyourvehicle aretherestraintsystems. Theseincludethefrontandrear seatbeltsforthedriverandallpassengers,frontairbagsfor boththedriverandfrontpassenger,driverinflatableknee blockerandifequipped,leftandrightsidecurtainairbags forthedriverandpassengersseatednexttoawindow.If youwillbecarryingchildrentoosmallforadult-sizeseat
belts,yourseatbeltsortheLATCHfeature(refertothe ChildRestraintsectioninthismanual),canbeusedtohold infantandchildrestraintsystems.
NOTE: Thefrontairbagshaveamultistageinflator design. Thisallowstheairbagtohavedifferentrates of inflationthatarebasedoncollisionseverity.
Please pay close attention to the information in this section. It tells you how to use your restraints system properly to keep you and your passengers as safe as possible.
WARNING!
In a collision, you and your passengers can suffer much greater injuries if you are not properly buckled up. You can strike the interior of your vehicle or other passengers, or you can be thrown out of the vehicle. Always be sure you and others in your vehicle are buckled up properly.
Buckleupeventhoughyouareanexcellentdriver,even onshorttrips.Someoneontheroadmaybeapoordriver andcauseacollisionthatincludesyou.Thiscanhappen farawayfromhomeoronyourownstreet.
Researchhasshownthatseatbeltssavelives,andthey canreducetheseriousnessofinjuriesinacollision.Some oftheworstinjurieshappenwhenpeoplearethrown fromthevehicle.Seatbeltsreducethepossibilityof ejectionandtheriskofinjurycausedbystrikingthe insideofthevehicle.Everyone inamotorvehicleshould bebeltedatalltimes.
Lap/ShoulderBelts
AlltheseatsinyourvehicleareequippedwithLap/ShoulderBelts.
Thebeltwebbingretractorisdesignedtolockduring verysuddenstopsorcollisions. Thisfeatureallowsthe shoulderpartofthebelttomovefreelywithyouunder normalconditions.Butinacollision,thebeltwilllock andreducetheriskofyourstrikingtheinsideofthe vehicleorbeingthrownout.
WARNING!
- It is extremely dangerous to ride in a cargo area, inside or outside of a vehicle. In a collision, people riding in these areas are more likely to be seriously injured or killed.
- Do not allow people to ride in any area of your vehicle that is not equipped with seats and seat belts.
- Be sure everyone in your vehicle is in a seat and using a seat belt properly.
WARNING!
- Wearing a seat belt incorrectly is dangerous. Seat belts are designed to go around the large bones of your body. These are the strongest parts of your body and can take the forces of a collision the best.
- Wearing your belt in the wrong place could make your injuries in a collision much worse. You might suffer internal injuries, or you could even slide out of part of the belt. Follow these instructions to wear your seat belt safely and to keep your passengers safe, too.
- Two people should never be belted into a single seat belt. People belted together can crash into one another in a collision, hurting one another badly. Never use a lap/shoulder belt or lap belt for more than one person, no matter what their size.
THINGSTOKNOWBEFORESTARTINGYOURVEHICLE33
Lap/Shoulder Belt Operating Instructions
- Enter the vehicle and closeted door. Sit back and adjust these seat.
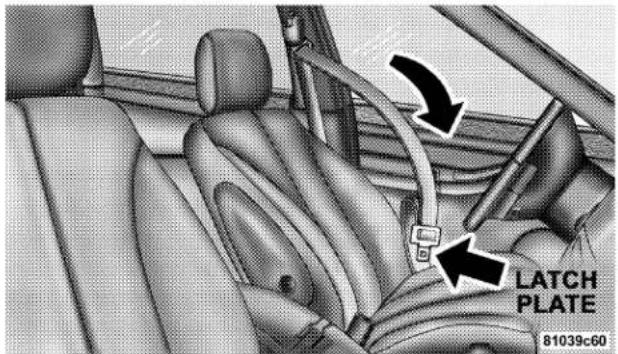
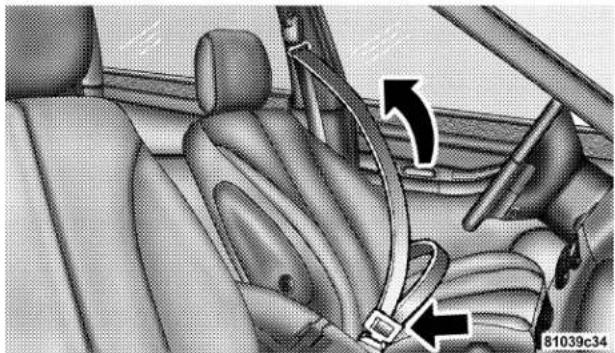
- Theseatbeltlatchplateisneartheseatbackofthe frontseatsandnexttoyourarmintherearseats.Grasp thelatchplateandpulloutthebelt.Slidethelatchplate upthewebbingasfarasnecessarytoallowthebelttogo aroundyourlap.
natural_image
Interior view of a car showing the seatbelt and dashboard (no text or symbols visible)WARNING!
- A belt that is buckled into the wrong buckle will not protect you properly. The lap portion could ride too high on your body, possibly causing internal injuries. Always buckle your belt into the buckle nearest you.
- A belt that is too loose will not protect you as well. In a sudden stop you could move too far forward, increasing the possibility of injury. Wear your seat belt snugly.
- A belt that is worn under your arm is very dangerous. Your body could strike the inside surfaces of the vehicle in a collision, increasing head and neck injury. A belt worn under the arm can cause internal injuries. Ribs aren't as strong as shoulder bones. Wear the belt over your shoulder so that your strongest bones will take the force in a collision.
-
A shoulder belt placed behind you will not protect you from injury during a collision. You are more likely to hit your head in a collision if you do not wear your shoulder belt. The lap and shoulder belt are meant to be used together.
-
Positionthelapbeltacrossyourthighs, below your abdomen. Toremoveslackinthelapbelportion, pullup on the shoulder belt. Toloosenthelapbeltifitistootight, tilt the latch plate and pull on the lap belt. Asnug belt reduce the risk of sliding under the beltinacollision.
natural_image
Interior view of a car showing the seatbelt and dashboard (no text or symbols visible)WARNING!
- A lap belt worn too high can increase the risk of internal injury in a collision. The belt forces won't be at the strong hip and pelvic bones, but across your abdomen. Always wear the lap belt as low as possible and keep it snug.
- A twisted belt can't do its job as well. In a collision it could even cut into you. Be sure the belt is straight. If you can't straighten a belt in your vehicle, take it to your dealer and have it fixed.
- Position the shoulder belton your chest so that it is comfortable and not resting on your neck. Theretractor will withdraw any slack in the belt.
A frayed or torn belt could rip apart in a collision and leave you with no protection. Inspect the belt system periodically, checking for cuts, frays, or loose parts. Damaged parts must be replaced immediately. Do not disassemble or modify the system. Seat belt assemblies must be replaced after a collision if they have been damaged (bent retractor, torn webbing, etc.).
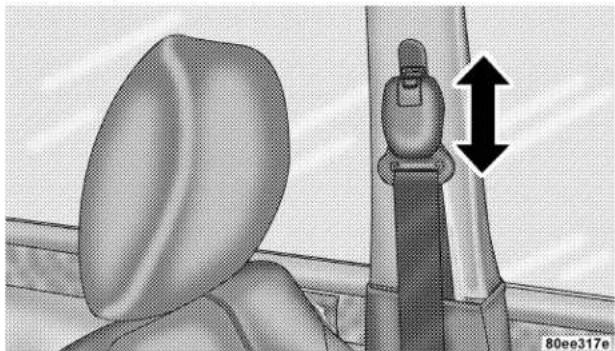
Adjustable Upper Shoulder Belt Anchorage Inthefrontseats, theshoulderbeltanchoragecanbe adjustedupwardordownwardtohelppositionthebelt awayfromyourneck. Pressthebuttontoreleasethe anchorage, and thenmoveitupordowntotheposition thatservesyoubest.
natural_image
Mechanical component with a vertical double-headed arrow indicating upward motion, shown in grayscale (no text or symbols)THINGSTOKNOWBEFORESTARTINGYOURVEHICLE37
Asaguide, if you a shorter than average, you will prefer lower position, and if you are taller than average, you'll prefer higher position. When you release the anchorage, try to move it up our don't make sure that it is locked in position.
Lap/ShoulderBeltUntwistingProcedure
Usethefollowingprocedureountwistatwistedlap/shoulderbelt.
- Positionthelatchplateascloseaspossibletothe anchorpoint.
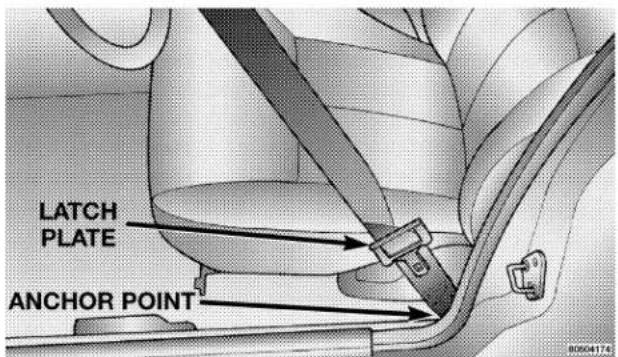
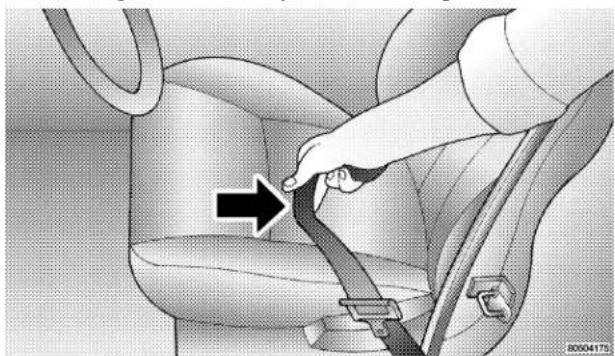
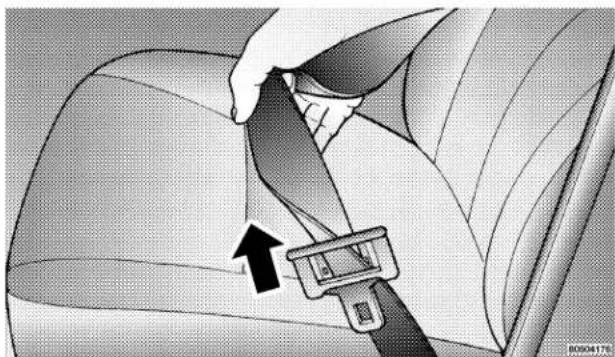
- Atabout6to12inches(15to30cm)abovethelatch plate, graspandtwistthebeltwebbing180°tocreatea fold that begins immediately abovethelatch plate.
natural_image
Car seatbelt buckle being adjusted for a person's seatbelt, showing no text or symbols3.Slidethelatchplateupwardoverthefoldedwebbing. Thefoldedwebbingmustentertheslotatthetopofthe latchplate.
natural_image
Close-up of a hand adjusting a car seatbelt buckle, showing the buckle being lifted (no text or symbols visible)- Continuetoslidethelatchplateupuntilclearsthe foldedwebbing.
SeatBeltPretensioners
Theseatbeltsforbothfrontseatingpositionsare equippedwithpretensioningdevicesthataredesignedto removeslackfromtheseatbeltintheeventofacollision. Thesedevicesimprovetheperformanceoftheseatbelt byassuringthatthebeltistightabouttheoccupantearly inacollision.Pretensionersaredesignedtoworkforall sizeoccupants.
NOTE: Thesedevicesarenotasubstituteforproperseat beltplacementbytheoccupant.Theseatbeltstillmustbe worn snuglyandpositionedproperly.
Thepretensionersaretriggeredbythefrontairbagcontrolmodule(seeAirbagSection).Likethefrontairbags, thepretensionersaresingleuseitems. Afteracollision thatissevereenoughtodeploytheairbagsandpretensioners, bothmustbereplaced.
EnhancedDriverSeatBeltReminderSystem (BeltAlert)
Ifthedriver'sseatbelthasnotbeenbuckledwithin60 secondsofstartingthevehicleandifthevehiclespeedis greaterthan5mph(8km/h),theEnhancedWarning System(BeltAlert)willalertthedrivertobuckletheirseat belt. Thedrivershouldalsoinstructallotheroccupantsto buckletheirseatbelts.Oncethewarningistriggered,the EnhancedWarningSystem(BeltAlert)willcontinueto chimeandflashtheSeatBeltWarningLightfor96 secondsoruntilthedriver'sseatbeltisbuckled.
The EnhancedWarning System(BeltAlert) will be activated if the driver's seat belt is unbuckled from more than 10 seconds and the vehicles speed is greater than 5 mph (8 km/h).
The Enhanced Warning System(BeltAlert) can be enabled, disabled by your authorized dealer or by following these steps:
NOTE: The following steps must occur within the first 60 seconds of the ignition switch being turned to the ON or RUN position. Daimler Chrysler does not recommend deactivating the Enhanced Warning System (Belt Alert).
- TurntheignitionswitchtotheOFFpositionand bucklethedriver'sseatbelt.
- TurntheignitionkeytotheRUNposition(engine doesnotneedtoberunning), and waitfortheSeatBelt WarningLighttoturnoff.
- Within 60 second sof starting the vehicle, unbuckle and thenre-buckle the driver's seat belt at least three times within 10 seconds, ending with these at belt buckled.
NOTE: WatchfortheSeatBeltWarningLighttoturnon whileunbucklingandoffwhilere-bucklingtheseatbelt. Itmaybenecessarytoretracttheseatbelt.
- Turnofftheengine.Asinglechimewillsoundto signifythatyouhavesuccessfullycompletedthrogramming.
The EnhancedWarning System(BeltAlert) can be reactivated by repeating this procedure.
NOTE: Although the Enhanced Warning System (BeltAlert) has been deactivated, the Seat Belt Warning Light will continue to illuminate while the driver's seat belt remains unbuckled.
SeatBeltsandPregnantWomen
Werecommendthatpregnantwomenusetheseatbelts throughouttheirpregnancies.Keepingthemothersafeis thebestwaytokeepthebabysafe.
Pregnantwomenshouldwearthelappartofthebelt acrossthethighsandassnugacrossthehipsaspossible. Keepthebeltlowsothatitdoesnotcomeacrossthe abdomen.Thatwaythestrongbonesofthehipswilltake theforceifthereisacollision.
SeatBeltExtender
Ifaseatbeltistooshort,evenwhenfullyextendedand whentheadjustableuppershoulderbeltanchorage(if equipped)isinitslowestposition,yourdealercan provideyouwithaseatbeltextender.Thisextender shouldbeusedonlyiftheexistingbeltisnotlong enough.Whenitisnotrequired,removetheextender andstowit.
WARNING!
Using a seat belt extender when not needed can increase the risk of injury in a collision. Only use when the lap belt is not long enough when it is worn low and snug, and in the recommended seating positions. Remove and store the extender when not needed.
DriverandFrontPassengerSupplemental RestraintSystem-Airbag
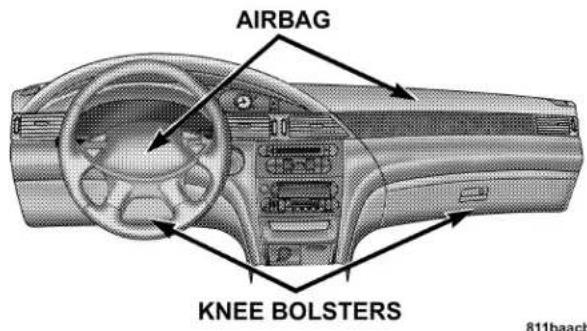
This vehicle has airbags for both the driver and front passenger as a supplement to these at belt restraints systems. The driver's front air bag is mounted in the center of the steering wheel. The passenger's front air bag is mounted in the instrument panel, abovethe glove compartment. The words SRSAIRBAG are embossed on the airbag covers.
NOTE: ThefrontairbagsarecertifiedtotheFederal regulationsthatallowlessforcefuldeploymentinlow speedcollisions.
Thefrontairbagshaveamultistageinflatordesign. This allows the airbag to have different rates of inflation that are based on collision severity.
This vehicle may also be equipped with a driver in flat-able knee blocker located on the instrument panel below the steering column.
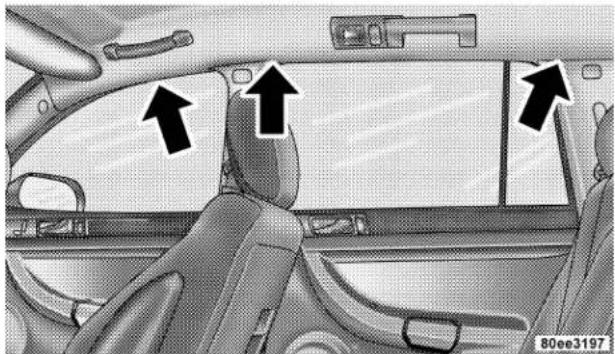
This vehicle may also be equipped with left and right side curtain air bag stop protected the driver and passengers sitting next to a window. If the vehicle is equipped with side curtain air bags, they are located above the side windows. Their covers are also labeled SRSAIRBAG.
natural_image
Interior view of a car showing driver's seat, dashboard, and window (no text or symbols visible)NOTE: Airbagcoversmaynotbeobviousintheinterior trim;buttheywillopentoallowairbagdeployment.
WARNING!
- Do not put anything on or around the airbag covers or attempt to manually open them. You may damage the airbags and you could be injured because the airbags are not there to protect you. These protective covers for the airbag cushions are designed to open only when the airbags are inflating.
- If your vehicle is equipped with left and right side curtain airbags, do not stack luggage or other cargo up high enough to block the location of the side curtain airbag. The area where the side curtain airbag is located should remain free from any obstructions.
- If your vehicle is equipped with left and right side curtain airbags, do not have any accessory items installed which will alter the roof, including adding a sunroof to your vehicle. Do not add roof racks that require permanent attachments (bolts or screws) for installation on the vehicle roof. Do not drill into the roof of the vehicle for any reason.
Airbagsinflateinmoderatetohighspeedimpacts. Along withseatbelts, and pretensioners, frontairbagswork with the instrument panel knee blocker stop provide improved protection for the driver and front passenger. Left and right side curtain air bags also work with seat belt to improve occupant protection.
Theseatbeltsaredesignedtoprotectyouinmanytypes ofcollisions.Thefrontairbagsdeployonlyinmoderate toseverefrontalcollisions.Ifyourvehicleisequipped, thesidecurtainairbagonthecrashsideofthevehicleis triggeredinmoderatetoseveresidecollisions.Incertain typesofcollisionswheretheairbagsdeploy,youneedthe seatbeltstokeepyouintherightpositionfortheairbags toprotectyouproperly.
Herearesomesimplestepsyoucantaketominimizethe riskofharmfromadeployingairbag.
- Children 12 years old and under should always ride buckled up in a rear seat.
Infantsinrearfacingchildrestraintsshould NEVER ride inthefrontseatofvehiclewithapassengerfrontairbag. Anairbagdeploymentcancausesevereinjuryordeathto infantsinthatposition.
Childrenthatarenotbigenoughtoproperlywearthe vehicleseatbelt(refertosectiononChildRestraint) shouldbesecuredintherearseat,inachildrestraintor belt-positioningboosterseatappropriateforthesizeand ageofthechild.Olderchildrenwhodonotuseachild restraintorbelt-positioningboosterseatshouldride properlybuckledupintherearseat.Neverallowchil-drentoslidetheshoulderbeltbehindthemorundertheir arm.
Ifachildfrom1to12yearsoldmustrideinthefront passengerseatbecausethevehicleiscrowded,movethe seatasfarbackaspossible,andusetheproperchild restraint.RefertothesectiononChildRestraint.
You should read the instructions provided with your child restraint to make sure that you are using it properly.
- All occupants should wear their lap and shoulder belts properly.
- The driver and front passenger seats should be moved back as far as practical to allow the front airbags room to inflate.
- If your vehicle has left and right side curtain airbags, do not lean against the door, airbags will inflate forcefully into the space between you and the door.
WARNING!
- Relying on the airbags alone could lead to more severe injuries in a collision. The airbags work with your seat belt to restrain you properly. In some collisions the airbags won't deploy at all. Always wear your seat belts even though you have airbags.
- Being too close to the steering wheel or instrument panel during front airbag deployment could cause serious injury. Airbags need room to inflate. Sit back, comfortably extending your arms to reach the steering wheel or instrument panel.
- If the vehicle has left and right side curtain airbags, they also need room to inflate. Do not lean against the door or window. Sit upright in the center of the seat.
"The Front Airbag System" consists of the following:
- AIRBAGReadinessLight
- DriverAirbag
- FrontPassengerAirbag
- SeatBeltPretensioners
• SteeringWheelandColumn - InstrumentPanel
- SeatBeltReadinessLight
- InterconnectingWiring
- PassengerKneeImpactBlocker
- DriverInflatableKneeBlocker
- AirbagControlModule(withintegratedimpactsensor)
How The Airbag Systems Work
- Theairbagcontrolmoduledeterminesifanimpactis severeenoughtorequiretheairbagstoinflate. Based onthelevelofcollisionseverity,thecontrolmodule determinestheproperrateofinflation.Thefront airbaginflatorsaredesignedtoprovidedifferentrates ofairbaginflation.Theairbagcontrolmodulewillnot detectrollovercollisions.
The airbag control module alsomonitorsthereadiness of the electronic part of the system whenever the ignition switch is in the START or ON positions. These include all of the items listed under "The Front Airbag System", except the passenger knee blocker, instrument panel and the steering wheel and column. If the key is in the OFF position, in the ACC position, or not in the ignition switch, the front air bags are not on and will not inflate.

The airbag control modules sends a message to the instrument cluster to turn on the AIRBAG light in the instrument panel for 6 to 8 seconds when the ignition switch is first turnedON, thenturnsthelightoff. If the airbag control module detects a malfunction in any part of the system, the airbag light will turn one either momentarily or continuously.
WARNING!
Ignoring the AIRBAG light in your instrument panel could mean you won't have the airbags to protect you in a collision. If the light does not come on, stays on after you start the vehicle, or if it comes on as you drive, have the airbag system checked right away.
- Whentheairbagcontrolmoduledetectsacollision requiringtheFront Airbags,itsignalstheinflator
THINGSTOKNOWBEFORESTARTINGYOURVEHICLE
units. Alargequantity of nontoxic gas is generated to inflat the frontairbags. Different frontairbag inflation rates are possible, these rates are determined by the airbag control module based on collision severity. The frontairbag covers separate and fold out of the way as the frontairbags in flat to their full size. The front airbags fully inflate in about 50 milliseconds. This is only about half of the time it takes out to link your eyes. The frontairbag then quickly deflate while helping to restraint the driver and front passenger. The driver's sand passenger's frontair bag basis invented through the airbag material and small vent openings toward the instrument panel. In this way the front airbags do not interfere with your control of the vehicle.
- The Supplemental Side Curtain Airbags are designed to activate only incertainsidecollisions. When the airbag control module detects a collision requiring the side curtain airbag to inflate, its signal the inflator son
thecrashsideofthevehicle.Aquantityofnontoxicgas isgeneratedtoinflatethesidecurtainairbag.The inflatingsidecurtainairbagpushestheoutsideedge of theheadlineroutofthewayandinflates(inaboutthe sametimeittakestoblinkyoureyes).Aproperly beltedandseatedoccupantislesslikelytobeinjured bytheforceoftheairbagorcrashevent.Itemsthatare positionedintheareawherethesidecurtainairbag inflatescanreducetheeffectivenessoftheairbag and alsoincreasethelikelihoodofinjuriestotheoccupants,thisespeciallyappliestochildren.Theside curtainairbagisabout4inches(10cm)thickwhenit isinflated.
- Whentheairbagcontrolmoduledetectsacollision requiringtheDriver Inflatable Knee Blocker,itsignalstheinflatorunit.Aquantityofnontoxicgasis generatedtoinflatetheDriverInflatableKneeBlocker. TheDriverInflatableKneeBlockerinflatesrearward towardsthedriver'skneestohelpprotecttheknees
andpositionyouforthebestinteractionwiththefront airbag.TheDriverInflatableKneeBlockerfullyinflatesinabout50milliseconds,thisisonlyabouthalf ofthetimeittakesyoutblinkyoureyes.Itthen quicklydeflateswhilehelpingtoprotectthedriver's knees.
- The Knee Impact Blockers help protect the knees and positionyouforthebestinteractionwiththefront airbags.
SideAirbagsSupplementalRestraintSystem (SRS)—IfEquipped
"Supplemental Side Curtain Airbag System", on vehicles equipped, consists of the following:
- AIRBAGReadinessLight(sharedwiththefrontairbag system)
-
LeftandRightSideCurtainAirbagsAboveSide Windows
-
AirbagControlModule
- InterconnectingWiring
If An Airbag Deployment Occurs
The airbagsystems are designed to deploy when the airbag control modules detect a moderate-to-severe collision, to help prestrain the driver and front passenger, and then immediately deflate.
NOTE: A collision that is not severe enough one need airbag protection will not activate the system. This does not means something is wrong with the air bags system.
If youdohaveacollisionwhichdeploystheairbag, any orallofthefollowingmayoccur:
- Theairbagmaterialmaysometimescauseabrasions and/orskinreddeningtothedriverandfrontpassengerastheairbagsdeployandunfold.Theabrasions aresimilartofrictionropeburnsorthoseyoumight getslidingalongacarpetorgymnasiumfloor.They
THINGSTOKNOWBEFORESTARTINGYOURVEHICLE
arenotcausedbycontactwithchemicals. They are not permanent and normally heal quickly. However, if you haven't the aled significantly within a few days, or if you have any blistering, see your doctor immediately.
- Astheairbagsdeflateyoumayseesomesmoke-like particles. Theparticles are an normal by-product of the process that generate thenontoxic gas used for airbag inflation. These airborne particles may irritatetheskin, eyes, nose, orthroat. If you have skin or eye irritation, rinse the area with cool water. Fornose throat irritation, movetofreshair. If their irritation continues, see your doctor. If these particles settle on your clothing, follow the garment manufacturer's instructions for cleaning.
- It is not advisable to drive your vehicle after the airbagshavedeployed. If you are involved in another collision, the airbags and seat belt pretensioners will not be in place to protect you.
WARNING!
Deployed airbags and seat belt pretensioners cannot protect you in another collision. Have the airbags and seat belt pretensioners replaced by an authorized dealer as soon as possible.
Enhanced Accident Response
If the airbags and seat belt hypertension deployment after an impact and the electrical system remains functional, vehicle equipped with power door lock will unlock automatically. In addition, approximately 5 seconds after the vehicle has stopped moving, the interior light will illuminate until the ignition switch is turned off.
Maintaining Your Airbag System
WARNING!
- Modifications to any part of the airbag system could cause it to fail when you need it. You could be injured because the airbags are not there to protect you. Do not modify the components or wiring, including adding any kind of badges or stickers to the steering wheel hub trim cover or the upper right side of the instrument panel. Do not modify the front bumper, vehicle body structure, or frame.
- You need proper knee impact protection in a collision. Do not mount or locate any aftermarket equipment on or behind the knee blockers.
- It is dangerous to try to repair any part of the airbag system yourself. Be sure to tell anyone who works on your vehicle that it has airbags.
Airbag Light
Youwillwanttohavetheairbagsreadytoinflateforyour protectioninacollision. Whiletheairbagsystemis designedtobemaintenancefree,ifanyofthefollowing occurs,haveanauthorizeddealerservicethesystem immediately.
- The AIRBAGlight does not come on or flickers during the 6 to 8 seconds when the ignition switch is first turned on.
- Thelightremainsonorflickersafterthe6to8second interval.
- Thelightflickersorcomesonandremainsonwhile driving.
ChildRestraint
Everyoneinyourvehicleneedstobebuckledupatall times—babiesandchildren,too.Everystateinthe UnitedStatesandallCanadianprovincesrequirethat smallchildrenrideinproperrestraintsystems.Thisisthe law,andyoucanbeprosecutedforignoringit.
Children12yearsandundershouldrideproperlybuckledupinaseatappropriatefortheirageandsize. According to crash statistics, children are safer when properly restrained in there are seats, rather than in the front.
In a collision, an unrestrained child, even a tiny baby, can become a missile inside the vehicle. The force required to hold even an infant on your lap could become so great that you could not hold the child, no matter how strong you are. The child and others could be badly injured. Any child riding in your vehicle should be in a proper restraint for the child's size.
Lower Anchors and Tether for CHildren (LATCH)
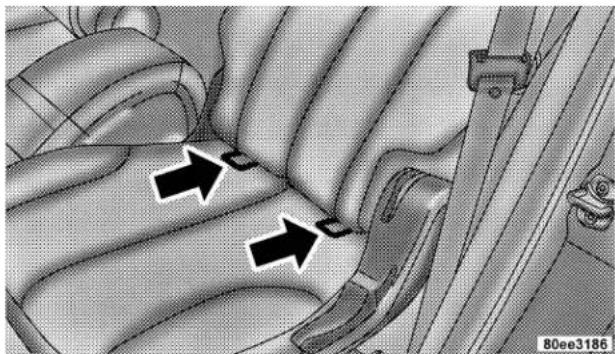
Each vehicle, is equipped with two child restraint anchorages system scalled LATCH, which stands for Lower Anchors and Tether for Children. The LATCH child restraint anchorages systems are installed on all second-row seats.
TheloweranchorbarsoftheLATCHSystemarelocated wheretheseatbackmeetstheseatcushion.
natural_image
Interior view of a car seatbelt with two black arrows pointing to specific parts (no text or symbols visible)natural_image
Interior view of a car showing seatbelt and rear seats with a black arrow pointing to the seat (no text or symbols)Childrestraintsystemsdesignedtobecompatiblewith thevehiclesLATCHSystemarenowavailable.LATCH childrestraintsmakeinstallationintothevehiclesimple andconvenient.
When using the LATCH System, always follow the child restraint manufactures installation instructions.
NOTE: If your child restraint seatis not LATCH compatible, install the restraint using the vehicle seat belts.
Therearetetherstrapanchoragesbehindallsecondrow seatingpositionsandthedriver'ssidethirdrowseating position. Thetetheranchorsarelocatedintherear surfaceoftheseat.Whenusingthetetheranchoragesin thesecondrowseatingposition,ensurethatthestrapis routedoverthetopoftheseatbackandunderthehead restraintbetweentheheadrestraintposts.
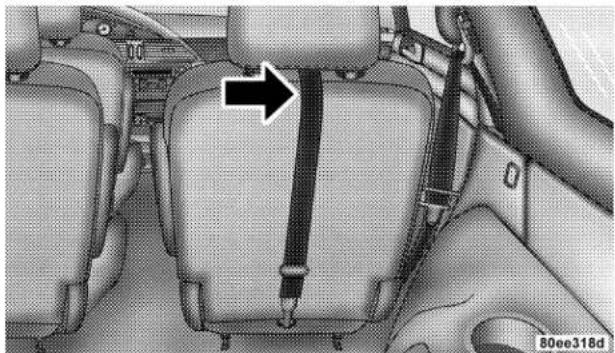
natural_image
Interior view of a car showing seatbelt and seatbelt connector (no text or symbols visible)Whenthetetheranchorageisusedinthethirdrow seatingposition, thestrapshouldbepositionedstraight overthetopoftheseatback.
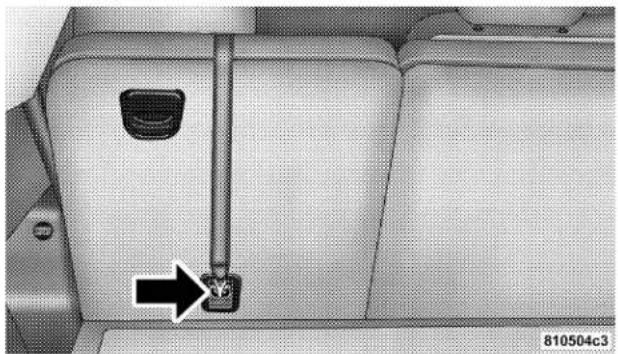
natural_image
Interior view of a car backrest with a vertical pipe and a small connector (no text or symbols visible)Infants and Children
Therearedifferentsizesandtypesofrestraintsfor childrenfromnewbornsizetothechildalmostlarge enoughforanadultsafetybelt.Alwayscheckthechild seatowner'smanualtoensureyouhavetherightseatfor yourchild.Usetherestraintthatiscorrectforyourchild:
- Safetyexpertsrecommendthatchildrenride rearward-facinginthevehicleuntiltheyareatleast oneycaroldandweighatleast9kg(20lbs).Twotypes ofchildrestraintscanbeusedrearward-facing:infant carriersand"convertible"childseats.Bothtypesof childrestraintsareheldinthevehiclebythelap/shoulderbeltortheLATCHchildrestraintanchorage system.Referto"LowerAnchorsandTetherforCHildren(LATCH)"inthissection.
THINGSTOKNOWBEFORESTARTINGYOURVEHICLE
55
- Theinfantcarrierisonlyusedrearward-facinginthe vehicle.Itisrecommendedforchildrenwhoweighup toabout9kg(20lbs)."Convertible"childseatscanbe usedeitherrearward-facingorforward-facinginthe vehicle. Convertible child seats often have a higher weight limit in the rearward-facing direction than infantcarriersdo,sotheycanbeusedrearward-facing bychildrenwhoweighmorethan9kg(20lbs)butare lessthanoneyearold.
- Rearward-facingchildseatsmustNEVER beused in the front seat of a vehicle with a front passenger airbag. Anairbagdeploymentcouldcausesevere injuryordeathtoinfantsinthisposition.
- Childrenwhoweighmorethan9kg(20lbs)andwho areolderthanoneyearcanrideforward-facinginthe vehicle. Forward-facing child seats and convertible childseatsusedintheforward-facingdirectionarefor childrenwhoweigh9to18kg(20to40lbs)andwho areolderthanoneyear.
- Thebelt-positioningboosterseatisforchildrenweighingmorethan18kg(40lbs),butwhoarestilltoosmall tofitthevehicle'sseatbeltsproperly.Ifthechildcan notsitwithkneesbentoverthevehiclesseatcushion whilethechild'sbackisagainsttheseatback,they shoulduseabelt-positioningboosterseat.Thechild andboosterseatareheldinthevehiclebythelap/shoulderbelt.(Someboosterseatsareequippedwitha frontshieldandareheldinthevehiclebythelap portion.)
NOTE: For additional information referto www.seatchec.org.
WARNING!
- Improper installation can lead to failure of an infant or child restraint. It could come loose in a collision. The child could be badly injured or killed. Follow the manufacturer's directions exactly when installing an infant or child restraint.
- A rearward facing child restraint should only be used in a rear seat. A rearward facing child restraint in the front seat may be struck by a deploying passenger airbag which may cause severe or fatal injury to the infant.
Here are some tips on getting the most out of your child restraint:
- Beforebuyinganyrestraintsystem,makesurethatit has a label certifying that it meets all applicable Safety Standards.Wealsorecommendthatyoumakesure
that you can install the child restraint in the vehicle where you will use it, before you buy it.
- Therestraintmustbeappropriateforyourchild's weightandheight.Checkthelabelontherestraintfor weightandheightlimits.
- Carefully follow the instruction that comewith the restraint. If you install therestraintimproperly, it may not work when you need it.
Thepassengerseatbeltsareequippedwithcinching latchplates,whicharedesignedtokeepthelap portiontightaroundthechildrestraintsothatitisnot necessarytousealockingclip.Pullinguponthe shoulderportionofthelap/shoulderbeltwilltighten thebelt.Thecinchinglatchplatewillkeepthebelt tight,however,anyseatbeltsystemwillloosenwith time,socheckthebeltoccasionallyandpullittightif necessary.
- Bucklethechildintotheseataccordingtothechild restraintmanufacturer'sdirections.
- Whenyourchildrestraintisnotinuse,secureitinthe vehiclewiththeseatbeltorremoveitfromthevehicle. Don'tleaveitlooseinthevehicle.Inasuddenstopor collision,itcouldstriketheoccupantsorseatbacksand causeseriouspersonalinjury.
Installing A Child Restraint
Weurgethatyoucarefullyfollowthedirectionsofthe manufacturerwheninstallingyourchildrestraint.Many, butnotall,restraintsystemswillbeequipped with separatestrapsoneachside, witheachhavingahookor connectorandameansforadjustingthetensioninthe strap.Forward-facingtoddlerrestraintsandsome rearward-facinginfantrestraintswillalsobeequipped withatetherstrap,ahookandmeansforadjustingthe tensioninthestrap.
In general, you will first loose the adjusters on the lower straps and tether straps so that you can more easily attach the hookor connect to the lower anchorages and tether anchorages. Thentighten all three straps as you push the child restraint rear forward and downward into these at.
Childrestraintsystemshavingattachmentsdesignedto connecttotheloweranchoragesarenowavailable.Child restraintshavingtetherstrapsandhooksforconnection totheseatbacktetheranchoragehavebeenavailablefor sometime.Infact,manychildrestraintmanufacturers willprovideadd-ontetherstrapkitsforsomeoftheir olderproducts.
Because the lower anchorages are to be introduced to passenger carrying vehicles over a period of years, child restraints system shaving attachments forth those anchorages will continue to have features for installation in vehicles using the lapor lap/shoulder belt. They will also
havetetherstraps, and you are urged to take advantage of all of the available attachments provided with your child restraint in any vehicle.
Notallchildrestraintsystemswillbeinstalledaswe havedescribedhere.Again,carefullyfollowtheinstructionsthatcomewiththechildrestraintsystem.
WARNING!
Improper installation of a child restraint to the LATCH anchorages can lead to failure of an infant or child restraint. The child could be badly injured or killed. Follow the manufacturer's directions exactly when installing an infant or child restraint.
Children Too Large For Booster Seats
Childrenwhoarelargeenoughtoweartheshoulderbelt comfortably,andwhoselegsarelongenoughtobend overthefrontoftheseatwhentheirbackisagainstthe seatback,shouldusethelap/shoulderbeltinarearseat.
- Makesurethatthechildisuprightintheseat.
- Thelapportionshouldbelowonthehipsandassnug aspossible.
- Checkbeltfitperiodically.Achild's squirmingor slouchingcanmovethebeltoutofposition.
- Iftheshoulderbeltcontactsthefaceorneck,movethe childclosertothecenterofthevehicle.Neverallowa childtoputtheshoulderbeltunderanarmorbehind theirback.
Transporting Pets
Airbagsdeployinginthefrontseatcouldharmyourpet. Anunrestrainedpetcouldbethrownaboutandpossibly injured,orinjureapassengerduringpanicbrakingorin acollision.
Petsshouldberestrainedintherearseatinpetharnesses orpetcarriersthataresecuredbyseatbelts.
ENGINEBREAK-INRECOMMENDATIONS
Alongbreak-inperiodisnotrequiredfortheenginein yournewvehicle.
Drivemoderatelyduringthefirst300miles(500km). Aftertheinitial60miles(100km),speedsupto50or55 mph(80or90km/h)aredesirable.
Whilecruising, brief full-throttle acceleration, within the limit so focal traffic laws, contributest to a good break-in. Wideopenthrottle acceleration in low gear can be detrimental and should be avoided.
Theengineoilinstalledintheengineatthefactoryisa highqualityenergyconservingtypelubricant.Oil changesshouldbeconsistentwithanticipatedclimate conditionsunderwhichvehicleoperationswilloccur. Therecommendedviscosityandqualitygradesare showninSection7ofthismanual.NON-DETERGENT ORSTRAIGHTMINERALOILSMUSTNEVERBE USED.
Anewenginemayconsumesomeoilduringitsfirstfew thousandmiles(kilometers)ofoperation. This should be considered as an normal part of the break-in and not interpreted as an indication of difficulty.
SAFETYTIPS
ExhaustGas
WARNING!
Exhaust gases can injure or kill. They contain carbon monoxide (CO) which is colorless and odorless. Breathing it can make you unconscious and can eventually poison you. To avoid breathing (CO) follow the safety tips below.
Donotruntheengineinaclosedgarageorinconfined areasanylongerthanneededtomoveyourvehicleinor outofthearea.
If it is necessary to sit in a parked vehicle with the engine running, adjust your heating or cooling control to force outside air into the vehicle. Set the blower at high speed.
WARNING!
If you are required to drive with the deck lid/liftgate open, make sure that all windows are closed, and the climate control blower switch is set at high speed. DO NOT use the recirculation mode.
SafetyChecksYouShouldMakeInsideThe Vehicle
Seat Belts
Inspectthebeltsystemperiodically,checkingforcuts, fraysandlooseparts.Damagedpartsmustbereplaced immediately.Donotdisassembleormodifythesystem.
Frontseatbeltassembliesmustbereplacedaftera collision.Rearseatbeltassembliesmustbereplacedafter acollisioniftheyhavebeendamaged(bentretractor,torn webbing,etc.Ifthereisanyquestionregardingbeltor retractorcondition,replacethebelt.
Airbag Light
Thelightshouldcomeonandremainonfor6to8 secondsasabulbcheckwhentheignitionswitchisfirst turnedON.IftheLEDisnotlitduringstarting,haveit checked.Ifthelightstaysonorcomesonwhiledriving, havethesystemcheckedbyanauthorizeddealer.
Defroster
Checkoperationbyselectingthedefrostmodeandplace theblowercontrolonhighspeed.Youshouldbeableto feeltheairdirectedagainstthewindshield.
62THINGSTOKNOWBEFORESTARTINGYOURVEHICLE
PeriodicSafetyChecksYouShouldMakeOutside TheVehicle
Tires
Examinetiresforexcessivetreadwearorunevenwear patterns. Checkforstones, nails, glass, or other objects lodged in the thread. Inspecttread and sidewall for cuts or cracks. Check wheel nuts fortightness, and tires (including spare) for proper pressure.
Lights
Havesomeoneobservetheoperationofexteriorlights whileyouworkthecontrols.Checkturnsignalandhigh beamindicatorlightsontheinstrumentpanel.
Fluid Leaks
Checkareaundervehicleafterovernightparkingforfuel, enginecoolant,oilorotherfluidleaks.Also,ifgasoline fumesaredetectedorfuel,powersteeringfluidorbrake fluidleaksaresuspected,thecauseshouldbelocatedand correctedimmediately.
UNDERSTANDINGTHEFEATURESOFYOURVEHICLE
CONTENTS
■Mirrors. 67
□InsideDay/NightMirror. 67
□AutomaticDimmingMirror—IfEquipped....67
□Driver'sSideOutsideMirrorAutoDimmer—If Equipped. 68
□ExteriorMirrorsFoldingFeature. . . . . . . . . . 6 8
□OutsideMirror—Driver'sSide. . . . . . . . . . . . 6 8
□OutsideMirror—Passenger'sSide. . . . . . . . . . 6 8
□PowerRemote-ControlMirrors. . . . . . . . . . . . . . 6 9
□HeatedRemoteControlMirrors. . . . . . . . . . . . 7 0
□IlluminatedVanityMirrors. 70
■Hands-FreeCommunication(UConnect™)—If Equipped 71
□Operation....72
□PhoneCallFeatures. 78
□UConnect™SystemFeatures. 81
□AdvancedPhoneConnectivity. 85
□ThingsYouShouldKnowAboutYourUConnect™ System 87
64UNDERSTANDINGTHEFEATURESOFYOURVEHICLE
■Seats. 93
□10-WayDriver'sPowerSeat—IfEquipped...93
□8-WayDriver'sPowerSeat—IfEquipped....93
□4-WayPassenger'sPowerSeat. 93
□AdjustableHeadRestraints. 94
□HeatedSeats—IfEquipped. 94
□SecondRowManualSeatRecliner. . . . . . . . . 9 6
□SecondRowManualSeatAdjuster. . . . . . . . . 9 7
□SecondRowFold&TumbleSeats. 98
□ThirdRowEasyExit. 99
□ThirdRowSeatingFlexibility. . . . . . . . . . . . 1 0 1
□LoadFloor. 102
□PlasticGroceryBagRetainer. 103
■DriverMemorySystem—IfEquipped. . . . . . 1 0 4
■ToOpenAndCloseTheHood. . . . . . . . . . . . 1 0 7
■Lights 108
□ Overhead Console Map/Reading Lights .....108
□Interior Lights 109
□Multi-FunctionLever. 109
□Headlights, ParkingLights, InstrumentPanel Lights 110
□ Automatic Headlights ..... 111
□ Daytime Running Lights (Canada Only) ..... 111
□Lights-On Reminder 111
□ Headlight Time Delay ..... 111
□Fog Lights — If Equipped .....112
UNDERSTANDINGTHEFEATURESOFYOURVEHICLE65
□TurnSignals. 1 1 2
□Highbeam/LowbeamSelectSwitch. . . . . . . . 1 1 3
□PassingLight. 1 1 3
■WindshieldWipersAndWashers. . . . . . . . . 1 1 3
□WindshieldWashers. 1 1 3
□MistFeature. 1 1 4
□WindshieldWiperOperation. 1 1 4
□IntermittentWiperSystem. 1 1 4
□RearWindowWiper/Washer. 1 1 4
■TiltSteeringColumn. 1 1 6
■TractionControlSwitch—IfEquipped. . . . . . 1 1 6
■AdjustablePedals—IfEquipped....1 1 8
■ElectronicSpeedControl....1 1 9
□ToActivate 119
□ To Set At A Desired Speed .....120
□ToDeactivate....1 2 0
□ToResumeSpeed....1 2 0
□ To Vary The Speed Setting .....120
□ To Accelerate For Passing .....121
■ Overhead Console — If Equipped .....122
□Courtesy/Reading Lights....122
□ Sunglasses Storage 122
■ Garage Door Opener — If Equipped .....123
□ Programming Homelink .....124
□ Canadian Programming/Gate Programming ..126
□ Using Homelink .....127
UNDERSTANDINGTHEFEATURESOFYOURVEHICLE
□ErasingHomelinkButtons. 1 2 7
□ReprogrammingaSingleHomelinkButton...128
□Security....128
■PowerSunroof—IfEquipped....129
□ExpressOpenFeature....129
□WindBuffeting. 131
□SunroofMaintenance. 131
■ElectricalPowerOutlets. 131
□ElectricalOutletUseWithEngineOff. . . . . . 1 3 2
■Cupholders. 133
□FrontSeatCupholders. 133
□SecondRowSeatCupholders. 1 3 3
□ThirdRowSeatCupholders. 133
■Storage. 133
□ConsoleFeatures. 1 3 3
□RearCargoStorageBin. 134
□RetractableCargoAreaCover—IfEquipped .134
□CargoTie-DownHooks. 135
■ Roof Luggage Rack — If Equipped .....137
■LoadLevelingSystem....138
MIRRORS
InsideDay/NightMirror
Adjustthemirrortocenterontheviewthroughtherear window.Atwopointpivotsystemallowsforhorizontal andverticaladjustmentofthemirror.
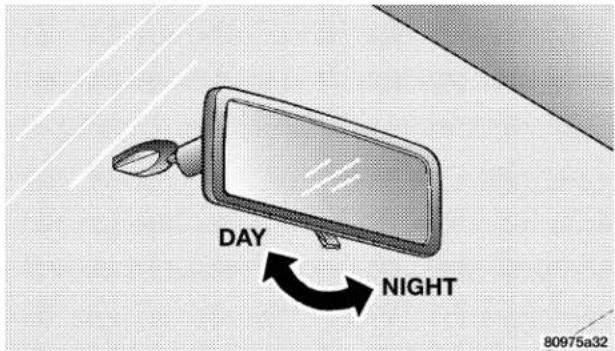
Annoyingheadlightglarecanbereducedbymovingthe smallcontrolunderthemirrortothenightposition
(towardrearofvehicle).Themirrorshouldbeadjusted whilesetinthedayposition(towardwindshield).
AutomaticDimmingMirror—IfEquipped
Iftheswitchisinthe"Auto"positionthemirrorwill automaticallyadjustforannoyingheadlightglarefrom vehiclesbehindyou.Youcanturnthefeatureonoroffby pressingthebuttonatthebaseofthemirror.Alightinthe mirrorwillilluminatetoindicatewhenthisfeatureison.
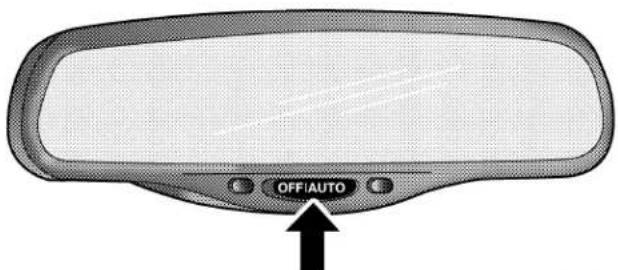
81074fc3
68 UNDERSTANDING THE FEATURES OF YOUR VEHICLE
CAUTION!
To avoid damage to the mirror during cleaning, never spray any cleaning solution directly onto the mirror. Apply the solution onto a clean cloth and wipe the mirror clean.
Driver'sSideOutsideMirrorAutoDimmer—If Equipped
This mirror automatically adjusts for annoying headlight glare from vehicles behind you. You can turn this feature on or off by pressing the button at the base of the Rearview Mirror.
ExteriorMirrorsFoldingFeature
Allexteriormirrorsarehingedandmaybemovedeither forwardorrearwardtoresistdamage. Thehingeshave threedetentpositions;fullforward,fullrearward,and normal.
OutsideMirror—Driver'sSide
Adjusttheoutsidemirrortocenterontheadjacentlaneof traffic,withaslightoverlapoftheviewobtainedonthe insidemirror.
OutsideMirror—Passenger'sSide
Adjusttheconvexoutsidemirrorsoyoucanjustseethe sideofyourvehicleintheportionofthemirrorclosestto thevehicle. Thistypeofmirrorwillgiveamuchwider viewtotherear, andespeciallyofthelanenexttoyour vehicle.
WARNING!
Vehicles and other objects seen in the right side convex mirror will look smaller and farther away than they really are. Relying too much on your right side mirror could cause you to collide with another vehicle or other object.
Use your inside mirror when judging the size or distance of a vehicle seen in this convex mirror.
PowerRemote-ControlMirrors
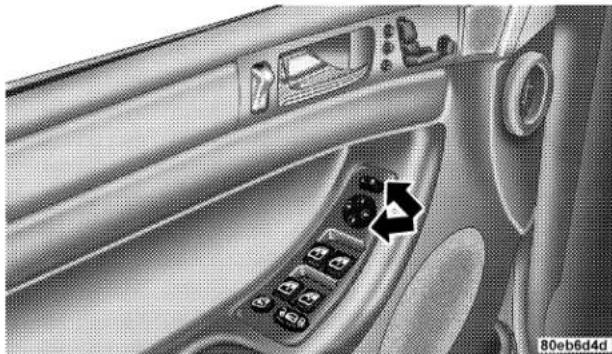
Usethemirrorselectswitch, locatedonthedriver'sdoor trimpanelabovethepowerwindowswitches,toadjust theviewobtainedintheoutsidemirrors.
natural_image
Interior view of a car's dashboard and steering wheel, showing the door panel with buttons and a black arrow pointing to the left side (no text or symbols visible)PresstherockerswitchtotheLorRforLeftorRight mirrorselection. Usethecenteroffpositiontoguard againstaccidentallymovingamirrororposition.
Selectamirrorandpressoneofthefourarrowsforthe directionyouwantthemirrortomove.
70UNDERSTANDINGTHEFEATURESOFYOURVEHICLE
Powermirrorpreselectedpositionscanbecontrolledby theoptionalMemorySeatFeature.Referto"Memory Seat"insection3ofthismanual.
HeatedRemoteControlMirrors
Thesemirrorsareheatedtomeltfrostorice. Thisfeature isactivatedwheneveryouturnontheRearWindow Defrost.
Illuminated Vanity Mirrors
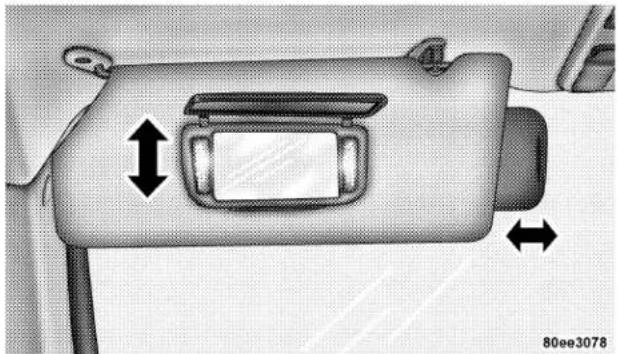
Anilluminated vanity mirror is on the sunvisor. Touse themirror, rotat the sun visordown and swing the mirror cover upward. The light turnon automatically. Closing them mirror cover turn soff the lights.
natural_image
Interior view of a car's rear seat and side panel showing directional arrows (no text or symbols)Sun Visor Extension
Thisfeaturehasapulloutextensiononthesunvisorfor increasedcoverage.
HANDS-FREECOMMUNICATION(UConnect™)—IFEQUIPPED
UConnect™isavoice-activated,hands-free,invehicle communicationssystem.UConnect™allowsyoutodial aphonenumberwithyourcellularphone*usingsimple voice commands (e.g., "Call ... Mike ...Work" or "Dial ... 248-555-1212").Yourcellularphone'saudioistransmitted throughyourvehicle'saudiosystem;thesystemwill automaticallymuteyourradiowhenusingtheUConnect™system.
NOTE: TheUConnect™systemuserequiresacellular phoneequippedwiththeBluetooth"Hands-FreeProfile," version0.96orhigher.
ForUConnectCustomerSupportcall1-877-855-8400or visittheUConnectwebsite(www.chrysler.com/uconnect).
UConnect™ allowsyoutotransfercallsbetween the systemandyourcellularphoneasyouenterorexityour vehicle, andenablesyoutomutethesystem'smicro-phoneforprivateconversation.
TheUConnect™ phonebookenablesyoutostoreupto32 namesandfournumberspername. This system is driven through your Bluetooth™ Hands-Freeprofilecellular phone. UConnect™ features Bluetooth™ technology-the global standard that enables different electronic devices to connect to each other without wires or docking station, so UConnect worksnomatter where you must your cellular phone (beityourpurse, pocket, or briefcase), as long as your phone is turned on and has been paired to the vehicle's UConnect™ system. The UConnect™ system allows support to sevencellular phonestobe linked to system. Only on linked (or paired) cellular phone can be used with the system at time. The system is available in English, Spanish, or French languages (as equipped).
72UNDERSTANDINGTHEFEATURESOFYOURVEHICLE
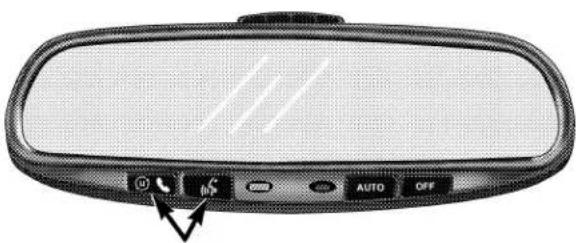
Therearviewmirrorcontainsthemicrophoneforthe systemandthecontrolbuttonsthatwillenableyouto accessthesystem.Thediagrambelowshowsthemirror withtheappropriatebuttons.Individualbuttonbehavior isdiscussedinthe"Operation"section.
natural_image
Back view of a car dashboard with navigation buttons (no text or symbols on the main subject)8105b20d
TheUConnect™systemcanbeusedwithanyHands-FreeProfilecertifiedBluetooth™cellularphone.Ifyour
cellularphonesupportsadifferentprofile(eg.,Headset Profile),youmaynotbeabletouseanyUConnect™ features.Refertoyourcellularserviceproviderorthe phonemanufacturerfordetails.
TheUConnect™ systemisfullyintegratedwiththe vehicle'saudiosystem.ThevolumeoftheUConnect™ systemcaneitherbeadjustedfromtheradiovolume controlknob,orfromthesteeringwheelradiocontrol (rightswitch),ifsoequipped.
Theradiodisplaywillbeusedforvisualpromptsfrom theUConnect™systemsuchas"CELL"orcallerIDon certainradios.
Operation
VoicecommandscanbeusedtooperatetheUConnect™ systemandtonavigatethroughtheUConnect™menu structure. Voicecommandsarerequiredaftermost
UNDERSTANDINGTHEFEATURESOFYOURVEHICLE73
UConnect™system prompts. You will be prompted for a specific command and the guided through the available options.
- Prior to giving a voice command, on must wait for the voice on beep, which follows the "Ready" prompt or another prompt.
- For certain operations, compound command scan be used. Forexample, instead of saying "Setup" and then "PhonePairing," the following compound command can be said: "Setup PhonePairing."
- Foreachofthefeatureexplanationinthissection,only thecombinedformofthevoicecommandisgiven. Youcanalsobreakthecommandsintopartsandsay eachpartofthecommand,whenyouareaskedforit. Forexample,youcaneitherusethecombinedform voicecommand"PhonebookNewEntry,"oryoucan breakthecombinedformcommandintotwovoice
commands: "Phonebook" and "New Entry." Please remember, the UConnect™ system works best when you talk in an normal conversational tone, as if speaking to some ones sitting eight feet away from you.
Help Command
If you need assistance at any prompt to you want to know what your options are at any prompt, say "Help" following the voice on beep. The UConnect™ system will play all the options at any prompt to you ask for help.
ToactivatetheUConnect™systemfromidle,simply pressthe'Phone'buttonandfollowaudiblepromptsfor directions.AllUConnect™systemsessionsbeginwitha pressofthe'Phone'buttononthemirror.
Cancel Command
Atanyprompt,afterthevoiceonbeep,youcansay "Cancel"andyouwillbereturnedtothemainmenu. However,inafewinstancesthesystemwilltakeyou backtothepreviousmenu.
74UNDERSTANDINGTHEFEATURESOFYOURVEHICLE
Pair (Link) UConnect™ System to a Cellular Phone
TobeginusingyourUConnect™system,youmustpair yourcompatibleBluetooth™enabledcellularphone(referto"Introduction"sectiontolearnaboutthephone type).Tocompletethepairingprocess,youwillneedto referenceyourcellularphoneowner'smanual.Oneofthe followingvehiclespecificwebsitesmayalsoprovide detailedinstructionsforpairingwiththebrandofphone thatyouhave:
NOTE: www.chrysler.com/uconnect
The following are general phoneto UConnect™ System pairing instructions:
- Pressthe'Phone'buttontobegin.
- Afterthe"Ready"promptandthefollowingbeep,say "SetupPhonePairing."
-
When prompted, after the voice on beep, say "Paira Phone."
-
Youwillbeaskedtosayafour-digitpinnumberwhich youwilllaterneedtoenterintoyourcellular.Youcan enteranyfour-digitpinnumber.Youwillnotneedto rememberthispinnumberaftertheinitialpairing process.
- TheUConnect™systemwillthenpromptyoutobegin thecellularphonepairingprocessonyourcellular phone.Beforeattemptingtopairphone,pleasesee yourcellularphone'susermanual(Bluetoothsection) forinstructionsonhowtocompletethisstep.
- Foridentificationpurposes,youwillbepromptedto givetheUConnect™systemanameforyourcellular phone.Eachcellularphonethatispairedshouldbe givenauniquephonename.
- Youwillthenbeaskedtogiveyourcellularphonea prioritylevelbetween1and7,1beingthehighest priority.Youcanpairuptosevencellularphonesto yourUConnect™system.However,atanygiventime,
onlyonecellularphonecanbeinuse,connectedto yourUConnect™System.Thepriorityallowsthe UConnect™systemtoknowwhichcellularphoneto useifmultiplecellularphonesareinthevehicleatthe sametime.Forexample,ifpriority3andpriority5 phonesarepresentinthevehicle,theUConnect™ systemwillusethepriority3cellularphonewhenyou makeacall.Youcanselecttousealowerpriority cellularphoneatanytime(referto"AdvancedPhone Connectivity"section).
Dial by Saying a Number
- Pressthe'Phone'buttontobegin.
- Afterthe"Ready"promptandthefollowingbeep,say "Dial."
- Systemwillpromptyoutosaythenumberyouwant call.
UNDERSTANDINGTHEFEATURESOFYOURVEHICLE75
- Forexample,youcansay"234-567-8901."Thephone numberthatyouentermustbeofvalidlengthand combination.TheUConnect™limitstheuserfrom dialinginvalidcombinationofnumbers.Forexample, 234-567-890isninedigitslong,whichisnotavalid phonenumber-theclosestvalidphonenumberhas tendigits.
- TheUConnect™systemwillconfirmthephonenum-berandthendial.Thenumberwillappearinthe displayofcertainradios.
Call by Saying a Name
- Pressthe"Phone"buttontobegin.
- Afterthe"Ready"promptandthefollowingbeep,say "Call."
- Systemwillpromptyoutosaythenameoftheperson youwantcall.
76 UNDERSTANDINGTHEFEATURESOFYOURVEHICLE
- After the "Ready" prompt and the following beep, say the name of the person you want to call. For example, you can say "John Doe," where John Doe is a previously stored name entry in the UConnect™ phonebook. Refer to section "Add Names to Your UConnect™ Phonebook," to learn how to store a name in the phonebook.
- The UConnect™ system will confirm the name and then dial the corresponding phone number, which may appear in the display of certain radios.
Add Names to Your UConnect™ Phonebook
NOTE: Adding names to phonebook is recommended when vehicle is not in motion.
- Press the "Phone" button to begin.
-
After the "Ready" prompt and the following beep, say "Phonebook New Entry."
-
When prompted, say the name of the new entry. Use of long names helps the voice recognition and is recommended. For example, say "Robert Smith" or "Robert" instead of "Bob."
- When prompted, enter the number designation (e.g.: "Home," "Work," "Mobile," or "Pager"). This will allow you to store multiple numbers for each phonebook entry, if desired.
- When prompted, recite the phone number for the phonebook entry that you are adding.
After you are finished adding an entry into the phone-book, you will be given the opportunity to add more phone numbers to the current entry or to return to the main menu.
The UConnect™ system will allow you to enter up to 32 names in the phonebook with each name having up to four associated phone numbers and designations.
Edit Entries in the UConnect™ Phonebook
NOTE: Adding namestophone book is recommended when vehicle is not in motion.
- Pressthe'Phone'buttontobegin.
- Afterthe"Ready"promptandthefollowingbeep,say "PhonebookEdit."
- Youwillthenbeaskedforthenameofthephonebook entrythatyouwishtoedit.
- Next,choosethenumberdesignation(home,work, mobile,orpager)thatyouwishtoedit.
- When prompted, recitethenewphonenumberforthe phonebookentrythatyouareediting.
Afteryouarefinishededitinganentryinthephonebook, youwillbegiventheopportunitiestoeditanotherentry inthephonebook,callthenumberyoujustedited,or returntothemainmenu.
"PhonebookEdit" can be used to add another phone number to an name entry that already exists in the phonebook. For example, the entry John Doemay have a mobile and a homenumber, but you can add John Doe's work number later using the "PhonebookEdit" feature.
Delete Entries in the UConnect™ Phonebook
- Pressthe'Phone'buttontobegin.
- Afterthe"Ready"promptandthefollowingbeep,say "PhonebookDelete."
- AfteryouenterthePhonebookDeletemenu,youwill thenbeaskedforthenameoftheentrythatyouwish todelete.Youcaneithersaythenameofaphonebook entrythatyouwishtodeleteoryoucansay"List Names"tohearalistoftheentriesinthephonebook fromwhichyouchoose.Toselectoneoftheentries fromthelist,pressthe"VoiceRecognition"button whiletheUConnect™systemisplayingthedesired entryandsay"Delete."
78 UNDERSTANDING THE FEATURES OF YOUR VEHICLE
- Afteryouenterthename,theUConnect™systemwill askyouwhichdesignationyouwishtodelete:home, work,mobileorpager.Saythedesignationyouwish todelete.
Delete All Entries in the UConnect™ Phonebook
- Pressthe'Phone'buttontobegin.
- Afterthe"Ready"promptandthefollowingbeep,say "PhonebookEraseAll."
- TheUConnect™systemwillaskyoutoverifythatyou wishtodeletealltheentriesfromthephonebook.
- Afterconfirmation, the phonebookentries will be deleted.
List All Names in the UConnect™ Phonebook
- Pressthe'Phone'buttontobegin.
- Afterthe"Ready"promptandthefollowingbeep,say "PhonebookListNames."
- TheUConnect™systemwillplaythenamesofallthe phonebookentries.
- Tocalloneofthenamesinthelist, pressthe"Voice Recognition'buttonduringtheplayingofthedesired nameandsay"Call".NOTE: theusercanalsoexercise "Edit" or "Delete" operations at this point.
- TheUConnect™systemwillthenpromptyouasto numberdesignationyouwishtocall.
• Theselectednumberwillbedialed.
PhoneCallFeatures
The following features can be accessed through the UConnect™ system if the feature(s) are available by your cellular service plan. For example, if your cellular service plan provides three-way calling, this feature can be
accessedthroughtheUConnect™system.Checkwith yourcellularserviceproviderforthefeaturesthatyou have.
Answer or Reject an Incoming Call - No Call Currently in Progress
When you receive acallony our cellular phone, the UConnect™ system will interrupt the vehicle audio system, if on, and will ask if you would like to answer the call. Toreject the call, press and hold the 'Phone' button until you hear a single beep indicating that the incoming call was rejected.
Answer or Reject an Incoming Call - Call Currently in Progress
Ifacalliscurrentlyinprogressandyouhaveanother incomingcall,youwillhearthesamenetworktonesfor callwaitingthatyounormallyhearwhenusingyourcell phone.Pressthe'Phone'buttontoplacethecurrentcall onholdandanswertheincomingcall.NOTE:The
UConnect™ systemcompatiblephonesinmarkettoday donotsupportrejectinganincomingcallwhenanother callisinprogress. Therefore, theusercanonlyeither answeranincomingcallorignoreit.
Making a Second Call while Current Call in Progress
Tomasesecondcallwhileyouarecurrentlyinacall, pressthe'VoiceRecognition'buttonandsay"Dial"or "Call"followedbythephonenumberorphonebookentry youwishtocall. Thefirstcallwillbeonholdwhilethe secondcallisinprogress. Togobacktothefirstcall, refer tosection "TogglingBetweenTwoCalls." Tocombinetwo calls, refertosection "ConferenceCall."
Place / Retrieve a Call from Hold
Tputacallonhold, press the 'Phone' button until you hearasinglebeep which will indicate that the call has been placed on hold. To bring the callback from hold, press and hold the 'Phone' button for 1 to 3 seconds.
80UNDERSTANDINGTHEFEATURESOFYOURVEHICLE
Toggling Between Calls
Iftwocallsareinprogress(oneactiveandoneonhold), pressthe'Phone'buttonuntilyouhearasinglebeep indicatingthattheactiveandholdstatusofthetwocalls haveswitched.Onlyonecallcanbeplacedonholdatone time.
Conference Call
Whentwocallsareinprogress(oneactiveandoneon hold),pressandholdthe'Phone'buttonuntilyouheara doublebeepindicatingthatthetwocallshavebeen joinedintooneconferencecall.
Three-Way Calling
Toinitiate three-way calling press the Voice Recognition button while acallisin progress and make a second phone call as described in section "Making a Second Call while Current Call in Progress." After these second call has established, pressandholdthe'Phone'buttonuntilyou hearadoublebeepindicatingthatthetwocallshave beenjoinedintooneconferencecall.
Call Termination
Toendacallinprogress,momentarilypressthe'Phone' button.Allactivecallswillbeterminated.
Redial
- Pressthe'Phone'buttontobegin.
- Afterthe"Ready"promptandthefollowingbeep,say "Redial."
- TheUConnect™systemwillcallthelastnumberthat wasdiedonyourcellularphone. Note: this may not be thelastnumberdied from theUConnect™system.
Call Continuation
Callcontinuationisprogressionofaphonecallon UConnect™systemafterthevehicleignitionkeyhas beenswitchedtooff.Callcontinuationfunctionalitycan beofthreetypes:
- Afterignitionkeyisswitchedoff,acallcancontinue ontheUConnect™systemeitheruntilthecallendorsor untilthevehiclebatteryconditiondictatescessationof thecallontheUConnect™systemandtransferofthe calltothemobilephone.
- Afterignitionkeyisswitchedtooff,acallcancontinue ontheUConnect™systemforcertainduration,after whichthecallisautomaticallytransferredfromthe UConnect™systemtothemobilephone.
- Anactivecallisautomaticallytransferredtothe mobilephoneafterignitionkeyisswitchedtooff. Vehicles,suchasPacifica,supportthisapproach.
UConnect™SystemFeatures
Language Selection
TochangethelanguagethattheUConnect™systemis using,
• Pressthe'Phone'buttontobegin.
- Afterthe"Ready"promptandthefollowingbeep,say thenameofthelanguageyouwishtoswitchto (English,Espanol,orFrancais,ifsoequipped).
- Continuetofollowthesystempromptstocomplete languageselection.
Afterselectingoneofthelanguages,allpromptsand voicecommandswillbeinthatlanguage.
NOTE: After every UConnect™ language change operation, you need to enter name the phone book and pair (re-link) phone(s).
82UNDERSTANDINGTHEFEATURESOFYOURVEHICLE
Emergency Assistance
If you are in an emergency and the mobile phone is reachable:
- Pickup the phone and manually dial the emergency number for your area.
If the phone is not reachable and the UConnect™ system is operational, you may reach the emergency number as follows:
- Pressthe'Phone'buttontobegin.
- Afterthe◆Ready◆ promptandthefollowingbeep,say ◆Emergency◆ andtheUConnect™systemwillinstruct thepairedcellularphonetocalltheemergencynumber.ThisfeatureisonlysupportedintheUSA.
NOTE: TheUConnect™systemdoesslightlylower yourchancesofsuccessfullymakingaphonecallasto thatforthecellphonedirectly.
Your phonemustbeturnedonandpairedtotheUConnect™systemtoallowuseofthisvehiclefeaturein emergencysituationswhenthecellphonehasnetwork coverageandstayspairedtotheUConnect™system.
Towing Assistance
If you need towing assistance,
- Pressthe'Phone'buttontobegin.
- Afterthe◆Ready◆ promptandthefollowingbeep,say ◆TowingAssistance.
Pleaserefertothe24-HourTowingAssistancecoverage detailsintheDaimlerChryslerCorporation24-Hour TowingAssistanceProgramGuide.
Paging
Tolearnhowtopage, refertosection ◆ Working with Automated Systems. ◆ Paging works properly except for pagers of certain companies which time out alittle too soon to work properly with the UConnect™ system.
Voice Mail Calling
Tolearnhowtoaccessyourvoicemail, refertosection "WorkingwithAutomatedSystems."
Working with Automated Systems
This method is designed to be used in instances where one generally has topress numbers on the cellular phone keypad while navigating through an automated telephony system.
YoucanuseyourUConnect™systemtoaccessavoicemailsystemoranautomatedservice,suchas,paging serviceorautomatedcustomerservice.Someservices requireimmediateresponseselection,insomeinstances, thatmaybetooquickforuseofUConnect™system.
WhencallinganumberwithyourUConnect™system thatnormallyrequiresyoutoenterinatouch-tone sequenceonyourcellularphonekeypad,youcanpush the'VoiceRecognition'buttonandsaythesequenceyou wishtoenterfollowedbytheword"Send."Forexample,
ifrequiredtoenteryourpinnumberfollowedwitha pound 3 7 4 6 # , you can press the ' VoiceRecognition button and say "3 7 4 6 # Send." Saying a number, or sequenceofnumbers,followedby"Send"isalsotobe usedtonavigatethroughanautomatedcustomerservice centermenustructureandtoleaveanumberonapager.
Barge In - Overriding Prompts
The'VoiceRecognition'buttoncanbeusedwhenyou wishtoskippartofapromptandissueyourvoice recognitioncommandimmediately. Forexample, ifa promptisplaying"Wouldyouliketopairaphone, clear a...,"youcouldpressthe'VoiceRecognition'buttonand say"PairaPhone"toselectthatoptionwithouthavingto listentotherestofthevoiceprompt.
Turning Confirmation Prompts On/Off
Turningconfirmationpromptsoffwillstopthesystem fromconfirmingyourchoices(e.g.theUConnect™systemwillnotrepeataphonenumberbeforeyoudialit).
- Pressthe'Phone'buttontobegin.
- Afterthe"Ready"promptandthefollowingbeep,say "SetupConfirmations."TheUConnect™systemwill playthecurrentconfirmationpromptstatusandyou willbegiventhechoicetochangeit.
Phone and Network Status Indicators
TheUConnect™systemwillprovidenotificationto informyouifyourcellularphoneisinroamingstatus, haslowsignalstrength,orhasalowbatterywhenyou aretryingtoplaceaphonecall.
Dialing Using the Cellular Phone Keypad
Youcandialaphonenumberwithyourcellularphone keypadandstillusetheUConnect™system(while dialingviathecellphonekeypad,theusermustexercise cautionandtakeprecautionarysafetymeasures).By dialinganumberwithyourpairedBluetooth™cellular phone,theaudiowillbeplayedthroughyourvehicle's audiosystem.TheUConnect™systemwillworkthe sameasifyoudialthenumberusingvoicerecognition.
NOTE: Certainbrandsofmobilephonesdonotsendthe dialringtotheUConnect™systemtoplayitonthe vehicleaudiosystem,soyouwillnothearit.Underthis situation,aftersuccessfullydialinganumber,theuser may feel that the call did not go through even though the callisinprogress.Onceyourcallisanswered,youwill heartheaudio.
Mute/Un-mute (Mute off)
When you mute the UConnect™ system, you will still be abletoheartheconversationcomingfromtheother party, buttheotherpartywillnotbeabletohearyou.In ordertomutetheUConnect™system:
- Pressthe'VoiceRecognition'button.
- Afterthe"Ready"promptandthefollowingbeep,say "Mute."
Inordertoun-mutetheUConnect™system:
- Pressthe'VoiceRecognition'button.
- Afterthe"Ready"promptandthefollowingbeep,say "Mute-off."
Information Service
When using AT&T Wireless Service, dialing to phone number "#121," you can access voice activated automated system to receive news, weather, stocks, traffic, etc. related information.
AdvancedPhoneConnectivity
Transfer Call to and from Cellular Phone
TheUConnect™systemallowsongoingcallstobe transferredtoyourcellularphonetotheUConnect™ systemwithoutterminatingthecall.TotransferanongoingcallfromyourUConnect™pairedcellularphoneto theUConnect™systemorvice-versa,pressthe'Voice Recognition'buttonandsay"TransferCall."
Connect or Disconnect Link Between the UConnect™ System and Cellular Phone
Yourcellularphone can be paired with many different electronic devices, but can only be actively connected with one electronic device at a time.
If you would like to connect disconnect the Bluetooth™ connection between a UConnect™ paired cellular phone and the UConnect™ system, follow the instruction described in your cellular phone user's manual.
List Paired Cellular Phone Names
- Pressthe'Phone'buttontobegin.
- Afterthe"Ready"promptandthefollowingbeep,say "SetupListPhones".
- Whenprompted, say "ListPhones".
86 UNDERSTANDING THE FEATURES OF YOUR VEHICLE
- TheUConnect™systemwillplaythephenenamesof allpairedcellularphonesinorderfromthehighestto thelowestpriority.
Select another Cellular Phone
Thisfeatureallowsyoutoselectandstartusinganother phonewiththeUConnect™system. Thephonemust havebeenpreviouslypairedtotheUConnect™system thatyouwanttouseitwith.
- Pressthe'Phone'buttontobegin.
- Afterthe"Ready"promptandthefollowingbeep,say "SetupSelectPhone."
- Whenprompted, say the phonename of the cellular phoneyouwishtouse, or say "List Phones" to hear a list of all the phonesthath have been paired to your UConnect™ system. Toselectaphone from the list, pressthe 'Voice Recognition' button and say "Select."
- Alowerpriorityphonewillonlybeusedforthenext phonecall. Afterthat,theUConnect™systemwill returntousingthehighestpriorityphonepresentinor near(approximatelywithin30feet)thevehicle.
Delete UConnect™ Paired Cellular Phones
- Pressthe'Phone'buttontobegin.
- Afterthe"Ready"promptandthefollowingbeep,say "SetupPhonePairing."
- Atthenextprompt, say "Delete."
- Youwillbeaskedtosaythenameofthephonethat youwishtodelete.Youcaneithersaythenameofthe phonethatyouwishtodeleteoryoucansay"All"to deleteallthephones.
ThingsYouShouldKnowAboutYourUConnect™ System
Voice Recognition (VR)
• Alwayswaitforthebeepbeforespeaking.
- Speaknormally, without pausing, just as you would speak to a person sitting approximately eight (8) feet away from you.
- Makesurethatnooneotherthanyouisspeaking duringavoicerecognitionperiod.
• Performanceismaximizedunder:
- low-to-mediumblowersetting,
- low-to-medium vehiclespeed,
- lowroadnoise,
- smoothroadsurface,
UNDERSTANDINGTHEFEATURESOFYOURVEHICLE87
- fullyclosedwindows,
-
dryweathercondition.
-
Eventhoughthesystemisdesignedforusersspeaking inNorthAmericanEnglishandSpanishaccents,the systemmaynotalwaysworkforsome.
- Whennavigatingthroughanautomatedsystem,such as,voicemail,orwhensendingapage,attheendof speakingthedigitstring,makesuretosay"send."
- Storingnamesinphonebookwhenvehicleisnotin motionisrecommended.
- Itisnotrecommendedtostoresimilarsounding namesintheUConnect™ phonebook.
- UConnect™ phonebooknametagrecognitionrateis optimizedforthepersonwhostoredthenameinthe phonebook.
88UNDERSTANDINGTHEFEATURESOFYOURVEHICLE
- You can say "O" (letter "O") for "0" (zero). "800" must be spoken "eight-zero-zero."
- Eventoughinternationaldialingformostnumber combinationsissupported,someshortcutdialing numbercombinationsmaynotbesupported.
Far End Audio Performance:
• Audioqualityismaximizedunder:
- low-to-mediumblowersetting,
- low-to-mediumvehiclespeed,
- lowroadnoise,
- smoothroadsurface,
- fullyclosedwindows,and
- dryweathercondition.
• Operationfromdriverseat. - Performance, such as, audioclarity, echo and loudnesstoalargedegree, rely on the phone and network, and not the UConnect™ system.
- Echoatfarendcansometimebereducedbylowering their-vehicleaudiovolume.
Bluetooth Communication Link
Cellularphoneshavebeenfoundtooccasionallyloose connectiontotheUConnect™system.Whenthishappens,theconnectioncangenerallybere-establishedby switchingthephoneoff/on.YourcellphoneisrecommendedtoremaininBluetooth"on"mode.
Reset
Inrareinstances, it may be necessary to reset the UConnect™ system. Therese feature is exercised by pressing and holding the 'UConnect™' and 'Voice Recognition' button simultaneously for 15 seconds. Normally, you do not need to exercise this feature.
Power-Up
AfterswitchingignitionkeyfromofftoeitherOnorACC position,orafterareset,youmustwaitatleastfive(5) secondspriortousingthesystem.
90UNDERSTANDINGTHEFEATURESOFYOURVEHICLE
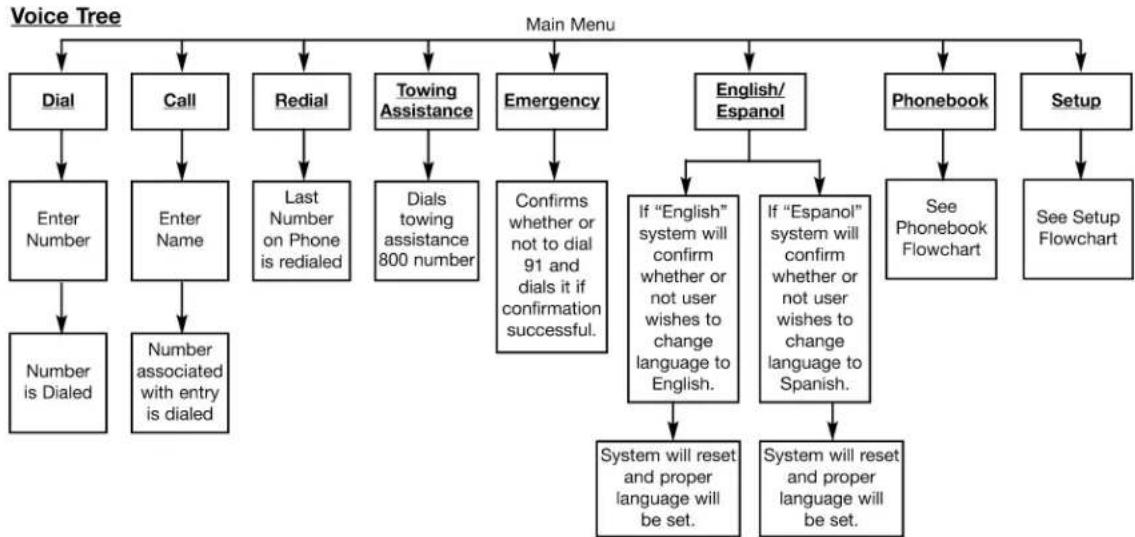
flowchart
graph TD
    A["Voice Tree"] --> B["Dial"]
    A --> C["Call"]
    A --> D["Redial"]
    A --> E["Towing Assistance"]
    A --> F["Emergency"]
    A --> G["English/ Espanol"]
    A --> H["Phonebook"]
    A --> I["Setup"]
    B --> J["Enter Number"]
    J --> K["Number is Dialed"]
    C --> L["Enter Name"]
    L --> M["Number associated with entry is dialed"]
    D --> N["Last Number on Phone is redialed"]
    N --> O["Dials towing assistance 800 number"]
    E --> P["Confirms whether or not to dial 91 and dials it if confirmation successful."]
    F --> Q["If "English" system will confirm whether or not user wishes to change language to English."]
    G --> R["If "Espanol" system will confirm whether or not user wishes to change language to Spanish."]
    H --> S["See Phonebook Flowchart"]
    I --> T["See Setup Flowchart"]
    P --> U["System will reset and proper language will be set."]
    Q --> V["System will reset and proper language will be set."]
Note: Available Voice commands are shown in bold face and are underlined.
8131b290
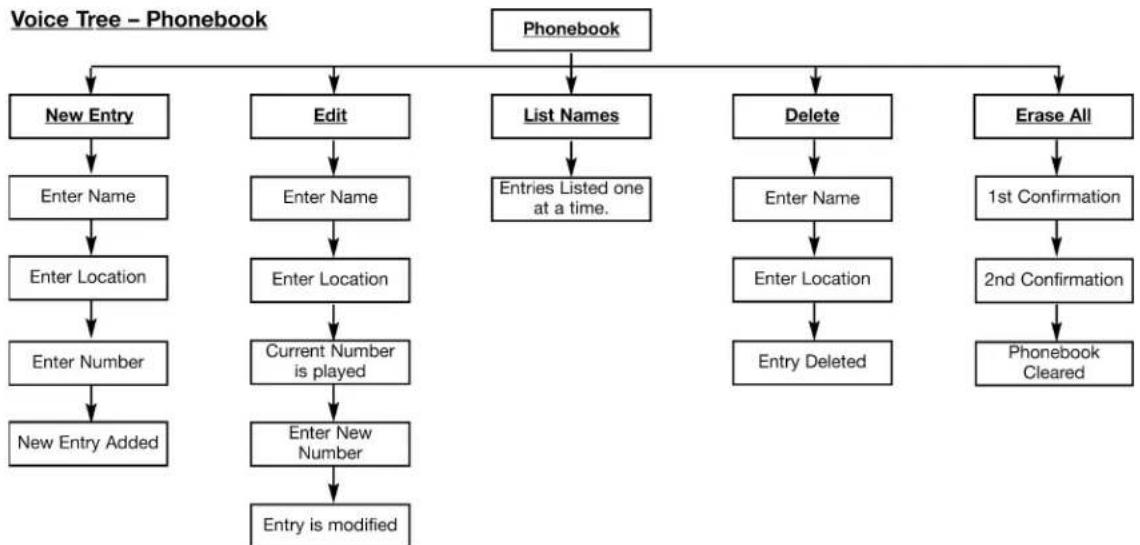
flowchart
graph TD
    A["Phonebook"] --> B["New Entry"]
    A --> C["Edit"]
    A --> D["List Names"]
    A --> E["Delete"]
    A --> F["Erase All"]
    B --> G["Enter Name"]
    G --> H["Enter Location"]
    H --> I["Enter Number"]
    I --> J["New Entry Added"]
    C --> K["Enter Name"]
    K --> L["Enter Location"]
    L --> M["Current Number is played"]
    M --> N["Enter New Number"]
    N --> O["Entry is modified"]
    D --> P["Entries Listed one at a time."]
    E --> Q["Enter Name"]
    Q --> R["Enter Location"]
    R --> S["Entry Deleted"]
    F --> T["1st Confirmation"]
    T --> U["2nd Confirmation"]
    U --> V["Phonebook Cleared"]
Note: Available Voice commands are shown in bold face and are underlined.
8131b294
92UNDERSTANDINGTHEFEATURESOFYOURVEHICLE
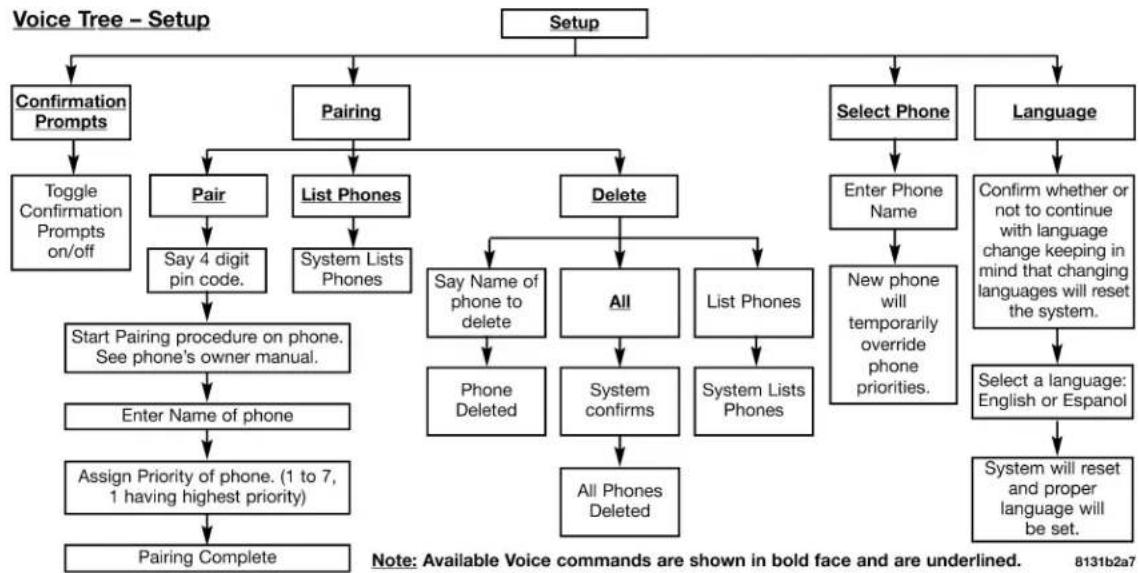
flowchart
graph TD
    A["Setup"] --> B["Confirmation Prompts"]
    A --> C["Pairing"]
    A --> D["Select Phone"]
    A --> E["Language"]
    B --> F["Toggle Confirmation Prompts on/off"]
    C --> G["Pair"]
    C --> H["List Phones"]
    C --> I["Delete"]
    I --> J["Say Name of phone to delete"]
    I --> K["All"]
    I --> L["List Phones"]
    J --> M["Phone Deleted"]
    K --> N["System confirms"]
    L --> O["System Lists Phones"]
    M --> P["Enter Name of phone"]
    N --> Q["All Phones Deleted"]
    O --> R["New phone will temporarily override phone priorities."]
    R --> S["Select a language: English or Espanol"]
    S --> T["System will reset and proper language will be set."]
    P --> U["Assign Priority of phone. (1 to 7, 1 having highest priority)"]
    Q --> V["All Phones Deleted"]
    style A fill:#f9f,stroke:#333
    style B fill:#ccf,stroke:#333
    style C fill:#ccf,stroke:#333
    style D fill:#ccf,stroke:#333
    style E fill:#ccf,stroke:#333
    style F fill:#cfc,stroke:#333
    style G fill:#cfc,stroke:#333
    style H fill:#cfc,stroke:#333
    style I fill:#cfc,stroke:#333
    style J fill:#cfc,stroke:#333
    style K fill:#cfc,stroke:#333
    style L fill:#cfc,stroke:#333
    style M fill:#fcc,stroke:#333
    style N fill:#fcc,stroke:#333
    style O fill:#fcc,stroke:#333
    style P fill:#fcc,stroke:#333
    style Q fill:#fcc,stroke:#333
    style R fill:#fcc,stroke:#333
    style S fill:#fcc,stroke:#333
    style T fill:#fcc,stroke:#333
SEATS
10-WayDriver'sPowerSeat—IfEquipped
The driver's power seat switches are located on the driver's front doort rim panel. The bottom switch control sup/down, forward/rearward, and tilt adjustment. The top switch control these at back recline adjustment and them middle switch control sthelum bar adjustment.
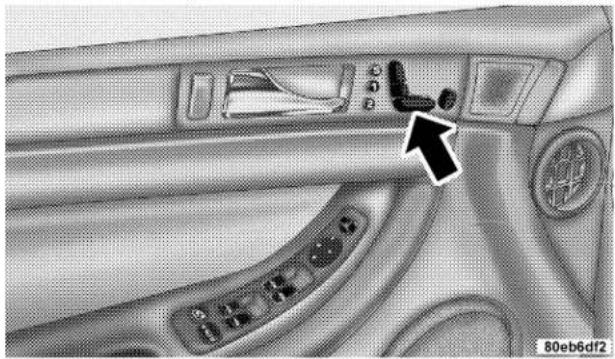
natural_image
Interior view of a car dashboard with control panel and door (no visible text or symbols)WARNING!
Adjust the seat only while the vehicle is parked. Adjusting a seat while the vehicle is moving is dangerous. The sudden movement of the seat could cause you to lose control. The seat belt might not be properly adjusted and you could be injured.
8-WayDriver'sPowerSeat—IfEquipped
The driver's power seat switches are located on the driver's front doort rim panel. The bottom switch controls up/down, forward/rearward, and tilt adjustment. The top switch control these at back recline adjustment.
4-WayPassenger'sPowerSeat
Thefrontpassenger'spowerseatswitchesarelocated on the passenger's frontdoortrimpanel. Thebottomswitch controlsforwardandrearwardadjustment. Thetop switchcontrolstheseatbackreclineadjustment.
94UNDERSTANDINGTHEFEATURESOFYOURVEHICLE
CAUTION!
Do not place any article under a power seat or impede its ability to move as it may cause damage to the seat controls. Seat travel may become limited if movement is stopped by an obstruction in the seat's path.
AdjustableHeadRestraints
Headrestraintscanreducetheriskofwhiplashinjuryin theeventofimpactfromtherear.Pulluporpushdown ontheheadrestraintsothattheupperedgeisashighas practical.Toraisetheheadrestraint,pulluponthehead restraint.Tolowertheheadrestraint,depresstherelease tablocatedatthebaseoftheheadrestraintandpush downontheheadrestraint.
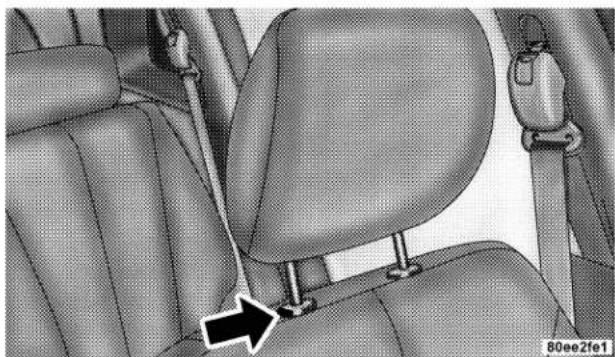
natural_image
Interior view of a car seatbelt and rearview mirror (no text or symbols visible)HeatedSeats—IfEquipped
Thisfeatureheatsthedriver,frontpassengerandsecond rowseats.Thecontrolsforthefrontheatedseatsare locatedonthedoortrimpanelnexttothepowerseat switches.
UNDERSTANDINGTHEFEATURESOFYOURVEHICLE95
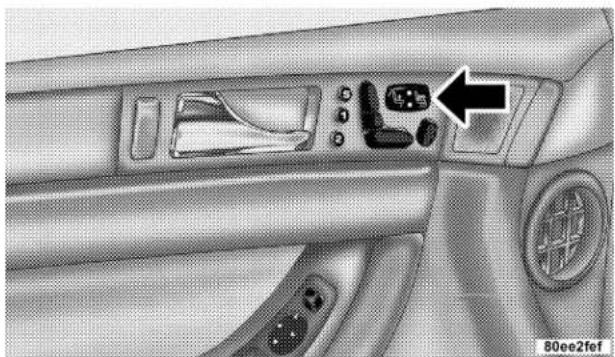
natural_image
Interior view of a car dashboard with control panel and directional arrow (no text or symbols)Presstheswitchoncetoselectaheatsetting(highorlow) and presstheswitchasecondtimeinthesamedirection toturntheheatedseatoff. The indicatorlightwillshow when LOWorHIGHheatisON.
The controls for these second row heated seats are located on the center console between these seats. Press the switch on cetoselecta heat setting (high or low) and press the
switchasecondtimeinthesamedirectiontoturnthe heatedseatoff.TheindicatorlightwillshowwhenLOW orHIGHheatisON.
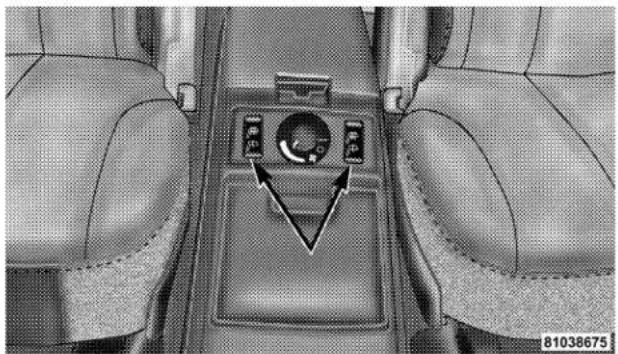
natural_image
Interior view of a car seatbelt with a central control panel and directional arrows indicating movement (no text or symbols)NOTE:
- Ifthelightsinthesecondrowheatedseatswitchbegin toflashwhentheswitchispressed, itindicatesthatthe
96UNDERSTANDINGTHEFEATURESOFYOURVEHICLE
heatedseatisnotfunctioningproperlyandthatserviceisrequired.Seeyourauthorizeddealerforservice.
- Onceaheatsettingisselected,heatwillbefeltwithin 2to3minutes.
- Theheatedseatswillturnoffwhentheignitionswitch isturnedtotheOFFposition.
SecondRowManualSeatRecliner
Thereclinermechanismcontrolisontheoutboardsideof theseat.Torecline,leanforwardslightly,liftthelever, thenpushbacktothedesiredpositionandreleasethe lever.Leanforwardandliftthelevertoreturnthe seatbacktoitsnormalposition.Usingbodypressure,lean forwardandrearwardontheseattobesuretheseatback haslatched.
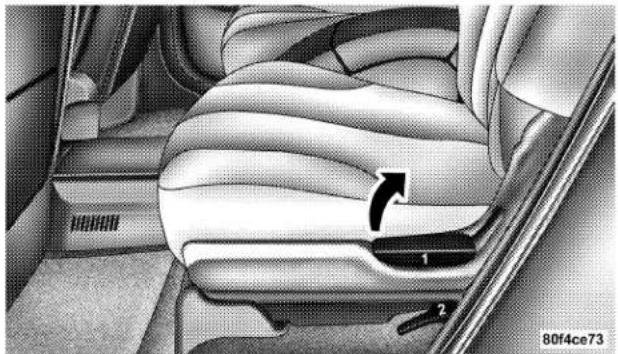
natural_image
Interior view of a car showing seatbelt and dashboard with numbered arrows indicating movement (no text or symbols)NOTE: When using therecliner mechanism with the 3rd rowseat folded down, these second rowseat may need to be adjusted forward to achieve full recline.
WARNING!
Do not ride with the seatback reclined so that the shoulder belt is no longer resting against your chest. In a collision you could slide under the seat belt and be seriously or fatally injured. Use the recliner only when the vehicle is parked.
SecondRowManualSeatAdjuster
The adjusting bar is located under the front of these seat. Pull the bar up and mov these seat to the desired position. Releasethe bartolock these seat in top position.
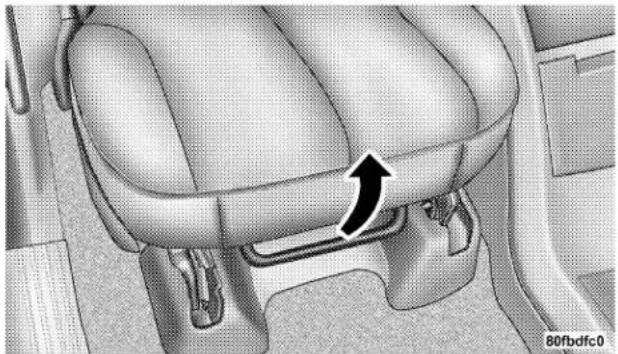
natural_image
Interior view of a car seatbelt with an arrow indicating direction (no text or symbols)Usingbodypressure,moveforwardandrearwardonthe seattobesuretheseatadjustershavelatched.
98UNDERSTANDINGTHEFEATURESOFYOURVEHICLE
WARNING!
Adjust the seat only while the vehicle is parked. Adjusting a seat while the vehicle is moving is dangerous. The seat belt might not be properly adjusted and you could be injured.
SecondRowFold&TumbleSeats
Thesecondrowseatscanbefoldedandtumbledforward foreasyaccesstothethirdseatorrrearcargoarea.
Tofoldandtumbletheseat,followthesesteps:
- Remove any obstructions from the floor in front of the seat.
-
Lowertheheadrestrainttoitsfulldownwardposition androtatethearmresttotheuprightposition.
3.Movetheseattothefullrearposition. -
Pullupontheseatbackreleaseleverlocatedonthe outboardsideoftheseatlabeled"1"andfoldthe seatbackdown.
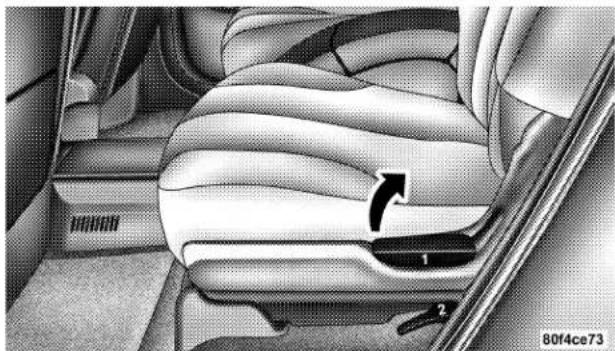
natural_image
Interior view of a car showing seatbelt and dashboard with directional arrow (no text or symbols)Toassuretheseatbackislatchedinthefoldedposition, additionaldownwardpressureontheseatbackmaybe requiredwhenfolding.
UNDERSTANDINGTHEFEATURESOFYOURVEHICLE99
5.Pulluponthereleasehandlelabeled"2" and lift firmly totumbletheseatfully forward. If theseat contactstherearofthefrontseat, movethefrontseat forward.
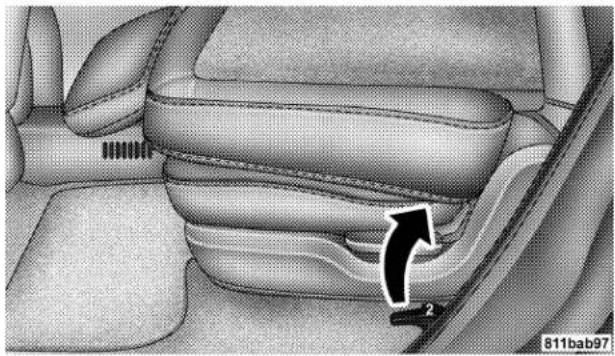
natural_image
Interior view of a car showing seatbelt and dashboard area with an arrow indicating direction (no text or symbols)Torelatchtheseat,tilttheseatrearwardandpushdown firmlytoengagetherearattachments.Thenliftthe seatbackreleaseleverlabeled"1"andpulltheseatback uptoreturnittoitsfulluprightposition.
WARNING!
In a collision, you or others in your vehicle could be injured if seats are not properly latched to their floor attachments. Always be sure the seats are fully latched.
ThirdRowEasyExit
Forpassengerssittinginthethirdrowseats,thesecond rowseatscanbefoldedandtumbledforwardforeasy exit.
Tofoldandtumbletheseatforward, followthesesteps:
100UNDERSTANDINGTHEFEATURESOFYOURVEHICLE
- Pullupontheseatbackreleasehandle "1" located on the back of these at to fold these at back down.
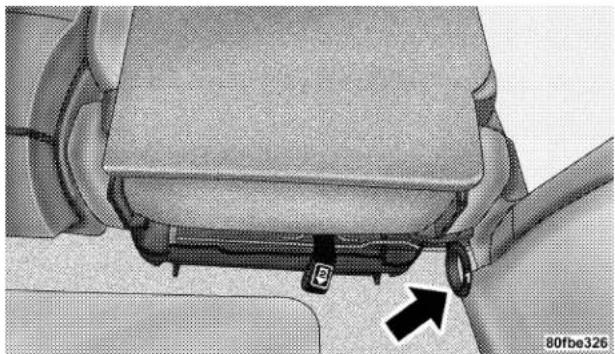
natural_image
Close-up of a car seatbelt buckle assembly with a black arrow pointing to the buckle (no text or symbols visible)- Pullthereleasestrap "2" located at the bottom of the seat to lift and tumble these at forward.
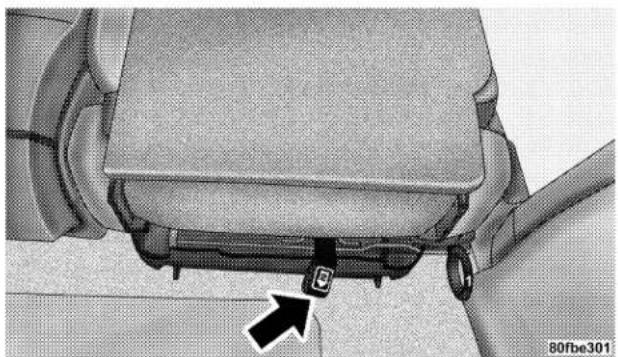
natural_image
Close-up of a car seatbelt buckle assembly with a black arrow pointing to the buckle (no text or symbols visible)Torelatchtheseat,tilttheseatrearwardandpushdown firmlytoengagetherearattachments.Thenliftthe seatbackreleaseleverlabeled"1"andpulltheseatback uptoreturnittoitsfulluprightposition.
ThirdRowSeatingFlexibility
Thethirdrowseatsmaybeusedwitheitherorboth seatbacksfoldedforwardforadditionalstoragespace.
Tofoldtheseat,removeanyobjectsfrominfrontoforon theseat.Thenpullhandlelocatedontheseatback and pushitforward.
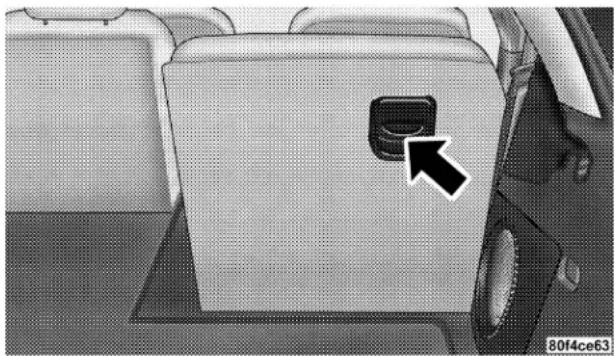
natural_image
Interior view of a car seat with a black arrow pointing to the side panel (no text or symbols visible)WARNING!
Do not sit in the 3rd row seat with the second row seatbacks folded or with the second row seats folded and tumbled. In a collision, you could slide under the seat belt and be seriously or even fatally injured.
Toraisethe3rdrowseat,liftupontheseatbackandpush rearwarduntiltheseatbackislatched.Movetheseatback forwardtobesuretheseatbackisfullylatched.
CAUTION!
Be sure there is nothing in front of the 3rd row seat cushion before folding it down. Damage to the seat may occur.
WARNING!
- Not all head restraints in this vehicle are the same. Head restraints from one seating position should not be removed and installed in any other seating position. In a collision, serious injury or death may result if the proper head restraint is not installed on each seat.
- The cargo area in the rear of the vehicle should not be used as a play area by children. They could be seriously injured in a collision. Children should be seated and using the proper restraint system.
- It is extremely dangerous to ride in a cargo area, inside or outside of a vehicle. In a collision, people riding in these areas are more likely to be seriously injured or killed.
- Do not allow people to ride in any area of your vehicle that is not equipped with seats and seat belts.
- Be sure everyone in your vehicle is in a seat and using a seat belt properly.
LoadFloor
For additional cargospace, these second and third row seatback may be folded forward and the load floor extended to cover the center console.
Toextendtheloadfloor, follow these steps:
- Movethesecondrowseatstothefullrearposition.
2.Foldthesecondandthirdrowseatbackdown. - Pullontheloadfloorstrapandliftthepanelfromthe driver'ssecondrowseatbackoverthecenterconsoleand ontothepassengersecondrowseat.
UNDERSTANDINGTHEFEATURESOFYOURVEHICLE103
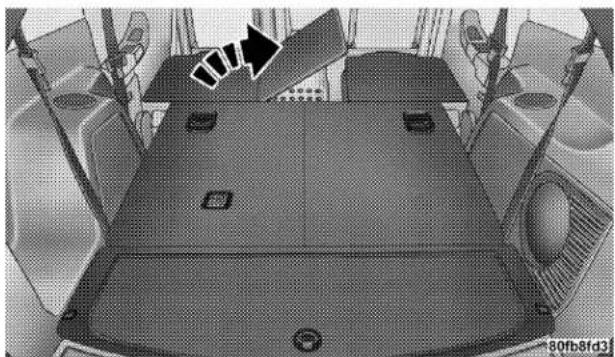
natural_image
Interior view of a vehicle showing the roof, dashboard, and seat area (no visible text or symbols)NOTE: Besuretoreattachthestraptosecuretheload floorpanelwhennotinuse.
PlasticGroceryBagRetainer
Retainerhookswhichwillholdplasticgrocerybag handlesarebuiltintotheseatbacksofallfrontseats.The floorsupportsthepartialweightofthebaggedgoods.
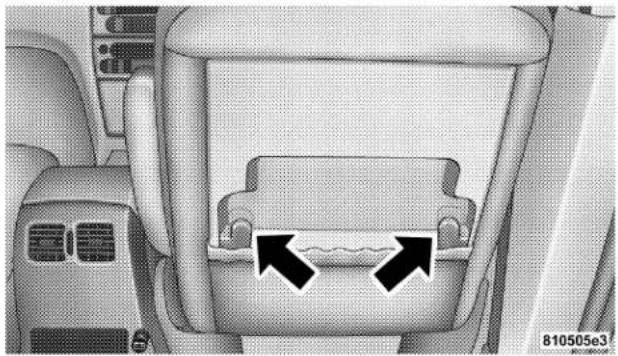
natural_image
Interior view of a car seatbelt with two black arrows pointing to the seat area (no text or symbols)DRIVERMEMORYSYSTEM—IFEQUIPPED
If your vehicle is equipped with memory systems, your remote key less entry transmit or memory seat buttons on the driver's door panel can be used to recall the driver's seat, outside mirrors, adjustable pedals (if equipped) and radiostation preset to saved positions.
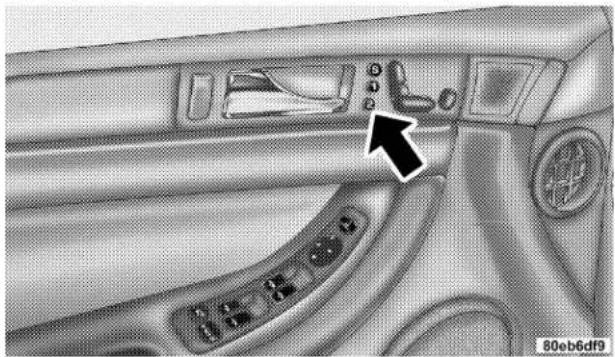
natural_image
Interior view of a car dashboard with control panel and directional arrow (no text or symbols)Thememoryseatbuttonslocatedonthedriver'sdoor willalwaysrecallstoredsettings.Theremotekeyless entrytransmittercanbeprogrammedtorecallpositions whentheUNLOCKbuttonispressed.Refertothe followingprocedureonhowtolinkaremotekeyless entrytransmittertoaposition.
NOTE: The vehicle must be in Park to recall memory positions. If are call is attempted when the vehicle is not in Park, am message will be displayed in the Electronic Vehicle Information Center (EVIC).
Torecallmemorypositionspressmemorybuttonnumber1ifyouarerecallingthememorypositionfordriverone orpressmemorybuttonnumber2ifyouarerecallingthe memorypositionfordrivertwo.Arecallcanbecancelled bypressinganyofthememorybuttonsduringarecall. Whenarecalliscancelled,theseatstopsmovinganda delayofapproximatelyonesecondwilloccurbeforeany otherrecallscanbeselected.
Yourvehiclehasbeendeliveredwithtworemotekeyless entrytransmitters.Oneorbothtransmitterscanbelinked toeithermemoryposition.Uptoeightremotekeyless entrytransmitterscanbeusedwithyourvehicle.The memoryseatsystemcanalsoaccommodateuptoeight transmitterslinkedtoeitherofthetwostoredseat positionsoranycombinationofthetwopositions.
ToProgramMemorySeatButtons&RKE Transmitters, FollowTheseSteps:
- TurntheignitionswitchtotheONposition.
- SelectRemoteLinkedtoMemoryfromtheEVICand enter"Yes".
- Usetheseat, mirror and adjustable pedal switchesto adjust theseat, recliner, side view mirrors and adjustable pedal stothedesired positions.
-
Settheradiostation presets (upto10AMand10FM stationscanbeset).
-
TurntheignitionswitchtotheOFFpositionand removethekey.
- Pressandrelease the SET(S) button located on the driver's door. Alightin the button will flashtelling you that you are in the set memory mode. You have five second to complete then next step.
- Within5seconds, pressandreleasebutton1or2on thedriver'sdoor.Achimewillsoundsignalingyouthat therivermemoryhasbeenset.Amessagewillalsobe displayedintheElectronicVehicleInformationCenter (EVIC), indicatingapositionhasbeenset.
- Within5seconds, pressandreleasetheLOCKbutton ononeoftheRemoteKeylessEntryTransmitters. A chimewillsoundsignalingyouthatthetransmitterhas been successfullylinked. AmessagewillalsobedisplayedintheElectronicVehicleInformationCenter (EVIC), indicatingthetransmitterhasbeenlinked.
Repeattheabovestepsforthesecondpositionusingthe otherdriver'sdoornumberedbuttonandRemoteKeylessEntryTransmitter.
Eachtime theSET(S)buttonandanumberedbuttonare pressed,youerasetheoldmemoryandstoreanewone.
ToDisableATransmitterLink, FollowTheseSteps:
- Select "RemoteLinkedToMemory" from the Electronic Vehicle Information Center, Customer Programmable features.
- TurntheignitionswitchtotheOFFpositionand removethekey.
-
Pressandrelease the SET(S) button located on the driver's door. Alightin the button will flashtelling you that you are in the set memory mode. You have five second to complete them next step.
-
Within5seconds, pressandreleasebutton1or2on thedriver'sdoor.Achimewillsoundsignalingyouthat thedrivermemoryhasbeenset.Amessagewillalsobe displayedintheElectronicVehicleInformationCenter (EVIC), indicatingapositionhasbeenset.
- Within5 seconds, press and release the UNLOCK button on theremote key less entry transmitters. Achime will sound signaling you that the transmitter link has been successfully disabled. Am message will also be displayed in the Electronic Vehicle Information Center (EVIC), indicating the transmitter has been disabled.
Todisableanothertransmitterfrommemorypositions1 or2,repeatsteps1–4foreachtransmitter.
NOTE: Thisfunctioncanbeselectedusingthe"CustomerProgrammableFeatures"intheElectronicVehicleInformationCenter(EVIC)section,Otherwiseeeyourauthorizeddealer.
UNDERSTANDINGTHEFEATURESOFYOURVEHICLE107
TOOPENANDCLOSETHEHOOD
Toopenthehood, twolatchesmustbereleased. Firstpull thehoodreleaseleverlocated undertheleftsideofthe instrumentpanel.
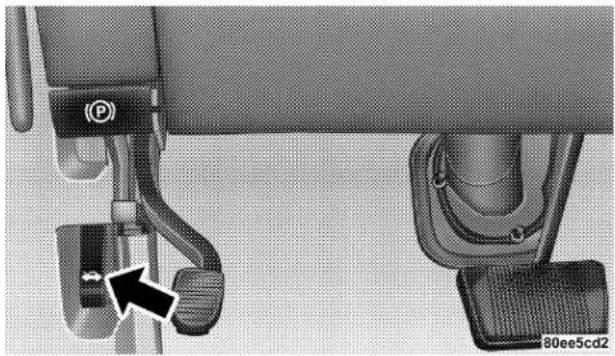
natural_image
Mechanical assembly diagram showing a valve mechanism with a black arrow pointing to a component (no text or symbols present)Next, pushtotheleftthesafetycatchlocatedunderthe frontedgeofthehood, nearthecenter.
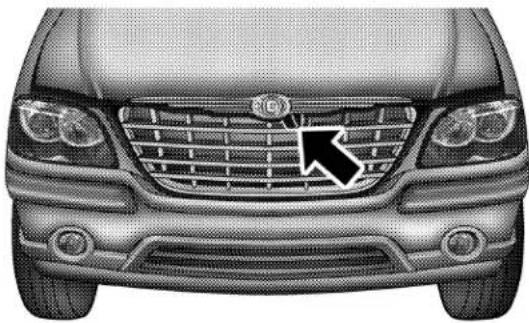
natural_image
Front view of a car with grille and headlights (no visible text or symbols)80ee5cdc
Usethehoodproprodtosecurethehoodintheopen position.
Topreventpossibledamage,donotslamthehoodto closeit.Lowerthehooduntilitisopenapproximately15 cm(6inches)andthendropit.Thisshouldsecureboth latches.Neverdriveyourvehicleunlesssthehoodisfully closed,withbothlatchesengaged.
108UNDERSTANDINGTHEFEATURESOFYOURVEHICLE
WARNING!
If the hood is not fully latched, it could fly up when the vehicle is moving and block your forward vision. You could have a collision. Be sure all hood latches are fully latched before driving.
LIGHTS
OverheadConsoleMap/ReadingLights
Theselightsaremountedbetweenthesunvisorsonthe overheadconsole.EachlightisturnedONbypassing thelens.Pressthelensasecondtimetoturnthelight OFF.Thelightsalsoturnonwhenadoorisopenedorthe dimmercontrolisturnedfullyupward,pastthesecond detent.
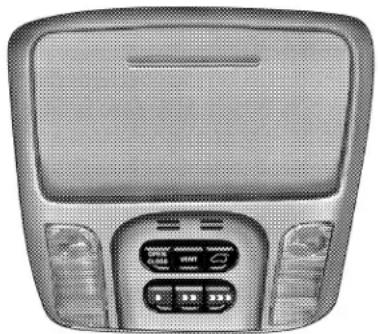
natural_image
Top-down view of a car rear air conditioner unit with control panel (no visible text or symbols)80ee5d20
NOTE: Thelightswillremainonuntiltheswitchis pressedasecondtime, sobesuretheyhavebeenturned offbeforeleavingthevehicle.
UNDERSTANDINGTHEFEATURESOFYOURVEHICLE109
InteriorLights
Theinteriorlightscomeonwhenadoorisopened.
Theinteriorlightswillautomaticallyturnoffinabout15 minutesifadoorisleftopenorthedimmercontrolisleft intheDomelightposition.TurntheignitionswitchON torestoretheinteriorlightoperation.
Multi-FunctionLever
TheMulti-FunctionLevercontrolstheoperationoftheheadlights, parkinglights, turnsignals, headlightbeam selection, instrumentpanellightdimming, interiorlights, thepassinglights, and foglights. Theleverislocated on theleftsideofthesteeringcolumn.
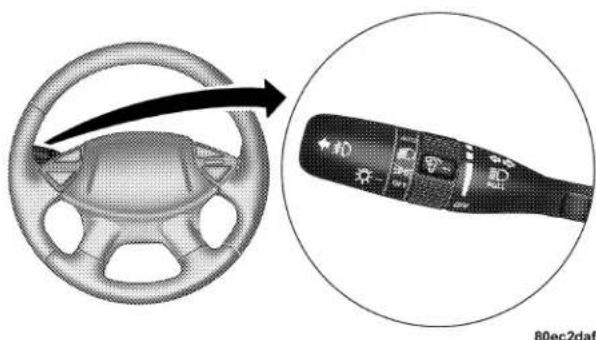
natural_image
Diagram showing a car steering wheel and its right-hand rule with control buttons (no text or symbols on the diagram itself)110 UNDERSTANDING THE FEATURES OF YOUR VEHICLE
Headlights, ParkingLights, InstrumentPanel Lights
TurntheendoftheMulti-FunctionLevertothefirst detentforparkinglightandinstrumentpanellight operation.Turntotheseconddetentforheadlight,park lightandinstrumentpanellightoperation.
Tochangethebrightnessoftheinstrumentpanellights, rotatethecenterportionoftheMulti-FunctionLeverupordown.
Dimmer Control
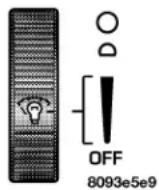
With the parking lights or headlights on, rotating the dimmer control for the interior light on the Multi-Function Leverupward will increase the brightness of the instrument panellights.
Dome Light Position
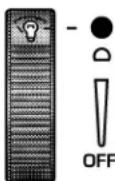
Rotatethedimmercontrolcompletely upwardtotheseconddetenttoturn ontheinteriorlights.Theinterior lightswillremainonwhenthedimmercontrolisinthisposition.
8093e5f6
Interior light Defeat (OFF)
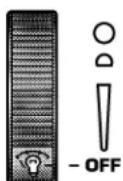
Rotatethedimmercontroltotheextremebottom"OFF"position.Theinteriorlightswillremainoffwhenthedoorsareopen.
8093e60e
Parade Mode (Daytime Brightness Feature)
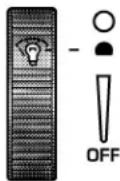
Rotatethedimmercontrolupwardto thefirstdetent. Thisfeaturebrightens theodometerandradiodisplaywhen theparkinglightsorheadlightsareon duringdaylightconditions.
8093e650
AutomaticHeadlights
ThisystemautomaticallyturnsyourheadlightsONor OFFbasedonambientlightlevels.Toturnthesystem ON,turntheendoftheMulti-FunctionLevertothethird detentposition.WhenthesystemisON,theHeadlight TimeDelayfeatureisalsoON.Thismeansyourhead-lightswillstayONforupto90secondsafteryouturnthe ignitionswitchOFF.ToturntheAutomaticSystemOFF, turntheendoftheMulti-FunctionLevertotheOFF position.
NOTE: Theenginemustberunningbeforethehead-lightswillcomeONintheAutomaticmode.
DaytimeRunningLights(CanadaOnly)
ThehighbeamheadlightswillcomeonasDaytime RunningLightswhenevertheignitionswitchison,the headlightsareoff,andtheparkingbrakeisoff.The headlightswitchmustbeusedfornormalnighttime driving.
Lights-onReminder
Iftheheadlightsorparkinglightsareonaftertheignition isturnedOFF,achimewillsoundtoalertthedriver whenthedriver'sdoorisopened.
HeadlightTimeDelay
Thisfeatureprovidesthesafetyofheadlightillumination forupto90seconds,whenleavingyourvehicleinan unlightedarea.
112UNDERSTANDINGTHEFEATURESOFYOURVEHICLE
Toactivatethedelayfeature,turnofftheignitionswitch whiletheheadlightsarestillon.Thenturnoffthe headlightswithin45seconds.The90seconddelayintervalbeginswhenheadlightswitchisturnedoff.Ifthe headlightsorparklightsareturnedbackonorthe ignitionswitchisturnedon,thedelaywillbecancelled.
If the headlights are turned off before the ignition, they will turn off in then normal manner.
NOTE: Thelightsmustbeturnedoffwithin45seconds ofturningtheignitionofftoactivatethisfeature
FogLights—IfEquipped
D ThefrontfoglightswitchisontheMulti-Function Lever.Toactivatethefrontfoglights,turnonthe parkinglightsorthelowbeamheadlightsandpull outtheendoftheMulti-FunctionLever.
NOTE: The foglightswillonlyoperatewiththehead-lightsonlowbeam.Selectinghighbeamheadlightswillturnoffthefoglights.
TurnSignals
MovetheMulti-FunctionLeverupordownandthe arrowsoneachsideoftheinstrumentclusterflashto showproperoperationofthefrontandreturnsignal lights.Youcansignalalanechangebymovingthelever partiallyupordownwithoutmovingbeyondthedetent.
Ifeitherlighthasaveryfastflashrate,checkfora defectiveoutsidelightbulb. Ifanindicatorfailstolight whentheleverismoved, itwouldsuggestthatthefuse orindicatorbulbisdefective.
Highbeam/LowbeamSelectSwitch
PulltheMulti-FunctionLevertowardsyoutoswitchtheheadlightstoHIGHbeam.PulltheLeverasecondtimeswitchtheheadlightstoLOWbeam.
PassingLight
Youcansignalanothervehiclewithyourheadlightsby lightlypullingtheMulti-FunctionLevertowardyou. Thiswillcausetheheadlightstoturnonathighbeam andremainonuntiltheleverisreleased.
Tousethefrontwasher, pullthelevertowardyou and holdwhilespraysdesired. If the lever is pulled while in the delay range, the wiper will operate for two wipe cycles after the lever is released, and then resum the intermittent interval previously selected.
114UNDERSTANDINGTHEFEATURESOFYOURVEHICLE
If the lever is pulled while in the OFF position, the wipers will operate for two wipecycles, then turn OFF.
MistFeature
Pushdownonthewiperlevertoactivateasinglewipeto clearoffroadmistorsprayfromapassingvehicle.As longastheleverishelddown,thewiperswillcontinue tooperate.
WindshieldWiperOperation
RotatetheendofthelevertotheseconddetentforLow speedwiperoperation,ortothethirddetentforHigh speedoperation
IntermittentWiperSystem
Use the intermittent wiper when weather conditions make a singlewiping cycle, with a variable pause between cycles, desirable. Rotatethe end of the levert to the first detent position, then turn the end of the levert to
selectthedesireddelayinterval. Thedelaycanberegulatedfromamaximumofapproximately23seconds betweencycles,toacycleeverysecond.
RearWindowWiper/Washer
Theswitchontherightsideofthesteeringcolumnalso controlsoperationoftherearwiper/washerfunction.
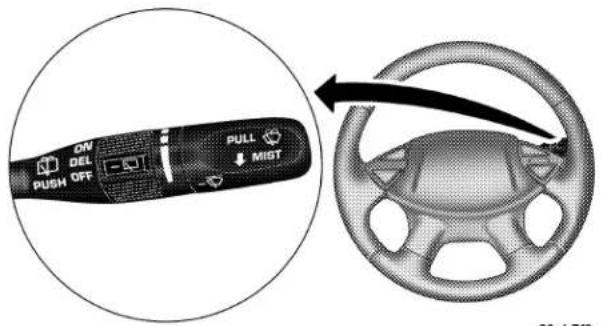
80eb7f6a
UNDERSTANDINGTHEFEATURESOFYOURVEHICLE115
Rotating the center of the switchupto the DEL (Delay) position or the ON position will activate therear wiper. Push the lever forward to initiate therear wash function in any of the three positions. Thew asher pump will continue to operate as long ast he lever is pressed. Upon release, therear wiper will cycle two times before returning to the set position.
Adding Washer Fluid
Thefluidreservoirforthewindshieldwashersandthe rearwindowwasherisshared.Itislocatedinthefrontof theenginecompartmentonthedriver'ssideandshould becheckedforfluidlevelatregularintervals.Fillthe reservoirwithwindshieldwashersolvent(notradiator antifreeze)andoperatethesystemforafewsecondsto flushouttheresidualwater.
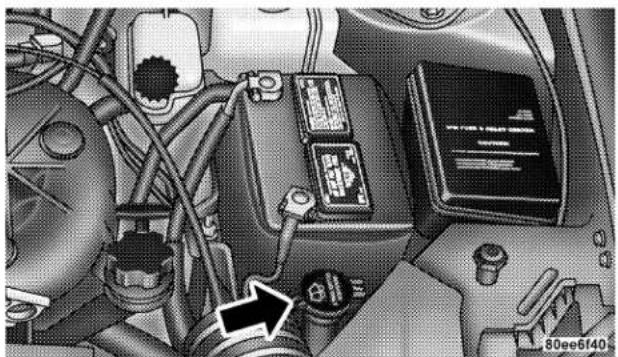
natural_image
Interior view of a vehicle's engine bay with visible components and wiring (no text or symbols)Thewasherfluidreservoirwillholdafullgallonoffluid whenLowWasherFluidilluminatesintheElectronic VehicleInformationCenter(EVIC).
116 UNDERSTANDING THE FEATURES OF YOUR VEHICLE
TILTSTEERINGCOLUMN
Totiltthecolumn,pullthelever,locatedbehindtheturn signalcontrol,towardyouandmovethesteeringwheel upordown,asdesired.Releasethelevertolockthe steeringwheelfirmlyinplace.
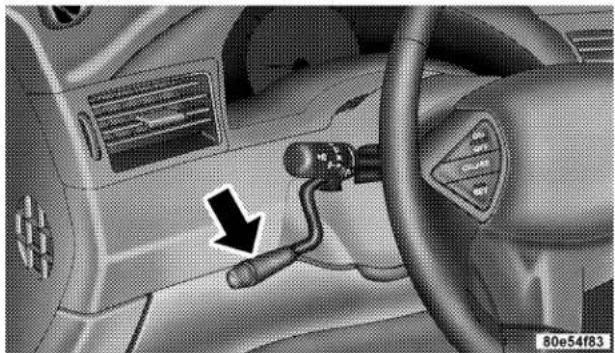
natural_image
Close-up of a car interior showing the steering wheel, dashboard, and infotainment device (no visible text or symbols)WARNING!
Tilting the steering column while the vehicle is moving is dangerous. Without a stable steering column, you could lose control of the vehicle and have an accident. Adjust the column only while the vehicle is stopped. Be sure it is locked before driving.
TRACTIONCONTROLSWITCH—IFEQUIPPED
ThetractioncontrolIndicator, located in the instrument cluster, will lightup when the Traction Controlisinuse.
ToturnthesystemOFF, press the Traction Control switch located on center consolen next to the ash tray, until the traction control indicator in the instrument cluster lights up.
UNDERSTANDINGTHEFEATURESOFYOURVEHICLE117
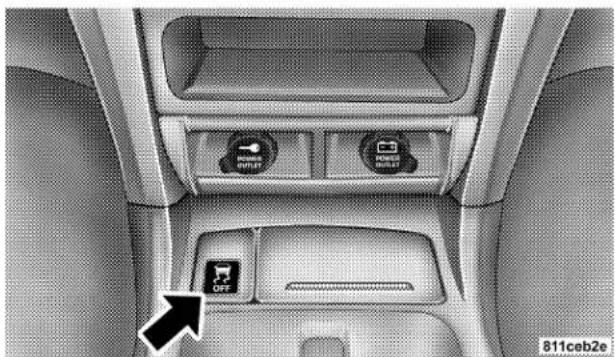
natural_image
Interior view of a car showing the rearview and side seats with two switches, one labeled 'OFF' (no text or symbols on main components)ToturnthesystembackON, presstheswitchasecond time until the extraction control Indicator turns OFF.
NOTE:
- ThetractioncontrolIndicatorcomesoneachtimethe ignitionswitchisturnedON.Thiswilloccurevenif youusedtheswitchtoturnthesystemOFF.
- TheTractionControlsystemwillmakebuzzingor clickingsoundswheninoperation.
ADJUSTABLEPEDALS—IFEQUIPPED
Thisfeatureallowsboththebrakeandacceleratorpedals tomovetowardorawayfromthedrivertoprovide improvedpositionwiththesteeringwheel.Theadjustablepedalsystemisdesignedtoallowagreaterrangeof drivercomfortforsteeringwheeltiltandseatposition. Theswitchislocatedonthedriversdoortrimpanelnext tothepowerseatswitches.
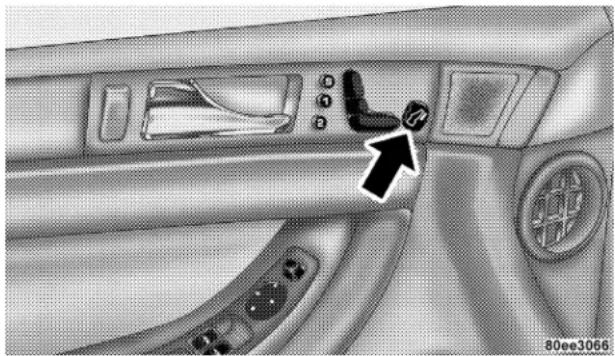
natural_image
Interior view of a car dashboard with steering wheel, dashboard panel, and control buttons (no text or symbols visible)Presstheswitchforwardtomovethepedalsforward (towardthefrontofthevehicle).
Presstheswitchrearwardtomovethepedalsrearward (towardthedriver).
- ThepedalscanbeadjustedwiththeignitionOFF.
• Thepedalscanbeadjustedwhiledriving. - Thepedalscannot beadjustedwhenthevehicleisinR (Reverse)orwhentheSpeedControlisON.Amessage willbedisplayedintheElectronicVehicleInformation Center(EVIC)ifthepedalsareattemptedtobeadjustedwhenthesystemislockedout("Adjustable PedalDisabled—CruiseControlEngaged" or "AdjustablePedalDisabled—VehicleInReverse").
NOTE: If your vehicle is equipped with memory seat feature, your remote key less entry transmitter or memory seat button on the driver's door panel can be used to recall the adjustable pedal status.
UNDERSTANDINGTHEFEATURESOFYOURVEHICLE119
CAUTION!
Do not place any article under the adjustable pedals or impede its ability to move as it may cause damage to the pedal controls. Pedal travel may become limited if movement is stopped by an obstruction in the adjustable pedal's path.
ELECTRONICSPEEDCONTROL
When engaged, this device takes over the accelerator operation at speed greater than 30 mph (50 km/h). The speed control switches are located on the steering wheel.
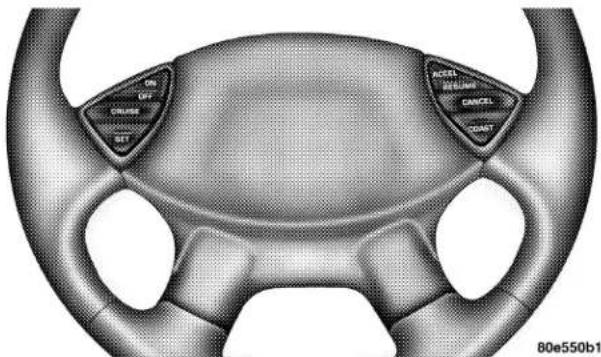
ToActivate:
Pushthe"ON/OFF"buttononceandtheCRUISEindicatorlocatedneartheinstrumentclusterodometerwill illuminateshowingtheelectronicspeedcontrolsystemis on.ToturnthesystemOFF,pushthe"ON/OFF"button againandthesystemandindicatorwillturnoff.
WARNING!
Leaving the Electronic Speed Control system on when not in use is dangerous. You could accidentally set the system or cause it to go faster than you want. You could lose control and have an accident. Always leave the system OFF when you aren't using it.
ToSetAtADesiredSpeed:
Whenthevehiclehasreachedthedesiredspeed,press andreleasethe"SET"button.Releasetheacceleratorand thevehiclewilloperateattheselectedspeed.The CRUISESETindicatorlocatedneartheinstrumentclusterodometerwillilluminateshowingtheelectronic speedcontrolisset.
NOTE: WhileintheAutoStickmode,SpeedControlwill onlyfunctioninthirdorfourthgear.
ToDeactivate:
Asofttaponthebrakepedal, pushing the "CANCEL" buttonornormalbrakingwhileslowingthevehiclewill deactivatethespeedcontrolwithouterasingthememory. Pushing the "ON/OFF" buttontotheOFFpositionor turningofftheignitionerasesthespeedmemory.
ToResumeSpeed:
Toresumeapreviouslysetspeed, pushandreleasethe "ACCEL/RESUME" button. Resumecanbeusedatany speedabove25mph(40km/h).
ToVarytheSpeedSetting:
Whenthespeedcontrolisset, speedcanbeincreased by pressingandholding the "ACCEL/RESUME" button. Whenthebuttonisreleased, anewsetspeedwillbe established.
Tappingthe"ACCEL/RESUME"buttononcewillresult ina2mph(3km/h)speedincrease.Eachtimethebutton
UNDERSTANDINGTHEFEATURESOFYOURVEHICLE121
istapped, speedincreases so that tapping the button threetimes will increase speed by 6 mph (10 km/h), etc.
Todecreasespeedwhilespeedcontrolisset,pressand holdthe"COAST"button.Releasethebuttonwhenthe desiredspeedisreached,andthenewspeedwillbeset.
Tappingthe"COAST"buttononcewillresultina1mph (2km/h)speeddecrease.Eachtimethebuttonistapped, speeddecreases.
ToAccelerateForPassing:
Depresstheacceleratorasyouwouldnormally.Whenthe pedalisreleased,thevehiclewillreturntothesetspeed.
NOTE: Thespeedcontrolsystemmaintainsspeedup anddownhills.Aslightspeedchangeonmoderatehills isnormal.
Fourspeedautomatictransmissionswillexperiencea downshiftto3rdgearwhileclimbinguphillordescendingdownhill.Thisdownshiftto3rdgearisnecessaryto maintainvehiclesetspeed.
Onsteephillsagreaterspeedlossorgainmayoccurso itmaybepreferabletodrivewithoutspeedcontrol.
WARNING!
Speed Control can be dangerous where the system can't maintain a constant speed. Your vehicle could go too fast for the conditions, and you could lose control. An accident could be the result. Don't use Speed Control in heavy traffic or on roads that are winding, icy, snow-covered, or slippery.
122UNDERSTANDINGTHEFEATURESOFYOURVEHICLE
OVERHEADCONSOLE—IFEQUIPPED
Theoverheadconsolecancontaincourtesy/reading lights,anoptionaluniversalgaragedooropener (HomeLink®),storageforsunglasses,optionalpower sunroofswitchesandanoptionalpowerliftgateswitch.
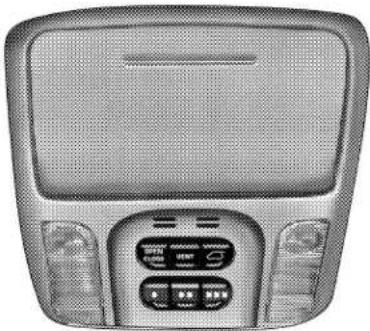
natural_image
Front view of a modern air conditioner unit with control panel and ventilation grille (no visible text or symbols)80ee5d20
Courtesy/ReadingLights
Attheforwardendoftheconsolearetwocourtesy/readinglights.
Pressthelenstoturntheselightson. Pressasecondtime toturnthelightsoff.
Thelightsalsoturnonwhenafrontdoor,areardooror theliftgateisopened. Thelightswillalsoturnonwhen theunlockbuttonontheremotekeylessentrytransmitter ispressed.
SunglassesStorage
Attherearoftheoverheadconsole,acompartmentis providedforthestorageofapairofsunglasses.
Pressthedoorlatchtoopenthecompartment. Thedoor willslowlyrotatetoanopenposition.
GARAGEDOOROPENER—IFEQUIPPED
TheHomeLink®UniversalTransceiverreplacesupto threeeremotecontrols(handheldtransmitters)thatoperatedevicessuchasgaragedooropeners,motorized gates,orhomelighting.Ittriggersthesedevicesatthe pushofabutton.TheUniversalTransceiveroperatesoff yourvehicle'sbatteryandchargingsystem;nobatteries areneeded.
ForadditionalinformationonHomeLink ^® ,call1-800-355-3515,orontheinternetatwww.homelink.com.
WARNING!
A moving garage door can cause injury to people and pets in the path of the door. People or pets could be seriously or fatally injured. Only use this transceiver with a garage door opener that has a “stop and reverse” feature as required by federal safety standards. This includes most garage door opener models manufactured after 1982. Do not use a garage door opener without these safety features it could cause injury or death. Call toll-free 1-800-355-3515 or, on the Internet at www.homelink.com for safety information or assistance.
124UNDERSTANDINGTHEFEATURESOFYOURVEHICLE
ProgrammingHomeLink
NOTE: When programmingagaragedooropener, itis advised toparkoutsidethegarage. Some vehicles may require the ignitions switch to be turned to these second (or "accessories") position for programming and/or operation of Home Link. It is also recommended that anew battery be placed in the hand-held transmitter of the device being programmed to Home Link for quicker training and accurate transmission of the radio-frequency signal.
- PressandholdthetwoouterHomeLinkbuttons, and releaseonlywhentheindicatorlightbeginstoflash(after 20seconds). Do not holdthebuttonsforlongerthan30 secondsanddo not repeatsteponetoprogramasecond and/orthirdhand-heldtransmittertotheremainingtwo HomeLinkbuttons.
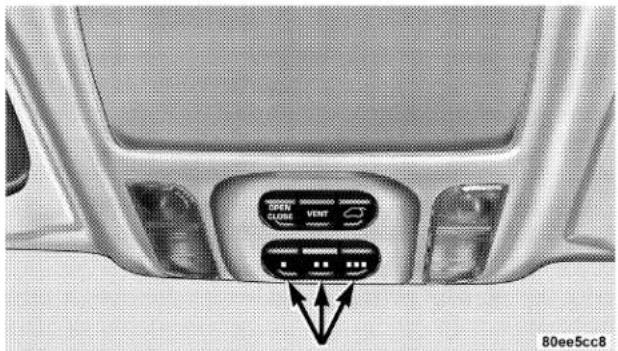
WARNING!
Vehicle exhaust contains carbon monoxide, a dangerous gas. Do not run the vehicle's exhaust while training the transceiver. Exhaust gas can cause serious injury or death.
WARNING!
Your motorized door or gate will open and close while you are training the Universal Transceiver. Do not train the transceiver if people or pets are in the path of the door or gate. A moving door or gate can cause serious injury or death to people and pets or damage to objects.
- Position the end of your hand-held transmitter 1-3 inches (3-8cm) away from the Home Link buttons while keeping the indicator light in view.
- Simultaneously press and hold both the Home Link button that you want to train and the hand-held transmitter buttons. Do not release the buttons until step 4 has been completed.
NOTE: Somegateoperatorsandgaragedooropeners mayrequireyoutoreplacethisProgrammingStep3with proceduresnotedinthe"GateOperator/CanadianProgramming"section.
4.TheHomeLinkindicatorlightwillflashslowly and thenrapidlyafterHomeLinksuccessfullyreceivesthe frequencysignalfromthehand-heldtransmitter.Release bothbuttonsaftertheindicatorlightchangesfromthe slowtotherapidflash.
5. PressandholdthejusttrainedHomeLinkbutton and observetheindicatorlight.Iftheindicatorlightstays on constantly, programming is complete and your device should activate when the HomeLinkbutton is pressed and released.
NOTE: ToprogramtheremainingtwoHomeLinkbuttons, begin with "Programming" step two. Do not repeat step one.
126UNDERSTANDINGTHEFEATURESOFYOURVEHICLE
If the indicator light blinks rapidly for two seconds and then turns to a constant light continue with "Programming" steps 6-8 to complete the programming of a rolling code equipped device (most commonly agaraged door opener).
- Atthegaragedooropenerreceiver(motor-headunit) in the garage, locate the "learn" or "smart" button. This canusually be found where the hanging antenna wire is attached to themotor-headunit.
- Firmly press and release the "learn" or "smart" button. (Thenameandcolorofthebuttonmayvarybymanufacturer.)
NOTE: Thereare30secondsinwhichtoinitiatestep eight.
- Return to the vehicle and firmly press, hold for two seconds and release the programmed HomeLink button. Repeat the "press/hold/release" sequence second time,
and, depending on the brand of the garagedoor opener (or other rolling code equipped device), repeat this sequence at third time to complete the programming.
HomeLinkshouldnowactivateyourrollingcode equippeddevice.
NOTE: ToprogramtheremainingtwoHomeLinkbuttons, begin with "Programming" step two. Do not repeat step one.Forquestionsorcomments,pleasecontact HomeLink at www.homelink.com or 1-800-355-3515.
CanadianProgramming/GateProgramming
Canadianradio-frequencylawsrequiretransmittersignals to "time-out" (or quit) after several seconds of transmissionwhichmaynotbelongenoughfor HomeLinktopickupthesignalduringprogramming. Similar to this Canadian law, some U.S. gate operators are designedto"time-out"inthesamemanner.
If you live in Canada aoryou are having difficulties programming agate operator by using the "Programming" procedures (regardless of where you live), replace "Programming HomeLink" step 3 with the following:
NOTE: If programmingagaragedooropenerogate operator,itisadvisedtounplugthedeviceduringthe "cycling"processtopreventpossibleoverheating. 3.ContinuetopressandholdtheHomeLinkbutton while you press and release every two seconds ("cycle") yourhand-heldtransmitteruntilthefrequencysignalhas successfullybeenacceptedbyHomeLink.(Theindicator lightwillflashslowlyandthenrapidly.)Proceedwith "Programming"stepfourtocomplete.
UsingHomeLink
Tooperate, simplypressandreleasetheprogrammed HomeLinkbutton. Activationwillnowoccurforthe traineddevice(i.e.garagedooropener,gateoperator, securitysystem,entrydoorlock,home/officelighting,
etc.).Forconvenience,thehand-heldtransmitterofthe devicemayalsobeusedatanytime.Intheeventthat therearestillprogrammingdifficultiesorquestions, contactHomeLinkat:www.homelink.com or 1-800-355-3515.
ErasingHomeLinkButtons
Toeraseprogrammingfromthethreebuttons(individual buttonscannotbeerasedbutcanbe"reprogrammed"-notebelow),followthestepnoted:
- PressandholdthetwoouterHomeLinkbuttonsuntil theindicatorlightbeginstoflash-after20seconds. Releasebothbuttons.Donotholdforlongerthat30 seconds.HomeLinkisnowinthetrain(orlearning) modeandcanbeprogrammedatanytimebeginning with"Programming"-step2.
128UNDERSTANDINGTHEFEATURESOFYOURVEHICLE
ReprogrammingaSingleHomeLinkButton
ToprogramadevicetoHomeLinkusingaHomeLink buttonpreviouslytrained, follow these steps:
-
PressandholdthedesiredHomeLinkbutton.Do NOT releasethebutton.
-
The indicator light will begin to flash after 20 seconds. Without releasing the Home Link button, proceed with "Programming" step2
Forquestionsorcomments,contactHomeLinkat: www.homelink.com or 1-800-355-3515.
Security
If you selly our vehicle, besuretoeras the frequencies.
Toeraseallofthepreviouslytrainedfrequencies, hold downbothoutsidebuttonsuntilthegreenlightbeginsto flash.
This device complies with part 15 of FCC rules and with RSS-210 of Industry Canada. Operation is subject to the following conditions:
- Thisdevicemaynotcauseharmfulinterference.
- This device must accept any interference that may be received including interference that may cause undesired operation.
NOTE: Changesormodificationsnotexpresslyapprovedbythepartyresponsibleforcompliancecould voidtheuser'sauthoritytooperatetheequipment.
HomeLink®isattrademarkownedbyJohnsonControls, Inc.
UNDERSTANDINGTHEFEATURESOFYOURVEHICLE129
POWERSUNROOF—IFEQUIPPED
Thepowersunroofswitchesarelocatedbetweenthesun visorsontheoverheadconsole.
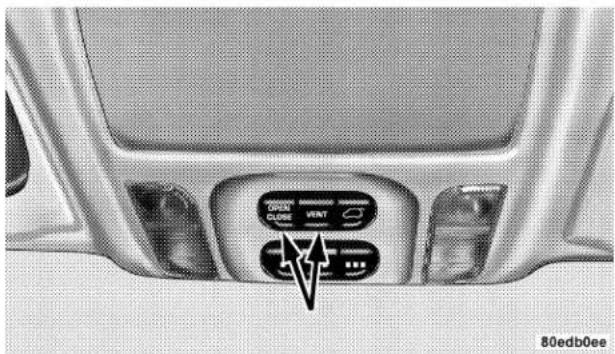
Pressandholdtheswitchrearwardtofullyopenthe sunroof. Thesunroofcanbestoppedatanyposition betweenenclosedandfullopen.Momentarilypressingthe
switchrearwardwillactivatetheExpressOpenFeature, causingthesunrooftoopenautomatically.
Pressandholdthebuttoninthecenterofthesunroof switchtoopenthevent.Thesunroofcanbestoppedat anypositionbetweenenclosedandfullvent.Toclosethe sunrooffromtheventposition,pressandholdtheswitch forward.Releasingtheswitchwillstopthemovementof thesunroofandthesunroofwillremaininthepartial ventpositionuntiltheswitchispushedforwardagain.
NOTE: Thepowersunroofswitchesremainactivefor upto45secondsaftertheignitionswitchhasbeenturned off.Openingeitherfrontdoorwillcancelthisfeature.
ExpressOpenFeature
Thesunroofisequippedwithanintermediatestopor comfortstopposition.Thisfeatureisdesignedtoeliminatewindbuffetingatvehiclespeedsbetween20-40mph (32-64km/h).Tooperatethisfeature,momentarilypress theswitchrearwardtoactivatetheExpressOpenFeature
130UNDERSTANDINGTHEFEATURESOFYOURVEHICLE
andtheglasswillautomaticallystopatthecomfortstop position.Pressingtheswitchrearwardagainwillfully openthesunroof.
DuringtheExpressOpenoperation,anymovementof theswitchwillstopthesunroofanditwillremainina partialopenposition.Again,momentarilypressingthe switchrearwardwillactivatetheExpressOpenFeature.
Toclosethesunroof, hold the switch in the forward position. Again, any release of the switch will stop the movement and the sunroof will remain in a partial open condition until the switch is pushed forward again.
Thesunshadecanbeopenedmanually.Itwillalsoopen asthesunroofopens.Thesunshadecannotbeclosedif thesunroofisopen.
WARNING!
- Never leave children in a vehicle, with the keys in the ignition switch. Occupants, particularly unattended children, can become entrapped by the power sunroof while operating the power sunroof switch. Such entrapment may result in serious injury or death.
- In an accident, there is a greater risk of being thrown from a vehicle with an open sunroof. You could also be seriously injured or killed. Always fasten your seat belt properly and make sure all passengers are properly secured too.
- Do not allow small children to operate the sun-roof. Never allow fingers or other body parts, or any object to project through the sunroof opening. Injury may result.
WindBuffeting
Windbuffetingcanbedescribedastheperceptionof pressureontheearsorahelicoptertypesoundinthe ears.Yourvehiclemayexhibitwindbuffetingwiththe windowsdown,orthesunroof(ifequipped)incertain openorpartiallyopenpositions.Thisisanormaloccurrenceandcanbeminimized.Ifthebuffetingoccurswith therearwindowsopen,openthefrontandrearwindows togethertominimizethebuffeting.Ifthebuffetingoccurs withthesunroofopen,adjustthesunroofopeningto minimizethebuffetingoropenanywindow.
SunroofMaintenance
Useonlyanon-abrasivecleanerandasoftclothoclean theglasspanel.
ELECTRICALPOWEROUTLETS
There are two 12 voltpower outlets located on the instrument panel below theradio. The driver's side outlet is controlled by the ignition switch and the passengers side outlet is connected directly to the battery. The driver's side outlet will also operate a conventional cigar lighter unit (if equipped with an optional Smoker's Package).
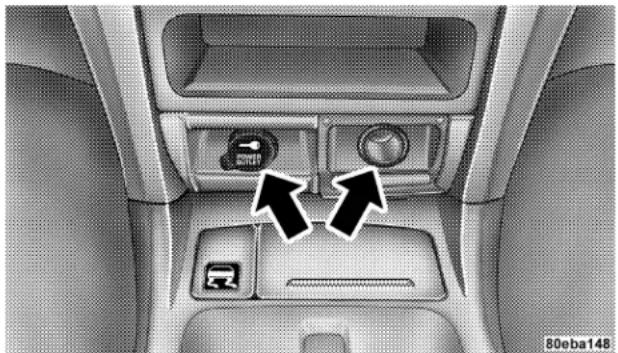
natural_image
Interior view of a car dashboard with air vent, controls, and directional arrows indicating movement (no text or symbols)132 UNDERSTANDINGTHEFEATURESOFYOURVEHICLE
Athirdoutletislocatedonthebackofthefrontcenter consolenearthefloor, andisalsocontrolledby the ignitionswitch.
Afourthoutletislocatedonthedriver'sside,intherear cargoareaandisalsocontrolledbytheignitionswitch.
The outlets include tethered caps labeled with a keyor battery symbol indicating the powersource. The passengerside instrument panel and center console outlets are powered directly from the battery, items plugged into these outlets may discharge the battery and/or prevent engine starting.
Thepassengersideandcenterconsoleoutletsareprotected byanautomaticresetcircuitbreaker.Theautomaticcircuit breakerrestorespowerwhentheoverloadisremoved.
NOTE: Ifdesired, the fourth power outlet in there are cargo are can be converted by your authorized dealer to provide power with the ignition switch in the OFF position.
ElectricalOutletUseWithEngineOff
CAUTION!
- Many accessories that can be plugged in draw power from the vehicle's battery, even when not in use (i.e. cellular phones, etc.). Eventually, if plugged in long enough, the vehicle's battery will discharge sufficiently to degrade battery life and/or prevent engine starting.
- Accessories that draw higher power (i.e. coolers, vacuum cleaners, lights, etc.), will degrade the battery even more quickly. Only use these intermittently and with greater caution.
- After the use of high power draw accessories, or long periods of the vehicle not being started (with accessories still plugged in), the vehicle must be driven a sufficient length of time to allow the alternator to recharge the vehicle's battery.
- Power outlets are designed for accessory plugs only. Do not hang any type of accessory or accessory bracket from the plug. Improper use of the power outlet can cause damage not covered by your warranty.
CUPHOLDERS
FrontSeatCupholders
Thecupholdersarelocatedintheforwardedgeofthe centerconsole.Pushdownontheforwardedgeofthe consoletoreleasethecupholders.Pressthecoverup whenthecupholdersarenolongerneeded.
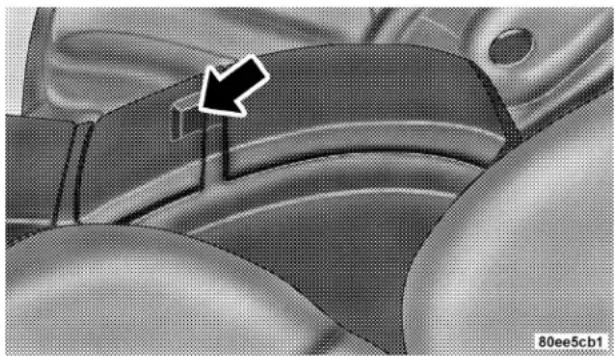
natural_image
Close-up of a textured fabric surface with a black arrow pointing to a specific area (no text or symbols visible)SecondRowSeatCupholders
Thesecondrowseatcupholdersarelocatedinthe forwardedgeofthecenterconsolelocatedbetweenthe secondrowseats.Pushdownontheforwardedgeofthe consoletoreleasethecupholders.Pressthecoverup whenthecupholdersarenolongerneeded.
ThirdRowSeatCupholders
Therearecupholderslocatedineachreartrimpanelfor thethirdrowseatpassengers.
STORAGE
ConsoleFeatures
Thecenterconsoles/armrestshaveapencil/tiregage holdermountedontheundersideofthecover.The bottomoftheconsolebinsalsohavebuiltinholdersfor compactdiscscorcassettetapes.
134UNDERSTANDINGTHEFEATURESOFYOURVEHICLE
RearCargoStorageBin
The storage bin is located in the floor of there are cargo area. To open lift upon the handle.
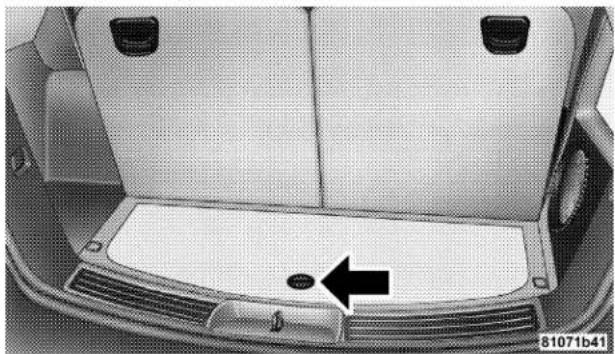
natural_image
Top-down view of a car backrest with a decorative grille and a black arrow pointing to the grille (no text or symbols)RetractableCargoAreaCover—IfEquipped
Tocoverthecargoarea:
1.Folddownthethirdrowseatbacks.
2.Unfoldthecargocoverextensionsandlockintoplace.
3. Insert the pinson the end of the cover into the slots located on the trim panel behind these second row seats.
4. Graspthecenterportionofthecoverlap.Pullitover thecargoarea.
5. Insert the pinson the end of the cover flap into the slot son therear trim panel.
6. Theliftgatemaybeopenedorclosedwiththecargo coverinplace.
UNDERSTANDINGTHEFEATURESOFYOURVEHICLE135
WARNING!
In an accident a cargo cover loose in the vehicle could cause injury. It could fly around in a sudden stop and strike someone in the vehicle. Do not store the cargo cover on the cargo floor or in the passenger compartment. Remove the cover from the vehicle when taken from its mounting. Do not store in the vehicle.
Stowed Position
- Folddownthethirdrowseatbacks.
-
Fold thecargocoverextensionstotheirstowedpositionandlockintoplace.
-
Insert the pinson the end of the cover into the slots located on the trim panel behind the third row seat backs.
- Graspthecenterportionofthecoverlap. Pullitover thecargoarea.
- Insert the pinson the end of the cover flap into the slotson therear trim panel.
- Theliftgatemaybeopenedorclosedwiththecargo coverinplace.
CargoTie-DownHooks
Thetie-downslocatedoncargooareafloorandontherear trimpanelsshouldbeusedtosafelysecureloadswhen vehicleismoving.
136UNDERSTANDINGTHEFEATURESOFYOURVEHICLE
WARNING!
- Cargo tie-down hooks are not safe anchors for a child seat tether strap. In a sudden stop or collision a hook could pull loose and allow the child seat to come loose. A child could be badly injured. Use only the anchors provided for child seat tethers.
- The weight and position of cargo and passengers can change the vehicle center of gravity and vehicle handling. To avoid loss of control resulting in personal injury, follow these guidelines for loading your vehicle:
- Alwaysplacecargoevenlyonthecargofloor.Put heavierobjectsaslowandasfarforwardaspossible.
- Placeasmuchcargoaspossibleinfrontoftherear axle. Toomuchweightorimproperlyplacedweight overorbehindtherearaxlecancausetherearofthe vehicletosway.
- Donotpile luggage or cargohigher than the top of the seat back. This could impair visibility or become a dangerous projectile in as sudden stop or collision.
WARNING!
To help protect against personal injury, passengers should not be seated in the rear cargo area. The rear cargo space is intended for load carrying purposes only, not for passengers, who should sit in seats and use seat belts.
UNDERSTANDINGTHEFEATURESOFYOURVEHICLE137
ROOFLUGGAGERACK—IFEQUIPPED
Thecrossbarsandsiderailsaredesignedtocarrythe weightonvehiclesequippedwithaluggagerack.The loadmustnotexceed150lbs(68kg),andshouldbe uniformlydistributedovertheluggagerackcrossbars.
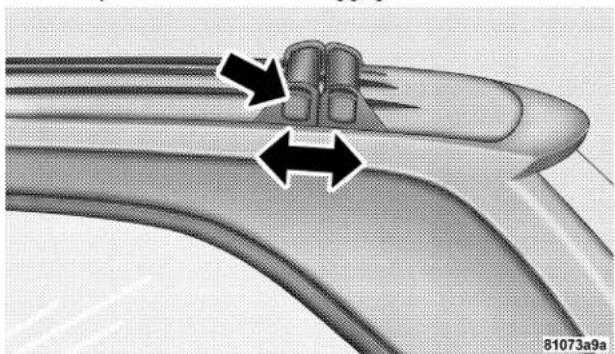
natural_image
Close-up of a curved mechanical component with two arrows indicating direction (no text or symbols)Distributecargoweightevenlyontheroofrackcrossbars. Theroofrackdoesnotincreasethetotalloadcarrying capacityofthevehicle.Besurethetotalloadofcargo
insidethevehicleplusthatontheexternalrackdoesnot exceedthemaximumvehicleloadcapacity.
Tomovethecrossbars, press the upper edge of each crossbar button, then movethecrossbartothed desired position. This is can be done with one person standing on each side of the vehicle, moving the crossbar at the same time. On the crossbar is in place, press the lower edge of the crossbar button to lock it into position.
Attempttomovethecrossbaragaintoensurethatithas properlylockedintoposition.
NOTE: Toreducetheamountofwindnoisewhenthe crossbarsarenotinuse,movebothcrossbarsnextto eachothertowardstherearofthevehicleintherearmost position.
Thetiedownholesonthecrossbarendsshouldalways beusedtotiedowntheload.Checkthestrapsfrequently tobesurethattheloadremainssecurelyattached.
CAUTION!
- To avoid damage to the roof rack and vehicle, do not exceed the maximum roof rack load capacity of 150 lbs (68 kg). Always distribute heavy loads as evenly as possible and secure the load appropriately.
- Long loads which extend over the windshield, such as wood panels or surfboards, or loads with large frontal area should be secured to both the front and rear of the vehicle.
- Travel at reduced speeds and turn corners carefully when carrying large or heavy loads on the roof rack. Wind forces, due to natural causes or nearby truck traffic, can add sudden upward loads. This is especially true on large flat loads and may result in damage to the cargo or your vehicle.
WARNING!
Cargo must be securely tied before driving your vehicle. Improperly secured loads can fly off the vehicle, particularly at high speeds, resulting in personal injury or property damage. Follow the Roof Rack Cautions when carrying cargo on your roof rack.
LOADLEVELINGSYSTEM
The automatic load levelings system will provide a level riding vehicle undermost passenger and cargo loading conditions.
Ahydraulicpumpcontainedwithintheshockabsorbers raisestherearofthevehicletothecorrectheight.Ittakes approximately1mile(1.6km)ofdrivingfortheleveling tocompleteddependingonroadsurfaceconditions.
If the leveled vehicle is not moved for approximately 15 hours, the levelingsystem will be edited itself down. The vehicle must be driven to a reset the system.
UNDERSTANDING YOUR INSTRUMENT PANEL
CONTENTS
■InstrumentsAndControls....142
■InstrumentCluster....143
■InstrumentClusterDescriptions. . . . . . . . . . . 1 4 4
ElectronicVehicleInformationCenter(EVIC)...151
□CustomerProgrammableFeatures—
IfEquipped.... 1 5 4
□CompassDisplay—IfEquipped....157
□ Mini-Trip Functions — If Equipped .....159
■SettingTheAnalogClock. 160
Electronic Digital Clock 160
□ClockSettingProcedure 160
■SalesCodeRAH—AM&FMStereoRadioWithCD PlayerAndCD/DVDChangerControls. . . . . . 1 6 1
□RadioOperation. 161
□CDPlayerOperation....163
□CD/DVDChangerOperation. 165
SalesCodeRBP—AM&FMStereoRadioWith CassetteTapePlayer,CDPlayer,AndOptional CD/DVDChangerControls. 165
□RadioOperation. 166
□TapePlayerOperation. 170
□CDPlayerOperation. 172
□CD/DVDChangerOperation—IfEquipped.173
■6DiscCD/DVDChanger(Rdv)—IfEquipped.175
□OperatingInstructions—CD/DVDChanger..175
□Eject(EJT)Button. 177
□OperatingInstructions—RemoteControl. . . . 1 7 8
□OperatingInstructions—VideoScreen. . . . . . 1 8 2
□OperatingInstructions—Headphones.....183
☐OperatingInstructions—MP3Player, Portable Walkman. 185
□OperatingInstructions—Video Games/Camcorders 185
SatelliteRadio—IfEquipped....186
□ System Activation .....186
□Electronic SerialNumber/SiriusIdentification Number(ENS/SID)....186
□SelectingSatelliteModeInRBB,RAH AndRBK Radios. 187
□ Selecting Satellite Mode In RBP, RBU, RAZ, And RBQRadios. 187
□ Selecting a Channel .....188
□ Storing And Selecting Pre-Set Channels .....188
□UsingThePTY (ProgramType)Button
(IfEquipped). 188
□ PTY Button "Scan" .....188
□ PTY Button "Seek" .....189
UNDERSTANDING YOURINSTRUMENT PANEL 141
□SatelliteAntenna. 189
□ReceptionQuality....189
■RemoteSoundSystemControls. 190
□RadioOperation....190
□TapePlayer....190
□CDPlayer....191
■RadioGeneralInformation. 191
□RadioBroadcastSignals. 191
□TwoTypesOfSignals. 191
□ElectricalDisturbances. 191
□AMReception. 192
□FMReception. 192
■CassetteTapeAndPlayerMaintenance. . . . . . 1 9 2
■CD/DVDDiscMaintenance....193
■RadioOperationAndCellularPhones. . . . . . . 1 9 4
■NavigationSystem—IfEquipped. . . . . . . . . . 1 9 4
■ClimateControls. 195
□Dual-ZoneAutomaticTemperatureControl...195
□ Electric Rear Window Defroster .....205
142UNDERSTANDINGYOURINSTRUMENTPANEL
INSTRUMENTSANDCONTROLS
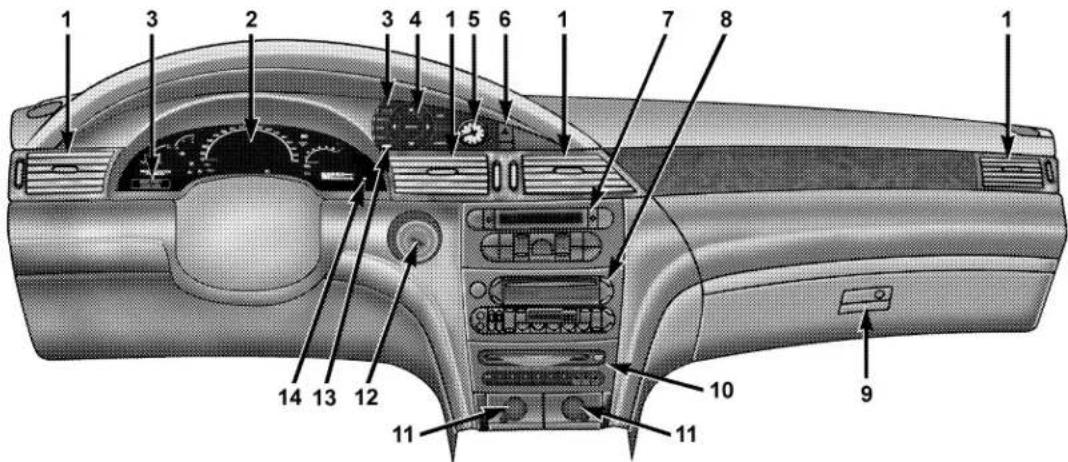
- Air Outlets
- Instrument Cluster
- Electronic Vehicle Information Center
- Navigation Buttons*
-
Analog Clock
-
Hazard Switch
-
Climate Controls
-
Radio
-
Glove Box
-
CD/DVD Player®
-
Power Outlets
-
Ignition Switch
-
Theft Alarm / Immobilizer Light
-
Trip Odometer Button
* If Equipped
80ee5ba1
INSTRUMENTCLUSTER
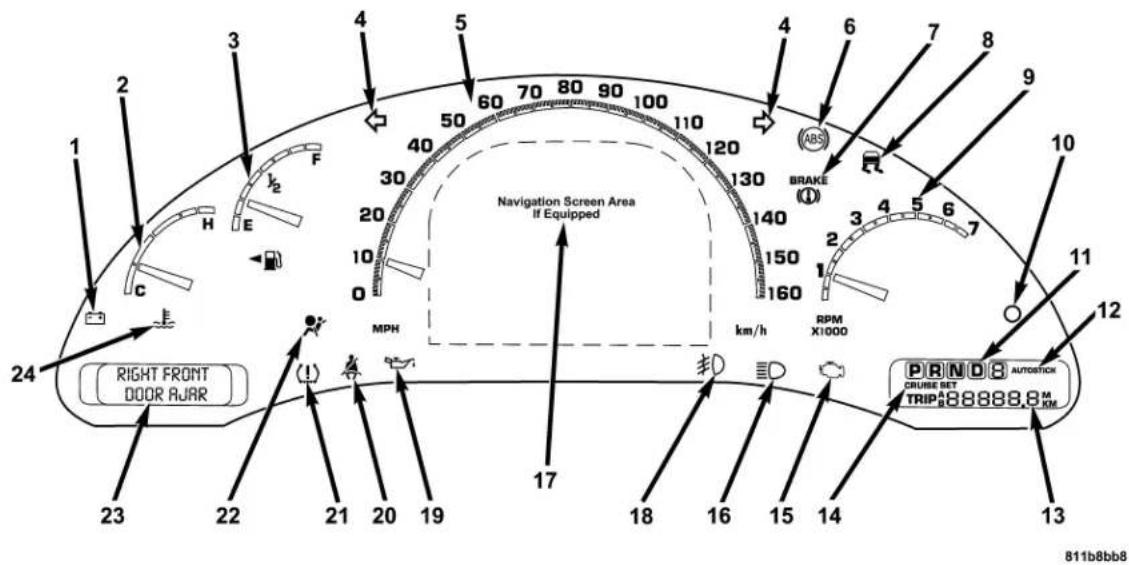
144UNDERSTANDINGYOURINSTRUMENTPANEL
INSTRUMENTCLUSTERDESCRIPTIONS
1. VoltageLight

Thislightmonitorstheelectricalsystemvoltage.
Thelightshouldturnonmomentarilyasthe
engineisstarted.Ifthelightstaysonorturnsonwhile driving,itindicatesaproblemwiththechargingsystem. Immediateserviceshouldbeobtained.
2. Temperature Gauge
The temperature gaugeshowsenginecoolanttemperature.Anyreadingwithinthenormalrangeindicates that theenginecoolingsystemisoperatingsatisfactorily.
Thegaugepointerwilllikelyindicateahighertemperaturewhendrivinginhotweather,upmountaingrades, orwhentowingatraler.Itshouldnotbeallowedto exceedtheupperlimitsofthenormaloperatingrange.
CAUTION!
Driving with a hot engine cooling system could damage your vehicle. If temperature gauge reads (H), pull over and stop the vehicle. Idle the vehicle with the air conditioner turned off until the pointer drops back into the normal range. If the pointer remains on the "H", and you hear continuous chimes, turn the engine off immediately, and call for service.
WARNING!
A hot engine cooling system is dangerous. You or others could be badly burned by steam or boiling coolant. You may want to call a service center if your vehicle overheats. If you decide to look under the hood yourself, see Section 7 of this manual. Follow the warnings under the Cooling System Pressure Cap paragraph.
3.FuelGauge
Thepointershowstheleveloffuelinthefueltankwhen theignitionswitchisintheONposition.

The Low Fuel Light will turn on when the fuel level reaches approximately 2 to 4 gallons (7 to 15 liters) this light will remain on until fuel is added.
4. TurnSignalIndicators

Thearrowwillflashwiththeexteriorturnsignal whentheturnsignalleverisoperated.
Ifthevehicleelectronicssensethatthevehiclehas traveledaboutonemilewiththeturnsignalson,achime willsoundtoalertyoutoturnthesignalsoff.Ifeither indicatorflashesatarapidrate,checkforadefective outsidelightbulb.
5.Speedometer
Indicates vehiclespeed.
6.Anti-LockLight

Thislightmonitorthe Anti-LockBrakeSystem. Thelightwillturnonwhentheignition switchisturnedtotheONpositionandmay stayonforaslongasfourseconds.
If the ABSlightremainsonorturnsonwhiledriving, it indicates that the Anti-Lock portion of the brakesystem
isnotfunctioningandthatserviceisrequired.However, theconventionalbrakesystemwillcontinuetooperate normallyiftheBRAKEwarninglightisnoton.
IftheABSlightison,thebrakesystemshouldbeserviced as soonaspossibletorestorethebenefitsofAnti-Lock brakes.IftheABSlightdoesnotturnonwhenthe IgnitionswitchisturnedtotheONposition,havethe lightinspectedbyanauthorizeddealer.
7. BrakeSystemWarningLight

Thislightmonitorsvariousbrakefunctions, includingbrakefluidlevelandparkingbrake application.Ifthebrakelightturnson,itmay indicate that the parkingbrakeisapplied,there isalowbrakefluidlevelorthereisaproblemwiththe anit-lockbrakesystem.
The dual brakesystem provides a reserve braking capacity in the event of a failure to a portion of the hydraulic system. Failure of either half of the dual brakes system is
indicated by the Brake Warning Light which will turn on when the brake fluid level in the master cylinder has dropped below as specified level.
Thelightwillremainonuntilthecauseiscorrected.
NOTE: Thelightmayflashmomentarilyduringsharp corneringmaneuverswhichchangefluidlevelconditions. Thevehicleshouldhaveserviceperformed.
Ifbrakefailureisindicated, immediaterepairisnecessary.
WARNING!
Driving a vehicle with the brake light on is dangerous. Part of the brake system may have failed. It will take longer to stop the vehicle. You could have an accident. Have the vehicle checked immediately.
VehiclesequippedwithAnti-Lockbrakes(ABS),arealso equippedwithElectronicBrakeForceDistribution(EBD). IntheeventofanEBDfailure,theBrakeWarningLight willturnonalongwiththeABSLight.Immediaterepair totheABSsystemisrequired.
The operation of the Brake Warning Light can be checked by turning the ignitions switch from the OFF position to the ON position. The light shouldilluminate for approximately two seconds. The light should the turnoff unless the parking brake is applied or a brake fault is detected. If the light does not illuminate, have the light inspected by an authorized dealer.
Thelightalsowillturnonwhentheparkingbrakeis appliedwiththeignitionswitchintheONposition.
NOTE: Thislightshowsonlythattheparkingbrakeis applied. It does not show the degree of brake application.
8. TractionControlIndicator—IfEquipped

This display indicator illuminates momentarily as a bulbcheck when the ignitions switch first turned ON.
ThetractioncontrolIndicatorwillturnonif:
• Thetractioncontrolsystemisinuse.
- TheTractionControlswitchhasbeenusedtoturn thesystemOFF.
- ThereisaTractionControlSystemmalfunction.
- Thesystemhasbeendeactivatedtopreventdamage tothebrakesystemduetooverheatedbraketemperatures.
NOTE: ExtendedheavyuseofTractionControlmay causethesystemtodeactivateandturnontheTraction ControlLight. Thisisopreventoverheatingofthebrake systemandisanormalcondition. Thesystemwillremain
disabledforabout4minutesuntilthebrakeshave cooled.ThesystemwillautomaticallyreactivateandturnofftheTractionControlLight.
9.Tachometer
Theredsegmentsindicatethemaximumpermissible enginerevolutions-per-minute(r.p.m.x1000)foreach gearrange.Beforereachingtheredarea,easeuponthe accelerator.
10.TripOdometerButton
Pressthisbuttontochangethedisplayfromodometerto eitherofthetwotripodometersettings.ThewordTRIP andeither“A”or“B”willappearwheninthetrip odometermode.Pushinandholdthebuttonfortwo secondstoresethetripodometerto0milesorkilometers.Theodometermustbeintripmodetoreset.
11. TransmissionRangeIndicator
This display indicator shows the automatic transmission gear selection.
12. AutoStickLight
Thisdisplayindicatorilluminateswhenthegearshift leverismovedtotheAutoStickposition.
13.Odometer/TripOdometer
Theodometershowsthetotaldistancethevehiclehas beendriven.
U.S.federalregulationsrequirethatupontransferof vehicleownership,thesellercertifytothepurchaserthe correctmileagethatthevehiclehasbeendriven.Therefore,iftheodometerreadingischangedduringrepairor replacement,besuretokeeparecordofthereading beforeandaftertheservicesothatthecorrectmileagecan bedetermined.
Thetwotripodometersshowindividualtripmileage. To switch from odometer to tripodometers, press and
releasetheTripOdometerbutton.Toresetatripodometer,displaythedesiredtripodometertoberesetthen pushandholdthebuttonuntilthedisplayresets(approximately2seconds).
14. CruiseIndicator
ThisdisplayindicatorshowsthattheSpeedControl SystemisON.
15.MalfunctionIndicatorLight

Thislightispartofanonboarddiagnosticsystem calledOBDthatmonitorsengineandautomatic transmissioncontrolsystems. ThelightwillilluminatewhenthekeyisintheONpositionbeforeengine start. If the bulb does not come on when turning the key from OFF to ON, have the condition checked promptly.
Certain conditions such as loose or missing gascap, poor fuel quality, etc. may illuminate the light after engine start. The vehicles should be serviced if the light
staysonthroughseveralofyourtypicaldrivingcycles.In mostsituationsthevehiclewilldrivenormallyandwill notrequiretowing.
TheMalfunctionIndicatorLightflashestoalertyouto seriousconditionsthatcouldleadtoimmediatelossof powerorseverecatalyticconverterdamage. Thevehicle shouldbeservicedassoonaspossibleifthisoccurs.
16. HighBeamLight

Thislightshowsthattheheadlightsareonhigh beam.PulltheMulti-Functionlevertowardsthe gwheeltoswitchtheheadlightsfromhighorlow
17. NavigationScreen—IfEquipped
Thenavigationsystemprovidesmaps,turnidentification,selectionmenusandinstructionsforselectinga varietyofdestinationsandroutes. Refertoyour"Navigation User's Manual" for detailed operating instructions.
150UNDERSTANDINGYOURINSTRUMENTPANEL
- FrontFogLightIndicator—IfEquipped

ThislightshowsthefrontfoglightsareON.
- Oil Pressure Warning Light
Thislightshowslowengineoilpressure. Thelight shouldturnonmomentarilywhentheengineis started. Ifthelightturnsonwhiledriving,stopthe vehicleandshutofftheengineassoonaspossible.A continuouschimewillsoundwhenthislightturnson.
Donotoperatethevehicleuntilthecauseiscorrected. Thislightdoesnotshowhowmuchoilisintheengine. Theengineoillevelmustbecheckedunderthehood.
20.SeatBeltReminderLight

WhentheignitionswitchisfirstturnedON,this lightwillturnonfor5to8secondsasabulbcheck. Duringthebulbcheck,ifthedriver'sseatbeltis kled,achimewillsound.Afterthebulbcheckor driving,ifthedriverseatbeltremainsunbuckled,
theSeatBeltWarningLightwillflashorremainon continuously. Referto "EnhancedDriverSeatBeltReminderSystem(BeltAlertTM)" in the Occupant Restraints section form more information.
- TirePressureMonitorWarningLight—If Equipped

ThislightwillturnonwhenthereisaLowtire pressurecondition. Thelightwillalsoturnon ifaproblemexistwithanytiresensor. Thelight willremainonuntilthetirepressureispropheproblemwiththesensoriscorrected.
Thislightwillturnonmomentarilyasabulbcheckwhen theengineisstarted.
Whenthetirepressuremonitoringsystemwarninglight islit,oneormoreofyourtiresissignificantlyunderinflated.Youshouldstopandcheckyourtiresassoonas possible,andinflatethemtotheproperpressureas indicatedonthetireandloadinginformationplacard.
Drivingonasignificantly underinflated tirecausesthe tiretooverheatandcanleadtotirefailure.Underinflationalsoreducesfuelefficiencyandtiretreadlife,and mayaffectthevehicle'shandlingandstoppingability. Eachtire,includingthespare,shouldbechecked monthlywhencoldandsettotherecommendedinflation pressureasspecifiedinthetireandloadinginformation placardandowner'smanual.
22.AirbagLight

Thislightturnsonandremainsonfor6to8 secondsasabulbcheckwhentheignition switchisfirstturnedON.Ifthelightisnoton duringstarting,stayson,orturnsonwhile driving,havethesysteminspectedbyanauthorized dealerassoonaspossible.
- Electronic Vehicle Information Center Display When the appropriate condition sexist, this display shows the Electronic Vehicle Information Center (EVIC) messages.
24. Engine Temperature Warning Light
Thislightwarnsofanoverheatedenginecondition.Ifthislightisaccompaniedbyacontinuous chime,theenginetemperatureiscriticallyhot,and thevehiclesshouldbeturnedoffimmediately.Thevehicle shouldbeservicedassoonaspossible.
ELECTRONICVEHICLEINFORMATIONCENTER (EVIC)
TheElectronicVehicleInformationCenter(EVIC)consistsofthefollowing:
• Vehicleinformationwarningmessagedisplays
- TirePressureMonitorSystem—IfEquipped
- Customerprogrammablefeatures
152UNDERSTANDINGYOURINSTRUMENTPANEL
- Compassdisplay—IfEquipped
- Mini-Tripfunctions—IfEquipped
PressingtheMENUbuttonwillchangethedisplayed programmingfeatures.PressingtheSTEPbuttonwill displaytheavailablechoices.PressingtheMENUbutton asecondtimeacceptsaselectedchoice.
When the appropriate condition sexist, the Electronic Vehicle Information Center (EVIC) displays the following messages.
- LEFT/RIGHTTURNSIGNALON(withacontinuous warningchime)
• INVALIDKEY&FOB(withasinglechime)
• SERVICEIMMOBILIZER(withasinglechime)
• KEYFOBBATTERYLOW(withasinglechime)
• KEY&FOBPROGRAMMED(withasinglechime)
• PROGRAMKEY&FOB
- MEMORY#1/#2POSITIONSET(withasinglechime)
- MEMORY#1/#2POSSELECTED
- MEMORYSYSTEMDISABLEDVEHICLENOTIN PARK(withasinglechime)
- SETINHIBITEDDUETOMOTION(withasingle chime)
• FOBLINKED(withasinglechime)
• FOBUNLINKED(withasinglechime)
• PARKBRAKEENGAGED(withasinglechime)
- LOWBRAKEFLUID(withasinglechime)
- LOWFUEL(withasinglechime)
- MENUINPARKONLY
- LIST#ALERTMESSAGES
UNDERSTANDING YOUR INSTRUMENT PANEL 153
- UNLOCKTOOPENLIFTGATE(withasinglechime)
• PUTINPARKFORLIFTGATE(withasinglechime)
• TOOCOLDFORPWRLIFTGATE(withasingle chime)
• TOOHOTFORPWRLIFTGATE(withasinglechime)
• PERFORMSERVICE(withasinglechime) - LEFT/RIGHTFRONTDOORAJAR(oneormore, withasinglechimeifspeedisabove1mph)
- LEFT/RIGHTREARDOORAJAR(oneormore, with asinglechimeifspeedisabove1mph)
• DOOR(S)AJAR(withasinglechime)
• DOOR(S)ANDGATEAJAR(withasinglechime) - LIFTGATEAJAR(withasinglechimeifspeedis above1mph)
• WASHERFLUIDLOW(withasinglechime)
• PEDALADJUSTDISABLEDCRUISEENGAGED
• PEDALADJUSTDISABLEDVEHICLEINREVERSE
- CHANNEL1,2,OR3TRANSMIT(withasingle chime)
- CHANNEL1,2,OR3TRAINING(withasingle chime)
• CHANNEL1,2,OR3TRAINED(withasinglechime)
- CLEARINGCHANNELS
• CHANNELSCLEARED
• CHANNELSDEFAULTED
• DIDNOTTRAIN
- 1,2,3OR4TIRE(S)LOWPRESSURE(Referto"Starting AndOperating,TireSection")
- 1,2,3OR4TIRE(S)HIGHPRESSURE(Referto"StartingAndOperating,TireSection")
- SERVICETIRESYSTEMSOON(Referto"Starting AndOperating,TireSection")
- TIREPRESSUREUNAVAILABLE(Referto"Starting AndOperating,TireSection")
- TCSSUSPENDED(TractionControlSystem, with a graphicandsinglechime)
- TCSACTIVE(TractionControlSystem, with a graphic)
- SERVICETCSSYSTEM(TractionControlSystem, with agraphicandsinglechime)
CustomerProgrammableFeatures—IfEquipped
PresstheMENUbuttonuntiloneofthefollowing displaychoicesappears:
Language?
Wheninthisdisplayyoumayselectoneofthreelanguagesforalldisplaynomenclature,includingthetrip computerfunctionsandnavigationsystem.Pressthe STEPbuttonwhileinthisdisplayselectsEnglish, Francais,orEspanol.Asyoucontinuethedisplayed informationwillbeshownintheselectedlanguage.
Display U.S. or Metric?
PressingtheUS/MbuttonwillchangetheEVIC, odometer, navigation systemandA/CControlunitsfromUS toMetric.
Use factory Settings?
When in this display you may select to use the factory settingsandnoprogrammablefeatureswillbeoffered.
Auto Door Locks?
Whenthisfeatureisselected, alldoorsandtheliftgate lockautomaticallywhenthespeedofthevehiclereaches 15mph(25km/h).PressingtheSTEPbuttonwheninthis displaywillselect"Yes"or"No."
Auto Unlock On Exit?
Whenthisfeatureisselectedallthevehicle'sdoorswill unlockwhenthedriver'sdoorisopenedifthevehicleis stoppedandthetransmissionisinP(Park)orN(Neutral)position.PressingtheSTEPbuttonwheninthis displaywillselect"Yes"or"No."
Remote Unlock Driver's Door 1st?
Whenthisfeatureisselectedonlythedriver'sdoorwill unlockonthefirstpressoftheremotekeylessentry unlockbuttonandrequireasecondpresstounlockthe remaininglockeddoorsandliftgate.WhenREMOTE UNLOCK ALL DOORS isselectedallofthedoorsand theliftgatewillunlockatthefirstpressoftheremote
keylessentryunlockbutton.PressingtheSTEPbutton wheninthisdisplaywillselectDRIVER'SDOOR1STor ALLDOORS.
Remote Linked To Memory? (Available with Memory Seat Only)
Whenthisfeatureisselectedthememoryseat,mirror, andradiosettingswillreturntothememorysetposition whentheremotekeylessentry"Unlock"buttonis pressed.Ifthisfeatureisnotselectedthenthememory seat,mirror,andradiosettingscanonlyreturntothe memorysetpositionusingthedoormountedswitch. PressingtheSTEPbuttonwheninthisdisplaywillselect "Yes"or"No."
Sound Horn On Lock?
Whenthisfeatureisselecteddashorthornsoundwill occurwhetheremotekeylessentry"Lock"buttonis pressed. Thisfeaturemaybeselectedwithorwithoutthe
156UNDERSTANDINGYOURINSTRUMENTPANEL
flashlightsonlock/unlockfeature.PressingtheSTEP buttonwheninthisdisplaywillselect"Yes"or"No."
Flash Lights On Lock/Unlock?
Whenthisfeatureisselected,thefrontandrearturn signalswillflashwhenthedoorsarelockedorunlocked usingtheremotekeylessentrytransmitter. Thisfeature maybeselectedwithorwithoutthesoundhornonlock featureselected.PressingtheSTEPbuttonwheninthis displaywillselect"Yes"or"No."
Headlamp Delay
Whenthisfeatureisselectedthedrivercanchoose,when exitingthevehicle,tohavetheheadlampsremainonfor 30,60,or90seconds,ornotremainon.PressingtheSTEP buttonwheninthisdisplaywillselect30,60,90,orOFF.
Headlamp On With Wipers? (Available with Auto Headlights Only)
When this feature is selected and the headlight switch has at least once been moved to the AUTO position, the
headlightswillturnoninapproximately10seconds whenthewipersareturnedon.Theheadlightswillalso turnoffwhenthewipersareturnedoffiftheywere turnedoninthisway.PressingtheSTEPbuttonwhenin thisdisplaywillselect"Yes"or"No."
NOTE: Turningtheheadlightsonduringthedaytime causestheinstrumentpanellightsstodim.Toincreasethe brightness,referto"Lights"inthissection.
Service Interval
Whenthisfeatureisselectedaserviceintervalbetween 2,000miles(3200km)and6,000miles(10000km)in500 mile(800km)incrementsmaybeselected.Pressingthe STEPbuttonwheninthisdisplaywillselectdistances between2,000miles(3200km)and6,000miles(10000 km)in500mile(800km)increments.
Reset Service Distance (Displays Only if Service Interval was Changed)
Whenthisfeatureisselectedthecurrentaccumulated servicedistancecanberesettothenewlyselectedservice interval.PressingtheSTEPbuttonwheninthisdisplay willselect"Yes"or"No."
Power Accessory Delay?
Whenthisfeatureisselected, thepowerwindow switches, radio, hands-freesystem, DVDvideosystem, powersunroof, and poweroutletswillremainactive for upto45 seconds after theignitionswitch has been turned off. Opening vehicle door or lift gate will cancel this feature.
Easy Exit Seat? (Available with Memory Seat Only)
Whenthisfeatureisselected,thedriver'sseatmoves rearward5cm(2inches)ortothefarthestrearward positionifthisdistanceislessthan5cm(2inches)when thekeyisremovedfromtheignitionswitchsothatthe
drivercanmoreeasilyexitthevehicle.Theseatwill returntothememorizedseatlocation(ifREMOTELINK TOMEMORYissettoYES)whentheremotekeyless entrytransmitterisusedtounlockthedoor.Pressingthe STEPbuttonwheninthisdisplaywillselect"Yes"or "No."
Retrain Tire Sensors (Available with Tire Pressure Monitor System Only)
The Tire Pressure Monitorsystem must be trained following atirerotation or wheel rim mounted sensor replacement. See your authorized dealer for service.
CompassDisplay—IfEquipped
Thisdisplayprovidesoneofeightcompassreadingsto indicatethedirectionthevehicleisfacing.
Automatic Compass Calibration
Thiscompassisselfcalibratingwhicheliminatesthe needtomanuallysetthecompass. Whenthevehicleis new, thecompassmayappearerratic and the EVIC will display "COMPASSCALIBRATING" until the compass is calibrated. The compasswill calibrate automatically after approximately 40 seconds if no buttons are pressed and the vehicleisin Park. You may also calibrate the compass by completing one 360^ turninan area a free from largemetal or metallic objects, the "COMPASSCALIBRATING" EVIC message will turn off and the compass will function normally.
Manual Compass Calibration
Ifthecompassappearserraticandthe"COMPASSCALIBRATING"messagedoesnotappearintheEVICdisplay, youmustputthecompassintotheCalibrationMode manually.
To put into a Calibration Mode: Turnontheignition switchandsetthedisplaytoCompass.PresstheRESET buttonforatleast10secondsuntilthe"COMPASS CALIBRATING"messageappears.ReleasetheRESET buttonandcompleteone360°turninanareafreefrom largemetalobjects.The"COMPASSCALIBRATING" messagewillturnoffandthecompasswillfunction normally.
Compass Variance
CompassVarianceisthedifferencebetweenmagnetic NorthandGeographicNorth.Insomeareasofthe country,thedifferencebetweenmagneticandgeographic Northisgreatenoughtocausethecompassstogivefalse readings.Ifthisoccurs,thecompassvariancemustbeset.
NOTE: Magneticmaterialsshouldbekeptawayfrom theoverheadconsole.
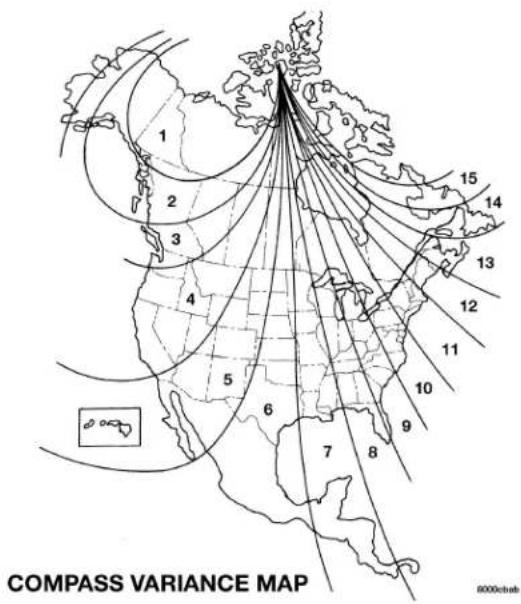
UNDERSTANDING YOUR INSTRUMENT PANEL 159
To set the variance: TurntheignitionswitchONandset thedisplaytoCompass.PresstheRESETbuttonfor approximately5secondsbutnomorethan10seconds. The "COMPASSVARIANCE" messageandthelastvariancezonenumberwillbeisplayed.PresstheSTEP buttontoselectthepropervariancezoneasshowninthe map.PresstheRESETbuttontosetthenewvariance zoneandresumenormaloperation.
Mini-TripFunctions—IfEquipped
Thisdisplaysinformationonthefollowing:
- AverageFuelEconomy(ECOAVG) Showstheaveragefueleconomysincethelastreset.The minimumaveragefueleconomythatwillbedisplayed onresetis0.3mpg.
- DistanceToEmpty(DTE) Show the estimated distance that can be travelled with the fuel remaining in the tank. This estimated distance is determined using the MPG forth the last few minutes.
- OffMode
Showsablankdisplay.
- StepButton
PushthisbuttontocyclethroughalltheMini-trip functions.
To Reset The Display
PressingandreleasingtheResetbuttononcewillcleartheresettablefunctioncurrentlybeingdisplayed.Theresettablefunctionisaveragefueleconomy.Resetwillonlyoccuriftheresettablefunctioniscurrentlybeingdisplayed.
SETTINGTHEANALOGCLOCK
Tosettheanalogclockatthetopcenteroftheinstrument panel, pressandholdthebuttonuntilthesettingis correct.
ELECTRONICDIGITALCLOCK
Theclockandradioeachusethedisplaypanelbuiltinto theradio. Adigitalreadoutshowsthetimeinhoursand minuteswhenevertheignitionswitchisintheONor ACCpositionandthetimebuttonispressed.
When the ignitions switch this in the OFF position, or when the radio frequency is being displayed, time keeping is accurately maintained.
ClockSettingProcedure
-
TurntheignitionswitchtotheONorACCposition andpressthetimebutton. Usingthetipofaballpointpen orsimilarobject, presseitherthehour(H)orminute(M) buttonsontheradio.
-
PresstheHbuttontosethoursortheMbuttontoset minutes. Thetimesettingwillincreaseeachtimeyou pressabutton.
SALESCODERAH—AM&FMSTEREORADIO WITHHCDPLAYERANDCD/DVDCHANGER CONTROLS
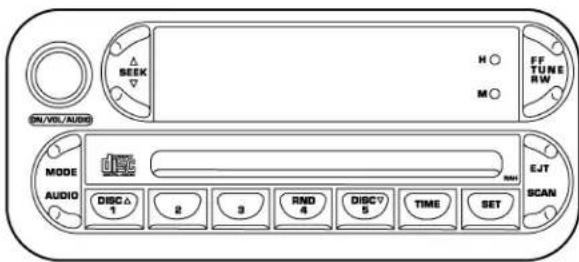
810236a4
RadioOperation
Power/Volume Control
PresstheON/VOLcontroltoturntheradioon.Turnthe volumecontrolclockwisetoincreasethevolume.
NOTE: Powertooperatetheradioissupplied through theignitionswitch.ItmustbeintheONorACCposition tooperatetheradio.
Mode
PresstheMODEbuttontoselectbetween,AM,FM,CD, CD/DVDchangerortheSatelliteRadio(ifequipped). WhentheSatelliteRadio(ifequipped)isselected"SA" willappearinyourradiodisplay.
AdiscmayremainintheradiowhileintheSatelliteor radiomode.
Seek
PressandreleasetheSEEKbuttontosearchforthenext stationineithertheAM,FMorSatellitemode.Pressthe
162 UNDERSTANDING YOUR INSTRUMENT PANEL
topofthebuttontoseekupandthebottomtoseekdown. Theradiowillremaintunedtothenewstationuntilyou makeanotherselection.Holdingthebuttoninwillbypassstationswithoutstoppinguntilyoureleaseit.
Tuning
PresstheTUNEcontrolupordowntoincreaseor decreasethefrequency.Ifyoupressandholdthebutton,theradiowillcontinuetotuneuntilyoureleasethe button.Thefrequencywillbedisplayedandcontinuouslyupdatedwhilethebuttonispressed.
Balance
The Balancecontroladjuststheleft-to-rightspeakerbalance. Press the AUDIO button, select BALANCE, then turn the volume knob to adjust the balance.
Fade
TheFadecontrolprovidesforbalancebetweenthefront andrearspeakers.PresstheAUDIObutton,selectFADE, thenturnthevolumeknobtoadjustthefadebalance.
Tone Control
TheBassand/orTreblecontrolssoundforthedesired tone.PresstheAUDIObutton,selectBassorTREBLE, thenturnthevolumeknobtoincreaseordecrease amplificationoftheband.
To Set The Radio Push-Button Memory
Whenyouarereceivingastationthatyouwishto committopush-buttonmemory,presstheSETbutton. SET1willshowinthedisplaywindow.Selectthe push-buttonyouwishtolockontothisstationandpress and releasethatbutton.Ifastationisnotselectedwithin 5secondsafterpressingtheSETbutton,thestationwill continuetoplaybutwillnotbelockedintopush-button memory.
Youmayaddasecondstationtoeachpush-buttonby repeatingtheaboveprocedurewiththisexception:Press theSETbuttontwiceandSET2willshowinthedisplay window.EachbuttoncanbesetforSET1andSET2in
bothAMandFM.Thisallowsatotalof10AMand10FM stationstobelockedintomemory.Youcanrecallthe stationsstoredinSET2memorybypassingthepush-buttontwice.
To Change From Clock To Radio Mode
Press the TIME button to changeth e display between radio frequency and time.
General Information
This radiocomplies with Part15 of FCC rules and with RSS-210 of Industry Canada. Operation is subject to the following conditions:
- This device may not cause harmful interference,
- This device must accept any interference received, including interference that may cause undesired operation.
NOTE: Changesormodificationsnotexpressivelyapprovedbythepartyresponsibleforcompliancecould voidtheuser'sauthoritytooperatetheequipment.
CDPlayerOperation
NOTE: TheignitionswitchmustbeintheONorACC positionandthevolumecontrolONbeforetheCDplayer willoperate.
Inserting The Compact Disc
CAUTION!
This CD player will accept only 4–3/4 inch (12cm) discs only. The use of other sized discs may damage the CD player mechanism.
YoumayeitherinsertorejectadiscwiththeradioOFF.
164 UNDERSTANDING YOUR INSTRUMENT PANEL
If you insert adisc with the ignition ON and ther radio OFF, the display will show the time of day. If you insert adisc with the ignition OFF, the display will show the time of day for about 5 seconds, then go out.
IfthepowerisON, the unit will switch from radiotoCD mode and begin to play when you insert the disc. The display will show the track number and index time in minutes and seconds. Play will begin at the start of track 1.
Seek
PressthetopoftheSEEKbuttonforthenextselectionon theCD.Pressthebottomofthebuttontoreturntothe beginningofthecurrentselection,orreturntothe beginningofthepreviousselectioniftheCDiswithinthe first10secondsofthecurrentselection.
EJT — Eject
PresstheEJTbuttonandthediscwillunloadandmove totheentranceforeasyremoval.Theunitwillswitchto theradiomode.
If you donotremovethedisc within 15 seconds, it will be reloaded. Theradiomodewillcontinuetoappear.
ThedisccanbeejectedwiththeradioOFF.
FF/TUNE/RW
PressFF(FastForward)andtheCDplayerwillbeginto fastforwarduntilFFisreleased.TheRW(Reverse) buttonworksinasimilarmanner.
RND — Random Play
PresstheRNDbuttonwhiletheCDisplayingtoactivate RandomPlay.Thisfeatureplaystheselectionsonthe compactdiscinrandomordertoprovideaninteresting changeofpace.
PresstheSEEKbuttontomovetothenextrandomly selectedtrack.
PressTUNEFFtofastforwardthroughthetracks.Press theFFbuttonasecondtimetostopthefastforward feature.IfTUNERWispressed, thecurrenttrackwill reversetothebeginningofthetrackandbeginplaying.
PresstheRNDbuttonasecondtimetostopRandom Play.
CD/DVDChangerOperation
Press the MODE button to select between the CD player and the optional remote CD/DVD changer.
Time
PresstheTIMEbuttontochangethedisplayfrom elapsedCDorDVDplayingtimetotimeofday.
SALESCODERBP—AM&FMSTEREORADIO WITHCASSETTETAPEPLAYER,CDPLAYER, ANDOPTIONALCD/DVDCHANGERCONTROLS
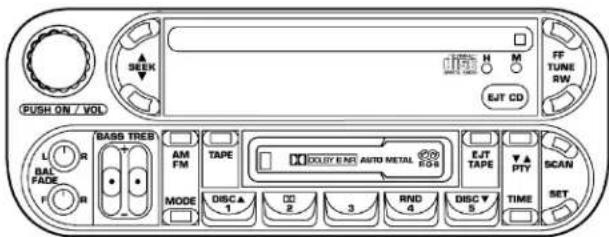
80e7c9a0
RadioOperation
Power/Volume Control
PresstheON/VOLcontroltoturntheradioon.Turnthe volumecontroltotherighttoincreasethevolume.
NOTE: Powertooperatetheradioissupplied through theignitionswitch.ItmustbeintheONorACCposition tooperatetheradio.
PTY (Program Type) Button
PressingthisbuttononcewillturnonthePTYmodefor5seconds.Ifnoactionistakenduringthe5secondtimeoutthePTYiconwillturnoff.PressingthePTYbuttonwithin5secondswillallowtheprogramformattypetobeselected.ManyradiostationsdonotcurrentlybroadcastPTYinformation.
TogglethePTYbuttontoselectthefollowingformat types:
| Program Type Radio | Display |
| AdultHitsAdltHit | |
| ClassicalClassic | |
| ClassicRockClsRock | |
| CollegeCollege | |
| Country | Country |
| Information | Inform |
| Jazz | Jazz |
| ForeignLanguage | Language |
| News | News |
| Nostalgia | Nostalga |
| Oldies | Oldies |
| Personality | Persnlty |
| Public | Public |
| RhythmandBlues | R&B |
| ReligiousMusic | RelMusc |
| ReligiousTalk | RelTalk |
| RockRock | |
| SoftSoft | |
| SoftRockSoftRck | |
| SoftRhythmandBluesSoftR&B | |
| SportsSports | |
| TalkTalk | |
| Top40Top40 | |
| WeatherWeather | |
BypressingtheSEEKbuttonwhenthePTYiconis displayed,theradiowillbetunedtothenextfrequency stationwiththesameselectedPTYname.ThePTY functiononlyoperateswhenintheFMandSatellite(if equipped)modes.
Theradiodisplaywillflash"SEEK"andtheselectedPTY program type when searching for the next PTY station. If
no station is found with the selected PTY program type, theradiowillreturn tothelastpreset station.
If a preset button is activated while in the PTY (Program Type)mode,thePTYmodewillbeexitedandtheradio willtunetothepreset station.
Pressing PTY, then SCAN will scan the FM Band and stop atallRDSstationsthatbroadcastthestationtype. Each RDS station will be played for a 5 second scan once around the FM Band and stop at the last station. The PTY iconwillthenturnoff.
Seek
Press and release the SEEK button to search for the next station in either the AM or FM mode. Press the top of the button to seek up and the bottom to seek down. The radio will remain tuned to the new station until you make another selection. Holding the button in will bypassstations without stopping until you release it.
168 UNDERSTANDING YOUR INSTRUMENT PANEL
Scan
PressandreleasetheSCANbuttontosearchforthenext stationineithertheAMorFMmode.Theradiowill pausefor5secondsateachlistenablestationbefore continuingtothenext.Tostopthesearch,pressthe SCANbuttonasecondtime.
Tune
PresstheTUNEcontrolupordowntoincreaseor decreasethefrequency.Ifyoupressandholdthebutton,theradiowillcontinuetotuneuntilyoureleasethe button.Thefrequencywillbedisplayedandcontinuouslyupdatedwhilethebuttonispressed.
Balance — BAL
The Balancecontroladjuststheleft-to-rightspeakerbalance.PresstheBALbuttoninanditwillpopout.Adjust thebalanceandpushthebuttonbackin.
Fade
TheFadecontrolprovidesforbalancebetweenthefront andrearspeakers.PresstheFADEbuttoninanditwill popout.Adjustthebalanceandpushthebuttonbackin.
Tone Control
Thetonecontrols affect the BASS and TREFLE frequency bands. Each is controlled by a slider control with a detent at themid position. Moving a controlupordown increases or decreases amplification of the band. The mid position provides a balanced output.
AM/FM Selection
PresstheAM/FMbuttontotogglebetweenAMandFM mode. Theoperatingmodewillbedisplayednexttothe stationfrequency. Thedisplaywillshow"ST" whena stereostationisreceived(FMonly).
To Set The Radio Push-Button Memory
When you are receiving a station that you wish to commit top push-button memory, press the SET button.
SET1willnowshowinthedisplaywindow.Selectthe "1-5"buttonyouwishtolockontothisstationandpress andreleasethatbutton.Ifabuttonisnotselectedwithin 5secondsafterpressingtheSETbutton,thestationwill continuetoplaybutwillnotbelockedintopush-button memory.
Youmayaddasecondstationtoeachpush-buttonby repeatingtheaboveprocedurewiththisexception:Press theSETbuttontwiceandSET2willshowinthedisplay window.EachbuttoncanbesetforSET1andSET2in bothAMandFM.Thisallowsatotalof10AMand10FM stationstobelockedintopush-buttonmemory.The stationsstoredinSET2memorycanbeselectedby pressingthepush-buttontwice.
Time
PresstheTIMEbuttontochangethedisplaybetween radiofrequencyandtime.
Tosettheclock, useaballpointpenorsimilarobjectto pressthehour(H)orminute(M)buttonsontheradio, Thetimesettingwillincreaseeachtimeyoupressthe button. Pressanyotherbuttontoexitfromtheclock settingmode.
General Information
This radiocomplies with Part 15 of FCC rules and with RSS-210 of Industry Canada. Operation is subject to the following conditions:
- This device may not cause harmful interference,
- This device must accept any interference received, including interference that may cause undesired operation.
NOTE: Changesormodificationsnotexpressivelyapprovedbythepartyresponsibleforcompliancecould voidtheuser'sauthoritytooperatetheequipment.
170UNDERSTANDINGYOURINSTRUMENTPANEL
TapePlayerOperation
Insertthecassettewiththeexposedtapesidetowardthe rightandthemechanicalactionoftheplayerwillgently pullthecassetteintotheplayposition.
NOTE: Whensubjectedtoextremelycoldtemperatures, thetapemechanismmayrequireafewminutestowarm upforproperoperation.Sometimespoorplaybackmay beexperiencedduetoadefectivecassettetape.Cleanand demagnetizethetapeheadsatleasttwiceayear.
Tape Side — /PTY
Pressingthe∇Δbuttonduringtapemodewillcausethe othersideofthetapetobeplayed.Thedisplaywill confirmtheselectedtapeplaydirection.Thetimeis alwaysdisplayed.
Tape
PresstheTAPEbuttontoselecttheTapemode.
Seek
PresstheSEEKbuttonupforthenextselectiononthe tapeanddowntoreturntothebeginningofthecurrent selection.
PresstheSEEKbuttonupordowntomovethetrack numbertoskipforwardorbackward1to7selections. PresstheSEEKbuttononcetomove1selection,twiceto move2selections,etc.thedisplaywillshowthetotal numberoftimestheSEEKbuttonwaspushed.TheSEEK functionwillbecancelledbypressingeithertheFF/RW orAM/FMbutton.
Fast Forward — FF
Press the FF button up momentarily to advance the theta pathway in the direction that it is playing. The temperature will be reached. At the end of the theta, the temperature will play in the opposite direction.
Rewind — RW
PresstheRWbuttondownmomentarilytoreversethe tapedirection. Thetapewillrewinduntilthebuttonis pressedagainoruntilthebeginningofthetapeis reached. Atthebeginningofthetape, thetapewillplay intheoppositedirection.
EJT Tape
PresstheEJTTAPEbuttonandthecassettewilldisengageandejectfromtheradio.
Metal Tape Selection (70μs)
Ifastandard70μ(metal)tapeisinsertedintotheplayer, theplayerwillautomaticallyselectthecorrectequalization.
Pinch Roller Release
IfignitionpowerortheradioON/OFFswitchareturned off, the pinchroller will automatically retract top protect
thetapefromanydamage.Whenpowerisrestoredtothe tapeplayer,thepinchrollerwillautomaticallyreengage andthetapewillresumeplay.
Dolby Noise Reduction
TheDolbyNoiseReductionSystem*isonwheneverthetapeplayerison,butmaybeswitched on/off.
ToturntheDolbyNoiseReductionSystemon/off:Press theDolbyNRbutton(button2)afteryouinsertthetape. TheNRlightinthedisplaywillgooffwhentheDolby Systemisoff.
*“Dolby”noisereductionmanufacturedunderlicense fromDolbyLaboratoriesLicensingCorporation.Dolby andthedouble-DsymbolaretrademarksofDolbyLaboratoriesLicensingCorporation.
172 UNDERSTANDING YOUR INSTRUMENT PANEL
CDPlayerOperation
NOTE: TheignitionswitchmustbeintheONorACC positionandthevolumecontrolONbeforetheCDplayer willoperate.
Inserting The Compact Disc
YoumayeitherinsertorejectadiscwiththeradioOFF.
If you insert adisc with the ignition ON and ther radio off, the display will show CD and the time of day will be displayed.
Ifthepowerison, the unit will switch from radiotoCD mode and begin to play when you insert the disc. The display will show the track number and index time in minutes and seconds. Play will begin at the start of track 1.
Seek
PressthetopoftheSEEKbuttonforthenextselectionon theCD.Pressthebottomofthebuttontoreturntothe
beginningofthecurrentselection,orreturntothe beginningofthepreviousselectioniftheCDiswithinthe firstsecondofthecurrentselection.
Scan
PresstheSCANbuttontoplay10secondsofeach selection.PresstheSCANbuttonasecondtimetocancel thisfeature.
EJT CD
PresstheEJTCDbuttonandthediscwillunloadand movetotheentranceforeasyremoval.Theunitwill switchtotheradiomode.
If you donotremovethedisc within 15 seconds, it will be reloaded. The unit will continue in radiomode.
Thedisccanbeejectedwiththeradioandignitionoff.
FF/TUNE/RW
PressFF(FastForward)andtheCDplayerwillbeginto fastforwarduntilFFisreleased.TheRW(Reverse) buttonworksinasimilarmanner.
Random Play — RND/Program Button 4
PresstheRND(button4)buttonwhiletheCDisplaying toactivateRandomPlay.Thisfeatureplaystheselections onthecompactdiscinrandomordertoprovidean interestingchangeofpace.
PressthetopoftheSEEKbuttontomovetothenext randomlyselectedtrack.
PresstheRND(button4)buttonasecondtimetostop RandomPlay.
MODE
PresstheMODEbuttontoselectbetweentheCDplayer, remoteCD/DVDchanger(ifequipped),orsatelliteradio (ifequipped).
ToselectSatelliteRadio(ifequipped),presstheMODE buttonuntilthewordSIRIUS™ appears. The following willbedisplayedinthisorder: Afterthreeseconds, the currentchannelnameandnumberwillbedisplayedfor fiveseconds. The currentprogramtypeandchannel numberwillthenbedisplayedforfiveseconds. The currentchannelnameandnumberwillthenbedisplayed untilanactionoccurs.ACDortapemayremaininthe playerwhileintheSatelliteRadiomode.
Time
Press the TIME button to changeth displayed from elapsed CD playing timetotime of day.
CD/DVDChangerOperation—IfEquipped
MODE
PresstheMODEbuttontoselectbetweentheCDplayer, andtheCD/DVDchanger(ifequipped).
174 UNDERSTANDING YOUR INSTRUMENT PANEL
Disc Up/Program Button 1
PresstheDISC(button1)buttontoplaythenextavailabledisc.
Random Play — RND/Program Button 4
PresstheRND(button4)buttonwhiletheCDisplaying toactivateRandomPlay.Thisfeatureplaystheselections onthecurrentlyplayingcompactdiscinrandomorderto provideaninterestingchangeofpace.
PressthetopoftheSEEKbuttontomovetothenext randomlyselectedtrack.
PresstheRND(button4)buttonasecondtimetostop RandomPlay.
FF/RW — TUNE
PressandholdtheFFbuttonforfastforward.Pressand holdtheRWbuttonforfastreverse.Theaudiooutputcan beheardwhenfastforwardandfastreverseareactivated.
Disc Down/Program Button 5
PresstheDISC(button5)buttontoplaytheprevious disc.
Seek
PressthetopoftheSEEKbuttonforthenextselectionon theCD.Pressthebottomofthebuttontoreturntothe beginningofthecurrentselection,orreturntothe beginningofthepreviousselectioniftheCDiswithinthe firstsecondofthecurrentselection.
Time
PresstheTIMEbuttontoswitchbetweentimeofdayand CDtracktime.
Scan
PresstheSCANbuttontoplay10secondsofeachtrack. PresstheSCANbuttonasecondtimetocancelthe feature.
6DISCCD/DVDCHANGER(RDV)—IFEQUIPPED
TheRearSeatAudio/VideoSystemallowspassengersto listentoaCDorDVDfromthe6discCD/DVDchanger throughwirelessheadphones,whilethefrontseatpassengerslistentoeitherAM/FM,CassetteorCDsfromthe radiospeakers.AremotecontrolisprovidedforfunctionssuchaschangingtracksorDVDfunctions,aswell asselectingdiscsloadedinthe6discCD/DVDchanger whilelisteningtotheRearAudio/VideoSystem.
TheRearSeatAudio/VideoSystemmaybeavailableina baseandpremiumversion.Thepremiumversionincludesasixdiscchanger,remotecontrolandtwosetsof wirelessheadphones.Thebaseversionincludesasingle discchangerandremotecontrol.
TheCD/DVDChangerwillplayCD-R,CD-RW,CD-AudioandDVDVideodiscformats.
NOTE: TheignitionswitchmustbeintheONorACC positionbeforetheCD/DVDchangerwilloperate.
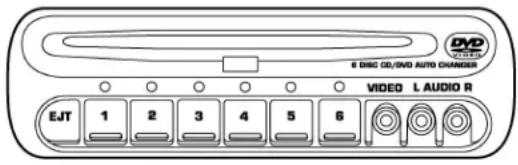
811caacd
OperatingInstructions—CD/DVDChanger
Loading The CD/DVD Changer

The premium version has a multi-discchanger, and will accept this six discs. The base version is a single-discchanger, and will only accept one disc.
Toinsertdisc(s)intothechanger, follow the instructions shown:
- On vehicle equipped with the premium version, select and press any numbered button without an illuminated light above it.
- Gently insert the disc with the label facing up while the light below the loadings slot is illuminated. On vehicle equipped with the premium version the light above the chosen button will also be flashing, indicating which numbered position the disc will be loaded into. The disc will automatically be pulled into the CD/DVD changer.
-
Upon insertion, the disc will begin to play, and the light below the loadings slot will turn off. On vehicles equipped with the premium version the light above the chosen button will remain illuminated.
-
Repeat the process for loading any additional CD/DVDs into the premium version multi-discchanger. The CD/DVDchanger will stop while additional CD/DVDs are loaded.
IftheradiovolumecontrolisON,theunitwillswitch fromradiotoCD/DVDmode.IftheDVDsupportsthe autoplayfeature,playwillbeginautomaticallyinapproximately10seconds,aftertheDVDdiscmenuis displayed.IftheDVDdoesnotplayautomatically,press theENTERbuttonontheremotecontroloronthesideof thevideoscreentoselectplayfromthemenuoptions. Theradiodisplaywillshowthechapternumberand indextimeinhoursandminutesoftheDVD,orthetrack number,minutesandsecondoftheCD.
NOTE:
- YoumayejectadiscwiththeradioOFF.
- If you insert adisc with the ignition ON and the radio OFF, the DVD will automatically be pulled into the DVD changer and the display will show the time of day.
- Itisrecommendedtolabelhomemadeburneddiscs withapermanentmarkerinsteadofadhesivelabels. Thesetypesoflabelsmaybecomelooseandcausethe disctobestuckintheDVDplayer.Thismaycause permanentdamagetotheDVDmechanism.
EJECT(EJT)Button
Ifthereisadiscinthechanger, press the EJT button and the discwilleject. If you donotremovethedisc within 10 seconds, it will be loaded and the display will show PAUSE. Theradiomodewill continueto operate.
Toejectadditionaldiscsfromthepremiumversion multi-discchanger,firstselectthenumberedbutton wherethedislocatedandthenpresstheEJTbutton.
ThedisccanbeejectedwiththeradioOFF.
178 UNDERSTANDING YOUR INSTRUMENT PANEL
Operating Instructions — Remote Control
NOTE: AimtheremotecontrolattheDVDchanger locatedonthecenteroftheinstrumentpanelandpress thedesiredbutton.Directsunlightorobjectsblockingthe lineofsightmayaffectthefunctionoftheremotecontrol.
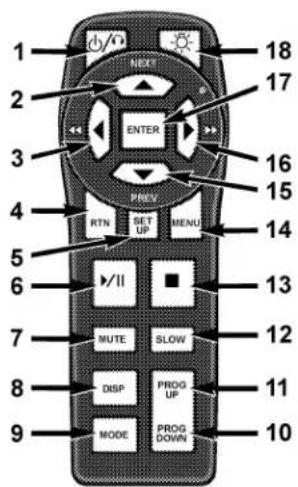
812cd578
- Headphone Transmitter
2.MenuUp/NextTrack/Chapter
3.MenuLeft/FastRewind
- Return
5.Setup
6.Pause/Play
7.Mute
8.Display
9.Mode
10.ProgramDown-PreviousDisc
11.ProgramUp-NextDisc
12.Slow
13.Stop
14.Menu
15.MenuDown/PreviousTrack/Chapter
16.MenuRight/FastForward
17.Enter
18.Light
Headphone Transmitter Button (1)
AfteradiscisinsertedintotheDVDchanger,boththe headphonetransmitterbutton(1)ontheremotecontrol andthepowerbuttonontheheadphonesmustbeturned ONbeforesoundcanbeheardfromtheheadphones.On someradiostheheadphonesymbolwillflashforap- proximately5secondsintheradiodisplay,indicatingthe headphonesareinuse.
ARROW Buttons (2, 3, 15, 16)
ThesebuttonsonlyfunctioninDVDvideomode. Use the arrowbuttonstotogglethroughtheDVDdiscmenu screenings.
RTN Button (4)
ThisbuttononlyfunctionsinDVDvideomode.Pressthis buttonotreturntothepreviousmenuwhenintheDVD discmenumode.
180UNDERSTANDINGYOURINSTRUMENTPANEL
SETUP Button (5)
ThisbuttononlyfunctionsinDVDvideomode.Pressthe buttonafterpressingtheSTOPbuttontoaccesstheDVD changersetupmenu.Usetherightandleftarrowsto movebetweenabsforlanguage,rating,mark,audioand aspect.Usetheupanddownarrowstomovebetween optionswithineachtab.
Tochangeanitemhighlightedinblue,pressENTER.This shouldcausethehighlighttoturnyellow.Again,using theupanddownnarrowswillcausethearwtomoveup ordown.Oncethearrowisonthedesiredselection,press ENTER.Whenfinished,presssetuporplaytoreturnto playingtheDVDorMenutoreturntotheDVDdisc menu.
PAUSE/PLAY Button (6)
ThisbuttononlyfunctionsinDVDvideomode.Pressthis buttononcetopausethevideo,pressasecondtimeto playthevideo.
MUTE Button (7)
Nofunction.
DISP Button (8)
ThisbuttononlyfunctionsinDVDvideomode.Whena DVDvideoisplaying,pressthisbuttontodisplaythe playmenuoptions.
MODE Button (9)
NoFunction
PROG UP/DOWN Buttons (10, 11)
PROGUPselectsthenextdiscloadedinthechanger. PROGDOWNselectsthepreviousdisloadedinthechanger.
SLOW Button (12)
ThisbuttononlyfunctionsinDVDvideomode.Pressthis buttontoadvancethevideo.IftheDVDispaused, pressingthisbuttonwilladvancethevideoframeby frame.
STOP Button (13)
ThisbuttononlyfunctionsinDVDvideomode.Pressthis buttonostoptheDVD.
MENU Button (14)
ThisbuttononlyfunctionsinDVDvideomode.Pressthis buttontoselecttheDVDdiscmenu.
NEXT/PREV Buttons (2, 15)
PresstheuparrowortheNEXTbuttonforthenext chapterortrackonthedisc.Pressthedownarrowor PREVbuttontoreturntothebeginningofthecurrent chapterortrack.PressthedownarroworPREVbutton twicewithintwosecondstoreturntotheprevious chapterortrack.EachpressoftheNEXT/PREVbutton upordownwilltogglethroughthechaptersortracks.
FF/RW Buttons (3, 16)
PressandholdFF(FastForward)onceandtheCD/DVD changerwillbegintofastforwarduntiltheFFbuttonis released.TheRW(Reverse)buttonworksinasimilar manner.
ENTER Button (17)
ThisbuttononlyfunctionsinDVDvideomode. Use the ENTERbuttontoenterselectionsfromthemenuscreens. Use the arrowbuttonstotogglethrough themenuscreen options.
Light Button (18)
Pressing this button illuminates the button on theremote control.
Remote Control Battery Service
- Toreplacethebatteriesfortheremotecontrolslidethe coverrearward.
Thereplacementbatteriesfortheremotecontrolaretwo AAAbatteries.
182UNDERSTANDINGYOURINSTRUMENTPANEL
OperatingInstructions—VideoScreen
Pushuponthereleasebuttontolowerthevideoscreen.
natural_image
Interior view of a car showing the rearview and side panels with a black arrow pointing to a component (no text or symbols visible)1. Screen Width Button
Changesthewidthofthescreenpicture.

2. Enter Button
Thisbuttonwillentertheselectionfromthe on-screenmenu.
3. Brightness Button
Changesthebrightnessofthescreenpicture.

OperatingInstructions—Headphones
1.PowerButton
2.VolumeControl
3.PowerIndicator
184UNDERSTANDINGYOURINSTRUMENTPANEL
Power Button
Pressing the power button will turn the headphones ON/OFF. An indicator light will illuminate on the head phone ear pieceto indicate the headphones are ON.
NOTE:
- Theheadphoneswillturnoffautomaticallyinapproximately3minutesiftheylosethesignalformthe systemorwhentheradioorrearaudio/videosystemisturnedoff.
Volume Control
Rotatethevolumecomtroltoadjustthevolumetothe desiredlisteninglevel.
Headphone Battery Service
- Pressthebuttonatthebottomofeachheadphone earpieceandliftthecoverupward.
natural_image
Cross-sectional diagram of a mechanical component with internal structure and an arrow indicating direction (no text or symbols)812cd563
- Replacethebatteryineachearpieceandreinstallthe cover.TheheadphonesrequiretwoAAAbatteries.
General Information
This device complies with part 15 of the FCC rules and RSS210 of Industry Canada. Operation is subject to the following two conditions: (1) This device may not cause harmful interference and (2) This device must accept any interference received, including interference that may cause undesired operation.
If you dono the earsound coming from the headphones, check for the following conditions:
- Rear Seat Audio/Video System and headphones are on. Pressthe headphonetransmitter button (1) on the remote control and the power button on the headphones. An indicator light willilluminate on the headphone ear pieceto indicate the headphones are ON.
- Weakbatteriesintheheadphones.
- Directsunlightorobjectsblockingthelineofsight betweentheheadphonetransmitteronthevideoscreen andtheheadphones.
OperatingInstructions—MP3Player, Portable Walkman
AnMP3playercanbeconnectedtotheaudiosystem. ConnectthecablestotheRCAjackslocatedonthefront oftheCD/DVDchanger.
NOTE: Followthemanufacturesinstructionsforthe correctcolorswhenconnectingtheRCAcables.
OperatingInstructions—Video Games/Camcorders
Avideogameunitorcamcordercanbeconnectedtothe rearaudio/videosystem.ConnectthecablestotheRCA jackslocatedonthefrontoftheCD/DVDchanger.
NOTE: TooperateavideogameunitaDCtoAC adaptermayberequired,plugtheadapterintoany poweroutlet.
Follow the manufactures instructions for the correct colors when connecting the RCA cables.
NOTE: MP3player's, videogamesystems, camcorders connected to the RCA jacks and CD's or DVD's inserted into the CD/DVD changercan be heard through the headphones.
SATELLITERADIO—IFEQUIPPED
Satelliteradiouesdirectsatellitetoreceiverbroadcastingtechnologytoprovidecleardigitalsound,coastto coast.ThesubscriptionserviceproviderisSirius™SatelliteRadio.Thisserviceoffersupto100channelsofmusic, sports,news,entertainment,andprogrammingforchildren,directlyfromitssatellitesandbroadcastingstudios.
SystemActivation
ToactivateyourSiriusSatelliteRadioservice, call the toll-freenumber888-539-7474, or visit the Sirius website at www.sirius.com. Please havethe following information available when activating your system:
-
The Electronic Serial Number / Sirius Identification Number (ESN/SID).
-
Creditcardinformation.
- Your Vehicle Identification Number.
ElectronicSerialNumber/SiriusIdentification Number(ENS/SID)
TheElectronicSerialNumber/SiriusIdentificationNumberisneededtoactivateyourSiriusSatelliteRadio system. To access the ESN/SID, refer to the following steps:
ESN/SID Access With RBB, RAH and RBK Radios
WiththeignitionswitchintheACCESSORYpositionandtheradioOFF,presstheTapeEjectorCDEject(depend-ingontheradiotype)andTimebuttonssimultaneously for 3 seconds. The first four digits of the twelve-digit ESN/SIDnumberwillbedisplayed.PresstheSEEKUP buttonodisplaythenextfourdigits.Continuetopress theSEEKUPbuttonuntilalltwelveESN/SIDdigitshave beendisplayed.TheSEEKDOWNwillpagedownuntil thefirstfourdigitsaredisplayed.Theradiowillexitthe
ESN/SIDmodewhenanyotherbuttonispushed, the ignitionisturnedOFF, or 5 minutes has passed since any button was pushed.
ESN/SID Access With RBP, RBU, RAZ, and RBQ Radios
WiththeignitionswitchintheACCESSORYpositionandtheradioOFF,presstheCDEjectandTIMEbuttonssimultaneouslyfor3seconds.AlltwelveESN/SIDnumberswillbedisplayed.TheradiowillexittheESN/SIDmodewhenanyotherbuttonispushed,theignitionis turnedOFF,or5minuteshaspassedsinceanybutton waspushed.
SelectingSatelliteModeinRBB,RAHandRBK Radios
Press the MODE button repeatedly until "S A" appears in the display.ACDortapemayremainintheradiowhile intheSatelliteradiomode.
SelectingSatelliteModeinRBP,RBU,RAZ,and RBQRadios
PresstheMODEbuttonrepeatedlyuntiltheword "SIRIUS"appearsinthedisplay.Theseradioswillalso displaythefollowing:
- After3seconds, the current channel name and channel number will be displayed for 5 seconds.
- Thecurrentprogramtypeandchannelnumberwill thenbedisplayedfor5seconds.
- The current channel number will then be displayed until an action occurs.
ACDortapemayremainintheradiowhileinthe Satelliteradiomode.
SelectingaChannel
PressandreleasetheSEEKorTUNEbuttonstosearchfor thenextchannel.Pressthetopofthebuttontosearchup andthebottomofthebuttontosearchdown.Holdingthe TUNEbuttoncausestheradiotobypasschannelsuntil thebuttonisreleased.
PressandreleasetheSCANbutton(ifequipped)to automaticallychangechannelsevery7seconds.The radiowillpauseoneachchannelfor7secondsbefore movingontothenextchannel.Theword"SCAN"will appearinthedisplaybetweeneachchannelchange.Press theSCANbuttonasecondtimetostopthesearch.
NOTE: Channelsthatmaycontainobjectionablecontent canbeblocked.ContactSiriusCustomerCareat888-539-7474todiscussoptionsforchannelblockingorunblocking.PleasehaveyourESN/SIDinformationavailable.
StoringandSelectingPre-SetChannels
Inadditiontothe10AMand10FMpre-setstations, you may also commit 10 satellitestation stop push button memory. Thesesatellite channel pre-set stations will not erase any AMorFM pre-set memory stations. Follow the memory pre-set procedure that apply to your radio.
UsingthePTY(ProgramType)Button(if equipped)
FollowthePTYbuttoninstructionsthat applytoyour radio.
PTYButton"SCAN"
Whenthesiredprogramtypeisobtained, pressthe "SCAN"buttonwithinfivesecends.Theradiowillplay7 secondsoftheselectedchannelbeforemovingtothenext channeloftheselectedprogramtype.Pressthe"SCAN" buttonasecondtimetostopthesearch.
NOTE: Pressing the "SEEK" or "SCAN" button while performing amusictypescanwillchangethechannelby oneandstopthesearch.Pressingapre-setmemory buttonduringamusictypescan,willcallupthememory channelandstopthesearch.
PTYButton"SEEK"
Whenthesiredprogramisobtained, press the "SEEK" button within five seconds. The channel will change to then each channel that match the program types selected.
SatelliteAntenna
Toensureoptimumreception, donotplaceitemsonthe roofaroundtherooftopantennalocation. Metalobjects placedwithinthelineofsightoftheantennawillcause decreasedperformance. Largerluggageitemsshouldbe placedasfarforwardaspossible. Donotplaceitems directlyonorarovetheantenna.
ReceptionQuality
Satellitereceptionmaybeinterruptedduetooneofthe followingreasons.
- The vehicle is parked in an underground parking structure or under a physical obstacle.
- Densetreecoveragemayinterruptreceptioninthe formofshortaudiomutes.
- Drivingunderwidebridgesoralongtallbuildingscan causeintermittentreception.
- Placingobjectsoverortooclosetotheantennacan causesignalblockage.
190 UNDERSTANDING YOUR INSTRUMENT PANEL
REMOTESOUNDSYSTEMCONTROLS
Theremotesoundsystemcontrolsarelocatedontherear surfaceofthesteeringwheelatthe3and9o'clock positions.
Therighthandrockerswitchhasapushbuttoninthe centerandcontrolsthevolumeandmodeofthesound system.Pressingthetopoftherockerswitchwillincrease thevolumeandpressingthebottomoftherockerswitch willdecreasethevolume.Pressingthecenterbutton changestheoperationoftheradiofromAMtoFMto TapeorCDmodedependingonwhichradioisinthe vehicle.
Thelefthandrockerswitchhasapushbuttoninthe center. Thefunctionofthelefthandswitchisdifferent dependingonwhichmodeyouarein.
The following describes the lefth and rockers switch operation in each mode:
RadioOperation
PressingthetopoftheswitchwillSEEKupforthenext listenablestationandpressingthebottomoftheswitch willSEEKdownforthenextlistenablestation.
Thebuttonlocatedinthecenterofthelefthandswitch willtunetothenextpre-setstationthatyouhave programmedintheradiopre-setpush-button.
TapePlayer
Pressingthetopoftheswitchoncewillgotothenext selectiononthecassette.Pressingthebottomofthe switchoncewillgotothebeginningofthecurrent selectionortothebeginningofthepreviousselectionifit iswithinthefirst5secondsofthecurrentselection.
If you press the switch up on downtwice it play the second selection, threetimes, it will play the third, etc.
Thebuttoninthecenterofthelefthandswitchhasno functioninthismode.
CDPlayer
Pressingthetopoftheswitchoncewillgotothenext trackontheCD.Pressingthebottomoftheswitchonce willgotothebeginningofthecurrenttrackortothe beginningofthepreviousstrackifitiswithinonesecond afterthecurrenttrackbeginstoplay.
If you press these witchupordowntwiceit play the second track, threetimes, it will play the third, etc.
Thebuttoninthecenterofthelefthandswitchhasno functioninthismode.
RADIOGENERALINFORMATION
RadioBroadcastSignals
Yournewradiowillprovideexcellentreceptionunder mostoperatingconditions.Likeanysystem,however,car radioshaveperformancelimitations,duetomobileoperationandnaturalphenomena,whichmightleadyouto believeyoursoundsystemismalfunctioning.Tohelp youunderstandandsaveyouconcernaboutthese"apparent"malfunctions,youmustunderstandapointortwoaboutthetransmissionandreceptionofradiosignals.
TwoTypesofSignals
Therearetwobasictypesofradiosignals...AMor AmplitudeModulation,inwhichthetransmittedsound causestheamplitude,orheight,oftheradiowavesto vary...andFMorFrequencyModulation,inwhichthe frequencyofthewaveisvariedtocarrythesound.
ElectricalDisturbances
Radiowavesmaypickupelectricaldisturbancesduring transmission. They mainly affect the wave amplitude, and thus remain apart of the AM reception. They interfere very little with the frequency variation that carry the FM signal.
AMReception
AMsoundisbasedonwaveamplitude, so AMreception can be disrupted by such things as lightning, powerlines and neonsigns.
FMReception
BecauseFMtransmissionisbasedonfrequencyvariations,interferencethatconsistsofamplitudevariations canbefilteredout,leavingthereceptionrelativelyclear, whichisthemajorfeatureofFMradio.
NOTE: Onvehiclessoequippedtheradio,steering wheelradiocontrolsand6discCD/DVDchangerif equipped,willremainactiveforupto45secondsafter theignitionswitchhasbeenturnedoff.Openinga vehiclefrontdoorwillcancelthisfeature.
CASSETTETAPEANDPLAYERMAINTENANCE
Tokeep the casset tetapes and playering good condition, takethe following precautions:
- DonotusecassettetapeslongerthanC-90; otherwise, soundqualityandtapedurabilitywillbegreatlydiminished.
- Keep the casset tetapein its casetoprotect from slackness and dust when it is not in use.
- Keep the cassette tape away from direct sunlight, heat and magnetic field such as a faster radios speakers.
- Before inserting atape, makes sure that the label is adhering flatly to the cassette.
- Aloosetapeshouldbecorrectedbeforeuse. Torewind aloosetape, inserttheeraserendofapencilintothetape drivegearandtwistthepencilintherequireddirections.
Maintainyourcassettetapeplayer.Theheadandcapstan shaftinthecassetteplayercanpickupdirtortape depositseachtimeacassetteisplayed.Theresultof depositsonthecapstanshaftmaycausethetapetowrap aroundandbecomelodgedinthetapetransport.The otheradverseconditionislowor“muddy”soundfrom oneorbothchannels,asifthetrebletonecontrolwere turnedallthewaydown.Topreventthis,youshould periodicallycleantheheadwithacommerciallyavailable WETcleaningcassette.
Aspreventivemaintenance, cleantheheadabout every 30hoursofuse. If you wait until the head becomes very dirty (noticeably poorsound), it may not be possible to remove all deposits with a simple WET cleaning cassette.
CD/DVDDISCMAINTENANCE
Tokeep the CD/DVD discussing good condition, take the following precautions:
- Handlethediscbyitsedge; avoidtouchingthe surface.
- If the discisstained, clean the surface with asoft cloth, wiping from centerto edge.
- Donotapplypaper, paperCDlabels, ortapetothe disc; avoidscratchingthedisc.
- Donotusesolventssuchasbenzine, thinner, cleaners, orantistaticsprays.
- Storethediscinitscaseafterplaying.
- Donotexposethedisctodirectsunlight.
- Donotstorethediscwheretemperaturesmaybecome toohigh.
194UNDERSTANDINGYOURINSTRUMENTPANEL
RADIOOPERATIONANDCELLULARPHONES
Undercertainconditions, thecellularphonebeingOnin yourvehiclecancauseerraticornoisyperformancefrom yourradio. Thisconditionmaybelessenedoreliminated byrelocatingthecellularphoneantenna. Thiscondition is notharmfultotheradio. If yourradioperformance does not satisfactorily "clear" bytherepositioning of the antenna, it is recommended that the radio volume be turned down or off during cellular phone operation.
NAVIGATIONSYSTEM—IFEQUIPPED
Thenavigationsystemprovidesmaps,turnidentification,selectionmenusandinstructionsforselectinga varietyofdestinationsandroutes.Thebuttonstoperate thesystemarelocatedontheinstrumentpanelnexttothe analogclock.
Refer to your Navigation User's Manual for detailed operating instructions.
ThenavigationDVDunitislocatedintheunderfloor storagecompartmentintherearcargoarea.Asingledisc containingmapinformationfortheentireUnitedStates andpartsofCanadaisstoredintheDVDunit.Updated DVD'sareavailablefromyourauthorizeddealer.
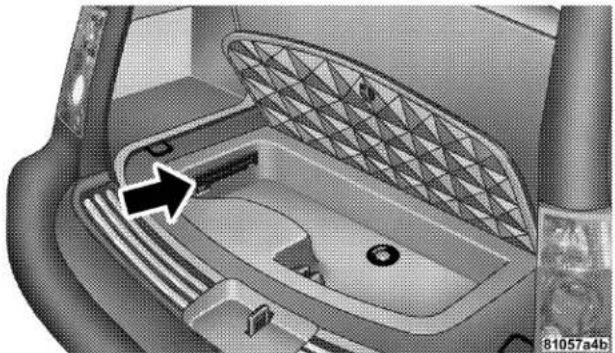
natural_image
Interior view of a car showing the dashboard and side panel with a black arrow pointing to a component (no text or symbols visible)ToreplacethenavigationmapDVDliftthestoragebin coverandlinerintherearcargoarea,presstheeject buttonandthediscwilleject.Gentlyinsertthenewdisc intotheDVDunitwiththelabelfacingup.Thediscwill automaticallybepulledintotheDVDunit.
CLIMATECONTROLS
The Air Conditioning and Heating System is designed to make you comfortable in all types of weather.
Dual-ZoneAutomaticTemperatureControl
The Dual Zone Automatic Temperature Control (ATC) System automatically maintain the interior comfort level desired by the driver and front seat passenger. This is accomplished by using two infrared sensors located in the center of the instrument panel. The two infrared sensors independently measure the surface temperature of the driver and front seat passenger. Based on the sensor input, the system automatically adjust the air
temperature, the airflow volume, the airflow distribution, and amount of inside air recirculation to maintain front seat occupant comfort, even under changing out-sideweather conditions.
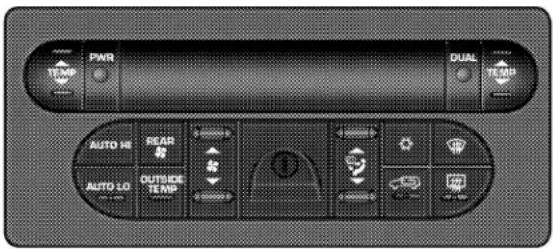
80e550c0
Tooperatethesystem, presseitherthe"AUTOHI" or "AUTOLO" buttons. Thesystemnowautomatically
regulate the heating and air conditionings system including blowerspeed, outlet air temperature, and airflow distribution through the various outlets within the instrument panel. Using the "TEMP" buttons, adjust the temperature you would like the system to maintain. When the system is set to your comfort level, it is not necessary to change the settings. You will experience the greatest efficiency by allowing the system function automatically. The system will operate fully automatically in either "AUTO HI" or "AUTO LO". The "AUTO LO" setting will limit them maximum fanspeed and should be used when more quiet operation is desired. Use the "AUTOHI" setting when the quickest cool-down or warm-up performance is desired.
NOTE:
- Itisnotnecessarytomovethetemperaturesettingsfor coldorhotvehicles. Thesystemautomatically adjusts the temperature, mode and fanspeed to provide comfortas quickly as possible.
- ThetemperaturecanbedisplayedinU.S.orMetricby selectingtheUS/Mcustomerprogrammable feature. Refertothe"ElectronicVehicleInformationCenter-CustomerProgrammableFeatures"inSection3ofthis manual.
Toprovideyouwithmaximumcomfortintheautomatic mode, during cold start-ups the blower fan will remain offand"DELAY"willappearinthedisplayuntilthe enginewarmsup.Anestimateofthetimeremaining until the "DELAY" is complete will appear periodically inthedisplay.However,thefanwillengageimmediately ifthedefrostmodeisselectedorbypushingtheblower switchandmanuallyadjustingthefanspeed.
Thisfeaturemaybedisabledusingthefollowingprocedure:
- PressandholdtheHeatedRearWindowandAutoLO buttonsfor5seconds.
- The "DELAY" symbolwillflashtoindicatethatthe featureasbeendisabled.
Thisfeaturemaybeenabledusingthefollowingprocedure:
- PressandholdtheHeatedRearWindowandAutoHI buttonsfor5seconds.
- The "DELAY" symbolwillflashtoindicate that the featureasbeenenabled.
Power Button
ThisbuttonturnstheentiresystemON/OFF.Whenthe systemisturnedonitwillreturntotheprevioussettings.
Dual/Single Zone Operation
When"DUAL"isdisplayedintheATCcontrolunit,the driverandpassengerairoutlettemperaturescanbe individuallyadjustedfromthetwoindependent"TEMP" buttons.Whenafrontseatpassengerisnotpresent, pressingthe"DUAL"buttonwilldisablethepassenger's infraredsensorandcontroltheentiresystembasedonly onthedriver'stemperaturesetting.Theoutsidetemperaturewillreplacethepassenger'stemperaturesettingin thedisplay.Pressingthe"DUAL"buttonasecondtimeor adjustingthepassenger's"TEMP"buttonwillreactivate thepassenger'sinfraredsensorandreturnthesystemto dualindependenttemperatureoperation.
Manual Operation
Thisystemoffersafullcomplementofmanualoverride features. The indicatorlightinboththe"AUTOHI"or "AUTOLO"buttonswillturnoffwhenthesystemis beingusedinthemanualmode. The fanspeed, airflow distribution, and outsideair/recirculatedaircanbe manuallyadjusted.
NOTE: Each of these features can be operate independently from each other. If anyone feature is controlled manually, there are two features will continue to operate automatically.
198UNDERSTANDINGYOURINSTRUMENTPANEL
Thefrontblowercontrolcanbesettoanyfixed blowerspeedbypassingtherockerswitchupor down. This allows the frontoccupant to control the volume of aircirculated in the vehicle and cancel the auto mode. The fan will now operate at a fixed speed until additional speeds are selected or untile either the "AUTO HI" or "AUTO LO" buttons are pressed. The system will continue automatically adjust air temperature and airflow distribution.
Theoperatorcanalsoselectthedirectionoftheairby pressingthemodecontrolrockerswitchlocatedtothe leftoftheA/Cbuttonandselectingoneofthefollowing positions.
PanelMode
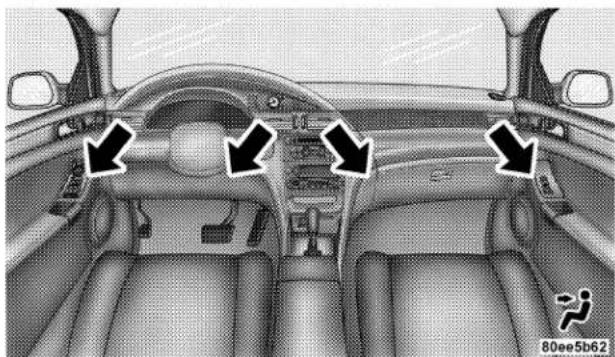
natural_image
Interior view of a car dashboard with directional arrows and a small vehicle icon (no text or symbols)Aircomesfromtheoutletsintheinstrumentpanel.Each oftheseoutletscanbeindividuallyadjustedtodirectthe flowofair.Movingtheknobup,down,left,orrightwill directtheairaccordingly.Thethumbwheelnexttoeach outletcanberotatedtoreduceorshutofftheairflow fromtheseoutlets.
Bi-LevelMode
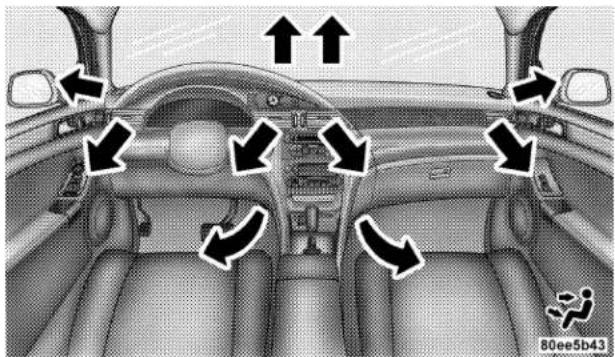
natural_image
Interior view of a car dashboard with directional arrows indicating airflow or movement (no text or symbols)Aircomesfromboththeinstrumentpaneloutletsand flooroutlets.Aslightamountofairisalsodirected throughedefrostandsidewindowdemisteroutlets.
NOTE: Inmanytemperaturepositions,thebi-level modeisdesignedtoprovidecoolerairoutofthepanel outletsandwarmerairfromtheflooroutlets.
FloorMode
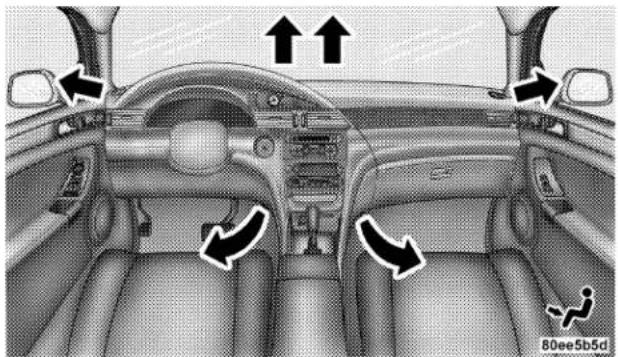
natural_image
Interior view of a car dashboard with directional arrows indicating traffic flow (no text or symbols)Aircomesfromtheflooroutlets.Aslightamountofairis directedthroughthedefrostandsidewindowdemister outlets.
200UNDERSTANDINGYOURINSTRUMENTPANEL
MixMode
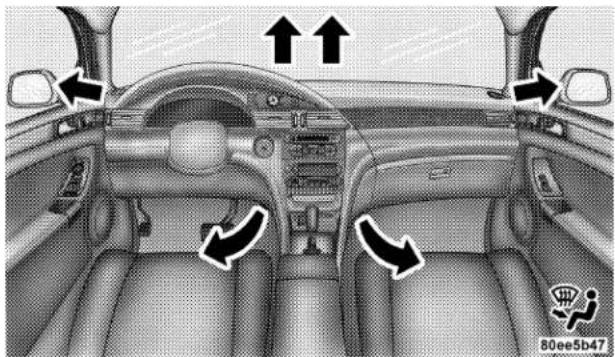
natural_image
Interior view of a car dashboard with directional arrows indicating airflow or traffic flow (no text or symbols)Aircomesfromthefloor,defrostandsidewindow demistoutlets.Thismodeisnotusedwhenoperatingin either "AUTO HI" or "AUTO LO". This mode should be usedwhenairflowtothefloorandwindshielddisdesired.
DefrostMode
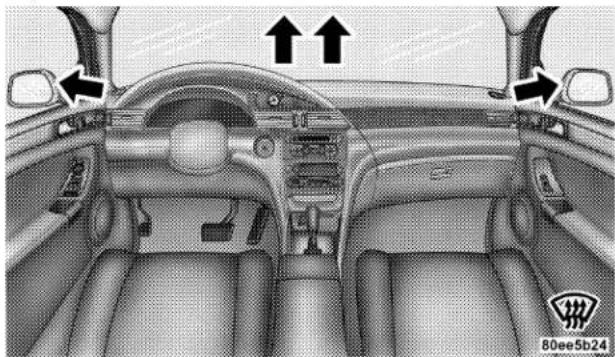
natural_image
Interior view of a car dashboard and steering wheel (no text or symbols visible)Aircomesfromthewindshieldandsidewindowdemist outlets. Usethissettingwhennecessarytodefrostyour windshieldandsidewindows. Ifafogormistonthe windshieldorsideglassstartstoimpairvisibility, press thefrontblowerbuttonandincreasethefanspeedto maximum.
NOTE: While operating in "AUTO HI" or "AUTO LO", thesystemwillnotautomaticallysensethepresencefog, mist,oriceonthewindshield. Thedefrostbuttonmustbe pressedtoclearthewindshieldandsideglass.

Depressthe“A/C”buttontoturnonandoffthe airconditioningduringmanualoperationonly. Cooldehumidifiedaircomesthroughtheoutlets selectedbytheModeControl.Toturnofftheairconditioning,presstheA/Cbuttonasecondtime.TheA/C symbolinthedisplaywillturnoff.
NOTE: Ifafogormistappearsonthewindshieldor sideglass, press the "A/C" button to engage the compressor or press the defrost button. Ifafogormiston the windshieldorsideglass start to impair visibility, press the front blower button and increase the fanspeed to maximum.
Recirculation Control

Whentheoutsideaircontainssmoke, odors, highhumidity, orifrapidcoolingisdesired youmaywishtorecirculateinteriorairby pressingtherecirculationbutton. Therecirculationmodeshouldonlybeusedtemporarily.Therecirculatesymbolwillilluminateinthedisplaywhenthis buttonisselected.Pushthebuttonasecondtimetoallow outsideairintothevehicle.
NOTE: Incoldweather, useoftherecirculationmode mayleadtoexcessivewindowfogging. There circulation modeisnotallowedintheMixandDefrostmodesto improvewindowclearingoperation. Recirculationwill bedisabledautomaticallyifthesemodesareselected.
A/C Recirculation Programming
There circulation control is programmed to cancel the recirculation modewhentheignition keyisturned OFF and will reset to the outside airmodewhentheignition
keyisturned"ON".The frequent use of outside air will help keep pedestrians from building up within the air conditioner-heater housing. It is recommended that the recirculation mode be used as little as possible, especially in humid climates.
Forhotanddryclimates,orpeoplewhoareallergicto pollenandfindfrequentuseoftherecirculationmode necessary,therecirculationmodecanbeprogrammedto notautomaticallyresettotheoutsidemodebyusingthe followingprocedures:
- TurntheignitionswitchtotheOFFposition.
- Pressandholdtherecirculationbutton.
- While holding there circulation button, turn the ignitions switch to the "RUN" position.
- Continueholdingtherecirculationbuttonfor4seconds,thenrelease.
There circulation control is now programmed so that the recirculation modewill not reset to the outside airmode when the engine is restarted. There circulation programming can be changed back by repeating this procedure.
Rear Fan Operation
Tooperatetherearfan, pressthe"REAR"button. The first timethisbutton ispressed the "REARAUTO" display willilluminate indicating that therearfanspeed is automatically controlled. Tomanually control therear fanspeed, pressthe"REAR"button again randomly "REAR" willilluminate in the display. This allows therear seat occupant to control therear fanspeed using the switch located in the center console between these second row seats. Bypassing the "REAR" button third time, therear fan will shutoff.
WhentheATCdisplayreads"REARAUTO"orwhenthe rearfanisoff,theswitchlocatedinthecenterconsole betweenthesecondrowseatsisnotfunctional.Whenthe ATCdisplayreads"REAR",onlytherearseatoccupants cancontroltherearfanspeedfromtherearswitch.When inthe"REAR"mode,therearoccupantscansettherear switch to any fan speed including "OFF", or "AUTO". Whileinthe"AUTO"position,therearfanspeedwillbe automaticallycontrolled.
Summer Operation
The enginecoolingsysteminairconditioned vehicles must be protected with a high-quality antifreeze coolant to provide proper corrosion protection and top protect against engine overheating. A 50% solution of ethylene glycolantifreeze coolant in water is recommended. Refer to section 7, Maintenance Procedures, of this manual for proper coolant selection.
Winter Operation
To insure the best possible heater and defroster performance, makes sure the engine cooling system is functioning properly and the proper amount, type, and concentration of coolant is used. Refertosection 7, Maintenance Procedures, of this manual for proper coolant selection. Use of the air recirculation mode during winter months is not recommended because it may cause window fogging.
Vacation Storage
Anytimeyoustoreyourvehicle,orkeepitoutofservice (i.e.vacation)fortwoweeksormore,runtheairconditioningsystematidleforaboutfiveminutesinthefresh airandhighblowersetting.Thiswillinsureadequate systemlubricationtominimizethepossibilityofcompressordamagewhenthesystemisstartedagain.
204UNDERSTANDING YOURINSTRUMENT PANEL
Window Fogging
Vehiclewindowstendtofogontheinsideinmildrainy orhumidweather.Toclearthewindows,usetheA/C buttontoreducethehumidityinsidethevehicle.
Foggingontheinsideofthewindshieldcanbequickly removedbypressingthedefrostbuttonandincreasing theblowerspeed.
DonotusetheRecirculationmodewithouttheA/C buttonforlongperiodsasfoggingmayoccur.
Outside Air Intake
Beforedriving, always makes sure the air intakelocated directly in front of the windshield is free of obstructions such as leaves, ice, or snow, which could reduce airflow and/or plug the waterdraintube insidetheplenum.
A/C Air Filter
Theclimatecontrolsystemfiltersoutdust,pollenand someodorsfromtheair.Strongodorscannotbetotally filteredout. Refertosection7"AirConditioning" for filterreplacementinstructions.
Outside Temperature Display
TheoutsidetemperaturecanbeshownintheATC displaybypressingthe"OUTSIDETEMP"button. After pressingthisbutton, thefrontseatpassenger'stemperaturesettingdisplaywillbereplacedwiththecurrent outsidetemperature.Pressthe"OUTSIDETEMP"button againorpressthepassenger's"TEMP"buttontoreturn thedisplaytothepassenger'stemperaturesetting.
ElectricRearWindowDefroster

Pressthisbuttontoturnontherearwindow defrosterandtheheatedsidemirrors.Alightin thebuttonwillilluminatetoindicatetherearwindow defrosterisON. Thedefrosterautomaticallyturnsoff afterabout10minutesofoperation.
CAUTION!
To avoid damaging the electrical conductors of the rear window defroster, do not use scrapers, sharp instruments, or abrasive window cleaners on the interior surface of the window.
Labels can be peeled off after soaking with warm water.
□ Anti-Lock Brake System .....220
■ Power Steering 222
■ Traction Control — If Equipped .....223
■ Tire Safety Information .....224
□ Alignment And Balance .....241
■ All Wheel Drive (AWD) — If Equipped .....242
■ Tire Pressure Monitor System — If Equipped . . .242
□1,2,3,Or4Tire(s)LowPressure. . . . . . . . . . 2 4 3
□1,2,3, Or 4 Tire(s) High Pressure .....243
□ServiceTirePressureSystem/SeeOwner's Manual. 243
□TirePressureUnavailable. 243
□GeneralInformation. 245
■TireChains. 245
■SnowTires. 246
■TireRotationRecommendations. 247
■ Fuel Requirements .....248
□ReformulatedGasoline. 248
□Gasoline/OxygenateBlends. 249
□MMTInGasoline. 249
□SulfurInGasoline. 250
□MaterialsAddedToFuel. 250
□FuelSystemCautions. 251
□CarbonMonoxideWarnings. 251
■AddingFuel. 252
□FuelFillerCap(GasCap). 252
■VehicleLoading....254
□VehicleCertificationLabel. 254
□GrossVehicleWeightRating(GVWR)....254
□GrossAxleWeightRating(GAWR)....254
□Overloading 255
□Loading 255
■ Trailer Towing ....256
□ Warranty Requirements .....257
Long periods of engine idling, especially at high engine speeds, can cause excessive exhaust temperatures which can damage your vehicle. Do not leave your vehicle unattended with the engine running.
WARNING!
Do not leave animals or children inside parked vehicles in hot weather; interior heat build up may cause serious injury or death.
The gear selectorm must be in the NEUTRAL or PARK position before you can start the engine. Apply the brakes to foreshifting into any driving gear.
NormalStarting
Normal Starting of either acoldorawarmengine is obtained without pumping or depressing the accelerator pedal. Turnthekey to the "START" position and release when the engine starts. If the engine has not started within 3 seconds, slightly depress the accelerator pedal while continuing to crank. If the engine failst o start within 15 seconds, turnthe key to the "OFF" position, wait 10 to 15 seconds, then repeat the normal starting procedure.
Extremely Cold Weather (below -29^ or -20^ ) To insurer reliable starting at the set temperatures, use of an externally powered electric engine block heater (available from your dealer) is recommended.
WARNING!
- Do not attempt to push or tow your vehicle to get it started. Vehicles equipped with an automatic transmission cannot be started this way. Unburned fuel could enter the catalytic converter and once the engine has started, ignite and damage the converter and vehicle. If the vehicle has a discharged battery, booster cables may be used to obtain a start from a booster battery or the battery in another vehicle. This type of start can be dangerous if done improperly. See section 6 of this manual for the proper jump starting procedures and follow them carefully.
- Never pour fuel or other flammable liquid into the throttle body air inlet opening in an attempt to start the vehicle. This could result in flash fire causing serious personal injury.
If Engine Fails to Start
If the engine failstostartafter you have followed the "NORMAL STARTING" procedure, it may be flooded. Push the accelerator pedal all the way to the floor and hold it ther while cranking the engine. This should clear any excess fuel in case the engine is flooded.
CAUTION!
To prevent damage to the starter, do not crank the engine for more than 15 seconds at a time. Wait 10 to 15 seconds before trying again.
If the engine has been flooded, it may start torun, but not have enough power to continuer running when the key is released. If this occurs, continue ranking up to 15 seconds with the accelerator pedal pushed all the way to the floor. Releasethe accelerator pedal and the key on the engine is runnings smoothly. Donot overspeed engine.
If the engines shows nosignof starting after two 15 second period so of cranking with the accelerator pedal held to the floor, the "NORMAL STARTING" procedure should be repeated.
After Starting
Theidlespeedwillautomaticallydecreaseastheengine warmsup.
ENGINEBLOCKHEATER—IFEQUIPPED
Theengineblockheaterwarmsenginecoolantand permitsquickerstartsincoldweather.Connectthecord toastandard110-115voltACelectricaloutletwitha grounded,three-wireextensioncord.
Theengineblockheatercordisroutedunderthehoodon theriversideofthevehicle.Ithasaremovablecapthat islocatedonthedriversideoftheIntegratedPower Module.
WARNING!
Remember to disconnect the cord before driving. Damage to the 110-115 volt electrical cord could cause electrocution.
AUTOMATICTRANSMISSION
CAUTION!
Damage to the transmission may occur if the following precautions are not observed:
- Shift into PARK only after the vehicle has come to a complete stop.
- Shift into or out of REVERSE only after the vehicle has come to a complete stop and the engine is at idle speed.
- Do not shift from REVERSE, PARK, or NEUTRAL into any forward gear when the engine is above idle speed.
- Before shifting into any gear, make sure your foot is firmly on the brake pedal.
WARNING!
It is dangerous to shift the selector lever out of "P" or "N" if the engine speed is higher than idle speed. If your foot is not firmly on the brake pedal, the vehicle could accelerate quickly forward or in reverse. You could lose control of the vehicle and hit someone or something. Only shift into gear when the engine is idling normally and when your right foot is firmly on the brake pedal.
Brake/TransmissionInterlockSystem
Thisystempreventsyoufrommovingthegearshiftout ofPARKandintoanygearunlesssthebrakepedalis pressed. Thissystemisactiveonlywhiletheignition switchisintheACCESSORYorONposition.Always depresssthebrake pedal first, beforemovingthegear selectoroutofPARK.
NOTE: Ifamalfunctionoccurs,thesystemwilltrapthe keyintheignitioncylindertowarnyouthatthissafety featureisinoperable. Theenginecanbestarted and stoppedbutthekeycannotberemoveduntilyouobtain service.
FourSpeedAutomaticTransmission
The electronically controlled transmission provides a precise shifts schedule. The transmission electronics are self-calibrating; therefore, the first few shiftson anew vehicle, may be somewhat abrupt. This is an normal condition, and precision shift will develop within a few hundred miles.
Reset Mode - Electronic Transmission
Thetransmissionismonitoredelectronicallyforabnormal conditions. If a condition is detected that could cause damage, the transmission automatically shifts in to second gear. The transmission remains in second gear despite the forward gear selected. Park(P), Reverse(R), and Neutral (N) will continue to operate. This Reset feature allows the vehicle to be driven to a dealer for service without damaging the transmission.
Intheeventthattheproblemhasbeenmomentary,the transmissioncanberesettoregainallforwardgears.
- StopthevehicleandshiftintoPark(P).
• TurnthekeytoOFFthenrestarttheengine. - Shiftintothedesiredrangeandresumedriving.
NOTE: Evenifthetransmissioncanbereset,itis recommendedthatyouvisitadealeratyourearliest possibleconvenience.Yourdealerhasdiagnosticequipmenttodetermineiftheproblemcouldrecur.
If the transmission cannot be reset, dealerservice is required.
Gear Ranges
DONOTracetheenginewhenshiftingfromPARKor NEUTRALpositionsintoanothergearrange.
"P"Park
Supplements the parking brake by locking the transmission. The engine can be started in this range. Never attempt to use PARK while vehicle is in motion.
Applyparkingbrakewhenleavingvehicleinthisrange.
"R"Reverse
Shiftintothisrangeonlyafterthevehiclehascometoa completestop.
"N"Neutral
Enginemaybestartedinthisrange.
"D"Overdrive
Tobeusedformostcityandhighwaydriving,itprovides smoothestupshiftsanddownshiftsandbestfuel economy.Whenfrequenttransmissionshiftingoccurs whileusingthe“D”Overdriveposition,suchaswhen operating the vehicle under heavy loading conditions, (i.e.inhillyterrain,travelingintostrongheadwindsor whiletowingheavytrailers),usethe AutoStickmodeand selectthe“3”range.
NOTE: Using the "3" range in the Auto Stick mode while operating the vehicle under heavy operating conditions will improve performance and extend transmission life by reducing excessives hifting and heat buildup.
Autostickisadriver-interactivetransmissionthatoffers manualgearshiftingcapabilitytoprovideyouwithmore control.Autostickallowsyoutomaximizeenginebraking,eliminateundesirableupshiftsanddownshifts,and improveoverallvehicleperformance.Thissystemcan alsoprovideyouwithmorecontrolduringpassing,city driving,coldslipperyconditions,mountaindriving,trailertowing,andmanyothersituations.
AutostickOperation
TheAutostickpositionisjustbelowtheOverdrivepositionandisidentifiedbytheword"AUTOSTICK".When youplacetheshiftleverintheAutostickposition,itcan bemovedfromsidetoside.Movingthelevertotheleft(-)triggersadownshiftandtotheright(+)anupshift. Thegearpositionwillbeshowninthetransmissiongear display,locatedintheinstrumentcluster.
Youcanshiftinoroutoftheautostickmodeatanytime withouttakingyourfootofftheacceleratorpedal. If you choose the Overdrivemode, the transmission will operate automatically; shifting between the four available gears. When you wish to engage autostick, simply move the shiftlevertothe AUTOSTICK position. The transmission will remain in the current gear until an upshift for downshift is chosen.
MovetheleverbacktotheOverdrivepositiontoshiftout oftheAutostickmode.
AutostickGeneralInformation
- The transmission will automatically upshift from first to second gear and from second to third gear when enginespeed reaches about 6300 RPM.
-
Downshifts from third to second gear above 74 mph (119 km/h) and from second to first gear above 41 mph (66 km/h) will be ignored.
-
Youcanstartoutinfirst,second,orthirdgear.Shifting intofourthgearcanoccuronlyaftervehiclespeed reaches15mph(24km/h).
- The transmission will automatically downshift to first gear when coming to as top.
- Startingoutinthirdgearishelpfulinsnowyoricy conditions.
- WhileintheAutostickmode,SpeedControlwillonly functioninthirdorfourthgear.
Downshiftingoutofthirdgearwillturnoffthespeed control. - If the system detect power train over heating, the transmission will revert to the automatic shift mode and remain in that mode until the power train cool so off.
- If the system detects a problem will disable the autostick mode and the transmission will return to the automatic mode until the problem is corrected.
ALLWHEELDRIVE—IFEQUIPPED
Thisfeatureprovidesfulltime,on-demand,AllWheel Drive(AWD).Thesystemisautomaticwithnodriver inputsoradditionaldrivingskillsrequired.Undernormaldrivingconditions,thefrontwheelsprovidemostof thetraction.Ifthefrontwheelsbegintolosetraction, powerisshiftedautomaticallytotherearwheels.The greaterthefrontwheeltractionloss,thegreaterthe powertransfertotherearwheels.
CAUTION!
All wheels must have the same size and type tires. Unequal tire sizes must not be used. Unequal tire size may cause failure of the power transfer unit and/or the viscous coupling.
PARKINGBRAKE
When the parking brake is applied with the ignition switch on, the brakelight in the instrument cluster will turn on.
NOTE: Thislightonlyshowsthattheparkingbrakeis applied. It does not show the degree of brake application.
Beforeleavingthevehicle,makesurethattheparking brakeisfullyappliedandplacethegearsectorinthe Parkposition.Toreleasetheparkingbrake,pullouton theparkingbrakereleaselocatedontheleftsideofthe instrumentpanel.
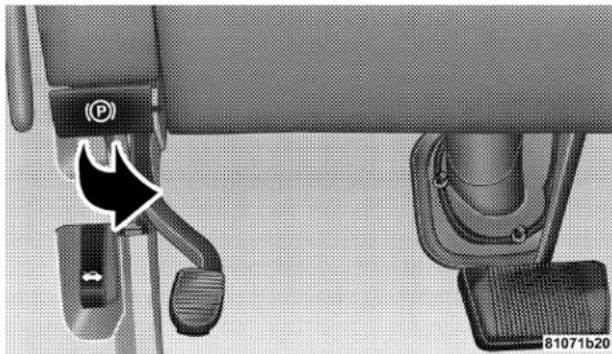
natural_image
Close-up of a car seatbelt mechanism with a directional arrow indicating movement (no text or symbols)Whenparkingonahill,itisimportanttosettheparking brakebeforeplacingthegearsectorinPark,otherwise theloadonthetransmissionlockingmechanismmay makeitdifficulttomovetheselectoroutofpark.Asan addedprecaution,turnthefrontwheelstowardthecurb onadownhillgradeandawayfromthecurbonauphill grade.
The parking brakes should always be applied when the driver is not in the vehicle.
WARNING!
- Leaving children in a vehicle unattended is dangerous for a number of reasons. A child or others could be injured. Children should be warned not to touch the parking brake, brake pedal or the gear selector lever. Don't leave the keys in the ignition. A child could operate power windows, other controls, or move the vehicle.
- Be sure the parking brake is fully disengaged before driving: failure to do so can lead to brake failure, and an accident.
BRAKESYSTEM
Intheeventpowerassistislostforanyreason(for example,repeatedbrakeapplicationswiththeengine off),thebrakeswillstillfunction.Theeffortrequiredto brakethevehiclewillbemuchgreaterthanthatrequired withthepowersystemoperating.

Your vehicle is equipped with dual hydraulic brakes systems. If either of the two hydraulic systems, a normal capability, the remaining system will still function. There will become lossofoverallbrakingeffectiveness. This maybe evident by increased pedal travel during application, greater pedal for cerequired to slow or worst stop, and potential activation of the Brake Warning Lamp.
Anti-LockBrakeSystem
The Anti-Lock Brake System provides increased vehicle stability and brake performance undermost braking conditions. Thesystem automatically "pumps" the brakes during severe braking condition stop prevent wheellock-up.
WARNING!
Pumping of the Anti-Lock Brakes will diminish their effectiveness and may lead to an accident. Pumping makes the stopping distance longer. Just press firmly on your brake pedal when you need to slow down or stop.
WARNING!
- Anti-lock system (ABS) cannot prevent the natural laws of physics from acting on the vehicle, nor can it increase braking or steering efficiency beyond that afforded by the condition of the vehicle brakes and tires or the traction afforded.
- The ABS cannot prevent accidents, including those resulting from excessive speed in turns, following another vehicle too closely, or hydroplaning. Only a safe, attentive, and skillful driver can prevent accidents.
- The capabilities of an ABS equipped vehicle must never be exploited in a reckless or dangerous manner which could jeopardize the user's safety or the safety of others.

The ABSlightmonitorthe Anti-LockBrake System. Thelightwillcomeonwhenthe ignitionswitchisturnedtotheONposition andmaystayonforaslongasfourseconds.
If the ABSlightremainsonorcomesonwhiledriving, it indicates that the Anti-Lock portion of the brakesystem is not functioning and that service is required. However, the conventional brakesystem will continue to operate normally if the BRAKE warning light is not on.
If the ABSlightison, the brakesystem should be serviced as soon as possible to restore the benefit of Anti-Lock brakes. If the ABSlight does not come on when the Ignitions switch is turned to the ON position, have the bulb repaired as soon as possible.
If both the Brake Warning Light and the ABS Light remain on, the Anti-Lock brakes (ABS) and Electronic Brake Force Distribution (EBD) systems are not functioning. Immediaterepair to the ABS system is required.
Whenthevehicleisdrivenover7mph(11km/h),you mayalsohearaslightclickingsoundaswellassome relatedmotornoises. ThesenoisesarethesystemperformingitsselfcheckcycletoensurethattheABSsystem isworkingproperly. Thisselfcheckoccurseachtimethe vehicleisstartedandacceleratedpast7mph(11km/h).
ABSisactivated during braking under certain roador stopping conditions. ABS-inducing conditions can include ice, snow, gravel, bumps, railroad tracks, loose debris, or panic stops.
Youalsomayexperiencethefollowingwhenthebrake systemgoesintoAnti-lock:
- TheABSmotorrunning(itmaycontinuetorunfora shorttimeafterthestop),
• theclickingsoundofsolenoidvalves, - brakepedalpulsations,
The Anti-Lock Brake System contains sophisticated electronic equipment that may be susceptible to interference caused by improperly installed or high output radio transmitting equipment. This interference can cause possible loss of anti-lock braking capability. Installation of such equipment should be performed by qualified professionals.
Allvehiclewheelsandtiresmustbethesamesizeand typeandtiresmustbeproperlyinflatedtoproduce accuratesignalsforthecomputer.
POWERSTEERING
The standard power steering system will give you good vehicle response and increase ease of maneuverability intight spaces. The system will provide mechanical steering capability if power assist is lost.
Ifforsomereason, the power assist is interrupted, it will still be possible to every your vehicle. Under these conditions you will observe substantial increase in steering effort, especially at very low vehicles speeds and during parking maneuvers.
NOTE: Increased noise levels at the end of the steering wheel travel are considered normal and does not indicate that there is a problem with the power steering system.
WARNING!
Continued operation with reduced power steering assist could pose a safety risk to yourself and others. Service should be obtained as soon as possible.
CAUTION!
Prolong operation of the steering system at the end of the steering wheel travel will increase the steering fluid temperature and should be avoided when possible. Damage to the power steering pump may occur.
TRACTIONCONTROL—IFEQUIPPED
The TractionControlSystem reduces wheelslip and maintain instruction at the driving (front) wheels. The system reduces wheelslip by engaging the brake on the wheel that is losing traction (spinning). Thesystem will operate at speeds below 35 mph (56 km/h).
Thesystemisalwaysinthe"standby"modeunless,
- TheTractionControlSwitchhasbeenusedtoturnthe systemOFF
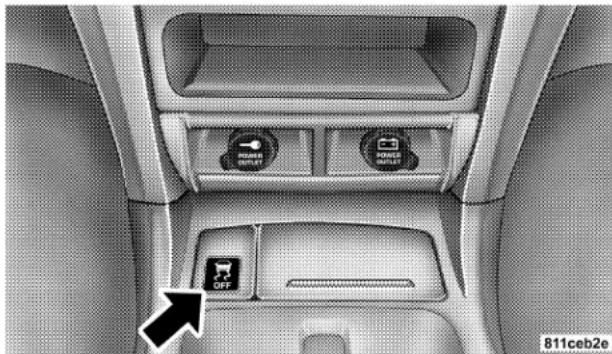
natural_image
Interior view of a car dashboard with two directional switches and a highlighted 'OFF' button (no text or symbols on the main components)- ThereisaTractionControlSystemmalfunction
- Thesystemhasbeendeactivatedtopreventdamageto thebrakesystemduetooverheatedbraketemperatures
- If your vehicle becomes stuck in mud, ice, or snow, turn the Traction Control System OFF before attempting to "rock" the vehicle free.
TIRESAFETYINFORMATION
TireMarkings
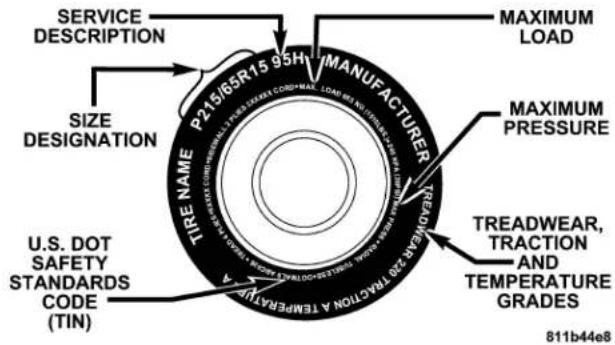
NOTE:
- P(Passenger)-MetrichtiresizingisbasedonU.S.design standards.P-Metricireshavetheletter“P”molded intothesidewallprecedingthesizedesignation.Example:P215/65R1595H.
- EuropeanMetrictiresizingisbasedonEuropean designstandards.Tiresdesignedtothisstandardhave thetiresizemoldedintothesidewallbeginningwith thesectionwidth.Theletter"P"isabsentfromthistire sizedesignation.Example:215/65R1596H
-
LT(LightTruck)-MetrictiresizingisbasedonU.S. designstandards.ThesizedesignationforLT-Metric tiresisthesameasforP-Metrictiresexceptforthe letters“LT”thataremoldedintothesidewallprecedingthesizedesignation.Example:LT235/85R16.
-
TemporarySparetiresarehighpressurecompact sparesdesignedfortemporaryemergencyuseonly. Tiresdesignedtothisstandardhavetheletter"T" moldedintothesidewallprecedingthesizedesignation.Example:T145/80D18103M.
- HighFlotationtiresizingisbasedonU.S.design standardsandbeginswiththetirediametermolded intothesidewall.Example:31x10.5R15LT.
| EXAMPLE: |
| Size Designation:P = Passenger car tire size based on U.S. design standards"....blank...." = Passenger car tire based on European design standardsLT = Light Truck tire based on U.S. design standardsT = Temporary Spare tire31 = Overall Diameter in Inches (in) |
| 215 = Section Width in Milimeters (mm) |
| 65 = Aspect Ratio in Percent (%)—Ratioofsectionheighttosectionwidthoftire.10.5 = Section Width in Inches (in) |
| R = Construction Code—"R"meansRadialConstruction.—"D"meansDiagonalorBiasConstruction. |
| 15 = Rim Diameter in Inches (in) |
| Service Description: |
| 95 = Load Index—Anumericalcodeassociatedwiththemaximumloadatirecancarry. |
| H = Speed Symbol—Asymbolindicatingtherangeofspeedsatwhichatirecancarryaloadcorresponding toitsloadindexundercertainoperatingconditions.—ThemaximumspeedcorrespondingtotheSpeedSymbolshouldonlybeachievedunderspecifiedoperatingconditions.(ie.tirepressure,vehicleloading,roadconditionsand postedspeedlimits). |
| Load Identification: |
| "....blank..." = Absence of any text on sidewall of the tire indicates a Standard Load (SL) Tire |
| Extra Load (XL) = Extra Load (or Reinforced) Tire |
| Light Load = Light Load Tire |
| C,D,E = Load range associated with the maximum load a tire can carry at a specified pressure |
| Maximum Load — Maximum Load indicates the maximum load this tire is designed to carry. |
| Maximum Pressure — Maximum Pressure indicates the maximum permissible cold tire inflation pressure for this tire. |
The TIN may be found on one or both sides of the tire however the date codemay only be on oneside. Tires with whitesidewallswill hav the full TIN including date codelocated on the whitesidewallside of the tire.
LookfortheTINontheoutboardsideofblacksidewall tiresasmountedonthevehicle.IftheTINisnotfoundon theoutboardsidethenyouwillfinditontheinboardside ofthetire.
| EXAMPLE: |
| DOT MA L9 ABCD 0301 |
| DOT =DepartmentofTransportation—ThissymbolcertifiesthatthetireisincompliancewiththeU.S.DepartmentofTransportationtiresafetystandards, andisapprovedforhighwayuse. |
| MA =Coderepresentingthetiremanufacturinglocation.(2digits) |
| L9 =Coderepresentingthetiresize.(2digits) |
| ABCD =Codeusedbytiremanufacturer.(1to4digits) |
| 03 =Numberrepresentingtheweekinwhichthetirewasmanufactured.(2digits)—03meansthe3rdweek. |
| 01 =Numberrepresentingtheyearinwhichthetirewasmanufactured.(2digits)—01meanstheyear2001.—PriortoJuly2000,tiremanufacturerswereonlyrequiredtohave1numbertorepresenttheyearinwhichthetirewasmanufactured.Example:031couldrepresentthe3rdweekof1981or1991. |
TireLoadingandTirePressure
Tire Placard Location
NOTE: Some vehicles have a "Tire and Loading Information" placard located on the driver's side "B" pillar.
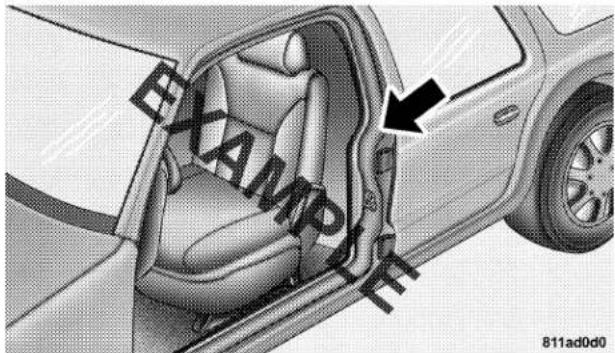
Tire and Loading Information Placard
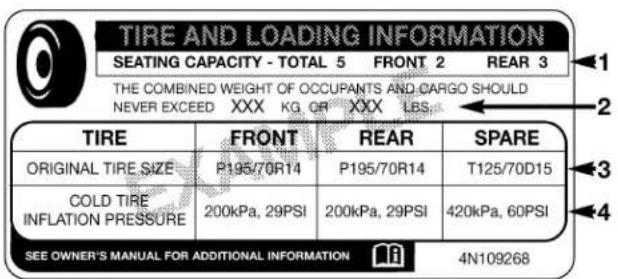
811b5a9a
This placard tells you important information about the,
1) numberofpeoplethatcanbecarriedinthevehicle
2) the total weight your vehicle can carry
3) thetiresizedesignedforyourvehicle
4) thecold tireinflation pressures for the front, rear and spare tires.
Loading
The vehicle maximum load on the tire must not exceed the load carrying capacity of the tire on your vehicle. You will not exceed the tire's load carrying capacity if you adher to the loading conditions, tiresize and cold tire inflation pressure specified on the Tire and Loading Information placard and the Vehicle Loading section of this manual.
NOTE: Underamaximumloadedvehiclecondition, grossaxleweightratings(GAWR's)forthefrontandrear axlesmustnotbeexceeded. For further information on GAWR's, vehicleloading and trailertowing, seethe VehicleLoadingsection of this manual.
Todeterminethemaximumloadingconditionsofyour vehicle,locatethestatement"Thecombinedweightof occupantsandcargoshouldneverexceedXXXkgorXXX
lbs."ontheTireandLoadingInformationplacard.The combinedweightofoccupants,cargo/luggageand trailertongueweight(ifapplicable)shouldneverexceed theweightreferencedhere.
StepsforDeterminingCorrectLoadLimit
- Locatethestatement "ThecombinedweightofoccupantsandcargoshouldneverexceedXXXpounds" on yourvehicle'splacard.
- Determinethecombinedweightofthedriverand passengersthatwillberidinginyourvehicle.
- Subtract the combined weight of the driver and passengers from XXX kilograms or XXX pounds.
- Theresultingfigureequalstheavailableamountof cargoandluggageloadcapacity.Forexample,if"XXX" amountequals1400lbs.andtherewillbefive150lb.
passengersinyourvehicle, theamountofavailablecargo andluggageloadcapacityis650lb.(1400-750(5x150)=650lb.)
- Determinethecombinedweightofluggageandcargo beingloadedonthevehicle.Thatweightmaynotsafely exceedtheavailablecargoandluggageloadcapacity calculatedinstep4.
- If your vehicle will betowing a trailer, load from your trailer will be transferred to your vehicle. Consult this manual determine how this reduces the available cargo and luggageload capacity of your vehicle.
NOTE: The following tables show examples on how to calculate total load, cargo/luggage and towing capacities of your vehicle with varying seating configurations and number and sizeof occupants. This table is for illustration purposes only and may not be accurate for the seating and load carry capacity of your vehicle.
NOTE: Forthefollowingexamplethecombinedweight ofoccupantsandcargoshouldneverexceed865lbs.(392 Kg).
811a4d11
WARNING!
Overloading of your tire is dangerous. Overloading can cause tire failure, affect vehicle handling, and increase your stopping distance. Use tires of the recommended load capacity for your vehicle. Never overload them.
TIRES—GENERALINFORMATION
TirePressure
Propertireinflationpressureisessentialtothesafeand satisfactoryoperationofyourvehicle.Threeprimary areasareaffectedbyimpropertirepressure:
- Safety—
WARNING!
Improperly inflated tires are dangerous and can cause accidents.
- Under inflation increases tire flexing and can result in tire failure.
- Over inflation reduces a tire's ability to cushion shock. Objects on the road and chuck holes can cause damage that results in tire failure.
- Unequal tire pressures can cause steering problems. You could lose control of your vehicle.
• Over inflated or under inflated tires can affect vehicle handling and can fail suddenly, resulting in loss of vehicle control. - Unequal tire pressures from one side of the vehicle to the other can cause the vehicle to drift to the right or left.
Always drive with each tire inflated to the recommended cold tire inflation pressure.
Improperinflationpressurescancauseunevenwear patternstodevelopacrossthetiretread. Theseabnormal wearpatternswillreducetreadliferesultinginaneedfor earliestirereplacement.Underinflationalsoincreasestire rollingresistanceandresultsinhigherfuelconsumption.
3.RideComfortandVehicleStability—
Propertireinflationcontributestoacomfortableride. Overinflationproducesajarringanduncomfortableride.
TireInflationPressures
The proper cold tire inflation pressure for passenger cars is listed one either the face of the driver's door or the driver's side "B" pillar. For vehicles other than passenger cars, the cold tire inflation pressures are listed one either the "B" pillar, the Certification Label or in the Tire Inflation Pressures brochure in the glove compartment.
Some vehicles may have Supplemental Tire Pressure Information for vehicle loadsthatarelessthanthe
maximumloaded vehicle condition. These pressure conditions will be found in the "Supplemental Tire Pressure Information" section of this manual.
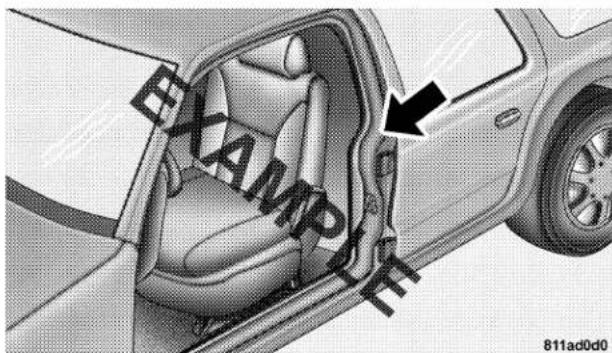
"B" PILLAR
The pressures should be checked and adjusted as well as inspecting for sign soft tire wear or visible damage at least once month. Use a good quality pocket-type gaugeto
checktirepressure.Donotmakeavisualjudgement when determining properinflation.Radialtiresmaylook properly inflated even when they are underinflated.
CAUTION!
After inspecting or adjusting the tire pressure always reinstall the valve stem cap-if equipped. This will prevent moisture and dirt from entering the valve stem, which could damage the valve stem.
Inflationpressuresspecifiedontheplacardarealways "coldtireinflationpressure".Coldtireinflationpressure isdefinedasthetirepressureafterthevehiclehasnot beendrivenforatleast3hours,ordrivenlessthan1mile (1km)aftera3hourperiod.Thecoldtireinflation pressuremustnotexceedthemaximuminflationpres- suremoldedintothetiresidewall.
Checktirepressuresmoreoftenifsubjecttoawiderange ofoutdoortemperatures,astirepressuresvarywith temperaturechanges.
Tirepressureschangebyapproximately1psi(7kPa)per 12°F(7°C)ofairtemperaturechange.Keepthisinmind whencheckingtirepressureinsideagarageespeciallyin thewinter.
Example: If garagetemperature = 68°F (20°C) and the outside temperature = 32°F (0°C) thenthecold tire inflation pressures should be increased by 3 psi (21 kPa), whichever 1 psi (7 kPa) forever 12°F (7°C) forth this outside temperature condition.
Tirepressuremayincreasefrom2to6psi(13to40kPa) duringoperation.DONOTreducethisnormalpressure builduporyourtirepressurewillbetoolow.
Tire Pressures for High Speed Operation
Themanufacturereradvocatesdrivingatsafespeeds withinpostedspeedlimits. Wherespeedlimitsorconditionsaresuchthatthevehiclecanbedrivenathigh speeds, maintainingcorrecttireinflationpressureisvery important. Increased tire pressure and reduced vehicle loading may berequired for high speed vehicle operation. Referto originalequipment or an authorized tire dealer for recommended safe operating speeds, loading and cold tire inflation pressures.
WARNING!
High speed driving with your vehicle under maximum load is dangerous. The added strain on your tires could cause them to fail. You could have a serious accident. Don't drive a vehicle loaded to the maximum capacity at continuous speeds above 75 mph (120 km/h).
Radial-PlyTires
WARNING!
Combining radial ply tires with other types of tires on your vehicle will cause your vehicle to handle poorly. The instability could cause an accident. Always use radial ply tires in sets of four (or 6, in case of trucks with dual rear wheels). Never combine them with other types of tires.
Cutsandpuncturesinradialtiresarerepairableonlyin thetreadareabecauseofsidewallflexing.Consultyour authorizedtiredealerforradialtirerepairs.
CompactSpareTire—IfEquipped
The compact spare is for temporary emergency use with radialtires. It is engineered to be used on your style vehicle only. Sincethistire has limited treadmill, the original tires should berepaired (or replaced) and reinstalled at the first opportunity.
WARNING!
Temporary use spare tires are for emergency use only. With these tires, do not drive more than 50 mph (80 km/h). Temporary-use spare tires have limited tread life. When two or more tread wear indicators appear in adjacent grooves, the temporary use spare tire needs to be replaced. Be sure to follow the warnings which apply to your spare. Failure to do so could result in spare tire failure and loss of vehicle control.
Donotinstallawheelcoverorattempttomounta conventionaltireonthecompactsparewheel,sincethe wheelisdesignedspecificallyforthecompactspare.
Donotinstallmorethanonecompactsparetire/wheel onthevehicleatanygiventime.
CAUTION!
Because of the reduced ground clearance, do not take your vehicle through an automatic car wash with the compact spare installed. Damage to the vehicle may result.
LimitedUseSpare—IfEquipped
Thelimitedusesparetireisfortemporaryemergencyuse onyourvehicle. Thistireisidentifiedbyalimiteduse spare tirewarninglabellocatedonthelimitedusespare tireandwheelassembly. Thistiremaylooklikethe originalequippedtireonthefrontorrearaxleofyour vehicle, butitisnot.Installationofthislimitedusespare tireaffectsvehiclehandling. Sinceitisnotthesametire, replace(orrepair)theoriginaltireandreinstallonvehicle atthefirstopportunity.
WARNING!
The limited use spare tires are for emergency use only. Installation of this limited use spare tire affects vehicle handling. With this tire, do not drive more than 60 mph (100 km/h). Keep inflated to the cold tire inflation pressure listed on either your tire placard or limited use spare tire and wheel assembly. Replace (or repair) the original tire at the first opportunity and reinstall it on your vehicle. Failure to do so could result in loss of vehicle control.
WARNING!
Fast spinning tires can be dangerous. Forces generated by excessive wheel speeds may cause tire damage or failure. A tire could explode and injure someone. Do not spin your vehicle's wheels faster than 35 mph (55 km/h) when you are stuck. And don't let anyone near a spinning wheel, no matter what the speed.
TireSpinning
Whenstuckinmud,sand,snow,oriceconditions,donot spinyourvehicle'swheelsabove35mph(55km/h).
SeetheparagraphonFreeingAStuckVehicleinSection 6ofthismanual.
Treadwearindicatorsareintheoriginalequipmenttires tohelpyouindeterminingwhenyourtiresshouldbe replaced.
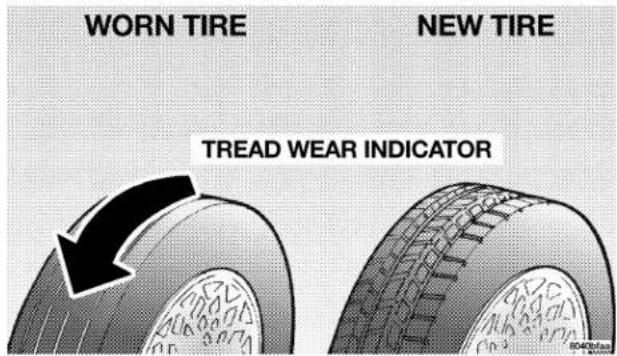
Theseindicatorsaremoldedintothebottomofthetread groovesandwillappearasbandswhenthetreaddepth becomes1/16inch(2mm).Whentheindicatorsappear in2ormoreadjacentgrooves,thetireshouldbereplaced.
Manystateshavelawsrequiringtirereplacementatthis point.
ReplacementTires
Thetiresonyournewvehicleprovideabalanceofmany characteristics. Theyshouldbeinspectedregularlyfor wearandcorrectcoldtireinflationpressure. Themanu- facturerstronglyrecommendsthatyouusetiresequiva- lenttotheoriginalsinsize,qualityandperformance whenreplacementisneeded(seetheparagraphontread wearindicators).RefertotheTireandLoadingInforma- tionplacardforthesizedesignationofyourtire. The servicedescriptionandloadidentificationwillbefound ontheoriginalequipmenttire.Failureretouseeequivalent replacementtiresmayadverselyaffectthesafety,hand- ling,andrideofyourvehicle.Werecommendthatyou contactyouroriginalequipmentoranauthorizedtire dealerwithanyquestionsyoumayhaveontirespecifi- cationsorcapability.
WARNING!
- Do not use a tire, wheel size or rating other than that specified for your vehicle. Some combinations of unapproved tires and wheels may change suspension dimensions and performance characteristics, resulting in changes to steering, handling, and braking of your vehicle. This can cause unpredictable handling and stress to steering and suspension components. You could lose control and have an accident resulting in serious injury or death. Use only the tire and wheel sizes with load ratings approved for your vehicle.
- Never use a tire with a smaller load index or capacity, other than what was originally equipped on your vehicle. Using a tire with a smaller load index could result in tire overloading and failure. You could lose control and have an accident.
- Failure to equip your vehicle with tires having adequate speed capability can result in sudden tire failure and loss of vehicle control.
CAUTION!
Replacing original tires with tires of a different size may result in false speedometer and odometer readings.
AlignmentAndBalance
Poorsuspensionalignmentmayresultin:
- Fasttirewear.
- Uneventirewear, such as feathering and one-sided wear.
• Vehiclepulltorightorleft.
Tiresmayalsocausethevehicletopulltotheleftorright. Alignmentwillnotcorrectthiscondition.Seeyourdealer forproperdiagnosis.
Improperalignmentwillnotcausevehiclevibration. Vibrationmayberesultoftireandwheelout-of-balance.Properbalancingwillreducevibrationand avoidtirecuppingandspottywear.
ALLWHEELDRIVE(AWD)—IFEQUIPPED
CAUTION!
All Wheel Drive (AWD) vehicles must have the same size and type tires on all wheel positions. Unequal tire sizes must not be used. Unequal tire size may cause failure of the power transfer unit and/or the viscous coupling.
TIREPRESSUREMONITORSYSTEM—IF EQUIPPED
The Tire Pressure Monitor System (TPM) system uses wireless technology with wheel rim mounted electronic sensor stomonitortire pressure levels (EXCLUDING THESPARETIRE). Sensors, mounted to each wheel as part of the valvestem, transmittire pressurereading to the Electronic Vehicle Information Center (EVIC) display in the instrument cluster.
NOTE: Itisparticularlyimportant, for y outocheck the tirepressure in allof your tires regularly and to maintain the proper pressure.
When the appropriate condition sexist, the Electronic Vehicle Information Center (EVIC) display the following messages.
1,2,3,OR4TIRE(S)LOWPRESSURE
Lowtirepressurelevelsof25psi1.72barsor lessdetectedinoneormoretires.
Inspectalltiresforproperinflationpressure,oncethe propertirepressurehasbeenset,theTPMsystem warningwillresetautomaticallywhenthevehiclehas beendrivenforatleast2minutesatorabove20mph(32 km/h).
1,2,3,OR4TIRE(S)HIGHPRESSURE
Hightirepressurelevelsof45psi3.10barsor moredetectedinoneormoretires.
Inspectalltiresforproperinflationpressure,oncethe propertirepressurehasbeenset,theTPMsystem warningwillresetautomaticallywhenthevehiclehas beendrivenforatleast2minutesatorabove20mph(32 km/h).
SERVICETIREPRESSURESYSTEM/SEE OWNER'SMANUAL
TheTirePressureMonitorSystem(TPM)systemrequires service.
Seeyourauthorizeddealerforservice.
TIREPRESSUREUNAVAILABLE
The TPM system function is temporarily unavailable due to external electronic magnetic interference, such as portable electronic devices, or nearby radioor TV towers.
Movethevehicletoanareafreefromradio,TVantennas andtransmittingtowersordisconnectanyportableelectronicdevices.Oncetheexternalinterferenceisremoved theTPMsystemwillresumenormaloperationand"TIRE PRESSURENOWAVAILABLE"willappearintheElectronicVehicleInformationCenter(EVIC)display.
CAUTION!
The TPM system has been optimized for the original equipment tires and wheels. TPM system pressures have been established for the tire size equipped on your vehicle. Undesirable system operation or sensor damage may result when using replacement equipment that is not of the same size, type, and/or style. After-market wheels can cause sensor damage. Do not use tire sealant or balance beads if your vehicle is equipped with a TPM system, as damage to the sensors may result.
NOTE:
- TheTPMsystemcaninformthedriverofalowtire pressureconditionof25psi1.72barsor less,orhighatirepressureconditionof45psi3.10 barsormore.
- TheTPMsystemisnotintendedtoreplacenormaltire careandmaintenance,nortoprovidewarningofatire failureorcondition.
- TheTPMsystemshouldnotbeusedasatirepressure gaugewhileadjustingyour tirepressure.
- TheTPMsystemmustberetrainedafteratirerotation orwheelrimmountedsensorreplacement.Sceyour authorizeddealerforservice.
CAUTION!
After inspecting or adjusting the tire pressure always reinstall the valve stem cap, if equipped. This will prevent moisture and dirt from entering the valve stem, which could damage the wheel rim sensor.
GeneralInformation
This device complies with part 15 of the FCC rules and RSS210 of Industry Canada. Operation is subject to the following conditions:
- Thisdevicemaynotcauseharmfulinterference.
- This device must accept any interference received, including interference that may cause undesired operation.
Thetirepressuresensorsarecoveredunderoneofthe followinglicenses:
UnitedStates. K R 5 S 1 2 0 1 2 3
Canada. 2671-S120123
TIRECHAINS
Useonlycompactchains,orothertractionaidsthatmeet SAEtype"ClassS"specifications.Chainsmustbethe propersizeforthevehicle,asrecommendedbythechain manufacturer.
NOTE: Donotusetirechainsonacompactsparetire.
CAUTION!
To avoid damage to your vehicle or tires, observe the following precautions:
- Because of restricted chain clearance between tires and other suspension components, it is important that only chains in good condition are used. Broken chains can cause serious damage. Stop the vehicle immediately if noise occurs that could indicate chain breakage. Remove the damaged parts of the chain before further use.
- Install chains on the front wheels as tightly as possible and then retighten after driving about 12 mile (0.8 km).
- Do not exceed 45 mph (70 km/h).
- Drive cautiously and avoid severe turns and large bumps, especially with a loaded vehicle.
- Do not use on rear wheels of All Wheel Drive (AWD) vehicles.
- Do not drive for prolonged period on dry pavement.
- Observe the tire chain manufacturer's instructions on the method of installation, operating speed, and conditions for use. Always use the lower suggested operating speed of the chain manufacturer if different than the speed recommended by the manufacture.
NOTE: Inordertoavoiddamagetotires,chains,and yourvehicledonotdriveforaprolongedperiodoftime ondrypavement. Observethetirechainmanufacturer's instructionsonmethodofinstallation,operatingspeed, andconditionsforusage.
Alwaysusethelowersuggestedoperatingspeedifboth thechainmanufacturerandvehiclemanufacturesuggest amaximumspeed.Thisnoticeappliestoallchain tractiondevices,includinglinkandcable(radial)chains.
SNOWTIRES
Someareasofthecountryrequiretheuseofsnowtires duringwinter.Standardtiresareoftheallseasonontype andsatisfythisrequirementasindicatedbytheM+S designationonthetiresidewall.
If you needs snowtires, select tiresequivalentin size and typeto the originalequipment tires. Uses now tires only inset sof 4, failure todos omay adversely affect the safety and handling of your vehicle.
Snowtiresgenerallyhavelowerspeedratingstthanwhat wasoriginallyequippedwithyourvehicleandshould notbeoperatedatsustainedspeedsover75mph(120 km/h).
Theseeffectscanbereducedbytimelyrotationoftires. Thebenefitsofrotationareespeciallyworthwhilewith aggressivetreaddesignssuchasthoseonallseasonontype tires.Rotationwillincreasetreadlife,helptomaintain mud,snow,andwettractionlevels,andcontributetoa smooth,quietride.
Followtherecommendedtirerotationfrequencyforyour typeofdrivingfoundinthe"MaintenanceSchedules"
Sectionofthismanual.Morefrequentrotationispermissibleifdesired.Thereasonsforanyrapidorunusual wearshouldbecorrectedpriororotationbeingperformed.
NOTE: TheTirePressureMonitorsystemmustbe retrainedfollowingatirerotation.Seeyourauthorized dealerforservice.
Thesuggested rotation methodisthe "forward-cross" shown in the following diagram.
TIRE ROTATION PATTERN
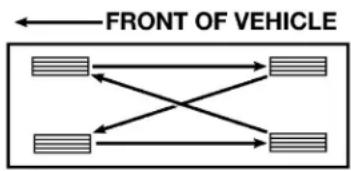
flowchart
graph LR
    A["Top Left Side"] --> B["Left Side"]
    A --> C["Right Side"]
    D["Bottom Left Side"] --> E["Left Side"]
    D --> F["Right Side"]
    G["Bottom Right Side"] --> H["Left Side"]
    G --> I["Right Side"]
4 TIRE ROTATION
80ba79fe
Your vehicle is designed to meet alllemissions regulations and provides satisfactory fuel economy and performance when using high quality unleaded gasoline having an octanerange of 87 to 89 or higher. The manufacturer recommends the use of 89
octaneforoptimumperformance.
Lightsparkknockatlowenginespeedsisnotharmfulto yourengine. However, continued heavysparkknockat highspeedscancausedamageandimmediateserviceis required. Enginedamageresultingfromoperatingwitha heavysparkknockmaynotbecoveredbythenew vehiclewarranty.
Poorqualitygasolinecancauseproblemssuchashard starting,stallingandhesitations.Ifyouexperiencethese symptoms,tryanotherbrandofgasolinebeforeconsideringserviceforthevehicle.
Over40automobilemanufacturersaroundtheworld haveissuedandendorsedconsistentgasolinespecifications(theWorldWideFuelCharter,WWFC)todefine fuelpropertiesnecessarytodeliverenhancedemissions, engineperformance,anddurabilityforyourvehicle.The manufacturerrecommendstheuseofgasolinesthatmeet theWWFCspecificationsiftheyareavailable.
Reformulated Gasoline
Manyareasofthecountryrequiretheuseofcleaner burninggasolinereferredtoas"ReformulatedGasoline".
Reformulated gasolines contain oxygenates, and a specifically blended to reduce vehicle emissions and improve air quality.
Themanufacturersupportstheuseofreformulatedgasolines. Properlyblendedreformulatedgasolineswillprovideexcellentperformanceanddurabilityofengineandfuelsystemcomponents.
Gasoline/OxygenateBlends
Somefuelsuppliersblendunleadedgasolinewithoxygenatessuchas10%ethanol,MTBE,andETBE.Oxygenatesarerequiredinsomeareasofthecountryduringthe wintermonthstoreducecarbonmonoxideemissions. Fuelsblendedwiththeseoxygenatesmaybeusedin yourvehicle.
CAUTION!
DO NOT use gasolines containing Methanol. Use of these blends may result in starting and driveability problems and may damage critical fuel system components.
Problemsthatresultfromusingmethanol/gasoline blendsarenottheresponsibilityofthemanufacturerand
maynotbecoveredbythevehiclewarranty. While MTBE isanoxygenatemade from Methanol, it does not have thenegative effect of Methanol.
MMTInGasoline
MMTisamanganesecontainingmetallicadditivethatis blendedintosomegasolinetoincreasetheoctanenumber.GasolinesblendedwithMMToffernoperformance advantagebeyondgasolinesofthesameoctanenumber withoutMMT.GasolinesblendedwithMMThaveshown toreducesparkpluglifeandreduceemissionsystem performanceinsomevehicles.ThemanufacturerrecommendsusinggasolineswithoutMMT.SincetheMMT contentofgasolinemaynotbeindicatedonthepump, youshouldaskyourgasolineretailerwhetherornot his/hergasolinecontainsMMT.
Itisevenmoreimportanttolookforgasolineswithout MMTinCanada, becauseMMTcanbeusedatlevels higherthanthoseallowedintheUnitedStates.
MMTisprohibited in Federal and Californi are formulated as gasolines.
SulfurInGasoline
YourvehiclemayhavebeendesignedtomeetCalifornia lowemissionstandardswhenusingcleanerburning Californiareformulatedgasolinewithlowsulfur.This vehiclemaybesoldnationwide.YourvehiclewilloperatesatisfactorilyonfuelsmeetingFederalspecification, butemissioncontrolsystemperformancemaybeadverselyaffected.
GasolinesoldoutsideofCaliforniaispermittedtohave highersulfurlevelswhichmayaffecttheperformance of thevehicle'scatalyticconverter. Thismaycausethe MalfunctionIndicatorLighttoilluminate. Themanufac-turerrecommendsthatyoutryadifferentbrandof unleadedgasolinehavinglowersulfurtodetermineifthe problemisfuelrelatedpriortoreturningyourvehicleto anauthorizeddealerforservice.
CAUTION!

If the Malfunction Indicator light is flashing, immediate service is required. Refer to the paragraph on the Onboard Diagnostics
System in section 7 of this manual.
MaterialsAddedtoFuel
AllgasolinesoldintheUnitedStatesrequiredto containeffectivedetergentadditives.Useofadditional detergentsorotheradditivesarenotneededunder normalconditionsandwouldresultinadditionalcost. Thereforeyoushouldnothavetoaddanythingtothe fuel.
FuelSystemCautions
CAUTION!
Follow these guidelines to maintain your vehicle's performance:
- The useofleadedgasisprohibitedbyFederallaw. Usingleadedgasolinecanimpairengineperformance, damagetheemissioncontrolsystem,andcouldresult inlossofwarrantycoverage.
- Anout-of-tuneengine, or certain fuel or ignition malfunctions, can cause the catalytic converter to overheat. If you notice a pungent burning odor or somelights smoke, you're in may be out-of-tune or malfunctioning and may require immediates service. Contact your dealer for service assistance.
- Theuseoffueladditiveswhicharenowbeingsoldas octaneenhancersarenotrecommended.Mostofthese productscontainhighconcentrationsofmethanol. Fuelsystemdamageorvehicleperformanceproblems resultingfromtheuseofsuchfuelsoradditivesarenot theresponsibilityofthemanufacturerandmaynotbe coveredundertheNewVehicleWarranty.
NOTE: Intentionaltamperingwithemissionscontrol systemscanresultincivilpenaltiesbeingassessed againstyou.
CarbonMonoxideWarnings
WARNING!
Carbon monoxide (CO) in exhaust gases is deadly. Follow the precautions below to prevent carbon monoxide poisoning:
- Donotinhaleexhaustgases. They contain carbon monoxide, acolorless and odorless gas which can kill. Never run the engine in a closed area, such as a garage, and never sit in a parked vehicle with the engineer running for an extended period. If the vehicle is stopped in an open area with the engineer running for more than a short period, adjust the ventilation system to force fresh, outside air into the vehicle.
- Guardagainstcarbonmonoxidewithpropermaintenance.Havetheexhaustsysteminspectedeverytime thevehicleisraised.Haveanyabnormalconditions repairedpromptly.Untilrepaired,drivewithallside windowsfullyopen.
- Keeptheliftgateclosedwhendrivingyourvehicleto preventcarbonmonoxideandotherpoisonousex-haustgasesfromenteringthevehicle.
ADDINGFUEL
FuelFillerCap(GasCap)
Thegascapislocatedbehindthefuelfillerdooronthe leftsideofthevehicle.Ifthegascapislostordamaged, besurethereplacementcapisforusewiththisvehicle.
CAUTION!
Damage to the fuel system or emission control system could result from using an improper fuel tank filler tube cap (gas cap). A poorly fitting cap could let impurities into the fuel system.
CAUTION!
To avoid fuel spillage and overfilling, do not "top off" the fuel tank after filling. When the fuel nozzle "clicks" or shuts off, the fuel tank is full.
NOTE:
- Tightenthegascapuntilyouheara "clicking" sound. Thisisanindicationthatthegascapisproperly tightened.Ifthegascapisnotsecuredproperlythe MalfunctionIndicatorLightintheinstrumentcluster willturnon.Makesurethatthegascapistightened eachtimethevehicleisrefueled.
- Whenthefuelnozzle"clicks"orshutsoff,thefuel tankisfull.
WARNING!
- Remove the fuel tank filler tube cap (gas cap) slowly to prevent fuel spray from the filler neck which may cause injury.
- The volatility of some gasolines may cause a buildup of pressure in the fuel tank that may increase while you drive. This pressure can result in a spray of gasoline and/or vapors when the cap is removed from a hot vehicle. Removing the cap slowly allows the pressure to vent and prevents fuel spray.
- Never have any smoking materials lit in or near the vehicle when the gas cap is removed or the tank filled.
- Never add fuel to the vehicle when the engine is running.
- A fire may result if gasoline is pumped into a portable container that is inside of a vehicle. You could be burned. Always place gas containers on the ground while filling.
The loadcarrying capacity of your vehicle is shown in the chart that follows. This information should be used for passenger and luggage loading as indicated.
If theseatbacks are folded for carrying cargo, donot exceed the specified GVWRandGAWR.
VehicleCertificationLabel
Your vehicle has acertification label attached to therear of the driver's door.
Thelabelcontainsthefollowinginformation:
• Nameofmanufacturer
• Monthandyearofmanufacture
• GrossVehicleWeightRating(GVWR)
• GrossAxleWeightRating(GAWR)front
• GrossAxleWeightRating(GAWR)rear
• VehicleIdentificationNumber(VIN)
- TypeofVehicle
• MonthDayandHourofManufacture(MDH)
The barcodeallowsacomputerscannertoreadthe VehicleIdentificationNumber(VIN).
GrossVehicleWeightRating(GVWR)
TheGVWRisthetotalallowableweightofyourvehicle. Thisincludesdriver,passengers,andcargo. Thetotal loadmustbelimitedsothatyoudonotexceedthe GVWR.
GrossAxleWeightRating(GAWR)
The GAWRisthemaximumcapacity of the front and rear axles. Distributetheload over the front and rear axles evenly. Makesure that you donot exceed either front or rear GAWR.
WARNING!
Because the front wheels drive and steer the vehicle, it is important that you do not exceed the maximum front or rear GAWR. A dangerous driving condition can result if either rating is exceeded. You could lose control of the vehicle and have an accident.
Overloading
Theloadcarryingcomponents(axle,springs,tires, wheels,etc.)ofyourvehiclewillprovidesatisfactory serviceaslongasyoudonotexceedtheGVWRandfront andrearGAWR.
The best way to figure out the total weight of your vehicle is to weigh it when it fully loaded and ready for operation. Weighiton a commercial scale to insure that it is not over the GVWR.
Figureouttheweightonthefrontandrearofthevehicle separately.Itisimportantthatyoudistributetheload evenlyoverthefrontandrearaxles.
Overloadingcancausepotentialsafetyhazardsand shortenusefulservicelife.Heavieraxlesorsuspension componentsdonotnecessarilyincreasethevehicle's GVWR.
Loading
Toloadyourvehicleproperly,firstfigureoutitsempy weight,axlebyaxleandsidebyside.Storeheavieritems downlowandbesureyoudistributetheirweightas evenlyaspossible.Stowalllooseitemssecurelybefore driving.Ifweighingtheloadedvehicleshowsthatyou haveexceededeitherGAWR,butthetotalloadiswithin thespecifiedGVWR,youmustredistributetheweight. Improperweightdistributioncanhaveanadverseeffect onthewayyourvehiclesteersandhandlesandtheway thebrakesoperate.
Aloaded vehicle is shown in the illustration. Not that neither the GVWRorthe GAWR capacities have been exceeded.
GROSS VEHICLE WEIGHT RATING (GVWR) 2630 KG (5800 LBS)
(Example Only)
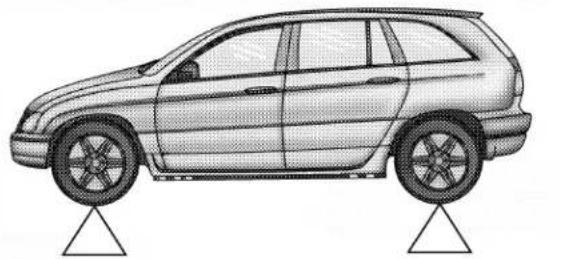
natural_image
Side profile illustration of a car with two triangular supports at the base (no text or symbols)8105b265
| Example Only Front | Axle | Rear Axle |
| EmptyWeight2538lbs | (1151kg) | 2076lbs (942kg) |
| Load(Includingdriver,pass-sengersandcargo) | 223lbs (101kg) | 890lbs (404kg) |
| Total | 2762lbs (1253kg) | 2968lbs (1346kg) |
| GAWR2826lbs | (1282kg) | 3035lbs (1377kg) |
TRAILERTOWING
In this section you will find safety tips and information on limit to the type of towing you can reasonably do with your vehicle. Before towing a trailer carefully review this information to how your load is efficiently and safely as possible.
Tomaintainwarrantycoverage,followtherequirements andrecommendationsinthismanualconcerningvehiclesusedfortrailertowing.
Performmaintenanceservicesasprescribedinthemaintenanceschedulesmanual.Whenyourvehicleisusedfor trailertowing,neverexceedthegrossaxleweightrating (GAWR)bytheadditionof:
• Thetongueweightofthetrailer.
- Theweightofanyothertypeofcargooerequipment putinoronyourvehicle.
- Remember that every thing put in or on the trailer adds to the load on your vehicle.
WarrantyRequirements
TheManufacturer's Passenger Vehicle Warranty will apply to vehicles used to tow trailers for non-commercial use. However the following conditions must be met:
- Themaximumfrontalareaofthetrailercannotexceed 32squarefeet(2.97squaremeters).
- Thetrailertongueloadmustbeconsideredaspartof thecombinedweightofoccupantsandcargo,and shouldneverexceedtheweightreferencedontheTire andLoadingInformationplacard.RefertotheTire-SafetyInformationSectioninthismanual.
- The "D" rangecanbeselectedwhentowing. However, iffrequentshiftingoccurswhileinthisrange,the "3" rangemustbeselected.
NOTE: Using the "3" rangewhileoperatingthevehicle underheavyoperatingconditionswillimproveperformanceandextendtransmissionlifebyreducingexcessiveshiftingandheatbuildup.
- Donotattempttotowatrailerwhileusingacompact sparetire.
- Whenever you pull a trailer, regardless of the trailer size, stop lights and turn signals on the trailer are recommended for motorings safety.
- The automatic transmission fluid and filters should be changed if you REGULARLY to at trailer form more than 45 minutes of continuous operation. See Schedule "B" in section 8 of this manual for transmission fluid change intervals.
NOTE:
- Check the automatic transmission fluid level before towing. Fluid discoloration, or aburntodor, show the need for transmission fluid and filter change.
- Forvehiclesequipped with Autostick. By using the Autostick modes, and selecting as specific gear range, frequent shifting can be avoided. The highest gear ranges should be selected that allows for adequate performance. Forexample, choose "4" if the desired speed can be maintained. Choose "3" or "2" if needed to maintain the desired speed.
- Extended driving at high RPM should be avoided to prevent excess heat generation. A reduction in vehicle
speedmayberequiredtoavoidextendeddrivingat highRPM.Returntoahighergearrangeorvehicle speedwhenroadconditionsandRPMlevelallows.
| TRAVEL CONDITION MAX | MAXIMUM TRAILER WEIGHT(TRAILER FRONTAL AREA NOT TO EXCEED 32 SQ. FT.) |
| 3.5LENGINES | |
| MAX.COMBINED WEIGHTOFVEHICLE ANDTRAILERNOTTO EXCEED8,600lbs(3900 kg) | |
| UP TO 2 PERSONS & LUGGAGE | 3,500lbs(1600kg) |
| 3 TO 4 PERSONS & LUGGAGE | 3,000lbs(1360kg) |
| 5 TO 6 PERSONS & LUGGAGE | 1,000lbs(454kg) |
Aloadequalizinghitchisrecommendedforloaded trailerweightsabove1,000lbs(454kg)andrequiredfor weightsabove2,000lbs(907kg).
CAUTION!
If the trailer weighs more than 1,000 lbs (454 kg) loaded, it should have its own brakes and they should be of adequate capacity. Failure to do this could lead to accelerated brake lining wear, higher brake pedal effort, and longer stopping distances.
WARNING!
Connecting trailer brakes to your vehicle's hydraulic brake lines can overload your brake system and cause it to fail. You might not have brakes when you need them and could have an accident.
WHATODOINEMERGENCIES
CONTENTS
■HazardWarningFlasher. 262
■IfYourEngineOverheats. 263
■JackingAndTireChanging. 264
□JackLocation. 265
□SpareTireStowage. 265
□PreparationsForJacking. 266
□JackingInstructions. 267
■Jump-StartingProceduresIfBatteryIsLow....270
■DrivingOnSlipperySurfaces. 272
□Acceleration. 272
□Traction. 272
■ Freeing A Stuck Vehicle .....273
■ Towing A Disabled Vehicle .....274
□WithIgnitionKey. 274
□WithoutTheIgnitionKey. 275
☐ TowingThisVehicleBehind AnotherVehicle(Flat TowingWithAllFourWheelsOnTheGround) .276
□ Towing This Vehicle Behind Another Vehicle With A TowDolley 276
262WHATODOINEMERGENCIES
natural_image
Interior view of a car dashboard with air conditioners and control panels (no visible text or symbols)ToengagetheHazardWarningFlashers, depress the switch on the instrument panel. When the Hazard Warning Switch is activated, all directional turn signals will flash on and off tow a noncoming traffic of an emergency. Push the switch second timet to turn off the flashers.
This is an emergency warnings system should not be used when the vehicle is in motion. Use it when your vehicle is disabled and is creating as safety hazard for other motorists.
Whenyoumustleavethevehicletoseekassistance,the HazardWarningFlasherswillcontinuetooperateeven thoughtheignitionswitchisOFF.
NOTE: Withextendeduse,theHazardWarningFlashersmayweardownyourbattery.
IFYOURENGINEOVERHEATS
Inanyofthefollowingsituations, you can reduce the potential for overheating by taking the appropriate action.
- Onthehighways—Slowdown.
- Incitytraffic—Whilestopped,puttransmissionin neutral,butdonotincreaseengineidlespeed.
NOTE: Therearestepsthatyoucantaketoslowdown animpendingoverheatcondition.Ifyourairconditioner ison,turnitoff.Theairconditioningsystemaddsheatto theenginecoolingsystemandturningofftheA/C removesthisheat.YoucanalsoturntheTemperature controltomaximumheat,theModecontroltofloor,and thefancontroltoHigh.Thisallowstheheatercoretoact asasupplementtotheradiatorandaidsinremovingheat fromtheenginecoolingsystem.
CAUTION!
Driving with a hot cooling system could damage your vehicle. If temperature gauge reads "H", pull over and stop the vehicle. Idle the vehicle with the air conditioner turned off until the pointer drops back into the normal range. If the pointer remains on the "H", turn the engine off immediately, and call for service.
WARNING!
A hot engine cooling system is dangerous. You or others could be badly burned by steam or boiling coolant. You may want to call a service center if your vehicle overheats. If you decide to look under the hood yourself, see Section 7, Maintenance, of this manual. Follow the warnings under the Cooling System Pressure Cap paragraph.
JACKINGANDTIRECHANGING
WARNING!
- Getting under a jacked-up vehicle is dangerous. The vehicle could slip off the jack and fall on you. You could be crushed. Never get any part of your body under a vehicle that is on a jack. If you need to get under a raised vehicle, take it to a service center where it can be raised on a lift.
- The jack is designed to use as a tool for changing tires only. The jack should not be used to lift the vehicle for service purposes. The vehicle should be jacked on a firm level surface only. Avoid ice or slippery areas.
JackLocation
Thejackandjack-handlearestowedintherearstorage binlocatedintherearcargofloor.Pulluponthestorage bincoverandlinertoaccessthejackandjacktools.
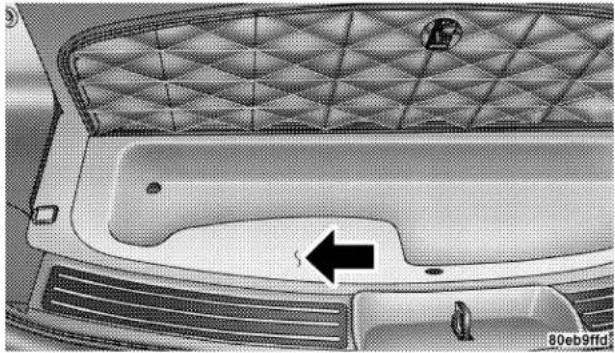
natural_image
Top-down view of a car's front grille and dashboard area, showing no text or symbolsSpareTireStowage
Thesparetireisstowedundertherearofthevehicleby meansofacablewinchmechanism.Toremoveorstow thespare,usethejackhandletorotatethe"sparetire drive"nut.Thenutislocatedunderthetrimcoveratthe centeroftherearstoragebinintherearcargofloor.
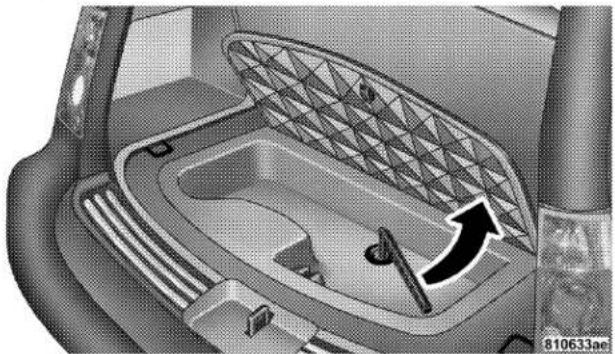
natural_image
Interior view of a car showing the backrest and dashboard with a triangular mesh pattern (no text or symbols visible)266WHATODOINEMERGENCIES
Spare Tire Removal
Fitthejack-handleoverthedrivenut.Rotatethenutto theleftuntilthespareisonthegroundwithenoughslack cabletoallowyoutopullthetireoutfromunderthe vehicle.
CAUTION!
The winch mechanism is designed for use with the jack handle only. Use of an air wrench or other power tools is not recommended and can damage the winch.
Whenthespareisclear,tilttheretainerattheendofthe cableandpullitthroughthecenterofthewheel.
PreparationsForJacking
Parkthevehicleonafirmlevelsurface,avoidiceor slipperyareas,set the parking brake andplacethegear selectorinPARK.TurnOFFtheignition.
WARNING!
Do not attempt to change a tire on the side of the vehicle close to moving traffic. Pull far enough off the road to avoid the danger of being hit when operating the jack or changing the wheel.
• TurnontheHazardWarningFlasher.
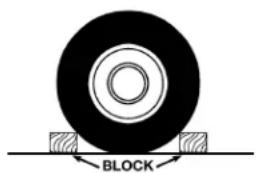
- Blockboththefrontandrear ofthewheeldiagonallyoppositethejackingposition. For example,ifchangingtheright fronttire,blocktheleftrear wheel.
- Passengers should not remain in the vehicle when the vehicle is being jacked.
JackingInstructions
-
Removethesparewheel, scissorsjack and jack-handle from stowage.
-
Carefullypryoffthewheelcentercapusingthetipof thejackhandle.
-
Loosen(butdonotremove)thewheellugnutsby turningthemtotheleftoneturnwhilethewheelisstill ontheground.
-
There are two jack engagement locations one each side of the body—see illustration.
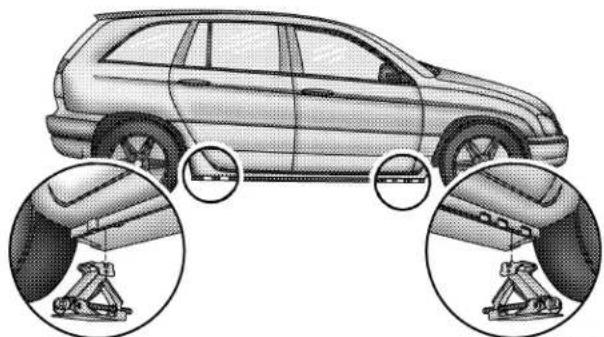
natural_image
Side view of a car with three circular insets showing mechanical components (no text or symbols)80ee6bda
- Theselocationsareonthesillflangeontheunderside ofthebody. Thejackistobelocated, engaging the flanges, 20cm(8inches) inwardfromtheedgeofthe wheelopeningclosesttothewheeltobechanged. Place thewrenchonthejackscrewandturntotherightuntil thejackheadisproperlyengagedinthedescribed
268WHATODOINEMERGENCIES
location.Do not raise the vehicle until you are sure the jack is securely engaged. Never jack up the vehicle using any suspension components.
- Raisethevehiclebyturningthejackscrewtotheright, usingtheswivelwrench.Raisethevehicleonlyuntilthe tirejustclearsthesurfaceandenoughclearanceis obtainedtoinstallthesparetire.Minimumumtirelift providesmaximumstability.
WARNING!
Raising the vehicle higher than necessary can make the vehicle less stable. It could slip off the jack and hurt someone near it. Raise the vehicle only enough to remove the tire.
-
Removethewheellugnuts, then pull the wheel off the hub.
-
Installthesparewheel. Then installthewheellugnuts with theconeshapedendofthenuttowardthewheel. Lightlytightenthelugnuts. To avoid theriskofforcing the vehicle off the jack, donottightenthelugnuts fully until the vehicle has been lowered.
-
Lowerthevehiclebyturningthejackscrewtotheleft.
10.Finishtighteningthelugnuts.Pushdownonthe wrenchwhiletighteningforincreasedleverage.Alternate lugnutsuntileachnuthasbeenightenedtwice.Correct wheelnuttightnessis130N·m(95ft.lbs).Ifindoubt aboutthecorrecttightness,havethemcheckedwitha torquewrenchbyyourdealerorataservicestation.
- Lowerthejacktoitsfullyclosedposition.
WARNING!
A loose tire or jack, thrown forward in a collision or hard stop could endanger the occupants of the vehicle. Always stow the jack parts and the spare tire in the places provided.
-
Securetheflatorsparetireasfollows:
-
Thecentercapofacastaluminumwheelmustbe removedpriortoflattirestowage.Storethecenter capinsidethegloveboxorotherstoragecompartment.
-
Turnthewheelsothatthevalve-stemisdown.Slide thewheelretainerthroughthecenterofthewheel andpositionitproperlyacrosstewheelopening.
-
For convenience in checking the spare tire inflation, stow with the valve-stemtoward therearofthe vehicle.
- Using the jack-handle, rotatethedrivenuttothe right until the wheel is drawn into place against the underside of the vehicle.
- Continueterotatethenutuntilyouhearthemechanismclickthreetimes.Itcannotbeovertightened. Pushagainsttthetireseveraltimestobesureitis securelyinplace.
13.Stowjackandhandle.
- Check the tire pressure as soon as possible. Correct pressure as required.
NOTE: Whenreinstallingthewheelcentercap, insure that thevalvestemsymbolonthebackofthecapis pointed towardthewheelvalvestem. Installthecenter capusinghandpressureonly.Donotuseahammer.
JUMP-STARTINGPROCEDURE SIFBATTERYIS LOW
WARNING!
Take care to avoid the radiator cooling fan whenever the hood is raised. It can start anytime the ignition switch is on. You can be hurt by the fan.
WARNING!
- Do not attempt to push or tow your vehicle to get it started. Vehicles equipped with an automatic transmission cannot be started this way. Unburned fuel could enter the catalytic converter and once the engine has started, ignite and damage the converter and vehicle. If the vehicle has a discharged battery, booster cables may be used to obtain a start from another vehicle. This type of start can be dangerous if done improperly, so follow this procedure carefully.
- Battery fluid is a corrosive acid solution; do not allow battery fluid to contact eyes, skin or clothing. Don't lean over battery when attaching clamps or allow the clamps to touch each other. If acid splashes in eyes or on skin, flush contaminated area immediately with large quantities of water.
-
A battery generates hydrogen gas which is flammable and explosive. Keep flame or spark away from the vent holes. Do not use a booster battery or any other booster source with an output that exceeds 12 volts.
-
We are yeprotection and remove anymetal jewelry such as watchbandsorbraceletsthatmightmakean inadvertentelectrical contact.
- When boost is provided by abattery in another vehicle, park that vehicle within boostercablereach and without letting the vehicle touch. Set the parking brake, placethe automatic transmission in PARK and turn the ignition switch to the OFF position for both vehicles.
- Turnofftheheater, radioandallunnecessaryelectrical loads.
- Connectoneendofajumpercabletothepositive terminalofthedischargedbattery. Connecttheotherend ofthesamecabletothepositiveterminalofthebooster battery.
272WHATODOINEMERGENCIES
- Connect the other cable, first to then negativeterminal of the booster battery and then to the engine of the vehicle with the discharged battery. Make sure you have agoodcontact on the engine.
6.Starttheengineinthevehiclewhichhasthebooster battery,lettheengineidleafewminutes,thenstartthe engineinthevehiclewiththedischargedbattery. - When removing the jumpercables, reversethe above sequence exactly. Becareful of themoving belts and fan.
DRIVINGONSLIPPERYSURFACES
Acceleration
Rapidaccelerationonsnowcovered, wet, or otherslipperysurfaces may cause the front wheel stop pullratically to other right or left. This phenomenon occurs when there is a difference in the surface extraction under the front (driving) wheels.
WARNING!
Rapid acceleration on slippery surfaces is dangerous. Unequal traction can cause sudden pulling of the front wheels. You could lose control of the vehicle and possibly have an accident. Accelerate slowly and carefully whenever there is likely to be poor traction (ice, snow, wet mud, loose sand, etc.).
Traction
Whendrivingonwetorslushyroads,itispossiblefora wedgeofwatertobuildupbetweenethetireandroad surface. Thisisknownashydroplaningandmaycause partialorcompletelossofvehiclecontrolandstopping ability.Toreducethispossibility,thefollowingprecautionsshouldbeobserved:
- Slowdown during grainstorms or when roads are slushy.
2.Slowdownifroadhasstandingwaterorpuddles.
3. Replacetireswhentreadwearindicatorsfirstbecome visible.
4. Keep tires properly inflated.
5. Maintainsufficientdistancebetweenyourvehicleand thevehicleinfronttoavoidacollisioninasuddenstop.
If your vehicle becomes stuck in mud, sandorsnow, it can often be moved by arocking motion. Turn your steering wheel right handle left to clear the area around the front wheels. Thenshift back and forth between Reverse and Drive. Usually the least accelerator pedal pressure to maintain therocking motion without spinning the wheels is most effective.
WARNING!
Fast spinning tires can be dangerous. Forces generated by excessive wheel speeds may cause tire damage or failure. A tire could explode and injure someone. Do not spin your vehicle's wheels faster than 35 mph (55 km/h) when you are stuck. And don't let anyone near a spinning wheel, no matter what the speed.
CAUTION!
Racing the engine or spinning the wheels too fast may lead to transmission overheating and failure. It can also damage the tires. Do not spin the wheels above 35 mph (55 km/h).
274WHATODOINEMERGENCIES
TOWINGADISABLEDVEHICLE
WithIgnitionKey
Front Wheel Drive
Your vehicle may be towed under the following conditions: The gear selectorm must be in NEUTRAL, the distance to be traveled must not exceed 100 miles (160 km), the towingspeed must not exceed 44 mph (72 km/h), and both front and rear wheels must be on the ground. Exceeding these to varying limits may cause a transmission gear train failure. If the transmission is not operative, or if the vehicle is to be towed more than 100 miles (160 km), the vehicle must be towed with the front wheel soff the ground.
All Wheel Drive
Your vehicle may be towed under the following conditions: The gear selectorm must be in NEUTRAL, the distancetobetraveled must not exceed 100 miles (160 km), the towingspeed must not exceed 44 mph (72 km/h), and both front and rear wheels must be on the ground. If your vehicle must be towed farther or at higher rates speed, it must be transported on a flatbed truck.
All Transmissions
CAUTION!
- Do not attempt to tow this vehicle from the front with sling type towing equipment. Damage to the front fascia will result.
- Always use wheel lift equipment when towing from the front. The only other approved method of towing is with a flat bed truck.
- Do not tow the vehicle from the rear. Damage to the rear sheet metal, liftgate and fascia will occur.
- Do not push or tow this vehicle with another vehicle as damage to the bumper fascia and transmission may result.
Ifitisnecessarytousetheaccessorieswhilebeingtowed (wipers,defrosters,etc.),thekeymustbeintheON position,nottheACCESSORYposition.Makecertainthe transmissionremainsinNEUTRAL.
WithoutThelgnitionKey
Specialcaremustbetakenwhenthevehicleistowed withtheignitionintheLOCKposition.Theonlyapprovedmethodoftowingwithouttheignitionkeyis withaflatbedtruck.Propertowingequipmentisnecessarytopreventdamagetothevehicle.
276WHATODOINEMERGENCIES
TOWINGTHISVEHICLEBEHINDANOTHER VEHICLE(Flattowingwithallfourwheelsonthe ground)
Flattowingofvehiclesequippedwithanautomatic transmission,isonlypermittedwithinthelimitations describedinthissection.
TOWINGTHISVEHICLEBEHINDANOTHER VEHICLEWITHATOWDOLLEY
Themanufacturerdoes not recommend thatyoutowan All-WheelDrive(AWD)orfrontwheeldrivevehicleona towdolley.Vehicledamagemayoccur.
MAINTAINING YOUR VEHICLE
CONTENTS
■3.5LEngine....280
■OnboardDiagnosticSystem—OBDII. . . . . . . 2 8 1
■EmissionsInspectionAndMaintenance Programs. 282
■ReplacementParts. 283
■DealerService. 283
■MaintenanceProcedures. 284
□EngineOil. 284
□EngineOilFilter. 288
□ Drive Belts — Check Condition And Tension . .288
□SparkPlugs 289
□EngineAirCleanerFilter. 289
□FuelFilter. 289
□Catalytic Converter 290
□ Maintenance-Free Battery .....291
□ Air Conditioner Maintenance .....293
□ Power Steering — Fluid Check .....294
□ Front & Rear Suspension Ball Joints .....295
278MAINTAININGYOURVEHICLE
□SteeringShaftSeal. 295
□SteeringLinkage. 295
□DriveShaftUniversalJoints. 295
□BodyLubrication....296
□WindshieldWiperBlades. 296
□WindshieldAndRearWindowWashers. . . . . 2 9 7
□ExhaustSystem. 297
□CoolingSystem. 298
□HosesAndVacuum/VaporHarnesses. . . . . . 3 0 3
□Brakes. 304
□MasterCylinder—ABSBrakesBrakeFluidLevel Check. 305
□FuelSystemHoses. 306
□AutomaticTransmission. 307
□AllWheelDrive(AWD)—IfEquipped. . . . . 3 1 0
□ Front And Rear Wheel Bearings .....311
□AppearanceCareAndProtectionFrom Corrosion. 3 11
□CleaningTheCenterConsoleCup Holders...316
■IntegratedPowerModule(IPM). . . . . . . . . . . 3 1 6
■VehicleStorage. 319
■ReplacementLightBulbs. 320
■BulbReplacement. 321
□StandardQuadHeadlights. 3 2 1
□HighIntensityDischargeHeadlights(HID)—If Equipped. 3 2 2
MAINTAININGYOURVEHICLE279
□FrontPark/TurnSignalAndSidemarker Lights. 322
□FrontFogLight. 323
☐RearTail,Stop,TurnSignal,SideMarkerAnd Back-UpLights. 3 2 4
□LicenseLight. 324
■FluidsAndCapacities. 325
■RecommendedFluids,LubricantsAndGenuine Parts. 326
□Engine. 326
□Chassis. 327
280MAINTAININGYOURVEHICLE
3.5LENGINE
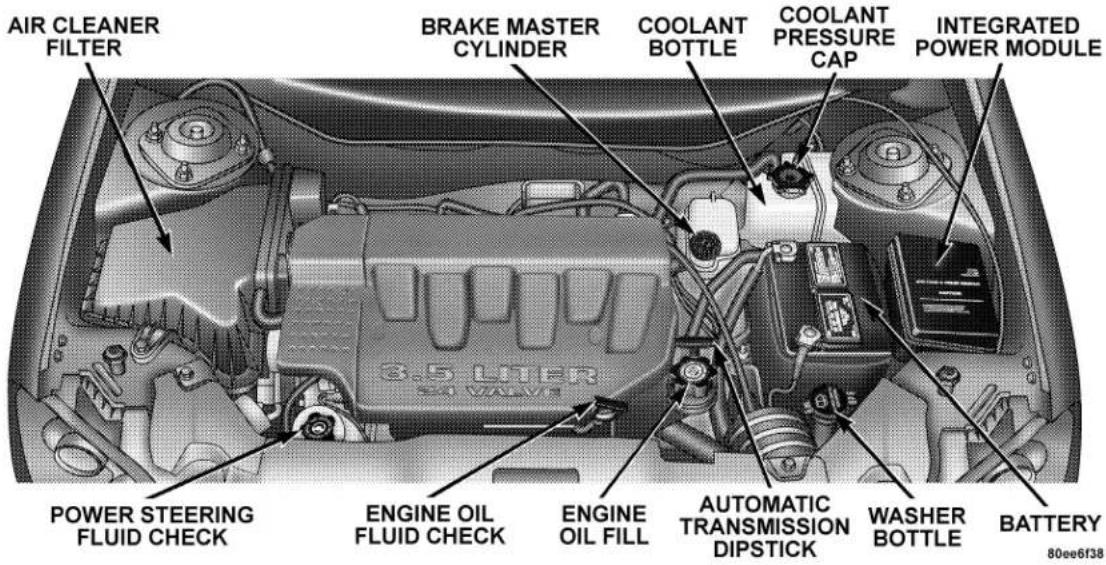
ONBOARDDIAGNOSTICSYSTEM—OBDII
Yourvehicleisequippedwithasophisticatedonboard diagnosticsystemcalledOBDII. Thissystemmonitors theperformanceoftheemissions,engine,andautomatic transmissioncontrolsystems. Whenthesesystemsare operatingproperly,yourvehiclewillprovideexcellent performanceandfueleconomy,aswellasengineemissionswellwithincurrentgovernmentregulations.
Ifanyofthesesystemsrequireservice,theOBDIIsystem willturnonthe"MalfunctionIndicatorLight."Itwill alsostorediagnosticcodesandotherinformationto assistyourservicetechnicianinmakingrepairs.Althoughyourvehiclewillusuallybedrivableandnot needtowing,seeyourdealerforserviceassoonas possible.
CAUTION!
- Prolonged driving with the "Malfunction Indicator Light" on could cause further damage to the emission control system. It could also affect fuel economy and driveability. The vehicle must be serviced before any emissions tests can be performed.
- If the "Malfunction Indicator Light" is flashing while the engine is running, severe catalytic converter damage and power loss will soon occur. Immediate service is required.
EMISSIONSINSPECTIONANDMAINTENANCE PROGRAMS
Insomelocalities, it maybe a legal requirement to pass an inspection of your vehicle's semissions control system. Failure to pass could prevent vehicleregistration.

ForstateswhichhaveanI/M(Inspection and Maintenance)requirement,thischeckverifiesthe following:theMIL(MalfunctionIndicatorLamp)
isfunctioningandisnotonwhentheengineisrunning, andthattheOBD(OnBoardDiagnostic)systemisready fortesting.
Normally, theOBDsystemwillbeready. TheOBD systemmay not beready if your vehicle was recently serviced, if you recently had a dead battery, or a battery replacement. If the OBD system should be determined not ready for the I/M test, your vehicle may fail the test.
Yourvehiclehasasimpleignitionkeyactuatedtest whichyoucanusepriortogoingtotheteststation.To checkifyourvehicle'sOBDsystemisready,youmustdo thefollowing:
- Insert your ignition key into the ignitions switch.
- TurntheignitiontotheONposition, butdonotcrank orstarttheengine.
- If you crank or start the engine, you will have to start the test over.
- As soon as y out turn your key to the ON position, you will see your MIL symbol come on as part of an normal bulb check.
- Approximately 15 seconds later, one of two things will happen:
a. The MIL will flash for about 10 seconds and then return to being fully illuminated until you turn off the
ignitionkeyorstarttheengine. This mean that your vehicle's OBD system is not ready and you should not proceed to the I/Mstation.
b. The MIL will not flash at all and will remain fully illuminated until y out turn off the ignition key or start the engine. This means that your vehicle's OBD system is ready and you can proceed to the I/M station.
If your OBD system is not ready, you should see your authorized dealer or repair facility. If your vehicle was recently serviced or had a battery failure or replacement, you may need to do nothing more than drive your vehicle as you normally would in order for your OBD system to update. Are check with the abovetest routine may then indicate that the system is now ready.
Regardless of whether your vehicle's OBD system is ready or not ready, if the MIL symbol is illuminated during normal vehicle operation, you should have your vehicleservicedbeforegoingtotheI/Mstation.TheI/M stationcanfailyourvehiclebecausetheMILsymbolison withtheengine running.
REPLACEMENTPARTS
UseofgenuineMopar®partsfornormal/scheduled maintenanceandrepairshighlyrecommendedtoinsurethedesigned performance.Damage orfailures causedbytheuseofnon-Mopar®partsformaintenance andrepairswillnotbe coveredby themanufacturer's warranty.
DEALERSERVICE
Yourdealerhasthequalifiedservicepersonnel, special toolsandequipmenttoperformallserviceoperationsin anexpertmanner.ServiceManualsareavailablewhich includedetailedserviceinformationforyourvehicle. Refertothesemanualsbeforeattemptinganyprocedure yourself.
284MAINTAININGYOURVEHICLE
NOTE: Intentionaltamperingwithemissionscontrol systemscanresultincivilpenaltiesbeingassessed againstyou.
WARNING!
You can be badly injured working on or around a motor vehicle. Do only that service work for which you have the knowledge and the proper equipment. If you have any doubt about your ability to perform a service job, take your vehicle to a competent mechanic.
MAINTENANCEPROCEDURES
Thepagesthatfollowcontaintherequired maintenance servicesdeterminedbytheengineerswhodesignedyour vehicle.
Besidesthemaintenanceitemsforwhichtherearefixed maintenanceintervals,thereareotheritemsthatshould operatesatisfactorilywithoutperiodicmaintenance. However,ifamalfunctionoftheseitemsdoesoccur,it couldadverselyaffecttheengineorvehicleperformance. Theseitemsshouldbeinspectedifamalfunctionis observedorsuspected.
EngineOil
Checking Oil Level
Toassureproperengine Lubrication, the engine oil must be maintained at the correct level. Check the oil level at regular intervals, such as every fuel stop.
Thebesttimetochecktheengineoillevelisabout5 minutesafterafullywarmedengineisshutofforbefore startingtheengineafterithassatovernight.
Checkingtheoilwhilethevehicleisonlevelgroundwill improvetheaccuracyoftheoillevelreadings.Maintain theoillevelbetweentheMINandMAXmarkingsonthe dipstick.Addingonequartofoilwhenthereadingisat theMINmarkwillresultinaMAXreadingonthese engines.
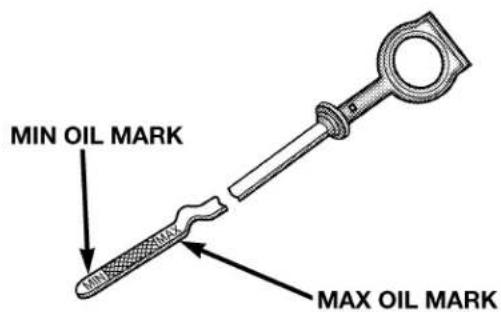
809744ab
CAUTION!
Overfilling or underfilling will cause oil aeration or loss of oil pressure. This could damage your engine.
286MAINTAININGYOURVEHICLE
Change Engine Oil
Roadconditionsandyourkindofdrivingaffectsthe intervalatwhichyouroilshouldbechanged.Checkthe followinglisttoseeifanyapplytoyou.
• Dayornighttemperaturesarebelow32°F(0°C).
- StopandGodriving.
- Extensiveengineidling.
- Drivingindustryconditions.
- Shorttripsoflessthan10miles(16km).
- Morethan50% of your driving is sustained high speeds during hot weather, above 90°F (32°C).
- Trailertowing.
• Taxi, Policeordeliveryservice(commercialservice).
- Off-Roadordesertoperation.
NOTE: IfANY oftheseapplytoyouthenchangeyour engineoilevery3,000miles(5000km)or3months, whichevercomesfirstandfollowschedule"B"ofthe "MaintenanceSchedules"sectionofthismanual.
If none of these apply to you, then change your engine oil at every interval shown on schedule "A" of the "Maintenance Schedules" section of this manual.
NOTE: Undernocircumstanceshouldoilchangeintervalsexceed6000miles(10000km)or6months whichevercomesfirst.
Engine Oil Selection
Forbestperformanceandmaximumprotectionunderall typesofoperatingconditions,themanufactureronly recommendsengineoilsthatareAPlcertifiedandmeet therequirementsofDaimlerChryslerMaterialStandard MS-6395.
American Petroleum Institute (API) Engine Oil Identification Symbol

Thissymbolmeansthattheoilhas beencertifiedbytheAmerican PetroleumInstitute(API).The manufactureronly recommends APICertifiedengineoils.
Engine Oil Viscosity Chart
The proper SAE viscosity grade of engine oil should be selected based on the following recommendation and be within the operating temperatures shown in the engine oil viscosity chart.
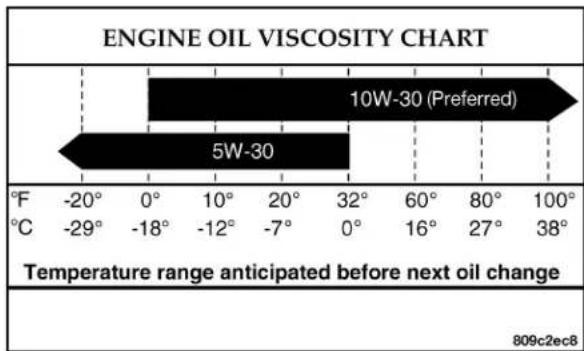
bar
| Temperature Range | Range | | ---------------- | ----------- | | 10W-30 (Preferred) | 10W-30 (Preferred) | | 5W-30 | 5W-30 (Preferred) |- SAE 10W-30 engine oil is preferred. SAE 5W-30 engine oilisallowed during cold weather only to improve cold weather starting.
Lubricantswhichdonothaveboth,theengineoilcertificationmarkandthecorrectSAEviscositygradenumbershouldnotbeused.
288MAINTAININGYOURVEHICLE
Synthetic Engine Oils
Youmay uses synthetic engine oils provided that the recommended oil quality requirements are met and the recommended maintenance intervals for oil and filter changes are followed.
Materials Added to Engine Oil
Themanufacturestrongly recommends against the addition of any additives (other than leak detection dyes) to the engine oil. Engine oil is an engineered product and it's performance may be impaired by supplemental additives.
Disposing of Used Engine Oil And Oil Filters
Careshouldbetakenindisposingofusedengineoiland oilfiltersfromyourvehicle.Usedoilandoilfilters, indiscriminatelydiscarded,canpresentaproblemtothe environment.Contactyourdealer,servicestation,or governmentalagencyforadviceonhowandwhereused oilandoilfilterscanbesafelydiscardedinyourarea.
EngineOilFilter
The engine oil filters should be replaced at every engine oil change.
Engine Oil Filter Selection
Thismanufacture'sengineshaveafull-flowtypeoilfilter. Useafilterofthistypeforreplacement.Thequalityof replacementfiltersvariesconsiderably.Onlyhighquality filtersshouldbeusedtoassuremostefficientservice. MoparEngineOilFiltersareahighqualityoilfilterand arerecommended.
DriveBelts—CheckConditionandTension
Atthemileageindicatedinthemaintenanceschedule,all beltsshouldbecheckedforconditionandpropertension. Improperbeltensioncancausebeltslippageandfailure.
Beltsshouldbeinspectedforevidenceofcuts,cracks,or glazing,andreplacedifthereisindicationofdamage whichcouldresultinbeltfailure.Lowgeneratorbelt tensioncancausebatteryfailure.
Alsocheckbeltroutingtomakesurethereisnointerferencebetweenthebeltsandotherenginecomponents.
SparkPlugs
Sparkplugsmustfireproperlytoassureengineperformanceandemissioncontrol.Newplugsshouldbeinstalledatthespecifiedmileage.Theentiresetshouldbe replacedifthereisanymalfunctionduetoafaultyspark plug.Malfunctioningsparkplugscandamagethecatalyticconverter.Forpropertyofreplacementspark plugs,refertothe"VehicleEmissionControlInformation"labelintheenginecompartment.
EngineAirCleanerFilter
Undernormaldrivingconditions,replacetheairfilterat theintervalsshownonSchedule"A".If,however,you drivethevehiclefrequentlyunderdustyorsevereconditions,thefilterelementsshouldbeinspectedperiodicallyandreplacedifnecessaryattheintervalsshownon Schedule"B".
WARNING!
The air cleaner can provide a measure of protection in the case of engine backfire. Do not remove the air cleaner unless such removal is necessary for repair or maintenance. Make sure that no one is near the engine compartment before starting the vehicle with the air cleaner removed. Failure to do so can result in serious personal injury.
FuelFilter
Apluggedfuelfiltercancausestalling,limitthespeedat whichavehiclecanbedrivenorcausehardstarting. Shouldanexcessiveamountofdirtaccumulateinthe fueltank,filterreplacementmaybenecessary.Seeyour localdealerforservice.
290MAINTAININGYOURVEHICLE
CatalyticConverter
The catalytic converter requires the use of unleaded fuel only. Leaded gasoline will destroy the effectiveness of the catalyst as an emission control device.
Undernormaloperatingconditions, the catalyticconverter will not require maintenance. However, it is important to keep the engine properly tuned to assure proper catalyst operation and prevent possible catalyst damage.
CAUTION!
Damage to the catalytic converter can result if your vehicle is not kept in proper operating condition. In the event of engine malfunction, particularly involving engine misfire or other apparent loss of performance, have your vehicle serviced promptly. Continued operation of your vehicle with a severe malfunction could cause the converter to overheat, resulting in possible damage to the converter and the vehicle.
NOTE: Intentionaltamperingwithemissionscontrol systemscanresultincivilpenaltiesbeingassessed againstyou.
WARNING!
A hot exhaust system can start a fire if you park over materials that can burn. Such materials might be grass or leaves coming into contact with your exhaust system. Do not park or operate your vehicle in areas where your exhaust system can contact anything that can burn.
Inunusualsituationsinvolvinggrosslymalfunctioning engineoperation,ascorchingodormayindicatesevere andabnormalcatalystoverheating.Ifthisoccurs,the vehicleshouldbestopped,theengineshutoffandthe vehicleallowedtocool.Thereafter,service,includinga tune-uptomanufacturer'sspecifications,shouldbeobtainedimmediately.
Tominimizethepossibilityofcatalystdamage:
- Donotshutofftheengineorinterrupttheignition whenthetransmissionisingearandthevehicleisin motion.
- Donottrytostartenginebypushingortowingthe vehicle.
- Donotidletheenginewithanysparkplugwires disconnectedorremoved,suchaswhendiagnostic testing,orforprolongedperiodsduringveryrough idlingormalfunctioningoperatingconditions.
Maintenance-FreeBattery
ThetopoftheMAINTENANCE-FREEbatteryispermanentlysealed.Youwillneverhavetoaddwater,noris periodicmaintenancerequired.
WARNING!
- Battery fluid is a corrosive acid solution and can burn or even blind you. Don't allow battery fluid to contact your eyes, skin or clothing. Don't lean over a battery when attaching clamps. If acid splashes in eyes or on skin, flush the area immediately with large amounts of water.
- Battery gas is flammable and explosive. Keep flame or sparks away from the battery. Don't use a booster battery or any other booster source with an output greater than 12 volts. Don't allow cable clamps to touch each other.
- Battery posts, terminals and related accessories contain lead and lead compounds. Wash hands after handling.
CAUTION!
- It is essential when replacing the cables on the battery that the positive cable is attached to the positive post and the negative cable is attached to the negative post. Battery posts are marked positive (+) and negative (-) and identified on the battery case. Cable clamps should be tight on the terminal posts and free of corrosion.
- If a "fast charger" is used while battery is in vehicle, disconnect both vehicle battery cables before connecting the charger to battery. Do not use a "fast charger" to provide starting voltage.
AirConditionerMaintenance
Forbestpossibleperformance,yourairconditioner shouldbecheckedandservicedbyanAuthorizedDealer atthestartofeachwarmseason.Thisserviceshould includecleaningofthecondenserfinsandasystem performancecheck.Drivebelttensionsshouldalsobe checkedatthistime.
WARNING!
- Use only refrigerants approved by the manufacturer for your air conditioning system. Some unapproved refrigerants are flammable and can explode, injuring you. Other unapproved refrigerants can cause the system to fail, requiring costly repairs.
- The air conditioning system contains refrigerant under high pressure. To avoid risk of personal injury or damage to the system, adding refrigerant or any repair requiring lines to be disconnected should be done by an experienced repairman.
294MAINTAININGYOURVEHICLE
Refrigerant Recovery And Recycling
R-134aAirConditioningRefrigerantisahydrofluorocarbon(HFC)thatisendorsedbytheEnvironmentalProtectionAgencyandisanozone-savingproduct.However, themanufacturerrecommendsthatairconditioning servicebeperformedbydealersorotherservicefacilities usingrecoveryandrecyclingequipment.
NOTE: AirConditioningsystemsfoundtobecontaminatedwithA/CSystemSealers,StopLeakProducts,Seal Conditioners,CompressorOil,orRefrigerantsnotapprovedbythemanufacturer,voidsthewarrantyforthe AirConditioningsystem.
A/C Air Filter
Thefilteraccessdoorislocatedundertheinstrument panelonthepassengerside.Toreplacethefilterslidethe locktowardtherearofthevehicle(unlockposition). Removetheaccessdoorandpullthefilterdownward.
Wheninstallinganewfilter,ensureitsproperorientation.Aligntheblackarrowonthebottomofthefilter frameworkthedirectionofairflow(awayfromtheblowermotorandtowardsthecenterofthecar).
Refer to the "Maintenance Schedules" section of this manual for the recommended air conditioning filter replacement intervals.
PowerSteering—FluidCheck
Checking the power steering fluid level at defined service interval is not required. The fluid should only be checked if leakissuspected, abnormal noises are apparent, and /orthesystem is not functioning as anticipated. Coordinate inspection effort through a certified Daimler Chrysler Dealership."
WARNING!
Fluid level should be checked on a level surface and with the engine off to prevent injury from moving parts and to insure accurate fluid level reading. Do not overfill. Use only manufacturers recommended power steering fluid.
If necessary, addfluidtorestoretotheproperindicated level. With aclean cloth, wipeanyspilled fluid from all surfaces. RefertoRecommended Fluids, Lubricants, and Genuine Parts for correct fluid type.
Front&RearSuspensionBallJoints
Thesuspensionballjointsarepermanentlysealed. No regularmaintenanceisrequiredforthesecomponents.
SteeringShaftSeal
Thesteeringshaftseal,atthepointwherethshaftpasses throughthebulkhead,islubricatedwhenitisinstalled.If thesealbecomesnoisywhenthesteringshaftisturned, itshouldbelubricatedwithamulti-purposegrease. Moparmulti-purposelubricantisrecommended.
SteeringLinkage
Thetierodendballjointsarepermanentlylubricatedand donotrequireperiodicmaintenance.
DriveShaftUniversalJoints
Yourvehiclehasconstantvelocityuniversaljoints.Periodiclubricationofthesejointsisnotrequired.However, thejointbootsshouldbeinspectedforexternalleakageor damagewhenothermaintenanceisperformed.Ifleakage ordamageisevident,theuniversaljointbootandgrease shouldbereplacedimmediately.
296MAINTAININGYOURVEHICLE
Continued operation could result in failure of the universal joint duetowater and dirt contamination of the grease. This would require complete replacement of the joint assembly.
BodyLubrication
Locksandallbodypivotpoints,includingsuchitemsas seattracks,doors,liftgateandhoodhinges,shouldbe lubricatedperiodicallytoassurequiet,easyoperation andtoprotectagainstrustandwear.Priorototheapplicationofanylubricant,thepartsconcernedshouldbe wipedcleantoremovedustandgrit;afterlubricating excessoilandgreaseshouldberemoved.Particular attentionshouldalsobegiventohoodlatchingcomponentstoinsureproperfunction.Whenperformingother underhoodservices,thehoodlatch,releasemechanism andsafetycatchshouldbecleanedandlubricated.
The externallockcylinders should be lubricated twice a year, preferably in the fallandspring. Apply asmall
amountofahighqualitylubricantsuchasMopar®Lock CylinderLubricantdirectlyintothelockcylinder.
WindshieldWiperBlades
Therubberedgesofthewiperbladesandthewindshield shouldbecleanedperiodicallywithaspongeorsoftcloth andamildnonabrasivecleaner.Thiswillremoveaccumulationsofsaltorroadfilm.
Operationofthewipersondryglassforlongperiods maycausedeteriorationofthewiperblades.Alwaysuse washerfluidwhenusingthewiperstoremovesaltordirt fromadrywindshield.
Avoidusingthewiperbladestoremovefrostoricefrom thewindshield.Keepthebladerubberoutofcontactwith petroleumproductssuchasengineoil,gasoline,etc.
WindshieldandRearWindowWashers
Thefluidreservoirforthewindshieldwashersandthe rearwindowwasherisshared.Itislocatedintheengine compartmentandshouldbecheckedforfluidlevelat regularintervals.Fillthereservoirwithwindshield washersolvent(notradiatorantifreeze)andoperatethe systemforafewsecondstoflushouttheresidualwater.
Thewasherfluidreservoirwillholdafullgallonoffluid whentheLowWasherFluidLightilluminates.
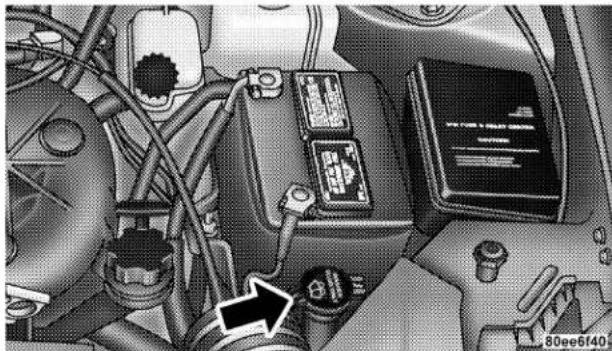
natural_image
Interior view of a vehicle's engine bay with visible wiring and battery components (no readable text or symbols)ExhaustSystem
The best protection against carbon monoxide entry into the vehicle body is a properly maintained engine exhaust system.
Wheneverachangeisnoticedinthesoundoftheexhaust system,whenexhaustfumescanbedetectedinsidethe vehicle,orwhentheundersideorrearofthevehicleis
298MAINTAININGYOURVEHICLE
damaged, have a competent mechanic inspect the complete exhaust system and adjacent body areas for broken, damaged, deteriorated, or mispositioned parts. Open seams or loose connections could permit exhaust fumes to seep into the passenger compartment. In addition, inspect the exhaust system each time the vehicle is raised for lubrication or oil change. Replace as required.
WARNING!
Exhaust gases can injure or kill. They contain carbon monoxide (CO) which is colorless and odorless. Breathing it can make you unconscious and can eventually poison you. To avoid breathing CO, follow the preceding safety tips.
CoolingSystem
Inspection
WARNING!
- When working near the radiator cooling fan, turn the ignition key to the OFF position. The fan is temperature controlled and can start at any time when the ignition key is in the ON position.
- You or others can be badly burned by hot coolant or steam from your radiator. If you see or hear steam coming from under the hood, don't open the hood until the radiator has had time to cool. Never try to open a cooling system pressure cap when the radiator is hot.
Coolant Checks
Coolantprotectionchecksshouldbemadevery12 months(priortotheonsetoffreezingweather,where applicable).Ifcoolantisdirtyorrustyinappearance,the systemshouldbedrained,flushedandrefilledwithfresh coolant.CheckthefrontoftheA/Ccondenserforany accumulationofbugs,leaves,etc.Ifdirty,cleanbygently sprayingwaterfromagardenhoseverticallydownthe faceofthecondenser.
Check the coolingsystem hoses for brittlerubber, cracking, tears, cuts and tightness of the connection at the bottle and radiator. Inspect the entire system for leaks.
Cooling System — Drain, Flush and Refill
Attheintervalsshownintheappropriatemaintenance schedule,thesystemshouldbedrained,flushed and refilled.
If the solution is dirty or contains a considerable amount of sediment, clean and flush with reliable cooling system cleaner. Follow with thorough rinsing to remove all deposits and chemicals. Properly dispose of antifreezesolution.
Selection Of Coolant
Useonlythemanufacturersrecommendedcoolant, refer toRecommendedFluids,LubricantsandGenuineParts forcorrectcoolanttype.
CAUTION!
- Mixing of coolants other than the specified HOAT coolant may result in decreased corrosion protection and engine damage that may not be covered under the new vehicle warranty. If a non-HOAT coolant is introduced into the cooling system in an emergency, it should be replaced with the specified coolant as soon as possible.
- Do not use plain water alone or alcohol base antifreeze products. Do not use additional rust inhibitors or antirust products, as they may not be compatible with the radiator coolant and may plug the radiator.
- This vehicle has not been designed for use with Propylene Glycol based coolants. Use of Propylene Glycol based coolants is not recommended.
Adding Coolant
Whenaddingcoolant, or refilling the system, a minimum of 50% solution of ethyleneglycolantifreeze coolant in waters should be used. Higher concentrations (not to exceed 70%) are required if temperatures below -37°F (-38°C) are anticipated.
Useonlyhighpuritywatersuchasdistilledordeionized waterwhenmixingthewater/antifreezesolution.The useoflowerqualitywaterwillreducetheamountof corrosionprotectionintheenginecoolingsystem.
Pleasenotethatitistheowner's responsibility to maintain the proper level of protection against freezing according to the temperatures occurring in the area where the vehicle is operated.
NOTE: Mixingcoolanttypeswilldecreasethelifeofthe enginecoolantandwillrequiremorerefrequentcoolant changes.
Coolant Pressure Cap
Thecoolantpressurecapmustbefullytightenedto preventlossofcoolant,andtoinsurethatcoolantwill returntothecoolantbottlefromtheoverflowtank.The coolantpressurecapshouldbeinspectedandcleanedif thereisanyaccumulationofforeignmaterialonthe sealingsurfaces.
WARNING!
- The warning words "DO NOT OPEN HOT" on the coolant pressure cap are a safety precaution. Never add coolant to the cooling system when the engine is overheated. Do not loosen or remove the coolant pressure cap to cool an overheated engine. Heat causes pressure to build up in the cooling system. To prevent scalding or injury, do not remove the coolant pressure cap while the system is hot or under pressure.
- Do not use a pressure cap other than the one specified for your vehicle. Personal injury or engine damage may result.
Disposal of Used Engine Coolant
Usedethyleneglycolbasedenginecoolantisaregulated substancerequiringproperdisposal.Checkwithyour localauthoritiestodeterminethedisposalrulesforyour
community.Topreventingestionbyanimalsorchildren donotstoreethyleneglycolbasedenginecoolantinopen containersorallowittoremaininpuddlesonthe ground.Ifingestedbyachild,contactaphysician immediately.Cleanupgroundspillsimmediately.
Coolant Level
Thecoolantbottleprovidesaquickvisualmethodfor determiningthatthecoolantlevelisadequate.Withthe engineoffandcold,thecoolantlevelshouldbebetween therangesindicatedonthebottle.Somedarkeningofthe coolantbottlewilloccurovertime.Thisisnormal.
When additional coolant is needed to maintain the proper level, it should be added to the coolant bottle. Do not overfill. When filling the coolant system, utilize the bleed vallevocated on the top of the radiator in the engine compartment on the passengers side. Use the bleed valvetobleed air when the system is cold and the pressure cap is removed from the coolant bottle.
Points to Remember
NOTE: Whenthevehicleisstoppedafterafewmilesof operation,youmayobservevaporcomingfromthefront oftheenginecompartment.Thisisnormallyaresultof moisturefromrain,snow,orhighhumidityaccumulatingontheradiatorandbeingvaporizedwhenthe thermostatopens,allowinghotwatertoentertheradiator.
Ifanexaminationofyourenginecompartmentshowsno evidenceofradiatororhoseleaks,thevehiclemaybe safelydriven.Thevaporwillsoondissipate.
- Donotoverfillthecoolantbottle.
- Checkcoolantfreezepointinthesystem.
-
Iffrequentcoolantadditionsarerequired, the cooling system should be pressure tested for leaks.
-
Maintaincoolantconcentrationat50%ethyleneglycol antifreeze(minimum)inwaterforpropercorrosion protectionofyourenginewhichcontainsaluminum components.
- Makesurethattheradiatorandcoolantbottlehoses arenotkinkedorobstructed.
- KeepthefrontoftheradiatorandthefrontoftheA/C condenserclean.
- Donotchangethethermostatforsummerorwinter operation. If replacement is every necessary, install ONLY the correct typethermostat. Other designs may result in unsatisfactory cooling performance.
- Increasingenginespeedatidledoesnotreducecoolanttemperature!PuttransmissioninNEUTRALand letengineidleatnormalengineidlespeed.
HosesAndVacuum/VaporHarnesses
Inspect surfaces of hoses and nylontubing forevidence of heat and mechanical damage. Hardor soft spots, brittlerubber, cracking, tears, cuts, abrasions, and excessive wellings indicated deterioration of the rubber.
Payparticularattentiontothosehosesnearestttohigh heatsourcessuchastheexhaustmanifold.Inspecthose routingobesurehosesdonotcomeincontactwithany heatsourceormovingcomponentwhichmaycauseheat damageormechanicalwear.
Insurenylontubingintheseareashasnotmeltedor collapsed.
Inspectallhoseconnectionssuchasclampsandcouplingstomakesuretheyaresecureandnoleaksare present.
Components should bere placed immediately if there is any evidence of wearordamage that could cause failure.
Brakes
Inordertoassurebrakesystemperformance, allbrake systemcomponentsshouldbeinspectedperiodically. SuggestedserviceintervalscanbefoundintheMaintenanceSchedules.
WARNING!
Riding the brakes can lead to brake failure and possibly an accident. Driving with your foot resting or riding on the brake pedal can result in abnormally high brake temperatures, excessive lining wear, and possible brake damage. You wouldn't have your full braking capacity in an emergency.
Brake And Power Steering Hoses
Whenthevehicleisservicedforscheduledmaintenance, inspectsurfaceofhosesandnylontubingforevidenceof heatandmechanicaldamage.Hardandbrittlerubber,
cracking, tears, cuts, abrasion, and excessiveswelling indicated deterioration of the rubber. Particular attention should be made to examining those hoses surfaces nearest to high heat sources, such as the exhaust manifold.
Insurenylontubingintheseareashasnotmeltedor collapsed.
Inspectallhoseconnectionssuchasclampsandcouplingstomakesuretheyaresecureandnoleaksare present.
NOTE: Often, fluids such as oil, power steering fluid, and brake fluid are used during assembly plant operation to facilitate the assembly of hosestocouplings. Therefore, oil wetness at the hose-coupling area is not necessarily an indication of leakage. Actual dripping of hot fluid when systems are under pressure (during vehicle operation), should be noted before a hose is replaced based on leakage.
NOTE: Inspectionofbrakehosesshouldbeperformed wheneverthebrakesystemisservicedandatevery engineoilchange.Inspechydraulicbrakehosesfor surfacecracking,scuffing,orwornspots.Ifthereisany evidenceofcracking,scuffing,orwornspots,thehose shouldbereplacedimmediately!Eventualdeterioration of thehosecantakeplaceresultinginapossibilityofa burstfailure.
WARNING!
Worn brake hoses can burst and cause brake failure. You could have an accident. If you see any signs of cracking, scuffing, or worn spots, have the brake hoses replaced immediately.
MasterCylinder—ABSBrakesBrakeFluidLevel Check
The fluid level in the master cylinder should be checked when performing underhood services, or immediately if the brakesystem warning light indicates system failure.
Cleanthetopofthemastercylinderareabeforeremoving thecap.Addfluidtobringtheleveluptothetopofthe "FULL" markonthesideofthemastercylinderreservoir.
Overfillingoffluidisnotrecommendedbecauseitmay causeleakinginthesystem.
Addenoughfluidtobringtheleveluptotherequirementsdescribedonthebrakefluidreservoir.Withdisc brakes,fluidlevelcanbeexpectedtofallasthebrake padswear.However,lowfluidlevelmaybecausedbya leakandacheckupmaybeneeded.
306MAINTAININGYOURVEHICLE
Useonlymanufacturersrecommendedbrakefluid, refer toRecommendedFluids,LubricantsandGenuineParts forcorrectfluidtype.
WARNING!
• Overfilling the brake fluid reservoir can result in spilling brake fluid on hot engine parts and the brake fluid catching fire.
- Use of brake fluid that may have a lower initial boiling point or unidentified as to specification, may result in sudden brake failure during hard prolonged braking. You could have an accident.
Useonlybrakefluidthathasbeeninatightlyclosed containertoavoidcontaminationfromforeignmatteror moisture.
CAUTION!
Do not allow petroleum base fluid to contaminate the brake fluid, all brake seal components could be damaged causing partial or complete brake failure.
FuelSystemHoses
ElectronicFuelInjectionhighpressurefuelsystemsare designedwithhosesandquickconnectfittingswhich haveuniquematerialcharacteristicstoprovideadequate sealingandresistattackbydeterioratedgasoline.
You are urged to use only the manufactures specified hoses with quick connect fittings, or the inequivalent material and specification, in any fuel systems servicing. It is mandatory to replace any damaged hoses or quick connect fitting that have been removed during service.
Careshouldbetakenininstallingquickconnectfittings toinsuretheyareproperlyinstalledandfullyconnected. Seeyourauthorizeddealerforservice.
AutomaticTransmission
The automatic transmission and differential assembly are contained within a single housing.
Allautomatictransmissionsareequippedwithaconventionalfillertubeanddipstick.Iffluidisadded,itshould beaddedthroughthedipstickholeinthecase.
Thedipstick is located just behind the radiator, lower rightside.
Selection of Lubricant
It is important that the proper lubricant is used in the transmission to assure optimum transmission performance. Use only manufacturers recommended transmission fluid, refer to Recommended Fluids, Lubricants and
GenuinePartsforcorrectfluidtype.Itisimportantthat thetransmissionfluidbemaintainedattheprescribed levelusingtherecommendedfluid.
CAUTION!
Using a transmission fluid other than the manufacturers recommended fluid may cause deterioration in transmission shift quality and/or torque converter shudder. Using a transmission fluid other than the manufacturers recommended fluid will result in more frequent fluid and filter changes. Refer to Recommended Fluids, Lubricants and Genuine Parts for correct fluid type.
308MAINTAININGYOURVEHICLE
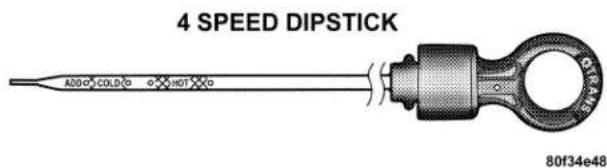
Procedure For Checking Fluid Level
Thefluidlevelintheautomatictransmissionsshouldbe checkedwheneverthevehicleisserviced.Operationwith animproperfluidlevelwillgreatlyreducethelifeofthe transmissionandofthefluid.
Toproperlychecktheautomatictransmissionfluidlevel, thefollowingproceduremustbeused:
- The vehicle must be on level ground.
-
The engines should be running at curbidlespeed for a minimum of 60 seconds.
-
Fully apply parking brake.
- Placethegareselectormomentarilyineachgear positionendingwiththeleverinP(PARK). Wipethearea aroundthedipstickcleantoeliminatethepossibility of dirtenteringthetransmission.
- Removethedipstick and determine if the fluid is hot, warm. Hot fluid is approximately 180^ F ( 82^ C), which is then normal operating temperature after the vehicle has been driven at least 15 miles (24 km). The fluid cannot be comfortably held between the fingertips. Cold when the fluid is below 80^ F ( 27^ C).
- Wipethedipstickcleanandreinsertuntilseated. Removedipstickandnotereading.
a. If the fluid is shot, thereadings should be in the crosshatched are marked "HOT" (between the upper two holes in the dipstick).
b. If the fluid disc cold, the fluid level should be between the lowertwoholes in the areamarked "COLD".
If the fluid level indicates slow, adds sufficient fluid to bring to the proper level.
CAUTION!
Do not overfill. Dirt and water in the transmission can cause serious damage. To prevent dirt and water from entering the transmission after checking or replenishing fluid, make certain that the dipstick cap is reseated properly.
Fluid and Filter Changes
Automatic transmission fluid should be changed on all transmissions as follows:
NormalUsage—Nochangenecessary
SevereUsage(fluidandfilter)—60,000miles(96000km)
SevereUsageisdefinedas:
- Police, taxi, limousine, commercial type operation, or trailertowing where the vehicle driven regularly for more than 45 minutes of continuous operation.
NOTE: RefertoSection8ofthismanualforMaintenanceSchedules.
If the transmission is disassembled for any reason, the fluid and filters should be changed.
Special Additives
Donotaddanyfluidadditivestothetransmission. The onlyexceptiontothispolicyistheuseofspecialdyesto aidindetectingfluidleaks. Theuseoftransmission sealersshouldbeavoidedastheymayadverselyaffect seals.
310MAINTAININGYOURVEHICLE
AllWheelDrive(AWD)—IfEquipped
Undernormaloperatingconditions,periodicfluidlevel checksandlubricantchangesforthePowerTransfer Unit,OverrunningClutchandRearCarrier,arenot required.Howeverwhenthevehicleisservicedforother reasons,theexteriorsurfaceofthesecomponentsshould beinspectedforevidenceoffluidleaks.Confirmedleaks shouldberepairedassoonaspossible.
Power Transfer Unit
Thefillplugislocatedonthesideofthepowertransfer unithousing. Thefluidshouldbemaintainedatalevel evenwiththebottomofthefillplugholewhenthe vehicleisparkedonalevelsurface.Ifitbecomesnecessarytoaddorreplacethefluid,useonlythemanufacturersrecommendedfluid,refertoRecommendedFluids,LubricantsandGenuinePartsforcorrectfluidtype.
Overrunning Clutch
Thefillplugislocatedonthesideoftheoverrunning clutchhousing.Thefluidshouldbemaintainedatalevel evenwiththebottomofthefillplugholewhenthe vehicleisparkedonalevelsurface.Ifitbecomesnecessarytoaddorreplacethefluid,useonlythemanufacturersrecommendedtransmissionfluid,refertoRecommendedFluids,LubricantsandGenuinePartsforcorrect fluidtype.Toassureperformance,itisimportantthatthe properlubricantbeused.
Rear Carrier
Thefillplugislocatedonthesideoftherearcarrier housing. Thefluidshouldbemaintainedataleveleven withthebottomofthefillplugholewhenthevehicleis parkedonalevelsurface.ifitbecomesnecessarytoadd orreplacethefluid,useonlythemanufacturersrecommendedfluid,refertoRecommendedFluids,Lubricants andGenuinePartsforcorrectfluidtype.
Fluid Changes
Thefluidshouldbechangedasfollows:
Normal Usage NoServiceRequired
Severe Usage
PowerTransferUnit15,000miles(24000km)
OverrunningClutch22,500miles(36000km)
RearCarrier22,500miles(36000km)
SevereUsageisdefinedas:
1.Morethan50%ofvehicleoperationinstopandgo trafficwherevehicleisdrivenregularlyformorethan45 minutesofcontinuousoperation,suchasinheavycityor inconstructionzonetraffic,
- Police, taxi, limousine, commercial type operation, or trailertowing where the vehicle driven regularly for more than 45 minutes of continuous operation.
FrontAndRearWheelBearings
Frontandrearwheelbearingsarepermanentlysealed. Noregularmaintenanceisrequiredforthesecomponents.
AppearanceCareandProtectionfromCorrosion
Protection of Body and Paint from Corrosion
Vehiclebodycarerequirementsvaryaccordingtogeographiclocationsandusage.Chemicalsthatmakeroads passableinsnowandice,andthosethataresprayedon treesandroadsurfacesduringotherseasons,arehighly corrosivetothemetalinyourvehicle.Outsideparking, whichexposesyourvehicletoairbornecontaminants, roadsurfacesonwhichthevehicleisoperated,extreme hotorcoldweatherandotherextremeconditionswill haveanadverseeffectonpaint,metaltrim,andunderbodyprotection.
The followingmaintenancerecommendationswillenable youtoobtainmaximumbenefitfromthecorrosion resistancebuiltintoyourvehicle.
What Causes Corrosion?
Corrosionistheresultofdeteriorationorremovalof paintandprotectivecoatingsfromyourvehicle.
Themostcommoncausesare:
- Roadsalt, dirtandmoistureaccumulation.
- Stoneandgravelimpact.
- Insects,treesapandtar.
- Saltintheairnearseacoastlocalities.
• Atmosphericfallout/industrialpollutants.
Washing
- Washyourvehicleregularly. Alwayswashyourvehicleintheshadeusingamildcarwashsoap, and rinsethepanelscompletelywithclearwater.
- Ifinsects, tarorothersimilardepositshaveaccumulatedonyourvehicle, washitassoonaspossible.
- UseMoparautopolishtoremoveroadfilmandstains andtopolishyourvehicle.Takecarenevertoscratch thepaint.
- Avoidusingabrasive compounds and power buffing that may diminish the glossorthin out the paint finish.
CAUTION!
Do not use abrasive or strong cleaning materials such as steel wool or scouring powder, which will scratch metal and painted surfaces.
Special Care
- If you drive unsalted or dusty roads or if you drive near the ocean, hose off the undercarriage at least once amonth.
- It is important that the rainholes in the lower edges of the doors, rocker panels and lift gate be kept clear and open.
-
If you detect anystone chips or scratches in the paint, touch them up immediately. The cost of such repairs is considered the responsibility of the owner.
-
If your vehicle is damaged due to an accidentor similar cause which destroy the paint and protective coating have your vehiclerepaired as soon as possible. The cost of such repairs is considered the responsibility of the owner.
- Allwheelsandwheeltrim,especiallyaluminumand chromeplatedwheelsshouldbecleanedregularly withmildsoapandwatertopreventcorrosion. To removeheavysoil,selectanonabrasive,non-acidic cleaner.Donotusescouringpads,steelwool,abristle brushormetalpolishes.OnlyMoparcleanersare recommended.Donotuseovencleaner.Avoidautomaticcarwashesthatuseacidicsolutionsorharsh brushesethatmaydamagethewheels'protectivefinish.
- If you carry special cargos such as chemicals, fertilizers, de-icersalt, etc., besurethatsuch materials are well packaged and sealed.
314MAINTAININGYOURVEHICLE
- Ifalotofdrivingisdoneongravelroads,consider mudorstoneshieldsbehindeachwheel.
- UseMopartouchuppaintonscratchesassoonas possible.Yourdealerhastouchuppainttomatchthe colorofyourvehicle.
Interior Care
UseMoparFabricCleanertocleanfabricupholstery and carpeting.
UseMoparVinylCleanertocleanvinylupholstery and trim.
MoparTotalCleanisspecificallyrecommendedfor leatherupholstery.
Yourleatherupholsterycanbebestpreservedbyregular cleaningwithadampsoftcloth.Smallparticlesofdirt canactasanabrasiveanddamagetheleatherupholstery andshouldberemovedpromptlywithadampcloth. Stubbornsoilscanberemovedeasilywithasoftcloth andMoparTotalClean.Careshouldbetakentoavoid soakingyourleatherupholsterywithanyliquid.Please donotusepolishes,oils,cleaningfluids,solvents,detergents,orammoniabasedcleanerstocleanyourleather upholstery.Applicationofaleatherconditionerisnot requiredtomaintaintheoriginalcondition.
WARNING!
Do not use volatile solvents for cleaning purposes. Many are potentially flammable, and if used in closed areas they may cause respiratory harm.
Glass Surfaces
Allglasssurfacesshouldbecleanedonaregularbasis withanycommercialhousehold-typeglasscleaner. Neveruseanabrasivetypecleaner.Usecautionwhen cleaningtheinsiderearwindowequippedwithelectric defrostersortherightrearquarterwindowequipped withtheradioantenna.Donotusescrapersorother sharpinstrumentswhichmayscratchtheelements.
Whencleaningtherearviewmirror,spraycleaneronthe towelorragthatyouareusing.Donotspraycleaner directlyonthemirror.
Cleaning Plastic Instrument Cluster Lenses
Thelensesinfrontoftheinstrumentsinthisvehicleare moldedinclearplastic. Whencleaningthelenses, care mustbetakentoavoidscratchingtheplastic.
- Cleanwithawetsoftrag. Amildsoapsolutionmaybe used, butdonotusehighalcoholcontentorabrasive cleaners. Ifsoapisused, wipecleanwithacleandamp rag.
- Dry with asoft tissue.
Seat Belt Maintenance
Donotbleach, dye or clean the belt with chemical solvents or abrasive cleaners. This will weaken the fabric. Sundamage can also weaken the fabric.
If the belts need cleaning, use a mild soapsolution or lukewarm water. Donot remov the belts from the carto wash them.
Replacethebeltsiftheyappearfrayedorwornorifthe bucklesdonotworkproperly.
316MAINTAININGYOURVEHICLE
CleaningTheCenterConsoleCupHolders
Removal
Grabthecenteroftherubberportionofthecupholder andliftupward.
Cleaning
Soaktherubbercupholderlinerinamixtureofmedium hottapwaterandoneteaspoonofmildliquiddishsoap. Letsoakforapproximatelyonehour. Afteronehourpull thelinerfromthewateranddipitbackintothewater aboutsixtimes. Thiswillloosenanyremainingdebris. Rinsethelinerthoroughlyunderwarmrunningwater. Shaketheexcesswaterfromthelineranddrytheouter surfaceswithacleansoftcloth.
Installation
Alignthelinerinthecupholderandpressdownfirmly.
INTEGRATEDPOWERMODULE(IPM)
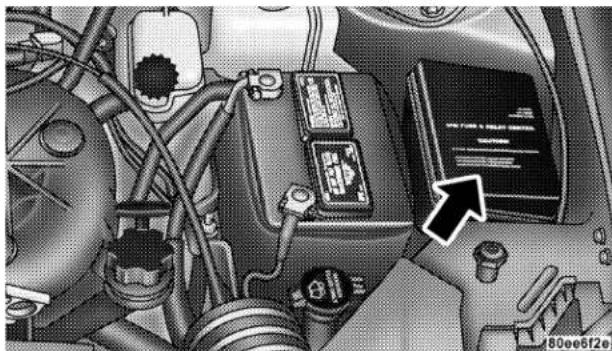
natural_image
Interior view of a vehicle engine bay with hoses and control panel (no visible text or symbols)AnIntegratedPowerModuleislocatedintheengine compartmentnearthebattery. Thiscentercontainsmaxi fuses, minifusesandrelays. Alabelthatidentifieseach componentisprintedontheinsideofthecover.
| Cavity Maxi Fuse Description | |
| 140AmpGreenAnti-LockBrakeSystem(ABS)Pump | |
| 2Spare | |
| 330AmpPinkIgnitionOffDraw(IOD) | |
| 440AmpGreenBodyControlModule(BCM)Feed1 | |
| 540AmpGreenElectronicBackLight(EBL) | |
| 630AmpPinkFrontWipers | |
| 740AmpGreenStarter | |
| 840AmpGreenPowerSeatC/B | |
| 940AmpGreenPowerSunroof | |
| Cavity Maxi Fuse Description | |
| 10Spare | |
| 1140AmpGreenHeadlightWasher,Power Liftgate | |
| 12Spare | |
| 1340AmpGreenRadiatorFan1 | |
| 14Spare | |
| 1540AmpGreenAnti-LockBrakeSystem (ABS)Module | |
| 4040AmpGreenDriverDoorNode | |
| 4140AmpGreenPassengerDoorNode | |
| 4240AmpGreenFrontBlower | |
318MAINTAININGYOURVEHICLE
| Cavity Mini Fuse Description | |
| 2420AmpYellowPowerOutlet(Selectable) | |
| 2515AmpBlueRadio,Amplifier,Navigation,Hands-Free Phone(HFM),Electronic VehicleInformationCenter(EVIC),EC,SNRF,Mirror | |
| 2620AmpYellowPowerOutlet | |
| 27Spare | |
| 2825AmpClearHorn | |
| 2920AmpYellowCluster,CHMSL,Stop Lights,Anti-LockBrake System(ABS) | |
| 3010AmpRedIgnitionSwitch | |
| 3120AmpYellowHazard | |
| 34Spare | |
| 35Spare | |
| Cavity Mini Fuse Description | |
| 3620AmpYellowElectronicAutomaticTransaxle(EATX)Sole-noid | |
| 3725AmpClearASD | |
| 3820AmpYellowFuelPump | |
| 3920AmpYellowA/CClutch,MTV | |
| 4425AmpClearRearHeatedSeats | |
| 4510AmpRedAnti-LockBrakeSystem(ABS)IgnitionRun | |
| 4620AmpYellowPassengerDoor | |
| 4720AmpYellowDriverDoor | |
| 4815AmpBluePLG,OHC,BodyControlModule(BCM),Navigation,Hands-FreePhone(HFM) | |
| 4925AmpClearAmplifier | |
| 5015AmpBlueHVAC,DVD,RAD,CLK,SKREEM | |
CAUTION!
- When installing the Integrated Power Module cover, it is important to ensure the cover is properly positioned and fully latched. Failure to do so may allow water to get into the Integrated Power Module, and possibly result in a electrical system failure.
- When replacing a blown fuse, it is important to use only a fuse having the correct amperage rating. The use of a fuse with a rating other than indicated may result in a dangerous electrical system overload. If a properly rated fuse continues to blow, it indicates a problem in the circuit that must be corrected.
VEHICLESTORAGE
If you are leaving your vehicle dormant form more than 21 days you may want to take step to protect your battery. You may:
- Disconnectthenegativecablefromthebattery.
- Anytimeyoustoreyourvehicle,orkeepitoutof service(i.e.vacation)fortwoweeksormore,runthe airconditioningsystematidleforaboutfiveminutes inthefreshairandhighblowersetting.Thiswill insureadequatesystemlubricationtominimizethe possibilityofcompressordamagewhenthesystemis startedagain.
REPLACEMENTLIGHTBULBS
LIGHT BULBS — Interior Bulb Number
Center&RearReadingLights. 578
FrontDoorCourtesyLight. 578
LiftgateLight(s). 578
OverheadConsoleReadingLights. 212-2
VisorVanityLights. V 2 6 3 7
NOTE: Forlightedswitches, see your dealer for replacement instructions.
Alloftheinteriorbulbsareglasswedgebaseorglass cartridgetypes. Aluminumbasebulbsarenotapproved and should not be used for replacement.
LIGHT BULBS — Exterior Bulb Number
Back-up. 921
RearStop,TurnSignal. 3157
RearSidemarker. 168
FogLight 9045
FrontTurnSignal. 3157A
FrontSidemarker. 194
StandardHeadlight H 7
License. 168
BULBREPLACEMENT
StandardQuadHeadlights
- Removethetwoscrewssecuringtheheadlightmoduletothevehicleandpulltheheadlightmoduleforward awayfromthevehicle, disengagingtheassemblyfrom thelowerattachmentclip.
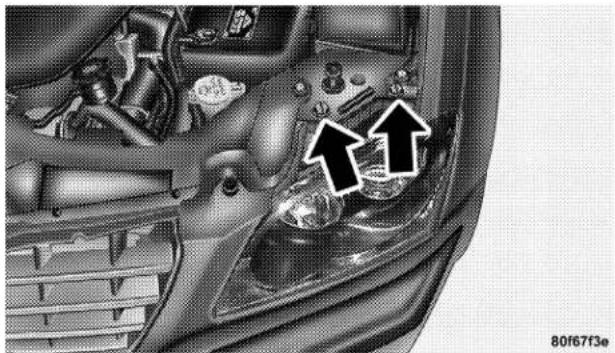
natural_image
Close-up of a car's head and dashboard with visible mechanical components and two black arrows pointing to specific parts (no text or symbols)- Removetherubberbootseals.
3.Disconnecttheelectricalconnector. - Rotatethebulbtotheleftandreplacethebulb. Reinstalltherubberbootsealsandthentheheadlight module.
CAUTION!
Do not touch the new bulb with your fingers. Oil contamination will severely shorten bulb life. If the bulb comes in contact with an oily surface, clean the bulb with rubbing alcohol.
HighIntensityDischargeHeadlights(HID)—If Equipped
Theheadlightsareatypeofhighvoltagedischargetube. Highvoltagecanremaininthecircuitevenwiththe headlightswitchoffandthekeyremoved.Because of this, you should not attempt to service a headlight bulb yourself. If a headlight bulb fails, take your vehicle to an authorized dealer for service.
WARNING!
A transient high tension occurs at the bulb sockets of High Intensity Discharge (HID) headlights when the headlight switch is turned ON. It may cause serious electrical shock or electrocution if not serviced properly. See your authorized dealer for service.
NOTE: OnvehiclesequippedwithHighIntensityDischargeHeadlights(HID),whentheheadlightsareturned onthereisabluehuetothelights.Thisdiminishesand becomesmorewhiteafterapproximately10seconds,as thesystemcharges.
FrontPark/TurnSignalandSidemarkerLights
- Removethetwoscrewssecuringtheheadlightmoduletothevehicleandpulltheheadlightmoduleforward awayfromthevehicle, disengagingtheassemblyfrom thelowerattachmentclip.
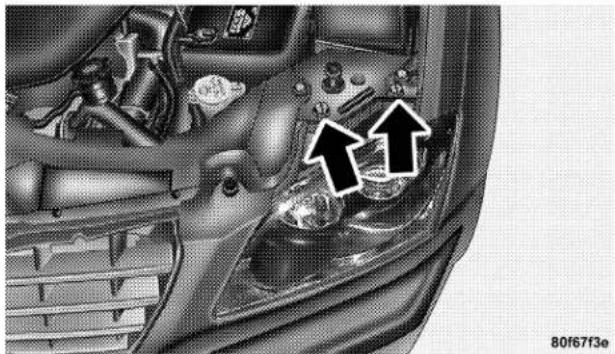
natural_image
Close-up of a car's head and dashboard with visible mechanical components and two black arrows pointing to specific parts (no text or symbols)- Twistthebulbsocketto remove from the headlight module and pull the bulb from socket.
- Replacethebulb, reinstallthesocket and then reinstall theheadlightmodule.
FrontFogLight
- Removethescrewfromthefrontofthefoglightand pulloutfromthefrontofthefascia.
2.Twistthefrontfoglightbulbtoremovefromthefog lightmodule. - Disconnect the electrical connector and replace the bulb.
CAUTION!
Do not touch the new bulb with your fingers. Oil contamination will severely shorten bulb life. If the bulb comes in contact with an oily surface, clean the bulb with rubbing alcohol.
324MAINTAININGYOURVEHICLE
RearTail,Stop,TurnSignal,SideMarkerand Back-upLights
- Raisetheliftgate.
- Removethetwotaillightasemblyscrewsandrotate theassemblyoutwardtoremovetheballstudformthe attachinggrommet.
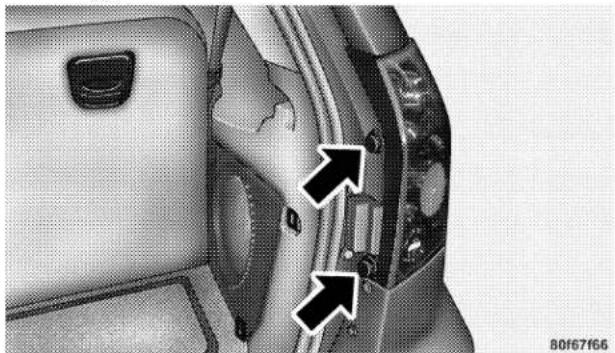
natural_image
Interior view of a car showing dashboard and seat components with two arrows pointing to specific parts (no text or symbols visible)3.Twistthesocketassemblytoremoveitfromthe housing.
4.Pullthebulboutofthesocket.
5. Replacethebulb, reinstallthesocket, andreattachthe taillightassembly.
LicenseLight
- Placeascrewdriverintheslotnexttotherleasetab andpushonthereleasetabtoremovethelens.
- Pullthebulboutofthesocket. Replacethebulband pushonthelensuntilitsnapsintoplace.
80f67f66
FLUIDSANDCAPACITIES
| U.S. Metric | ||
| Fuel(approximate)89Octane | 23gallons87l | liters |
| EngineOil-WithFilter | ||
| 3.5LiterEngines(SAE10W-30,APICertified)5.5qts5.2liters | ||
| CoolingSystem* | ||
| 3.5LiterEngines(Mopar®Antifreeze/Coolant5Year/100,000MileFormula) | 10.5qts9.9liters | |
| *IncludesheaterandcoolantrecoverybottlefilledtoMAXlevel. | ||
RECOMMENDEDFLUIDS, LUBRICANTSANDGENUINEPARTS
Engine
| Component Fluids, Lubricants and | Genuine Parts |
| EngineCoolantMopar®Antifreeze/Coolant5Year/100,000MileFormulaHOAT(Hybrid OrganicAdditiveTechnology) | |
| EngineOilUseAPICertified.SAE10W-30ispreferred,refertooilviscositychartfor correctSAEgrademeetingDaimlerChryslerMaterialStandardMS-6395. | |
| SparkPlugsRefertotheVehicleEmissionControlInformationlabelintheengine compartment. | |
| OilFilterMopar®5281090orequiv. | |
| FuelSelection89Octane | |
Chassis
| Component Fluids, Lubricants and Genuine Parts | |
| AutomaticTransmissionMopar®ATF+4 | AutomaticTransmissionFluid. |
| AWDPowerTransferUnitMopar®GearLubricant75W-90. | |
| AWDOverrunningClutchMopar®ATF+4 | AutomaticTransmissionFluid. |
| AWDRearCarrierMopar®GearLubricant75W-90. | |
| BrakeMasterCylinderMopar®DOT3and | SAEJ1703shouldbeused.IfDOT3brakefluidisnotavailable,thenDOT4orDOT4+isacceptable.Useonlyrecommendedbrakefluids. |
| PowerSteeringReservoirMopar®ATF+4 | AutomaticTransmissionFluid. |
MAINTENANCESCHEDULES
CONTENTS
■EmissionControlSystemMaintenance. . . . . . . 3 3 0 □Schedule“B”. . . . . . . . . . . . . . . . . . . . . . . . . . . . . . . . . . . . . . . . . . . . . . . . . . . 3 3 3
■MaintenanceSchedules. 3 3 0 □Schedule"A" 3 4 4
330 MAINTENANCESCHEDULES
The "Scheduled"maintenanceservices, listedinbold type must bedoneatthetimesormileagesspecified to assure the continued proper functioning of the emission control system. These, and all other maintainances services included in this manual, should bedonetoprovide best vehicle performance and reliability. More frequent maintainancemaybeneeded for vehicles in severe operating condition such as dusty areas and very short trip driving.
Inspection and service also should be done anytime a malfunction is suspected.
NOTE: Maintenance, replacement, or repair of the emission control devices and system on your vehicle may be performed by any automotiver repair establishment or individual using any automotive part which has been certified pursuant to U.S. EPA or in the State of California, California Air Resources Board regulations.
MAINTENANCESCHEDULES
There are two main maintenance schedules that show the required service for your vehicle.
FirstisSchedule“B”.Itisforvehiclesthatareoperated undertheconditionsthatarelistedbelowandatthe beginningoftheschedule.
• Dayornighttemperaturesarebelow32°F(0°C).
- Stopandgodriving.
- Extensiveengineidling.
- Drivingindustryconditions.
- Shorttripsoflessthan10miles(16km).
- More than 50% of your driving is at sustained high speeds during hot weather, above 90^ F ( 32^ C).
- Trailertowing.
- Taxi, police, ordelivery service(commercial service). ◇
- Off-roadordesertoperation.
NOTE: IfANY oftheseapplytoyouthenchangeyour engineoilevery3,000miles(5000km)or3months, whichevercomesfirstandfollowschedule"B"ofthe "MaintenanceSchedules"sectionofthismanual.
NOTE: Most vehicles are operated under the conditions listed for Schedule "B".
SecondisSchedule"A".Itisforvehiclesthatarenot operatedunderanyoftheconditionslistedunderSchedule"B".
Usetheschedulethatbestdescribesyourdrivingconditions. Wheretimeandmileagearelisted, followthe intervalthatoccursfirst.
NOTE: Undernocircumstanceshouldoilchangeintervalsexceed6000miles(10000km)or6months whichevercomesfirst.
CAUTION!
Failure to perform the required maintenance items may result in damage to the vehicle.
AtEachStopforFuel
- Checktheengineoillevelabout5minutesafterafully warmedengineisshutoff.Checkingtheoillevelwhile the vehicle is on level ground will improve the accuracyoftheoillevelreading. Addoilonlywhenthe levelisatorbelowtheADDorMINmark.
- Check the windshield washer solvent and add if required.
332MAINTENANCESCHEDULES
OnceaMonth
- Checktirepressureandlookforunusualwearor damage.
- Inspectthebatteryandcleanandtightentheterminals asrequired.
- Checkthefluidlevelsofcoolantbottle,brakemaster cylinderandtransmission,addasneeded.
- Checkalllightsandallotherelectricalitemsforcorrect operation.
AtEachOilChange
- Changetheengineoilfilter.
- Inspecttheexhaustsystem.
- Inspectthebrakehoses.
- InspecttheCVjointsandfrontsuspensioncomponents.
- Checktheautomatictransmissionfluidlevel.
- Checkthecoolantlevel,hoses,andclamps.
SCHEDULE“B”
Followschedule“B”ifyouusuallyoperateyourvehicle underoneormoreofthefollowingconditions.Change theautomatictransmissionfluidandfilterevery60,000 miles(96000km)ifthevehicleisusuallyoperatedunder oneormoreoftheconditionsmarkedwithan◇.
• Dayornighttemperaturesarebelow32°F(0°C).
- Stopandgodriving.
- Extensiveengineidling.
- Drivingindustryconditions.
- Shorttripsoflessthan10miles(16km).
- Morethan50% of your driving is sustained high speeds during hot weather, above 90°F (32°C).
- Trailertowing.
- Taxi, police, ordelivery service(commercial service). ◇
- Off-roadordesertoperation.
NOTE: IfANY oftheseapplytoyouthenchangeyour engineoilevery3,000miles(5000km)or3months, whichever comesfirstandfollowschedule"B"ofthe "MaintenanceSchedules"sectionofthismanual.
If none of these apply to you, then change your engine oil at every interval shown on schedule "A" of the "Maintenance Schedules" section of this manual.
334 SCHEDULE“B”
| Miles 3,000 6,000 9,000 12,000 15,000 18,000 (Kilometers) (5 000 ) (10 000 ) (14 000) (19 000) (24 000) (29 000) | ||||||
| Changeengineoilandengineoilfilter.X X | X | X | X | X | ||
| RotateTiresXXX | ||||||
| Inspectthebrakelinings. | X | X | ||||
| Inspecttheengineaircleanerfilter,replaceif necessary.* | X | X | X | X | X | |
| Replacetheengine air cleaner filter. * | X | |||||
| Changethe AllWheelDrive(AWD)power transferunitfluid.(Seenoteattheendofthis chart) | X | |||||
| Replacetheairconditioningfilter. | X |
SCHEDULE "B" 335
| Miles 21,000 24,000 27,000 30,000 33,000 36,000 (Kilometers) (34 000) (38 000) (43 000) (48 000) (53 000) (58 000) | ||||||
| Changeengineoilandengineoilfilter.X X | X | X | X | X | ||
| RotateTiresXXX | ||||||
| Inspectthebrakelinings.XX | ||||||
| Inspecttheengineaircleanerfilter,replaceif necessary.* | X | X | X | X | ||
| Replacetheengine air cleaner filter. | X | |||||
| Inspectthetierodendsandbootseals.(Front& Rear) | X | |||||
| InspectthePCV valve andreplaceasnecessary.* | X | |||||
| Changethe AllWheelDrive(AWD)power transferunitfluid.(Seenoteattheendofthis chart) | X | |||||
| Changethe AllWheelDrive(AWD)overrunning clutchandrear carrierfluid.(Seethenoteatthe endofthischart) | X | |||||
| Replacetheairconditioningfilter. | X | X |
336 SCHEDULE“B”
| Miles 39,000 42,000 45,000 48,000 51,000 54,000 (Kilometers) (62 000) (67 000) (72 000) (77 000) (82 000) (86 000) | ||||||
| Changeengineoilandengineoilfilter.X X | X | X | X | X | ||
| RotateTiresXXX | ||||||
| Inspectthebrakelinings.XX | ||||||
| Inspecttheengineaircleanerfilter,replaceif necessary.* | X | X | X | X | ||
| Replacetheengine air cleaner filter. * | X | |||||
| Changethe AllWheelDrivepowertransfer unitfluid.(Seethenoteattheendofthis chart.) | X | |||||
| Changethe AllWheelDrive(AWD)overrunningclutchandrear carrierfluid.(Seenoteat theendofthischart) | X | |||||
| Replacetheairconditioningfilter. | X | |||||
X
SCHEDULE“B” 337
| Miles 57,000 60,000 63,000 66,000 69,000 72,000 (Kilometers) (91 000) (96 000) (101 000) (106 000) | (110 000) (115 000) | ||||
| Changeengineoilandengineoilfilter.X X | X | X | X | X | |
| RotateTiresXXX | |||||
| Inspectthebrakelinings.X | X | ||||
| Inspecttheengineaircleanerfilter,replaceif necessary.* | X | X | X | X | |
| Replacetheengine air cleaner filter. | X | ||||
| Inspectthetierodendsandbootseals.(Front &Rear) | X | ||||
| InspectthePCV valve andreplaceifnecessary.* | X | ||||
| Inspecttheserpentinedrivebelt,replaceif necessary.‡ | X | ||||
| Changetheautomatictransmissionfluidand filter. | X |
338SCHEDULE“B”
| Miles 57,000 60,000 63,000 66,000 69,000 72,000 (Kilometers) (91 000) (96 000) (101 000) (106 000) | (110 000) (115 000) | ||||
| ChangetheAllWheelDrive(AWD)power transferunitfluid.(Seenoteattheendofthis chart) | X | X | |||
| ChangetheAllWheelDrive(AWD)overrunningclutchandrearcarrierfluid.(Seenoteat theendofthischart) | X | ||||
| Replacetheairconditioningfilter.XX |
SCHEDULE“B” 339
| Miles 75,000 78,000 81,000 84,000 87,000 90,000 (Kilometers) (120 000) (125 000) (130 000) (134 000) (139 000) (144 000) | |||||
| Changeengineoilandengineoilfilter.X X | X | X | X | X | |
| RotateTiresXXX | |||||
| Inspectthebrakelinings.XX | |||||
| Inspecttheengineaircleanerfilter,replaceif necessary.* | X | X | X | X | |
| Replacetheengine air cleaner filter | XX | ||||
| Replacethespark plugs on3.5literengines. | X | ||||
| Inspectthetierodendsandbootseals.(Front &Rear) | X | ||||
| CheckthePCV valve andreplaceifnecessary. Notrequiredifpreviouslychanged.* | X | ||||
| Inspecttheserpentinedrivebelt,replaceif necessary.‡ | X | X | |||
| Changethe AllWheelDrivepowertransfer unitfluid.(Seethenoteattheendofthis chart.) | X | X | |||
340SCHEDULE“B”
| Miles 75,000 78,000 81,000 84,000 87,000 90,000 (Kilometers) (120 000) (125 000) (130 000) (134 000) (139 000) | (144 000) | ||||
| ChangetheAllWheelDrive(AWD)overrunningclutchandrearcarrierfluid.(Seenoteat theendofthischart) | X | ||||
| Replacetheairconditioningfilter.X | |||||
| Miles 93,000 96,000 99,000 100,000 102,000 105(Kilometers) (149 000) (154 000) (158 000) (160 000) (163 000) | (168 000) | ||||
| Changeengineoilandengineoilfilter.XXXXX | |||||
| RotateTiresXX | |||||
| Inspectthebrakelinings.X | |||||
| Inspecttheengineaircleanerfilter,replaceif necessary.* | X | X | X | X | X |
| Replacetheengine air cleaner filter * | X | ||||
| Replaceenginetimingbelt. | X | ||||
| Changethe AllWheelDrive(AWD)power transferunitfluid.(Seenoteatthecendofthis chart) | X | ||||
| Changethe AllWheelDrive(AWD)overrunningclutchandrear carrierfluid.(Seenoteat theendofthischart) | X | ||||
| Inspecttheserpentinedrivebelt,replace if necessary.‡ | X |
342 SCHEDULE "B"
| Miles 93,000 96,000 99,000 100,000 102,000 105(Kilometers) (149 000) (154 000) (158 000) (160 000) (163 000) | (168 000) | ||||
| Flushandreplacetheenginecoolantat60monthsor100,000miles. | X | ||||
| Replacetheairconditioningfilter.X |
| Miles 108,000 111,000 114,000 117,000 120,000 (Kilometers) (173 000) (178 000) (182 000) (187 000) | (192 000) | ||||
| Change engine oil and engine oil filter. | X | X | X | X | X |
| RotateTires | X | X | X | ||
| Inspectthebrakelinings. | X | X | |||
| Inspecttheengineaircleanerfilter,replaceifnecessary.* | X | X | X | X | |
| Replacetheengine air cleaner filter. | X | ||||
| Inspectthetierodendsandbootseals.(Front&Rear) | X | ||||
| Inspect the PCV valve and replace as necessary.* | X |
| Miles 108,000 111,000 114,000 117,000 120,000 (Kilometers) (173 000) (178 000) (182 000) (187 000) (192 000) | ||||
| Inspecttheserpentinedrivebelt,replaceifnecessary.‡ | X | |||
| Changetheautomatictransmissionfluidandfilter.X | ||||
| ChangetheAllWheelDrive(AWD)powertransfer unitfluid.(Seenoteattheendofthischart) | X | |||
| Replacetheairconditioningfilter.XX |
*This maintenance is recommended by the manufacture to the owner but is not required to maintain the emissions warranty.
‡Thismaintenanceisnotrequiredifpreviouslyreplaced.
Inspection and services should also be performed anytime a malfunction is observed or suspected. Retain all receipts.
NOTE: The AWD power transfer unit fluid and the AWD overrunning clutch/ rear carrier fluid must be changedatthemorefrequentintervalsshowninschedule B if the vehicle is operated under any of the conditions noted by a diamond (◇) at the beginning of the schedule.
344 SCHEDULE "A"
SCHEDULE"A"
| Miles 6,000 12,000 18,000 24,000 30,000 36,000 (Kilometers) (10 000) (19 000) (29 000) (38 000) (48 000) (58 000) [Months] [6] [12] [18] [24] [30] [36] | ||||||
| Changeengineoilandengineoilfilter.XXXXXX | ||||||
| RotateTiresXXXXXX | ||||||
| Inspectthebrakelinings.X | X | |||||
| Inspecttheengineaircleanerfilter,replaceif necessary.* | X | X | X | X | X | |
| Replacetheengine air cleaner filter. | X | |||||
| Inspectthetierodendsandbootseals.(Front &Rear) | X | |||||
| Replace the air conditioning filter. | X | X | X |
SCHEDULE "A" 345
| Miles 42,000 48,000 54,000 60,000 66,000 72,000 (Kilometers) (67 000) (77 000) (86 000) (96 000) (106 000) (115 Months) [42] [48] [54] [60] [66] [72] | ||||||
| Change engine oil and engine oil filter. | X | X | X | X | X | X |
| Rotate Tires | X | X | X | X | X | X |
| Inspectthebrakelinings. | X | X | ||||
| Inspecttheengineaircleanerfilter,replaceif necessary.* | X | X | X | X | X | |
| Replace the engine air cleaner filter. | X | |||||
| Inspectthetierodendsandbootseals.(Front &Rear) | X | |||||
| CheckthePCV valve andreplace,if necessary.* | X | |||||
| Inspecttheserpentinedrivebelt,replaceif necessary.‡ | X | X | ||||
| Flushandreplacetheenginecoolantat60 months,regardlessofmileage. | X | |||||
| Replace the air conditioning filter. | X | X | X |
| Miles 78,000 84,000 90,000 96,000 100,000 (Kilometers) (125 000) (134 000) (144 000) (154 000) (160 000) [Months] [78] [84] [90] [96] | |||||
| Changeengineoilandengineoilfilter.XXXX | |||||
| RotateTiresXXXX | |||||
| Inspectthebrakelinings. | X | ||||
| Inspecttheengineaircleanerfilter,replaceif necessary.* | X | X | X | X | |
| Replacetheengine air cleaner filter. X | |||||
| Inspectthetierodendsandbootseals.(Front& Rear) | X | ||||
| CheckandreplacethePCV valve ,ifnecessary.* | X | ||||
| Inspecttheserpentinedrivebelt,replaceif necessary.‡ | X | ||||
| Replacethspark plugs 3.5literengines. | X | ||||
| Flushandreplacetheenginecoolantat100,000 miles,ifnotdoneat60months. | X | ||||
| Replacetheairconditioningfilter. | X | X |
| Miles 102, 000 108, 000 114, 000 120, 000 (Kilometers) (163 000) (173 000) (182 000) (192 000) [Months] [102] [108] [114] [120] | ||||
| Change engine oil and engine oil filter. | X | X | X | X |
| Rotate Tires | X | X | X | X |
| Inspectthebrakelinings. | X | |||
| Inspect the engine air cleaner filter, replace if necessary. * | X | X | X | |
| Replacetheengine air cleaner filter. | X | |||
| Replaceenginetimingbelt. | X | |||
| Inspectthetierodendsandbootseals.(Front&Rear) | X | |||
| CheckthePCV valve andreplace,ifnecessary.* | X | |||
| Inspect the serpentine drive belt, replace if necessary. ‡ | X | X | ||
| Flushandreplacetheenginecoolantat120months,ifnot doneat100,000miles(160000km). | X | |||
| Replacetheairconditioningfilter. | X | X |
348SCHEDULE"A"
*This maintenance is recommended by the manufacture to the owner but is not required to maintain the emissions warranty.
‡Thismaintenanceisnotrequiredifpreviouslyreplaced.
Inspection and services should also be performed any time amalfunction is observed or suspected. Retain all receipts.
WARNING!
You can be badly injured working on or around a motor vehicle. Do only that service work for which you have the knowledge and the right equipment. If you have any doubt about your ability to perform a service job, take your vehicle to a competent mechanic.
IFYOUNEEDCONSUMERASSISTANCE
CONTENTS
■SuggestionsForObtainingServiceForYour Vehicle. 350
□PrepareForTheAppointment. 350
□PrepareAList. 350
□BeReasonableWithRequests. 350
■IfYouNeedAssistance....350
■WarrantyInformation....3 5 3
■Mopar®Parts. 355
■ReportingSafetyDefects. 355 □InCanada 355
■ Publication Order Forms .....356
■DepartmentOfTransportationUniformTire QualityGrades 357
□Treadwear. 357
□TractionGrades. 357
□TemperatureGrades 358
SUGGESTIONSFOROBTAININGSERVICEFOR YOURVEHICLE
PrepareForTheAppointment
If you're having warranty work done, besure to have the right papers with you. Take your warranty folder. All work to be performed may not be covered by the warranty, discuss additional charges with the service manager. Keep a maintenance of your vehicle's service history. This can often provide a cluet to the current problem.
PrepareAList
Makeawrittenlistofyourvehicle'sproblemsorthe specificworkyouwantdone.Ifyou'vehadanaccident, orworkdonethatisnotonyourmaintenancelog,letthe serviceadvisorknow.
BeReasonableWithRequests
Ifyoulistanumberofitems, and you must have your vehicle by the end of the day, discuss the situation with the service advisor and list the items in order of priority. At many dealers you may obtain a rental vehicle at a minimal daily charge. If you need a rental, it is advisable to make these arrangements when you call for an appointment.
IFYOUNEEDASSISTANCE
Themanufactureranditsdealersarevitallyinterestedin yoursatisfaction.Wewantyoutobehappywithout productsandservices.
Yoursellingdealerisbestequippedandmostanxiousto providepromptresolutionforanywarrantyissueor relatedmatterthatyoumayexperience.Themanufacturer'sdealershavethefacilities,factory-trainedtechnicians,specialtools,andthelatestinformationtoassure yourvehicleisfixedcorrectlyandinatimelymanner.
IFYOUNEEDCONSUMERASSISTANCE351
Themanufacturerhasempowereditsdealerstomake warrantyandrepairdecisionsthatensureyouarenot inconvenienced.Thereisnoneedforyoutowaitfora decisionfromthemanufacturer.Ifaspecialcircumstance occursthatrequiresinformationfromthemanufacturer, wehaveaskedthealer'sservicemanagementtomake thecontactonyourbehalf.
Thisiswhyyoushouldalwaystalktoyourdealer's servicemanagerfirst.Mostmatterscanberesolvedwith thisprocess.
- Ifforsomereasonyouarestillnotsatisfied,talktothe generalmanagerorownerofthedealership.They wanttoknowifyouneedassistance.
- If your dealership is unable to resolve the concern, you may contact the Manufacturer's Customer Center.
AnycommunicationtotheManufacturer'sCustomerCentershouldincludethefollowinginformation:
- Owner'snameandaddress
- Owner'stelephonenumber(homeandoffice)
- Dealershipname
• Vehicleidentificationnumber
• Vehicledeliverydateandmileage
DaimlerChryslerMotorsCorporationCustomerCenter P.O.Box21-8004 AuburnHills,MI48321-8004 Phone:(800)992-1997
DaimlerChryslerCanadaInc.CustomerCenter P.O.Box1621 Windsor,OntarioN9A4H6 Phone—(800)465-2001
InMexicocontact: Av.ProlongacionPaseodelaReforma,1240 SanteFeC.P.05109
352 IFYOUNEEDCONSUMERASSISTANCE
Mexico, D.F.
InMexico(915)729-1248or729-1240
OutsideMexico(525)729-1248or729-1240
CustomerAssistanceForTheHearingOrSpeech Impaired(TDD/TTY)
Toassistcustomerswhohavehearingdifficulties,the manufacturerhasinstalledspecialTDD(TelecommunicationDevicesfortheDeaf)equipmentatitsCustomer Center.Anyhearingorspeechimpairedcustomerwho hasaccesstoaTDDoraconventionalteletypewriter (TTY)intheUnitedStatescancommunicatewiththe manufacturerbydialing1-800-380-CHRY.
ServiceContract
Youmayhavepurchasedaservicecontractforyour vehicletohelpprotectyoufromthehighcostofunexpectedrepairsafteryourmanufacturer'snewvehicle limitedwarrantyexpires.Themanufacturerstandsbehindonlythemanufacturer'sServiceContracts.Ifyou
purchasedamanufacturer'sServiceContract,youwill receivePlanProvisionsandanOwnerIdentificationCard inthemailwithinthreeweeksofyourvehicledelivery date.Ifyouhaveanyquestionsaboutyourservice contract,callthemanufacturer'sServiceContractNationalCustomerHotlineat1-800-521-9922.
Themanufacturerwillnotstandbehindanyservice contractthatisnotthemanufacturer'sServiceContract. It is not responsible for any service contract other than the manufacturer's Service Contract. If you purchased a service contract that is not a manufacturer's Service Contract, and you require service after your manufacturer's new vehicle limited warranty expires, please refer to your contract documents, and contact the person listed in those documents.
Weappreciatethatyouhavemadeamajorinvestment whenyoupurchasedyournewvehicle.Yourdealerhas alsomadeamajorinvestmentinfacilities,tools,and trainingtoassurethatyouareabsolutelydelightedwith youownershipexperience.You'llbepleasedwiththeir sincereffortstoresolveanywarrantyissuesorrelated concerns.
WARRANTYINFORMATION
Seeyourmanufacturer's Warranty Information Booklet for information on warranty coverage and transfer of warranty.
354IFYOUNEEDCONSUMERASSISTANCE
| DESCRIPTION | 1 Yr/ 12,000 | 2 Yr/ 24,000 | 3 Yr/ 36,000 | 3 Yr/ 50,000 | 3 Yr/ Unlmtd | 5 Yr/ 100,000 | 7 Yr/ 70,000 | 8 Yr/ 80,000 |
| Basic Limited Warranty Coverage | ||||||||
| Special Extended Warranty Coverage | ||||||||
| Powertrain Limited Warranty ($100 deductible) | 1st Owner & 2nd Owner with Paid Powertrain Transfer | |||||||
| 2nd Owner if Powertrain Not Transferred and 3rd (And After) Owners | ||||||||
| Anti-Corrosion Perforation Limited Warranty: All Panels | ||||||||
| Outer Panels | ||||||||
| Federal Emission Warranty | ||||||||
| Federal Emission Warranty - Specified Components | ||||||||
| California Emission Warranty | ||||||||
| California Emission Warranty - Specified Components | ||||||||
NOTE: Vehicles used as a police vehicle, taxi, limousine, postal delivery vehicle, ambulance or rental vehicle are covered only under the 3 year/36,000 mile Basic Limited Warranty.
MOPAR®PARTS
Mopar® fluids, lubricants, parts, and accessories are available from your dealer. They will help you keep your vehicle operating at its best.
REPORTINGSAFETYDEFECTS
Inthe50UnitedStatesandWashingtonD.C.:Ifyou believethatyourvehiclehasadefectwhichcouldcause acrashorcauseinjuryordeath,youshouldimmediately informtheNationalHighwayTrafficSafetyAdministration(NHTSA)inadditiontonotifyingthemanufacturer.
IfNHTSAreceivessimilarcomplaints,itmayopenan investigation,andifitfindsthatasafetydefectexistsin agroupofvehicles,itmayorderarecallandremedy campaign.However,NHTSAcannotbecomeinvolved in individualproblemsbetweenyou,yourdealer,andthe manufacturer.
TocontactNHTSA,youmayeithercalltheAutoSafety Hotlinetollfreeat1-800-424-9393(or366-0123inWashingtonDCarea)orwriteto:NHTSA,U.S.Dept.of Transportation,WashingtonDC20590.Youcanalso obtainotherinformationaboutmotorvehiclesafetyfrom theHotline.
InCanada:
If you believe that your vehicle has safety defect, you should contact the Customer Service Department immediately. Canadian customers show is to report safety defect to the Canadiang government should writet to Transport Canada, Motor Vehicle Defect Investigations and Recalls, 2780 Sheffield Road, Ottawa, Ontario K1B 3V9.
PUBLICATIONORDERFORMS
Toorder the following manuals, you may use either the website or the phonenumbers listed below. Visa, Mastercard, AmericanExpress, and Discover orders are accepted. If you prefer mailing your payment, please call for an order form.
NOTE: Astreetaddressisrequiredwhenordering manuals.(NoP.O.Boxes).
• ServiceManuals.
These comprehensiveservicemanualsprovide the information that students and professional technicians need indiagnosing/troubleshooting, problemsolving, maintaining, servicing and repairing Daimler Chrysler Corporation vehicles. A completeworking knowledge of the vehicle, system and or components is written in straightforward language with illustrations, diagrams and charts.
• DiagnosticProcedureManuals.
Filledwithdiagrams,chartsanddetailedillustrations, thesepracticalmanualsmakeiteasyforstudentsand technicianstofindandfixproblemsoncomputer-controlledvehiclesystemsandfeatures. Theyshow exactlyhowtofindandcorrectproblemsthefirsttime, usingstep-by-steptroubleshootinganddriveability procedures,provendiagnostictestsandacompletelist ofalltoolsandequipment.
- Owner'sManuals.
These manuals have been prepared with the assistance of service and engineerings specialist to acquaint you with specific Chrysler group vehicles. Included are starting, operating, emergency and maintenance procedures as well as specifications, capabilities and safety tips.
CallTollFreeat1-800-890-4038 (U.S.) or1-800-387-1143 (Canada)
Or
VisitusontheWorldWideWebat:
www.techauthority.daimlerchrysler.com or www.daimlerchrysler.ca/manuals
DEPARTMENTOFTRANSPORTATIONUNIFORM TIREQUALITYGRADES
The following describesthetiregradingcategoriesestablished by the National highway Traffic Safety Administration. Thespecific graderating assigned by the tire's manufacturerine category is shown on the sidewall of the tiresonyour car.
AllPassengerCarTiresMustConformtoFederalSafety RequirementsinAdditiontoTheseGrades.
Treadwear
Thetreadweargradeisacomparativeratingbasedonthe wearrateofthetirewhentestedundercontrolledconditionsonaspecifiedgovernmenttestcourse.Forexample,atiregraded150wouldwearoneandahalf(1 1/2)timesaswellonthegovernmentcourseasatire graded100. Therelativeperformanceoftiresdepends upontheactualconditionsoftheiruse,however,and maydepartsignificantlyfromthenormduetovariations indrivinghabits,servicepracticesaddifferencesinroad characteristicsandclimate.
TractionGrades
Thetractiongrades, from highest to lowest, are A, B, and C, and they represent the tire's ability to stop on wet pavements measured under controlled conditions on specified government tests surfaces of asphalt and concrete. At remarked C may have poor traction performance.
WARNING!
The traction grade is based on braking (straight-ahead) traction tests and does not include cornering (turning) performance.
TemperatureGrades
ThetemperaturegradesareA(highest),B,andC,representingthetire'sresistancetothegenerationofheatanditsabilitytodissipateheatwhentestedundercontrolledconditionsonaspecifiedindoorlaboratorytestwheel. Sustainedhightemperaturecancausethematerialofthetiretodegenerateandreducetirelife,andexcessive temperaturecanleadtosuddentirefailure. ThegradeC correspondstoalevelofperformancewhichallpassengercartiresmustmeetundertheFederalMotorVehicle SafetyStandardNo.109. GradesBandArepresent higherlevelsofperformanceonthelaboratorytestwheel thantheminimumrequiredbylaw.
WARNING!
The temperature grade is established for a tire that is properly inflated and not overloaded. Excessive speed, underinflation, or excessive loading, either separately or in combination, can cause heat buildup and possible tire failure.
INDEX
360INDEX
AddingFuel. 252
AddingWasherFluid. 1 15,297
Additives,Fuel. 250
AdjustablePedals. 1 1 8
AirConditionerMaintenance....293
AirConditioningFilter. 204,294
AirConditioningRefrigerant. 293
AirConditioningSystem. 195,293
AirPressure,Tires. 234
Airbag. 42
AirbagDeployment. 49
AirbagLight. 46,51,61,151
AirbagMaintenance. 50
Airbag,Side. 48
AlarmSystem. 24
AlignmentandBalance. 241
AllWheelDrive. 217,242,310
Alterations/Modifications,Vehicle. 7
Antenna,SatelliteRadio. 189
AntifreezeDisposal. 301
Antifreeze(EngineCoolant). . . . . . . . . . 299,300,325
Anti-LockBrakeSystem. 2 2 0
Anti-LockWarningLight. 145
Anti-TheftSecurityAlarm 24
AppearanceCare. 3 1 1
ArmingTheftSystem. 24
AutoDownPowerWindows....30
AutomaticDimmingMirror 67
AutomaticDoorLocks. 17,18
AutomaticHeadlights. 1 1 1
AutomaticTemperatureControl 195
AutomaticTransaxle 213,307
AddingFluid 327
Filter 309
FluidandFilterChanges. 309
FluidLevelCheck. 308
InterlockSystem. 214
ResetMode 214
INDEX361
SelectionOfLubricant. 307,327
Shifting. 215
SpecialAdditives. 309
Autostick. 120,215,216
BallJoints. 295
Battery. 291
JumpStarting. 270
KeylessTransmitterReplacement. 23
Bearings. 311
Belts,Drive. 288
BodyMechanismLubrication. 296
B-PillarLocation. 2 2 9
Brake,Parking. 218
BrakeSystem. 219,304
Anti-Lock. 220
FluidCheck. 305,327
Hoses. 304
WarningLight. 146
Brakes. 219,304
Brake/TransmissionInterlock. 2 1 3
Break-InRecommendations,NewVehicle ..... 5 9
BulbReplacement. 321
Bulbs,Light 320
Calibration, Compass. 158
Capacities,Fluid. 325
Caps,Filler Fuel 252
Radiator. 301
CarWashes. 312
CarbonMonoxideWarning. 251
CargoAreaCover. 134
CargoCompartment LuggageCarrier.... 1 3 7
Cargo Tie-Downs 135
CassetteTapeandPlayerMaintenance ..... 1 9 2
CassetteTapePlayer 165,170
362INDEX
CatalyticConverter. 290
Caution, ExhaustGas. 60,297
CDChanger. 165,173,175
CDPlayer. 161,163,165,172,175
CDPlayerMaintenance. 193
CellularPhone....71,194
Chains,Tire. 245
ChangingAFlatTire. 264
Chart,TireSizing. 2 2 6
ChildRestraint. 51
ChildRestraintTetherAnchors. 52,54
ChildSafetyLocks. 18
ChildSeat. 57
CleanAirGasoline. 248
ClimateControl. 195
Clock. 160
CompactDiscMaintenance....193
CompactSpareTire. 237
Compass. 157
CompassCalibration. 158
CompassVariance. 158
Computer, Trip/Travel. 159
Console 133
Console, Floor. 133
Console,Overhead. 122
Contract,Service.... 3 5 2
CoolantPressureCap. 301
CoolingSystem. 298
AddingCoolant(Antifreeze).... 300
CoolantCapacity....325
CoolantLevel. 302
DisposalofUsedCoolant. 301
Drain,Flush,andRefill. 299
Inspection. 298
PointstoRemember. 302
PressureCap. 301
RadiatorCap. 301
SelectionofCoolant. 299,325,326
INDEX363
CruiseControl. 119
CruiseLight. 149
CupHolder....133,316
CustomerAssistance....350
DealerService. 283
Defroster,RearWindow.... 205
Defroster,Windshield....61,200
DelayWipers. 1 1 4
Deploying, Airbag. 49
DiagnosticSystem, Onboard. 281
DigitalVideoDiscPlayer....175
DimmerSwitch,Headlight. 1 1 3
Dipsticks
AutomaticTransaxle. 308
Disarming,TheftSystem. 25
Disposal
Antifreeze. 301
DoorLocks. 16
DoorLocks, Automatic 17
Door Opener, Garage 123
DriveBelts. 288
DriveShaftUniversalJoints. 295
Driving
OnSlipperySurfaces. 272
DVDPlayer 175
ElectricRemoteMirrors. 69
ElectricalPowerOutlets 131
Electronic Speed Control 119
ElectronicVehicleInformationCenter 151
Emergency, In Case of
Jacking. 264
Overheating. 263
EmissionControlSystemMaintenance ..... 282,330
Engine. 280
AirCleaner. 289
AirCleanerFilter 289
BlockHeater. 212
Break-InRecommendations. 59
CheckingOilLevel. 284
Compartment. 280
Coolant. 326
Cooling. 298
ExhaustGasCaution. 29,251
FailstoStart. 2 1 1
FuelRequirements. 248,325
Oil 284,325,326
OilChangeInterval. 286
OilSelection. 286,325
OilSynthetic. 288
Overheating. 263
TemperatureGauge. 144
EngineOilViscosityChart. 287
ExhaustGasCaution. 29,60,251,298
ExhaustSystem. 297
Extender,SeatBelt. 41
ExteriorFoldingMirrors. 6 8
Filters
AirCleaner 289
AirConditioning. 204,294
AutomaticTransaxle. 309
EngineFuel 289
EngineOil 288,326
EngineOilDisposal 288
Flashers
HazardWarning. 262
TurnSignal....145,322,324
FloorConsole. 133
FluidCapacities. 325
FluidLeaks. 62
FluidLevelChecks
AutomaticTransaxle. 308
Brake 327
PowerSteering. 294,327
INDEX365
FogLightService....3 2 3
FogLights. 1 12,150,323
FoldingRearSeat. 101
FreeingAStuckVehicle. 273
Fuel. 248
Adding. 252
Additives. 250
CleanAir. 248
FillerCap. 252
Filter. 289
Gasoline. 248
Gauge. 145
Hoses. 306
OctaneRating. 248,326
Requirements. 248,325
TankCapacity. 325
FuelSystemCaution 251
Fueling. 252
Fuses 316
GarageDoorOpener 123
Gas Cap 252
Gasoline. 248
Gasoline,CleanAir. 248
Gasoline,Reformulated. 249
Gauges
CoolantTemperature.... 1 4 4
Fuel 145
Speedometer 145
Tachometer....148
Gearshift. 215
GeneralInformation. 15,23,245
GlassCleaning 315
GroceryBagRetainer 103
GrossAxleWeightRating. 254
GrossVehicleWeightRating 254
Hands-FreePhone. 71
HazardWarningFlasher. 262
HeadPhones. 183
HeadRestraints. 94
Headlights. 322
BulbReplacement....321
HighBeam. 1 1 3
HighBeam/LowBeamSelectSwitch. . . . . . . 1 1 3
Passing. 1 1 3
Replacing. 321
Switch. 1 1 0
TimeDelay....1 1 1
HeatedSeats. 94
Heater,EngineBlock. 212
Holder,Cup. 133
HomelinkTransmitter. 123
HoodRelease. 107
Hoses 303,306
Ignition
Key 11
IlluminatedEntry.... 1 5
Immobilizer. 12
Indicator, TractionControl. 147
InfantRestraint. 5 5
InformationCenter,Vehicle. 151
InstrumentCluster. 143,144
Instrument Panel and Controls 142
InstrumentPanelLensCleaning. 3 1 5
IntegratedPowerModule 316
Interior Appearance Care 314
InteriorFuses. 316
InteriorLights 109,110
IntermittentWipers. 1 1 4
Introduction. 4
JackLocation. 265
JackOperation 264,267
JackingInstructions 267
JumpStarting. 270
INDEX367
Key, Programming. 14
Key,Replacement. 14
Key,Sentry. 12
Key-InReminder....12
KeylessEntrySystem....19
Keys. 1 1
KneeBolster. 46,48
Lap/ShoulderBelts. 3 1
LATCH(LowerAnchorsandTether
forCHILDREN). 52,54
Latches
Hood. 107
LeadFreeGasoline. 248
Liftgate. 26
Lights. 62,108
Airbag. 46,51,61,151
Anti-Lock. 145
Automatic Headlights 111
Back-Up. 32 4
BrakeWarning. 146
BulbReplacement 320,321
Courtesy/Reading 108
Cruise 149
Daytime Running 111
DimmerSwitch,Headlight 109
EngineTemperatureWarning....15 1
Fog 112,150,323
HazardWarningFlasher 262
HeadlightSwitch....1 1 0
Headlights 110,321,322
HighBeamIndicator.... 1 4 9
IlluminatedEntry. 15
InstrumentCluster 110
Interior 110
License. 32 4
Lights On Reminder 111
MalfunctionIndicator 149
368INDEX
OilPressure....150
Park. 322
Reading. 122
RearServicing. 324
RearTail. 324
SeatBeltReminder....150
Service. 320,321
ServiceEngineSoon. 149
SideMarker. 324
TurnSignal. 109,112,322,324
Voltage. 144
Warning(InstrumentClusterDescription). . . . . 1 4 4
LoadLevelingSystem. 138
LoadingVehicle. 254,255
Capacities. 255
Tires 22
Locks
Door....16
Lower AnchorsandTetherforCHildren
(LATCH) 52,54
Lubrication, Body 296
LuggageRack. 137
Maintenance, Airbag. 50
Maintenance Free Battery 291
MaintenanceProcedures. 284
MaintenanceSchedule 330
Light Duty Schedule "A" 344
LightDutySchedule"B"....333
Schedule "A" 344
Schedule "B" 333
Maintenance,Sunroof. 131
MalfunctionIndicatorLight. 149,282
Manual,Service. 356
Map/ReadingLights. 122
MemoryFeature. 104
MemorySeat. 70,104
INDEX369
Mini-TripComputer....159
Mirrors. 67
AutomaticDimming. 67
ElectricRemote. 69
ExteriorFolding. 68
Heated. 70
Memory. 104
Outside. 68
Rearview....67
Vanity. 70
Modifications/Alterations,Vehicle. . . . . . . . . . . . . . 7
Monitor,TirePressureSystem. 242
MoparParts. 283,355
Multi-FunctionControlLever. 109
� NavigationSystem. 194
NewVehicleBreak-InPeriod. 59
OccupantRestraints. 30
OctaneRating,Gasoline. 248
Odometer. 148
Oil,Engine. 284,326
Capacity. 325
ChangeInterval. 286
Checking. 284
Disposal 288
Filter. 288,326
FilterDisposal 288
IdentificationLogo. 287
Materials Addedto. 288
Recommendation. 286,325
Synthetic. 288
Viscosity 287,325
Onboard DiagnosticSystem. 281,282
Opener, GarageDoor. 1 2 3
OperatorManuals. 4
Overdrive. 215
Overhead Console....122
370INDEX
OverheadTravelInformationCenter. . . . . . . . 1 2 2
Overheating,Engine. 144,263
Owner'sManual. 4,356
PanicAlarm. 21
ParkingBrake. 218
ParkingOnHill. 218
PassingLight. 1 1 3
Pedals,Adjustable. 1 1 8
Pets. 59
Phone, Cellular. 71
Phone,Hands-Free. 71
Placard, Tire and Loading Information. 2 2 9
Power
Brakes. 219
DistributionCenter. 3 1 6
DoorLocks. 16
LiftGate. 27
Mirrors. 69
Outlet. 131
Seats. 93
Steering. 2 2 2
Steering,Checking 294
Sunroof. 129
Windows. 29
PregnantWomenandSeatBelts. 4 1
PreparationforJacking. 2 6 6
Pretensioners
SeatBelts 39
ProgrammableElectronicFeatures ..... 124,128,154
ProgrammingTransmitters 21,124,128
RadialPlyTires. 237
RadiatorCap. 301
Radio 161,165
RadioBroadcastSignals. 191
RadioOperation 166,194
RadioRemoteControls. 178,190
INDEX371
Radio,Satellite. 186
RearLiftgate. 26
RearSeatingFlexibility....101
RearWindowDefroster. 205
RearWindowFeatures....1 1 4
RearWiper/Washer....1 1 4
RearviewMirrors. 67
RecliningFrontSeats. 96
Recommended Fluids, Lubricants and Genuine Parts. 326
Reminder,SeatBelt. 39
RemoteKeylessEntry. 19
RemoteSoundSystemControls. 190
ReplacementKeys. 14
ReplacementParts. 283
ReplacementTires. 240,242
ReportingSafetyDefects. 355
Restraint,Head. 94
Restraints,Child. 51,57
Restraints, Infant 5 5
Retractable Cargo Area Cover 134
RockingVehicleWhenStuck. 273
RoofRack. 137
Rotation,Tires 247
SafetyChecksInsideVehicle 61
SafetyChecksOutsideVehicle. 62
SafetyDefects,Reporting 355
Safety, ExhaustGas. 29
SafetyInformation,Tire. 2 2 4
SafetyTips 60
SatelliteRadio. 186
Satellite Radio Antenna 189
Schedule,Maintenance 330
SeatBeltMaintenance 315
SeatBeltReminder. 39
SeatBelts 30
AdjustableShoulderBelt 36
AdjustableUpperShoulderAnchorage. . . . . . . 3 6
AndPregnantWomen. 41
ChildRestraint. 5 1
Extender. 4 1
FrontSeat. 31
Pretensioners. 39
RearSeat. 31
Reminder. 150
UntwistingProcedure. 37
Seats. 93
Adjustment. 97
EasyEntry. 98
Heated....94
Memory....104
Power. 93
Reclining. 96
Tilting. 98
SecurityAlarm. 24
SelectionofCoolant 326
SentryKey 12
SentryKeyProgramming. 14
ServiceAssistance. 350
ServiceContract 352
ServiceEngineSoonLight. 149
ServiceManuals. 356
SettingtheClock 160
ShoulderBelts. 31
SideAirbag. 48
Signals,Turn 145,322,324
SlipperySurfaces,DrivingOn. 272
SnowChains. 245
SnowTires 246
SpareTire. 237,238,265
SparkPlugs. 289
Speed Control 119
Speedometer 145
Starting. 210
EngineFailstoStart. 2 11
INDEX373
StartingandOperating. 210
StartingProcedures. 2 1 0
Steering
Linkage. 295
Power. 222,294
ShaftSeal. 295
TiltColumn. 1 1 6
SteeringWheelMountedSoundSystem
Controls. 190
Storage. 133,319
Storage,Vehicle. 203,319
StoringYourVehicle. 319
SulfurinGasoline. 250
SunRoof. 129
SunVisorExtension. 70
SunglassStorage. 122
SunroofMaintenance. 131
SupplementalRestraintSystem-Airbag 42
System,Navigation. 194
Tachometer. 148
TapePlayer 170
TemperatureControl,Automatic. 195
TemperatureGauge,EngineCoolant ..... 144,263
TetherAnchor,ChildRestraint. 52,54
TheftAlarm. 24
TheftSystem 24
TheftSystemArming 24
TheftSystemDisarming 25
TieDownHooks,Cargo 135
TiltSteeringColumn 116
TireandLoadingInformationPlacard. 2 2 9
TireIdentificationNumber(TIN) 2 2 8
TireMarkings. 2 2 4
TireSafetyInformation 2 2 4
Tires 62,233,357
AirPressure. 233
Alignment. 241
Chains 24
Changing. 264
CompactSpare. 237
GeneralInformation. 233
HighSpeed. 236
InflationPressures. 234
Jacking. 264
LoadCapacity....229,230
PressureMonitorSystem. 242
QualityGrading. 357
Radial. 237
Replacement. 240,242
Rotation. 247
Safety. 224,233
Sizes. 2 2 6
SnowTires. 246
SpareTire. 265
Spinning. 239
TreadWearIndicators. 240
Towing. 256
DisabledVehicle. 274
Trailering. 256
Traction Control 116,147,223
Traction Control Switch 116,223
TrailerTowing. 256
MinimumRequirements. 257
TrailerandTongueWeight. 257
Transaxle. 213,307
Automatic 213,307
Autostick. 120,215,216
Filter. 309
Operation. 213
Overdrive 215
SelectionofLubricant 307,327
Transmission . . . . . . . . . . . . . . . . . . . See Transaxle
TransmitterBatteryService. 23
Transmitter,GarageDoorOpener 123
TransmitterProgramming. 21
Transmitter,RemoteKeylessEntry 19
TransportingPets. 59
TreadWearIndicators. 240
TripOdometer. 148
TripOdometerResetButton. 148
TurnSignals....1 12,145,322,324
UniformTireQualityGrades. 357
UniversalJoints. 295
UniversalTransmitter. 1 2 3
UnleadedGasoline. 248
UntwistingProcedure,SeatBelt. 37
VanityMirrors. 70
Variance,Compass. 158
VehicleCertificationLabel. 254
VehicleIdentificationNumber. 6
VehicleLoading....230,254,255
VehicleModifications/Alterations. 7
VehicleStorage.... 203,319
VehicleTheftAlarm. 24
VideoEntertainmentSystem. 175
WarningFlasher,Hazard 262
WarningLights(InstrumentClusterDescription).144
WarningsandCautions 6
WarrantyInformation. 353
Washer, Adding Fluid 115,297
Washers,Windshield. 1 1 3
WashingVehicle. 312
WheelAlignmentandBalance 241
WheelandWheelTrim. 3 1 3
WheelBearings. 3 1 1
WindBuffeting. 30,131
WindowFogging 204
Windows 29
Power 29
Windshield Washers 113,297
WindshieldWiperBlades. 296
376INDEX
WindshieldWipers. 1 1 3
WiperBladeReplacement. 296
Wiper,Rear. 1 1 4
Wipers,Intermittent. 1 1 4


- INTRODUCTION
- INTRODUCTION
- WARNING!
- HOWTOUSETHISMANUAL
- 6INTRODUCTION
- WARNINGSANDCAUTIONS
- VEHICLEIDENTIFICATIONNUMBER
- VEHICLEMODIFICATIONS/ALTERATIONS
- THINGSTOKNOWBEFORESTARTINGYOURVEHICLE
- CONTENTS
- THINGSTOKNOWBEFORESTARTINGYOURVEHICLE11
- AWORDABOUTYOURKEYS
- IgnitionKeyRemoval
- CAUTION!
- Key-In-IgnitionReminder
- SENTRYKEY
- NOTE:
- ReplacementKeys
- CustomerKeyProgramming
- GeneralInformation
- ILLUMINATEDENTRYSYSTEM
- PowerDoorLocks
- THINGSTOKNOWBEFORESTARTINGYOURVEHICLE17
- Automatic Door Locks
- ChildProtectionDoorLock
- THINGSTOKNOWBEFORESTARTINGYOURVEHICLE19
- REMOTEKEYLESSENTRY
- 20THINGSTOKNOWBEFORESTARTINGYOURVEHICLE
- Tounlockthedoorsandliftgate:
- Tolockthedoorsandliftgate:
- UsingThePanicAlarm:
- ToProgramTransmitters:
- THINGSTOKNOWBEFORESTARTINGYOURVEHICLE
- ToOpen/ClosePowerLiftgate—IfEquipped
- ToTurnOff"FlashLightsOnLock/Unlock"
- TransmitterBatteryService
- VEHICLETHEFTALARM
- THINGSTOKNOWBEFORESTARTINGYOURVEHICLE25
- LIFTGATE
- THINGSTOKNOWBEFORESTARTINGYOURVEHICLE27
- PowerLiftgate—IfEquipped
- WINDOWS
- PowerWindows
- Wind Buffeting
- OCCUPANTRESTRAINTS
- Lap/ShoulderBelts
- THINGSTOKNOWBEFORESTARTINGYOURVEHICLE33
- Lap/Shoulder Belt Operating Instructions
- THINGSTOKNOWBEFORESTARTINGYOURVEHICLE37
- Lap/ShoulderBeltUntwistingProcedure
- SeatBeltPretensioners
- EnhancedDriverSeatBeltReminderSystem (BeltAlert)
- SeatBeltsandPregnantWomen
- SeatBeltExtender
- DriverandFrontPassengerSupplemental RestraintSystem-Airbag
- "The Front Airbag System" consists of the following:
- How The Airbag Systems Work
- SideAirbagsSupplementalRestraintSystem (SRS)—IfEquipped
- If An Airbag Deployment Occurs
- Enhanced Accident Response
- Maintaining Your Airbag System
- Airbag Light
- ChildRestraint
- Lower Anchors and Tether for CHildren (LATCH)
- Infants and Children
- Installing A Child Restraint
- Children Too Large For Booster Seats
- Transporting Pets
- ENGINEBREAK-INRECOMMENDATIONS
- SAFETYTIPS
- ExhaustGas
- SafetyChecksYouShouldMakeInsideThe Vehicle
- Seat Belts
- Defroster
- 62THINGSTOKNOWBEFORESTARTINGYOURVEHICLE
- PeriodicSafetyChecksYouShouldMakeOutside TheVehicle
- Tires
- Lights
- Fluid Leaks
- UNDERSTANDINGTHEFEATURESOFYOURVEHICLE
- 64UNDERSTANDINGTHEFEATURESOFYOURVEHICLE
- UNDERSTANDINGTHEFEATURESOFYOURVEHICLE65
- MIRRORS
- InsideDay/NightMirror
- AutomaticDimmingMirror—IfEquipped
- UNDERSTANDING THE FEATURES OF YOUR VEHICLE
- Driver'sSideOutsideMirrorAutoDimmer—If Equipped
- ExteriorMirrorsFoldingFeature
- OutsideMirror—Driver'sSide
- OutsideMirror—Passenger'sSide
- PowerRemote-ControlMirrors
- 70UNDERSTANDINGTHEFEATURESOFYOURVEHICLE
- HeatedRemoteControlMirrors
- Illuminated Vanity Mirrors
- HANDS-FREECOMMUNICATION(UConnect™)—IFEQUIPPED
- 72UNDERSTANDINGTHEFEATURESOFYOURVEHICLE
- Operation
- UNDERSTANDINGTHEFEATURESOFYOURVEHICLE73
- Help Command
- Cancel Command
- 74UNDERSTANDINGTHEFEATURESOFYOURVEHICLE
- Pair (Link) UConnect™ System to a Cellular Phone
- UNDERSTANDINGTHEFEATURESOFYOURVEHICLE75
- UNDERSTANDINGTHEFEATURESOFYOURVEHICLE
- Add Names to Your UConnect™ Phonebook
- Edit Entries in the UConnect™ Phonebook
- Delete Entries in the UConnect™ Phonebook
- UNDERSTANDING THE FEATURES OF YOUR VEHICLE
- Delete All Entries in the UConnect™ Phonebook
- List All Names in the UConnect™ Phonebook
- PhoneCallFeatures
- Answer or Reject an Incoming Call - No Call Currently in Progress
- Answer or Reject an Incoming Call - Call Currently in Progress
- Making a Second Call while Current Call in Progress
- Place / Retrieve a Call from Hold
- 80UNDERSTANDINGTHEFEATURESOFYOURVEHICLE
- Toggling Between Calls
- Conference Call
- Three-Way Calling
- Call Termination
- Redial
- Call Continuation
- UConnect™SystemFeatures
- Language Selection
- 82UNDERSTANDINGTHEFEATURESOFYOURVEHICLE
- Emergency Assistance
- Towing Assistance
- Paging
- Voice Mail Calling
- Working with Automated Systems
- Barge In - Overriding Prompts
- Turning Confirmation Prompts On/Off
- Phone and Network Status Indicators
- Dialing Using the Cellular Phone Keypad
- Mute/Un-mute (Mute off)
- Information Service
- AdvancedPhoneConnectivity
- Transfer Call to and from Cellular Phone
- Connect or Disconnect Link Between the UConnect™ System and Cellular Phone
- List Paired Cellular Phone Names
- UNDERSTANDING THE FEATURES OF YOUR VEHICLE
- Select another Cellular Phone
- Delete UConnect™ Paired Cellular Phones
- ThingsYouShouldKnowAboutYourUConnect™ System
- Voice Recognition (VR)
- UNDERSTANDINGTHEFEATURESOFYOURVEHICLE87
- 88UNDERSTANDINGTHEFEATURESOFYOURVEHICLE
- Far End Audio Performance:
- Bluetooth Communication Link
- Reset
- Power-Up
- 90UNDERSTANDINGTHEFEATURESOFYOURVEHICLE
- SEATS
- 10-WayDriver'sPowerSeat—IfEquipped
- 8-WayDriver'sPowerSeat—IfEquipped
- 4-WayPassenger'sPowerSeat
- AdjustableHeadRestraints
- HeatedSeats—IfEquipped
- UNDERSTANDINGTHEFEATURESOFYOURVEHICLE95
- 96UNDERSTANDINGTHEFEATURESOFYOURVEHICLE
- SecondRowManualSeatRecliner
- SecondRowManualSeatAdjuster
- 98UNDERSTANDINGTHEFEATURESOFYOURVEHICLE
- SecondRowFold&TumbleSeats
- UNDERSTANDINGTHEFEATURESOFYOURVEHICLE99
- ThirdRowEasyExit
- 100UNDERSTANDINGTHEFEATURESOFYOURVEHICLE
- ThirdRowSeatingFlexibility
- LoadFloor
- UNDERSTANDINGTHEFEATURESOFYOURVEHICLE103
- PlasticGroceryBagRetainer
- DRIVERMEMORYSYSTEM—IFEQUIPPED
- ToProgramMemorySeatButtons&RKE Transmitters, FollowTheseSteps:
- ToDisableATransmitterLink, FollowTheseSteps:
- UNDERSTANDINGTHEFEATURESOFYOURVEHICLE107
- TOOPENANDCLOSETHEHOOD
- OverheadConsoleMap/ReadingLights
- UNDERSTANDINGTHEFEATURESOFYOURVEHICLE109
- InteriorLights
- Multi-FunctionLever
- UNDERSTANDING THE FEATURES OF YOUR VEHICLE
- Headlights, ParkingLights, InstrumentPanel Lights
- Parade Mode (Daytime Brightness Feature)
- AutomaticHeadlights
- DaytimeRunningLights(CanadaOnly)
- Lights-onReminder
- HeadlightTimeDelay
- 112UNDERSTANDINGTHEFEATURESOFYOURVEHICLE
- FogLights—IfEquipped
- D ThefrontfoglightswitchisontheMulti-Function Lever.Toactivatethefrontfoglights,turnonthe parkinglightsorthelowbeamheadlightsandpull outtheendoftheMulti-FunctionLever.
- TurnSignals
- Highbeam/LowbeamSelectSwitch
- PassingLight
- 114UNDERSTANDINGTHEFEATURESOFYOURVEHICLE
- MistFeature
- WindshieldWiperOperation
- IntermittentWiperSystem
- RearWindowWiper/Washer
- UNDERSTANDINGTHEFEATURESOFYOURVEHICLE115
- Adding Washer Fluid
- UNDERSTANDING THE FEATURES OF YOUR VEHICLE
- TILTSTEERINGCOLUMN
- TRACTIONCONTROLSWITCH—IFEQUIPPED
- UNDERSTANDINGTHEFEATURESOFYOURVEHICLE117
- ADJUSTABLEPEDALS—IFEQUIPPED
- UNDERSTANDINGTHEFEATURESOFYOURVEHICLE119
- ELECTRONICSPEEDCONTROL
- ToActivate:
- ToSetAtADesiredSpeed:
- ToDeactivate:
- ToResumeSpeed:
- ToVarytheSpeedSetting:
- UNDERSTANDINGTHEFEATURESOFYOURVEHICLE121
- ToAccelerateForPassing:
- 122UNDERSTANDINGTHEFEATURESOFYOURVEHICLE
- OVERHEADCONSOLE—IFEQUIPPED
- Courtesy/ReadingLights
- SunglassesStorage
- GARAGEDOOROPENER—IFEQUIPPED
- 124UNDERSTANDINGTHEFEATURESOFYOURVEHICLE
- ProgrammingHomeLink
- 126UNDERSTANDINGTHEFEATURESOFYOURVEHICLE
- CanadianProgramming/GateProgramming
- UsingHomeLink
- ErasingHomeLinkButtons
- 128UNDERSTANDINGTHEFEATURESOFYOURVEHICLE
- ReprogrammingaSingleHomeLinkButton
- Security
- UNDERSTANDINGTHEFEATURESOFYOURVEHICLE129
- POWERSUNROOF—IFEQUIPPED
- ExpressOpenFeature
- 130UNDERSTANDINGTHEFEATURESOFYOURVEHICLE
- WindBuffeting
- SunroofMaintenance
- ELECTRICALPOWEROUTLETS
- UNDERSTANDINGTHEFEATURESOFYOURVEHICLE
- ElectricalOutletUseWithEngineOff
- CUPHOLDERS
- FrontSeatCupholders
- SecondRowSeatCupholders
- ThirdRowSeatCupholders
- STORAGE
- ConsoleFeatures
- 134UNDERSTANDINGTHEFEATURESOFYOURVEHICLE
- RearCargoStorageBin
- RetractableCargoAreaCover—IfEquipped
- UNDERSTANDINGTHEFEATURESOFYOURVEHICLE135
- Stowed Position
- CargoTie-DownHooks
- 136UNDERSTANDINGTHEFEATURESOFYOURVEHICLE
- UNDERSTANDINGTHEFEATURESOFYOURVEHICLE137
- ROOFLUGGAGERACK—IFEQUIPPED
- LOADLEVELINGSYSTEM
- UNDERSTANDING YOUR INSTRUMENT PANEL
- UNDERSTANDING YOURINSTRUMENT PANEL 141
- INSTRUMENTCLUSTERDESCRIPTIONS
- VoltageLight
- Temperature Gauge
- 3.FuelGauge
- TurnSignalIndicators
- 5.Speedometer
- 6.Anti-LockLight
- BrakeSystemWarningLight
- TractionControlIndicator—IfEquipped
- 9.Tachometer
- 10.TripOdometerButton
- TransmissionRangeIndicator
- AutoStickLight
- 13.Odometer/TripOdometer
- CruiseIndicator
- 15.MalfunctionIndicatorLight
- HighBeamLight
- NavigationScreen—IfEquipped
- 150UNDERSTANDINGYOURINSTRUMENTPANEL
- 22.AirbagLight
- Engine Temperature Warning Light
- ELECTRONICVEHICLEINFORMATIONCENTER (EVIC)
- 152UNDERSTANDINGYOURINSTRUMENTPANEL
- UNDERSTANDING YOUR INSTRUMENT PANEL 153
- CustomerProgrammableFeatures—IfEquipped
- Language?
- Display U.S. or Metric?
- Use factory Settings?
- Auto Door Locks?
- Auto Unlock On Exit?
- Remote Unlock Driver's Door 1st?
- Remote Linked To Memory? (Available with Memory Seat Only)
- Sound Horn On Lock?
- 156UNDERSTANDINGYOURINSTRUMENTPANEL
- Flash Lights On Lock/Unlock?
- Headlamp Delay
- Headlamp On With Wipers? (Available with Auto Headlights Only)
- Service Interval
- Reset Service Distance (Displays Only if Service Interval was Changed)
- Power Accessory Delay?
- Easy Exit Seat? (Available with Memory Seat Only)
- Retrain Tire Sensors (Available with Tire Pressure Monitor System Only)
- CompassDisplay—IfEquipped
- Automatic Compass Calibration
- Manual Compass Calibration
- Compass Variance
- UNDERSTANDING YOUR INSTRUMENT PANEL 159
- Mini-TripFunctions—IfEquipped
- To Reset The Display
- SETTINGTHEANALOGCLOCK
- ELECTRONICDIGITALCLOCK
- ClockSettingProcedure
- SALESCODERAH—AM&FMSTEREORADIO WITHHCDPLAYERANDCD/DVDCHANGER CONTROLS
- RadioOperation
- Power/Volume Control
- Mode
- Seek
- UNDERSTANDING YOUR INSTRUMENT PANEL
- Tuning
- Balance
- Fade
- Tone Control
- To Set The Radio Push-Button Memory
- To Change From Clock To Radio Mode
- General Information
- CDPlayerOperation
- UNDERSTANDING YOUR INSTRUMENT PANEL
- EJT — Eject
- FF/TUNE/RW
- RND — Random Play
- CD/DVDChangerOperation
- Time
- PTY (Program Type) Button
- UNDERSTANDING YOUR INSTRUMENT PANEL
- Scan
- Tune
- Balance — BAL
- AM/FM Selection
- 170UNDERSTANDINGYOURINSTRUMENTPANEL
- TapePlayerOperation
- Tape Side — /PTY
- Tape
- Fast Forward — FF
- Rewind — RW
- EJT Tape
- Metal Tape Selection (70μs)
- Pinch Roller Release
- Dolby Noise Reduction
- UNDERSTANDING YOUR INSTRUMENT PANEL
- Inserting The Compact Disc
- EJT CD
- Random Play — RND/Program Button 4
- CD/DVDChangerOperation—IfEquipped
- UNDERSTANDING YOUR INSTRUMENT PANEL
- Disc Up/Program Button 1
- FF/RW — TUNE
- Disc Down/Program Button 5
- 6DISCCD/DVDCHANGER(RDV)—IFEQUIPPED
- OperatingInstructions—CD/DVDChanger
- Loading The CD/DVD Changer
- EJECT(EJT)Button
- Headphone Transmitter Button (1)
- ARROW Buttons (2, 3, 15, 16)
- RTN Button (4)
- 180UNDERSTANDINGYOURINSTRUMENTPANEL
- SETUP Button (5)
- PAUSE/PLAY Button (6)
- MUTE Button (7)
- DISP Button (8)
- MODE Button (9)
- PROG UP/DOWN Buttons (10, 11)
- SLOW Button (12)
- STOP Button (13)
- MENU Button (14)
- NEXT/PREV Buttons (2, 15)
- FF/RW Buttons (3, 16)
- ENTER Button (17)
- Light Button (18)
- Remote Control Battery Service
- 182UNDERSTANDINGYOURINSTRUMENTPANEL
- OperatingInstructions—VideoScreen
- Screen Width Button
- Enter Button
- Brightness Button
- OperatingInstructions—Headphones
- 184UNDERSTANDINGYOURINSTRUMENTPANEL
- Power Button
- Volume Control
- Headphone Battery Service
- OperatingInstructions—MP3Player, Portable Walkman
- OperatingInstructions—Video Games/Camcorders
- SATELLITERADIO—IFEQUIPPED
- SystemActivation
- ElectronicSerialNumber/SiriusIdentification Number(ENS/SID)
- ESN/SID Access With RBB, RAH and RBK Radios
- ESN/SID Access With RBP, RBU, RAZ, and RBQ Radios
- SelectingSatelliteModeinRBB,RAHandRBK Radios
- SelectingSatelliteModeinRBP,RBU,RAZ,and RBQRadios
- SelectingaChannel
- StoringandSelectingPre-SetChannels
- UsingthePTY(ProgramType)Button(if equipped)
- PTYButton"SCAN"
- PTYButton"SEEK"
- SatelliteAntenna
- ReceptionQuality
- UNDERSTANDING YOUR INSTRUMENT PANEL
- REMOTESOUNDSYSTEMCONTROLS
- TapePlayer
- CDPlayer
- RADIOGENERALINFORMATION
- RadioBroadcastSignals
- TwoTypesofSignals
- ElectricalDisturbances
- AMReception
- FMReception
- CASSETTETAPEANDPLAYERMAINTENANCE
- CD/DVDDISCMAINTENANCE
- 194UNDERSTANDINGYOURINSTRUMENTPANEL
- RADIOOPERATIONANDCELLULARPHONES
- NAVIGATIONSYSTEM—IFEQUIPPED
- CLIMATECONTROLS
- Dual-ZoneAutomaticTemperatureControl
- Dual/Single Zone Operation
- Manual Operation
- 198UNDERSTANDINGYOURINSTRUMENTPANEL
- 200UNDERSTANDINGYOURINSTRUMENTPANEL
- MixMode
- DefrostMode
- Recirculation Control
- A/C Recirculation Programming
- Rear Fan Operation
- Summer Operation
- Winter Operation
- Vacation Storage
- 204UNDERSTANDING YOURINSTRUMENT PANEL
- Window Fogging
- Outside Air Intake
- A/C Air Filter
- Outside Temperature Display
- ElectricRearWindowDefroster
- NormalStarting
- If Engine Fails to Start
- After Starting
- ENGINEBLOCKHEATER—IFEQUIPPED
- AUTOMATICTRANSMISSION
- Brake/TransmissionInterlockSystem
- FourSpeedAutomaticTransmission
- Reset Mode - Electronic Transmission
- Gear Ranges
- "P"Park
- "R"Reverse
- "N"Neutral
- "D"Overdrive
- AutostickOperation
- AutostickGeneralInformation
- ALLWHEELDRIVE—IFEQUIPPED
- PARKINGBRAKE
- BRAKESYSTEM
- Anti-LockBrakeSystem
- POWERSTEERING
- TRACTIONCONTROL—IFEQUIPPED
- TireLoadingandTirePressure
- Tire and Loading Information Placard
- Loading
- StepsforDeterminingCorrectLoadLimit
- TIRES—GENERALINFORMATION
- TirePressure
- 3.RideComfortandVehicleStability—
- TireInflationPressures
- Tire Pressures for High Speed Operation
- Radial-PlyTires
- CompactSpareTire—IfEquipped
- LimitedUseSpare—IfEquipped
- TireSpinning
- ReplacementTires
- AlignmentAndBalance
- ALLWHEELDRIVE(AWD)—IFEQUIPPED
- TIREPRESSUREMONITORSYSTEM—IF EQUIPPED
- 1,2,3,OR4TIRE(S)LOWPRESSURE
- 1,2,3,OR4TIRE(S)HIGHPRESSURE
- SERVICETIREPRESSURESYSTEM/SEE OWNER'SMANUAL
- TIREPRESSUREUNAVAILABLE
- TIRECHAINS
- SNOWTIRES
- Reformulated Gasoline
- Gasoline/OxygenateBlends
- MMTInGasoline
- SulfurInGasoline
- MaterialsAddedtoFuel
- FuelSystemCautions
- CarbonMonoxideWarnings
- ADDINGFUEL
- FuelFillerCap(GasCap)
- VehicleCertificationLabel
- GrossVehicleWeightRating(GVWR)
- GrossAxleWeightRating(GAWR)
- Overloading
- TRAILERTOWING
- WarrantyRequirements
- WHATODOINEMERGENCIES
- 262WHATODOINEMERGENCIES
- IFYOURENGINEOVERHEATS
- JACKINGANDTIRECHANGING
- JackLocation
- SpareTireStowage
- 266WHATODOINEMERGENCIES
- Spare Tire Removal
- PreparationsForJacking
- JackingInstructions
- 268WHATODOINEMERGENCIES
- JUMP-STARTINGPROCEDURE SIFBATTERYIS LOW
- 272WHATODOINEMERGENCIES
- DRIVINGONSLIPPERYSURFACES
- Acceleration
- Traction
- TOWINGADISABLEDVEHICLE
- WithIgnitionKey
- Front Wheel Drive
- All Wheel Drive
- All Transmissions
- WithoutThelgnitionKey
- TOWINGTHISVEHICLEBEHINDANOTHER VEHICLE(Flattowingwithallfourwheelsonthe ground)
- TOWINGTHISVEHICLEBEHINDANOTHER VEHICLEWITHATOWDOLLEY
- MAINTAINING YOUR VEHICLE
- 278MAINTAININGYOURVEHICLE
- MAINTAININGYOURVEHICLE279
- 3.5LENGINE
- ONBOARDDIAGNOSTICSYSTEM—OBDII
- EMISSIONSINSPECTIONANDMAINTENANCE PROGRAMS
- REPLACEMENTPARTS
- DEALERSERVICE
- 284MAINTAININGYOURVEHICLE
- MAINTENANCEPROCEDURES
- EngineOil
- Checking Oil Level
- 286MAINTAININGYOURVEHICLE
- Change Engine Oil
- Engine Oil Selection
- American Petroleum Institute (API) Engine Oil Identification Symbol
- Engine Oil Viscosity Chart
- 288MAINTAININGYOURVEHICLE
- Synthetic Engine Oils
- Materials Added to Engine Oil
- Disposing of Used Engine Oil And Oil Filters
- EngineOilFilter
- Engine Oil Filter Selection
- DriveBelts—CheckConditionandTension
- SparkPlugs
- EngineAirCleanerFilter
- FuelFilter
- 290MAINTAININGYOURVEHICLE
- CatalyticConverter
- Maintenance-FreeBattery
- AirConditionerMaintenance
- 294MAINTAININGYOURVEHICLE
- Refrigerant Recovery And Recycling
- PowerSteering—FluidCheck
- Front&RearSuspensionBallJoints
- SteeringShaftSeal
- SteeringLinkage
- DriveShaftUniversalJoints
- 296MAINTAININGYOURVEHICLE
- BodyLubrication
- WindshieldWiperBlades
- WindshieldandRearWindowWashers
- ExhaustSystem
- 298MAINTAININGYOURVEHICLE
- CoolingSystem
- Coolant Checks
- Cooling System — Drain, Flush and Refill
- Selection Of Coolant
- Adding Coolant
- Coolant Pressure Cap
- Disposal of Used Engine Coolant
- Coolant Level
- Points to Remember
- HosesAndVacuum/VaporHarnesses
- Brakes
- Brake And Power Steering Hoses
- MasterCylinder—ABSBrakesBrakeFluidLevel Check
- 306MAINTAININGYOURVEHICLE
- FuelSystemHoses
- Selection of Lubricant
- 308MAINTAININGYOURVEHICLE
- Procedure For Checking Fluid Level
- Fluid and Filter Changes
- Special Additives
- 310MAINTAININGYOURVEHICLE
- Power Transfer Unit
- Overrunning Clutch
- Rear Carrier
- Fluid Changes
- Severe Usage
- FrontAndRearWheelBearings
- AppearanceCareandProtectionfromCorrosion
- Protection of Body and Paint from Corrosion
- What Causes Corrosion?
- Washing
- Special Care
- 314MAINTAININGYOURVEHICLE
- Interior Care
- Glass Surfaces
- Cleaning Plastic Instrument Cluster Lenses
- Seat Belt Maintenance
- 316MAINTAININGYOURVEHICLE
- CleaningTheCenterConsoleCupHolders
- Removal
- Cleaning
- Installation
- VEHICLESTORAGE
- REPLACEMENTLIGHTBULBS
- LIGHT BULBS — Interior Bulb Number
- LIGHT BULBS — Exterior Bulb Number
- BULBREPLACEMENT
- StandardQuadHeadlights
- HighIntensityDischargeHeadlights(HID)—If Equipped
- FrontPark/TurnSignalandSidemarkerLights
- FrontFogLight
- 324MAINTAININGYOURVEHICLE
- RearTail,Stop,TurnSignal,SideMarkerand Back-upLights
- LicenseLight
- RECOMMENDEDFLUIDS, LUBRICANTSANDGENUINEPARTS
- MAINTENANCESCHEDULES
- MAINTENANCESCHEDULES
- AtEachStopforFuel
- 332MAINTENANCESCHEDULES
- OnceaMonth
- AtEachOilChange
- SCHEDULE“B”
- 348SCHEDULE"A"
- IFYOUNEEDCONSUMERASSISTANCE
- SUGGESTIONSFOROBTAININGSERVICEFOR YOURVEHICLE
- PrepareForTheAppointment
- PrepareAList
- BeReasonableWithRequests
- IFYOUNEEDASSISTANCE
- IFYOUNEEDCONSUMERASSISTANCE351
- IFYOUNEEDCONSUMERASSISTANCE
- CustomerAssistanceForTheHearingOrSpeech Impaired(TDD/TTY)
- ServiceContract
- WARRANTYINFORMATION
- MOPAR®PARTS
- REPORTINGSAFETYDEFECTS
- InCanada:
- PUBLICATIONORDERFORMS
- DEPARTMENTOFTRANSPORTATIONUNIFORM TIREQUALITYGRADES
- Treadwear
- TractionGrades
- TemperatureGrades
- INDEX
- 360INDEX
- INDEX361
- 362INDEX
- INDEX363
- Filters
- Flashers
- FluidLevelChecks
- INDEX365
- INDEX367
- 368INDEX
- INDEX369
- 370INDEX
- INDEX371
- INDEX373
- 376INDEX
Brand : Chrysler
Model : Pacifica Touring (2005)
Category : Automotive