
ENVCWI-PTG1 - Security Camera ENCORE - Free user manual and instructions
Find the device manual for free ENVCWI-PTG1 ENCORE in PDF.


| Product Type | Wireless Network IP Security Camera |
| Brand | ENCORE |
| Model | ENVCWI-PTG1 |
| Connectivity | Wireless (Wi-Fi) and Ethernet |
| Power Supply | DC 12V (typical) |
| Pan/Tilt | Yes, via software control |
| Audio | 2-way audio supported |
| Motion Detection | Yes, configurable with alarms and recording |
| Recording | Manual, scheduled, motion-triggered |
| Storage | On PC hard drive via UltraView software |
| Max Cameras Supported | Up to 16 cameras |
| View Modes | 1, 4, 9, 16 windows, full screen, scan |
| Snapshot | Yes, via software |
| Email Alerts | Yes, for motion detection |
| Trigger Out | Yes, for external devices (e.g., light) |
| Software Compatibility | Windows 2000/XP/Vista |
| Software Version | UltraView 1.2.0.15 |
| Video Codec | Xvid (for playback) |
| Recording File Size | 20-200 MB per file |
| Camera IP Configuration | Manual or auto search |
Frequently Asked Questions - ENVCWI-PTG1 ENCORE
User questions about ENVCWI-PTG1 ENCORE
0 question about this device. Answer the ones you know or ask your own.
Ask a new question about this device
Download the instructions for your Security Camera in PDF format for free! Find your manual ENVCWI-PTG1 - ENCORE and take your electronic device back in hand. On this page are published all the documents necessary for the use of your device. ENVCWI-PTG1 by ENCORE.
USER MANUAL ENVCWI-PTG1 ENCORE
natural_image
Red and white geometric logo design with diagonal stripes (no text or symbols)ENCORE
ELECTRONICS
ENVCWI-PTG1
Wireless Network (IP) Camera with PAN & TILT
Software User Guide
Version 1.1
Contents
Introduction....2
Installation....3
Using UltraView....6
To launch the program....6
Item features....7
To add a camera 12
To remove a camera....15
To link to the Web page of the camera .....15
To record video....16
To configure the recording settings....18
To playback the recorded video....20
To set up motion detection options....21
Information 23
This Software User Guide provides detailed instructions on operating UltraView, a customized software application with a user-friendly interface allowing you to access and control your camera(s). You can connect up to 16 cameras to monitor different places and record events for each camera. With UltraView, you can also change some basic settings of the camera, such as schedule profiles and motion detecting. In addition, if your camera supports advanced features, such as audio or pan/tilt function, you can use these functions through the control panels of UltraView.
To use UltraView, you have to install it in your computer. It is recommended to use a high performance computer if you want to connect multiple cameras simultaneously. The following provides the system requirements:
Platform: Microsoft® Windows® 2000/XP/Vista.
Hardware Requirement:
1 camera connected: Intel Pentium III 800MHz; 512MB RAM
2 \~ 4 cameras connected: Intel Pentium 4 1.3GHz; 512MB RAM
5 \~ 8 cameras connected: Intel Pentium 4 2.4GHz; 1GB RAM
9 \~ 16 cameras connected: Intel Pentium 4 3.4GHz; 2GB RAM
Resolution: 1024x768 or above
NOTE When you use UltraView to record video clips, store the recorded files to an exclusive hard disk drive in your computer to ensure that there will be enough storage space.
INSTALLATION
Firstly, insert the Installation CD-ROM into the CD drive of your computer to initiate the Auto-Run program. The Auto-Run screen provides the following buttons:
- Quick Guide
- Advanced Guide
- Software Manual
- IPFinder
- Install Software
- Browse
- Exit
To start installing:
- Click Install Software and then select UltraView. The setup wizard appears to help you complete the installation step-by-step.
NOTE To use UltraView, you must have Microsoft .NET Framework 2.0 installed in the computer. The setup wizard will detect it and, if the program is not installed yet, ask you to install it during the process of installing UltraView.
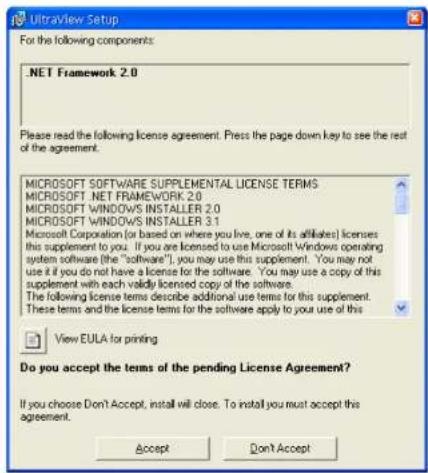
- On the welcome screen, click Next.

- Click Browse to select the destination location to install the software; otherwise, leave the default setting and click Next.

- Click Next again to confirm installation. The setup wizard starts to install the software and the progress bar indicates the installation is proceeding.

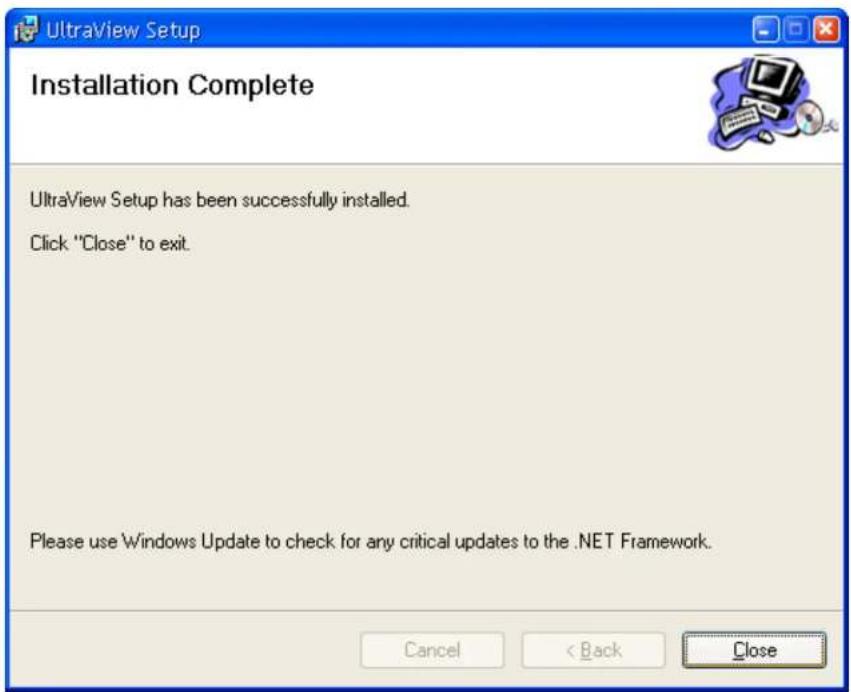
- Installation is completed. Click Close.
To launch the program
This section describes the user interface and operating instructions of UltraView. To launch the program, click Start > Programs > UltraView > UltraView, and the main screen will appear as below:

NOTE Please set the resolution to 1024x768 or above on your computer while using UltraView; otherwise, the displayed main screen may be distorted.
Item features
The following describes the function of each item on the main screen:
■ CONTROLS Panel
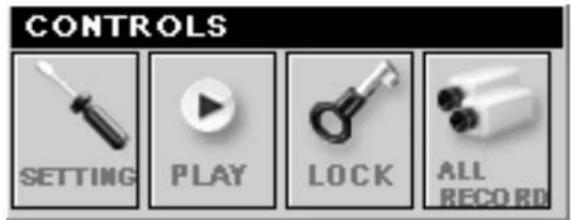
- SETTING: Click to enter the Setting screen of UltraView. Click again to return to the main screen of UltraView.
- PLAY: Click to play the recorded video file using the media player on the computer (for example, Windows Media Player by default).
- LOCK: Click to lock the camera controls. Click again to resume controls for the camera. If you have set ID and Password in SETTING > Account, you will be asked to enter the required information to unlock.
- ALL RECORD: Click to start recording video clips using all connected cameras. Click again to stop recording and save the files in the computer. When you connect only one camera, this button's function is the same as the RECORD button.
TIP By default, the ID and Password boxes are "blank." Click SETTING > Account to change the ID and password of lock/unlock function.
■ VIEW SELECTION Panel

- View mode buttons: UltraView provides multiple view modes, including 1/4/9/16 windows and Full screen mode.
- SCAN: When you connect multiple cameras, click this button to display the video views as the main window in turn.
- PREV: When you connect multiple cameras, click this button to switch the video view to the previous camera.
- NEXT: When you connect multiple cameras, click this button to switch the video view to the next camera.
TIP To set the time interval of scanning, click SETTING > Other and then adjust the time from 1 to 10 seconds in the Time interval of scan option.
■ CAMERA Panel

- TRIGGER OUT: Click to turn on the trigger out connector of the camera. This button is available only when the connected camera supports the trigger out connector, which is used to control the external device connected to the camera, such as a light.
- SNAPSHOT: Click to capture a still image using the selected camera and save the file in the computer.
- RECORD: Click to start recording a video clip using the selected camera. Click again to stop recording and save the file in the computer.
- TALK: Click to speak out through the camera. This button is available only when the connected camera supports 2-way audio function.
- LISTEN: Click to receive the on-site sound and voice from the camera.
■ SYSTEM Panel
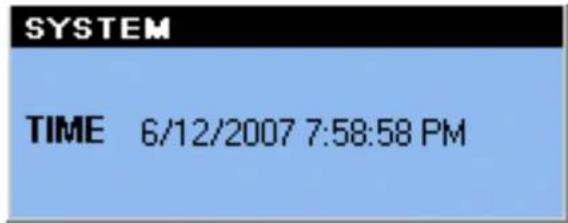
This panel displays the current date and time.
■ PAN-TILT CONTROL Panel (optional)

When you connect a pan/tilt camera, the system will detect the camera's function automatically and the PAN-TILT CONTROL buttons will become functional. Otherwise, these buttons are displayed as gray out buttons.
- Direction/Home buttons: Click these buttons to adjust the camera's viewing angle to Up ( ) / Down ( ) / Left ( ) / Right ( ) / Left-Up ( ) / Left-Down ( ) / Right-Up ( ) / Right-Down ( ).
Click the Home button ( ) to return the camera to the default position.
- : If you have saved two or more positions for the selected camera, click this button to control the camera swinging from one position to another position.
■ Video View Window and Camera List

- Video View Window: This window displays the video view of the selected camera, which can be divided into 4/9/16 windows according to your selection in VIEW SELECTION panel.
- Camera List: This list displays the information of the connected camera(s).
To add a camera
- Click SETTING in the CONTROLS panel to display the Setting screen.
- Click Add Camera.


In the pop-up Add New Camera dialog window, you can:
- Select the Search tab if you are not sure of the camera's IP address. Click Search camera to search the available camera within the network. Once the camera is found and is shown in the list, select it and click Add Camera.

- Select the Input tab to add a camera by entering its IP address directly. Enter the camera's IP address (default: 192.168.0.30) and Port (default: 80), and then click Add Camera.

- Enter the User name and Password for the camera, and then click OK. The connected camera will be displayed in the Camera List.
- Click SETTING to return to the Video View Window. The video view of the selected camera will be displayed now.

TIP If you have changed the setting of camera after it is connected to the Camera list. UltraView might display the incorrect information or unauthorized error. Click SETTING > Refresh to update the latest information of camera.
To remove a camera
- Click SETTING in the CONTROLS panel to display the Setting screen.
- Select a camera from the list and click Delete Camera.

To link to the Web page of the camera
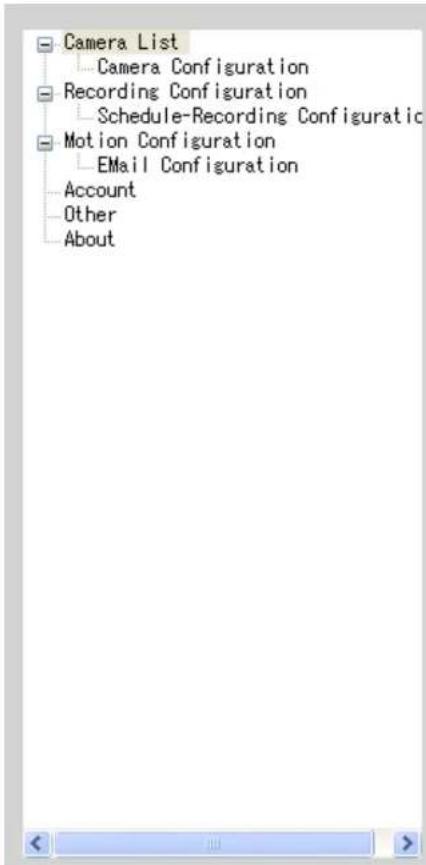
Click SETTING > Camera List > Camera Configuration and then Link web page to launch the Web browser that displays live view image and Web Configuration of the selected camera.
To record video
UltraView provides three methods to record video clips: one is to click the RECORD/ALL RECORD button to record manually; the second is to record by motion detection; the third is to set the recording schedule in Setting > Recording Configuration > Schedule Recording Configuration.
- Manually recording
Click RECORD/ALL RECORD and it starts recording. Click the button again to stop.
● Trigger recording by motion detection
When the motion detection function of the selected camera is enabled, you can configure the camera to start recording triggered by the motion detected. Click SETTING > Motion Configuration, and then select the Recording option to enable the selected camera to record by motion detection.

- Schedule recording
This recording method will work after you have completed the required settings in Schedule Recording
Configuration. The recording schedule can be defined by Dates or Days.
- Dates: First, select the camera from the pull-down list. Then, click Add to set the Start/Stop date and time and then click OK to add the recording schedule to the list. Click Apply to save the settings.

- Days: First, select the camera from the pull-down list and select Days tab. Then, select the weekday from the day buttons and then set the time period. Click Apply to save the settings.

To configure the recording settings
To configure the recording settings, including the storage folder and storage options, click SETTING > Recording Configuration.
- Recording File Path: To change the destination folder to save the recorded video file, click Browse under the Recording File Path box to assign a new folder.
● Each Recording File Size: This option allows you to select from 20 to 200 MB so that the video will be recorded as another file automatically when the recording file reaches the specified size limit.
- Reserved HDD space for each camera: This option allows you to set to reserve the storage space on the hard disk drive for the manual/scheduled recording and motion-detected recording half-and-half of each camera. Before setting the reserve space on the hard disk drive, you can check the available storage space that is displayed in the HDD Free space field.
- Enable Recycle Recording: Click on the camera number to clear the files when the unreserved space of the hard disk drive is full.
NOTE The system will not delete the recorded file of motion detection, please back up and then remove the files nonscheduledly. Otherwise, the system might stop the motion-detected recording because of the shortage of storage space.

To playback the recorded video
The recorded video clips are saved in your computer, and can be played using the media player on the computer, such as Windows Media Player. To start playback, simply click the PLAY button on the CONTROLS panel, and the following dialog screen will appear, allowing you to select the file to playback.

Select the recorded video file under the [camera] path and then click Open to launch the media player to playback.
NOTE If your player on the computer don't have video codec to playback the recorded video. You can download video codec from http://www.xvid.org/downloads.15.0.html to support.
To set up motion detection options
When the motion detection function of the selected camera is enabled, you can set the Motion Options by selecting Alarm, Recording, Send e-Mail, and Trigger Out under SETTING > Motion Configuration.
- Alarm: Select Beep or Music to alert you for the motion detected. When you select Music, you can customize the sound by clicking Browse and then selecting your favorite music (*.wav or *.mp3 file) in the computer.
● Recording: Select this option to enable the camera to record by motion detected. - Send e-Mail: Select this option so that the system will be able to send an email to the specified receiver. Once the option is selected, you have to complete the required information in SETTING > Motion Configuration > EMail Configuration.
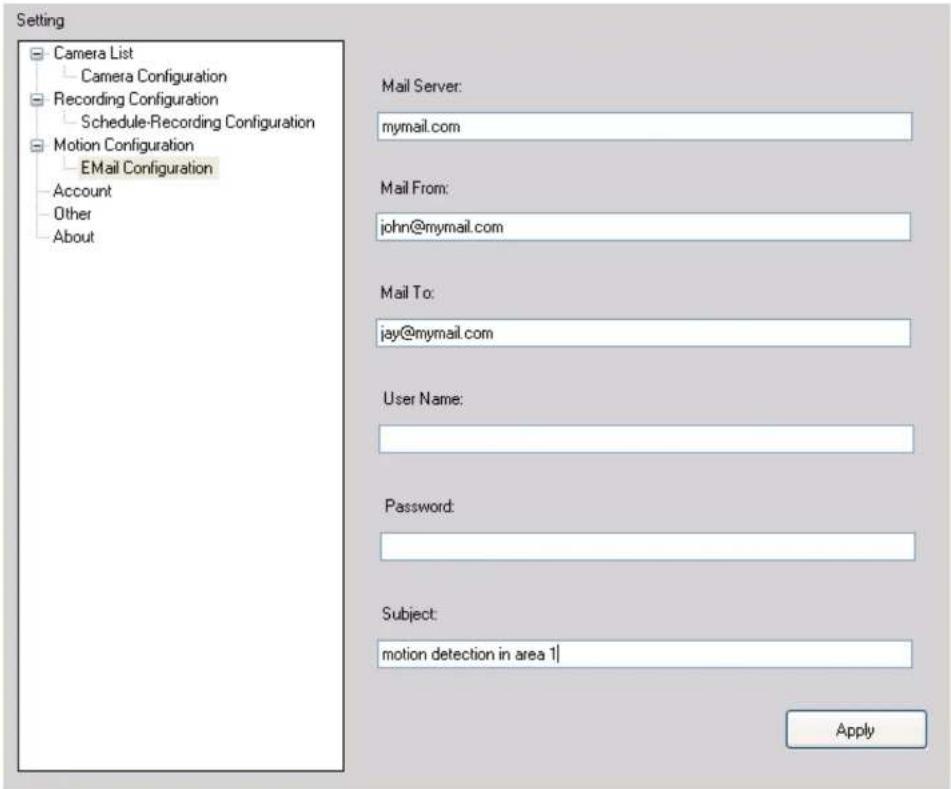
- Mail Server: Enter the mail server address. For example, mymail.com.
- Mail From: Enter the email address of the user who will send the email. For example, John@mymail.com.
- Mail To: Enter the email address of the user who will receive the email.
- User Name: Enter the user name to login the mail server.
- Password: Enter the password to login the mail server.
- Subject: Enter a subject for the notification email.
- Trigger Out: If the selected camera supports Trigger Out connector, select this option and interval time to enable the Trigger Out function.
Information
Click SETTING > About to display the information of the software application.


- ENCORE
- ELECTRONICS
- ENVCWI-PTG1
- Wireless Network (IP) Camera with PAN & TILT
- Contents
- Hardware Requirement:
- INSTALLATION
- To launch the program
- Item features
- ■ CONTROLS Panel
- ■ VIEW SELECTION Panel
- ■ CAMERA Panel
- ■ SYSTEM Panel
- ■ PAN-TILT CONTROL Panel (optional)
- To add a camera
- To remove a camera
- To link to the Web page of the camera
- To record video
- - Manually recording
- ● Trigger recording by motion detection
- - Schedule recording
- To configure the recording settings
- To playback the recorded video
- To set up motion detection options
- Information
Brand : ENCORE
Model : ENVCWI-PTG1
Category : Security Camera