
DMR-E50EG9-S - DVD player PANASONIC - Free user manual and instructions
Find the device manual for free DMR-E50EG9-S PANASONIC in PDF.
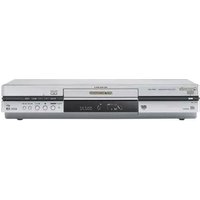


| Product Type | DVD Player/Recorder (DVD-RAM, DVD-R) |
| Model Number | DMR-E50 (Region 1) |
| Dimensions (W x H x D) | Approx. 430 x 79 x 283 mm (16-15/16 x 3-1/8 x 11-3/16 inches) |
| Weight | Approx. 3.7 kg (8.14 lbs) |
| Power Supply | AC 120 V, 60 Hz |
| Power Consumption | 26 W (normal operation), approx. 3.2 W in standby |
| Recordable Discs | DVD-RAM (4.7 GB, 9.4 GB, 2.8 GB), DVD-R (4.7 GB, 1.4 GB) for General Ver. 2.0 |
| Playable Discs | DVD-RAM, DVD-R, DVD-Video, Video CD, Audio CD, CD-R/RW (CD-DA, Video CD, MP3) |
| Recording Modes | XP (High Quality), SP (Normal), LP (Long Play), EP (Extra Long Play), FR (Flexible Recording) |
| Maximum Recording Time (on 4.7 GB disc) | XP: 1 hour, SP: 2 hours, LP: 4 hours, EP: 6 hours |
| Video Recording System | MPEG2 (Hybrid VBR), Dolby Digital stereo audio |
| Progressive Scan Output | 480p via component video terminals (Y, P_B, P_R) |
| Video Inputs | 3 x LINE (pin jack), 3 x S-Video |
| Video Outputs | 1 x LINE, 1 x S-Video, 1 x Component (480p/480i), 1 x Digital Audio Optical |
| Audio System | Dolby Digital recording/playback, 2 channels |
| Quick View Function | Faster playback with stereo audio (1.3x speed) |
| Direct Navigator | List recorded programs for quick access and playback |
| VCR Plus+ Support | Timer recording using PlusCode numbers |
| Editing Features | Create play lists, divide programs, erase, protect, and title discs/programs |
| MP3 Playback | Compatible with MP3 files on CD-R/RW, DVD-RAM, DVD-R |
| Lens Cleaning | Use DVD-RAM/PD lens cleaner (LF-K123LCA1) every 1-4 months |
| Safety Certification | Class 1 Laser Product, FCC Class B, complies with Part 15 |
Frequently Asked Questions - DMR-E50EG9-S PANASONIC
User questions about DMR-E50EG9-S PANASONIC
0 question about this device. Answer the ones you know or ask your own.
Ask a new question about this device
Download the instructions for your DVD player in PDF format for free! Find your manual DMR-E50EG9-S - PANASONIC and take your electronic device back in hand. On this page are published all the documents necessary for the use of your device. DMR-E50EG9-S by PANASONIC.
USER MANUAL DMR-E50EG9-S PANASONIC
Operating Instructions

Model No. DMR-E50


Region number supported by this unit
Region numbers are allocated to DVD players and software according to where they are sold.
- The region number of this unit is "1".
- The unit will play DVDs marked with labels containing "1" or "ALL".
Example:


This manual was printed with soy based ink.
Dear customer
Thank you for purchasing this product. For optimum performance and safety, please read these instructions carefully.
Before connecting, operating or adjusting this product, please read these instructions completely. Please keep this manual for future reference.
For U.S.A. only
The warranty can be found on page 56.
For Canada only
The warranty can be found on page 57.
THIS PRODUCT UTILIZES A LASER.
USE OF CONTROLS OR ADJUSTMENTS OR PERFORMANCE OF PROCEDURES OTHER THAN THOSE SPECIFIED HEREIN MAY RESULT IN HAZARDOUS RADIATION EXPOSURE.
DO NOT OPEN COVERS AND DO NOT REPAIR YOURSELF. REFER SERVICING TO QUALIFIED PERSONNEL.
WARNING:
TO REDUCE THE RISK OF FIRE, ELECTRIC SHOCK OR PRODUCT DAMAGE, DO NOT EXPOSE THIS APPARATUS TO RAIN, MOISTURE, DRIPPING OR SPLASHING AND THAT NO OBJECTS FILLED WITH LIQUIDS, SUCH AS VASES, SHALL BE PLACED ON THE APPARATUS.

CAUTION
RISK OF ELECTRIC SHOCK DO NOT OPEN

CAUTION: TO REDUCE THE RISK OF ELECTRIC
SHOCK, DO NOT REMOVE SCREWS.
NO USER-SERVICEABLE PARTS
INSIDE.
REFER SERVICING TO QUALIFIED
SERVICE PERSONNEL.

The lightning flash with arrowhead symbol, within an equilateral triangle, is intended to alert the user to the presence of uninsulated “dangerous voltage” within the product’s enclosure that may be of sufficient magnitude to constitute a risk of electric shock to persons.

The exclamation point within an equilateral triangle is intended to alert the user to the presence of important operating and maintenance (servicing) instructions in the literature accompanying the appliance.
CAUTION:
TO PREVENT ELECTRIC SHOCK MATCH WIDE BLADE OF PLUG TO WIDE SLOT, FULLY INSERT.
CAUTION!
DO NOT INSTALL OR PLACE THIS UNIT IN A BOOKCASE, BUILT-IN CABINET OR IN ANOTHER CONFINED SPACE. ENSURE THE UNIT IS WELL VENTILATED. TO PREVENT RISK OF ELECTRIC SHOCK OR FIRE HAZARD DUE TO OVERHEATING, ENSURE THAT CURTAINS AND ANY OTHER MATERIALS DO NOT OBSTRUCT THE VENTILATION VENTS.
THE FOLLOWING APPLIES ONLY IN THE U.S.A.
FCC Note:
This equipment has been tested and found to comply with the limits for a Class B digital device, pursuant to Part 15 of the FCC Rules. These limits are designed to provide reasonable protection against harmful interference in a residential installation. This equipment generates, uses, and can radiate radio frequency energy and, if not installed and used in accordance with the instructions, may cause harmful interference to radio communications. However, there is no guarantee that interference will not occur in a particular installation. If this equipment does cause harmful interference to radio or television reception, which can be determined by turning the equipment off and on, the user is encouraged to try to correct the interference by one or more of the following measures:
● Reorient or relocate the receiving antenna. - Increase the separation between the equipment and receiver. - Connect the equipment into an outlet on a circuit different from that to which the receiver is connected. - Consult the dealer or an experienced radio/TV technician for help.
FCC Caution: To assure continued compliance, follow the attached installation instructions and use only shielded interface cables when connecting to peripheral devices.
Any changes or modifications not expressly approved by the party responsible for compliance could void the user's authority to operate this equipment.
This device complies with Part 15 of the FCC Rules. Operation is subject to the following two conditions: (1) This device may not cause harmful interference, and (2) this device must accept any interference received, including interference that may cause undesired operation.
THE FOLLOWING APPLIES ONLY IN THE U.S.A.
Note to CATV system installer:
This reminder is provided to call the CATV system installer's attention to Article 820-40 of the NEC that provides guidelines for proper grounding and, in particular, specifies that the cable ground shall be connected to the grounding system of the building, as close to the point of cable entry as practical.
| DANGER - VISIBLE AND INVISIBLE LASER RADIATION WHEN OPEN, AVOID DIRECT EXPOSURE TO BEAM. (FDA 21 CFR) |
| CAUTION - VISIBLE AND INVISIBLE LASER RADIATION WHEN OPEN, AVOID EXPOSURE TO BEAM. (IEC50825-1) |
| ATTENTION: RAVONNEMENT LASER VISIBLE AND INVISIBLE EN CAS D'OUVERTURE, EXPOSITION DANGEREVISE AU FAISCLAU |
| ADVARSEL - SYNJLG OUSYNILIG LASERSTRALING VED ABBNING, VORKAATTELSE, VORSETTELSE BEAM. |
| VAROI - AVATTRESSA OLET ALTIIINA NAKYVÄRA, JA NAKYMNATÖN LASERSTAYILLE, ALA KATSO SATEESSEEN. |
| VARNING - SYNJLG OCH OSYNILIG LASERSTRALING NÄR DENNA DEL ÄR ÖPPNAD, BETRAKTA EJ STRÅLEN. |
| ADWARSEL - SYNJLG OUSYNILIG LASERSTRALING NÄR DEKSEL ÄPNES, UNNGA EKSPONERING FOR STRÅLEN. |
| VORSICHT - SICHTBARE UND USICHTBARE LASERSTRALING, WENN BEECKOUNG GEÖFFNET, NICT DES STRAIL JASSETZEN. |
| 注意 - 打开时有可见及不可见激光辐射。避免激光束照射。 |
| 注意 - ここを間と可見びなく作るレーザー光が出ます。ピームで連携見たり、触れたりしてくださいです。 |
(Inside of product)
Before moving the unit, ensure the disc tray is empty. Failure to do so will risk severely damaging the disc and the unit.
Do not place the unit on amplifiers or equipment that may become hot.
The heat can damage the unit.

IMPORTANT SAFETY INSTRUCTIONS
Read these operating instructions carefully before using the unit. Follow the safety instructions on the unit and the applicable safety instructions listed below. Keep these operating instructions handy for future reference.
1) Read these instructions. 2) Keep these instructions. 3) Heed all warnings. 4) Follow all instructions. 5) Do not use this apparatus near water. 6) Clean only with dry cloth. 7) Do not block any ventilation openings. Install in accordance with the manufacturer's instructions. 8) Do not install near any heat sources such as radiators, heat registers, stoves, or other apparatus (including amplifiers) that produce heat. 9) Do not defeat the safety purpose of the polarized or grounding-type plug. A polarized plug has two blades with one wider than the other. A grounding-type plug has two blades and a third grounding prong. The wide blade or the third prong are provided for your safety. If the provided plug does not fit into your outlet, consult an electrician for replacement of the obsolete outlet.
10) Protect the power cord from being walked on or pinched particularly at plugs, convenience receptacles, and the point where they exit from the apparatus. 11) Only use attachments/accessories specified by the manufacturer. 12) Use only with the cart, stand, tripod, bracket, or table specified by the manufacturer, or sold with the apparatus. When a cart is used, use caution when moving the cart/apparatus combination to avoid injury from tip-over. 13) Unplug this apparatus during lightning storms or when unused for long periods of time. 14) Refer all servicing to qualified service personnel. Servicing is required when the apparatus has been damaged in any way, such as power-supply cord or plug is damaged, liquid has been spilled or objects have fallen into the apparatus, the apparatus has been exposed to rain or moisture, does not operate normally, or has been dropped.

Features
This unit allows recording of high quality video on DVD-RAM, the compact and durable digital media with fast random access. This media also out performs past tape formats in ease of operation.
■ Exceptional sound and picture quality when recording
●Audio is recorded using Dolby Digital stereo, enabling high quality sound recordings.
- The encoder system used for recording is called "Hybrid VBR" and allows high quality recordings.
■ Fast access to the program you want to watch (→page 17) RAM DVD-R
Use the Direct Navigator to find a program you have recorded and start play.
■ Make your own DVD-Video
- Finalizing a DVD-R that has been recorded on produces an original DVD-Video in accordance with DVD-Video standards.
- In addition to DVD-Video movie software, this unit can also play other types of discs including audio CDs and Video CDs. This means that this unit has the potential to play a central role in your home entertainment, from high-end home theater through to CD playback.
■ Maximum 12 hours on DVD-RAM
- Using a double sided, 9.4 GB DVD-RAM allows you to record a maximum of 12 hours (6 hours continuously).
- You can also use the FR (Flexible Recording) mode to fit recordings efficiently onto the available space on the disc.
■ Editing your recording RAM
- You can divide programs (→page 32).
- Use play lists (→page 28) to select your favorite scenes and rearrange them to play in any order you like.
■ MP3 disc play (→page 21)
You can also play MP3 files recorded on CD-R and CD-RW, as well as DVD-RAM, DVD-R, DVD-Video, Video CDs and CDs.
■ Progressive Scan
By connecting the component video terminal of this unit to a progressive scan television, it is possible to enjoy the high quality picture rendered by the progressive scan function.
■ Quick View (→page 19)
You can speed up play to make checking the contents faster. Both video and sound are played faster.
■ The FUNCTIONS window shows you most of the features you can use (→page 23)
The FUNCTIONS window has most of the features and functions you are likely to use regularly. Just select the icon for the operation you want to perform.
■ Watch a program while you are recording it (→page 22) RAM
Chasing play
You can watch a program from the start while you are still recording it.
Simultaneous rec and play
You can record a program while watching one you recorded previously.
Time Slip
You can jump back to review a piece of action you missed while recording by pressing the time slip button.
- During playback, you can specify a length of time to jump to the scene you wish to view.
The manufacturer accepts no responsibility and offers no compensation for loss of recorded or edited material due to a problem with the unit or disc, and accepts no responsibility and offers no compensation for any subsequent damage caused by such loss.
Examples of causes of such losses are
- A disc recorded and edited with this unit is played in a DVD recorder or computer disc drive manufactured by another company. ●A disc used as described above and then played again in this unit.
- A disc recorded and edited with a DVD recorder or computer disc drive manufactured by another company is played in this unit.
Getting started
IMPORTANT SAFETY INSTRUCTIONS .... 3
Features 3
Accessories....4
Setting up
STEP 1 Antenna and television connections ..... 5
STEP 2 The remote control 6
STEP 3 Plug-in Auto Tuning....6
STEP 4 VCR Plus+ guide channel settings ....8
STEP 5 Set up to match your television ..... 10
Disc information....11
Control reference guide 12
Recording
Recording television programs....14
Inserting discs 15
Recording modes and approximate recording times in hours . 15
Watching the television while recording 15
Recording from a video cassette recorder....15
Recording the best quality pictures in the remaining time — Flexible Recording....15
Playing back
Playing discs....16
When a menu screen appears on the television ..... 17
Position Memory 17
Using the Direct Navigator. 17
To erase a program that is being played back ..... 17
Other methods of play 18
Skipping 18
Slow-motion play 18
Frame-by-frame viewing....18
Starting play from a selected program, title, chapter, or track. . 18
Skipping a minute forward—CM Skip 18
Selecting an amount of time to skip—Time Slip ..... 19
Fast forward and rewind—SEARCH 19
Quick View 19
Marking places to play again—MARKER 20
Marking positions directly....20
Using on-screen menus to mark positions. 20
Using menus to play MP3 discs 21
Playing while you are recording 22
Playing from the beginning of the program you are recording —Chasing Play 22
Simultaneous rec and play....22
Reviewing the recorded images while recording—Time Slip. . 22
Changing audio....23
Using the FUNCTIONS window 23
Timer recording
Timer recording....24
Specify a time to stop recording....24
Using VCR Plus+ codes to make timer recordings ..... 24
Manually programming timer recordings 25
Check programs....26
Change or delete the program 26
Editing
Entering text. 27
Creating play lists ....28
Playing play lists, Playing play list scenes .....29
To erase a play list or a play list scene during playback....29
Editing play lists....30
Editing programs....32
Disc setting ....34
Advanced operation
Using on-screen menus ....36
Common procedures, Disc menu. 36
Play menu, Audio menu....37
Video menu ....38
On-screen displays ....39
Home Theater....40
Connecting a cable TV box/satellite receiver .....41
Connecting an amplifier or system component .....42
Connecting other video equipment. 43
Other antenna connections....44
Other antenna connection to the unit 44
Other antenna connection from the unit to the television .....44
Changing the remote control code .....45
Changing the unit's settings .....46
Summary of settings....46
Common procedures 48
Clock settings 49
Reference
Glossary, Disc handling .....50
Error messages....51
Troubleshooting guide....52
Maintenance....54
Product Service ....54
Specifications....55
Limited Warranty (ONLY FOR U.S.A.) 56
Limited Warranty (ONLY FOR CANADA)....57
Español
Please check and identify the supplied accessories. Use numbers indicated in parentheses when asking for replacement parts.
Only for U.S.A.: To order accessories contact 1-800-332-5368 or web site (http://www.panasonic.com).
Only for Canada: To order accessories, call the dealer from whom you have made your purchase.
□ 1 Remote control (EUR7615KN0)
☐ 2 Batteries for remote control

☐ 1 AC power supply cord (RJA0065-A)

□ 1 Audio/Video cable (VJA0788)

□ 1 75 Ω coaxial cable (VJA1091)

□ 1 DVD-RAM disc


Note
The included AC power supply cord is for use with this unit only. Do not use it with other equipment.
(U.S.A. only)
Product Registration Card
Please complete and return the included product registration card, or register via the Internet at: http://www.prodreg.com/panasonic/
STEP 1 Antenna and television connections
Preparation
- Refer to the television's operating instructions.
- Turn the television off and disconnect its AC power supply cord.
To enjoy sound through other audio equipment (→ page 42) To enjoy progressive video
Connect to the component video (480P) input terminals on a television compatible with this unit's copy guard system. (Video will not be displayed correctly if connected to an incompatible television.) - All Panasonic televisions that have 480P input terminals are compatible. Consult the manufacturer if you have another brand of television.
![graph TD A["Television"] --> B["AUDIO IN R L"] B --> C["Red White Yellow"] C --> D["75 Ω coaxial cable (included) → below"] D --> E["Red White Yellow"] F["To the antenna"] --> G["Cable TV"] G --> H["Outdoor antenna"] H --> I["Indoor antenna"] I --> J["Antenna cable (usually disconnected from the tel…](/content/2026/05/844285/images/687d90403af41d485c97f7a1a30e7b91373dbf284fff458c4bef5c805635bef7.jpg)
S-VIDEO OUT terminal
The S-VIDEO OUT terminal achieves a more vivid picture than the VIDEO OUT terminal by separating the chrominance (C) and luminance (Y) signals. (Actual results depend on the television.)
![graph LR A["ING"] --> B["R-AUDIO-L"] B --> C["VIDEO"] C --> D["S-VIDEO"] D --> E["S VIDEO IN"] style A fill:#f9f,stroke:#333 style E fill:#ccf,stroke:#333 note right of D: S video cable (not included)](/content/2026/05/844285/images/1e6019139d84d5284db5f7b9a70c7a4735799cb89f92ba17bdaf81d479f8b23e.jpg)
When making this connection, ensure you connect the audio cables to the corresponding audio input terminals on the television.
75 Ω coaxial cable
- The signal from the antenna passes through this unit and along the 75 Ω coaxial cable to the television even when this unit is turned off. You don't have to connect the antenna to the television.
- The picture and sound signal from this unit does not go through the 75 Ω coaxial cable to the television. Make sure you connect one of the following terminals on this unit to the television: the AUDIO/VIDEO terminal, the S-VIDEO OUT terminal or the COMPONENT VIDEO OUT terminal. If the television has none of these terminals, consult your local dealer.
Conserving power
This unit consumes a small amount of power, even when it is turned off (approx. 3.2 W). To save power when the unit is not to be used for a long time, unplug it from the household AC outlet.
Television![graph TD A["COMPONENT VIDEO IN"] --> B["Y"] A --> C["P_B"] A --> D["P_R"] B --> E["Video cable (not included)"] C --> E D --> E E --> F["Y"] E --> G["P_B"] E --> H["P_R"] F --> I["OPTICAL"] G --> I H --> I I --> J["TIGITAL AUDIO OUT FOR CHINA/STRAWN"]](/content/2026/05/844285/images/5a093bb2cde82f2e71e22c8da3713b898d73c188134a6f6317f9f617411d5780.jpg)
COMPONENT VIDEO OUT terminal
These terminals can be used for either interface or progressive output and provide a purer picture than the S-VIDEO OUT terminal.
Connection using these terminals outputs the color difference signals (PR/PR) and luminance signal (Y) separately in order to achieve high fidelity in reproducing colors.
- The description of the component video input terminals depends on the television or monitor (e.g. Y/PB/PB, Y/B-Y/R-Y, Y/CB/CB). Connect to terminals of the same color.
- After making this connection, change the black level for a better picture (→page 47, Video-Black Level Control). When making this connection, ensure you connect the audio cables to the corresponding audio input terminals on the television.
Do not connect the unit through a video cassette recorder
Video signals fed through video cassette recorders will be affected by copyright protection systems and the picture will not be shown correctly on the television.
STEP 2 The remote control
Batteries

- Insert so the poles (+ and -) match those in the remote control.
- Do not use rechargeable type batteries.
Do not:
• mix old and new batteries. - use different types at the same time. - heat or expose to flame. ●take apart or short circuit. - attempt to recharge alkaline or manganese batteries. - use batteries if the covering has been peeled off. Mishandling of batteries can cause electrolyte leakage which can damage items the fluid contacts and may cause a fire.
Remove if the remote control is not going to be used for a long period of time. Store in a cool, dark place.
Note
If you cannot operate the unit or television using the remote control after changing the batteries, please re-enter the codes (television→page 10, main unit→page 45).
Use

STEP 3 Plug-in Auto Tuning


After plugging the unit into your household AC outlet and pressing [⏻, DVD POWER] to turn the unit on for the first time, the unit assists you to set the menu language, and automatically tunes in all the channels it can receive and sets the clock.
The unit automatically determines the type of transmission (air or cable) and puts them into channels as follows.
| Band Channel | ||
| TV Mode (Air) | VHF 2-13 | |
| UHF 14-69 | ||
| CATV Mode (Cable) | VHF 2-13 | |
| CATV LOW BAND 95-99 | ||
| CATV MID/SUPER BAND 14-36 | ||
| CATV HYPER BAND 37-65 | ||
| ULTRA BAND | 66-94100-125 | |
| SPECIAL CATV CHANNEL 1 | ||
Preparation
- Confirm that the antenna is connected correctly.
- Turn on the television and select the appropriate video input to suit the connections to this unit.
1 Press [⏻, DVD POWER] to turn the unit on.
![graph TD A["Select Language\nSeleccione la Lengua\nSélection de Langue"] --> B["English"] A --> C["Espanol"] A --> D["Français"] A --> E["Press ENTER\nPulse ENTER\nAppuyer sur ENTER"]](/content/2026/05/844285/images/940d73ffce034f22f044d587f422f7f53b855e9727acd1876777d6c25289043f.jpg)
2 Press [▲, ▼] to select the menu language and press [ENTER].
e.g., when you select English

3 Press [ENTER].
Plug-in Auto Tuning starts and the unit puts the stations it can receive into channels.
The unit then proceeds with Auto Clock Setting. The time is displayed when finished. If the clock is an hour slower or faster than the actual time, go to "Time Zone Adjust" to correct it (→page 49).
4 When the display shows the correct time
Press [ENTER] to complete Plug-in Auto Tuning.
If the unit couldn't set the clock automatically
Press [ENTER] to show the "Manual Clock Setting" screen. Set the time manually (→page 49).
To start Plug-in Auto Tuning again (after relocation, for example)
Antenna system, channel caption, and VCR Plus+ guide channel settings all revert to the default values when you perform the procedure below. Timer recording settings are also cleared.
When the unit is on and stopped
① Press and hold [v, CH] and [∧, CH] on the main unit for about five seconds.
The unit turns off.
② Press [⏻, DVD POWER] to turn the unit on.
Follow the above steps 2–4.
If Plug-in Auto Tuning fails
1 Press [SETUP] to show the menus.

2 Press [▲, ▼] to select "Channel" and press [▶].

3 Press [▲, ▼] to select "Antenna System" and press [ENTER].

4 Press [▲, ▼] to select "TV" or "CATV" and press [ENTER].
The screen shown in step 2 reappears.
5 Press [▲, ▼] to select "Auto Channel Setting" and press [ENTER].

If you have not yet set the clock, the "Auto Channel/Clock Setting" screen appears.
6 Press [ENTER].
Auto setting starts. This takes a few minutes. (To stop auto channel setting, press [RETURN].) When finished, the Complete screen or time display is shown. Press [ENTER].
To return to the previous screen
Press [RETURN].
When you are finished
Press [SETUP].
Adding and deleting channels
Add or delete channels if necessary channels are not set or unnecessary channels are set.
While this unit is receiving the antenna signal (but not during recording):
1 Press the numbered buttons to select a channel.


- You can also use [^, v, CH] when you are going to delete a channel.
2 Press [ADD/DLT].
The channel is deleted if it was set or added if it was not set. e.g.,

Repeat steps 1 and 2 as necessary.
STEP 4 VCR Plus+ guide channel settings

Set these guide channels so you can use VCR Plus+ codes for timer recording. Before starting the settings, prepare a chart showing the channels, station names, and guide channels.
e.g.,
| Station name | Guide channel | Channel number | Channel setting (in step 5) |
| CBS 04 04 | unnecessary | ||
| HBO 33 15 | Enter channel 15 next to Guide Channel 33. | ||
| Nickelodeon 38 | 20 | Enter channel 20 next to Guide Channel 38. |
Look up the guide channels for the stations in magazines.
Write down all the stations you can receive.
1 Press [SETUP] to show the menus.

2 Press [▲, ▼] to select "Channel" and press [▶].

3 Press [▲, ▼] to select "VCR Plus+CH Setting" and press [ENTER].
e.g., when the current antenna system is CATV.

4 Press [▲, ▼] to select the guide channel you want to set and press [▶].
When selecting the guide channel, press and hold [▲, ▼] to scroll the screen up and down.

5 Press [▲, ▼] to select the channel corresponding to the guide channel and press [◀].
![SETUP VCR Plus+ CH Setting Guide Channel CATV Channel 4 ... 5 ... 6 [1-2] SELECT ... 7 ... 8 ... RETURN](/content/2026/05/844285/images/16a2a655399b9af7f8071bf2bf68110da20cdffe055b965f14a488dda3b58b52.jpg)
To delete a number, press [CANCEL]. Repeat steps 4 and 5 as necessary.
6 Press [ENTER].
The "Channel" screen reappears.
To return to the previous screen
Press [RETURN].
When you are finished
Press [SETUP].
VCR Plus+ and PlusCode are registered trademarks of Gemstar Development Corporation. The VCR Plus+ system is manufactured under license from Gemstar Development Corporation.
Pats. 5,307,173; 5,335,079; 4,908,713; 4,751,578; and 4,706,121
Other channel settings
1 Press [SETUP] to show the menus. 2 Press [▲, ▼] to select "Channel" and press [▶].

Preset Channel Caption
3 Press [▲, ▼] to select "Preset Channel Caption" and press [ENTER].

4 Press [▲, ▼] to select the caption and then press [▶].
You can choose from the following captions.
ABC, PBS, CBS, CNN, FOX, ESPN, NBC, HBO, A&E, AMC, FAM, MAX, MTV, SHOW, TBS, USA, TNT, CBC, UPN, CTV, WB, TSN, DSC, GLOB
- The screen scrolls a page at a time if you press and hold [▲, ▼].
5 Press [▲, ▼] to select the channel corresponding to the caption and then press [◀].
- Channels are not displayed if they do not contain a station or if captions have been added manually.
- To delete the channel number, press [CANCEL].
- Repeat steps 4 and 5 as necessary.
6 Press [ENTER].
The "Channel" screen reappears.
Manual Channel Caption
3 Press [▲, ▼] to select "Manual Channel Caption" and press [ENTER].

4 Press [▲, ▼] to select the channel and then press [▶].
- Channels are not displayed if they do not contain a station or if preset captions have been added.
5 Press [▲, ▼] to select the first character and then press [▶].
- You can choose from the following characters: A-Z, 0-9, -, &, !, /, (space)
- To delete the caption, press [CANCEL].
- Repeat step 5 to enter the other characters.

6 Press [◀, ▶] to return to the Channel Number column when you are finished.
Repeat steps 4, 5, and 6 as necessary.
7 Press [ENTER].
The "Channel" screen reappears.
To return to the previous screen
Press [RETURN].
When you are finished
Press [SETUP].
STEP 5 Set up to match your television

Change the settings if your television is: ●Widescreen (16:9 aspect ratio) -Progressive - Read your television's operating instructions for details.
1 Press [SETUP] to show the menus.

2 Press [▲, ▼] to select "TV Screen" and press [▶].

3 Press [▲, ▼] to select "TV Type" and press [ENTER].

4 Press [▲, ▼] to select the item and press [ENTER].
- If you select a progressive output (480P) item, select Video in the on-screen menu and set "Transfer" to suit the material (→page 38).
To return to the previous screen
Press [RETURN].
When you are finished
Press [SETUP].
■ Regarding Progressive Television Picture
Progressive image aspect (height to width ratio) is set at a standard 16:9. DVD-Video which has been set at 16:9 will be displayed correctly. However, 4:3 video material will be stretched to the right and left when displayed.
• To view the picture at the right aspect
- For televisions that allow the aspect of progressive images to be adjusted, use the function provided on the television and adjust as necessary.
- For televisions which do not allow the aspect of progressive images to be adjusted, please set "Progressive" to "OFF" (→ page 38).
Note
- If the unit is connected to the TV through VIDEO OUT or S-VIDEO OUT, output will be interlace only (even if you select progressive output).
- When progressive output is on, closed captions cannot be displayed.
Television operation
You can control televisions by entering the remote control code.
Press and hold [⏻, POWER TV] and enter the two-digit code with the numbered buttons.
e.g., 01: press [0] → [1].
Code No. and Manufacturer
| 0102 12 | Panasonic/National QUASAR HITACHI | 11 JVC | |
| 03 | MAGNAVOX SYLVANIA PHILIPS (RC-5) | 13 | MITSUBISHI |
| 04 ZENITH 14 SAMSUNG | |||
| 05 THOMSON RCA GE 15 | 16 | GOLDSTAR/LG | |
| 0607 17 | SHARP | ||
| 08 SONY 18 | SAMSUNG | ||
| 09 TOSHIBA 19 | |||
| 10 SANYO FISHER | — | ||
- Test by turning on the television and changing channels. Repeat the procedure until you find the code that allows correct operation.
Note
If your television brand is not listed or if the code listed for your television does not allow control of your television, this remote control is not compatible with your television.
Operation
Point the remote control at the television.
| Operation | Button |
| On and off | [∅, POWER TV] |
| Video input mode | [TV/VIDEO] |
| Channels | (Switch [DVD, TV] to "TV".)[^, ∨, CH] or Numbered buttonse.g., Channel "5": [0] → [5] |
| Volume | [+, -, VOLUME] |
Discs you can use for recording and play
 RAM4.7 RAM4.7 |  RR4.7 RR4.7 |
| DVD-RAM4.7 GB/9.4 GB, 12 cm (5")2.8 GB, 8 cm (3") | DVD-R4.7 GB 12 cm (5")1.4 GB, 8 cm (3")for General Ver. 2.0 |
- We recommend using Panasonic discs as they have been confirmed to be compatible with this unit. Other discs may not perform correctly.
- Do not allow the disc to become dirty or scratched. Fingerprints, dirt, dust, scratches or deposits of cigarette smoke on the recording surface may make it impossible to use the disc for recording.
- Discs with programs recorded in PAL already cannot be recorded on using this unit.
DVD-RAM
- DVD-RAM recorded on this unit may not be compatible with other DVD players, including some Panasonic players. Consult the manual for the player to determine compatibility with these DVD-RAM discs.
- This unit is compatible with both non-cartridge and cartridge DVD-RAM, but the write-protect tabs on cartridge-type discs give better protection to your recordings.
- Picture aspect ratios, regular 4:3 or widescreen 16:9, are recorded as they are received.
DVD-R
- In order to play a DVD-R recorded using this unit on another playback source, the disc must first be finalized (→page 34).
- Once a DVD-R is finalized, it becomes DVD-Video.
- You can record onto the available space on the disc and perform editing functions, such as giving titles to discs and programs and erasing programs before finalizing.
- When programming is erased from a DVD-R, that space does not become available. Once an area on a DVD-R is recorded on, that area is no longer available for recording, whether the recording is erased or not.
- It takes about 30 seconds for the unit to complete recording management information after recording finishes.
- This unit optimizes the DVD-R for each recording. Optimizing is carried out when you start recording after inserting the disc or turning on the unit. Recording onto the disc may become impossible if optimizing is carried out too many times.
- Play may be impossible in some cases due to the condition of the recording.
- The video is recorded in a 4:3 aspect irrespective of the video signal input.
Play-only discs
  VIDEO VIDEO |  DIGITAL VIDEO DIGITAL VIDEO |  DIGITAL AUDIO DIGITAL AUDIO |
| DVD-Video | Video CD | Audio CD* |
* Including discs recorded with MP3.
- The producer of the material can control how DVD-Video and Video CDs are played. This means that you may not be able to control play of a disc with some operations described in these operating instructions. Read the disc's instructions carefully.
- This unit can play CD-R/CD-RW (audio recording disc) recorded with CD-DA (digital audio), video CD (video CD format 2.0 or above) or MP3. Finalize ®1 the disc after recording. It may not be able to play some CD-R or CD-RW due to the condition of the recording. 1 A process that allows play on compatible equipment. ●This unit cannot record onto CD-R or CD-RW.
DVD-Video
- Audio format
 | Dolby Digital (→page 47)This unit can play Dolby Digital in stereo (2 channels). Connect an amplifier with a built-in Dolby Digital decoder to enjoy surround sound. |
 | DTS Digital Surround (→page 47)Connect this unit to equipment that has a DTS decoder to enjoy DVDs with this mark. |
Discs you can use
The features you can use with the different types of discs are indicated as follows.

DVD-R indicates DVD-R that have not yet been finalized (→page 34). DVD-R that have been finalized can use the same features as DVD-Video. (Refer to features indicated DVD-V.)
Discs that cannot be played
- DVD-Video with a region number other than "1" or "ALL"
- 12-cm (5"), 2.6- and 5.2-GB DVD-RAM
- DVD-RAM not recorded following the Video Recording Standard ●3.95- and 4.7-GB DVD-R for Authoring ●Unfinalized DVD-R recorded on other equipment
- PAL discs
- DVD-ROM
- DVD-RW
- DVD-Audio
- +RW
- CD-ROM
- CDV
- CD-G
- Photo CD
- CVD
- SVCD
- SACD
- MV-Disc
- PD
- Divx Video Disc, etc.
Protection
RAM
You can protect the contents of your discs in the following ways.
- Cartridge-protect: With the write-protect tab in the protect position, you cannot record to, edit, or erase from the disc. (Type 1, 2, and 4 cartridge discs)
- Program-protect (→page 32)
- Disc-protect (→page 34)

Remote control

How to open the remote control
Hold both sides of the remote control's cover to open it. (You can also open it by pressing on the center of it and sliding it down.)
① POWER button (☐, DVD POWER) 7,14
Press to switch the unit from on to standby mode or vice versa. In standby mode, the unit is still consuming a small amount of power.
② VCR Plus+ button (VCR Plus+)....24
③ Television input mode selector (TV/VIDEO)....10
④ Numbered buttons (1–9, 0, 100)
⑤ Cancel button (CANCEL)....8
⑨ Top menu and Direct Navigator button (TOP MENU, DIRECT NAVIGATOR)....17, 21
⑩ Cursor buttons (▲, ▼, ◀, ▶)/Enter button (ENTER) ... 7, 15
⑪ Functions button (FUNCTIONS) 23
⑫ Manual channel adding and deleting button (ADD/DLT)....7
⑬ Manual programming and check button (PROG/CHECK). 25
⑭ On-screen display button (STATUS)....39
⑮ Disc tray open/close button (▲ OPEN/CLOSE)....14
⑯ Audio button (AUDIO) 23
⑰ Setup button (SETUP) 48
⑱ Program/play list erase button (ERASE) ..... 17, 29
⑲ Flexible Recording button (F Rec) 15
⑳ TV power on/off button (⏻, POWER TV)....10
②1 DVD/TV switch (DVD, TV).... 10
② Recording button (●, REC) 14
②3 Recording mode button (REC MODE) 14
②4 Channel buttons for recorder and TV (∧, ∨, CH) ..... 10, 14
②5 TV volume buttons (+, -, VOLUME)....10
② Slow/search buttons (◀◀, ▶▶ SLOW/SEARCH) ..... 18
⑳ Play/quick view button (▶ PLAY/×1.3).... 16, 19
⑳ Menu and Play list button (MENU, PLAY LIST) ..... 17, 28
⑲ Return button (RETURN)....7
③0 One-minute skip button (CM SKIP)....18
③1 Time slip button (TIME SLIP).... 19, 22
③2 Frame advance and frame reverse buttons ( FRAME)....18
③3 Input select button (INPUT SELECT) 15
③4 On-screen menu button (DISPLAY) 36
③5 Marker button (MARKER) 20
③6 Position memory button (POSITION MEMORY) ..... 17
Main unit

Controls such as ① function the same as the buttons on the remote control.
③7 Remote control signal sensor....6 ③8 Disc tray 14 ⑲ Channel buttons for recorder (v, ∧, CH) .....14 ④0 L2 input terminals (L2)....43
④1 Display ④2 Time slip indicator (TIME SLIP)....22 ④3 Skip/Slow/Search buttons (◀◀/◀◀, ▶▶/▶▶▶). . . . . . 18, 19
The unit's display

Center circle (e.g., DVD-RAM) Rotating (REC): recording Stopped (REC): recording paused

Rotating (REC, PLAY):
Chasing play or simultaneous
rec and play is in progress
Rotating (PLAY):playing
Stopped (PLAY):play paused
"PLAY" flashes:
the resume function (→page 16,
To stop play) is working
Timer recording display
On: When timer recording is on standby (→page 24) Flashes: When the unit couldn't go to timer recording standby
B Disc type
© The display mode of the main display section
GRP: Group number TITLE: Title number PL: Play list number CHAP: Chapter number PG: Program number TRACK: Track number
D Recording mode (→ page 15) E DVD indicator Flashes: When you press [☐, DVD POWER] to turn the unit off until it actually turns off F Channel G Main display section Recording and play counter, and other miscellaneous messages


RAM DVD-R
1 Press [⏻, DVD POWER] to turn the unit on. 2 Press [▲ OPEN/CLOSE] to open the tray and insert a disc (→ next page).
- Press the button again to close the tray.
- It is not possible to record continuously from one side of a double-sided disc to the other. You will need to eject the disc and turn it over. 3 Ensure [DVD, TV] is switched to "DVD" and press [∧, ∨, CH] to select the channel.
e.g., when you select channel 4

4 Press [REC MODE] to select the recording mode (→ next page).
e.g., when you select "XP"

5 Press [●, REC] to start recording.

Program information (e.g., time and date) is registered in the program list (→ page 17).
DVD-R
To play DVD-R on compatible equipment, finalize it (→ page 34).
To stop recording
Press [■].
To pause recording
Press [III]. Press again to restart recording.
Auto power-off
The unit switches to standby after about 6 hours in the stop mode. You can turn this feature off or change the time to 2 hours (→ page 46, Set Up—Off Timer).
Note
- You cannot change the channel or recording mode during recording.
- Release protection (cartridge → page 11, disc → page 34) when you record. RAM
- When using a DVD-RAM for the first time with this unit, format it to ensure accurate recording (→ "Format", page 34).
- There are limitations when recording to DVD-R (→ page 11).
- When recording MTS sound onto DVD-R, either the main channel or the sub channel can be recorded, not both. Select at "Select MTS" (→ page 47).
For your reference
- You can record up to 99 programs on one disc.
- This unit is compatible with the Content Protection for Recordable Media (CPRM → page 50) system so you can record broadcasts that allow one copy, such as some CATV broadcasts, onto 4.7 GB/9.4 GB DVD-RAM (these are CPRM compatible). It is not possible to record onto DVD-R or 2.8 GB DVD-RAM.
- Recording will take place on open space on disc. Data will not be overwritten.
Should the AC power supply cord come loose by accident or for any other reason the power supply is cut off while recording or editing is taking place, the contents of the disc may be lost.
Inserting discs
RAM DVD-R
You can insert a cartridge or non-cartridge disc.
Non-cartridge disc
Insert label-up with the arrow facing in.
Note
- Load double-sided discs so the label for the side you want to record/play is facing up.
- When using 8 cm (3") DVD-RAM, remove the disc from the cartridge and insert it, making sure you align it with the groove.
Recording modes and approximate recording times in hours
| Mode\Disc | DVD-RAM | DVD-R(4.7 GB) | |
| Single-sided(4.7 GB) | Double-sided(9.4 GB) | ||
| XP (High quality) 1 | 2 | 1 | |
| SP (Normal) | 2 | 4 | 2 |
| LP (Long play) | 4 | 8 | 4 |
| EP (Extra long play) | 6 | 12 | 6 |
FR (Flexible Recording Mode)
The unit automatically selects a recording rate between XP and EP that will enable the recordings to fit in the available recording time on the disc with the best possible recording quality. You may use FR Mode in either Flexible Recording ( → right) or in timer recording ( → page 25).
Watching the television while recording
RAM DVD-R
Pictures being recorded are unaffected.
Switch [DVD, TV] to "TV".
① Press [TV/VIDEO] to change the television's input mode to "TV". ② Press [∧, ∨, CH] to change channels.
- You can also select the channel with the numbered buttons.
e. g., “ 5 ”: [0] → [5] " 1 5": [1] → [5] " 1 1 5": [1 0 0] → [1] → [5]
Recording from a video cassette recorder
RAM DVD-R
Preparation
Connect a video cassette recorder to this unit's input terminals (→ page 43).
1 While stopped
Press [INPUT SELECT] to select the input channel for the equipment you have connected.
Select L1, L2, or L3.
- You can also select the input channel by pressing [∧, ∨, CH].
2 Press [REC MODE] to select the recording mode (XP, SP, LP or EP).
3 Start play on the other equipment.
4 Press [●, REC] at the point you want to start recording.
Recording starts.
To skip unwanted parts
Press [11] to pause recording. (Press again to restart recording.)
To stop recording
Press [■].
Note
- When recording using L1, L2 or L3 terminals, only the sound received at the time of recording will be recorded.
- If flexible recording (see below) is used instead of steps 2 and 4, settings can be made so that recording continues to the end of the video.
Almost all videos and DVD software on sale have been treated to prevent illegal copying. Any software that has been so treated cannot be recorded using this unit.
Recording the best quality pictures in the remaining time—Flexible Recording
RAM DVD-R
The unit calculates a recording rate that enables the recording to fit in the time you set (within the remaining time on the disc) and with the best possible picture quality.
1 While stopped, press [F Rec].
2 Press [◀, ▶] to select “Hour” and “Min.” and press [▲, ▼] to set.
3 Press [▲, ▼, ◀, ▶] to select "Start" and press [ENTER].
Recording starts.
Note
It may not be possible to record to the finish of the program if the remaining time doesn't allow.
For your reference
- Press [STATUS] during recording to show the remaining time.
- Recording time reduces if you repeatedly pause recording.


RAM DVD-R DVD-V VCD CD MP3
1 Press [⏻, DVD POWER] to turn the unit on. 2 Press [▲ OPEN/CLOSE] to open the tray and insert a disc (→ page 15).
- Press the button again to close the tray.
- If cartridge protection is activated (→ page 11), play begins automatically when you close the tray. RAM
- You cannot play continuously from one side of a double-sided disc to the other. Eject the disc and turn it over.
3 Press [▶] (PLAY).
The unit takes some time to read the disc before play starts. (When a menu screen appears on the television → next page)

- If the resume function (→ below, To stop play) is not active, playback will begin from the most recently recorded program. To play from the beginning of a disc, select "PLAY FROM TOP" in the FUNCTIONS window (→ page 23).
To stop play
Press [■].
- When "PLAY" flashes on the display, resume function is active. Press [▶] (PLAY) to start play from where you stopped it. To cancel, press [■] until "PLAY" goes out. (The position is also cleared when you turn the unit off or open the disc tray.)
- The screen saver may appear when you stop play. Press [■] again and you can use this unit's tuner to watch television.


To pause play
Press [III]. (Press again to restart play.)
Auto power-off
The unit switches to standby after about 6 hours in the stop mode. You can turn this feature off or change the time to 2 hours (→page 46, Set Up—Off Timer).
Note
- If a disc is loaded, the unit will come on and play will start when you press [▶] (PLAY).
- When you play a disc with an audio-only track, the video from the previous disc may continue to be shown on the television.
- Actual sound levels for DVD-Video are lower compared to television broadcast or playback of other discs. To avoid a sudden increase in volume level when switching from DVD-Video, reduce the volume setting before playing other sources or switching to television broadcast.
When a menu screen appears on the television
VCD
Switch [DVD, TV] to "DVD" and
Press the numbered buttons (0, 1–9) to select an item.
e.g., “5”: [0] → [5] “15”: [1] → [5]
DVD-V
Press [▲, ▼, ◀, ▶] to select an item and press [ENTER].
- You may also be able to use the numbered buttons (0, 1–9) to select an item.
Other buttons used to operate menus
Read the disc's instructions for further details about operation.
[▶▶] [▶▶/▶▶]: Shows the next menu.
[◀◀][◀◀/◀◀]: Shows the previous menu.
[RETURN]: Shows the menu screen. VCD
[TOP MENU]: Shows the first menu screen. DVD-V
[MENU]: Shows the menu screen. DVD-V
Note
- Discs continue to rotate while menus are displayed. Press [■] when you have finished viewing to preserve the unit's motor and your television screen.
- If “” appears on the television, the operation is prohibited by the unit or disc. ●Functions available vary from disc to disc.
Position Memory
RAM DVD-R DVD-V VCD CD MP3
You can start play from a memorized position even after turning the unit off.
(When the elapsed play time is displayed)
1 During play
Press [POSITION MEMORY].
The message "Position Memorized" appears on the television.
2 After switching the unit to standby and back on
Press [▶] (PLAY).
Play starts from the memorized position. (The position is cleared.)
Note
DVD-R DVD-V VCD CD MP3
●The position is cleared when you open the disc tray.
RAM
- Positions remain memorized even after the disc tray is opened.
- You cannot mark positions if the disc is write-protected.
For your reference
If you press [■] before switching the unit to standby after pressing [POSITION MEMORY] to memorize a position, play will resume from the position you pressed [■] when you press [▶] (PLAY).
Using the Direct Navigator
RAM DVD-R
A list of programs is created as you record them. You can use this list to find programs to watch.
1 Press [DIRECT NAVIGATOR].
The highlighted program plays in the background.

2 Press [▲, ▼] to select the program and press [ENTER].
- You can also select programs with the numbered buttons.
e.g., "5": [0] → [5]
"15": [1] → [5]
Play of the images that were playing in the background continues.
To stop play
Press [■].
To clear the program list
Press [DIRECT NAVIGATOR].
About the program list
Write-protected
Displayed when you have protected the program.
Copy-protected
Displayed when you have recorded a program that has copy protection, from CATV broadcasts, for example.
Unable to play
Displayed if you cannot play the program.
Currently recording
Displayed when the program is being recorded.

To erase a program that is being played back
Since the program and any play lists (→page 28) created from it are erased irretrievably by this procedure, you should be certain you wish to erase before carrying it out.
1 Press [ERASE].
A confirmation screen will be displayed.
2 Press [◀] to select "Erase" and press [ENTER].
- On the main unit, press [◀◀/◀◀] and [ERASE].
Note
- It is not possible to erase the program when you are carrying out simultaneous rec and play (→page 22). RAM
- The amount of space remaining on the disc does not increase even if you erase programs. DVD-R
- If the confirmation screen disappears before you complete the operation, start from the beginning again.

Skipping
RAM DVD-R DVD-V VCD CD MP3
During play or while paused
Press [◀◀] or [▶▶].
- Press [I◄◄/◄◄] or [►►/►►I] on the main unit. • Each press increases the number of skips.
![graph TD A["Play position"] --> B["Once"] B --> C["Once Twice Twice"] D["DVD-V"] --> E["Chapter/track"] F["VCD"] --> G["Chapter/track"] H["CD"] --> I["Chapter/track"] J["MP3"] --> K["[▶"]]] L["RAM"] --> M["Program"] N["DVD-R"] --> O["Program"] P["Play position"] --> Q["Once"] Q --> R["Once Twice"] S…](/content/2026/05/844285/images/d1b3c98a2ba5a0cb216dc73c6518de28fe8525794eae6aca32c44593967bf2a7.jpg)
For your reference
Pressing [|◀◀] [|◀◀/◀◀] or [▶▶] [▶▶/▶▶] while the playback control feature on Video CDs (→page 50) is working may take you to a menu screen.
Slow-motion play
RAM DVD-R DVD-V VCD
While paused
Press [◀◀] or [▶▶].
Press and hold [I◄◄/◄◄] or [►►/►►I] on the main unit.
Note
●The speed increases up to 5 steps. - Press [▶] (PLAY) to restart play. - Backward ([◀◀] [◀◀/◀◀]) does not work with Video CDs.
Frame-by-frame viewing
RAM DVD-R DVD-V VCD
While paused
Press [◀▶] or [▶▶].
Note
• Each press shows the next frame. - Press [▶] (PLAY) to restart play. - Cursor buttons [◀, ▶] are also effective while paused for frame-by-frame viewing. - Backward ([◀▶▶]) does not work with Video CDs.
Starting play from a selected program, title, chapter, or track
RAM DVD-R DVD-V VCD CD MP3
During play or while stopped
Press the numbered buttons to select the item.
| e.g., | “5”: [0] → [5] | MP3 | “5”: [0] →[0] →[5] |
| “15”: [1] → [5] | “15”: [0] →[1] →[5] |
Note
●This may not work with some discs. - This works only when stopped with some discs (the screen saver is on the television).

Skipping a minute forward—CM Skip
RAM DVD-R
During play
Press [CM SKIP].
Play restarts from approximately a minute later.
Note
If the start of the next program is within one minute of the point you skipped from, play restarts from the beginning of that program.
Selecting an amount of time to skip—Time Slip
RAM DVD-R
1 During play
Press [TIME SLIP].

2 Within 5 seconds
Press [▲, ▼] to enter the time and then press [ENTER].
e.g., Go back to 5 minutes

Press to alter in one-minute units. Press and hold to alter in 10-minute units.
Fast forward and rewind—SEARCH
RAM DVD-R DVD-V VCD CD MP3
During play
Press [◀◀] or [▶▶].
- Press and hold [◀◀/◀◀] or [▶▶/▶▶▶] on the main unit.
Note
●The speed increases up to 5 steps. - Press [▶] (PLAY) to restart play. - Audio will be heard during search. You can turn this audio off if you want to (→page 47, Audio—PLAY ×1.3 & Audio during Search).
Quick View
RAM (Only with Dolby Digital)
You can increase the speed of play without disrupting the soundtrack. Output is in stereo during Quick View.
During play
Press and hold [▶] (PLAY/ × 1.3).

To return to normal speed
Press [▶] (PLAY/×1.3).
Note
- Output is in PCM when using a digital connection (→page 42, A).
- This is canceled if you perform operations to change the soundtrack, skip or pause.
- This does not work if the setting is "Off" in "PLAY ×1.3 & Audio During Search" (→page 47).
- This does not work when recording is in XP or FR mode during simultaneous rec and play (→page 22).

You can mark positions by pressing [MARKER]. Also use on-screen menus to mark, recall, and clear positions.
RAM DVD-R
Mark up to 999 positions. The unit records the markers directly onto the disc and they remain intact even if you remove the disc.
DVD-V VCD CD MP3
Mark up to 5 positions. The markers clear when you open the disc tray.
Marking positions directly
During play
Press [MARKER].
One marker is added.
MARKER
Using on-screen menus to mark positions
Displaying the marker icon
1 During play
Press [DISPLAY].
The on-screen menus appear. (e.g., DVD-RAM)
| Disc | Sound track | 1 | DO Digital 2/0ch |
| Play | Subtitle | OFF | |
| Video | Audio channel | LR | |
| Audio | |||
2 Press [▲, ▼] to select “Play” and press [▶].
| Disc | Repeat play | OFF | ||
| Play | Marker | 1-10 | ********** | |
| Video | ||||
| Audio | ||||
3 Press [▲, ▼] to select "Marker" and press [▶] to highlight the first asterisk (*).
| RAM | DVD-R |
| 1-10 | * * * * * * * * * * * * * * * * * * * * * * * * * * * * * * * * * * * * * * * * * * * * * * * * * * * * * * * * * * * * * * * * * * * * * * * * * * * * * * * * * * * * * * * * * * * * * * * * * * * * * |
Marking positions
Press [◀, ▶] to select an asterisk (*) and press [ENTER].
One marker is added.
When marking positions 11 and above (RAM, DVD-R)
① Press [◀, ▶] to highlight “1-10”. ② Press [▲, ▼] to select "11-20". You can select the next group of 10 when the current group is full. ③ Press [▶]. The first asterisk is highlighted. ④ Press [ENTER] to mark a position.

Playing from a marked position
Press [◀, ▶] to select a marker number and press [ENTER].
Play starts from the marked position.
Clearing markers
Press [◀, ▶] to select a marker number and press [CANCEL].
An asterisk replaces the number and the position is cleared.
To clear the on-screen menus
Press [RETURN].
Note
- You cannot use this feature if:
- the disc's elapsed play time is not shown in the display.
- you are using a play list. RAM -protection (cartridge →page 11, disc →page 34) is set (you can still recall the markers to play a position).
- Subtitles around markers may fail to appear.
- Markers are cleared when you finalize DVD-R (→page 34).
- Markers on DVD-RAM and DVD-R are ordered by time, so marker numbers can change when you add and delete them.

MP3 This unit can play MP3 files recorded on CD-R/RW with a computer. Files are treated as tracks and folders are treated as groups.
1 Press [TOP MENU].
Selected group number and name
G: Group no.
T: Track no. in the group
TOTAL: Selected track no./Total track no. in all groups

2 Press [▲, ▼] to select the track and press [ENTER].
Play continues to the last track in the last group.
- “☐” indicates the track currently playing.
- You can also select tracks with numbered buttons.
e.g., “5”: [0] → [0] → [5]
“15”: [0] → [1] → [5]
To show other pages
Press [▲, ▼, ◀, ▶] to select "Prev." or "Next" and press [ENTER]. After listing all the tracks in one group, the list for the next group appears.
To exit the file list
Press [TOP MENU].
Using the tree screen to find a group
1 While stopped
Press [▶] while a track is highlighted to display the tree screen.
Selected group no. /Total group no.
- If the group has no track, “—” is displayed as group number.

2 Press [▲, ▼, ◀, ▶] to select a group and press [ENTER].
The file list for the group appears.
To return to the file list
Press [RETURN].
Note
- Discs must conform to ISO9660 level 1 or 2 (except for extended formats).
- This unit is compatible with multi-session but if there are a lot of sessions it takes more time for play to start. Keep the number of sessions to a minimum to avoid this.
- If you play a MP3 track that includes still picture data, it will take some time before the music itself starts playing and the elapsed time will not be displayed during this time. Even after the track starts, the correct play time will not be displayed. ●This unit is not compatible with ID3 tags.
- Compatible sampling rate: 16, 22.05, 24, 32, 44.1 and 48 kHz.
Compatible compression rate: between 32 kbps and 320 kbps
Naming folders and files
- MP3 files must have the extension ".MP3" or ".mp3".
- At the time of recording, give folder and file names a 3-digit numeric prefix in the order you want them to play (this may not work at times).
e.g.,![graph TD A["001 (folder=group)"] --> B["001track.mp3 (tile=track)"] A --> C["002track.mp3"] A --> D["003track.mp3"] E["002 group"] --> F["001track.mp3"] E --> G["002track.mp3"] E --> H["003track.mp3"] I["003 group"] --> J["001track.mp3"] I --> K["002track.mp3"] I --> L["003track.mp3"]](/content/2026/05/844285/images/50f29706997563f3d4dfba7b11e0dcd6e221f202e4574b8ddcf474df1a26ded7.jpg)
MPEG Layer-3 audio decoding technology licensed from Fraunhofer IIS and Thomson multimedia.

Playing from the beginning of the program you are recording—Chasing Play
RAM
Press [▶] (PLAY).
Play starts from the beginning of the program being recorded. (Time slip indicator lights.)
e.g.,
You are recording a sports program and you want to watch it from the beginning.
The same sports program is played back from the beginning. (Recording continues.)

Note
Sound is not output while fast-forwarding.
To stop play and recording
① Press [■]. (Play stops.)
Wait 2 seconds.
② Press [■]. (Recording stops.)
- To stop timer recording, press [■], then [ENTER] within 5 seconds.
Simultaneous rec and play
RAM
You can play a program previously recorded.
1 During recording
Press [DIRECT NAVIGATOR].
Time slip indicator lights.
2 Press [▲, ▼] to select a program and press [ENTER].
e.g.,
You want to watch the movie you recorded yesterday (program 1) while recording program 2 (sport).
Program 1 is played back while program 2 (sport) is being recorded.

Note
● Sound is not output while fast-forwarding.
- You cannot edit programs during simultaneous rec and play (→ page 32).
Reviewing the recorded images while recording—Time Slip
RAM
You can play the program being recorded to check that it is being recorded correctly. You can also check parts that were recorded previously.
1 Press [TIME SLIP].
Time slip indicator lights. Play starts from 30 seconds previous. The current recording images appear as a picture-in-picture and you will hear the playback audio.
- You can select another program if you press [DIRECT NAVIGATOR].

2 Press [▲, ▼] to enter the time and press [ENTER].
- Press [▲, ▼] to alter in one-minute units. Press and hold [▲, ▼] to alter in 10-minute units.

Press [TIME SLIP] to show the play images in full. Press again to show the play and recording images.
Changing audio

RAM DVD-V VCD
You can change the audio being received or played.
Press [AUDIO].
How the type changes depends on when you press the button.
■ While receiving MTS audio (Multi-channel Television Sound Stereo)
Stereo: Main audio (stereo)
SAP: Secondary audio program (SAP)
Mono: Main audio (monaural)
(Return to Stereo)
- If the broadcast is "Mono + SAP", audio will be monaural even if you select Stereo mode.
- Select "Mono" if reception is poor during a stereo broadcast.

Note
- If you change the sound setting while recording, the recorded sound will also change.
- You cannot change the sound when a DVD-R is in the disc tray.
- If recorded in SAP mode, main audio is also recorded.
- When you record MTS audio, select either "Main" or "SAP" before recording (→page 47, Audio—Select MTS). DVD-R
■ While playing DVD-RAM or Video CD


- If you have recorded an SAP broadcast by pressing [AUDIO] to select SAP RAM
MAIN←→SAP
For your reference
You can change the audio for the full images being played with simultaneous rec and play and Time Slip. RAM
■ While playing DVD-Video
You can change the audio channel number each time you press the button. This allows you to change things like the soundtrack language.

Note
RAM
You may be unable to change the audio when you have connected the unit to an AV receiver through the DIGITAL AUDIO OUT terminal and "Dolby Digital" is set to "Bitstream". If this occurs:
- Change "Dolby Digital" to "PCM" (→page 47), or
- Connect also with an audio cable (→page 42, B) and change the input on the receiver.
Using the FUNCTIONS window

RAM DVD-R DVD-V VCD CD MP3
By using the FUNCTIONS window you may access the main functions quickly and easily.
1 While stopped
Press [FUNCTIONS].
e.g., DVD-RAM

2 Press [▲, ▼, ◀, ▶] to select an item.
Refer to the relevant pages for details.
| Icon Refer to | |
| DISC SETTING →page 34, Disc setting | |
| TIMER RECORDING | →page 24, Timer recording |
| SETUP | →page 46, Changing the unit's settings |
| DIRECT NAVIGATOR | →page 17, Using the Direct Navigator→page 32, Editing programs |
| RESUME PLAY | →page 16, Playing discs |
| PLAY | |
| PLAY FROM TOP | RAM DVD-RPlay will begin with the oldest program on the disc (Program 1).DVD-VPlay will avoid playing the introductory parts and begin playing the contents immediately. (The performance of this function varies from disc to disc.) |
| FLEXIBLE REC | →page 15, Recording the best quality pictures in the remaining time –Flexible Recording |
| CREATE PLAY LIST | →page 28, Creating play lists |
| PLAY LIST | →page 29, Playing play lists→page 30, Editing play lists |
| TOP MENU | →page 17, When a menu screen appears on the television |
| MENU | |
Functions displayed depend on the type of disc.
- Some items will be grayed out and cannot be selected if:
-the disc is write protected/the disc is not formatted/there is nothing recorded on the disc.
3 Press [ENTER].
Your selection is entered and the FUNCTIONS window disappears. If the operation requires further selections, another screen appears.
To clear the FUNCTIONS window
Press [FUNCTIONS].

RAM DVD-R
Specify a time to stop recording
This is a simple way of specifying a time to stop recording when you are in a hurry or before you go to bed.
During recording
Press [●, REC] to select the recording time.
Each time you press the button:
e.g.,
0: 3 0 1: 0 0 1: 3 0 2: 0 0 3: 0 0 Counter (cancel) ← 4: 0 0 ←
![PANASONIC DMR-E50EG9-S - Press [●, REC] to select the recording time. - 1](/content/2026/05/844285/images/03b5336bf0dc8841fd4509bda4aeee18e3a5a7e12591ec34aedf99cfb5eda316.jpg)
For your reference
- Press [STATUS] to show the time remaining until recording finishes.
- This does not work during timer recordings or while using Flexible Recording (→ page 15).
- Recording stops and the set time is cleared if you press [■].
- The set time is cleared if you change the recording mode or channel while recording is paused.
Preparation
- Ensure the clock (and guide channels for VCR Plus+ recording, → page 8) are set correctly.
- Release protection (cartridge → page 11, disc → page 34) before proceeding. RAM
Using VCR Plus+ codes to make timer recordings
Entering VCR Plus+ codes is an easy way of programming the unit for recording. You can find these codes in newspapers and magazines. You can enter up to 16 programs up to a month in advance.
1 Press
[VCR Plus+].

2 Press the numbered buttons to enter the VCR Plus+ code.
Press [◀] to move back to correct a digit.

3 Press [ENTER].
Confirm the program and make corrections if necessary using [▲, ▼, ◀, ▶]. - "Invalid Entry" is displayed when you enter the wrong code. Reenter the code. - To change the recording mode Press [REC MODE]. - To enter the title of the program Press [◀, ▶] to select "Enter Title" and press [ENTER] (→ page 27).

![PANASONIC DMR-E50EG9-S - Press [ENTER]. - 2](/content/2026/05/844285/images/132fbf1c48f9bd952b062af6b783aa8a5291f479f91d65f8f21c29806fab8c07.jpg)
When you press [ENTER]
The current recording mode (shown on the unit's display) is automatically selected.

Displayed if the recording can fit in the remaining space on the disc.
Repeat steps 1–3 to program other recordings.
4 Press [RETURN].
The timer recording list disappears and the message "TURN RECORDER OFF FOR TIMER RECORDING" is shown on the television.
5 Press [⏻, DVD POWER].
Ensure “💡” lights on the unit’s display.
Manually programming timer recordings
You can enter up to 16 programs up to a month in advance. Each daily or weekly program is counted as one program.
1 Press [PROG/CHECK].

2 Press [ENTER].

3 Press [▶] to move through the items and change the items with [▲, ▼].
- The current settings are shown each time you press [▶].
- You may use the numbered buttons to enter the CHANNEL, DATE, ON (start Time), and OFF (Finish Time).

- CHANNEL (Channel number and caption)
•DATE
![graph TD A["Current date"] --> B["Next day up to one month later minus one day"] B --> C["Weekly timer: SUN-SAT→MON-SAT→MON-FRI"] C --> D["Daily timer: WEEKLY SUN→---→ WEEKLY SAT"] D --> E["(Return to Current date)"]](/content/2026/05/844285/images/7871677f952cdcdccc197221da29f6b1b54846530dc151c9bc4172bfd37bab58.jpg)
- ON (Start time)/OFF (Finish time)
The time increases or decreases in 30-minute increments if you hold the button.
- MODE (Recording mode → page 15)
SP→XP→FR→EP→LP (→Return to SP)
- Enter Title
Select "Enter Title" using [◀, ▶] and press [ENTER] (→page 27).
4 Press [ENTER] when you have finished programming the timer.

- Displayed if the recording can fit in the remaining space on the disc.
- Press [▲, ▼] to select "New Timer Program" and repeat steps 2-4 to program other recordings.
5 Press [PROG/CHECK] or [RETURN].
The timer recording list disappears and the message "TURN RECORDER OFF FOR TIMER RECORDING" is shown on the television.
6 Press [⏻, DVD POWER].
Ensure “💡” lights on the unit's display.
To release the unit from recording standby
If you want to record something else before the program start time, for example:
Press [⏻, DVD POWER].
The unit turns on and “💡” goes out.
- Be sure to press [∅, DVD POWER] to return the unit to standby mode before the scheduled recording time. Timer recording will work only if “∅” is displayed.
To stop recording when recording has already begun
Press [■], then [ENTER] within 5 seconds.
Recording stops.
Note
- The actual time recorded may be longer than the program itself when television programs are recorded using VCR Plus+.
- If you don't select a recording mode when using VCR Plus+ codes to make a timer recording, the unit sets the mode selected on the unit at that time (unless the mode is "XP", in which case the unit sets "FR" as the mode).
- "All timer programs are occupied." appears if there are already 16 programs.
- The remaining time displayed is based on the current recording mode.
- When you program successive timer recordings to start immediately one after the other, the unit cannot record the part at the beginning of the later programs (a few seconds when recording with DVD-RAM and approximately 30 seconds when recording with DVD-R).
- If you set DST (Daylight Saving Time) to ON when manually setting the clock (→page 49), timer recording may not work when summer switches to winter and vice versa.
- “💡” flashes when the unit couldn't go to timer recording standby (e.g., a disc isn't loaded, a disc that can't be recorded to is loaded, or the disc is protected). Check the disc carefully.

RAM DVD-R
Check programs
1 Press [PROG/CHECK].

Icon explanations
w The times overlap those in another program. Note the following if times overlap: The program with the earlier start time receives priority. Recording of the program with the later start time starts when the earlier program finishes recording. If you make two programs with the same start time, the one you programmed last receives priority. - You stopped recording of a weekly or daily timer recording. The icon disappears the next time the timer starts recording. ● This program is currently recording. F The disc was full or the maximum number of programs or scenes was reached so the program failed to record. The material was copy-prohibited so it was not recorded. The program failed to record for some other reason.
- Programs that failed to record are displayed gray. They are automatically deleted from the timer recording list at 4 a.m. two days later.
To put the unit on timer recording standby
Press [⏻, DVD POWER].
The unit turns off and “☐” lights on the unit's display.
Message displayed in the CHECK line
Some of the information shown in the CHECK line may not be correct while you are recording.
Enable: Displayed if the recording can fit in the remaining space on the disc.
→ (Date): For recordings made daily or weekly, the display will show until when recordings can be made (up to a maximum of one month from the present time) based on the time remaining on the disc. ! : It may not be possible to record because of write protection, because there is no more space left or because the number of possible programs has reached its maximum. Please check the disc.
2 Press [PROG/CHECK] or [RETURN].
The timer recording list disappears.
Change or delete the program
1 Press [PROG/CHECK].
The timer recording list appears.
2 Press [▲, ▼] to select the program.
- You may also select programs by inputting a 2-digit number using the numbered buttons.
e.g., "5": [0] → [5]
"15": [1] → [5]
- Press [◀, ▶] to move to the page preceding or following the one on display.
3 Press [CANCEL] or [ADD/DLT] to delete,
You cannot delete programs that are currently recording. or press [ENTER] to change.
The timer recording setting screen appears.
4 If you pressed [ENTER] in step 3,
Move through the items with [◀, ▶] and change the settings with [▲, ▼] and press [ENTER].
5 Press [PROG/CHECK] or [RETURN].
The timer recording list disappears.
Note
- A Timer recording that is taking place in a recording mode other than "FR" may have its end time altered.
- Even if the power is off you can still view timer recording information by pressing [PROG/CHECK].

RAM DVD-R
This page shows how to enter text for:
- Program titles for timer recording (→pages 24 and 25) Program titles (→page 32)
- Play list titles (→page 30)
- Disc titles (→page 34)
You can enter up to:
●64 characters (DVD-RAM) ●40 characters for a disc title (DVD-R) ●44 characters for a program title (DVD-R)
Preparation
Release protection (cartridge →page 11, program →page 32, disc →page 34) before proceeding.
1 After the titling screen appears
Press [▲, ▼, ◀, ▶] to select the character and press [ENTER].
Title field: shows the text you have entered
![Enter Title 1 1 2 3 4 5 6 7 8 9 0 2 A B C a b c + - × 3 D E F d e f / = % 4 G H I g h i # $ & 5 J K L j k l < > @ 6 M N O m n o [ ] _ 7 P Q R S p q r s ( ) 8 T U V t u v [ ] * 9 W X Y Z w x y z \ | 0 . , ? ! " : : ^ ^ 100 SPACE ■ ERASE ■ SET ○ --100 SELECT ENTER RETURN](/content/2026/05/844285/images/e7ab7354ec38666c963975cf3296cd4f1946d296a48ce30e46168e6d1f94d80f.jpg)
Repeat step 1 to enter other characters.
2 Press [■].
The title is entered and the screen disappears.
- You can also finish entering the title by selecting "SET" and pressing [ENTER].
Using the numbered buttons to enter characters
e.g., entering the letter "R"
① Press [7] to move to the 7th row. ② Press [7] twice to highlight "R". ③ Press [ENTER].

To erase a character
① Press [▲, ▼, ◀, ▶] to select the character you want to erase in the title field. ② Press [11].
You can also erase characters by selecting "ERASE" and pressing [ENTER].
Note
- The full title is shown in the Properties screen (→page 30 and 32), but if you enter a long title, only part of it is shown in the program list or play list screen.
- If you enter a long title, only part of it is shown in the menu screen after finalization. DVD-R


RAM
Specify start and end points to create scenes, then specify the order in which they are to be played. These scenes are not recorded separately so this doesn't use much capacity.
You can create a maximum of 99 playlists and 999 scenes.
Preparation
Release protection (cartridge →page 11, disc →page 34) before proceeding.
1 While stopped
Press [PLAY LIST].
2 Press [▲, ▼] to select “-- --/--” and press [ENTER].

3 Press [ENTER] at the start point.
The length of the whole contents on the disc.
The location of the start point.

- Use [◀◀], [▶▶] and slow-motion (→page 18) to find the start and end points.
- Pressing [◀◀], [▶▶] allows you to select other programs.
4 Press [ENTER] at the end point.

To specify another scene
Select "Next" and press [ENTER], then repeat steps 3 and 4.
5 Press [▲, ▼] to select "Exit" and press [ENTER].
The play list screen appears.
To clear the play list screen
Press [PLAY LIST].
To stop partway through
Press [RETURN].
For your reference
- You cannot specify an end point before a start point.
- You may not be able to specify points within 3 seconds of each other.
- Play pauses if the end of the last program on the disc is reached during this procedure.
- Depending on the state of recording, the actual number of play lists that can be recorded may be less than that specified in this manual.
Playing play lists
1 While stopped
Press [PLAY LIST].

2 Press [▲, ▼] to select the play list and press [ENTER].
- You can also select play lists by entering a 2-digit number with the numbered buttons.
e.g., "5": [0] → [5]\"15": [1] → [5]
All the scenes in the play list are played.
To stop play list play
Press [■]. (The play list appears.)
Playing play list scenes
1 While stopped
Press [PLAY LIST].
2 Press [▲, ▼] to select the play list that contains the scene you want to play and press [▶].
![PANASONIC DMR-E50EG9-S - Press [▲, ▼] to select the play list that contains the scene you want to play and press [▶]. - 1](/content/2026/05/844285/images/5a21f3acd78d5c1660eb22a8bbd24f210975c17758ad979699dddd6832f9155f.jpg)
3 Press [▲, ▼] to select "Play Scenes" and press [ENTER].

Page no./Total page no.
4 Press [▲, ▼, ◀, ▶] to select the scene and press [ENTER].
The scene you select is played.
To show scene 10 and later
Press [▲, ▼, ◀, ▶] to select "Next" and press [ENTER].
- You can also select a page of scenes by entering a 3-digit number with the numbered buttons.
e.g., "5": [0] → [0] → [5]
"15": [0] → [1] → [5]
To stop scene play
Press [■]. (The scene list appears.)
To clear the scene list
Press [RETURN].
To erase a play list or a play list scene during playback
1 Press [ERASE].
A confirmation screen will be displayed.
2 Press [◀] to select "Erase" and press [ENTER].
Editing play lists
RAM![graph TD A["Operation"] --> B["While stopped Press [PLAY LIST"]] B --> C["Press [▲, ▼"] to select the list. • To create a new list, select “—” and_press["ENTER"] (→ page 28).] C --> D["Press [▶"] so the submenu appears. Press["▲, ▼"] to_select_the_item_and_press["ENTER"].] D --> E["Numbered buttons"…](/content/2026/05/844285/images/ea1e1cc9989f7fce560d505f61267cbaa14ce9687fb7bec9ab9b4e680ef5a73f.jpg)

■ Add (maximum of 999 scenes)
Press [▲, ▼, ◀, ▶] to select the place where you want to add the scene and press [ENTER].
Press [ENTER] at the start point of the scene.

Press [ENTER] at the end point of the scene.
Press [▲, ▼] to select "Exit" and press [ENTER].
The new scene is inserted before the highlighted scene.
Press [▲, ▼] to select "Next" and press [ENTER]. (Repeat to add other scenes.)
■ Move
Press [▲, ▼, ◀, ►] to select the scene and press [ENTER].
Press [▲, ▼, ◀, ▶] to select the place where you want to move the scene to and press [ENTER].
The scene is moved and inserted before the highlighted scene.
Repeat to move other scenes.
■ Re-edit
Press [▲, ▼, ◀, ►] to select the scene and press [ENTER].
Press [ENTER] at the start point of the scene.

Press [ENTER] at the end point of the scene.
Press [▲, ▼] to select "Exit" and press [ENTER].
The re-edited scene replaces the old one.
Press [▲, ▼] to select "Prev." or "Next" and press [ENTER]. (Repeat to re-edit other scenes.)
■ Erase
Once a scene has been erased, it is irretrievable. Check carefully before proceeding.
Press [▲, ▼, ◀, ▶] to select the scene and press [ENTER].

Press [◀] to select "Yes" and press [ENTER].
The selected scene is erased from the play list.
Note
The play list itself is erased if you erase all the scenes in it.
Repeat to erase other scenes.
Note
- Use [◀◀], [▶▶] and slow-motion (→ page 18) to find the start and end points.
- You cannot specify an end point before a start point.
- You may not be able to specify points within 3 seconds of each other.
- Play pauses if the end of the last program is reached during this procedure.
- You cannot edit still picture images.
- Depending on the state of recording, the actual number of play lists or scenes that can be recorded may be less than that specified in this manual.
![graph TD A["Operation"] --> B["Press [DIRECT NAVIGATOR"]] B --> C["Press [▲, ▼"] to select the program.] C --> D["Press [►"] so the submenu appears.] D --> E["Press [▲, ▼"] to_select_the_item_and_press["ENTER"]] E --> F["Numbered buttons"] E --> G["DIRECT NAVIGATOR"] F --> H["To clear the program li…](/content/2026/05/844285/images/ba3d6d4fc09ddc967f1ef05b62d5a2e96cc77b08d750f964ca4852d69f58de9b.jpg)

Press [◀] to select "Erase" and press [ENTER].
The program is erased.
Note
- The disc's available recording time may not increase after erasing short programs.
- Computer data cannot be erased.
- The available recording time on DVD-R does not increase when you erase programs.
![Press [◀] to set protection and press [ENTER]. The lock symbol appears when the program is write- protected. DIRECT NAVIGATOR No DIRECT NAME FILETITLE 1 2 D20 MED 10 00 PM Dinosaur 2 3 D20 MED 5 00 PM Auto action 3 4 D20 MED 11 00 PM USJ TOTAL 3 No SELECT #~ # ENTER * RETURN](/content/2026/05/844285/images/fe978c6b83086e4411eae674ae64ffafe7936e8e1c79d261951ff59fd42677b6.jpg)
![graph TD A["Press ENTER at start point of section you want to erase."] --> B["Start Segment 03 PLAY"] B --> C["Start End"] C --> D["Next Exit"] D --> E["Start End"] E --> F["End"] F --> G["Press ENTER at end point of section you want to erase."] G --> H["Start Segment 03 PLAY"] H --> I["Start End"]…](/content/2026/05/844285/images/7e364af44859e171f53b91d31d17b1071a485e8234883b2d798c12db0d1a4d6b.jpg)
Note
- Use [◀◀], [▶▶] and slow-motion (→ page 18) to find the start and end points.
- Play pauses if the end of the program is reached during this procedure.
- You may not be able to specify points within 3 seconds of each other.
- You cannot specify an end point before a start point.
- You cannot specify points on still pictures in the program.
- The disc's available recording time may not increase after erasing short segments.
![Shorten Segment 0:19 SPR remaining Recording Time Corresponding PLAY LIST will also be erased. Erase Cancel Press [◀] to select "Erase" and press [ENTER].](/content/2026/05/844285/images/844bd85e7bdc699b274013265b428c85886b04d13403306aedbf38009de748f0.jpg)
![graph LR A["Press [ENTER"] at the point you want to divide the program.] --> B["Press [▲, ▼"] to select “Exit” and_press["ENTER"].] B --> C["Divide Program\nOnce you divide the program, it will not be restored to the original.\nDivide Cancel\nEXIT\NENTERS"] C --> D["Press [◀"] to select “Divide” and…](/content/2026/05/844285/images/3e6c5e98b039e7f9d0975081ca9d9760f8d381f41c3d58470bb0f6840ab61b02.jpg)
To confirm the division point
Press [▲, ▼] to select "Preview" and press [ENTER]. (Play will begin from a point 10 seconds prior to and after the division point.)
To change the division point
Press [▲, ▼] to select "Divide" and press [ENTER] at the point you want to change.
Note
- The divided programs retain the title and CPRM property (→ page 50) of the original program.
- A minute portion of the recording directly preceding the division point may be lost.
- It is not possible to carry out Divide Program in the following cases: - when the program is extremely short. - when the total number of programs is more than 99.
![graph TD A["Operation"] --> B["While stopped Press [FUNCTIONS"].] B --> C["Press [▲, ▼, ◀, ▶"] to select "DISC SETTING" and_press["ENTER"].] C --> D["e.g., DVD-RAM"] D --> E["Press [▲, ▼"] to_select_the_item_and_press["ENTER"].] E --> F["Enter Title: RAM DVD-R<br>Entering text → page 27"] F --> G["D…](/content/2026/05/844285/images/6800458391c48ee1bd79b9c2191b3e8eda9a0ea9dcad8eb79a857751b905ff59.jpg)

Press [◀] to set disc protection and press [ENTER].

The lock symbol appears closed when the disc is write-protected.

Press [◀] to select "Yes" and press [ENTER].
Press [◀] to select "Start" and press [ENTER].
All programs and play lists are erased.
Note
Computer data cannot be erased.

Press [◀] to select "Yes" and press [ENTER].
Press [◀] to select "Start" and press [ENTER].
Formatting starts.
- A message appears when formatting is finished.
Press [ENTER] to complete the procedure.
Note
- Do not turn the unit off or disconnect the AC power supply cord while the message "Formatting the disc" is on the television. This can render the disc unusable.
- Formatting takes up to a maximum of 70 minutes.
- The contents on the disc are erased when you format it even if you have set program or disc protection.
- It may not be possible to use a disc on this unit if you cannot format it.
- Formatting cannot be performed on DVD-R or CD-R/RW.
To stop formatting
Press [RETURN].
You can cancel formatting if it takes more than 2 minutes. The disc must be reformatted if you do this.

Press [◀] to select "Yes" and press [ENTER].
Press [◀] to select "Start" and press [ENTER].
Finalizing starts.
- A message appears when finalizing is finished.
Press [ENTER] to complete the procedure.
Note
- Do not turn the unit off or disconnect the AC power supply cord while the message "Finalizing the disc" is on the television. This will render the disc unusable.
- Finalizing takes up to 15 minutes.
After finalizing..
- You cannot record or perform editing such as giving titles and erasing programs.
- Programs longer than 5 minutes are divided into about five-minute chapters.
- These DVD-R can be played on other Panasonic DVD players, but this is not guaranteed. Play may not be possible due to the player you are using, the DVD-R, or the condition of the recording. Play the disc using this unit if you experience problems with other equipment. Visit Panasonic's homepage for more information about DVDs. http://www.panasonic.com/playDVD-R

Common procedures
1 Press [DISPLAY].
e.g., DVD-RAM

2 Press [▲, ▼] to select the menu and press [▶]. 3 Press [▲, ▼] to select the item and press [▶]. 4 Press [▲, ▼] to select the setting.
To clear the on-screen menus
Press [DISPLAY].
For your reference
- The screens depend on the disc contents.
- Depending on the condition of the unit (playing, stopped, etc.) and disc contents, there are some items that you cannot select or change.
Disc menu
Not available when playing CDs and MP3 discs.
e.g., DVD-RAM
| Disc | Sound track | 1 | Digital 2/0 ch |
| Play | Subtitle | OFF | |
| Video | Audio channel | LR | |
| Audio | |||
| Item | Content |
| Sound track | Soundtrack language DVD-VSeeAbelow. |
| Audio attribute RAM DVD-R DVD-VSeeBbelow. | |
| Karaoke vocals, on and off(Karaoke DVD-V only)Solo: ON←→OFFDuet: OFF←→V1+V2←→V1←→V2↑ | |
| Subtitle Subtitle | language DVD-VSeeAbelow. |
| Subtitle on/off RAM DVD-R DVD-V | |
| Angle | Angle number DVD-V |
| Audio channel | RAM VCD (→page 23) |
| PBC | Playback control on/off VCDIndicates whether menu play ( playback control) is on or off. |
A Soundtrack/Subtitle language
| ENG: EnglishFRA: FrenchDEU: GermanITA: ItalianESP: SpanishNLD: Dutch | SVE: SwedishNOR: NorwegianDAN: DanishPOR: PortugueseRUS: RussianJPN: Japanese | CHI: ChineseKOR: KoreanMAL: MalayVIE: VietnameseTHA: Thai*: Others |
B Audio attributes
LPCM/DIG Digital/DTS/MPEG: Signal type
k (kHz): Sampling frequency
b (bit): Number of bits
ch (channel): Number of channels

For your reference
- When playing back recordings of SAP broadcasts, "1+1 ch" will be displayed.
- You can only select subtitles, soundtracks, and angles if they are recorded on the disc.
- Some discs allow changes to soundtracks, subtitles, and angles only by using the disc's menus.
- If the subtitles overlap closed captions recorded on discs, turn the subtitles off.
Play menu
e.g., DVD-RAM
| Disc | Repeat play | OFF | ||
| Play | Marker | 1-10 | ********** | |
| Video | ||||
| Audio | ||||
| Item | Content | Remarks |
| Repeat play | Each time you press [▲,▼]:RAM DVD-R DVD-VPRG: Program ChapterAll TitlePL: Play list (RAM) O F FOFFVCD CD MP3TrackTrackAll GroupOFF OFFTo cancel: Select “OFF”. | ●You cannot use repeat play to repeat an entire DVD-Video.●Repeat play does not work if the disc’s elapsed play time is not shown on the unit’s display.●[ERASE] does not work while in repeat play mode.If the Video CD has playback control1 While stopped (the screen saver is on the television), press the numbered buttons to select a track (→page 18).2 Select the repeat mode. |
| Marker | RAM DVD-R DVD-V VCD CD MP3(→page 20) | — |
Audio menu
Not available when playing Video CDs, CDs and MP3 discs.
e.g., DVD-Video
| Disc | V. S. S. | OFF |
| Play | Dialog Enhancer | OFF |
| Video | ||
| Audio |
| Item | Content | Remarks |
| V.S.S. | RAM DVD-R DVD-V(Only with Dolby Digital with 2 or more channels)Enjoy a surround-like effect if you are using two front speakers only. The effect is broadened and sound seems to come from virtual speakers on either side if the disc has surround signals recorded on it.Natural Emphasis OFF↑ | Turn off the surround effects on the other equipment.V.S.S. will not work, or will have less effect, with some discs.Turn V.S.S. off if it causes distortion. |
| Dialog Enhancer | DVD-V(Dolby Digital, 3-channel or over only, including a center channel)The volume of the center channel is raised to make dialog easier to hear.ON OFF | — |
Video menu
Not available when playing CDs and MP3 discs.
RAM DVD-R DVD-V VCD
| Disc | Picture | Normal |
| Play | MPEG-DNR | ON |
| Video | ||
| Audio | ||
| Item | Content |
| Picture Normal: | Default settingSoft: Soft picture with fewer video artifactsFine: Details are sharperCinema: Mellows movies, enhances detail in dark scenes. |
| MPEG-DNR You can turn the recommended settings for 3D NR, block NR, and mosquito NR on and off.ON←→OFF3D NR: Reduces overall noiseBlock NR: Smoothes block noiseMosquito NR: Reduces the smudging that appears around contrasting sections of the picture | |
■ When you have set "TV Type" to "Aspect 4:3 & 480P" or "Aspect 16:9 & 480P" in SETUP (→page 10)
| Disc | Picture | Normal | ||
| Play | MPEG-DNR | ON | ||
| Video | Progressive | ON | Transfer | Auto 1 |
| Audio | ||||
| Item Content | |
| Progressive ON: | Enables progressive outputOFF: Disables progressive output |
| Transfer(When progressive output is on) | Select the method of conversion for progressive output to suit the type of material being played (→page 50, Film and video).Auto1 (normal): For film materialAuto2: For film material (the same as Auto1, but able to convert 30-frame-per-second progressive video.)Video: For video material |

Displays appear on the television when you operate the unit to let you know what operation was performed and what condition the unit is in.
- You can change the setting in the SETUP menu so the first display does not appear automatically (→page 47, Display—Status Messages).
Changing the information displayed
Press [STATUS].
The display changes each time you press the button. e.g., DVD-RAM
![graph TD A["DVD-RAM"] --> B["RECAV"] B --> C["PLAY"] B --> D["LR"] C --> E["■ Remain 0:50 XP6/8 1"] E --> F["■ PRG2 0:05.14 XP"] E --> G["■ PRG1 0:00.10 SP"] F --> H["↓"] G --> H H --> I["Bit Rate 0...5...10"] I --> J["■ REC 5.4Mbps XP"] I --> K["■ PLAY 3.1Mbps SP"] L["FDVD-RAM"] --> M["RECAV"] M --…](/content/2026/05/844285/images/587b6ebfe2adaad5b8f1d66730f7136252ee98a11c2ffb7f456c8db82a9b29d5.jpg)
Display examples

a Disc indication
⑥ Audio type (→page 23)
Shows the selected audio type.
- During reception
Stereo: Stereo is selected
Mono: Monaural is selected
SAP: Secondary audio program is selected
(")(" appears when the type you have selected is actually being received.)
- During play
LR, R, L: a stereo program is recorded
MAIN, SAP: an SAP program is recorded
© Current recording or play status/input channel and caption (if entered)
REC: Recording
PAUSE: Recording paused
PLAY: Playing ■: Playing paused
◀◀: Rewinding ▶▶: Fast forwarding
◀: Reverse slow-motion ▶: Slow-motion

(d) The current date and time (e) Elapsed recording time/recording mode ① Elapsed play time of a program playing/mode at the time of recording ⑨ Available recording time and recording mode ① Approximate volume of recording ① Play position in the volume of recording
① Selected group and track name ① Selected group and track number ① Selected track no./Total track no. in all groups ③ Elapsed play time of a track playing

⑨ Recording mode or I/P/B display when paused (→ page 50) ◎ Video bit-rate when recording
© Video bit-rate when playing
⑨ Bit-rate display*
Show as Mbps (Megabits per seconds) during play and recording, or kbit (kilobits) while paused.
* The method of calculating bit-rate for recording and playing is different so there may be differences in the figures displayed. (Values are approximate.)
Refer to the relevant pages for details.
Enjoying CATV/Satellite broadcasts
| What you want to do How to do it | Reference pages | Settings | Reference pages |
| Enjoying CATV/Sat-ellite broadcasts | Connect a cable TV box or satellite receiver. | 41 Tune to channels correctly. 9 | |
| Change the necessary settings on the equipment you have connected. | — |
Enjoying more powerful sound
Enjoying 5.1-channel surround sound with Dolby Digital and DTS | Digital connectionConnect to an amplifier with built-in decoders. | 42A | SETUP—Audio—Digital Audio Output●Set PCM Down Conversion to suit the equipment.●Set Dolby Digital and DTS to suit the equipment. | 47 |
| Change speaker settings on the amplifier. | - | |||
Enjoying stereo or Dolby Pro Logic | Analog connectionConnect to an analog amplifier or system component. | 42B | SETUP—Audio—Digital Audio Output●Set PCM Down Conversion to Off. | 47 |
| Digital connectionConnect to a digital amplifier or system component. | 42A | SETUP—Audio—Digital Audio Output●Set PCM Down Conversion to suit the equipment.●Set Dolby Digital to PCM.●Set DTS to Off. | 47 |
Other uses
Record to digital recording equipment or cassette deck (see page 42)
Record from a video cassette recorder (see page 15)
Manufactured under license from Dolby Laboratories.
"Dolby", "Pro Logic" and the double-D symbol are trademarks of Dolby Laboratories.
"DTS", "DTS Digital Surround" and "DTS Digital Out" are registered trademarks of Digital Theater Systems, Inc.
The equipment connections described are examples. Peripheral equipment and optional cables sold separately unless otherwise indicated. Before connection, turn off all equipment and read the appropriate operating instructions. The signal from the cable TV box or satellite receiver passes through this unit to the television even when this unit is turned off.
Connecting a cable TV box/satellite receiver
You need to subscribe to a cable TV or satellite TV service to enjoy viewing their programming.
- Consult your service provider regarding appropriate cable box or satellite receiver.
- Select the applicable input on your television to view the output from your cable box or satellite receiver, or the applicable video input on the television is connected using the audio and video connections.
One cable TV box/satellite receiver
Note
When a home satellite system (Dishnetwork/DSS) is connected, auto tuning and auto clock setting may not operate properly. Set the clock manually (see page 49).
- Change the video input on the television when you want to watch another program while recording.
- You cannot do a timer recording unless the channel is first selected on the cable TV box or DSS receiver.
Two cable TV boxes
You can record and view both scrambled and unscrambled channels if connections are made as shown in the diagram below.
![graph TD A["Television"] -->|red white yellow| B["Audio/Video cable (included)"] B --> C["Connect with 75 Ω coaxial cable"] C --> D["This unit"] D --> E["Cable TV box"] E --> F["IN OUT"] E --> G["OUT1"] E --> H["OUT2"] E --> I["IN"] D --> J["Switch box"] J --> K["Cable TV box"] K --> L["2-way splitt…](/content/2026/05/844285/images/1fcdc7c436f6af7f46d8fdc908f61ba59aaebab5ab6caf863a2bed22b496a362.jpg)
- Change the video input on the television when you want to watch another program while recording.
- You cannot do a timer recording unless the channel is first selected on the cable TV box.
Connecting an amplifier or system component
This model can play Dolby Digital, but only in two channels. This model does not have a DTS decoder. You must connect a unit with a Dolby Digital or DTS decoder to enjoy surround sound.

Digital connection
To enjoy multi-channel surround sound
Connect an amplifier with a built-in decoder or a decoder-amplifier combination.
- Change the settings in "Digital Audio Output" (→page 47).
Note
You cannot use DTS Digital Surround decoders not suited to DVD.
To enjoy stereo or Dolby Pro Logic
Connect a digital amplifier or system component.
- Change the settings in "Digital Audio Output" (→page 47).
![graph TD A["Speaker (Example)"] --> B["Amplifier"] B --> C["Optical IN"] C --> D["Optical digital audio cable"] D --> E["Insert fully, with this side facing up."]](/content/2026/05/844285/images/c8397f1ddba92290dab5a1cf570a1a4051fb893f432aa7b6ae7c26b65280ff8d.jpg)

Analog connection
To enjoy stereo or Dolby Pro Logic
Connect an analog amplifier or system component.
![graph TD A["Amplifier or system component"] --> B["AUX IN"] B --> C["Audio cable"] C --> D["R - AUDIO - L"]](/content/2026/05/844285/images/c70ad55a73b59dd924821a9f2c0a7977114127508dfc4bf15783580f7f4bc46d.jpg)

Recording to digital recording equipment or cassette tapes
Digital recording
You can record the digital signal directly to digital recording equipment (→ Connection A above).
Note
- With DVD, the following conditions must be met: ① the disc doesn't have protection preventing digital recording, and ② the recording equipment can handle signals with a sampling frequency of 48 kHz.
- You cannot record DTS signals.
- You cannot record MP3.
When recording DVDs, make the following settings.
V.S.S.: OFF (→page 37)
PCM Down Conversion: On (→page 47)
Dolby Digital: PCM (→page 47)
DTS: Off (→ page 47)
Analog recording
You can record to a cassette deck or other recording equipment (→ Connection B above).
There are no limitations on recording analog signals as there are with digital signals.
Connecting other video equipment
Connecting to the L2 input terminals on the front of the unit
Other video equipment Connect to the video and audio output terminals. * By using the S video cable instead of the yellow video cable you may make recordings of higher picture quality.
Note
If the audio output of the other equipment is monaural, connect to L/MONO. (Both left and right channels are recorded when connected through L/MONO.)
Connecting to the input terminals on the rear of the unit, L1 and L3
Other video equipment Connect to the video and audio output terminals. * By using the S video cable instead of the yellow video cable you may make recordings of higher picture quality.
Note
If audio output on the other equipment is monaural, use a stereomonaural conversion cable (not included).
Other antenna connection to the unit
Use one of the following connections to suit the antenna lead.
A single twin lead
■ A twin lead and a coaxial cable
■ Two twin leads
- If your television has both lead and coaxial VHF terminals, use the lead connection to minimize signal loss.
Other antenna connection from the unit to the television
Use one of the following connections to suit the antenna terminals on your television. Refer to the television's operating instructions.
■ A twin lead and coaxial plug terminal
■ A twin lead terminal
■ Two twin lead terminals
■ Multiple antenna terminals
- Connect to one of the terminals, then change the television's setting as necessary.

Panasonic DVD players and recorders use the same remote control system so they may respond unintentionally to a command from this remote control. Change the code on this unit and its remote control (the two must match) if you place equipment close together. - Use "1", the factory set code, under normal circumstances.
1 While stopped
Press [SETUP] to show the menus.

2 Press [▲, ▼] to select "Set Up" and press [▶]. 3 Press [▲, ▼] to select "Remote Control Code" and press [ENTER]. 4 Press [▲, ▼] to select the code (1, 2, or 3) and press [ENTER].
The remote control code on the unit has been set.
5 While pressing [ENTER] on the remote control, press the numbered button ([1], [2] or [3]) corresponding to the code you selected in step 4.
The remote control code on the remote control has been set.
6 Press [SETUP]
The following display appears when you use a remote control with a different code.

The unit's remote control code
If you are trying to use this unit's remote control, change its code to match the unit's (→ step 5).
Summary of settings
This chart shows the initial settings for this unit. See page 48 for details on menu operation.
- Underlined items are the factory presets.
| Tabs Menus Options | |||
| Channel | Antenna System (→page 7)Select to suit the type of antenna you are using. Channels are set corresponding to the antenna system you select. | ●TV ●CATV _ | |
| Auto Channel Setting (→page 7)The unit sets the channels automatically. | |||
| Preset Channel Caption (→page 9)You can give preset captions to the channels. | |||
| Manual Channel Caption (→page 9)You can set channel captions manually. | |||
| VCR Plus+ CH Setting (→page 8)Set the guide channels for use with VCR Plus+ timer recording. | |||
| Set Up | Off TimerSelect how long the unit remains on when it is not being used. | ●2 hr ●6 hr ●Off _ | |
| Remote Control Code (→page 45)To avoid operating equipment other than the one intended (when more than one remote controlled item is in the same area), change the remote control code. | ●Set Code 1 ●Set Code 2 ●Set Code 3 | ||
| Auto Clock Setting (→page 49)The unit adjusts the clock automatically. | |||
| Manual Clock Setting (→page 49)You can adjust the clock. | |||
| Time Zone Adjust (→page 49)Adjust the time zone if it was not set correctly after auto clock setting. This appears only after auto clock setting is complete. | ●-1 ●0 ●+1 _ | ||
| Re-initialize SettingThis returns all values in the SETUP menus, except for the clock, channel settings, ratings level, and display language, to the default settings. | ●Yes●No _ | ||
| Disc DVD-V | AudioChoose the audio language. | Some discs start in a certain language despite any changes you make here. | ●English ●French ●Spanish●Original: The original language of each disc will be selected.●Other * * * * :Input a code (→page 48). |
| SubtitleChoose the subtitle language. | ●Automatic: If the language selected for “Audio” is not available, subtitles of that language will automatically appear if available on that disc.●English ●French ●Spanish ●Other * * * * | ||
| MenusChoose the language for disc menus. | ●English ●French ●Spanish ●Other * * * * | ||
| RatingsSet a ratings level to limit DVD-Video play. The password screen is shown when you select levels 0 to 7.To enter a password1. Input a 4-digit password with the numbered buttons.●If you enter a wrong number, press [CANCEL] to erase it.●Do not forget your password.2. Press [ENTER].●The lock symbol appears closed to show the rating is locked.3. Press [ENTER] to confirm the 4 digits.If you insert a DVD-Video that exceeds the ratings limit you set, a message appears on the television.Press [SETUP] to select “Ratings” again and change ratings. | Setting ratings (When level 8 is selected)8 No Limit: All DVD-Video can be played.1 to 7: Prohibits play of DVD-Video with corresponding ratings recorded on them.0 Lock All: Prohibits play of all DVD-Video.Changing ratings (When level 0-7 is selected)●Unlock Recorder ●Change Password●Change Level ●Temporary Unlock | ||
| Video | 3-D Y/C SeparationTurn 3-D Y/C separation on or off. | ●On: Reduces noise for recording by separating the luminance (Y) and color (C) signals received from the television station.●Off: Reduces the ghosting that occurs when recording fast moving images. | |
| Hybrid VBR ResolutionSwitch between automatic and fixed hybrid VBR resolution when recording. | ●Automatic: The unit automatically switches resolution rates during recording. The unit reduces block noise, which occurs during MPEG compression, by selecting the optimum rate.●Fixed: The resolution rate is fixed to ensure the resolution rate is not reduced. | ||
| Tabs | Menus | Options | |
| Video | Still ModeSelect the type of picture shown when you pause play. | ●Automatic.●Field: Less blurred field stills are shown. Select if jittering occurs when “Automatic” is selected.●Frame: Sharper frame stills are shown. Select if small text or fine patterns cannot be seen clearly when “Automatic” is selected. | |
| Black Level ControlSelect normal, lighter or darker for adjusting the black level control to the desired setting for picture enhancement. | ●Input Level (Lighter/Darker):Adjusts the black level of the input signal (e.g., L1, L2, L3)●Composite & S Video Output Level (Lighter/Darker):when connected to a TV through the VIDEO OUT or S-VIDEO OUT terminal●Component Video Output Level (Lighter/Normal/Darker):when connected to a TV through the COMPONENT VIDEO OUT (Y/Pa/Pa) terminal | ||
| Audio | PLAY ×1.3 & Audio during Search RAM DVD-R DVD-V VCDChoose whether to have sound during the first level of fast-forward. Quick View (→page 19) does not work if you make the setting “Off”. | ●On ●Off | |
| D. Range Compression DVD-V (Dolby Digital only)Change the dynamic range for late night viewing. | ●On ●Off — | ||
| Select MTS (→page 23)Select whether to record the main or secondary audio type (SAP) when recording to DVD-R. | ●Main ●SAP | ||
| Digital Audio OutputChange the settings when you have connected equipment through this unit’s DIGITAL AUDIO OUT terminal (→page 42, A). | |||
| PCM Down ConversionSelect how to output audio with a sampling frequency of 96 kHz. | ●On: Converted to 48 kHz for output. Select if the equipment you connect cannot process signals with a sampling frequency of 96 kHz.●Off: Output as 96 kHz. There is no output if the disc has copy protection. Select “On” in this case.If you use analog connection, select this setting irrespective of the type of equipment. | ||
| Dolby Digital ●BitstreamIf the equipment you connected cannot decode the signal, the setting must be changed to PCM or Off. If not, signals the equipment cannot process will be output by this unit, causing high levels of noise which can damage your hearing and the speakers. | ——: Select if the equipment you connected can decode the signal.●PCM: Select if the equipment you connected cannot decode the signal.●Bitstream: Select if the equipment you connected can decode the signal.●Off: Select if the equipment you connected cannot decode the signal. | ||
| Display | Status MessagesChoose whether to show on-screen messages automatically. | ●Automatic ●Off | |
| Language of Display MessageChoose the language for these menus and the on-screen messages. | ●English ●Español ●Français | ||
| Blue BackgroundSelect “Off” if you do not want to have the unit show the blue background when reception is weak. | ●On ●Off | ||
| FL DisplayChanges the brightness of the unit’s display. | ●Bright ●Dim●Automatic: The display dims during video playback and goes off completely when the unit is turned off or on timer recording standby. If you press a button the display will brighten briefly. (At this time the power consumed will be 0.4 W.) | ||
| TV Screen | TV Type (→page 10)Choose the setting to suit your television. | ●Aspect 4:3 & 480l ●Aspect 4:3 & 480P●Aspect 16:9 & 480l ●Aspect 16:9 & 480P | |
| 4:3 TV Settings for DVD-VideoSelect how DVD-Video widescreen picture is shown on a 4:3 standard aspect television. | ●Pan & Scan (→page 50):Video recorded for a widescreen is played as Pan & Scan (unless prohibited by the producer of the disc).●Letterbox (→page 50):Video recorded for a widescreen is played in the letterbox style. | ||
| 4:3 TV Settings for DVD-RAMSelect how DVD-RAM widescreen picture is shown on a 4:3 standard aspect television. | ●4:3: Programs played as recorded.●Pan & Scan:Video recorded for a widescreen is played as Pan & Scan.●Letterbox: Video recorded for a widescreen is played in the letterbox style. | ||

Common procedures
See page 46 for menu and option details.
1 While stopped Press [SETUP] to show the menus.
![graph TD A["SETUP"] --> B["Channel Settings"] B --> C["Set Up"] C --> D["Disc"] D --> E["Video"] E --> F["Audio"] F --> G["Display"] G --> H["TV Screen"] H --> I["Tabs"] I --> J["Manus"] J --> K["Options"] K --> L["Antenna System"] K --> M["Auto Channel Setting"] K --> N["Channel Caption"] K --> O["…](/content/2026/05/844285/images/b86816b75727518f4f62a54c3e7c33e2ba590474b5dddc915f3fcef22e986911.jpg)
2 Press [▲, ▼] to select the menu's tab and press [▶]. 3 Press [▲, ▼] to select the menu and press [ENTER]. 4 Press [▲, ▼] to select the option and press [ENTER].
The screen now shows the menu again.
- Some items require different operations. Follow the on-screen instructions, or read the following explanations.
To return to the previous screen
Press [RETURN].
When you are finished
Press [SETUP].
Language code list Input the code with numbered buttons.
| Abkhazian: 6566 | Chinese: 9072 | Hausa: 7265 | Lithuanian: 7684 | Romanian: 8279 | Telugu: 8469 |
| Afar: 6565 | Corsican: 6779 | Hebrew: 7387 | Macedonian: 7775 | Russian: 8285 | Thai: 8472 |
| Afrikaans: 6570 | Croatian: 7282 | Hindi: 7273 | Malagasy: 7771 | Samoan: 8377 | Tibetan: 6679 |
| Albanian: 8381 | Czech: 6783 | Hungarian: 7285 | Malay: 7783 | Sanskrit: 8365 | Tigrinya: 8473 |
| Ameharic: 6577 | Danish: 6865 | Icelandic: 7383 | Malayalam: 7776 | Scots Gaelic: 7168 | Tonga: 8479 |
| Arabic: 6582 | Dutch: 7876 | Indonesian: 7378 | Maltese: 7784 | Serbian: 8382 | Turkish: 8482 |
| Armenian: 7289 | English: 6978 | Interlingua: 7365 | Maori: 7773 | Serbo-Croatian:8372 | Turkmen: 8475 |
| Assamese: 6583 | Esperanto: 6979 | Irish: 7165 | Marathi: 7782 | Shona: 8378 | Twi: 8487 |
| Aymara: 6588 | Estonian: 6984 | Italian: 7384 | Moldavian: 7779 | Sindhi: 8368 | Ukrainian: 8575 |
| Azerbaijani: 6590 | Faroese: 7079 | Japanese: 7465 | Mongolian: 7778 | Singhalese: 8373 | Urdu: 8582 |
| Bashkir: 6665 | Fiji: 7074 | Javanese: 7487 | Nauru: 7865 | Slovak: 8375 | Uzbek: 8590 |
| Basque: 6985 | Finnish: 7073 | Kannada: 7578 | Nepali: 7869 | Slovenian: 8376 | Vietnamese: 8673 |
| Bengali; Bangla: 6678 | French: 7082 | Kashmiri: 7583 | Norwegian: 7879 | Somali: 8379 | Volapük: 8679 |
| Frisian: 7089 | Kazakh: 7575 | Oriya: 7982 | Spanish: 6983 | Welsh: 6789 | |
| Bhutani: 6890 | Galician: 7176 | Kirghiz: 7589 | Pashto, Pushto:8083 | Sundanese: 8385 | Wolof: 8779 |
| Bihari: 6672 | Georgian: 7565 | Korean: 7579 | Persian: 7065 | Swahili: 8387 | Xhosa: 8872 |
| Breton: 6682 | German: 6869 | Kurdish: 7585 | Polish: 8076 | Swedish: 8386 | Yiddish: 7473 |
| Bulgarian: 6671 | Greek: 6976 | Laotian: 7679 | Portuguese: 8084 | Tagalog: 8476 | Yoruba: 8979 |
| Burmese: 7789 | Greenlandic: 7576 | Latin: 7665 | Punjabi: 8065 | Tajik: 8471 | Zulu: 9085 |
| Byelorussian:6669 | Guarani: 7178 | Latvian, Lettish:7686 | Quechua: 8185 | Tamil: 8465 | |
| Cambodian:7577 | Gujarati: 7185 | Lingala: 7678 | Rhaeto-Romance:8277 | Tatar: 8484 | |
| Catalan: 6765 |
Clock settings
Preparation
If you connect the unit through a cable TV box or DSS receiver (→page 41), tune to your local PBS station before starting auto clock setting. Use manual clock setting if auto clock setting does not work or if there is no local PBS channel in your area.
1 Press [SETUP] to show the menus.
2 Press [▲, ▼] to select "Set Up" and press [▶].

Auto Clock Setting
3 Press [▲, ▼] to select "Auto Clock Setting" and press [ENTER].

If you have not yet set channels, the "Auto Channel/Clock Setting" screen appears.
4 Press [ENTER].
Auto setting starts. This can take some time, up to a few hours in some cases. (To stop auto clock setting, press [RETURN].) The following screen appears when setting is complete. Press [ENTER].

Note
- If the time was not set correctly, use manual clock setting or time zone adjust.
- DST, Daylight Saving Time, shows the summertime setting. •TIME ZONE shows the time difference from Greenwich meantime (GMT). EST=GMT -5, CST=GMT -6, MST=GMT-7, PST=GMT-8, AST=GMT -9, HST=GMT-10, For other areas: xx hr
Manual Clock Setting
3 Press [▲, ▼] to select "Manual Clock Setting" and press [ENTER].

4 Press [◀, ▶] to select the item you want to change and press [▲, ▼] to change the setting.
MONTH←→DAY←→YEAR←→HOUR (12-hour display) ↑→TIME ZONE←→DST←→MINUTE←↑
DST (Daylight Saving Time): ON or OFF
If you select "ON", the clock is advanced one hour starting at 2 a.m. on the first Sunday in April and ending at 2 a.m. on the last Sunday in October.
TIME ZONE:

5 Press [ENTER].
The clock starts.
Note
When you change the time zone, the recording times for programs recorded before the time zone was changed also change to correspond to the new time zone.
Time Zone Adjust
Adjust the time zone (-1 or +1) if it was not set correctly with auto clock setting.
You cannot change this setting if you set the clock manually.
3 Press [▲, ▼] to select "Time Zone Adjust" and press [ENTER].

4 Press [▲, ▼] to select "-1", "0", or "+1" and press [ENTER].
The "Set Up" screen (→ step 2) reappears.
Glossary
Bitstream
This is the digital form of multi-channel audio data (e.g., 5.1 channel) before it is decoded into its various channels.
CPRM (Content Protection for Recordable Media)
CPRM is the copyright protection technology that is used to protect broadcasts that are allowed to be recorded only once (e.g. some CATV broadcasts).
Decoder
A decoder restores the coded audio signals on DVDs to normal. This is called decoding.
Dolby Digital
This is a method of coding digital signals developed by Dolby Laboratories. Apart from stereo (2-channel) audio, these signals can also be multi-channel audio. A large amount of audio information can be recorded on one disc using this method.
This unit is set to record using Dolby Digital in all recording modes.
Dolby Pro Logic
A surround system where a 4-channel audio track is recorded as 2 channels and then is restored to 4 channels for play. The surround channel is monaural and can reproduce up to 7 kHz.
DTS (Digital Theater Systems)
This surround system is used in many movie theaters around the world. There is good separation between the channels, so realistic sound effects are possible.
Film and video
DVD-Videos are recorded using either film or video. Usually, film is recorded at 24 frames per second, the rate movies are filmed at, while video is recorded at 30 frames per second.
Frame still and field still
Frames are the still pictures that go together to make a moving picture. There are about 30 frames shown each second.
One frame is made up of two fields. A regular television shows these fields one after the other to create frames.
A still is shown when you pause a moving picture. A frame still is made up of two alternating fields, so the picture may appear blurred, but overall quality is high.
A field still is not blurred, but it has only half the information of a frame still so picture quality is lower.
Interlace and progressive output
NTSC, the video signal standard, has 480 interlaced (i) scan lines, whereas progressive scanning uses twice the number of scan lines. This is called 480p. The video signals output from this unit's COMPONENT VIDEO OUT terminals (Y, P_B, P_R) allow you to enjoy higher quality pictures than if the signals were output from the VIDEO OUT terminal or S-VIDEO OUT terminal.
I/P/B
MPEG 2, the video compression standard adopted for use with DVD-Video, codes frames using these 3 picture types.
I: Intra coded picture
This picture has the best quality and is the best to use when adjusting the picture.
P: Predictive coded picture
This picture is calculated based on past I- or P-pictures.
B: Bidirectionally-predictive coded picture
This picture is calculated by comparing past and future I- and P-pictures so it has the lowest volume of information.
Linear PCM (pulse code modulation)
These are uncompressed digital signals. This unit outputs linear PCM sound in 2 channels from the DIGITAL AUDIO OUT terminals.
Playback control (PBC)
If a Video CD has playback control, you can select scenes and information with menus.
Pan&Scan/Letterbox
In general, DVD-Video are produced with the intention that they be viewed on a widescreen television with an aspect ratio of 16:9. This means you can view most material with the intended aspect ratio on a widescreen television.
Material with this ratio will not fit onto a standard television with an aspect ratio of 4:3. Two styles of picture, "Pan&Scan" and "Letter-box", deal with this problem.
Pan&Scan: The sides are cut off so the picture fills the screen.
Letterbox: Black bands appear at the top and bottom of the picture so the picture itself appears in an aspect ratio of 16:9.


Disc handling
Do not use irregularly shaped discs, such as heart-shaped. (These can damage the unit.)

■ How to hold a disc
Do not touch the recorded surface.

■ If there is dirt or condensation on the disc
Moisture may condense on discs after they are brought inside from the cold.
DVD-RAM and DVD-R
Clean only with the DVD-RAM/PD disc cleaner available as an optional accessory, part number LF-K200DCA1.
Do not use cleaners or cloths for CDs to clean DVD-RAM and DVD-R.
DVD-Video, Video CD, CD
Wipe with a damp cloth and then wipe dry.

■ Handling precautions
- Do not write on the label side with a ball-point pen or other writing instrument.
- Do not use record cleaning sprays, benzine, thinner, static electricity prevention liquids or any other solvent.
- Do not attach labels or stickers to discs. (Do not use discs with exposed adhesive from tape or left over peeled-off stickers.)
- Do not use scratch-proof protectors or covers.
- Do not use discs printed with label printers available on the market.
- Do not use discs that are badly warped or cracked.
On the television Page
| No disc. | ● You haven't inserted a disc. Correctly insert a disc that this unit can use.● The disc is upside down. If it is a single-sided disc, insert it so the label is facing up. | 1115 |
| This is non-recordable disc. | ● The unit cannot record on the disc you inserted. Insert a DVD-RAM or unfinalized DVD-R.● You inserted an unformatted DVD-RAM. Format the disc with this unit. | 1134 |
| This disc is not formatted properly.Please format the disc in ‘DISC SETTING’ to record. | ||
| This disc cannot be read. | ● You inserted an incompatible disc. | 11 |
| Please check write protect tab on the disc. | ●The write-protect tab on the cartridge is set to PROTECT.Use a ballpoint pen or similar to release the write protection. | — |
| Contents of this disc are protected. | ●The program is write-protected. Cancel the protection.●The disc is write-protected. Cancel Disc Protection. | 3234 |
| Cannot finish recording completely. | ●The program was copy-guarded.●No space left on the disc.→ Create space by erasing any unwanted programs. RAM→ Use a new disc. RAM DVD-R●Recording was not completed for some other reason. | —32— |
| Cannot record on the disc. | ●The disc is scratched. Use another disc.●The disc is dirty.●You inserted an incompatible disc. | —5011 |
| Disc is full. ●No space left on the | disc.→ Create space by erasing any unwanted programs. RAM→ Use a new disc. RAM DVD-R | 32— |
| Please set clock. | ●The clock is not set. | 49 |
| This disc may not be played in your region. | ●You tried to play a disc with a region number different from this unit's region number. This unit can only play discs with the region numbers compatible with this unit (1, All, or including the number 1). | Cover page |
| Your selection exceeds the recorder's rating limit. | ●A ratings level has been set for DVD-Video with this unit. Unlock the unit with “Ratings” in “Disc”. | 46 |
| Finalizing is necessary for compatible playback. | ●To enable playback of your DVD-R on compatible equipment, it is necessary to finalize it. | 34 |
| Error has occurred. Please press [ENTER]. | ●A serious, but temporary error has occurred and one of the unit's safety devices has activated. Press [ENTER]. The unit switches to the standby mode. Press [∅, DVD POWER] to turn the unit on again. | — |
On the unit's display
| NO READ •The disc is dirty or badly scratched.→ Clean the disc if it is dirty.→ The disc cannot be played if it is scratched and this display doesn't disappear.•The unit cannot read the disc.•You have used a DVD-RAM/PD lens cleaner and it has finished. | 50——50 |
| UNSUPPORT | • You have inserted a disc the unit cannot play or record on. |
| U14 | •The unit is hot.→ The unit switches to standby automatically for safety reasons and you cannot operate it.Wait for about 30 minutes for the service number to disappear.→ Select a position with good ventilation when installing the unit.→ Do not block the cooling fan on the rear of the unit. |
| U99 | • The unit fails to operate properly. Press [⏻, DVD POWER] to switch the unit to standby. Now press [⏻, DVD POWER] again to turn the unit on. |
| CHK REMOTE | • The remote control and main unit are using different codes. Change the code on the remote control or main unit. |
| RECOVER | • There was a power failure or the AC plug was disconnected while the power was on. The unit is carrying out its recovery process. Wait until the message disappears. |
Troubleshooting guide
Before requesting service, make the below checks. If you are in doubt about some of the check points, or if the remedies indicated in the chart do not solve the problem:
In the U.S.A., contact the Panasonic Customer Call Center at 1-800-211-7262, or e-mail consumerproducts@panasonic.com, or web site (http://www.panasonic.com).
In Canada, contact Panasonic Canada Inc. Customer Care Centre at 1-800-561-5505, web site (www.panasonic.ca), or an authorized Servicentre closest to you.
Power Page
| No power. | ● Insert the AC power supply cord securely into a known active AC outlet. | 5 |
| The unit switches to the standby mode. | ● This is a power saving feature. You can turn it off if you would prefer (Set Up—Off Timer—Off). Press [➊, DVD POWER] to turn the unit on.● One of the unit's safety devices may have activated. Press [➊, DVD POWER] to turn the unit on. | 46— |
Operation
| The unit is on but cannot be operated. | Some operations may be prohibited by the disc.The unit is hot ("U14" appears on the display). Wait for "U14" to disappear.One of the unit's safety devices may have activated.Reset the unit as follows:Press [∅, DVD POWER] to switch the unit to standby.If the unit doesn't switch to standby, press and hold [∅, DVD POWER] for about 10 seconds. The unit is forcibly switched to standby.Alternatively, disconnect the AC power supply cord, wait one minute, then reconnect it.Press [∅, DVD POWER] to turn the unit on. | —51— |
Picture
- When progressive output is on, refer also to "Progressive video" below.
| The images from this unit do not appear on the television. | Make sure that the television is connected to the AUDIO/VIDEO terminal, S-VIDEO OUT terminal or COMPONENT VIDEO OUT terminal on this unit.Make sure that the television's input setting (e.g., VIDEO 1) is correct.You have set “TV Type” to “4:3 (480P)” or “16:9 (480P)” in the TV Screen menus, but the television isn't compatible with progressive signals. Press and hold [■] and [TIME SLIP] on the unit at the same time for about 5 seconds. The setting will change to interlace. | 5— |
| Television reception worsens after connecting the unit. | This can occur because the signals are being divided between the unit and the television. It can be solved by using a signal booster, available from audio-visual suppliers. Consult your dealer if reception does not improve. | — |
| Screen size is wrong. | Check the settings on your television.Check the settings for “TV Type”, “4:3 TV Settings for DVD-Video” or “4:3 TV Settings for DVD-RAM” in the TV Screen menu. | —10, 47 |
| On-screen messages do not appear. | Go to the Display menu and select “Automatic” for “Status Messages”.Press [STATUS] to show the on-screen messages constantly. | 4739 |
| The blue background does not appear. | Go to the Display menu and select “On” for “Blue Background”. | 47 |
| There is ghosting. | Turn “MPEG-DNR” off if it is on. | 38 |
| Play stops for a moment during Quick View. | Play may stop where two play lists join, but this is not a malfunction. | — |
Progressive video
| There is ghosting when progressive output is on. | ● Set “Progressive” to “OFF”. This problem is caused by the editing method or material used on DVD-Video, but should be corrected if you use interlace output. | 38 |
| There is no apparent change in picture quality when adjusted with the Video menu in the on-screen menus. | ● The effect is less perceivable with some types of video. | — |
Sound Page
| No sound.Low volume.Distorted sound. | Check the connections. Check the input mode on the amplifier if you have connected one.Turn V.S.S. off if it causes distortion. | 5,41–4337 |
| Cannot hear the desired audio type. | Press [AUDIO] to select the desired audio type. 23 | |
| Cannot switch audio during stereo or SAP broadcasts. | You have used digital connection. Set “Dolby Digital” to “PCM” or connect to other equipment using audio cables (analog connection).You cannot change the audio type when a DVD-R is in the disc tray. | 42, 47— |
Play
| Play fails to start even when [▶] (PLAY) is pressed.Play starts but then stops immediately. | ●Insert the disc correctly with the label facing up.●This unit cannot play discs other than DVD-RAM, DVD-R, DVD-Video, Video CD, CD and MP3 discs.●The disc is dirty. Clean it.●The disc may be badly scratched.●You inserted a blank DVD-RAM or DVD-R.●Condensation has formed: Wait 1 to 2 hours for it to evaporate. | 151150——— |
| A title or chapter doesn’t play when it is selected. | ●Some titles and chapters on DVD-Video are not played when you have changed the ratings level. | 46 |
| Picture distorted during search. | ●Some distortion is normal. — | |
| Alternative soundtrack and subtitles cannot be selected. | ●The languages are not recorded on the disc.●You may have to use the disc's menus to select languages. | —17 |
| No subtitles. ●Subtitles are not recorded on the disc.●Turn the subtitles on. | —36 | |
| Angle cannot be changed. | ●This function depends on software availability. Angles can only be changed during scenes where different angles are recorded. | — |
| You have forgotten your ratings password. | ●Return the ratings setting to “8”.While the disc tray is open, press and hold [|◀◀/◀◀] and [▶▶/▶▶] on the main unit at the same time for 5 or more seconds. | — |
Displays
| The display is dim. | ● Go to the Display menu and change the display's brightness with “FL Display”. | 47 |
| “12:00” is flashing on the unit's display. | ● The clock is not set. 49 | |
| The displayed recording time and actual recording time dif-fer. | ● Displayed recording time is based on the number of frames per second. This number is sub-ject to minute variations. When recording over long periods, these variations may result in the difference between displayed recording time and actual recording time. This is normal. | — |
| The display doesn't show the correct time. MP3 | ● Times may not appear correctly when searching through tracks recorded with a variable bit rate. | — |
Remote control
| The remote control doesn’t work. | •[DVD, TV] is not switched to “DVD”. Switch to “DVD” when operating this unit.• The remote control and main unit are using different codes. Change the code on the remote control or main unit.• The batteries are depleted. Replace them with new ones.• Point the remote control at the remote control sensor on the main unit.• Remove obstacles from between the remote control and main unit. | 124566— |
| Cannot operate the television. | • Change manufacturer code. Some televisions cannot be operated even if you change the code.• [DVD, TV] is not switched to “TV”. Switch to “TV” when selecting the receiving channel for the television. | 1012 |
Recording and timer recording Page
| Cannot record. | You haven't inserted a disc or the disc you inserted cannot be recorded on. Insert a disc the unit can record onto.The disc is unformatted. Format the disc so this unit can record on it.The write-protect tab on the cartridge is set to PROTECT.Some programs have limitations on the number of times they can be recorded (CPRM).The disc is protected with DISC SETTING.The disc is full or nearly full. Erase unneeded programs or use another disc.You cannot record on finalized DVD-R discs. | 113411143432— |
| VCR Plus+ programming does not work properly. | The guide channels are incorrect. Go to the Channel menu and correct them with “VCR Plus+ CH Setting”.The clock is wrong. Go to the Set Up menu and correct it with “Clock Settings”. | 849 |
| Timer recording does not work properly. | The timer program is incorrect. Correct the program.The unit is not on timer recording standby. (“ 1 ” on the unit's display is not on.) Press [ Ⓧ , DVD POWER] to turn the unit off and make sure that 2 ” is on.Different timer program times overlap.The clock is wrong. Go to the Set Up menu and correct it with “Clock Settings”. | 26——49 |
| The unit switches to standby while making a timer recording. | The disc has run out of space. Use a disc that has enough space to record the program. | — |
| The timer program remains even after recording finishes. | The program remains if you select “DAILY” or “WEEKLY”. | 25 |
| Timer recording does not stop even when [■] is pressed. | Press [■] and then [ENTER] within 5 seconds to turn “ 2 ” off. Recording stops. — | |
| The available recording time doesn’t increase even after erasing recordings on the disc. | As this unit is unable to erase data written to DVD-RAM with a computer, the available recording time does not increase. The data will be erased if you reformat the disc.If the disc is dirty, wipe with the DVD-RAM/PD disc cleaner (optional) before formatting. | 3450 |
| A part or whole of a recorded program has been lost. | If there is a power failure or the plug is disconnected from the household AC outlet while recording or editing, the program may be lost or the disc may become unusable.→ We cannot offer any guarantee regarding lost programs or discs. You will have to format the disc or use a new disc. | 34 |
Discs make sounds as they rotate. This does not indicate a malfunction.
Maintenance
The precision parts in this unit are readily affected by the environment, especially temperature, humidity, and dust. Cigarette smoke also can cause malfunction or breakdown.
To clean this unit, wipe with a soft, dry cloth.
- Never use alcohol, paint thinner or benzine to clean this unit.
- Before using chemically treated cloth, read the instructions that came with the cloth carefully.
Product Service
- Damage requiring service—The unit should be serviced by qualified service personnel if: (a) The AC power supply cord or AC adaptor has been damaged; or (b) Objects or liquids have gotten into the unit; or (c) The unit has been exposed to rain; or (d) The unit does not operate normally or exhibits a marked change in performance; or (e) The unit has been dropped or the cabinet damaged.
- Servicing—Do not attempt to service the unit beyond that described in these operating instructions. Refer all other servicing to authorized servicing personnel.
Observe the following points to ensure continued listening and viewing pleasure.
Dust and dirt may adhere to the unit's lens over time, making it impossible to record or play discs.
Use DVD-RAM/PD lens cleaner (LF-K123LCA1) every 1 to 4 months, depending on frequency of use and the operating environment. Read the lens cleaner's instructions carefully before use.
- Replacement parts—When parts need replacing ensure the servicer uses parts specified by the manufacturer or parts that have the same characteristics as the original parts. Unauthorized substitutes may result in fire, electric shock, or other hazards.
- Safety check—After repairs or service, ask the servicer to perform safety checks to confirm that the unit is in proper working condition.
Product information
For product information or assistance with product operation:
In the U.S.A., contact the Panasonic Customer Call Center at 1-800-211-7262, or e-mail consumerproducts@panasonic.com, or web site (http://www.panasonic.com).
In Canada, contact Panasonic Canada Inc. Customer Care Centre at 1-800-561-5505, web site (www.panasonic.ca), or an authorized Servicentre closest to you.
Specifications
| Recording system: DVD video recording standards(DVD-RAM),DVD video standards (DVD-R) | |
| Optical pick-up: System with 1 lens, 2 integrationunits (662 nm wavelength for DVDs,790 nm wavelength for CDs) | |
| Recordable discs: 12 cm (5") 4.7 GB DVD-RAM discs12 cm (5") 9.4 GB DVD-RAM discs8 cm (3") 2.8 GB DVD-RAM discs12 cm (5") 4.7 GB DVD-R discs8 cm (3") 1.4 GB DVD-R discs(for General Ver. 2.0) | |
| Recording time: Max. 6 hours (using 4.7 GB disc)XP: 60 minutesSP: 120 minutesLP: 240 minutesEP: 360 minutes | |
| Discs played: 12 cm (5") 4.7 GB DVD-RAM discs12 cm (5") 9.4 GB DVD-RAM discs8 cm (3") 2.8 GB DVD-RAM discs12 cm (5") 4.7 GB DVD-R discs8 cm (3") 1.4 GB DVD-R discs(for General Ver. 2.0)DVD-VIDEO discsCD-Audio discs (CD-DA)Video CD discsCD-R/CD-RW discs(CD-DA, Video CD, MP3 formatted discs)MP3Maximum number of tracks and groups recognizable: 999 tracks and 99 groupsCompatible compression rate: between 32 kbps and 320 kbps |
Video system
TV system: NTSC system, 525 lines, 60 fields
Recording system: MPEG2 (Hybrid VBR)
| Input: | LINE (pin jack)×3, 1.0 Vp-p; 75 Ω |
| S connector×3 Y: 1.0 Vp-p; 75 Ω | |
| C: 0.286 Vp-p; 75 Ω |
| Output: | LINE (pin jack)×1, 1.0 Vp-p; 75 Ω |
| S connector×1 Y: 1.0 Vp-p; 75 Ω | |
| C: 0.286 Vp-p; 75 Ω |
Component video output (480P/480i):
Y: 1.0 Vp-p; 75 Ω
PB: 0.7 Vp-p; 75 Ω
PR: 0.7 Vp-p; 75 Ω
Antenna reception input:
TV Channel: 2ch–69ch, 75 Ω
CATV Channel: 1ch–125ch, 75 Ω
| Audio system | |
| Recording system: | Dolby Digital (XP/SP/LP/EP) |
| Input: | LINE (pin jack)×3 |
| Reference input: 309 mVrms | |
| FS: 2 Vrms (1 kHz, 0 dB) | |
| Input impedance: 47 kΩ | |
| Output: | LINE (pin jack)×1 |
| Reference output: 309 mVrms | |
| FS: 2 Vrms (1 kHz, 0 dB) | |
| Output impedance: 1 kΩ | |
| (Load impedance: 10 kΩ) | |
Number of channels: Recording: 2 channels Playback: 2 channels
| Other input/output connectors: |
| Digital audio optical output connector |
| Operating temperature range: |
| 5 °C–40 °C (41 °F–104 °F) |
| Operating humidity range: | |
| 10%–80% RH (no condensation) | |
| Clock unit: | Quartz-controlled 12-hour digital display |
LASER Specification Class I LASER Product
| Wave length: | 775–815 nm 655–666 nm |
| Laser power: | No hazardous radiation is emitted with the safety protection |
| Power supply: | AC 120 V, 60 Hz |
| Power consumption: 26 W | |
| Dimensions: | Approx. 430 (W)×79 (H)×283 (D) mm [Approx. 1615/16'' (W)× 31/8'' (H)× 113/16'' (D)] (excluding protrusions) |
| Mass: | Approx. 3.7 kg (8.14 lbs) |
Power consumption in standby mode: approx. 3.2 W
Note
Specifications are subject to change without notice. Mass and dimensions are approximate.
Panasonic Consumer Electronics Company,
Division of Matsushita Electric Corporation of America
One Panasonic Way Secaucus, New Jersey 07094
Panasonic Sales Company, Division of Matsushita Electric
of Puerto Rico, Inc.
San Gabriel Industrial Park, Carolina, Puerto Rico 00985
Panasonic DVD Player/Recorder Limited Warranty
Limited Warranty Coverage
If your product does not work properly because of a defect in materials or workmanship, Panasonic Consumer Electronics Company or Panasonic Sales Company (collectively referred to as "the warrantor") will, for the length of the period indicated on the chart below, which starts with the date of original purchase ("warranty period"), at its option either (a) repair your product with new or refurbished parts, or (b) replace it with a new or a refurbished product. The decision to repair or replace will be made by the warrantor.
| Product or Part Name Parts Labor | ||
| DVD Player One (1) Year Ninety (90) Days | ||
| DVD Recorder One (1) Year One (1) Year | ||
| Rechargeable Batteries, DVD-RAM Disc (in exchange for defective item) | Ten (10) Days Not Applicable | |
During the "Labor" warranty period there will be no charge for labor. During the "Parts" warranty period, there will be no charge for parts. You must carry-in or mail-in your product during the warranty period. If non-rechargeable batteries are included, they are not warranted. This warranty only applies to products purchased and serviced in the United States or Puerto Rico. This warranty is extended only to the original purchaser of a new product which was not sold "as is". A purchase receipt or other proof of the original purchase date is required for warranty service.
Carry-In or Mail-In Service
For Carry-In or Mail-In Service in the United States call 1-800-211-PANA(7262) or visit Panasonic Web Site: http://www.panasonic.com
For assistance in Puerto Rico call Panasonic Sales Company (787)-750-4300 or fax (787)-768-2910.
Limited Warranty Limits And Exclusions
This warranty ONLY COVERS failures due to defects in materials or workmanship, and DOES NOT COVER normal wear and tear or cosmetic damage. The warranty ALSO DOES NOT COVER damages which occurred in shipment, or failures which are caused by products not supplied by the warrantor, or failures which result from accidents, misuse, abuse, neglect, mishandling, misapplication, alteration, faulty installation, set-up adjustments, misadjustment of consumer controls, improper maintenance, power line surge, lightning damage, modification, or commercial use (such as in a hotel, office, restaurant, or other business), rental use of the product, service by anyone other than a Factory Servicenter or other Authorized Servicer, or damage that is attributable to acts of God.
THERE ARE NO EXPRESS WARRANTIES EXCEPT AS LISTED UNDER "LIMITED WARRANTY COVERAGE". THE WARRANTOR IS NOT LIABLE FOR INCIDENTAL OR CONSEQUENTIAL DAMAGES RESULTING FROM THE USE OF THIS PRODUCT, OR ARISING OUT OF ANY BREACH OF THIS WARRANTY. (As examples, this excludes damages for lost time, travel to and from the servicer, loss of media or images, data or other recorded content. The items listed are not exclusive, but are for illustration only.) ALL EXPRESS AND IMPLIED WARRANTIES, INCLUDING THE WARRANTY OF MERCHANTABILITY, ARE LIMITED TO THE PERIOD OF THE LIMITED WARRANTY.
Some states do not allow the exclusion or limitation of incidental or consequential damages, or limitations on how long an implied warranty lasts, so the exclusions may not apply to you.
This warranty gives you specific legal rights and you may also have other rights which vary from state to state. If a problem with this product develops during or after the warranty period, you may contact your dealer or Servicenter. If the problem is not handled to your satisfaction, then write to the warrantor's Consumer Affairs Department at the addresses listed for the warrantor.
PARTS AND SERVICE WHICH ARE NOT COVERED BY THIS LIMITED WARRANTY ARE YOUR RESPONSIBILITY.
Customer Services Directory
For Product Information, Operating Assistance, Literature Request, Dealer Locations, and all Customer Service inquiries please contact:
1-800-211-PANA (7262), Monday–Friday 9 am–9 pm; Saturday–Sunday 9 am–7 pm, EST. or send e-mail:
consumerproducts@panasonic.com
For hearing or speech impaired TTY users, TTY: 1-877-833-8855
Web Site: http://www.panasonic.com
You can purchase parts, accessories or locate your nearest servicenter by visiting our Web Site.
Accessory Purchases:
1-800-332-5368 (Customer Orders Only)
For hearing or speech impaired TTY users, TTY: 1-866-605-1277
Panasonic Services Company 20421 84th Avenue South, Kent, WA 98032
(6 am to 5 pm Monday–Friday; 6 am to 10:30 am Saturday; PST)
(Visa, MasterCard, Discover Card, American Express, Check)
Service in Puerto Rico
Matsushita Electric of Puerto Rico, Inc. Panasonic Sales Company/Factory Servicenter: Ave. 65 de Infanteria, Km. 9.5, San Gabriel Industrial Park, Carolina, Puerto Rico 00985 Phone (787) 750-4300 Fax (787) 768-2910
F0102NY1082
The model number and serial number of this product can be found on either the back or the bottom of the unit.
Please note them in the space provided below and keep for future reference.
MODEL NUMBER DMR-E50
SERIAL NUMBER
User memo:
DATE OF PURCHASE
DEALER NAME
DEALER ADDRESS
TELEPHONE NUMBER
Panasonic Canada Inc.
5770 Ambler Drive, Mississauga, Ontario L4W 2T3
PANASONIC/TECHNICS PRODUCT—LIMITED WARRANTY
Panasonic Canada Inc. warrants this product to be free from defects in material and workmanship and agrees to remedy any such defect for a period as stated below from the date of original purchase.
Panasonic DVD Recorder One (1) year, parts and labour
LIMITATIONS AND EXCLUSIONS
This warranty does not apply to products purchased outside Canada or to any product which has been improperly installed, subjected to usage for which the product was not designed, misused or abused, damaged during shipping, or which has been altered or repaired in any way that affects the reliability or detracts from the performance, nor does it cover any product which is used commercially. Dry cell batteries are also excluded from coverage under this warranty.
This warranty is extended to the original end user purchaser only. A purchase receipt or other proof of date of original purchase is required before warranty service is performed.
THIS EXPRESS, LIMITED WARRANTY IS IN LIEU OF ALL OTHER WARRANTIES, EXPRESS OR IMPLIED, EXCLUDING ANY IMPLIED WARRANTIES OF MERCHANTABILITY OR FITNESS FOR A PARTICULAR PURPOSE.
IN NO EVENT WILL PANASONIC CANADA INC. BE LIABLE FOR ANY SPECIAL, INDIRECT OR CONSEQUENTIAL DAMAGES.
In certain instances, some jurisdictions do not allow the exclusion or limitation of incidental or consequential damages, or the exclusion of implied warranties, so the above limitations and exclusions may not be applicable.
WARRANTY SERVICE
For product operation and information assistance, please contact your Dealer or our Customer Care Centre at: Telephone #: (905) 624-5505 Fax #: (905) 238-2360 Web: www.panasonic.ca
For product repairs, please contact one of the following:
- Your Dealer who will inform you of an authorized Servicentre nearest you.
- Our Customer Care Centre at (905) 624-5505 or www.panasonic.ca ●A Panasonic Factory Servicentre listed below:
Richmond, British Columbia
| Panasonic Canada Inc. |
| 12111 Riverside Way |
| Richmond, BC |
| V6W 1K8 |
| Tel: (604) 278-4211 |
| Fax: (604) 278-5627 |
Calgary, Alberta Mississauga, Ontario Lachine, Québec
| Panasonic Canada Inc.6835-8 th St. N. E.Calgary, ABT2E 7H7Tel: (403) 295-3955Fax: (403) 274-5493 |
| Panasonic Canada Inc.5770 Ambler Dr.Mississauga, ONL4W 2T3Tel: (905) 624-8447Fax: (905) 238-2418 |
| Panasonic Canada Inc.3075, rue Louis A. AmosLachine, QCH8T 1C4Tel: (514) 633-8684Fax: (514) 633-8020 |
CUSTOMER'S RECORD:
Customer Name:
Model Number: Serial Number:
Date of Purchase:
Dealer's Name:
Address: Phone Number:
IF YOU SHIP THE PRODUCT TO A SERVICENTRE
Carefully pack and send prepaid, adequately insured and preferably in the original carton. Include details of the defect claimed, and proof of date of original purchase.
Antenna system .....7
Audio attribute 36
Channel caption .....9
Channel setting 9
Chasing play 22
Cleaning
disc 50
lens 54
main unit 54
Clock setting .....49
CM Skip 18
Connection
amplifier, system component ..... 42
antenna 44
antenna, television 5
cable TV box, satellite receiver .... 41
video equipment 43
CPRM system 50
Dialog Enhancer 37
Direct Navigator 17
Divide Program 32
Edit Scenes .... 30
Enter title
disc 34
play list 30
program 24,32
Erase
all program 34
play list 29,30
play list scene 29,31
program 17,32
Finalize 34
Flexible Recording (FR) ..... 15, 23
Format DVD-RAM 34
FUNCTIONS window....23
Language code list ..... 48
Marker 20
MPEG-DNR 38
MP3 21
On-screen display....39
On-screen menu 36
PCM Down Conversion ..... 47
Picture 38
PLAY FROM TOP 23
Play list 28,30
Position memory ..... 17
Progressive ....5, 10, 38, 50
Properties
play list 30 program 32
Protection
cartridge.... 11
disc.... 34
program 32
Quick View....19
Ratings password .... 46
Recording mode ..... 15
Re-initialize setting....46
Repeat play 37
Resume function 16
SETUP menu....48
Shorten Segment 32
Simultaneous rec and play ..... 22
Sound track....36
Subtitle 36
Time Slip 19,22
Timer recording ..... 24–26
Transfer 38
TV Type 10
VCR Plus+
guide channel 8 timer recording 24
V.S.S. 37
Index
Apparatus Claims of U.S. Patent Nos. 4,631,603, 4,577,216, and 4,819,098, licensed for limited viewing uses only.
This product incorporates copyright protection technology that is protected by method claims of certain U.S. patents and other intellectual property rights owned by Macrovision Corporation and other rights owners. Use of this copyright protection technology must be authorized by Macrovision Corporation, and is intended for home and other limited viewing uses only unless otherwise authorized by Macrovision Corporation. Reverse engineering or disassembly is prohibited.
Panasonic Consumer Electronics
Company, Division of Matsushita
Electric Corporation of America
One Panasonic Way Secaucus,
New Jersey 07094
http://www.panasonic.com
Panasonic Sales Company,
Division of Matsushita Electric
of Puerto Rico, Inc. ("PSC")
San Gabriel Industrial Park, Carolina,
Puerto Rico 00985
Panasonic Canada Inc.
5770 Ambler Drive
Mississauga, Ontario
L4W 2T3
www.panasonic.ca



- REGION NUMBER SUPPORTED BY THIS UNIT
- DEAR CUSTOMER
- FOR U.S.A. ONLY
- FOR CANADA ONLY
- WARNING
- CAUTION
- RISK OF ELECTRIC SHOCK DO NOT OPEN
- THE FOLLOWING APPLIES ONLY IN THE U.S.A
- FCC NOTE
- NOTE TO CATV SYSTEM INSTALLER
- DO NOT PLACE THE UNIT ON AMPLIFIERS OR EQUIPMENT THAT MAY BECOME HOT
- IMPORTANT SAFETY INSTRUCTIONS
- FEATURES
- GETTING STARTED
- SETTING UP
- RECORDING
- PLAYING BACK
- TIMER RECORDING
- EDITING
- ADVANCED OPERATION
- REFERENCE
- ESPAÑOL
- NOTE
- (U.S.A. ONLY)
- STEP 1 ANTENNA AND TELEVISION CONNECTIONS
- PREPARATION
- TO ENJOY SOUND THROUGH OTHER AUDIO EQUIPMENT (→ PAGE 42) TO ENJOY PROGRESSIVE VIDEO
- S-VIDEO OUT TERMINAL
- Ω COAXIAL CABLE
- CONSERVING POWER
- COMPONENT VIDEO OUT TERMINAL
- DO NOT CONNECT THE UNIT THROUGH A VIDEO CASSETTE RECORDER
- STEP 2 THE REMOTE CONTROL
- BATTERIES
- DO NOT
- USE
- STEP 3 PLUG-IN AUTO TUNING
- IF THE UNIT COULDN'T SET THE CLOCK AUTOMATICALLY
- IF PLUG-IN AUTO TUNING FAILS
- TO RETURN TO THE PREVIOUS SCREEN
- ADDING AND DELETING CHANNELS
- STEP 4 VCR PLUS+ GUIDE CHANNEL SETTINGS
- PRESS [SETUP] TO SHOW THE MENUS
- PRESS [▲, ▼] TO SELECT "CHANNEL" AND PRESS [▶]
- PRESS [▲, ▼] TO SELECT "VCR PLUS+CH SETTING" AND PRESS [ENTER]
- PRESS [▲, ▼] TO SELECT THE GUIDE CHANNEL YOU WANT TO SET AND PRESS [▶]
- PRESS [▲, ▼] TO SELECT THE CHANNEL CORRESPONDING TO THE GUIDE CHANNEL AND PRESS [◀]
- PRESS [ENTER]
- WHEN YOU ARE FINISHED
- OTHER CHANNEL SETTINGS
- MANUAL CHANNEL CAPTION
- STEP 5 SET UP TO MATCH YOUR TELEVISION
- PRESS [▲, ▼] TO SELECT "TV SCREEN" AND PRESS [▶]
- PRESS [▲, ▼] TO SELECT "TV TYPE" AND PRESS [ENTER]
- PRESS [▲, ▼] TO SELECT THE ITEM AND PRESS [ENTER]
- REGARDING PROGRESSIVE TELEVISION PICTURE
- TO VIEW THE PICTURE AT THE RIGHT ASPECT
- TELEVISION OPERATION
- PRESS AND HOLD [⏻, POWER TV] AND ENTER THE TWO-DIGIT CODE WITH THE NUMBERED BUTTONS
- OPERATION
- DVD-RAM
- DVD-R
- DVD-VIDEO
- DISCS YOU CAN USE
- DISCS THAT CANNOT BE PLAYED
- PROTECTION
- RAM
- REMOTE CONTROL
- MAIN UNIT
- THE UNIT'S DISPLAY
- RAM DVD-R
- TO STOP RECORDING
- TO PAUSE RECORDING
- AUTO POWER-OFF
- FOR YOUR REFERENCE
- INSERTING DISCS
- RECORDING MODES AND APPROXIMATE RECORDING TIMES IN HOURS
- FR (FLEXIBLE RECORDING MODE)
- WATCHING THE TELEVISION WHILE RECORDING
- RECORDING FROM A VIDEO CASSETTE RECORDER
- WHILE STOPPED
- PRESS [REC MODE] TO SELECT THE RECORDING MODE (XP, SP, LP OR EP)
- START PLAY ON THE OTHER EQUIPMENT
- PRESS [●, REC] AT THE POINT YOU WANT TO START RECORDING
- TO SKIP UNWANTED PARTS
- RECORDING THE BEST QUALITY PICTURES IN THE REMAINING TIME—FLEXIBLE RECORDING
- WHILE STOPPED, PRESS [F REC]
- PRESS [◀, ▶] TO SELECT “HOUR” AND “MIN.” AND PRESS [▲, ▼] TO SET
- PRESS [▲, ▼, ◀, ▶] TO SELECT "START" AND PRESS [ENTER]
- RAM DVD-R DVD-V VCD CD MP
- TO STOP PLAY
- TO PAUSE PLAY
- WHEN A MENU SCREEN APPEARS ON THE TELEVISION
- VCD
- DVD-V
- OTHER BUTTONS USED TO OPERATE MENUS
- POSITION MEMORY
- USING THE DIRECT NAVIGATOR
- TO CLEAR THE PROGRAM LIST
- ABOUT THE PROGRAM LIST
- TO ERASE A PROGRAM THAT IS BEING PLAYED BACK
- SKIPPING
- SLOW-MOTION PLAY
- FRAME-BY-FRAME VIEWING
- STARTING PLAY FROM A SELECTED PROGRAM, TITLE, CHAPTER, OR TRACK
- SKIPPING A MINUTE FORWARD—CM SKIP
- SELECTING AN AMOUNT OF TIME TO SKIP—TIME SLIP
- DURING PLAY
- WITHIN 5 SECONDS
- FAST FORWARD AND REWIND—SEARCH
- QUICK VIEW
- RAM (ONLY WITH DOLBY DIGITAL)
- TO RETURN TO NORMAL SPEED
- MARKING POSITIONS DIRECTLY
- USING ON-SCREEN MENUS TO MARK POSITIONS
- PRESS [▲, ▼] TO SELECT “PLAY” AND PRESS [▶]
- PRESS [▲, ▼] TO SELECT "MARKER" AND PRESS [▶] TO HIGHLIGHT THE FIRST ASTERISK (*)
- WHEN MARKING POSITIONS 11 AND ABOVE (RAM, DVD-R)
- PRESS [TOP MENU]
- PRESS [▲, ▼] TO SELECT THE TRACK AND PRESS [ENTER]
- TO SHOW OTHER PAGES
- TO EXIT THE FILE LIST
- USING THE TREE SCREEN TO FIND A GROUP
- PRESS [▲, ▼, ◀, ▶] TO SELECT A GROUP AND PRESS [ENTER]
- TO RETURN TO THE FILE LIST
- NAMING FOLDERS AND FILES
- PLAYING FROM THE BEGINNING OF THE PROGRAM YOU ARE RECORDING—CHASING PLAY
- PRESS [▶] (PLAY)
- TO STOP PLAY AND RECORDING
- SIMULTANEOUS REC AND PLAY
- REVIEWING THE RECORDED IMAGES WHILE RECORDING—TIME SLIP
- CHANGING AUDIO
- RAM DVD-V VCD
- PRESS [AUDIO]
- WHILE RECEIVING MTS AUDIO (MULTI-CHANNEL TELEVISION SOUND STEREO)
- WHILE PLAYING DVD-RAM OR VIDEO CD
- WHILE PLAYING DVD-VIDEO
- USING THE FUNCTIONS WINDOW
- PRESS [FUNCTIONS]
- PRESS [▲, ▼, ◀, ▶] TO SELECT AN ITEM
- TO CLEAR THE FUNCTIONS WINDOW
- SPECIFY A TIME TO STOP RECORDING
- DURING RECORDING
- PRESS [●, REC] TO SELECT THE RECORDING TIME
- USING VCR PLUS+ CODES TO MAKE TIMER RECORDINGS
- PRESS
- PRESS THE NUMBERED BUTTONS TO ENTER THE VCR PLUS+ CODE
- PRESS [RETURN]
- PRESS [⏻, DVD POWER]
- MANUALLY PROGRAMMING TIMER RECORDINGS
- PRESS [PROG/CHECK]
- PRESS [▶] TO MOVE THROUGH THE ITEMS AND CHANGE THE ITEMS WITH [▲, ▼]
- CHANNEL (CHANNEL NUMBER AND CAPTION)
- DATE
- ON (START TIME)/OFF (FINISH TIME)
- MODE (RECORDING MODE → PAGE 15)
- ENTER TITLE
- PRESS [ENTER] WHEN YOU HAVE FINISHED PROGRAMMING THE TIMER
- PRESS [PROG/CHECK] OR [RETURN]
- TO RELEASE THE UNIT FROM RECORDING STANDBY
- TO STOP RECORDING WHEN RECORDING HAS ALREADY BEGUN
- CHECK PROGRAMS
- ICON EXPLANATIONS
- TO PUT THE UNIT ON TIMER RECORDING STANDBY
- MESSAGE DISPLAYED IN THE CHECK LINE
- CHANGE OR DELETE THE PROGRAM
- PRESS [▲, ▼] TO SELECT THE PROGRAM
- PRESS [CANCEL] OR [ADD/DLT] TO DELETE
- IF YOU PRESSED [ENTER] IN STEP
- AFTER THE TITLING SCREEN APPEARS
- PRESS [■]
- USING THE NUMBERED BUTTONS TO ENTER CHARACTERS
- TO ERASE A CHARACTER
- PRESS [▲, ▼] TO SELECT “-- --/--” AND PRESS [ENTER]
- PRESS [ENTER] AT THE START POINT
- PRESS [ENTER] AT THE END POINT
- PRESS [▲, ▼] TO SELECT "EXIT" AND PRESS [ENTER]
- PLAYING PLAY LISTS
- PRESS [▲, ▼] TO SELECT THE PLAY LIST AND PRESS [ENTER]
- TO STOP PLAY LIST PLAY
- PLAYING PLAY LIST SCENES
- PRESS [▲, ▼] TO SELECT THE PLAY LIST THAT CONTAINS THE SCENE YOU WANT TO PLAY AND PRESS [▶]
- PRESS [▲, ▼] TO SELECT "PLAY SCENES" AND PRESS [ENTER]
- PRESS [▲, ▼, ◀, ▶] TO SELECT THE SCENE AND PRESS [ENTER]
- TO SHOW SCENE 10 AND LATER
- TO STOP SCENE PLAY
- TO CLEAR THE SCENE LIST
- TO ERASE A PLAY LIST OR A PLAY LIST SCENE DURING PLAYBACK
- PRESS [ERASE]
- PRESS [◀] TO SELECT "ERASE" AND PRESS [ENTER]
- EDITING PLAY LISTS
- ADD (MAXIMUM OF 999 SCENES)
- MOVE
- RE-EDIT
- ERASE
- TO CONFIRM THE DIVISION POINT
- TO CHANGE THE DIVISION POINT
- TO STOP FORMATTING
- AFTER FINALIZING
- COMMON PROCEDURES
- PRESS [DISPLAY]
- TO CLEAR THE ON-SCREEN MENUS
- DISC MENU
- A SOUNDTRACK/SUBTITLE LANGUAGE
- B AUDIO ATTRIBUTES
- PLAY MENU
- AUDIO MENU
- VIDEO MENU
- CHANGING THE INFORMATION DISPLAYED
- PRESS [STATUS]
- DISPLAY EXAMPLES
- OTHER USES
- CONNECTING A CABLE TV BOX/SATELLITE RECEIVER
- CONNECTING AN AMPLIFIER OR SYSTEM COMPONENT
- DIGITAL CONNECTION
- TO ENJOY MULTI-CHANNEL SURROUND SOUND
- TO ENJOY STEREO OR DOLBY PRO LOGIC
- ANALOG CONNECTION
- RECORDING TO DIGITAL RECORDING EQUIPMENT OR CASSETTE TAPES
- DIGITAL RECORDING
- ANALOG RECORDING
- CONNECTING OTHER VIDEO EQUIPMENT
- OTHER ANTENNA CONNECTION TO THE UNIT
- OTHER ANTENNA CONNECTION FROM THE UNIT TO THE TELEVISION
- PRESS [SETUP]
- SUMMARY OF SETTINGS
- CLOCK SETTINGS
- AUTO CLOCK SETTING
- MANUAL CLOCK SETTING
- TIME ZONE ADJUST
- GLOSSARY
- BITSTREAM
- CPRM (CONTENT PROTECTION FOR RECORDABLE MEDIA)
- DECODER
- DOLBY DIGITAL
- DOLBY PRO LOGIC
- DTS (DIGITAL THEATER SYSTEMS)
- FILM AND VIDEO
- FRAME STILL AND FIELD STILL
- INTERLACE AND PROGRESSIVE OUTPUT
- I/P/B
- LINEAR PCM (PULSE CODE MODULATION)
- PLAYBACK CONTROL (PBC)
- PAN&SCAN/LETTERBOX
- DISC HANDLING
- HOW TO HOLD A DISC
- IF THERE IS DIRT OR CONDENSATION ON THE DISC
- DVD-RAM AND DVD-R
- DVD-VIDEO, VIDEO CD, CD
- HANDLING PRECAUTIONS
- TROUBLESHOOTING GUIDE
- PICTURE
- MAINTENANCE
- PRODUCT SERVICE
- PRODUCT INFORMATION
- SPECIFICATIONS
- VIDEO SYSTEM
- PANASONIC DVD PLAYER/RECORDER LIMITED WARRANTY
- LIMITED WARRANTY COVERAGE
- CARRY-IN OR MAIL-IN SERVICE
- LIMITED WARRANTY LIMITS AND EXCLUSIONS
- CUSTOMER SERVICES DIRECTORY
- ACCESSORY PURCHASES
- PANASONIC CANADA INC
- PANASONIC/TECHNICS PRODUCT—LIMITED WARRANTY
- PANASONIC DVD RECORDER ONE (1) YEAR, PARTS AND LABOUR
- LIMITATIONS AND EXCLUSIONS
- THIS EXPRESS, LIMITED WARRANTY IS IN LIEU OF ALL OTHER WARRANTIES, EXPRESS OR IMPLIED, EXCLUDING ANY IMPLIED WARRANTIES OF MERCHANTABILITY OR FITNESS FOR A PARTICULAR PURPOSE
- WARRANTY SERVICE
- CUSTOMER'S RECORD
- IF YOU SHIP THE PRODUCT TO A SERVICENTRE
- INDEX
Brand : PANASONIC
Model : DMR-E50EG9-S
Category : DVD player