
Flooris - Vacuum Cleaner Zelmer - Free user manual and instructions
Find the device manual for free Flooris Zelmer in PDF.


| Product Type | Canister Vacuum Cleaner |
| Brand | Zelmer |
| Model | Flooris |
| Dimensions (L x W x H) | 400 x 280 x 250 mm |
| Weight | 5.0 kg |
| Power Supply | 220-240 V, 50/60 Hz |
| Power Consumption | 1600 W |
| Dust Capacity | 2.0 L |
| Filtration System | HEPA 13 Filter |
| Noise Level | 75 dB(A) |
| Cord Length | 6.0 m |
| Operating Radius | 9.0 m |
| Suction Control | Electronic slide control |
| Main Functions | Dry vacuum cleaning, crevice tool, floor brush, upholstery nozzle |
| Maintenance | Washable HEPA filter, replaceable dust bag (type E) |
| Safety Features | Thermal overload protection, automatic shut-off |
| Spare Parts | Dust bags, HEPA filter set, brush roller |
| Color | Black and silver |
| Warranty | 2 years |
Frequently Asked Questions - Flooris Zelmer
User questions about Flooris Zelmer
0 question about this device. Answer the ones you know or ask your own.
Ask a new question about this device
Download the instructions for your Vacuum Cleaner in PDF format for free! Find your manual Flooris - Zelmer and take your electronic device back in hand. On this page are published all the documents necessary for the use of your device. Flooris by Zelmer.
USER MANUAL Flooris Zelmer
PROBLEMA CUM PROCEDATI
Congratulations on your choice of our appliance, and welcome among the users of Zelmer products.
In order to achieve best possible results we recommend using exclusively original Zelmer accessories. They have been specially designed for this product.
Please read this instruction manual carefully. Pay special attention to important safety instructions. Keep this User's Guide for future reference.
Important safety instructions

DANGER! / WARNING!
Health hazard
- Do not operate the appliance if the cord, the housing or the handle is visibly damaged. In such a case, return the appliance to a service center.
- If the supply cord is damaged, it must be replaced by the manufacturer, its service agent or similarly qualified persons in order to avoid a hazard.
- The appliance can only be repaired by qualified service personnel. Improper servicing may cause a serious hazard to the user. In case of defects please contact a qualified service center.
● Always unplug the appliance before cleaning, assembling or dismantling.
- Turn off the device and unplug it from an outlet before replacing the equipment or approaching moving parts during use.
- Do not use the vacuum cleaner clean people or animals, pay special attention to keep the nozzles away from eyes and ears.
- Do not use the vacuum cleaner clean liquids or other damp dirt.
This appliance can be used by children aged from 8 years and above and persons with reduced physical, sensory or mental
capabilities or lack of experience and knowledge if they have been given supervision or instruction concerning use of the appliance in a safe way and understand the hazards involved. Children shall not play with the appliance. Cleaning and user maintenance shall not be made by children without supervision.

CAUTION!
Not observance can result in damage to possessions
Connect the vacuum cleaner only to a 230 V mains supply equipped with a 16 A fuse.
Do not unplug by pulling on cord.
Do not run the vacuum cleaner or the brushes over the cord, it may cause damage to the cord insulation.
Do not vacuum without the dust bag and the filters or if they are damaged.
Do not pick up: matches, cigarette butts, hot ash. Avoid picking up sharp objects.
Check the suction hose, the tubes and the nozzles – remove the dirt from the inside.
Do not vacuum fine dust such as: flour, cement, gypsum, toners for printers and copy machines etc.
It is forbidden to cover up the air holes of the vacuum cleaner while it is working. Otherwise, the hot air has no way of exiting the vacuum cleaner, and this may lead to motor overheating causing a failure or a deformation of the plastic parts.

SUGGESTION
Information on the product and suggestions for its use
to
The vacuum cleaner is for household use only.
Operate the appliance only in indoor spaces and vacuum only dry surfaces. Before vacuuming dry the carpets that were wet cleaned.
Vacuum cleaner is a universal device with a switchable sucking brush nozzle, which is used for vacuuming hard floors and carpets.
Vacuum cleaners with the energy efficiency class A do not work with ZELMER Turbo Brush Type VB1000.
Product data sheet provided with the vacuum cleaner showing the technical parameters is an integral part of the instruction manual.
Before using the battery-powered electrobrush, see the instructions for use.
| Type\Workmanship and equipment option | Suction power regulator | Safety valve | Parksystem „Auto-start" | Bag loading indicator | No bag protection | Dust bag / amount | Outlet filter | Suction tube | Switchable combination brush | Small nozzle | Crevice nozzle | Small brush | Mini turbobrush | Parquet brush “BNB” | Suction nozzle for mattresses cleaning | Brush for collecting pet hair from carpets | Battery-powered electrobrush |
| 1 | 2 | 3 | 4 | 5 | 6 | 7 | 8 | 9 | 10 | 11 | 12 | 13 | 14 | 15 | 16 | 17 | 18 |
| ZVC545CQ | + | + | + | + | + | SAFBAG 1 piece | HEPA H13 | Telescopic | + | + | + | + | + | + | - | + | + |
| ZVC545CA | + | + | + | + | + | SAFBAG 1 piece | HEPA H13 | Telescopic | + | + | + | + | + | - | - | + | - |
| ZVC545AP | + | + | + | + | + | SAFBAG 1 piece | HEPA H13 | Telescopic | + | + | + | + | - | + | + | - | - |
Technical parameters
The type of the vacuum cleaner and the technical parameters are indicated on the rating label. Mains protection 16 A. Does not cause interferences with audio/video devices.
Does not require grounding

ZELMER vacuum cleaners meet the requirements of the applicable norms.
The appliance is in conformity with the requirements of the directives:
–Electrical equipment designed for use within specific voltage limits (LVD) – 2006/95/EC.
–Electromagnetic compatibility (EMC) – 2004/108/EC.
The device meets the requirements of Commission Regulation (EU) No. 666/2013 on implementing the Directive of the European Parliament and of the Council 2009/125/EC with regard to eco-design requirements for vacuum cleaners. The device complies with the requirements of the Commission Delegated Regulation (EU) No. 665/2013 supplementing Directive of the European Parliament and of the Council 2010/30/EU with regard to energy labelling of vacuum cleaners.
Noise level: max. 75 dB(A).
The appliance was marked by a CE sign on the rating label.
Static electricity
In the process of vacuuming of some surfaces in areas of low air humidity the device may become electrically charged. It is a natural phenomenon – it does not damage the device, and it is not considered to be a fault.
In order to minimize the phenomenon, we recommend you to:
discharge the device by touching metal items in the room with the pipe,
increase air humidity in the room,
use widely available antistatic agents.
Appliance elements

1 Cord rewind button
2 Combination brush fastening
3 Plug and cord
4 Filter cover release button
5 Outlet filter cover
6 Suction power regulation slider
7 Dust bag full indicator
8 ON/OFF button
9 Handle
10 Front cover fastening
11 Slider – mechanical suction power regulator
12 Suction hose
13 Telescopic suction tube
14 SAFBAG dust bag module. Vacuum cleaner is equipped with only one module (A or B)
A Antibacterial bag SAFBAG with nanosilver (only in model ZVC545AP) (installed in the vacuum cleaner)
B Anti-aromatic SAFBAG bag with activated charcoal (only in model ZVC545CA, ZVC545CQ) (installed in the vacuum cleaner)
15 Outlet filter. The vacuum cleaner is fitted with only one outlet filter (A or B)
A Anti-bacterial filter Aller-Sweep HEPA H13 (only in model ZVC545AP) (installed in the vacuum cleaner)
B Anti-aromatic filter HEPA H13 with activated charcoal (only in model ZVC545CA, ZVC545CQ) (installed in the vacuum cleaner)
16 Inlet filter casing (installed in the vacuum cleaner)
17 Inlet filter (installed in the vacuum cleaner)
18 Parquet brush "BNB" (Brush Natural Bristle) (only in model ZVC545AP, ZVC545CQ)
Is used to clean and polish hard, scratch sensitive surfaces such as wooden floors, floor panels, parquet, marble, tiles, etc.
Delicate and soft natural bristles ensure maximum vacuum effectiveness and protects against scratching the cleaned surface.
19 Small nozzle
20 Small brush
21 Crevice nozzle
22 Switchable combination brush
23 Mini turbobrush (only in model ZVC545CA, ZVC545CQ)
24 Suction nozzle for mattresses cleaning (only in model ZVC545AP)
25 Brush for collecting pet hair from carpets (only in model ZVC545CA, ZVC545CQ)
26 Accessory holder
27 Holder screws
28 Battery-powered electrobrush (only in model ZVC545CQ)
Preparing the vacuum cleaner for operation
B
① Insert the curved hose end in the opening of the vacuum cleaner and gently press. A characteristic click indicates that the hose has been properly installed.
② Connect the other end of the hose (handle) with the telescopic suction tube. In order to do so press the locking device “A” and slide the tube into the hose handle so that the locking device “A” is blocked in opening “B”.
③ Adjust the length of the telescopic suction tube by sliding the slider according to the arrow and pull out/ pull the tube together.
④ Assemble the appropriate nozzle or brush to the other end of the suction tube.
⑤ Use combination carpet & floor brush for vacuuming both hard surfaces and carpets. To clean hard surfaces – wooden floors, plastic floors, ceramic tiles etc. pull out the brush by pressing the switch on the combination brush according to the figure 1. Refact the brush when vacuuming carpets (set the switch in “”).
⑥ The accessories may be attached to the accessory holder in the suction hose handle. This way they will be available for use at any time.
⑦ Pull the plug and cord (3) out of the vacuum cleaner. Do it smoothly (do not tug) to avoid cord tangling and blocking in the vacuum body.
While pulling out the cord pay attention to the yellow stripe which signals the end of the cord. Further attempts (pulling on cord) may result in damaging the cord.
⑧ Plug in the appliance.
Before operation make sure that the SAFBAG bag is installed in the vacuum cleaner chamber and that inlet filter and the HEPA outlet filter is installed in the appliance.
⑨ Switch on the vacuum cleaner by pressing the "on/off" button (8).
⑩ The vacuum cleaner is equipped with electronic power regulator allowing a stepless regulation of vacuum cleaner power. The power regulation is performed with a slider.
Moving the slider right or left will increase or reduce the suction power.
The following slider positions are recommended:

– for delicate fabrics such as curtains, etc.

– for upholstered furniture

– for carpets and floor coverings

- for hard surfaces such as floor, tiles, parquet etc.
The power may also be adjusted individually depending on the type of surface, vacuum effectiveness and suction power of the switchable combination brush.
⑪ The vacuum cleaner features the parking system and auto start. Use this feature to temporarily turn off the vacuum cleaner without having to use the power button by hooking your combination carpet & floor brush on the parking system. For a quick break during vacuum cleaning, simply hook your combination carpet & floor brush on the parking system (2) in a horizontal position. The vacuum cleaner will turn off automatically. The dust bag full indicator (7) will come on.
⑫ The vacuum cleaner is also equipped with a mechanical suction power regulator (11) located on the suction hose handle. It can be used to adjust the suction power slightly for a short time without having to use the slider (6).
Filter disassembly
Before changing the filters make sure that the vacuum cleaner is switched off and unplugged from the mains supply.
INLET FILTER

① Release the catch of front cover (10) and open it.
② Remove the SAFBAG dust bag module from the vacuum cleaner chamber.
③ Put out the cover of inlet filter together with installed inlet filter from the guide rails located on back wall of vacuum cleaner chamber.
④ Take out the inlet filter from the inlet filter cover.
⑤ Put the new filter into inlet filter cover (16). Pay attention whether the edges of filter cling closely to the cover of filter.
⑥ The cover of inlet filter (16) together with installed filter press home into guide rails to the previous location.
The damaged inlet filter should be replaced with a new, genuine manufactured product only.
⑦ Insert the SAFBAG dust bag module to the vacuum cleaner chamber.
⑧ Close the cover by pressing it until you hear a characteristic click – pay attention not to trap the dust bag.
HEPA 13 OUTLET FILTER

The vacuum cleaners are equipped with an H13 outlet filter HEPA (High Efficiency Particulate Air).
① In order to replace the HEPA filter, press the blocking mechanism of the outlet filter cover and slide up the cover of the vacuum cleaner.
② Remove the HEPA filter cassette and replace it with a new one. The HEPA filter assures circa 1 year of effective usage.
③ Slide the outlet filter cover back on in such a way that the fastenings on the side of the cover fit into the sliders in the vacuum cleaner housing. The filter cover fastening should close.
SAFBAG dust bag disassembly/assembly

① The vacuum cleaner is equipped with safety valve located in chamber of dust container (bag). It opens automatically in case of total stopping of suction hose or total stopping of equipment elements connected thereto, as well as in case of overfill of dust bag. After opening the valve one can hear characteristic "whirr" sound inside the vacuum cleaner.
② When the "Dust bag full" indicator light (7) comes on when the nozzle or brush is above the floor, it indicates that the bag needs to be replaced. The "Dust bag full" indicator light may come on when the suction hose or connected accessories become clogged.
③ Switch off the vacuum cleaner by pressing the on/off button (8) and unplug the appliance.
④ Press the two side buttons on the end of the hose and remove the hose end from the inlet opening of the vacuum cleaner.
⑤ Release the front cover fastening (10) and open the cover.
⑥ Remove the SAFBAG dust bag module from the vacuum cleaner chamber (14).
⑦ While holding the module, pull the frontal part of the bag plate upwards and remove the bag. Close the SAFBAG bag cap to close the full bag. Dispose of the bag.
⑧ Slide the plate of the new bag in the direction shown in the picture. The end of the plate should lock in the socket. The bag cap should be on top. The direction is shown by an arrow placed on the bag.
Put the SAFBAG module together with the assembled bag (14) into the vacuum cleaner container so that the cogs of the SAFBAG module fit into the holes in the container wall. Press and close the cover until you hear the characteristic clicking sound – be careful not to catch the bag.

not vacuum
installed.
disables
The lac
to slam
SAFBAG bag module
of SAFBAG bag
the upper cover
disables
cleaner.
ZELMER vacuum cleaners are equipped with SAFBAG dust bags in the amount indicated in the table. It is recommended to replace the dust bag if:
a) the "Dust bag full" indicator light will come on,
b) the safety valve activates,
c) the vacuum cleaner operates poorly,
d) the dust bag is full.
The number of SAFBAG bags set that can be purchased, is placed on a sticker located in the vacuum chamber.
Accessory holder

The accessory holder allows hanging accessories (suction tube, small nozzle, small brush, crevice nozzle, combination brush, turbobrush or parquet brush) for example in the closet.
① Join the holder elements.
② Screw the holder (for example to the wall of the closet) using the four provided screws.
③ Fit the accessories onto the holder as shown in the picture.
End of operation cleaning and maintenance

① Switch off the vacuum cleaner by pressing the "on/off" button (8).
② Unplug the appliance.
③ Wind the cord by pressing the cord rewind button (1). While doing this hold the cord to make sure it is not tangled and the plug does not hit the vacuum cleaner housing.
④ Disconnect the telescopic tube from the nozzle or brush.
⑤ Disconnect the telescopic tube from the hose. In order to remove the tube from the hose handle press the "A" locking device and pull the tube in the direction of the arrow.
⑥ Press the two side buttons on the end of the hose and remove the hose end from the inlet opening of the vacuum cleaner.
⑦ The vacuum cleaner may be stored vertically or horizontally. In order to do so, insert the fastening hook of the combination brush to the combination brush fastener. The hose may be attached to the vacuum cleaner, however you have to make sure that it is not excessively bent during storing.
⑧ If necessary wipe the housing and the dust bag container with a damp cloth (it may be soaked with dishwashing liquid) and dry it or wipe until dry.

Do not use abrasive detergents or solvents.
module of vac
Examples of problems while operating the vacuum cleaner
| PROBLEM ACTION | |
| A characteristic “fluttering” of the vacuum cleaner is heard which indicates the opening of the safety valve. | The dust bag may be full – replace the dust bag.Replace the dust bag even if it is not full yet. In unfavorable conditions, fine dust might have clogged the pores on the surface of the dust bag.The suction tube, hose or nozzle is blocked – clear all blockages. |
| The dust bag is damaged. | Remove the dust bag and the filters. |
| The suction power of the vacuum cleaner is weak. | Replace the dust bag and the filters, check the suction tube, the hose and the nozzle - remove the cause of the clogging. |
| The bag loading indicator is operated. | Remove the end of suction hose from the slot of front cover, and clean the hose as well as the equipment elements connected thereto. |
| The electrical installation fuse went out. | Check if other appliances are not plugged to the same electrical circuit as the vacuum cleaner. If the fuse goes out repeatedly, return the vacuum cleaner to a service point. |
| The vacuum cleaner does not operate; the housing or the cord is damaged. | Return the vacuum cleaner to a service point. |
Ecology – Environmental protection
Each user can contribute to protect the environment. It is neither difficult nor expensive. In order to do so:
Return cardboard packages to recycling points.
Throw polyethylene (PE) bags into appropriate containers.
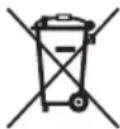
Return a worn out appliance to an appropriate collecting point as the components of the appliance may pose a threat to the environment.
Do not dispose of with household waste!
The manufacturer does not accept any liability for any damages resulting from unintended use or improper handling.
The manufacturer reserves his right to modify the product any time in order to adjust it to the regulations, norms, directives or due to construction, trade, aesthetic or other reasons without notifying in advance.

- PROBLEMA CUM PROCEDATI
- Important safety instructions
- DANGER! / WARNING!
- Health hazard
- CAUTION!
- Not observance can result in damage to possessions
- SUGGESTION
- Information on the product and suggestions for its use
- to
- Technical parameters
- Static electricity
- Appliance elements
- Preparing the vacuum cleaner for operation
- B
- Filter disassembly
- INLET FILTER
- The damaged inlet filter should be replaced with a new, genuine manufactured product only.
- HEPA 13 OUTLET FILTER
- SAFBAG dust bag disassembly/assembly
- Accessory holder
- End of operation cleaning and maintenance
- Examples of problems while operating the vacuum cleaner
- Ecology – Environmental protection
Brand : Zelmer
Model : Flooris
Category : Vacuum Cleaner