L23CW13E - Microwave Logik - Free user manual and instructions
Find the device manual for free L23CW13E Logik in PDF.
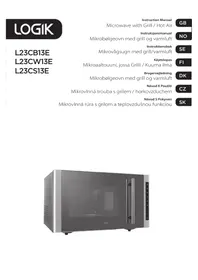


| Product Type | Microwave with Grill and Convection |
| Brand | Logik |
| Model | L23CW13E |
| Dimensions (W x D x H) | 485 mm x 395.6 mm x 292.5 mm |
| Weight | Approximately 13 kg |
| Power Supply | 230 V ~ 50 Hz |
| Microwave Output Power | 800 W |
| Microwave Input Power | 1300 W |
| Grill Input Power | 1200 W |
| Convection Input Power | 1200 W |
| Operating Frequency | 2450 MHz |
| Functions | Microwave, Grill, Convection, Combination, Auto Cook, Defrost by Weight/Time, Quick Start, Kitchen Timer, Child Lock |
| Control Type | Touch buttons with LED display |
| Display | LED digital display for clock, cooking time, and settings |
| Timer | Up to 95 minutes with variable increments |
| Child Lock | Yes, press and hold for 3 seconds |
| Defrost | By weight (dEF1) or by time (dEF2) |
| Auto Cook Programs | 10 preset menus: Pizza, Potato, Meat, Fish, Vegetable, Beverage, Pasta, Popcorn, Cake, Chicken |
| Included Accessories | Glass turntable plate, turntable support, grill rack |
| Cleaning Instructions | Wipe with mild detergent and water; avoid abrasive cleaners; keep wave guide cover clean |
| Safety Features | Door interlocks, earthing required, automatic shut-off when door opens, child lock |
| Material | Metal cabinet with enamel-coated interior, glass door |
| Color | White |
| Compliance | EC directives 2004/108/EC and 2006/95/EC |
Frequently Asked Questions - L23CW13E Logik
User questions about L23CW13E Logik
0 question about this device. Answer the ones you know or ask your own.
Ask a new question about this device
Download the instructions for your Microwave in PDF format for free! Find your manual L23CW13E - Logik and take your electronic device back in hand. On this page are published all the documents necessary for the use of your device. L23CW13E by Logik.
USER MANUAL L23CW13E Logik
Microwave with Grill / Hot Air
Instruction Manual
GB
NO
SE
FI
DK
CZ
SK
Safety Warnings....7
Unpacking 49
Getting Ready 50
Introducing Microwave Cooking....51
Cooking with a Microwave....51
Using Aluminium Foil in Your Microwave....52
Materials That Can Be Used in the Microwave ....53
Microwave Heating Categories....54
Steam 55
Condensation....55
Product Overview....56
The Main Unit....56
The Control Panel....56
Checking Your Microwave....57
Clock Setting 58
Kitchen Timer 59
Setting the Child Lock 60
Microwave Cooking....61
Grilling Cooking....62
Combination Cooking 63
Convection Cooking (with Preheating)....64
Convection Cooking (without Preheating)....65
Auto Cooking 66
Auto Menu....66
Auto Menu Table 67
Defrosting 68
Defrost by Weight....68
Defrost by Time....68
Quick Start Cooking 69
Querying the Cooking Function....70
To Find Out the Current Cooking Setting....70
Cleaning Your Microwave....71
Frequently Asked Questions 72
Specifications....73
Combination Cooking....113
IMPORTANT SAFETY INSTRUCTIONS READ CAREFULLY AND KEEP FOR FUTURE REFERENCE
General Safety
- Switch off and unplug before fitting or removing parts/attachments, after use, and before cleaning.
- Keep your fingers away from moving parts and fitted attachments. Never use a damaged appliance. Never operate the appliance when it is empty.
- Keep the mains cord out of reach of children.
- Keep the unit, mains cord, and plug away from water.
- Do not let the cord hang over the edge of the table or counter. Never exceed the maximum capacities.
- When using an attachment, read the accompanying safety instructions. Take care when lifting this appliance as it is heavy.
- You should always have your appliance checked by a qualified technician if it has been dropped or damaged to ensure it is safe to use.
- This appliance can be used by children aged from 8 years and above and persons with reduced physical, sensory or mental capabilities or lack of experience and knowledge if they have been given supervision or instruction concerning use of the appliance in a safe way and understand the hazards involved. Children shall not play with the appliance. Cleaning and user maintenance shall not be made by children unless they are older than 8 and supervised.
- Keep the appliance and its cord out of reach of children less than 8 years. Only use the appliance for its intended domestic use.
- This appliance is designed for indoor, household use only, and similar applications such as:
- staff kitchen areas in shops, offices and other working environments;
- by clients in hotels, motels, bed and breakfasts, farmhouses, and other residential environment types.
Maintenance Of Your Microwave
Warning: It is hazardous for anyone other than a qualified technician to carry out any service or repair operation which involves the removal of a cover that gives protection against exposure to microwave energy.
Warning: If the door or door seals are damaged, the microwave must not be operated until it has been repaired by a qualified technician.
- If smoke is observed, switch off or unplug the microwave and keep the door closed in order to stifle any flames.
- If the mains cord is damaged, it must be replaced by a service agent or a qualified technician.
- If you have a pacemaker, please contact your doctor before using a microwave.
Microwave Use
• This microwave is not intended for commercial use. - It should never be used for drying clothes or for other non-food purposes, including any type of storage, which may lead to risk of injury, ignition or fire. • This microwave can only be used indoors in a dry, well ventilated area. • Do not place the microwave in a cabinet. • The back of the microwave must be placed against a wall. • Install or locate this oven only in accordance with the installation instructions provided. - The appliance is not intended to be operated by means of an external timer or separate remote-control system. - The microwave should not be left unattended when in use. - The temperature of accessible surfaces may be high when the microwave is operating keep children away. • To prevent high moisture content gathering inside the microwave cavity, open the door immediately after the cooking function has stopped to allow steam to escape. • Only use utensils that are suitable for microwave use. - Care should be taken when using paper, plastic, wooden or other combustible materials in the microwave as they can catch fire.
- Oil and fat for deep frying should not be heated in the microwave.
- Only use cling film designed for microwave use and take extra care when removing the film to avoid steam burns. Do not allow the cling film to touch the food.
- Only heat popcorn that has been designed for microwave use.
- Do not operate the microwave empty as this could damage the product.
- Do not attempt to operate this oven with the door open since this can result in harmful exposure to microwave energy. It is important not to break or tamper with the safety interlocks.
- Do not obstruct the unit's front or door, or allow soiling or cleaner residue to accumulate on sealing surfaces.
Cooking Use
- As the power of different microwaves can vary considerably, care must be taken when first using this microwave as it may cook faster than expected.
- Do not leave the microwave unattended during use. • Take care when cooking food with a high sugar or fat content, such as Christmas pudding or fruitcake. The sugar or fat can overheat and in some cases catch fire. • Do not overcook food.
- Remove wire twist-ties and metal handles from paper or plastic containers/bags before placing them in the oven.
Warning: Only allow children to use the microwave without supervision when adequate instructions have been given so that the child is able to use the microwave in a safe way and understands the hazards of improper use; DO NOT assume that because a child has mastered one cooking skill he/she can cook everything without close supervision. The microwave MUST NOT be treated nor used like a toy.
Fire!
In the event of fire:
- Keep the microwave door closed.
- Turn off the power. • Unplug the microwave from the mains power.
First Aid
Treat scalding by:
- Quickly placing the scald under cold running water for at least 10 minutes.
- Cover with a clean dry dressing. Do not use creams, oils or lotions.
Cleaning Your Microwave
- The microwave should be cleaned regularly and food deposits removed. Failure to maintain the microwave in a clean condition can affect the life of the microwave and possibly result in a hazardous situation. (See cleaning your microwave.)
- Do not use a steam cleaner to clean the unit.
Do Not Use These In Your Microwave
• Metal objects are not to be used in the microwave. These include:
- Metal cooking utensils.
- Metal plates or trays
- Wine twist ties
- Crockery with metal trims
- Meat thermometer
- Never use equipment made of metal, except aluminium foil in your microwave. The microwave energy cannot pass through the metal so it bounces off and sparks against the inside of the microwave.
- Stop the microwave straight away if any equipment is causing sparks.
- Remember that some crockery has a metal trim around the edge. Even this trim can cause sparks.
Containers
Warning : Pressure will build up in sealed containers and can cause them to explode. Therefore, do not use the following in your microwave:
- Sealed containers - Capped bottles
- Vacuum containers - Sealed jars
- Hard-boiled eggs - Eggs in their shells
• Always pierce the skin of fruit and vegetables, such as potatoes. - Never use scratched, cracked or damaged glass in a microwave. Damaged glass can explode. - When heating food in plastic or paper containers, keep an eye on the microwave due to the possibility of ignition.
Delayed Boiling
Liquids heated in a microwave can boil up when removing them from the microwave.
Take the following precautions:
• Always stir liquids, before and after cooking. - Allow them to stand. • Use containers that are wider at the top than at the bottom.
Preparing Food For Babies
Extra care must be taken when preparing food or drink for babies and small children.
• Always test the food or liquid temperature before feeding it to the baby. - When using a baby bottle, ensure the teat is removed before heating. - When warming milk, ensure the bottle is shaken.
Caution!
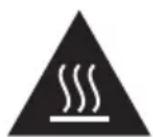
Hot Surface
During cooking the outer surface will become hot. Do not touch the outer casing of the microwave. Care should be taken not to store any items on top of your microwave.
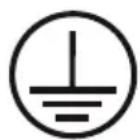
Earthing Instructions
Warning: THIS APPLIANCE MUST BE EARTHED.
- This appliance is equipped with a mains cord having an earthed plug.
- The plug must be plugged into an appropriate mains socket that is installed and earthed in accordance with all local standards and requirements.
Warning!
- Improper connection of the appliance-earthing conductor can result in a risk of an electric shock.
- Check with a qualified electrician or service representative if you are in doubt whether the appliance is properly earthed.
- Never modify the plug provided with the appliance.
- If the plug does not fit properly in the mains socket, have a qualified electrician install a proper mains socket.
- The appliance is not intended to be operated by means of an external timer or separate remote-control system.
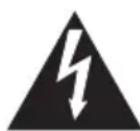
CAUTION
RISK OF ELECTRIC SHOCK DO NOT OPEN
The lightning flash with arrowhead symbol, within an equilateral triangle, is intended to alert the user to the presence of uninsulated “dangerous voltage” within the unit’s enclosure that may be of sufficient magnitude to constitute a risk of electric shock.
The exclamation point within an equilateral triangle is intended to alert the user to the presence of important operating and maintenance (servicing) instructions in the manual accompanying the unit.
IMPORTANT SAFETY INSTRUCTIONS
READ CAREFULLY AND KEEP FOR FUTURE REFERENCE. General Safety
Maintenance Of Your Microwave
If smoke is observed, switch off or unplug the microwave and keep the door closed in order to stifle any flames.
Remove all packaging from the unit. Retain the packaging. If you dispose of it please do so according to local regulations.
The following items are included:
The Main Unit, Glass Turntable Plate x 1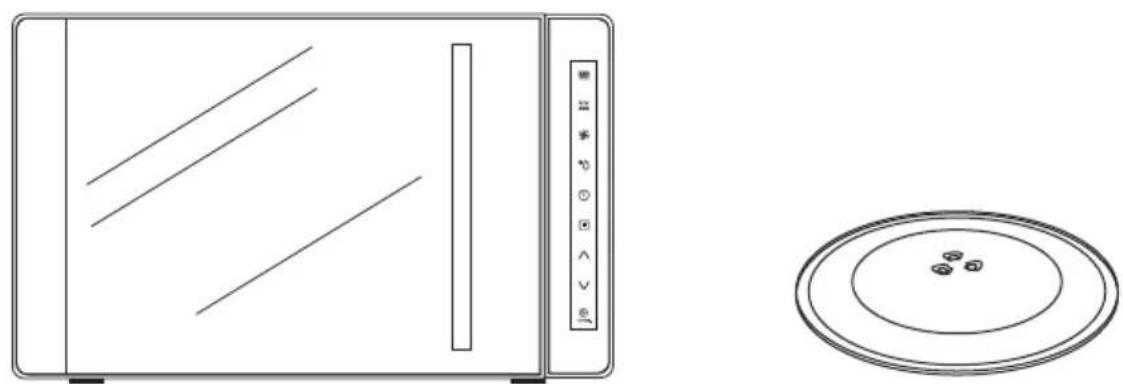
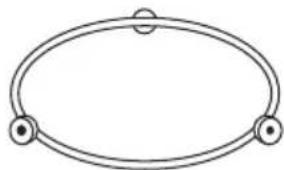
Turntable Support x 1
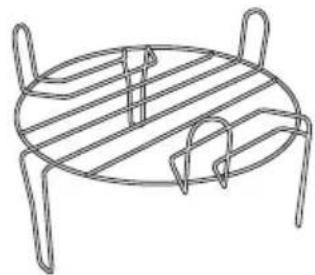
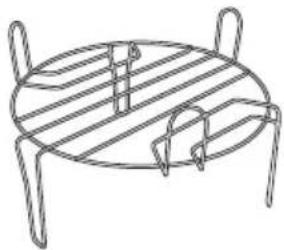
Grill Rack x 1
* All images in this instruction manual are for indication only; please refer to your individual unit for details.
Getting Ready
This microwave is designed for home use. It should not be used for commercial catering.
- After unpacking your microwave, check that it has not been damaged whilst in the box. Make sure there are no dents, and the door closes properly. A damaged microwave could allow microwave energy to escape. Make sure that you have taken out all the packaging from inside the microwave. Please dispose of the plastic wrappings / bags safely and keep out of the reach of babies and young children.
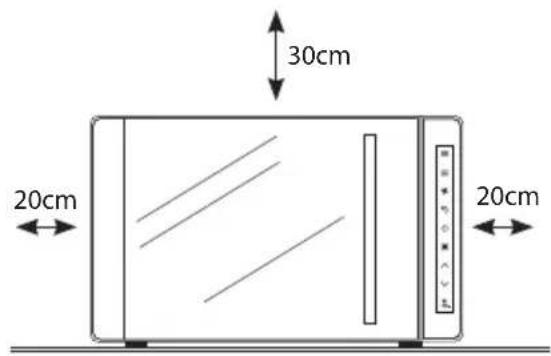
- Choose a flat work surface for your microwave away from heat sources such as radiators or fires and away from cold areas. The surface should be at least 85cm above the floor. Place the back of the microwave against a wall and allow a 20cm space on both sides of the unit and 30cm above so that warm air can escape from the vents during cooking. This microwave is not designed to be built in.
- Plug your microwave into a standard household electrical socket (230V~, 13 amp rated). Avoid using a socket that also has an adaptor and other equipment plugged in. Do not use a multi-adaptor.
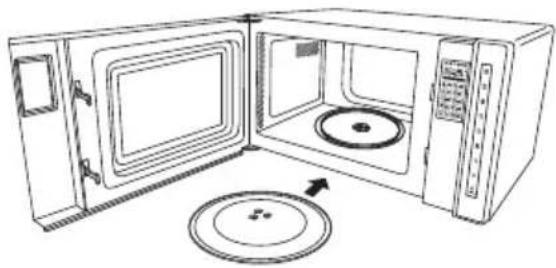
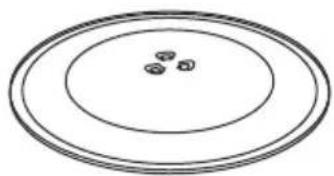
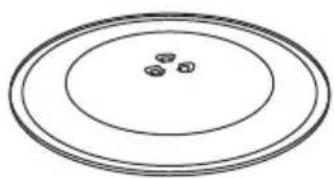
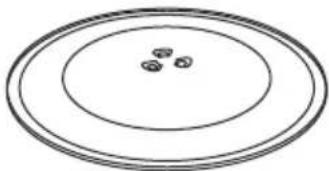
- Put the turntable support inside the microwave and place the glass turntable plate on top of the support. The turntable support is shaped to sit securely on the spindle. You must always use the turntable plate and support whenever you use the microwave.
- To protect your work surface, we recommend that you fix some non-slip cushion buttons (not included) to the underside of the microwave.
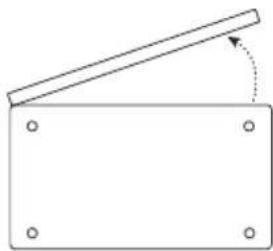

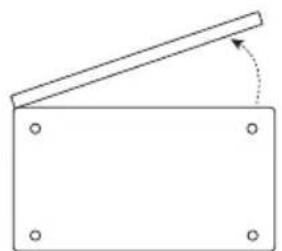
- Remove the turntable plate and turntable support before turning the microwave upside down.
- Do not remove the unit's feet.
Underside View
Always remember the basic safeguards you would follow when using any cooking equipment or handling hot food.
This page gives some of the basic guidelines for microwave cooking. If you are unfamiliar with using a microwave, there is more information at the back of this instruction manual.
Cooking with a Microwave

Cooking with a microwave is much faster than conventional cooking and, whilst you should make sure that food is fully cooked, you should be careful not to overcook it. Food can catch fire if excessive cooking times are used.
- Microwave energy can heat unevenly so stirring to distribute heat is very important. Always stir from the outside, inwards.
- If you are cooking a number of individual foods at the same time, such as baked potatoes or small cakes, arrange them evenly on the turntable plate so that they cook evenly. Never stack food in your microwave.
- Turn larger foods such as meat roasts and poultry during cooking so that the top and bottom cook evenly. It is also recommended to turn pieces of meat or poultry, especially if they have not been deboned.

If you are unsure how long the food should cook for, begin cooking at the lowest recommended time, then add more time if necessary. The moisture content of food can vary. Ensure food is thoroughly cooked all the way to the centre before serving.
- Meat and poultry which is cooked for 15 minutes or more will brown lightly in its own fat. Anything cooked for a shorter time can be brushed with a browning sauce to give an appetising colour.
- Strips of aluminium foil can be used to cover the thinner pieces of food to stop them overcooking before the thicker parts of the food have had a chance to cook. Use the aluminium foil sparingly and wrap around the food or container carefully to stop it touching the inside of the microwave which could cause sparks.
- Microwaves cook food using microwave energy that is similar to naturally occurring radio waves. Normally, these "waves" would fade as they disappear into the atmosphere but in a microwave they are concentrated on the food causing it to heat up.
- Microwave energy cannot pass through metal – so it can not escape from inside your microwave – but it can pass through materials like glass, porcelain, plastic, and paper. These are the things used to make microwave-safe cooking equipment.
- Microwave-safe cooking equipment will still get hot as the food it contains heats up.
- The microwave energy focuses on the moisture in the food causing lots of tiny vibrations. The vibrations get so great that the moisture – and the food – heat up.
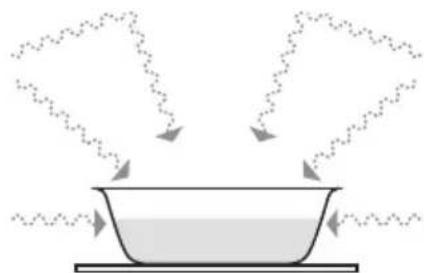
Most heat-resistant, non-metallic cooking utensils are safe to use in your microwave. If made of plastic or glass, utensils will be marked as "microwave safe" or similar.

If you are not sure and/or there is no microwave-safe marking on the utensil, do NOT use it in the microwave.
For the types of utensils you can use in the microwave, please see the "Materials That Can Be Used" section.

- Never use equipment made of metal, except aluminium foil in your microwave oven.
- The microwave energy can not pass through the metal so it bounces off and sparks against the inside of the oven.
- Stop the microwave straight away if any equipment does cause sparks.
- Remember that some crockery has a metal trim around the edge. Even this trim can cause sparks.
- Never use scratched, cracked or damaged glass in a microwave. Damaged glass can explode.
Using Aluminium Foil in Your Microwave
It is safe to use aluminium foil in your microwave as long as you follow these safety guidelines.
As with all metals, microwave energy cannot pass through aluminium foil, but provided you keep the aluminium foil away from the side of the microwave it will not cause sparks and there will not be any damage to your microwave.
Using aluminium foil is a good way of shielding parts of food that you do not want to cook as quickly as others – perhaps where the food is narrower and would otherwise overcook.
Place the aluminium foil over the area you want to shield, taking care that the aluminium foil will not touch the sides of the microwave when the turntable plate rotates. Only use one piece of aluminium foil at a time so that you do not get sparks between the separate pieces.
Follow these guidelines when using aluminium foil in your microwave:
- Remove aluminium foil lids from containers before using in the microwave. Some lids are made of card with an aluminium foil covering – these should be removed too. Use a microwave safe transparent lid if possible. • Stir food during cooking if the container has a lid or film cover. • Always use the glass turntable plate.
- Use shallow containers with a large surface area. Do not use containers that are more than 1.25in (3.5cm) deep. • Use gloves when handling hot aluminium foil containers.
- Do not completely cover food with aluminium foil. The microwave energy cannot pass through the aluminium foil so the food will not cook.
- Do not let aluminium foil touch the inside of the microwave.
- Do not use more than one piece of aluminium foil in the microwave at the same time.
| Utensils Remarks | |
| Aluminum foil | Shielding only. Small smooth pieces can be used to cover thin parts of meat or poultry to prevent overcooking. Arcing can occur if foil is too close to oven walls. The foil should be at least 1 inch (2.5cm) away from oven walls. |
| Browning dish | Follow manufacturer's instructions. The bottom of browning dish must be at least 3/16 inch (5mm) above the turntable. Incorrect usage may cause the turntable to break. |
| Dinnerware | Microwave-safe only. Follow manufacturer's instructions. Do not use cracked or chipped dishes. |
| Glassware | Heat-resistant oven glassware only. Make sure there is no metallic trim. Do not use cracked or chipped dishes. |
| Oven cooking bags | Follow manufacturer's instructions. Do not close with metal tie. Make slits to allow steam to escape. |
| Paper plates and cups | Use for short-term cooking/warming only. Do not leave oven unattended while cooking. |
| Paper towels | Use to cover food for reheating and absorbing fat. Use with supervision for a short-term cooking only. |
| Greaseproof paper Use | as a cover to prevent splattering or a wrap for steaming. |
| Plastic containers | Microwave-safe only. Follow the manufacturer's instructions. Should be labelled "Microwave Safe". Some plastic containers soften, as the food inside gets hot. "Boiling bags" and tightly closed plastic bags should be slit, pierced or vented as directed by the instructions on their packaging. |
| Plastic wrap | Microwave-safe only. Use to cover food during cooking to retain moisture. Do not allow plastic wrap to touch food. |
Microwave Heating Categories
Your microwave has been tested and labelled to meet the UK government's voluntary agreement on the reheating of pre-cooked food.
The heating characteristics and output power levels of microwaves are usually calculated using a relatively large portion of food (a 1000 gram load, IEC 60705) but many packs of pre-cooked food are sold in smaller packs, often about 350 grams.
The UK government, in partnership with food companies and microwave manufacturers, has set up a system of heating categories to help you choose the reheating time for pre-cooked food.
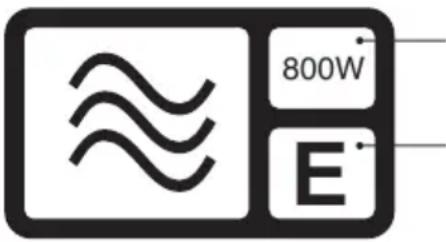
800W is the output power of the microwave. (IEC60705)
E is the heating category for your microwave. Check the cooking times for category E on the food's packaging to see how long it should be cooked for.
The category (a letter from A to E), is designed to help you reheat small quantities of food such as microwave ready meals.
The label given above and also on the oven door gives the heating category and output power of the oven.
Microwave ready meals weighing up to 500g (1lb 2oz) should have cooking instructions for heating categories A to E. Follow the instructions for the letter that corresponds to the heating category of the oven.
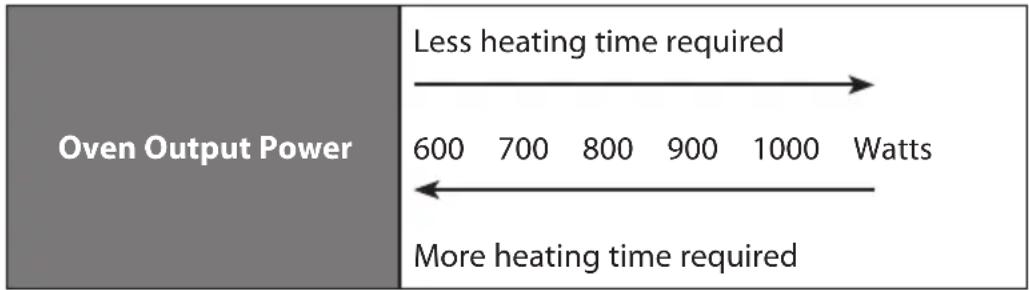
The higher the output power and heating category of the oven the less heating time is required. This is shown in the diagrams below:
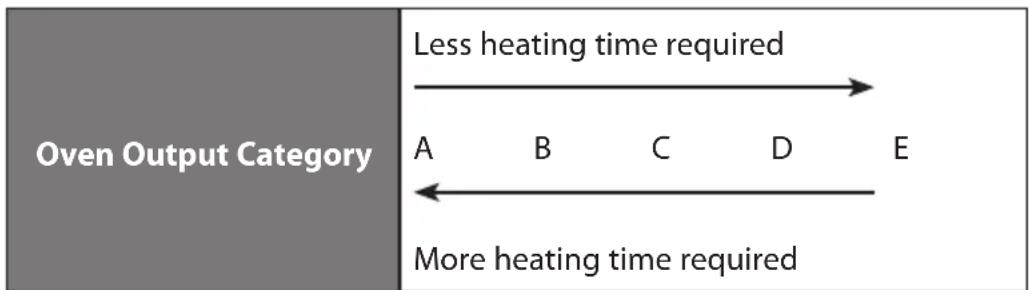

Start cooking at the lowest recommended time, and add more time if necessary. The moisture content of food can vary, ensure food is cooked thoroughly all the way to the centre before serving.
Steam
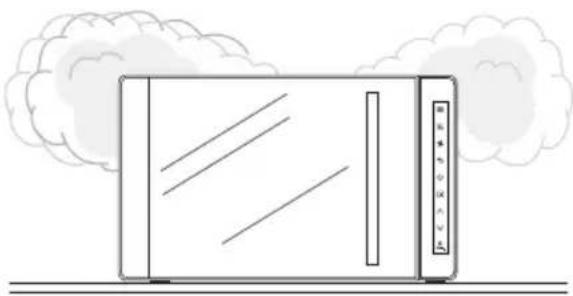
When you microwave food, steam is created as water in the food heats up and evaporates. The steam formed during microwave cooking is entirely safe. It has to escape from the microwave to prevent pressure from building up inside the microwave. It does this through the vents on the back of the microwave and from around the door.
Condensation
As the steam cools, you may find that condensation gathers in small pools inside your microwave and on the work surface beneath the door and vents. Always dry the microwave after cooking foods with a high moisture content.
Your microwave is designed to let steam escape from the vents and around the door without microwave energy escaping. There is no danger of microwave energy escaping with the steam.
The Main Unit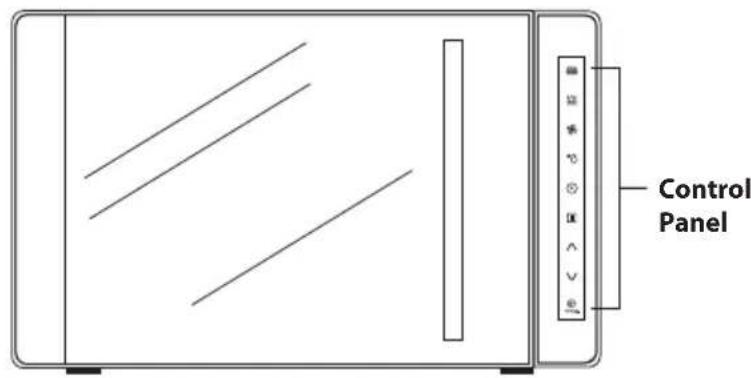
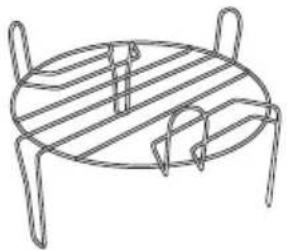
Grill Rack
For use when grilling, convection, combination or auto-cooking.
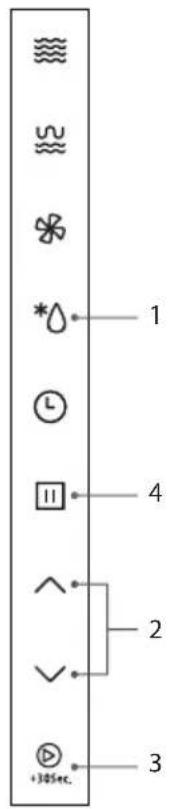
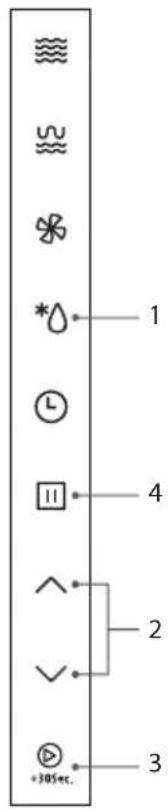
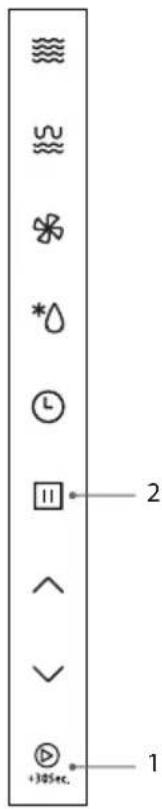
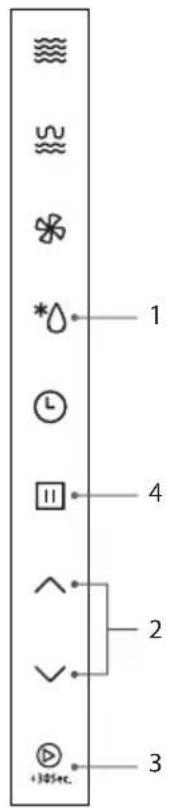
The Control Panel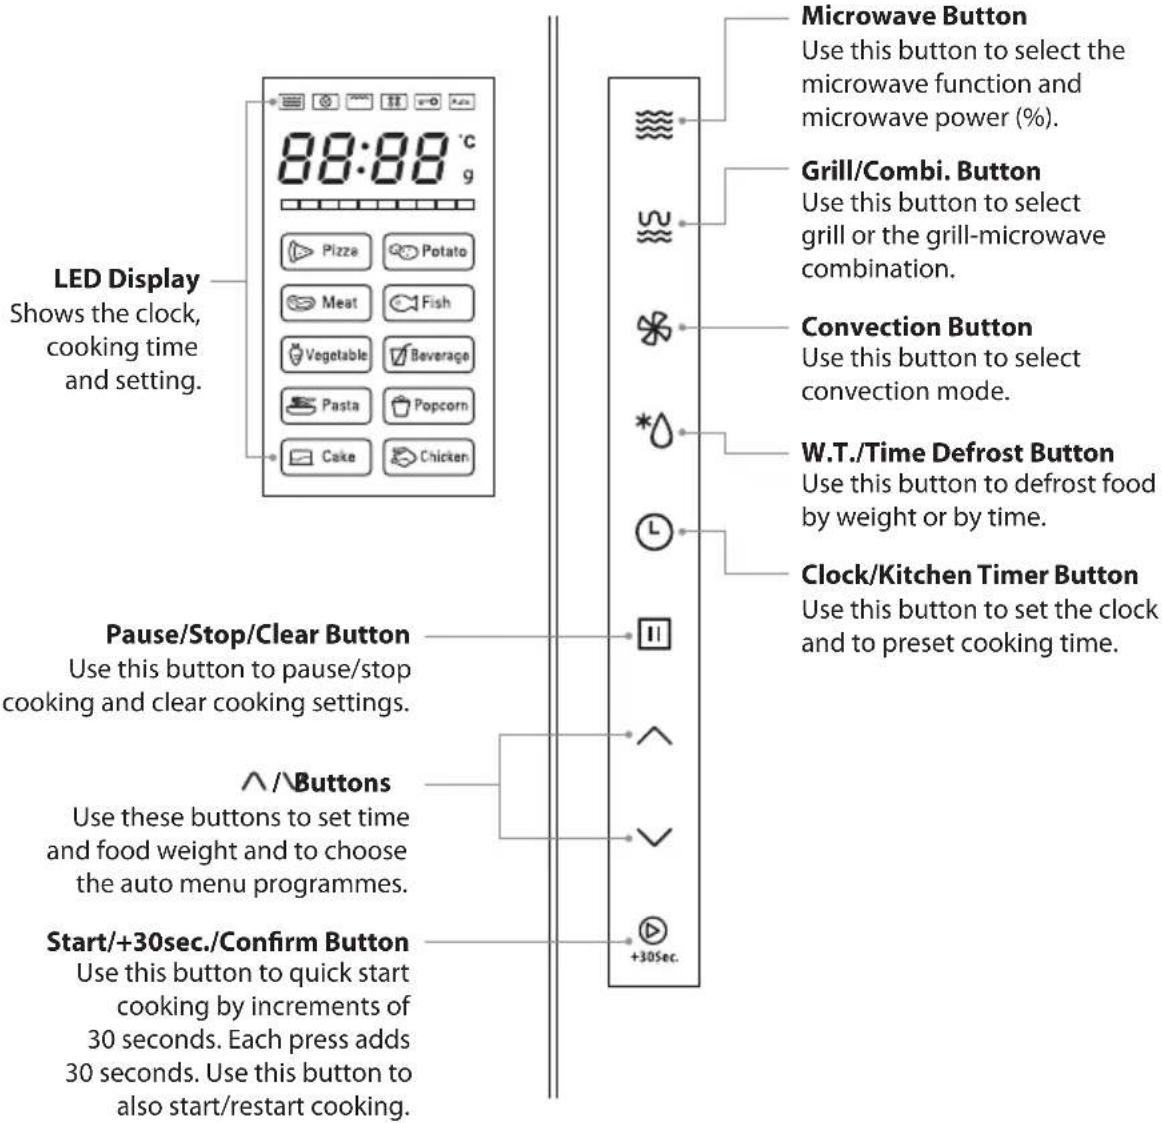
Check your microwave after unpacking.

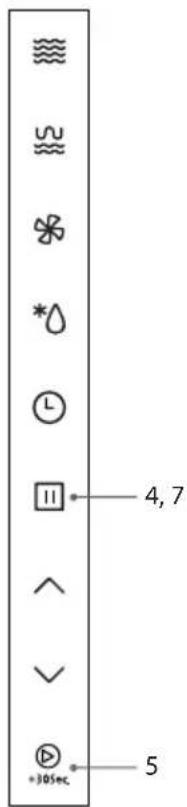
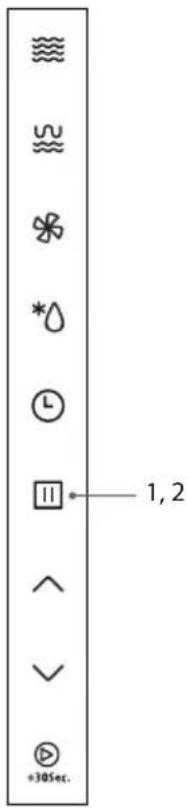
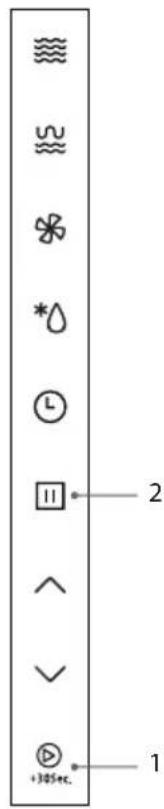
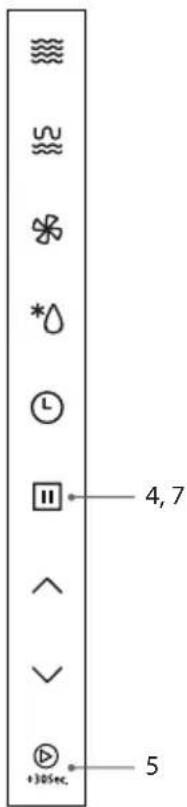
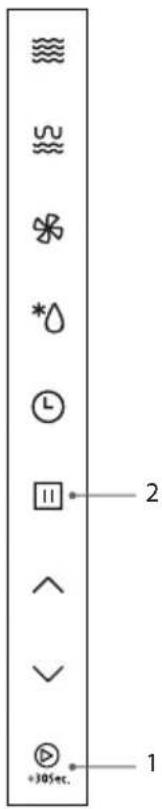
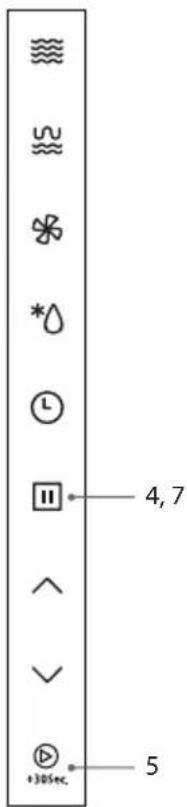
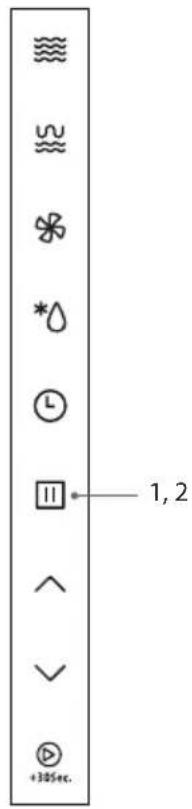
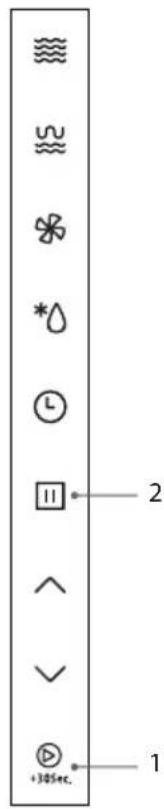
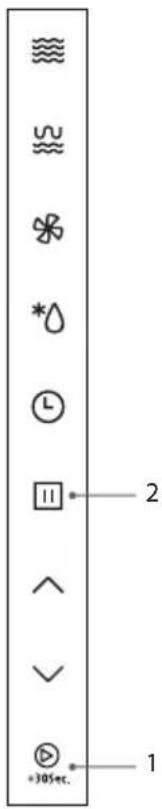
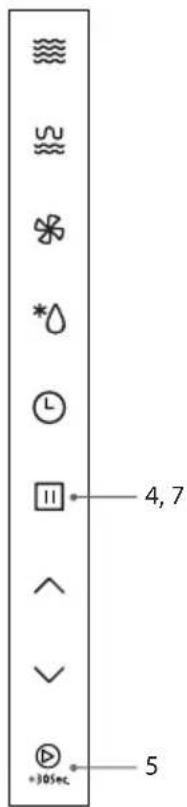
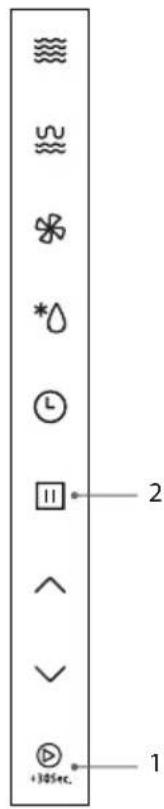
For your safety, the microwave stops if the door is opened during cooking. Close the door and press the 📋 button to continue the cooking cycle.
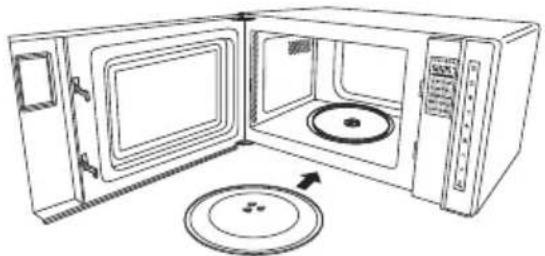
- Pull the handle to open the door.
- Place a cup of water on the glass turntable plate. Make sure the cup is microwave-safe (it should not have any decorative metal trim).
- Close the door.
- Press the ☐ button to clear any settings that have already been set.
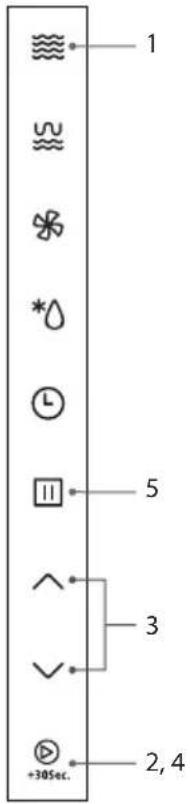
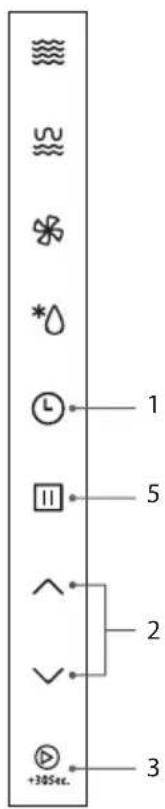
- Press the +30sec button to start a simple 30-second microwave cooking cycle and that allows you to check the operation of the microwave.
- When the cooking cycle has finished, the water should be hot (be careful when you take the cup out of the microwave).
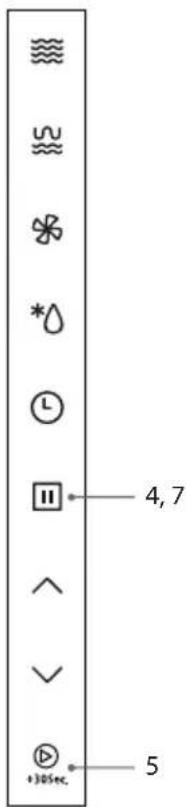
- Press the ☐ button to pause the cooking and press the ☐ button again to stop/clear any settings.
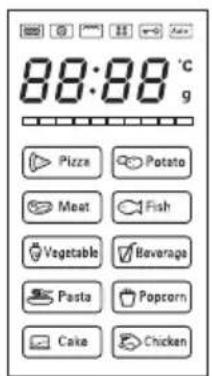
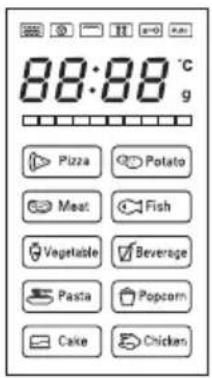
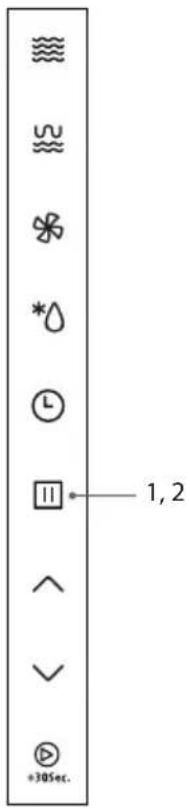
When the microwave is connected to the mains power, the LED display will show "0:00" and the microwave will sound once. Please ensure that you have set the clock prior to use.
Please follow the steps below to set the clock.
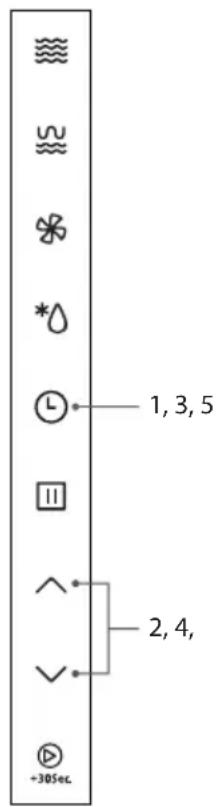
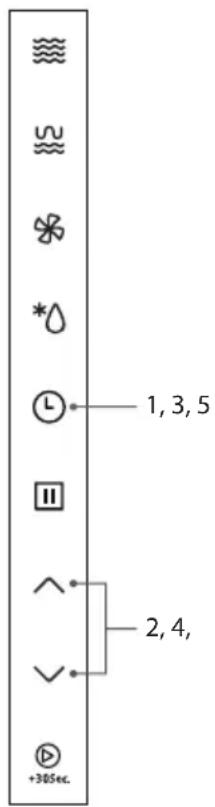
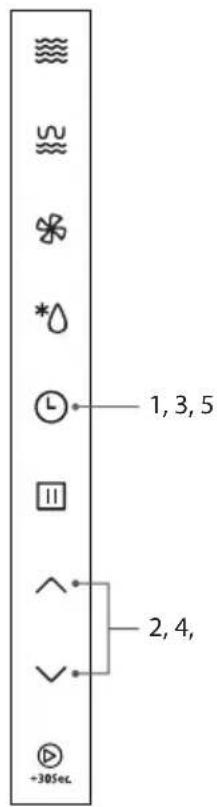
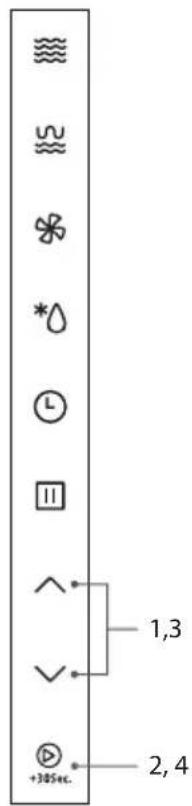
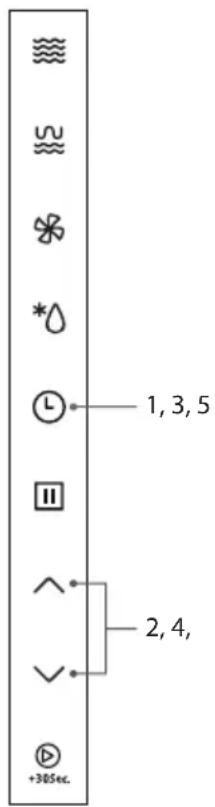
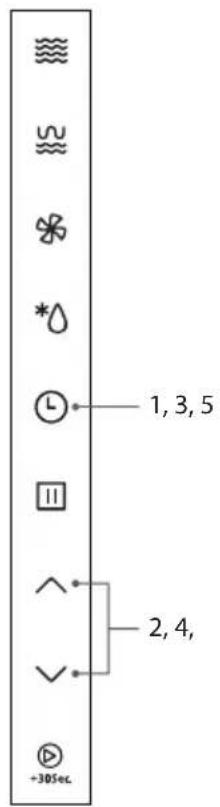
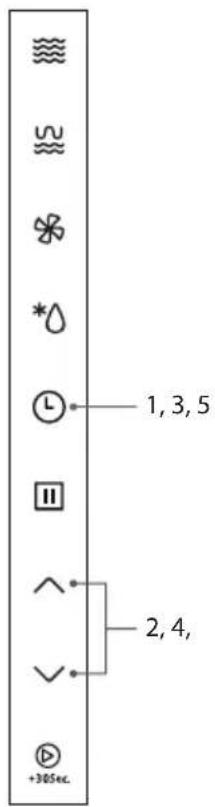
- Press the Ⓛ button, the hour digits will flash. The unit will also beep.
- Press the ∧/buttons to adjust the hour digits. The input time has to be within 0-23.
- Press the Ⓛ button, the minute digits will flash. The unit will also beep.
- Press the ∧/buttons to adjust the minute digits. The input time should be within 0-59.
- Press the Ⓛ button to finish clock setting. The unit will also beep. “:” will start flashing and the time will illuminate.
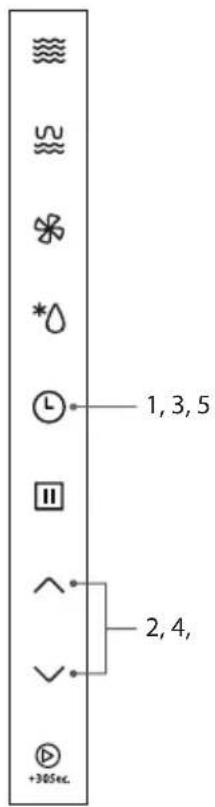

- This is a 24-hour clock. When the microwave is connected to the mains power for the first time or when the power is resumed after a power interruption, the LED display will show "0:00". To re-set the clock, simply follow the above 5 steps.
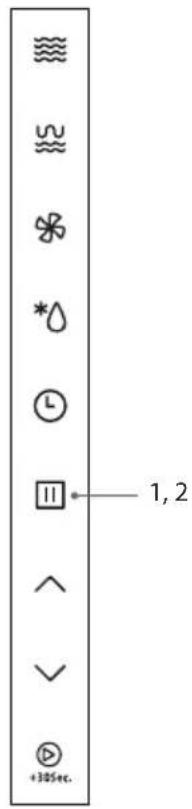
- In the process of clock setting, if the ☐ button is pressed or if there is no operation within 5 minutes, the microwave will go back to the previous status automatically. • If the clock needs to be reset, please repeat steps 1 to 5.
- To find out the current time while the microwave is operating, press the ⏻ button. It will last for 3 seconds and then return to its original display.
While the microwave is operating or not in use, this feature allows you to use the microwave as a timer.
To set the kitchen timer, follow the steps below.
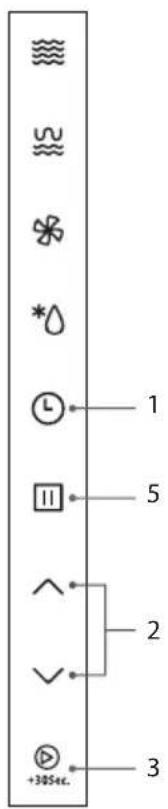
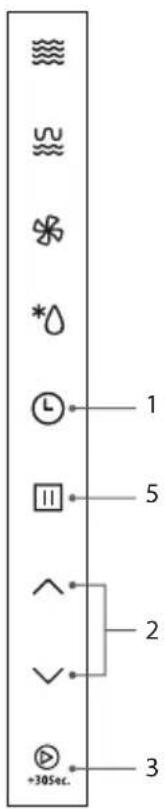
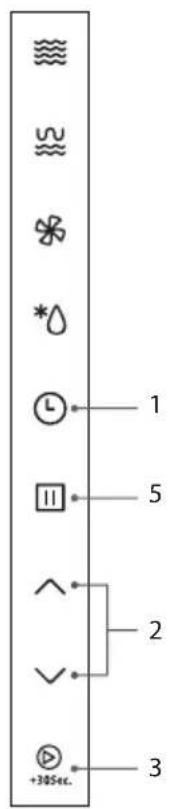
- Press the Ⓛ button twice. The LED display will show "00:00". The LED display will not flash.
- Press the ∧/buttons to select the timer time. The input time has to be within 5sec-95min.

The time setting is between 0:05 - 95:00. Varying time increments are added or subtracted for each press of the ↑buttons as follows:
0-1 min: 5 seconds
1-5 min: 10 seconds
5-10 min: 30 seconds
10-30 min: 1 minute
30-95 min: 5 minutes
- Press the button to confirm the setting.
- Once the elapsed time is reached, the microwave will sound 5 times and return to its original state.
- Press the ☐ button to cancel the timer.

When the kitchen timer is running, programmes cannot be set. Even if the microwave door is open, the kitchen timer will continue running.
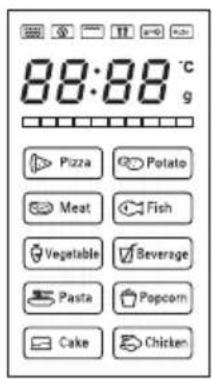
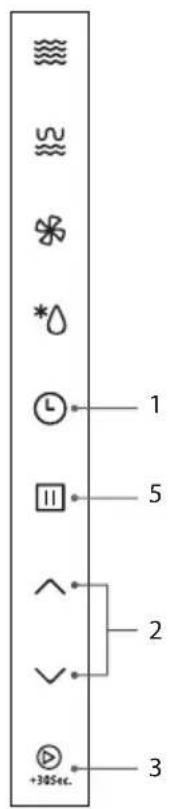
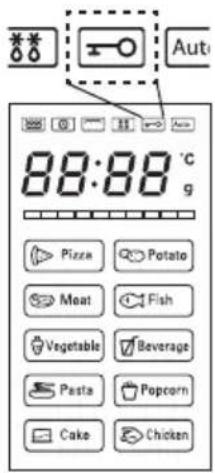
This feature prevents the electronic operation of the microwave by locking the operation of the control panel until you have cancelled it.
Please follow the steps below to set the child lock.
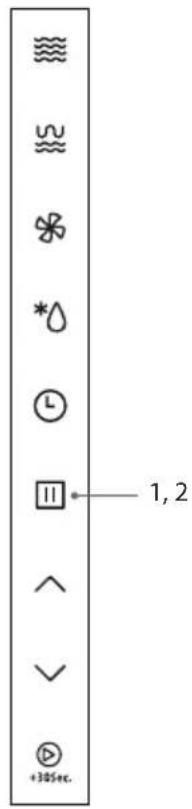
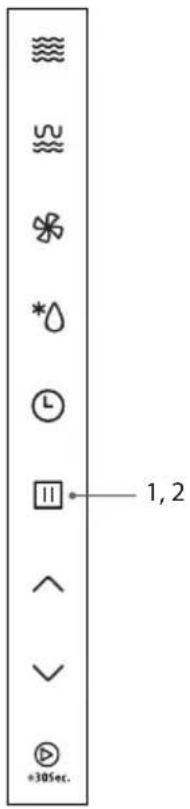
- While the microwave is not in use, press the button for 3 seconds; the unit will beep. The child lock indicator will illuminate on the LED display to indicate the microwave has set the child lock. The LED will also display the current time or "0:00".
- To release the child lock, press the ☐ button again for 3 seconds; the unit will beep. The child lock indicator will disappear from the LED display to indicate that the microwave has released the child lock.
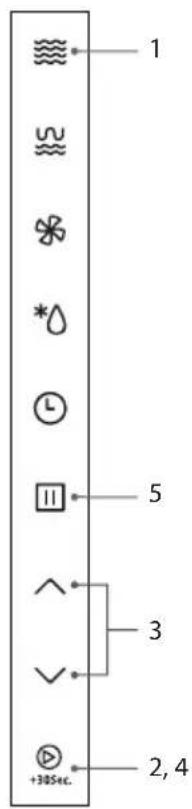
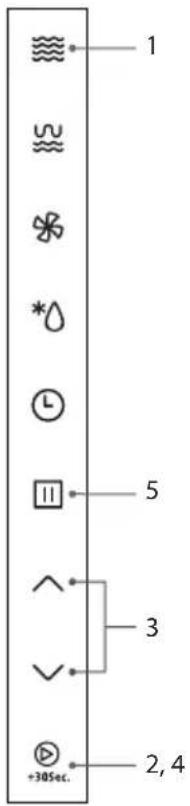
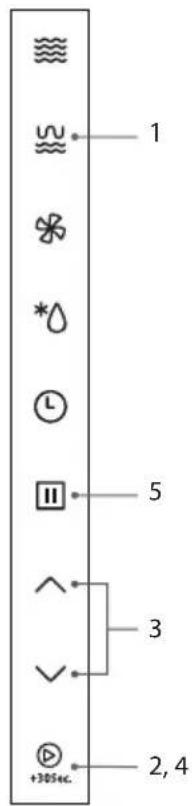
For simple Microwave Cooking, follow the steps below.
For instance, if you want to use 80% microwave power to cook for 20 minutes.
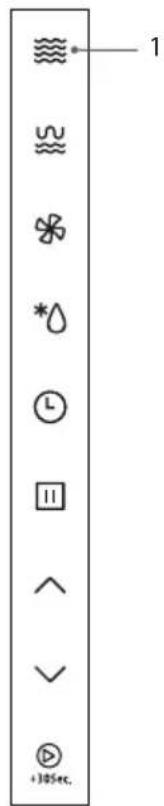
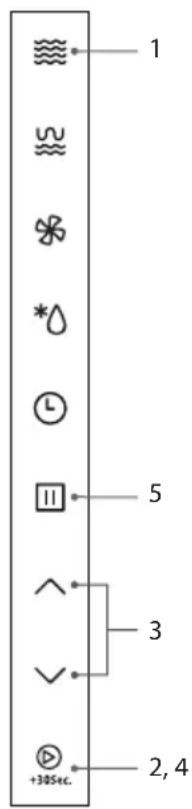
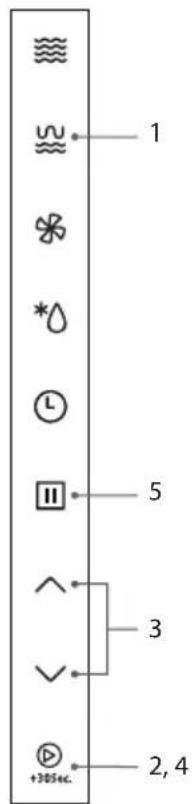
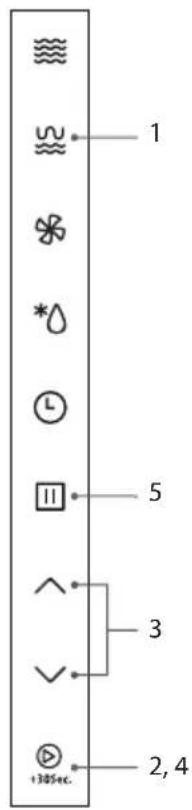
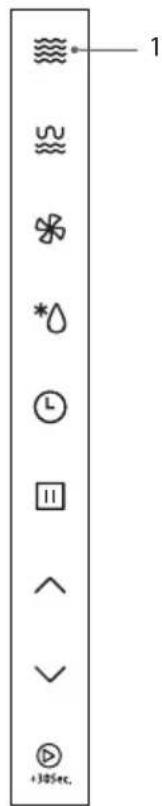
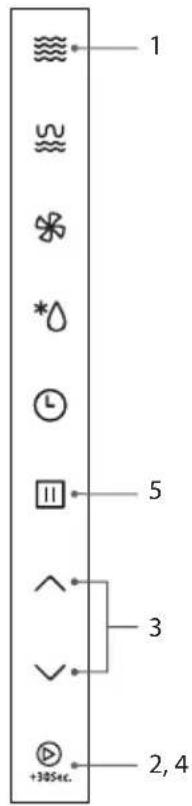
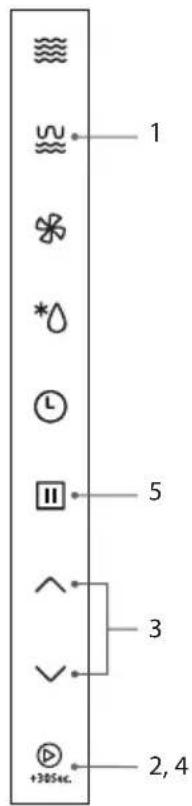
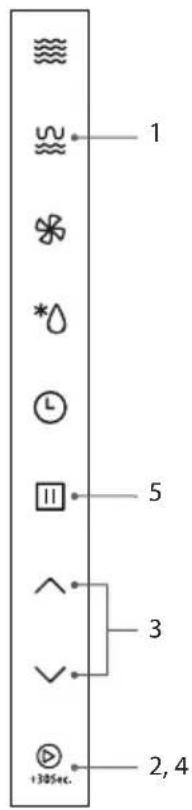
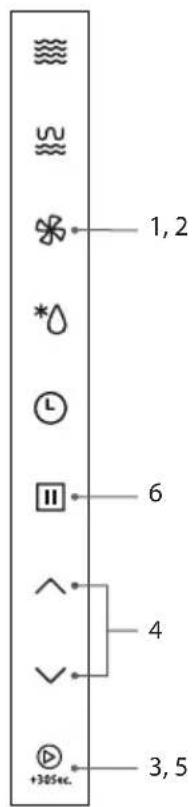
- Press the 📋 button once and the LED display will show "P100". Press the microwave button repeatedly until the LED display shows "P80".
- Press the +30sec button to confirm the microwave power level.
- Press ∧/ to adjust cooking time. The input time must be within 5 sec - 95 min.
- Press the +30sec button to confirm and start cooking.
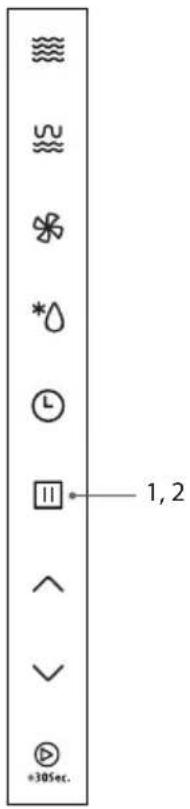
- Press the ☐ button once to pause the cooking. Press the ☐ button again to stop/clear the setting.

- Stop the microwave before removing food from it.
- Operating the microwave without food in it can result in overheating and damage the magnetron.
- Cooking with a microwave is much faster than conventional cooking. Whilst you should ensure that food is thoroughly cooked, you should be careful not to overcook it.
| Microwave Button Control | ||
| Press Order | LED Display | Microwave Power |
| 1 P100 | 100% | |
| 2 P80 | 80% | |
| 3 P50 | 50% | |
| 4 P30 | 30% | |
| 5 P10 | 10% | |
| Time Adjustment using /or √ | |
| Time Range | Increment |
| 0 - 1 min 5 secs | |
| 1 - 5 mins 10 secs | |
| 5 - 10 mins 30 secs | |
| 10 - 30 mins 1 min | |
| 30 - 95 mins 5 mins | |
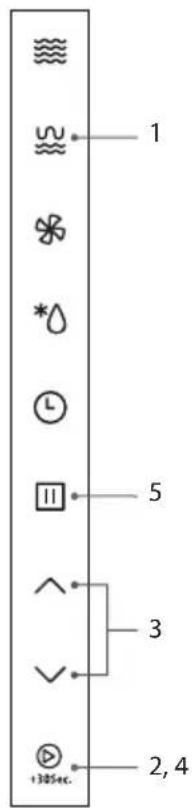
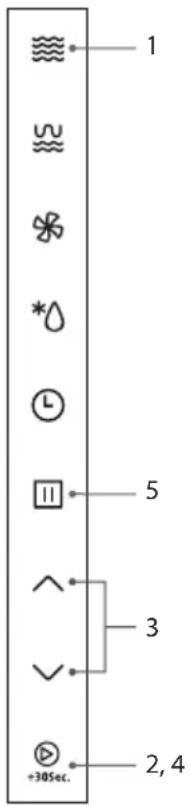
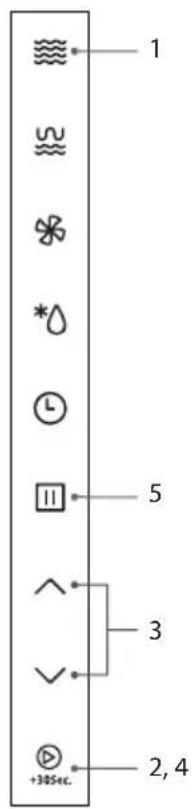
For Grilling, follow the steps below.

We recommend that you use the supplied grill rack. Place your food on the grill rack then place on top of the glass turntable plate.
- Press the ≈ button once and the LED display will show "G-1".
- Press the +30sec button to confirm the grill cooking setting.
- Press ∧/∨ to adjust cooking time. The input time must be within 5 sec - 95 min.
- Press the +30sec button to start cooking.
- Press the ☐ button once to pause the cooking. Press the ☐ button again to stop/ cancel the setting.

In order to obtain better grilling performance for your food, please turn your food over. When half the grilling time has passed, the oven will sound twice to remind you to turn the food over. After you turn over the food, you need to press the +30sec button to continue. If there are no button presses or interruptions, the unit will continue cooking without pausing.
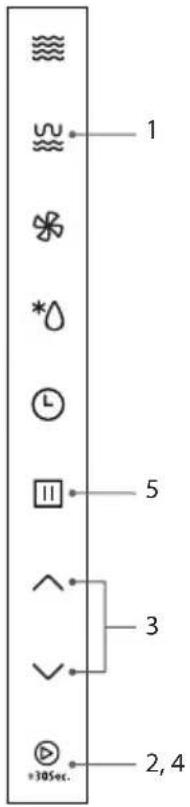
For Combination Cooking, follow the steps below.
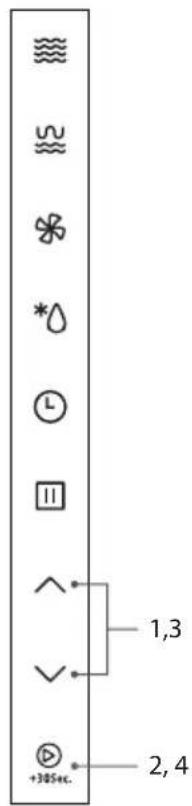
- Press the 📋 button twice and the LED display will show "C-1". Press the 📋 button three times and the LED display will show "C-2" and so forth.

Alternatively, after you press the 📊 button once, you can press the ✗ √ buttons until the LED display shows "C-1", "C-2", "C-3" or "C-4".
- Press the button to confirm the cooking setting.
- Press the ∧/∨ buttons to adjust the cooking time. The input time must be within 5 sec - 95 min.
- Press the +30sec button to confirm and start cooking.
- Press the ☐ button once to pause the cooking. Press the ☐ button again to stop/ clear the setting.
| Grill/Combi. button control | ||||
| press order | LED display | microwave grill convection | ||
| 1 G-1 | √ | |||
| 2 C-1 | √ | √ | ||
| 3 C-2 | √ | √ | ||
| 4 C-3 | √ | √ | ||
| 5 C-4 | √ √ | √ | ||
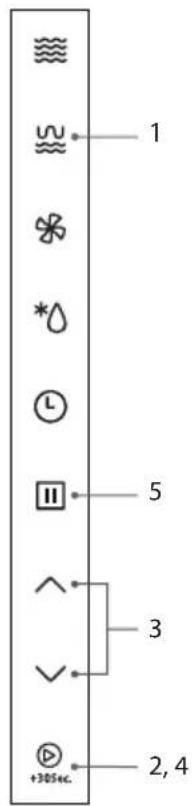
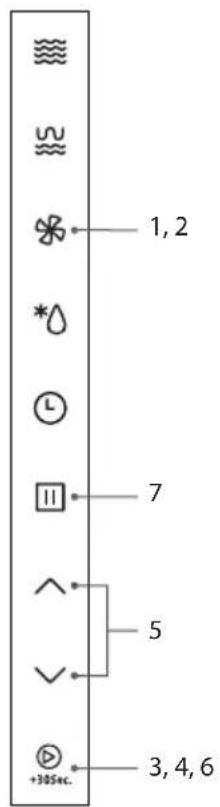
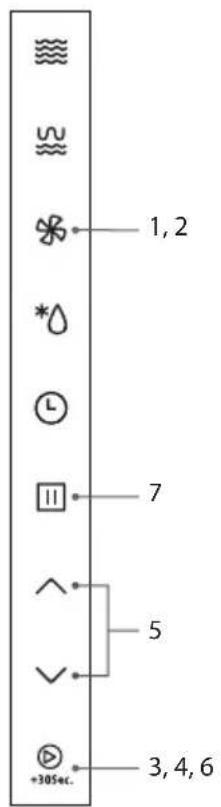
Convection Cooking (with Preheating)
Convection cooking allows you to cook the food like a traditional oven.

We recommend that you use the supplied grill rack. Place your food on the grill rack then place on top of the glass turntable plate.
It is recommended to preheat the microwave to the appropriate temperature before placing the food in the microwave. Microwave power will not be used.
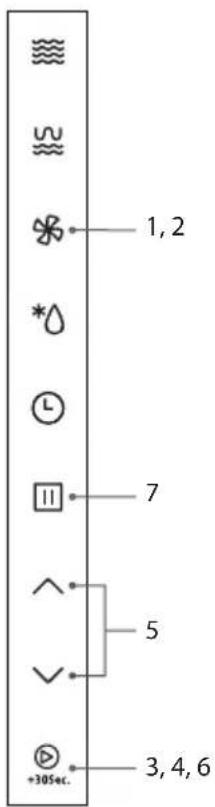
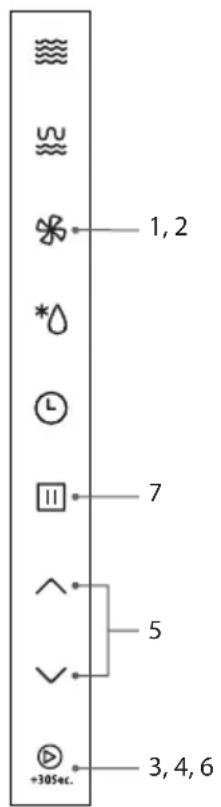
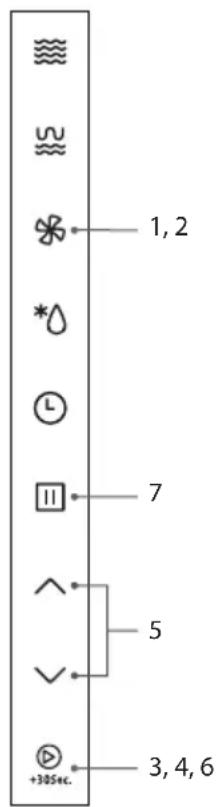
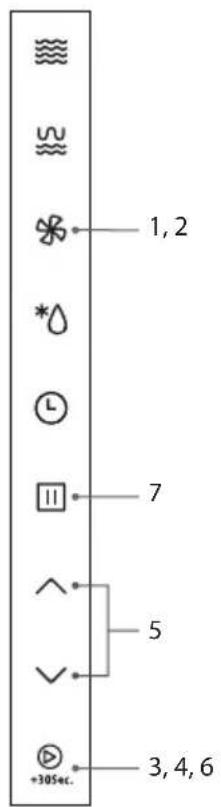
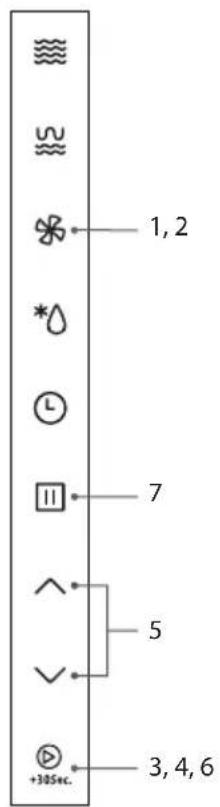
- Press the ✿ button once and the LED display will flash "100°C".
- Press the ✿ button repeatedly until the LED display shows your preferred temperature setting. Press the button each time and the temperature will increase 10°C. The temperature ranges from 100°C to 190°C.

Alternatively, after you press the button once, you can press the ↗ √ buttons to change the temperature setting.
- Press the button to confirm the temperature setting.
- Press the +30sec button again to start preheating. Once the preheating temperature is reached, the microwave will sound twice and the LED display will flash the preheated temperature to remind you.
- Place your food in the microwave and close the door. Press the ^/buttons to adjust the cooking time. The maximum time setting is 95 minutes.

During use this appliance becomes hot. Care should be taken to avoid touching hot surfaces, e.g. glass turntable plate. Keep children away.
- Cooking time cannot be input until the preheating temperature is reached. The door must be open to input the cooking time.
- The cooking time must be input within 5 minutes, otherwise, the microwave will stop preheating, sound 5 times and return to its original display.
- You can check the convection temperature while cooking is in progress by pressing the ✿ button.
- Press the +30sec button to confirm and start cooking.
- Press the ☐ button once to pause the cooking. Press the ☐ button again to stop/clear the setting.
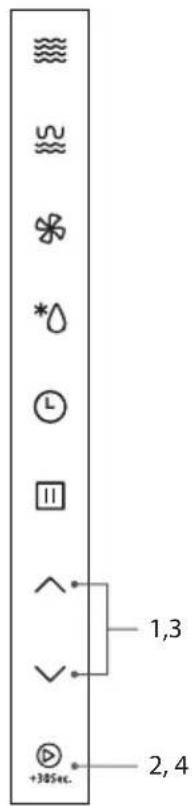
For convection cooking without preheating, please follow the steps below.

We recommend that you use the supplied grill rack. Place your food on the grill rack then place on top of the glass turntable plate.
For instance: If you want to cook your food for 15 minutes at 180°C.
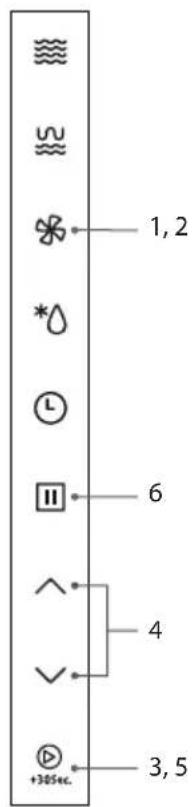
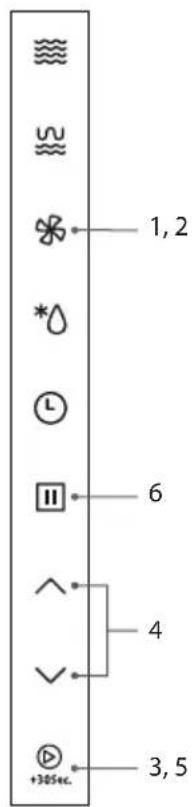
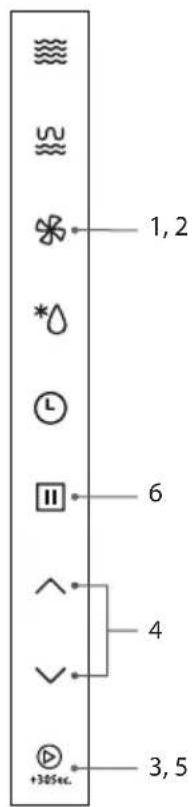
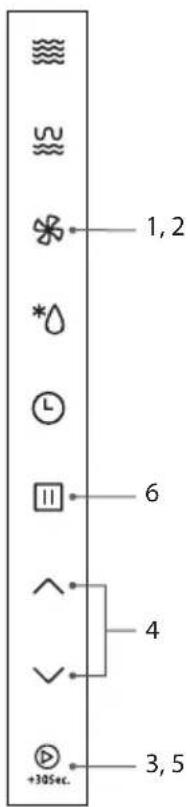
- Press the ✿ button once and the LED display will flash "100°C".
- Press the ✿ button repeatedly until the LED display shows "180°C". Press the button each time and the temperature will increase 10°C. The temperature ranges from 100°C to 190°C.

Alternatively, after you press the button once, you can press the ↗ √ buttons to change the temperature setting.
- Press the +30sec button to confirm the temperature setting.
- Place your food in the microwave and close the door. Press the ^/buttons to adjust the cooking time to 15:00. The maximum time setting is 95 minutes.
- Press the +30sec button to confirm and start cooking.
- Press the button once to pause the cooking. Press the button again to stop/clear the setting.

The LED display will show the current temperature stage below the timer.
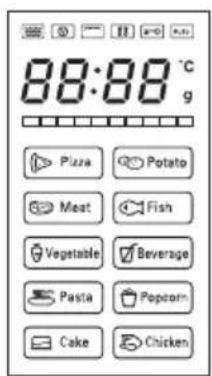
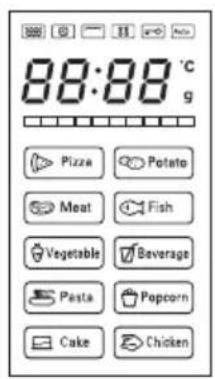
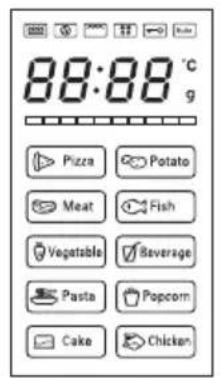
This feature allows you to cook most of your food based on the food category and the weight. Select the category and choose the weight of your food. For quick reference of the cooking time and the weight, please refer to the auto menu table.
Auto Menu
While the unit is not in use:
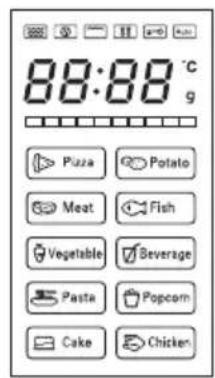
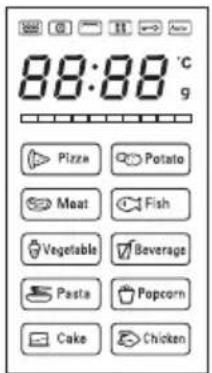
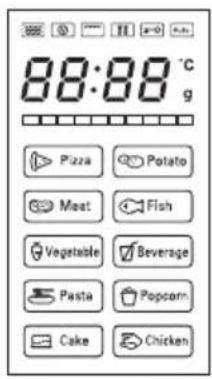
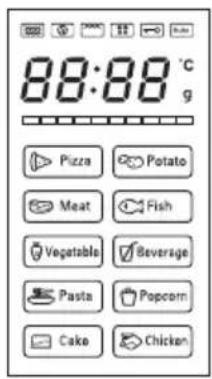
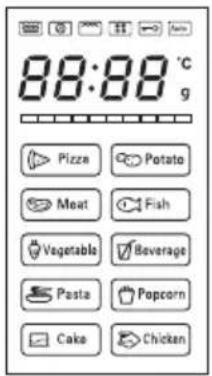
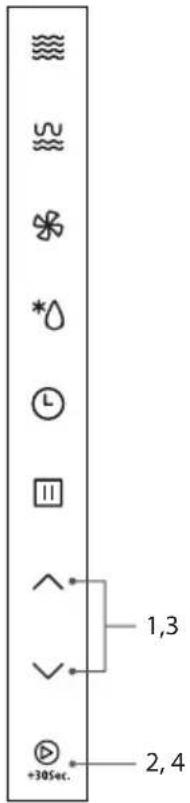
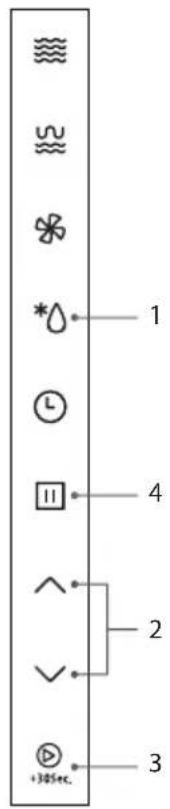
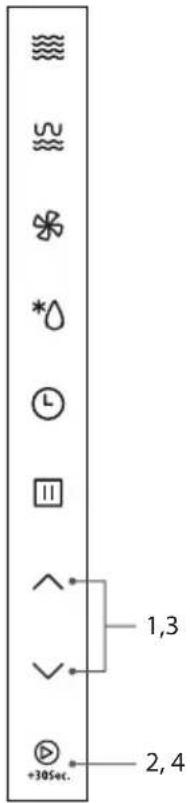
- Press ∧ or to choose the desired auto-cooking function. "A1", "A2", "A3", etc., up to "A10" will be displayed. The Auto-cooking menu panel icons will light up with each press.
- Press ▶ to confirm the auto-cook setting.
- Press ∧ or to select the weight. "g" will illuminate.
- Press ☑ to confirm and start cooking.
For instance: If you want to cook 300g of fish using the auto menu programme. Please follow the steps below.
- Press ∧ or to choose "A-4" for the fish programme. The LED will display "A-4".
- Press ▶ to confirm the auto-cook setting.
- Press ∧ or to choose the weight (300g), "g" will illuminate.
- Press ▶ to confirm and start cooking.
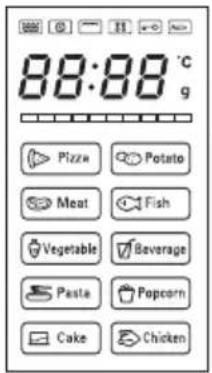
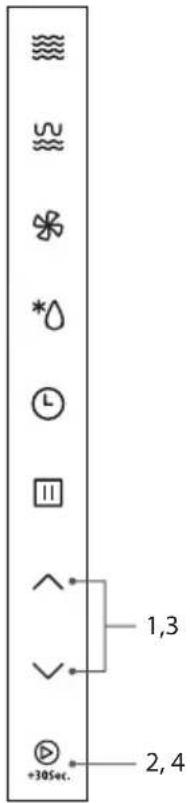

The auto-menu cooking programme for "Cake" falls under the "Convection with preheating (160°C)" function:
- Preheat the microwave by following the auto-menu programme.
- When the preheated temperature is reached, the unit will stop preheating and beep.
- Place the cake inside on the turntable and firmly close the door.
- Press +30Sec. to start cooking.
| Menu Weight Display Time Comments | ||||
| A-1 Pizza | 300g 300g 10' | This setting is designed for re-heating cooked pizza slices (not frozen pizza). Allow extra time for thicker pieces. | ||
| 400g 400g 11'30" | ||||
| A-2 Potato * (at least 230g per potato) | 230g 230g 5'30" | For best results, pierce the potatoes' skin before cooking. Once the potatoes are cooked, wrap in aluminium foil for at least 5 minutes to ensure they are cooked thoroughly. | ||
| 460g 460g 9' | ||||
| 690g 690g 12' | ||||
| A-3 Meat | 200g 200g 2'40" | Make sure food is cooked thoroughly before consuming. Additional cooking time may be required for thicker pieces. | ||
| 300g 300g 4'20" | ||||
| 400g 400g 5'30" | ||||
| 500g 500g 6'30" | ||||
| A-4 Fish | 200g 200g 3'30" | Make sure food is cooked thoroughly before consuming. Additional cooking time may be required for thicker pieces of fish. | ||
| 300g 300g 4'30" | ||||
| 400g 400g 5'30" | ||||
| 500g 500g 6'30" | ||||
| A-5 Vegetable | 200g 200g 3' | Only use suitable microwavable containers and cling film in the microwave. Pierce the film with a fork before cooking.Check the cooking regularly to make sure the water does not boil over. | ||
| 300g 300g 4' | ||||
| 400g 400g 5' | ||||
| 500g 500g 6' | ||||
| A-6 Beverage | 1 cup 1 1'50" | Only use suitable microwavable containers and cling film in the microwave. Pierce the film with a fork before cooking.Check the cooking regularly to make sure the water does not boil over. | ||
| 2 cups 2 3' | ||||
| 3 cups 3 4'30" | ||||
| A-7 Pasta | 50g 50g 18' | Only use suitable microwavable containers and cling film in the microwave. Pierce the film with a fork before cooking.Check the cooking regularly to make sure the water does not boil over. | ||
| 100g 100g 21' | ||||
| 150g 150g 24' | ||||
| A-8 Popcorn | 50g 50g 1'25" | Only use suitable microwavable containers and cling film in the microwave. Pierce the film with a fork before cooking. | ||
| 100g 100g 2'15" | ||||
| A-9 Cake | 475g 475g 70'00" | Unit will preheat to 160°C first. | ||
| A-10 Chicken | 750g 750g 35' | Make sure food is cooked thoroughly before consuming. Additional cooking time may be required for thicker pieces. | ||
| 1000g 1000g 40' | ||||
| 1250g 1250g 45' | ||||
* It is recommended that when auto-cooking a potato, the potato should weigh at least 230g. Note: potatoes will vary in water content depending on age, type, weight, etc.
This feature allows you to defrost your frozen foods simply by entering the weight or time.
Defrost by Weight
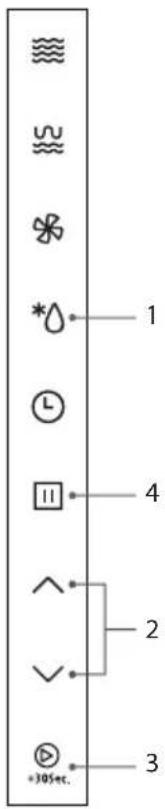
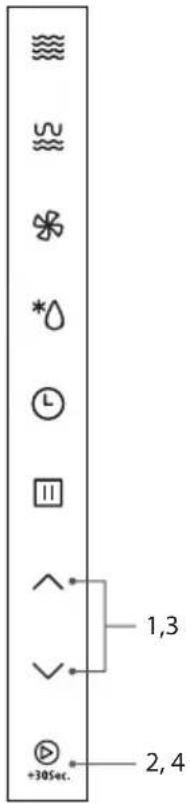
- Press the button once and the LED display will show "dEF1".
- Press ∧ or ∨ to input the weight.
- Press the +30sec button to start defrosting. When half the defrosting time has passed, the unit will beep to remind you to turn over the food. If no action is taken, the unit will continue cooking without pausing.
- Press the ☐ button once to pause the defrosting. Press the ☐ button again to stop/cancel the setting.

After pressing ☐ once, if the unit is paused for 5 minutes or more, the unit will automatically cancel the setting and return to standby.
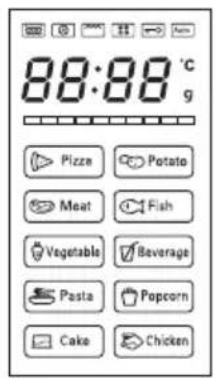
Defrost by Time
- Press the button twice and the LED display will show "dEF2".
- Press ∧ or to input the defrosting time. The maximum input time is 95 minutes.
- Press the +30sec button to start defrosting.
- Press the ☐ button once to pause the defrosting. Press the ☐ button again to stop/cancel the setting.

- Large items may be frozen in the centre. To ensure even thawing, turn them over from time to time and break them into smaller pieces during defrosting.
- You will need to press the button once to hold the defrosting programme and open the door. After you rotate the food, you need to press the +30sec. button to re-start defrosting.
- Place roasts fat-side down or whole poultry breast-side down.
- Drain liquids during defrosting as the juices from food can get hot and cook the food.
This feature allows you to quickly cook your food for 30 seconds with 100% microwave power.
Make sure the unit is in standby mode, then follow the steps below.
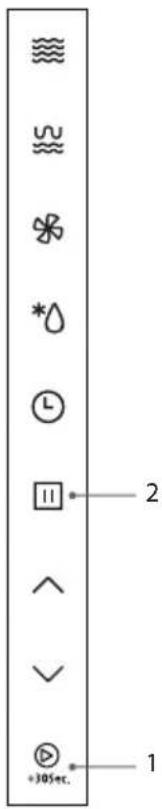
- Press the +30sec button to start the quick start cooking at 100% cooking power. Press the +30sec button again to increase by another 30 seconds. You may increase the cooking time up to 95 minutes.

Each press of increases cooking time by 30 seconds in general.
- Press the button once to pause cooking. Press the button again to stop/cancel the setting.

This feature can be used during: microwave, grill, convection and time defrost cooking.
This feature cannot be used during weight, defrost, and auto-menu and multi-stage cooking.
This feature allows you to check and view the current cooking settings.
To Find Out the Current Cooking Setting
- Press the button once and the LED display will show the current cooking power while the microwave is in microwave cooking. It will last for 3 seconds and then return to its original display.

Cleaning your microwave each time you use it will help to prevent a build up of stubborn marks that can be difficult to clean.
Unplug your microwave from the mains and wait for it to completely cool down before cleaning.
On the right hand side wall of the cavity is the wave guide cover. Microwaves are passed through this to enable your food to cook. It is important that this wave guide cover is kept clean at all times. Wipe it with mild detergent and water and leave to dry.
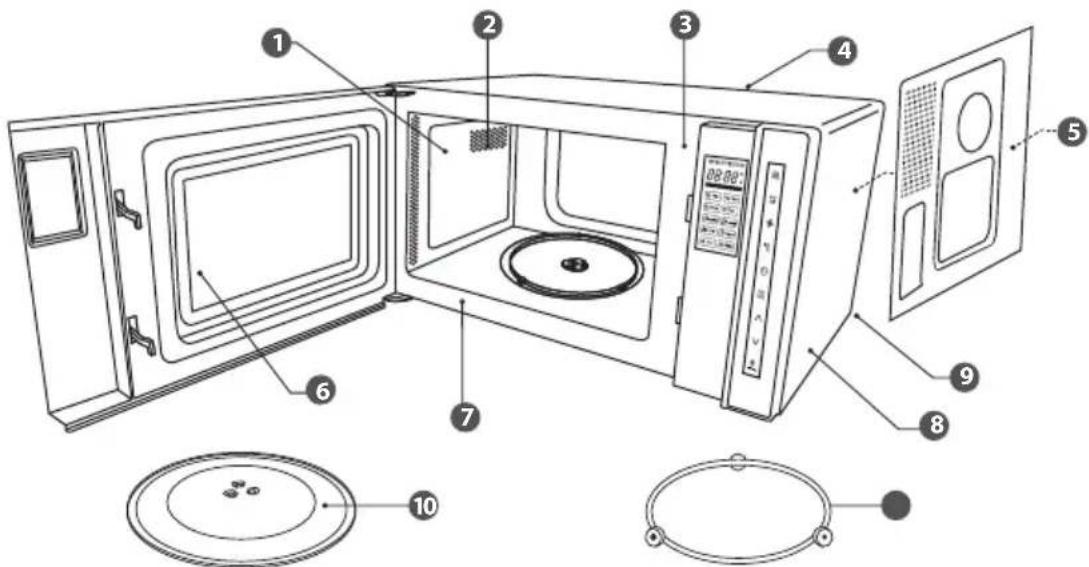
The microwave walls have a special enamel coating which makes cleaning very easy. Use a soft damp cloth to wipe off any splashes or a paper towel to mop up any spills. Wipe off grease with a damp cloth and a little detergent. Dry thoroughly. If grease is left to accumulate, it can smoke and even catch fire.
② Make sure you keep the outlet grids clean.
3 Keep the front of the microwave clean so that the door can close properly.
4 Be careful not to spill water into the vents.
5 Do not remove the wave guide cover: It is important to keep the cover clean in the same manner as the inside of the microwave. If grease is left to accumulate, it can smoke and even catch fire.
6 Keep the inside of the door clean with a damp cloth. Use warm soapy water for stubborn marks and dry thoroughly. The inside of the door has a special coating and must not be cleaned with abrasive pads or cleaning powders.
7 Clean behind the door ledge.
8 Use warm soapy water to clean the outside of the microwave. Do not use abrasive cleaners, pads or powders that could scratch the surface. 9 Unplug the microwave before cleaning the power lead and the microwave. Wipe with a damp cloth and leave to dry before plugging it back in. 10 Treat the glass turntable plate as you would any glass plate. After you have used it for more than 15 minutes, allow it to cool down before you use it again. Do not wash the glass turntable plate in very hot water, doing so could crack it. Wash the turntable support in warm water. Do not use very hot water which could warp it. Make sure the glass turntable plate and turntable support are dry before you put them back in the microwave. 11 Wash the racks in warm water. Do not use very hot water which could warp them.

Do not remove any fixed parts from the inside of your microwave during cleaning or at any other time.
If a problem does occur, it may often be due to something very minor. The following Q & A may be able to resolve the problem.
| Questions Answers | |
| Why doesn't the food seem to cook? | Check that:the cooking time has been set.the door is closed.the mains socket is not overloaded causing the fuse to blow. |
| Why does the food seem undercooked or overcooked? | Check that:the correct cooking time has been set.the correct power setting has been used. |
| How can I stop eggs from popping? | When you bake or poach eggs in the microwave, the yolk can sometimes pop as steam builds up inside it. You can stop the egg from popping by piercing the yolk with a toothpick before cooking.Never cook eggs that are still in their shells. |
| Why is it so important that I allow standing time after cooking? | With microwave cooking, many foods build up enough heat inside them to continue cooking even after they've been taken out of the microwave. Because microwave cooking works from the outside of food inwards, standing time lets you cook the centre of the food without the outside being overcooked. |
| Why does my microwave sometimes take longer to cook than it says in the recipe? | First check that the microwave was set just as the recipe said. Cooking times and heat settings are suggestions to help prevent overcooking but differences in the weight, size, shape and starting temperature of food will all affect how long it takes to cook – just as it does with a conventional oven. Use your judgement along with the recipe to check whether the food has been cooked properly. |
| Why do I get condensation on the inside of the door? | Condensation is perfectly normal, especially when you are cooking food with a high moisture content such as potatoes. |
| Does the microwave energy get through the window on the door? | No. The door has a special metal screen with holes in that lets you see inside but stops microwave energy from getting out. |
| Steam comes out of the side of the door and vents. Can microwave energy get out too? | No. The door and vents are carefully designed to let steam out during cooking but keep microwave energy in. The gaps are not big enough for microwave energy to escape. |
| What happens if the microwave is switched on while the microwave is empty? | The microwave will be damaged. Do not switch the microwave on when there's nothing inside the microwave. It is a good idea to keep a cup of water in the microwave just in case someone accidentally starts the microwave. |
| Why doesn't the microwave's light illuminate? | Open the door. If the light does not illuminate, the bulb has probably blown. Call a qualified technician – do not try to change the bulb yourself. |
| There are sparks inside the microwave when I use the microwave. Will this cause any damage? | Yes. Make sure that you are not using any metal utensils and that your containers don't have a metal trim. You must not use metal in your microwave when you cook (except aluminium foil). |
| Light is showing through the vents and door. Does this mean the microwave energy can escape? | No. It is normal for the light to be visible and is nothing to be concerned about. |
| Why do I get interference on my TV and radio when I use the microwave? | Microwaves use radio waves similar to those received by TVs and radios. You can lessen the interference by moving your microwave further away from the TV or radio. |
| Model L23CB13E/ L23CW13E/ L23CS13E | |
| Input 230V~ 50Hz | |
| Microwave Output 800W | |
| Microwave Frequency 2450 MHz | |
| Outside Dimensions (Width X Depth X Height) | 485 mm x 395.6 mm x 292.5 mm |
| Power consumption | |
| Microwave Input | 1300 W |
| Grill Input | 1200 W |
| Convection Input | 1200 W |
Complies with EC directives 2004/108/EC and 2006/95/EC.
We continually strive to improve our products. Features and specifications may change without prior notice.
NO

Unpacking
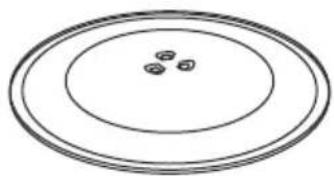
Main unit Glass turntable × 1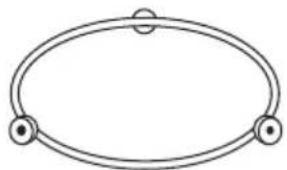
Grill rack × 1
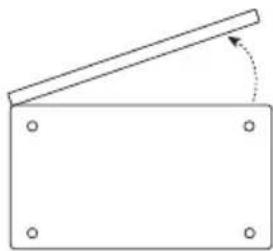
View from underneath

Checking Utensils for Cooking
Main unit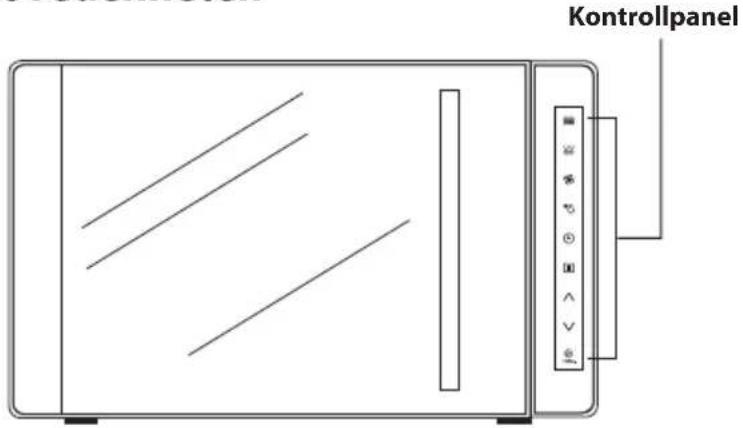
Grill rack

NO
Microwave cooking
| Bruke Mikrobølge-Knappen | ||
| Trykk Nr. | LED-skjerm | Mikrobølgeeffekt |
| 1 P100 | 100% | |
| 2 P80 | 80% | |
| 3 P50 | 50% | |
| 4 P30 | 30% | |
| 5 P10 | 10% | |
| Trykk på å-knappene for å stille kjøkkenuret. | |
| Periode Inkrement | |
| 0 - 1 min. 5 sekunder | |
| 1 - 5 min. 10 sekunder | |
| 5 - 10 min. 30 sekunder | |
| 10 - 30 min. 1 minutt | |
| 30 - 95 min. 5 minutter |
NO
Combination cooking
Convection cooking allows you to cook food just like in a regular oven

We recommend that you use the supplied grill rack. Place the food on the grill rack and then place it on top of the glass turntable.



With this function, you can control and view the current cooking settings.
How to Find the Current Cooking Setting
- Press the button once, and the LED screen will display the oven's current cooking power while microwave cooking is in progress. The display lasts for 3 seconds before the original display resumes.
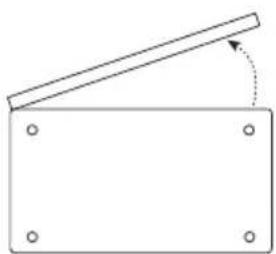
Bottom view
Check the cooking equipment
Main unit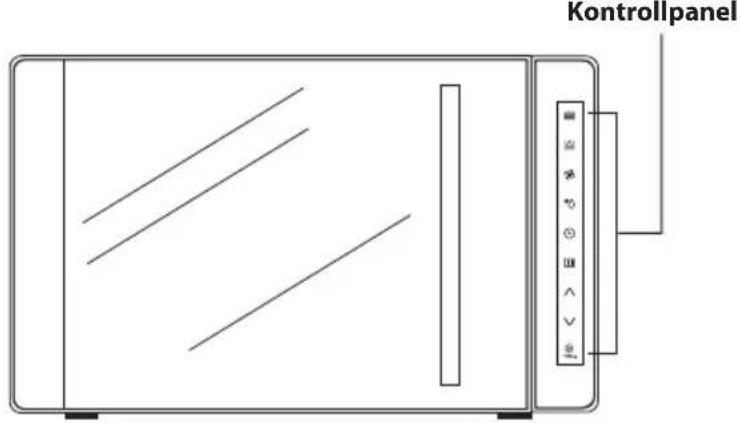
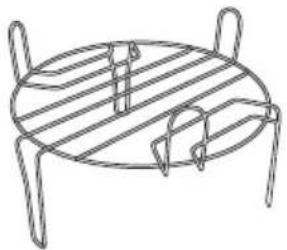
Grill rack
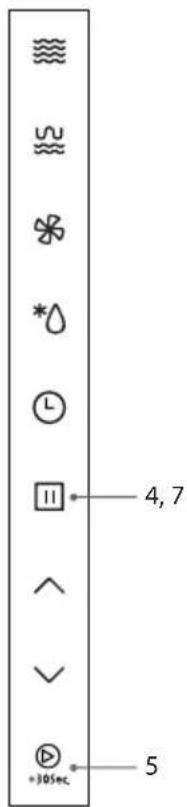
| Mikrovågsknapp-Kontroll | ||
| Tryckordning | Led-Display | Mikrovågseffekt |
| 1 P100 | 100% | |
| 2 P80 80% | ||
| 3 P50 50% | ||
| 4 P30 30% | ||
| 5 P10 10% | ||





Defrost by Time

Grill rack x 1
Bottom view

Device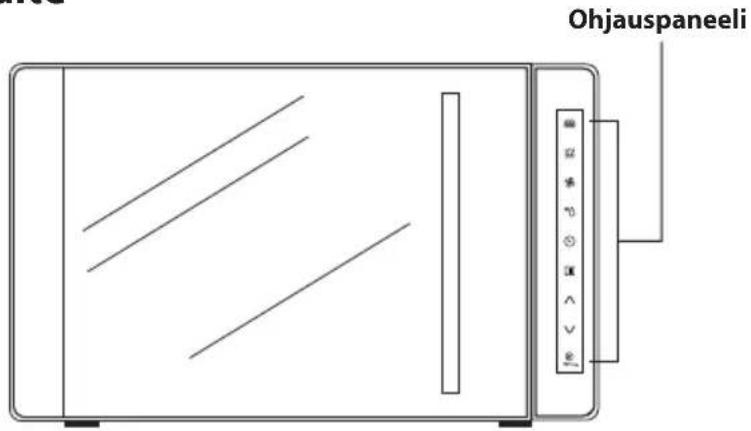
Grill grate





Grill grate x 1
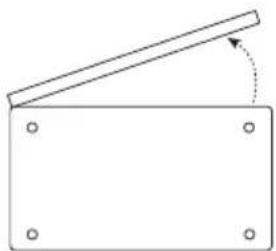
View from below

Main unit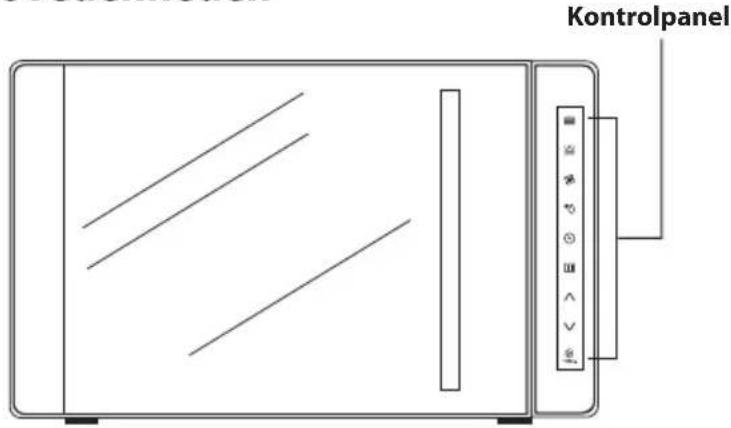
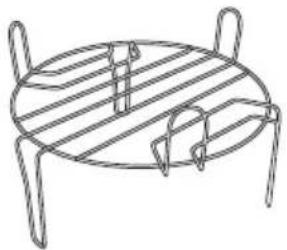
Grill grate
DK
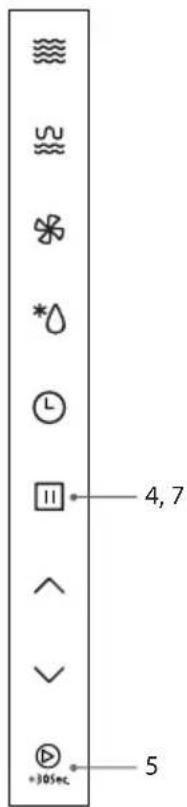







The display shows the current temperature during the timer.




View from below
Main unit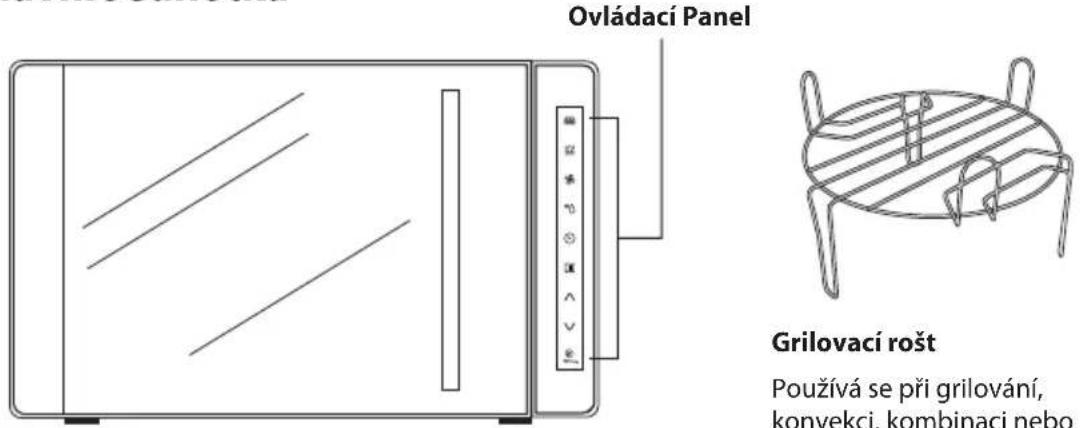
CZ

Combined cooking


Quick cooking
©


View from below

Cooking row control

Main Device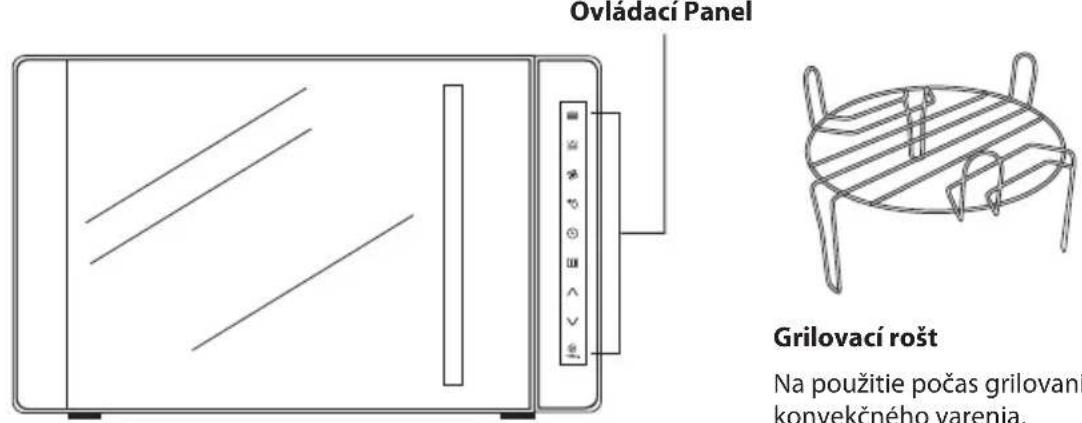
Grilling Rack


| Ovládanie Pomocou Tlačidla Mikrovlnné Varenie | ||
| Poradie | Led Displej | Mikrovlnný Výkon |
| 1 P100 | 100% | |
| 2 P80 | 80% | |
| 3 P50 | 50% | |
| 4 P30 | 30% | |
| 5 P10 | 10% | |



Time-Based Defrosting

This symbol on the product or in the instructions means that your electrical and electronic equipment should be disposed at the end of its life separately from your household waste. There are separate collection systems for recycling in the EU.
For more information, please contact the local authority or your retailer where you purchased the product.
NO
- IMPORTANT SAFETY INSTRUCTIONS READ CAREFULLY AND KEEP FOR FUTURE REFERENCE
- GENERAL SAFETY
- MAINTENANCE OF YOUR MICROWAVE
- MICROWAVE USE
- COOKING USE
- FIRE
- FIRST AID
- CLEANING YOUR MICROWAVE
- DO NOT USE THESE IN YOUR MICROWAVE
- CONTAINERS
- DELAYED BOILING
- PREPARING FOOD FOR BABIES
- CAUTION
- HOT SURFACE
- EARTHING INSTRUCTIONS
- WARNING: THIS APPLIANCE MUST BE EARTHED
- WARNING
- IMPORTANT SAFETY INSTRUCTIONS
- READ CAREFULLY AND KEEP FOR FUTURE REFERENCE. GENERAL SAFETY
- GETTING READY
- COOKING WITH A MICROWAVE
- USING ALUMINIUM FOIL IN YOUR MICROWAVE
- MICROWAVE HEATING CATEGORIES
- STEAM
- CONDENSATION
- CONVECTION COOKING (WITH PREHEATING)
- AUTO MENU
- DEFROST BY WEIGHT
- DEFROST BY TIME
- TO FIND OUT THE CURRENT COOKING SETTING
- NO
- UNPACKING
- CHECKING UTENSILS FOR COOKING
- GRILL RACK
- MICROWAVE COOKING
- COMBINATION COOKING
- HOW TO FIND THE CURRENT COOKING SETTING
- CHECK THE COOKING EQUIPMENT
- GRILL GRATE
- CZ
- COMBINED COOKING
- QUICK COOKING
- COOKING ROW CONTROL
- GRILLING RACK
- TIME-BASED DEFROSTING
Brand : Logik
Model : L23CW13E
Category : Microwave