CarCam - Action Camera A-Rival - Free user manual and instructions
Find the device manual for free CarCam A-Rival in PDF.


| Product Type | Car Dashcam / Action Camera |
| Brand | A-Rival |
| Model | CarCam |
| Chipset | Ambarella A2S70 |
| Image Sensor | 1/2.7" 2.1M Sensor |
| Video Resolution | 1920x1080 (30/25fps), 1280x720 (60/50fps), WVGA (60/50fps), QVGA (120fps) |
| Video Format | .mp4 |
| Photo Resolution | 0.9M, 2M, 3M, 3.5M |
| Photo Format | .JPG |
| Lens | F/NO=2.8 f=2.8, 140° angle |
| Digital Zoom | Yes |
| LCD Size | 1.5" (3.8 cm), 480x240 resolution |
| G-Sensor | Yes (sensitivity 1-6) |
| GPS | External (via GPS cable) |
| Built-in Memory | 512 MB |
| Storage Card | MicroSD up to 32 GB (Class 4 or higher recommended) |
| Microphone / Speaker | Yes |
| Other Ports | USB, HDMI |
| Battery Capacity | 900 mAh |
| Charge Port | USB (5V 1000mA) |
| Dimensions | Approx. 65.5 x 38 x 37.5 mm |
| Weight | Approx. 80 g (including battery) |
| Mounting | Suction cup |
| Special Features | Loop recording, motion detection, car plate stamp, speed limit alert, GPS player software |
| Cleaning | Clean lens with a soft, dry cloth. Avoid liquids. |
| Safety | FCC Class B compliant. Use only supplied charger (5V 1000mA). |
| Repairability | Contact manufacturer or certified service center. |
Frequently Asked Questions - CarCam A-Rival
User questions about CarCam A-Rival
0 question about this device. Answer the ones you know or ask your own.
Ask a new question about this device
Download the instructions for your Action Camera in PDF format for free! Find your manual CarCam - A-Rival and take your electronic device back in hand. On this page are published all the documents necessary for the use of your device. CarCam by A-Rival.
USER MANUAL CarCam A-Rival
Quick Guide / User Information
Please read this manual carefully before you use this unit, and keep it well for further checking.
(Important)
FCC Verification
NOTE: This equipment has been tested and found to comply with the limits for Class B digital device, pursuant to part 15 of the FCC Rules. These limits are designed to provide reasonable protection against harmful interference in a residential installation. This equipment generates, uses and can radiate radio frequency energy and, if not installed and used in accordance with the instructions, may cause harmful interference to radio or television reception, which can be determined by turning the equipment off and on, the user is encouraged to try to correct the interference by one or more of the following measures:
- Reorient or relocate the receiving antenna
- Increase the separation between the equipment and the receiver
- Connect the equipment into an outlet on a circuit different from that to which the receiver is connected
- Consult the dealer or an experienced radio/TV technician for help.
IMPORTANT NOTE: Prohibition against eavesdropping
Except for the operations of law enforcement officers conducted under lawful authority, no one permitted direct or indirectly. A device operated pursuant to the provisions of this Part for the purpose of overhearing or recording the private conversations of others unless such use is authorized by all of the parties engaging in the conversation.
Contents
Introduction 5
Brief Introduction......5
Screen Icons....5
Getting Started....6
Micro SD Card 7
Charging 7
Button Definitions....8
Mode Button 8
LED definitions....9
How to Record and Take a Photo?......10
Record Quality 11
Video quality 11
Photo quality....11
Install in your car....12
Speed limit....12
Anti-glare 12
5 easy recording modes....12
Car plate stamp....12
Basic operations 13
Copy video file from default card A to card B....13
File protection 14
Mute recording....15
How to use the GPS player? 15
Settings....17
Video settings 17
Resolution....17
REC scene....17
Quality 18
Anti-glare 18
Split mode....18
Record loop ....19
Video Rotation....19
Photo Size 19
Capture scene....20
Self-timer / photo mode....20
Interval / Photo mode 20
Image sequence 20
White balance 20
Digital Effect....21
AE ISO....21
AE BIAS....21
Contrast 21
Sharpness....21
Motion detection....22
G-sensor 22
GPS switch 22
Time zone 22
Stamp speed....22
System settings....23
Car ID 23
QUICK RECORD....23
Car mode....23
Storage selection 23
GPS OSD 23
Time Stamp 24
REC LED 24
LCD OFF 24
Power OFF 24
Microphone....24
Volume 25
Flicker 25
TV type 25
Time and date....25
Format 25
Default setting....26
Firmware....26
Languages 26
Accessories....27
Specification....28
FAQ 29
Introduction
Brief Introduction

Screen Icons

1 Mute recording
2 Recording mode
3 Recording resolution
4 Remaining time of memory (in recording, it will show recorded time)
5 Motion detection symbol
6 Cycle recording symbol
7 Current storage memory card (1 means internal memory; 2 means card)
8 Battery indicator
9 GPS symbol
10 Date indicator (day/month/year)
11 Time indicator (hour/min./sec.)
12 Car plate number
13 GPS coordinate
Getting Started
Install batteries
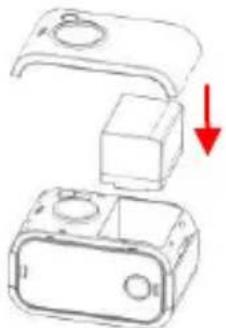
natural_image
Diagram showing two views of a mechanical component with a red arrow indicating downward motion (no text or symbols)Charging
Connect the USB cable to camera USB port, insert the charger to socket and wait for 2-3 hours. During charging, the LED is yellow. When power full, the LED light will turn off automatic.
Insert Micro SD Card
Hold the camera; make sure buttons are upward; confirm the Micro SD Card direction and the side with words towards to display screen; Push Micro SD Card into card slot gently, and pay attention to the directions. If insert the card opposite, it will get stuck; when totally insert the card, with a "tick" sound. Press the card and take the card out, this will release the lock, and card will be pop out. Please take out the Micro SD Card gently for the spring is very powerful.

natural_image
Diagram of a mechanical component with a red arrow pointing to a specific part (no text or symbols present)Setup your Cam
Press the menu button twice to get into menu, the step is:
- Select the video resolution.
- Set up the video mode (Auto/Sunny/Cloudy/Rainy/Snowy).
- Format your SD Card.
- Set up time and date (if with GPS, time update automatic, time zone location by manual).
- Select the video split option for your video.
- Set the recording Quality.
Micro SD Card
Select Micro SD Card
The memory maximum up to 32 GB.
1 GB can store 7-30 minutes video. For more information about image and quality please refer to details below.
Minimum memory 8GB is recommended, 16GB or 32GB will be better for full HD recording.
To ensure the card transfer speed, we highly recommend using a class 4 or higher card.
Find out these icons:

Charging
You can charge your camera by USB port left side
- Plug mini- USB to USB adaptor, and the other end to your camera USB interface.
- Plug USB adaptor to your power socket.
Non-5V power not allowed to connect to camera.
Charging via computer
It is not enough for currency (5V 500mA) via computer USB Port, although the battery is small, but it is very strong, so need more power. With our charger (5V 1000mA), you can get it worked perfectly.
Charging status indicator
When the camera is charging, the yellow LED on right side will light on, when it is fully charged, this LED will off;
It need about 2.5 hours to be fully charged if you use the attached USB charger; But if you charge via computer with the USB cable, it will take more time;
Button Definitions
[Power /Record/Photo]
- Power on: press this button and hold it down for 2 seconds to power on.
- Power off: in preview mode, press this button and hold it down for 2 seconds.
- Record: in record mode, press this button, it will start recording.
- Stop Recording: when recording, press this button to stop.
- Photo: in photo mode, press this button to take a photo. Snapshot: during play backing, press to take a snapshot.
OK Button
- Change to playback mode
In record preview mode, press to enter video playback.
In photo mode, press to enter photo playback.
Photo slide view: during photo play backing, press to make slide view.
- In playback
Start playback.
Pause playback.
- Resume normal playbacks in fast forward or fast backward. Confirm in menu settings
- Mute recording
While recording, press OK button to turn off microphone.
Mode Button
- Mode change
In preview mode, press and change between the recording mode, photo mode, and setting mode. - Delete or copy file
In 6 blocks preview mode, hold this button, to delete or copy file. - Return to original mode
In 6 blocks preview mode, press this button to switch to record mode or photo mode. - Quit playback
While playing video, press to exit playing and get back to 6 blocks preview mode.
- Exit menu In setting mode, press to exit.
- File protect In recording, press to protect this video file. This file will not be erased by normal cycle recording.
[<</+/ ] and [>>/-]
- Digital zoom While in recording mode, no matter preview or recording mode, press [<+/+] to zoom in and [>>/-] to zoom no zoom function for 1920*1280 and 1280*720@50 resolution.
- Photo zoom In photo mode, press [<+/+] to zoom in and [>>/-] to zoom out.
- Left/Right navigation In 6 blocks playback mode, press this button to choose file.
- Fast forward and fast backward In play backing, hold [>>/-] to make fast forward; hold [<+/+] to fast backward. You can choose between 4x/8x/16x three different speeds.
• Volume ▲ ▼ While playback video, press this button to adjust the volume. You can choose the volume between off, 1, 2, and 3.
- Menu select In setting mode, press this button to select function or select between main page and second page.
LED definitions
- Blue It means the device is ready and wait for your instruction. If it is flashing, means it is low power now.
- Red Flashing red means it is recording now. It is red, but no flashing. It means the card is full now.
- Green Flashing green means it is searching for satellite signal. Green but no flash means satellite signal is ready.
- Yellow Battery is under charging now. If the yellow LED turns off, the battery is full now.
How to Record and Take a Photo?
How to record?
- Record
After the camera is powered on, press power button to start. The red LED is blinking now.
- Quick Record
Before the camera is powered on, hold the power button for 2 seconds, it will power on and start recording. The red LED is blinking now.
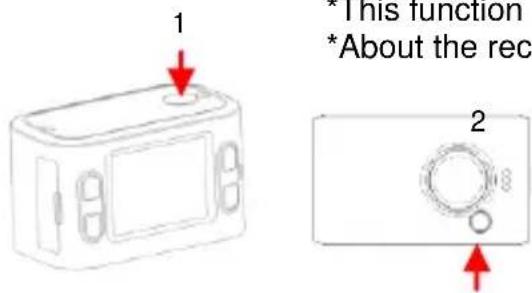
*This function need to set up in the menu.
*About the rec LED, you can turn it off in the menu.
How to take a photo?
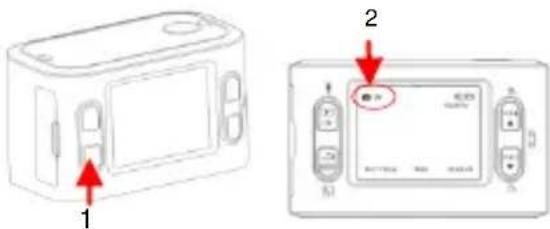
After the camera is powered on, you can press [mode] button to switch to photo mode. Press the power button, it will take a phone.
*You can choose 0.9/2/3/3.5M definition. You can set it in the menu. After you set the definition, it will show on the screen.
Record Quality
Resolution and quality decide the capacity of recording. Please read it carefully.
Video quality
| Resolution | L | M | H |
| 720p | 4007kbps | 6270kbps | 8334kbps |
| (30 min/GB) | (20 min/GB) | (15 min/GB) | |
| 1080p | 8109kbps | 10284kbps | 12361kbps |
| (15 min/GB) | (11 min/GB) | (9min/GB) |
Photo quality
| Photo quality | Photo resolution | Size |
| 3.5M | 2560 x 1440 | 900 photos/GB |
| 3M | 2403 x 1296 | 1000 photos/GB |
| 2M | 1920 x 1080 | 1500 photos/GB |
| 0.9M | 1280 x 720 | 3500 photos/GB |
Install in your car
Speed limit
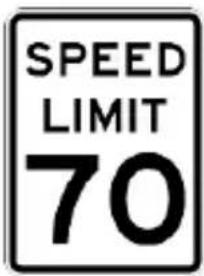
It will protect you from overspeeding. This function needs to work with GPS for speed test. When the real speed is beyond what you set in the menu, the GPS coordinator stamp will hide in the video. The default is 120KPK.you can change it with 5KPH interval.
Anti-glare

natural_image
Stylized black-and-white graphic of an eye with a starburst effect (no text or symbols)Turn on this function at night, it can help you to see the car license plate clearer in front of you.
5 easy recording modes

natural_image
Four-panel black-and-white weather icon set with sun, cloud, moon, and snow (no text or symbols)Auto/Sunny/Rainy/Snowy/Night, choose the most suitable mode in different situation. If you don't know which is better, please choose auto.
Car plate stamp
CAR PLATE
Input your car plate No. into your Car DVR, it will be a stamp on the right upper corner on the screen. That is the best evidence to show the video is taken from your car.
Basic operations
How to make it?
-
Use your computer to create a ".txt" in your SD card
a) Make a new folder [SYS] under the root of your SD card.
b) Make a new.txt file under folder [SYS].
c) Input your car plate No.
d) Choose "save as...", and select Code to be [UNICODE]
e) Name it "ID". -
Insert this SD card into your device
Power on the device, the device will update and show your "car plate no" in the video now.
How to turn it off?
In the menu, choose [Car ID] to [OFF].
Please check this file structure for reference.
Removable Disk
E DCIM MISC SYS ID.txt (Unicode)
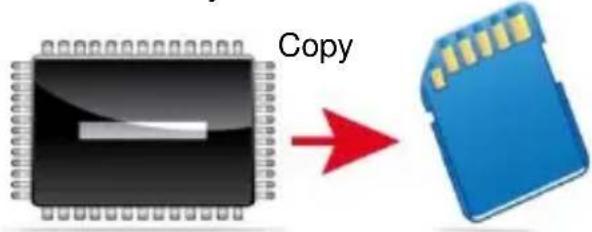
Copy video file from default card A to card B
-
Copy video file from card to internal memory
Select the video file, hold [mode/return] button, and select [copy].
The video file will be copied from card to internal memory; -
Push out card A and insert card B
-
Copy from internal memory to card B
a) In menu, change [storage] to [internal memory]
b) Select the video file, hold [mode/return] and select [copy].
The video file will be copied from internal memory to card B;
512M memory Your friend's SD card
File protection
1. How to protect it?
a) From G-Sensor
If the G-Sensor detected movement, it will start recording and protect this video file. There will be [L] on the screen. This video will not be erased by normal cycle recording.
b) Manual
During recording, press [Mode/Return] button, your file will be locked from being deleted.
2. How to delete protected video
a) On device
select the storage to be [internal memory], choose [format];
b) On computer
select video files and choose [delete] from computer.
File structure


Note:
1) 100MEDIA folder is for emergency video file. It will store 30files. When it comes the 31st file, this file will replace the 1st file.
2) 101MEDIA is for normal file.
Mute recording

natural_image
Camera lens icon with a red prohibition symbol overlay (no text or symbols present)If you don't want to record your voice, just press the [OK] Button.
There will be a mute icon on the screen.
It will stop to record any sound now.
How to use the GPS player?
Installation
1) Connect it to computer via a USB cable.
2) Find the player .rar, copy it to your computer.
3) Decompress player .rar, double click to open the player (Refer to Pic1).

1 Video 6 G-Sensor
2 Car speed 7 play/pause/stop
3 Compass 8 zoom in / zoom out
4 Google Map 9 G-sensor information
5 Add video
Add video
a. Press to add video folder (Refer to Pic2)
b. Double click the video to play (Refer to Pic3)
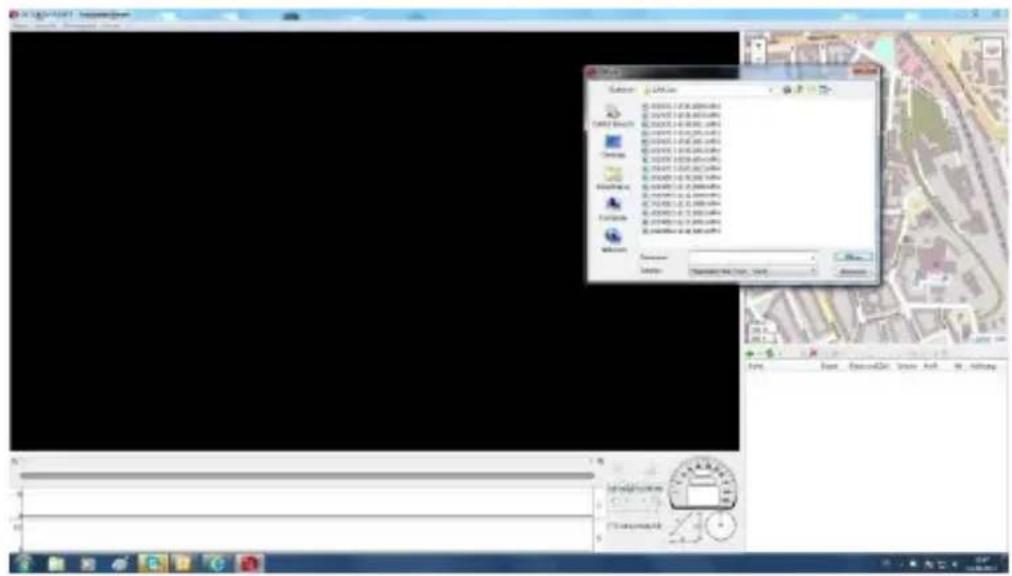
Pic2

Pic3
Settings
Video settings
| 01/04 | |
| RESOLUTION | 1920X1080P30 |
| REC SCENE | AUTO |
| QUALITY | H |
| ANTI-GLARE | OFF |
| SPLIT MODE | 5 MIN. |
| OK SET | MODE EXIT |
Resolution
You can choose among 1920×1080P30, 1920×1080P25, 1280×720P60, 1280×720P50, 1280×720P30, 1280×720P25, 848×480P60, 848×480P50, and 320 × 240P120.
Between 30fps and 25fps, which one should I choose? If you have PAL TV system in your country, please set it in 30fps. Please select 25fps if your country TV system is NTSC. Then the frames will be smooth in your local system.
REC scene
You can choose among Auto/Night/Sunny/Cloudy/Rainy/Snowy to get a better video quality.
Quality
You can choose among H, M, L. For bitrate information, please check below.
| Resolution | Quality | Bitrate Mbit/s |
| 1920×1080P30|25 | H | 12 |
| M | 10 | |
| L | 8 | |
| 1280×720P30|25 | H | 8 |
| M | 6 | |
| L | 4 | |
| 848×480P65|50 | H | 8 |
| M | 6 | |
| L | 4 | |
| 320×240P120 | H | 8 |
| M | 6 | |
| L | 4 |
Anti-glare
To see the car plate of the front car much clearer, try to turn it on.
Split mode
This is to set the file segment, so it will be much easier to share the file or upload. You can choose among 1min/5min/10min/15min/30min/45min/OFF.
Please note if you turn on the [Record Loop], then [split mode] will not work.
| RECORD LOOP | NO |
| VIDEO ROTATION | NO |
| PHOTO SIZE | 5M |
| CAPTURE SCENE | AUTO |
| SELF CAPTURE | AUTO |
| OK SET | MODE EXIT |
Record loop
This is to set the loop recording on and set each file segment. There will be no gap between different video segments. You can choose between 1min/5min/NO. The older stored files will overwrite.
Video Rotation
Choose between [Auto],[Yes],[No]. [Auto] means the device will rotate automatically. The g-sensor inside will sense the movement of the device. Please make sure that you don't rotate the device after recording already started. Only use it before recording. [Yes]: it will rotate right away. [No]: it will not rotate anyway.
Photo Size
You can choose from 0.9M/2M/3M/3.5M.
The default is 2M, Choose size below 2M to save in your SD card.
| 3.5M | 2560 x 1440 |
| 3M | 2403 x 1296 |
| 2M | 1920 x 1080 |
| 0.9M | 1280 x 720 |
Capture scene
This is to set the photo scene to get better photos.
You can choose among [Auto], [Sunset], [Portrait], [Landscape], [Sports], [Night], [Spotlight], [Water], [Sand Snow].
Self-timer / photo mode
Here is a time for the self-timer can be set. To switch on, choose between 5, 10, 20, 30 or 60 seconds. If you press the record button, it will automatically take a picture after this time.
Interval / Photo mode
You can choose between 1, 2, 5, 10, 30, 60 seconds and OFF. Always after the set time, the camera make an automatic image. The self-timer is hereby repealed or determined by the time set here.
Image sequence
Define the number of images in self-timer - or in interval mode will be added automatically.
White balance
You can choose from Incandescent, Sunny, Cloudy, Fluorescent and Auto.
| 03/04 | |
| INTERVAL CAP | OFF |
| CONTINUE CAP | OFF |
| WHITE BALANCE | AUTO |
| DIGITAL EFFECT | OFF |
| AE ISO | AUTO |
| OK SET | MODE EXIT |
Digital Effect
To get a different style of your video, try the digital effects. You can choose Art, Sepia, Negative, Black & White, Vivid, OFF.
AE ISO
Change the ISO for photos and videos. You can choose among 100, 200, 400, 800, 1600 and Auto. For photos, if you set a higher ISO, the shutter will be faster. It is useful in dark circumstance. For videos, please just leave [Auto], otherwise you may get strange videos.
AE BIAS
This is to set the EV level of the video. You can set it before recording or during recording. So it will be very useful when you find something too dark or too bright. You can choose from -2 to +2.
Contrast
To set the contrast, you can choose Standard, Hard, and Soft.
Sharpness
To set the sharpness, you can choose Standard, Hard, and Soft.
| 03/04 | |
| AE BIAS | EV.0.0 |
| CONTRAST | STANDARD |
| SHARPNESS | STANDARD |
| MOTION DETECT | OFF |
| GSENSOR | OFF |
| GPS SWITCH | ON |
| TIME ZONE | +01 |
| STAMP SPEED | 120 |
| OK SET | MODE EXIT |
Motion detection
Turn on, the device will record the object movement, last one minute.
G-sensor
This is to change the sensitivity of the G-sensor. You can choose from 1 to 6 and OFF. 1 means it is very sensitive. Normal setting for G-Sensor can be 3
GPS switch
This is to turn ON/OFF the GPS. It will affect the GPS icon on the screen. If your device doesn't have GPS, please put this option to OFF.
NOTE:
PLEASE NOTE THAT THE CABLE WITH GPS MODULE MUST BE INSERTED IN THE CAR CHARGER. THE GPS MODULE IS OTHERWISE NOT SUPPLIED WITH POWER AND MAY NOT BE RECOGNIZED FROM THE CAMERA.
Time zone
If you buy this device with GPS, it will sync the satellite time automatically. But the satellite time is GMT time. So you need to set your time zone to get the correct time in your country.
Stamp speed
When the real speed is beyond what you set in the menu, the GPS coordinator stamp will hide in the video. The default is 120KPH. You can change it with 5KPH interval.
System settings
Car ID
Input your car plate number into video. Please refer to page [Car plate stamp] for operation.
| 01/03 | |
| CAR ID | ON |
| QUICK RECORD | OFF |
| CAR MODE | ON |
| STORAGE SELECT | INTERNAL CARD |
| GPS OSD | GPS/SPEED |
| OK SET | MODE EXIT |
QUICK RECORD
You can choose between ON and OFF. The record will start automatically after switch on the camera.
Car mode
You can choose ON and OFF. If ON, when you connect this device to car power via a car adaptor, it will power on the device and start recording. After you turn off your engine, the device will power off in 30 seconds. If set to [OFF], the device will only being charged. You may need a specified cable to support auto power on and recording
Storage selection
You can select between internal memory and SD card. If you don't put in your SD card, the video file will be recorded to internal memory. On the screen, it will show card 1. If you push your card in, the storage will change to SD card automatically, and it will show card 2 on the screen.
GPS OSD
You can choose among GPS/Speed, GPS, and Speed. Default is GPS/Speed, so it will show GPS coordinator and speed information.
| 02/03 | |
| TIME STAMP | ON |
| REC LED | ON |
| LCD OFF | OFF |
| POWER OFF | 3 MIN. |
| MICROPHONE | ON |
| OK SET | MODE EXIT |
Time Stamp
You choose ON and OFF. If it is ON, it will date in Month/Date/Year mode and time on the video.
REC LED
You can choose between ON and OFF. If you set ON, the LED on frontside will flash while recording.
LCD OFF
The screen will enter into power-save mode after the set time. You can choose between 30sec, 1min, 2min, 3min, 5min, and OFF.
Power OFF
The device will be powered OFF in set time if there is no operation. You can choose between 30sec, 1min, 2min, 3min, 5min, and OFF.
Microphone
Switch the internal microphone ON or OFF.
| 03/03 | |
| VOLUME | 2 |
| FLICKER | 50HZ |
| TV TYPE | NTSC |
| TIME AND DATE | 18.12.2012 11:07 |
| FORMAT | NO |
| OK SET | MODE EXIT |
Volume
You can turn the beep volume from 1 to 3 and OFF. [3] means maximum.
Flicker
It is a setting of your light frequency. Choose between 60Hz and 50Hz.
TV type
If you want to watch video on TV, select the right TV type between NTSC and PAL. In Germany select PAL, pls.
Time and date
Set the correct time and date of your device. If you have built-in GPS, it will sync with satellite after it finish the searching.
Format
This is to format the SD card or the internal memory. If you insert the SD card, please make sure which one to format; if just internal memory, it will format your internal memory.
| DEFAULT SETTING | NO |
| FIRMWARE | 107AB165/21207 |
| LANGUAGE | ENGLISH |
| OK SET | MODE EXIT |
Default setting
This will restore all of the settings to factory default. If you find strange thing happen, try this.
Firmware
It tells the firmware version and product information. Better to help your check the quality problems.
Languages
Change between different languages. Now it supports:
German, Spain, France, Italian, Russian, Dutch, Portuguese, Polish, English
Accessories
What's in the package?

natural_image
Simple black-and-white diagram of a mechanical component with no text or symbolsWindow mount
Car Charger

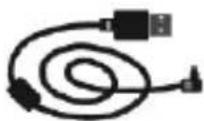
USB_Cable
Camera GPS-Cable User Manual with integrated GPS module

Specification
| Chipset | Ambarella A2S70 |
| Image Sensor | 1/2.7" 2.1M Sensor |
| Video Resolution | 1920x1080 (30/25fps) | 1280x720 (60/50fps) | WVGA (60/50fps) | QVGA (120fps) |
| Video Record Format | .mp4 |
| Photo Resolution | 0,9 MB /2 MB /3 MB /3,5 MB |
| Photo Record Format | .JPG |
| Lens Specs | F/NO=2.8 f=2.8 |
| Lens Angle | 140° |
| Lens Digital Zoom | Yes |
| LCD Size | Ca. 3,8 cm / 1.5" |
| LCD Resolution | 480 x 240 |
| G-Sensor | Yes |
| GPS (Int./Ext.) | External |
| Built-in Memory Size | 512MB |
| Storage Card | MicroSD up to32GB |
| Microphone/Speaker | Yes |
| Other Input/Output Ports | USB, HDMI |
| Battery Capacity | 900 mAh |
| Charge Port | USB |
| Body Dimensions | Ca. 65.5*38*37,5 mm |
| Weight | Ca. 80g incl. the weight of Battery |
| Mounting | Suction cup |
FAQ
Q: It won't turn on!
A: Try turning it on and off again. Has the camera been left on/recording for a while? Is it charged? If not, check out "You got the Power: Charging the Battery". Also, try to charge from a computer's USB socket.
Q: I can't play back footage on my computer.
A: Try using a different program, such as KMPLAYER Media Player. It works with a huge range of operating systems. You may need to drag and drop the file onto the KMPLAYER window if the default file association isn't right.
Guarantee
Please keep the proof of purchase for this device for the entire duration of the guarantee period, as it must be produced in the event of any claim.
You (as the end user) receive a 36-month guarantee from the date of sale.
The article has been manufactured using the most modern production methods and subjected to strict quality controls.
Please contact only the manufacturer (not the dealer where you purchased it) in the event of any defects during the guarantee period.
Hotline: +49 (0)511 - 123 83 506 or: support@first-servicecenter.de
The guarantee does not cover damage caused by improper use or external influence (water, falling, sunlight, breakage or impact).
Userinformation/Contact
If your device has a defect or you have problems with it, please contact our Service & Support Centre.
If you need to send your device to us, please attend to the following points:
- Use only the original packaging
- Add a detailed error description
- Add your full name and address and a copy of your purchase receipt
- Stamp and send the package to us (sufficient postage)
Address of our Service Center:
First Service Center
Kleine Düwelstr. 21
DE-30171 Hannover/Germany
- Quick Guide / User Information
- (Important)
- FCC Verification
- IMPORTANT NOTE: Prohibition against eavesdropping
- Contents
- Introduction
- Getting Started
- Install batteries
- Charging
- Insert Micro SD Card
- Setup your Cam
- Micro SD Card
- Select Micro SD Card
- You can charge your camera by USB port left side
- Charging via computer
- Charging status indicator
- Button Definitions
- [Power /Record/Photo]
- OK Button
- Mode Button
- LED definitions
- How to Record and Take a Photo?
- How to record?
- How to take a photo?
- Record Quality
- Install in your car
- Speed limit
- Anti-glare
- easy recording modes
- Car plate stamp
- Basic operations
- How to make it?
- Copy video file from default card A to card B
- File protection
- How to protect it?
- a) From G-Sensor
- b) Manual
- How to delete protected video
- Note:
- Mute recording
- How to use the GPS player?
- Installation
- Add video
- Settings
- Video settings
- Resolution
- REC scene
- Quality
- Split mode
- Record loop
- Video Rotation
- Photo Size
- Capture scene
- Self-timer / photo mode
- Interval / Photo mode
- Image sequence
- White balance
- Digital Effect
- AE ISO
- AE BIAS
- Contrast
- Sharpness
- Motion detection
- G-sensor
- GPS switch
- Time zone
- Stamp speed
- System settings
- Car ID
- QUICK RECORD
- Car mode
- Storage selection
- GPS OSD
- Time Stamp
- REC LED
- LCD OFF
- Power OFF
- Microphone
- Volume
- Flicker
- TV type
- Time and date
- Format
- Default setting
- Firmware
- Languages
- Accessories
- FAQ
- Guarantee
- Userinformation/Contact
- Address of our Service Center:
Brand : A-Rival
Model : CarCam
Category : Action Camera