
SD-C7V - Tumble dryer Infiniton - Free user manual and instructions
Find the device manual for free SD-C7V Infiniton in PDF.


| Product Type | Vented Tumble Dryer |
| Brand & Model | Infiniton SD-C7V |
| Dimensions (H x W x D) | 840 x 595 x 555 mm |
| Net Weight | 33 kg |
| Rated Capacity | 7 kg |
| Rated Voltage & Frequency | 220-240 V ~ 50 Hz |
| Power Consumption | 2000 W |
| Energy Efficiency Class | C |
| Annual Energy Consumption | 510 kWh/year (based on 160 cycles) |
| Sound Power Level | 69 dB (for Cotton Normal full load) |
| Number of Programmes | 8 (Cotton, Mixed, Synthetic, 1 Hour, etc.) |
| Drying Levels | Extra, Normal, Minimum |
| Special Features | Anti-wrinkle (30 or 120 min), Child lock, Auto-off |
| Exhaust Duct | Flexible hose (included), rear vent |
| Installation Requirements | Level surface, min. 10 cm from wall, ambient temp 5°C-35°C, grounded outlet |
| Filter Type | Door lint filter (double-layer), clean after each cycle |
| Drum Material | Stainless steel (presumed) |
| Control Panel | Buttons: On/Off, Start/Pause, Programme, Drying Level, Anti-wrinkle |
| Safety Features | Grounded plug, thermal fuse, child lock, auto shut-off |
| Warranty | Contact Infiniton or authorized service center |
Frequently Asked Questions - SD-C7V Infiniton
User questions about SD-C7V Infiniton
0 question about this device. Answer the ones you know or ask your own.
Ask a new question about this device
Download the instructions for your Tumble dryer in PDF format for free! Find your manual SD-C7V - Infiniton and take your electronic device back in hand. On this page are published all the documents necessary for the use of your device. SD-C7V by Infiniton.
USER MANUAL SD-C7V Infiniton
natural_image
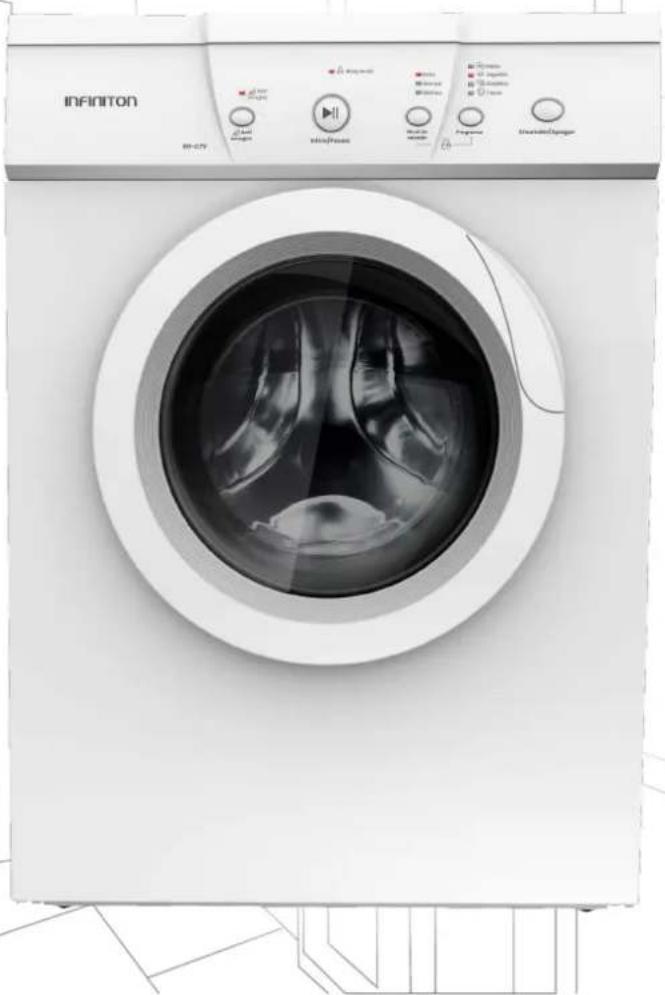
Front view of a white infinity washing machine with control panel and door controls (no visible text or symbols on the device itself)SD-C7V
ean code: 8445639003107
natural_image
Simple line drawing of a container with a cross mark on a textured surface (no text or symbols)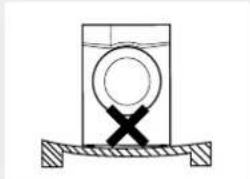
natural_image
Simple line drawing of a container with a circular top and cross mark, resting on a curved surface (no text or symbols)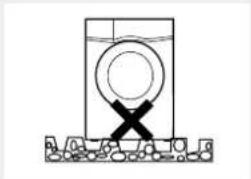
natural_image
Simple line drawing of a container with a circular inlet and cross mark, placed on a surface (no text or symbols)¡ADVERTENCIA!
Transporte
natural_image
Two stick figures pulling a gray rectangular block (no text or symbols)natural_image
Technical line drawing of a rectangular electronic device with ventilation slots and a 10cm height dimension label (no text or symbols beyond measurement annotation)Nivelar
natural_image
Close-up of a white mechanical component with a metallic handle and a small attached part (no visible text or symbols)natural_image
Diagram of a washing machine with a screwdriver inserted, showing no text or symbols on the device itself.natural_image
Technical line drawing of a mechanical device with mounting bracket and side profile (no text or symbols)B
natural_image
Technical line drawing of a mechanical device with internal components and a side view (no text or symbols)Conexión eléctrica
natural_image
Diagram of a hand holding a circular object with an arrow indicating rotation (no text or symbols)
natural_image
Cross-sectional diagram of a mechanical device with internal components and a black arrow indicating rotation (no text or symbols)
natural_image
Simple line drawing of a wall socket with a bulb and cable, no text or symbols presentnatural_image
Illustration of a box with an arrow pointing upward, alongside a magnified inset showing a small structure labeled 'A' (no text or symbols on the diagram itself)natural_image
Symbol of a trash bin crossed out by two crossed lines (no text or labels)
natural_image
Logo of 'easyplay' play button with red triangle and multicolored segments (no text beyond logo design)natural_image
Line drawing of a front-loading washing machine with a hand inserting a circular component (no text or symbols)natural_image
Line drawing of a washing machine with an open door and a hand holding a cloth inside (no text or symbols)natural_image
Front view of a white infinity washing machine with control panel and door panel, placed on a patterned cabinet (no visible text or symbols on the device itself)SD-C7V
ean code: 8445639003107
| Índice | English |
| Installation | 24 |
| Safety information | 27 |
| Before drying | 29 |
| How to use | 32 |
| Cleaning & Maintenance | 35 |
How does an evacuation dryer work?
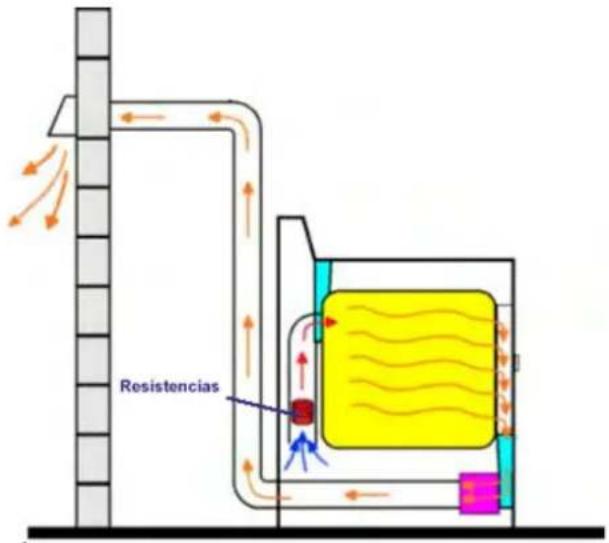
You are probably wondering how an evacuation dryer works. It is a dryer that takes air from outside and heats it, through electrical resistances, which means that the moisture in the clothes is transferred through the air. It then passes through the drum where the damp clothes are, which means that the humidity of the clothes is transferred through the air and expelled to the outside through a tube that we will have to place in the window.
For the evacuation dryer to work correctly, it is necessary that where it is installed there is an outlet to the outside, either through a tube that comes out of the window or through a hole in the wall where the dryer is located to take the tube out.
How do you install an evacuation dryer?
First of all, the best place to install the tumble dryer is indoors, in the kitchen or bathroom, but with the washing machine nearby. This avoids having to walk around with wet clothes. Installing your tumble dryer outside the house can be harmful because there can be sudden changes in temperature outside and, in addition, if you live in a humid area or it rains a lot, we do not recommend placing it on the terrace.
It must be taken into account that for the installation of an evacuation dryer you must choose a space that faces outside because this dryer is based on the expulsion of humidity.
It is advisable that the place where the installation is carried out has a temperature of between 5^ and 35^ and that it is well ventilated so that the air can circulate without problems. Another recommendation is to place the dryer on top of the washing machine, as it weighs less and you will have twice as much space.
Location
Before installing this Infiniton appliance, you must choose a location that meets the following requirements:
- Rigid, dry and level surface
- Avoid direct sunlight
- Sufficient ventilation
- The ambient temperature must be above 0°C
- Keep the appliance away from any heat source (cookers, boilers, radiators, etc.).
- Install the appliance in a clean place, where there is no accumulation of dirt. Do not obstruct the air inlets of the product.
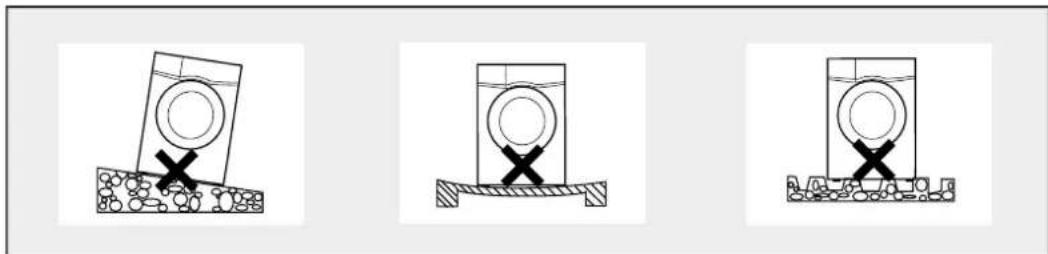
WARNING! Stability is important to prevent the appliance from moving. Ensure that the product is level and stable. To ensure that the vibration and noise levels emitted by the appliance during operation are normal, the appliance should be placed on a firm and level surface.
natural_image
Three diagrams showing a container with cross marks placed on a surface, no text or symbols present.WARNING! Make sure the power cable is not trapped or damaged is not trapped or damaged.
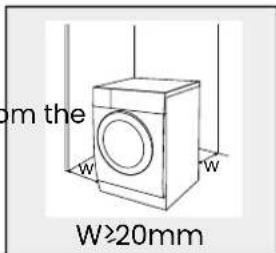
WARNING! Be sure to maintain the minimum distances from the walls, as shown in the picture on the right.
Transport
Move the appliance with extreme care. Do not grip any protruding parts of the product. The door of the product must not be used as a carrying handle under any circumstances. If the appliance cannot be transported in an upright position, it can be tilted to the right less than 30^ .
Risk of damage and injury! Improper handling of the appliance may cause injury.
⚠️ Important! The appliance is very heavy, please never carry the appliance alone;
always do so with the help of another person.
Remove all obstacles from the transport route and the installation site:
- Open doors and remove objects on the floor.
Do not use the open door as a support point.
Remove all packing materials before using the appliance.
Before installing the product, check it for externally visible damage.
Do not install or use the appliance if it is damaged.

natural_image
Two stick figures pulling a gray rectangular block (no text or symbols)Do not install the appliance in a room where there is a risk of frost. At temperatures close to freezing point, the product may not operate properly. There is a risk of damage if condensed water is allowed to freeze in the pump and hoses.
Location
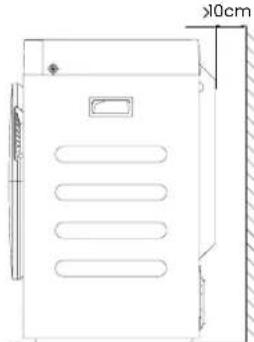
The tumble dryer should be placed in a ventilated area at a distance of not less than 10cm from the wall.
It is suggested that there should be no obstacles within 1.5m in front of the tumble dryer to ensure good ventilation of the appliance.
This tumble dryer should be installed in a well-ventilated place where you can easily put an exhaust duct to vent the steam out of the house.
natural_image
Technical line drawing of a rectangular enclosure with ventilation slots and a 10cm height dimension label (no text or symbols beyond measurement annotation)Levelling
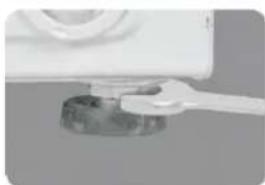
Once you have positioned the appliance in its normal place of operation, make sure that it is completely level. To do this, you should use a spirit level. If the appliance is not completely level, you should adjust the legs according to the following figure:
natural_image
Close-up of a white mechanical component with a metallic base and a lever handle (no visible text or symbols)- Loosen the counter nut
- Turn the foot until it reaches the floor
- Adjust the feet and lock the nuts with a spanner.
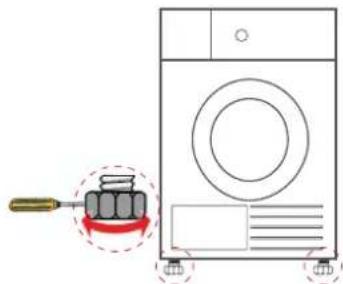
It is possible that the levelling feet adjustment system may be different from the illustration above and may be more in line with the following:
natural_image
Diagram of a washing machine with a red-handled tool and a ball inside, showing no text or symbols.Do not install the dryer outdoors or place it where it can be damaged by rain. Do not place the back of the dryer near curtains.
Do not place the dryer near a flammable area.
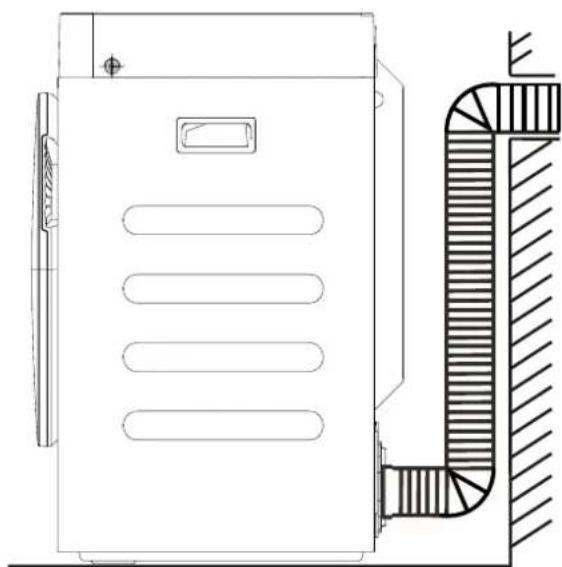
Attaching the flexible hose
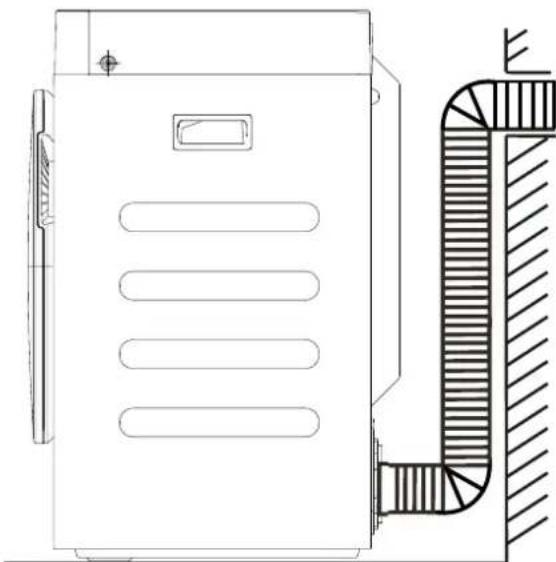
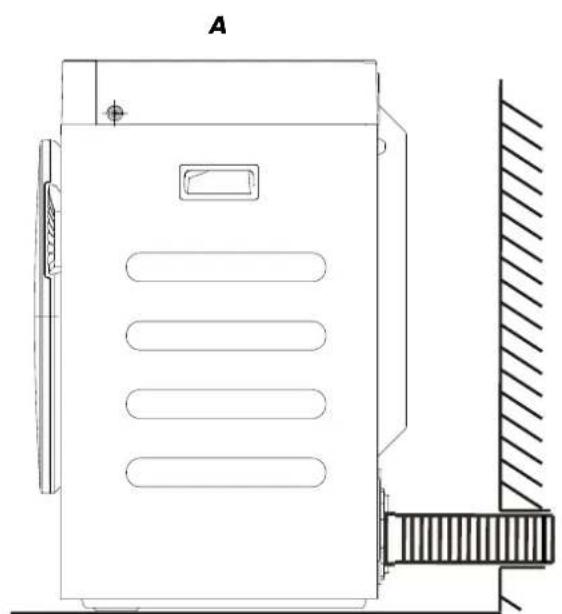
Connect one end of the threaded hose to the rear ventilation grille and fix it until it is tight.
The other end of the hose will be extended outwards, see the following pictures for the correct mounting options.
natural_image
Technical line drawing of a mechanical device labeled 'A' with no visible text or symbols on the device itself.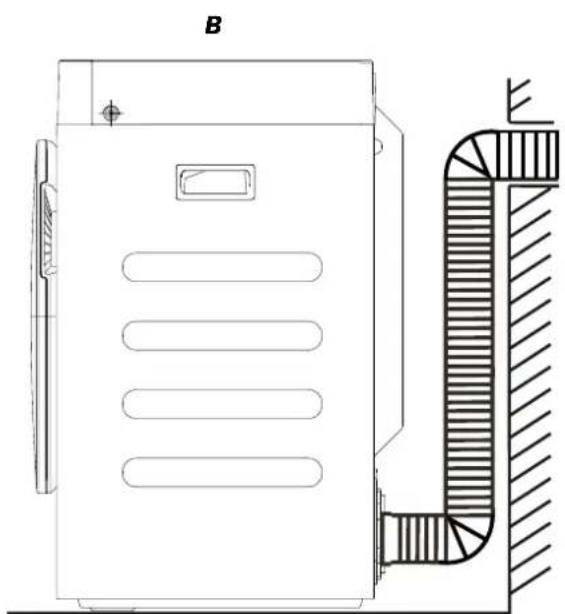
natural_image
Technical line drawing of a mechanical device with a side profile view showing internal components (no text or symbols)Electrical connection
This appliance must be grounded for safety. The power cord of this appliance is equipped with a three-prong plug that fits into a standard three-prong outlet to minimize the possibility of electric shock. Do not, under any circumstances, cut or remove the third grounding prong from the supplied power cord.
Do not cut or remove the third grounding prong of the supplied power cord under any circumstances.
This appliance requires a standard 220-240V-50/60Hz three-prong grounded outlet. The cord must be secured behind the appliance and must not be left unattended. appliance and should not be left exposed or dangling, thus avoiding accidents and/or injuries.
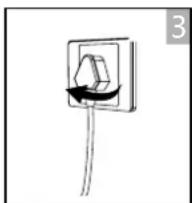
Never unplug the appliance by pulling on the power cord. Always grasp the plug firmly and pull it out. Do not use an extension cord with this appliance. If the power cord is If the power cord is too short, have a qualified electrician or serviceman install an outlet near the appliance. The use of an extension cord may adversely affect the performance of the unit.
Quick start
Before use, make sure that the dryer is installed correctly.
Before each drying
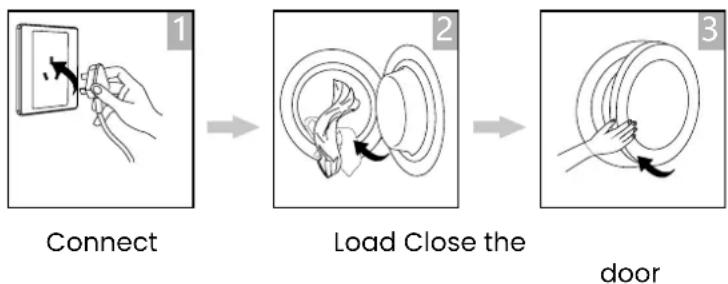
Drying

After drying
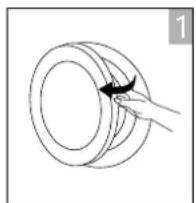
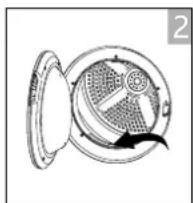
When the drying programme is finished, a beep will sound and the display will show "0:00".
natural_image
Diagram of a hand holding a circular object with an arrow indicating rotation (no text or symbols)
natural_image
Cross-sectional diagram of a mechanical device with internal components and an arrow indicating rotation (no text or symbols)
natural_image
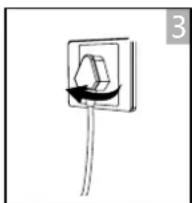
Simple line drawing of a wall socket with a bulb and cable, no text or symbols present- Open the door and take out the clothes.
- Clean the door filter.
- Switch off.
Note: If using the socket with a switch, press the switch to turn off the power directly.
General security information
For your safety and to ensure correct use, before installing and using the device for the first time, please read this user manual carefully, including its tips and warnings. To avoid unnecessary errors and accidents, it is important to ensure that all persons using the device are thoroughly familiar with its operation and safety features. Keep these instructions and ensure that they remain with the device if it is moved or sold, so that all those who use it throughout its lifetime are properly informed about the use and safety of the device.
For the safety of life and property, observe the precautions in these user instructions, as the manufacturer is not liable for damage caused by omission.
Safety of children and vulnerable people
- This appliance can be used by children aged from 8 years and above and persons with reduced physical, sensory or mental capabilities or lack of experience and knowledge if they have been given supervision or instruction concerning use of the appliance in a safe way and understand the hazards involved.
• Children up to 8 years of age can charge and discharge this appliance. - Children should be supervised to ensure that they do not play with the appliance.
- Cleaning and user maintenance shall not be made by children unless they are 8 years of age or older and supervised.
- Keep all containers away from children. There is a risk of suffocation.
- If you are discarding the appliance, pull the plug out of the socket, cut the power cord (as close to the appliance as possible) and remove the door to prevent children from getting an electric shock if it falls or closes.
Electrical connections
- Make sure that the power cord is not trapped by the appliance, as this could damage it.
- Connect the appliance to a grounded socket outlet protected by a fuse that complies with the values in the "Technical specifications" table.
- The installation of the earth connection must be carried out by a qualified electrician.
- Ensure that the machine is installed in accordance with local regulations.
- Water and electrical connections must be carried out by a qualified technician in accordance with the manufacturer's instructions and local safety regulations.
WARNING! Do not use multiple plugs or extension cords.
WARNING! The product must not have an external switching device, such as a timer or be connected to a circuit timer or connected to a circuit that switches on and off regularly.

WARNING!
WARNING!
WARNING!
WARNING!
Do not disconnect the plug from the socket if there are flammable gases nearby.
Never pull out the plug with wet hands.
Always pull the plug, not the cable.
Always unplug the product when not in use.
Unpacking the appliance

WARNING! Packaging material (e.g. film, polystyrene foam) can be dangerous for children.
Risk of suffocation! Keep all packaging out of the reach of children.
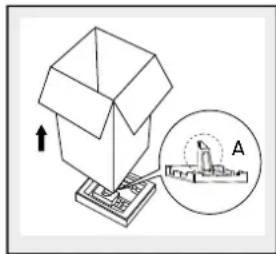
- Remove the cardboard box and the Styrofoam packaging.
- Lift the washer and remove the packaging from the base.
- Make sure to remove the small triangular foam (A) together with the bottom packaging. Otherwise, place the unit on a side surface and remove it manually.
- Remove the tape securing the power cord and drain hose.
- Remove the inlet hose from the drum.
natural_image
Illustration of a box with an arrow pointing upward, alongside a circular diagram showing a building labeled 'A' (no text or symbols on the diagram itself)Service & Disposal
- Any electrical work required to service the appliance must be carried out by a qualified electrician or competent person.
- This product must be serviced by an authorised Service Centre, and only original spare parts must be used.
natural_image
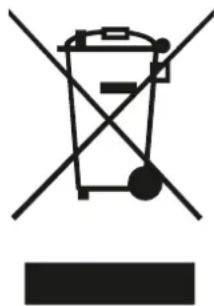
Symbol of a trash bin crossed with a diagonal line and a horizontal bar below (no text or labels)This symbol on the product or on its packaging indicates that this product must not be treated as household waste. Instead, it must be taken to the appropriate collection point for the recycling of electrical and electronic equipment.
By ensuring this product is disposed of correctly, you will help prevent potential negative consequences for the environment and human health, which could otherwise be caused by inappropriate waste handling of this product.
For more detailed information about recycling of this product, please contact your local authorities, your household waste disposal service or the shop where you purchased the product.
Packing materials
Materials with the symbol 🎨 are recyclable. Dispose of the packaging in a suitable collection container for recycling.
Disposal of the device
- Disconnect the plug from the socket.
- Cut the power cord and discard it.
Twist and go!
Normally washing machines come with dozens of programmes, and Infiniton does too, but the reality is that we only use 3 of them. Synthetic, cotton and 30/40 degrees. That's why simplifying things is thinking about the customer. We assure you that our seniors will appreciate the efficiency and simplicity. Put Easy Play in your life. Turn the wheel, press play and that's it. Your clothes will be washed to perfection depending on the time you have available.

natural_image
Colorful play button logo with triangular design and 'easyplay' text (no additional symbols or text)What's Easy play technology?
Introducing the easiest to use Infiniton washing machines. Infiniton washing machines with Easy Play technology are essentially the solution to do the laundry quickly and optimally.
At Infiniton we have a clear philosophy; technology should be within everyone's reach to improve our lives. An accessible and non-exclusive good.
Easy Play, a child's game!
With Easy Play technology in Infiniton washing machines, doing the laundry will be easier than ever. This technology helps you to program the washing machine in an intuitive way so that you don't have any problems in your day-to-day life. Select the temperature and type of fabric depending on the clothes you are going to wash, so you can be sure that your clothes will be perfect.
Turn on Select the
flowchart
graph TD
    A["Start"] --> B{Loop Point}
    B --> C["Loop Back"]
    C --> D["End"]
    style A fill:#f9f,stroke:#333
    style D fill:#bbf,stroke:#333
the right programme
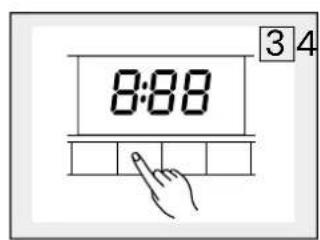
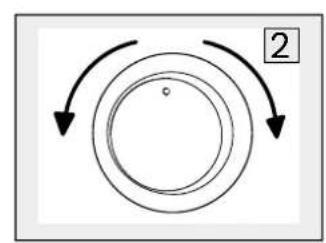
Select the function or keep the default settings
natural_image
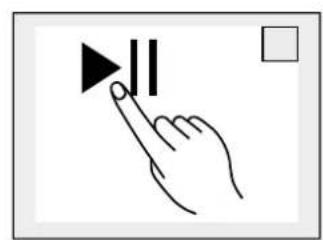
Hand icon pointing at a play button with double vertical lines (no text or symbols)Press Start/Pause to start the programme
Why Easy Play is essential?
Infiniton simplifies your life with our washing machines. These washing machines develop the best technology to make your life much easier.
Doing the laundry is no longer a chore. Make Easy Play and spend your time on the things that really matter. These washers not only take care of your most delicate clothes, they also protect everyday fabrics and textures.
Allow to stand for 2 hours after transport and before the first use, use a soft cloth to clean the inside of the drum.
Place some clean cloths in the drum.
Connect it to the power supply, press On / Off.
Select a programme and press Start / Pause button.
After finishing this programme, follow the "cleaning and care" instructions to clean the filter door.
During drying, the compressor and water will generate a noise which is completely normal.
- Before drying, spin the laundry well in the washing machine. Centrifuging the laundry at high speed shortens the drying time and saves energy.
- To obtain an even drying result, sort the laundry according to the type of fabric and select the appropriate drying programme.
- Before drying, close zips, hooks, buttons, fabric belts, etc.
- Remove all items from pockets, such as lighters and matches.
- Sew or remove rings from zips.
- Close duvet and pillow cases to prevent small items from rolling around inside.
- Leave jackets open and undo long zips to allow textiles to dry evenly.
- Do not over-dry clothes, as clothes that are too dry can easily wrinkle.
- Do not dry garments containing rubber or similar elastic materials.
- Keep the area around the dryer clean. Coal dust or flour may cause an explosion.
- The door should only be opened after the end of the tumble dryer programme to avoid steam burns.
- Clean the lint filter and empty the water container after each use to avoid prolonged drying time and increased energy consumption.
- Do not dry the laundry after the dry-cleaning process.
 Jersey(mixed 800g) Jersey(mixed 800g) |  Jackets(800g cotton) Jackets(800g cotton) |  Jeans(800g) Jeans(800g) |  Towels(900g cotton) Towels(900g cotton) |
 Bed linen(Cotton 600g) Bed linen(Cotton 600g) |  Daily clothing(1120g) Daily clothing(1120g) |  Pyjamas(200g) Pyjamas(200g) |  Shirts(300g cotton) Shirts(300g cotton) |
 T-shirts(cotton 180g) T-shirts(cotton 180g) |  Underwear(cotton 70g) Underwear(cotton 70g) |  Socks(mixed fabric 50g) Socks(mixed fabric 50g) |
Note: We recommend not to use more load than the recommended nominal load. Do not dry laundry that is too wet, as this may damage the dryer.
Labelling
The following icons provide care instructions for each garment. The garment label contains symbols for washing, bleaching, drying and ironing, or dry cleaning if necessary. Follow the instructions on the label to prolong the life of the garment and reduce laundry problems.
Washing
Boiling wash at 95°C
Colour wash at 60°C
Colour and delicate wash at 60°C
Colour wash at 40°C
Gentle wash at 40°C
Very gentle wash at 40°C
Delicate wash at 30°C
Gentle delicate wash at 30°C
Very gentle delicate wash at 30°C
Hand wash
Do not wash
Note: The number shown in the drawing specifies the maximum wash temperature in degrees Celsius which must not be exceeded.
Ironing
Ironing at a max. temperature of 200°C.
Ironing at a max. temperature of 150°C.
Ironing at a max. temperature of 100^ C.
Do not iron
Note: Dots indicate ironing temperature ranges (regulator, steam, travel irons and ironing machines).
Drying
Suitable for tumble dryer
Tumble dry/ tumble dry at 80°C normal
Tumble dry/ tumble dry at 60°C mild
Do not tumble dry
Line drying
Line drip dry
Flat tumble drying
Flat drip-drying
Line drying in the shade
In-line drip-drying in the shade
Horizontal shade drying
Horizontal drip-drying in the shade
Note: The dots indicate the drying level of the tumble dryer and the lines indicate the type and position of drying.
Bleach
Any type of bleach
Oxygen bleach only
Do not use bleach
Note: Do not use more detergent than recommended by the product manufacturer.
Note: Use stain and bleach removers before the washing cycle and only when necessary.
Note: Save water and electricity by always loading the washing machine to the maximum load (the exact amount of laundry depends on the programme used).
Product parts
Due to technological innovations, the product description in this manual may not completely match your appliance. More detailed information corresponds to the final product.
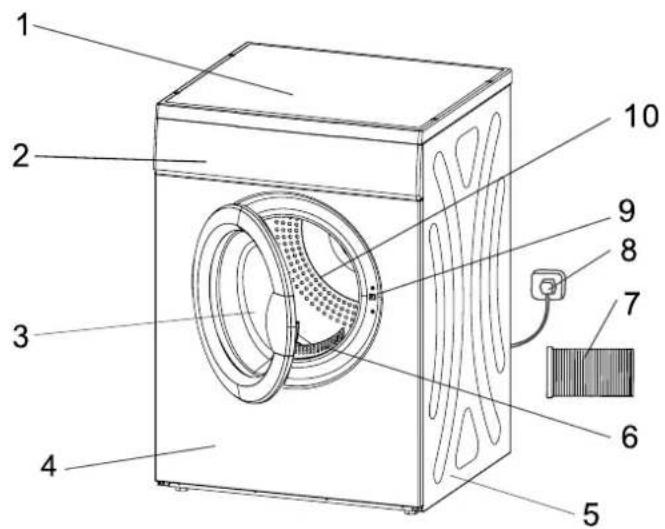
| 1 Top cover | |
| 2 Control panel | |
| 3 Drum | |
| 4 | Front cover |
| 5 | Side cover |
| 6 Door filter | |
| 7 Flexible hose | |
| 8 Power cable | |
| 9 | Seal |
| 10 Drum | |
| Model | SD-C7V |
| Drying type Evacuation | |
| Product dimensions (height x width x depth) 840 x 595 x | 555mm |
| Maximum load capacity (Kg) 7 | |
| Rated voltage and frequency 220-240V ~ 50Hz | |
| Ambient operating temperature 5°C ~ 35°C | |
| Net weight (Kg) 33 | |
| Power 2000W | |
| Number of programmes 8 |
Note
The rated capacity is the maximum capacity of laundry that can be dried at one time. Make sure that the laundry loaded in the product does not exceed the rated capacity.
Do not install the dryer in a room where there is a risk of frost. At temperatures close to freezing point, the dryer may not operate properly.
There is a risk of damage if condensed water is allowed to freeze in the pump, hoses and/or condensed water container.
Control panel
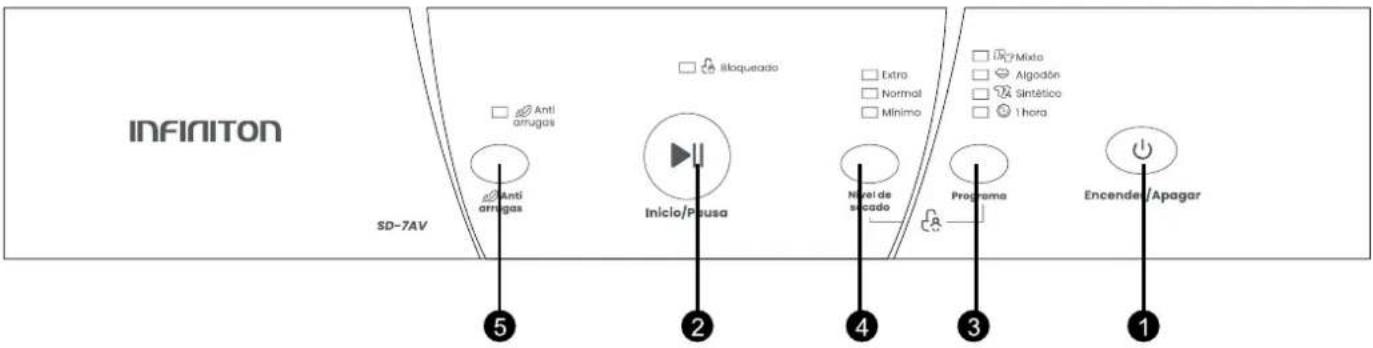
| 1 ON / OFF | |
| 2 START / PAUSEPress the button to start or pause the drying cycle. | |
| 3 PROGRAMMESDifferent drying cycles can be selected according to the user's needs and the type of laundry to be dried. | |
| 4 DRYING LEVELSelect between three drying levels (Extra, Normal, Minimum). | |
| 5 Anti-wrinklePrevents the rope from creasing at the end of the programme. |
How to use
1) Press the [Programme] button to select the desired programme.
2) Press [Drying Level] button ] to select the desired drying level.
3) Press the [Anti-Wrinkle] button to start the Anti-Wrinkle function.
4) Press the [Start/Pause] button.
5) Activate the child lock function by pressing and holding down the [Drying Level] and [Programme] buttons simultaneously for more than 3 seconds.
6) A beep sound will indicate the end of the drying cycle. After the beep, press
[On/Off] and unplug the dryer.
7) Clean the filter, lid and drum.
Note:
To avoid creasing, do not over-dry the laundry.
Do not use the dryer with clothes that have been dry cleaned.
Programme's table
| PROGRAMME | Approx. amount of re- maintaining moisture | Capacity Pro- gram- mess | Drying level | Notes |
| Cotton 70% | 7/3.5 Cotton Extra Select the dr- | ying program- me and power level according to the type of laundry, its weight and moistu- re content. | ||
| 60% | 7/3.5 Cotton Normal | |||
| 7/3.5 Cotton Minimum | ||||
| Mixed 70% | 7/3.5 Mixed Extra | |||
| 60% | 7/3.5 Mixed Normal | |||
| Synthetic 50% | 3.5/1 Synthetic Extra | |||
| 40% | 3.5/1 Synthetic Normal | |||
| Cotton --- | 1 | 1 Hour | --- | |
At the end of the selected programme, the anti-wrinkle function is activated for 30 minutes by an intermittent rotation in one direction only. You can interrupt this function at any time to remove the laundry. If the "Anti-wrinkle" button is activated, the duration of this mode increases from 30 to 120 minutes.
IMPORTANT NOTE:
For drying less than 1kg of laundry choose the 1 HOUR programme.
Table of approximate times
| PROGRAME | DURATION | ANTI-WRINKLE AUTO | ANTI-WRINKLE EXTRA |
| Cotton+Extra | 150 | +30min | +120min |
| Cotton+Normal | 120 | +30min | +120min |
| Cotton+Minimal | 105 | +30min | +120min |
| Mixed+Extra | 150 | +30min | +120min |
| Mixed+Normal | 140 | +30min | +120min |
| Synthetic+Extra | 55 | +30min | +120min |
| Synthetic+Normal | 45 | +30min | +120min |
| 1 Hour | 60 | +30min | +120min |
WARNING! Before cleaning, unplug the power plug first; do not connect or disconnect the power plug with wet hands, as there is a risk of electric shock and injury.
Do not spill water directly on the appliance, thus avoiding rust, electricity leakage and accidents.
Regular cleaning of this appliance helps to prolong its life.
External cleaning
Clean dust accumulated on the surface of the appliance frequently.
After using detergent, be sure to rinse it with clean water and then wipe it dry with a cloth.
Note: Never use metal scouring pads as this may damage painted, chrome and plastic surfaces.
WARNING! Do not use bristle brushes, wire brushes, detergent, soap powder, alkaline detergent, benzene, gasoline, acid, hot water and other corrosive or soluble elements to clean the surface of the appliance, door gasket, plastic decorative parts, etc. to avoid damage. Carefully dry the door gasket, clean the groove with a wooden stick wrapped with cotton thread.
Cleaning the door
Clean the glass and door gasket after each wash to remove possible lint and/or detergent/softener residues, as leaks may occur.
If any rust stains are found inside the drum, they should be removed with non-chlorine detergent.
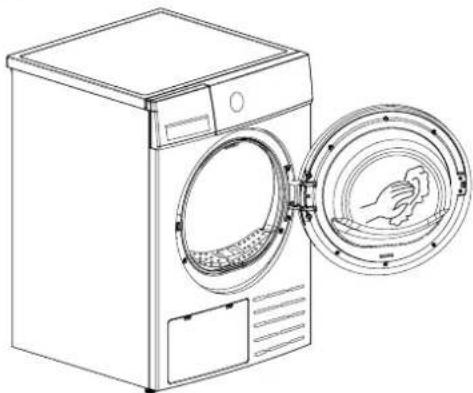
natural_image
Line drawing of a front-loading washing machine with a hand inserting a cloth into the door (no text or symbols)Cleaning the filters
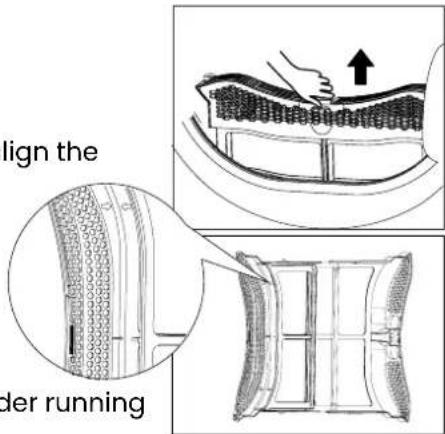
This tumble dryer has a main lint filter in the door.
Be sure to clean the door filter after each cycle.
Note:
In order for the double-layer filter to close smoothly, it is necessary to align the arrows at both ends, as well as the centre slot and the side slot.
slot.
Cleaning the door filter
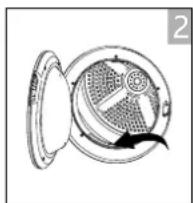
- Open the door.
- Remove the door filter.
- Open the filter and remove the lint from the filter, you can clean it under running water.
- Dry the door filter thoroughly before reinstalling it.
Observe the correct orientation before inserting the door filter.
Drum cleaning
- Disconnect the power cord before cleaning.
- Clean the dryer with a damp cloth that is moistened with clean water only.
- Do not use solvents, abrasive cleaners, glass cleaners or all-purpose cleaners. They may damage plastic surfaces and other parts.
• Use gloves for cleaning.
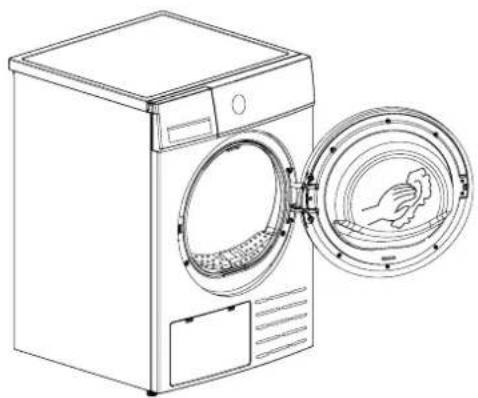
natural_image
Line drawing of a washing machine with an open door and a circular inset showing a hand washing a cloth (no text or symbols)• Prepare a damp cloth dampened with clean water.
- Clean the door, especially the inner window.
- Clean the seal around the door opening.
- Clean the humidity sensor inside the drum.
- Remove all filters, clean the seal and air flow openings.
• Before starting the dryer, dry all parts with a soft cloth.
Troubleshooting
Whenever there is a problem with the appliance, check if you can solve it by following the tables below. If the problem persists, contact customer service.
| DESCRIPTION CAUSE SOLUTION | ||
| Does not start Power failure. The plug is not properly connected.The temperature of the laundry is too high.The temperature fuse is disconnected. | Wait until the power is on.Check the socket, make sure that the plug is properly connected.The laundry in the dryer must be after spinning, and the laundry to be dried must not exceed 3 kg.Call the service technician to reset the temperature fuse. | |
| Hot or smells burnt The lint filter is dirty.The suction or exhaust duct is dirty. | Make sure to clean the lint filter well in advance.Clean the tube. | |
| Clothes too dry There is too much laundry in the dryer.Laundry is not taken out in time when finished.Laundry is not sorted correctly.Temperature is too high. | Make sure there is no overload of laundry.Take the laundry out immediately when finished.Respect the maintenance label on the laundry. | |
| Clothes shrink Too dry Observe the care label on the laundry. If clothes shrink easily, examine them when they are dry. Remove clothes when they are too wet or too dry and hang them up until they are completely dry. | ||
| Lint forms on clothes It is correct that synthetic fibres and permanent press fibre cause hairballs. This is because the correct rubbing causes the formation of fluff. | Use fabric softener to lubricate the fibre, when ironing clothes, apply a little fabric softener to the cuffs and neckline, turn the iron outwards to reduce rubbing. | |
Note
If you cannot solve the problems yourself and need help:
- Press the button (On / Off).
- Disconnect the mains plug from the mains and call for service.
Product sheet
Brand: INFINITON
Model: SD-C7V
Rated capacity: 7 kg
Tumble dryer type: ventilated air
Energy efficiency class: C
Energy consumption 510.0kWh per year, based on 160 drying cycles of the normal cotton programme at full and partial load, and that of the low energy mode.
low energy modes. Actual energy consumption per cycle depends on how the appliance is used.
Automatic or non-automatic: Automatic
EU Ecolabel: N/A
Energy consumption of the normal cotton programme with full load: 4.38kWh Energy consumption of the normal cotton programme with partial load: 2.38kWh
Power consumption off (Po): 0.46W
Standby power consumption (Po): 0.46W
Duration of standby mode: 10 min.
The Cotton + Standard programme, which is the "standard cotton programme" used at both full and partial load, is the standard drying programme referred to on the label and in the energy fiche. This programme is recommended for drying damp cotton laundry and is the most efficient in terms of energy consumption for cotton laundry.
Weighted programme duration of the normal cotton programme with full and partial load : 100 min.
Programme duration of the normal cotton programme with full load : 130 min.
full load : 130 min
Programme duration of the normal cotton programme with partial load : 74 min.
partial load : 74 min
Sound power level for the normal cotton programme with full load : 69dB
full load : 69dB
INFINITON
Secadora
natural_image
Front view of a white infinity washing machine (no visible text or symbols on the device body)SD-C7V
Ean: 8445639003107
natural_image
Simple line drawing of a mechanical setup with a block, cross mark, and circular components (no text or symbols)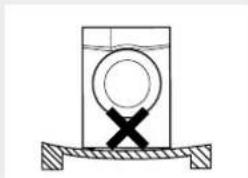
natural_image
Simple line drawing of a container with a cross mark on a base, no text or symbols present.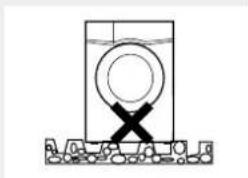
natural_image
Simple line drawing of a washing machine with a circular component and cross symbol, placed on a surface (no text or labels)Transporte
natural_image
Two stick figures pulling a gray rectangular object, no text or symbols presentnatural_image
Technical line drawing of a rectangular electronic device with ventilation slots and a 10cm height dimension label (no text or symbols beyond measurement annotation)Nivelação
natural_image
Diagram of a washing machine with a tool inserted, showing no text or symbols on the device itself.natural_image
Technical line drawing of a mechanical device with mounting bracket and side profile (no text or symbols)B
natural_image
Technical line drawing of a mechanical device with internal components and a side profile (no text or symbols)Conexão eléctrica
flowchart
graph LR
    A["1: Ligar"] --> B["2: Cable with fastening"]
    B --> C["3: Cable with fastening"]
porta
Secagem

flowchart
graph LR
    A["Ligar Seleccionar programa"] --> B[" Selecionar função "]
    B --> C[" Play "]
Após secagem
flowchart
graph LR
    A["1: Screen with arrows indicating direction"] --> B["2: Filter with internal mesh"]
    B --> C["3: Cable with plug and cable"]
    style A fill:#f9f,stroke:#333
    style B fill:#ccf,stroke:#333
    style C fill:#cfc,stroke:#333
natural_image
Symbol of a trash bin crossed out by two crossed lines (no text or labels)
natural_image
Logo featuring a red play button inside a triangular shape with multicolored segments and the word 'easyplay' below (no additional text or symbols)natural_image
Line drawing of a washing machine with an open door and a hand cleaning the interior (no text or symbols)Limpeza dos filtros
Limpeza do tambor
natural_image
Line drawing of a front-loading washing machine with an open door and a hand inserting a fan (no text or symbols)¿Necesitas ayuda?
natural_image
Silhouette of a person wearing a headset with a crossed wrench icon (no text or symbols)
INFINITON
TÉRMINOS Y REGISTRO DE GARANTÍA

- Transporte
- Nivelar
- Conexión eléctrica
- How does an evacuation dryer work?
- How do you install an evacuation dryer?
- Location
- Transport
- Levelling
- Attaching the flexible hose
- Electrical connection
- Quick start
- Before each drying
- Drying
- After drying
- General security information
- Safety of children and vulnerable people
- Electrical connections
- Unpacking the appliance
- Service & Disposal
- Packing materials
- Disposal of the device
- Twist and go!
- What's Easy play technology?
- Easy Play, a child's game!
- Why Easy Play is essential?
- Labelling
- Washing
- Ironing
- Bleach
- Product parts
- Note
- Control panel
- How to use
- IMPORTANT NOTE:
- External cleaning
- Cleaning the door
- Cleaning the filters
- Drum cleaning
- Troubleshooting
- Product sheet
- INFINITON
- Nivelação
- Conexão eléctrica
- Secagem
- Após secagem
- Limpeza dos filtros
- Limpeza do tambor
- ¿Necesitas ayuda?
- TÉRMINOS Y REGISTRO DE GARANTÍA
Brand : Infiniton
Model : SD-C7V
Category : Tumble dryer