
MJ-BH6001W - Blender MIDEA - Free user manual and instructions
Find the device manual for free MJ-BH6001W MIDEA in PDF.


| Product Type | Hand Blender (Immersion Blender) |
| Model Number | MJ-BH6001W |
| Rated Voltage | 220-240V~ |
| Rated Frequency | 50-60Hz |
| Rated Power | 600W |
| Blocked Power | 1000W |
| Main Unit Material | Plastic (ABS) |
| Wand Attachment Length | Approx. 20 cm |
| Beaker Capacity | 600 ml |
| Chopper Bowl Capacity | 500 ml |
| Baby Chopper Bowl Capacity | 100 ml |
| Maximum Whisk Capacity | 400 ml (cream) or 4 egg whites |
| Included Attachments | Wand, Whisk, Chopper, Potato Masher, Beaker |
| Optional Attachments | Baby Chopper |
| Speed Control | Stepless speed + Turbo button |
| Maximum Continuous Operation | 60 seconds (wand), 2 minutes (whisk), 1 minute (masher) |
| Safety Features | Overload protection, automatic shut-off, sharp blade warning |
| Cleaning | Wand and whisk body: wipe only; beaker, whisk wire, chopper blade: dishwasher safe |
| Not for | Ice crushing, blending hot liquids, chopping hard items (coffee beans, spices, chocolate) |
| Warranty | Standard manufacturer warranty (contact dealer) |
| Power Cord Length | Approx. 1.2 m |
| Weight | Approx. 1.5 kg (with attachments) |
| Dimensions (main unit) | Approx. 40 x 8 x 8 cm |
Frequently Asked Questions - MJ-BH6001W MIDEA
User questions about MJ-BH6001W MIDEA
0 question about this device. Answer the ones you know or ask your own.
Ask a new question about this device
Download the instructions for your Blender in PDF format for free! Find your manual MJ-BH6001W - MIDEA and take your electronic device back in hand. On this page are published all the documents necessary for the use of your device. MJ-BH6001W by MIDEA.
USER MANUAL MJ-BH6001W MIDEA
natural_image
Line drawings of four kitchen utensils: a whisk, a digital brush, a lid, and a cup (no text or symbols)MANUALE
MJ-BH6001W
INDICE
ISTRUZIONI DI SICUREZZA....1
DATI TECNICI DEL PRODOTTO 2
COMPONENTI 3
INSTRUZIONI PER L'USO 4
RICETTE 9
ACCESSORI (Optional)
natural_image
Illustration of hands pouring liquid into a glass with food items (no text or symbols)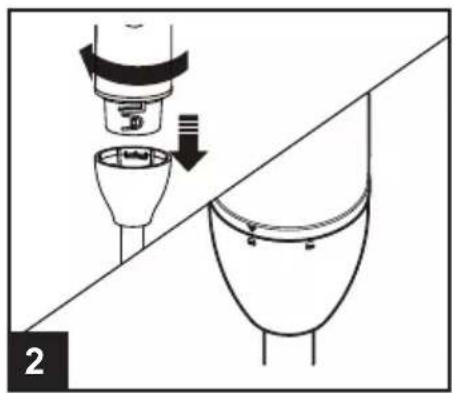
natural_image
Diagram showing a mechanical assembly with a component being inserted into a housing, alongside a close-up of its internal structure (no text or symbols)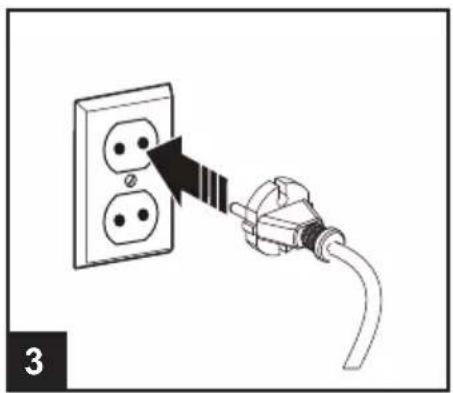
natural_image
Line drawing of a plug inserted into an electrical outlet with two outlets, showing a black arrow indicating the insertion direction (no text or symbols present)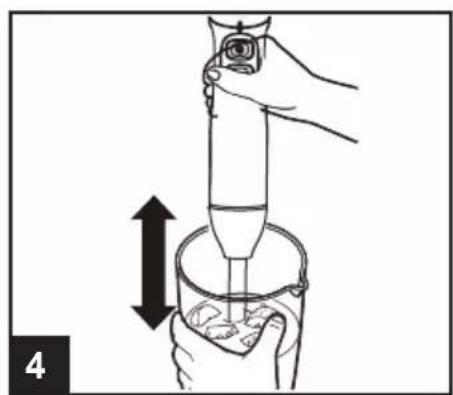
natural_image
Illustration of a hand using a pipette to lift a container with liquid, showing mechanical setup (no text or symbols)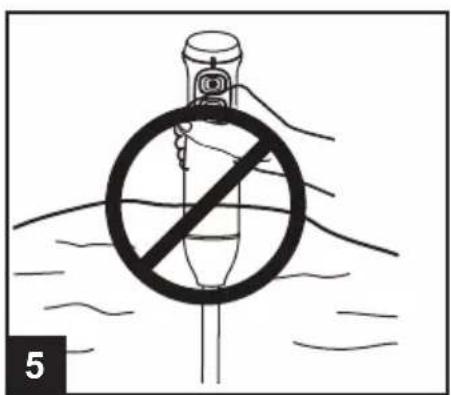
natural_image
Diagram showing a plug inserted into an electrical outlet with two socket outlets, connected to a cable (no text or symbols present)natural_image
Simple line drawing of a bucket with a downward arrow indicating downward motion (no text or symbols)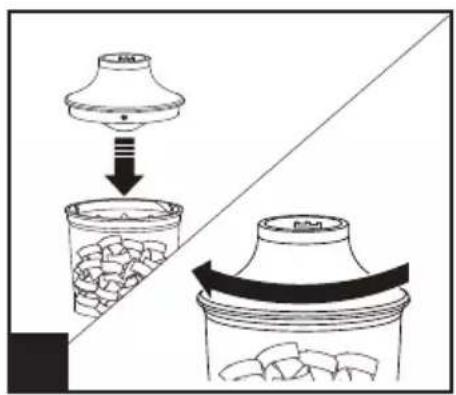
natural_image
Diagram showing a lid being inserted into a glass container with granular material, alongside a side view of the lid (no text or symbols present)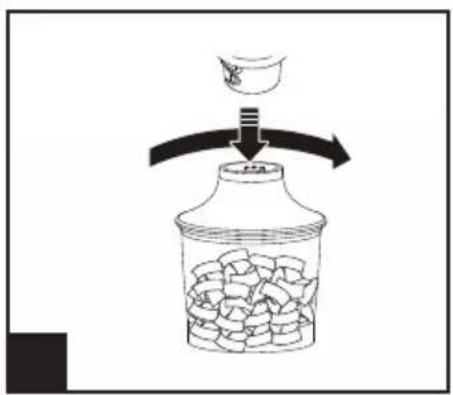
natural_image
Diagram showing a bottle being compressed with a container filled with granular material, no text or symbols present.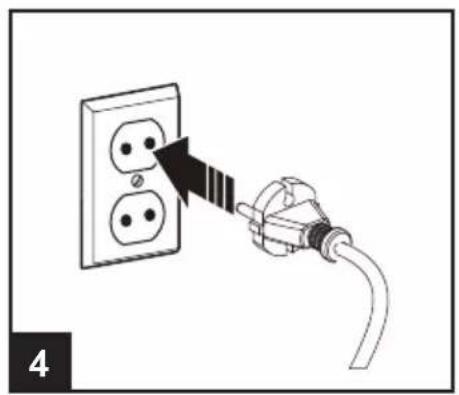
natural_image
Line drawing of a plug inserted into an electrical outlet with two socket plugs, showing wiring connection (no text or symbols)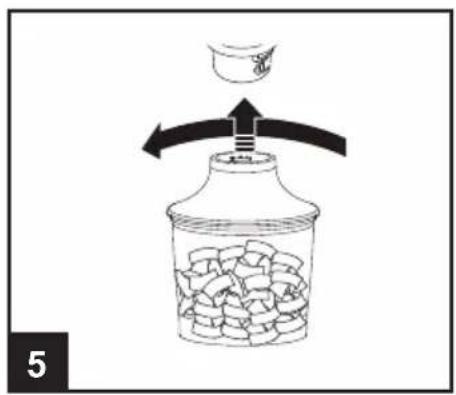
natural_image
Diagram showing a bottle pouring liquid into a jar with an arrow indicating flow direction (no text or symbols)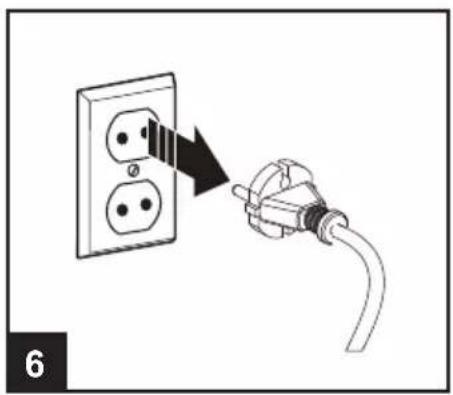
natural_image
Diagram showing a plug inserted into an electrical outlet with a black arrow indicating the insertion direction (no text or symbols present)ISTRUZIONI PER L'USO
natural_image
Diagram of a mechanical assembly showing a cylindrical component with internal components and a downward arrow indicating motion (no text or symbols)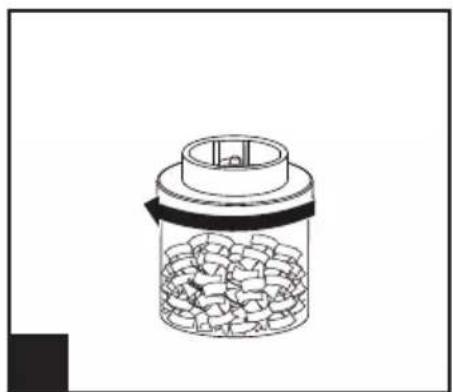
natural_image
Diagram of a mechanical component with granular material inside a jar (no text or symbols)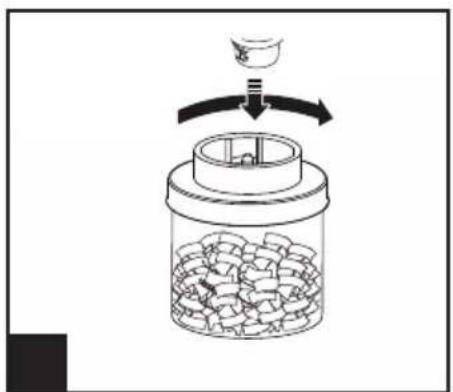
natural_image
Diagram of a mechanical device with rotating components and directional arrows, no text or symbols presentISTRUZIONI PER L'USO
natural_image
Line drawing of a plug inserted into an electrical outlet, showing power cord and socket (no text or symbols)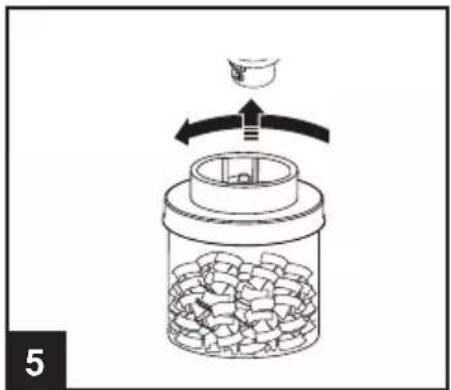
natural_image
Diagram of a mechanical device with rotating components and granular material inside a jar (no text or symbols)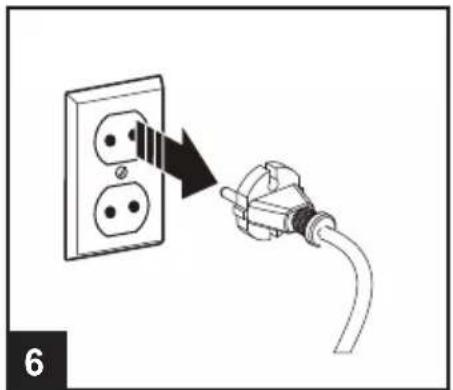
natural_image
Diagram showing a plug inserted into an electrical socket, with a black arrow indicating the insertion direction (no text or symbols present)natural_image
Technical line drawing of a mechanical device with internal components and a base component (no text or symbols)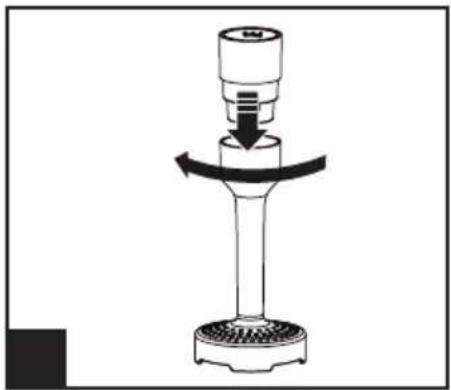
natural_image
Diagram of a mechanical press or valve mechanism with directional arrows indicating motion (no text or symbols)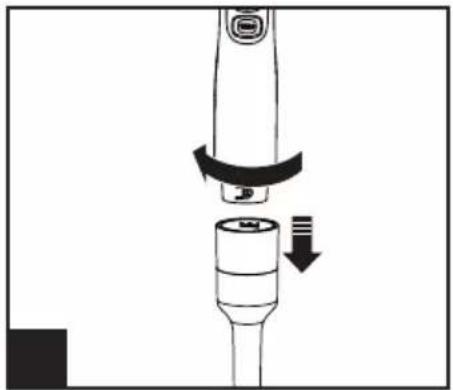
natural_image
Diagram of a dental implant with a curved arrow indicating rotation and a downward arrow for size (no text or symbols)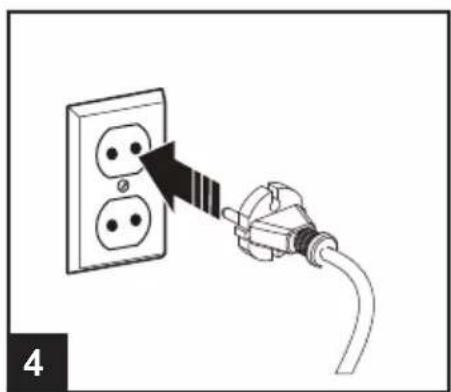
natural_image
Illustration of a plug inserted into an electrical outlet with a black arrow indicating the insertion direction (no text or symbols present)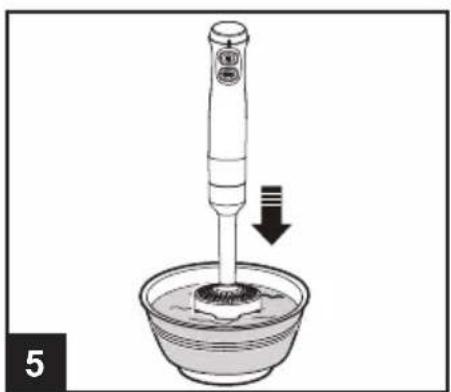
natural_image
Illustration of a pipette dispensing liquid into a bowl with a downward arrow indicating flow (no text or symbols)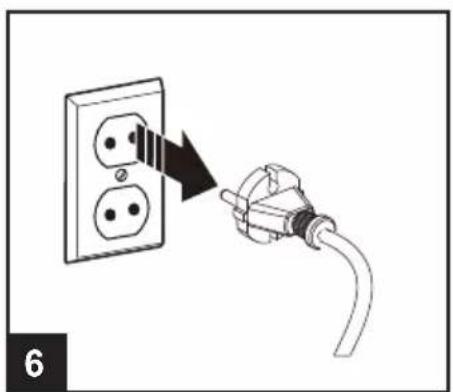
natural_image
Diagram showing a plug inserted into an electrical outlet, with a black arrow indicating the insertion direction (no text or symbols present)ISTRUZIONI PER L'USO
SCHIACCIAPATATE UTILIZZARE SOLO L'IMPOSTAZIONE DEL PULSANTE DI ACCENSIONE
natural_image
Diagram showing a plug inserted into an electrical outlet with two socket plugs, no text or symbols present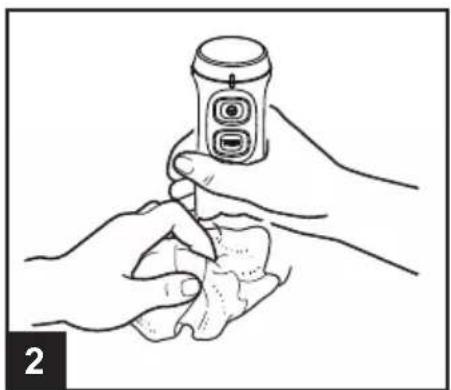
natural_image
Illustration of two hands holding a device with a circular button, no text or symbols present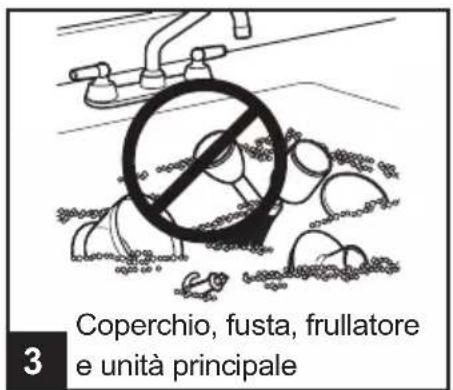
IMPORTANT SAFETY INSTRUCTIONS. 1
TECHNICAL DATA OF THE PRODUCT 2
PART NAME 3
INSTRUCTIONS FOR USE 4
RECIPES 9
ABNORMALITY ANALYSIS AND HANDLING 9
CLEANING AND MAINTENANCE 10
CIRCUIT PRINCIPLE DIAGRAM....12
IMPORTANT NOTE: Please read the manual carefully before operating your product. Retain it for future reference.
IMPORTANT SAFETY INSTRUCTIONS
To avoid the risk of serious injury when using your hand blender, basic safety precautions should be followed, including the following.
READ ALL INSTRUCTIONS, SAFEGUARDS, AND WARNINGS BEFORE OPERATING THE APPLIANCE.
- To protect against risk of electrical shock do not put into water or other liquid.
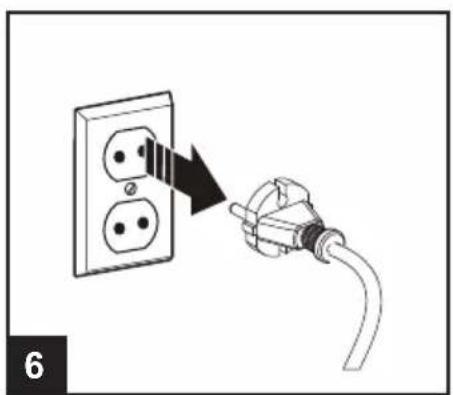
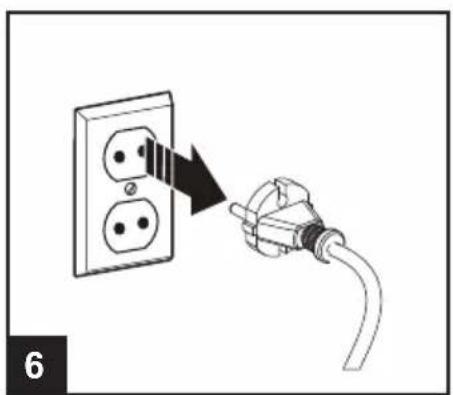
- Unplug from outlet when not in use, before putting on or taking off parts, and before cleaning.
- Avoid contacting moving parts.
- Do not operate any appliance with a damaged cord or plug or after the appliance malfunctions, or is dropped or damaged in any manner.
- The use of attachments not recommended or sold by the manufacturer may cause fire, electric shock or injury.
- Do not use outdoors.
- Do not let cord hang over edge of table or counter.
- Do not let cord contact hot surface, including the stove.
- Blades are sharp. Handle carefully.
- Do not blend hot liquids.
- The appliance shall not be used by children. Keep the appliance and its cord out of reach of children.
- This appliance can be used by persons with reduced physical, sensory or mental capabilities, or lack of experience and knowledge if they have been given supervision or instruction concerning use of the appliance in a safe way and if they understand the hazards involved. Children should not do not play with the appliance.
- If the supply cord is damaged, it must be replaced by a special cord or assembly available from the manufacturer or its service agent or similarly qualified person in order to avoid a hazard.
- This appliance is intended to be used in household and similar applications such as:
IMPORTANT SAFETY INSTRUCTIONS
– Staff kitchen areas in shops, offices and other working environments;
- Farm houses;
– By clients in hotels, motels and other residential type environments;
- Bed and breakfast type environments.
- Be careful if hot liquid is poured into the food processor or blender as it can be ejected out of the appliance due to a sudden steaming.
- Always disconnect the appliance from the supply if it is left unattended and before assembling, disassembling or cleaning;
- Switch off the appliance and disconnect from supply before changing accessories or approaching parts that move in use.
- Warning: Risks of injuries if you don't use the appliance correctly.
- Care shall be taken when handling the sharp cutting blades, emptying the bowl and during cleaning.
- If the instruction has lost, you can download it from our website or contact local importer to send you the instruction or CD disc.
SAVE THESE INSTRUCTION.
THIS UNIT IS INTENDED FOR HOUSEHOLD USE ONLY.

Caution:
The failure to follow any of the important safeguards and the important instructions for safe use is a misuse of your hand blender that can void your warranty and create the risk of serious injury.
TECHNICAL DATA OF THE PRODUCT
| Product name | Model No. | Rated voltage | Rated frequency | Rated power | Blocked power |
| HAND BLENDER | MJ-BH6001W | 220-240V~50-60Hz | 600W | 1000W |
PART NAME
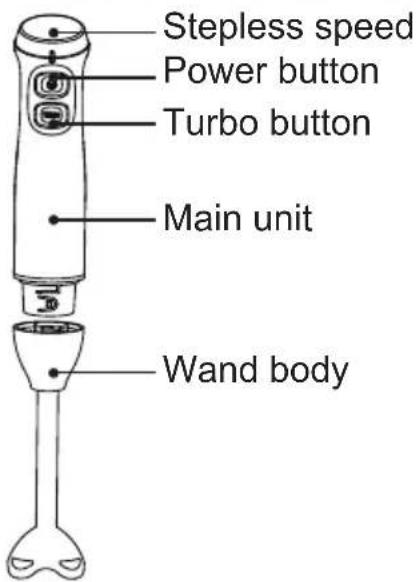
Wand Attachment
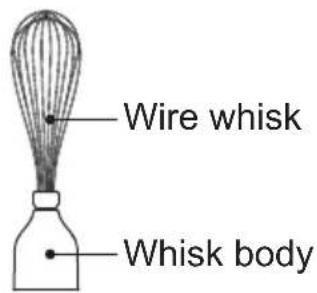
Whisk Attachment
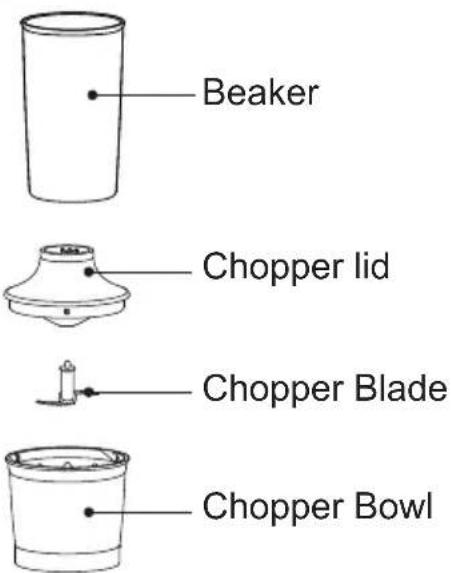
Chopper Attachment
ACCESSORIES (Optional)
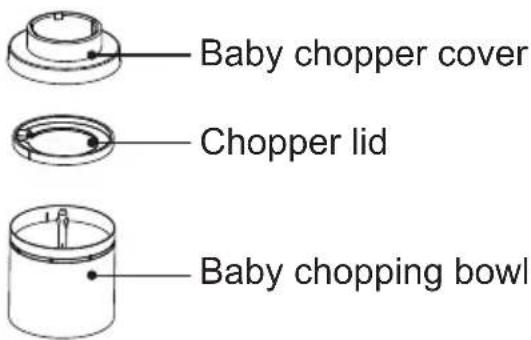
Baby Chopper Attachment
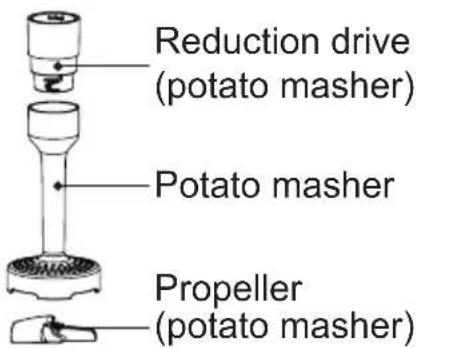
Potato masher Attachment
Note:
- The hand blender is not designed for use over a heat source.
• This appliance is not intended to chop ice.
• To use the hand blender in a saucepan, be sure to remove the pan from the stove. - To puree foods, liquid is needed. Add cooking liquid, broth, juice, milk, or cream until desired consistency is reached.
- For thorough blending, move hand blender up and down in mixture until smooth.
- To achieve best blending results and to reduce splattering (especially hot foods or liquids), use deep, tall containers.
- We recommend chopping only 5oz. (142g) of meat at a time in the food chopper. Meat should be cut into 2-inch (5.1-cm) pieces before processing.
- Don't allow to use hand blender on long time.
INSTRUCTIONS FOR USE
hand blender/whisk attachment
natural_image
Illustration of hands pouring liquid into a glass with food items (no text or symbols)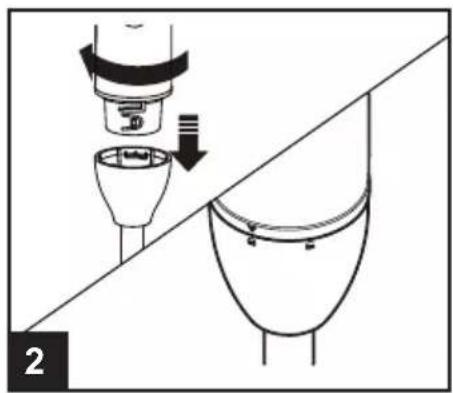
natural_image
Diagram showing a mechanical assembly with a component being inserted into a housing, alongside a close-up of the housing (no text or symbols present)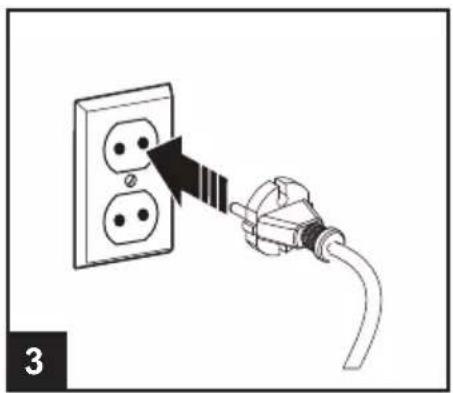
natural_image
Diagram showing a plug inserted into an electrical outlet with two outlets, connected by a black arrow (no text or symbols present)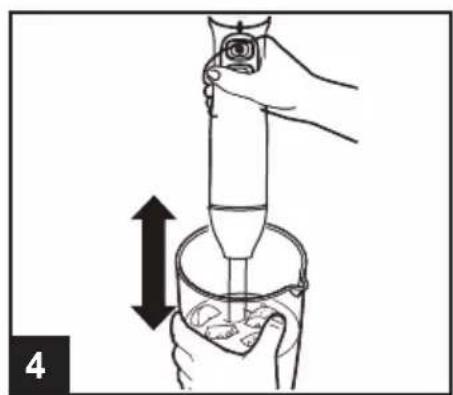
natural_image
Illustration of a hand using a pipette to lift a container with liquid, showing an upward arrow (no text or symbols)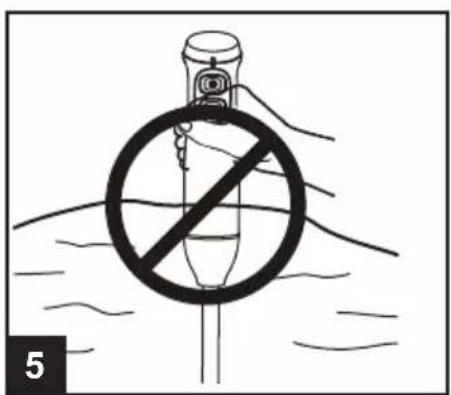
natural_image
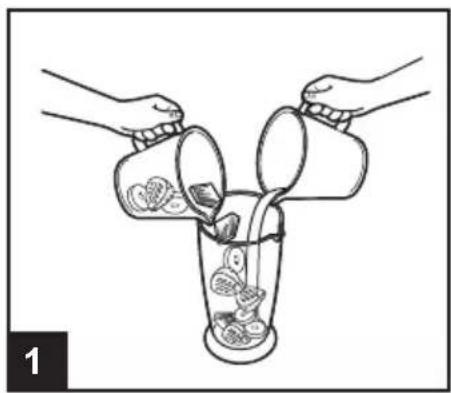
Diagram showing a plug inserted into an electrical outlet with two socket outlets, connected to a cable (no text or symbols present)According to require assembled appliance body and attachment, let every attachment be locked completely. Assembled way be showed on picture.
Wand use
- You can blend carrot (240g carrot, 360g water), operating time is less than 60 seconds and rest 60 seconds.
Wand used on beaker
- Please check over accessory is run good before use appliance for blend food.
- Put the beaker on a worktop, and pour not over 600ml food or mixture into it
- Assembled appliance body and wand completely (wand be locked on appliance body)
- Put appliance plug into socket of supply power.
- Hold appliance body tightly and let finger can easy operate speed button.
- Put wand into beaker, Select Speed, Press the TURBO button on top of the main unit. You can also press the power button first and turning the Stepless speed Speed can be gradually adjusted at any time during blending.
- Do not hold power button down for more than 60 seconds at a time.
- Move appliance up-down, right-left slowly, until food be blended good
INSTRUCTIONS FOR USE
- Release speed button, let blade be stop, and put out appliance, Pull out power cord from socket or shut off appliance power if need blend another food.
• Take a cool pan and put it on worktable, assemble blender body and wand tightly. - Plug in. To avoid splashing, place the blade in food before switching on Hold the beaker steady, then press either speed button.
- Don't let liquid get above the join between the power handle and blender shaft.
- Move the blade through the food and use a stabling action.
- If you blender gets blocked, unplug before clearing.
• After use, unplug and dismantle.
Caution:
Do not use nonfood items in this hand blender. This product is not meant for soap making.
Do not immerse the main unit in water.
Always inspect attachments before each use. Do not use cracked, bent, or damaged attachments.
chopper
natural_image
Simple line drawing of a bucket with a downward arrow indicating downward motion (no text or symbols)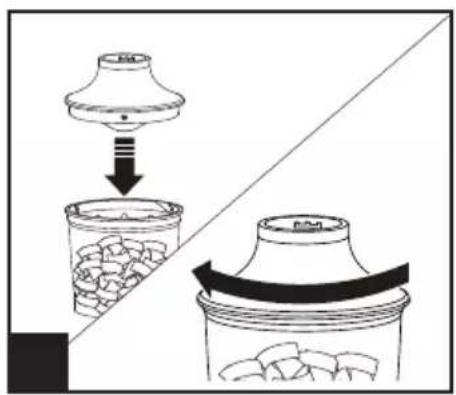
natural_image
Diagram showing a lid being inserted into a glass container with granular material, alongside a side view of the lid (no text or symbols present)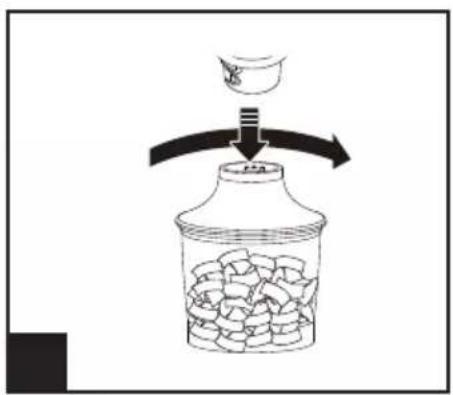
natural_image
Diagram showing a bottle being poured into a container with granular material, no text or symbols present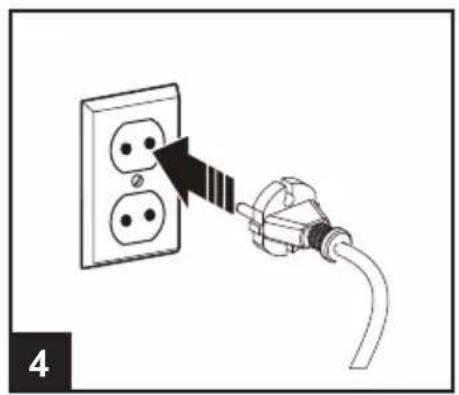
natural_image
Line drawing of a plug inserted into an electrical outlet with two socket plugs, showing a black arrow indicating the insertion direction (no text or symbols present)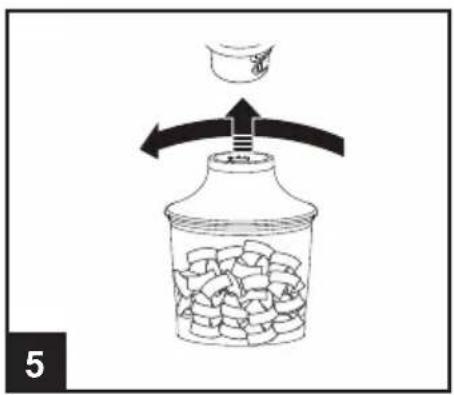
natural_image
Diagram showing a plug inserted into an electrical outlet with a black arrow indicating the insertion direction (no text or symbols present)INSTRUCTIONS FOR USE
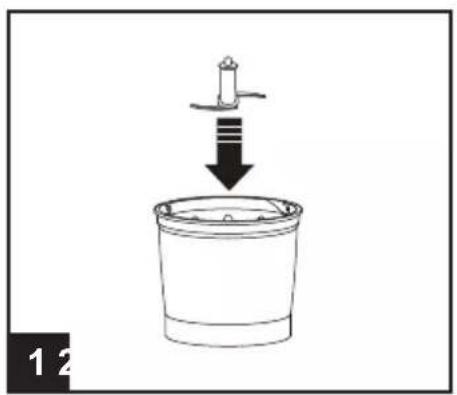
- Remove bones and cut food into 1-2cm cubes.
- Open chopper lid and fit chopper blade right.
- Add you food and not let food volume over 500ml.
• Fit chopper lid and locked it on bowl.
• Fit stick blender body on chopper tightly. - Plug in. Hold the bowl and blender body tightly, then press Turbo button.
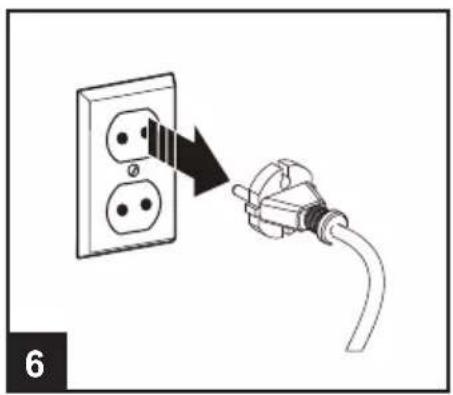
• After use, unplug and dismantle.

Note:
You can chop meat, cheese, vegetable, herbs, bread, biscuits and nuts, but not permit use it to chop hard food such as coffee bean, ice cubes, spices or chocolate, otherwise will damage the blade.
Whisk use
Whisk used to make light ingredients such as egg whites, cream, instant dessert, eggs and sugar for whisked sponges.
- Push the wire whisk into the whisk body and fit this whisk-ASM to stick blender body and turn & lock it.
- Place you food in a bowl.
- Put whisk into bowl, Select Speed, Press the TURBO button on top of the main unit. You can also press the power button first and turning the Stepless speed, Speed can be gradually adjusted at any time during blending.
• After use, unplug in and dismantle it. - Don't whisk more than four eggs whites or 400ml(3/4 Pt) cream.
- Don't let liquid get above the whisk wires. operating time is less than 2 minutes and rest 2 minutes.

Note:
Please not use it whisk heavier mixtures such as margarine and sugar, you will damage the whisk
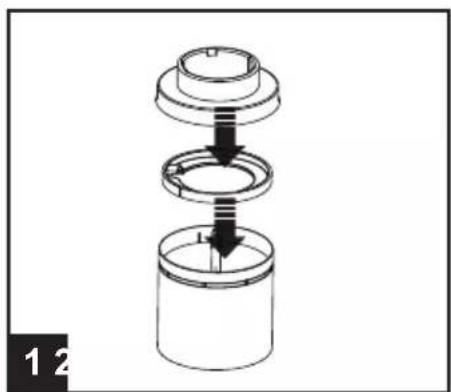
Baby chopper
natural_image
Diagram of a mechanical assembly showing a cylindrical component with internal components and a downward arrow indicating motion (no text or symbols)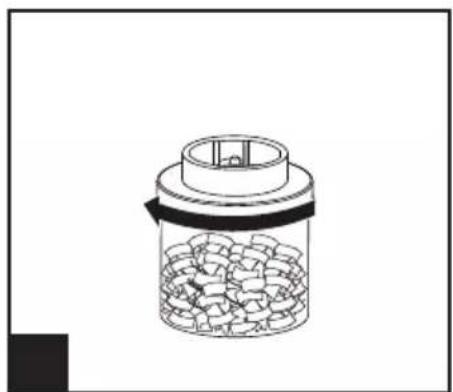
natural_image
Diagram of a mechanical component with granular material inside a jar (no text or symbols)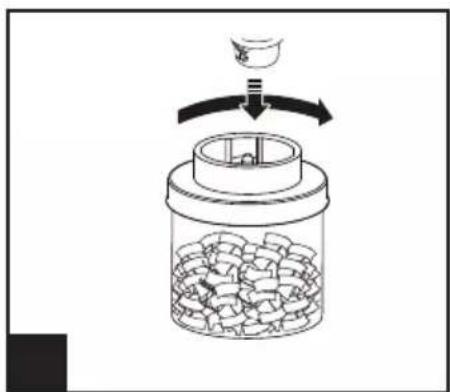
natural_image
Diagram of a mechanical device with a rotating component and granular material inside a jar (no text or symbols)INSTRUCTIONS FOR USE
natural_image
Line drawing of a plug inserted into an electrical outlet with a black arrow indicating the insertion point (no text or symbols present)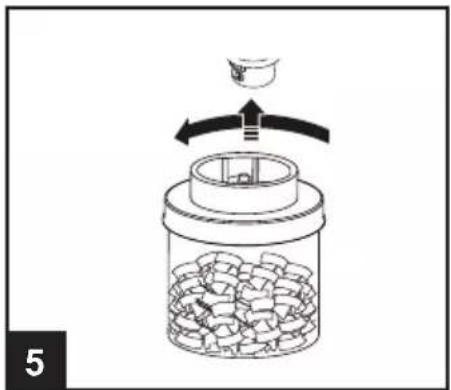
natural_image
Diagram of a mechanical device with rotating arm and granular material inside a jar (no text or symbols)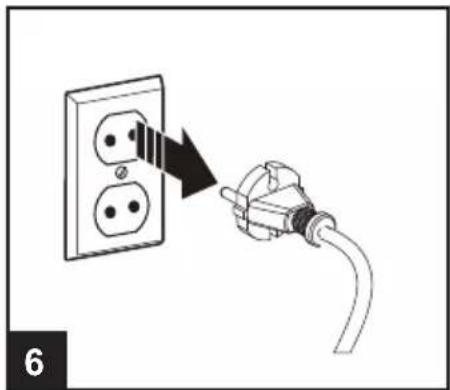
natural_image
Diagram showing a plug inserted into an electrical outlet with a magnified inset (no text or symbols)- Remove bones and cut food into 1-2cm.
- Open chopper cover and chopper lid.
- Add you food and not let food volume over 100ml.
• Fit chopper lid and chopper cover and locked it on bowl.
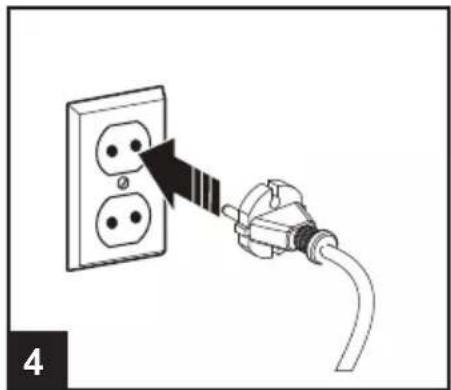
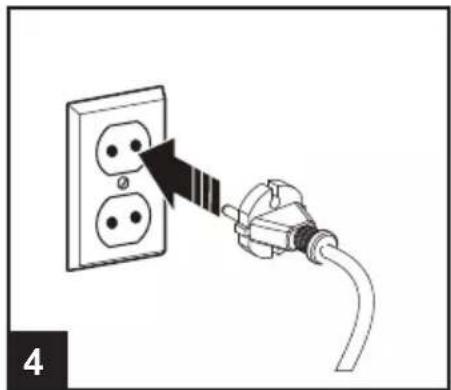
• Fit stick blender body on chopper tightly. - Plug in. Hold the bowl and blender body tightly, then press Turbo button.
• After use, unplug and dismantle.
Potato masher
natural_image
Technical line drawing of a mechanical component with a central gear and a separate tool (no text or symbols)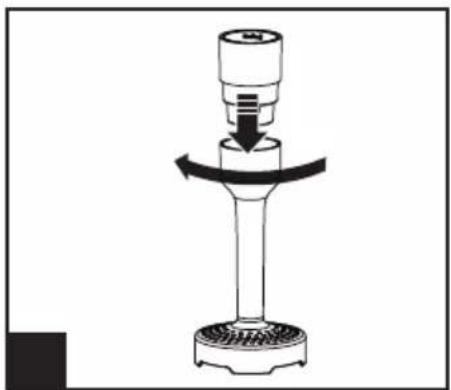
natural_image
Diagram of a mechanical press or valve mechanism with a rotating shaft and base (no text or symbols)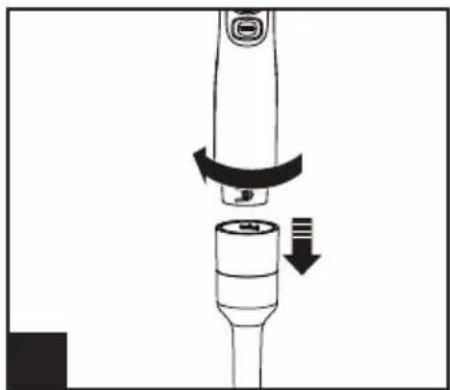
natural_image
Diagram of a dental tool with a curved arrow indicating rotation or movement (no text or symbols)
natural_image
Line drawing of a plug inserted into an electrical outlet with a black arrow indicating the insertion point (no text or symbols present)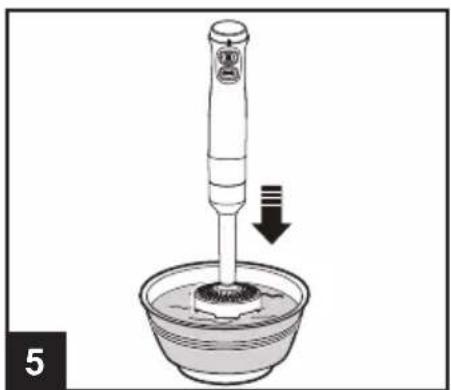
natural_image
Illustration of a digital water tap with a downward arrow indicating flow or movement (no text or symbols)
natural_image
Diagram showing a plug inserted into an electrical outlet with a black arrow indicating the insertion direction (no text or symbols present)INSTRUCTIONS FOR USE
POTATO MASHER ONLY USE THE POWER BUTTON SETTING IN
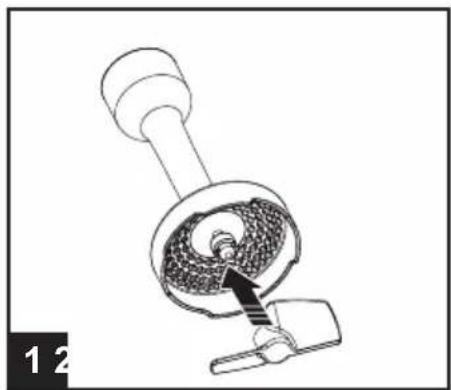
- Assembled the propeller on the bayonet adapter and lock the propeller into position by turning it counter
- Lock the potato masher into place by turning it clockwise until it will not go any further.
- Lock the reduction drive into place by turning it clockwise until it will not go any further.
Note: To make sure that the axis of the hand mixer does not turn along with the propeller, attach the propeller last. While disassembling, remove the propeller first. - Press the power button to start the Blender Stick. While adjust the Stepless speed to get right speed.
- To stop the blending process, let go of the switch before you pull the blending stick out of the food.
- After use, unplug the device from mains immediately.
TIPS FOR OPTIMUM USE
- The potato masher is a great tool for processing cooked vegetables, such as potatoes, beets and carrots.
- Never process hard or raw ingredients. This can cause damage to the device.
• Cook all vegetables through and drain the water prior to blending. - Do not hit the potato masher against the sides of the pot to remove any food mass after mashing. Use a spatula to scrape down the pot or bowl. However, before you do this, unplug the Blender Stick.
Recipe: Potatoes
• 1.25kg boiled potatoes (washed potatoes: medium-large size)
- cup pure cream
- 30g (1 ☒ Tbsp) butter
- The potatoes are peeled and cut into 3cm cubes prior to boiling. Cooked until tender
- Temperature has a huge impact on the quality and duration of mashing before it is considered processed.
The warmer the potatoes, the better the results are. Try to conduct the tests as soon as the potatoes are done (operating time is less than 1 minute and rest 1 minutes.) to ensure that it remains warm.
RECIPES
(Chopper)
| Food type | Maximum amount | Recommended speed | Approx. time(S) |
| Meat | 300g (10.5Oz) | Turbo button | 5 |
| Herbs | 20g (0.75Oz) | Turbo button | 20 |
| Nuts | 200g (7.0 Oz) | Turbo button | 30 |
| Cheese | 150g (5.0Oz) | Turbo button | 30 |
| Bread | 1 slice | Turbo button | 50 |
| Hardboiled egg | 2 | Turbo button | 5 |
| Onions | 100g (3.5 Oz) | Turbo button | 10 |
| Creamy dressing and dips | 150g (5.0 Oz) Power button 30 | ||
| Vegetables (cooked) | 300g (10.5 Oz) Power button | 30 | |
(Baby chopper)
| Food type | Maximum amount | Recommended speed | Approx. time(S) |
| Meat | 35g (1.2Oz) | Turbo button | 5 |
| Nuts | 20g (0.7Oz) | Turbo button | 20 |
| Cheese | 15g (0.7Oz) | Turbo button | 20 |
| Pigskin | 35g (1.2Oz) | Turbo button | 5 |
| Onions | 15g (0.5Oz) | Turbo button | 10 |
| Creamy dressing and dips | 15g (0.7 Oz) Power button 20 | ||
| Vegetables (cooked) | 35g (1.2 Oz) Power button | 20 | |
Note: operating time is refer to the recipes and rest time is 2 minutes.
ABNORMALITY ANALYSIS AND HANDLING
Abnormality Handling
- In case of abnormalities such as abnormal noises, smell, smoke, etc., you should immediately cut off power and stop use.
- If the product cannot work, please check if the power supply is connected, if the switch is put to the ON position and if fittings are installed in place.
- If the product still cannot work after checks mentioned above, please consult the designated repair centre for maintenance.
ABNORMALITY ANALYSIS AND HANDLING
Fault Analysis and Elimination
| Symptom | Analysis of Possible Causes | Countermeasure |
| Product does not work | Did not press the inching switch | Keep the point switch in the pressed state |
| Mixing sword master | Excessive amount of food processing | Reduce the quantity of ingredients |
| Ingredients stick to blade Cut off the power supply, clean up the blade on the ingredients | ||
| The abnormal odor products, hot, the phenomenon such as smoking | Excessive amount of food processing | Reduce the quantity of ingredients |
| Product continuous working time is too long | Shorten the product continuous working time | |
| Processing the ingredients of temperature is too high | The temperature of the ingredients do not exceed 60 ☒C | |
CLEANING AND MAINTENANCE
Cleaning
natural_image
Diagram showing a plug inserted into two socket outlets, with an arrow indicating the insertion direction (no text or symbols present)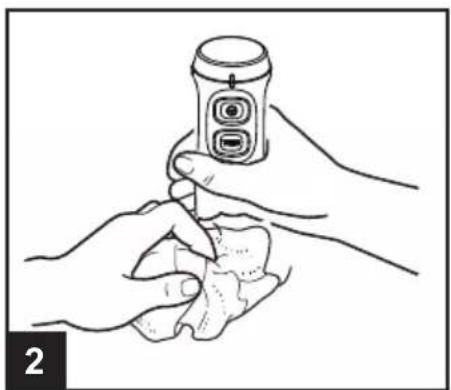
natural_image
Illustration of two hands holding a small object, possibly a device or tool, with no visible text or symbols.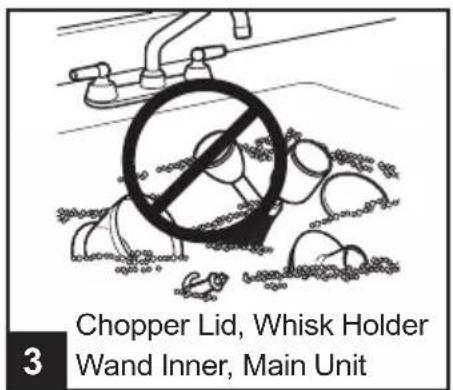
CLEANING AND MAINTENANCE
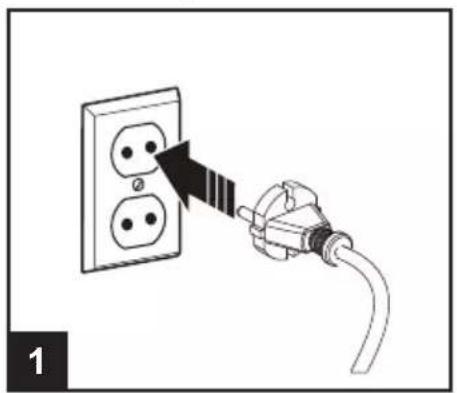
• Always switch off and unplug when cleaning appliance.
- Don't touch the sharp blades and keep special care when clearing blades avoid to be injured
- Some food easy discolor plastic part, Please rub with a cloth dipped in vegetable oil help remove discoloring.
- Do not immerse in water or any other liquid as below parts, Only allow use simply wipe clean with a damp cloth:
Main unit、Wand Attachment、Whisk body、Chopper lid、Reduction drive、Potato masher.
- You can wash with warm soapy water or clean on top shelf of the dishwasher as below parts. To avoid scratch the parts, Do not use any sharp, metal objects.
Beaker、Wire Whisk、chopper Blade、Chopping bowl、Baby Chopper parts、Propeller.
- Note: Unlock the propeller on the bayonet adapter by turning it anticlockwise. To reassemble after wash and dry thoroughly.
Caution:
Never hold main unit portion of hand blender under running water. Simply wipe clean with a damp cloth.
If you put the wand and whisk into the water to clean, you must pay attention to the following two aspects:
- Height of water can't over the plastic part at top of wand.
- Whisk must take out from the whisk body. Whisk can immerse in water for cleaning, but the whisk body only allows cloth to wipe.
Don't permit water or liquid be flow into chopper lid、stick blender body、wand、whisk body. If water get inside, drain and dry it before use it.
Maintaining
- If the power cord be damaged, for safety reasons, it must be send to our company authorized shop repair and changed.
- If the appliance have un-normal state, please contact with shop where purchase this appliance and make it clear or change it.
- When not use the appliance, please coil the cord, and lay it on somewhere children cannot get it.
- Keep appliance on a dry condition when not use appliance
- Don't plug in when not use appliance
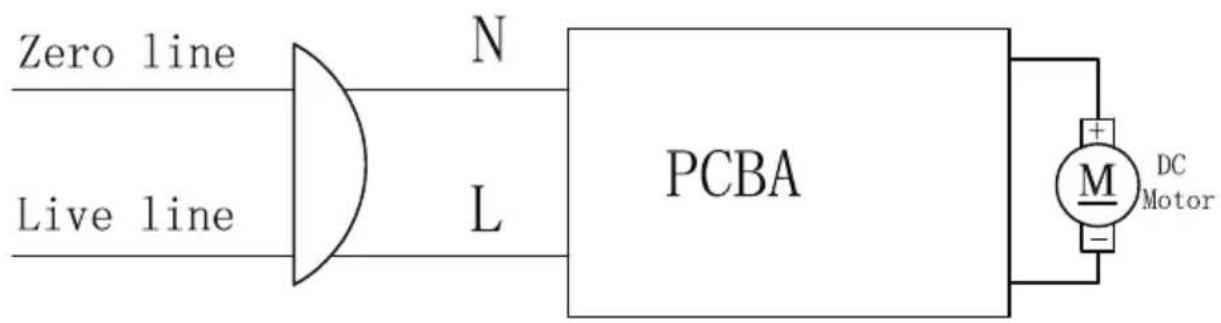
CIRCUIT PRINCIPLE DIAGRAM
Environmental protection
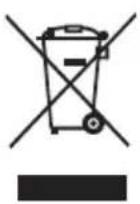
The appliance must not be disposed of with regular household waste. At the end of its service life, the appliance must be properly delivered to a collection point for the recycling of electrical and electronic equipment. By Collection and recycling of old appliances, you are making an important contribution to the conservation of our natural resources and provide for environmentally sound and healthy disposal.

- MANUALE
- ACCESSORI (Optional)
- ISTRUZIONI PER L'USO
- SCHIACCIAPATATE UTILIZZARE SOLO L'IMPOSTAZIONE DEL PULSANTE DI ACCENSIONE
- IMPORTANT SAFETY INSTRUCTIONS
- READ ALL INSTRUCTIONS, SAFEGUARDS, AND WARNINGS BEFORE OPERATING THE APPLIANCE.
- SAVE THESE INSTRUCTION.
- THIS UNIT IS INTENDED FOR HOUSEHOLD USE ONLY.
- Caution:
- TECHNICAL DATA OF THE PRODUCT
- PART NAME
- ACCESSORIES (Optional)
- Note:
- INSTRUCTIONS FOR USE
- hand blender/whisk attachment
- Wand use
- Wand used on beaker
- chopper
- Whisk use
- Potato masher
- POTATO MASHER ONLY USE THE POWER BUTTON SETTING IN
- TIPS FOR OPTIMUM USE
- Recipe: Potatoes
- RECIPES
- ABNORMALITY ANALYSIS AND HANDLING
- Abnormality Handling
- CLEANING AND MAINTENANCE
- Maintaining
- CIRCUIT PRINCIPLE DIAGRAM
- Environmental protection
Brand : MIDEA
Model : MJ-BH6001W
Category : Blender