
MB-FS5077 - Autre appareil électroménager MIDEA - Free user manual and instructions
Find the device manual for free MB-FS5077 MIDEA in PDF.


| Product Type | Multi-function Rice Cooker |
| Brand | Midea |
| Model | MB-FS5077 |
| Capacity | Approx. 1.8 L (10 cups cooked rice) |
| Power Supply | 220-240 V ~ 50/60 Hz |
| Functions | Rice, Steam, Soup/Stew, Slow Cook, Porridge, Pasta, Sauté, Meat, Bread, Yogurt, Manual/DIY |
| Control Panel | LED display with buttons: ON/OFF/START, Warm/Cancel, Menu, Soup/Stew, Rice, Slow Cook, TIMER/TEMP, +, - |
| Timer | Preset up to 24 hours; adjustable cooking time for each function |
| Keep Warm | Automatic after cooking, up to 12 hours |
| Safety Features | Temperature fuse, automatic shut-off, cool-touch handles, steam valve with pressure release |
| Accessories Included | Measuring cup, serving spatula, soup ladle, steamer basket |
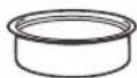
| Inner Pot | Non-stick cooking pot (removable and washable) |
| Cleaning | Removable steam valve, cover plate, and condensation collector for easy cleaning; wipe heating plate with damp cloth |
| Dimensions (approx.) | 30 x 28 x 25 cm (12 x 11 x 10 inches) |
| Weight (approx.) | 3.5 kg (7.7 lbs) |
| Material | Plastic outer body, stainless steel heating plate, aluminum inner pot with non-stick coating |
| Usage | Household indoor use only |
| Environmental Protection | Do not dispose with household waste; recycle at designated collection points |
Frequently Asked Questions - MB-FS5077 MIDEA
User questions about MB-FS5077 MIDEA
0 question about this device. Answer the ones you know or ask your own.
Ask a new question about this device
Download the instructions for your Autre appareil électroménager in PDF format for free! Find your manual MB-FS5077 - MIDEA and take your electronic device back in hand. On this page are published all the documents necessary for the use of your device. MB-FS5077 by MIDEA.
USER MANUAL MB-FS5077 MIDEA
natural_image
Line drawing of a robotic vacuum cleaner (no text or symbols)Modello No.: MB-FS5077

Do not place the cooking pot on other stoves for heating to avoid deformation due to high temperature; do not replace the cooking pot with other containers and operate on the heating plate.
natural_image
Illustration showing a hand holding a container with arrows indicating motion (no text or symbols)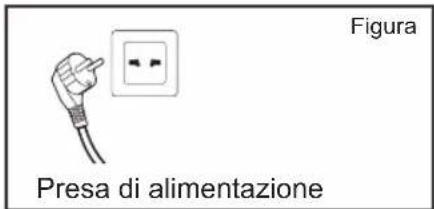
natural_image
Illustration of a hand cleaning a circular object with a handle (no text or symbols)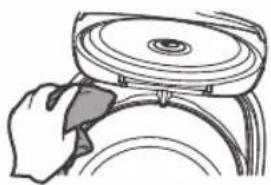
natural_image
Illustration of a hand using a tool to press or adjust a circular component (no text or symbols visible)natural_image
Illustration of a hand holding a curved object with radiating lines, no text or symbols presentnatural_image
Illustration of a hand holding a rolled-up document or scroll (no text or symbols visible)natural_image
Illustration of a person cleaning a circular object with a loop handle (no text or symbols)natural_image
Line drawing of a rice cooker with hands operating it (no text or symbols)natural_image
Technical line drawing of a device casing with internal components (no text or symbols)natural_image
Technical line drawing of a mechanical component with no visible text or symbolsnatural_image
Technical line drawing of a mechanical device with a handle and internal components (no text or symbols)natural_image
Line drawing of a hand pressing a button on a device (no text or symbols)natural_image
Line drawing of a robotic vacuum cleaner (no text or symbols)Model No.: MB-FS5077
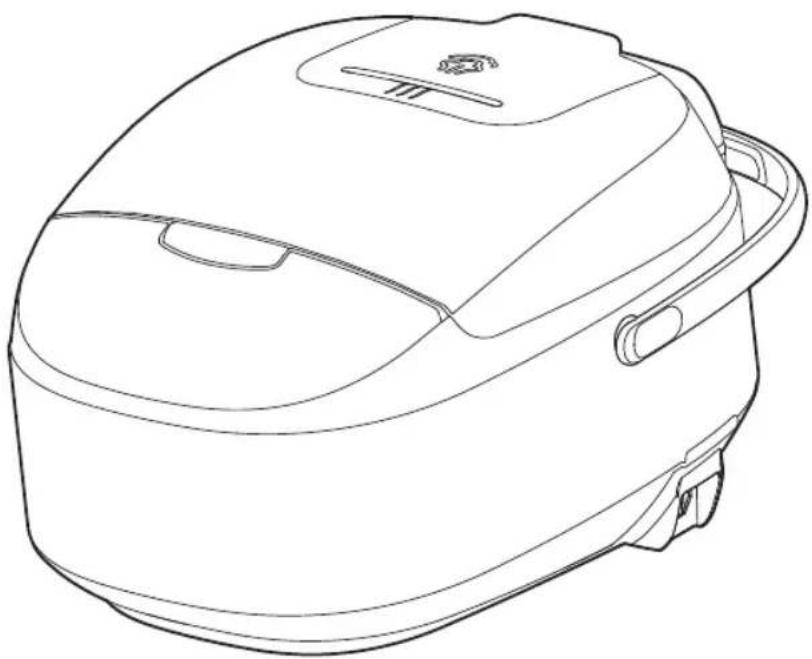
Thank you for purchasing the Midea Electric Rice Cooker. Please read the Operation Instructions carefully before using and keep it cautiously after reading for future reference. Pictures are for reference only, subject to the final product.
Important Safety Instructions
When using electrical appliances, please take the basic safety precautions that include the following: please read the full description.
-
This appliance is for household use only. Do not use outdoors.
-
This appliance can be used by children aged from 8 years and above and persons with reduced physical, sensory or mental capabilities or lack of experience and knowledge if they have been given supervision or instruction concerning use of the appliance in a safe way and understand the hazards involved. Children shall not play with the appliance. Cleaning and user maintenance shall not be made by children unless they are older than 8 and supervised. Keep the appliance and its cord out of reach of children aged less than 8 years.
-
Children should be supervised to ensure that they do not play with the appliance.
-
This appliance is intended to be used in household and similar applications such as:
-
Staff kitchen areas in shops, office and other working environments;
- farm houses;
- by clients in hotels, motels and other residential type environments;
-
bed and breakfast type environments;
-
If the supply cord is damaged, it must be replaced by a special cord or assembly available from the manufacture or its service agent.
-
Please turn off and unplug the appliance before cleaning, maintenance or relocation and whenever it is not in use.
-
Do not immerse any part of the appliance in water or other liquid.
-
The heating element surface is subject to residual heat after use, do not touch.
-
Warning: Avoid spillage on the connector.
-
Warning: Misuse may cause potential injury.
-
The appliance is not intended to be operated by means of an external timer or a separate remote-control system.
Product Description
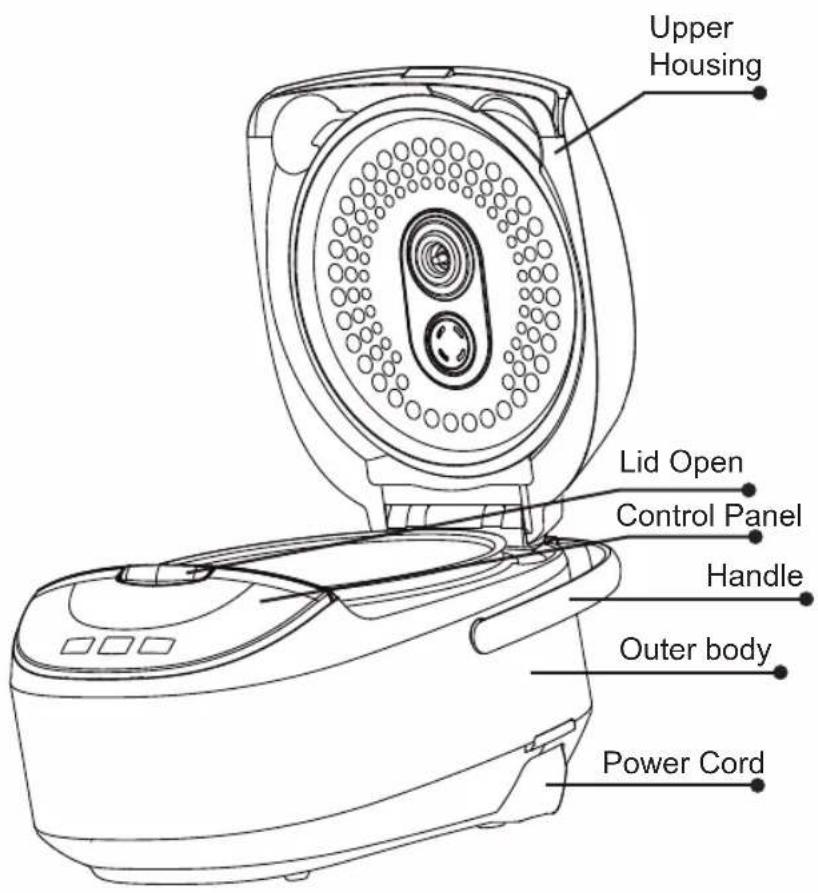
Accessories
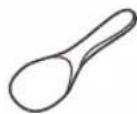
Serving Spatula Soup Ladle Measuring Cup Steamer


Instructions for Use
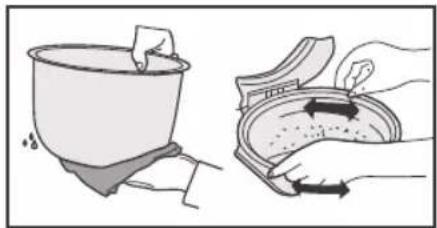
- Wipe dry the exterior of cooking pot with cloth and place in the body; rotate the pot around for 2-3 times to ensure close attachment between the pot bottom and heating plate; press the lid until you hear a click. Do not place the cooking pot on other stoves for heating to avoid deformation due to high temperature; do not replace the cooking pot with other containers and operate on the heating plate.
● Plug in the power supply Ensure plugs of the body and power source are properly connected.
natural_image
Illustration showing a hand holding a container with arrows indicating flow or movement (no text or symbols)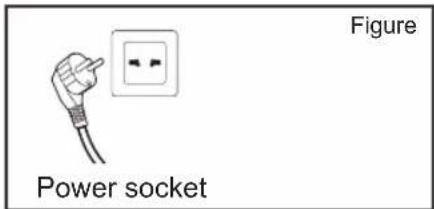
- Press function button to select functions as you need and then press the "Start" button to start operation. Or press button of the selected function to directly enter operation mode.
Application of function buttons
ON/OFF/START button
Plug in power supply, press "ON/OFF/START" button to turn on the power, LED displays"——", "ON/OFF/START" light flashes, multi-cooker is on "ON" state (Standby mode). Press "ON/OFF/START" again and return to "OFF" state (ECO mode, the panel has no display). Under the "ON" state (standby mode), select the desired function and press "ON/OFF/START" to start the program. If there is not any operation for more than two minutes under the ON state, it will enter the OFF state automatically.
Warm/Cancel button
- Under the "ON" state (standby mode), press "Warm/Cancel" button to start the temperature preservation program.
- Under the working state: press "Warm/Cancel" button to exit the working state and return to the "ON" state (standby mode).
- Temperature preservation mode will start when cooking is completed, the timer displays from 0 to 12 hours. The LED displays "— —" after 12 hours and returns to the "ON" state (standby mode). Food is best to be consumed within 5 hours after cooking, so that flavor and taste does not deteriorate.
Note: Sauté and Yogurt mode do not have temperature preservation feature.
Application of function buttons
Menu button
Under the "ON" state (standby mode), press the "Menu" button to select various functions. The functions cycle as follow:
Steam-Yogurt-Pasta-Saute-Porridge-Meat-Manual/DIY-Bread.
Soup/Stew button
Under the "ON" state (standby mode), press "Soup/Stew" button, "Soup/Stew" light flashes on, press "Start" button to start the "Soup/Stew" program.
Rice button
Under the "ON" state (standby mode), press "Rice" button, "Rice" light flashes on, press "Start" button to start the "Rice" program.
Slow Cook button
Under the "ON" state (standby mode), press "Slow Cook" button, "Slow Cook" light flashes on, press "Start" button to start the "Slow Cook" program.
TIMER/TEMP button
After selecting the function need to pre-set the cooking time, press "TIMER/TEMP" button, both "TIMER/TEMP" and the corresponding function lights flash on, set the time and press "Start" button. The pre-set time is the cooking completion time.
“+” and “-” button
- After selecting the required function, use "+" or "-" buttons to adjust the pre-set timer to set the cooking completion time.
- Under the manual function, use the "+" or "-" buttons to select the temperature value under the temperature setting state.
- Adjust the cooking time.
Instructions for Use
Sauté
-
Under the standby mode, press the "Menu" button and the "Sauté" light on.
-
Press the "Start" button to start the "Sauté" function, "Start" light stays on and "Sauté" light flashes, and digital screen display "running circle". The rice cooker cover is in the open state at this point, add olive oil according to the proportion (refer to the proportion table) and heat for 5 minutes.
-
Once the oil heated, add in Thai fragrant rice, stir fry till the rice turn golden or yellowish (about 10-13 minutes);
-
Add in soup, and then close the cover. The program detects the closed cover and the "Sauté" light stays on.
-
The cooker enters the stew stage and the digital display shows the countdown timer.
-
The cooker returns to standby mode when Sauté program completes.
| Proportion Table: | |||||
| Water volume (Scale) | Olive oil (ml) | Onion (piece) | Bell pepper (piece) | Salt (gram) | Ketchup (gram) |
| One scale | 40ml 1/3 | piece 1/3 piece | ce 10g 60g | ||
| Two scales | 60ml 2/3 | piece 2/3 piece | ce 20g 90g | ||
| Three scales | 80ml 1 piece | ece 1 piece | 30g 120g | ||
Steam
-
Under the standby mode, press the "Menu" button, select "Steam" function, "Steam" light on.
-
Press "+" or "-" button to adjust the steaming time, the default timing is 5 minutes. Time can be adjusted between 5 to 30 minutes.
-
Press the "Start" button to start the "Steam" function, "Start" and "Steam" lights stay on, the digital screen displays the "running circle".
-
When the water is boiled, the digital screen displays the countdown timer.
-
Steam function automatically enters the temperature preservation function when program completes.
Pasta
-
Under the standby mode, press the "Menu" button, select "Pasta" function, "Pasta" light on
-
Press "+" and "-" button to adjust Pasta cooking time, the default timing is 10 minutes. Time can be adjusted between 10 to 35 minutes.
-
Add water and salt (refer to the proportion table, no more than 5 scales).
Instructions for Use
-
Press the "Start" button to start the "Pasta" function, "Start" and "Pasta" lights stay on, the digital screen displays the "running circle".
-
When the water is boiled, the digital screen displays the countdown timer, open the cover, add the corresponding amount of pasta according to water level and start mixing (refer to the proportion table), stir 1 to 2 minutes, close the cover and continue cooking.
-
Pasta function automatically enters the temperature preservation function when program completes.
| Proportion Table: | |
| Water volume P | asta (g) |
| 2 cups of water | 100g |
| 4 cups of water | 200g |
| 6 cups of water | 300g |
| 8 cups of water | 400g |
Porridge
-
Under the standby mode, press the "Menu" button, select "Porridge" function, "Porridge" light on.
-
Press "+" and "-" button to adjust Porridge cooking time, the default timing is 2 hours. Time can be adjusted between 2 to 4 hours.
-
Press the "Start" button to start the "Porridge" function, "Start" and "Porridge" lights stay on, the digital screen display Soup/Stew countdown timer.
-
Porridge function automatically enters the temperature preservation function when program completes.
Manual/DIY
-
Under the standby mode, press the "Menu" button, select "Manual/DIY" function, "Manual/DIY" light on.
-
Press "+" or "-" button to adjust the Manual/DIY program time, the default timing is 1 minute. Time can be adjusted between 1 minute to 4 hours.
-
Press the "TEMP" button, "TEMP" light stays on, select cooking temperature, the default temperature is F95 (other options include F95, F105, F120, F140, F160, F175, F195, F210, F230, F250 and F275), when the cooking time is > 2 hours, F250 and F275 are not available. Digital screen displays selected temperature value.
-
Press "Start" to start the "Manual/DIY" function. The "Start" and "Manual/DIY" lights stay on. The digital screen displays the "running circle" before reaching the specified cooking temperature. After reaching the specified cooking temperature, the screen displays countdown timer. (Press "TEMP" at this point, the digital screen displays the set cooking temperature and returns to normal screen after 3 seconds)
-
Manual function automatically enters the temperature preservation function when program completes.
Meat
- Under the standby mode, press the "Menu" button, select "Meat" function, "Meat" light on.
- Press "+" or "-" button to adjust the Meat cooking time, the default timing is 20 minutes. Time can be adjusted between 10 minutes to 1 hour.
- Pour a tablespoon of cooking oil into the pot, add the tasty meat into it, and close the cover.
- Press the "Start" button to start the "Meat" function, "Start" and "Meat" lights stay on, and digital screen shows steaming countdown timer.
- Meat function automatically enters the temperature preservation function when program completes.
Bread
- Defrost frozen dough thoroughly before use. Don't use more than 500g, or the dough might overwhelm the appliance.
- Under the standby mode, press the "Menu" button, select "Bread" function, "Bread" light on.
- Press "+" or "-" button to adjust the Bread cooking time, the default timing is 3 hours. Time can be adjusted between 2 hours to 4 hours.
- Wipe the bowl with cooking oil, put the dough into the bowl.
- Press the "Start" button to start the "Bread" function, "Start" and "Bread" lights stay on, and digital screen shows steaming countdown timer.
- Bread function automatically enters the temperature preservation function when program completes.
Yogurt
- In a sauce pan, heat milk to 180^ F on the stovetop, stirring constantly to prevent scauldling.
- Allow milk to cool to 115^ F for approximately 1-2 hours. Add yogurt culture. Stir mixture thoroughly.
- Pour milk mixture into the inner pot.
- Be sure inner pot is clean and dry before placing into the rice cooker.
- Under the standby mode, press the "Menu" button, select "Yogurt" function, "Yogurt" light on.
- Press "+" or "-" button to adjust the Yogurt cooking time, the default timing is 8 hours. Time can be adjusted between 6 hours to 12 hours.
- Press the "Start" button to start the "Yogurt" function, "Start" and "Yogurt" lights stay on, and digital screen shows steaming countdown timer.
- The cooker returns to standby mode when Yogurt program completes.
- Once incubation is complete, store the yogurt in an air tight container in the refrigerator. Do not leave in the rice cooker.
Soup/Stew
- Under the standby mode, press the "Soup/Stew" button, select "Soup/Stew" function, "Soup/Stew" light on.
- Press "+" and "-" button to adjust Soup/Stew cooking time, the default timing is 2 hours. Time can be adjusted between 2 to 4 hours.
- Press the "Start" button to start the "Soup/Stew" function, "Start" and "Soup/Stew" lights stay on, the digital screen display Soup/Stew countdown timer.
- Soup/Stew function automatically enters the temperature preservation function when program completes.
Rice
- Under the standby mode, press the "Rice" button, select "Rice" function, "Rice" light on.
- Press the "Start" button to start the "Rice" function, "Start" and "Rice" lights stay on, digital screen display "running circle".
- The Rice function automatically enters the stew stage after cooking and display countdown timer in the digital screen.
- Rice function automatically enters the temperature preservation function when program completes.
Slow Cook
- Under the standby mode, press the "Slow Cook" button, select "Slow Cook" function, "Slow Cook" light on.
- Press "+" or "-" button to adjust the slow cook program time, the default timing is 2 hours. Time can be adjusted between 2 to 10 hours.
- Press the "Start" button to start the "Slow Cook" function, "Start" and "Slow Cook" lights stay on, and digital screen shows slow cook countdown timer.
- Slow Cook function automatically enters the temperature preservation function when program completes.
Instructions for Use
Cooking time setting method
- Steam Cooking time: default setting is 5 minutes, adjustable between 5 to 30 minutes. Press "+" to increase 1 minute, press "-" to decrease 1 minute.
- Slow Cook Cooking time: t default setting is 2 hours, adjustable between 2 to 10 hours. Press "+" to increase 1 hour, press "-" to decrease 1 hour.
- Manual Cooking time: default setting is 1 minute, adjustable between 1 minute to 4 hours. Press "+" to increase 10 minutes, press "-" to decrease 10 minutes.
- Soup/Stew/Bread/Porridge Cooking time: default setting is 2 hours, adjustable 2 to 4 hours. Press "+" to increase 30 minutes, press "-" to decrease 30 minutes.
- Pasta Cooking time: default setting is 10 minutes, adjustable between 10 to 35 minutes. Press "+" to increase 1 minute, press "-" to decrease 1 minute. After setting the cooking time, press "Start" button to start the program.
- Yogurt Cooking time: default setting is 8 hours, adjustable between 6 to 12 hours. Press "+" to increase 1 hour, press "-" to decrease 1 hour.
- Meat Cooking time: default setting is 20 minutes, adjustable between 10 minutes to 1 hour. Press "+" to increase 5 minutes, press "-" to decrease 5 minutes.
Instructions for Use
Timer per-set method (Bread, Porridge, Steam, Slow Cook, Soup/Stew, Rice and Pasta)
-
Select the function requires pre-set timer, press the "TIMER/TEMP" button, "TIMER/TEMP" light on and enter the setting state. Press "+" or "-" to pre-set the completion time. Press "+" once to increase 1 hour, press "-" once to decrease 1 hour. Long press to increase automatically.
-
Press "Start" button to start the pre-set timer function. The screen displays the completion time and starts the countdown.
-
Timer can be pre-set up to 24 hours.
-
Temperature preservation: Meat, Rice, Bread, Porridge, Steam, Slow Cook, Manual, Soup/Stew and Pasta. The cooker enters to temperature preservation mode once cooking completed. The temperature preservation time is up to 12 hours, cooker returns to standby mode after 12 hours. The shorter the preservation time, the better the taste.
Note: Recommended timer pre-setting is no more than 12 hours to avoid food deterioration.
Cleaning and Maintenance
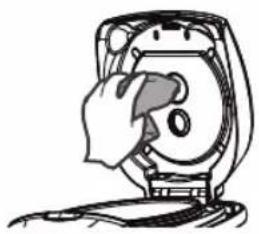
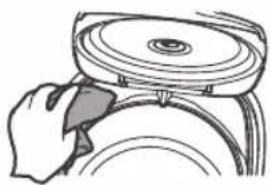
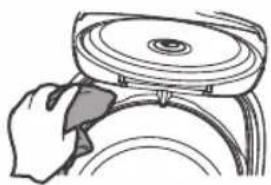
● Wipe the heat preservation cover with wet cloth and do not wash with water.
natural_image
Illustration of a hand cleaning a circular object with a handle (no text or symbols)● Wipe dry the water in condensation collector with dry cloth.
natural_image
Illustration of a hand using a tool to lift a circular component (no text or symbols visible)Cleaning and Maintenance
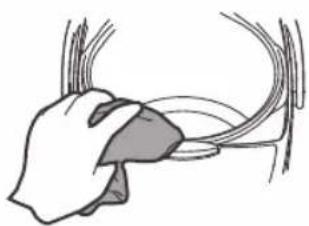
● Clean the multi-cooker with a damp cloth.
natural_image
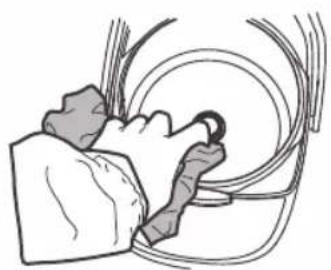
Illustration of a hand holding a curved object with radiating lines, no text or symbols present- Clean the water on heating plate (if any) with cloth; polish the burnt rice on the plate (if any) with steel scrubber or sand paper
natural_image
Illustration of a person handling a large cylindrical object with a looped ring (no text or symbols)● Wipe the water and rice around and below the cooking pot before placing in.

natural_image
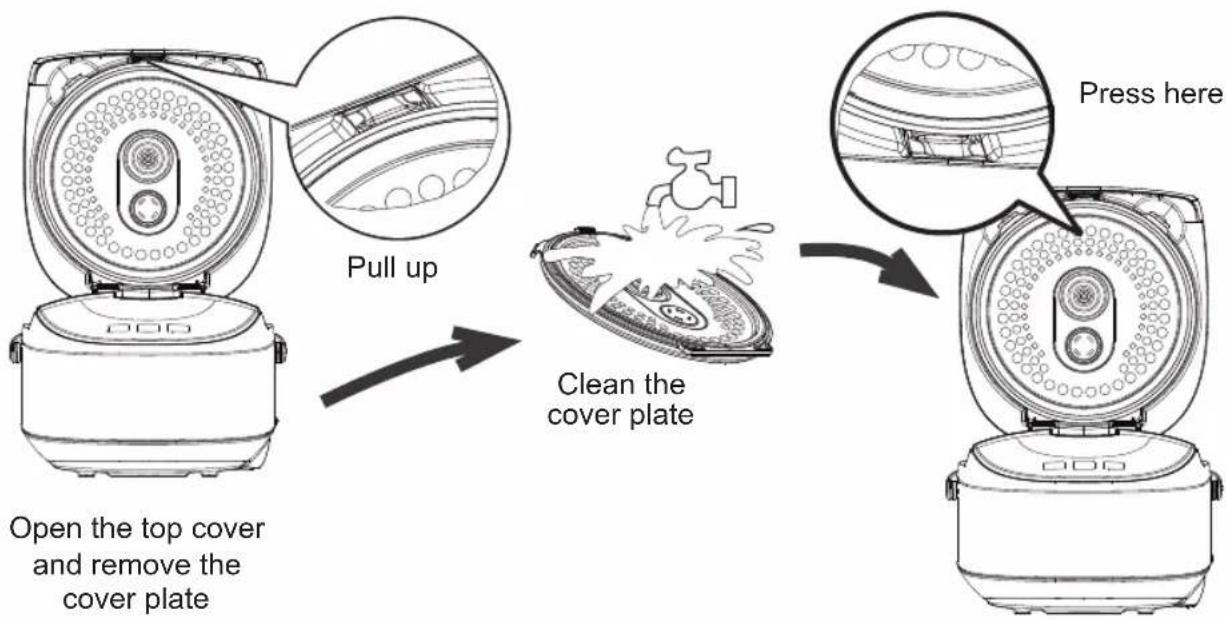
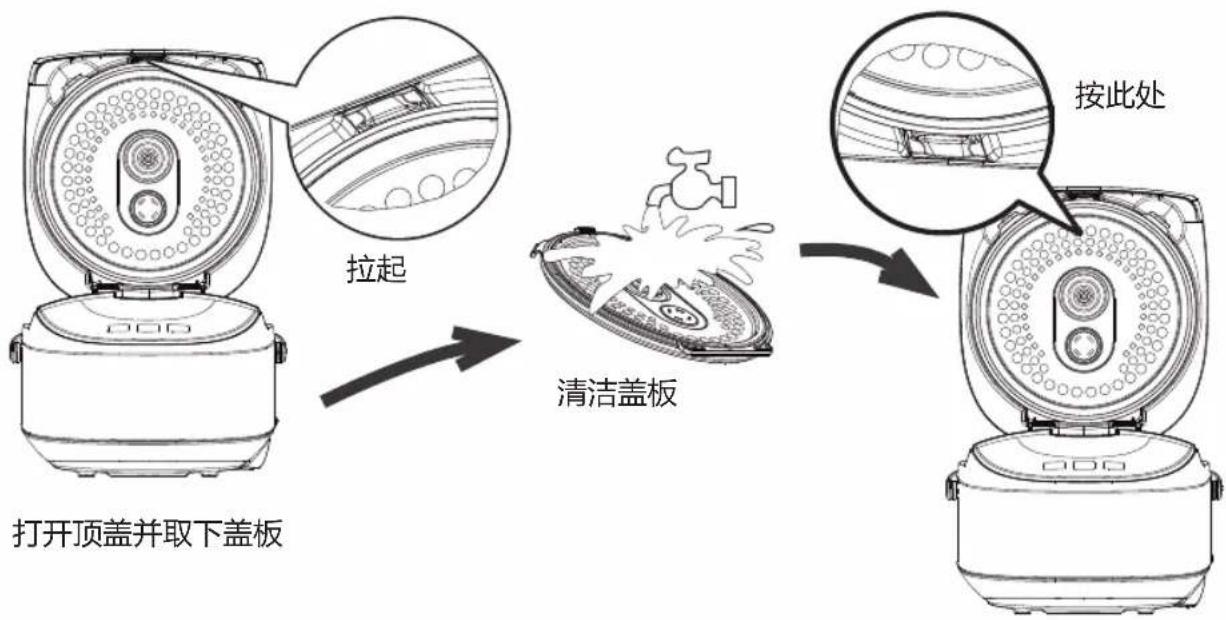
Illustration of a hand holding a rolled-up document or scroll (no text or symbols visible)Cover plate cleaning methods
Cleaning and Maintenance
Disassembly, Cleaning and Assembly of Steam Valve.
Note: The valve should be cleaned frequently to ensure smooth venting. Please clean when the appliance cools down to avoid burns.
● Grasp the handle of steam valve and lift upward
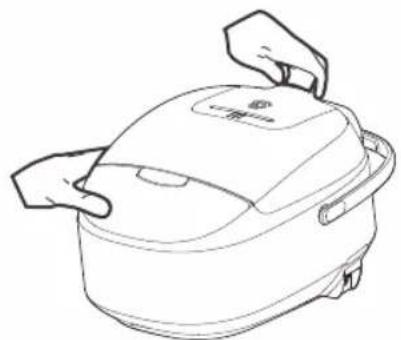
natural_image
Line drawing of a rice cooker with hands adjusting its lid (no text or symbols)- Open the valve seat and valve cover in according to the direction indicated on the valve seat
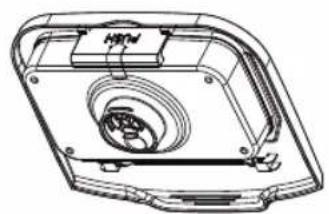
natural_image
Technical line drawing of a mechanical device with internal components (no text or symbols)Cleaning and Maintenance
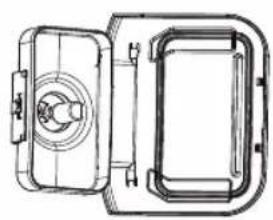
● Figure for opening Wash with water
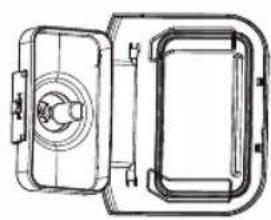
natural_image
Technical line drawing of a mechanical component with no visible text or symbolsNote: Please reattach if the seal ring falls off
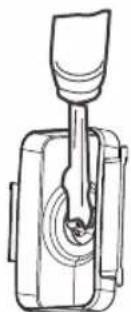
natural_image
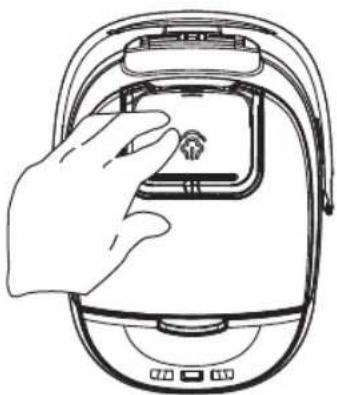
Technical line drawing of a mechanical device with a handle and internal components (no text or symbols)- Align the valve cover with the slot of valve seat, close the steam valve in accordance with the instructions, installation completed when heard "Click" sound
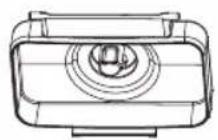
- Press down to install the steam valve
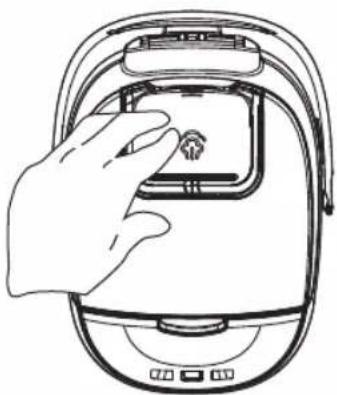
natural_image
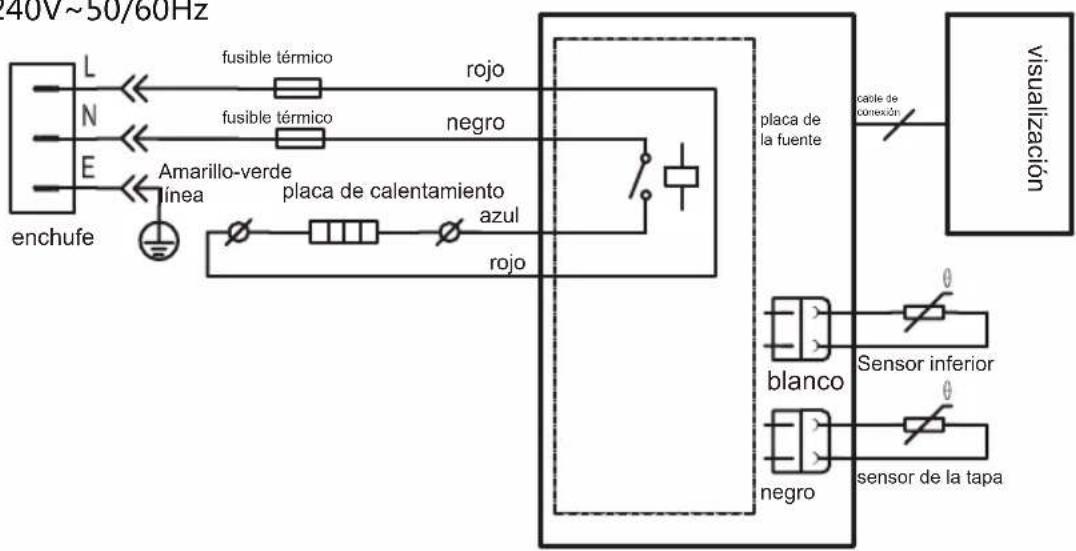
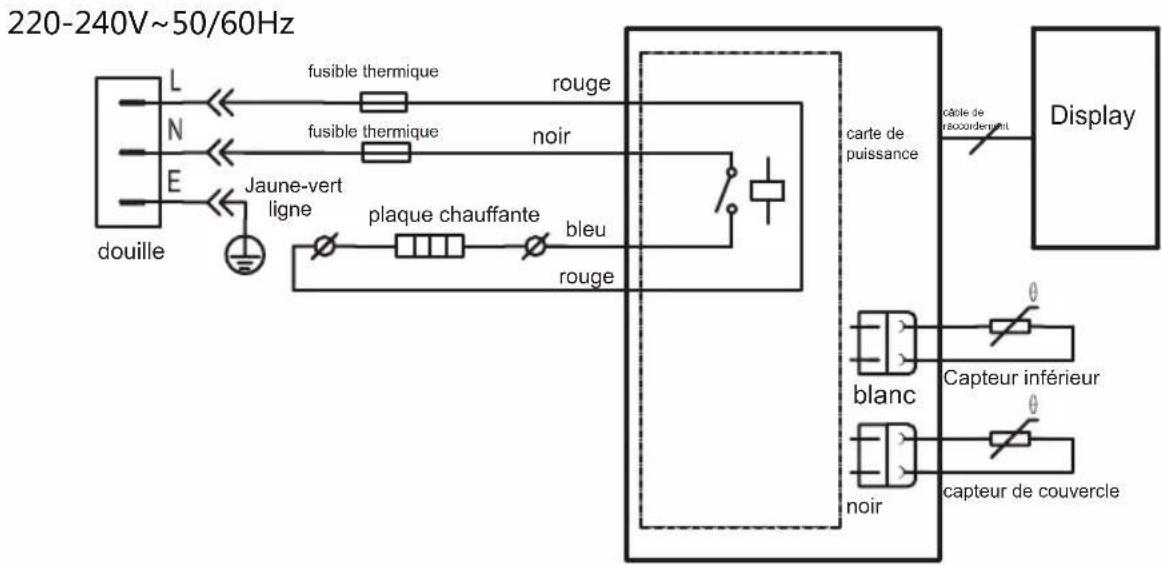
Line drawing of a hand pressing a button on an open robotic device (no text or symbols)Circuit Principle Diagram
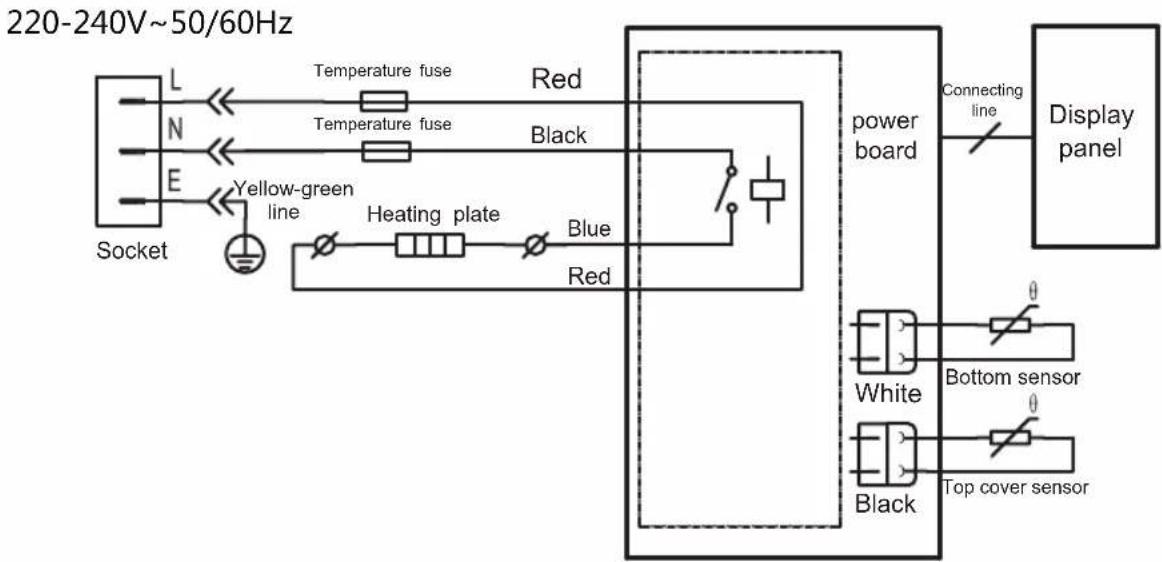
flowchart
graph TD
    A["Socket"] --> B["Yellow-green line"]
    B --> C["Heating plate"]
    C --> D["Blue"]
    D --> E["Power board"]
    E --> F["Display panel"]
    G["220-240V~50/60Hz"] --> H["Temperature fuse"]
    H --> I["Red"]
    H --> J["Black"]
    K["Connecting line"] --> E
    L["Bottom sensor"] --> M["White"]
    M --> N["Black"]
    O["Top cover sensor"] --> P["Black"]
ENVIRONMENTAL PROTECTION
The appliance must not be disposed of with regular household waste. At the end of its service life, the appliance must be properly delivered to a collection point for the recycling of electrical and electronic equipment. By Collection and recycling of old appliances, you are making an important contribution to the conservation of our natural resources and provide for environmentally sound and healthy disposal.
Midea
natural_image
Line drawing of a robotic vacuum cleaner (no text or symbols)型号:MB-FS5077
natural_image
Illustration showing a hand holding a container with arrows indicating motion or movement (no text or symbols)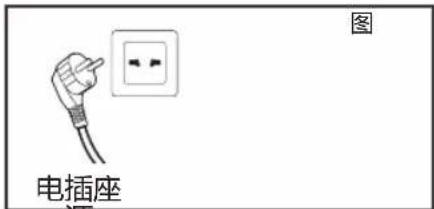
natural_image
Illustration of a hand cleaning a circular object with a handle (no text or symbols)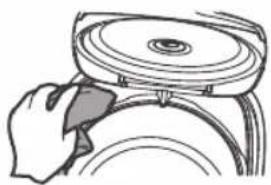
natural_image
Hand operating a mechanical component with a circular top and ring (no text or symbols visible)清洁与保养
湿
natural_image
Illustration of a hand holding a curved object with a shaded area, possibly depicting a mechanical or architectural component (no text or symbols present)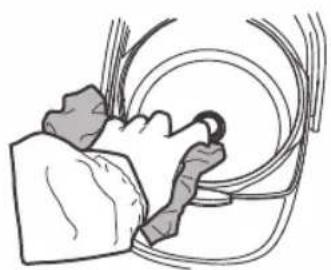
natural_image
Illustration of a person handling a large cylindrical object with wires, no text or symbols presentnatural_image
Illustration of a hand holding a rolled-up document or scroll (no text or symbols visible)盖板清洗方法
natural_image
Line drawing of a rice cooker with hands adjusting its lid (no text or symbols)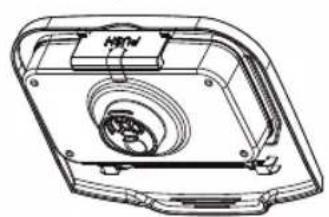
natural_image
Technical line drawing of a device casing with internal components (no text or symbols)清洁与保养
- 开启_图 用水冲洗
natural_image
Technical line drawing of a mechanical component with no visible text or symbolsnatural_image
Technical line drawing of a mechanical device with a handle and internal components (no text or symbols)- 压下安装蒸汽阀。
natural_image
Line drawing of a hand pressing a button on an open industrial robotic device (no text or symbols)电路原理图
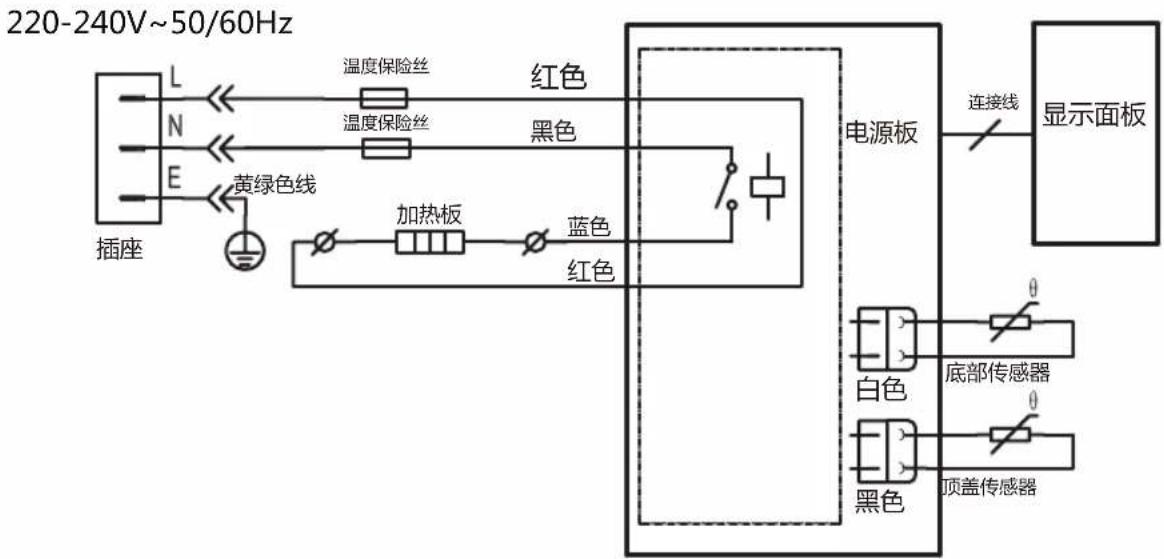
flowchart
graph TD
    A["插座"] --> B["黄绿色线"]
    B --> C["加热板"]
    C --> D["蓝色"]
    D --> E["红色"]
    E --> F["电源板"]
    F --> G["显示面板"]
    H["L"] --> I["温度保险丝"]
    J["N"] --> K["温度保险丝"]
    L["E"] --> M["黄绿色线"]
    N["电源板"] --> O["连接线"]
    P["电源板"] --> Q["显示面板"]
    R["电源板"] --> S["底部传感器"]
    T["电源板"] --> U["顶部传感器"]
    V["电源板"] --> W["白色"]
    X["电源板"] --> Y["黑色"]
环境保护
natural_image
Line drawing of a robotic vacuum cleaner (no text or symbols)natural_image
Illustration showing a hand holding a container with arrows indicating motion (no text or symbols)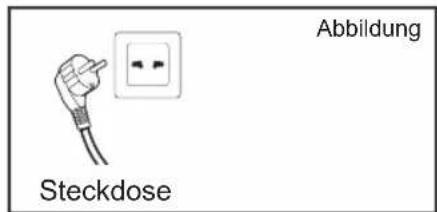
Taste Heiss/Abbrechen
Manuell/Selbermachen
natural_image
Illustration of a hand cleaning a circular object with a handle (no text or symbols)natural_image
Illustration of a hand using a tool to press or adjust a circular component (no text or symbols visible)natural_image
Illustration of a hand holding a curved object with radiating lines, no text or symbols presentnatural_image
Illustration of a person handling a large cylindrical object with a looped ring (no text or symbols)natural_image
Illustration of a hand holding a folded paper or bag (no text or symbols visible)natural_image
Line drawing of a rice cooker with hands operating it (no text or symbols)natural_image
Technical line drawing of a device casing with internal components (no text or symbols)natural_image
Technical line drawing of a mechanical housing or enclosure with internal components (no text or symbols)natural_image
Technical line drawing of a mechanical device with a handle and internal components (no text or symbols)natural_image
Line drawing of a hand pressing a button on a mounted appliance (no text or symbols)Schaltdiagramm
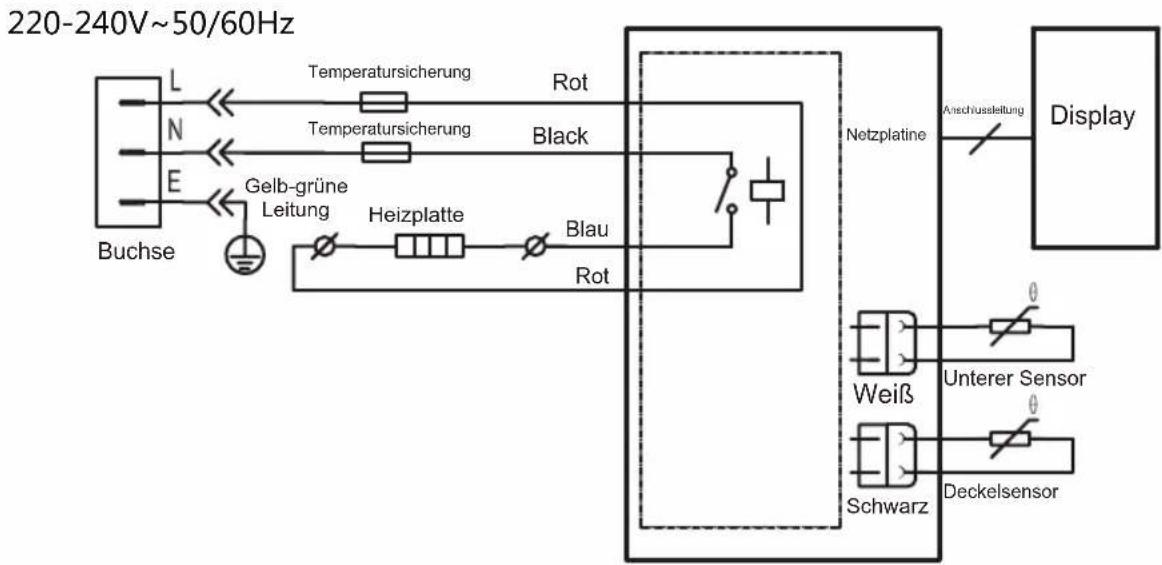
flowchart
graph TD
    A["220-240V~50/60Hz"] --> B["L"]
    A --> C["N"]
    A --> D["E"]
    A --> E["Buchse"]
    B --> F["Temperatursicherung"]
    C --> G["Temperatursicherung"]
    D --> H["Gelb-grüne Leitung"]
    E --> I["Heizplatte"]
    F --> J["Rot"]
    G --> K["Rot"]
    H --> L["Black"]
    I --> M["Blau"]
    J --> N["Netzplatine"]
    K --> O["Rot"]
    L --> P["Anschussleitung"]
    M --> Q["Display"]
    N --> R["Netzplatine"]
    O --> S["Unterer Sensor"]
    P --> T["Nebezogene"]
    Q --> U["Schwarz"]
    R --> V["Deckelsensor"]
UMWELTSCHUTZ
natural_image
Line drawing of a robotic vacuum cleaner (no text or symbols)natural_image
Illustration showing a hand holding a container with arrows indicating motion (no text or symbols)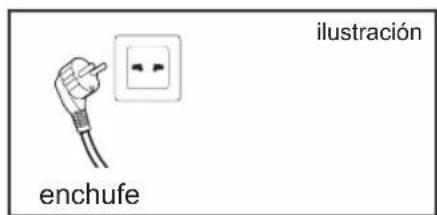
natural_image
Illustration of a hand cleaning a circular object with a handle (no text or symbols)natural_image
Illustration of a hand using a tool to press or adjust a circular component (no text or symbols visible)natural_image
Illustration of a hand holding a curved object with radiating lines (no text or symbols)natural_image
Illustration of a person holding a coiled cable or wire, no text or symbols presentnatural_image
Illustration of a hand holding a folded paper or bag (no text or symbols visible)natural_image
Line drawing of a rice cooker with hands adjusting its lid (no text or symbols)natural_image
Technical line drawing of a device casing with internal components (no text or symbols)natural_image
Technical line drawing of a mechanical component with circular features and rectangular housing (no text or symbols)natural_image
Technical line drawing of a mechanical component with a tool inserted (no text or symbols)natural_image
Line drawing of a hand pressing a button on a robotic vacuum cleaner device (no text or symbols)diagrama de circuito
220-240V\~50/60Hz
flowchart
graph TD
    A["enchufe"] --> B["Amarillo-verde línea"]
    B --> C["fusible térmico"]
    C --> D["rojo"]
    D --> E["negro"]
    E --> F["placa de calentamiento"]
    F --> G["azul"]
    G --> H["rojo"]
    H --> I["placa de la fuente"]
    I --> J["cable de conexión"]
    J --> K["visualización"]
    L["240V~50/60Hz"] --> M["fusible térmico"]
    N["N"] --> O["fusible térmico"]
    P["E"] --> Q["Amarillo-verde línea"]
    Q --> R["placa de calentamiento"]
    R --> S["azul"]
    S --> T["rojo"]
    T --> U["placa de la fuente"]
    U --> V["cable de conexión"]
    W["blanco"] --> X["Sensor inferior"]
    Y["negro"] --> Z["Sensor de la tapa"]
natural_image
Line drawing of a robotic vacuum cleaner (no text or symbols)natural_image
Illustration showing a hand holding a container with arrows indicating motion (no text or symbols)
Taste Heiss/Abbrechen
natural_image
Illustration of a hand cleaning a circular object with a handle (no text or symbols)natural_image
Illustration of a hand using a tool to press or adjust a circular component (no text or symbols visible)natural_image
Illustration of a hand holding a curved object with radiating lines (no text or symbols)natural_image
Illustration of a hand holding a coiled cable or wire, no text or symbols presentnatural_image
Illustration of a hand holding a rolled-up document or scroll (no text or symbols visible)natural_image
Line drawing of a rice cooker with hands operating it (no text or symbols)natural_image
Technical line drawing of a device casing with internal components (no text or symbols)natural_image
Technical line drawing of a mechanical component with no visible text or symbolsnatural_image
Technical line drawing of a mechanical device with a handle and internal components (no text or symbols)natural_image
Line drawing of a hand pressing a button on a robotic vacuum cleaner device (no text or symbols)schéma de circuit
natural_image
Line drawing of a robotic vacuum cleaner (no text or symbols)Model No.: MB-FS5077
natural_image
Illustration showing a hand holding a container with arrows indicating motion (no text or symbols)
- Pritisnite funkcijsku tipku za odabir funkcija po potrebi, a zatim pritisnite tipku "Start" za početak rada. Ili pritisnite gumb odabrane funkcije da biste izravno ušli u način rada.
Under the "ON" state (standby mode), press "Slow Cook" button, "Slow Cook" light flashes on, press "Start" button to start the "Slow Cook" program.
TIMER / TEMP tipka
natural_image
Illustration of a hand cleaning a circular object with a handle (no text or symbols)- Obrišite suhu krpu vodu u kondenzacijskom kolektoru.
natural_image
Illustration of a hand using a tool to lift a circular component (no text or symbols visible)natural_image
Illustration of a hand holding a tool with curved lines, no text or symbols presentObrišite vodu i rižu oko i ispod posude za kuhanje prije nego što stavite unutra.

natural_image
Illustration of a hand holding a rolled-up document or scroll (no text or symbols visible)- Očistite vodu na grijaćoj ploči (ako postoji) krpom; polirajte izgorjelu rižu na tanjuru (ako postoji) čeličnim pilingom ili pijeskom
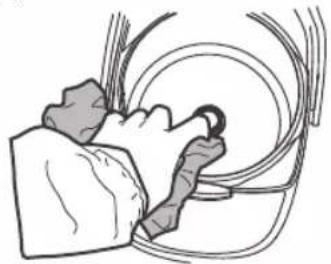
natural_image
Illustration of a person handling a large cylindrical object with wires, no text or symbols presentNačini čišćenja pokrovne ploče
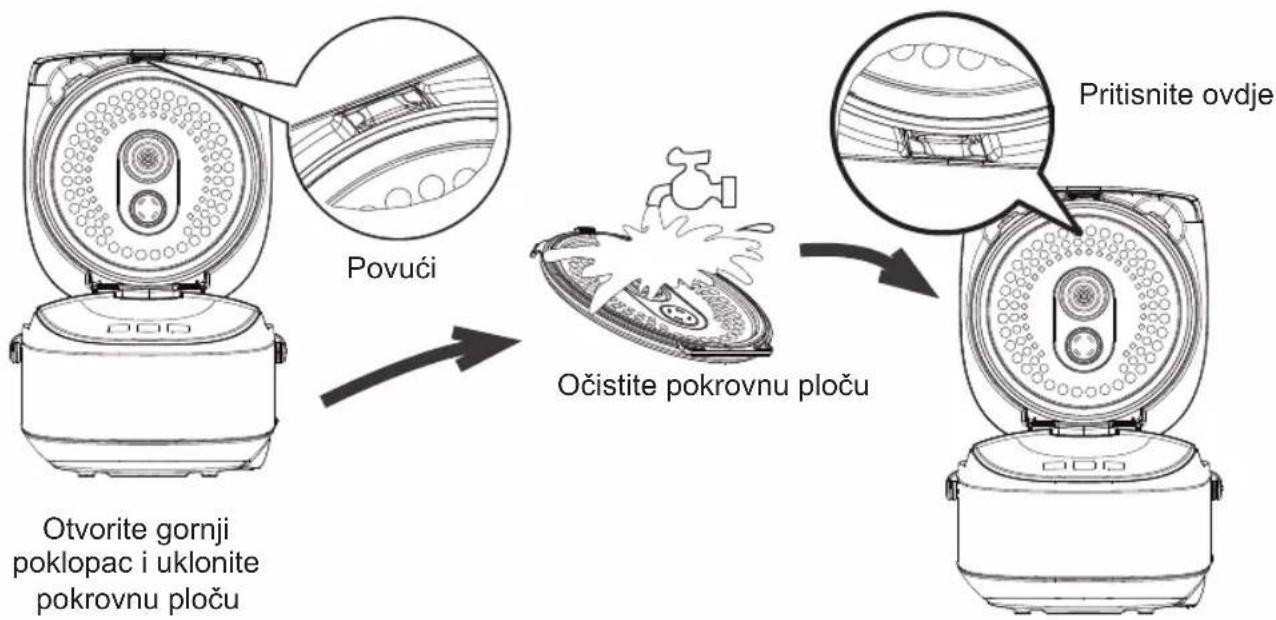
natural_image
Line drawing of a rice cooker with hands operating it (no text or symbols)natural_image
Technical line drawing of a mechanical device casing with internal components (no text or symbols)natural_image
Technical line drawing of a mechanical housing or enclosure component (no text or symbols)Napomena: Ako je ispusni brtveni prsten, ponovo pričvrstite
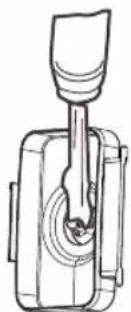
natural_image
Technical line drawing of a mechanical device with a handle and internal components (no text or symbols)natural_image
Line drawing of a hand pressing a button on an open robotic device (no text or symbols)Dijagram principa kruga
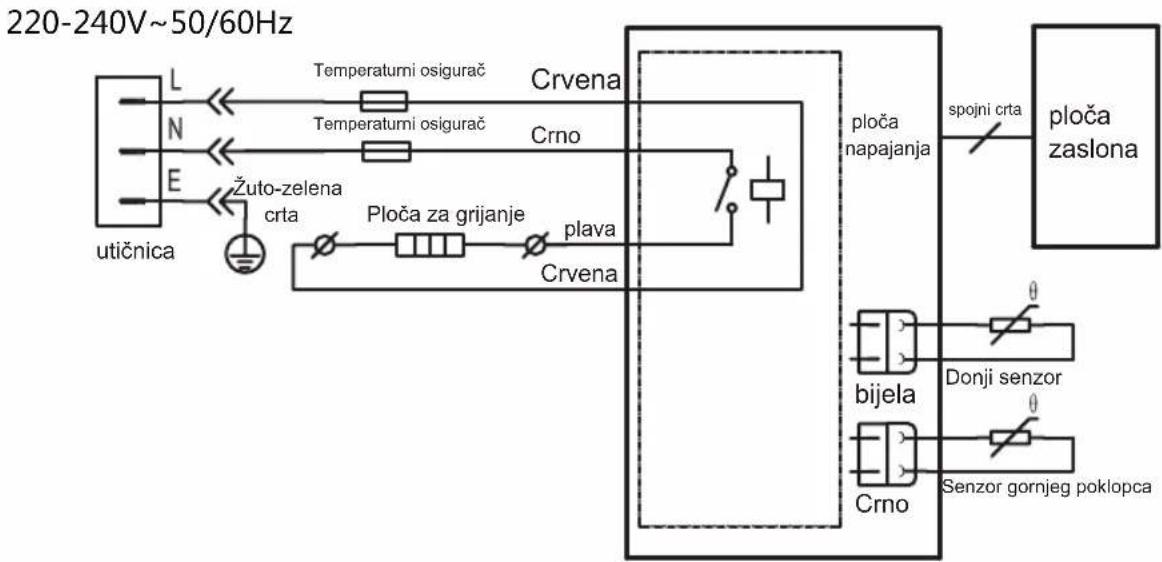
flowchart
graph LR
    A["utičnica"] --> B["L"]
    A --> C["N"]
    A --> D["E"]
    B --> E["Temperaturni osigurač"]
    C --> F["Temperaturni osigurač"]
    D --> G["Zuto-zelena crta"]
    G --> H["Ploča za grijanje"]
    H --> I["plava"]
    I --> J["Crvena"]
    J --> K["crno"]
    K --> L["Crvena"]
    L --> M["ploča napajanja"]
    M --> N["spojni crta"]
    N --> O["ploča zaslona"]
    P["bijela"] --> Q["Donji senzor"]
    P --> R["Senzor gornjeg poklopca"]
    S["Crno"] --> T["Crno"]
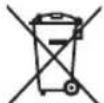
ZAŠTITA OKOLIŠA
Uređaj se ne smije odlagati s uobičajenim kućnim otpadom. Na kraju radnog vijeka, uređaj mora biti pravilno isporučen u zbirno mjesto za recikliranje električne i elektroničke opreme. Prikupljanjem i recikliranjem starih uređaja dajete važan doprinos očuvanju naših prirodnih resursa i osiguravate ekološki zdravo i zdravo zbrinjavanje.
- Important Safety Instructions
- Product Description
- Accessories
- Instructions for Use
- Application of function buttons
- ON/OFF/START button
- Warm/Cancel button
- Menu button
- Soup/Stew button
- Rice button
- Slow Cook button
- TIMER/TEMP button
- Sauté
- Steam
- Pasta
- Porridge
- Manual/DIY
- Meat
- Bread
- Yogurt
- Soup/Stew
- Rice
- Slow Cook
- Cooking time setting method
- Timer per-set method (Bread, Porridge, Steam, Slow Cook, Soup/Stew, Rice and Pasta)
- Cleaning and Maintenance
- Cover plate cleaning methods
- Circuit Principle Diagram
- ENVIRONMENTAL PROTECTION
- Midea
- 清洁与保养
- 湿
- 盖板清洗方法
- 电路原理图
- 环境保护
- Taste Heiss/Abbrechen
- Manuell/Selbermachen
- Schaltdiagramm
- UMWELTSCHUTZ
- diagrama de circuito
- schéma de circuit
- TIMER / TEMP tipka
- Načini čišćenja pokrovne ploče
- Dijagram principa kruga
- ZAŠTITA OKOLIŠA
Brand : MIDEA
Model : MB-FS5077
Category : Autre appareil électroménager