
SLRD18 - Drone SereneLife - Free user manual and instructions
Find the device manual for free SLRD18 SereneLife in PDF.


| Product Type | Drone |
| Brand | SereneLife |
| Model | SLRD18 |
| Dimensions | Approx. 30 x 30 x 10 cm (folded) |
| Weight | ~100 g |
| Battery Type | Li-Po 3.7V 650mAh |
| Flight Time | 8-10 minutes |
| Charging Time | 60-90 minutes |
| Control Range | Up to 50 meters |
| Camera Resolution | 720p HD |
| Remote Control Frequency | 2.4 GHz |
| Obstacle Avoidance | None (basic model) |
| GPS | No |
| Functions | Headless mode, altitude hold, 360° flips, speed modes |
| Maintenance | Clean with dry cloth, keep propellers free of debris |
| Safety | Low battery alarm, automatic return-to-home (RTH) when signal lost |
| Spare Parts | Replacement propellers, battery, remote control available |
| Repairability | Modular design; user-replaceable parts |
| Manual | Free PDF available on notice-facile.com |
Frequently Asked Questions - SLRD18 SereneLife
User questions about SLRD18 SereneLife
0 question about this device. Answer the ones you know or ask your own.
Ask a new question about this device
Download the instructions for your Drone in PDF format for free! Find your manual SLRD18 - SereneLife and take your electronic device back in hand. On this page are published all the documents necessary for the use of your device. SLRD18 by SereneLife.
USER MANUAL SLRD18 SereneLife
natural_image
Black quadcopter drone with four propellers and a red-lit head (no visible text or symbols)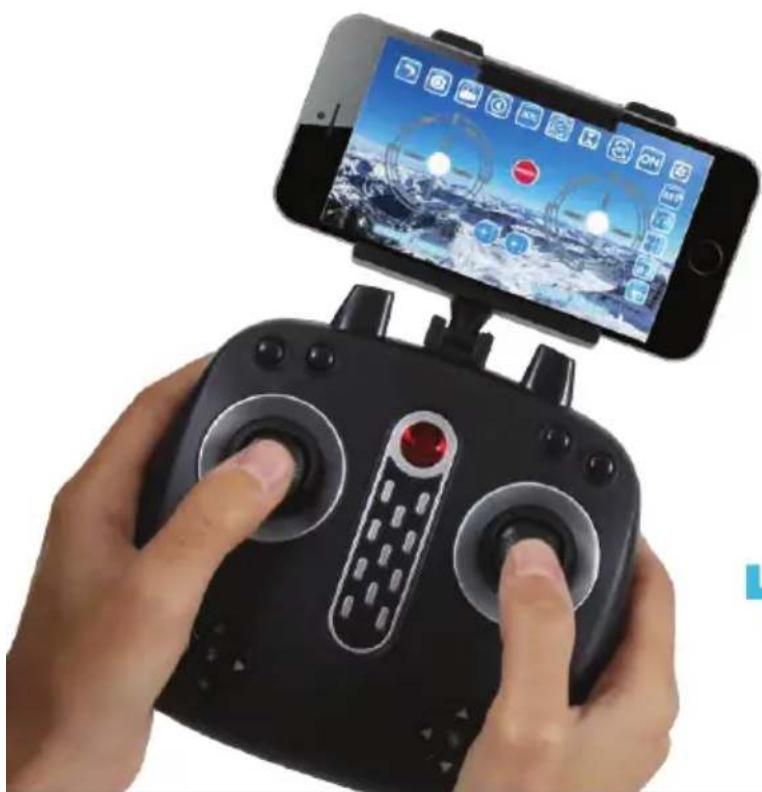
natural_image
Person using a black remote control device on a smartphone, with a digital interface visible on the screen (no text or symbols on the device itself)SLRD18
4-AXIS AEROCRAFT
USER MANUAL
4-AXIS AEROCRAFT
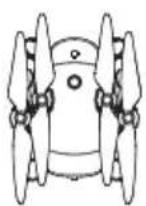
Drone Remote control USB Charger
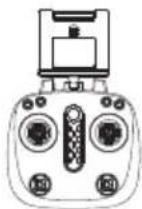
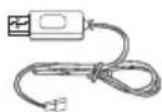
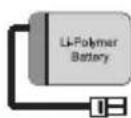
Li-Polymer battery
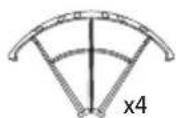
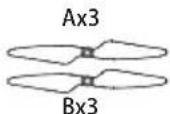
Crash guard Main blade
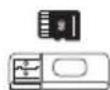
SD card & Card Reader (Sold separately)
All photos here are for reference only. Specifications are subject to physical product.
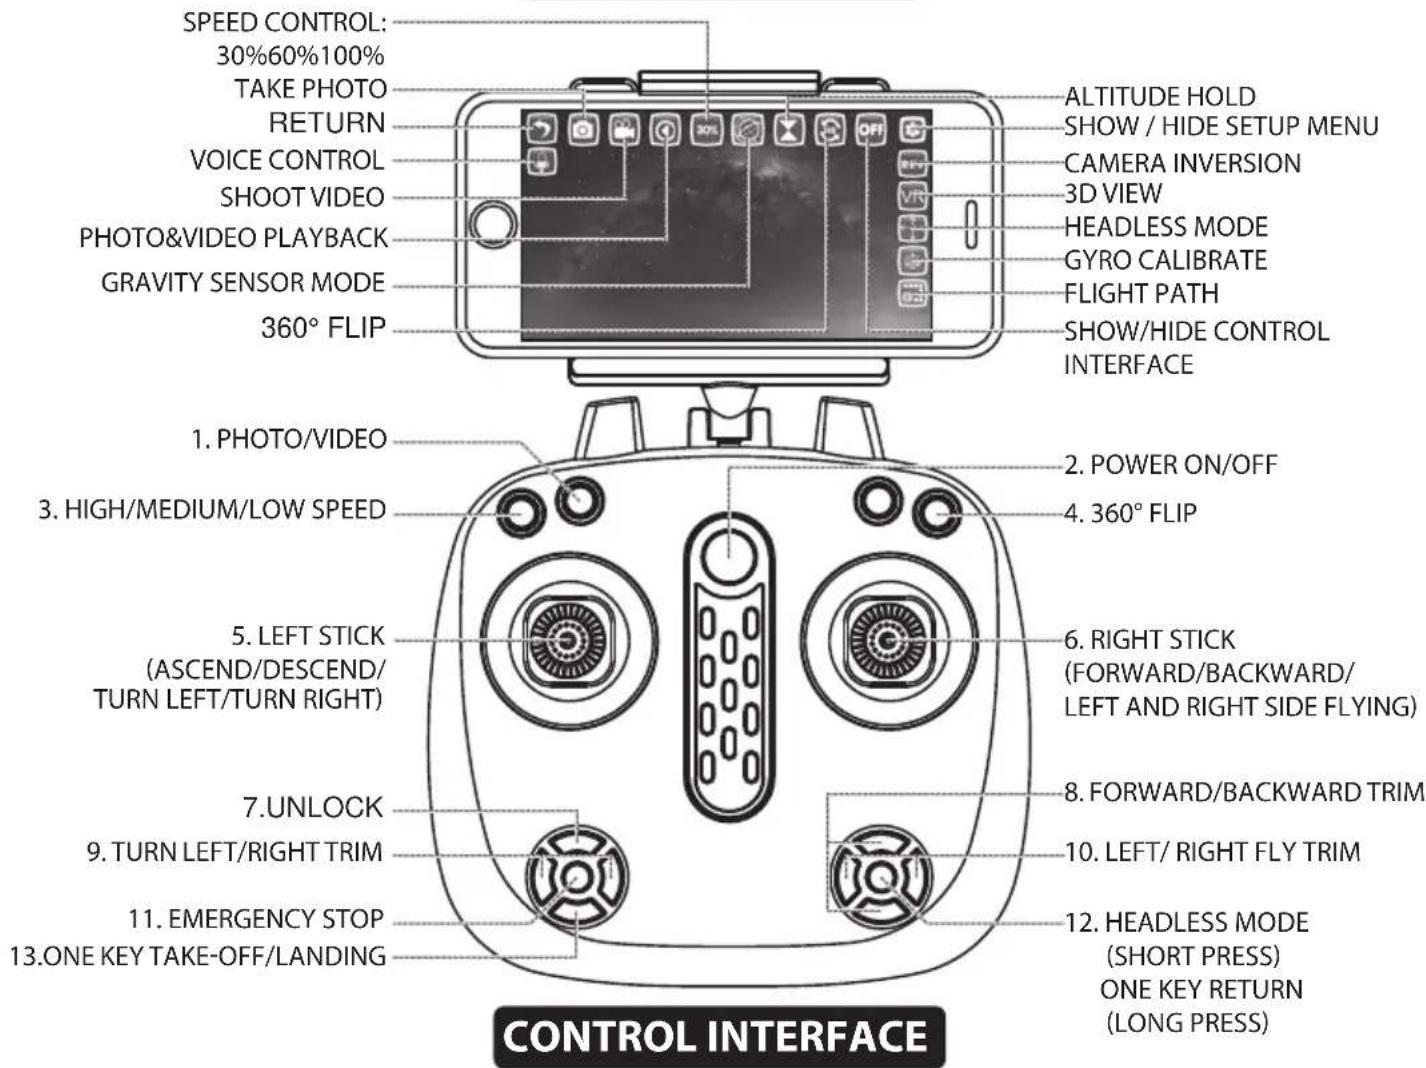
FUNCTION KEYS & NAME DESCRIPTION
| Serial Number | Function keys / Names | Function / Effect |
| 1 | Photo/Video | Short press to take photo; long press 3 seconds to take video, short press again stop taking video. |
| 2 | Power ON/OFF | Remote Control POWER ON/OFF switch |
| 3 | High/medium/low speed | Adjust the drones flying speed in all directions. |
| 4 | 360° Flip | This button will cause the drone to do a flip in the air. |
| 5 | Left stick | Pressing up will move the drone higher, pressing down will move it lower, left will spin it in place to the left, and right will spin it in place to the right. |
| 6 | Right stick | Pressing forward will move the drone forward, pressing back will move it backwards, left will move it to the left, and right will move it to the right. |
| 7 | Unlock | This button will start the motor, after pressing it you will be able to take off and fly/control the drone. |
| 8 | Forward/backward trim | If the drone is drifting forward or backward while hovering without any operation, press the opposite trim forward/backward button until it stays in place. |
| 9 | Turn left/right Trim | If the drone is turning left or right while hovering without any operation, press the opposite trim left/right turn button until it stays in place. |
| 10 | Left/right fly trim | If the drone is drifting left or right while hovering without any operation, press the opposite trim left/right movement button until it stays in place. |
| 11 | Emergency stop | Pressing this will slow down the motor and the drone will drop quickly. |
| 12 | Headless mode/One key returner | Short press into Headless Mode; Long press about 3 seconds into One key return function. |
| 13 | One key take-off/Landing | Once you hit the unlock button and start the motor, pressing this button will lift the drone up into the air and hover there, if you press it again it will slowly drop down and land on the ground. |
WIFI APP INSTRUCTIONS
Only for WIFI featured version:
1. SOFTWARE DOWNLOAD AND INSTALLATION:
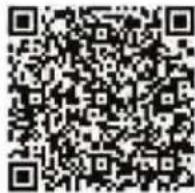

Available on the App Store
Apple Store search GX-FPV (Please scan this QR code to install this software).
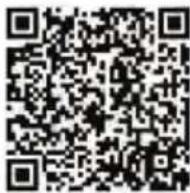

ANDROID APP ON Google play
Google play search GX-FPV (Please scan this QR code to install this software).
2. INSTRUCTIONS:
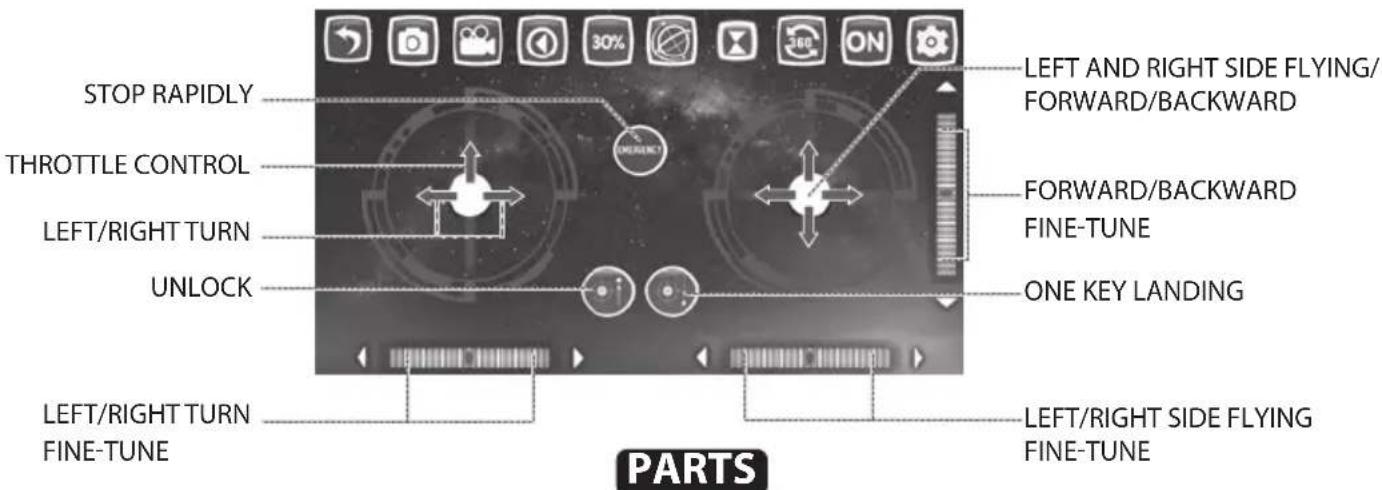
Open the power switch of this aircraft, and then access "SETTING" in the mobile, open the "WIFI" and find the "WiFiUFO" which corresponds to GX-FPV for connecting. When the link is successfully connected, please exit from the Setting Option. Open the same software "GX-FPV" in the mobile and then click the icon "PLAY" to access into the control interface to make real-time recording. (Please keep away from other WiFi signals as far as possible when flying.)
DRONE POWER SWITCH INTRODUCTIONS
To turn ON the drone, press the power button located on top of the drone. To turn OFF the drone, PRESS and HOLD the power button for 3 seconds.
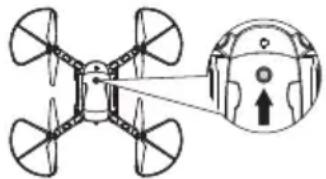
natural_image
Diagram of a four-wheeled drone with an inset showing a targeting device (no text or symbols present)REMOTE CONTROL BATTERY INSTALLATION
- Remove the battery cover from the back of controller (Fig. A)
-
Install 4 "AA" batteries into the controller, make sure to install batteries to their correct polarity. (Fig. B) Do not mix old and new batteries or battery types.
-
Replace the battery cover
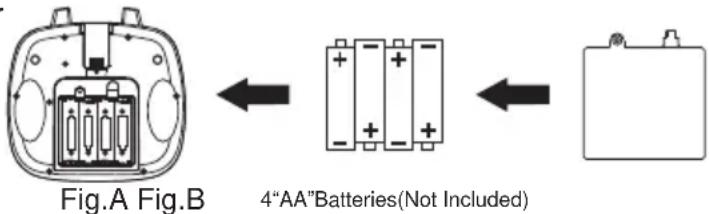
LITHIUM BATTERY CHARGING INSTRUCTION
- Open the battery cover of drone., Take out lithium battery of drone from battery case.(Fig.1)
- Plug the USB charger into the power supply, and connect charger cord socket with lithium battery socket. When charging, the USB LED light is off; when the charger LED light turns red again, charging is complete. Charging time is approximately 150 minutes.
- Connect the battery plug with the circuit board plug after charging. Please pay attention to the correct polarity. (Fig.3)
- Close battery cover of drone.
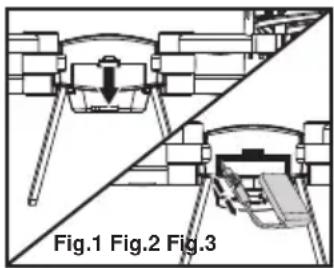
natural_image
Technical diagram showing two mechanical assembly steps labeled Fig.1 and Fig.2, with no visible text or symbols.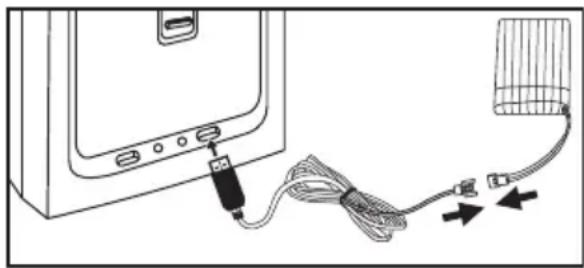
natural_image
Diagram showing cable connection between a computer monitor and a grid device (no text or symbols)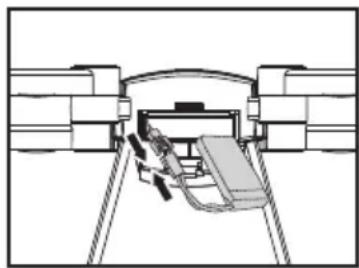
natural_image
Diagram of a vehicle entering a parking lot with an open trunk (no text or symbols)Attention:
- Make sure the USB Charger fits properly into the USB port that is being used for charging. If the charger is not inserting easily into the port, do NOT forcefully insert the charger, as it could cause damage to the charger or battery.
- The charging plug will overheat if overcharged for long periods of time. Do not leave the battery on the charger for longer than 3 hours as it may cause damage to the battery.
- Do not leave the battery inside the drone when charging.
- Do not use any chargers other than the one supplied, as it could cause damage to the battery.
- Wait 15-20 minutes after flying the drone before recharging the battery, to prevent the battery from overheating.
- Do not leave the battery near any hot surfaces or in direct sunlight for long periods of time, as this can cause serious damage to the battery.
- Do not puncture or damage the battery. If the battery is damaged, stop using it and contact the manufacturer.
FLIGHT PREPARATION
- Operate in wide open spacious areas. Do not operate in bad weather, or windy conditions. Avoid flying close to people, animals, and obstacles.
- Make sure the battery is installed correctly and that the battery cover closes properly. Turn on the drone by pressing the power button at the top, which will cause the lights to flash. Now place the drone on a flat surface and it is ready to be synced with the controller.
- Turn on the remote control and move the joysticks all the way up then all the way down to sync the controller with the drone. The lights will flash then turn solid, letting you know the drone paired successfully with the remote control.
The drone is now ready for flight.
NOTICE: If the drone is moving while hovering without being controlled, adjust the movement with the trimming buttons on the remote control until the drone is hovering properly.
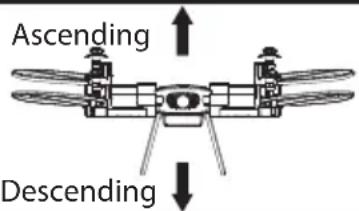 | Push up the throttle stick, and the spinning speed of the main blades will increase and the aerocraft begins to ascend.Pull down the throttle stick, and the spinning speed of the main blades will decrease. The aerocraft begins to descend. | 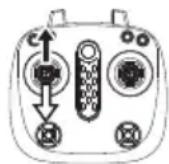 |
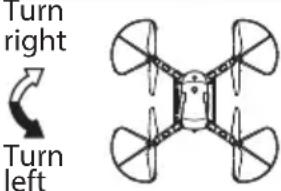 | Push the rudder stick to the left, and the aerocraft will go left.Push the rudder stick to the right, and the aerocraft will go right. | 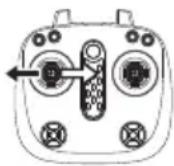 |
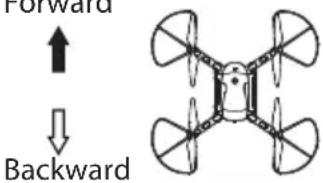 | When the rudder stick is pushed upward, the aerocraft swashplate will downtilt and advances.When the rudder stick is pushed downward, the aerocraft will uptilt and it recedes. | 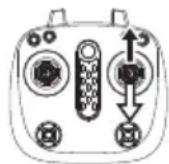 |
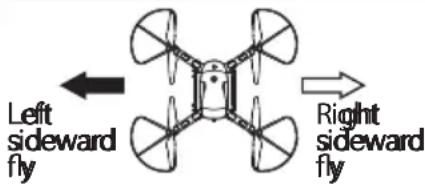 | When pushing the right lever (steering rudder) to the right, the aerocraft will fly to the right.When pushing the right lever (steering rudder) to the left, the aerocraft will fly to the left. | 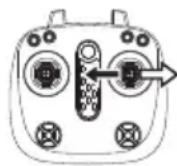 |
| If the aircraft cant rise up vertically, you need to re-set it, press the throttle lever and direction of operation joystick to the bottom right corner of the controller for 3 seconds, indicator will flash quickly, after it stops flashing, loosen all remote control button and the calibration is completely. | 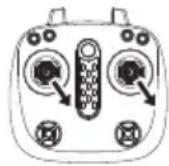 | |
PRECAUTIONS:
- The distance the remote control will work at reduces as the power gets lower and lower on both the drone and the remote control. Make sure to keep fresh batteries in the remote and use caution when flying too high/far for long periods of time.
- When the drone's power is low, it becomes more difficult to take off and fly high.
- If the drone becomes damaged, stop flying it immediately and repair it. This is to prevent further damage or causing injury.
- If you are not going to use the remote control for a long time, please remove the batteries to avoid battery leaking/corrosion.
- Do not drop or throw the remote control. Doing so can damage the components and cause it to stop working.
COMMON PROBLEM AND SOLUTION INSTRUCTION:
| THE PROBLEM | REASON | COUNTER MEASURES |
| The drone lights are flashing, but it wont sync with the remote. | 1. Frequency modulation between the quadcopter and remote control is not operated correctly.2. Insufficient battery power. | 1. Refer to the Preparation for taking off, and re-modulate the frequency.2. Recharge the battery. |
| The drone's blades are rotating, but the drone will not take off. | 1. Insufficient battery power.2. The blades are distorted. | 1. Recharge the battery.2. Replace the blades. |
| The drone shakes and struggles to fly properly. | The blades are distorted | Replace the blades |
| The trimming buttons are working, but the drone continues to not fly properly. | 1. Distorted blades2. The motor doesn’t work properly. | 1. Replace the blades.2. Replace the motor. |
| The drone stops working correctly after crashing. | Three-axis acceleration sensor lose it’s balance after crashing. | Put the quadcopter on the ground for 5-10 seconds. |

natural_image
Illustration of a laptop with a red checkmark on screen, accompanied by partial text 'V H N W' on the right side (no readable document content)VISIT US ONLINE:
Have a question?
Need service or repair?
Want to leave a comment?
PyleUSA.com/ContactUs


- SLRD18
- 4-AXIS AEROCRAFT
- USER MANUAL
- FUNCTION KEYS & NAME DESCRIPTION
- WIFI APP INSTRUCTIONS
- SOFTWARE DOWNLOAD AND INSTALLATION:
- Available on the App Store
- ANDROID APP ON Google play
- INSTRUCTIONS:
- DRONE POWER SWITCH INTRODUCTIONS
- REMOTE CONTROL BATTERY INSTALLATION
- LITHIUM BATTERY CHARGING INSTRUCTION
- Attention:
- FLIGHT PREPARATION
- PRECAUTIONS:
- VISIT US ONLINE:
Brand : SereneLife
Model : SLRD18
Category : Drone