
Discovery 2 - Drone SereneLife - Free user manual and instructions
Find the device manual for free Discovery 2 SereneLife in PDF.


| Product Type | Drone with 720P HD WiFi Camera |
| Brand | SereneLife |
| Model | Discovery 2 |
| Dimensions | 334 x 334 x 127 mm |
| Weight | 248 g |
| Battery Type | 7.4V (2S) 1000mAh LiPo |
| Charging Time | Approx. 180 minutes |
| Flight Time | 13-15 minutes |
| Max Control Distance | 150 m |
| Max Image Transmission Distance | 50 m |
| Frequency | 2.4 GHz |
| Camera Resolution | 1280 x 720 (720P HD) |
| Camera Angle | 120° wide-angle |
| Transmitter Battery | 4 x AA alkaline batteries (not included) |
| Motor Size | 1020 brushed motors (4 pcs) |
| Propeller Diameter | 147 mm |
| Altitude Hold | Yes |
| Headless Mode | Yes (Heading Hold) |
| One Key Takeoff/Landing | Yes |
| Emergency Stop | Yes |
| Speed Modes | Low, Medium, High |
| Mobile App | Flyingsee (iOS/Android) |
| WiFi Control Range | Up to 40 m |
| VR Mode | Yes (via app) |
| Flight Route Setting | Yes (via app) |
| Gravity Control | Yes |
| Suitable Age | 14 years and above |
| Certifications | FCC Part 15 |
| Included Items | Drone, transmitter, USB cable, landing gear, camera, propellers, screwdriver, manual |
| Spare Parts Availability | Yes (see manual for part numbers) |
Frequently Asked Questions - Discovery 2 SereneLife
User questions about Discovery 2 SereneLife
0 question about this device. Answer the ones you know or ask your own.
Ask a new question about this device
Download the instructions for your Drone in PDF format for free! Find your manual Discovery 2 - SereneLife and take your electronic device back in hand. On this page are published all the documents necessary for the use of your device. Discovery 2 by SereneLife.
USER MANUAL Discovery 2 SereneLife
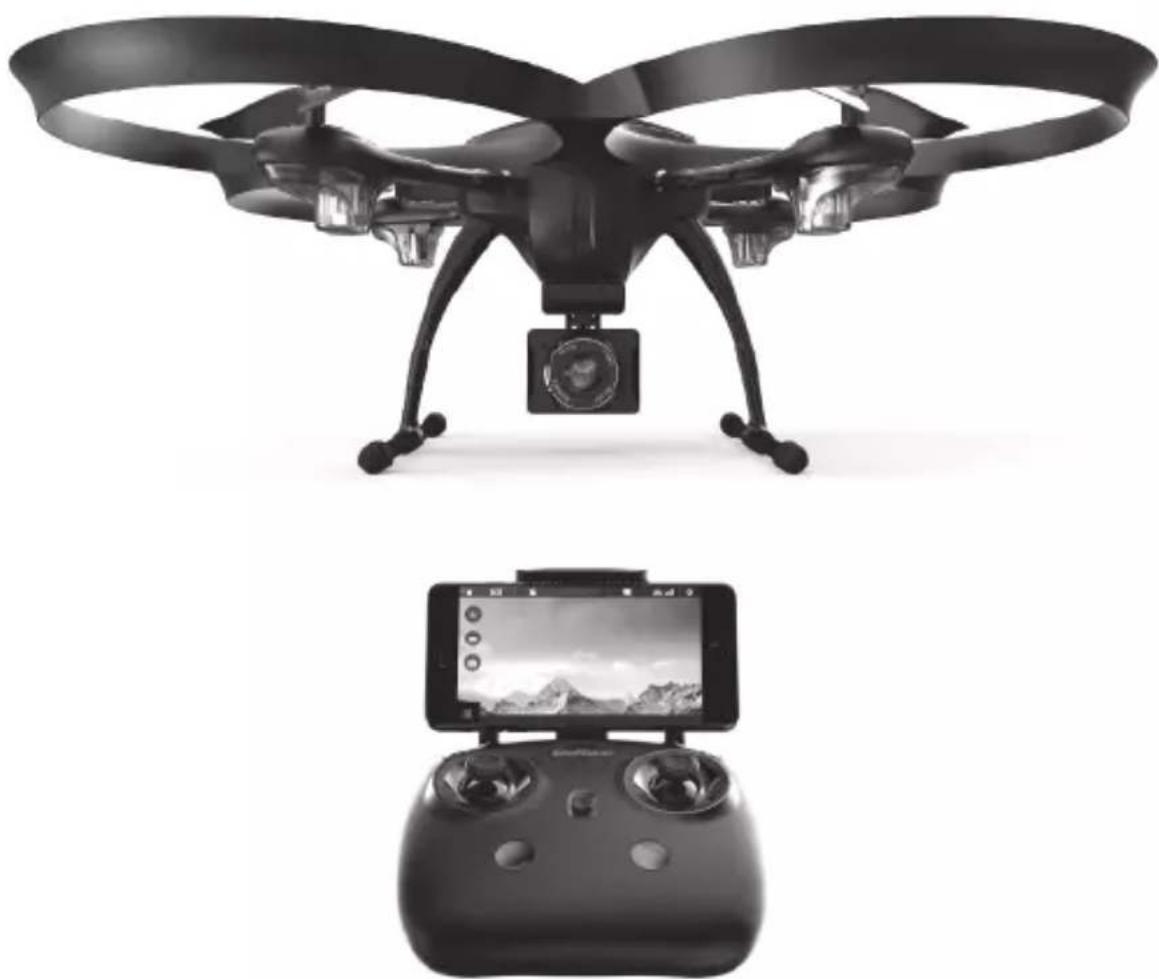
DISCOVERY 2 Equipped with 120° wide-angle 720P HD WIFI Camera
natural_image
Two black-and-white images: top shows a quadcopter drone with camera, bottom shows a handheld device with a screen (no text or symbols visible)SLRD42WIFI
Operations Guide
Catalog
Important Statement 3
Safety Precautions 3
Safe Notice for Drone Battery 4
Charging Instruction for Drone Battery 5
Check List Before Flight 5
Instruction for Drone and Transmitter 6
Pre-flight Operation Instruction 10
Functions Introduction ...... 13
To know your APP 16
component integration 22
Spare Parts 24
Troubleshooting Guide 26
Important Statement
Thank you for buying UDIRC's product. People who under 14 years old must not use the product. Please read this brochure carefully before using the product. You are regarded as accepting all content in this user manual when using this drone.
This product is not an ordinary toy but a piece of complicated equipment which is integrated with professional knowledge by mechanic, electronic, air mechanics, high-frequency emission etc. The users promise to be responsible for their behavior when using this product and relevant APP. The users promise to use the drone and relevant APP for legal purpose, and agree to obey above rules and local laws and regulations.
We undertake no liability for those accidents caused by environment, illegal behavior, improper operation and refitting of the drone after sale of the product.
We have entrusted the distributor to provide technology support and after-sale service. If you have any questions about use, operation, repair etc., please contact the local distributor.
* Please only use attached spare parts or purchase original UDIRC accessories for replacement, or if lead to any accident, we UDIRC do not assume any responsibility.
* Keep the packing and user manual so as to refer to the important information whenever.
Safety Precautions:
This drone is suitable for experienced RC drone user aged 14 years or above. This product contains small parts, please put it out of child's reach.
(1) Flying Area
The flying field must be legally approved by your local government. Do not fly the drone near in the airport. Keep far away from the airport more than 5km when flying a RC drone. Flying field must spacious enough and we suggest at least 8M (length)*8M (width)*5M (height).
(2) Use correctly
For safety elements, please only use UDIRC's spare parts to replace the damaged parts. Improper assembly, broken main frame, defective electronic equipment or unskilled operation all may cause unpredictable accidents such as drone damage or human injury. Please pay special attention to safety operation and have good knowledge of accident responsibility that the user may cause.
(3) Keep away from obstacles and crowd
The speed and status of a flying RC drone is uncertain and it may cause potential danger. So the user must keep away from crowd, tall building, power lines etc. when operating a flying RC drone. Do not fly a RC drone in rainy, storm, thunder and lighting weather for the safety of user, around people and their property.
(4) Keep away from humid environment
The drone inside is consisted of precise electronic components. Humidity or water vapor may damage electronic components and cause accident.
(5) Safe operation
Please operate the RC drone in accordance with your physical status and flying skill. Fatigue, listlessness and improper operation may increase the rate of accident.
(6) Keep away from rotating parts
Rotating parts like propellers or motors may cause serious injury and damage. Keep face and body away from rotating parts.
(7) Keep away from heat
The RC drone is made of metal, fiber, plastic, electronic components etc. Keep away from heat and sunshine to avoid distortion and damage.
(8) The drone should be controlled within max control distance. Do not fly the drone near tall building, high voltage cable or other place with signal interference. Or may cause signal interruption and the drone will out of control, which may result of accident.
(9) Do not touch the hot motor to avoid being burnt.
(10) Please use the recommended charger only. Power off the drone before cleaning the RC drone. Check the USB cable, charging plug etc. regularly to ensure they can work well. If there is any damage, stop using it immediately till it's fixed well.
Safe Notice for Drone Battery
* Keep LiPo batteries away from children and animals.
* Never charge the LiPo battery that has ballooned or swelled.
* Never charge the LiPo battery that has been punctured or damaged.
* After a crash, inspect the battery pack for signs of damage.
* Never overcharge the LiPo battery.
* Do not charge LiPo batteries near flammable materials or liquids.
* Do not put the battery on high temperature place, Reduce risks from fire or explosion by storing LiPo batteries inside a suitable container.
* Do not put battery packs in pockets or bags where they can short circuit or can come into contact with sharp or metallic objects.
* Do not attempt to disassemble or modify or repair the LiPo battery.
* Do not use the battery to crash or hit hard surface.
* Do not put the battery in water and keep it should be stored at room temperature in a dry place.
* Do not leave the battery without supervision when charging.
* Make sure that there is no short circuit of the power wire.
* Please use the recommended charger only.
* Check the charger's wire, plug, surface regularly. Do not use any broken charger.
* If more than one week without using LiPo batteries, power is maintained at about 50% for storage to maintain its performance and service life.
Charging Instruction for Drone Battery
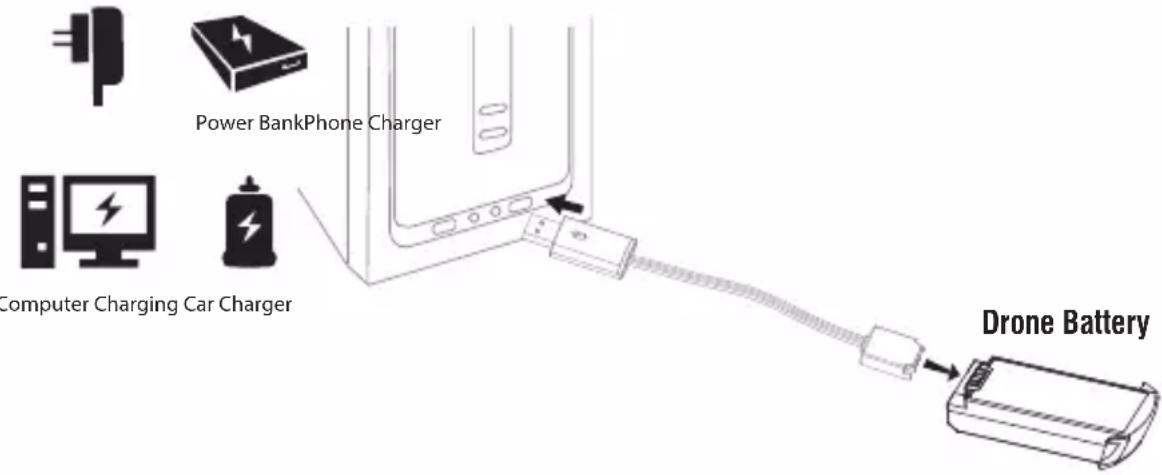
- Connect the drone battery with USB cable first and then choose one of the method as below picture shown to connect with USB plug.
- The red USB indicator light keeps bright when charging. And the light turns green when fully charged.
* For faster charging, it is recommended to use an adapter with 5V 2A output current (not included) to charge the battery.
Li-Po Battery Disposal & Recycling
Wasted Lithium-Polymer batteries must not be placed with household trash. Please contact local environmental or waste agency or the supplier of your model or your nearest Li-Po battery recycling center.

Check List Before Flight
- Make sure the drone battery and transmitter battery are fully charged.
- Make sure the Left Stick of the transmitter in the middle position.
- Please strictly obey the order of turn on and turn off before operation. Turn on the transmitter power first and then turn on the drone power before flying; turn off the drone power first and then turn off the transmitter power when finish flying. Improper turn on and turn off order may cause the drone out of control and threaten people's safety. Please cultivate a correct habit of turn on and turn off.
- Make sure the connection is solid between battery and motor etc. The ongoing vibration may cause bad connection of power terminal make the drone out of control.
- Improper operation may cause drone crash, which may arouse motor defective and noise, and then effect the flying status or even stop flying. Please go to the local distributor to buy new parts for replacement so that the drone will return to its best status.
Instruction for Drone and Transmitter
Drone
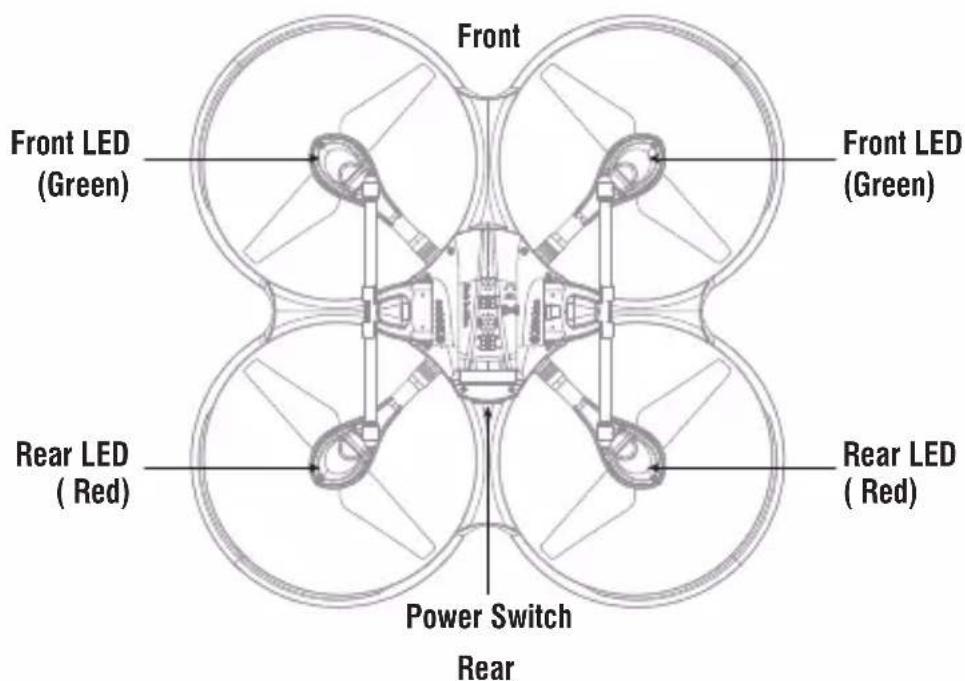
Specification
| Drone Size | 334x334x127mm | Charging Time for Drone Battery | 180mins |
| Drone Weight | 248g | Max Flying Distance/Radius | 150m |
| Propeller Diameter | 147mm Max Image Transmission Distance/Radius 50m | ||
| Camera Resolution 1280x720PFlying Time 13~15mins | |||
| Drone Battery 3.7Vx2 1000mAh | Main Motor 1020x4 | ||
| Transmitter Battery 4xAA Alkaline Batteries | Frequency | 2.4Ghz | |
Exploded View
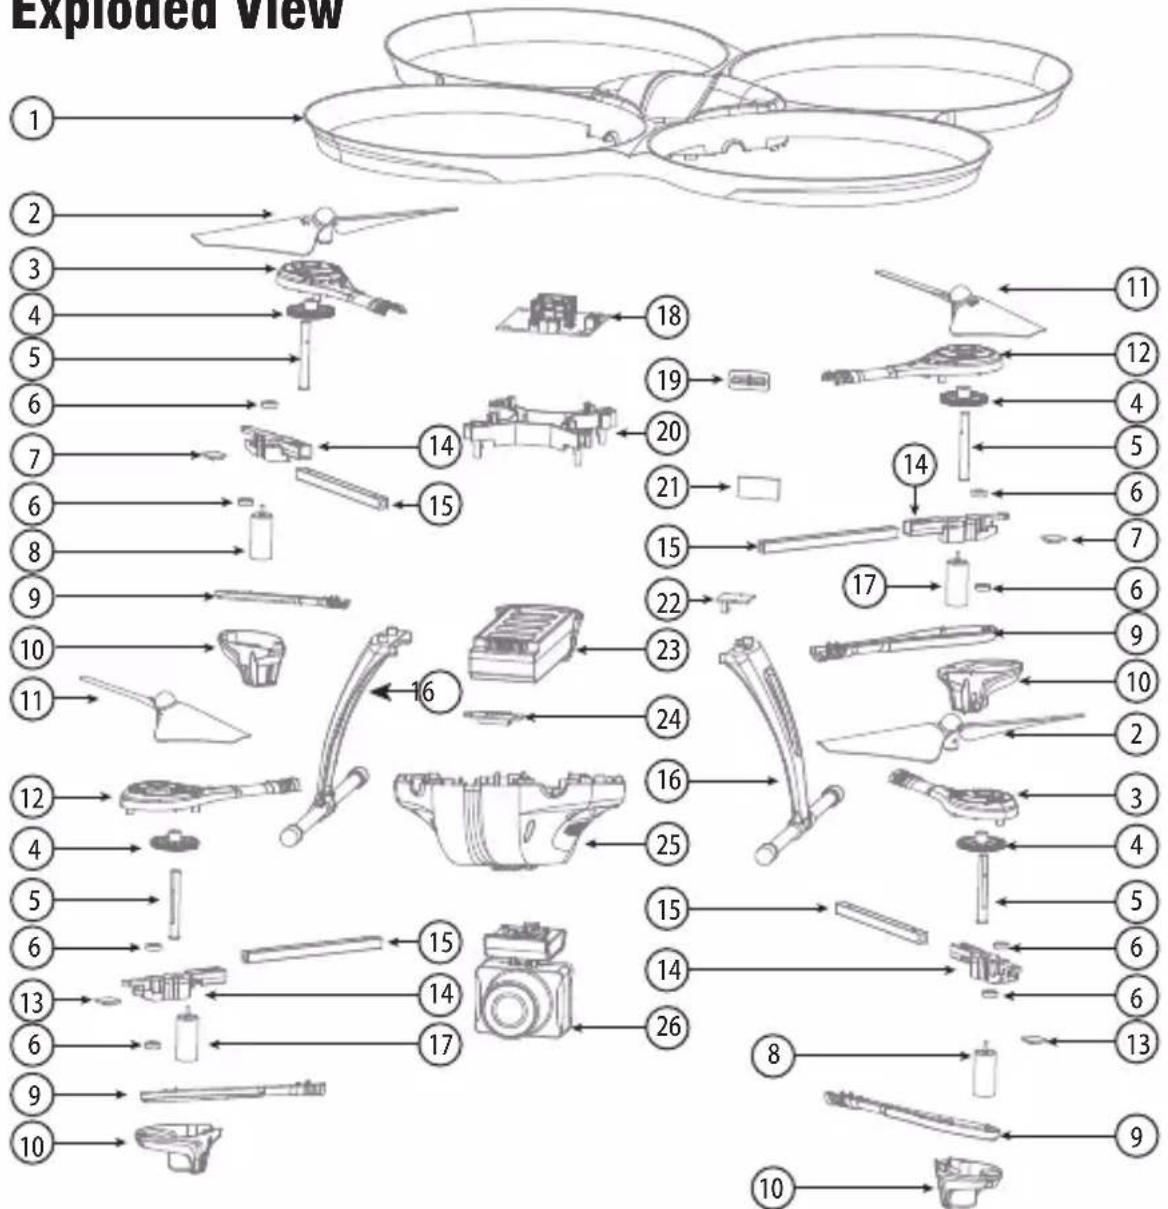
| No. | Name | No. | Name | No. | Name |
| 1 | Drone Cover Housing | 10 | Lampshade | 19 | Switch |
| 2 | A propeller | 11 | B propeller | 20 | Receiver Board Holder |
| 3 | Upper Motor Cover A | 12 | Upper Motor Cover B | 21 | Power Board |
| 4. | Gear | 13 | Front LED Board (Green) | 22 | Camera Adapter Board |
| 5 | AL Main Shaft | 14 | Motor Holder | 23 | Battery Box |
| 6 | Bearing | 15 | C-Pb Square Tube | 24 | Battery Adapter Board |
| 7 | Rear LED Board (Red) | 16 | Landing Gear | 25 | Lower Drone Cover |
| 8 | A Motor(Black and White wire/White connector) | 17 | B Motor (Red and blue wire/ Red connector) | 26 | Camera |
| 9 | Lower Motor Cover | 18 | Receiver Board |
Transmitter
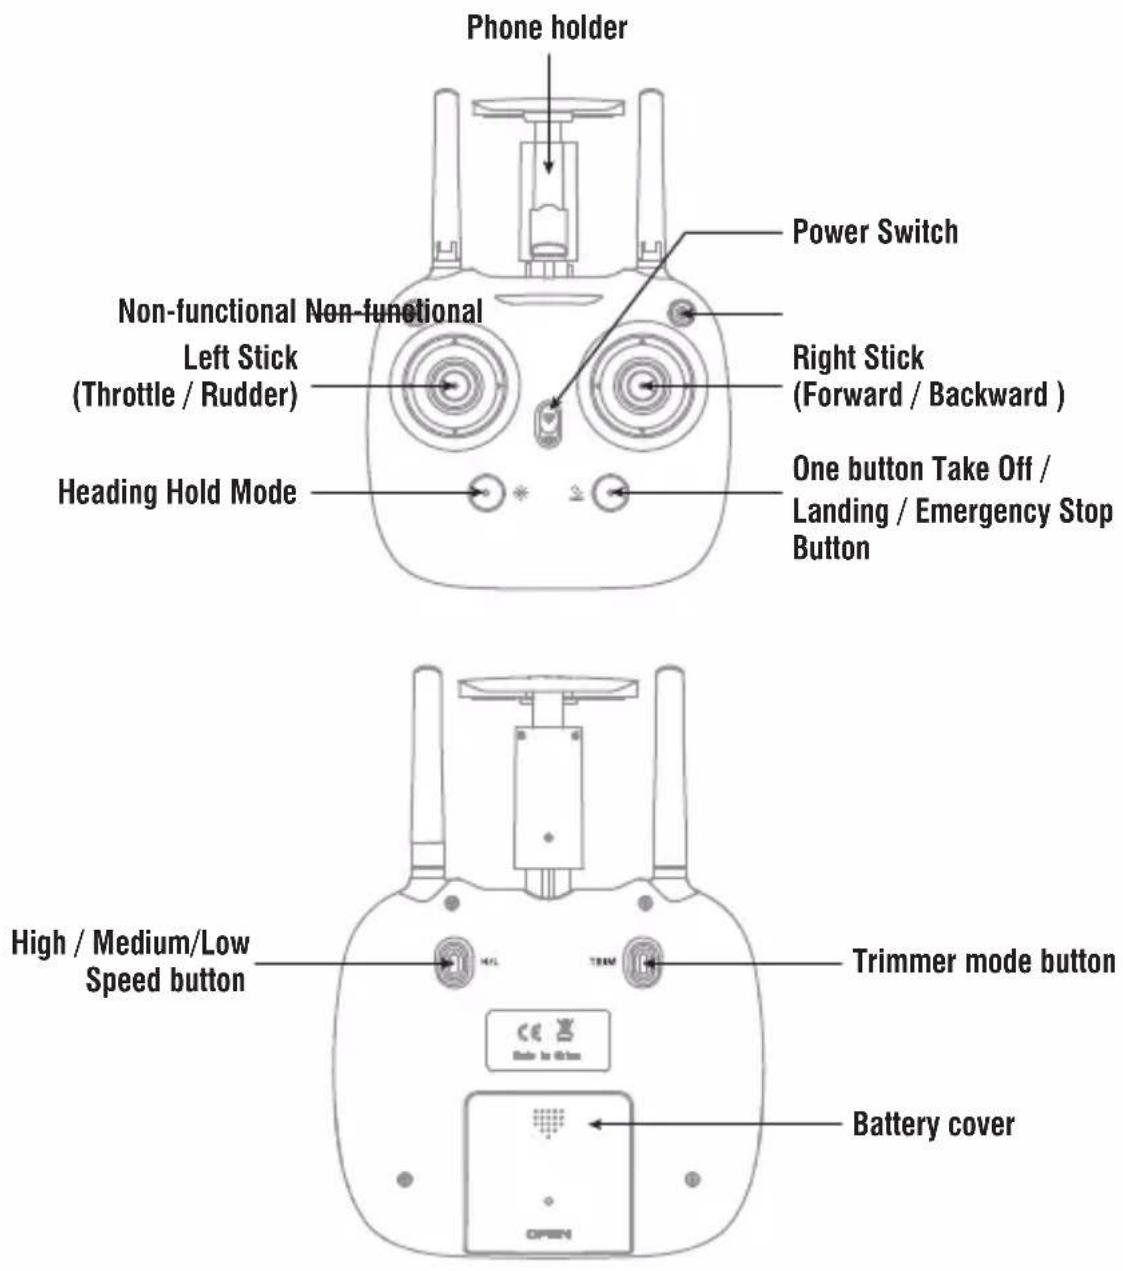
Brief Introduction for Button Functions
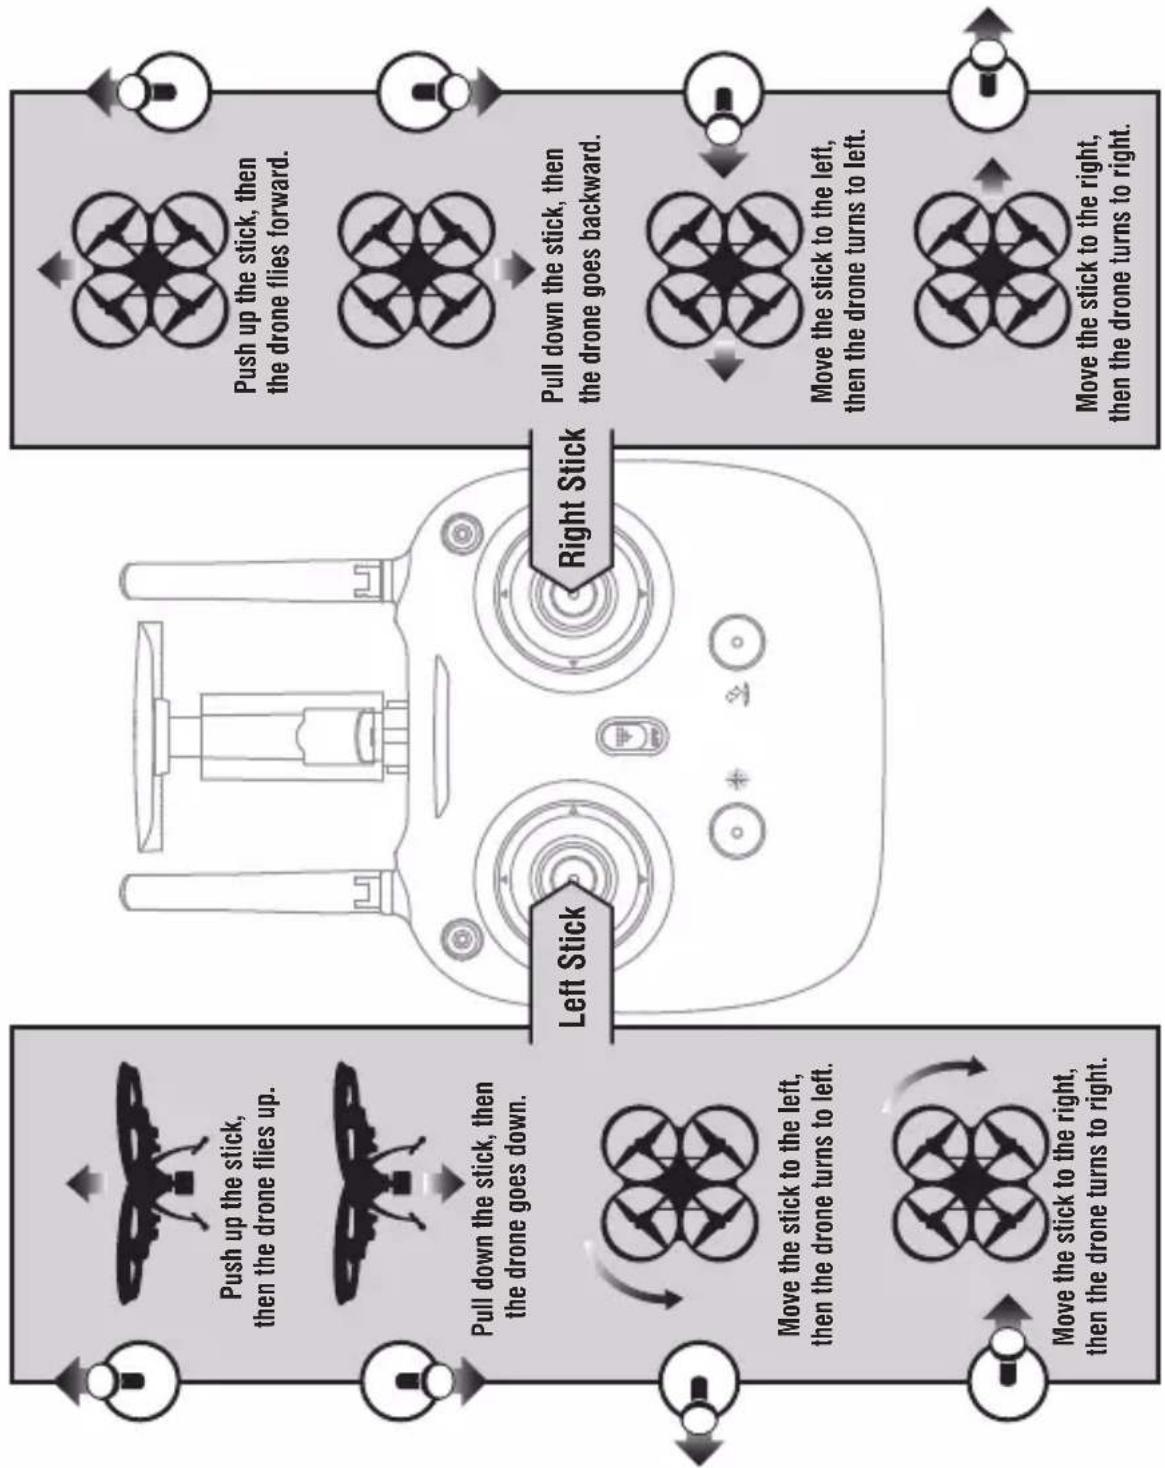
| Left Stick | Move the Stick to forward / backward / left / right to fly the drone to up / down / turn left / turn right. |
| Right Stick | Move the Stick to forward / backward / left / right to fly the drone to forward / backward / left / right. |
| Power Switch | Push up the power switch to turn on the transmitter, and pull down to turn off. |
| Heading Hold Mode | Press the button to enter heading hold mode, and press again to exit from heading hold mode. |
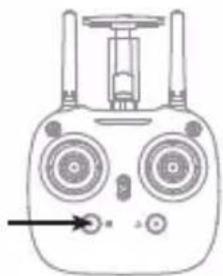
| Take Off / Landing / Emergency Stop Button | Press the button and the drone will fly up automatically. Press the button again and the drone will land on the ground automatically. Press and hold the button more than 1s, the drone propellers will stop and fall down immediately. |
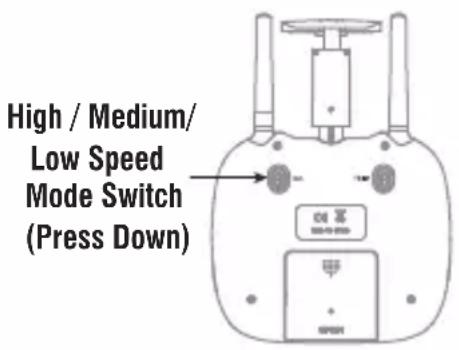
| High / Medium/Low Speed button | Press down this button to switch to High /Medium/ Low Speed. |
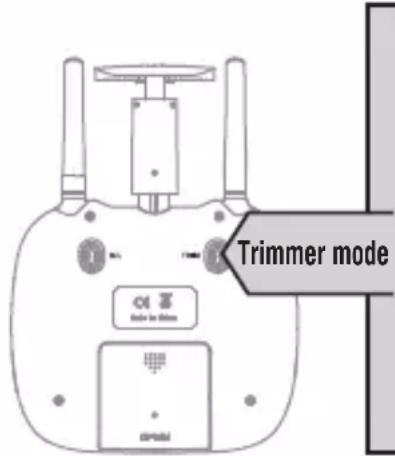
| Trimmer mode Button | Press down this button,move the right stick to the required trimmer direction, then it will adjust the direction accordingly, when loose the stick, then ESC from the trimmer mode. |
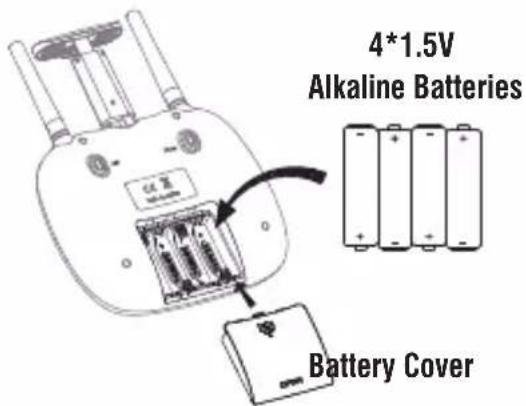
Battery installation:
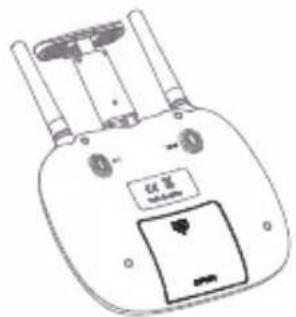
Open the battery cover on the back side of the transmitter and put 4 alkaline batteries (AA, not included) into the box in accordance with electrode instructions, as picture 1,2 shown.
natural_image
Line drawing of a handheld electronic device with ports and a control panel (no text or symbols)Picture 2Picture 1
| Notice: | 1. Make sure the electrodes are correct.2. Do not mix new and old batteries.3. Do not mix different kinds of batteries.4. Do not charge the non rechargeable battery. |
Phone Installation Instruction:
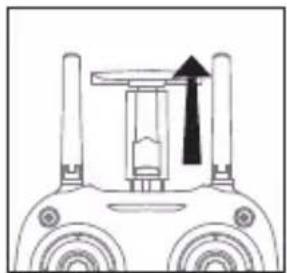
- Pull up the phone holder(Picture 3), firstly open the lower clamp, then pull the upper holder until can hold the phone(Picture 4).
- Put the phone into the holder, then release the clamp, the clamp will hold the phone tightly (Picture 5/6).
natural_image
Diagram of a mechanical device with two wheels and a central component, no visible text or symbols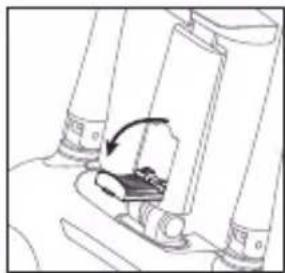
natural_image
Diagram of a mechanical assembly with no visible text or symbols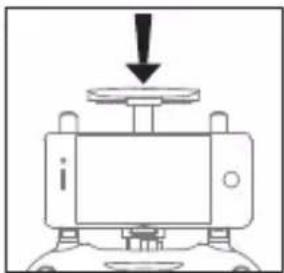
natural_image
Simple line drawing of a mechanical device with a downward arrow and labeled components (no text or symbols)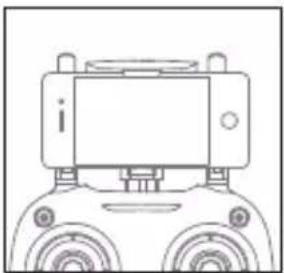
natural_image
Front view line drawing of a robotic vehicle with two wheels and a screen (no text or symbols)Picture 3 Picture 4 Picture 5 Picture 6
Pre-flight Operation Instruction Frequency Pairing
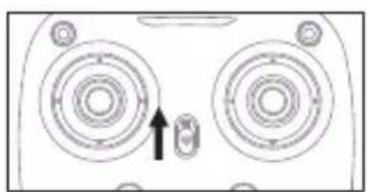
- Turn on the transmitter switch (Picture 7) and the power indicator light flashes rapidly. Push the Left Stick all the way down to the lowest position and then release. The Left Stick will back to the middle position automatically. (Picture 8 / 9) The power indicator light flashes slowly, which indicates the transmitter is ready for frequency pairing.
natural_image
Diagram of two circular speaker or speaker units with a small inset device, no text or symbols present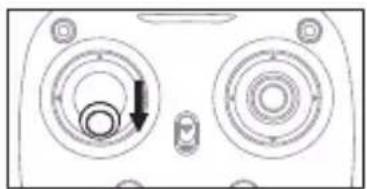
natural_image
Diagram of a device front panel with two circular chambers and a directional arrow indicating rotation (no text or symbols)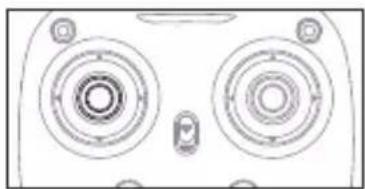
natural_image
Top-down schematic of a speaker grille with two main ladders and a small button (no text or labels)Picture 7 Picture 8 Picture 9
- Install the battery to the mounted box in the drone as picture show (Picture 10). When you put the battery, you need to press down the buckle and then push the battery until fully fixed (Picture 11).
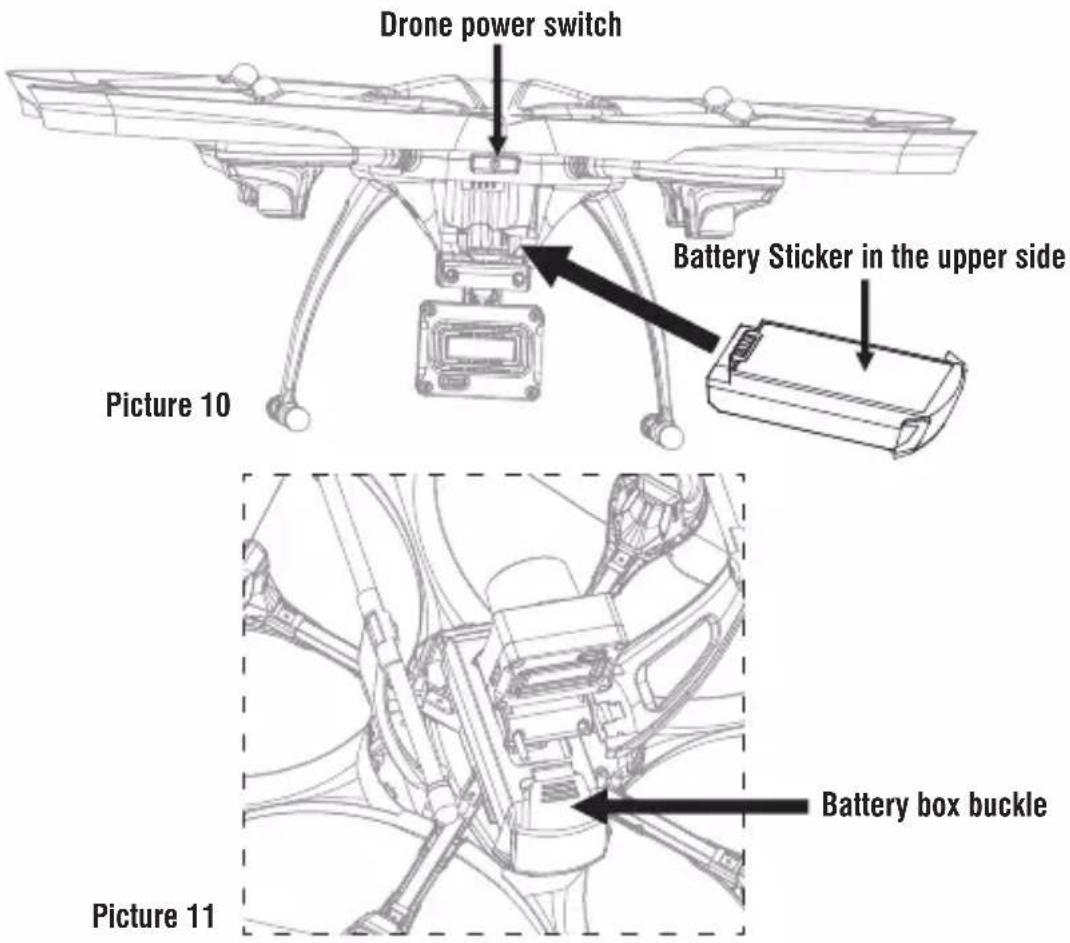
- Press for about 2 seconds on the power switch button(Picture 10), put the drone on the flat surface, the drone body lights turn from flashing to solid bright, which indicates successful frequency pairing.
Important Notice: Please make sure the drone is placed on the horizontal position after powering on the drone, so that the drone can work well.
Checklist before Flight
- The camera is in front of the drone. Keep the drone front away from you.
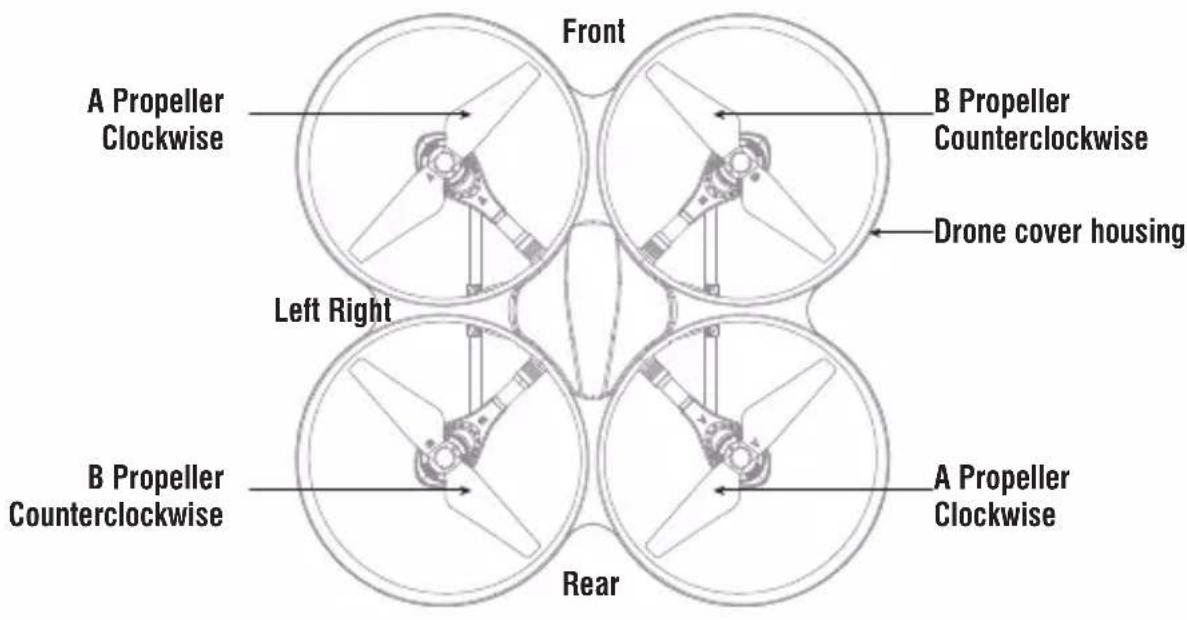
- Power on the drone and check the direction of the rotating propellers. The left
front and right rear A propellers rotating clockwise while the right front and left rear B propellers rotating counterclockwise.
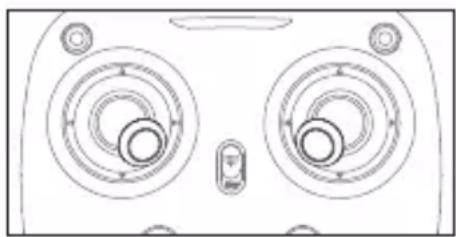
- Activate(unlock) motors: Move the Left Stick and Right Stick at the same time (45 degree inward) to start the motors and repeat previous step again to lock the motors. (Picture 12)
natural_image
Front view of a device with two circular gauges and a central button (no text or symbols)Picture 12
-
After activate the motors, push up the Left Stick slowly to fly up the drone, and pull down the Left Stick slowly to the lowest end(Picture 8), then the drone will land on the ground slowly.
-
It's recommended to repeat above Step 4 to practice.
-
Adjust relative transmitter Trimmer button to adjust the rudder if the drone tilts to one side when flying.
Calibration Instruction
Please follow below steps to calibrate the drone if the drone becomes imbalance after crashing during the flight, and can not be adjusted by trimmer button and cause difficult operation.
- Power off the drone, then turn off the transmitter switch.
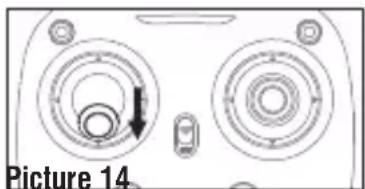
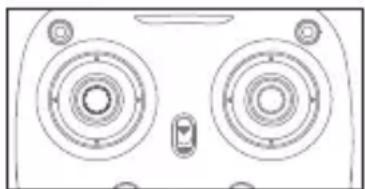
- Turn on the transmitter switch, push the Left Stick all the way down to the lowest position (Picture 13) and then release. The Left Stick will back to the middle position automatically (Picture 14). The transmitter is ready for frequency pairing mode.
natural_image
Diagram of a device casing with two circular components and a directional arrow, labeled 'Picture 14' (no text or symbols on the diagram itself)Picture 13 Picture 14
natural_image
Line drawing of a two-tiered electronic device with circular and rectangular components (no text or symbols)-
Power on the drone and put it on a flat surface in a horizontal position. The drone body lights change from flashing to solid bright, which indicates successful frequency pairing.
-
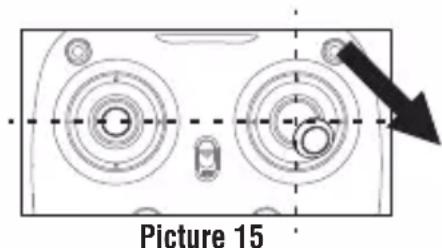
Do not move the Left Stick before successful calibration. Push the Right Stick as Picture 15 and then release. The drone body lights flash, which indicates that the drone is calibrating. When the drone body lights remain solid, which indicates successful calibration.
natural_image
Diagram of a device with circular components and a black arrow pointing to a section labeled 'Picture 15' (no readable text or symbols beyond label)Notice: When the drone is fiercely impacted or crashed, it may cause the gyro can not recover and cause difficult to control, if so, then you need to power off and power on again to calibrate.
Flying Control
Notice: Every time before the drone take off, move the Left Stick and Right Stick at the same time as Picture 12 shown(45 degree inward) to start the motors. Push up the Left Stick slowly to fly up the drone or press down the one button take off.
flowchart
graph TD
    A["Top Row: Push up the stick, then the drone flies forward."] --> B["Right Stick: Pull down the stick, then the drone goes backward."]
    B --> C["Left Stick: Pull down the stick, then the drone goes down."]
    C --> D["Top Row: Move the stick to the right, then the drone turns to right."]
    D --> E["Right Stick: Move the stick to the right, then the drone turns to right."]
Forward and backward trimmer
When take off, if the drone tilts forward, press down the trimmer button, and push the right stick backwards. Otherwise push forwards.
Left and right side flying trimmer
When take off, if the drone tilts to left, then press down the trimmer button and push the right stick to right to adjust. Otherwise push to left.
Left and right turning trimmer
When take off, if the drone head rotates to left, then press down the trimmer button and push the left stick to right. Otherwise push to left.
Functions Introduction
Take off/ One button take off/Landing modes
- Method 1 (Take off): After frequency pairing successful, push the Left Stick and Right Stick as Picture 12 shown to start the motor and then release. Then push up the Left Stick to fly up the drone to certain altitude and then release the stick.
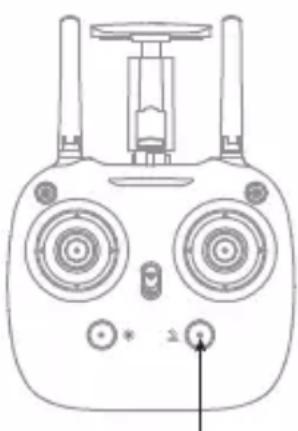
- Method 2 (One Button Take Off): After frequency pairing successful or motors activated, press the Take Off / Landing / Emergency Stop Button (Picture 16), the drone will fly up automatically and keep flying at an altitude of 1.2 meters approximately.
Landing Methods
natural_image
Front view diagram of a Drones hover with dual motors and control buttons (no text or symbols)Take Off / Landing / Emergency Stop Button
Picture 16
- Method 1 (Landing): When flying, push the Left Stick all the way down to the lowest position(Picture 13) and hold it till the motors stop and the drone will land on the ground slowly.
- Method 2 (One Button Landing): When flying, press the Take Off / Landing / Emergency Stop Button once shortly(picture 16), and the drone will land on the ground automatically. (When using this function, you can not touch the left stick, if not, then the function will fail)
▲Emergency Stop: When the drone in emergency situation and going to hit the walking people or obstacle etc., press the Take Off / Landing / Emergency Stop Button immediately and hold it for more than 1s( picture 16). The propellers will stop immediately.
Tip: Do not use the emergency stop function unless in emergency situation. The drone will fall down suddenly after all propellers stop.
Altitude Hold Mode
Altitude hold mode indicates that the drone maintains a consistent altitude while allowing roll, pitch, and yaw to be controlled normally. It makes easier to control
the drone for beginner and more stable
for aerial photography.
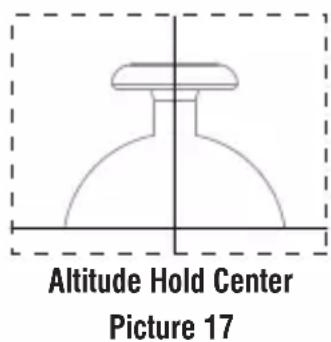
Push the Left Stick up (down) to fly the drone up (down) at certain altitude and then release the Stick. The Stick will back to the center position (Altitude Hold Center) as Picture 17 shown. And the drone will keep flying at current altitude. Repeat above steps if you want to change the drone altitude (Default mode).
Note: The Altitude Holding Mode can not be used when the blades are accidentally deformed or damaged.
High / Medium/Low Speed Mode Switch
Press down this button, then it will sound “di”, it means low speed mode “L”; when it sounds “di.di”, means medium speed “M”; and sounds “di.di.di” means
high speed mode "H".
Low Speed Mode(Mode 1)
- Low Speed Mode is suitable for beginner.
Medium speed Mode(Mode 2)
- Medium Speed Mode is suitable for skillful pilots to play in the gentle breeze.
High Speed Mode(Mode 3)
- High Speed Mode is suitable for expert to experience aerial stunt in outdoor.
Heading Hold Mode
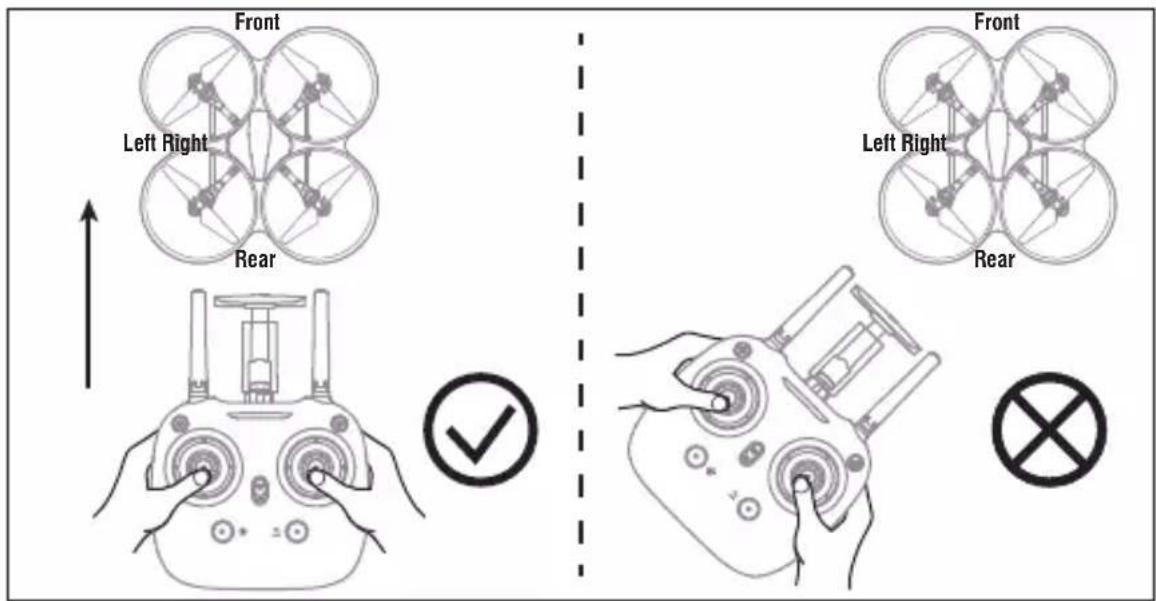
Drones generally have a front and rear indicated by LED lights or colored propellers. By default, the users are required to tell the front and the rear of the drone when flying. Under heading hold mode, the users can operate the drone without worrying about the orientation (left is left and right is right all the time, regardless of where your drone is pointing at). Heading Hold Mode is designed for beginners and the users who fly the drone in daylight or at a far distance or difficult to identify the drone orientation.
The default setting is NOT Heading hold Mode.
You are allowed to activate the heading hold mode function before taking off or in flight. Fly under heading hold mode, you're required to ensure the drone front direction aligned with your front direction, DO NOT change your direction of your transmitter and keep it fly in front of you all the time.(See below picture)
WARNING: DO NOT USE HEADING HOLD MODE BEFORE YOU ARE SURE THAT THE DRONE'S FRONT IS YOUR FRONT. OTHERWISE, IT MIGHT BE OUT OF CONTROL OR FLY AWAY.
* Press down Heading hold mode button, the drone's left and right LED will start flashing alternately, it shows the drone enters Heading hold mode, press the button again, then the LED gets solid and the drone ESC from heading hold mode.
Heading Hold Mode
natural_image
Line drawing of a handheld remote control with dual dials and a scroll wheel (no text or symbols)Low Battery Alarm
When the transmitter in low battery, the transmitter will beep "di...di...di..." to remind the user to land the drone to replace the batteries as soon as possible. Or the drone may out of control.
When the drone in low battery, the transmitter will beep" di.di.di..." constantly to remind the user to land the drone as soon as possible. The flip function will turn off automatically when the drone in low battery.
Out of Range Alarm
When the drone flying out of the max remote control distance, the transmitter will Beep "didi...didi...didi..." to alarm the user to fly back the drone immediately. Or the drone may be out of control and fly away.
Motors Stuck Protection
- When the propellers get stuck, then the drone LED will flash quickly and activate stuck protection function and the motors stop running.
- Pull down the left stick to the lowest position, the drone LED will get a solid light and stuck protection will be released and the drone can fly again.
To know your APP
Download and Install the APP: Flyingsee
The APP is suitable for mobile phone with iOS and Android system, please download from the mobile phone software store:
- For mobile phone with iOS system, please search Flyingsee in APP Store.
- For mobile phone with Android system, please search Flyingsee in Google Play.
- Scan the below QR code to download Flyingsee App.
[Non-Text]
Available on the App Store
ANDROID APP ON Google play
Frequency Pairing between Mobile Phone and Drone WiFi:
- Install the battery to the mounted box and power on the drone. Put the drone on the flat surface in horizontal position.
- Enter "set up" of the mobile phone, turn on WiFi (WLAN) and choose udirc-***, return to desktop after successful connection.
- Click on the icon Flyingsee and click on ◀ to enter remote control interface to experience real time transmission.
natural_image
Icon of a drone with a circular lens, no text or symbols presentFlyingsee

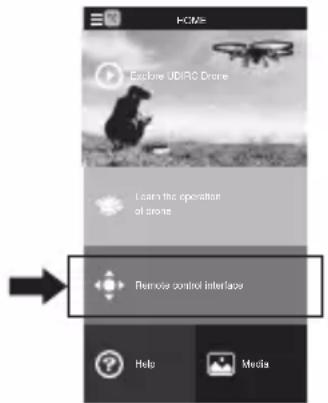

to enter remote control interface
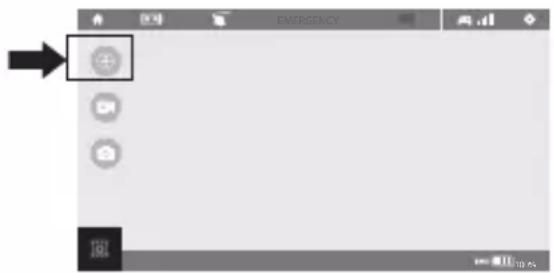
Click on the icon Home Page Real time Transmission Interface
- Click on to enter Virtual Control Interface. At this time the drone
LED lights change from flash to solid bright, which indicates successful frequency pairing and the drone is ready to be controlled via APP.
Virtual Control Interface
Important Tip:
Ensure the drone is put it on a flat surface in horizontal position so that the drone can work well. Or it may be fail to be controlled.
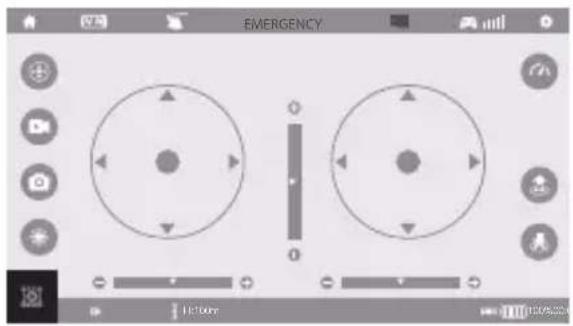
Introduction for APP Icons Home Page Icons

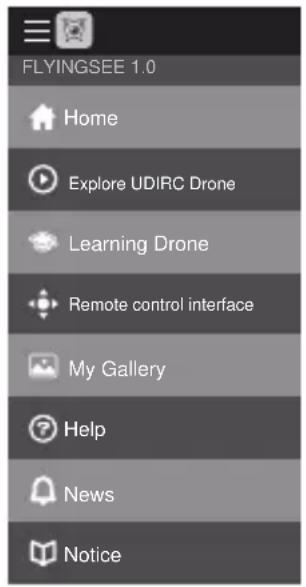
Explore UDIRC Drone

Learn the operation of Drone

Remote control interface

Help

Media
Remote Control Interface

Home Page Icon
Click on the icon and back to home page.

Virtual Reality Mode
Click on the icon to enter virtual reality mode to experience first person view (only available when using with a VR headset). Click on the icon again to exit from virtual reality mode.

Flight Route Setting Mode
Click on this icon and it turns red. Draw a flight route in the right area. The drone will fly according to the flight route. Click on the icon again to exit from Flight Route Setting Mode. The icon turns white.
EMERGENCY
Emergency Stop
The icon is red by default. Click this icon and the propellers will stop immediately. The drone will fall down to the ground straightly.
Tip: Do not use the emergency stop function unless in emergency situation.

TF Card
When not yet insert the TF card to the drone camera, then the icon will show 📄, when the TF card is in, then the icon shows 📋.
Remote Control Signal
To show the drone's WiFi signal strength.

Setting
Click on this icon to set some parameters as below, and click again to exit.
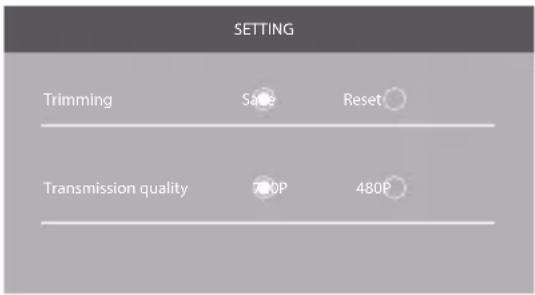
Click on "Save" to save trimming setting.
Choose "Reset" for factory reset.
Select "720P" transmission quality.
Remote Control

Virtual Control Stick
The virtual control stick is hidden by default. Click on the icon to turn on the virtual control stick.

Gravity Induction Mode
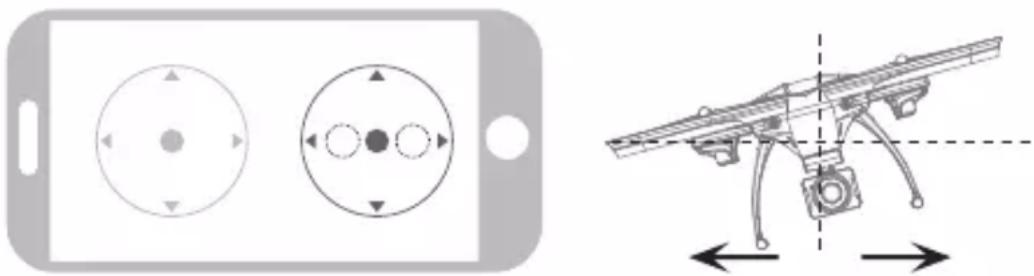
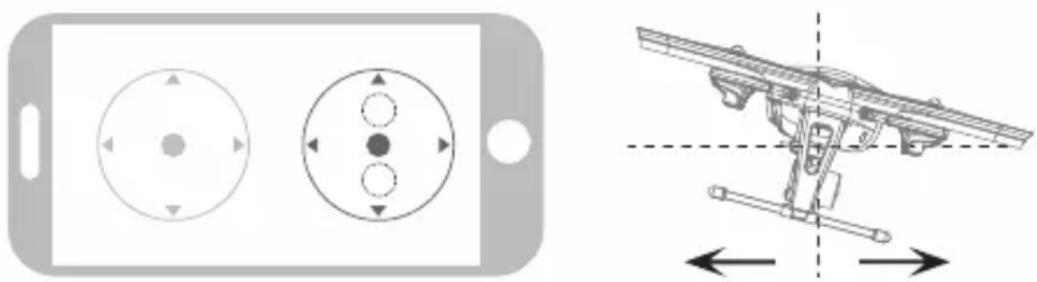
Click on this icon to enter gravity induction control mode. (only available for flying left / right and forward / backward). Click on the icon again to exit from gravity induction control mode.
natural_image
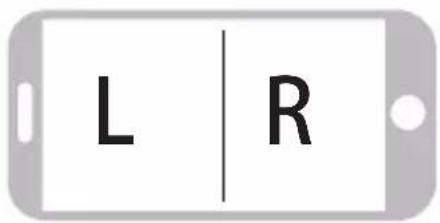
Diagram showing a smartphone with circular control buttons and a drone-like device with directional arrows (no text or symbols)If the mobile phone shakes to the left / right, the Right Ball will move accordingly causing the drone to fly left / right.
natural_image
Diagram showing a smartphone with two circular control buttons and a mechanical assembly with directional arrows (no text or symbols)If the mobile phone shakes to forward / backward, the Right Ball will roll forward / backward, causing the drone to fly forward / backward.

Video
Click on this icon to record video. The recording time will show at the bottom of the screen. Click on this icon again to finish recording.

Photo
Click on this icon to take photo.

Heading Hold Mode
Click on this icon and it turns red, which indicates that the drone enter Heading Hold Mode. Click again to exit from Heading Hold Mode. The icon turns white.

Media
Click on this icon to view or delete the aerial video and photo. Click on the arrow to exit.

H

High / Low Speed Mode
By default, the drone is in Low Speed Mode "L". Click on "H" to enter High Speed Mode.

One Button Take Off
Click on this icon and it turns red shortly. The drone will fly up automatically and stay flying at an altitude of 1.2 meters.

One Button Landing
Click on this icon and the icon turns red, the drone will fly down slowly and land on the ground. All propellers also will stop running.

H:0.1m
Altitude hold icon
It indicates the drone's altitude position(As per calibration level)

B
100%
Drone battery status icon
When the drone battery capacity left around 15%, the phone will vibrate to alarm that the battery is going to run out and you need to fly back and replace the battery.
Calibration Instruction
If the drone becomes imbalance after crashing during the flight, and can not be adjusted by trimmer button and cause difficult operation, please calibrate the drone.
- Please refer to the Frequency Pairing between Mobile Phone and Drone WiFi to calibrate the drone.
- Do not push the Left Ball before successful calibration. Move the Right Ball as the picture shown on the right. The drone body lights flash 3 times, which indicates that the drone is calibrating. When the drone body lights get solid, which indicates successful calibration and the drone is ready to be controlled.
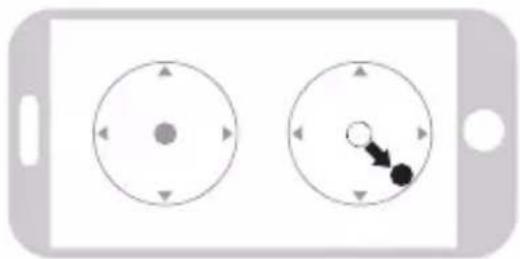
natural_image
Two circular diagrams with directional arrows and a cursor pointer, no text or symbols presentAPP Flying Control
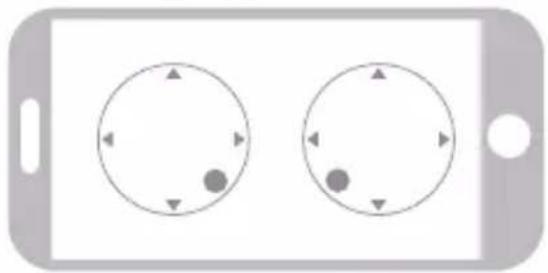
natural_image
Two identical circular diagrams with directional arrows on each, displayed on a smartphone screen (no text or symbols)Move the Left Ball and Right Ball at the same time to start the drone as picture shown. Or click on One Button Take Off icon to start the motors, then the drone is ready to control.
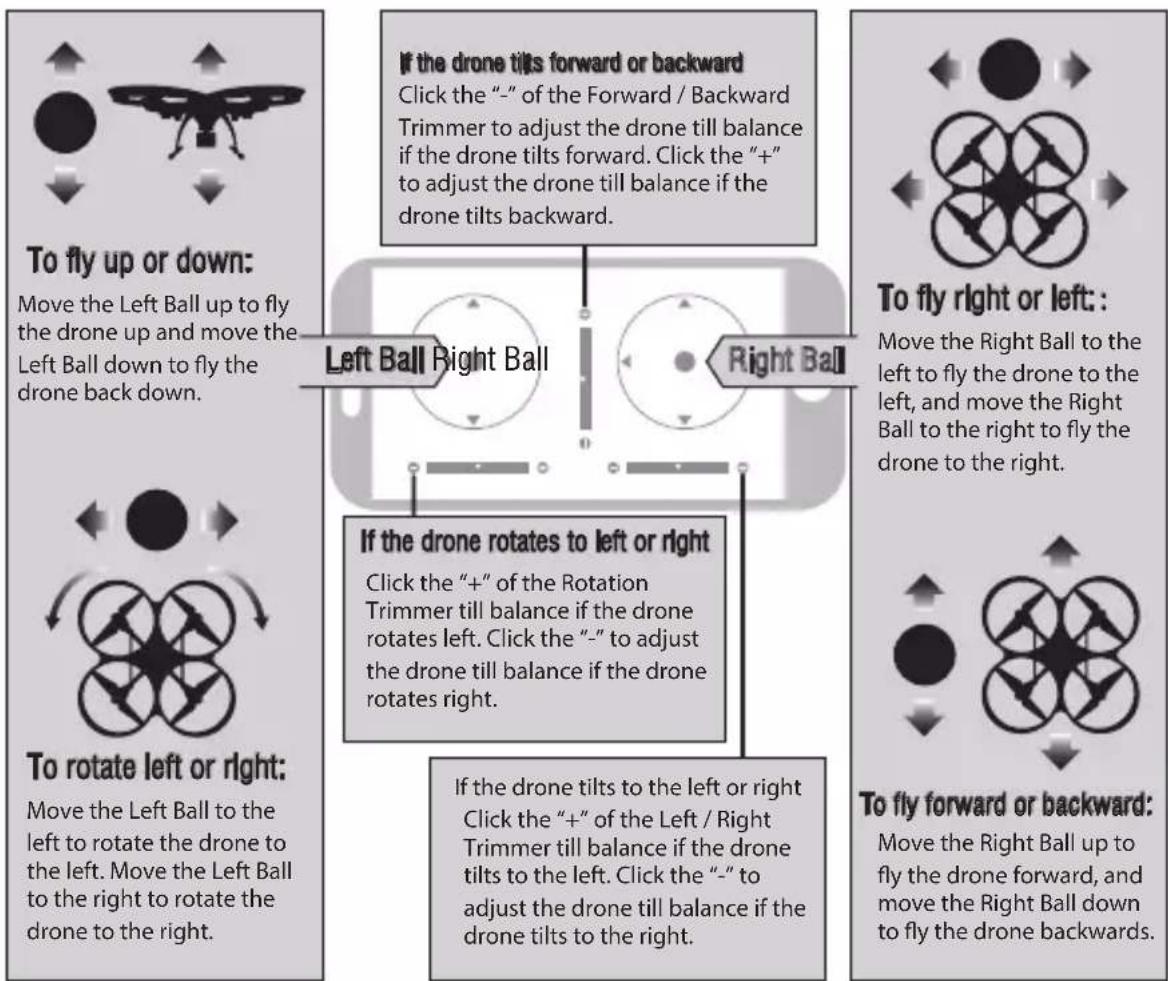
flowchart
graph TD
    A["To fly up or down: Move the Left Ball up to fly the drone up and move the Left Ball down to fly the drone back down."] --> B["Left Ball Right Ball"]
    C["To rotate left or right: Move the Left Ball to the left to rotate the drone to the left. Move the Left Ball to the right to rotate the drone to the right."] --> D["If the drone tilts forward or backward Click the "-" of the Forward / Backward Trimmer to adjust the drone till balance if the drone tilts forward. Click the "+" to adjust the drone till balance if the drone tilts backward."]
    E["To fly right or left: Move the Right Ball to the left to fly the drone to the left, and move the Right Ball to the right to fly the drone to the right."] --> F["If the drone rotates to left or right Click the "+" of the Rotation Trimmer till balance if the drone rotates left. Click the "-" to adjust the drone till balance if the drone rotates right."]
    G["To fly forward or backward: Move the Right Ball up to fly the drone forward, and move the Right Ball down to fly the drone backwards."] --> H["If the drone tilts to the left or right Click the "+" of the Left / Right Trimmer till balance if the drone tilts to the left. Click the "-" to adjust the drone till balance if the drone tilts to the right."]
Notice:
- If you can not find the WiFi signal to connect, turn off WiFi and turn on again to search and connect.
- The available WiFi control radius/distance is 40m, please control the drone within this range.
- When alternating control from mobile phone to transmitter, the transmitter left stick must be in the center position, or exit from the APP. If not then you can not control the drone alternately.
Display the photos and video

To view the photos and videos.
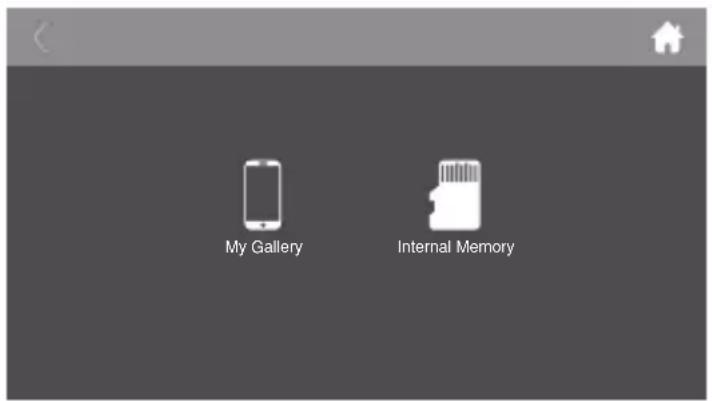
Main menu Media interface
Notice: App must be authorized to access the phone gallery, if not, then may be unavailable to display the video and photos.
The photos are stored in the local phone gallery and TF card, the video is only stored in the TF card, you need to download the video to the phone gallery and display it. Please download the video as per APP instruction.
To take photo and record video
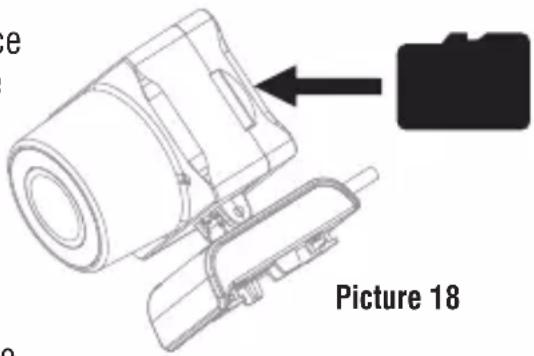
- Insert the TF card to the slot in accordance with Picture 18. Make sure the metal side of the card faces up as the picture.
- The aerial photo will be saved in your mobile phone and the TF card, while the video only be saved in the TF card. But you can download the video to the mobile phone only when the mobile phone connecting with the drone WiFi and the TF card in the drone.
Tip: Click on the video icon to save a video when ending recording, or the video cannot be saved.
- Power off the drone first when finish aerial photography. Take out TF card and insert the card to a card reader. Connect the card reader with computer USB port. After a while, view the aerial photography data from "my computer"- "mobile disk".
Tip: Please play the video or photo after coping all aerial photography data to computer and make sure the play software can support AVI format.
Basic parameter for aerial camera: Video DPI 1280*720P; Image Size 1280*720P.
Component installation
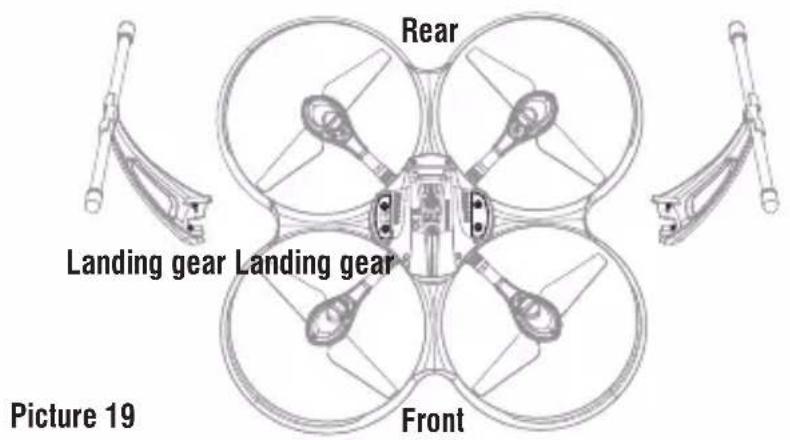
Landing gear installation diagram
Install the left and right landing gear to the bottom housing position as per picture 19 show, and then use the screw driver to tighten the screws in clockwise.
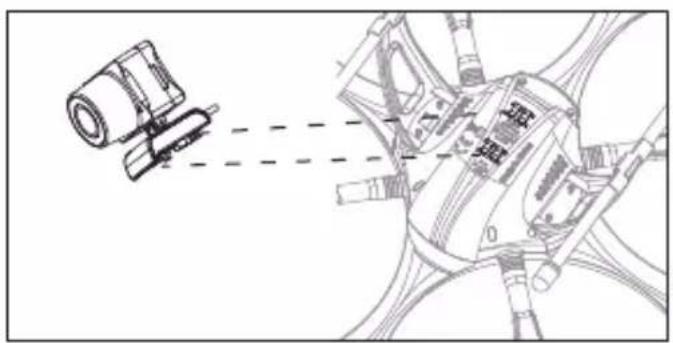
Camera box installation diagram
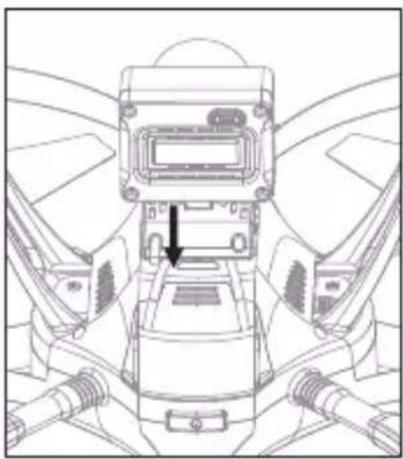
Insert the camera buckle to the drone bottom position(picture 20), and then push in correctly(picture 21).
natural_image
Technical line drawing of a mechanical assembly with no visible text or symbols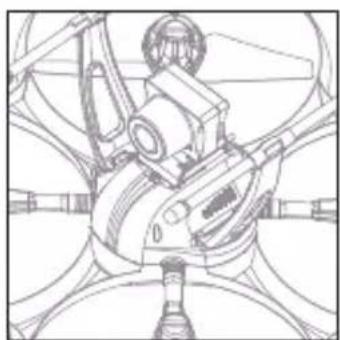
natural_image
Technical line drawing of a mechanical assembly with no visible text or symbolsPicture 20 Camera box buckle entrance direction Picture 21
Camera wire connection diagram
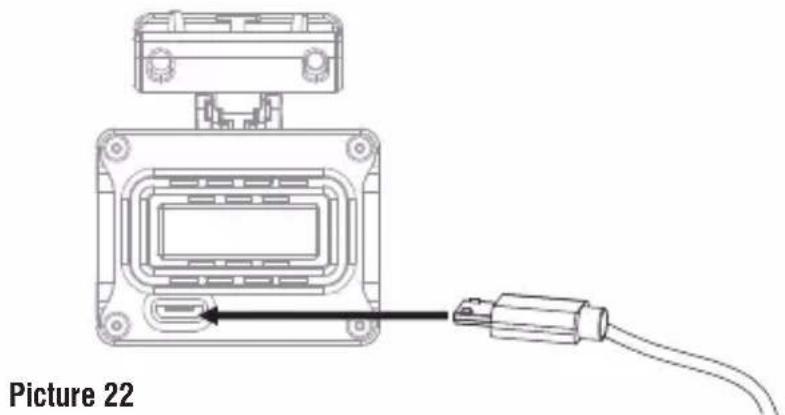
- Insert the attached Micro terminator to the camera socket(picture 22).
natural_image
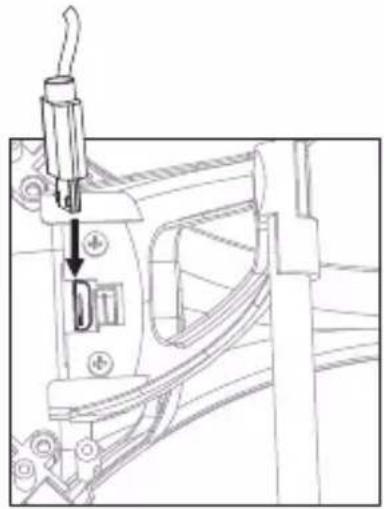
Diagram of a device with an attached cable and connector, labeled 'Picture 22' (no text or symbols on the diagram itself)- Insert the Micro terminator into the bottom housing socket as picture show (picture 23).
Picture 23
natural_image
Technical line drawing of a mechanical assembly with no visible text or symbolsPropeller installation diagram
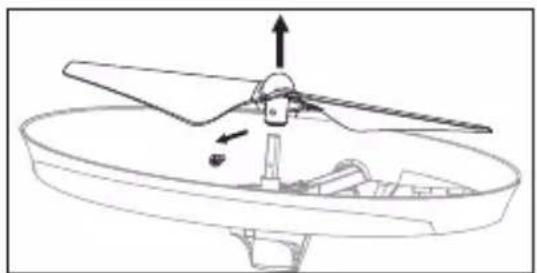
- Use the screw counter clockwise to pick out the screw and then pull out the damaged propeller(picture 24).
- Replace with the same new rotating direction propeller, aim at the screw hole to install it (picture 25), then tighten the screw in clockwise.
natural_image
Technical line drawing of a propeller assembly with directional arrows indicating motion (no text or symbols)Picture 24
natural_image
Diagram of a boat's interior with an arrow indicating direction, no text or symbols presentPicture 25
Motors installation diagram
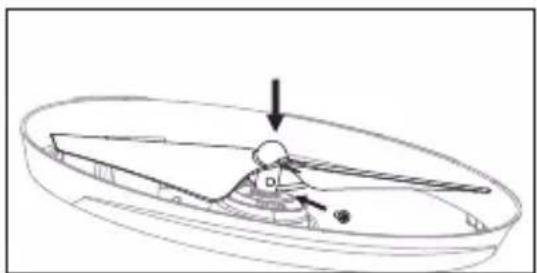
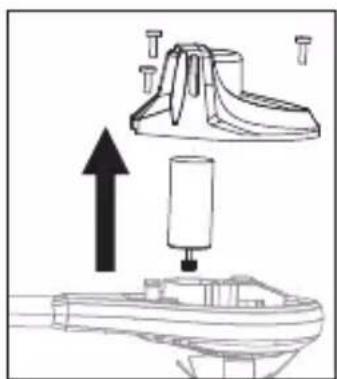
- Rotate the screw driver in counter clockwise to loose the screw, and take out the 3PCS screws in the lampshade, disconnect the wire and then take out the defective motor(picture 26).
- Replace with the same new motor, connect the motor wire(picture 27), put on the lampshade, then tighten the 3pcs screws in clockwise( picture 28).
natural_image
Diagram showing a shoe being inserted into a base with an upward arrow indicating force (no text or symbols present)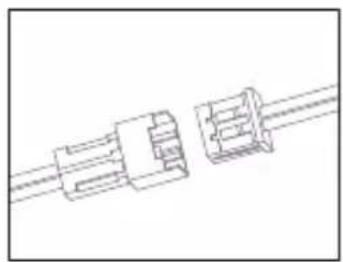
natural_image
Pure technical line drawing of three connected mechanical components (no text or symbols)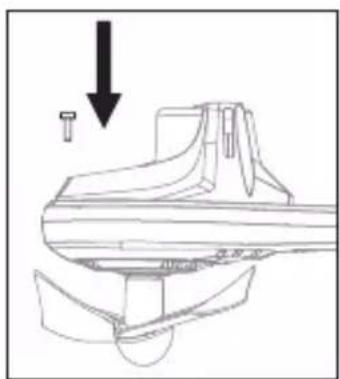
natural_image
Technical line drawing of a mechanical component with an arrow indicating downward motion (no text or symbols)Picture 26 Picture 27 Picture 28
Battery installation diagram
When install, you need to squeeze up and down of the battery buckle(picture 29) and then put the lipo battery aim at the drone battery slot, push into the position is fine.
natural_image
Technical line drawing of a mechanical assembly with no visible text or symbolsPicture 29
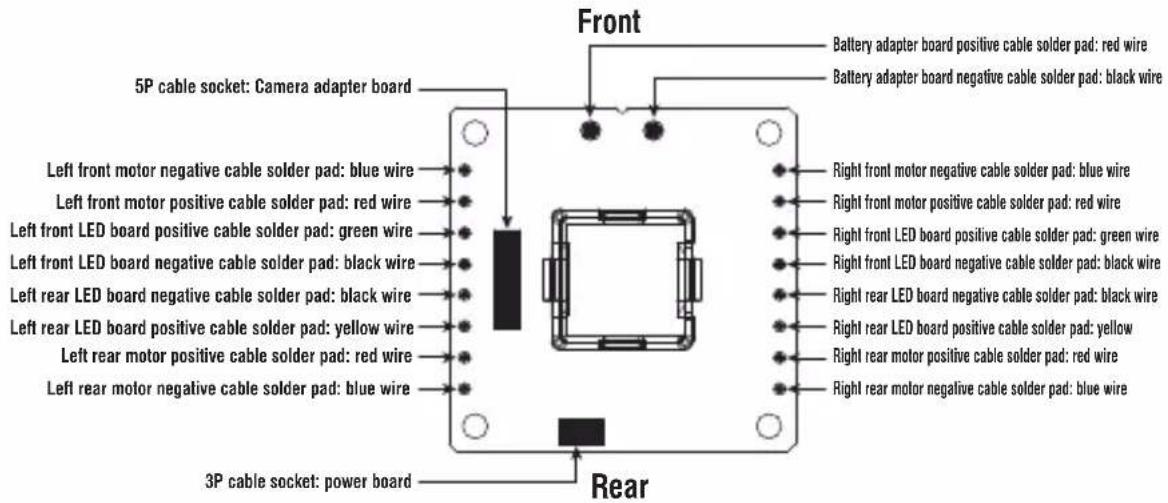
Receiver board solder wire diagram
Spare Parts
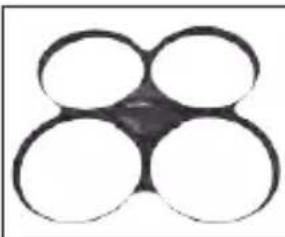
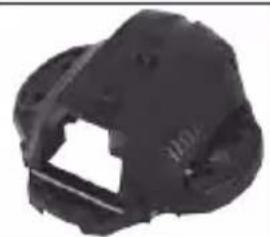
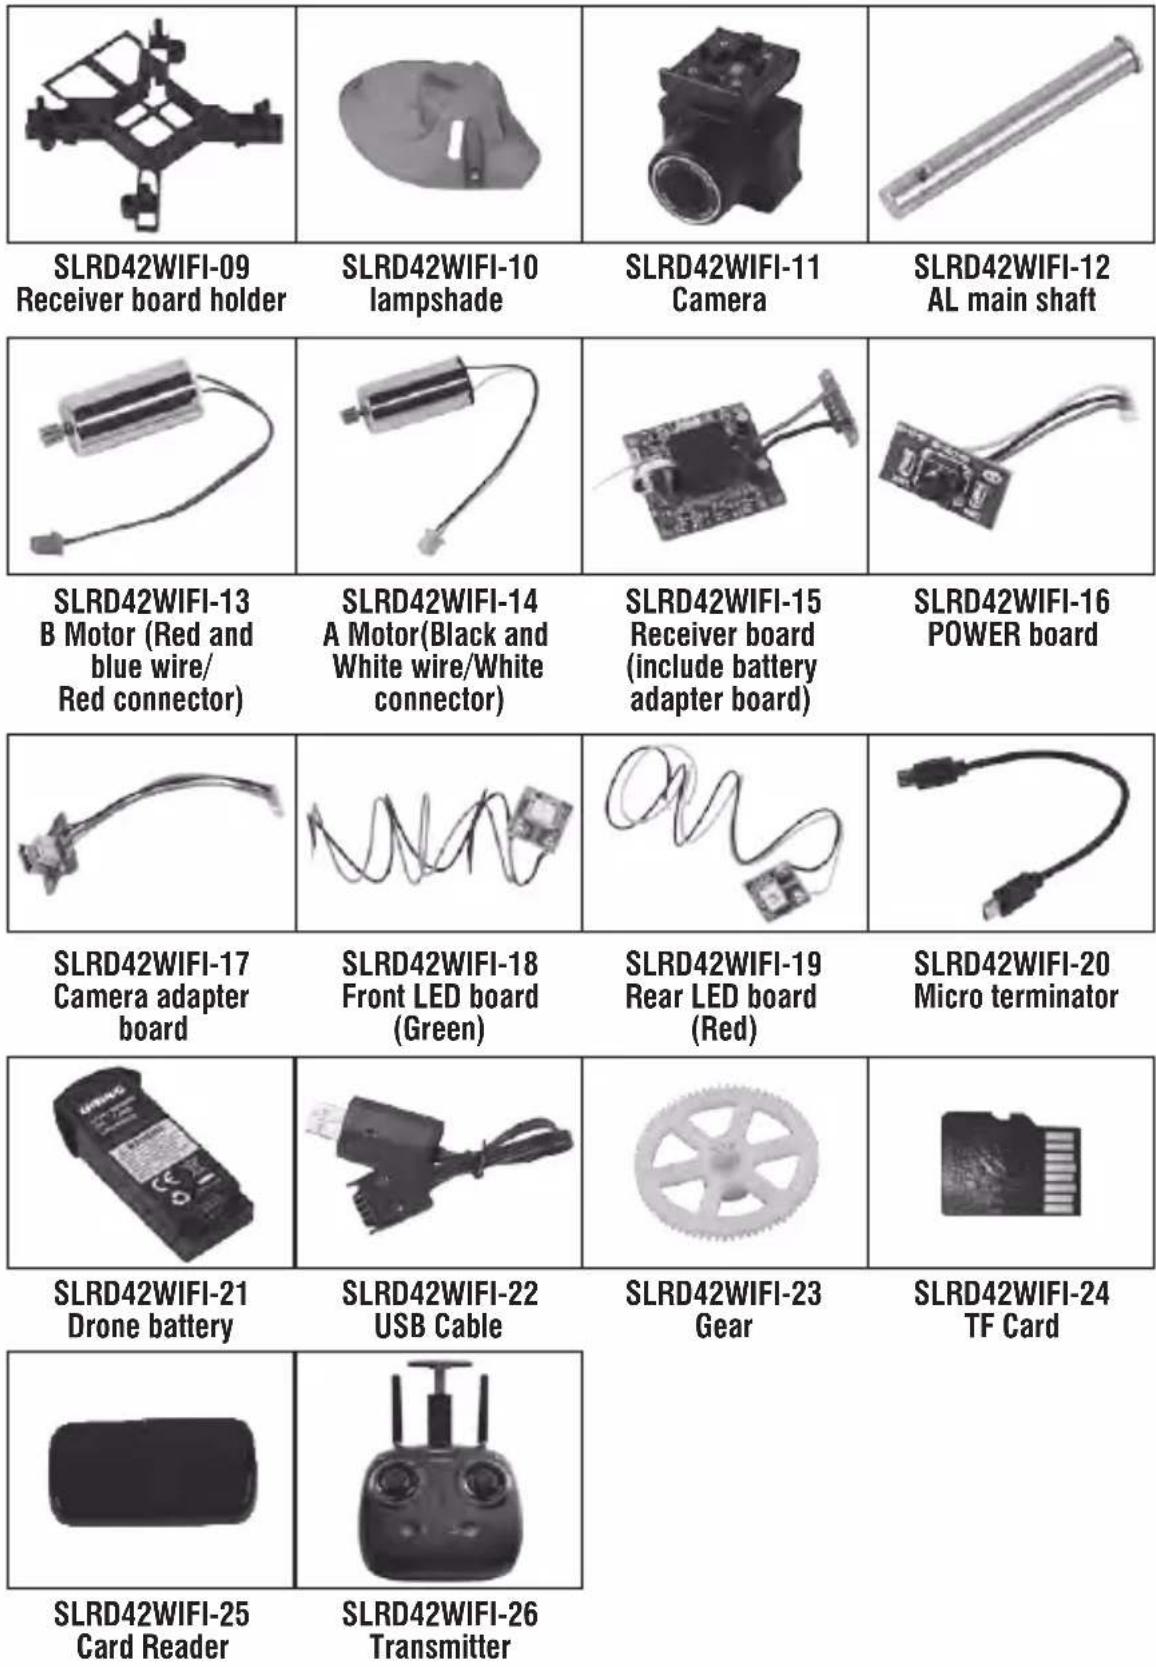
For convenience, the spare parts are listed for you to choose, which can be purchased from the local seller.
natural_image
Abstract geometric pattern with four overlapping circles and a central dark shape (no text or symbols)SLRD42WIFI-01 Drone cover housing
natural_image
Close-up of a black plastic mechanical component with cutouts and mounting holes (no visible text or symbols)SLRD42WIFI-02 Drone bottom housing
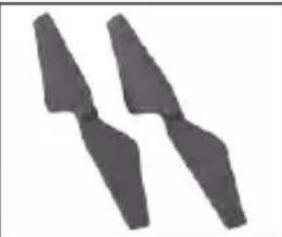
natural_image
Two dark, elongated, abstract geometric shapes on a white background (no text or symbols)SLRD42WIFI-03 A Propeller
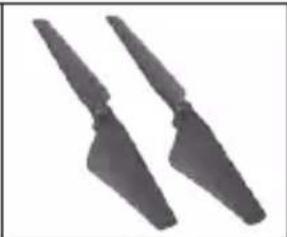
natural_image
Two black propeller blades against a white background (no text or symbols)SLRD42WIFI-04 B Propeller
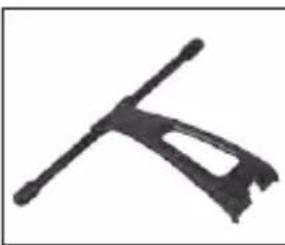
natural_image
Abstract black brushstroke on white background (no text or symbols)SLRD42WIFI-05 Landing Gear
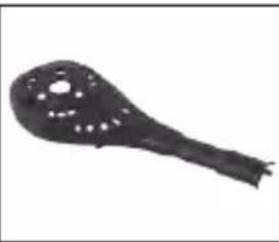
natural_image
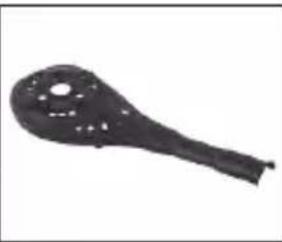
Black sculpted spoon or spoon-like object with a circular hole on the handle (no text or symbols visible)SLRD42WIFI-06 Motor cover holder A
natural_image
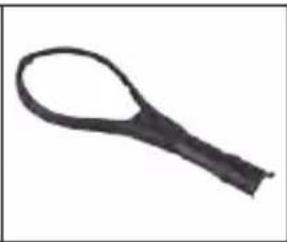
Black metal spoon or plunger with a circular hole on the handle (no text or symbols visible)SLRD42WIFI-07 Motor cover holder B
natural_image
Simple black-and-white illustration of a curved object resembling a magnifying glass or tool (no text or symbols)SLRD42WIFI-08 Motor bottom holder
Important Statement
Our company's products are improving all the time, design and specifications are subject to change without notice.
All the information in this manual has been carefully checked to ensure accuracy, if any printing errors, our company reserve the final interpretation right.
Troubleshooting Guide
| Problem | Problem Cause SolutionNo. | ||
| 1 | The transmitter indicator light is off | 1. Low battery. 1. Replace the transmitter battery. | |
| 2. The battery positive pole and negative pole are in reverse order. | 2. Install the battery in accordance with the user manual. | ||
| 3. Poor Contact. | 3. Clean the dirt between the battery and the battery slice. | ||
| 2 | Fail to pair the drone with transmitter | 1. Indicator light is off. | 1. The same as above 1.2.3. |
| 2. There is interfering signal nearby. | 2. Restart the drone and power on the transmitter. | ||
| 3. Misoperation. | 3. Operate the drone step by step in accordance with the user manual. | ||
| 4. The electronic component is damaged for frequent crash. | 4. To buy spare parts from local seller and replace damaged parts. | ||
| 3 | The drone is under-powered or can not fly. | 1. The propeller deformed seriously. 1. Replace the propeller. | |
| 2. Low battery. 2. Recharge the drone battery. | |||
| 3. Incorrect installation of propeller. | 3. Install the propeller in accordance with the user manual. | ||
| 4 | The drone could not hover and tilts to one side. | 1. The propeller deformed seriously. 1. Replace propeller. | |
| 2. The motor holder deformed. 2. Replace the motor holder. | |||
| 3. The gyro did not reset after violent crash. | 3. Put the drone on the flat ground for about 10s or restart the drone to calibrate again. | ||
| 4. The motor is damaged. 4. Replace motor. | |||
| 5 | The drone indicator light is off. | 1. Low battery. 1. Recharge the drone battery. | |
| 2. The battery is expired or over discharge protection. | 2. Buy a new battery from local seller to replace the battery. | ||
| 3. Poor contact. | 3. Disconnect the battery and then connect it with the plug again. | ||
| 6 | Could not see the picture. | 1. Did not connect the wire of camera box or poor contact. | 1. Check the wire and connect well. |
| 2. There is interfering signal nearby. 2. Cut off the wire and re-connect. | |||
| 3. Damaged camera. | 3. Buy a new camera box from local seller to replace. | ||
| 7 | Hard to control by cellphone. | 1. Not experienced enough. | 1. Practice and read the cellphone controlling instruction carefully. |
| 8 | Double image when using VR | 1. Lens focal length is not correct. | 1. If there is double image, move the lens to the proper position till the image is clear. |
FCC Note
This equipment has been tested and found to comply with the limits for a Class B digital device, pursuant to Part 15 of the FCC Rules. These limits are designed to provide reasonable protection against harmful interference in a residential installation. This equipment generates uses and can radiate radio frequency energy and, if not installed and used in accordance with the instructions, may cause harmful interference to radio communications. However, there is no guarantee that interference will not occur in a particular installation. If this equipment does cause harmful interference to radio or television reception, which can be determined by turning the equipment off and on, the user is encouraged to try to correct the interference by one or more of the following measures:
● Reorient or relocate the receiving a ntenna.
- Increase the separation between the equipment and receiver.
- Connect the equipment into an outlet on a circuit different from that to which the receiver is connected.
WARNING: Changes or modifications not expressly approved by the party responsible for compliance could void the user's authority to operate the equipment.
FCC Notice
The equipment may generate or use radio frequency energy. Changes or modifications to this equipment may cause harmful interference unless the modifications are expressly approved in the instruction manual. Modifications not authorized by the manufacturer may void user's authority to operate this device.
This device complies with Part 15 of the FCC Rules. Operation is subject to the following two conditions:
(1) This device may not cause harmful interference.
(2) This device must accept any interference received, including interference that may cause undesired operation.
natural_image
Illustration of a laptop with a red checkmark on the screen (no text or symbols)VISIT US ONLINE:
Have a question?
Need service or repair?
Want to leave a comment?
PyleUSA.com/ContactUs

MADE IN CHINA
SereneLife
by PYLE

- DISCOVERY 2 Equipped with 120° wide-angle 720P HD WIFI Camera
- SLRD42WIFI
- Operations Guide
- Catalog
- Important Statement
- Safety Precautions:
- Flying Area
- Use correctly
- Keep away from obstacles and crowd
- Keep away from humid environment
- Safe operation
- Keep away from rotating parts
- Keep away from heat
- Safe Notice for Drone Battery
- Charging Instruction for Drone Battery
- Li-Po Battery Disposal & Recycling
- Check List Before Flight
- Battery installation:
- Phone Installation Instruction:
- Pre-flight Operation Instruction Frequency Pairing
- Checklist before Flight
- Calibration Instruction
- Flying Control
- Forward and backward trimmer
- Left and right side flying trimmer
- Left and right turning trimmer
- Functions Introduction
- Take off/ One button take off/Landing modes
- Landing Methods
- Altitude Hold Mode
- High / Medium/Low Speed Mode Switch
- Low Speed Mode(Mode 1)
- Medium speed Mode(Mode 2)
- High Speed Mode(Mode 3)
- Heading Hold Mode
- Low Battery Alarm
- Out of Range Alarm
- Motors Stuck Protection
- To know your APP
- Download and Install the APP: Flyingsee
- Frequency Pairing between Mobile Phone and Drone WiFi:
- Virtual Control Interface
- Introduction for APP Icons Home Page Icons
- Remote Control Interface
- Home Page Icon
- Virtual Reality Mode
- Flight Route Setting Mode
- EMERGENCY
- Emergency Stop
- TF Card
- Remote Control Signal
- Setting
- Remote Control
- Virtual Control Stick
- Gravity Induction Mode
- Video
- Photo
- Media
- High / Low Speed Mode
- One Button Take Off
- One Button Landing
- Altitude hold icon
- Drone battery status icon
- Notice:
- Display the photos and video
- To take photo and record video
- Component installation
- Landing gear installation diagram
- Camera box installation diagram
- Camera wire connection diagram
- Propeller installation diagram
- Motors installation diagram
- Battery installation diagram
- Receiver board solder wire diagram
- Spare Parts
- FCC Note
- FCC Notice
- SereneLife
- by PYLE
Brand : SereneLife
Model : Discovery 2
Category : Drone