
RR-939B - Remote control ROTEL - Free user manual and instructions
Find the device manual for free RR-939B ROTEL in PDF.


| Product Type | Universal Remote Control |
| Brand | Rotel |
| Model | RR-939B |
| Dimensions (approx.) | 200 x 50 x 25 mm |
| Weight (approx.) | 180 g (with batteries) |
| Power Source | 2 x AAA batteries (not included) |
| Battery Life | Approximately 6 months with normal use |
| Control Type | Infrared (IR) |
| Range | Up to 10 meters |
| Number of Keys | Approximately 40 |
| Programmable | Yes, via code search or direct code entry |
| Compatible Devices | TV, DVD, Blu-ray, satellite, cable, streaming devices |
| Learning Function | No (pre-programmed code library) |
| Macro Support | Yes, up to 10 macros |
| Backlight | No |
| Material | Plastic |
| Color | Black |
| Cleaning Instructions | Wipe with a soft, dry cloth. Do not use liquids or solvents. |
| Safety Precautions | Keep away from moisture and heat. Remove batteries if not used for extended periods. |
Frequently Asked Questions - RR-939B ROTEL
User questions about RR-939B ROTEL
0 question about this device. Answer the ones you know or ask your own.
Ask a new question about this device
Download the instructions for your Remote control in PDF format for free! Find your manual RR-939B - ROTEL and take your electronic device back in hand. On this page are published all the documents necessary for the use of your device. RR-939B by ROTEL.
USER MANUAL RR-939B ROTEL
Thank you for purchasing the RR-939B Universal Remote Control. It is designed to operate all current Rotel products as well as a wide range of popular audio and video components from other manufacturers. You will find that the RR-939B Remote Control is a significant improvement over conventional remotes in overall convenience and ease of operation.
Please take a few moments to read this user guide. You'll find the time well spent as it will significantly shorten your search for remote control sanity.
Some Preliminary Precautions
- The RR-939B is surprisingly rugged but it is not indestructible. So please don't drop it — particularly not on a concrete floor! With normal care, the RR-939B's low maintenance design will let you enjoy its convenience for years to come.
- When the RR-939B needs a bit of cleaning, use a soft, lint-free damp cloth.
- Above all, don't try to take the RR-939B apart. There isn't anything inside you can fix anyway and disassembly will void the warranty.
Battery Installation
Remove the RR-939B and the package of 4 AAA batteries from the packing material. Turn the RR-939B over and lift the cover off the battery compartment by compressing the release tab and lifting up.
Place the four AAA batteries inside (follow the polarity drawing on the bottom of the compartment) and replace the cover. MAKE SURE you install the batteries correctly!
Using the RR-939B
The RR-939B can replace up to eight different remote controls. Stored in memory are control codes to operate your specific audio/video components, selected from hundreds of models in the RR-939B's extensive database. Programming the RR-939B to operate your components takes just minutes and need only be done once. See the PROGRAMMING section of this manual for easy to follow instructions.
Once the programming is complete, you select a component with the press of a button and turn the RR-939B into the remote control for your Rotel CD player or your Sony TV set or your Panasonic video recorder. Then, you simply press command buttons that duplicate the functions on the remote that came with your component.
To get started, look at the layout of the RR-939B and the following operating instructions:
Device Buttons 1
Eight buttons at the top of the RR-939B determine which set of commands is currently active. For example, if you press the AUDIO button (labeled AUD), the RR-939B becomes the remote control for your Rotel Surround Sound Processor. If you press the TV button, the RR-939B becomes the remote control for your TV set.
These buttons are also used in programming the RR-939B. See PROGRAMMING section below for details.
Command Buttons 2
This large group of buttons duplicates the functions on the remote controls for your audio/video components. A general description of these functions follows. Detailed information on the specific function of each button can be found in the CONTROL COMMANDS tables.
At the top of this group of buttons are basic controls such as Power, Volume, Channel Selection, etc.
Below these is a group of buttons that duplicate the transport functions on a tape recorder or VCR (Stop, Play, Pause, etc.) as well as the Up and Down commands that might be found on a cable or satellite TV receiver.
The next group of buttons duplicates the numeric keypad buttons such as might be used for direct track selection on a CD Player or direct channel selection on a TV set. Included in this section are special command buttons providing functions found on various components.
At the bottom of this group of buttons are ten round source selection buttons labelled CD, TUNER, TAPE, etc. These duplicate the source input selection buttons on a receiver, preamplifier, or surround sound processor. The function of these buttons is not the same as the DEVICE buttons at the top of the remote control. The DEVICE buttons determine which command set is active on the RR-939B. The source select COMMAND buttons switch inputs on the audio/video component being controlled.
To operate the RR-939B:
Step One: Press a DEVICE button to activate the commands for the desired component. This command set will remain active until you press a different DEVICE button.
Step Two: Press COMMAND buttons to operate the component you have selected.
Remember that the COMMAND buttons duplicate many controls on many different types of audio/video components and their function may vary depending on the type of component selected. For example, the PLAY/SELECT button engages the play mode on a CD Player, but it duplicates the SELECT function on a cable TV converter.
Note: The RR-939B tells you which command set is active. Each time you press a COMMAND button, the active DEVICE key blinks red to tell you which component you are controlling. If the COMMAND button that you press has no function in the active command set (for example, the numeric keys in VCR mode), no DEVICE button will blink, indicating that the COMMAND button is inactive.
The COMMAND buttons are labelled, often with multiple labels if the button serves different purposes for different kinds of components. As long as you remember that pressing a DEVICE button turns the RR-939B into, for example, a CD player remote control or a VCR remote control, the functions of each button should be intuitive. Tables listing the function of each button for each type of component are supplied with this manual.
A few buttons have a second function, activated by pressing and releasing the SHIFT button before pressing the COMMAND button, as described below.
Macro Buttons 3
A macro is a series of individual commands triggered by pressing one button. Macros make operating a complex home entertainment system much easier. For example, think of playing a videotape: You turn on the TV, turn on the VCR, select the TV input connected to the VCR, and, finally, put the VCR into Play mode. That's four separate commands — and it may take you as many as six pushes on various buttons to execute them. A macro makes this simpler by executing all the needed commands with just one push of a button.
There are five MACRO buttons on the RR-939B – the four buttons labeled M1, M2, M3, and M4, along with the POWER button. A sequence of up to eight different commands can be memorized to be replayed automatically with the press of a MACRO button. See the section, PROGRAMMING MACROS, for more detailed information.
Note: Macro buttons are available only in the AUD, SAT, and CBL modes. However, you can include switching to a different DEVICE mode as part of a macro, in order to operate other components.
To replay a MACRO, first activate one of the DEVICE modes (AUD, SAT, and CBL only). Then, press the desired MACRO button. If a macro has been programmed for that button, the RR-939B will replay the memorized sequence of commands and the DEVICE button will blink red for each command. If no macro has been programmed, or if macros are not available in that DEVICE mode, nothing will happen and no DEVICE buttons will blink.
Special Buttons 4
There are two special function buttons at the bottom of the RR-939B remote.
The LIGHT button turns on backlighting so you can see the buttons in a dark room. The lights stay on for 7 seconds and will stay on for an additional 7 seconds each time another button is pressed.
The SHIFT button activates additional commands for some buttons. These functions are shown in italics on the illustrations and in the command tables. To activate one of these commands, press and release the SHIFT button and then press the desired COMMAND button.
Programming
The RR-939B can replace up to eight different remote controls, one for each of the eight DEVICE buttons. Before you use it, you must program the RR-939B, i.e. tell it which audio/video components you wish it to control.
The RR-939B contains hundreds of command sets for various A/V components. Programming the remote involves selecting the command sets that correspond to the components in your system, and assigning them to the eight DEVICE buttons by entering a three digit code. This need only be done once during initial set-up of the RR-939B.
The easiest way to proceed is to find your components and corresponding three-digit codes from the list of codes supplied with this manual. If your component is not listed, there is an alternative auto-search method for finding the right command set.
Three Digit Code Programming
Find your audio/video component in the code list and note the 3-digit code(s):
Step One: Turn on the component you wish to memorize.
Step Two: Press the corresponding DEVICE button (for example, if you are memorizing the command set for a CD player, press the CD DEVICE button at the top of the RR-939B). While pressing the DEVICE button, simultaneously press the MUTE button and hold both for at least one second. The DEVICE key will light in red for 20 seconds, indicating that you have entered the program mode. The next step must be done within this 20 second period, or the RR-939B will revert to its standard operating mode.
Step Three: Point the RR-939B at the audio/video component and enter the 3-digit code, using the numeric buttons. The DEVICE key will flash each time you enter a digit. If you have entered the correct code, the component will turn off. If there is more than one 3-digit code for your brand of source component, continue entering additional 3-digit codes from the list until the component turns off, indicating that you have found the right one.
Step Four: Store the code number by pressing the corresponding DEVICE button again. The button will blink twice to confirm the storage of the code in memory.
Step Five: Test the COMMAND buttons, using the tables as a reference for the available functions. If the functions do not work correctly, repeat the above steps, with the next available 3-digit code from the list for your brand of component.
Repeat the steps above for each of up to eight components, assigning each one to the appropriate DEVICE key.
Auto-Search Programming
If the code table does not provide a 3-digit code or if none of the code numbers assigned to your brand of component work, use the following auto-search method to find a code number that will operate your components.
Step One: Turn on the component you wish to operate.
Step Two: Press the corresponding DEVICE button and the MUTE button, simultaneously for one second or more. The LED will light for 20 seconds.
Step Three: Press and hold the CH UP or CH DOWN button. This sends a succession of Power ON/OFF code signals that are stored in memory. Stop pressing the CH button as soon as the component turns off, signifying that you have found a code set that operates that component.
Step Four: Press the DEVICE button to store the code set you have found. The button will blink twice to confirm that you have stored the code.
Step Five: Test the remote control functions. If any do not work properly, repeat the preceding steps until you find the right code.
Displaying a Code Number
To find out which 3-digit code is currently stored on a DEVICE button:
Step One: Press the DEVICE button and the MUTE button simultaneously for one second or more. The DEVICE button will light red for 20 seconds.
Step Two: Press the RECALL button. The DEVICE button will blink a number of times, indicating the first digit in the code, followed by a one second interval with the light off, followed by a number of blinks indicating the second digit, followed by another interval, followed by blinks indicating the third digit. For example, one blink, three blinks, and eight blinks, with one second intervals in between, represents the 3-digit code number 138.
Note: The number ZERO in a 3-digit code is represented by 10 blinks.
Macro Programming
There are five MACRO buttons – the four labeled M1, M2, M3, and M4 plus the POWER button. When the RR-939B is in the AUDIO, SAT, or CABLE mode, the macro buttons can store and replay a sequence of up to 8 commands.
To memorize a macro sequence:
Step One: Press a DEVICE button (AUD, SAT, or CBL only) and the MUTE button simultaneously for at least one second. The DEVICE button will light red for 20 seconds.
Step Two: Press the MACRO button you wish to program.
Step Three: Press a sequence of commands (up to 8) that you wish to store. Pressing a DEVICE button to change modes during the sequence counts as one command.
Step Four: Press the CH UP button to store the macro sequence. The DEVICE button will blink twice to confirm.
Note: Because the POWER button can be used as a MACRO button, the normal Power On/Off commands are temporarily stored on the MUTE button during the macro learning sequence. To include a power on/off command in a macro, simply press the MUTE button.
To erase a previously stored macro sequence, follow the above steps, skipping Step 3 without entering any commands, i.e. memorize a blank macro.
Volume Punch Through
It may be desirable to have the AUDIO or TV volume commands available at all times. For example, when using the RR-939B to control your CD player, you might want the VOLUME buttons (which would normally be inactive in CD mode) to change the volume of your preamp or surround sound processor. This feature, called Volume Punch Through, can be used to make the volume commands from either the AUDIO or TV device mode available in other device modes.
To set-up the Volume Punch Through feature:
Step One: Press the DEVICE button (the device you wish to transfer the volume function to) and the MUTE button simultaneously for at least one second.
Step Two: Press the VOLUME UP button.
Step Three: Press the AUDIO or TV DEVICE button (the device you wish to transfer the volume function from). The DEVICE button will blink twice to confirm.
RR-939B
REMOTE CONTROL
TÉLÉCOMMANDE
FERNBEDIENUNG
MANDO A DISTANCIA
COMANDO A DISTANZA
AFSTANDSBEDIENING
FJERNBETJENING
The Rotel Co. Ltd.
10-10 Shinsen-Cho
Shibuya-Ku
Tokyo 150-0045
Japan
Phone: +81-3-5458-5325
Fax: +81-3-5458-5310
Rotel of America
54 Concord Street
North Reading, MA 01864-2699
USA
Phone: +1 978-664-3820
Fax: +1 978-664-4109
Rotel Europe
Meadow Road
Worthing, West Sussex BN11 2RX
England
Phone: +44 (0)1903 524 813
Fax: +44 (0)1903 524 831
Rotel Deutschland
Kleine Heide 12
North Reading, MA 01864-2699
USA
Phone: +1 978-664-3820
Fax: +1 978-664-4109
Rotel Europe
Meadow Road
Worthing, West Sussex BN11 2RX
England
Phone: +44 (0)1903 524 813
Fax: +44 (0)1903 524 831
Rotel Deutschland
Kleine Heide 12
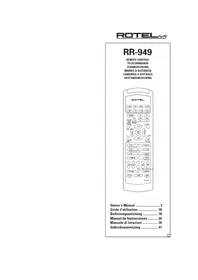
Brand : ROTEL
Model : RR-939B
Category : Remote control