
CompleteChef FPC-100 - Food processor CUISINART - Free user manual and instructions
Find the device manual for free CompleteChef FPC-100 CUISINART in PDF.


| Product Type | Food Processor with Integrated Cooking Capabilities |
| Model | CompleteChef FPC-100 |
| Brand | Cuisinart |
| Motor Power | 1.5 HP (1100 watts) |
| Work Bowl Capacity | 12 cups (3 quarts) |
| Cooking Bowl Capacity | 1.5 liters (6 cups) |
| Dimensions (L x W x H) | 16 x 11 x 12 inches |
| Weight | 20 lbs |
| Power Supply | 120 V, 60 Hz, 1500 W |
| Speed Settings | 15 speeds with pulse function |
| Heating Temperature Range | 100°F to 400°F (38°C to 204°C) |
| Preset Functions | Chop, slice, shred, knead, blend, cook, steam, slow cook, rice, stir, melt, simmer |
| Display Type | Touchscreen control panel with LED display |
| Main Bowl Material | Impact-resistant Tritan copolyester (BPA-free) |
| Blade Material | Stainless steel |
| Cooking Plate Material | Non-stick coated aluminum |
| Cleaning | Work bowl, cooking bowl, lid, and blades are dishwasher safe; wipe base with damp cloth |
| Safety Features | Safety interlock prevents operation if bowl or lid not properly locked; thermal overload protection; non-slip feet |
| Included Accessories | Stainless steel chopping blade, kneading dough blade, slicing disc (adjustable), shredding disc, French fry disc, steaming basket, mixing paddle, cleaning brush |
| Repairability | Customer replaceable bowl, lid, and blade assemblies; authorized service center for motor and electronics; spare parts available online |
| Warranty | 3-year limited warranty |
Frequently Asked Questions - CompleteChef FPC-100 CUISINART
User questions about CompleteChef FPC-100 CUISINART
0 question about this device. Answer the ones you know or ask your own.
Ask a new question about this device
Download the instructions for your Food processor in PDF format for free! Find your manual CompleteChef FPC-100 - CUISINART and take your electronic device back in hand. On this page are published all the documents necessary for the use of your device. CompleteChef FPC-100 by CUISINART.
USER MANUAL CompleteChef FPC-100 CUISINART
natural_image
Exterior view of a modern stainless steel robotic food processor with a digital display (no visible text or symbols on the device itself)Cuisinart® CompleteChef™ Cooking Food Processor
FPC-100
For your safety and continued enjoyment of this product, always read the instruction book carefully before using.
IMPORTANT UNPACKING INSTRUCTIONS
This package contains a Cuisinart® CompleteChef™ Cooking Food Processor and accessories:
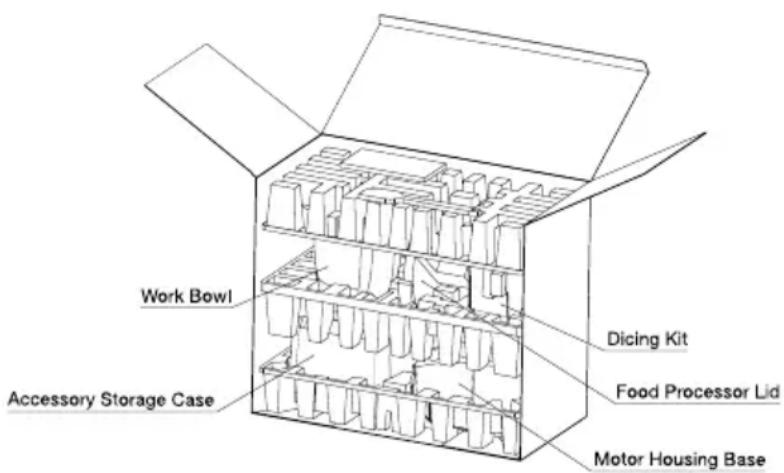
Motor Housing Base, Stainless Steel Work Bowl, Cooking Lid, Food Processor Lid with 3 Pushers & interlock, Accessory Storage Case, Dicing Kit, Spatula and Instruction Book.
CAUTION: THE CUTTING TOOLS HAVE VERY SHARP EDGES.
To avoid injury when unpacking the parts, please follow these instructions.
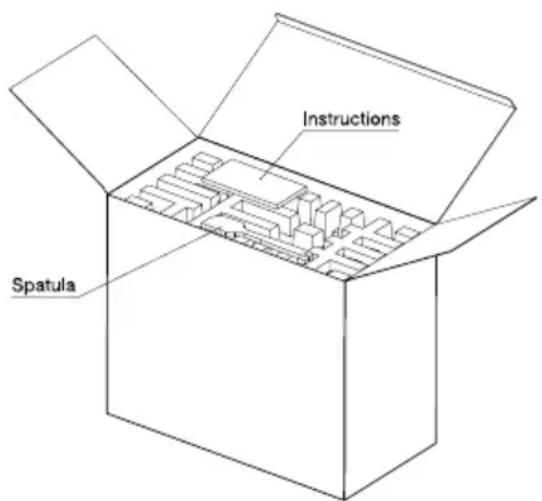
- Place the box on a low table or on the floor next to the kitchen counter where you intend to keep the Cooking Food Processor. Be sure the box is right-side up.
- Open top flaps – there will be a rectangular block of packing material that holds the processor parts, each fitted into a cavity.
- Remove the Spatula/Instruction Book.
- Lift out the first layer of packing material.
- Remove the Stainless Steel Bowl, Food Processor Lid and Dicing Kit and place them on the counter or table.
- Lift out the second layer of packing material.
- Remove the Accessory Storage Case and Motor Housing Base and place them on the counter or table.
-
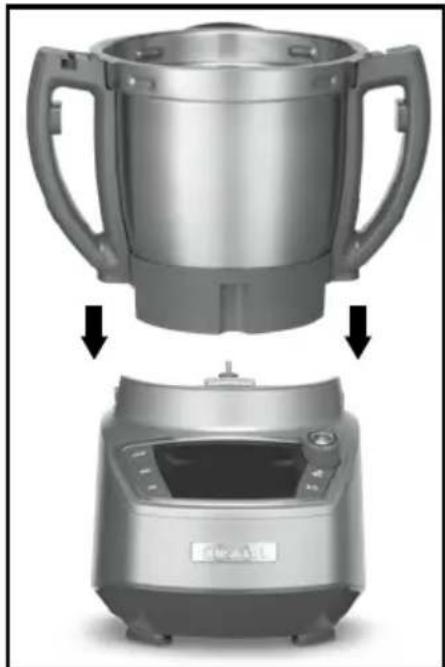
Assemble the Stainless Steel Work Bowl on the Base by grasping bowl handles and guiding it down into the locked position.
-
Always read the Instruction Booklet thoroughly before using your Cooking Food Processor.
-
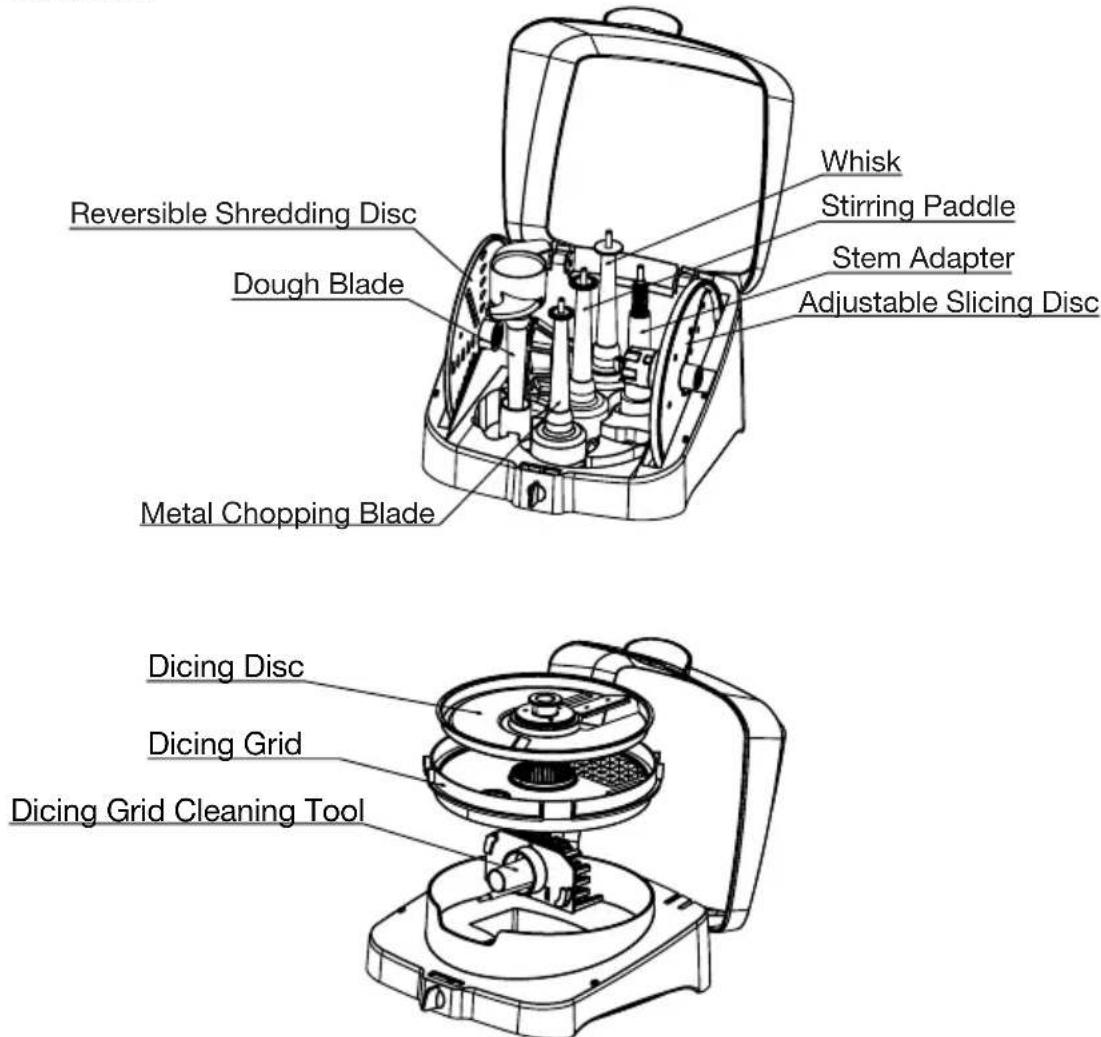
When ready to use your machine, select the suitable lid, unlock the Accessory Storage Case, lift the cover and remove the clamshell, the Chopping Blade, Dough Blade, Stirring Paddle, Whisk, Stem Adapter, Adjustable Slicing Disc, and Reversible Shredding Disc from each cavity. CAREFULLY REMOVE THE METAL CHOPPING BLADE BY GRASPING THE CENTER HUB AND LIFTING IT STRAIGHT UP. NEVER TOUCH THE BLADES, AS THEY ARE RAZOR SHARP. CAREFULLY REMOVE THE ADJUSTABLE SLICING DISC BY USING THE PLASTIC HUB. DO NOT TOUCH THE BLADE, AS IT IS VERY SHARP.
Carefully remove the Slicing Disc and Shredding Disc by holding the plastic hub. Remember to lock the parts in the Storage Case when not in use.
-
To use the Dicing Kit, unlock the Dicing Case, lift the cover and remove the clamshell to access the dicing Cutting Disc, Dicing Grid and Cleaning Tool. CAREFULLY REMOVE THE DICING CUTTING DISC BY USING THE PLASTIC HUB. DO NOT TOUCH THE BLADE, AS IT IS VERY SHARP.
-
Save the shipping cartons and plastic foam blocks. You will find them very useful if you need to repack the processor for moving or other shipment.
NOTE: We recommend that you visit our website, www.cuisinart.com for a fast, efficient way to complete your product registration.
IMPORTANT SAFEGUARDS
Always follow these safety precautions when using this appliance.
Getting Ready
- Read all instructions.
- Blades and discs are sharp. Handle them carefully.
- Turn the appliance OFF, then unplug from the outlet when not in use, before assembling or disassembling parts and before cleaning. To unplug, grasp the plug and pull from the outlet. Never pull from the power cord.
- Do not use outdoors.
- Do not let cord hang over edge of table or counter, or touch hot surfaces.
- Do not operate any appliance with a damaged cord or plug or after the appliance malfunctions, or is dropped or damaged in any manner. Contact the manufacturer at their customer service telephone number for information on examination, repair, or adjustment.
Operation
- Keep hands, as well as spatulas and other utensils, away from moving blades or discs while processing food to prevent the possibility of severe personal injury or damage to food processor. A plastic scraper may be used, but only when the food processor motor is stopped.
- Avoid coming into contact with moving parts. Never push food down by hand when slicing or shredding. Always use pusher.
- Make sure motor has completely stopped before removing cover. (If machine does not stop within 4 seconds after you remove the bowl cover assembly, call 1-800-762-0190 for assistance. Do not use the machine.)
- Never store any blade or disc on motor shaft. To reduce the risk of injury, no blade or disc should be placed on the shaft except when the bowl is properly locked in place and the processor is in use. Store blades and discs out of reach of children.
- Be sure cover is securely locked in place before operating food processor.
- Never try to override or tamper with cover interlock mechanism.
-
Do not touch hot surfaces. Use handles or knobs.
-
Extreme caution must be used when moving an appliance containing hot oil or other hot liquids.
- Never feed food by hand. Always use food pusher.
Cleaning
To protect against risk of electric shock, do not put base in water or other liquids.
Unplug from outlet when not in use and before cleaning. Allow to cool before putting on or taking off parts.
General
- This appliance is not intended for use by persons (including children) with reduced physical, sensory, or mental capabilities, or lack of experience and knowledge, unless they are closely supervised and instructed concerning use of the appliance by a person responsible for their safety. Close supervision is necessary when any appliance is used by or near children. Children should be supervised to ensure that they do not play with the appliance.
- Do not operate this, or any other motor-driven appliance, while under the influence of alcohol or other substances that affect your reaction time or perception.
- This food processor is UL listed for household use. Use it only for food preparation or cooking as described in the accompanying recipes and instruction book. Do not use this appliance for anything but its intended use.
- The use of attachments not recommended or sold by Cuisinart may cause fire, electric shock or personal injury, or damage to your food processor.
- To avoid possible malfunction of work bowl switch, never store processor with cover assembly in locked position.
- Maximum rating of 1550 watts is based on the cooking and stirring functions, which draw the greatest current. Other recommended attachments may draw significantly less current.
- Do not operate your appliance in an appliance garage or under a wall cabinet. When storing in an appliance garage, always unplug the unit from the electrical outlet. Not doing so could create a risk of fire, especially if the appliance touches the walls of the garage or the door touches the unit as it closes.
NOTICE: Do not fill the bowl above the marked maximum fill line (or rated capacity)
to avoid risk of injury due to damage to the cover or bowl.
- Do not place on or near a hot gas or electric burner, or in a heated oven.
- This appliance is not intended for deep frying foods.
SAVE THESE INSTRUCTIONS
A short power-supply cord is provided to reduce the risks of injury resulting from becoming entangled in or tripping over a longer cord. Longer, extension cords are available and may be used if care is exercised in their use. If a longer extension cord is used:
- The marked electrical rating of the cord set or extension cord should be at least as great as the electrical rating of the appliance.
- The cord should be arranged so that it will not drape over the countertop or tabletop where it can be pulled on by children or tripped over unintentionally.
- The cord set or extension cord should be a grounding-type 3-wire cord.
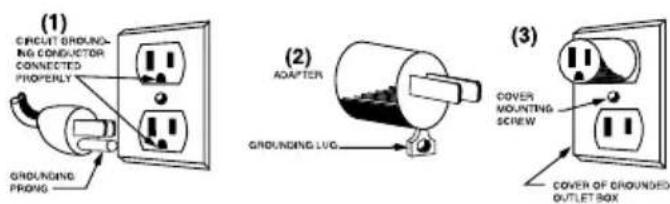
NOTICE: This appliance has a Grounding plug. To reduce the risk of electric shock, this plug will fit into a Grounding outlet only one way. If it still does not fit, contact a qualified electrician. Do not modify the plug in any way.
CONTENTS
IMPORTANT UNPACKING INSTRUCTIONS....2
IMPORTANT SAFEGUARDS 3
INTRODUCTION....6
Food Processor Parts and Accessories ....7
Cooking Parts and Accessories....9
Control Panel 11
Getting Started/Setup 12
PREPPING....13
Food Processor Assembly 13
Food Processor Functions and Presets....15
Start Prepping....16
Setting Time & Speed....19
COOKING 22
Cook Assembly....22
Cooking Functions and Presets 24
Start Cooking....25
USING RECIPES 27
CLEANING, MAINTENANCE AND SUPPORT 36
For Your Safety 37
Technical Data 37
Troubleshooting 37
Warranty Information 40
CHARTS AND GUIDES
Dicing Guide 18
Food Processor Functions Chart....19
Food Processor Max Capacity Chart 20
Food Processor User Guide....21
Cooking Functions Guide....25
Temperature Chart....25
Recipe Lists 28
Steaming Chart....35
INTRODUCTION
Introducing the Cuisinart® CompleteChef™ Cooking Food Processor
Congratulations on choosing one of the most innovative and versatile kitchen appliances Cuisinart has ever made. Get ready to have fun discovering everything you can do in this one incredible machine!
A Brand-New Classic
We've added a new twist to the classic Cuisinart® Food Processor you've always loved. Now you can prep ingredients and cook them right in one big stainless steel work bowl. And we're not talking just about a low-heat simmer. The Cuisinart® CompleteChef™ Cooking Food Processor has a wide temperature range to cook all of your favorite dishes. We've even programmed a great collection of recipes with step-by-step instructions to make cooking a breeze!
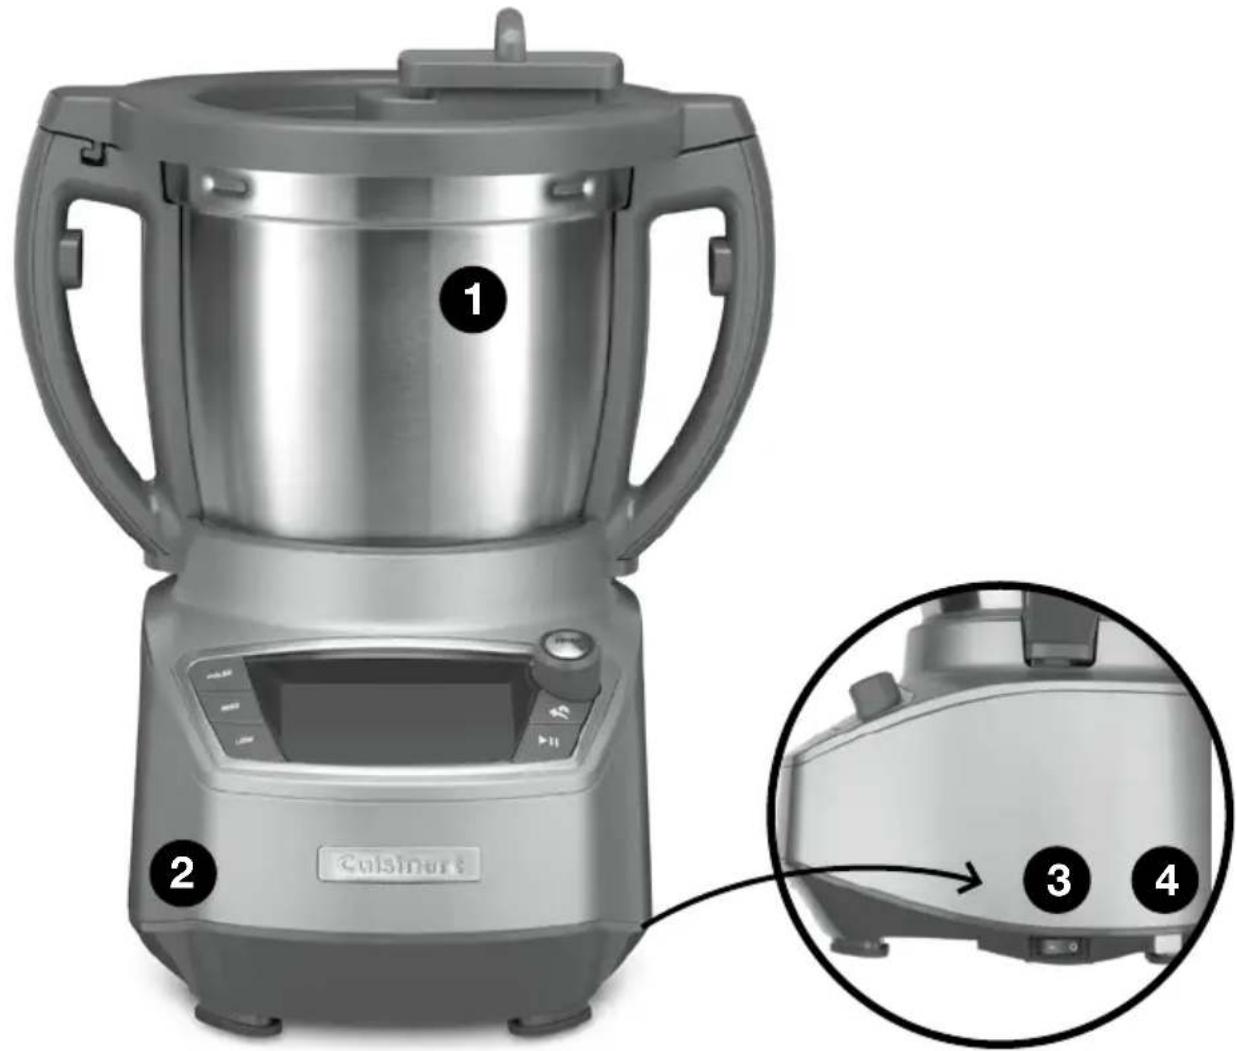
MAIN PARTS
1. Stainless Steel Work Bowl
Extra-large, 18-cup capacity – ideal for family meals and entertaining.
2. Motor Housing Base
Heavy-duty construction.
3. ON/OFF Switch
Powers unit ON and OFF.
4. USB Port with Cover
Use when a software or recipe update is required. Go to www.cuisinart.com/shopping/appliances/foodprocessors/FPC-100 for more information.
FOOD PROCESSOR PARTS AND ACCESSORIES
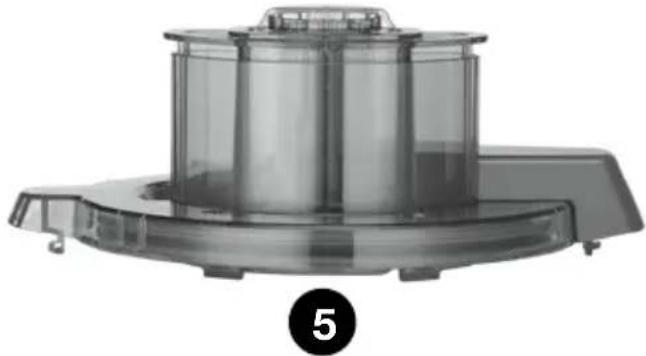
5. Food Processor Lid
Transparent lid with Wide Mouth Feed Tube
6. 3-Part Pusher Assembly
The Small Pusher (6a) sits inside the Medium Pusher (6b), which sits inside the Large Pusher (6c), allowing you to accommodate ingredients of all sizes. The Large Pusher lock can be pulled out to lock the Large Pusher, and pushed in to unlock it. This feature should be used when processing heavy loads or dicing.
7. Adjustable Slicing Disc
The versatile disc adjusts to create perfect 1mm to 7mm slices.
8. Reversible Shredding Disc
Provides the option of either fine or coarse shredding.
9. Stem Adapter
For use with Slicing/Shredding Discs and Dicing Kit.
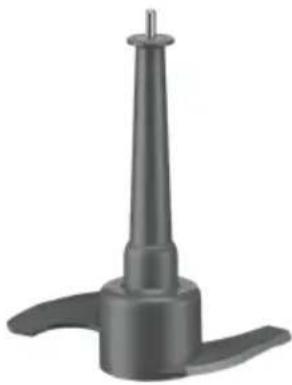
10. Metal Chopping Blade
This heavy-duty stainless steel blade effortlessly processes a variety of foods. The BladeLock System keeps the blade in place for optimal ease when pouring.
natural_image
Exterior view of a mechanical device with transparent casing and circular base (no text or symbols)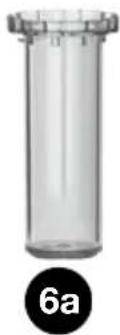
natural_image
Transparent cylindrical object with a black circular label containing the number 6a (no text or symbols on the object itself)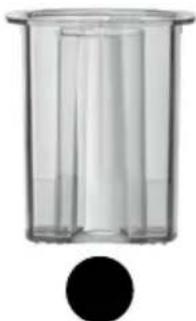
natural_image
Clear glass beaker containing vertical tubes, with a black circular indicator below (no text or symbols)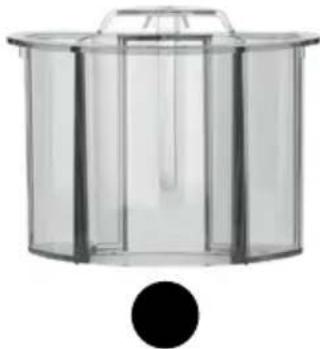
natural_image
Transparent cylindrical container with a central vertical tube and a black circular base (no text or symbols)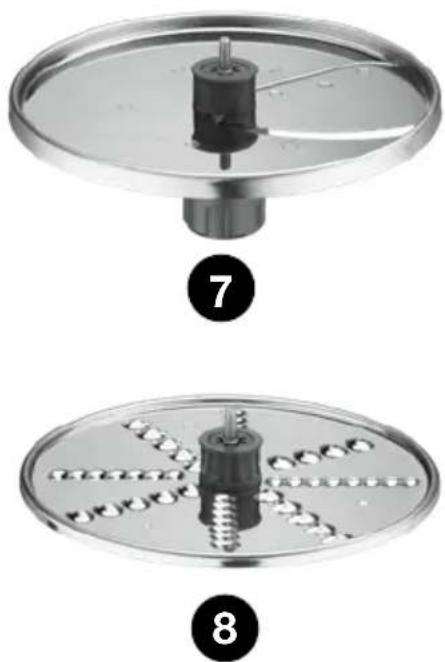
natural_image
Two views of a circular mechanical component with internal structure, labeled 7 and 8 (no text or symbols on the components themselves)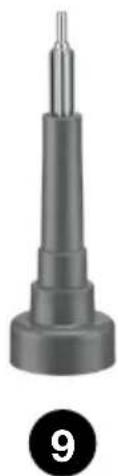
natural_image
Close-up of a cylindrical mechanical component with a pointed tip and a black circular badge labeled '9' (no text or symbols on the object itself)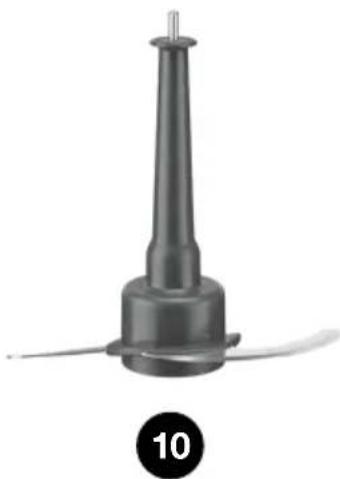
natural_image
Close-up of a black cylindrical mechanical component with a pointed tip and base, labeled with number 10 below (no text or symbols on the object itself)11. Dough Blade
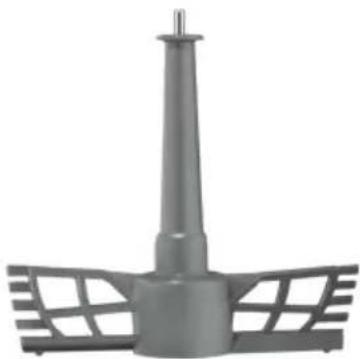
Designed to gently knead all types of dough.
12. Whisk
Whips up voluminous creams and perfect meringues.
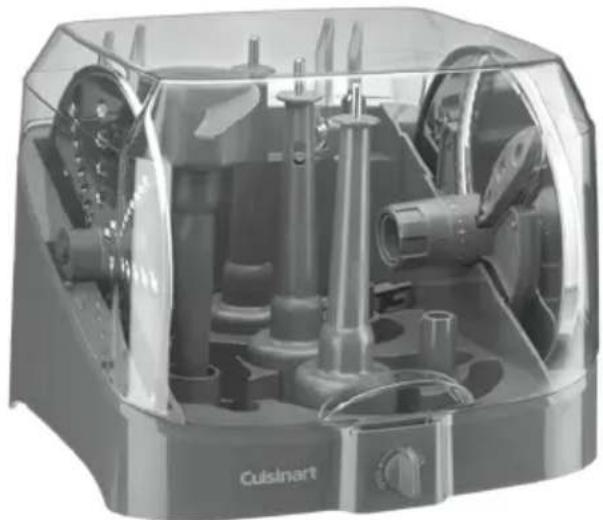
13. Accessory Storage Case
This convenient storage case with safety lock holds all of the blades and discs.
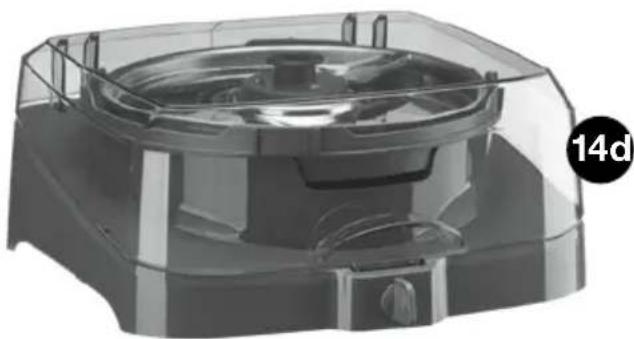
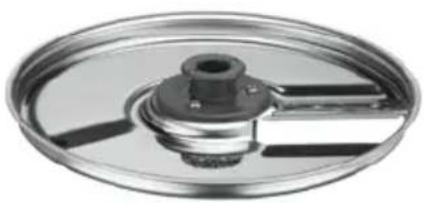
14. Dicing Kit
For use with Food Processor Lid and Stem Adapter.
a. Dicing Disc
Cuts food as it is pushed through grid.
b. Dicing Grid
Positions food to be cut into perfect squares.
c. Dicing Grid Cleaning Tool
Removes food trapped in dicing grid.
d. Dicing Storage Case
Safely stores all the parts of the Dicing Kit and stacks onto Accessory Storage Case to store.
NOTE: When using the Dicing Kit, the Stem Adapter (pg. 7) is required.
natural_image
Exterior view of a Cuisinart laboratory instrument with transparent casing and internal components (no visible text or symbols)13
natural_image
3D rendered image of a gray mechanical component with a conical tip and three curved blades (no text or symbols)11
natural_image
3D rendering of a cylindrical industrial component with a conical top and flanged base (no text or symbols visible)12
natural_image
3D rendering of a transparent plastic enclosure with a circular label showing '14d' (no text or symbols on the object itself)14
natural_image
Close-up of a metallic circular mechanical component with central hub and three side blades (no text or symbols visible)14a
natural_image
Close-up of a mechanical component with a central gear-like feature and two circular grooves (no text or symbols visible)●
natural_image
Close-up of a mechanical component with multiple pins and a central shaft (no visible text or symbols)14c
COOKING PARTS AND ACCESSORIES
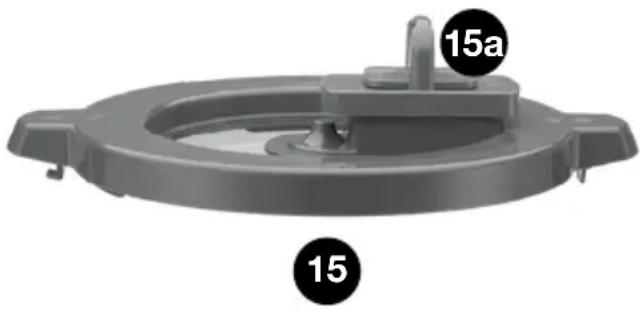
15. Cooking Lid
With glass view and steam release vent.
a. Steam Cap
Remove or adjust for more or less steam.
16. Stirring Paddle
Designed to automatically stir ingredients as you cook.
17. Steam Basket
Place in Work Bowl to cook vegetables, fish, shrimp, eggs...and more.
18. Funnel
Use the Funnel to easily add ingredients to Work Bowl before or during cooking.
19. Spatula
Removes every last bit of ingredients from Work Bowl.
natural_image
3D rendered image of a gray plastic mechanical component with labeled parts (15 and 15a), no readable text or symbols beyond labels.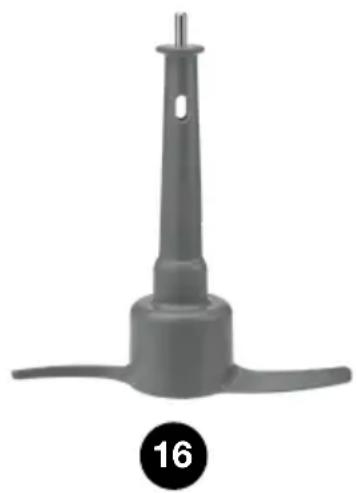
natural_image
Gray plastic propeller or fan component with a pointed tip and three curved blades, labeled with number 16 (no text or symbols on the object itself)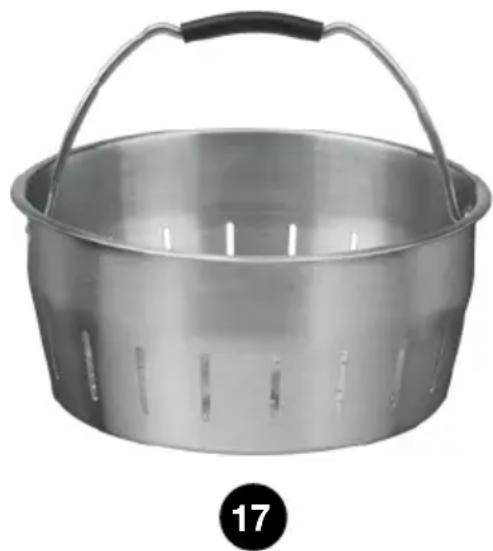
natural_image
Metallic empty grain basket with handle and side slots, labeled with number 17 (no text or symbols on the basket itself)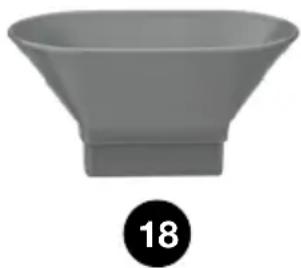
natural_image
Gray funnel-shaped object with a black circular badge labeled '18' below it (no other text or symbols)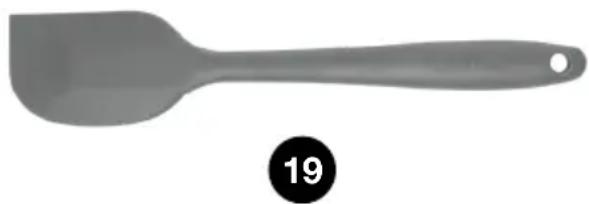
natural_image
Gray spatula with a black circular badge showing the number 19 (no text or symbols on the spatula itself)ACCESSORY STORAGE CASE
Operating the Lock
To unlock, turn counterclockwise. Gently lift up the transparent cover. Do not force the cover open when the knob is in the locked position. To lock, gently close the cover and turn the knob clockwise.
Inserting Accessories
The Accessory Storage Case holds the Whisk on the peg in the back of the case, the Stirring Paddle, Stem Adapter, Dough Blade (upside down) on the middle peg, and the Metal Chopping Blade on the front peg. The Adjustable Slicing Disc goes in the slot on the right; the reversible shredding disc goes in the left slot.
Carefully hold discs by center hub when inserting into and removing from the storage case.
NOTE: DO NOT TOUCH METAL BLADES OR CUTTING EDGES OF DISCS. ALL ARE EXTREMELY SHARP AND CONTACT COULD CAUSE INJURY.
DICING KIT STORAGE CASE
Removing Parts
- To unlock, turn counterclockwise. Gently lift up the transparent cover. Do not force the cover open when the knob is in the locked position. To lock, gently close the cover and turn the knob clockwise.
- Grasp center knob on Dicing Disc and set aside on a flat surface.
- Using the openings in the top of Dicing Grid, grip and lift out to remove. See page 14 for dicing assembly instructions.
- The Cleaning Tool sits in the dedicated space in the base of the storage case.
NOTE: When finished dicing, wash, thoroughly dry and following above directions in reverse, return parts to storage case.
CONTROL PANEL
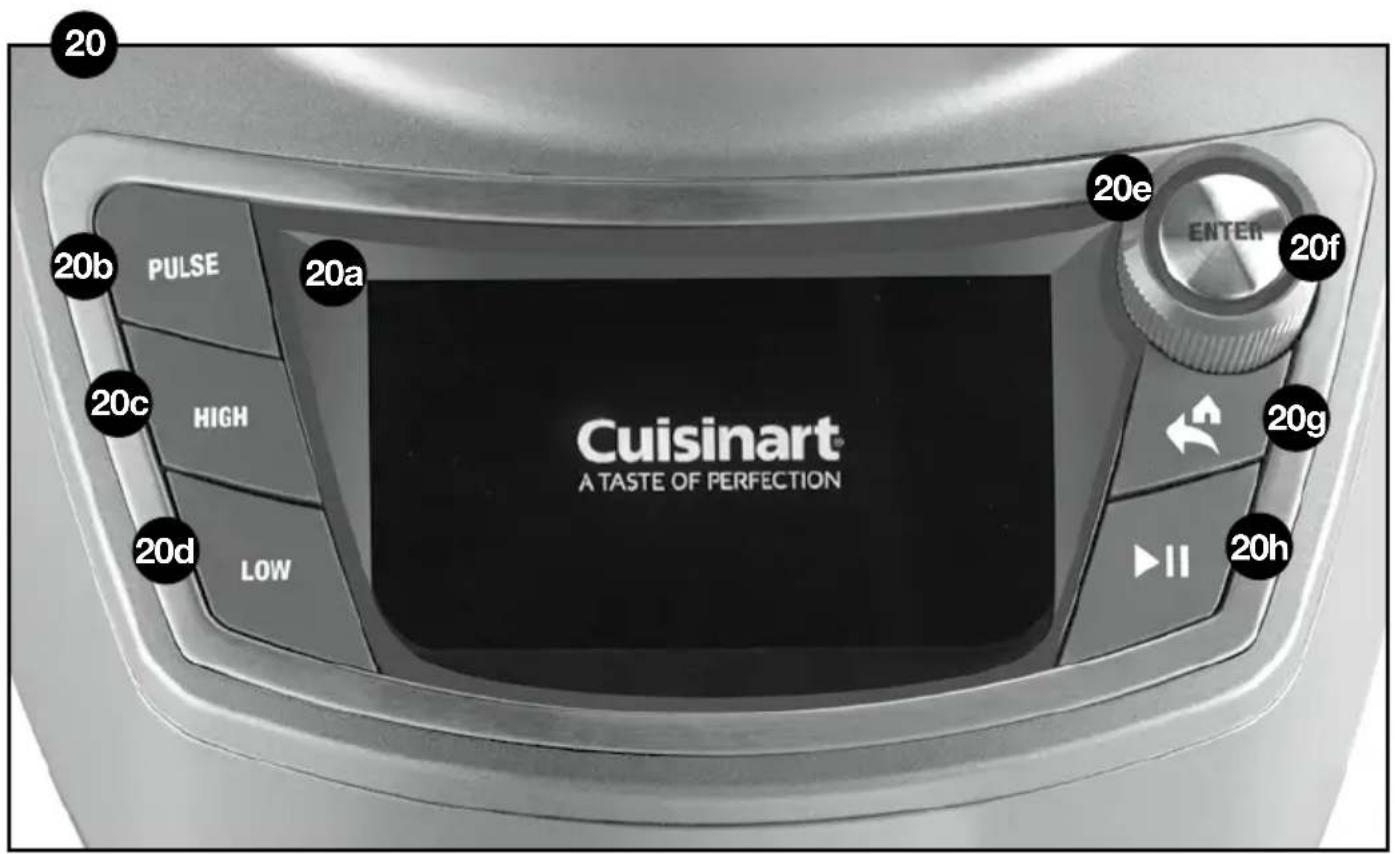
20. Screen and Controls
a. Large, Full-Color Digital Display
High-resolution TFT screen for
exceptionally clear view.
b. Food Processor PULSE Button
Press and release for "short burst"
precision processing.
c. Food Processor HIGH SPEED Button
Press to turn High Speed on and off.
d. Food Processor LOW SPEED Button
Press to turn Low Speed on and off.
e. SELECTOR Dial
Turn to scroll through options on screen.
f. ENTER Button
Press to confirm selection.
g. HOME/BACK Button
Press and hold to go to Home Screen. Press and release to return to previous screen.
h. ▶ISTART/STOP Button
Starts and stops operation.
GETTING STARTED/SETUP
The Cuisinart® CompleteChef™ Cooking Food Processor and its Control Panel, pictured in the images below, show you just how much care we put into making sure this appliance is intuitive, easy to use and easy to love!
You'll find full instructions on the following pages.
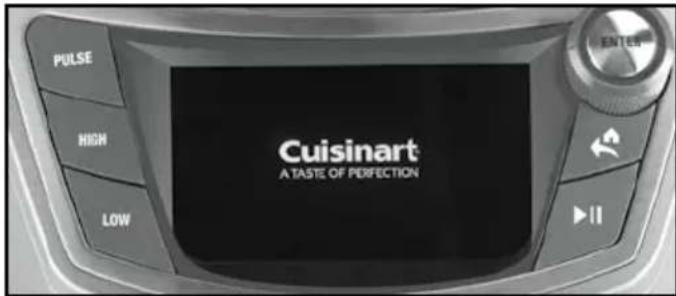
When first turning on the Cuisinart®
CompleteChef™ Cooking Food Processor, you will be greeted by our Welcome Screen.
Welcome Screen
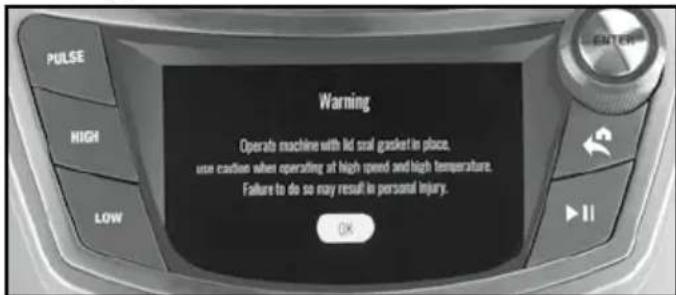
Immediately following the Welcome Screen, a Warning Screen will appear. Press ENTER as acceptance; you will then be forwarded to the Home Screen.
Warning Screen
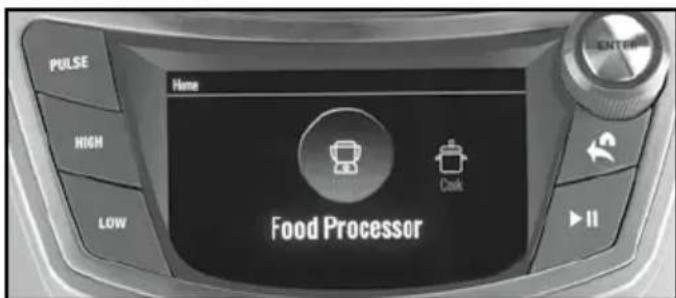
The Home Screen displays the following options to select:

Food
Processor

Cook Recipes Settings


Use selector dial to scroll between functions and select ENTER when desired function is highlighted.
Home Screen
ADJUSTING SETTINGS
We recommend adjusting your Settings before cooking or food processing.
NOTE: The unit will automatically save your preferences until you go back into Settings to change them, even after turning off and unplugging the unit.
Settings
Customize to individual preferences for language, brightness, sound and temperature. Scroll through options on the Settings Screen and select ENTER when the desired setting is highlighted.

Language
Select English, French or Spanish

Brightness
Increase and decrease the screen's brightness

Sound
Increase and decrease the volume of the unit

Temperature
Select Fahrenheit or Celsius
PREPPING
FOOD PROCESSOR ASSEMBLY

Before using your Cuisinart® CompleteChef™ Cooking Food Processor for the first time, wash all the parts (see Cleaning, Storage and Maintenance instructions on page 36).
-
Place the Motor Housing Base on a dry, level countertop with the controls facing toward you. Do not plug the unit in until it is fully assembled.
-
Place the Stainless Steel Work Bowl onto the base and push down; you'll hear it click and feel it lock into place.
natural_image
Two views of a modern kitchen appliance, one showing top-down view and the other showing front view (no text or symbols visible)-
Select the accessory you want to use (see list on pages 7–9 or use the accessory recommendation displayed on your screen when following a preset or recipe).
-
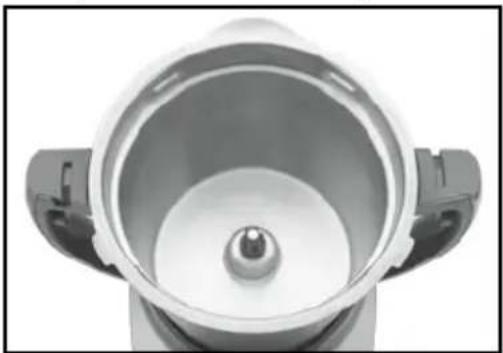
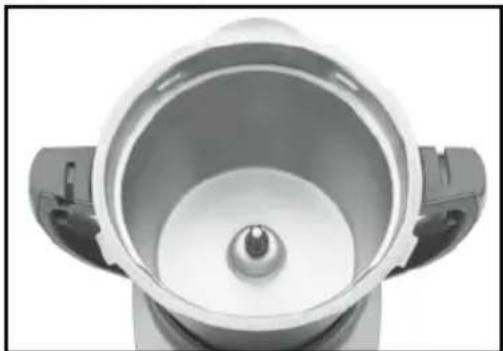
Hold the accessory by the center shaft, and push down until it locks into place. Discs are set onto the Stem Adapter, once it is securely installed in Work Bowl. See images for reference.
NOTE: To remove accessory, lift it out of Work Bowl, being careful not to touch sharp cutting edges.
NOTE: The BladeLock feature keeps Chopping Blade, Whisk and Stirring Paddle in place during processing, pouring, lifting, and handling, but they are not permanently attached.
Handle with care. Always check to be sure the accessory is securely engaged before turning the bowl upside down.
Sample Blade Assembly
natural_image
Top-down view of a white cylindrical container with a central metallic sphere, mounted on a black stand (no text or symbols visible)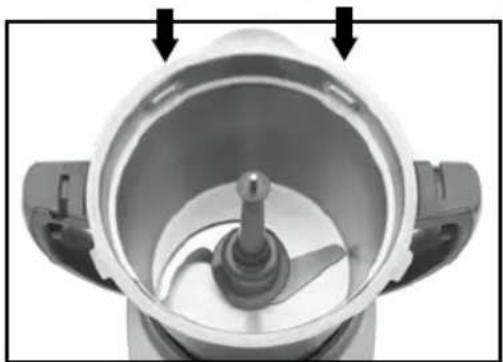
natural_image
Close-up of a kitchen pot with a central handle and two arrows pointing to the top section (no text or symbols visible)Sample Disc Assembly
natural_image
Top-down view of a white ceramic pot with a central metallic sphere, no text or symbols visible.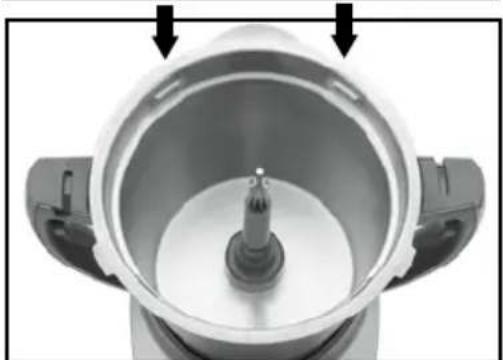
natural_image
Top-down view of a white ceramic pot with a central screw and two side handles, showing internal structure (no text or symbols visible)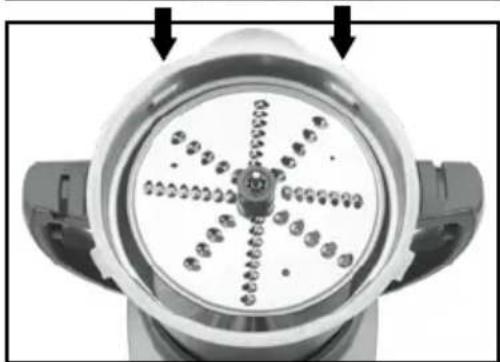
natural_image
Close-up of a circular mechanical component with radial slots and central hub, no visible text or symbolsAssembling Dicer in the Work Bowl
-
Place Stem Adapter on hub in bottom of Work Bowl.
-
Carefully place Dicing Grid onto the Stem Adapter with the grid positioned closest to the front of the food processor. Be sure "This Side Up" shows on top. The cutting grid should be facing the triangle on front of the grid and line up with the front center of the work bowl. Dicer will not work if inserted incorrectly.
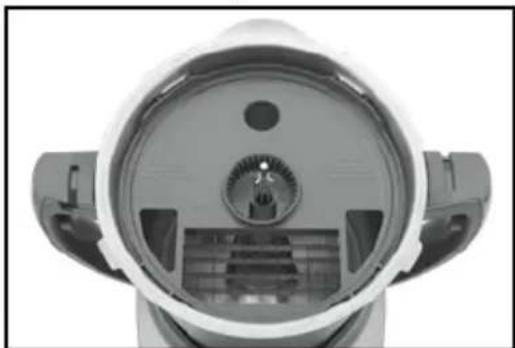
natural_image
Close-up of a mechanical device with central dial and mounting brackets (no visible text or symbols)- Place Dicing Disc on top of grid. Push down slightly to lock into place. It should not move if correctly positioned. NOTE: Always use caution when handling the dicing blade: It is very sharp.
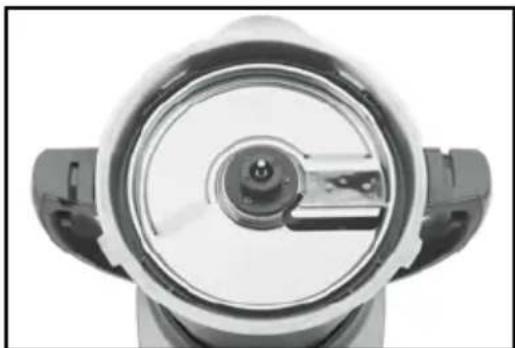
natural_image
Close-up of a mechanical component with circular dial and side brackets (no visible text or symbols)SECURING THE FOOD PROCESSOR LID TO THE WORK BOWL
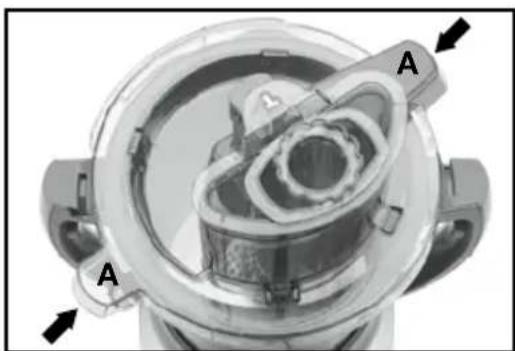
- Place the Lid over the Work Bowl with the lid grips (A) positioned at approximately 1 and 7 o'clock.
natural_image
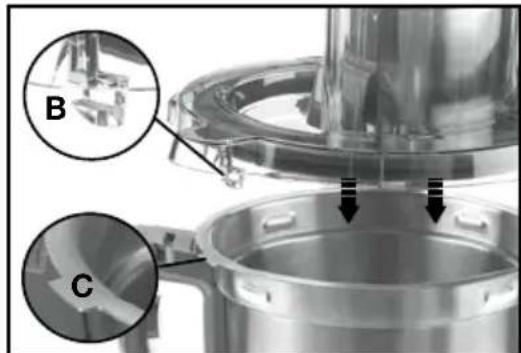
Cross-sectional view of a mechanical component with labeled parts A, showing internal structure and mounting features (no text or symbols beyond labels)- Lower the Lid onto the Work Bowl, aligning the locking tabs (B) under the lid grips with the metal tabs (C) on the bowl.
natural_image
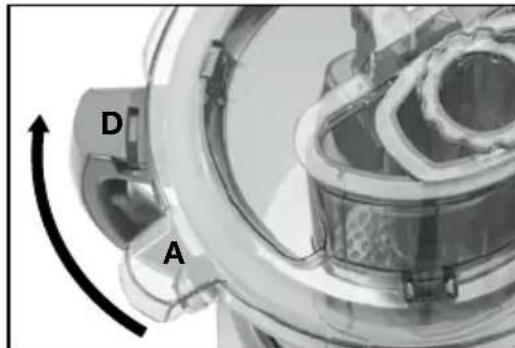
Close-up of a stainless steel mixing bowl with labeled parts (B and C), showing internal components and structural details (no readable text or symbols)- Press Lid down and rotate clockwise.
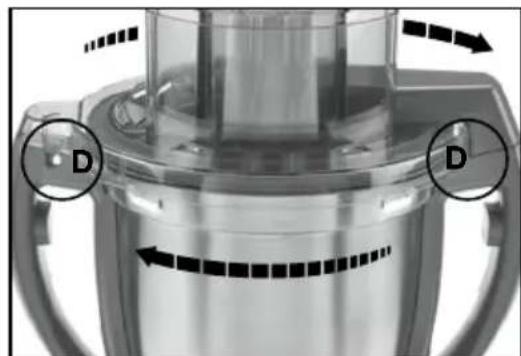
- Continue rotating clockwise until you hear and see the lid locking mechanisms on bowl handles and lid grips (A) click into place (D).
natural_image
Close-up of a stainless steel kitchen mixer with two labeled components (D) and directional arrows indicating motion or movement (no text or symbols on the main body)NOTE: To remove Lid, simply grip firmly and turn counterclockwise until lid grips are in the 1 and 7 o'clock position and lift up.
FOOD PROCESSOR MANUAL CONTROLS
On the left-hand side of your screen, you will find the manual buttons for the food processor functions.
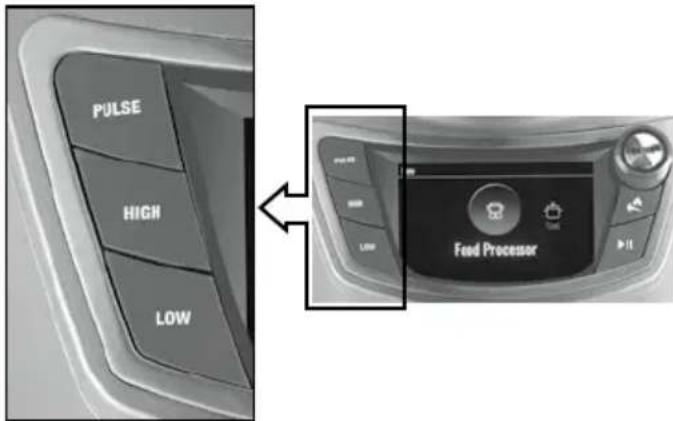
HIGH and LOW Speed Buttons
Pressing the HIGH or LOW buttons allows the machine to run until the HIGH or LOW button – or the ▶II START/STOP button – is pressed again to turn the food processor off.
- PresstheHIGH or LOW button to start processing. Time will count up by the second in time display.
- Pause or stop operation by pressing HIGH or LOW button again, or pressing the ▶II START/STOP button on the opposite side of the screen.
- To restart, press HIGH or LOW once more.
PULSE Button
The PULSE button allows the machine to run only while the button is being pressed. This provides more precise control of both duration and frequency of processing. Unless otherwise specified, one pulse should be about two seconds. When using the PULSE button, the screen will display a count of how many pulses you have done.
With the Work Bowl and Food Processor Lid properly in place and ingredients in the bowl, press and release the PULSE button repeatedly until the consistency you want is reached. The number of pulses will count up in display.
FOOD PROCESSOR FUNCTIONS AND PRESETS
Scroll through Home Screen to select FOOD PROCESSOR; press ENTER. The following functions will appear on screen. Scroll through the functions and press ENTER to select.
When you select a function, a preset SPEED will appear on screen. You may use the preset or adjust if necessary. The required accessories for each function will also be displayed.

Chop/Blend
Use for chopping/blending tasks like mincing, emulsifying, and combining ingredients for soups, sauces, chili and more.

Slice
Use for all slicing tasks. The adjustable slicing disc slices foods from 1 (thinnest) to 7 (thickest), for scalloped potatoes, fruit and vegetable trays, and burger fixings.

Shred
Use the reversible shredding disc – one side for fine, one side for coarse – to shred a variety of cheeses, vegetables for salads and slaws.

Dice
Use the Dicing Kit to create perfect little cubes of fruits, vegetables and more. Ideal for soups, salads and garnishes. See Dicing Kit Assembly instructions on page 14.

Purée
Use this function to make puréed soups and smooth purées of fresh and cooked fruits and vegetables. This setting is also ideal for homemade baby food.

Dough
Knead yeast doughs for bread, pizza and dinner rolls. Faster and easier than kneading by hand.

Whisk
Whip up voluminous meringues and velvety smooth cream toppings.
START PREPPING
USING THE METAL CHOPPING BLADE
With your Food Processor Work Bowl assembled on the base, insert the Metal Chopping Blade and carefully push down until it locks into place.
NOTE: Handle with care. Always check to be sure the blade is securely locked.
The BladeLock feature is designed to keep the blade in place during processing, pouring, lifting, and handling tasks – but is not permanently attached.

Chop/Blend (using the Metal Chopping Blade)
Peel, core and/or remove seeds and pits. Food should be cut into even, 1- to 2-inch pieces. Foods cut into same size pieces produce the most even results.
PULSE ingredients in 1- to 2-second increments first to roughly chop. For finer chop, proceed using HIGH or LOW buttons or CHOP/BLEND preset. Good results can also be achieved by pulsing continuously.
Watch ingredients closely to achieve desired consistency and scrape the Work Bowl as necessary.
Lower speeds are recommended for making doughs and batters. Higher speeds are recommended for most other chopping, processing and blending tasks.

Purée (using the Metal Chopping Blade)
To purée fresh fruits or cooked fruits or vegetables: Ingredients should be cut into 1- to 2-inch pieces. A smooth purée is best achieved when all the pieces are equal in size.
PULSE ingredients in 1- to 2-second increments first to roughly chop. Proceed using HIGH or LOW buttons or PURÉE preset until food is puréed. Scrape the Work Bowl as necessary.
To purée cooked food, see page 25 for instructions.
Use the Whisk preset to purée cooked potatoes.
USING THE ADJUSTABLE SLICING DISC
The Adjustable Slicing Disc comes with rotating hub and indicator markings to select slicing thickness from 1 to 7 (1 for thinnest slice, 7 for thickest slice).
With your Food Processor Work Bowl assembled on the base, position the Stem Adapter onto the shaft. Select slice thickness on the disc and insert the disc over the Stem Adapter.

Slice (using the Adjustable Slicing Disc)
To slice food, use HIGH or LOW button or select SLICE preset.
Always pack food in the Feed Tube evenly for slicing. The food will dictate the amount of pressure: Use light pressure for soft foods, medium pressure for medium foods and firm pressure for harder foods. Always process with even pressure.
For round fruits or vegetables, slice a thick piece off base so it sits upright in Feed Tube. Slice to fit Feed Tube if necessary. For small ingredients like mushrooms, radishes or strawberries: Trim the ends so the food sits upright in the Feed Tube.
When slicing cheese, make sure that it is well chilled.
NOTE: Always use the Pusher when slicing. Never put your fingers in the Feed Tube while unit is running.
USING THE REVERSIBLE SHREDDING DISC
The Reversible Shredding Disc comes with a fine shredding side and a coarse shredding side. With your Food Processor Work Bowl assembled on the base, position the Stem Adapter onto the shaft. Determine whether the fine or coarse side will be used and insert the disc over the Stem Adapter.

Shred (using the Reversible Shredding Disc)
To shred food, use HIGH or LOW button or select SHRED preset.
Always pack food in the Feed Tube evenly for shredding. The food will dictate the amount of pressure: Use light pressure for soft foods, medium pressure for medium foods and firm pressure for harder foods. Always process with even pressure.
For round fruits or vegetables, slice a thick piece off base so it sits upright in Feed Tube. Slice to fit Feed Tube if necessary. For small ingredients, like radishes or potatoes: Trim the ends so the food sits upright in the Feed Tube.
When shredding cheese, make sure that it is well chilled.
To shred leafy vegetables, like lettuce or spinach: Roll leaves together and stand them in Feed Tube. Process with even pressure.
NOTE: Always use the Pusher when shredding. Never put your fingers in the Feed Tube while unit is running.
USING THE DOUGH BLADE
With your Food Processor Work Bowl assembled on the base, insert the Dough Blade and carefully push down until it locks into place.
NOTE: Handle with care. Always check to be sure the blade is securely locked.

Dough (using the Dough Blade or Metal Chopping Blade)
To make bread dough, manually select Speed 6 or select DOUGH preset (also Speed 6). Use Speed 6 to sift dry ingredients, then slowly add liquid to begin the kneading process. Increase speed to 10 to finish kneading.
The Metal Chopping Blade is ideal for pastry doughs, while the Dough Blade is specifically designed for kneading yeast doughs.
The Large Pusher lock is recommended to be in the locked position when kneading dough to avoid it from moving around – some vibration is still normal.
USING THE WHISK
With your Food Processor Work Bowl assembled on the base, insert the Whisk and carefully push down to secure.

Whisk
To whisk egg whites or cream, select WHISK preset. The default Speed 7 works for both whipped cream and meringue.
When whipping cream or egg whites, the amount you're using will affect whipping time. For instance, 1 cup of cream will take about 1 12 minutes on
Speed 7, while 2 cups might take an additional minute. Keep a close eye when whisking to avoid over whipping.
A Cooking Lid is recommended for better visibility.
Use the Whisk to make fluffy mashed potatoes. We recommend using Speed 6.
USING DICING KIT
With your Food Processor Work Bowl assembled on the base, place the Stem Adapter on the hub in the bottom of the Work Bowl. Carefully assemble the Dicing Kit as per instructions on page 14.

Dice
Never use the largest Feed Tube for dicing. Use either medium or small Feed Tube. For hard foods, like winter squash and carrots, always use the smallest Feed Tube.
The Dicing Disc and Grid make cubed pieces of fruit and vegetables. The recommended speed for dicing most fruits and vegetables is High. Use Low speed when dicing very soft items, such as kiwi.
Be sure to pack smaller or single items tightly, to the left of the Feed Tube, using consistent downward pressure.
Cleaning Dicing Grid
Do not use your fingers to clean the grid. ONLY USE THE CLEANING TOOL.
- Unplug unit and carefully remove Dicing Disc.
- For ease of use, attach the middle Pusher from the Food Processor Lid Feed Tube to the Cleaning Tool to use as a handle. (Shown below.)
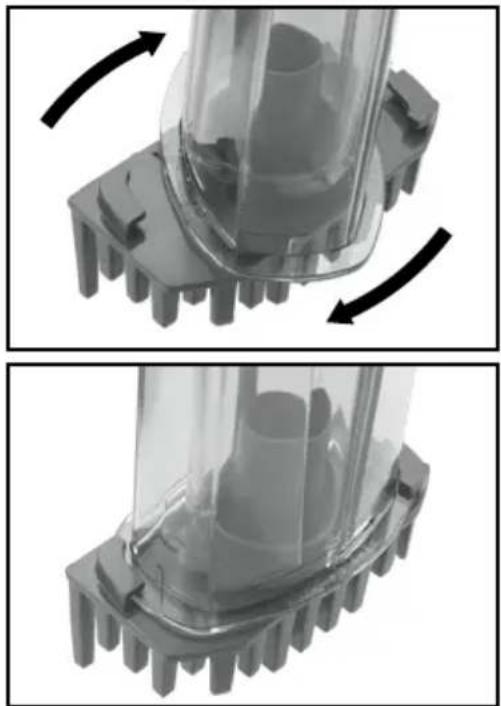
natural_image
Two-panel image showing a vacuum cleaner's internal structure before and after rotation, with no visible text or symbols.-
Align the Cleaning Tool's two long pins along the right and left of the grid; guide the Cleaning Tool into position and push down firmly to remove food residue from grid.
-
For any stubborn food, use the tall, pointed tooth on top of the Cleaning Tool to push food through grid.
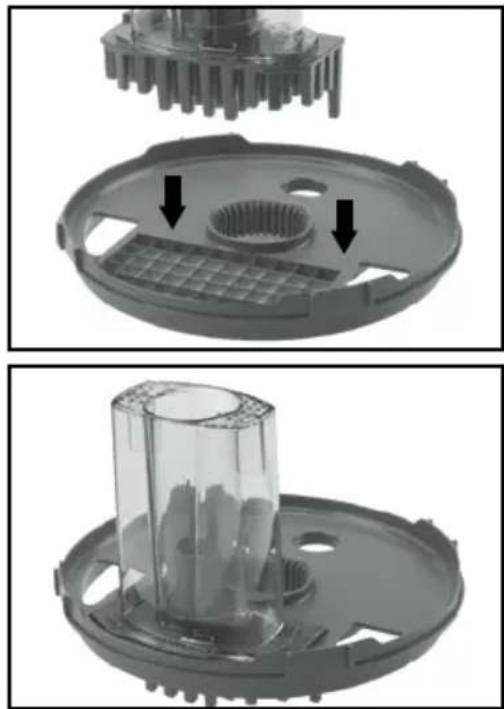
natural_image
Two views of a mechanical component showing internal structure and assembly, with arrows indicating features (no text or symbols present)DICING GUIDE
| Food Tool Speed Directions | |||
| Most vegetables (e.g., potato, zucchini) | Dicing Kit High Peel vegetables | les if necessary, and trim to fit small or medium Feed Tube before dicing. | |
| Soft/Very Ripe Vegetables (e.g., ripe tomatoes and avocados) | Dicing Kit Low Peel vegetables | les if necessary, and trim to fit small or medium Feed Tube before dicing. | |
| Most Fruits (e.g., apples, bananas, strawberries) | Dicing Kit High Peel fruits if necessary, and trim to fit small or medium Feed Tube before dicing. | ||
| Soft/Very Ripe Fruits (e.g., kiwi, ripe pineapple, very ripe bananas) | Dicing Kit Low Peel fruits if necessary, and trim to fit small or medium Feed Tube before dicing. | ||
TIP: To avoid overflow of food, please note recommended max capacity (chart on page 20) for each type of food. All food capacities are not equal.
SETTING TIME & SPEED
Each function listed below has a preset speed. If the preset speed works for you, press ▶II START/STOP to begin processing. If you want to adjust:
-
ScrolltoSPEED icon, press ENTER. Recommended speed for the processing function appears. To change to optional speeds for that function, refer to chart below. Scroll to select desired speed and press ENTER.
-
Time can be entered or adjusted as well. To select time, scroll to TIME icon, press ENTER, and use Selector Dial to select time. Press ENTER again. Or just let the Cuisinart® CompleteChef™ Cooking Food Processor count up seconds for you!
-
View accessory requirements for selected function at bottom of screen to be sure you are using the correct lid and accessory.
-
Press ▶II START/STOP to begin processing. If you've set time, unit will stop when time elapses.
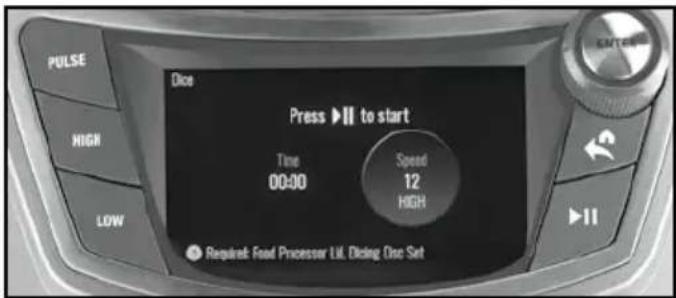
Recommended speeds for each function can be found in the chart below.
FOOD PROCESSOR FUNCTIONS
| Food Default Speed Speed | Range General Use | |
| Chop/Blend 12 | 6 to 12 Chop fruits and vegetables, emulsify dressing or sauces, mix ingredients, including for baked goods, and cut butter into flour for pastry and biscuits | |
| Dough 6 | 6 to 12 Knead yeast bread doughs, pizza dough | |
| Whisk | 7 | 6 to 10 Whip cream and egg whites |
| Purée | 10 6 to 10 Purée soups, sauces, baby food | |
| Slice | 12 9 to 12 Slice fruits and vegetables | |
| Shred 12 9 to 12 Shred fruits and vegetables | ||
| Dice | 12 9 to 12 Dice fruits and vegetables |
FOOD PROCESSOR MAX CAPACITY
| Food Capacity | |
| Sliced/shredded fruit, vegetables or cheese 18 cups | |
| Diced fruit and vegetables 10 cups | |
| Chopped fruit or vegetables 8 cups | |
| Chopped hard cheese (e.g., Parmesan) 6 cups | |
| Puréed fruit or vegetables 8 cups cooked, 6 cups puréed | |
| Chopped or puréed meat, fish or seafood 2 pounds | |
| Thin liquid 10 cups | |
| Cake batter 9-inch cheesecake batter, 2-box cake mix | |
| Cookie dough 5 dozen (based on average chocolate chip cookie recipe) | |
| White bread/pizza dough 4 cups (all-purpose or bread flour) | |
| Nuts for nut butter 6 cups | |
| Egg whites 10 egg whites | |
| Heavy cream for whipping 2 cups | |
FOOD PROCESSOR USER GUIDE
| Food Tool Speed Directions | |||
| Soft Cheeses (ricotta, cream cheese, cottage cheese, etc.) | Metal Chopping Blade | Low to gently mix or High to whip | Have cheese at room temperature. When applicable, cut into 1-inch pieces. Process until smooth, stopping to scrape down the sides of the bowl as needed. Perfect for making cheesecakes, dips, pasta fillings and more. |
| Firm Cheeses (Cheddar, Swiss, Edam, Gouda, etc.) | Slicing or Shredding Disc | High Cheese | should be well chilled before slicing or shredding.Cut to fit Feed Tube. Use light to medium pressure when slicing or shredding. |
| Hard Cheeses (Parmesan, Romano, etc.) | Metal Chopping Blade Slicing or Shredding Disc | Pulse and High | If using the metal chopping blade, cut into 12 -inch pieces. Pulse to break up and then process until finely grated. This will produce a nice grated cheese. If slicing or shredding, cut to fit Feed Tube. Use light to medium pressure when slicing or shredding. |
| Baby Food Metal | Chopping Blade Pulse | and High | As for all fruit and vegetable purées, cut ingredients into 12 - to 1-inch pieces. Steam ingredients until completely soft. Pulse to chop, then process until completely smooth (add steaming liquid through the Feed Tube when processing if necessary). Keeps frozen in ice cube trays for individual 1-ounce portions. |
| Butter Metal Chopping | Slicing or Shredding Disc | High For creaming: Have butter at room temperature. Cut into 1-inch pieces. Process, scraping bowl as necessary. For compound (flavored) butters, process flavoring ingredients, such as herbs, zest, vegetables, etc., before adding butter. For shredding or slicing: Freeze briefly. Use light to medium pressure to shred or slice. Shredded butter is great for preparing certain pastry doughs. Sliced butter is great for serving alongside corn on the cob or freshly made rolls. | |
| Crumbs (Bread, Cookie, Cracker, Chip) | Metal Chopping Blade | Pulse and High | Break into pieces. Pulse to break up, and then process until desired consistency. This will make perfect bread/cracker/ chip crumbs for coating meats and fish. Processed cookies make delicious pie and cake crusts. |
| Fresh Herbs | Metal Chopping Blade | Pulse | Wash and dry herbs thoroughly. Pulse to roughly chop. Continue pulsing until desired consistency is achieved. |
| Ground Meat | Metal Chopping Blade | Pulse | Cut meat into 1-inch pieces. Pulse to chop, about 25 long pulses, or until desired consistency is achieved. If a purée is desired, continue to process. Never chop/purée more than 2 pounds at one time. Make sure to never process meat containing bones. |
| “Ice Cream” Meta | Chopping Blade Pulse | and High | Put frozen fruit cut into 1-inch pieces into the Work Bowl, with liquid (juice or milk), any desired sweetners, such as sugar, honey, simple syrup and other flavors. Pulse to break up. Process until smooth. |
| Milk Shakes/ Smoothies | Metal Chopping Blade | Low | For milk shakes, first add ice cream. While unit is running, add milk through the Feed Tube until desired consistency is achieved. For smoothies, add fruit first, then add the liquid through the Feed Tube while unit is running. |
| Nuts Metal Chopping | Blade Pulse | and High | Pulse to chop to desired consistency. To make a nut butter, pulse to break up, and then process until smooth, stopping to scrape down as needed. |
| Superfine Sugar | Metal Chopping Blade | High | Process granulated sugar for about 1 minute until finely ground. Excellent for using in meringues and other baked goods. |
COOKING
COOK ASSEMBLY

Before using your Cuisinart® CompleteChef™ Cooking Food Processor for the first time, wash all the parts (see Cleaning, Storage and Maintenance instructions on page 36).
-
Place the Motor Housing Base on a dry, level countertop with the controls facing toward you. Do not plug the unit in until it is fully assembled.
-
Place the Stainless Steel Work Bowl onto the base and push down; you'll hear it click and feel it lock into place.
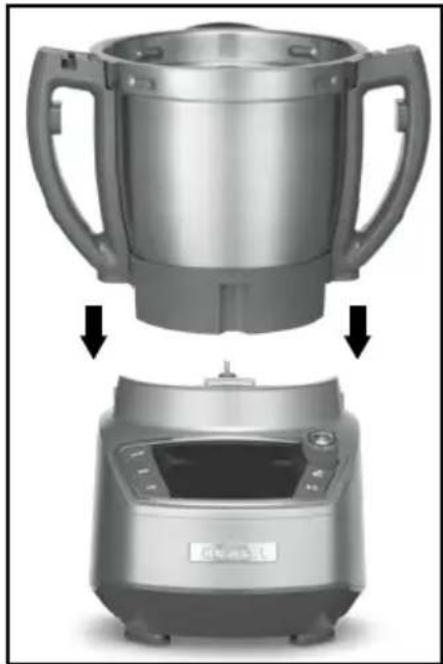
natural_image
Two views of a modern kitchen blender with handles and a digital display (no text or symbols visible)- Select the accessory you want to use (see list on pages 7–9 or use accessory recommendation displayed on your screen when following a function or recipe).
For stirring, secure the Stirring Paddle in the Work Bowl. Grasp it by the center shaft and push down until it locks into place. If you've processed ingredients in the Work Bowl, the Metal Chopping Blade can be left in place to stir on a slow speed.
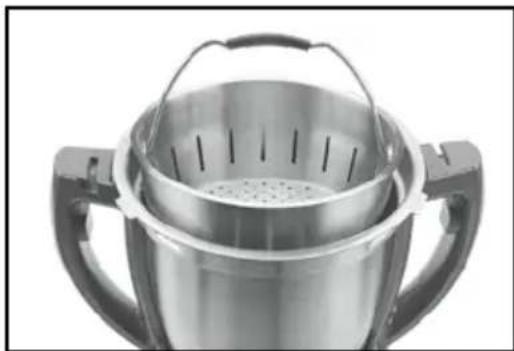
For steaming, place Steam Basket into the Work Bowl. Be sure to follow steaming instructions on page 35.
natural_image
Close-up of a stainless steel cooking pot with lid and handle (no text or symbols visible)SECURING COOKING LID TO WORK BOWL
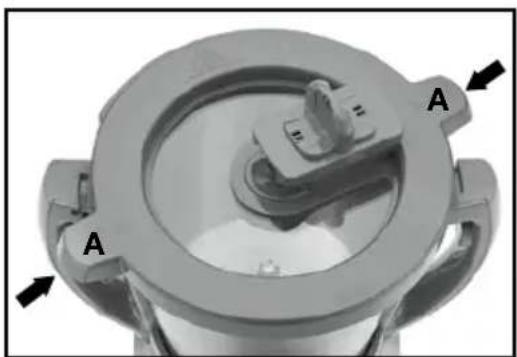
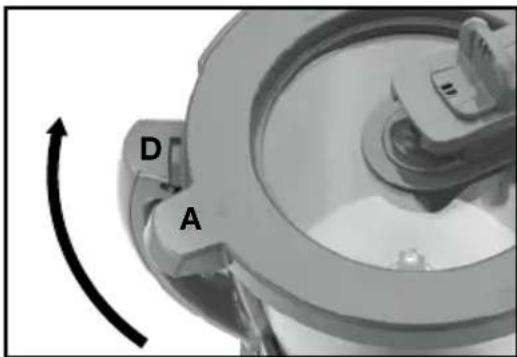
- Place the Lid over the Work Bowl with the lid grips (A) positioned at approximately 1 and 7 o'clock.
natural_image
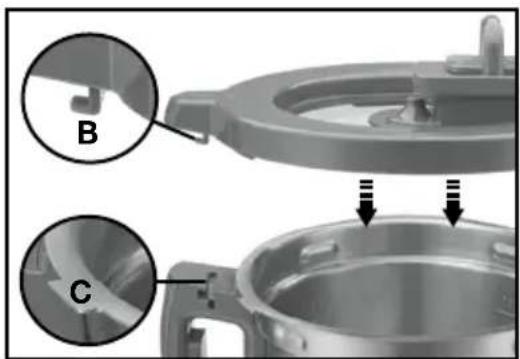
Mechanical component with labeled parts A and directional arrows (no text or symbols beyond labels)- Lower the Lid onto the Work Bowl, aligning the locking tabs (B) under the lid grips with the metal tabs (C) on the bowl.
natural_image
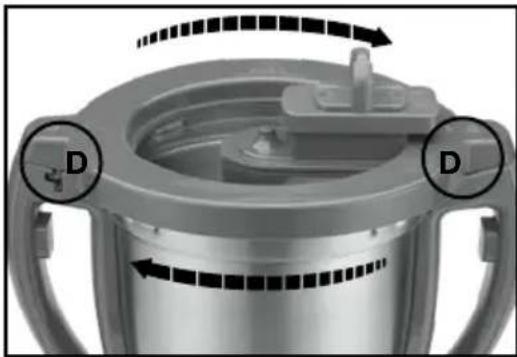
Close-up of a mechanical component with labeled parts B and C, showing internal structure and assembly (no text or symbols beyond labels)- Press Lid down, rotating clockwise until you hear and see the lid locking mechanisms on bowl handles and lid grips (A) click in place (D). NOTE: To remove Lid, simply grip firmly and turn counterclockwise until lid grips are in the 1 and 7 o'clock position and lift up.
natural_image
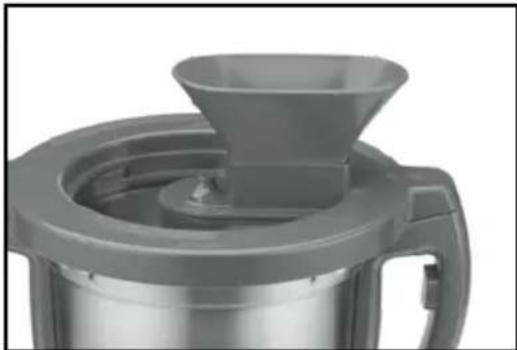
Close-up of a mechanical component with two circular ports labeled D, showing internal structure and motion arrows (no text or symbols beyond labels)- Attach the Funnel to the Lid to easily add ingredients before or during cook cycle.
natural_image
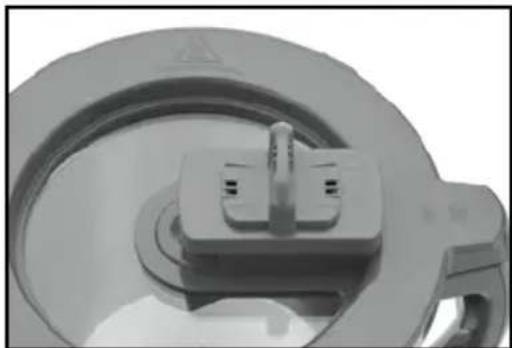
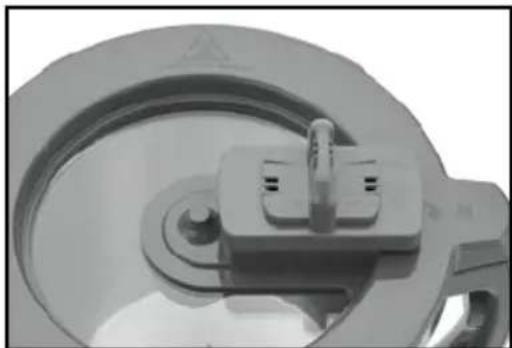
Close-up of a gray portable kitchen blender with a funnel and handle (no text or symbols visible)- To control the level of steam, toggle the Steam Cap from left (less steam) to right (more steam), depending on your cooking method.
Less Steam
natural_image
Close-up of a mechanical component with a central knob and circular base (no visible text or symbols)More Steam
natural_image
Close-up of a mechanical component with a circular base and central mounting bracket (no visible text or symbols)COOKING FUNCTIONS AND PRESETS
Scroll through Home Screen to select COOK; press ENTER. The following functions will appear on the screen. Scroll through and press ENTER to select.
When you select a function, a preset TIME, TEMPERATURE and SPEED will appear on screen. You may use the presets or adjust if necessary.
The required accessories for each function will also be displayed.

Custom
Select the cooking time, temperature and stirring speed to create your favorite recipes.

Sauce/Soup
Optimal time, temperature and stirring speed preprogrammed for simmering both soups and sauces.
Adjust the default for personal preference.

Slow Cook
Treat this program as you would any slow cooker. The default is set for a low, slow-cook temperature. Should a high temperature be preferred, select 210^ F. The time and stirring option can also be adjusted to fit individual recipes.

Sauté
Ideal for sautéing vegetables and aromatics to create the foundation for many dishes.

Simmer
Set at the precise temperature to keep a recipe at a simmer to fully cook and develop flavor.

Steam
Using provided Steam Basket, steam foods from vegetables to fish to dumplings. Use our provided Steam Chart (page 35) as a guide.

Risotto
This setting is for cooking the perfect risotto with accurate temperature and the perfect amount of stirring; designed for cooking once base aromatics are sautéed.

Keep Warm & Stir
Holds food at a safe serving temperature until serving. Intermittent stirring keeps food evenly heated.
SETTING TIME, TEMPERATURE, AND SPEED
Except for CUSTOM, each Cooking Function in the chart on the following page, as well as each preprogrammed Recipe, has a preset TIME, TEMPERATURE and SPEED. If the presets work for you, press ▶II START/STOP to begin cooking.
- To set or change time, press ENTER. Use the Selector Dial to adjust or select time, and press ENTER to confirm selection. If time is not selected, the Cuisinart® CompleteChef™ Cooking Food Processor will count up seconds for you.
- To set or change temperature, scroll to TEMPERATURE and press ENTER. Use the Selector Dial to adjust, and press ENTER to confirm selected temperature.
- To set or change speed, scroll to SPEED and press ENTER. Use the Selector Dial to adjust, and press ENTER to confirm selected speed.
- View accessory requirements for selected function or recipe at the bottom of the screen to be sure you are using the correct accessory. Only the Cooking Lid may be used for cooking functions.
- Press▶II START/STOP to begin cooking. If you set time, machine will stop when time elapses and you will hear a tone.
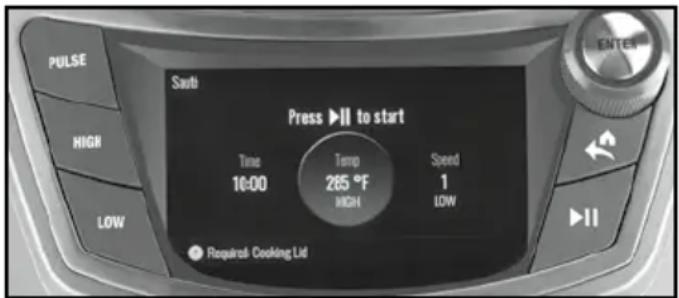
For preset and/or recommended time, temperature and speed, please reference chart on page 25, as well as tips and hints in the following Start Cooking section.
COOKING FUNCTIONS
| Function Default Time Temp. | Speed General Use | ||
| Sauce/Soup 60 minutes 205°F 1 | All soups and slow-simmered sauces | ||
| Slow Cook 120 minutes 205°F 1 | Longer cooking, slow-cooked dishes like stews and chilis | ||
| Sauté 10 minutes 285°F 1 Sauté and sweat vegetables | |||
| Risotto 30 minutes 205°F 2 Risotto | |||
| Simmer 30 minutes 205°F 1 | Simmering ingredients, including poaching and finishing soups and sauces | ||
| Steam 20 minutes 285°F N/A | Steaming fruits, vegetables and protein | ||
| Keep Warm with Stir | 60 minutes 160°F 1 | Keeping dishes warm for serving | |
START COOKING
Approach the Cuisinart® CompleteChef™ Cooking Food Processor as if cooking on the stovetop. Prep base recipe ingredients first, if necessary, by either chopping, slicing, shredding or dicing.
Once ingredients are prepped, select an accessory for cooking, if necessary. For recipes that require stirring, replace the prep accessory with the Stirring Paddle.
For puréed soups or sauces, the Metal Chopping Blade can serve as both the prep and cooking tool. Chop ingredients first and then use the chopping blade to stir, if necessary, while cooking. Once cooking is complete, purée ingredients.
Also, for puréed soups, the recommended technique is to cook or steam base ingredients in a smaller amount of liquid than traditionally used. At the end of cooking time, purée ingredients using the Metal Chopping Blade.
With the food processor running, add additional liquid to the Work Bowl until desired consistency is achieved. Use our recipes as a guide for liquid amounts.
Use extreme caution when processing hot liquids. Ingredients should never exceed the Max Fill line.
TEMPERATURE
For each cooking step, select temperature.
| Temperature Setting | Temperature Range |
| Warm | 85°F to 110°F |
| Low | 115°F to 140°F |
| Low-Medium | 145°F to 170°F |
| Medium | 175°F to 205°F |
| Boil | 212°F |
| Medium-High | 215°F to 240°F |
| High | 245°F to 285°F |
The unit takes about 5 to 10 minutes to heat up.
Use the highest temperature to bring liquid to a boil, when browning meats and quick vegetable cooking. To sauté vegetables that are the base for certain recipes, use temperatures ranging between 250°F to 285°F.
For longer cooking that may require a higher temperature, refrain from using the highest temperature. The highest recommended temperature is 250^ F in this instance.
For gentle dishes, like risotto, we recommend 205^ F as the optimal temperature for the entire cooking process, from sweating aromatic vegetables to cooking the rice.
For dishes like soups, sauces and stews, it is advised that once the liquid is added, bring the recipe to a boil and then immediately reduce to a simmer (between 205°F and 210°F) for the
remainder of the cooking time to fully cook ingredients and develop flavor.
SPEED
For each cooking step, select speed.
Stirring speeds 1 to 3 are intermittent. Use these when occasional stirring is required. Many recipes benefit from an occasional stir – risotto, oatmeal, soups and stews.
Constant stirring (i.e., speeds 4 to 6) is recommended for dishes that require an emulsion, when combining ingredients and when cooking with eggs in recipes, such as Hollandaise, cheese sauces, custard and dressings.
Certain dishes require no stirring – steaming recipes and some simmering sauces and soups.
ADDITIONAL COOKING TIPS
Most converted recipes will require less liquid than the original, as there is less evaporation in the Cooking Food Processor than in stovetop cooking.
It is advised to scrape the bowl occasionally during both processing and cooking tasks for even incorporation of ingredients.
To change any of the settings, such as TIME, TEMPERATURE or SPEED midway through cooking, press PAUSE▶II first, and then the HOME/BACK ← to adjust. Once new settings are selected, press START▶II to resume the cooking process.
Only the Cooking Lid should be used when cooking or using a cooking function.
The Food Processor Lid can only be used for slicing, shredding and dicing. However, it is possible and even recommended to use the Cooking Lid for functions like chopping, blending and dough making.
Remove the Steam Cap when cooking in instances where more browning or reducing liquids is desired. Leave Steam Cap in place when slow cooking, bringing liquids to a boil, maintaining temperature, steaming and cooking grains.
COOKING GRAINS
Grains can be cooked right in the bowl without an accessory. No stirring speed is required.
Always allow rice or grains to rest for 10 minutes once cooking is complete before removing the lid.
White rice
1 cup rice: 1½ cups water
Cook for 12 to 15 minutes at 285^ F to bring to a boil; finish by simmering for 20 minutes at 205^ F.
Rest for 10 minutes before removing the lid.
Brown rice
1 cup rice: 2 cups water
Cook for 12 to 15 minutes at 285^ F to bring to a boil; finish by simmering for 45 minutes at 205^ F.
Rest for 10 minutes before removing the lid.
Quinoa
1 cup quinoa: 2 cups water
Cook for 12 to 15 minutes at 285^ F to bring to a boil; finish by simmering according to package directions, around 8 minutes at 205^ F. Rest for 10 minutes before removing the lid.
COOKING PASTA
Cook no more than 12 pound of pasta at a time, as the cooking liquid will foam excessively. Cook at 285^ F according to the manufacturer's instructions.
COOKING DRIED BEANS
Soak 1 cup of beans overnight. Drain and add to the Work Bowl. Cover with at least 2 inches of water. Bring to a boil at 285^ F and then set temperature to simmer at 205^ F until beans are soft (time varies depending on type of bean).
TOASTING NUTS
Put 12 to 1 cup nuts into the Work Bowl. If chopped nuts are desired, use the Metal Chopping Blade. If not, use the Stirring Paddle. Set the cooking time for 5 minutes at 200^ F on Speed 4 to toast.
Once toasted, PULSE to chop to desired consistency.
USING RECIPES

Here you will find over 200
preprogrammed recipes, and easy ways to search for just what you'd like to make.
Scroll to select and highlight desired option.

ALLRECIPES
Over 200 preprogrammed recipes with step-by-step instructions and ingredients lists included.

CATEGORIES
Select any category provided to see the recipes.
Breakfast/Brunch

Salads

Sauces/Basics

Pizza

Bread/Dough

Drinks

Appetizers

Soups

Mains

Sides

Dessert


FAVORITES
Any recipe you've put on your "loved" list. Be sure to click on the heart after you've finished a recipe you want to make again to put it on the list!

RECENTLY VIEWED
Easily view all of your recently viewed recipes.
START USING RECIPES
We have preprogrammed your Cuisinart® CompleteChef™ Cooking Food Processor with over 200 recipes, including step-by-step instructions for each recipe.
- Scroll through ALL RECIPES or CATEGORIES to select a desired recipe and press ENTER. A recipe Home Screen will appear. Recipe Home Screen includes Ingredients, Nutrition Info, and Get Started selections, as well as required Lid(s) and accessories.
- Use SELECTOR DIAL to scroll to Ingredients and press ENTER. When finished reading, gathering and prepping ingredients, press ENTER or HOME/BACK ← button to return to previous screen.
- When you are ready to proceed with a recipe, select Get Started and press ENTER. Scroll through recipe steps before beginning to prep and cook.
- When ENTER to Process or ENTER to Cook appears on screen, select and press ENTER. Preset TIME, TEMPERATURE and SPEED will appear. If the presets work for you, press START/STOP▶II to begin processing or cooking, or adjust as desired.
- View accessory requirements for each step at the bottom of the screen to be sure you are using the correct accessory.
- Unit will turn off automatically when processing or cooking cycle is complete.
IMPORTANT RECIPE TIPS
The most important tip is to read through all ingredients, as well as each step, before beginning any recipe.
It is highly recommended to gather and prep ingredients before starting recipe.
When in the process of a recipe, use the HOME/BACK ← button to look ahead in the recipe to be fully prepared, as there are steps that can be completed while food is cooking.
Use our recipes as a guide when converting personal favorites.
RECIPE LISTS

BREAKFAST/BRUNCH
| Recipe Function Vegetarian Gluten Free | |||
| Açai Bowl Food Processor | ✓ | ✓ | |
| Banana Pancakes Food Processor | ✓ | ||
| Basic Crêpes Cook/Food Processor | ✓ | ||
| Blueberry Lavender Butter Food Processor | ✓ | ✓ | |
| Blueberry or Cranberry Maple Syrup | Cook | ✓ | ✓ |
| Caramelized Apples Cook/Food Processor | ✓ | ✓ | |
| Cinnamon Rolls Food Processor | ✓ | ||
| Cranberry Oat Bran Cook | ✓ | ✓ | |
| Creamy Oats and Blueberries | Cook | ✓ | ✓ |
| Eggs Florentine Cook/Food Processor | ✓ | ||
| Hard- and Soft-Boiled Eggs Cook | ✓ | ✓ | |
| Home Fries | Cook/Food Processor | ✓ | ✓ |
| Hot Muesli | Cook | ✓ | ✓ |
| Maple Cinnamon Oatmeal | Cook | ✓ | ✓ |
| Morning Glory Muffins | Food Processor | ✓ | |
| Morning Grains and Greens | Cook/Food Processor | ✓ | ✓ |
| Morning Power Bowl | Cook/Food Processor | ✓ | ✓ |
| Quick Berry Jam | Cook/Food Processor | ✓ | ✓ |
| Rustic Potato and Fennel Tart | Food Processor | ✓ | |
| Shakshuka | Cook/Food Processor | ✓ | |
| Zucchini Spice Bread | Food Processor | ✓ |

APPETIZERS
| Recipe Function Vegetarian Gluten Free | |||
| Buffalo Chicken Dip Cook/Food Processor | ✓ | ✓ | |
| Caramelized Onion Dip Cook/Food Processor | ✓ | ✓ | |
| Deviled Eggs | Cook/Food Processor | ✓ | ✓ |
| Fire-Roasted Salsa | Cook/Food Processor | ✓ | ✓ |
| Gougères | Cook/Food Processor | ✓ | |
| Guacamole | Food Processor | ✓ | ✓ |
| Hummus | Food Processor | ✓ | ✓ |
| Mango Avocado Salsa | Food Processor | ✓ | |
| Peach Salsa | Food Processor | ✓ | ✓ |
| Pico de Gallo | Food Processor | ✓ | ✓ |
| Popovers Cook/Food Processor | ✓ | ||
| Potato Nachos | Food Processor | ✓ | ✓ |
| Queso Fundido Dip | Cook/Food Processor | ✓ | |
| Sicilian Caponata | Cook/Food Processor | ✓ | ✓ |
| Spinach and Artichoke Dip | Cook/Food Processor | ✓ | ✓ |
| Swedish Meatballs | Cook/Food Processor | ||
| Veggie Empanadas | Cook/Food Processor | ✓ |

SALADS
| Recipe Function | Vegetarian Gluten Free | ||
| Asian Cole Slaw Food | Processor | √ | √ |
| Chopped Salad Food | Processor | √ | √ |
| Classic Cole Slaw Food | Processor | √ | √ |
| Egg Salad Cook/Food Processor | √ | √ | |
| Picnic Potato Salad Cook/Food Processor | √ | √ | |
| Simple Cucumber Salad Food Processor | √ | √ | |
| Tabbouleh Food Processor | √ | ||
| Zesty Three-Bean Salad Cook/Food Processor | √ | √ | |

SOUPS
| Recipe Function Vegetarian Gluten Free | |||
| Asparagus Leek Soup Cook/Food Processor | ✓ | ✓ | |
| Caldo Verde Cook/Food Processor | ✓ | ||
| Chicken Noodle Soup Cook/Food Processor | |||
| Cioppino Cook/Food Processor | ✓ | ||
| Creamy Broccoli and Potato Soup | Cook/Food Processor | ✓ | ✓ |
| Creamy Root Vegetable Soup | Cook/Food Processor | ✓ | ✓ |
| Creamy White Bean Soup Cook/Food Processor | ✓ | ✓ | |
| Curried Butternut Squash Soup | Cook/Food Processor | ✓ | ✓ |
| French Onion Soup Cook/Food Processor | ✓ | ||
| Gazpacho Food Processor | ✓ | ✓ | |
| Minestrone Cook/Food Processor | ✓ | ||
| Potato Leek Soup Cook/Food Processor | ✓ | ✓ | |
| Quick Chicken Stock Cook | ✓ | ||
| Smoky Sweet Potato Soup Cook/Food Processor | ✓ | ✓ | |
| Spring Vegetable Soup with Pistou | Cook/Food Processor | ✓ | ✓ |
| Tortilla Soup Cook/Food Processor | ✓ |

SAUCES/DRESSING/BASICS
| Recipe Function Vegetarian Gluten Free | |||
| Alfredo Sauce | Cook | √ | |
| Applesauce | Cook/Food Processor | √ | √ |
| Asian Marinade | Food Processor | √ | √ |
| Basic and Herbed Fresh Breadcrumbs | Food Processor | √ | |
| Basic Cheese Sauce | Cook/Food Processor | √ | |
| Basil Pesto | Food Processor | √ | √ |
| Béchamel | Cook/Food Processor | √ | |
| Bolognese | Cook/Food Processor | √ | |
| Buttermilk Dressing | Food Processor | √ | √ |

SAUCES/DRESSING/BASICS
| Recipe Function | Vegetarian Gluten Free | ||
| Champagne Vinaigrette Food Processor | √ | √ | |
| Citrus Vinaigrette Food Processor | √ | √ | |
| Coconut Curry Simmer Sauce Cook/Food Processor | √ | √ | |
| Fresh Herb Butter Food Processor | √ | √ | |
| Garden Vegetable Sauce Cook/Food Processor | √ | √ | |
| Green Goddess Dressing Food Processor | √ | √ | |
| Herb Vinaigrette Food Processor | √ | √ | |
| Hollandaise Sauce Cook/Food Processor | √ | √ | |
| Marinara Sauce Cook/Food Processor | √ | √ | |
| Mushroom Gravy Cook/Food Processor | √ | √ | |
| Peanut Butter Food Processor | √ | √ | |
| Peanut Sauce | Food Processor | √ | √ |
| Pizza Sauce | Cook/Food Processor | √ | √ |
| Red Chile Sauce | Cook/Food Processor | √ | √ |
| Roasted Red Pepper Sauce | Cook/Food Processor | √ | √ |
| Simple Gravy | Cook | ||
| Simple Syrup | Cook | √ | |
| Tomato Sauce | Cook/Food Processor | √ | √ |

MAIN COURSES
| Recipe Function | Vegetarian Gluten Free | ||
| Asian-Style Sea Bass | Cook/Food Processor | √ | |
| Beer-Steamed Clams with Chorizo | Cook/Food Processor | √ | |
| Burrito Bowl | Cook/Food Processor | √ | √ |
| Chicken Burgers and Mango Salsa | Food Processor | √ | |
| Chicken with Herb Dumplings | Cook/Food Processor | ||
| Chicken with Peppers | Cook/Food Processor | √ | |
| Chile Verde Cook/Food Processor | √ | ||

MAIN COURSES
| Recipe Function Vegetarian Gluten Free | |||
| Classic Beef Stew Cook/Food Processor | ✓ | ||
| Falafel Food Processor | ✓ | ✓ | |
| Grandma's Meatballs Cook/Food Processor | |||
| Korean BBQ Rice Bowl Cook/Food Processor | ✓ | ||
| Latin Shredded Chicken Cook | ✓ | ||
| Mussels with White Wine and Thyme Cook/Food Processor | ✓ | ||
| Pineapple Chipotle Pork Cook/Food Processor | ✓ | ||
| Pork Barbecue Cook/Food Processor | ✓ | ||
| Posole Rojo Cook/Food Processor | ✓ | ||
| Quinoa Bowl with Salmon and Greens Cook/Food Processor | ✓ | ||
| Shepherds Pie Cook/Food Processor | ✓ | ||
| Tacos Americanos | Cook/Food Processor | ✓ | |
| The Ultimate Burger | Food Processor | ✓ | |
| Tikka Masala | Cook/Food Processor | ✓ | |
| Turkey Chili | Cook/Food Processor | ✓ | |
| Vegetarian Farro Bowl | Cook/Food Processor | ✓ | |
| Vegetarian Lasagna | Cook/Food Processor | ✓ | |
| Wild Mushroom Ravioli | Cook/Food Processor | ✓ |

PIZZA
| Recipe | Function | Vegetarian | Gluten Free |
| Cauliflower Crust Pizza | Food Processor | √ | √ |
| Focaccia Romana | Food Processor | √ | √ |
| Hawaiian Pizza | Food Processor | ||
| Mediterranean Vegetable Pizza | Food Processor | √ | |
| Mushroom Pizza | Cook/Food Processor | √ | |
| Pepperoni Pizza | Food Processor | ||
| Pissaladière Cook/Food Processor | |||
| Pizza Bianca | Food Processor | ||
| Pizza Margherita Food Processor | √ | ||
| Roasted Red Pepper Calzone | Cook/Food Processor | √ | |
| Sausage and Broccoli Calzone | Cook/Food Processor | ||
| Sausage and Spinach Pizza Food Processor | |||
| Very Veggie Pizza | Cook/Food Processor | √ | |

SIDES
| Recipe Function Vegetarian Gluten Free | |||
| Baked Beans Cook/Food Processor | √ | √ | |
| Basic Risotto Cook/Food Processor | √ | √ | |
| Brussels Sprouts with Pancetta Cook/Food Processor | √ | ||
| Butternut Squash Risotto Cook/Food Processor | √ | √ | |
| Cauliflower Rice Cook/Food Processor | √ | √ | |
| Cider-Braised Greens Cook/Food Processor | √ | ||
| Creamed Spinach Cook/Food Processor | √ | ||
| Creamy Mashed Potatoes Cook/Food Processor | √ | √ | |
| Holiday Stuffing Cook/Food Processor | √ | ||
| Lacy Potato Pancakes Food Processor | √ | √ | |
| Macaroni and Cheese Cook/Food Processor | √ | ||
| Mashed Maple Sweet Potatoes Cook/Food Processor | √ | √ | |
| Porcini Risotto Cook/Food Processor | √ | √ | |
| Rice Pilaf | Cook/Food Processor | √ | √ |
| Risotto Milanese | Cook/Food Processor | √ | √ |
| Sautéed Broccoli Rabe | Cook/Food Processor | √ | √ |
| Spanish Rice | Cook/Food Processor | √ | √ |
| Spring Vegetable Risotto Cook/Food Processor | √ | √ | |
| Steamed Asparagus | Cook | √ | √ |
| Wild Mushroom Risotto | Cook/Food Processor | √ | √ |

DOUGH/BREAD
| Recipe Function | Vegetarian Gluten Free | ||
| Basic Sweet Pastry Dough | Food Processor | √ | |
| Basic White Bread | Food Processor | √ | |
| Brioche | Food Processor | √ | |
| Buttery Dinner Rolls | Food Processor | √ | |
| Cheddar Cheese Corn Bread | Food Processor | √ | |
| Flaky Pie Crust | Food Processor | √ | |
| Gluten-Free Bagels Food Processor | √ | √ | |
| Gluten-Free Pizza Dough | Food Processor | √ | √ |
| Pasta Dough | Food Processor | √ | |
| Pâte à Choux | Food Processor | √ | |
| Pâte Brisée | Food Processor | √ | |
| Pâte Sucrée | Food Processor | √ | |
| Pizza Dough | Food Processor | √ | |
| Whole-Wheat Bread | Food Processor | √ |

DESSERTS
| Recipe Function Vegetarian Gluten Free | |||
| Autumn Spice Doughnuts Cook/Food Processor | ✓ | ||
| Banana Chip “Ice Cream” Food Processor | ✓ | ||
| Caramelized Apples Food Processor | ✓ | ||
| Carrot Cake Food Processor | ✓ | ||
| Champagne Sabayon Cook | ✓ | ✓ | |
| Chocolate Bark Cook | ✓ | ✓ | |
| Chocolate Cookie Crust Food Processor | ✓ | ||
| Chocolate Cream Pie Cook/Food Processor | ✓ | ||
| Chocolate Ganache Cook | ✓ | ✓ | |
| Cinnamon Apple Pie Food Processor | ✓ | ||
| Citrus Butter Cookies Food Processor | ✓ | ||
| Classic Cheesecake | Food Processor | ✓ | |
| Cream Cheese Frosting | Food Processor | ✓ | ✓ |
| Crème Anglaise | Cook | ✓ | ✓ |
| Decorating Icing | Food Processor | ✓ | ✓ |
| Espresso Truffles | Cook | ✓ | ✓ |
| Graham Cracker Crust | Food Processor | ✓ | |
| Hot Fudge | Cook | ✓ | ✓ |
| Lemon Curd | Cook/Food Processor | ✓ | ✓ |
| Lemon Tart | Cook/Food Processor | ✓ | |
| Mango Sorbet | Food Processor | ✓ | |
| Meringue Kisses | Food Processor | ✓ | ✓ |
| Pecan Shortbread | Food Processor | ✓ | |
| Pumpkin Pie | Food Processor | ✓ | |
| Rice Pudding | Cook | ✓ | ✓ |
| Roasted Apricot Soufflé Food Processor | ✓ | ✓ | |
| Sugar Cookies | Food Processor | ✓ | |
| Tropical Fruit Salad | Food Processor | ✓ | ✓ |
| Vanilla Bean Poached Pears | Cook | ✓ | ✓ |
| Whipped Cream | Food Processor | ✓ | ✓ |

DRINKS
| Recipe Function Vegetarian Gluten Free | |||
| Chai Cook | √ | √ | |
| Fresh Fruit Smoothie Food Processor | √ | √ | |
| Golden Milk Cook | √ | √ | |
| Hot Chocolate Cook | √ | √ | |
| Hot Toddy Cook | √ | √ | |
| Mango Lassi Food Processor | √ | √ | |
| Matcha Latte Cook | √ | √ | |
| Mulled Wine/Cider Cook | √ | √ | |
| Oat Milk Food Processor | √ | √ | |
| Sangria | Food Processor | √ | √ |
STEAMING CHART
| Food | Amount | Preparation | Time |
| Asparagus | 4 ounces (15 spears) | Trimmed | 16 minutes |
| Broccoli | 1 pound | Florets and trimmed stalks | 18 to 20 minutes |
| Brussels Sprouts | 1 pound | Halved | 16 minutes |
| Cabbage | 1 small head | Quartered | 24 minutes |
| Carrots | 1 pound | Baby | 22 to 24 minutes |
| Carrots | 1 pound | Sliced – 1⁄4 inch | 16 minutes |
| Cauliflower | 1 pound | Florets | 18 minutes |
| Corn on the Cob | 2 ears | Halved | 24 minutes |
| Beans, green and wax | 12 ounces | Trimmed | 18 minutes |
| Snow Peas | 12 ounces | Trimmed | 16 minutes |
| Sugar Snap Peas | 12 ounces | Trimmed | 16 minutes |
| Potatoes, new | 1 pound | Halved or cut into 1-inch pieces | 24 minutes |
| Potatoes, yellow/gold | 12 ounces | 1-inch pieces | 26 to 28 minutes |
| Potatoes, sweet | 12 ounces | 1-inch pieces | 17 to 18 minutes |
| Squash, Zucchini, Summer | 1 pound | Sliced – 1⁄2 inch | 18 minutes |
| Chicken Breast | 1 pound | Whole | 20 to 22 minutes |
| Shrimp | 1 pound | Peeled | 15 minutes |
| Fish | 1 pound | Fillets | 22 to 25 minutes |
| Eggs | 12 | Pierce pinhole in the bottom of each egg | 12 minutes: runny yolk; 24 minutes hard boiled |
NOTE: Add water to steam Max Fill line on Work Bowl.
CLEANING, MAINTENANCE AND SUPPORT
CLEANING, STORAGE AND MAINTENANCE
Keep your Cuisinart® CompleteChef™ Cooking Food Processor ready to use on the kitchen counter. When not in use, leave it unplugged.
Keep the blades and discs out of reach of children.
All parts, except the housing base, are dishwasher safe, and we recommend washing them in the dishwasher on the top rack only. Due to intense water heat, washing lids and accessories on the bottom rack may cause damage over time.
Insert the Food Processor Lid with the Feed Tube facing up to ensure proper cleaning. Insert the Work Bowl and Pusher upside down for drainage. Remember to unload the dishwasher carefully wherever you have placed sharp blades and discs.
To simplify cleaning, rinse the Work Bowl, Lids, Pusher and blade or disc immediately after use so food won't dry on them. Be sure to position the Pusher upside down for drainage. If food lodges in the Pusher, remove it by running water through it, or use a bottle brush.
Seals in Food Processor and Cooking Lids are removable and dishwasher safe. To reassemble the Food Processor Lid after washing, find three circles symbol ••• on one side of the Food Processor Seal. Align the symbol with the same symbol found inside the Food Processor Lid. Press firmly to snap in place.
The Cooking Lid Seal is reversible and can be reassembled by stretching it around the seal rim.
For cooked-on ingredients in the Work Bowl, soak with hot, soapy water and then use a stainless steel scrubby to remove all residue.
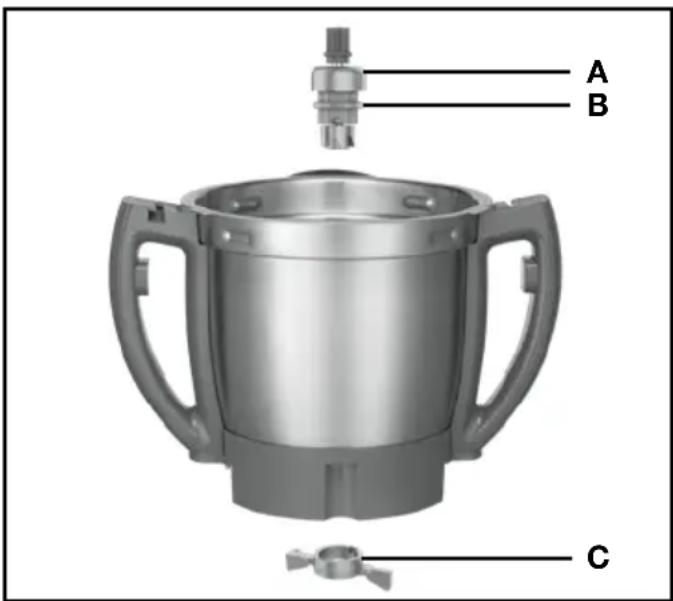
The Hub Assembly in the center of the Work Bowl can be removed for cleaning. The Hub Assembly consists of 3 parts: the Metal Hub [A], Silicone Seal [B] and Locking Nut [C]. To disassemble the Hub, turn the Locking Nut counterclockwise until the Metal Hub is released.
The 3-part Hub Assembly must be hand-washed. After washing, assemble the Hub by placing the Silicone Seal on the Metal Hub. Place the Metal Hub with Silicone Seal in the Work Bowl and secure with Locking Nut by turning Locking Nut clockwise.
If you wash the blades and discs by hand, do it carefully. When handling, use the plastic hubs. Avoid leaving them in soapy water where they may disappear from sight.
To clean the blades, fill the Work Bowl with soapy water, hold the blade by its plastic center and move it rapidly up and down on the center shaft of the bowl. Use of a spray attachment is also effective. If necessary, use a brush.
The housing base may be wiped clean with a soapy, nonabrasive material. Be sure to dry it thoroughly.
If the feet leave spots on the counter, spray spots with a spot remover and wipe with a damp sponge.
If any trace of the spot remains, repeat the procedure and wipe the area with a damp sponge and nonabrasive cleaning powder.
IMPORTANT: Never store any blade or disc on the motor shaft. No blade or disc should be placed on the shaft except when the Food Processor is about to be used.
MAINTENANCE: Any servicing should be performed by an authorized service representative.
FOR YOUR SAFETY
Like all powerful electrical appliances, a food processor should be handled with care. Follow these guidelines to protect yourself and your family from misuse that could cause injury.
Handle and store blades and discs carefully. Their cutting edges are very sharp.
Never put blades or discs on the motor shaft until the Work Bowl is locked in place.
Always be sure that the blade or disc is down on the motor shaft as far as it will go.
Always insert the blade in the Work Bowl before putting ingredients in bowl.
When slicing, shredding or dicing food, always use the Pusher. Never put your fingers or spatula into Feed Tube.
Always wait for the blade or disc to stop spinning before you remove the Pusher assembly or Cover from the Work Bowl.
Always unplug the unit before removing food, cleaning or putting on or taking off parts.
Always remove Work Bowl from base of machine before you remove the blade.
Be careful to prevent the Metal Chopping Blade from falling out of the Work Bowl when emptying the bowl. Remove it before tilting the Work Bowl.
TECHNICAL DATA
The motor in your Cuisinart® CompleteChef™ Cooking Food Processor operates on a standard line operating current. The appropriate voltage and frequency for your machine are shown on a label on the bottom of the base.
An automatic, temperature-controlled circuit breaker in the motor ensures complete protection against motor burnout. If the processor runs for an exceptionally long time when chopping, mixing or kneading a thick or heavy mixture in successive batches, the motor may overheat. If this happens, the food processor will stop.
Turn it off and unplug to reset. Wait for the motor to cool before proceeding. It will usually cool within 10 minutes. In extreme cases, it could take an hour. Plug the unit back in.
Safety switches prevent the machine from operating when the Work Bowl or the Lid is not locked into position. The motor stops within seconds when the motor is turned off, and when the Pusher assembly is removed.
A fast-stop circuit also enables the motor to stop within seconds.
Cuisinart offers a Limited Three-Year Warranty on the entire machine.
TROUBLESHOOTING
Food Processing
Problem: The food is unevenly processed when chopping.
Solution:
- The ingredients should be cut evenly into 12 - to 1-inch pieces before processing.
- Process in batches to avoid overloading.
Problem: Slices are uneven or slanted.
Solution:
- Place evenly cut food, cut side down, into the Feed Tube. Always use the smallest Feed Tube possible.
- Apply even pressure on the Pusher.
Problem: Food falls over in Feed Tube.
Solution:
- Feed Tube should be packed full for best results.
Problem: Some food remains on top of the disc.
Solution:
- It is normal for small pieces to remain; cut remaining bits by hand and add to processed ingredients.
Problem: The Food Processor Lid is misaligned and cannot be locked into place
Solution:
- Please make sure that the Food Processor Lid Seal is in place and the Food Processor Lid is assembled correctly. Please see instructions on page 14.
- Make sure there is no obstruction.
Dicing Kit
Problem: Food is stuck in the grid.
Solution:
- Do not use your fingers to clean the grid. ONLY USE THE CLEANING TOOL.
- First, unplug unit, then carefully remove Dicing Disc.
- Use the tall, pointed tooth on top of Cleaning Tool to push stubborn food through grid.
- If need be, attach the middle Pusher from the Food Processor Lid Feed Tube to use as a
handle and align the Cleaning Tool's two long pins along the right and left of the grid. Guide the Cleaning Tool to position and push down firmly to remove food residue from grid.
Problem: Pieces of food are not evenly cut.
Solution:
- Pack items closest to the left in medium or small Feed Tube.
- Use the small Feed Tube for smaller items.
- Apply even pressure when using Feed Tube.
Dough Kneading
Problem: Motor slows down.
Solution:
- Amount of dough may exceed maximum capacity of your Food Processor. Remove half and process in two batches.
- Dough may be too wet. If motor speeds up, continue processing. If not, add more flour, 1 tablespoon at a time, until the motor speeds up. Process until dough cleans the sides of the Work Bowl.
Problem: Blade doesn't incorporate ingredients.
Solution:
- Always start the Food Processor before adding liquid. Add liquid in a slow, steady stream, or through the drizzle hole in the Pusher, allowing the dry ingredients to absorb it. If liquid is added too quickly, wait until ingredients in the Work Bowl have mixed, then add remaining liquid slowly (do not turn off the machine).
- Pour liquid onto dough as it passes under Feed Tube opening; do not pour liquid directly onto bottom of the Work Bowl.
Problem: Blade rises in Work Bowl.
Solution:
- Excessively sticky dough can cause blade to rise. Carefully reinsert blade and immediately add 2 tablespoons of flour through the Feed Tube while the machine is running.
Problem: Dough doesn't clean inside of the Work Bowl.
Solution:
- Amount of dough may exceed maximum capacity of your Food Processor. Remove half and process in two batches.
- Dough may be too dry.
- Dough may be too wet.
Problem: Nub of dough forms on top of blade and does not become uniformly kneaded.
Solution:
- Stop machine, carefully remove dough, divide it into 3 pieces and redistribute them evenly in the Work Bowl.
Problem: Dough feels tough after kneading.
Solution:
- Divide dough into 2 or 3 pieces and redistribute evenly in bowl. Process 10 seconds or until uniformly soft and pliable.
Problem: Dough is too dry.
Solution:
- While machine is running, add water, 1 tablespoon at a time, until dough cleans the inside of the bowl.
Problem: Dough is too wet.
Solution:
- While machine is running, add flour, 1 tablespoon at a time, until dough cleans the inside of the bowl.
Cooking
Problem: The food is cooking unevenly or there is dark residue on the bottom of the Work Bowl.
Solution:
- Reduce cooking temperature or increase stirring speed.
Problem: The machine does not heat up.
Solution:
- Check your temperature setting. It takes 5–10 minutes for the machine to get to a set temperature.
Problem: The machine stirs intermittently.
Solution:
- Please check stirring speed. Stirring speeds 1 to 3 are intermittent. Use speeds 4 to 6 for constant stirring.
Problem: The Cooking Lid is misaligned and cannot be locked into place.
Solution:
- Please make sure that the Cooking Lid Seal is in place and the Cooking Lid is assembled correctly. Please see instructions on page 36.
- Make sure there is no obstruction.
Technical
Problem: The motor does not start.
Solution:
- There is a safety interlock to prevent the motor from starting if it is not properly assembled. Make sure the Work Bowl and Work Bowl Cover are securely locked into position.
- If the motor still will not start, check the power cord and outlet.
Problem: The Food Processor shuts off during operation.
Solution:
- The Lid may have become unlocked; check to make sure it is securely in position.
- A safety protector in the motor prevents the motor from overheating, which is caused by excessive strain. Turn off and unplug to reset. Wait 10 minutes to allow the Food Processor to cool off before resuming.
Problem: The motor slows down during operation.
Solution:
- This is normal, as some heavier loads (e.g., slicing/shredding cheese) may require the motor to work harder. Simply reposition the food in the Feed Tube and try again.
- The maximum load capacity may have been exceeded. Remove some of the ingredients and continue processing.
Problem: The Food Processor vibrated/moved around the countertop during processing.
Solution:
- Make sure the rubber feet at the bottom of the unit are clean and dry. Also make sure that the maximum load capacity is not being exceeded.
- This is normal, as some heavier loads (e.g., slicing/shredding cheese or kneading dough) may require the motor to work harder. An imbalance may develop in the Work Bowl which may cause the unit to vibrate or move around the countertop during processing.
WARRANTY
Limited Three-Year Warranty (U.S. and Canada only)
This warranty is available to U.S. consumers only. You are a consumer if you own a Cuisinart® CompleteChef™ Cooking Food Processor that was purchased at retail for personal, family or household use. Except as otherwise required under applicable law, this warranty is not available to retailers or other commercial purchasers or owners. We warrant that your Cuisinart® CompleteChef™ Cooking Food Processor will be free of defects in materials and workmanship under normal home use for 3 years from the date of original purchase.
We recommend that you visit our website, www.cuisinart.com for a fast, efficient way to complete your product registration. However, product registration does not eliminate the need for the consumer to maintain the original proof of purchase in order to obtain the warranty benefits. In the event that you do not have proof of purchase date, the purchase date for purposes of this warranty will be the date of manufacture.
CALIFORNIA RESIDENTS ONLY
California law provides that for In-Warranty Service, California residents have the option of returning a nonconforming product (A) to the store where it was purchased or (B) to another retail store that sells Cuisinart products of the same type. The retail store shall then, according to its preference, either repair the product, refer the consumer to an independent repair facility, replace the product, or refund the purchase price less the amount directly attributable to the consumer's prior usage of the product. If neither of the above two options results in the appropriate relief to the consumer, the consumer may then take the product to an independent repair facility, if service or repair can be economically accomplished. Cuisinart and not the consumer will be responsible for the reasonable cost of such service, repair, replacement, or refund for nonconforming products under warranty.
California residents may also, according to their preference, return nonconforming products directly to Cuisinart for repair or, if necessary, replacement by calling our Consumer Service Center toll-free at 800-726-0190. Cuisinart will be responsible for the cost of the repair, replacement, and shipping and handling for such nonconforming products under warranty.
HASSLE-FREE REPLACEMENT WARRANTY
Your ultimate satisfaction in Cuisinart products is our goal, so if your Cuisinart® CompleteChef™ Cooking Food Processor should fail within the generous warranty period, we will repair it or, if necessary, replace it at no cost to you. To obtain a return shipping label, email us at https://www.cuisinart.com/customer-care/product-return. Or call our toll-free customer service department at 1-800-726-0190 to speak with a representative.
Your Cuisinart® CompleteChef™ Cooking Food Processor has been manufactured to the strictest specifications and has been designed for use only in 120-volt outlets and only with authorized accessories and replacement parts. This warranty expressly excludes any defects or damages caused by attempted use of this unit with a converter, as well as use with accessories, replacement parts or repair service other than those authorized by Cuisinart. This warranty does not cover any damage caused by accident, misuse, shipment or other than ordinary household use. This warranty excludes all incidental or consequential damages. Some states do not allow the exclusion or limitation of these damages, so these exclusions may not apply to you. You may also have other rights, which vary from state to state.
Important: If the nonconforming product is to be serviced by someone other than Cuisinart's Authorized Service Center, please remind the servicer to call our Consumer Service Center at 1-800-726-0190 to ensure that the problem is properly diagnosed, the product is serviced with the correct parts, and to ensure that the product is still under warranty.
©2020 Cuisinart
East Windsor, NJ 08520
Printed in China
20CE059309
Cuisinart® MANUAL DE INSTRUCCIONES
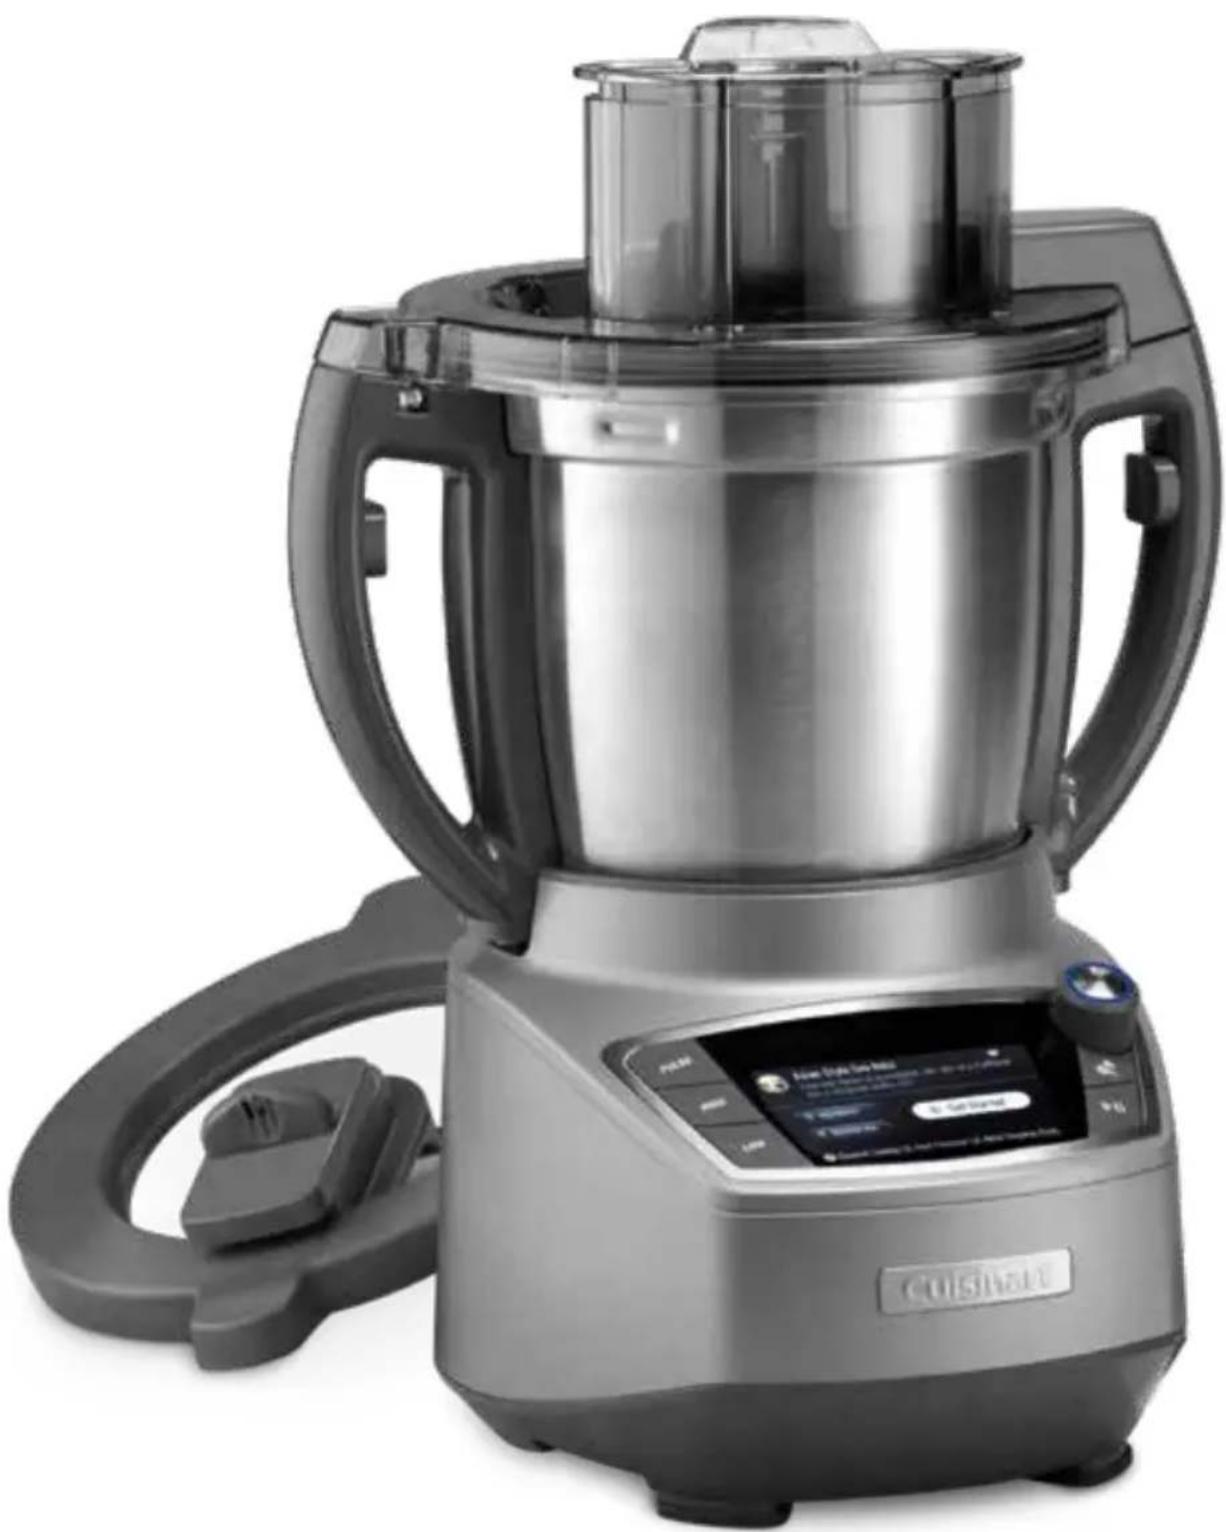
natural_image
Exterior view of a CUSIBAY robotic kitchen appliance with digital display (no signage)Robot de cocina Cuisinart® CompleteChef™
FPC-100
IMPORTANTES INSTRUCCIONES DE DESEMBALAJE
natural_image
Exterior view of a transparent cylindrical device with a base and top component (no text or symbols visible)5
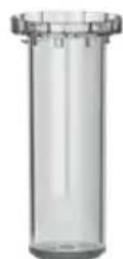
6a
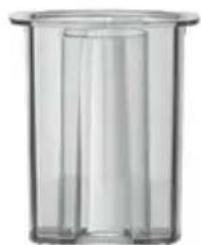
natural_image
Transparent cylindrical container with internal vertical structure (no text or symbols visible)●
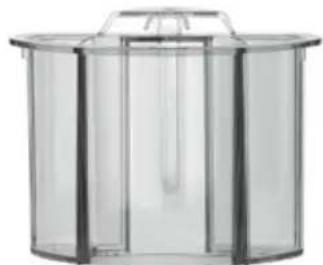
natural_image
Transparent cylindrical container with internal structure and lid (no text or symbols visible)●
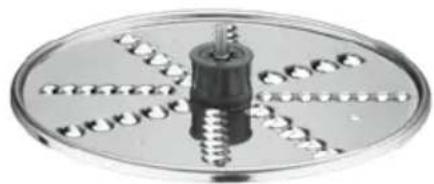
natural_image
Close-up of a metallic circular component with threaded screw and four evenly spaced holes (no text or symbols visible)8
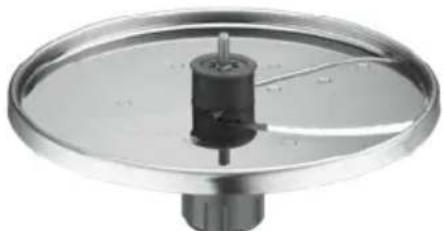
natural_image
Close-up of a metallic circular mechanical component with a central shaft and central hub (no visible text or symbols)7
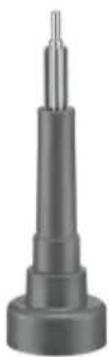
natural_image
Close-up of a cylindrical mechanical component with a pointed tip and stepped shaft (no visible text or symbols)9
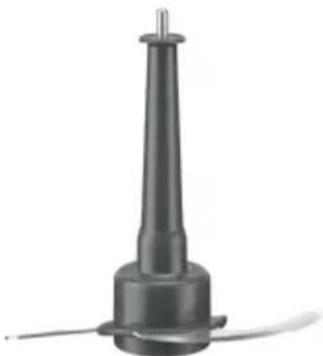
natural_image
Black cylindrical object with a pointed tip and base, possibly a sensor or antenna (no text or symbols visible)10
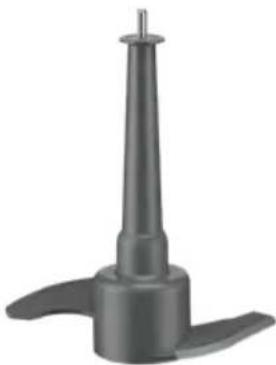
natural_image
3D rendering of a propeller or turbine component with three blades and a central conical tip (no text or symbols visible)11
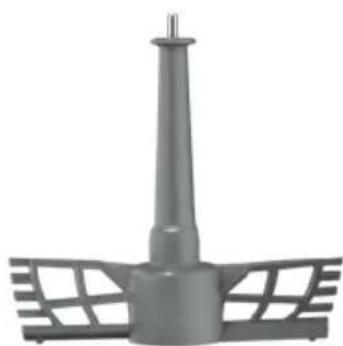
natural_image
3D rendering of a cylindrical industrial component with a conical top and two side slats (no text or symbols visible)12
natural_image
Interior view of a Cuisinart kitchen appliance with visible mechanical components and no text or symbols on the main body.13
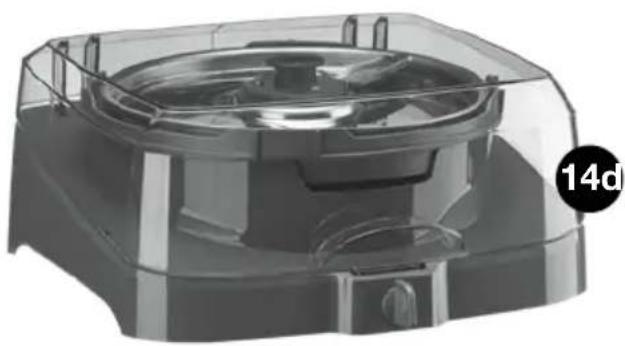
natural_image
3D rendering of a transparent plastic enclosure with internal components, labeled '14d' in the corner (no other text or symbols)14
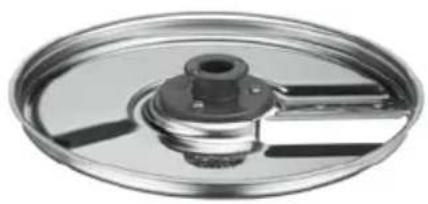
natural_image
Close-up of a metallic mechanical component with a central hub and three side ribs (no text or symbols visible)14a
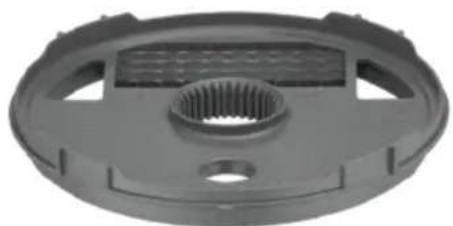
natural_image
Close-up of a mechanical component with a central threaded hole and flanges (no visible text or symbols)●
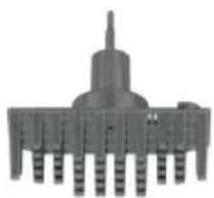
natural_image
Close-up of a mechanical component with multiple pins and a central shaft (no visible text or symbols)14c
natural_image
3D rendered image of a gray plastic mechanical component with a circular top and side flanges, featuring a central handle and a labeled section '15a' (no other text or symbols)15
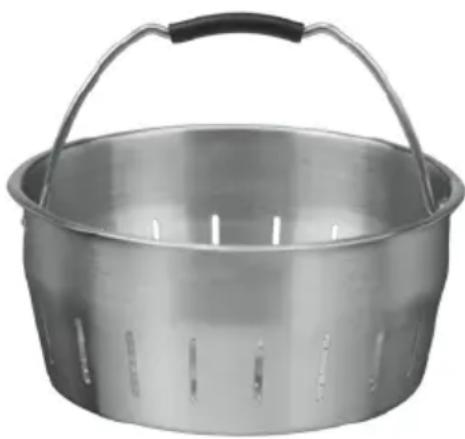
natural_image
Metallic empty grain basket with handle and side slots (no text or symbols visible)17
18. Embudo
natural_image
3D rendered image of a propeller or fan with a pointed tip and three blades (no text or symbols visible)16

natural_image
Gray funnel-shaped object with a flat top and narrow base (no text or symbols)18
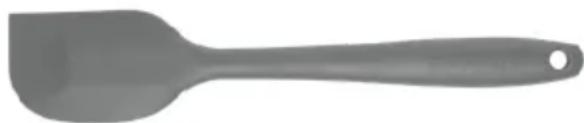
natural_image
Gray spatula with a smooth handle and circular end, isolated on white background (no text or symbols)19
CAJA DE ALMACENAJE
natural_image
Two views of a modern rice cooker with lid and side panel, showing internal components (no text or symbols visible)natural_image
Two-panel image showing a kitchen pot interior with a central bowl and a side view of the interior (no text or symbols visible)Ensamblaje de disco
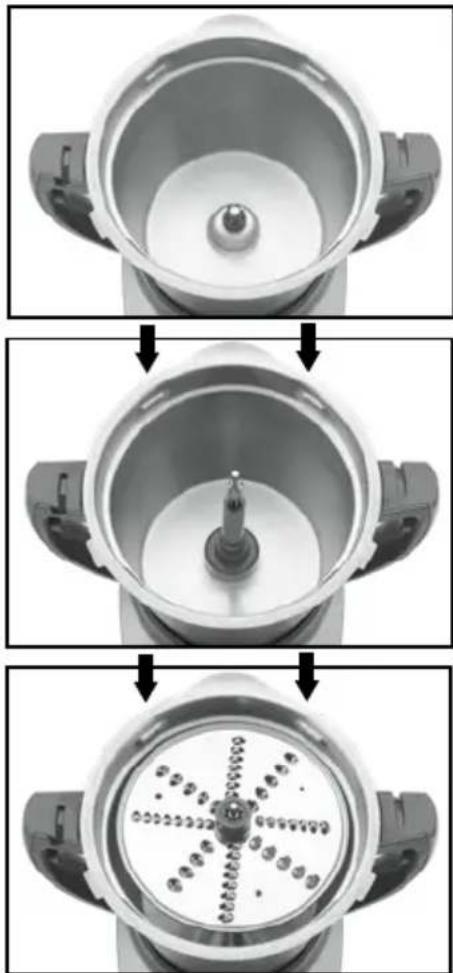
natural_image
Three-step diagram showing a mechanical component with a central pin inserted into a housing, no text or symbols present.natural_image
Close-up of a mechanical device with central dial and mounting brackets (no visible text or symbols)natural_image
Close-up of a mechanical component with circular dial and side brackets (no visible text or symbols)CÓMO ASEGURAR LA TAPA AL BOL
natural_image
Cross-sectional view of a mechanical component with labeled parts A and directional arrows (no text or symbols beyond labels)natural_image
Close-up of a mechanical assembly with labeled parts (B and C), showing components like a lid and housing (no text or symbols beyond labels)natural_image
Close-up of a stainless steel kitchen blender with two labeled parts (D) and directional arrows indicating rotation or movement (no text beyond labels)natural_image
Close-up of a vacuum cleaner's head and neck with directional arrows indicating rotation (no text or symbols)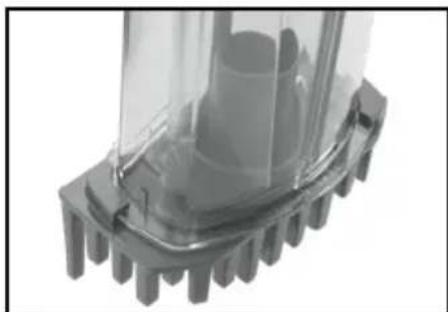
natural_image
Close-up of a mechanical component with textured base and central cylindrical feature (no visible text or symbols)natural_image
Close-up of a mechanical gear assembly with internal components and arrows indicating features (no text or symbols)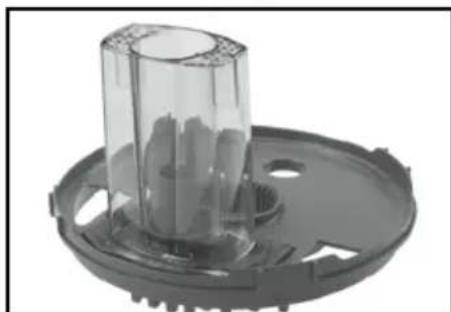
natural_image
Close-up of a plastic mechanical component with a cylindrical shaft and circular base (no text or symbols visible)GUÍA DE USO DEL KIT PARA CORTAR EN CUBOS
natural_image
Two views of a modern kitchen appliance, one showing a large lid and the other a side view with a front-mounted control panel (no text or symbols visible)natural_image
Close-up of a stainless steel cooking pot with lid and handle (no text or symbols visible)CÓMO ASEGURAR LA TAPA PARA COCINAR AL BOL
natural_image
Mechanical component with labeled parts A and directional arrows (no text or symbols beyond labels)natural_image
Close-up of a mechanical component with labeled parts (B and C), showing internal structure and mounting features (no text or symbols beyond labels)natural_image
3D rendering of a mechanical component with two circular ports labeled D, showing internal structure and rotation arrows (no text or symbols beyond labels)natural_image
Close-up of a gray kitchen blender with a funnel and lid (no text or symbols visible)natural_image
Close-up of a mechanical component with a central knob and circular base (no visible text or symbols)Más vapor
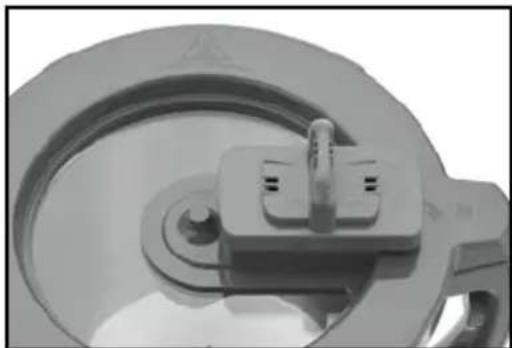
natural_image
Close-up of a mechanical component with a circular base and central mounting bracket (no visible text or symbols)FUNCIONES Y PROGRAMAS
East Windsor, NJ 08520
Impreso en China

- IMPORTANT UNPACKING INSTRUCTIONS
- CAUTION: THE CUTTING TOOLS HAVE VERY SHARP EDGES.
- IMPORTANT SAFEGUARDS
- Getting Ready
- Operation
- Cleaning
- General
- SAVE THESE INSTRUCTIONS
- CONTENTS
- IMPORTANT UNPACKING INSTRUCTIONS....2
- IMPORTANT SAFEGUARDS 3
- INTRODUCTION....6
- PREPPING....13
- COOKING 22
- USING RECIPES 27
- CLEANING, MAINTENANCE AND SUPPORT 36
- CHARTS AND GUIDES
- INTRODUCTION
- Introducing the Cuisinart® CompleteChef™ Cooking Food Processor
- A Brand-New Classic
- MAIN PARTS
- Stainless Steel Work Bowl
- Motor Housing Base
- ON/OFF Switch
- USB Port with Cover
- FOOD PROCESSOR PARTS AND ACCESSORIES
- Food Processor Lid
- 3-Part Pusher Assembly
- Adjustable Slicing Disc
- Reversible Shredding Disc
- Stem Adapter
- Metal Chopping Blade
- Dough Blade
- Whisk
- Accessory Storage Case
- Dicing Kit
- COOKING PARTS AND ACCESSORIES
- Cooking Lid
- a. Steam Cap
- Stirring Paddle
- Steam Basket
- Funnel
- Spatula
- ACCESSORY STORAGE CASE
- Operating the Lock
- Inserting Accessories
- DICING KIT STORAGE CASE
- Removing Parts
- CONTROL PANEL
- Screen and Controls
- GETTING STARTED/SETUP
- ADJUSTING SETTINGS
- Settings
- Language
- Brightness
- Sound
- Temperature
- PREPPING
- FOOD PROCESSOR ASSEMBLY
- Assembling Dicer in the Work Bowl
- SECURING THE FOOD PROCESSOR LID TO THE WORK BOWL
- FOOD PROCESSOR MANUAL CONTROLS
- HIGH and LOW Speed Buttons
- PULSE Button
- FOOD PROCESSOR FUNCTIONS AND PRESETS
- Chop/Blend
- Slice
- Shred
- Dice
- Purée
- Dough
- Whisk
- START PREPPING
- USING THE METAL CHOPPING BLADE
- NOTE: Handle with care. Always check to be sure the blade is securely locked.
- Chop/Blend (using the Metal Chopping Blade)
- Purée (using the Metal Chopping Blade)
- USING THE ADJUSTABLE SLICING DISC
- Slice (using the Adjustable Slicing Disc)
- NOTE: Always use the Pusher when slicing. Never put your fingers in the Feed Tube while unit is running.
- USING THE REVERSIBLE SHREDDING DISC
- Shred (using the Reversible Shredding Disc)
- USING THE DOUGH BLADE
- Dough (using the Dough Blade or Metal Chopping Blade)
- USING THE WHISK
- USING DICING KIT
- Cleaning Dicing Grid
- Do not use your fingers to clean the grid. ONLY USE THE CLEANING TOOL.
- SETTING TIME & SPEED
- COOKING
- COOK ASSEMBLY
- SECURING COOKING LID TO WORK BOWL
- COOKING FUNCTIONS AND PRESETS
- Custom
- Sauce/Soup
- Slow Cook
- Sauté
- Simmer
- Steam
- Risotto
- Keep Warm & Stir
- SETTING TIME, TEMPERATURE, AND SPEED
- START COOKING
- SPEED
- For each cooking step, select speed.
- ADDITIONAL COOKING TIPS
- Only the Cooking Lid should be used when cooking or using a cooking function.
- COOKING GRAINS
- White rice
- Brown rice
- Quinoa
- COOKING PASTA
- COOKING DRIED BEANS
- TOASTING NUTS
- USING RECIPES
- ALLRECIPES
- CATEGORIES
- FAVORITES
- RECENTLY VIEWED
- START USING RECIPES
- IMPORTANT RECIPE TIPS
- RECIPE LISTS
- CLEANING, MAINTENANCE AND SUPPORT
- CLEANING, STORAGE AND MAINTENANCE
- FOR YOUR SAFETY
- TECHNICAL DATA
- TROUBLESHOOTING
- Food Processing
- Solution:
- Dicing Kit
- Dough Kneading
- Technical
- WARRANTY
- Limited Three-Year Warranty (U.S. and Canada only)
- CALIFORNIA RESIDENTS ONLY
- HASSLE-FREE REPLACEMENT WARRANTY
- Cuisinart® MANUAL DE INSTRUCCIONES
- IMPORTANTES INSTRUCCIONES DE DESEMBALAJE
- Embudo
- CAJA DE ALMACENAJE
- CÓMO ASEGURAR LA TAPA AL BOL
- CÓMO ASEGURAR LA TAPA PARA COCINAR AL BOL
- FUNCIONES Y PROGRAMAS
Brand : CUISINART
Model : CompleteChef FPC-100
Category : Food processor