
HIF1975BT - Turntable Reflexion - Free user manual and instructions
Find the device manual for free HIF1975BT Reflexion in PDF.


| Product Type | Bluetooth Turntable with Cassette and FM Radio |
| Brand | Reflexion |
| Model | HIF1975BT |
| Power Supply | AC 230V ~ 50Hz |
| Power Consumption | 13W |
| Dimensions (L x W x H) | 56.5 x 35.6 x 15.3 cm |
| Weight | 5.4 kg |
| Turntable Speeds | 33⅓, 45, 78 RPM |
| Bluetooth Version | V5.0 |
| Bluetooth Range | Up to 10 meters (line of sight) |
| FM Frequency Range | 87.5 - 108 MHz |
| Max Music Power | 2 x 24W |
| Headphone Jack | 3.5mm, 32 Ohm |
| Audio Outputs | AUX IN (3.5mm), LINE OUT (RCA) |
| Cassette Player | Yes, with recording function |
| Included Accessories | Power cord, user manual, 45 RPM adapter |
| Operating Temperature | 5°C to 35°C |
Frequently Asked Questions - HIF1975BT Reflexion
User questions about HIF1975BT Reflexion
0 question about this device. Answer the ones you know or ask your own.
Ask a new question about this device
Download the instructions for your Turntable in PDF format for free! Find your manual HIF1975BT - Reflexion and take your electronic device back in hand. On this page are published all the documents necessary for the use of your device. HIF1975BT by Reflexion.
USER MANUAL HIF1975BT Reflexion
natural_image
Vintage digital vinyl record with open lid and wooden base (no visible text or symbols)natural_image
Technical diagram of a mechanical component with concentric circles and radial lines (no text or symbols)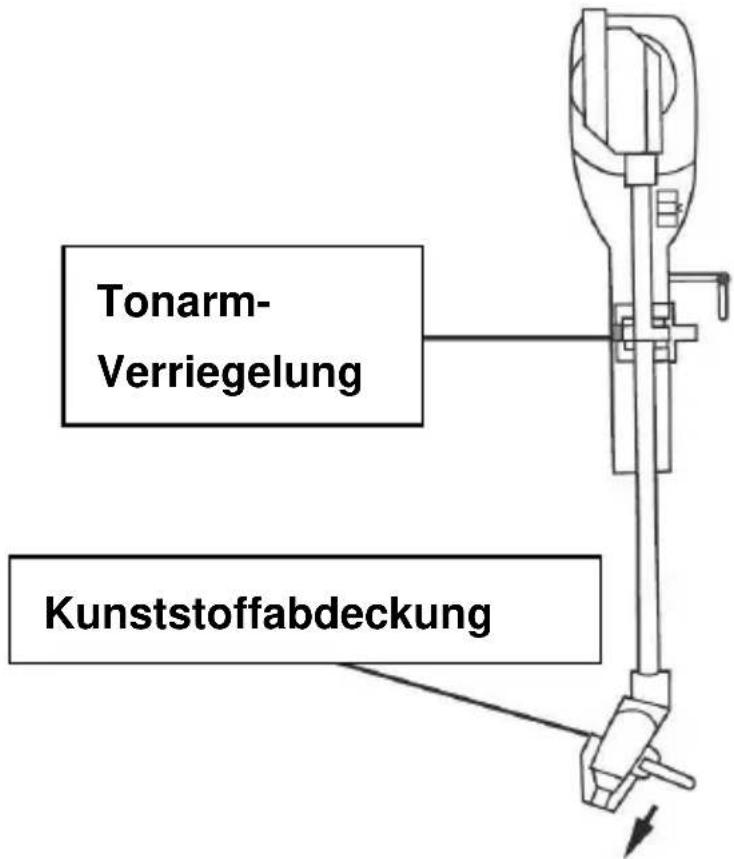
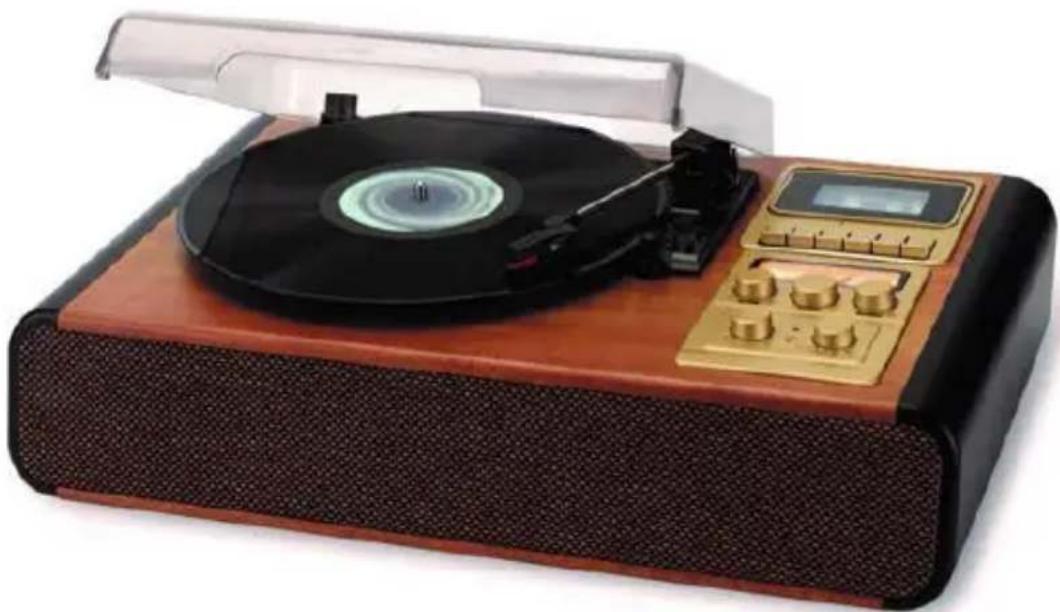
Bluetooth-Turntable in wooden case with
Bluetooth, Cassette, AUX IN and FM
Model No.: HIF1975BT
natural_image
Vintage wooden and brown portable vinyl record with open lid and control knobs (no visible text or symbols)Read the operating instructions carefully before using the device for the first time and keep the instructions for future reference.

The exclamation mark in a triangle draws the user's attention to important operating and maintenance instructions (service) in this manual that must be followed.
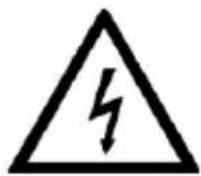
The lightning bolt symbol in the triangle alerts the user to "dangerous voltages" on some components inside the device.
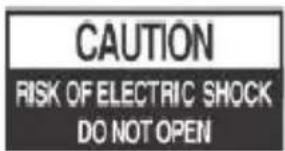
To avoid the risk of electric shock, do not open the housing under any circumstances. There are no user-serviceable parts inside. Repairs may only be carried out by an authorized specialist workshop.
AC230V





This device is designed for AC 230V mains voltage. If higher voltages are used, the device may malfunction.
Do not expose the device to moisture or rain.
Do not switch on the system until you have carefully checked all connections.
Set up the device so that there is always an undisturbed Fresh air supply is ensured. Never place the device on carpets or near curtains, and do not build it into bookshelves.
Do not expose the device to direct sunlight or Sources of heat.
READ ALL INSTRUCTIONS CAREFULLY BEFORE USE
1) Read these operating instructions carefully before using the device for the first time.
2) Keep these operating instructions in a safe place for future reference.
3) The device should not be exposed to dripping or splashing and no objects filled with liquids, such as vases, should be placed on the device. Use only in dry regions.
4) Do not place open flames such as candles on the device and keep the device away from open flames.
5) Children should be supervised to ensure that they do not play with the device.
6) Make sure that the device is only connected to an AC 230V voltage source. If higher voltages are used, the device may malfunction.
7) Only use accessories and spare parts that have been approved by the manufacturer.
8) Install the device according to the manufacturer's instructions.
9) Only set up the device in adequately ventilated areas. Place the device on a flat and stable surface.
10) Do not expose to temperatures above 35^ C. At the installation site, make sure that 30 cm to the rear and the top of the device and 5 cm from each side are adhered to.
11) Always make sure that the device is unplugged from the socket before transport or cleaning. Only clean it with a dry cloth.
12) In the event of a thunderstorm or if the device is not used for a long period of time, disconnect the device from the power supply.
13) This device has no user-serviceable parts. Do not try to repair this device yourself. Only qualified service personnel are allowed to perform maintenance. If the device is defective, report it to your dealer.
14) Never leave the device unattended and be careful that nothing is pushed into the housing of the device through holes, slots or any other openings. This can result in a fatal electric shock.
15) Do not place the device near televisions, speakers, or other objects that generate strong magnetic fields.
- Carefully remove the device from the box and remove all packaging material from the device.
- Unwind the power cord.
- Place the device on a stable, level surface.
- Connect the device to your home socket using the included power supply.
- Open the lid of the turntable.
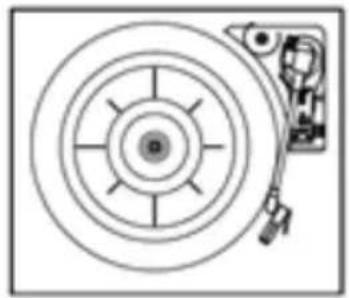
- Remove all transport locks (adhesive strips, etc.).
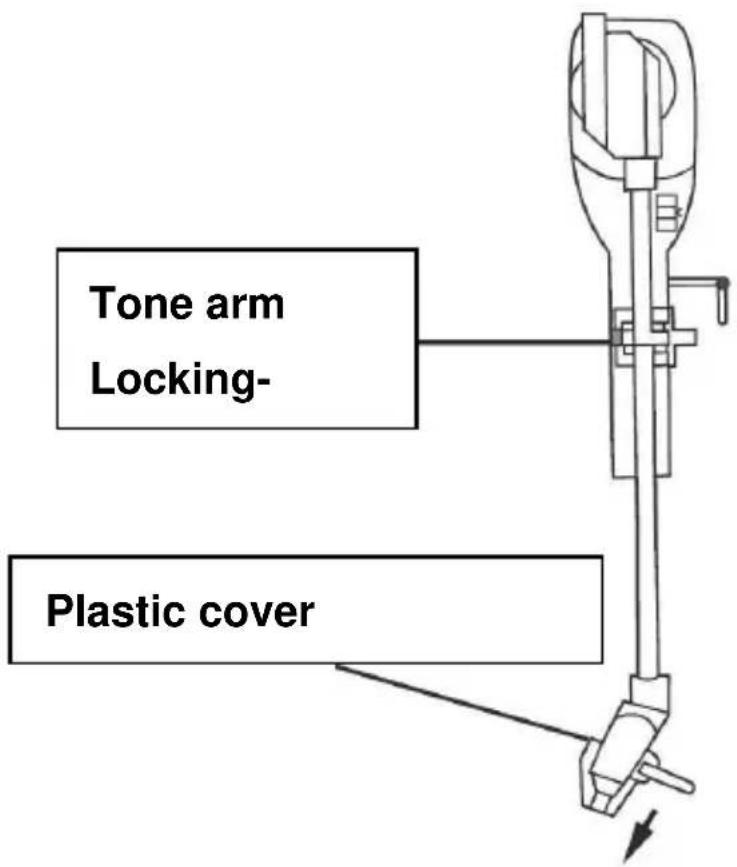
- Remove the white plastic cover from the clay needle by pulling it in the direction of the arrow.
- Remove the cable tie from the tonearm.
natural_image
Technical line drawing of a mechanical component with concentric circles and radial slots (no text or symbols)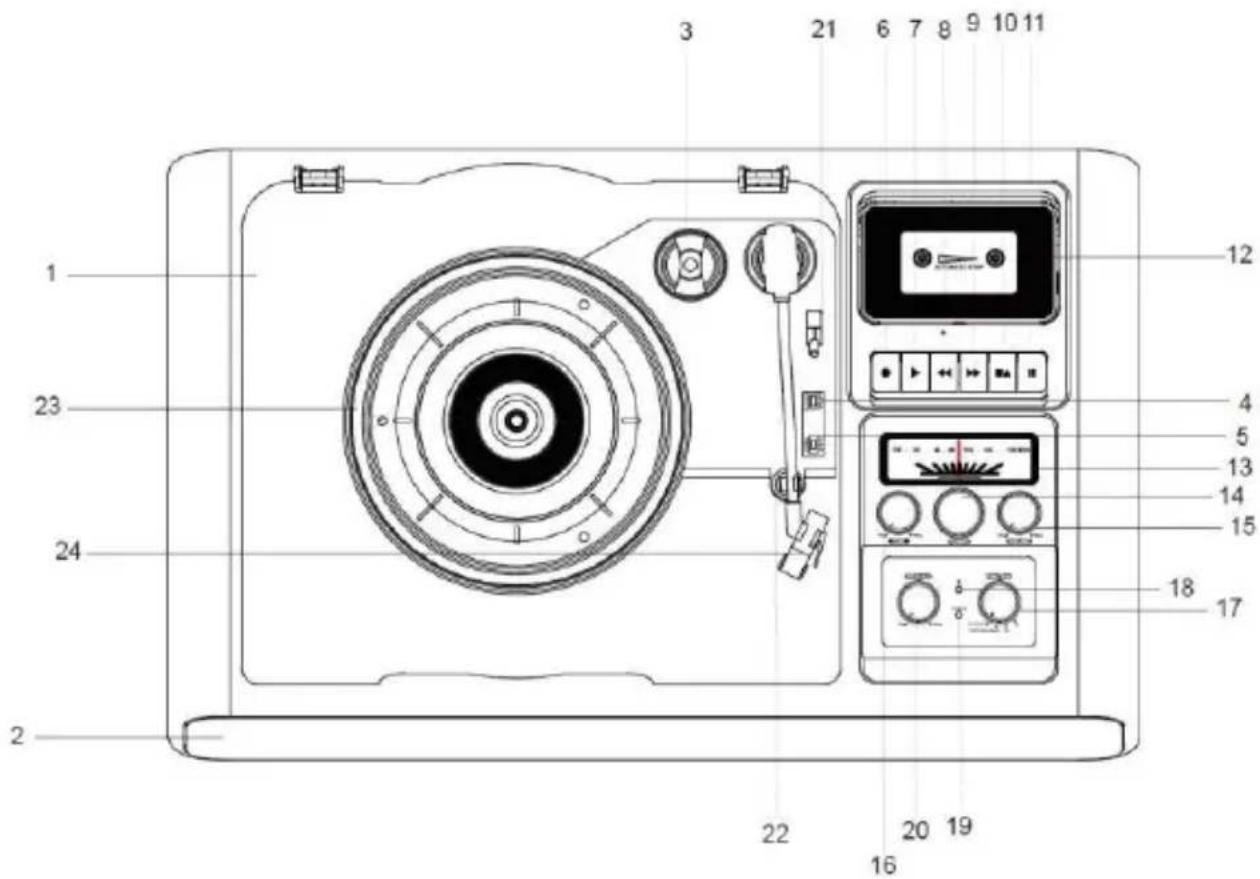
- Dust Cover: Cover for the turntable.
- Speaker: Loudspeakers for music output.
- 45 RPM adapter: Adapter for 45 turntables
- Auto Stop Switch: Auto-Stop (On / Off).
- Speed selector: 33 / 45 / 78 U/min.
- Record button (Cassette): Start cassette recording.
- Play button (Cassette): Start cassette playback.
- Rewind button (Cassette): Rewind the cassette..
- Fast Forward button (Cassette): Fast forward the cassette.
- Stop/Eject button (Cassette): Stop cassette playback / open cassette drive.
- Pause button (Cassette): Pause cassette playback.
- Cassette Compartment: Insert the cassette.
- Radio Tuning Dial & Dial Pointer: Displays the selected radio frequency.
- Tuning Knob: Set the radio frequency.
- Volume Control: Adjust the volume.
- Tone Control: Adjust the Tone.
- Function selector: Set the playback mode.
- Bluetooth Indicator: Displays the current Bluetooth status.
- Power Indicator: Displays the Power status.
- Pitch Adjust Control: Fine adjustment of the speed of the turntable playback.
- Tone Arm Lift Lever: Raise and lower the tone Arm.
- Ton-Arm-Holder: Tray for the tone Arm when not playing.
- Turntable: Turntable for the vinyl.
- Ton-Arm: Tone Arm for the vinyl playback.
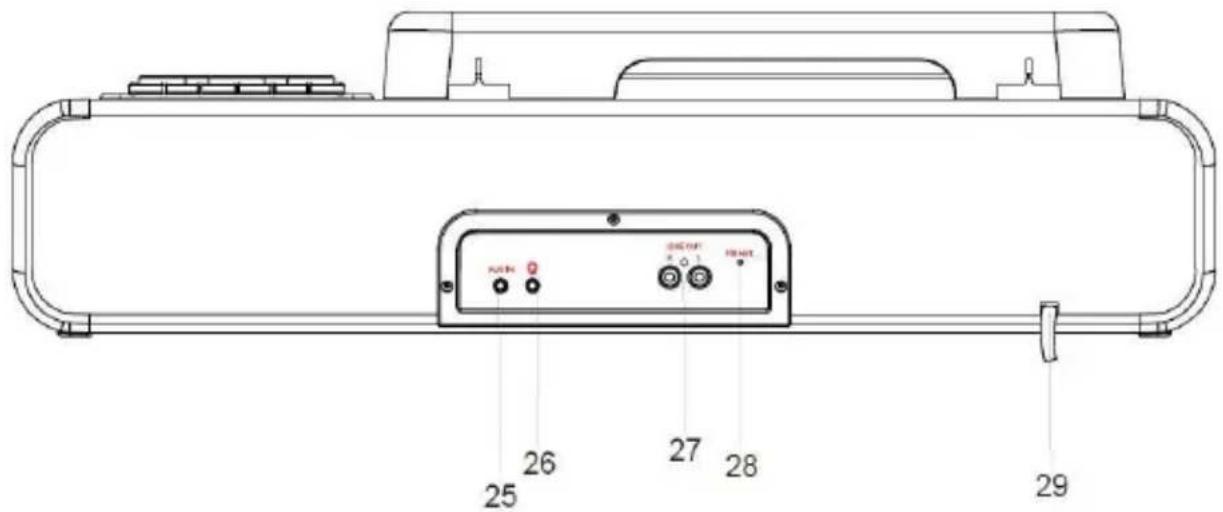
- AUX-IN: 3,5mm AUX IN socket.
- Headphone Jack: 3,5mm Headphone output.
- LINE OUT: Cinch output for audio output to another device.
- FM Wire Antenna: Wire antenna for FM reception.
- AC Power Cord: AC power for the power supply.
POWER SUPPLY
Connect the power cable to your household socket. The device may only be connected to an AC 230V power source.
Turn on a device:
- Turn the [FUNCTION] control to switch on the device and select an operating mode.
- If the device is switched on, the [POWER] LED lights up red.
Switching off the device:
- Turn the [FUNCTION] control to the "Off" position to switch the device off.
- If the device is switched off, the power LED does not light up.
Note:
- The device automatically switches to standby mode after approx. 15 minutes if there is no playback in Phono Mode, AUX-IN Mode and Bluetooth mode.
- To switch the device on again. Turn the function knob to the OFF position. Then turn the function knob to the desired mode to switch the device on again.
ADJUSTING THE VOLUME
- To change the volume, turn the [VOLUME] control until the desired volume is reached.
SETTING THE FUNCTIONAL MODE
- To select the function mode, turn the [FUNCTION] control to the desired function mode.
- The following function modes are available.
- TAPE (OFF):
Cassette mode
- TURNTABLE / AUX
Turntable / AUX-IN mode
• FM:
FM mode
• BT:
Bluetooth mode
TAPE MODE
- Turn the control [FUNCTION] to "TAPE" to switch to tape mode.
- Press the [EJECT] button to open the "Cassette Drive".
- Insert a cassette into the drive and close the "cassette drive".
- Start playback with the [PLAY] button.
- Use the following buttons to control playback:
| Record: | • |
| Play: | ▶ |
| Rewind: | ◀◀ |
| Fast forward: | ▶▶ |
| Stop playback / Eject: | ■/▲_ |
| Pause: | || |
Record Cassette:
- Open the "Cassette Drive" and insert an empty cassette.
- Select the desired playback mode (example: FM / UKW).
- Press the Record button to start recording.
- To end the recording, press the Stop button.
PHONO MODE
- Turn the control [FUNCTION] to "TURNTABLE" to switch to the turntable mode.
- Select the playback speed based on your record with the [speed control] (33/45/78 rpm).
- Place the vinyl on the turntable.
- Raise the [Tonearm] with the [Tonearm Lifter].
- Move the tonearm over the vinyl.
- The turntable starts rotating.
- Lower the tonearm with the [Tonearm Lifter].
- Playback starts.
Autostop
- On: The turntable will stop automatically when playback reaches the end point.
• Off: The turntable does not stop automatically.
Note:
- Before playing, check that all transport stickers have been removed and that the protective cap has been removed from the sound needle.
- The tonearm does not automatically return to the zero position after playback.
AUX-IN MODE
Connect an external device to the HIF1975BT to play the music of the external device via the HIF1975BT.
- Turn the control [FUNCTION] to "AUX IN" to switch to the AUX IN mode.
- Connect a 3.5mm audio cable (not included) to the "AUX IN" connection. Connect the other end of the audio cable to your external device.
- Start playback on your external device to play the music on the HIF1975BT device.
- You can control playback with your external device.
FM MODE
- Turn the control [FUNCTION] to "FM" to switch to FM mode.
- Turn the [TUNING] control to tune the FM frequency to the desired radio station.
Note:
- Lay out the wire antenna completely for the best reception.
BLUETOOTH MODE
Pair an external Bluetooth device with the HIF1975BT to play the music from the external device via the HIF1975BT.
- Turn the control [FUNCTION] to "BT" to switch to the Bluetooth mode.
- The "Bluetooth LED" shows whether a device is connected.
"Bluetooth LED" flashes blue: It is not connected to any device. "Bluetooth LED" lights up blue: Is connected to a device.
- When the "Bluetooth LED" flashes, open the Bluetooth function on your external Bluetooth device and start the Bluetooth search.
- Select "HIF1975BT" from the device list of the Bluetooth devices found.
- The "Bluetooth LED" now lights up blue and a signal tone sounds. The devices are now connected.
- You control the music playback with the external Bluetooth device.
Note:
- Bluetooth works best within 10 meters outdoors.
- The device automatically connects to the last connected device.
- The basic volume is specified by your external device. You can adjust the volume with the volume control on the device.
- Only Bluetooth signals can be received with the device.
Connect the HIF1975BT device to an external device using a cinch cable to play the music on the external device.
- Connect a cinch cable to the [LINE OUT] output on the rear of the device.
- Connect the other end of the cable to your external device.
- Select the appropriate input on your external device.
- Start the desired playback on the HIF1975BT.
- The playback will now be output on the external device.
Note:
- Only connect to active external devices with their own signal processing.
- Passive loudspeakers without their own power supply and signal processing are not supported.
HEADPHONE FUNCTION
- Connect a 3.5mm headphone to the headphone socket on the back of the device.
- As soon as the headphones are plugged into the socket, the integrated loudspeakers of the device switch off.
- Pull the headphones out of the headphone socket to play the music again through the integrated speakers of the device.
Note:
- When listening to music with headphones, keep the volume level balanced. Listening to music too loudly can damage your hearing.
- If headphones are connected to the device, music is played only through the headphones.
Technical specifications
General
| Power supply | AC 230V ~ 50Hz |
| Power consumption | 13W |
| Dimensions (L / W / H) | L56.5 x W35.6 x H15.3cm |
| Weight device | 5.4kg |
| Operating temperature | 5 °C - + 35 °C |
| Turntable | 33/45/78 rpm. |
| Headphone jack | 3.5mm / 32Ohm |
| Max. Music power | 2x 24W |
| FM | 87.5 - 108Mhz |
| Bluetooth version | V5.0 |
| Transmission range | 10 meters (line of sight) |
| Compatible Bluetooth profiles | A2DP / Android / IOS |
| Bluetooth transmission power | + 3dBm |
| Bluetooth frequency | 2.402 - 2.480 GHz |
| Accessories: | |
| HIF1975BT | 1x |
| Operating instructions | 1 x |
All statements without guarantee. Design and specification are subject to change without notice.
DISPOSAL INSTRUCTIONS
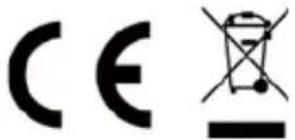
This symbol on the product or in the instructions means that the device and electrical and electronic parts must be disposed of separately from your household waste at the end of its service life. There are separate collection systems for recycling in the EU.
For more information, please contact the local authority or the dealer where you purchased the product.
Simplified EU declaration of conformity
Hereby, UltraMedia GmbH & Co. Handels KG declares that the radio equipment type HIF1975BT is in compliance with Directive 2014/53 / EU.
The full text of the EU Declaration of Conformity can be requested at the following email address.
info@ultramedia.de
We hope you enjoy using the device.
Your UltraMedia Team

Warranty
Dear Customer,
Thank you for choosing one of our products. Our products undergo precise quality control during production. If one of our devices gives you cause for complaint or you have questions about one of our devices, please call our customer support.
We give a warranty of 24 months on this device from the date of purchase.
Outside of the warranty, we offer you a repair that is subject to a charge and a cost estimate. Please contact our customer support before submitting.
Please understand that the warranty can only be taken into account for devices that we receive within the warranty period.
The warranty relates to material and production defects. Your device will be repaired or replaced during the warranty. A reimbursement of the purchase amount by the company UltraMedia is unfortunately not possible. Damage caused by improper use, the use of third-party accessories, fall, dust, water damage and wear and tear (e.g. scratches, optical wear and tear) caused by the customer or external influences are excluded from the warranty.
In order to assert the warranty claims, send the device with all accessories, a copy of the invoice and the description of the error to the address below. Unfortunately, no guarantee can be taken into account for devices that do not have a proof of guarantee. Please do not forget to specify for any questions your full address, a phone number / email address.
Shipping to us takes place at your own expense. Parcels that are not prepaid cannot be accepted and are returned to the sender.
Please pack the device sufficiently for transport. UltraMedia assumes no liability for transport damage that occurs on the way to us. After receiving your submission, we will process your device as quickly as possible and send it back to you.
Please contact our customer support or your specialist dealer before sending in your device, as many problems can also be solved by telephone.

- Bluetooth-Turntable in wooden case with
- POWER SUPPLY
- Turn on a device:
- Switching off the device:
- Note:
- ADJUSTING THE VOLUME
- SETTING THE FUNCTIONAL MODE
- TAPE MODE
- Record Cassette:
- PHONO MODE
- Autostop
- AUX-IN MODE
- FM MODE
- BLUETOOTH MODE
- HEADPHONE FUNCTION
- Technical specifications
- DISPOSAL INSTRUCTIONS
- Simplified EU declaration of conformity
- Warranty
Brand : Reflexion
Model : HIF1975BT
Category : Turntable