
KD-X80BT - Bluetooth Car Stereo JVC - Free user manual and instructions
Find the device manual for free KD-X80BT JVC in PDF.
Download the instructions for your Bluetooth Car Stereo in PDF format for free! Find your manual KD-X80BT - JVC and take your electronic device back in hand. On this page are published all the documents necessary for the use of your device. KD-X80BT by JVC.
USER MANUAL KD-X80BT JVC
Refer to page of How to reset your unit Still having trouble?? USA ONLY Call 1-800-252-5722 FRANÇAIS Having TROUBLE with operation? Please reset your unit ESPAÑOL http://www.jvc.com We can help you!
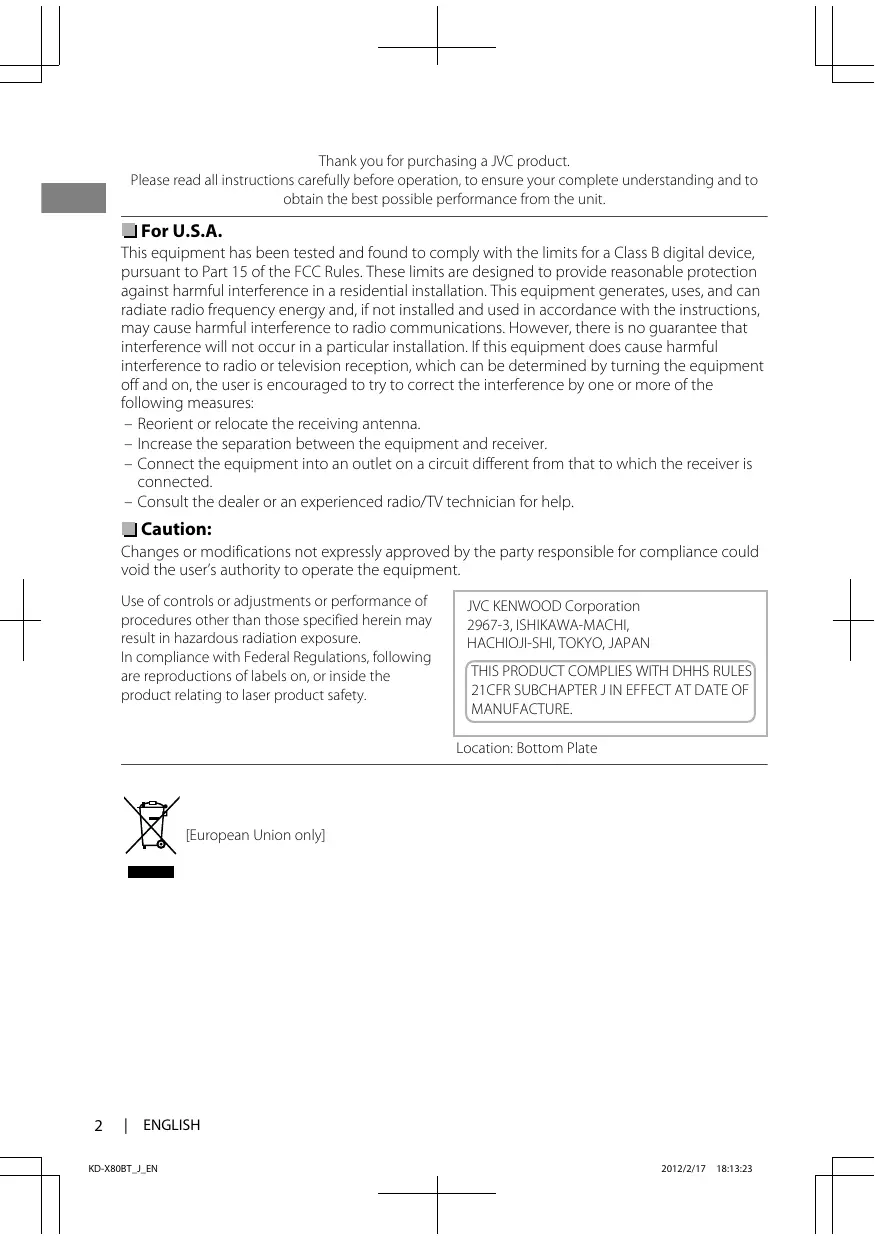
K EN, SP, FR © 2012 JVC KENWOOD Corporation 0312DTSSANJEIN For Customer Use: Enter below the Model No. and Serial No. which are located on the top or bottom of the cabinet. Retain this information for future reference. Model No. Serial No. GET0804001A [J] 2/24/2012 4:55:34 PM Thank you for purchasing a JVC product. Please read all instructions carefully before operation, to ensure your complete understanding and to obtain the best possible performance from the unit. For U.S.A. This equipment has been tested and found to comply with the limits for a Class B digital device, pursuant to Part 15 of the FCC Rules. These limits are designed to provide reasonable protection against harmful interference in a residential installation. This equipment generates, uses, and can radiate radio frequency energy and, if not installed and used in accordance with the instructions, may cause harmful interference to radio communications. However, there is no guarantee that interference will not occur in a particular installation. If this equipment does cause harmful interference to radio or television reception, which can be determined by turning the equipment off and on, the user is encouraged to try to correct the interference by one or more of the following measures: – Reorient or relocate the receiving antenna. – Increase the separation between the equipment and receiver. – Connect the equipment into an outlet on a circuit different from that to which the receiver is connected. – Consult the dealer or an experienced radio/TV technician for help. Caution: Changes or modifications not expressly approved by the party responsible for compliance could void the user’s authority to operate the equipment. Use of controls or adjustments or performance of procedures other than those specified herein may result in hazardous radiation exposure. In compliance with Federal Regulations, following are reproductions of labels on, or inside the product relating to laser product safety. JVC KENWOOD Corporation 2967-3, ISHIKAWA-MACHI,
HACHIOJI-SHI, TOKYO, JAPAN
THIS PRODUCT COMPLIES WITH DHHS RULES
21CFR SUBCHAPTER J IN EFFECT AT DATE OF MANUFACTURE. Location: Bottom Plate [European Union only]
|ޓENGLISH KD-X80BT_J_EN 2012/2/17ޓ18:13:23
Warning:
Stop the car before operating the unit. Caution: Adjust the volume so that you can hear sounds outside the car. Driving with the volume too high may cause an accident. Avoid using the USB device or iPod/iPhone if it might hinder driving safety. Caution on volume setting: Digital devices (USB) produce very little noise compared with other sources. Lower the volume before playing these digital sources to avoid damaging the speakers by the sudden increase of the output level. Temperature inside the car: If you have parked the car for a long time in hot or cold weather, wait until the temperature in the car becomes normal before operating the unit. appears on the display and animation/text scroll will be stopped to prevent the display from being blurred when the temperature falls below 0°C. Once operating temperature is normalised, these functions will start working again. Maintenance Cleaning the unit Wipe off the dirt on the panel with a dry silicon or soft cloth. Failure to observe this precaution may result in damage to the unit. Cleaning the connector Wipe off dirt on the connector of the unit and panel. Use a cotton swab or cloth. How to read this manual:
This manual mainly explains operations using the buttons on the control panel. < > indicates the displays on the control panel. [XX] indicates the initial setting of a menu item. ENGLISH |ޓ3 KD-X80BT_J_EN 2012/2/17ޓ18:13:23 How to reset your unit How to attach the control panel Your preset adjustments will also be erased. How to detach the control panel Avoid touching the connectors. Preparation Canceling the display demonstration The display demonstration is always turned on unless you cancel it.
DEMO (Hold) DEMO Clock Color 3 Select <Set Clock>.
Clock Clock Display PUSH Set Clock 24/12H Off Set Clock
Clock Clock 4 Adjust the hour. 4 Press MENU to exit. DEMO 2 Select <Clock>. DEMO PUSH SET UP PUSH PUSH (Initial setting) 3 Select <Off>.
Clock DEMO Off PUSH Setting the clock 1 : 00AM PUSH (Initial setting) 5 Adjust the minute. Set Clock 1 : 00AM PUSH 6 Select <24H/12H>. Clock Set Clock PUSH 24/12H Clock Adjust 7 Select <24Hours> or <12Hours>. 8 Press MENU to exit.
|ޓENGLISH KD-X80BT_J_EN 2012/2/17ޓ18:13:23 Basic operations Basic operations Control panel Remote controller Display window Flips down the panel Remote sensor Aim the remote controller directly at the sensor. DO NOT expose to bright sunlight. Control dial When you press or hold the following button(s)... Control panel Remote controller General function SOURCE Turns on. Turns off. (Hold) Press the /SOURCE button on the control panel and turn the control dial within 2 seconds to select the source. Press repeatedly to select the source. Adjusts the volume level. Control dial (press)
Selects items. Mutes the sound or pauses playback. Press the button again to cancel muting or resume playback. Confirms selection. Selects the preset sound mode. (' page 23) Enters “Hands-Free” menu (' page 18), or answers incoming call when the unit rings. Ends a call. (Hold) Returns to the previous menu.
Selects a preset station (' page 7)/category (' page 10). Searches for HD Radio stations only. (Hold) Searches for HD Radio multicast channels. Selects MP3/WMA/WAV folder. (' page 11) Searches for a station automatically. (' page 6) Searches for a station manually. (Hold) Selects track (' page 11, 12, 21)/Satellite Radio channel. Fast-forwards or reverses track. / Changes Satellite Radio channel rapidly. (Hold) ENGLISH |ޓ5 KD-X80BT_J_EN 2012/2/17ޓ18:13:23 Basic operations Display information Changes the display information. (Press) Scrolls the current display information. (Hold) Source Radio HD Radio Satellite Radio USB/Bluetooth Audio iPod/iPhone (Headunit Mode/iPod Mode) iPod/iPhone (Application Mode) Pandora姞 internet radio External Components
Display (Normal display pattern)*1 Non-Radio Broadcast Data System station: Frequency FM Radio Broadcast Data System station: Programme type (PTY)/Frequency/Station name (PS) Track title*2/Album title*2/Frequency Category name/Channel name/Track title Track title/Album title/Artist Application Mode Station name/Album title/Track title Ext Input or Aux In Display information varies for large font and large clock display patterns. “No Text” appears when no text is received. Radio Searching for a station B A Select <FM> or <AM>. Auto search. (Press) Manual search. (Hold) “M” appears, then press the button repeatedly. “ST” lights up when receiving an FM stereo broadcast with sufficient signal strength. Storing stations in memory Manual presetting 2 Select preset number. You can preset up to 18 stations for FM and 6 stations for AM. While listening to a station...
The preset number flashes. (Hold) “Preset Mode” screen appears.
|ޓENGLISH KD-X80BT_J_EN 2012/2/17ޓ18:13:23 Radio Auto presetting (FM) SSM (Strong-station Sequential Memory) You can preset up to 18 stations for FM. If an HD Radio tuner box is connected, you can also preset up to 6 stations for AM.
4 Set the activation time.. 5 Press MENU to exit.
-<Tuner> -<SSM> -<SSM 01 – 06> “SSM” appears. When all the stations are stored, “SSM” disappears. To preset <SSM 07 – 12>/<SSM 13 – 18>, repeat steps 1 and 2.
lights up after the Radio Timer has been set. Only one timer can be set. Setting a new timer will override the previous setting. The Radio Timer will not activate if the unit is turned off or if <AM> is set to <Hide> after selecting an AM station for the timer. (' page 26) Searching for your favorite Programs—Program Type (PTY) Search Selecting a preset station This feature is only available for FM Radio Broadcast Data System stations.
You can also select a preset station using / . (Hold) 2 Select a PTY code. Setting the Radio Timer You can tune in to a preset station at a specific time regardless of the current source.
[Off] 3 Select the preset station. .PTY Search starts. If there is a station broadcasting a program of the same PTY code as you have selected, that station is tuned in. PTY codes News, Inform (Information), Sports, Talk, Rock, Cls Rock (Classic Rock), Adlt Hit (Adult Hits), Soft Rck (Soft Rock), Top 40, Country, Oldies, Soft, Nostalga (Nostalgia), Jazz, Classicl (Classical), R & B (Rhythm and Blues), Soft R & B (Soft Rhythm and Blues), Language, Rel Musc (Religious Music), Rel Talk (Religious Talk), Persnlty (Personality), Public, College, Habl Esp (Spanish Talk), Musc Esp (Spanish Music), Hip Hop, Weather -<FM>/<AM> -<1> ... <18> for FM/ <1> ... <6> for AM ENGLISH |ޓ7 KD-X80BT_J_EN 2012/2/17ޓ18:13:23 HD Radio™ tuner control This unit can control the JVC KT-HD300 HD Radio tuner box (separately purchased). Refer to the KT-HD300 instruction manual for installation and connection details. HD Radio tuners can also tune in to conventional analog broadcasts. Many HD Radio stations offer more than one channel of programming. This service is called multicasting. To find HD Radio stations in your area, visit <http://www.hdradio.com/>. Searching for a station B A HD Radio station Select <FM> or <AM>. Auto search. (Press) Manual search. (Hold) “M” appears, then press the button repeatedly. HD Radio multicast channel First four letters of Call Sign Call Sign HD Radio Searching for HD Radio stations only HD Radio (Hold) “HD” flashes when a station is tuned in, and searching stops. Selecting an HD Radio multicast channel Changing HD Radio reception mode While receiving an HD Radio broadcast, you can change the reception mode—digital or analog. This setting does not take effect for the conventional FM/AM stations.
When receiving HD Radio multicast channels... Select your desired channel (HD1 to HD8). [Auto] “Linking” appears while linking to a multicast channel. -<Tuner> -<Blend Hold> -<Auto>/<Analog>/ <Digital> Switches between digital and analog audio automatically. “HD” flashes if the radio station forces only analog reception. Analog Tunes to analog audio only. “ANA” lights up. Digital Tunes to digital audio only. “DIGI” lights up. The setting automatically returns to <Auto> when you tune in to another broadcast. For storing stations in memory and selecting a preset station, ' page 6.
|ޓENGLISH KD-X80BT_J_EN 2012/2/17ޓ18:13:23 Satellite Radio tuner control Before operating, connect either one of the following systems (not supplied) to the expansion port on the rear of this unit. Refer to the “Installation/Connection Manual” for details. SIRIUS Satellite Radio XM Satellite Radio
JVC KS-SRA100 (SIRIUS Satellite Radio interface) and SCC1 (SiriusConnect Vehicle Tuner) or SCVDOC1 (SiriusConnect Vehicle Docking Kit) and SIRIUS radio XMDJVC100 (Smart Digital Adapter for JVC) and XM Universal Tuner Box CNPJVC1 (Connection cable for JVC) and CNP2000UCA (Protocol Interface Adapter and XM Direct 2 Tuner) For details, refer also to the instructions supplied with the other components. For SIRIUS/XM programming, visit <www.siriusxm.com>. Activating your SIRIUS subscription Activating your XM subscription 1 Select <XM>. 1 Select <SIRIUS>. SIRIUS Satellite Radio starts updating the SIRIUS channels. Once completed, SIRIUS Satellite Radio tunes in to the Preview Channel. 2 Select “Channel 0” to check your SIRIUS ID. The 12-digit SIRIUS ID will be displayed. You can also check your SIRIUS ID from the label on the packaging, or from menu operations (' page 25). XMDirect2 Tuner System starts updating all the XM channels. “Channel 1” is tuned in automatically. 2 Select “Channel 0” to check your XM Satellite Radio ID. The display alternates between “RADIO ID” and the 8-digit alphanumeric ID number. You can also check your XM Satellite Radio ID labeled on the casing of the XMDirect2 Tuner System. 3 Contact Sirius Satellite Radio on the internet at <www.siriusxm.com/ activatenow> to activate your subscription. 3 Contact XM Satellite Radio on the internet at <www.siriusxm.com/activatenow> to activate your subscription. Once subscription has been activated, “SUB UPDATE PRESS ANY KEY” appears on the display. Once subscription has been activated, the unit can be tuned to one of the available channels. Channel Updates (SIRIUS)
If channels are updated after subscription, updating starts automatically. “UPDATING” appears and no sound can be heard. Updates take a few minutes to complete. During an update, you cannot operate your Satellite Radio. ENGLISH |ޓ9 KD-X80BT_J_EN 2012/2/17ޓ18:13:23 Satellite Radio tuner control Selecting a channel
Selecting a preset station/ category/channel from the list
“List” menu appears. Select <SIRIUS> or <XM>. Select a category. If you want to select channels of all categories... SIRIUS: Select <ALL>. XM: Skip this step. Select a desired channel. Holding the button changes the channels rapidly. While searching, invalid and unsubscribed channels are skipped. 2 Select <Preset>, <Category> or <Channel>. If a category is selected, the first channel of this category is tuned in. 3 Select a desired item. Storing stations in memory You can preset up to 18 channels for both SIRIUS and XM. While listening to a station...
(Hold) “Preset Mode” screen appears. 2 Select preset number. The preset number flashes. 10 |ޓENGLISH KD-X80BT_J_EN 2012/2/17ޓ18:13:23 USB USB Playing a USB device USB cable from the rear of the unit The source changes to “USB” and playback starts.
This unit can play MP3/WMA/WAV files stored in USB mass storage device (such as a USB memory and Digital Audio Player). Make sure all important data has been backed up. We shall bear no responsibility for any loss of data in USB mass storage class device while using this system. Selecting a folder/track Selects folder. Selecting the playback modes You can select one of the following playback modes at a time.
Selects track. (Press) Fast-forwards or reverses the track. (Hold) Selecting a track/folder from the list 2 Select a folder. (Hold) <Repeat>)<Random>
Repeat Off Cancels repeat playback. Track Repeats current track. Folder Repeats current folder. Random Off Cancels random playback. Folder Randomly plays all tracks of current folder, then tracks of next folders. All Randomly plays all tracks. 3 Select a track. If there are many folders or tracks, you can fast search for the desired folder or track by turning the control dial quickly, or use Quick Search (' page 14). ENGLISH |ޓ11 KD-X80BT_J_EN 2012/2/17ޓ18:13:23 iPod/iPhone Playing an iPod/iPhone USB cable from the rear of the unit 2 Select the desired list.
3 Select the desired track. USB 2.0 cable (not supplied)* The source changes to “iPod-1/iPod-2” and playback starts.
- Recommend to use a cable suitable for car use. Selecting the control mode -<Headunit Mode>/ <iPod Mode>/ <Application Mode> Controls iPod playback through this unit. Controls iPod playback from the iPod/iPhone. Application Mode The sound of any functions (music, games, applications, etc.) running on the connected iPod/ iPhone is emitted through the speakers connected to this unit.
You can also change the setting using <iPod Switch> in the menu. (' page 26) Selecting a track Applicable under <Headunit Mode>/<iPod Mode> only. For <Application Mode>, applicable only for some audio applications. Selects track/chapter. (Press) Fast-forwards or reverses the track. (Hold) Selecting a track from the list Applicable under <Headunit Mode> only.
Repeat this step until the desired track is selected. If the selected menu contains many tracks, you can fast search for the desired track by turning the control dial quickly, or use Quick Search (' page 14). Selecting the playback modes Applicable under <Headunit Mode> only. You can select one of the following playback modes at a time.
(Hold) <Repeat>)<Random>
Repeat Off Cancels repeat playback. One Functions the same as “Repeat One” of the iPod. All Functions the same as “Repeat All” of the iPod. Random Off Cancels random playback. Song Functions the same as “Shuffle Songs” of the iPod. Album Functions the same as “Shuffle Albums” of the iPod.
“Album” is not applicable for some iPod/ iPhone. 12 |ޓENGLISH KD-X80BT_J_EN 2012/2/17ޓ18:13:23 iPod/iPhone application You can operate JVC original application with this unit in <Application Mode>. For more details, visit JVC website: <http://www3.jvckenwood.com/ english/car/index.html> (English website only). Pandora姞 internet radio Preparation 1 Search for “Pandora” in the Apple iTunes App Store to find and install the most current version of the Pandora姞 application onto your device. 2 In the application on your device, log in and create an account with Pandora姞. If you are not a registered user, an account can also be created at www.pandora.com.
Pandora姞 is only available in the US. Because Pandora姞 is a third-party service, the specifications are subject to change without prior notice. Accordingly, compatibility may be impaired or some or all of the services may become unavailable. Some functions of Pandora姞 cannot be operated from this unit. For issues using the application, please contact Pandora at pandora-support@pandora.com. iPod/iPhone Creating a new station You can create a new station based on the currently playing song or artist.
-<NEW STATION> -<From Artist>/ <From Song> A new station is created based on the current song or artist. Searching the registered station from the list 2 Select the station list display mode. BY DATE According to the registration date A-Z Alphabetical order You can proceed directly to step 3 to select station or use the search menu to scroll through the desired menu. (' page 14) 3 Select the desired station. Listening to Pandora姞 internet radio 1 Open the Pandora姞 application on your device. 2 Connect the device to one of the USB terminals. (' page 12) The source switches and broadcast starts automatically from your current station. Basic Operations To bookmark song/artist information While receiving a song...
Starts/pauses playback.
Selects thumbs up/thumbs down. If thumbs down is selected, current track is skipped. Skips track. <This Artist>)<This Track> “BOOKMARKED” appears and the song/artist information is stored to the iPod/iPhone. This unit allows you to bookmark songs and/or artists in your personalized Pandora姞 account. The bookmarks will not be available for review on the unit but will be available in your Pandora姞 account. ENGLISH |ޓ13 KD-X80BT_J_EN 2012/2/17ޓ18:13:23 Quick Search Quick Search If you have many folders/tracks/contacts, you can search through them quickly according to the first character (A to Z, 0 to 9 and OTHERS). Select the desired list. Select <Phonebook>. 2 Select the desired character (A to Z, 0 to 9 and OTHERS). “OTHERS” appears if the first character is not A to Z or 0 to 9, such as #, -, !, etc. 3 Select your desired folder/track/contact. For USB and iPod/iPhone, repeat step 3 until the desired track is selected. Searching may not work on some of the layers of the selected menu (for iPod/iPhone). External components You can connect an external component to the following terminals: EXT IN: Expansion port on the rear of this unit using the following adapters (not supplied): - JVC KS-U57, Line Input Adapter - JVC KS-U58, AUX Input Adapter AUX: AUX (auxiliary) cable from the rear of the unit. For details, refer also to the instructions supplied with the adapters or external components. For connection to expansion port on the rear of this unit, refer to the “Installation/Connection Manual”. Playing an external component from AUX/expansion port Portable audio player, etc. 1 Connect to AUX cable and/or the expansion port from the rear of the unit. 2 Set the source as necessary. (Hold) Select <Show>. AUX 4 Turn on the connected component and start playing the source. 14 |ޓENGLISH KD-X80BT_J_EN 2012/2/17ޓ18:13:23 Bluetooth姞 connection Bluetooth姞 connection By connecting the supplied KS-UBT1 USB Bluetooth Adapter and microphone to this unit, you can operate a Bluetooth device using this unit. Refer to the “Installation/Connection Manual” for details on connecting the microphone. Once the USB Bluetooth Adapter is attached, this unit is always available for pairing. Refer also to the instructions supplied with the Bluetooth device. Refer to the separate appendix to check the countries where Microphone KS-UBT1 you may use the Bluetooth function. If you turn off the unit, detach the control panel, or unplug the USB Bluetooth Adapter during a phone call conversation, the Bluetooth connection is disconnected. Continue the conversation using your mobile phone. This unit supports the following Bluetooth profiles Hands-Free Profile (HFP 1.5) Object Push Profile (OPP 1.1) Phonebook Access Profile (PBAP 1.0) Advanced Audio Distribution Profile (A2DP 1.2) Audio/Video Remote Control Profile (AVRCP 1.3)
Warning:
Stop the car in a safe place before operating complicated steps such as dialing numbers, using phonebook, etc. Pairing a Bluetooth device When connecting a Bluetooth device to the unit for the first time, perform pairing between the unit and the device. Up to five Bluetooth devices can be registered in this unit. A maximum of two Bluetooth phones and one Bluetooth audio device can be connected at any time. This unit supports Secure Simple Pairing (SSP). 1 Connect the USB Bluetooth adapter (KS-UBT1) to one of the USB input terminals. USB cable from the rear of the unit
KS-UBT1 2 Search and select “JVC Unit” on the Bluetooth device.
For some Bluetooth devices, you may need to enter the Personal Identification Number (PIN) code immediately after searching. ENGLISH |ޓ15 KD-X80BT_J_EN 2012/2/17ޓ18:13:23 Bluetooth姞 connection 3 Perform (A) or (B) depending on what appears on the display. For some Bluetooth devices, pairing sequence may vary from the steps described below
(A) Pairing? Device: [Device name] Passkey: XXXXXX
(B) Pairing? Yes: Press VOL No: Press BACK “XXXXXX” is a 6-digit passkey randomly generated during each pairing. Ensure that the passkey which appears on the unit and Bluetooth device is the same. Select “Yes” to confirm the passkey. Pairing? Device: [Device name] Pairing? Yes: Press VOL No: Press BACK (1) When the Bluetooth device prompts you to key in a PIN or passcode, enter the PIN code “0000” into the Bluetooth device. The above should then appear on the display.
You can change to a desired PIN code before pairing. (' page 26) (2) If only “Pairing” appears, operate the Bluetooth device to confirm pairing. Operate the Bluetooth device to confirm the passkey. Select “Yes” to confirm the pairing. After pairing is successful, “Pairing COMPLETED” appears on the display. The unit will establish a connection with the newly paired Bluetooth device and you can then control the Bluetooth device through the unit. “” will light up when a phone is connected. “” will light up when an audio device is connected.
Once the connection is established, the device is registered to the unit and there is no need to perform the pairing again unless you delete the registered device. Some Bluetooth devices may not be able to connect to the unit after pairing. Connect the device to the unit manually. Refer to the instruction manual of the Bluetooth device for more information. Connecting/Disconnecting a registered device manually To connect
(Hold) 2 Select <Connect>. (Hold) 3 Select the desired device. 3 Select the desired device. “Connecting...” appears on the display when the unit is connecting to the device. “Connected”#“[Device Name]” appears on the display when the device is connected. “Disconnected”#“[Device Name]” appears on the display when the device is disconnected. 4 Press MENU to exit. 4 Press MENU to exit. 16 |ޓENGLISH KD-X80BT_J_EN 2012/2/17ޓ18:13:23 Bluetooth姞 connection Connecting to JVC original application JVC original application is designed to view JVC car receiver status and perform simple control operations on Android smart phones. For JVC original application operations, visit JVC website: <http://www3.jvckenwood.com/english/car/ index.html> (English website only).
(Hold) Deleting a registered device
(Hold) 2 Select <Delete OK>. -<Bluetooth> -<Delete Pairing> - [Device Name] -<Delete OK?> “OK” appears when the device is deleted. 3 Select the desired smart phone.
“Connected”#“[Device Name]” appears on the display when the device is connected. 4 Press MENU to exit. Bluetooth mobile phone Receiving a call To end a call To receive a call When there is an incoming call, the source automatically changes to “BT-1”/“BT-2”. “Receiving...” appears on the display, followed by the phone number or name. The display flashes in blue. (' page 20) (Hold)
(Hold) You can also press and hold ////SOURCE on the remote control to end a call. To deactivate/activate hands-free mode
During a phone conversation... You can also press ////SOURCE on the remote control to answer a call. When <Auto Answer> is set to <On>, the unit answers incoming calls automatically. (' page 20)
Operations may vary according to the connected Bluetooth device. ENGLISH |ޓ17 KD-X80BT_J_EN 2012/2/17ޓ18:13:23 Bluetooth mobile phone Adjustments during a call Phone volume(00 — 50) [Volume 15]: Volume adjustments made during a call will not affect the other sources. Microphone level (01— 03)[02]: As the number increases, the microphone becomes more sensitive. Text message notification When a text message is received, the unit rings and “[Device Name]”#“Received Message” appears. <Message Notice> must be set to <On>. (' page 20) You cannot read, edit, or send a message through the unit. This feature is only available on certain phones. Noise Reduction and Echo Cancellation mode: Turns on/off. Switching between two connected mobile phones When two mobile phones are connected to the unit, you can access to both “Hands-Free” menus.
Press to enter 1st phone’s “Hands-Free” menu. Press twice to enter 2nd phone’s “Hands-Free” menu. Press to return to 1st phone’s “Hands-Free” menu. Making a call from the hands-free menu 1 Enter the “Hands-Free” menu. 2 Select a calling method. Refer to the table below for options. 3 Select and call the contact (name/phone number). Dialed Calls Select the name/phone number Call Received Calls Missed Calls Phonebook Dial Number If the phonebook contains many numbers, you can fast search for the desired number by turning the control dial quickly, or use Quick Search (' page 14). “No History Found” appears if there is no recorded call history. “No Data” appears if no entries are found in the Bluetooth device’s phonebook. “Send Phonebook Manually” appears if <Phonebook Select> is set to <In Unit> or the phone does not support PBAP. (' page 20) Enter the phone number to dial. Move the entry position Call Select number/character 18 |ޓENGLISH KD-X80BT_J_EN 2012/2/17ޓ18:13:23 Bluetooth mobile phone Using voice recognition You can use the voice recognition features of the connected phone through this unit. “Not Support” appears if the connected phone does not support this feature. Deleting a contact (name/ phone number) Only when <Phonebook Select> is set to <In Unit>. (' page 20) 1 Enter voice recognition mode. If only one phone is connected, (Hold) 2 Select a call method. -<Dialed Calls>/ <Received Calls>/ <Missed Calls>/ <Phonebook> If two phones are connected, Select the desired phone Enter “phone list” (Hold) 3 Select the contact (name/phone number) to be deleted. Name Phone Number 2 When “Waiting Voice”#“[Device Name]” appears on the display, speak the name of the contact you want to call or the voice command to control the phone functions. Supported voice recognition features vary for each phone. Please refer to the instruction manual of the connected phone for details.
4 Enter “Delete Entries” menu. (Hold) 5 Select <Delete> or <Delete All>. Delete Delete All Selected name/phone number from step 3 is deleted. All name/phone numbers from selected menu in step 2 are deleted. ENGLISH |ޓ19 KD-X80BT_J_EN 2012/2/17ޓ18:13:23 Bluetooth mobile phone 3 Repeat this step to perform the necessary settings.
To return to the previous menu, press . To exit from the menu, press MENU. The following settings are applicable to the paired device. If another device is paired, perform the settings again. Menu item Selectable setting (Initial: [XX]) Phonebook Select * [In Phone]: The unit browses the phonebook of the connected phone. In Unit: The unit browses the phonebook registered in the unit. (You can copy the phonebook memory using <Phonebook Trans> (' page 26).) Auto Answer On: The unit answers incoming calls automatically. [Off]: The unit does not answer incoming calls automatically. Ringing Tone [In Unit]: The unit rings to alert you when a call/text message comes in. – Call Tone: Select your preferred ring tone (Tone 1 — 5) for incoming calls. – Message Tone: Select your preferred ring tone (Tone 1 — 5) for incoming text messages. Default ring tone is different according to the paired device. In Phone: The unit uses the connected phones’ ring tone to alert you when a call/text message comes in. (The connected phone will ring if it does not support this feature.) Ringing Color Color 01 — 29[06]: Select your preferred color for incoming call/text message alerts. Off: Cancels. NR/EC Mode [On]: Turns on the Noise Reduction and Echo Cancellation of the connected microphone for clearer sound. Off: Cancels. MIC Setting Level (01— 03)[02]: The sensitivity of the microphone increases as the MIC level is increased. Message Notice [On]: The unit rings and “[Device Name]”#“Received Message” appears to alert you of an incoming text message. Off: The unit does not alert you of an incoming text message.
- Selectable only when the connected phone supports PBAP. 20 |ޓENGLISH KD-X80BT_J_EN 2012/2/17ޓ18:13:23 Bluetooth audio player Bluetooth audio player Playing a Bluetooth audio player
Select <BT-1> or <BT-2> depending on the location of the USB Bluetooth adapter KS-UBT1.
Operate the Bluetooth audio player to start playback. Operations and display indications may differ according to their availability on the connected device. Random Basic operations Off Cancels random playback. Starts or resumes playback. All Randomly plays all tracks. Randomly plays all tracks of Group the current group. Mutes the sound. Listening to BT Pandora姞 internet radio Selects group/folder. You can listen to Pandora姞 internet radio on your smart phone through Bluetooth on this unit. Reverse skips or forward skips. (Press) Fast-forwards or reverses the track. (Hold) Selecting the playback modes 1 Open the Pandora姞 application on your device. 2 Connect to Bluetooth audio. Refer to “To connect” ' page 16, select <Bluetooth>#<Audio>#<Connect>. 3 Select <BT-1> or <BT-2> depending on the location of the USB Bluetooth adapter KS-UBT1. For Bluetooth devices that support AVRCP 1.3.
(Hold) 4 Select <Pandora>. (Hold) <Repeat>)<Random>
The source switches and broadcast starts automatically. Repeat Off Track All Group Cancels repeat playback. Repeats current track. Repeats all tracks. Repeats all tracks of the current group.
You can also activate Pandora姞 on your Bluetooth smart phone via <BT Audio Switch>. (' page 26) BT Pandora姞 internet radio is only for Android OS and RIM OS. You can operate Pandora姞 in the same way as Pandora姞 for iPod/iPhone. (' page 13) ENGLISH |ޓ21 KD-X80BT_J_EN 2012/2/17ޓ18:13:23 Illumination color adjustments Button zone Display zone All zone: Includes both Button zone and Display zone. All zone Selecting the preset color Storing your own adjustments You can select a preset color for <Button Zone>, <Display Zone>, and <All Zone> separately. You can store your own day and night colors for <Button Zone> and <Display Zone> separately.
(Hold) (Hold) 2 Select <Color>. 2 Select <Color Setup>.
Button Zone Display Zone All Zone
Color 01-29/User/ COLORFLOW 1-3*
- Color changes in different speeds. Press / to select a primary color <Red/ Green/Blue>, then turn the control dial to adjust the level <00-31>. Repeat this procedure until you have adjusted all the three primary colors. Your adjustment is automatically stored to “User”. If “00” is selected for all the primary colors for <Display Zone>, nothing appears on the display. Changes the display and buttons illumination during menu, list search, and playback mode operations.
Button Zone Day Color Display Zone Initial color: Button Zone [Color 06], Display Zone [Color 01], All Zone [Color 06]. If <All Zone> is selected, the button and display illumination will change to the current/ selected <Button Zone> color. Button Zone 4 Press MENU to exit. Night Color Display Zone Night Color/Day Color is changed by turning on/off your car’s headlight. 4 Press MENU to exit. 22 |ޓENGLISH KD-X80BT_J_EN 2012/2/17ޓ18:13:23 Brightness adjustments Brightness adjustments You can select your preferred brightness for <Button Zone>, <Display Zone> separately.
-<Dimmer> -<Brightness> -<Day Brightness>/ <Night Brightness> Button Zone Display Zone Level 00 to 31 Level 00 to 31 4 Press MENU to exit. Sound adjustments This unit memorizes sound settings adjusted for each individual source. HD Radio tuner, Satellite Radio tuner and <EXT IN> share the same sound adjustment settings. Selecting the preset sound You can select a preset sound mode, for each individual source, suitable for the music genre. Pro Equalizer
- - - - - - - - or - - - - - - - Press repeatedly. DYNAMIC-VOCAL-BASS-USER-FLATNATURAL-(back to the beginning) 3 Press / to adjust the frequency. 4 Press / to adjust the Q-slope. 5 Adjust the level. Storing your own adjustments While listening, you can adjust and store the tone level for each individual source. Easy Equalizer
(Hold) 2 Select a setting item (Sub. W/Bass/Middle/ Treble). 3 Adjust the level. Adjust the sound elements of the selected tone. Bass (Initial: [XX]) Frequency 60/80/[100]/200 Hz Level Lvl -6 to +6 [+5] [Q1.0]/Q1.25/Q1.5/Q2.0 Middle Frequency 0.5/[1]/1.5/2.5 kHz Level Lvl -6 to +6 [0] Q0.75/Q1.0/[Q1.25] Treble Frequency 10/[12.5]/15/17.5 kHz Level Lvl -6 to +6 [+5] [FIX] 6 Repeat steps 2 to 5 to adjust other tones. (Initial: [XX]) Sub.W* 00 to 08 [08] Bass -6 to +6 [+5] Middle -6 to +6 [0] Treble -6 to +6 [+5] The adjustments are stored and <USER> is activated. The adjustments are stored and <USER> is activated. 7 Press MENU to exit.
- Adjustable only when <Subwoofer On/Off> is set to <On>. (' page 25) ENGLISH |ޓ23 KD-X80BT_J_EN 2012/2/17ޓ18:13:23 Menu operations Menu operations
If no operation is done for about 60 seconds, the operation will be canceled.
To return to the previous menu, press . To exit from the menu, press DISP or MENU.
Clock Color Color Setup Dimmer Set
Selectable setting (Initial: [XX]) For settings, ' page 4. On: Shows the clock display when the power is off. [Off]: Cancels. For settings, ' page 4. For settings, ' page 4. Off: Cancels. [Auto]: The built-in clock is automatically adjusted using the clock data provided via the Satellite Radio channel. [Eastern]/Atlantic/Newfndlnd/Alaska/Pacific/Mountain/Central: Selects your residential area from one of the time zones for clock adjustment. [On]: Activates daylight savings time if your residential area is subject to DST. Off: Cancels. For settings, ' page 22. Selects the display and button illumination adjusted in the <Brightness>/ <Color Setup> setting. Off: Selects the Day adjustments. On: Selects the Night adjustments. [Auto]: Changes between the Day and Night adjustments when you turn off/on the car headlights. *3 Time Set: Sets the start/end timer for dimmer. Turn the control dial to adjust the start time, then press the control dial to confirm. Repeat this step to enter the end time. Brightness Day Brightness[31]/Night Brightness[15]: Brightness settings for the display and button illumination for day and night. Button Zone/Display Zone: Sets the brightness levels 00 — 31. Scroll *4 Off: Cancels. [Once]: Scrolls the display information once. Auto: Repeats scrolling (at 5-second intervals). Tag Display [On]: Shows the TAG information while playing MP3/WMA/WAV tracks. Off: Cancels. LCD Type [Negative]: Negative pattern of the display. Positive: Positive pattern of the display. Auto: Positive pattern will be selected during the day*5, while negative will be selected during the night*5. Contrast Level 01 — Level 15 [Level 09]: Adjusts the contrast of the display to make indications clear and legible. Displayed only when SIRIUS Satellite Radio or XM Satellite Radio is connected. Displayed only when <Clock Adjust> is set to <Auto>. The illumination control lead connection is required. (See “Installation/Connection Manual”.) This setting may not work correctly on some vehicles (particularly on those having a control dial for dimming). In this case, change the setting to other than <Dimmer Auto>. Some characters or symbols will not be shown correctly (or will be blanked) on the display. Depends on the <Dimmer Set> setting. 24 |ޓENGLISH KD-X80BT_J_EN 2012/2/17ޓ18:13:23 Menu operations Menu item PRO EQ Fad/Bal *6*7 Loud (Loudness) Volume Adjust Audio Subwoofer On/ Off Subwoofer LPF *8 Subwoofer Level *8 Subwoofer Phase *8 HPF (High-pass filter) Tuner Beep (Keytouch tone) Amplifier Gain
Selectable setting (Initial: [XX]) For settings, ' page 23. R6 — F6[0]: Press / to adjust the front and rear speaker output balance. L6 — R6[0]: Press / to adjust the left and right speaker output balance. On: Boosts low and high frequencies to produce a well-balanced sound at a low volume level. [Off]: Cancels. Level -5 — Level +5[Level 0]: Presets the volume adjustment level of each source, compared to the FM volume level. Before adjustment, select the source you want to adjust. (“FIX” appears if “FM” is selected.) [On]: Turns on the subwoofer output. Off: Cancels. LOW 55Hz/MID 85Hz/[HIGH 120Hz]: Audio signals with frequencies lower than 55 Hz/85 Hz/120 Hz are sent to the subwoofer. 00 — 08[08]: Adjusts the subwoofer output level. [0 Deg] (normal)/180 Deg (reverse): Selects the subwoofer phase. LOW 100Hz/MID 120Hz/HIGH 150Hz: Activates the High Pass Filter. Audio signal with frequencies lower than 100 Hz/120 Hz/150 Hz are cut off from the front/rear speakers. [Off]: Deactivates. (All signals are sent to the front/rear speakers.) [On]/Off: Activates or deactivates the keypress tone. Off: Deactivates the built-in amplifier. Low Power: Limits the maximum volume level to 30. (Select if the maximum input power of each speaker is less than 50 W to prevent damaging the speakers.) [High Power]: The maximum volume level is 50. SSM For settings, ' page 7. (Displayed only when the source is “FM” or “HD Radio”.) Area Change [US]: For North/Central/South America, AM/FM intervals: 10kHz/200kHz. (Frequency EU: For any other areas, AM/FM intervals: 9kHz/50kHz. tuning interval) SA: For some South American countries, AM/FM intervals: 10kHz/50kHz. IF Band [Auto]: Increases the tuner selectivity to reduce interference noises (Intermediate between adjacent stations. (Stereo effect may be lost.) frequency band) Wide: Subject to interference noises from adjacent stations, but sound quality will not be degraded and the stereo effect will remain. Sirius ID The 12-digit SIRIUS identification number appears on the display. (Displayed only when SIRIUS Satellite Radio is connected.) Blend Hold For settings, ' page 8. (Displayed only when the source is “HD Radio”.) Stereo/Mono Displayed only when the source is “FM” or “HD RADIO”. [Stereo]: Enables stereo FM reception. Mono: Improves the FM reception but stereo effect will be lost. Radio Timer *9 For settings, ' page 7. If you are using a two-speaker system, set the fader level to “0”. This adjustment will not affect the subwoofer output. Displayed only when <Subwoofer On/Off> is set to <On>. Not available when JVC KT-HD300 HD Radio tuner box is connected. ENGLISH |ޓ25 KD-X80BT_J_EN 2012/2/17ޓ18:13:23 Menu operations Menu item USB *10 iPod Switch *11 (iPod/iPhone control) Audiobooks *11 Bluetooth *12 Phone *13 Audio Application BT Audio Switch *14 Delete Pairing Phonebook Trans Set PIN Code Auto Connect Initialize Source Select Information Ext Input *16 AM Source *16 AUX Source *16 Bluetooth Audio *17 Software Version Selectable setting (Initial: [XX]) Drive Change: Selects to change the drive when a device with multiple drives is connected to the USB input terminal. [Headunit Mode]/iPod Mode/Application Mode: For settings, ' page 12. Normal/Faster/Slower: Selects the playback speed of the Audiobooks sound file in your iPod/iPhone. Initial selection depends on your iPod/iPhone setting. Connect/Disconnect: Connects or disconnects the Bluetooth phone/ audio device. (' page 16) Connect/Disconnect: Connects or disconnects the application in the smart phone. (' page 17) Switches between “Bluetooth Audio” and “Bluetooth Pandora”. For settings, ' page 17. Copies up to 400 numbers from the phonebook memory of a connected phone to the unit via OPP. Changes the PIN code (1 to 6-digits). (Default PIN code: 0000) Turn the control dial to select a number, press / to move to the entry position. After entering the PIN code, press the control dial to confirm. [On]: Establishes connection automatically with the Bluetooth device when the unit is turned on. Off: Cancels. [No]: Cancels. Yes: Initializes all the Bluetooth settings (including stored pairing, phonebook, and etc.). Connected Phone/Connected Audio/Connected App Mode *15: Displays connected phone/audio/application device name. My BT Name: Displays the unit name (JVC Unit). My Address: Shows address of USB Bluetooth Adapter. Show/[Hide]: Enables or disables “EXT IN” in source selection. [Show]/Hide: Enables or disables “AM” in source selection. [Show]/Hide: Enables or disables “AUX In” in source selection. [Show]/Hide: Enables or disables “BT Audio” in source selection. Displays the firmware version of the unit. *10 Displayed only when the source is “USB-1/USB-2”. *11 Displayed only when the source is “iPod-1/iPod-2”. *12 If the USB Bluetooth Adapter is not connected to the unit, “Please Connect BT Adapter” appears on the display. *13 <Connect> will not be displayed if two Bluetooth phones are connected at the same time. *14 Displayed only when the source is “BT-1/BT-2”. *15 Displayed only when a Bluetooth phone/audio player/application is connected. *16 Displayed only when the unit is in any source other than the corresponding source “Ext Input/ AM Source/AUX Source”. *17 Displayed only when the USB Bluetooth Adapter (KS-UBT1) is attached and current source is not “BT-1/BT-2”. 26 |ޓENGLISH KD-X80BT_J_EN 2012/2/17ޓ18:13:23 Remote controller Remote controller
Warning:
Preparing When you use the remote controller for the first time, pull out the insulation sheet.
Insulation sheet For USA-California Only: This product contains a CR Coin Cell Lithium Battery which contains Perchlorate Material— special handling may apply. See www.dtsc.ca.gov/hazardouswaste/perchlorate Replacing the lithium coin battery
If the effectiveness of the remote controller decreases, replace the battery. CR2025
Do not install any battery other than CR2025 or its equivalent. Do not leave the remote controller in places (such as dashboards) exposed to direct sunlight for a long time. Store the battery in places out of reach of children. Do not recharge, short, disassemble, heat the battery, or dispose of it in a fire. Do not place the battery with other metallic materials. Do not poke the battery with tweezers or similar tools. Insulate the battery by wrapping it with tape when disposing or storing it. This unit is equipped with the steering wheel remote control function. For details, refer also to the instructions supplied with the remote adapter. Caution:
Danger of explosion if battery is incorrectly replaced. Replace only with the same or equivalent type. Battery shall not be exposed to excessive heat such as sunshine, fire, or the like. ENGLISH |ޓ27 KD-X80BT_J_EN 2012/2/17ޓ18:13:23 Additional information Additional information About audio files Playable files
File extensions: MP3(.mp3), WMA(.wma), WAV(.wav) Bit rate: MP3 (MPEG-1): 32 kbps - 320 kbps MP3 (MPEG-2): 8 kbps - 160 kbps WMA: 5 kbps - 320 kbps WAV: Linear PCM at 705 kbps and 1 411 kbps Sampling frequency: MP3 (MPEG-1): 32 kHz, 44.1 kHz, 48 kHz MP3 (MPEG-2): 16 kHz, 22.05 kHz, 24 kHz WMA: 8 kHz - 48 kHz WAV: 44.1 kHz Channel: WMA/WAV: 1 ch/2 ch Variable bit rate (VBR) files. (The elapsed time for VBR files will not be displayed correctly.) Unplayable files
MP3 files: - encoded in MP3i and MP3 PRO format - encoded in an inappropriate format - encoded with Layer 1/2 WMA files: - encoded in lossless, professional, and voice format - not based upon Windows Media® Audio - copy-protected with DRM Files which include data such as AIFF, ATRAC3, etc. File/folder names About USB device
This unit supports files/folder names recorded in a format compliant with ISO 9660 Level 1, Level 2, Romeo, or Joliet, and the proper extension code <.mp3>, <.wma> or <.wav>. Cautions Others
This unit can show WMA Tag and ID3 Tag Version 1.0/1.1/2.2/2.3/2.4 (for MP3). The search function works but search speed is not constant. When connecting a USB cable, use the USB 2.0 cable. You cannot connect a computer or portable HDD to the USB input terminal of the unit. Connect only one USB device to the unit at a time. Do not use a USB hub. USB devices equipped with special functions such as data security functions cannot be used with the unit. Do not use a USB device with 2 or more partitions. This unit cannot recognize a USB device whose rating is other than 5 V and exceeds 1 A. This unit may not recognize a memory card inserted into the USB card reader. This unit may not play back files in a USB device properly when using a USB extension cord. Depending on the shape of the USB devices and connection ports, some USB devices may not be attached properly or the connection might be loose. Operation and power supply may not work as intended for some USB devices. The maximum number of characters for: – Folder names: 25 characters – File names: 25 characters – MP3 Tag: 128 characters – WMA Tag: 128 characters – WAV Tag: 128 characters This unit can recognize a total of 20000 files, 2000 folders (999 files per folder including folder without unsupported files), and of 8 hierarchies. However, the display can only show until 999 folders/files.
Do not pull out and attach the USB device repeatedly while “READING” is shown on the display. Electrostatic shock at connecting a USB device may cause abnormal playback of the device. In this case, disconnect the USB device then reset this unit and the USB device. Do not leave a USB device in the car, expose to direct sunlight, or high temperature. Failure to do so may result in deformation or cause damages to the device. 28 |ޓENGLISH KD-X80BT_J_EN 2012/2/17ޓ18:13:23 Additional information About iPod/iPhone
iPod/iPhone that can be connected to this unit: - iPod touch (4th generation) - iPod touch (3rd generation) - iPod touch (2nd generation) - iPod touch (1st generation) - iPod classic - iPod with video (5th generation)* - iPod nano (6th generation) - iPod nano (5th generation) - iPod nano (4th generation) - iPod nano (3rd generation) - iPod nano (2nd generation) - iPod nano (1st generation)* - iPhone 4S - iPhone 4 - iPhone 3GS - iPhone 3G - iPhone *<iPod Mode>/<Application Mode> are not applicable. It is not possible to browse video files on the “Videos” menu in <Headunit Mode>. The song order displayed on the selection menu of this unit may differ from that of the iPod. When operating an iPod/iPhone, some operations may not be performed correctly or as intended. In this case, visit the following JVC website: <http://www3.jvckenwood.com/english/car/ index.html> (English website only). Trademark and license notice
Microsoft and Windows Media are either registered trademarks or trademarks of Microsoft Corporation in the United States and/or other countries. The Bluetooth word mark and logos are owned by the Bluetooth SIG, Inc. and any use of such marks by JVC KENWOOD Corporation is under license. Other trademarks and trade names are those of their respective owners. Ready to receive HD Radio broadcasts when connected to the KT-HD300, sold separately. Sirius, XM and all related marks and logos are trademarks of Sirius XM Radio Inc. All rights reserved. “Made for iPod” and “Made for iPhone” mean that an electronic accessory has been designed to connect specifically to iPod, or iPhone, respectively, and has been certified by the developer to meet Apple performance standards. Apple is not responsible for the operation of this device or its compliance with safety and regulatory standards. Please note that the use of this accessory with iPod, or iPhone may affect wireless performance. iPhone, iPod, iPod classic, iPod nano, and iPod touch are trademarks of Apple Inc., registered in the U.S. and other countries. PANDORA, the PANDORA logo, and the Pandora trade dress are trademarks or registered trademarks of Pandora Media, Inc., used with permission. About Bluetooth
Depending on the Bluetooth version of the device, some Bluetooth devices may not be able to connect to this unit. This unit may not work with some Bluetooth devices. Signal conditions vary, depending on the surroundings. When the unit is turned off, the device is disconnected. For more information about Bluetooth, visit the following JVC website: <http://www3.jvckenwood.com/english/car/ index.html> (English website only) ENGLISH |ޓ29 KD-X80BT_J_EN 2012/2/17ޓ18:13:23 Troubleshooting Troubleshooting Symptom 4 General No sound, sound interrupted or static noise. “Miswiring Check Wiring Reset The Unit”/“Warning Check Wiring Reset The Unit” appears on the display and no operations can be done. The unit does not work at all. Source cannot be selected. The correct characters are not displayed (e.g. album name). 4 FM/AM SSM automatic presetting does not work. 4 USB/iPod/iPhone “Reading” keeps flashing on the display. Tracks/folders are not played back in the order you have intended. “No File” appears on the display. “Not Support” appears on the display and track skips. “Cannot Play” flashes on the display. The unit cannot detect the connected device. Pandora姞 The iPod/iPhone does not turn on or does not work. “CANNOT SKIP” “NO STATION”
“NO ACTIVE STATION”
“SET UP PANDORA ON YOUR
DEVICE” Remedy/Cause Check the cords, antenna and cable connections. Check the condition of the connected device and recorded tracks. Ensure to use the recommended stereo mini plug when connecting to an external component. (' page 14) Ensure the terminals of the speaker leads are properly insulated with tape before resetting the unit. (' page 4) If the message does not disappear, consult your JVC car audio dealer or kits supplying company.
Reset the unit. (' page 4) Check the <Source Select> setting. (' page 26) This unit can only display letters (capital: A – Z, small: a – z), numbers (0 – 9), and a limited number of symbols, and spacing. Store stations manually. A longer readout time is required. Do not use too many hierarchical levels and folders. Reattach the USB device. The playback order is determined by the file name.
Check whether the selected folder, the connected USB device, or the iPod/iPhone contains a playable file. Check whether the track is a playable file format. Check whether the connected device is compatible with this unit. (USB: ' page 33) (iPod/iPhone: ' page 29) Ensure that the device contains files in the supported formats. (' page 28) Reattach the device. Check the connection between this unit and iPod/iPhone. Detach and reset the iPod/iPhone using hard reset. For details on resetting the iPod/iPhone, refer to the instruction manual supplied with the iPod/iPhone. Check whether <iPod Switch> setting is appropriate. (' page 12) The skip limit has been reached. No registered station in your iPod/iPhone. No active station. Pandora姞 setup is not completed. Connect the iPod/iPhone to this unit after completing the setup in your iPod/iPhone.
30 |ޓENGLISH KD-X80BT_J_EN 2012/2/17ޓ18:13:23 Troubleshooting Pandora姞 Symptom New station creation: “NO STATION”
“STATION REACH LIMIT”
“CANNOT MAKE NEW
STATION” 4 HD Radio Sound quality changes when receiving HD Radio stations. No sound can be heard. “Reset 08” appears on the display. 4 Satellite Radio “UNSUBSCRIBED CH” appears on the display while listening to the SIRIUS Satellite Radio. No sound can be heard. “UPDATING” appears on the display. “ACQUIRING SIGNAL” or “NO SIGNAL” appears on the display. “ANTENNA ERROR” or “CHECK ANTENNA” appears on the display. “INVALID CHANNEL” appears on the display for about 5 seconds, then returns to the previous channel or default channel while listening to the SIRIUS Satellite Radio. Blank display appears. “CHANNEL---” or “CHANNEL UNAVL” appears on the display for about 2 seconds, then returns to the previous channel while listening to the XM Satellite Radio. “OFF AIR” appears on the display while listening to the XM Satellite Radio. “LOADING” appears on the display while listening to the XM Satellite Radio. “RESET 08” appears on the display. Satellite Radio does not work at all. Remedy/Cause There are no stations found for the current song or artist. You may not create more than 100 stations. There is a problem creating a new station, such as a network issue. Fix the reception mode to either <Analog> or <Digital>. (' page 8) <Analog> is selected when receiving all digital broadcast of HD Radio station. Select <Auto> or <Digital>. (' page 8) <Digital> is selected when receiving weak digital signals or receiving conventional radio broadcast. Select <Auto> or <Analog>. (' page 8) Reconnect this unit and the HD Radio tuner box correctly, then reset the unit. SIRIUS or XM Satellite Radio is connected but does not have an active subscription. For information on how to subscribe, ' page 9. The unit is updating the channel information and it takes a few minutes to complete. Make sure your Satellite Radio antenna is mounted outside the vehicle. Move the vehicle to an area with a clear view of the sky. Check your Satellite Radio antenna connection and be sure it is firmly attached.
No broadcast on the selected channel. Select another channel or continue listening to the previous channel or default channel. No text information for the selected channel. Selected channel is no longer available or is unauthorized. Select another channel or continue listening to the previous channel.
Selected channel is not broadcasting at this time. Select another channel or continue listening to the previous channel. The unit is loading the channel information and audio. Text information are temporarily unavailable. Reconnect this unit and the Satellite Radio correctly and reset this unit. ENGLISH |ޓ31 KD-X80BT_J_EN 2012/2/17ޓ18:13:23 Troubleshooting Symptom 4 Bluetooth “BT-1”/“BT-2” cannot be selected. No Bluetooth device is detected. Pairing cannot be made. “Pairing Full” appears on the display when trying to perform pairing. Echo or noise occurs. Phone sound quality is poor. The unit does not respond when you try to copy the phonebook to the unit. Sound is being interrupted or skipped during playback of a Bluetooth audio player. The connected Bluetooth audio player cannot be controlled. “Voice” calling method is not successful. “Not Support” appears when trying to perform voice dial. “Connection Error” appears on the display. “Error” appears on the display. “Please Wait” appears on the display. “HW Error” appears on the display. “BT Device Not Found” appears on the display. Remedy/Cause Check <Bluetooth Audio> in the <Source Select> setting. (' page 26) Search from the Bluetooth device again. Reset the unit. (' page 4) Make sure you have entered the same PIN code to both the unit and Bluetooth device. Delete pairing information from both the unit and the Bluetooth device, then perform pairing again. You have already registered the maximum of five Bluetooth devices in the unit. To pair another device, delete an existing paired device from the unit first. (' page 17) Adjust the microphone unit’s position. Adjust <NR/EC Mode> and <Mic Level> to a better combination. (' page 20) Reduce the distance between the unit and the Bluetooth device. Move the car to a place where you can get a better signal reception. You may have tried to copy the same entries (as stored) to the unit. Press DISP or to exit. Reduce the distance between the unit and the Bluetooth audio player. Turn off, then turn on the unit and try to connect again. Other Bluetooth devices might be trying to connect to the unit. Check whether the connected Bluetooth audio player supports Audio/Video Remote Control Profile (AVRCP). (Refer to the instructions of your audio player.) Disconnect and connect the Bluetooth player again. Use “Voice” calling method in a more quiet environment. Reduce the distance from the microphone when you speak the name. Change “NR/EC Mode” to “Off” (' page 20), then try again. The connected phone does not support this feature.
The device is registered but the connection has failed. Connect the device manually. (' page 16) Try the operation again. If “Error” appears again, check if the device supports the function you have tried. The unit is preparing to use the Bluetooth function. If the message does not disappear, turn off and turn on the unit, then connect the device again (or reset the unit). (' page 4) Reset the unit and try the operation again. If “HW Error” appears again, consult your nearest JVC car audio dealer. The unit failed to search for the registered Bluetooth devices during Auto Connect. Turn on Bluetooth from your device and connect manually. 32 |ޓENGLISH KD-X80BT_J_EN 2012/2/17ޓ18:13:23 Specifications Specifications 20 W RMS x 4 Channels at 4Ω and ≤1% THD+N 4Ω (4Ω to 8Ω allowance) Frequency Response Signal-to-Noise Ratio Line-Out, Subwoofer-Out Level/Impedance Output Impedance 40 Hz to 20 000 Hz 80 dBA (reference: 1 W into 4Ω)
4.8 V/20 kΩ load (full scale)
≤ 600Ω Usable Sensitivity 50 dB Quieting Sensitivity Alternate Channel Selectivity (400 kHz) Frequency Response Stereo Separation Frequency Range Sensitivity/Selectivity 200 kHz step: 87.9 MHz to 107.9 MHz 50 kHz step: 87.5 MHz to 108.0 MHz
9.3 dBf (0.8 μV/75Ω)
16.3 dBf (1.8 μV/75Ω)
65 dB 40 Hz to 15 000 Hz 40 dB 10 kHz step: 530 kHz to 1 700 kHz 9 kHz step: 531 kHz to 1 611 kHz 20 μV/40 dB USB SECTION USB Standard Data Transfer Rate (Full Speed) Compatible Device Compatible File System Playable Audio Format Maximum Supply Current USB 1.1, USB 2.0 Max. 12 Mbps Mass storage class FAT 32/16/12
MP3/WMA/WAV
DC 5 V " 1 A BLUETOOTH SECTION Version Power Class Service Area Profile Bluetooth 2.1 certified (+EDR) Class 2 Radio 10 m (10.9 yd)
HFP 1.5, OPP 1.1, A2DP 1.2, AVRCP 1.3, PBAP 1.0
GENERAL Power Requirement (Operating Voltage) Grounding System Allowable Operating Temperature Dimensions Installation Size (W × H × D) (approx.) Panel Size Mass DC 14.4 V (11 V to 16 V allowance) Negative ground 0°C to +40°C (32°F to 104°F) 182 mm × 52 mm × 159 mm (7-3/16" × 2-1/16" × 6-5/16") 188 mm × 59 mm × 13 mm (7-7/16" × 2-3/8" × 9/16")
1.1 kJ (2.5 lbs) (excluding accessories)
Subject to changes without notice. ENGLISH |ޓ33 KD-X80BT_J_EN 2012/2/17ޓ18:13:23 ESPAÑOL |ޓ3 KD-X80BT_J_SP 2012/2/24ޓ16:23:51 ESPAÑOL |ޓ5 KD-X80BT_J_SP 2012/2/24ޓ16:23:51 [Off] Once Daily ESPAÑOL |ޓ7 KD-X80BT_J_SP 2012/2/24ޓ16:23:51 ESPAÑOL |ޓ9 KD-X80BT_J_SP 2012/2/24ޓ16:23:51 10 |ޓESPAÑOL KD-X80BT_J_SP 2012/2/24ޓ16:23:51 USB USB
Repeat Off Track Folder Random Off ESPAÑOL |ޓ11 KD-X80BT_J_SP 2012/2/24ޓ16:23:51 (Sostener) Headunit Mode iPod Mode Application Mode
Repeat Off One All 12 |ޓESPAÑOL KD-X80BT_J_SP 2012/2/24ޓ16:23:51 14 |ޓESPAÑOL KD-X80BT_J_SP 2012/2/24ޓ16:23:51 Conexión Bluetooth姞 Conexión Bluetooth姞 ESPAÑOL |ޓ15 KD-X80BT_J_SP 2012/2/24ޓ16:23:51 Pairing? Yes: Press VOL No: Press BACK Pairing? Yes: Press VOL No: Press BACK ESPAÑOL |ޓ17 KD-X80BT_J_SP 2012/2/24ޓ16:23:51 Received Calls Missed Calls Phonebook Dial Number 18 |ޓESPAÑOL KD-X80BT_J_SP 2012/2/24ޓ16:23:51 (Sostener) 5 Seleccione <Delete> o <Delete All>. Delete Delete All ESPAÑOL |ޓ19 KD-X80BT_J_SP 2012/2/24ޓ16:23:51 Phonebook Select * 20 |ޓESPAÑOL KD-X80BT_J_SP 2012/2/24ޓ16:23:51 Repeat Off Track All Group ESPAÑOL |ޓ21 KD-X80BT_J_SP 2012/2/24ޓ16:23:51 Button Zone Display Zone All Zone
-<Dimmer> -<Brightness> -<Day Brightness>/ <Night Brightness> Button Zone Display Zone Level 00 a 31 Level 00 a 31 ESPAÑOL |ޓ23 KD-X80BT_J_SP 2012/2/24ޓ16:23:51 Color Color Setup Dimmer Set
24 |ޓESPAÑOL KD-X80BT_J_SP 2012/2/24ޓ16:23:51 Phone *13 Audio Application BT Audio Switch *14 Delete Pairing Phonebook Trans Set PIN Code Auto Connect Initialize Source Select Information Ext Input *16 AM Source *16 AUX Source *16 Bluetooth Audio *17 Software Version 26 |ޓESPAÑOL KD-X80BT_J_SP 2012/2/24ޓ16:23:51 Control remoto ESPAÑOL |ޓ27 KD-X80BT_J_SP 2012/2/24ޓ16:23:51 28 |ޓESPAÑOL KD-X80BT_J_SP 2012/2/24ޓ16:23:51 Información adicional Microsoft y Windows Media son marcas registradas o bien marcas comerciales de Microsoft Corporation en los Estados Unidos y/ u otros países. La marca Bluetooth y sus logotipos son propiedad de Bluetooth SIG, Inc., y cualquier uso de los mismos por JVC KENWOOD Corporation se realiza bajo licencia. Otras marcas y nombres comerciales son de sus respectivos propietarios. Puede recibir transmisiones de HD Radio cuando se conecta al KT-HD300, que se vende por separado. Sirius, XM y todas las marcas y logotipos vinculados son marcas comerciales de Sirius XM Radio Inc. Todos los derechos reservados. “Made for iPod” and “Made for iPhone” mean that an electronic accessory has been designed to connect specifically to iPod, or iPhone, respectively, and has been certified by the developer to meet Apple performance standards. Apple is not responsible for the operation of this device or its compliance with safety and regulatory standards. Please note that the use of this accessory with iPod, or iPhone may affect wireless performance. iPhone, iPod, iPod classic, iPod nano, and iPod touch are trademarks of Apple Inc., registered in the U.S. and other countries. PANDORA, the PANDORA logo, and the Pandora trade dress are trademarks or registered trademarks of Pandora Media, Inc., used with permission. ESPAÑOL |ޓ29 KD-X80BT_J_SP 2012/2/24ޓ16:23:51 “CANNOT SKIP” “NO STATION”
“NO ACTIVE STATION”
“SET UP PANDORA ON YOUR
DEVICE” 30 |ޓESPAÑOL KD-X80BT_J_SP 2012/2/24ޓ16:23:51 ESPAÑOL |ޓ31 KD-X80BT_J_SP 2012/2/24ޓ16:23:51 32 |ޓESPAÑOL KD-X80BT_J_SP 2012/2/24ޓ16:23:51 Especificaciones Especificaciones Intervalo 200 kHz: 87,9 MHz a 107,9 MHz Intervalo 50 kHz: 87,5 MHz a 108,0 MHz 9,3 dBf (0,8 μV/75Ω) 16,3 dBf (1,8 μV/75Ω) 65 dB 40 Hz a 15 000 Hz 40 dB Intervalo 10 kHz: 530 kHz a 1 700 kHz Intervalo 9 kHz: 531 kHz a 1 611 kHz 20 μV/40 dB Bluetooth 2.1 certified (+EDR) Radio Clase 2 10 m (10,9 yardas)
HFP 1.5, OPP 1.1, A2DP 1.2, AVRCP 1.3, PBAP 1.0
JVC KENWOOD Corporation 2967-3, ISHIKAWA-MACHI,
HACHIOJI-SHI, TOKYO, JAPAN
THIS PRODUCT COMPLIES WITH DHHS RULES
21CFR SUBCHAPTER J IN EFFECT AT DATE OF MANUFACTURE. Emplacement : embase Clock DEMO PUSH Clock Color [Off] Once Daily Station HD Radio Repeat Off Track Folder Pairing? Yes: Press VOL No: Press BACK Pairing? Yes: Press VOL No: Press BACK Received Calls Missed Calls Phonebook Dial Number Phonebook Select *
Repeat Off Track All Group Button Zone Display Zone All Zone
Button Zone Day Color Display Zone -<Dimmer> -<Brightness> -<Day Brightness>/ <Night Brightness>
Button Zone Display Zone Article de menu DEMO Clock Display Set Clock 24H/12H Clock Adjust Time Zone *1*2 DST *1*2 Display Dimmer Color Color Setup Dimmer Set
Phone *13 Audio Application BT Audio Switch *14 Delete Pairing Phonebook Trans Set PIN Code Auto Connect Initialize Source Select Information Ext Input *16 AM Source *16 AUX Source *16 Bluetooth Audio *17 Software Version “CANNOT SKIP” “NO STATION”