
Mantis - Synthesizer Tiptop Audio - Free user manual and instructions
Find the device manual for free Mantis Tiptop Audio in PDF.


| Product Type | Eurorack Synthesizer Case |
| Brand | Tiptop Audio |
| Model | Mantis |
| Dimensions | 520 x 280 x 90 mm |
| Weight | 4.5 kg |
| Power Supply | Internal 120-240V AC to DC adapter, 1400mA +12V, 900mA -12V, 500mA 5V |
| Total HP | 168 HP (2 rows of 84 HP) |
| Module Depth Clearance | Approximately 40mm (including power ribbon) |
| Flying Busboards | Included: 4 busboards with 60 connectors total |
| Mounting Hardware | Included screws and sliding nuts |
| Main Functions | Provides power and mounting for Eurorack modules, sturdy carrying handle, angled design for ergonomic access |
| Cooling | Passive cooling via ventilation slots |
| Maintenance | Keep vents clear of dust; clean with dry cloth; do not use liquids |
| Safety | Do not expose to moisture or excessive heat; use only supplied power adapter; disconnect power when not in use |
| Spare Parts & Repairability | Busboards and power supply available from Tiptop Audio; standard screws; repair by qualified technician |
| General Information | Desktop or rackmount via optional ears; compatible with all Eurorack modules; ships fully assembled |
Frequently Asked Questions - Mantis Tiptop Audio
User questions about Mantis Tiptop Audio
0 question about this device. Answer the ones you know or ask your own.
Ask a new question about this device
Download the instructions for your Synthesizer in PDF format for free! Find your manual Mantis - Tiptop Audio and take your electronic device back in hand. On this page are published all the documents necessary for the use of your device. Mantis by Tiptop Audio.
USER MANUAL Mantis Tiptop Audio
Using the optional bracket accessory Mantis can be doubled up to 416HP! Multiply your Mantis and watch your studio setup grow..
The Dual Mantis Studio Brackets pair lets you connect two Mantis together in a robust and elegant solution. This setup is fixed and is recommend mainly for studio use. The brackets are cut precisely by laser from a sturdy metal and then coated twice for a nice smooth finish that matches the Mantis light gray color. They come with sixteen screws and special washers that help hold the screw in place during assembly and keep a tiny gap between the brackets and the Mantis. Installation is fairly simple and takes about 30 minutes to complete.
Before we begin:
Please get a Phillips head screw driver. It is also recommended to have eight eurorack modules available to help align the Z-Rails but this is not mandatory.
The kit contains:
2 x Brackets, left and right
2 x Adhesive foam strips
12 x Phillips pan head machine screws
12 x Nylon washers
1 x Allen Wrench 3mm
IMPORTANT SAFETY MESSAGE
Tiptop Audio has conducted testing to determine the safest and most effective methods to install the Mantis brackets. Please read these instructions fully before beginning the assembly process. Failure to follow these instructions closely could result in damage, not limited to, the brackets, Mantis cases, Eurorack modules and furniture surfaces.
A second person might be needed to lift or move the Mantis cases into position. When moving the two Mantis assembly around, hold it from the lower Mantis. Do not hold it from the upper Mantis.
If you have any questions or need clarification on the assembly, please contact Tiptop Audio before starting the assembly process!
Step 1:
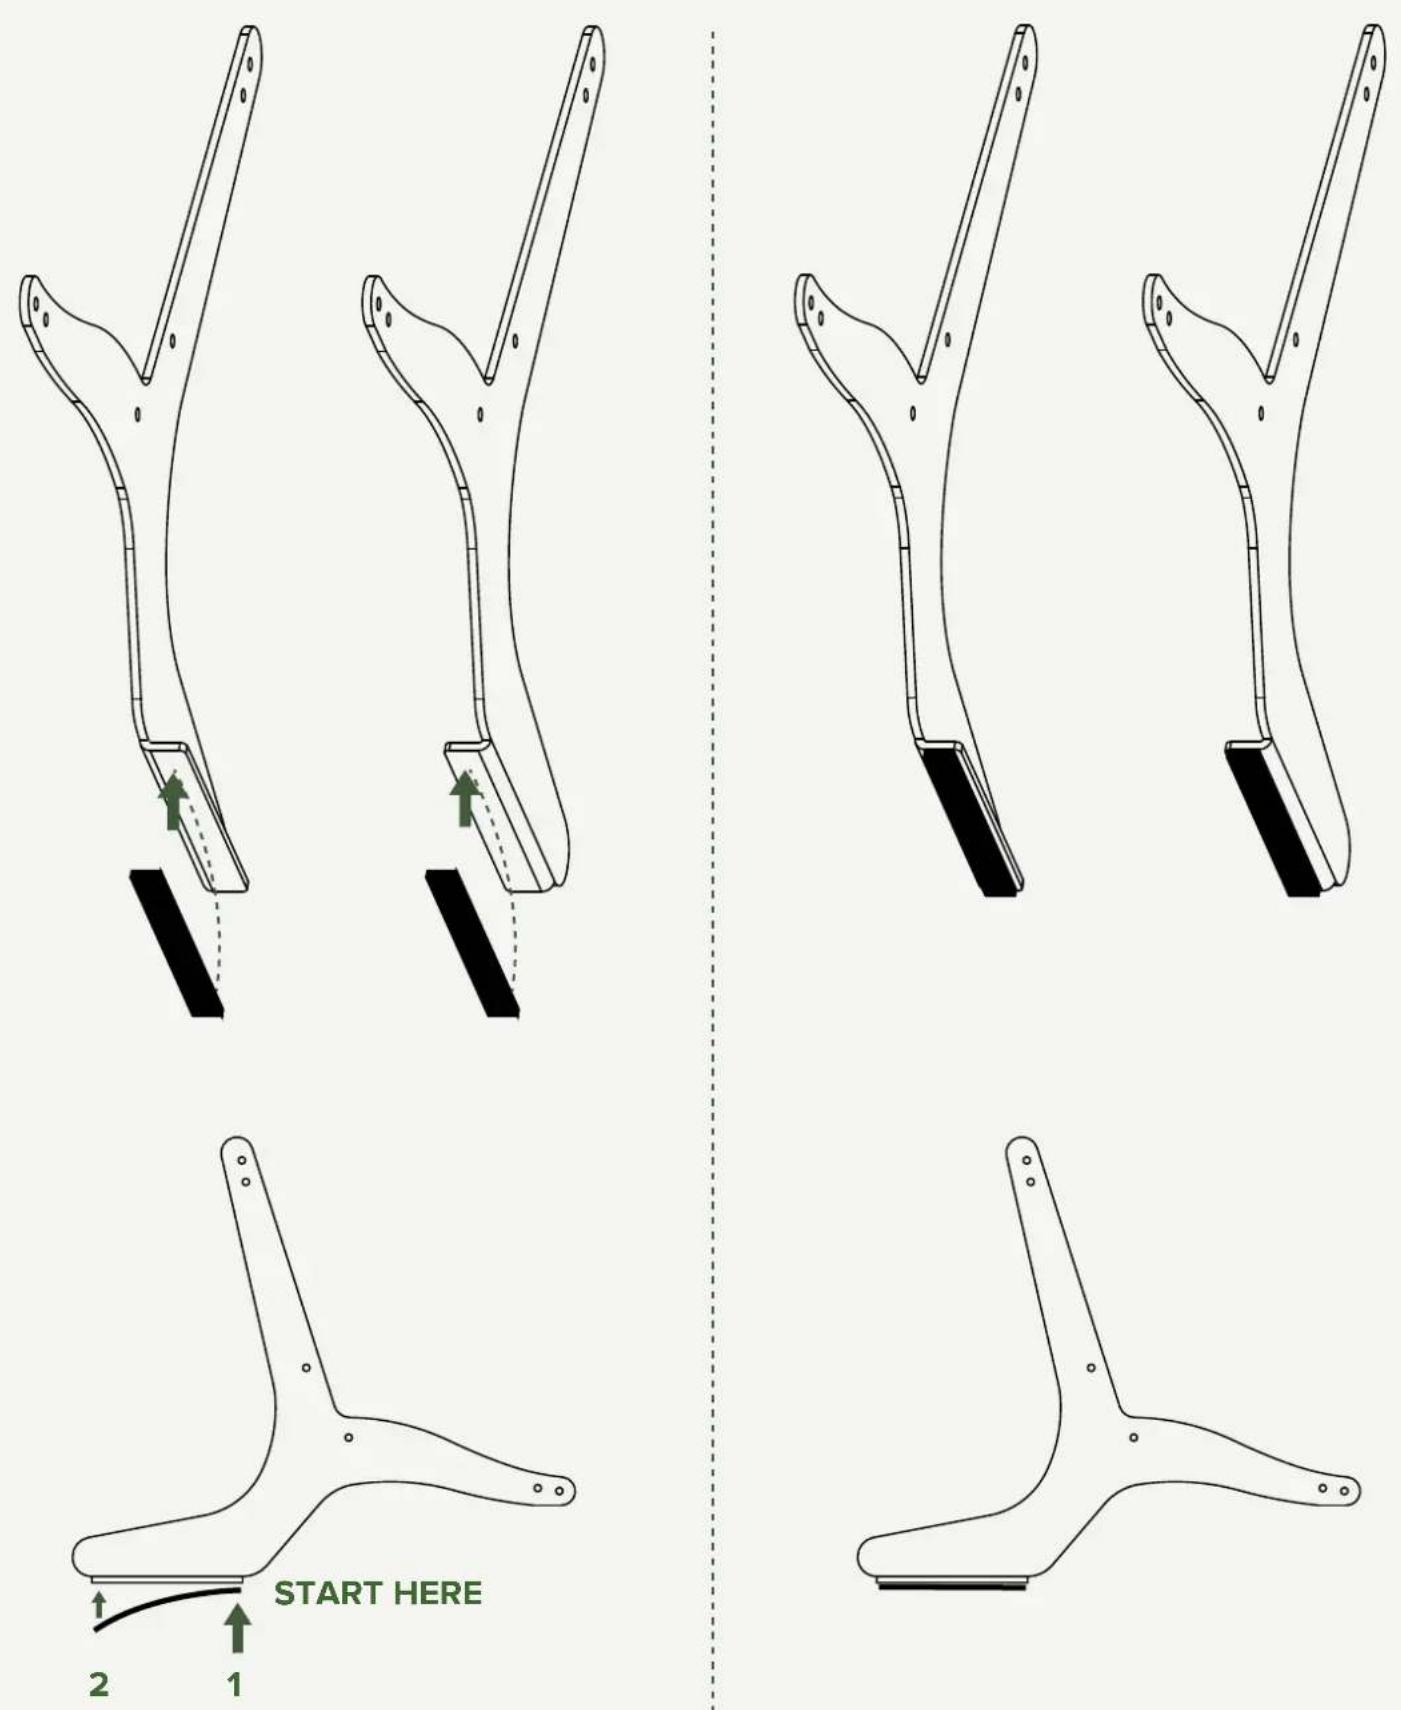
Locate the two black foam strips, gently pull off the white back paper to expose the adhesive, carefully align the strip to the bracket leg and apply. This stuff is sticky and can not be reapplied so make sure you get it right the first time. We recommend sticking one end of the strip first and then slowly pressing down the strip to the other end.
Step 2:
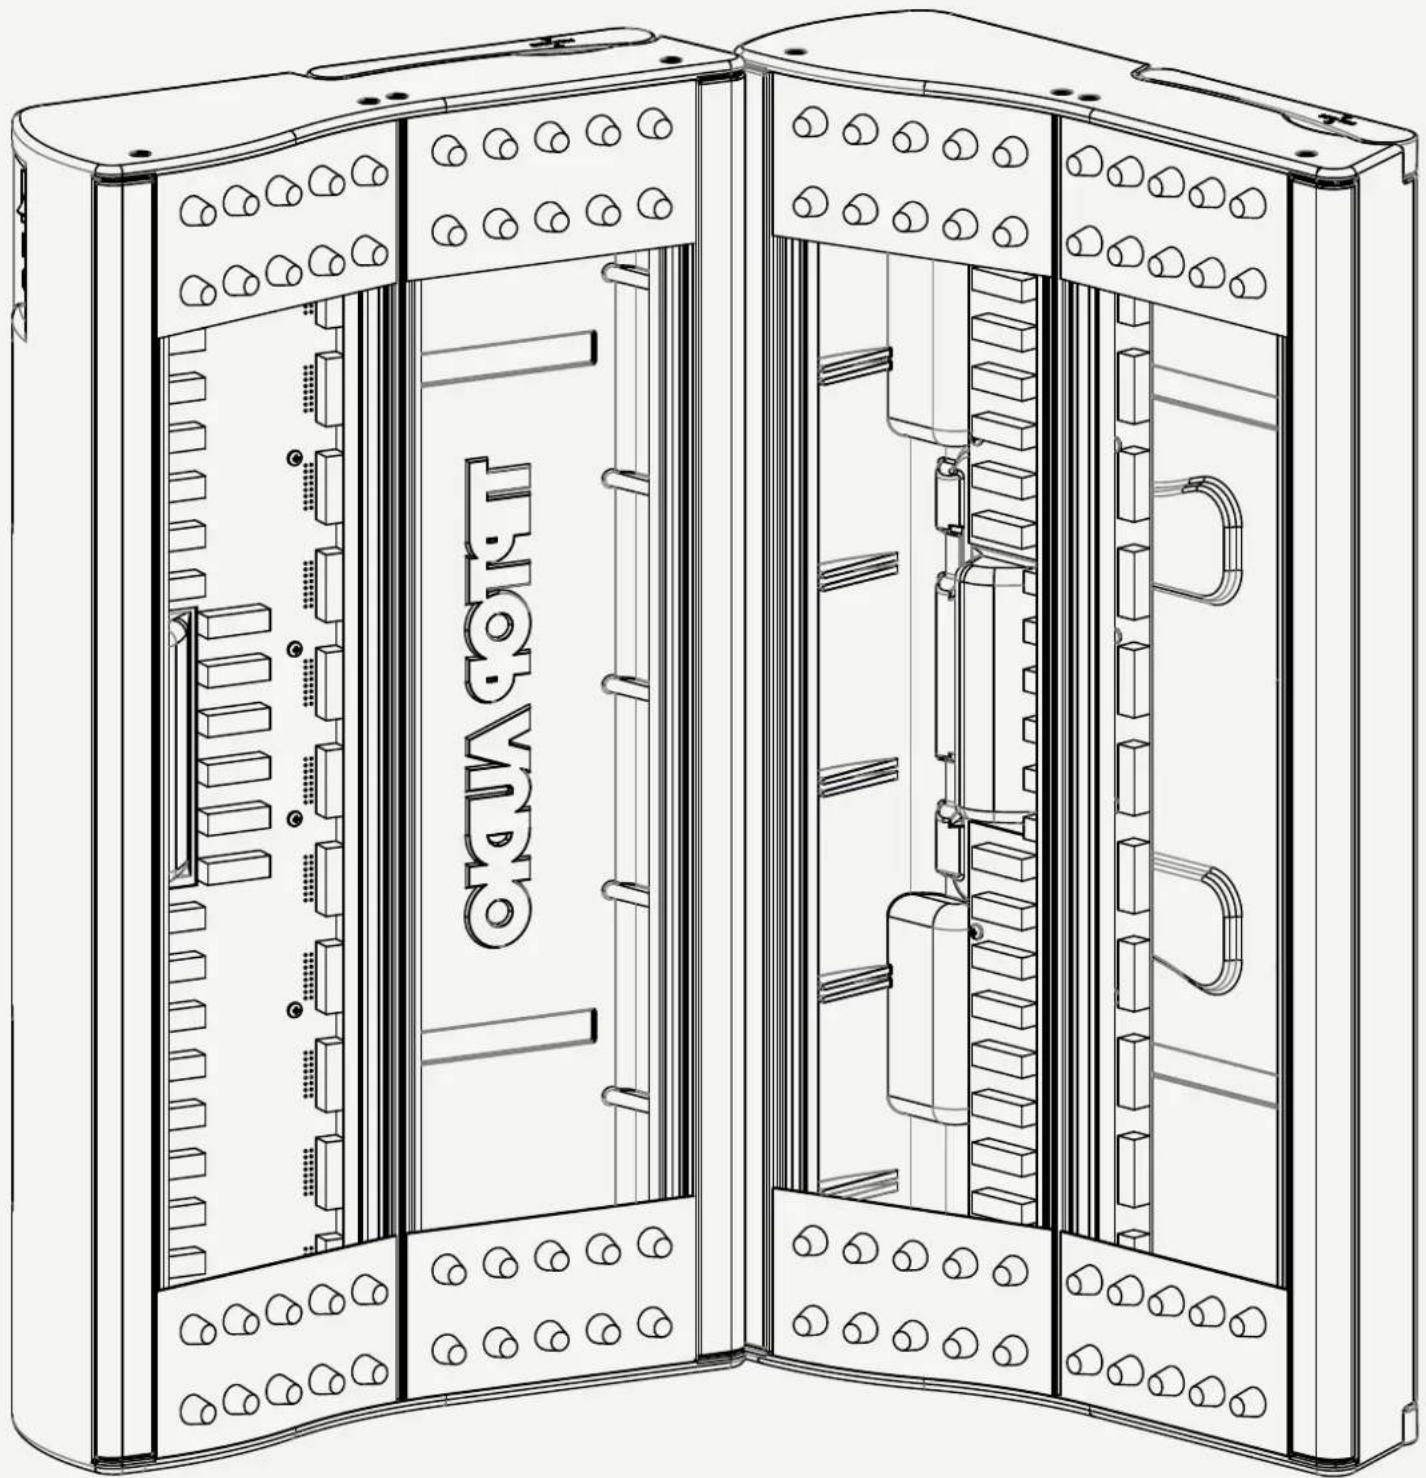
Never install the brackets with the system full of modules. If you have eight eurorack modules please mount them to all eight corners as shown in below image. It is OK if you don't have any modules, just skip to the next step.
natural_image
Technical line drawing of a dual-chamber industrial control cabinet with visible internal components and mounting holes (no text or symbols)Step 3:
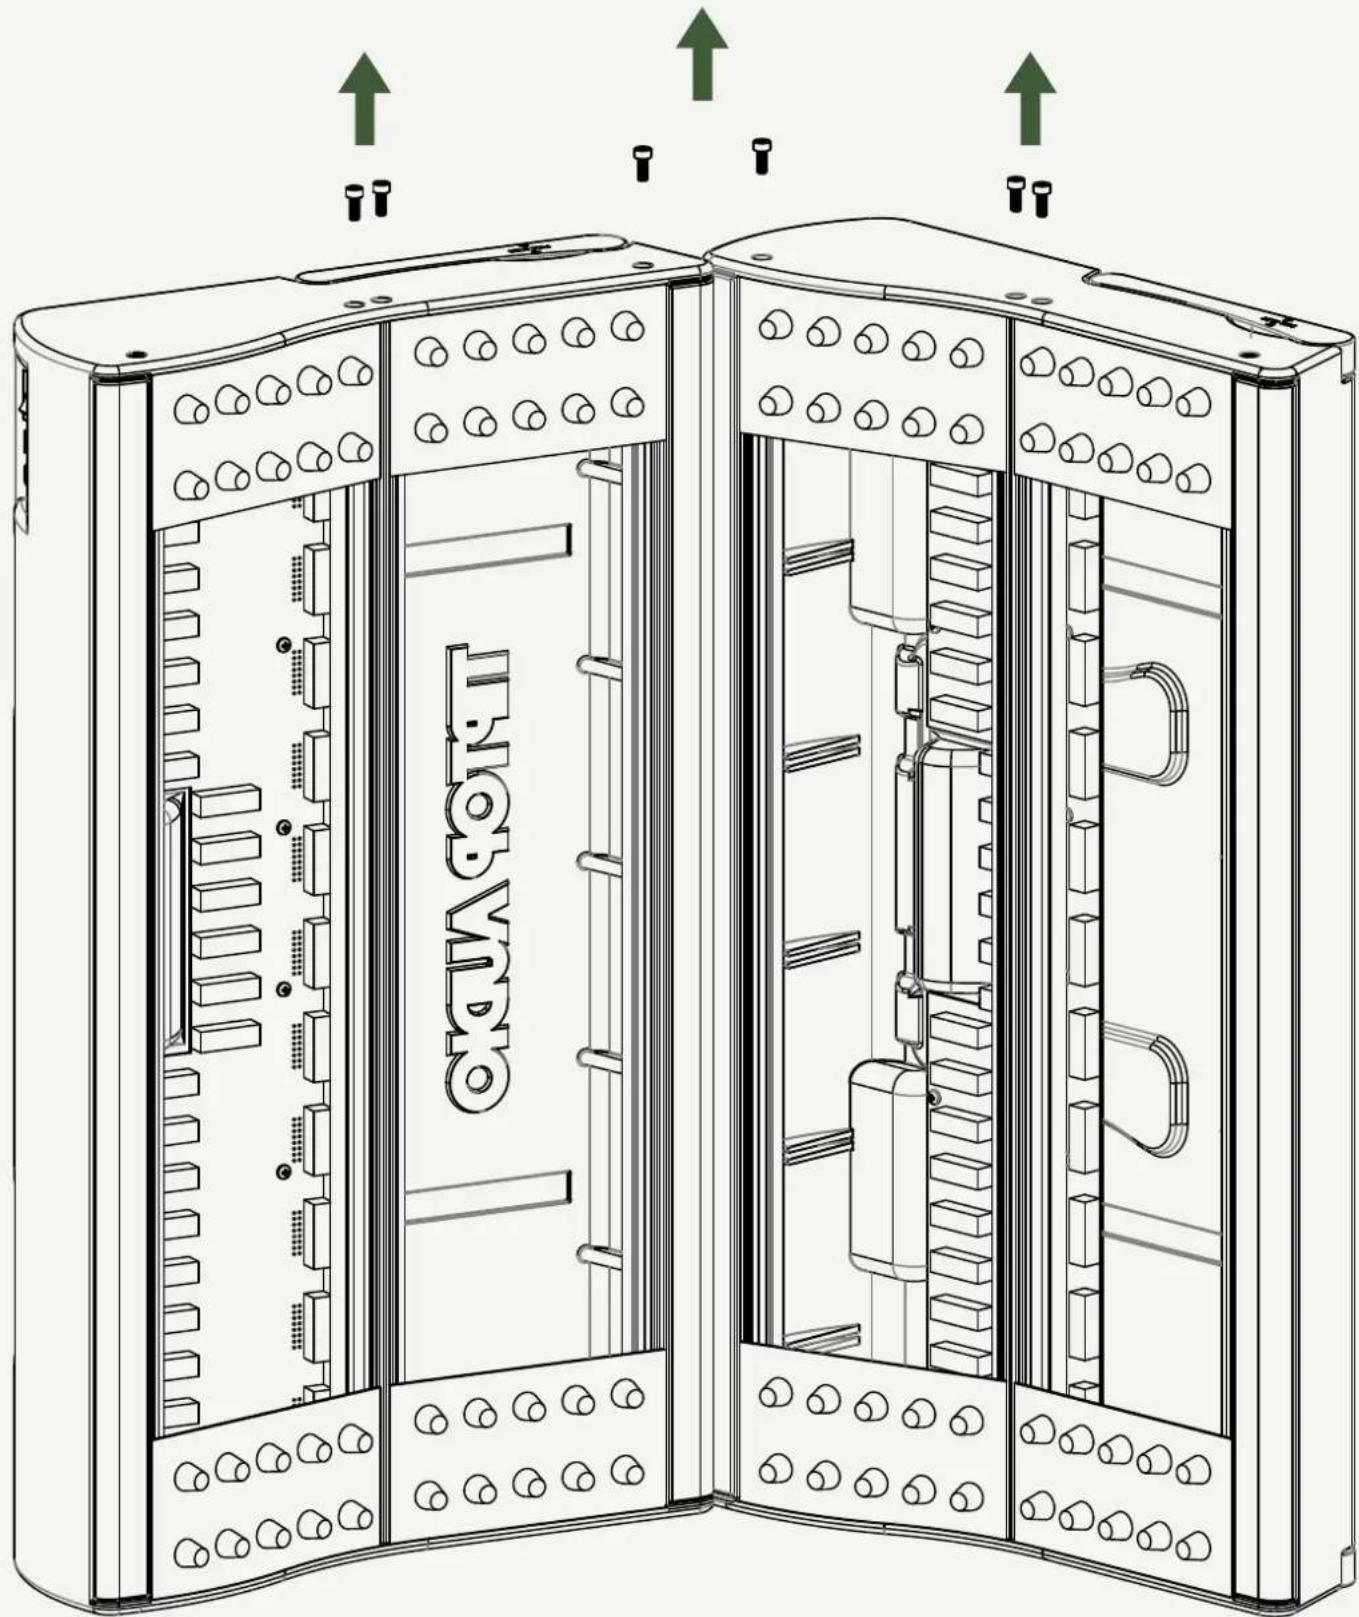
Set the two Mantis on a flat surface sideways as you see in the picture. Make the bottom of the upper mantis touch the upper side of the lower Mantis. Using the provided Allen Wrench unscrew the 6 screws shown in the photo, counter clock wise. Try not to vibrate the Mantis so the Z-Rails don't get out of alignment. If one of the Z-Rails does move, push it back to position by looking through the screw hole.
Step 4:
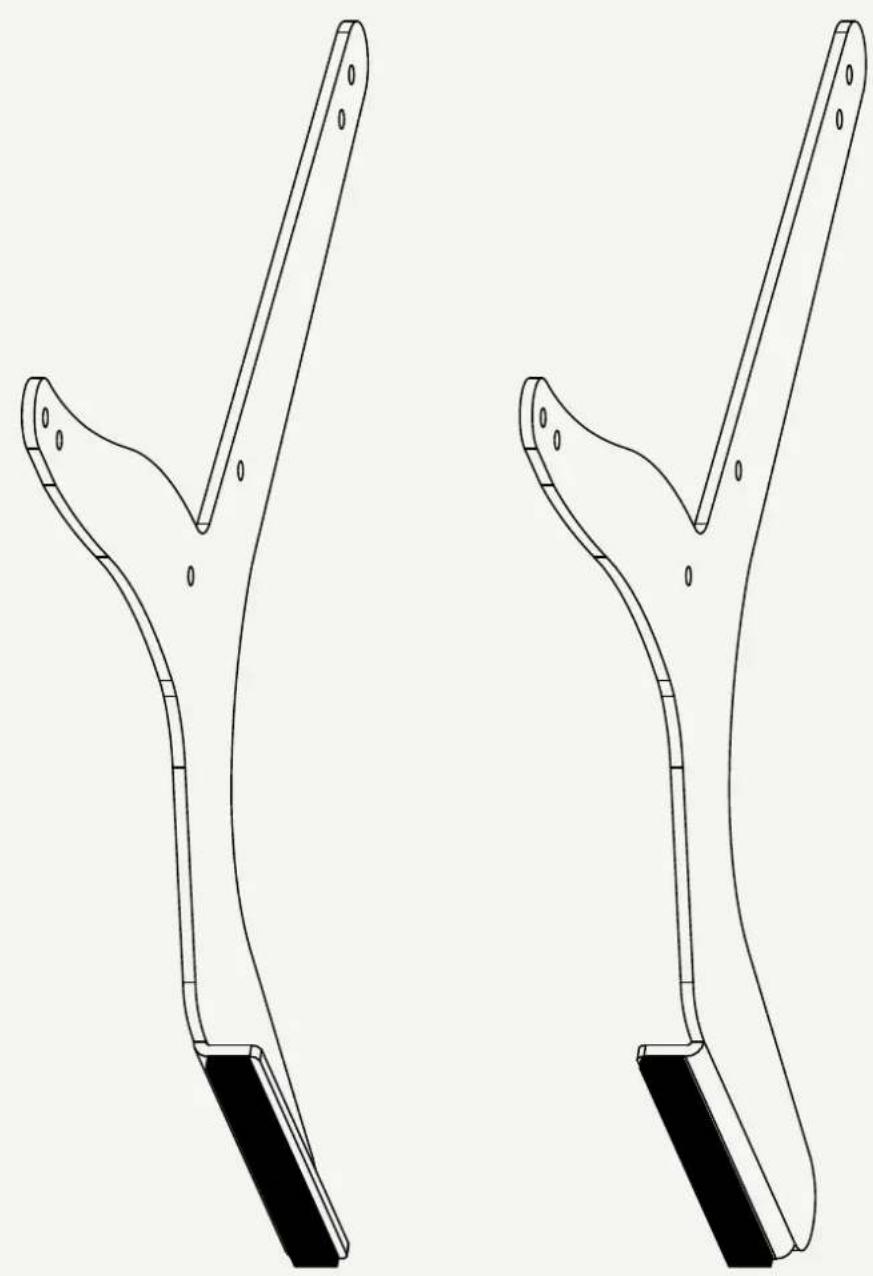
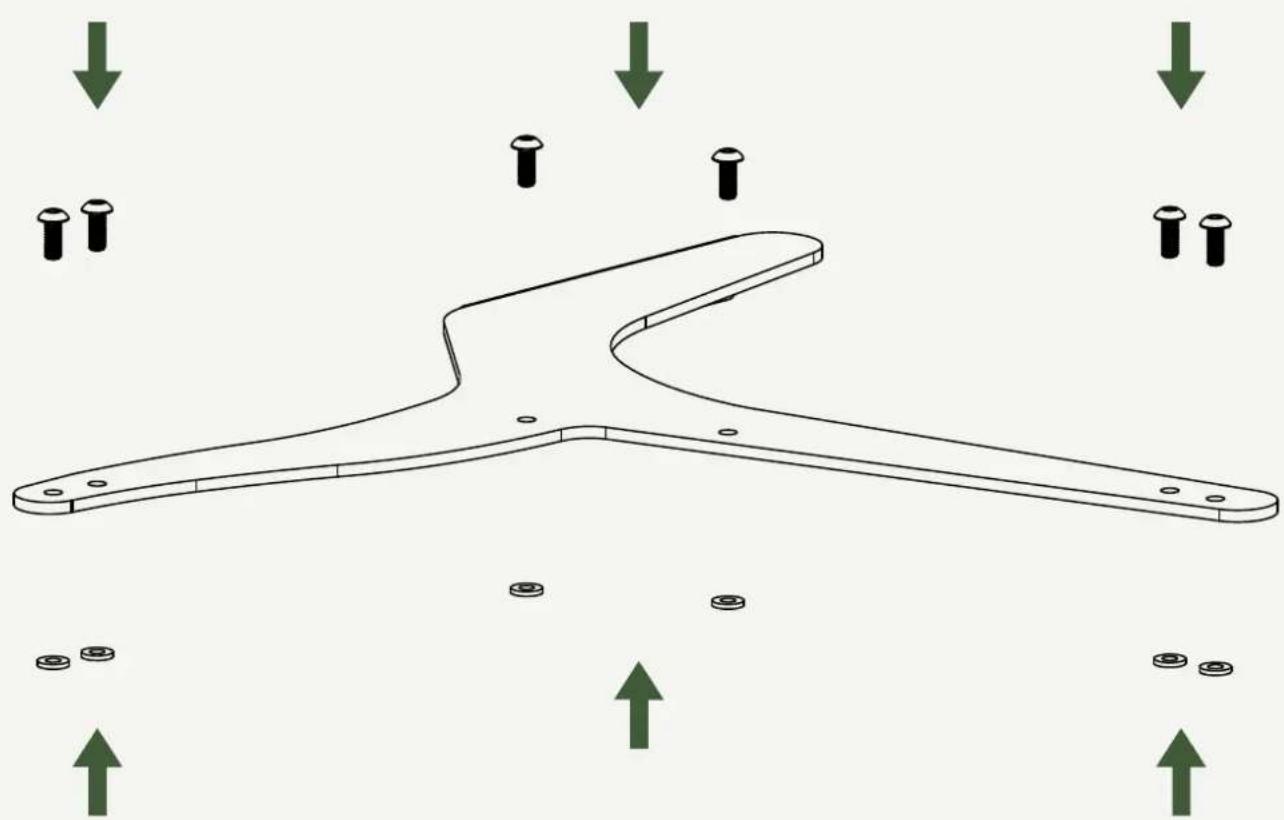
We are starting with the right bracket, locate the right bracket.
natural_image
Technical line drawing of two Y-shaped metal bracket components with mounting holes and a black base (no text or symbols)With the leg facing down Insert the screws through the holes and push the washers from the other side all the way in. The washers are used to help you keep the screws in place.
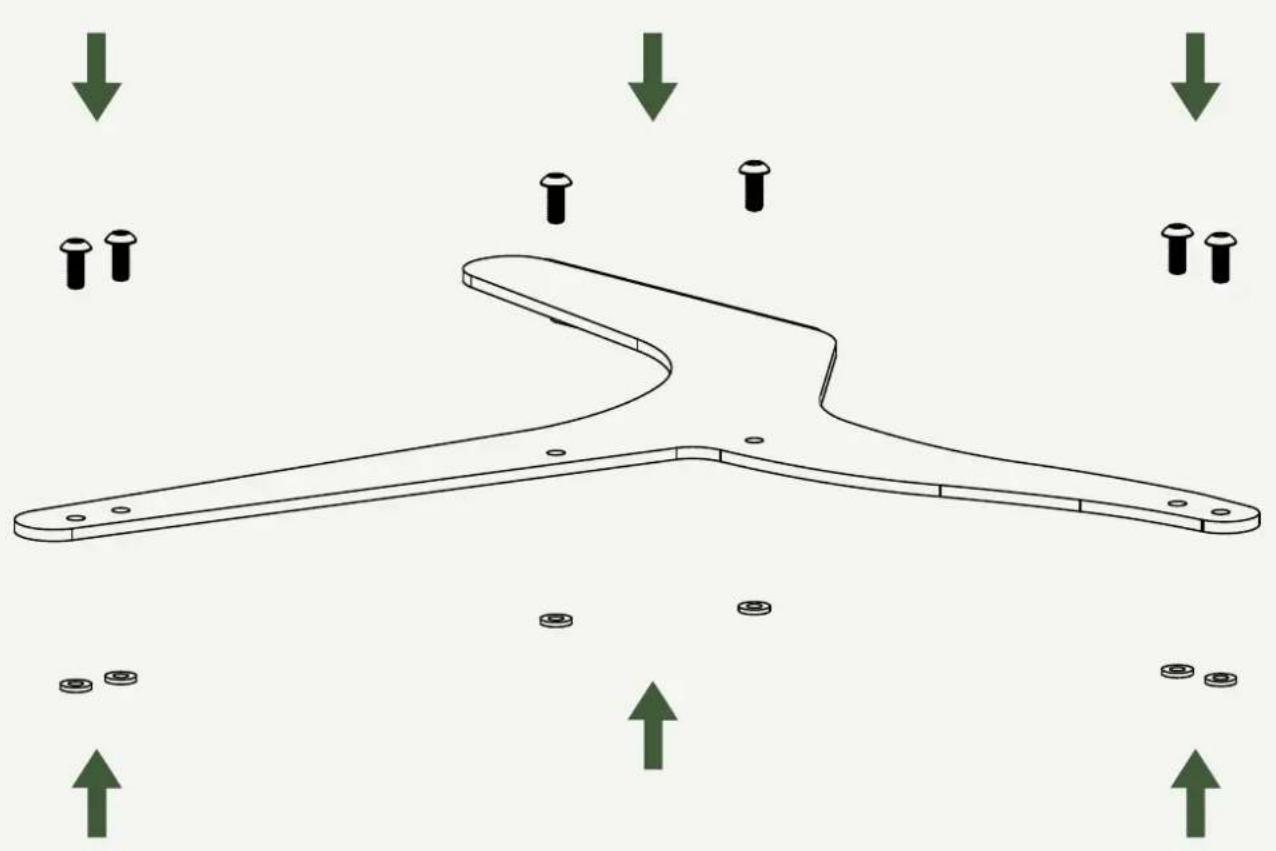
natural_image
Technical line drawing of a mechanical part with multiple holes and bolt holes, surrounded by green directional arrows indicating movement or force (no text or symbols)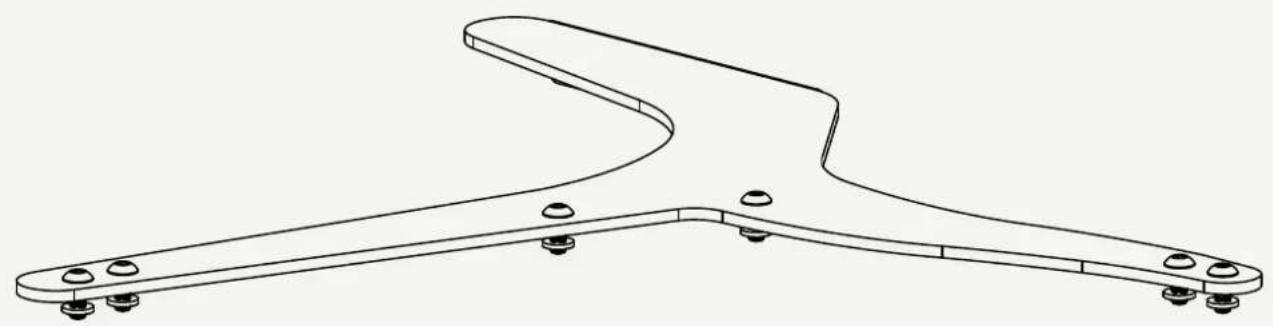
natural_image
Technical line drawing of a mechanical bracket with mounting holes and a curved top component (no text or symbols)Step 5:
Bring the bracket close to the two Mantis, slowly move the Mantis until the bracket screws align with the Mantis screw holes and attach the bracket. Using the Philips screwdriver, slowly start screwing them in, one by one with just a few turns. If one of them feels too stiff it might not be aligned with the rail, try to unscrew it and check the alignment. Do not screw in if it feels hard to turn as it might damage the thread on the Z-Rail.
After all screws are all the way in, tighten them just a bit. We will tighten them completely at the end.
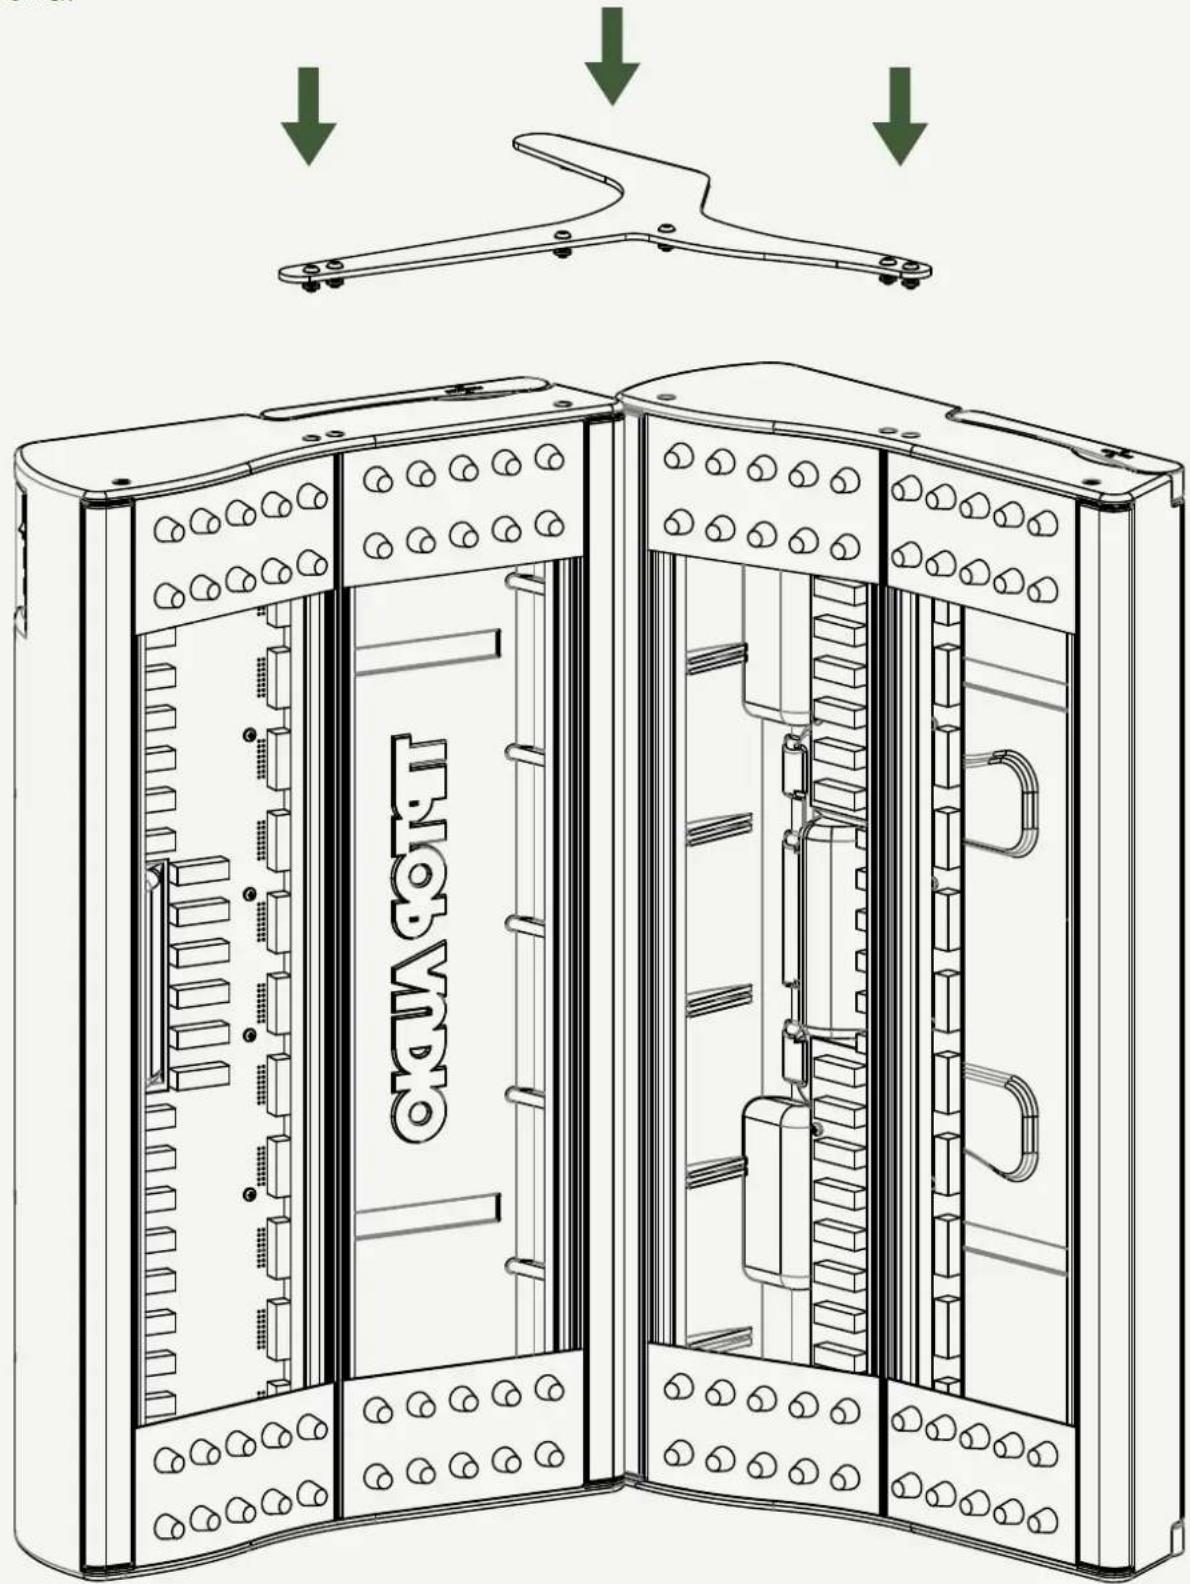
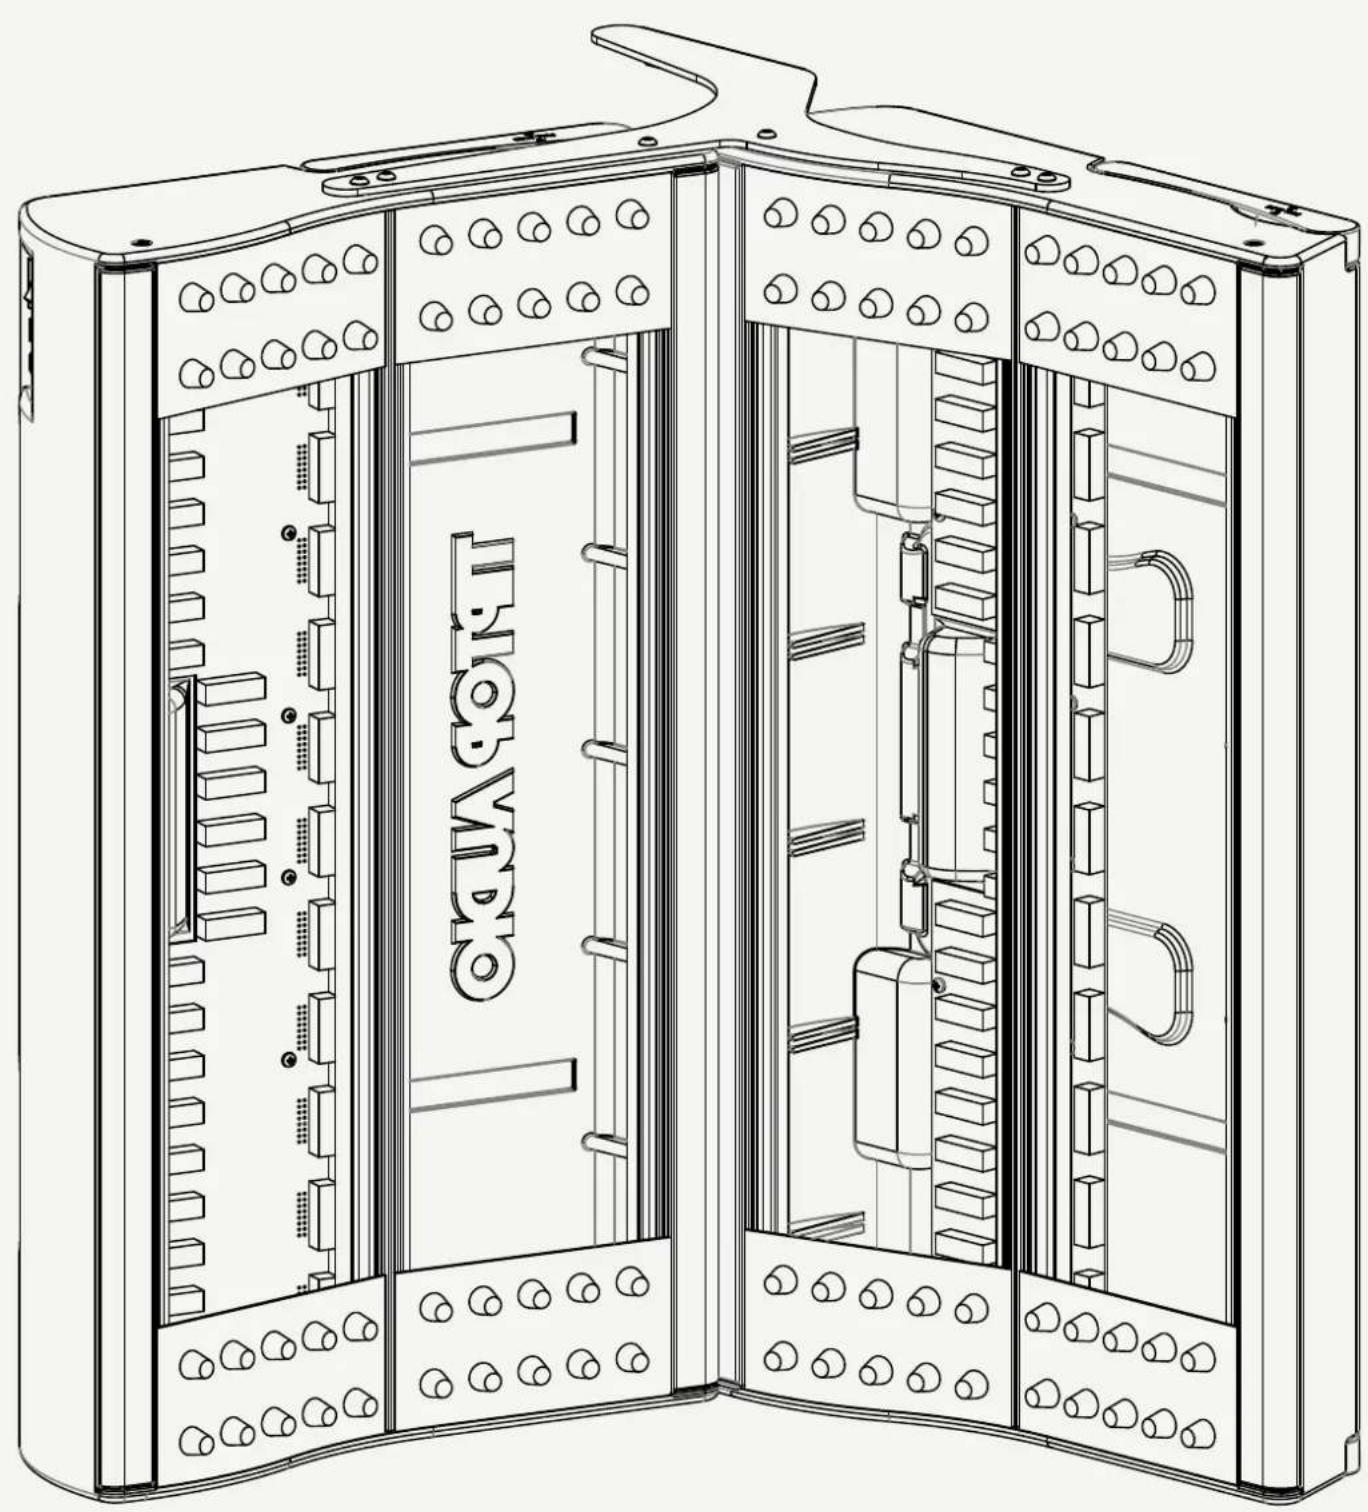
natural_image
Technical line drawing of a dual-chamber industrial control cabinet with visible internal components and mounting brackets (no text or symbols)Step 6:
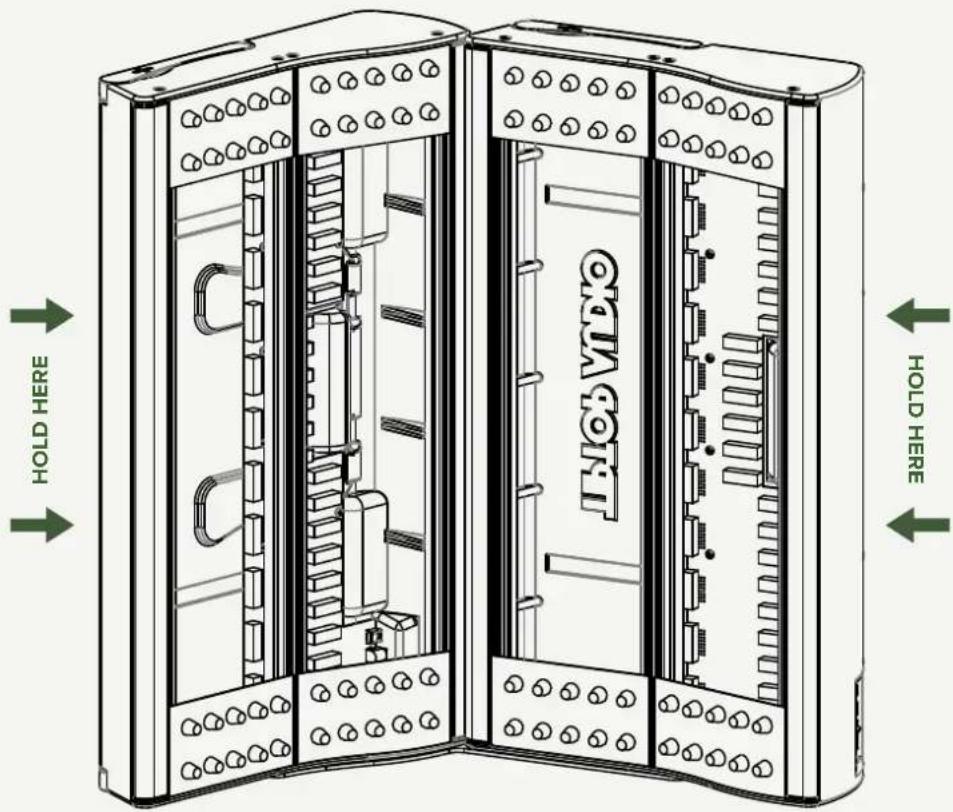
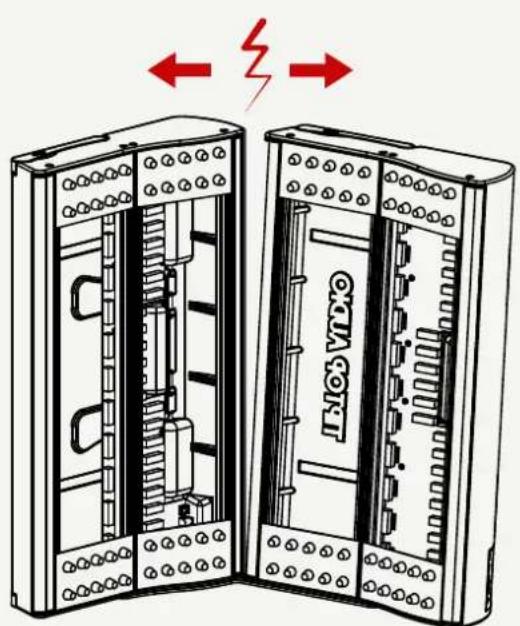
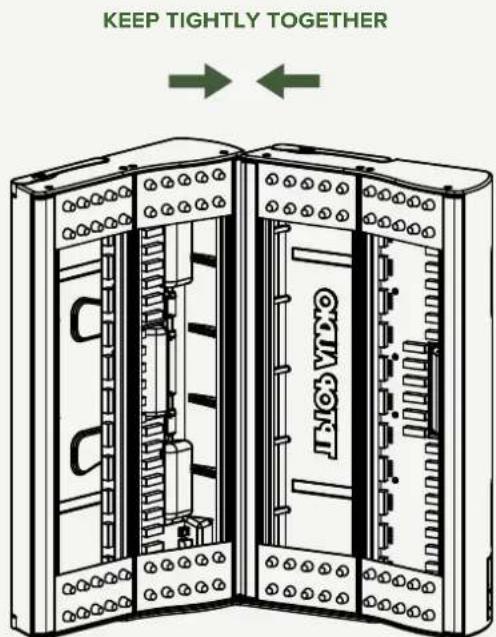
This step requires careful attention. You are about to flip the assembly upside down to attach the second bracket. It is important that when you do that you keep the two Mantis tight together so there is no stress put on the bracket and its joints. Both Mantis need to stay at 90 degrees with the bracket. Hold on the edge of both cases, lift up, rotate and put back on the table.

Step 7:
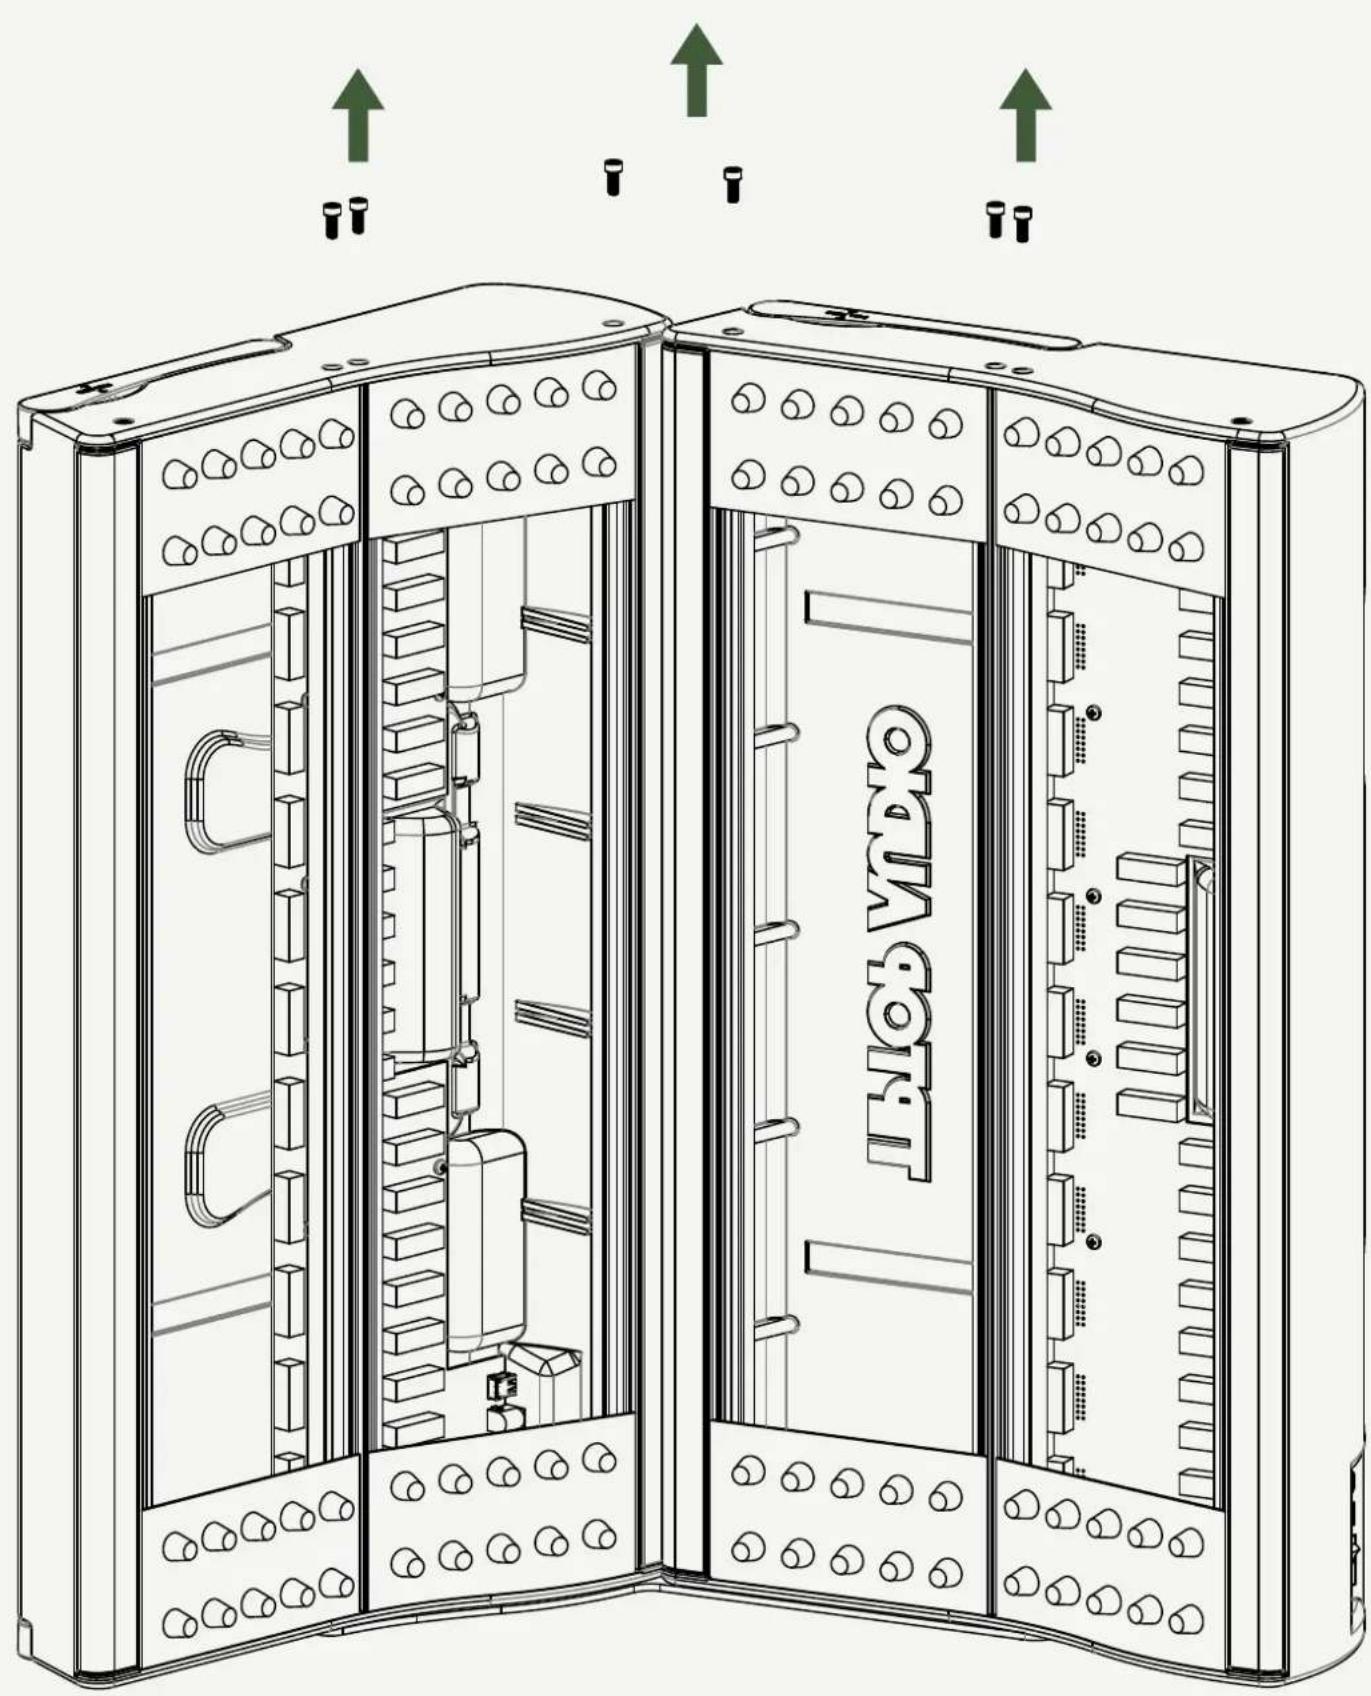
Once again, using the provided Allen Wrench unscrew the 6 screws, counter clock wise. Try not to vibrate the Mantis so the Z-Rails don't get out of alignment. If one of the Z-Rails does move, push it back to position by looking through its screw hole.
Step 8:
Repeat the same process as in Step 4 and Step 5, but this time with the left mantis bracket.
natural_image
Technical line drawing of a mechanical part with multiple bolt holes and directional arrows indicating movement or force (no text or symbols)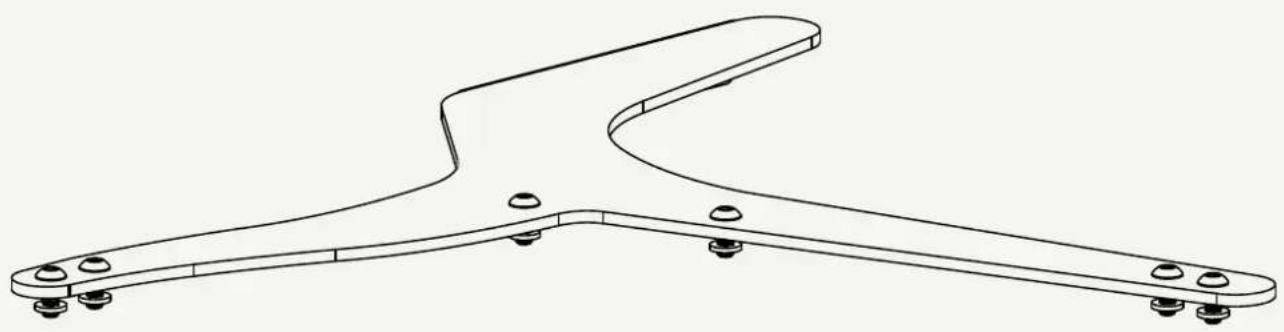
natural_image
Technical line drawing of a mechanical bracket with mounting holes and a curved top (no text or symbols)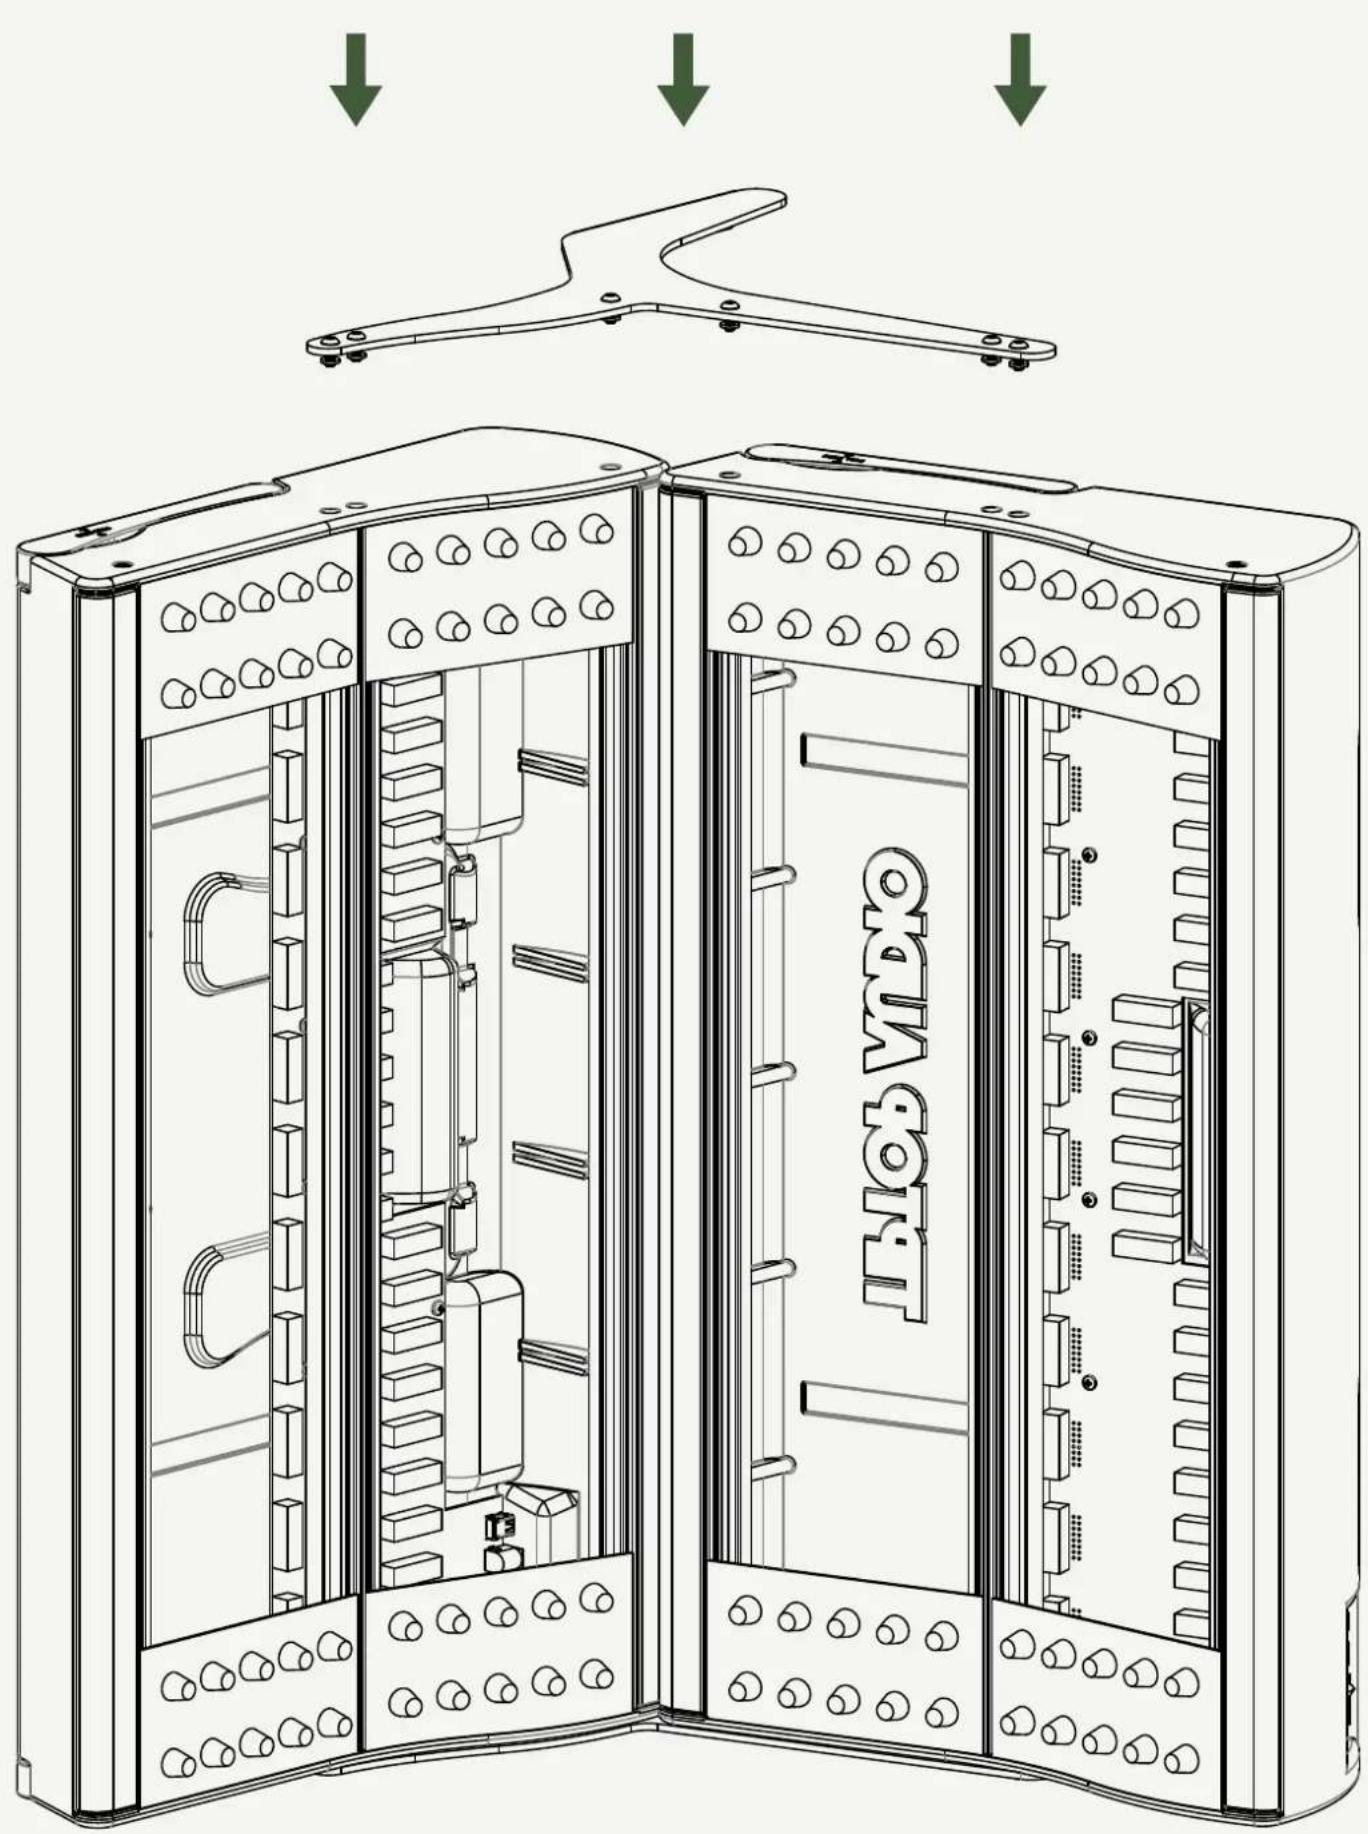
Step 9:
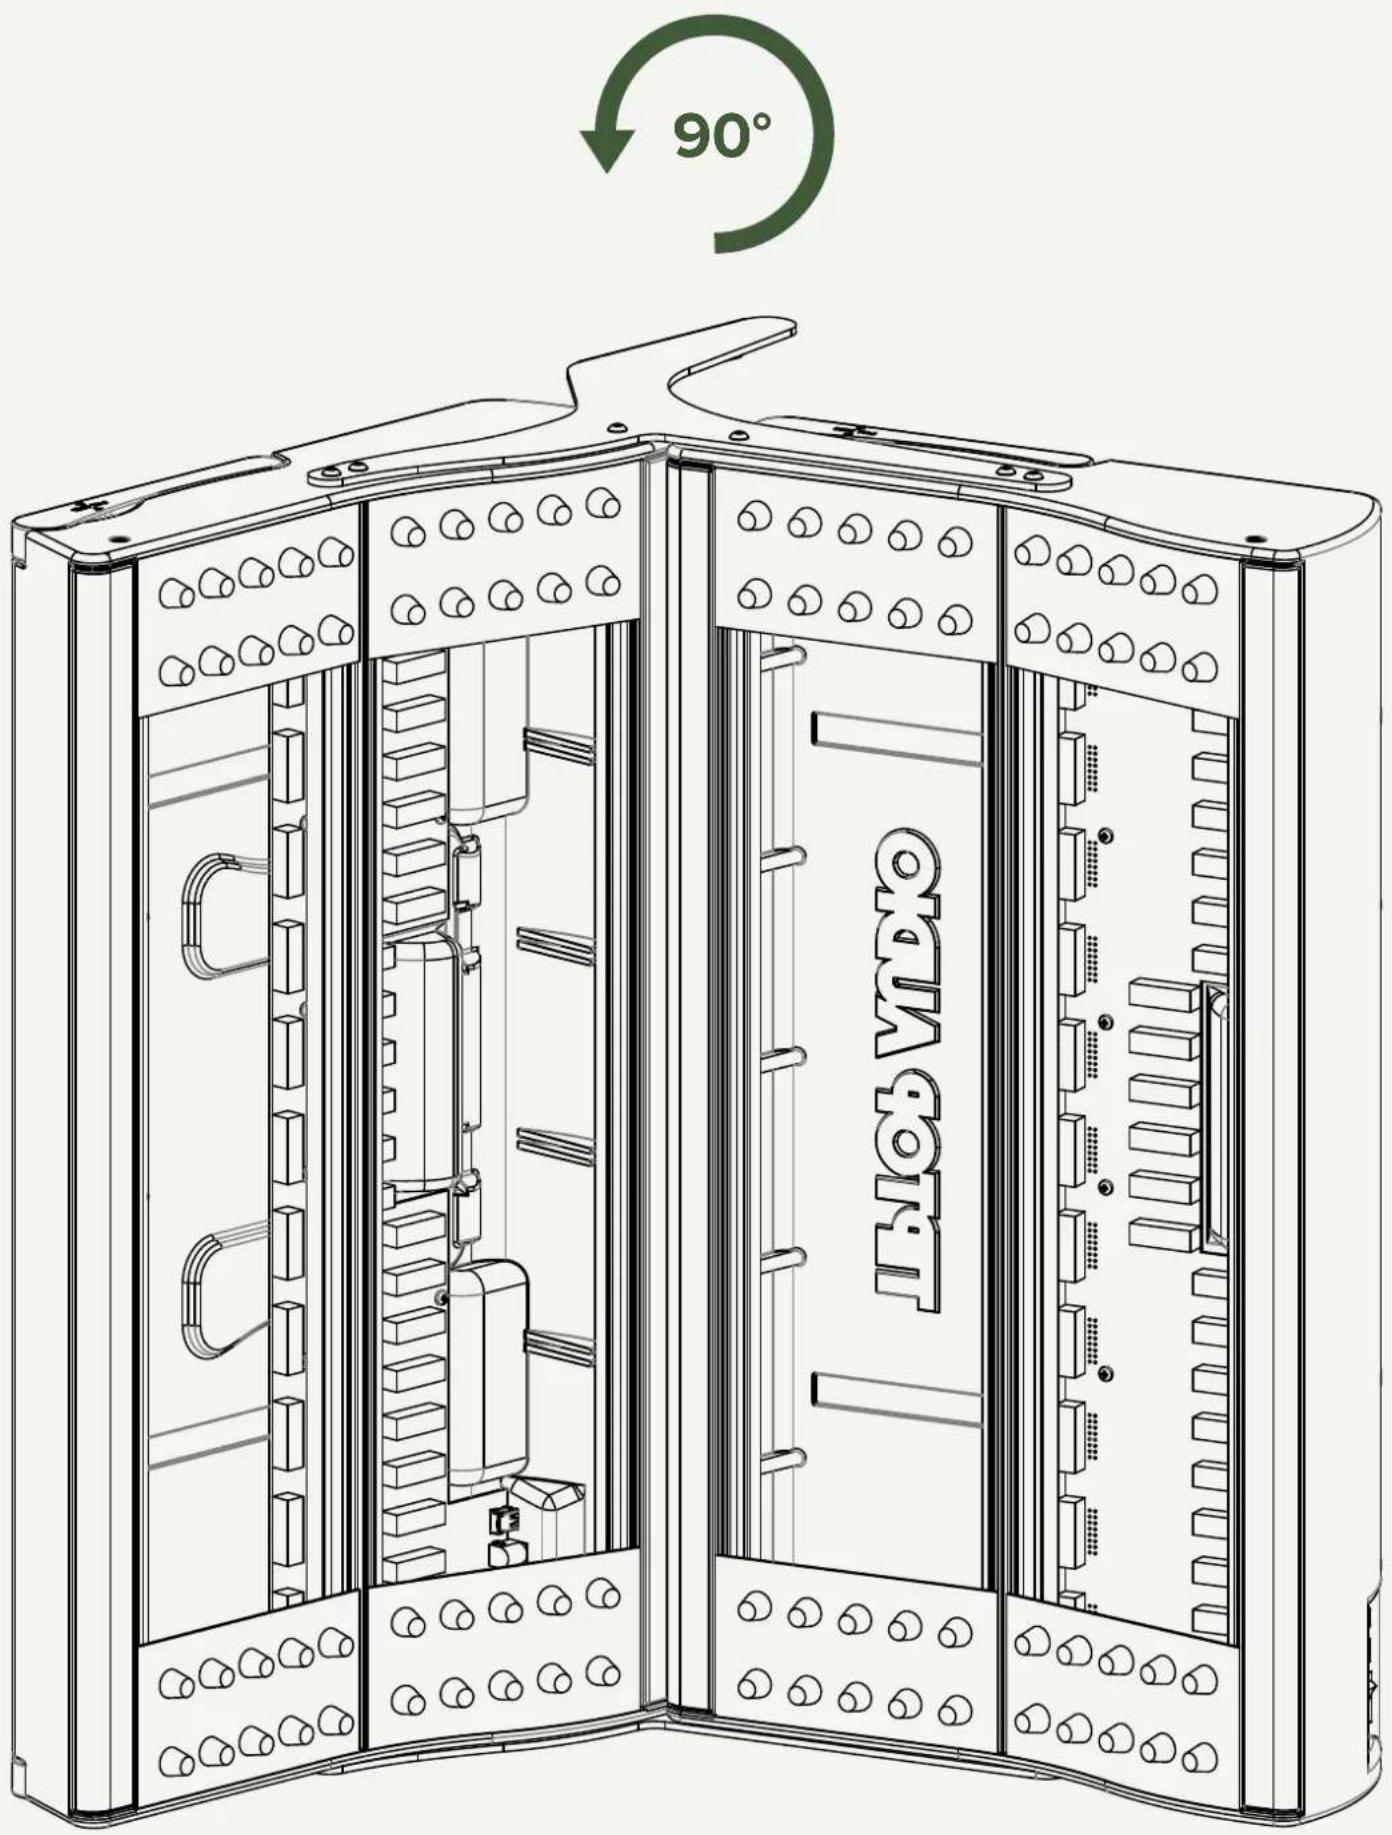
Rotate the assembly 90 degree, the two Mantis should now be securely connected. Now tighten all 12 screws firmly but do not apply excessive force.
Connecting to power:
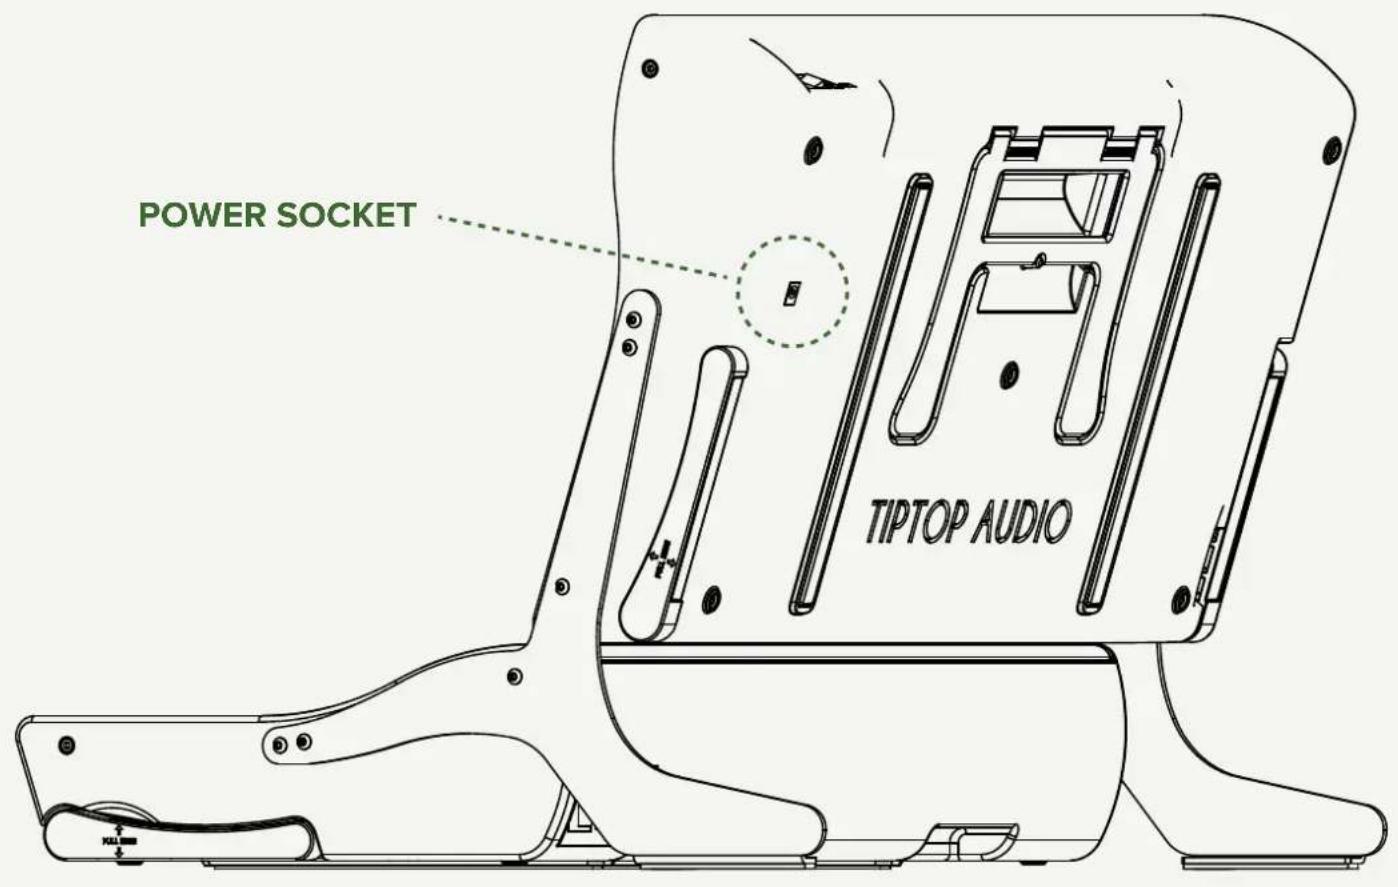
The two Mantis will still be powered independently, each with its own power adapter and switch. The upper standing Mantis will use the bottom power socket (see below) and the lower Mantis will use the side power socket next to the power switch. To turn power on/off flip the power switch on both the upper and lower Mantis.
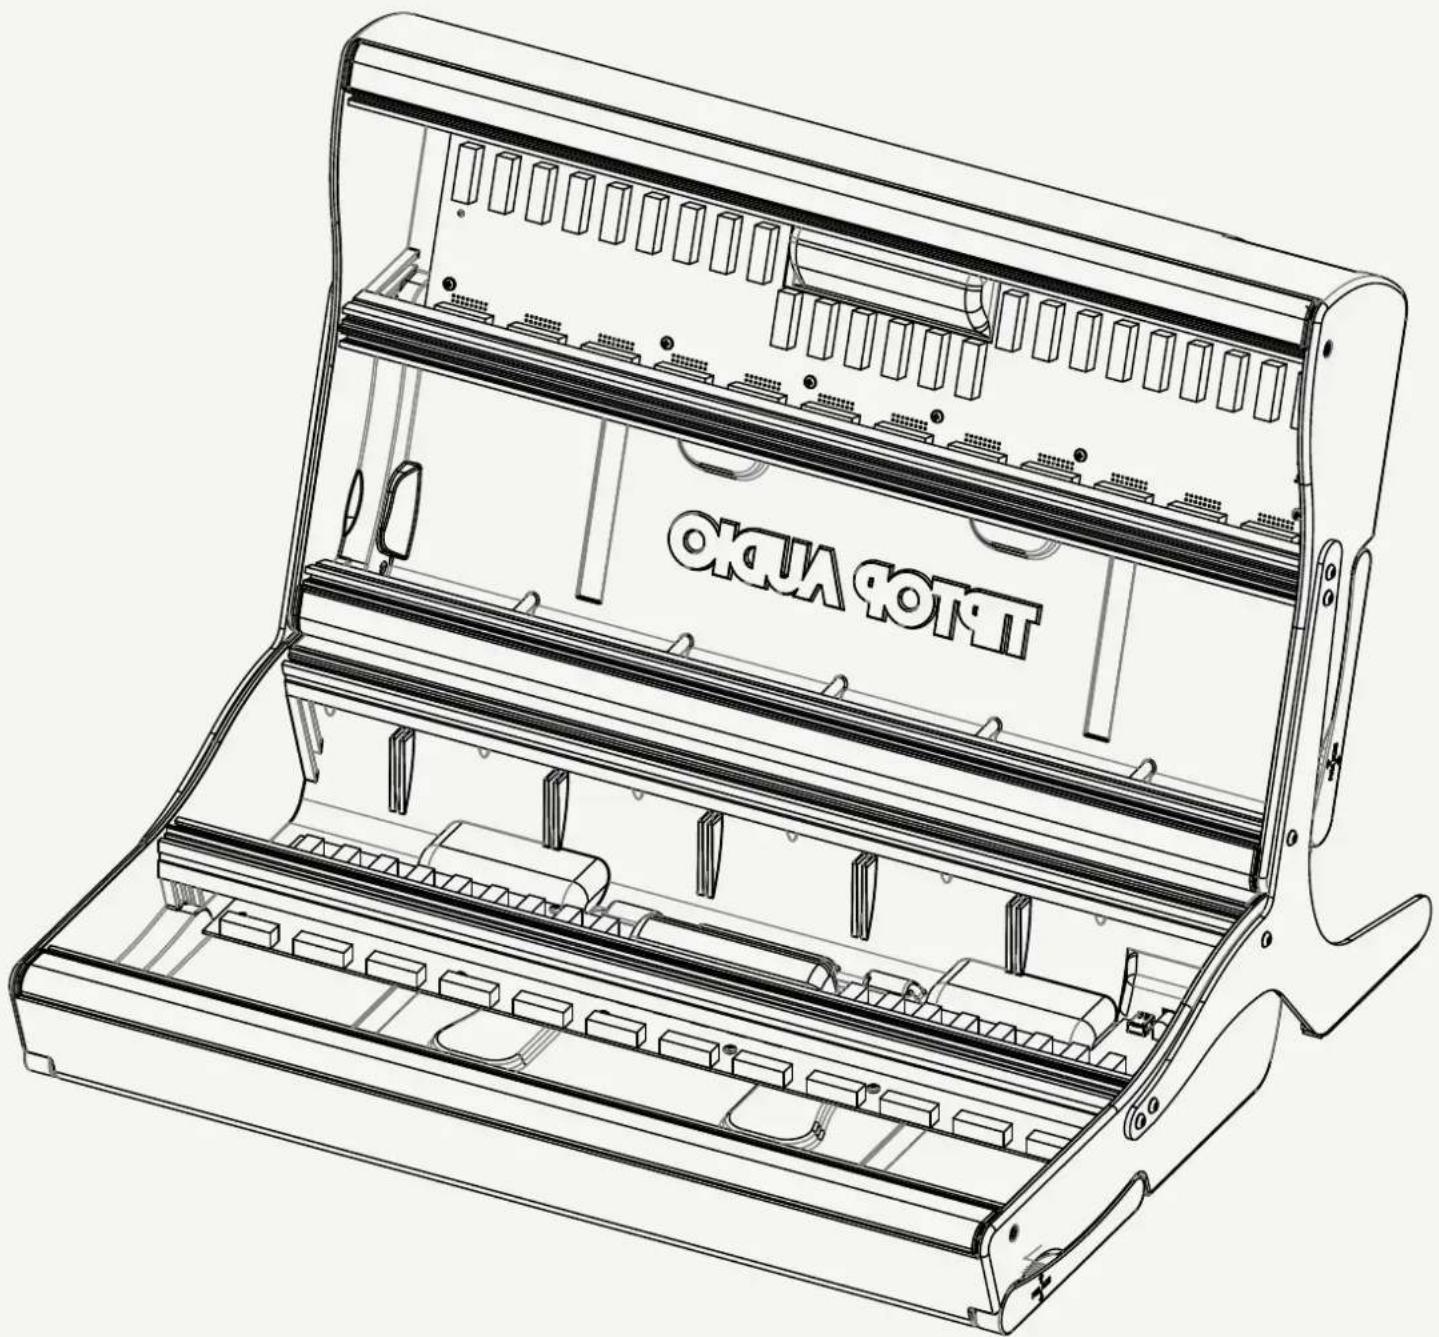
Now it is time to fill the cases up with modules!
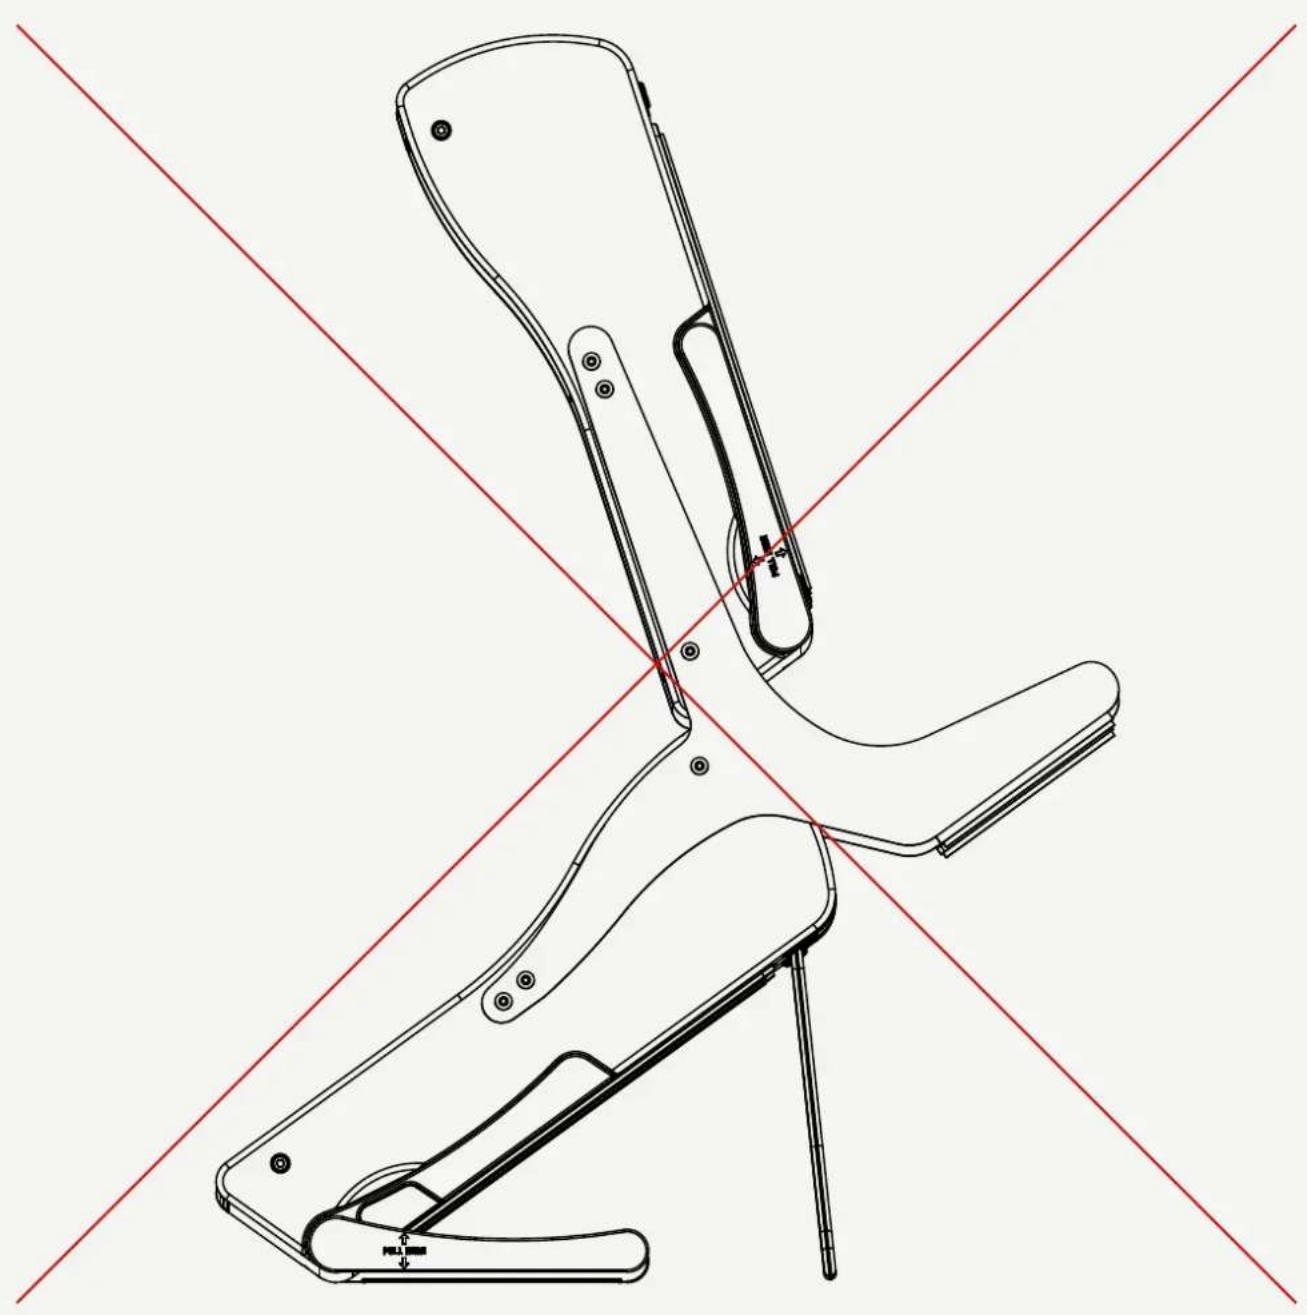
WARNING
And one last note about safety, do not use the Mantis legs when using the brackets.
natural_image
Technical line drawing of a mechanical device with red diagonal lines intersecting, no text or symbols presentwww.tiptopaudio.com/mantis
