
HCW-4505 - Uncategorized Infiniton - Free user manual and instructions
Find the device manual for free HCW-4505 Infiniton in PDF.


| Product Type | Electric Space Heater |
| Model | HCW-4505 |
| Brand | Infiniton |
| Heat Output - High | 2000 W |
| Heat Output - Low | 1000 W |
| Fan Mode | Yes (no heat) |
| Power Supply | 220-240 V ~ 50 Hz (assumed) |
| Control Type | Manual on unit and remote control |
| Timer | 1-12 hours (on unit); 0-12 hours (remote); weekly program available |
| Temperature Range | 10-49 °C |
| Swing Function | Yes |
| Open Window Detection | Yes |
| Weekly Program | Yes (7 days, up to 6 time periods per day) |
| Display | Digital LED |
| Installation Height | At least 1.8 m above floor |
| Safety Features | Overheat protection, thermal cutout, automatic 12-hour shutdown |
| Suitable Locations | Indoor, bathroom (outside certain volumes) |
| Certification | CE |
| Color | White |
| Includes | Remote control, user manual |
| Cleaning | Wipe with damp cloth; do not immerse or use solvents |
| Environmental Disposal | Do not dispose with household waste; recycle properly |
Frequently Asked Questions - HCW-4505 Infiniton
User questions about HCW-4505 Infiniton
0 question about this device. Answer the ones you know or ask your own.
Ask a new question about this device
Download the instructions for your Uncategorized in PDF format for free! Find your manual HCW-4505 - Infiniton and take your electronic device back in hand. On this page are published all the documents necessary for the use of your device. HCW-4505 by Infiniton.
USER MANUAL HCW-4505 Infiniton
natural_image
White air conditioner unit with digital display and 'invasion' branding (no text beyond branding)MODEL NO.: HCW-4505
Nota:
Nota:
Nota:
natural_image
White air conditioner unit with digital display and control buttons (no visible text or symbols on body)MODEL NO.: HCW-4505
Important safeguards
- This appliance can be used by children aged from 8 years and above and persons with reduced physical, sensory or mental capabilities or lack of experience and knowledge if they have been given supervision or instruction concerning use of the appliance in a safe way and understand the hazards involved. Children shall not play with the appliance. Cleaning and user maintenance shall not be made by children without supervision.
- Children of less than 3 years should be kept away unless continuously supervised.
Children aged from 3 years and less than 8 years shall only switch on/off the appliance provided that it has been placed or installed in its intended normal operating position and they have been given supervision or instruction concerning use of the appliance in a safe way and understand the hazards involved. Children aged from 3 years and less than 8 years shall not plug in, regulate and clean the appliance or perform user maintenance.
CAUTION - Some parts of this product can become very hot and cause burns. Particular attention has to be given where children and vulnerable people are present.
- If the supply cord is damaged, it must be replaced by the manufacturer, its service agent or similarly qualified persons in order to avoid a hazard.
- CAUTION: In order to avoid a hazard due to inadvertent resetting of the thermal cutout, this appliance must not be supplied through an external switching device, such as a timer, or connected to a circuit that is regularly switched on and off by the utility.

- WARNING: In order to avoid overheating, do not cover the heater.
- The heater must not be located immediately below a socket-outlet.
- The heater must be installed at least 1.8 m above the floor.
- Means for disconnection having a contact separation in all poles must be incorporated in the fixed wiring in accordance with the wiring rules.
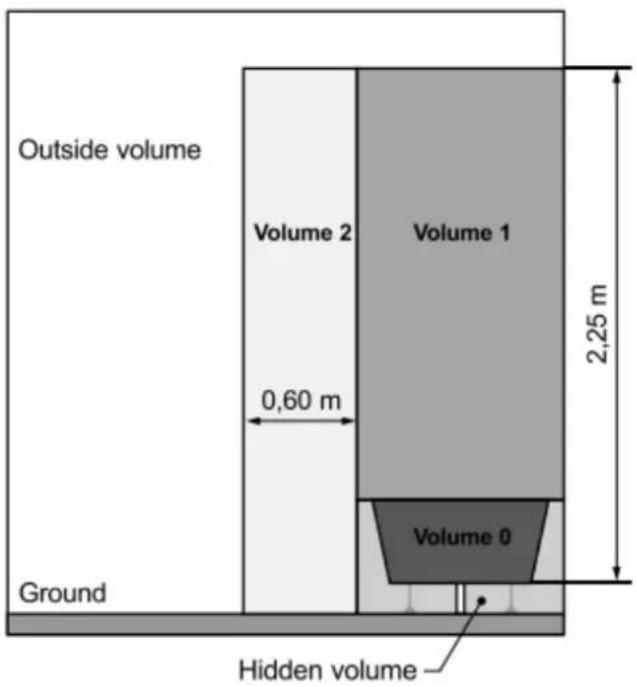
Fixed heaters are to be installed so that switches and other controls cannot be touched by a person in the bath or shower.
Warning: this product can be installed in bathrooms but only out of the volumes according the national wiring rules (For France NF C 15-100)
Note: The above drawing is for reference only.
We suggest that you to contact a professional electrician for assistance.
Function operation (both machine & remote control)
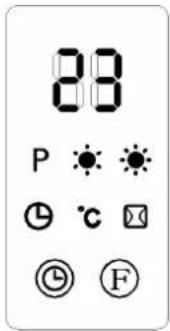
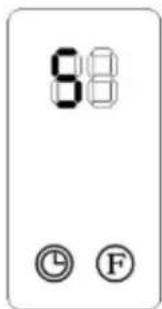
- Plug in and switch on by pressing the red switch 0/1, enter into standby mode and display shows "S":
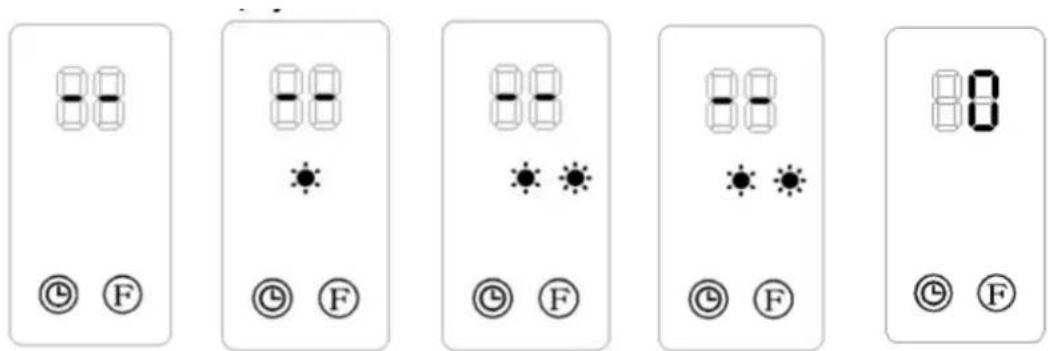
- Press" F" button for one time, enter into fan mode and the display show --".press
second time ,the product works with low heating(1000W) and display shows “-- / ” . Press third time, changes to high heating(2000W) and display shows “--/ ” .then press fourth time ,enter into swing and display shows “--/ ” , Press fifth time , change to stand by.and display shows “0”
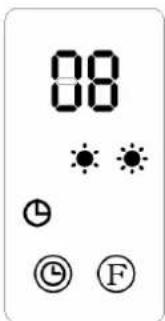
- Press" Ⓤ" button to set timer(00-12hours). Pressing the button one time increases one hour for timer. After setting time, the display will show current setting time for 5 seconds, then resume to previous display, meanwhile the light of " Ⓤ" will on. Below photo is an example of setting 8h:
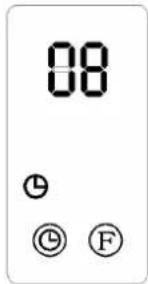
- Appointment "ON": In standby mode, press Ⓛ timer button, you can set the appointment turn-on time in 00-12 hours. After complete setting, the display shows the appointment turn-on time and also the light " ℓ " is on. The display automatically decreases 1 hour for each hour passed. When the appointment power-on time arrived, the product will automatically turns on. The default setting temperature is 23 °C during appointment turn-on. Below photos is an example to set appointment turn-on time to 8
hours:
Note: If not setting the temperature and weekly program, the product will automatically turn-off after 12 hours of continuous work, and enter into standby.
Function operation (ONLY by remote control)
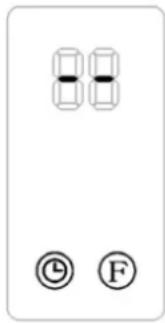
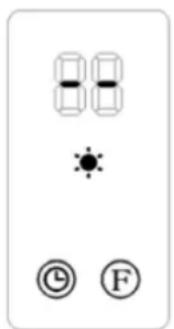
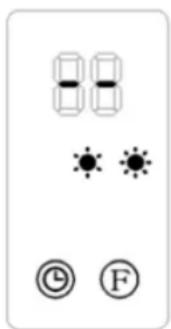
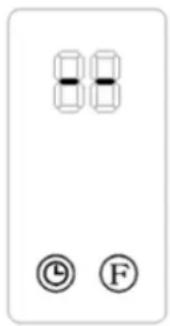
- Press " button for one time, the product works with low heating(1000W) and display shows -- / . Press again, changes to high heating(2000W) and display shows --/".
Press third time, heating switch off, only fan blowing and the display show “--”.
-
P ress" (≥ "button to set swing function, press again, will stopped;
-
P ress" " button to set timer(1-12hours) and lighted" "
-
Set current TIME/DAY (can set both under standby mode & working status):
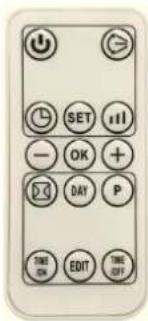
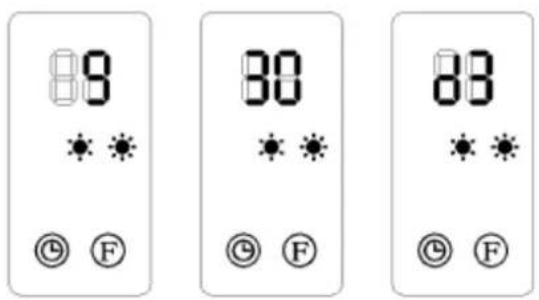
Press "SET" button for one time, the display shows "12" as default, press "+/−" to set current hour; press "SET" again, the display shows minute "30", press "+/−" to set current minute, then press "SET" for third time, the display shows the day "d1", press "+/−" to set current day(Monday-Sunday: d1-d7). Then press "OK" to confirm the setting, the display will show previous settings.
For example: Setting to Wednesday, 9:30 AM under 25°C under II heating, pls. refer to the following photos:
Note:
- Press" SET " to check the current time & day in turn;
-The LCD was display off if no any operation during 5 seconds;
-The timer is in 24 hours.
-00\~59 minutes.
2.Set temperature
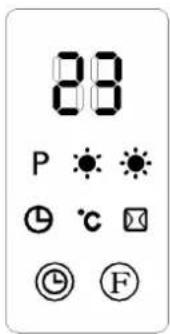
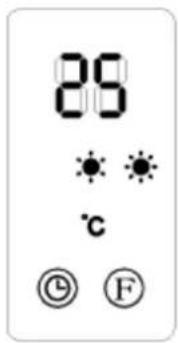
During working status, Press “ + / −”, the display shows “ 23 “ as default. Press “ + / −” to set desired temperature (temperature range 10-49°C), press” OK “ to confirm the setting.
For example: The current ambient temperature is 15^ C , when set temperature to 25^ C , the display shows as below:
Note:
When setting temperature, it will use SMART working way:
1) Setting temperature – ambient temperature>2°C, working with high power-2000W;
2)0°C<Setting temperature – ambient temperature=<2°C, working with low power-1000W;
3) Setting temperature - ambient temperature = 0^ , the cool fan will work for 30 seconds to
below out the heating left inside, then enter into standby mode.
4) after enter into standby mode, if the machine cool down and:
Setting temperature – ambient temperature > = 2^ , the machine will wake up and resume to heating.
If you want to cancel the setting temperature, press " 🔍 " key to choose the heating 🔍 or

, the product will work without setting temperature. While the display " ℃ " will go off, and will show “--”. After continuous heating for 12 hours, the cool fan will work for 30 seconds and enter into standby mode.
Set weekly program(ONLY by remote control)
After complete setting of current TIME/DAY, below is the steps to set weekly program:
2) Press " ⏻ ", the product enter into working status.
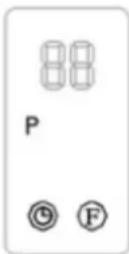
2)Press “P”, the display shows “P”, it enter into weekly program setting:
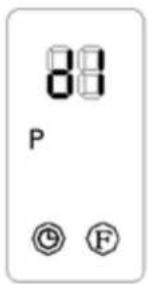
3).Press" (DAY) ",the display shows d1\~d7, set to working day(Monday-Sunday: d1\~d7). Such as set Monday:
Note:
In order to distinguish between setting current day & working day:
Current day - Monday-Sunday: d1\~d7
4).Press" EDIT ", the display shows P1\~P6(for each day, it can be set maximum 6 time periods).Such as setting P1:
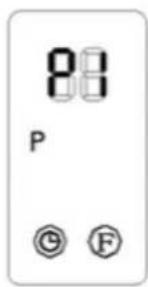
5).Press" TIME /on "the display shows 00" as default. Press" TIME /on "continuously to set the turn-on time. Such as set the turn-on time 7:00am (Memo: the setting time 0-24 for choice)(As figure);
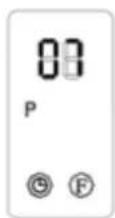
6).Press" TIME /off "the display shows the pervious step turn-on time by default. Press " TIME /off " continuously to set the turn-off time.Such as set the shutdown time at 13:00pm (the display as figure ), (Note: turn-off time later than turn-on time, when turn-on time same as turn-off time, the unit in stand by mode)
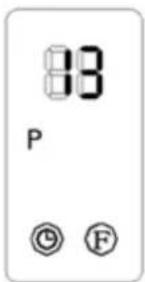
9).Press" ⊕ / - "to setting the target temperature(Temperature range 10-49°C),
10) Repeat steps 2-7 above, you can set the whole weekly program (& Each day, the work of each segment opens, the time of shutdown).
9) After above setting, press “DAY” choose the unit turn-on day of the week, then press “EDIT” to choose the turn-on time of the day, then Press “+ / -” to set desired temperature (temperature range 10-49°C), press “OK” to confirm the setting.
9). To cancel the weekly function, press the "P" agian, the light "P" will go off. The weekly program is off. The product will revert to the previous function working status.
Note:
-After the above setting are completed and P program is working,press" (DAY) "to check the setting time of each day and time periods,
- The turn-on time periods 00\~24hours, cannot set to minutes;
-The "TIME/OFF" can not be less than "TIME/ON";
-When the "TIME/ON" is the same as "TIME/OFF", the time period enter into standby mode;
Note: If main switch off, power cut off, or plug out, it need reset. You can press to check you set Time /Day.
Set open-window detection(ONLY by remote control):
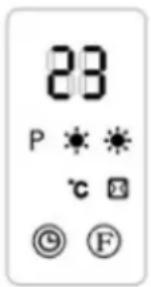
1). Press “ ⏻”, the product enter into working status. Heating for a moment until stable. 2). Press “ ⏱” by remote control, light “ ☑/ °C ” will on; The temperature display” 23” by default. Press“ + / - ” to set target temperature. During open-window detection mode, once the ambient temperature drops 5-10°C within 10 minutes, then the product will stop working within 30 minutes and enter into stand by mode. Then press “ ⏻” to turn on the product.
Press " again to turn off the open-window detection, the light " will go off and the product will resume to previous working mode.
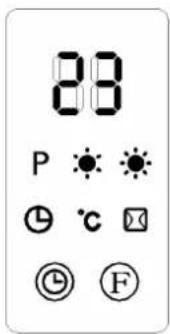
Below is an example to set 23°C during open-window detection.
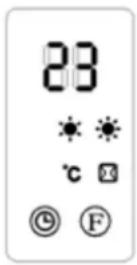
4). When turn on at the same time for both open-window detection and weekly program, during the OFF period of weekly program, the product doesn't work. During the working status of weekly program, the temperature is subject to the setting temperature of open-window detection. Below is a example:
Note:
- Before turn on weekly program: it must set day and time period, otherwise the weekly default state is "00", which does not work.
CLEANING AND MAINTENANCE
-
If you don't use the heater for a long time, please wipe the surface and put it into the box. Lay the carton on the ventilated and dry place. Humidity and force press was prohibited.
-
Wait for the machine being cool and pull out the plug, then clean it. Wipe it clean with wet washcloth or cleaner. Never directly wash with water, do not drop the water into the machine. Never clean it with acids, chemical thinner, gasoline, benzene etc.
Before use it again, please check it and make sure the outlet ventilation have no sundries.
Environment

Meaning of crossed –out wheeled dustbin:
Do not dispose of electrical appliances as unsorted municipal waste, use separate collection facilities.
Contact you local government for information regarding the collection systems available.
If electrical appliances are disposed of in landfills or dumps, hazardous substances can leak into the groundwater and get into the food chain,
damaging your health and well-being.
When replacing old appliances with new ones, the retailer is legally obligated to take back your old appliance for disposals at least free of charge.
INFINITON
natural_image
White air conditioner unit with digital display and 'invasion' branding (no text-heavy elements)MODEL NO.: HCW-4505
Importantes salvaguardas
Note:
Nota:
Ao definir a temperatura, ele usará o SMART working way:
Note:
natural_image
Symbol of a trash bin with crossed lines and a black rectangular base (no text or labels)Information requirements for electric local space heaters
| Model identifier(s): HCW-4505 | |||||
| Item | Symbol | Value | Unit Item | Unit | |
| Heat output | Type of heat input, for electric storage local space heaters only (select one) | ||||
| Nominal heat output | P_nom | 2,0 | kW | manual heat charge control, with integrated thermostat | [no] |
| Minimum heat output (indicative) | P_min | 0 | kW | manual heat charge control with room and/or outdoor temperature feedback | [no] |
| Maximum continuous heat output | P_max,c | 2,0 | kW | electronic heat charge control with room and/or outdoor temperature feedback | [no] |
| Auxiliary electricity consumption | fan assisted heat output | [no] | |||
| At nominal heat output | eI_max | 0 | kW | Type of heat output/room temperature control (select one) | |
| At minimum heat output | eI_min | 0 | kW | single stage heat output and no room temperature control | [no] |
| In standby mode | eI_SB | 0.001 | kW | Two or more manual stages, no room temperature control | [no] |
| with mechanic thermostat room temperature control | [no] | ||||
| with electronic room temperature control | [no] | ||||
| electronic room temperature contro plus day timer | [no] | ||||
| electronic room temperature contro plus week timer | [yes] | ||||
| Other control options (multiple selections possible) | |||||
| room temperature control, with presence detection | [no] | ||||
| room temperature control, with oper window detection | [yes] | ||||
| with distance control option | [no] | ||||
| with adaptive start control | [no] | ||||
| with working time limitation | [yes] | ||||
| with black bulb sensor | [no] | ||||
CERTIFICACION CE
natural_image
Empty white rectangle with a thin black border (no text or symbols)Brand : Infiniton
Model : HCW-4505
Category : Uncategorized