
SVI6391B - Cooker SVAN - Free user manual and instructions
Find the device manual for free SVI6391B SVAN in PDF.


| Product Type | Induction Cooktop (Built-in) |
| Brand | SVAN |
| Model | SVI6391B |
| Number of Cooking Zones | 3 |
| Power Supply | 220-240V~ 50-60Hz |
| Total Power | 6600W |
| Dimensions (L x W x H) | 590 x 520 x 62 mm |
| Cut-out Dimensions (A x B) | 560 x 490 mm |
| Surface Material | Ceramic Glass |
| Control Type | Touch Controls |
| Boost Function | Yes (max power per zone) |
| Timer | Yes (up to 99 minutes, minute minder or auto-off) |
| Child Lock | Yes |
| Pause Function | Yes |
| Pan Detection | Automatic (induction) |
| Residual Heat Indicator | Yes (displays 'H') |
| Automatic Shut-off | Yes (per power level and when no pan detected) |
| Overheat Protection | Yes |
| Installation Type | Built-in |
| Ventilation Requirements | At least 50mm clearance below, 760mm above |
| Cleaning | Use cooktop cleaner, avoid abrasive pads |
| Warranty | Refer to manufacturer |
Frequently Asked Questions - SVI6391B SVAN
User questions about SVI6391B SVAN
0 question about this device. Answer the ones you know or ask your own.
Ask a new question about this device
Download the instructions for your Cooker in PDF format for free! Find your manual SVI6391B - SVAN and take your electronic device back in hand. On this page are published all the documents necessary for the use of your device. SVI6391B by SVAN.
USER MANUAL SVI6391B SVAN
SVI201
- Zona máx. 1800/2200W zone
- Zona máx. 1200/1500W zone
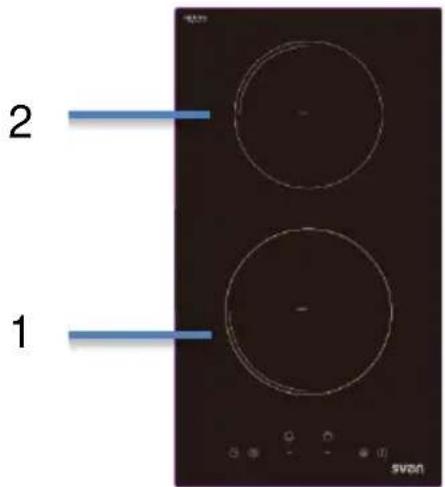
SVI6393B
- Zona máx. 1800/2200W zone
- Zona máx. 1200/1500W zone
- Zona máx. 2500/3700W zone
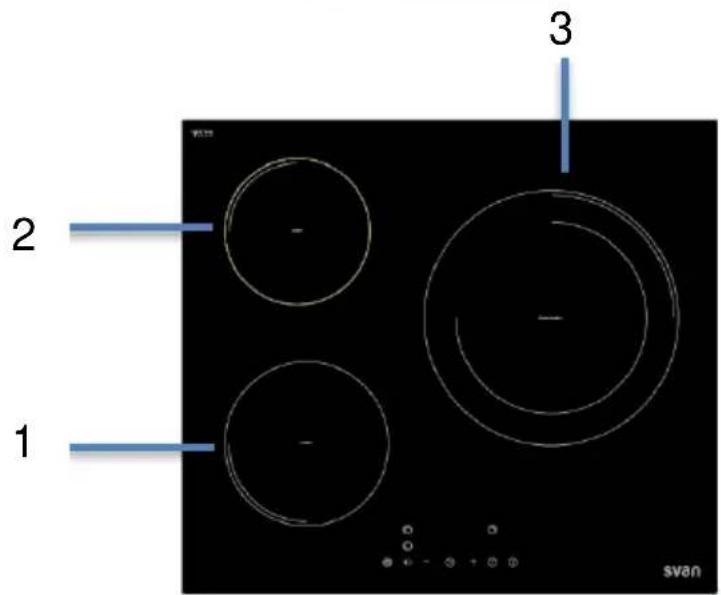
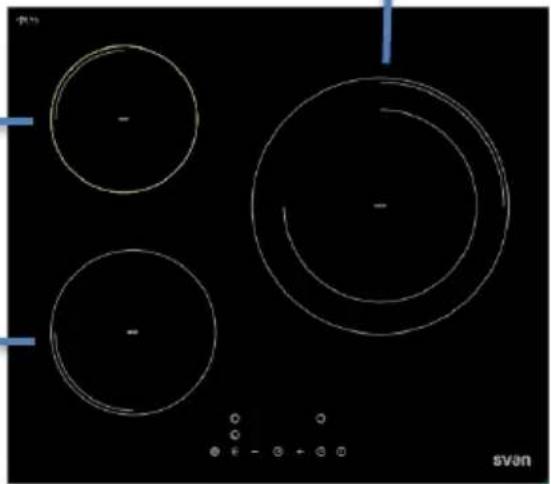
SVI6391B
- Zona máx. 1800/2200W zone
- Zona máx. 1200/1500W zone
- Zona máx. 2500/3000W zone
2
natural_image
Three white circular diagrams on a black background, resembling stylized ovals or circles, with no visible text, numbers, or symbols.1
3
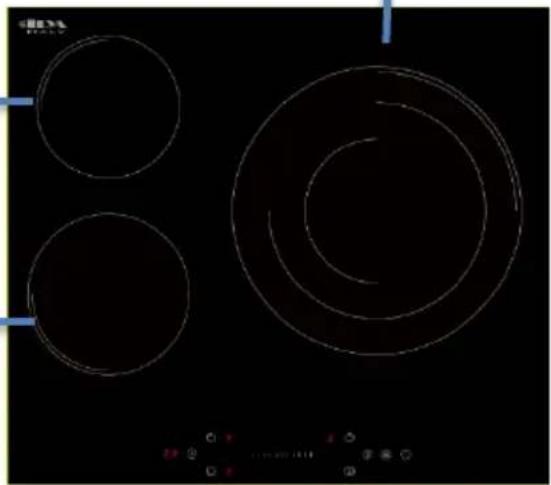
SVI632B2
- Zona máx. 1800/2200W zone
- Zona máx. 1200/1500W zone
- Zona máx. 3000/4000W zone
2
natural_image
Three concentric circles drawn on a black background, no text or symbols present1
SVI623FZ
- Zona máx. 1800/2200W zone
- Zona máx. 1800/2200W zone
- Zona máx. 1800/2200W zone
- Zona máx. 1800/2200W zone
2
1
4
2.2 Panel de control
SVV6374
SVI201
SVI6393B
SVI6391B
natural_image
Simple line drawing of a steam locomotive with wheels and motion indicators (no text or symbols)Recipiente de hierro
natural_image
Three identical cooking pots with crossed-out X marks, no text or symbols presentnatural_image
Simple line drawing of a cooking pot with a curved handle (no text or symbols)natural_image
Four identical cooking pots with crossed-out X marks, shown in different orientations (no text or symbols)natural_image
Two cooking pots with crossed arrows indicating opposing pressure, one with a cross symbol and the other with bidirectional arrows (no text or labels)3.3 Modo de empleo
| L(mm) | W(mm) | H(mm) | D(mm) | A(mm) | B(mm) | X(mm) | |
| SVV6374 | 590 | 520 | 50 46 56 | 490 | 50 min. | ||
| SVI201 2 | 90 520 50 | 46 | 270 | 490 | 50 min. | ||
| SVI6393B | 590 520 | 62 46 | 560 | 490 | 50 min. | ||
| SVI6391B | 590 520 | 62 46 | 560 | 490 | 50 min. | ||
| SVI632B2 | 590 520 | 62 46 | 560 | 490 | 50 min. | ||
| SVI623FZ | 590 520 | 62 58 | 560 | 490 | 50 min. |
9.6 Precaución
Your safety is important to us. Please read this information before using your cooktop.
1.2 Installation
1.2.1 Electrical Shock Hazard
- Disconnect the appliance from the mains electricity supply before carrying out any work or maintenance on it.
- Connection to a good earth wiring system is essential and mandatory.
- Alterations to the domestic wiring system must only be made by a qualified electrician.
- Failure to follow this advice may result in electrical shock or death.
1.2.2 Cut Hazard
• Take care - panel edges are sharp.
- Failure to use caution could result in injury or cuts.
1.2.3 Important safety instructions
- Read these instructions carefully before installing or using this appliance.
- No combustible material or products should be placed on this appliance at any time.
- Please make this information available to the person responsible for installing the appliance as it could reduce your installation costs.
- In order to avoid a hazard, this appliance must be installed according to these instructions for installation.
- This appliance is to be properly installed and earthed only by a suitably qualified person.
- This appliance should be connected to a circuit which incorporates an isolating switch providing full disconnection from the power supply.
-
Failure to install the appliance correctly could invalidate any warranty or liability claims.
-
This appliance can be used by children aged from 8 years and above and persons with reduced physical, sensory or mental capabilities or lack of experience and knowledge if they have been given supervision or instruction concerning use of the appliance in a safe way and understand the hazards involved.
- Children shall not play with the appliance. Cleaning and user maintenance shall not be made by children without supervision.
- If the supply cord is damaged, it must be replaced by the manufacturer, its service agent or similarly qualified persons in order to avoid a hazard.
- Warning: If the surface is cracked, switch off the appliance to avoid the possibility of electric shock, for hob surfaces of glass-ceramic or similar material which protect live parts
- Metallic objects such as knives, forks, spoons and lids should not be placed on the hob surface since they can get hot
- A steam cleaner is not to be used.
- Do not use a steam cleaner to clean your cooktop.
- The appliance is not intended to be operated by means of an external timer or separate remote-control system.
- WARNING: Danger of fire: do not store items on the cooking surfaces.
- The cooking process has to be supervised. A short term cooking process has to be supervised continuously.
- WARNING: Unattended cooking on a hob with fat or oil can be dangerous and may result in fire. NEVER try to extinguish a fire with water, but switch off the appliance and then cover flame e.g. with a lid or a fire blanket.
1.3 Operation and maintenance
1.3.1 Electrical Shock Hazard
- Do not cook on a broken or cracked cooktop. If the cooktop surface should break or crack, switch the appliance off immediately at the mains power supply (wall switch) and contact a qualified technician.
- Switch the cooktop off at the wall before cleaning or maintenance.
- Failure to follow this advice may result in electrical shock or death.
1.3.2 Health Hazard
- This appliance complies with electromagnetic safety standards.
- However, persons with cardiac pacemakers or other electrical implants (such as insulin pumps) must consult with their doctor or implant manufacturer before using this appliance to make sure that their implants will not be affected by the electromagnetic field.
- Failure to follow this advice may result in death.
1.3.3 Hot Surface Hazard
- During use, accessible parts of this appliance will become hot enough to cause burns.
- Do not let your body, clothing or any item other than suitable cookware contact the Induction glass until the surface is cool.
- Keep children away.
- Handles of saucepans may be hot to touch. Check saucepan handles do not overhang other cooking zones that are on. Keep handles out of reach of children.
- Failure to follow this advice could result in burns and scalds.
1.3.4 Cut Hazard
- The razor-sharp blade of a cooktop scraper is exposed when the safety cover is retracted. Use with extreme care and always store safely and out of reach of children.
- Failure to use caution could result in injury or cuts.
1.3.5 Important safety instructions
- Never leave the appliance unattended when in use. Boilover causes smoking and greasy spillovers that may ignite.
- Never use your appliance as a work or storage surface.
- Never leave any objects or utensils on the appliance.
- Do not place or leave any magnetisable objects (e.g. credit cards, memory cards) or electronic devices (e.g. computers, MP3 players) near the appliance, as they may be affected by its electromagnetic field.
- Never use your appliance for warming or heating the room.
- After use, always turn off the cooking zones and the cooktop as described in this manual (i.e. by using the touch controls). Do not rely on the pan detection feature to turn off the cooking zones when you remove the pans.
- Do not allow children to play with the appliance or sit, stand, or climb on it.
- Do not store items of interest to children in cabinets above the appliance. Children climbing on the cooktop could be seriously injured.
- Do not leave children alone or unattended in the area where the appliance is in use.
- Children or persons with a disability which limits their ability to use the appliance should have a responsible and competent person to instruct them in its use. The instructor should be satisfied that they can use the appliance without danger to themselves or their surroundings.
- Do not repair or replace any part of the appliance unless specifically recommended in the manual. All other servicing should be done by a qualified technician.
- Do not place or drop heavy objects on your cooktop.
- Do not stand on your cooktop.
- Do not use pans with jagged edges or drag pans across the Induction glass surface as this can scratch the glass.
- Do not use scourers or any other harsh abrasive cleaning agents to clean your cooktop, as these can scratch the Induction glass.
- This appliance is only intended to be used in household
- WARNING: The appliance and its accessible parts become hot during use.
- Care should be taken to avoid touching heating elements.
- Children less than 8 years of age shall be kept away unless continuously supervised.
Congratulations on the purchase of your new Hob. We recommend that you spend some time to read this Instruction / Installation Manual in order to fully understand how to install correctly and operate it.
For installation, please read the installation section.
Read all the safety instructions carefully before use and keep this Instruction / Installation Manual for future reference.
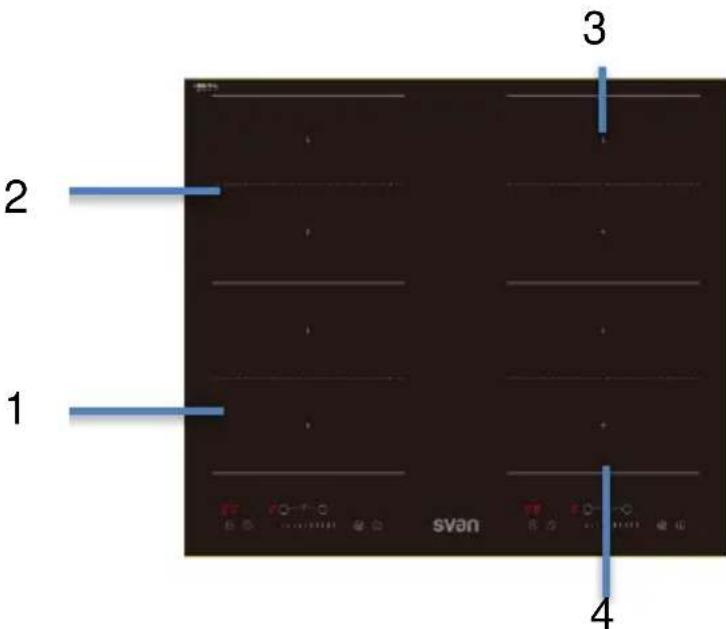
2. Product Introduction
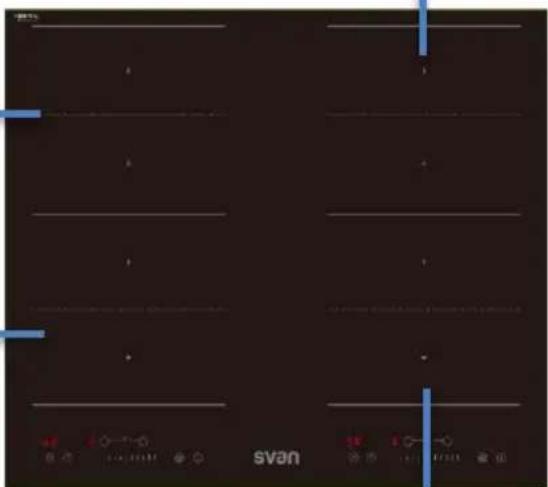
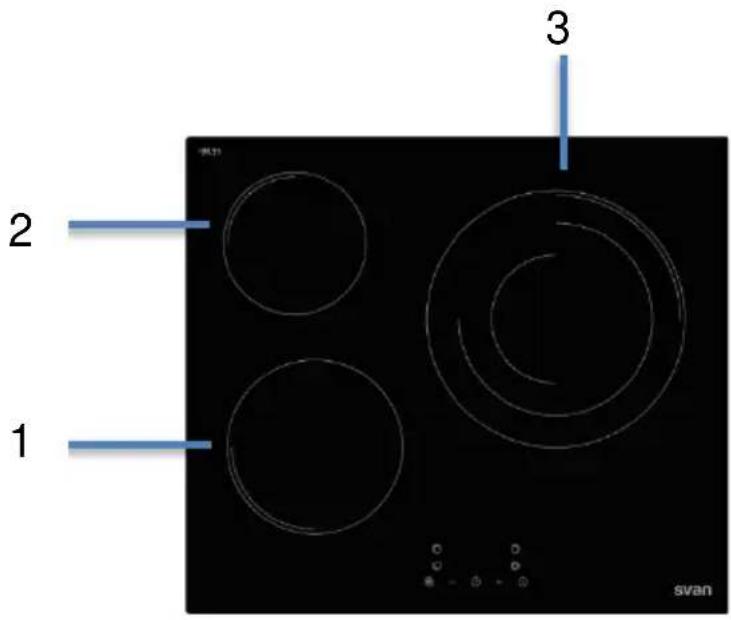
2.1 Top View
SVV6374
- max. 1800W zone
- max. 1200W zone
- max. 1050/1950/2700W zone
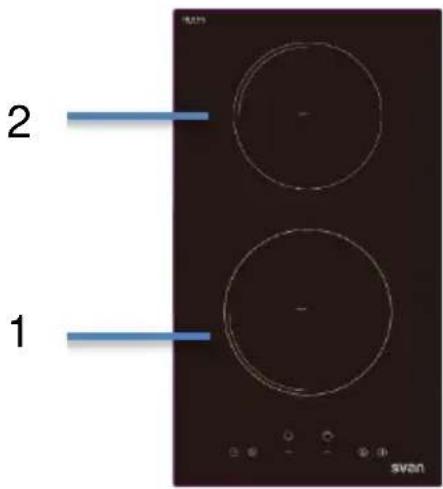
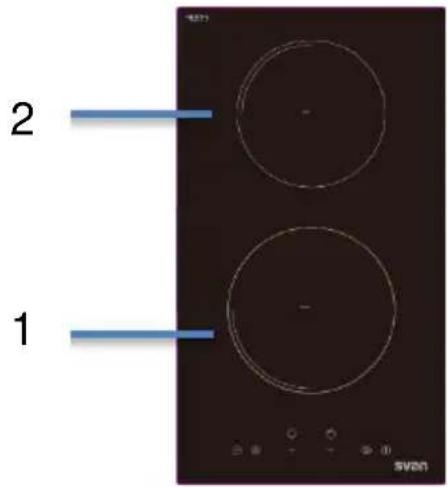
SVI201
- max. 1800/2200W zone
- max. 1200/1500W zone
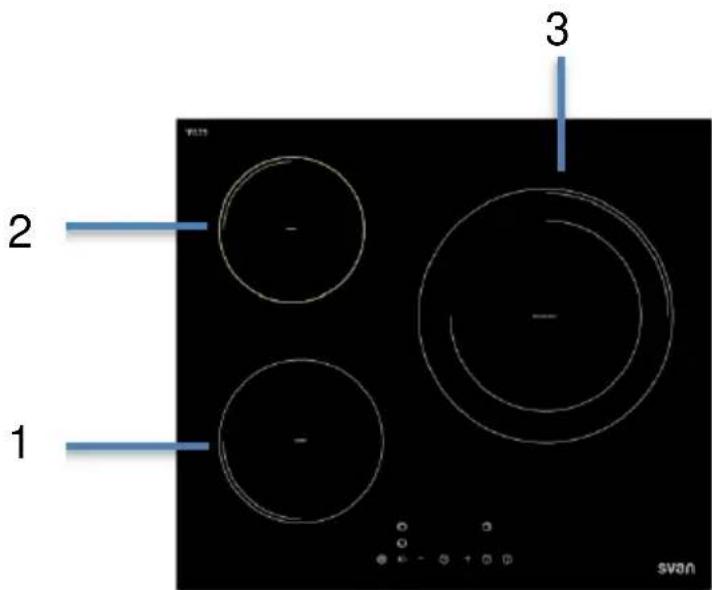
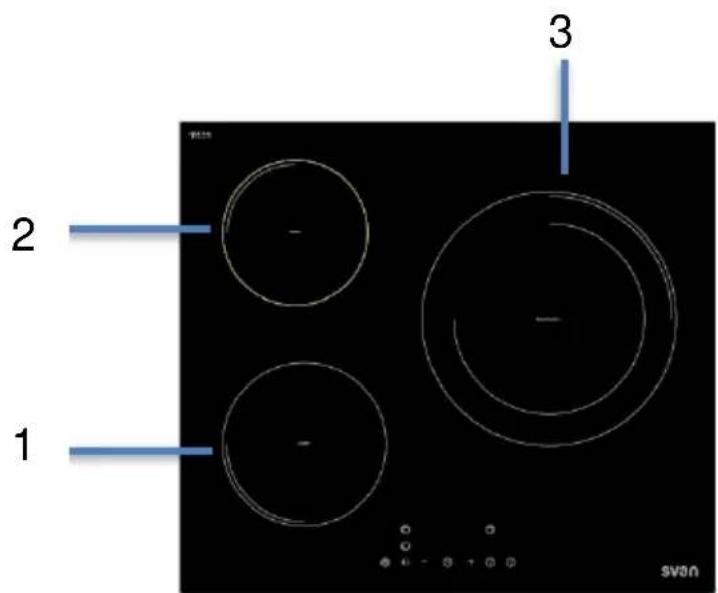
SVI6393B
- max. 1800/2200W zone
- max. 1200/1500W zone
- max. 2500/3700W zone
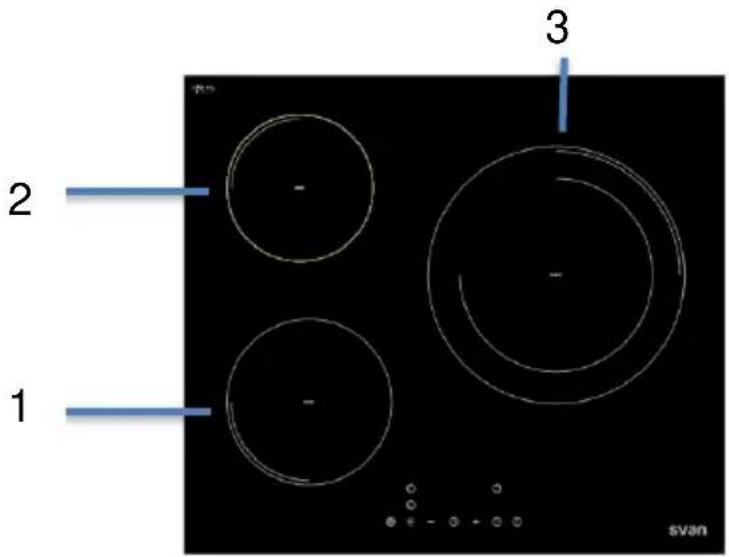
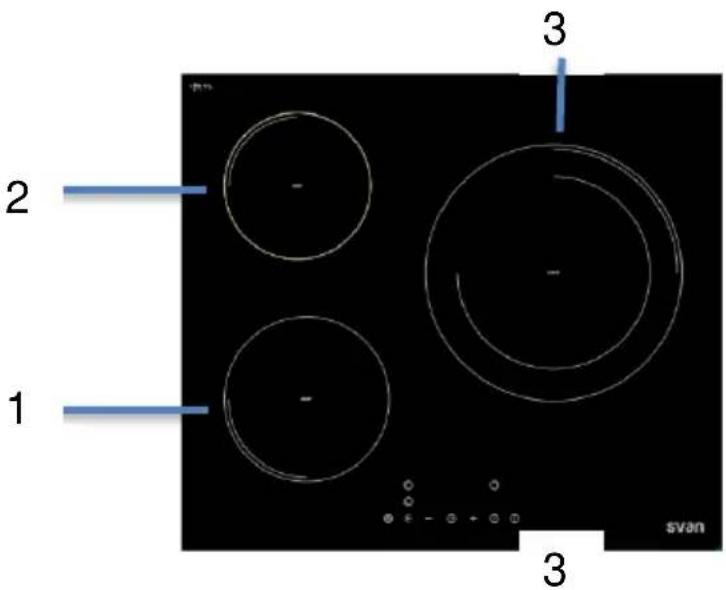
SVI6391B
- max. 1800/2200W zone
- max. 1200/1500W zone
- max. 2500/3000W zone
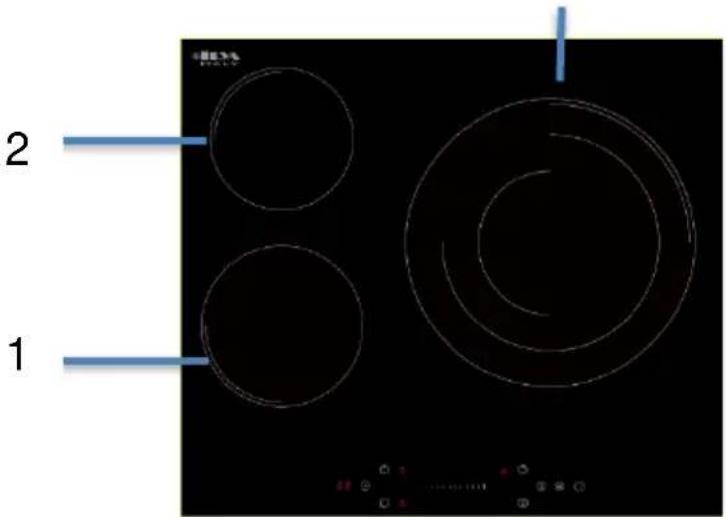
SVI632B2
- max. 1800/2200W zone
- max. 1200/1500W zone
- max. 3000/4000W zone
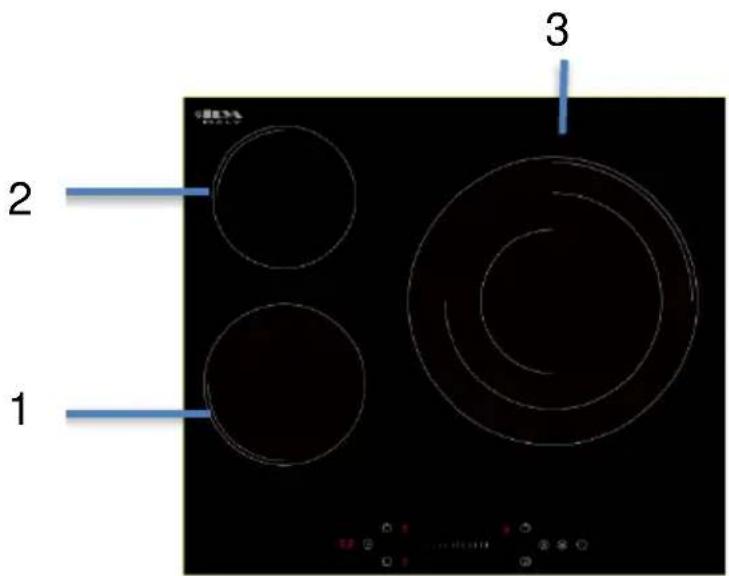
SVI623FZ
- max. 1800/2200W zone
- max. 1800/2200W zone
- max. 1800/2200W zone
- max. 1800/2200W zone
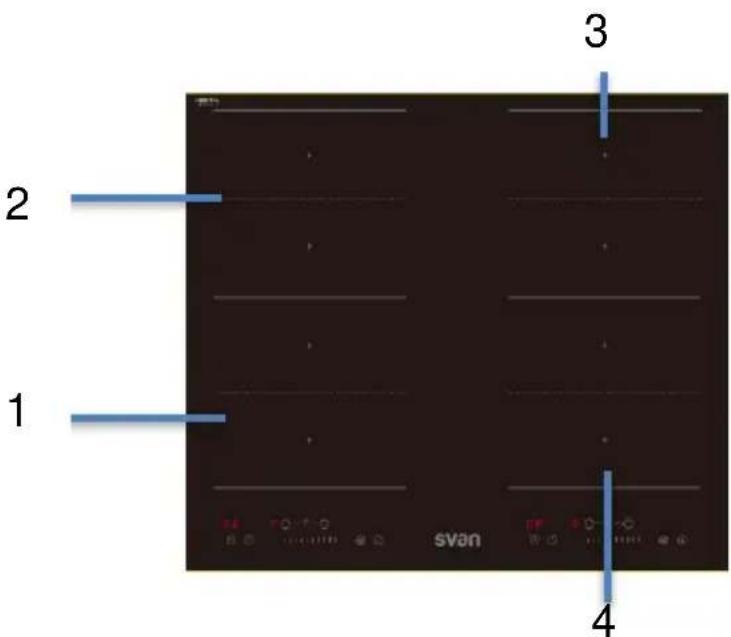
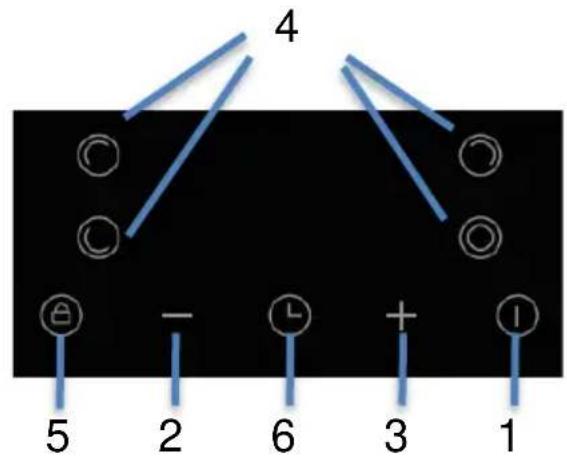
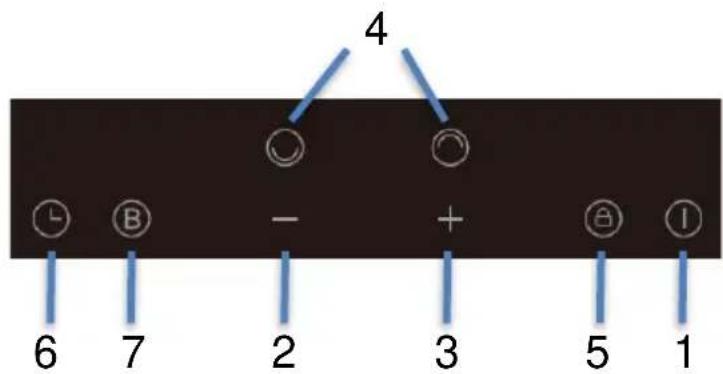
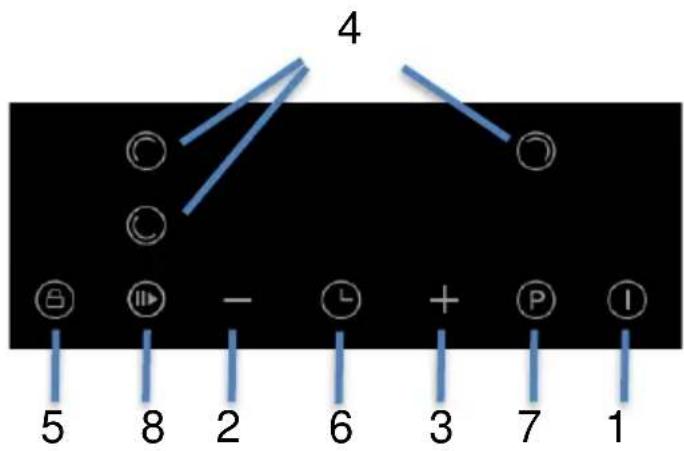
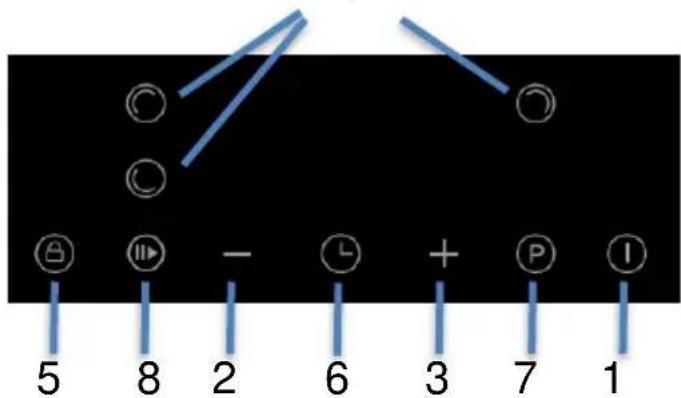
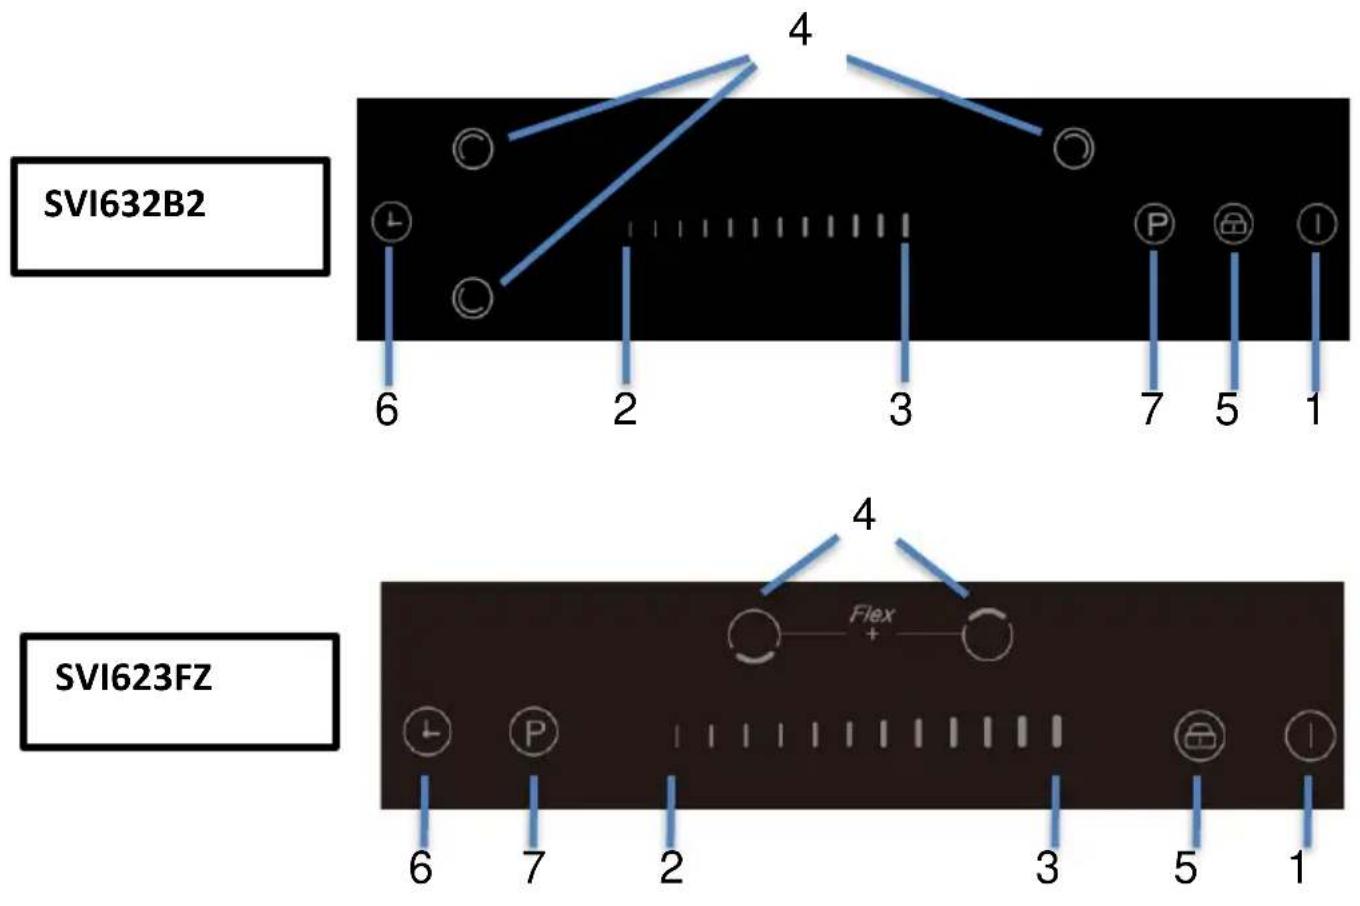
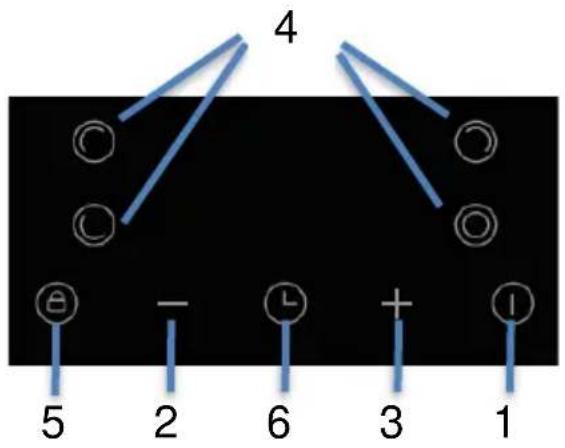
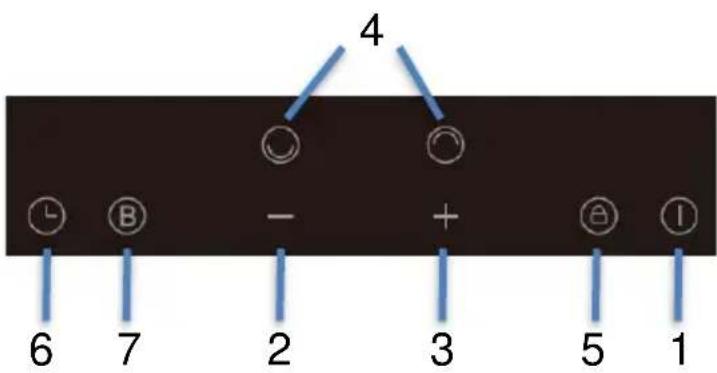
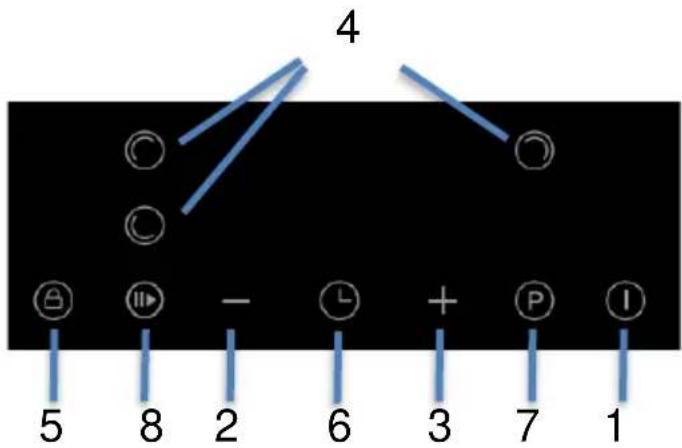
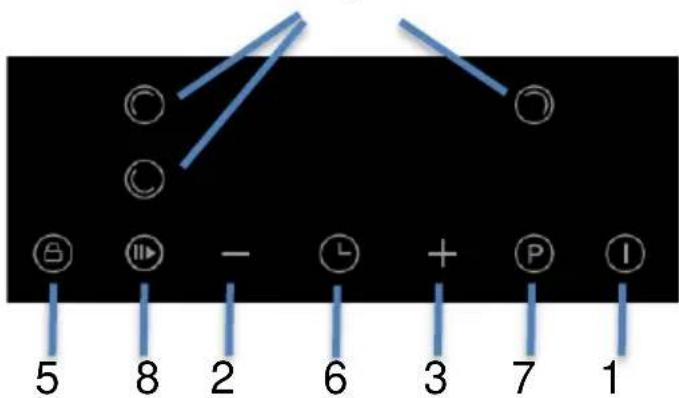
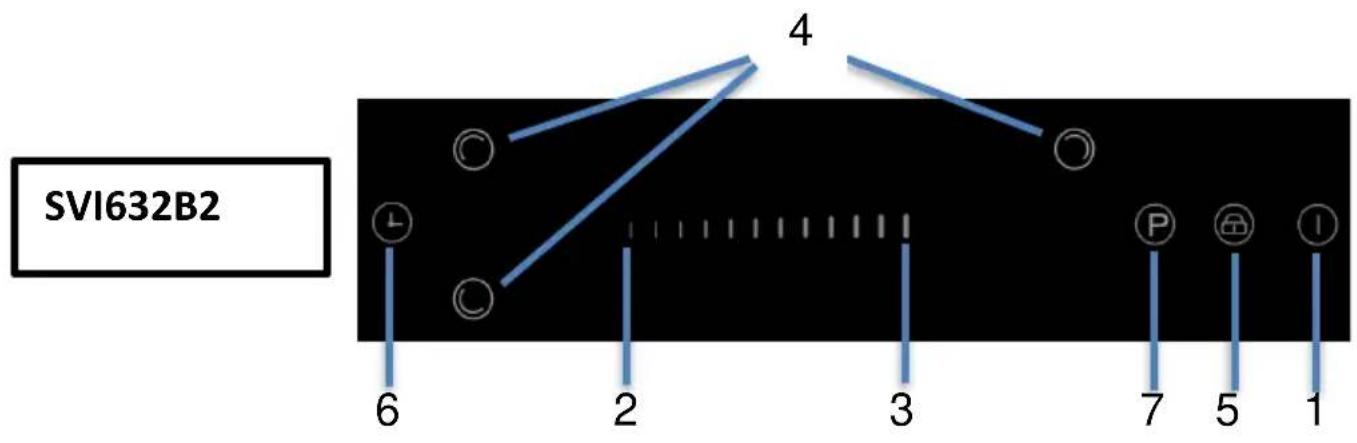
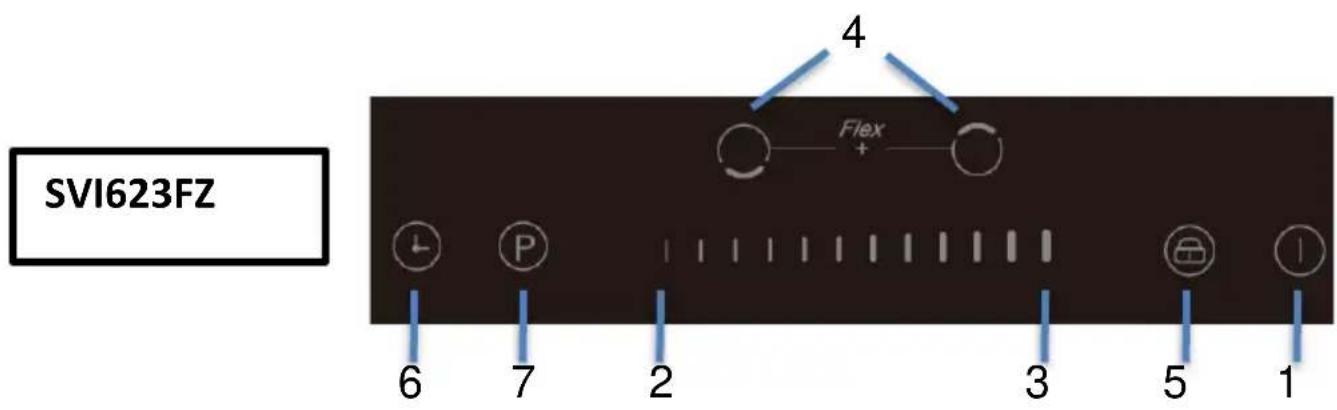
2.2 Control Panel
SVV6374
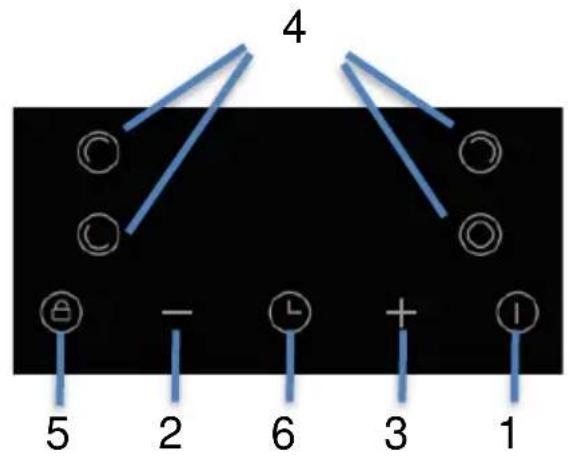
SVI201
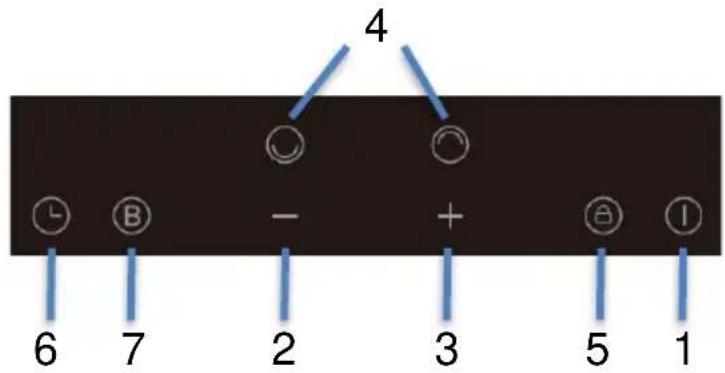
SVI6393B
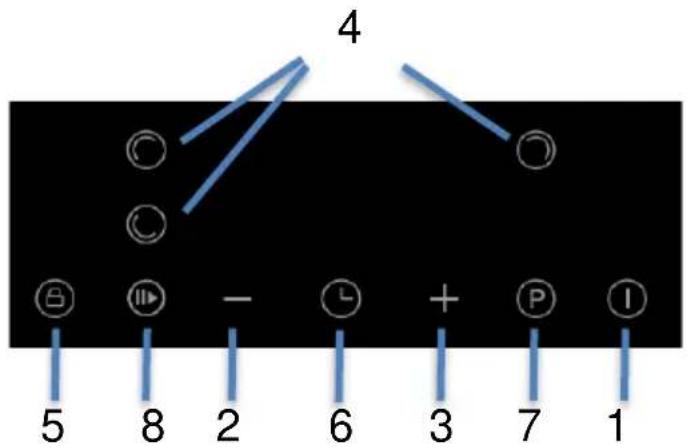
SVI6391B
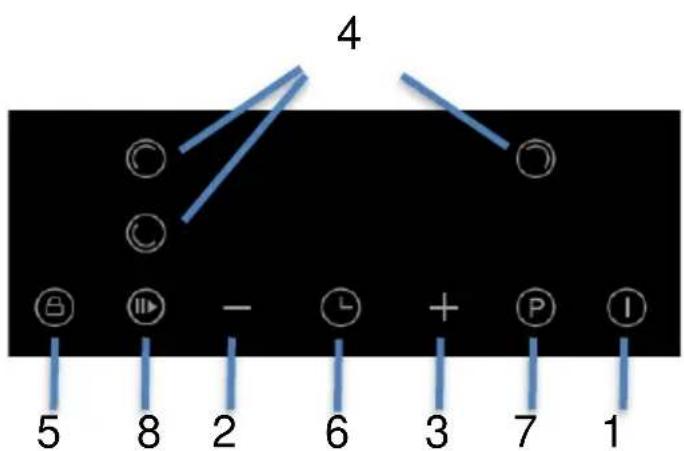
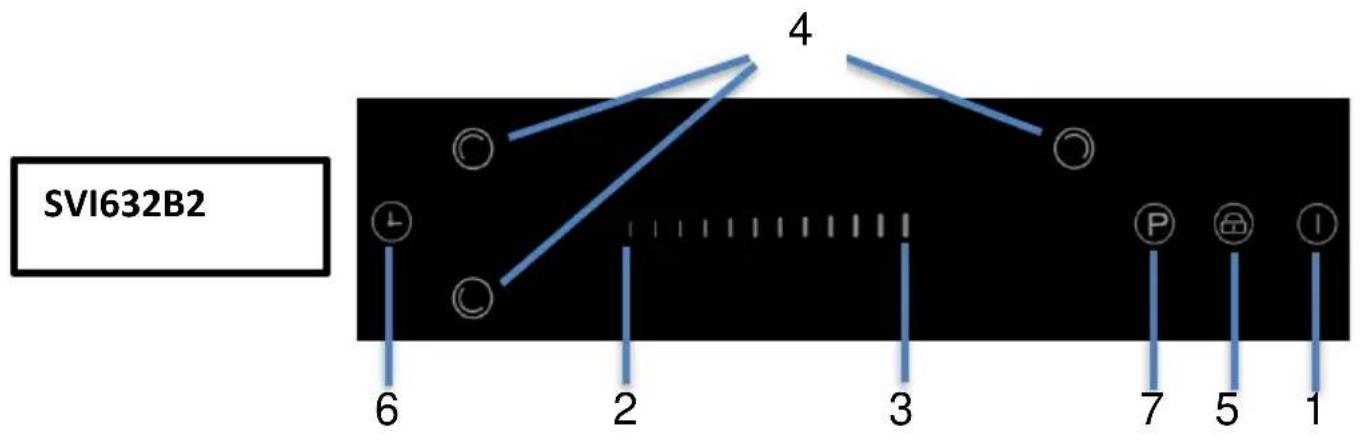
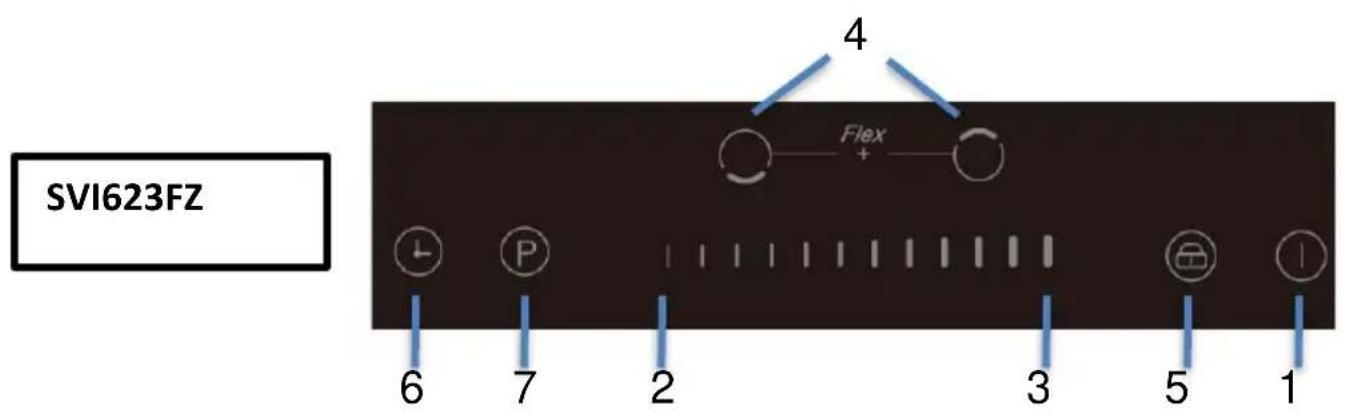
- ON/OFF
- MINUS
- PLUS
-
Zone selection
-
Child Lock
- Timer
- DUAL ZONE / BOOSTER
- Pause
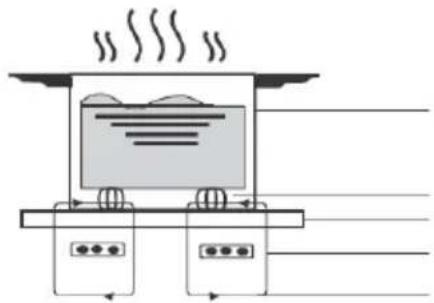
2.3 Working Theory (for induction hob)
Induction cooking is a safe, advanced, efficient, and economical cooking technology. It works by electromagnetic vibrations generating heat directly in the pan, rather than indirectly through heating the glass surface. The glass becomes hot only because the pan eventually warms it up.
natural_image
Simple line drawing of a steaming appliance with two wheels and a lid, no text or symbols presentiron pot
magnetic circuit ceramic glass plate induction coil induced currents
2.4 Before using your new Hob
- Read this guide, taking special note of the 'Safety Warnings' section.
- Remove any protective film that may still be on your hob.
3. Operation of Product
3.1 Touch Controls
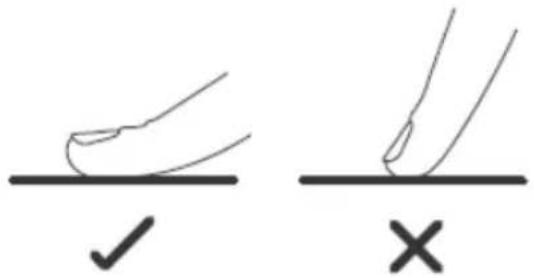
- The controls respond to touch, so you don't need to apply any pressure.
- Use the ball of your finger, not its tip.
- You will hear a beep each time a touch is registered.
- Make sure the controls are always clean, dry, and that there is no object (e.g. a utensil or a cloth) covering them. Even a thin film of water may make the controls difficult to operate.
3.2 Choosing the right Cookware

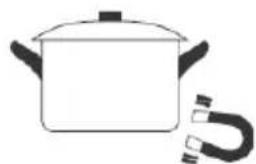
- Only use cookware with a base suitable for induction cooking. Look for the induction symbol on the packaging or on the bottom of the pan.
- You can check whether your cookware is suitable by carrying out a magnet test. Move a magnet towards the base of the pan. If it is attracted, the pan is suitable for induction.
• If you do not have a magnet:
natural_image
Simple line drawing of a cooking pot with a coiled tube (no text or symbols)-
Put some water in the pan you want to check.
-
If does not flash in the display and the water is heating, the pan is suitable.
- Cookware made from the following materials is not suitable: pure stainless steel, aluminum or copper without a magnetic base, glass, wood, porcelain, ceramic, and earthenware.
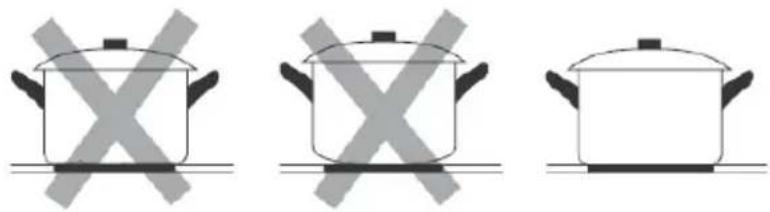
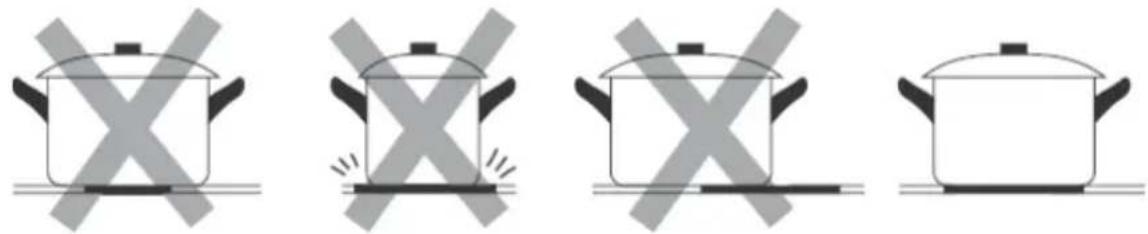
Do not use cookware with jagged edges or a curved base.
natural_image
Three identical cooking pots with crossed-out X marks, no text or symbols presentMake sure that the base of your pan is smooth, sits flat against the glass, and is the same size as the cooking zone. Use pans whose diameter is as large as the graphic of the zone selected. Using a pot a slightly wider energy will be used at its maximum efficiency. If you use smaller pot efficiency could be less than expected. Pot less than 140 mm could be undetected by the hob. Always center your pan on the cooking zone.
natural_image
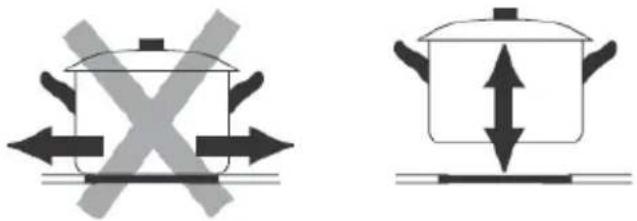
Four identical cooking pots with crossed-out X marks, shown in sequence (no text or symbols)Always lift pans off the hob - do not slide, or they may scratch the glass.
3.3 How to use
3.3.1 Start cooking
| Touch the ON/OFF key (1) for one second. After power on, the buzzer beeps once, all displays show “-” or “- -”, indicating that the hob has entered the state of standby mode. |  |
| Place a suitable pan on the cooking zone that you wish to use.• Make sure the bottom of the pan and the surface of the cooking zone are clean and dry. | 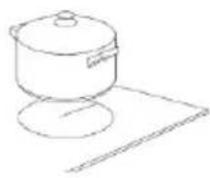 |
| Touching the heating zone selection control, and an indicator next to the key will flash. | 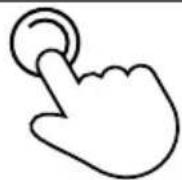 |
| Select power level by touching the MINUS (2) or PLUS key (3). For slider control models, just slide finger on the slider.• If you don’t choose a heat setting within 1 minute, the hob will automatically switch off. You will need to start again at step 1.• You can modify the heat setting at any time during cooking. | 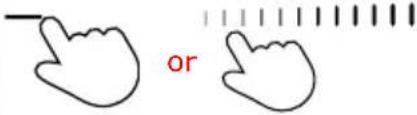 |
If the display flashes alternately with the heat setting (for induction hob)
This means that:
- you have not placed a pan on the correct cooking zone or,
- the pan you're using is not suitable for induction cooking or,
• the pan is too small or not properly centered on the cooking zone.
No heating takes place unless there is a suitable pan on the cooking zone.
The display will automatically turn off after 2 minutes if no suitable pan is placed on it.
3.3.2 Finish cooking
Touching the heating zone selection control that you wish to switch off.
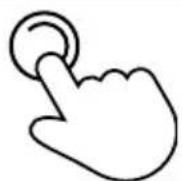
| Turn the cooking zone off by touching the MINUS (2) to “0”.Make sure the display shows “0”. For slider control models, just slide finger to the left of the slider. | 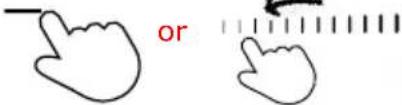 |
| Turn the whole cooktop off by touching the ON/OFF control. |  |
| Beware of hot surfacesH will show which cooking zone is hot to touch. It will disappear when the surface has cooled down to a safe temperature. It can also be used as an energy saving function if you want to heat further pans, use the hotplate that is still hot. |  |
3.3.3 Using the Boost function (for induction hob)
| Activate the boost function | |
| Select the zone with Booster, then touching the BOOST key (7), the zone indicator shows “P” and the power reach Max. |  |
| Cancel the Boost function | |
| Select the zone under Booster mode, touching the MINUS key (2) to cancel the Boost function, and select the level you want to set. |  |
• The function can work in any cooking zone.
• The cooking zone returns to its original setting after 5 minutes.
• If the original heat setting equals 0, it will return to 9 after 5 minutes.
3.3.4 Extended zone control (for ceramic hob)
If your hob is equipped with an extendable zone, it can be used in the following mode:
• A: Center zone – only first heating unit is turned on
B: Extended zone (Center + Outer) - Both first and second heating circuits are turned on
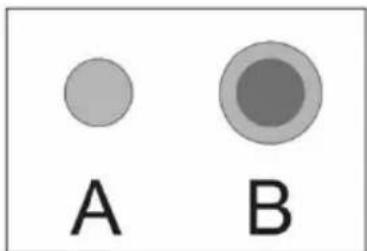
Upon selecting the cooking zone, only the center zone will be turned on, to activate the outer zone:
- Select a cooking zone with the extendable zone function.
- Touch the extendable zone key (7), the indicator display will show " = "
To cancel the outer zone, press the extendable zone key (7) to turn off the second heating circuit, then select the desired power level by touching the power adjusting keys.
3.3.5 Using the Flexible zone function (for induction hob)
| Touch the up and down zone selection key simultaneously for two seconds, the buzzer beeps once, the hob has entered the state of flexible zone mode. |  |
| Finger slide on the control slider, to left to lower the working power and to right to higher the cooking power. | 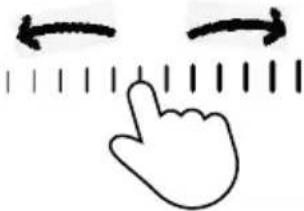 |
| To cancel the flexible zone function, touch any zone selection key on the flexible zone side for two second ,the buzzer beeps once, or just power off the flexible zone side. | 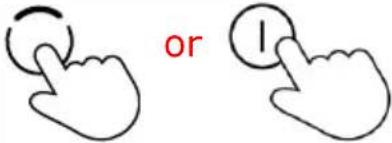 |
3.3.6 Locking the Controls
- You can lock the controls to prevent unintended use (for example children accidentally turning the cooking zones on).
- When the controls are locked, all the controls except the ON/OFF control are disabled.
| To lock the controls | |
| Touch and hold the lock key (5) for a while. | The timer indicator will show “ Lo ” |
| To unlock the controls | |
| Touch and hold the lock (5) for 3 seconds. | |

When the hob is in the lock mode, all the controls are disable except the ON/OFF (1), you can always turn the hob off with the ON/OFF (1) control in an emergency, but you shall unlock the hob first in the next operation.
3.3.7 Pause Mode (Optional function)
- You can pause the heating instead of shutting the hob off.
- When entering the Pause mode, all the controls except the ON/OFF control are disabled.
| To enter pause mode | |
| Touch the Pause key (8). | All the indicator will show " 11" |
| To exit pause mode | |
| Touch the Pause key again. | |

When the hob is in the pause mode, all the controls are disable except the ON/OFF(1), you can always turn the hob off with the ON/OFF (1) in an emergency. The hob will shut down after 10min if you don't exit the pause mode.
3.3.7 Timer control
You can use the timer in two different ways:
- You can use it as a minute minder. In this case, the timer will not turn any cooking zone off when the set time is up.
- You can set it to turn one or more cooking zones off after the set time is up. The timer of maximum is 99min.
a) Using the Timer as a Minute Minder
If you are not selecting any cooking zone
| Make sure the cooktop is turned on. Note: you can use the minute minder even if you're not selecting any cooking zone. | 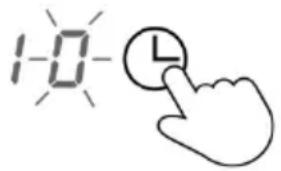 |
| Touch timer key (6), the "10" will show in the timer display and the "0" flashes. | |
| Set the time by touching the MINUS key (2) or PLUS key (3) |  |
| Touch timer key again, then number to represent tens digit will flash. | 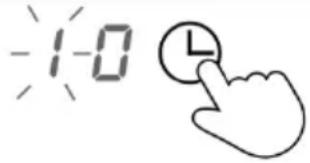 |
| set the desired dozens of minutes by touching MINUS key (2) or PLUS key (3). | 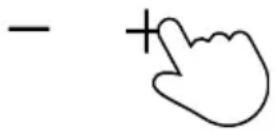 |
| When the time is set, it will begin to count down immediately. The display will show the remaining time. Buzzer will beep for 30 seconds and the timer indicator shows "-" when the setting time finished. | |
b) Setting the timer to turn one or more cooking zones off
| Set one zone | |
| Touching the heating zone key (4) that you want to set the timer for. |  |
| Touch timer key (6), the "10" will show in the timer display and the "0" flashes. | 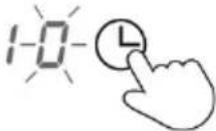 |
| Set the time by touching MINUS key (2) or PLUS key (3). | 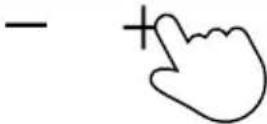 |
| Touch timer key again, then number to represent tens digit will flash. Set the desired dozens of minutes by touching MINUS key (2) or PLUS key (3). | 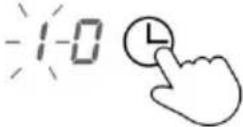 |
| When the time is set, it will begin to count down immediately. The display will show the remaining time.NOTE: The red dot next to power level indicator will illuminate indicating that zone is selected. | 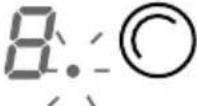 |
| When cooking timer expires, the corresponding cooking zone will be switched off automatically.⚠ Other cooking zone will keep operating if they are turned on previously. | |
| set more zones: | ||
| The steps for setting more zones are similar to the steps of setting one zone;When you set the time for several cooking zones simultaneously, decimal dots of the relevant cooking zones are on. The minute display shows the min. timer. The dot of the corresponding zone flashes. | 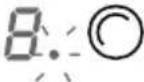 | Set to 10min |
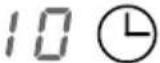 | ||
 | Set to 50min | |
| Once the countdown timer expires, the corresponding zone will switch off. Then it will show the new min. timer and the dot of corresponding zone will flash. | ||
| Touch the heating zone selection control, the corresponding timer will be shown in the timer indicator. | ||
c) Cancel the timer
| Touching the heating zone selection control (4) that you want to cancel the timer. |  |
| Touching the timer control (6), the indicator flash. |  |
Touch the MINUS key (2) to set the timer to "00", the timer is cancelled.
3.3.8 Default working times
Auto shut down is a safety protection function for your hob. It shut down automatically if ever you forget to turn off cooking. The default working times for various power levels are shown in the below table:
| Power level | 1 | 2 | 3 | 4 | 5 | 6 | 7 | 8 | 9 |
| Default working timer (hour) | 8 | 8 | 8 | 4 | 4 | 4 | 2 | 2 | 2 |
When the pot is removed, the hob can stop heating immediately and the hob automatically switch off after 2 minutes.

People with a heart pace maker should consult with their doctor before using this unit.
4. Cooking Guidelines

Take care when frying as the oil and fat heat up very quickly, particularly if you're using Booster. At extremely high temperatures oil and fat will ignite spontaneously and this presents a serious fire risk.
4.1 Cooking Tips
- When food comes to the boil, reduce the temperature setting.
• Using a lid will reduce cooking times and save energy by retaining the heat. - Minimize the amount of liquid or fat to reduce cooking times.
- Start cooking on a high setting and reduce the setting when the food has heated through.
4.2 Detection of Small Articles (for induction hob)
When an unsuitable size or non-magnetic pan (e.g., aluminum), or some other small item (e.g. knife, fork, key) has been left on the hob, the hob automatically go on to standby in 1 minute. The fan will keep cooking down the induction hob for a further 1 minute.
5. Heat Settings
The settings below are guidelines only. The exact setting will depend on several factors, including your cookware and the amount you are cooking. Experiment with the hob to find the settings that best suit you.
| Heat setting | Suitability |
| 1 - 2 | • delicate warming for small amounts of food• melting chocolate, butter, and foods that burn quickly• gentle simmering• slow warming |
| 3 - 4 | • reheating• rapid simmering• cooking rice |
| 5 - 6 | • pancakes |
| 7 - 8 | • sautéing• cooking pasta |
| 9/P | • stir-frying• searing• bringing soup to the boil• boiling water |
- Care and Cleaning
| What? | How? | Important! |
| Everyday soiling on glass (fingerprints, marks, stains left by food or non-sugary spillovers on the glass) | Switch the power to the cooktop off.Apply a cooktop cleaner while the glass is still warm (but not hot!)Rinse and wipe dry with a clean cloth or paper towel.Switch the power to the cooktop back on. | When the power to the cooktop is switched off, there will be no 'hot surface' indication but the cooking zone may still be hot! Take extreme care.Heavy-duty scourers, some nylon scourers and harsh/abrasive cleaning agents may scratch the glass. Always read the label to check if your cleaner or scourer is suitable.Never leave cleaning residue on the cooktop: the glass may become stained. |
| Boilovers, melts, and hot sugary spills on the glass | Remove these immediately with a fish slice, palette knife or razor blade scraper suitable for glass cooktops, but beware of hot cooking zone surfaces:Switch the power to the cooktop off at the wall.Hold the blade or utensil at a 30° angle and scrape the soiling or spill to a cool area of the cooktop.Clean the soiling or spill up with a dish cloth or paper towel.Follow steps 2 to 4 for 'Everyday soiling on glass' above. | Remove stains left by melts and sugary food or spillovers as soon as possible. If left to cool on the glass, they may be difficult to remove or even permanently damage the glass surface.Cut hazard: when the safety cover is retracted, the blade in a scraper is razor-sharp. Use with extreme care and always store safely and out of reach of children. |
| Spillovers on the touch controls | Switch the power to the cooktop off.Soak up the spillWipe the touch control area with a clean damp sponge or cloth.Wipe the area completely dry with a paper towel.Switch the power to the cooktop back on. | The cooktop may beep and turn itself off, and the touch controls may not function while there is liquid on them. Make sure you wipe the touch control area dry before turning the cooktop back on. |
- Hints and Tips
| Problem | Possible causes | What to do |
| The hob cannot be turned on. | No power. | Make sure the hob is connected to the power supply and that it is switched on.Check whether there is a power outage in your home or area. If you’ve checked everything and the problem persists, call a qualified technician. |
| The touch controls are unresponsive. | The controls are locked. | Unlock the controls. See section 'How to use' for instructions. |
| The touch controls are difficult to operate. | There may be a slight film of water over the controls or you may be using the tip of your finger when touching the controls. | Make sure the touch control area is dry and use the ball of your finger when touching the controls. |
| The glass is being scratched. | Rough-edged cookware. Unsuitable, abrasive scourer or cleaning products being used. | Use cookware with flat and smooth bases. See 'Choosing the right cookware'. See 'Care and cleaning'. |
| Some pans make crackling or clicking noises. | This may be caused by the construction of your cookware (layers of different metals vibrating differently). | This is normal for cookware and does not indicate a fault. |
| The induction hob makes a low humming noise when used on a high heat setting. | This is caused by the technology of induction cooking. | This is normal, but the noise should quieten down or disappear completely when you decrease the heat setting. |
| Fan noise coming from the induction hob. | A cooling fan built into your induction hob has come on to prevent the electronics from overheating. It may continue to run even after you've turned the induction hob off. | This is normal and needs no action. Do not switch the power to the induction hob off at the wall while the fan is running. |
| Pans do not become hot and appears in the display. | The induction hob cannot detect the pan because it is not suitable for induction cooking. The induction hob cannot detect the pan because it is too small for the cooking zone or not properly centred on it. | Use cookware suitable for induction cooking. See section 'Choosing the right cookware'. Centre the pan and make sure that its base matches the size of the cooking zone. |
| The induction hob or a cooking zone has turned itself off unexpectedly, a tone sounds and an error code is displayed (typically alternating with one or two digits in the cooking timer display). | Technical fault. | Please note down the error letters and numbers, switch the power to the induction hob off at the wall, and contact a qualified technician. |
8. Failure Display and Inspection
If an abnormality comes up, the hob will enter the protective state automatically and display corresponding protective codes:
Error Code for Ceramic hob
| Problem | Possible causes | What to do |
| E0 & repeated beep sound warning. | Overheating protection: the hob is over heated. | Stop cooking till the internal temperature back to normal. Please contact after sales service to check the hob if there is PCB failure. |
| E1 | Open circuit failure of thermocouple | Please contact after sales service. |
Error Code for Induction hob
| Problem | Possible causes | What to do |
| E1 | Signal lost (PCB failure) | Please contact after sales service. |
| E2/E3 | Abnormal high/Low input voltage | Stop cooking and wait until input voltage back to normal. If not please contact service center. |
| E4/E5/E6 | Thermistor failure. | Please contact service center to repair. |
| E7 | Abnormal high temperature (dry burning) | Cut off power, wait for 30min and switch on. If still not working, please contact service. |
| E8/E9 | Failure of IGBT sensor | Please contact service center to repair. |
| E0 | IGBT Overheat | Check if the fan is still working. If not please contact service center to repair. |
| EE | Display PCB failaure. | Please contact service center. |
The above are the judgment and inspection of common failures.
ATTENTION! To avoid danger, please do not disassemble the unit by yourself!
9. Installation
9.1 Selection of installation equipment
Cut out the work surface according to the sizes shown in the drawing.
For the purpose of installation and use, a minimum of 5cm space shall be preserved around the hole. Be sure the thickness of the work surface is at least 30mm. Please select heat-resistant and insulated work surface material (Wood and similar fibrous or hygroscopic material shall not be used as work surface material unless impregnated) to avoid the electrical shock and larger deformation caused by the heat radiation from the hotplate. As shown below:

Note: The safety distance between the sides of the hob and the inner surfaces of the worktop should be at least 3mm.
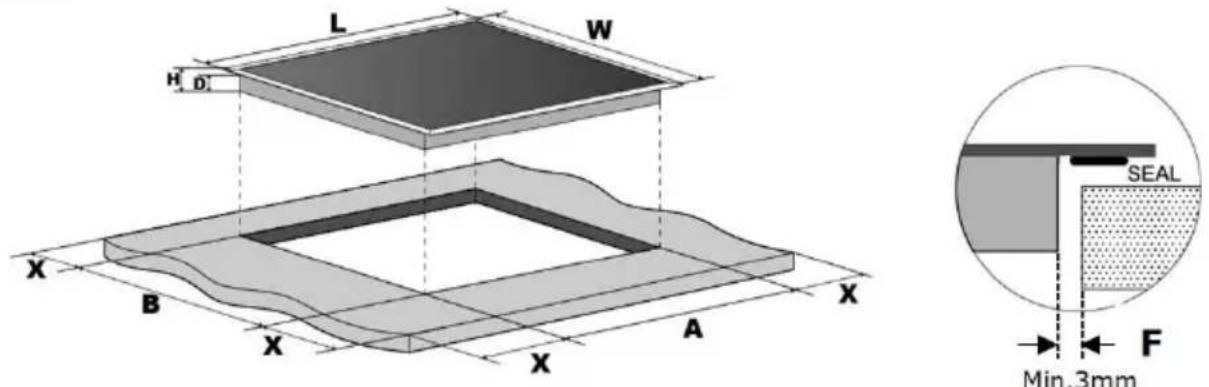
| L(mm) | W(mm) | H(mm) | D(mm) | A(mm) | B(mm) | X(mm) | |
| SVV6374 | 590 | 520 | 50 | 46 | 560 | 490 | 50 min. |
| SVI201 | 290 | 520 | 50 | 46 | 270 | 490 | 50 min. |
| SVI6393B | 590 | 520 | 62 | 46 | 560 | 490 | 50 min. |
| SVI6391B | 590 | 520 | 62 | 46 | 560 | 490 | 50 min. |
| SVI632B2 | 590 | 520 | 62 | 46 | 560 | 490 | 50 min. |
| SVI623FZ | 590 | 520 | 62 | 58 | 560 | 490 | 50 min. |
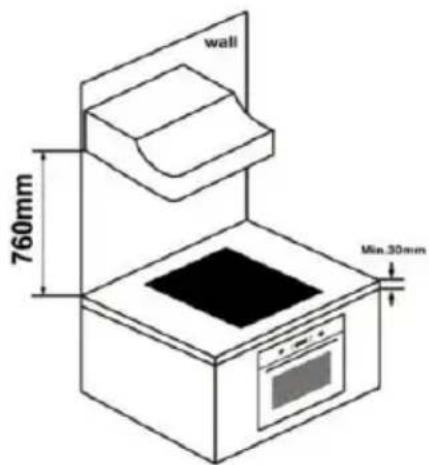
Under any circumstances, make sure the hob is well ventilated and the air inlet and outlet are not blocked. Ensure the hob is in good work state. As shown below:

Note: The safety distance between the hotplate and the cupboard above the hotplate should be at least 760 mm.
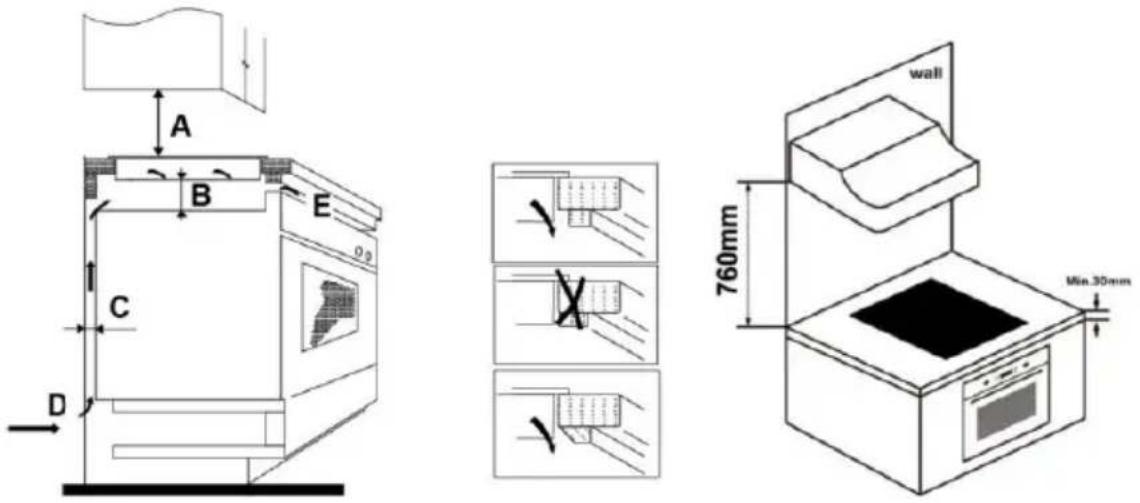
| A(mm) | B(mm) | C(mm) | D | E |
| 760 | 50 min. | 20 min. | Air intake | Air exit 5mm |
WARNING: Ensuring Adequate Ventilation
Make sure the induction hob is well ventilated and that air inlet and outlet are not blocked. In order to avoid accidental touch with the overheating bottom of the hob, or getting unexpected electric shock during working, it is necessary to put a wooden insert, fixed by screws, at a minimum distance of 50mm from the bottom of the hob.
Follow the requirements below.
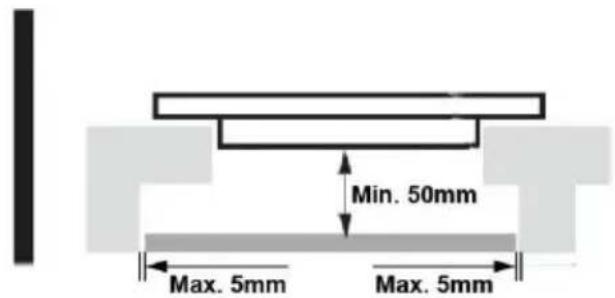

- There are ventilation holes around outside of the hob. YOU MUST ensure these holes are not blocked by the worktop when you put the hob into position.
- Be aware that the glue that join the plastic or wooden material to the furniture, has to resist to temperature not below 150^ C , to avoid the unstuck of the paneling.
- The rear wall, adjacent and surrounding surfaces must therefore be able to withstand a temperature of 90^ .
9.2 Before installing the hob, make sure that
- The work surface is square and level, and no structural members interfere with space requirements.
- The work surface is made of a heat-resistant and insulated material.
- If the hob is installed above an oven, the oven has a built-in cooling fan.
- The installation will comply with all clearance requirements and applicable standards and regulations.
- A suitable isolating switch providing full disconnection from the mains power supply is incorporated in the permanent wiring, mounted and positioned to comply with the local wiring rules and regulations.
- The isolating switch must be of an approved type and provide a 3 mm air gap contact separation in all poles (or in all active [phase] conductors if the local wiring rules allow for this variation of the requirements).
- The isolating switch will be easily accessible to the customer with the hob installed.
- You consult local building authorities and by-laws if in doubt regarding installation.
- You use heat-resistant and easy-to-clean finishes (such as ceramic tiles) for the wall surfaces surrounding the hob.
9.3 After installing the hob, make sure that
- The power supply cable is not accessible through cupboard doors or drawers.
- There is adequate flow of fresh air from outside the cabinetry to the base of the hob.
- If the hob is installed above a drawer or cupboard space, a thermal protection barrier is installed below the base of the hob.
- The isolating switch is easily accessible by the customer.
9.4 Before locating the fixing brackets
The unit should be placed on a stable, smooth surface (use the packaging). Do not apply force onto the controls protruding from the hob.
9.5 Adjusting the bracket position
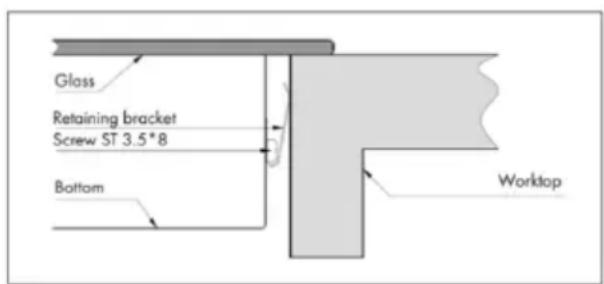
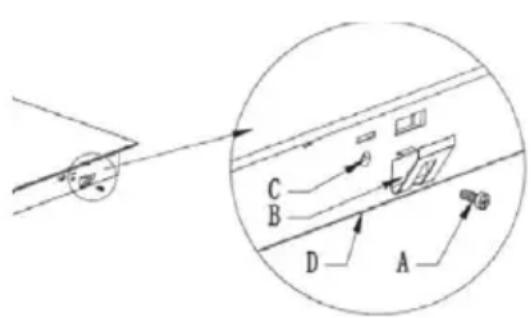
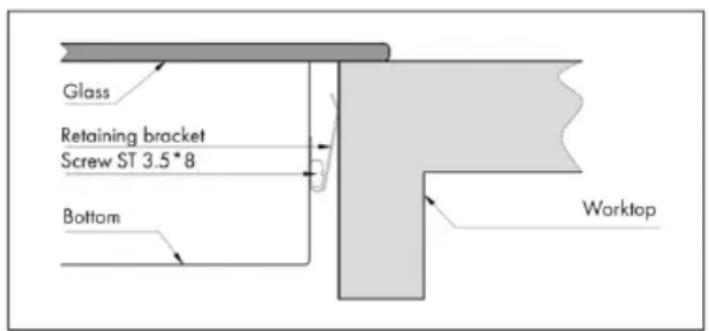
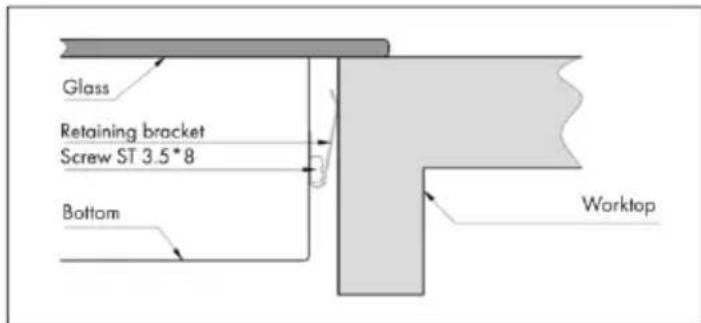
Fix the hob on the work surface by screw 2 brackets on the bottom of hob (see picture) after installation. Adjust the bracket position to suit for different table top thickness.
9.6 Cautions
- The hob must be installed by qualified personnel or technicians. We have professionals at your service. Please never conduct the operation by yourself.
- The hob will not be installed directly above a dishwasher, fridge, freezer, washing machine or clothes dryer, as the humidity may damage the hob electronics
- The hotplate shall be installed such that better heat radiation can be ensured to
enhance its reliability.
- The wall and induced heating zone above the table surface shall withstand heat.
- To avoid any damage, the sandwich layer and adhesive must be resistant to heat.
- A steam cleaner is not to be used.
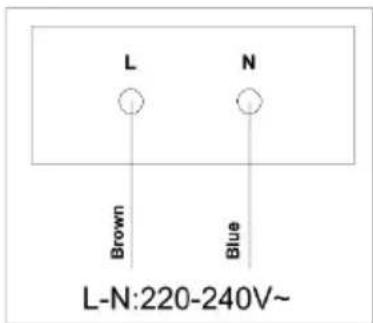
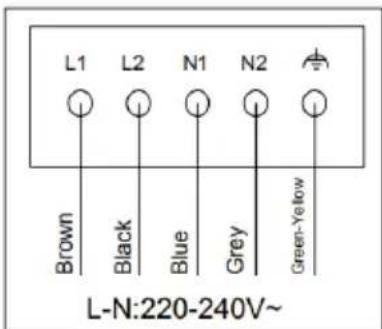
9.7 Connecting the hob to the mains power supply

This hob must be connected to the mains power supply only by a suitably qualified person. Before connecting the hob to the mains power supply, check that:
- The domestic wiring system is suitable for the power drawn by the hob.
- The voltage corresponds to the value given in the rating plate
- The power supply cable sections can withstand the load specified on the rating plate.
To connect the hob to the mains power supply, do not use adapters, reducers, or branching devices, as they can cause overheating and fire.
The power supply cable must not touch any hot parts and must be positioned so that its temperature will not exceed 75^ C at any point.

Check with an electrician whether the domestic wiring system is suitable without alterations. Any alterations must only be made by a qualified electrician.
SVV6374
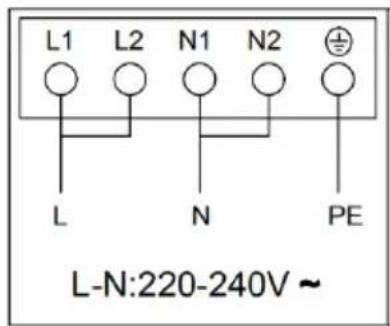
SVI201
SVI6393B SVI6391B SVI632B2 SVI623FZ
- If the cable is damaged or to be replaced, the operation must be carried out the by after-sale agent with dedicated tools to avoid any accidents.
- If the appliance is being connected directly to the mains an omnipolar circuit-breaker must be installed with a minimum opening of 3mm between contacts.
- The installer must ensure that the correct electrical connection has been made and that it is compliant with safety regulations.
- The cable must not be bent or compressed.
- The cable must be checked regularly and replaced by authorised technicians only.
- The bottom surface and the power cord of the hob are not accessible after installation.

Technical Specification
| Cooking Hob | SVV6374 |
| Cooking Zones | 3 Zones |
| Supply Voltage | 220-240V~ 50-60Hz |
| Installed Electric Power | 5700W |
| For circular cooking zones: diameter of useful surface area per electric heated cooking zone, rounded to the neastest 5mm | Left up: 15.5Left down: 19.0Right up: 30.0 |
| Energy consumption per cooking zone or area calculated per kg (EC electric cooking) | Left up: 195,29 Wh/kgLeft down: 183,85 Wh/kgRight up: 180,86 Wh/kg |
| Energy consumption of the hob, calculated per kg (EC electric hob) | 186,66 Wh/kg |
| Cooking Hob | SVI201 |
| Cooking Zones | 2 Zones |
| Supply Voltage | 220-240V~ 50-60Hz |
| Installed Electric Power | 3600W |
| For circular cooking zones: diameter of useful surface area per electric heated cooking zone, rounded to the neatest 5mm | Left: 18.0Right: 16.0 |
| Energy consumption per cooking zone or area calculated per kg (EC electric cooking) | Left: 192,5 Wh/kgRight: 188,6 Wh/kg |
| Energy consumption of the hob, calculated per kg (EC electric hob) | 190,55 Wh/kg |
| Cooking Hob | SVI6393B |
| Cooking Zones | 3 Zones |
| Supply Voltage | 220-240V~ 50-60Hz |
| Installed Electric Power | 7200W |
| For circular cooking zones: diameter of useful surface area per electric heated cooking zone, rounded to the neatest 5mm | Left up: 16.0Left down: 18.0Right up: 28.0 |
| Energy consumption per cooking zone or area calculated per kg (EC electric cooking) | Left up: 186,9 Wh/kgLeft down: 196,5 Wh/kgRight up: 192,5 Wh/kg |
| Energy consumption of the hob, calculated per kg (EC electric hob) | 191,97 Wh/kg |
| Cooking Hob | SVI6391B |
| Cooking Zones | 3 Zones |
| Supply Voltage | 220-240V~ 50-60Hz |
| Installed Electric Power | 6600W |
| For circular cooking zones: diameter of useful surface area per electric heated cooking zone, rounded to the neastest 5mm | Left up: 16.0Left down: 18.0Right up: 28.0 |
| Energy consumption per cooking zone or area calculated per kg (EC electric cooking) | Left up: 186,9 Wh/kgLeft down: 196,5 Wh/kgRight up: 192,5 Wh/kg |
| Energy consumption of the hob, calculated per kg (EC electric hob) | 191,97 Wh/kg |
| Cooking Hob | SVI632B2 |
| Cooking Zones | 3 Zones |
| Supply Voltage | 220-240V~ 50-60Hz |
| Installed Electric Power | 7200W |
| For circular cooking zones: diameter of useful surface area per electric heated cooking zone, rounded to the neatest 5mm | Left up: 16.0Left down: 18.0Right up: 28.0 |
| Energy consumption per cooking zone or area calculated per kg (EC electric cooking) | Left up: 186,9 Wh/kgLeft down: 196,5 Wh/kgRight up: 192,5 Wh/kg |
| Energy consumption of the hob, calculated per kg (EC electric hob) | 191,97 Wh/kg |
| Cooking Hob | SVI623FZ |
| Cooking Zones | 4 Zones |
| Supply Voltage | 220-240V~ 50-60Hz |
| Installed Electric Power | 7200W |
| For circular cooking zones: diameter of useful surface area per electric heated cooking zone, rounded to the neatest 5mm | Left up: 19.0Left down: 19.0Right up: 19.0Right down:19.0 |
| Energy consumption per cooking zone or area calculated per kg (EC electric cooking) | Left up: 192,5 Wh/kgLeft down: 192,5 Wh/kgRight up: 192,5 Wh/kgRight down: 192,5 Wh/kg |
| Energy consumption of the hob, calculated per kg (EC electric hob) | 192,5 Wh/kg |
Weight and Dimensions are approximate. Because we continually strive to improve our products, we may change specifications and designs without prior notice.
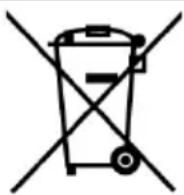

DISPOSAL: Do not dispose this product as unsorted municipal waste. Collection of such waste separately for special treatment is necessary.
This appliance is labeled in compliance with European directive 2012/19/EU for Waste Electrical and Electronic Equipment (WEEE). By ensuring that this appliance is disposed of correctly, you will help prevent any possible damage to the environment and to human health, which might otherwise be caused if it were disposed of in the wrong way.
The symbol on the product indicates that it may not be treated as normal household waste. It should be taken to a collection point for the recycling of electrical and electronic goods.
This appliance requires specialist waste disposal. For further information regarding the treatment, recover and recycling of this product please contact your local council, your household waste disposal service, or the shop where you purchased it.
For more detailed information about treatment, recovery and recycling of this product, please contact your local city office, your household waste disposal service or the shop where you purchased the product.
1. Introdução
SVI201
- max. 1800/2200W zone
- max. 1200/1500W zone
SVI6393B
- max. 1800/2200W zone
- max. 1200/1500W zone
- max. 2500/3700W zone
SVI6391B
- max. 1800/2200W zone
- max. 1200/1500W zone
- max. 2500/3000W zone
SVI632B2
- max. 1800/2200W zone
- max. 1200/1500W zone
- max. 3000/4000W zone
SVI623FZ
- max. 1800/2200W zone
- max. 1800/2200W zone
- max. 1800/2200W zone
- max. 1800/2200W zone
2.2 Painel de controlo
SVV6374
SVI201
SVI6393B
SVI6391B
natural_image
Simple line drawing of a steam machine with wheels and heat dissipation (no text or symbols)panela de ferro
natural_image
Simple line drawing of a cooking pot with a curved handle (no text or symbols)natural_image
Three identical line drawings of a cooking pot with crossed handles, shown in different orientations (no text or symbols)natural_image
Four identical cooking pots with crossed-out handles, shown in different orientations (no text or symbols)natural_image
Two identical line drawings of a cooking pot with crossed arrows indicating pressure or movement, no text or symbols present.| L(mm) | W(mm) | H(mm) | D(mm) | A(mm) | B(mm) | X(mm) | |
| SVV6374 | 590 | 520 | 50 | 46 | 560 | 490 | 50 min. |
| SVI201 | 290 | 520 | 50 | 46 | 270 | 490 | 50 min. |
| SVI6393B | 590 | 520 | 62 | 46 | 560 | 490 | 50 min. |
| SVI6391B | 590 | 520 | 62 | 46 | 560 | 490 | 50 min. |
| SVI632B2 | 590 | 520 | 62 | 46 | 560 | 490 | 50 min. |
| SVI623FZ | 590 | 520 | 62 | 58 | 560 | 490 | 50 min. |

9.6 Precauções
- SVI201
- SVI6393B
- SVI6391B
- SVI632B2
- SVI623FZ
- Panel de control
- Modo de empleo
- Precaución
- Installation
- Electrical Shock Hazard
- Cut Hazard
- Important safety instructions
- Operation and maintenance
- Electrical Shock Hazard
- Health Hazard
- Hot Surface Hazard
- Cut Hazard
- Important safety instructions
- Product Introduction
- Top View
- SVV6374
- Control Panel
- Working Theory (for induction hob)
- Before using your new Hob
- Operation of Product
- Touch Controls
- Choosing the right Cookware
- How to use
- Start cooking
- If the display flashes alternately with the heat setting (for induction hob)
- Finish cooking
- Using the Boost function (for induction hob)
- Extended zone control (for ceramic hob)
- Using the Flexible zone function (for induction hob)
- Locking the Controls
- Pause Mode (Optional function)
- Timer control
- a) Using the Timer as a Minute Minder
- If you are not selecting any cooking zone
- Default working times
- Cooking Guidelines
- Cooking Tips
- Detection of Small Articles (for induction hob)
- Heat Settings
- Failure Display and Inspection
- Installation
- Selection of installation equipment
- WARNING: Ensuring Adequate Ventilation
- Before installing the hob, make sure that
- After installing the hob, make sure that
- Before locating the fixing brackets
- Adjusting the bracket position
- Cautions
- Connecting the hob to the mains power supply
- Introdução
- Painel de controlo
- Precauções
Brand : SVAN
Model : SVI6391B
Category : Cooker