
DABMAN 2 - Radio Imperial - Free user manual and instructions
Find the device manual for free DABMAN 2 Imperial in PDF.


| Product Type | Portable DAB/DAB+ / FM Radio with MP3 Playback |
| Brand / Model | Imperial / DABMAN 2 |
| Dimensions (WxHxD) | 45 x 92 x 11 mm |
| Weight | 40 g |
| Power Input | 5 V DC, 300 mA via Micro USB |
| Battery Type | Lithium Polymer, 3.7 V, 430 mAh |
| Battery Life (DAB with headphone) | Approx. 10 hours |
| Battery Life (DAB with Bluetooth) | Approx. 5.5 hours |
| Battery Life (DAB with FM Transmitter) | Approx. 7.5 hours |
| Radio Bands | DAB/DAB+ (Band III), FM (87.5–108 MHz) |
| Bluetooth Version | Bluetooth 2.1, A2DP compatible |
| FM Transmitter Frequency Range | 87.5–108 MHz (selectable) |
| Memory Card Slot | Micro SD (for MP3 files) |
| Audio Output | 3.5 mm stereo headphone jack |
| Display | LCD with station info, time, signal strength |
| Charging Time (recommended first charge) | Approx. 2 hours |
| Operating Temperature | 0–35 °C |
| Items Supplied | Radio, USB charging cable, audio cable, antenna cable, in-ear headphones, user manual |
| Cleaning Instructions | Use only a dry cloth; do not use liquids |
| Safety Notes | Do not open housing; avoid moisture; keep away from children; use only supplied accessories |
| Spare Parts / Repairability | Contact manufacturer TELESTAR Digital GmbH for service; firmware update via USB possible |
| Disposal | Do not dispose in household waste; recycle at designated collection points |
Frequently Asked Questions - DABMAN 2 Imperial
User questions about DABMAN 2 Imperial
0 question about this device. Answer the ones you know or ask your own.
Ask a new question about this device
Download the instructions for your Radio in PDF format for free! Find your manual DABMAN 2 - Imperial and take your electronic device back in hand. On this page are published all the documents necessary for the use of your device. DABMAN 2 by Imperial.
USER MANUAL DABMAN 2 Imperial
natural_image
Black-and-white photo of a woman smiling while holding earphones, wearing a sports outfit (no visible text or symbols)
imperial
D
INHALTSVERZEICHNIS
natural_image
Black cable with two USB connectors, no text or symbols visibleD
③

natural_image
Close-up of a black cable with metallic connector (no text or symbols visible)④

natural_image
Coiled black audio cable with a 3.5-pin connector (no text or symbols visible)⑤
natural_image
Black cordless earbuds with attached cable, no visible text or symbols⑥

4. ABBILDUNGEN
D
1. Display
2. Menü Taste
natural_image
Abstract cityscape with glowing purple and blue bars against a black background (no text or symbols)Sprachauswahl
Hinweis:
6. BEDIENUNG
6.3 Lautstärke
natural_image
Circular icon with musical notes, gear, and document symbols (no readable text or numbers)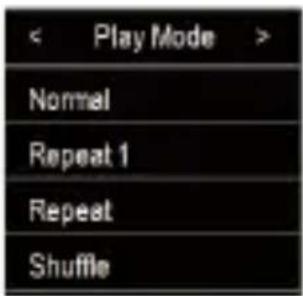
6. BEDIENUNG
D
6.6 Navigation
natural_image
Circular icon with musical notes and control buttons (no readable text or symbols)

6. BEDIENUNG
Vorheriger Titel

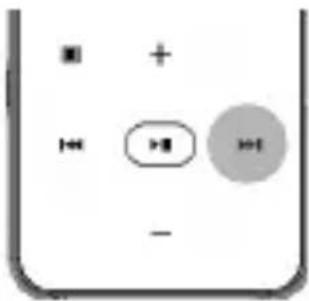
Nächster Titel
Wechsel MP3/Radio Modus
natural_image
Simple diagram with a central oval and surrounding symbols (no text or labels)6. BEDIENUNG
D
oder
natural_image
Simple diagram with a circle, plus sign, and two circles inside a container (no text or symbols)

natural_image
Circular icon with a red gear and star, no text or symbols present

6. BEDIENUNG

natural_image
Circular icon with a red gear and star, no text or symbols present


natural_image
Circular icon with gear and star symbols, no readable text or numbers

6. BEDIENUNG
D
Hinweis:
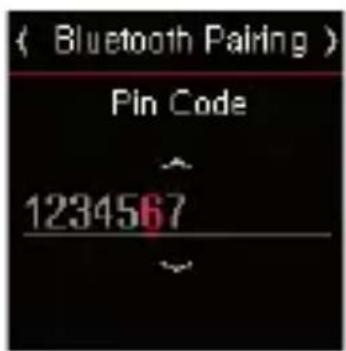
(Optionally) Entering PIN code
6. BEDIENUNG
Bluetooth an

Bluetooth gekoppelt
Hinweis:
6. BEDIENUNG
6.9 FM Transmitter
6. BEDIENUNG
D

oder
6. BEDIENUNG

natural_image
Circular icon with a red circle containing a document symbol, surrounded by icons including stars, gear, and editing tools (no text or labels)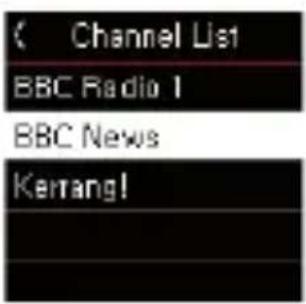
Preset Kanalliste
natural_image
Simple diagram with a circle, plus sign, and two oval shapes inside a rounded rectangle (no text or symbols)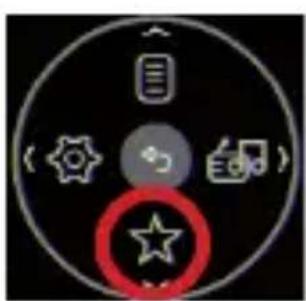
natural_image
Circular icon with icons including stars, gear, and document symbols (no readable text)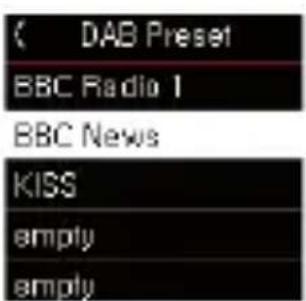
7. MENÜ
7.2 Modusauswahl

natural_image
Circular icon with icons and a red circle highlighting a document or app symbol (no readable text)
7. MENÜ
D 7.3 Einstellungen
Bedienungsanleitung
7. MENÜ
natural_image
Simple line drawing of a trash bin with no text or symbols
natural_image
Black-and-white photo of a woman smiling while holding earphones and earbuds, no visible text or symbols
TABLE OF CONTENTS
- INTRODUCTION 46
- SAFETY NOTICES......47
2.1 Basic Safety notices....47 - ITEMS SUPPLIED .... 50
- ILLUSTRATIONS....52
-
FIRST INSTALLATION.... 54
-
OPERATION .... 57
6.1 Display Information 57
6.2 Station selection 58
6.3 Volume....59
6.4 Change radio mode 59
6.5 MP3 mode....60
6.6 Navigation....62
6.7 Scanning DAB channels 64
6.8 Establishing a Bluetooth connection....65
6.9 FM Transmitter 68
6.10 Preset channels....70
- SETTINGS 72
7.1 Display DAB/DAB+ channel list....73
7.2 Display Preset Channel List 73
7.3. Mode switch 74
-
TROUBLESHOOTING....77
-
TECHNICAL SPECIFICATIONS .... 78
-
DISPOSAL INSTRUCTIONS....79
-
SERVICE UND SUPPORT 80
-
CE MARKING 81
1. INTRODUCTION
E
Thank you for purchasing the DABMAN 2. When you use the DABMAN 2 for the first time, please read these instructions carefully, and retain them for reference in future. You will be able to fully enjoy the many functions of the radio only if you follow the instructions.
This operating manual will assist you with the
- correct
- safe
- optimal
use of the IMPERIAL DABMAN 2. We assume the user of the radio has general knowledge related to the operation of consumer electronics products.
Any person
- installing
- connecting
- operating
- cleaning
- disposing of
this radio must first have taken notice of the entire contents of this operating manual. Always keep this operating manual close to the radio.
2. SAFETY NOTICES
Please read the safety notices carefully before operating the radio. Please note all warnings and instructions both on the product and in the operating manual.
2.1 Basic Safety notices
- In case of operating problems, disconnect the radio from the USB power source.
- Do not expose the radio to rain or to very humid, wet conditions.
- Do not open the housing of the product.
- Only connect the radio to the mains current via a correctly installed USB power supply connected with 220–240 V\~, 50–60 Hz mains outlet.
- Should liquid or foreign objects fall into the radio, immediately disconnect the USB power supply. In this case the product checked by qualified personnel before resuming operation.
- Please ensure the electrical outlet (plug) is easily accessible.
- Do not squeeze or sharply bend cable connections.
- Never allow children to use the radio without supervision.
- Always leave maintenance or repair work to qualified personnel. Ignoring this may endanger yourself and others.
- Obtain spare parts exclusively from the manufacturer.
- Changes to the product will result in a termination of liability by the manufacturer.
2. SAFETY NOTICES
- Remove protective foils/films.
- Use only a dry cloth to clean the equipment
E
Distraction
Using the DABMAN 2 in some circumstances can distract you and may cause a dangerous situation (for example, using headphones while riding a bicycle or driving a car, while working on machines and so on.). Observe rules that prohibit or restrict the use of headphones. Don't use this device with headphones, if this will interfere the hearing of other things in your environment.
Hearing Loss
Listening to sound at high volumes espacially with headphones may damage your hearing. Background noise, as well as continued exposure to high volume levels, can make sounds seem quieter than they actually are. Turn on audio playback and check the volume before inserting the earphones in your ear.
Charging the device
In order to charge the device please use the charging cable of delivery content and connect it to an USB port only.
Radio frequency interference
Observe signs and notices that prohibit or restrict the use of electronic devices (for example, in health care facilities, airplanes or blasting areas).
2. SAFETY NOTICES
Although the DABMAN 2 is designed, tested, and manufactured to comply with regulations governing radio frequency emissions it might negatively affect the operation of other electronic equipment, causing them to malfunction.
Turn off the DABMAN 2 or when use is prohibited, such as while traveling in aircraft, or when asked to do so by authorities.
The hardware used in this device emits electromagnetic fields which may interfere with pacemakers, defibrillators or other medical devices. Please make sure to have a safe distance to this kind of medical devices.
If you suspect the DABMAN 2 is interfering with your pace-maker or any other medical device, turn off the DABMAN 2 immediately.
Choking hazard
Some accessories of DABMAN 2 may present a choking hazard to small children. Keep these accessories away from small children
Operating temperature
Please operate the DABMAN 2 in a temperature range between 0° C and 35° C.
3. ITEMS SUPPLIED
Please check the items supplied before first use.
The following components should be contained in delivery content:
1 DABMAN 2
2 USB charging cable USB - Micro USB
3 Audio Cable 3,5 mm Audio Jack
4 Antenna cable
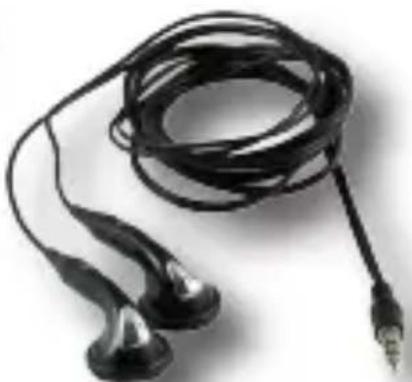
5 In ear headphone
6 User Manual
3. ITEMS SUPPLIED
①
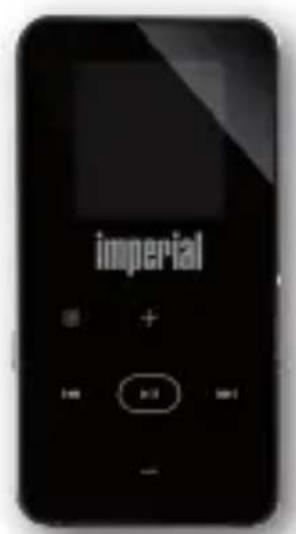
2
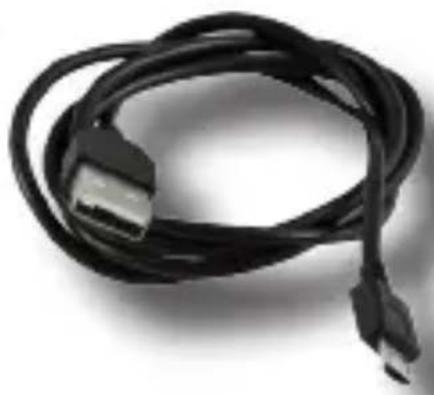
natural_image
Close-up of a black USB cable with two connectors, no text or symbols visible
③

natural_image
Close-up of a black cable with metallic connector (no text or symbols visible)④

natural_image
Black cable with a metallic connector, no visible text or symbols⑤

natural_image
Black cordless earplifier with two earbuds and a connector, isolated on white background (no text or symbols)⑥

4. ILLUSTRATIONS
- Display
- Menu Button
Enter the menu of device with this button
E
- VOLUME / FM Transmitter/navigation up
Press this button to turn up the volume.
Hold this key pressed for 2 seconds to enter the
FM transmitter menu.
Scroll up in menu with this key.
- OK ENTER/Play Pause Button
Confirm any kind of selection you made in menu.
Press this button to play mp3 music via SD card.
- Station selection/Previous/Next title
Select the next or previous station with this key.
Select the next or previous title in mp3 mode.
- VOLUME- / Bluetooth function / navigation down
Press this key to decrease the volume
Hold this key pressed for 2 seconds to enter the
Bluetooth menu.
Scroll up in menu with this key.
- ON/OFF
Hold this key pressd to turn on/turn off the device.
- Earphone connection
Connect the earphone or external antenna, included in delivery content to this plug.
- Micro USB charging plug
Plug in the USB charging cable, included in delivery content.
- SD card slot
Input a micro SD card here.
4. ILLUSTRATIONS

E
5. FIRST INSTALLATION
Charching the device
We recommend to charge the device for about 2 hours before starting the first time.
Please use the charging cable included in delivery content and connect the radio to any kind of USB power supply like PC, Notebook or USB charger.
Once connected to an USB power supply, the charging process starts automatically
Earphone connection
Connect the earphone included in delivery conetent by plugging in the earphone.
Alternatively you can also use the external antenna included in delivery content, if you want to use the DABMAN 2 as DAB+ receiver transmitting the signal to an audio device.
Please note:
It is always necessary to connect the headphone or external antenna to receive any DAB+ or FM signal!
5. FIRST INSTALLATION
Power On
Hold the Power ON/OFF key pressed to switch on the radio.
The DABMAN 2 starts to boot.
Hold the Power ON/OFF key pressed for 3 seconds to switch on the radio.
The DABMAN 2 starts to boot.

natural_image
Abstract digital cityscape with glowing purple and blue blocks against a black background (no text or symbols)Language
Select the menu language and press OK to confirm.

Once confirmed the menu language, the device starts an automatic channel search.
5. FIRST INSTALLATION
E
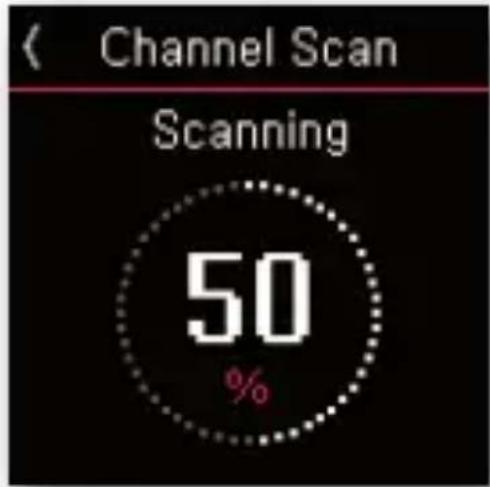
Please note:
In the first installation the device starts the channel search in DAB/ DAB+ mode.
If you want to search FM radio stations, please see chapter 6.5.
All available stations are stored automatically.
When channel search is complete, the device starts playing the first found DAB/DAB+ station.

6. OPERATION
6.1 Display Information

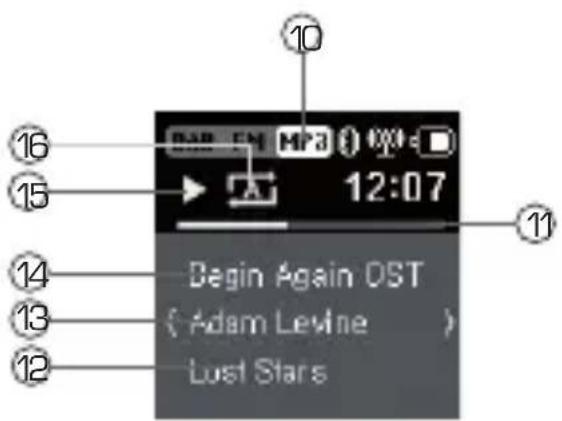
The Display of DABMAN 2 shows the following information In DAB/FM radio Mode:
- Shows the current radio reception mode.
(DAB/DAB+ or FM)
-
The bars beside the antenna symbol indicate the signal strength of the currently selected radio stations.
-
The color of this symbol changes from grey to white when Bluetooth is active.
(Please read chapter 6.8. also)
- The color of this symbol changes from grey to white when the FM transmitter is active.
(Please read chapter 6.9. also)
-
This symbol indicates the state of charge of the battery.
-
Shows the current time.
-
This symbol is in red color if the selected radio station is already stored in the preset list.
-
Name of the selected radio station.
-
Title and artist name of current played song.
6. OPERATION
In MP3 Play mode:
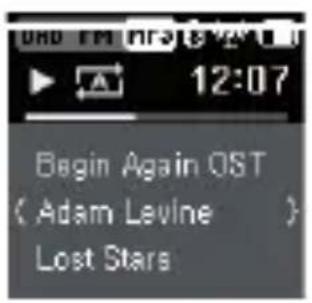
- Shows the current MP3 status.
- Shows the progress bar for play mode
- Artist name
- Song titel
- Album titel
- Shows the current play status
- Shows the current play mode status
6.2 Station selection
With the station selection keys 3 / 6 you can select a radio station that was found during the automatic channel search. Holding this keys pressed for 2 seconds, you can select a radio station, stored in the preset list. (Please see chapter 6.6. also)

natural_image
Simple icon showing a play button inside a rounded rectangle, with no text or symbols6. OPERATION
6.3 Volume
Change the volume with the keys 2 / 4.

6.4 Change radio mode
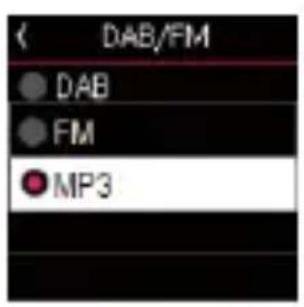
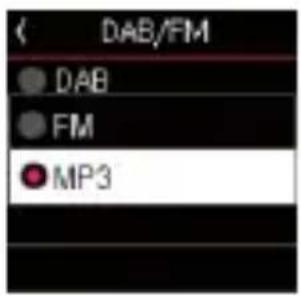
With this radio you can receive radio channels broadcasted in FM or digital radio DAB/DAB+.
In order to change the radio mode press the Menu key. Press the » key.
Select the wanted radio mode via the navigation keys up/down and confirm with OK.


natural_image
Circular icon with gear and document symbols, no readable text or numbers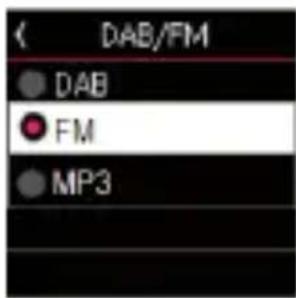

6. OPERATION
6.5 MP3 mode
E
The DABMAN 2 has a Micro SD card slot where MP3 music files are located and play those MP3 file via earphone, Bluetooth speakers, and car A/V system.
Change mode from DAB/DAB+/FM to MP3 play Press menu button to open menu, and select "Setting" "Mode" "MP3".
Then DABMAN 2 displays all the folder/album/file lists in Micro SD card.


natural_image
Circular icon with gear and star symbols, no readable text or symbols

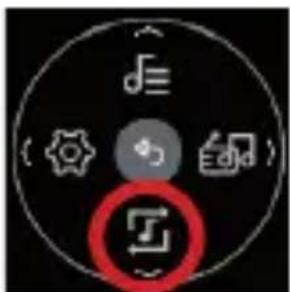
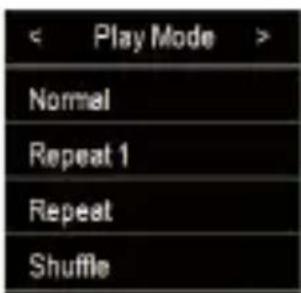
Play mode
As usual in MP3 player, DABMAN 2 supports various play modes in tables.
To change the play mode, press Menu button to open menu while playing MP3 file.
Select "Play Mode" in menu, then there are 6 play modes to be chosen.
6. OPERATION
Normal Play

Repeat Play
Repeat 1 time

Shuffle

Repeat All

Shuffle All


6. OPERATION
6.6 Navigation
E
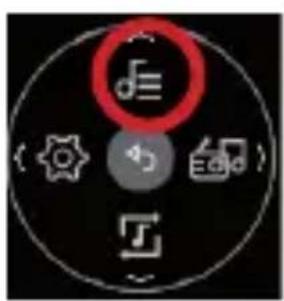
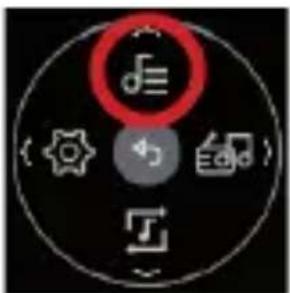
Navigation of MP3 folder/album/file in Micro SD card While playing a song, press MENU button to open menu and select "File List" in menu as below, then it shows all folder/album/file list in Micro SD card (Root folder).


MP3 File Play
Navigate Folder/Album/files in Micro SD card and select a MP3 file.
Then, MP3 play screen shows up including album, artist, and name of song information.

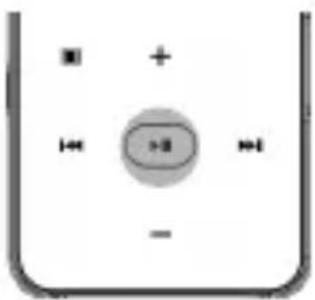
Play a previous or next song
While playing a song, press ▶▶ or ◀◀ button, then it plays previous or next song of list.
6. OPERATION

Plays previous song in the
list


Plays next song in the list
Changing radio mode from MP3 to DAB/FM radio
While playing a song, press ▶ for 3 seconds, then radio shows mode change.

natural_image
Simple diagram of a container with an internal oval and surrounding symbols (no text or labels)Press for 3 seconds
6. OPERATION
While playing a song, press to open menu and select "File List" in menu as below, then it shows all folder/album/file list in Micro SD card.
E

6.7 Scanning DAB channels
If you travel to another city and place, you may need to scan available DAB/DAB+ radio frequency again since each area may use different frequency for radio channels. If you want to search and tune local DAB/DAB+ channels again, please precede channel scan as below.
Press ☐ to open menu, and select "Setting" ▷ "Channel Scan" ▷ ▶

6. OPERATION
6.8 Establishing a Bluetooth connection
You can establish a Bluetooth connection to any kind of Bluetooth audio device like Bluetooth loudspeakers, headphones or car radio in order to stream the radio stations, received with DABMAN 2 to these kinds of devices.
Therefor it is neccesary to pair the DABMAN 2 with the Bluetooth device.
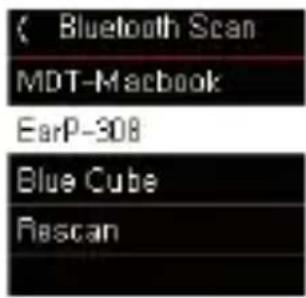
If you want to connect and pair to a Bluetooth audio device press 📋 button to open menu, and select "Setting" ▷ "Bluetooth" ▷ "Search" to find available Bluetooth Audio devices.

An alternative way to connect to a Bluetooth audio device You can also access Bluetooth by pressing ☐ to open menu, and select "Setting" ▷ "Bluetooth" ▷ "On".

6. OPERATION
After searched available Bluetooth audio devices, Select the name of Bluetooth audio device you want to connect and pair
E
+ - Change PIN code number (0 - 9)

Delete last digit

Move to next digit

Finish PIN code input and enter
3 Sec.
Cancel PIN code input
If the PIN code is not correct, it goes back to PIN code input screen again.
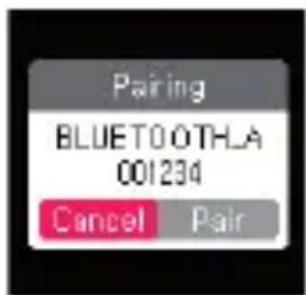
Operation Manual
66
6. OPERATION
Bluetooth status indicator
After selecting a Bluetooth audio device, DABMAN 2 will try to connect (or pair) the Bluetooth audio device. Once DABMAN 2 is successfully connected (paired) with the Bluetooth audio device, the Bluetooth status indicator is activated and will be displayed as below.

Bluetooth off
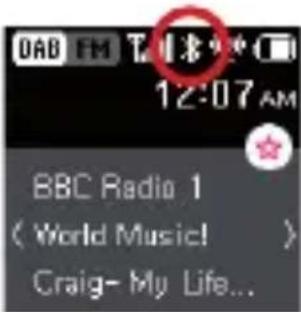
Bluetooth on
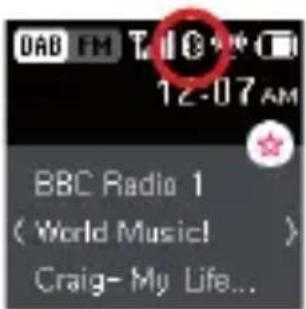
Bluetooth paired
Switching between earphone and Bluetooth audio device If you want to switch radio sound output between Bluetooth audio device and earphone, press ☐ to open menu and select "Setting" ▷ "Bluetooth" ▷ "Off".

natural_image
Simple diagram with a central oval and surrounding symbols (no text or labels)
natural_image
Circular icon with a red gear and star, surrounded by icons like document, edit, and stars (no text or symbols)
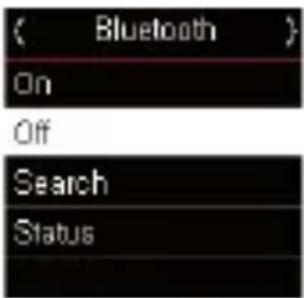
PLEASE NOTE:
When a Bluetooth connection and streaming is active, there is no sound available on connected earphones.
6. OPERATION
6.9 FM Transmitter
E
Apart from Bluetooth streaming function the DABMAN 2 is equipped with a FM Transmitter also.
With this FM transmitter it is possible to stream the digital radio signal DAB/DAB+ or MP3 file to an analogue FM radio.
This application is useful, when you want to listen to the music broadcasted via digital radio on a car radio that is not equipped with a Bluetooth interface.
Enabling FM transmitter
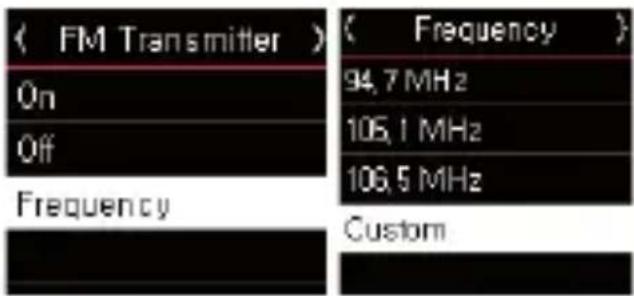
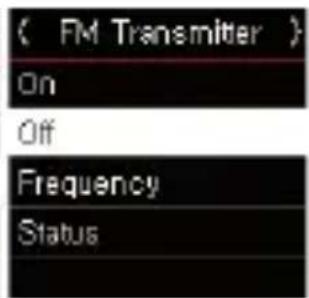
To enable FM transmitter, press + button for

Or press ☐ to open menu and select "Setting" ▷ "FM Transmitter" ▷ "On".

6. OPERATION
After enabling FM Transmitter, it needs to choose one of preset FM frequencies in the list.
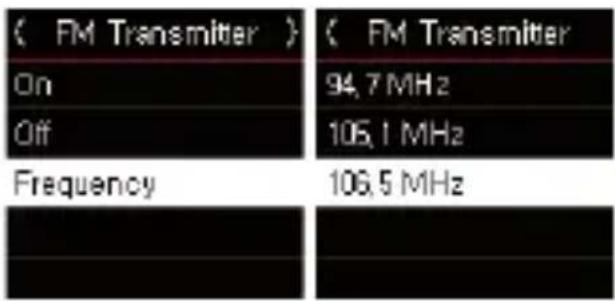
Or you can set a new FM frequency manually.

Note that you need to choose exactly the same FM frequency in your FM radio or car A/V system.
If FM Transmitter's frequency that you choose is already using by any radio broadcasting channel, the FM Transmitter will not work correctly.
Turning-off FM transmitter
To switch off FM transmitter, press + button

6. OPERATION
Or press to open menu and select "Setting" ▷ "FM Transmitter" ▷ "Off".
E

natural_image
Simple diagram with a central oval and surrounding symbols (no text or labels)
natural_image
Circular icon with a red gear and star, no text or symbols present
6.10 Preset channels
Add or delete preset channel
While listening DAB/DAB+ or FM radio, press ▶ button for 3 seconds to add current channel to a preset channel list. The preset channel can be add.


If current channel is already in the Preset channel list, previous same channel will be overwritten from Preset channel list.
Press ☐ to open menu and select "Preset List" to display all of Preset channel list. Navigate preset channel list using + & - button, and press ▶ button to select a preset channel.
6. OPERATION

natural_image
Simple diagram with a central oval and surrounding symbols (no text or labels)
natural_image
Circular device control panel with icons for file, gear, lock, and star (no readable text or symbols)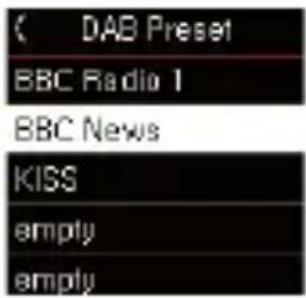


There are two separate Preset channel lists for DAB and FM. If you enter Preset List screen in DAB mode, only DAB preset channels are displayed.
Jump to previous/next preset channel
In order to move a previous channel or a next channel, press ◀◀◀ or ▶▶◀ button for 3 seconds to tune.

(Press for 3 seconds)
7. SETTINGS
Menu for DAB/DAB+/FM radio
Press 📄 button to display menu screen while using DAB/DAB+ or FM
E
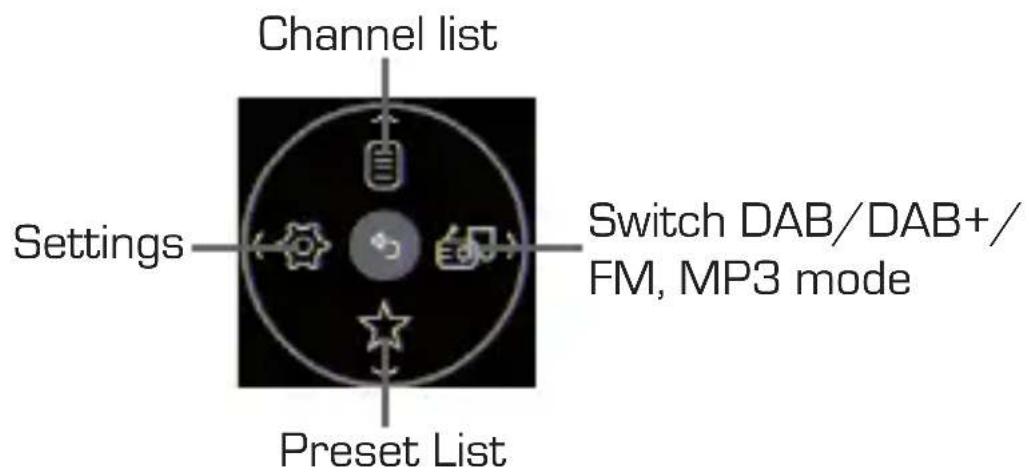
Press ☐ button to display menu screen while using MP3.

Operation Manual
7. SETTINGS
7.1 Display DAB/DAB+ channel list
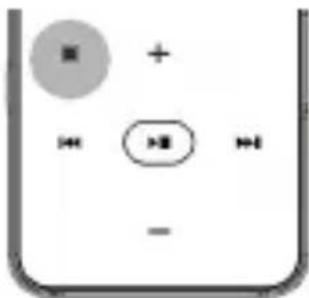
Press button to open menu screen and select "Channel List" to display DAB/DAB+ channel list. Select any channel and press ▶ button to change channel. Press◀◀ to exit from the channel list.
natural_image
Simple diagram with a gray circle containing a square and plus sign, surrounded by symbols including an hourglass, a cross, and minus signs (no text or labels)
natural_image
Circular icon with a document symbol, gear, camera, and star symbols (no readable text or numbers)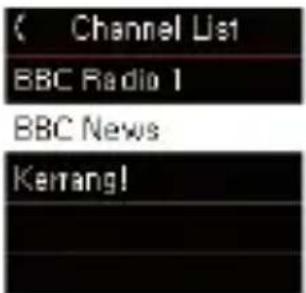
7.2 Display Preset Channel List
Press ☐ button to open menu and select "Preset" to displays the list of Preset channels.


natural_image
Circular icon with icons and a red circle highlighting a star (no text or symbols)
7. SETTINGS
7.3. Mode switch
E
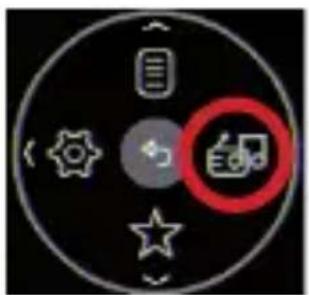
Press ☐ button to open menu screen and select "Mode". Now choose a mode between DAB/DAB+, FM radio, and MP3.

natural_image
Circular icon with icons and a red circle highlighting a document or folder (no text or symbols)
Press ☐ button to open menu screen and select "Setting" to displays setting menu.
Press ◀◀ button to return to exit from the menu.
Setting menu list for DAB/DAB+/FM
Scan for DAB/DAB+ channels
Bluetooth
Turns on or off sound output via Bluetooth audio device, Search available Bluetooth devices nearby
7. SETTINGS
FM Transmitter
Turns on or off sound output to FM transmitter, or set the FM frequency.
You can choose one of frequency in the list, or enter the frequency you want manually.
Audio
Stereo/Mono : Change sound mode to stereo or mono DRC: Change Dynamic Range Control (DRC) mode to Off, Half or Full. (available in selected DAB channels only) Equalizer: Change equalizer effect to Normal, Pop, Rock, Classic and Jazz.
Service Following
When turned on Service Following, DABMAN 2 automatically changes to the same FM channel when the DAB/DAB+ radio reception signal is poor hence the channel is not usable.
Note: Service following feature depends the local DAB/DAB+ broadcasting. Not all DAB/DAB+ channels support this feature.
Sleep mode
Sets sleep timer. You can set sleep timer as 15 minutes, 30 minutes, or 60 minutes.
Language
Change menu language with German or English
7. SETTINGS
System
- Reset All: Clears all channel/preset list and settings and restart DABMAN 2.
• Information: Displays model no, serial number and firmware version number - Firmware Update: Update firmware of DABMAN 2.
Update firmware
Download new firmware file of DABMAN 2 to a computer from web site
Press to open menu and select "System"→ "Firmware Update"
As described below image, connect DABMAN 2 to USB port of the computer.

DABMAN 2 will be seen as a external storage in the computer (like a USB memory stick)
Copy the firmware image file to DABMAN 2.
Remove DABMAN 2 safely from the computer.
- In Windows, right-click the drive name of DABMAN 2 and select "Eject".
- In Mac OS X or Linux, click eject icon on the drive icon. DABMAN 2 will automatically update itself and restart system.
Operation Manual
8. TROUBLESHOOTING
| Symptom | Possible cause and solution |
| Does not turn on Fully sound in the head-phone | charge DABMAN 2 before using itCannot hear any sound in the headphoneCheck if headphone is firmly inserted to the port.Check if headphone cable is stretched enough. Rolling out the cable may affect radio reception.When you connected DABMAN 2 to Bluetooth audio device, no sound come out from headphone port. |
| Failed to scan or connect to Bluetooth audio device | Check if Bluetooth device is in “Pairing” modeCheck if PIN code of Bluetooth device is correctPlace DABMAN 2 closer to the Bluetooth device |
| Cannot hear any sound in FM car audio | Check if car radio is tuned to correct FM frequencyCheck if FM transmitter setting of DABMAN 2 is ONand FM frequency is correctCheck if an headphone or headphone extension cable is connected to the port.Try other FM frequency |
9. TECHNICAL SPECIFICATIONS
E
System
| Radio system | DAB/DAB+FM (RDS) |
| Frequency range | DAB/DAB+: Band-IIIFM: 87.5~108.0MHz |
| Earphone port | 3.5mm stereo audio jack |
| Antenna | Earphone Extension or EarphoneBluetooth 2.1 |
| Bluetooth | Compatible with Bluetooth A2DP compliant Bluetooth devices such as speakers, headsets, auto-mobile audio systemsSelectable frequency |
| FM transmitter | (87.5~108.0MHz)Micro SD Card slot |
| External Memory slot | Li-polymer 3.7V 430mAh |
| Battery Life | DAB with headphone: 10 hoursDAB with Bluetooth: 5.5 hoursDAB with FM transmitter: 7.5 hours |
| Power input | 5V 300mA (micro USB port) |
| Dimensions | 45 x 92 x 11mm |
| Weight | 40g |
| Operating environment | 0~40°C, 20~80% RH |
10. DISPOSAL INSTRUCTIONS
The packaging of your product consists exclusively of recyclable materials. Please return these materials, appropriately sorted, to the „Dual System“ or appropriate recycling system in your country. At the end of its lifetime, this product may not be disposed of in your normal household waste, it must be handed in at a collection point for the recycling of electrical and electronic equipment.

The symbol on the product, packaging or operating manual indicates this requirement.
The materials used are recyclable as indicated by their markings. By recycling or otherwise re-using old products or their components you are making an important contribution to the protection of our environment. Please enquire from your local authorities where the appropriate recycling centre is located. Please ensure that spent batteries as well as electronic waste are not disposed of in your domestic waste, and are professionally recycled.

natural_image
Simple line drawing of a trash bin with no text or symbols11. SERVICE UND SUPPORT
Dear customer!
Thank you for choosing a product from our range. Our product complies with all legal requirements, and has been manufactured subject to constant quality controls. The technical data correspond with the current status at the time of printing. Subject to change without notice.
The warranty period for the DABMAN 2 corresponds with the legal requirements at the time of purchasing. In addition, we provide our telephonic Hotline service, offering professional assistance.
Professional, trained experts are available in our service area to answer your queries. Here you can pose any questions you may have with regard to IMPERIAL products, and obtain hints on finding possible causes of problems.
Our technicians are available from Monday-Friday, from 08h00 to 16h45 (CET) at the following telephone number: +49(0)2676 / 95 20 101 or per E-Mail at: service@telestar.de
If the service hotline is unable to assist you, please send your DABMAN 2, if possible in the original packaging, and definitely securely packed, to the following address:
TELESTAR - DIGITAL GmbH
Service Center
Am Weiher 14 (Industrial zone)
D-56766 Ulmen/Germany
12. CE MARKING

E
Your radio bears the CE mark, and complies with all required EU standards.
CE mark for European markets
The CE mark on the product IMPERIAL DABMAN 2 gives you the assurance that the product complies with the CE regulations.
The conformity declaration for this product can be obtained at:
Please note that all technical data or any described functions are subject to change without notice.
Copy and reproduction only with authorization of the publisher.
TELESTAR Digital GmbH is not responsible for printing errors.
Correct as at: December 2017
TELESTAR - DIGITAL GmbH
Am Weiher 14
56766 Ulmen
- INHALTSVERZEICHNIS
- ABBILDUNGEN
- D
- Display
- Menü Taste
- Sprachauswahl
- Hinweis:
- BEDIENUNG
- Lautstärke
- Navigation
- Wechsel MP3/Radio Modus
- oder
- FM Transmitter
- Preset Kanalliste
- MENÜ
- Modusauswahl
- D 7.3 Einstellungen
- TABLE OF CONTENTS
- INTRODUCTION
- E
- SAFETY NOTICES
- Basic Safety notices
- Distraction
- Hearing Loss
- Charging the device
- Radio frequency interference
- Choking hazard
- Operating temperature
- ITEMS SUPPLIED
- ILLUSTRATIONS
- FIRST INSTALLATION
- Charching the device
- Earphone connection
- Please note:
- Power On
- Language
- OPERATION
- Display Information
- In MP3 Play mode:
- Station selection
- Volume
- Change radio mode
- MP3 mode
- Play mode
- MP3 File Play
- Play a previous or next song
- Changing radio mode from MP3 to DAB/FM radio
- Scanning DAB channels
- Establishing a Bluetooth connection
- Bluetooth status indicator
- Enabling FM transmitter
- Turning-off FM transmitter
- Preset channels
- Jump to previous/next preset channel
- SETTINGS
- Menu for DAB/DAB+/FM radio
- Display DAB/DAB+ channel list
- Display Preset Channel List
- Mode switch
- Setting menu list for DAB/DAB+/FM
- Bluetooth
- FM Transmitter
- Audio
- Service Following
- Sleep mode
- System
- Update firmware
- TROUBLESHOOTING
- TECHNICAL SPECIFICATIONS
- DISPOSAL INSTRUCTIONS
- SERVICE UND SUPPORT
- CE MARKING
Brand : Imperial
Model : DABMAN 2
Category : Radio