
55RNCS - Monitor ORION - Free user manual and instructions
Find the device manual for free 55RNCS ORION in PDF.


User questions about 55RNCS ORION
0 question about this device. Answer the ones you know or ask your own.
Ask a new question about this device
Download the instructions for your Monitor in PDF format for free! Find your manual 55RNCS - ORION and take your electronic device back in hand. On this page are published all the documents necessary for the use of your device. 55RNCS by ORION.
USER MANUAL 55RNCS ORION
natural_image
3D rendering of a rectangular panel with mounting flanges and a central shaded area (no text or symbols)SUNLIGHT READABLE SERIES
(46\~55 inches)
1. SAFETY INSTRUCTION
※ Follow this safety instruction to use the monitor properly and prevent the damages.
※ This safety instruction has “Warning” & “Caution” as below

Warning - If the user does not follow this instruction, it may cause the serious damage to the user.

Caution - If the user does not follow this instruction, it may cause the slight damage to the user or cause some damages to the monitor.
※ Keep this user's guide book for later use.

Warning
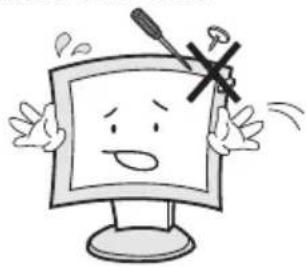
Never remove the back over and touch the inside of the monitor. If you need a service, please contact the service center.
natural_image
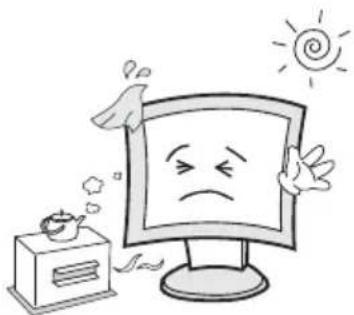
Cartoon illustration of a smiling computer monitor character with a cross mark on its head (no text or symbols)Keep away the monitor from the direct sunlight and a heating appliance.
natural_image
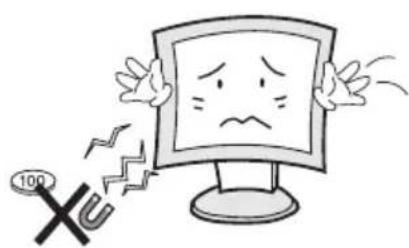
Cartoon illustration of a sad computer monitor with steam rising, next to a steaming cup and sun (no text or symbols)Never push objects of any kind into this product as they may result in a risk of fire or electric shock.
natural_image
Cartoon illustration of a computer monitor with a sad face and a '100' mark, symbolizing stress or urgency (no text or symbols on the main image)Connect the power code to the wall outlet tightly. If the power code or plug are defective and the wall outlet is not tight, please do not use them.

natural_image
Cartoon illustration of a computer monitor with a sad face and a starburst, connected to a power outlet (no text or symbols)
Warning
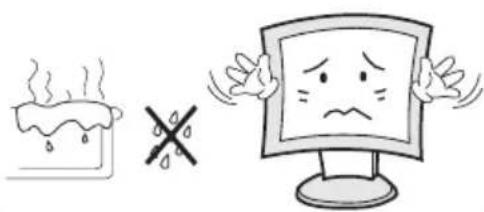
Do not install this monitor on the outside and near water. If may cause damage to the product, electric shock and fire.
natural_image
Illustration of a steaming container and a computer monitor with a sad face, both showing no text or symbols.For cleaning do not use liquid cleaners. Never touch the power plug with wet-hands.

text_image
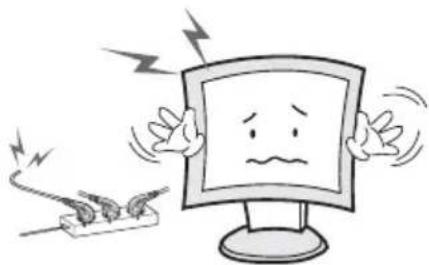
Cartoon illustration showing a computer monitor with a sad face, a spray bottle, and a mosquito, all crossed out by a 'No' symbol.When lightning and thundering, unplug the monitor from the wall outlet and never touch it.
natural_image
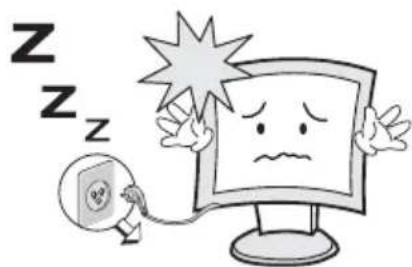
Cartoon illustration of a computer monitor character with a sad face and lightning bolts, next to a plug (no text or symbols)Unplug this product from the wall outlet, when It does not operate for a long time.
natural_image
Cartoon illustration of a distressed computer monitor with a sad face and a small phone emitting smoke, surrounded by 'Z' symbols (no text or labels)When smoking and noising from the monitor, unplug the product from the wall outlet and contact a service center.

natural_image
Cartoon illustration of a smiling computer monitor with a waving hand and question mark symbols (no text or labels)
WARNING : How to fix
Do not open this product as it contains high voltage inside.
It may create an electric shock.
It the user disassembles and remove the back cover, it does not make sure to make up for the damages and do a service and exchange the monitor.

Cautions
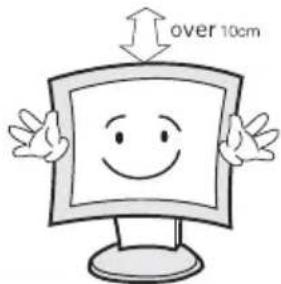
Install this monitor some distance From the wall and do not install unless Proper ventilation is provided.
natural_image
Cartoon illustration of a smiling computer monitor with arms and legs, no text or symbols presentPlace this product on a stable place. If not, it may fall, causing serious Damages to the monitor and people.

natural_image
Cartoon illustration of a computer monitor with a sad face and waving hands (no text or symbols)The openings must not be blocked by curtain, rug or other similar surface.

natural_image
Cartoon illustration of a computer monitor with a sad face and frowning expression (no text or symbols)When carrying this monitor, be careful not to damage the panel and drop it. It may cause some trouble.

natural_image
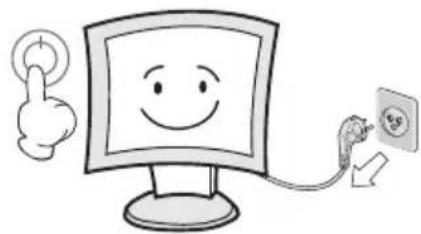
Cartoon illustration of a smiling computer monitor with arms extended (no text or symbols)Before carrying the monitor, tum it off and Unplug the signal cables and the power code From the wall outlet.
natural_image
Cartoon illustration of a smiling computer monitor with a pointing finger and a plug, connected to an electrical outlet (no text or symbols)Take the power plug out from the wall outlet. Do not pull the cable. It may snap the inner-wires and cause overheating and fire.
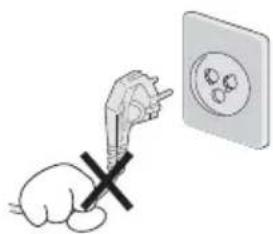
natural_image
Illustration of a hand holding a plug with a cross symbol, next to an electrical outlet (no text or symbols present)
Cautions
Install this monitor about 50cm far from the eyes and an angle of 0\~15 degrees below eyes. Too close installation may cause having weak sight.
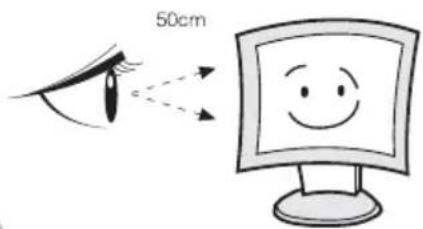
text_image
50cmDo not press the LCD panel with hands or the sharpened material hardly.

natural_image
Cartoon illustration of a sad computer monitor character with arms and legs, holding a blank sign (no text or symbols present)For cleaning, unplug the monitor from the Wall outlet. Do net use the liquid cloth. Use the soft cloth.
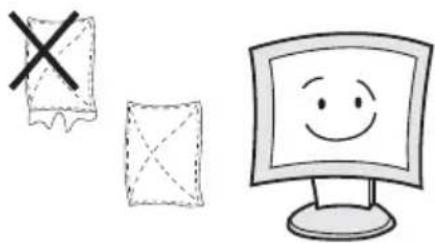
natural_image
Simple line drawing of a computer monitor with a smiling face, next to two geometric shapes: a cross and a square (no text or symbols)Do not use the chemical liquid for cleaning. It may cause fading and breakage.
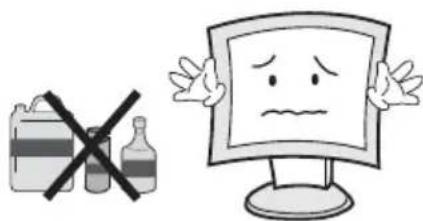
natural_image
Illustration of a crossed-out bottle and a sad face on a computer monitor (no text or symbols)2. FCC RF INTERFERENCE STATEMENT
NOTE
This equipment has been tested and found to comply with the limits for a Class A digital device, pursuant to Part 15 of the FCC Rules. These limits are designed to provide reasonable protection against harmful interference in a residential installation. This equipment generates, uses and can radiate radio frequency energy and, if not installed and used in accordance with the instructions, may cause harmful interference to radio communications. However, there is no guarantee that interference will not occur in a particular installation. If this equipment does cause harmful interference to radio or television reception which can be determined by turning the equipment off and on, the user is encouraged to try to correct the interference by one or more of the following measures.
- Reorient or relocate the receiving antenna.
- Increase the separation between the equipment and receiver.
- Connect the equipment into an outlet on a circuit different from that to which the receiver is connected.
- Consult the dealer or an experienced radio, TV technician for help.
- Only shielded interface cable should be used.
Finally, any changes or modifications to the equipment by the user not expressly approved by the grantee or manufacturer could void the users authority to operate such equipment.
DOC COMPLIANCE NOTICE
This digital apparatus does not exceed the Class A limits for radio noise emissions from digital apparatus set out in the radio interference regulation of Canadian Department of communications.
TABLE OF CONTENTS
- SAFETY INSTRUCTION 2
1-1 Warning
1-2 Caution
-
FCC STATEMENT 6
-
INSTALLATION 8
3-1 Parts
3-2 How to Install
- OSD MENU SETTING 12
5-1 Mode Setting
5-2 Menu Setting (VIDEO, S-VIDEO, COMPONENT Mode)
5-3 Menu Setting (VGA Mode)
5-4 Menu Setting (DVI, HDMI Mode)
- SERIAL WIRED CONTROLLER SETTING 32
- FEATURES 33
- MECHANICAL DRAWING 34
- LIMITED WARRANTY 35
- TROUBLESHOOTING 35
3. INSTALLATION
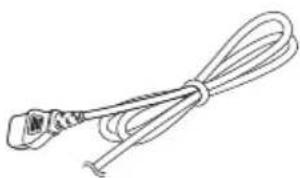
3-1 Parts
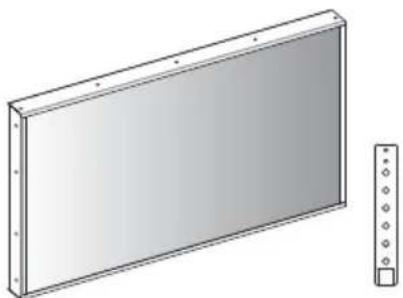
natural_image
Illustration of a rectangular electronic device with a vertical panel and a separate control panel (no text or symbols)LCD Monitor & Keypad
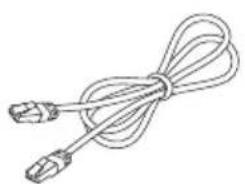
natural_image
Line drawing of a cord with two connectors (no text or symbols)UTP Cable VGA Ca
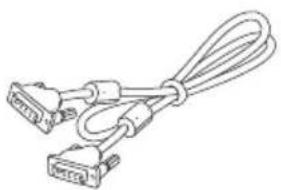
natural_image
Line drawing of two connected VGA connectors with a coiled cable (no text or symbols)Serial Cable
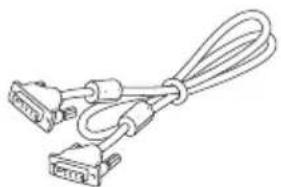
natural_image
Line drawing of two connected VGA connectors with coiled cable (no text or symbols)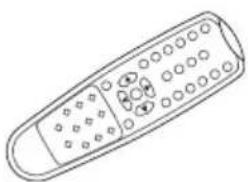
natural_image
Line drawing of a remote control with buttons and dials (no text or symbols)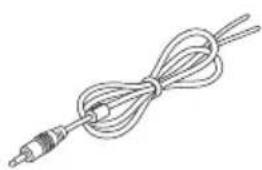
natural_image
Line drawing of a coiled cable with two leads (no text or symbols)Trigger Cable Power
natural_image
Line drawing of a cable with a plug and connector (no text or symbols)ple Remote Controller
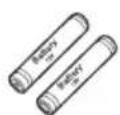
Battery Install CD
r Manual

3-2 How to Install
KEYPAD CONTROLLER

text_image
KEYPAD This KEYPAD is attached to a magnet, so you can freely paste UTP Cable (1.5m) EXIT MENU SOURCE AUTO VOLUME SELECT O/I POWERIf you want to replace with a longer cable Please purchase separately
SHORT KEY FUNCTION
| OSD Key Function | |
| EXIT MENU | Activates and exit the OSD |
| ▽SOURCE | Select input source, and select the OSD menu |
| △AUTO | Move the OSD menu and auto adjustment of RGB source |
| ◀VOLUME | Decrease the level of volume and move the previous menu |
| ▷SELECT | Increase the level of volume and select rhe OSD menu |
| ○/|POWER | Turns the power ON or OFF. There will be a few seconds delay before the display appears.The power LED (next to the power switch) lights with green when the power is turned ON. The power is turned off by pressing the power switch again and the power LED goes red. |
CONNECTION

text_image
HDMI [ ] DM HSA AUDIO PCI COMPONENT L PVD RIO AUDIO (VDD-2) AUDIO (VDD-VDD) S4802 OUT IN VIDEO-1 OUT IN TWGER BYRSE MS 200 1 2 3 4 5 6 7 8 9 10 11 12 13 14 AC POWER1 HDMI
HDMI Signal 1 / 2 input S-VIDEO signal input / looping out
2 DVI
DVI signal input VIDEO-2 signal input / looping out
3 VGA
VGA (PC RGB) signal input VIDEO-1 signal input / looping out
4 AUDIO (PC)
Stereo audio input for VGA TRIGGER Signal input
5 COMPONENT
COMPONENT (Y/Pb/Pr) signal & stereo audio input
6 AUDIO (VIDEO-2)
Stereo audio input for VIDEO-2
POWER Turn ON / OFF the monitor MUTE Turn ON / OFF the sound
AUTO Auto adjust position of the screen (in VGA mode)
SCAN MODE Select the scan mode of the screen
MENU / EXIT Activate and exit the OSD menu
STILL Freeze the current image
C PIP CONTROL MENU
S. SET Select between main and PIP audio input
P. INPUT Select an input source for PIP mode
P. SIZE Select a size for PIP mode
PIP Activates PIP/PBP mode
P. LOCATION Select a location for PIP mode
P. SWAP Swap between main and PIP input
4. OSD MENU SETTING
5-1 Mode Setting
INPUT
VIDEO1
VIDEO2
S-VIDEO
√RGB PC
DVI
HDMI 1
HDMI 2
COMPONENT

:MOVE
:ENTER
- Use SOURCE button and then ▲/▼ button to move the source.
- Press the ▶ button to select the source.
- Press the MENU/EXIT button to exit the INPUT menu.
Inputs can be set to VIDEO1, VIDEO2, S-VIDEO, RGB PC, DVI, HDMI1, HDMI2 & COMPONENT mode
VIDEO1
Select VIDEO1 mode
S-VIDEO
Select S-VIDEO mode
DVI
Select DVI mode
HDMI2
Select HDMI2 mode
VIDEO2
Select VIDEO2 mode
RGB PC
Select VGA mode
HDMI1
Select HDMI1 mode
COMPONENT
Select COMPONENT mode
5-2 Menu Setting (VIDEO, S-VIDEO, COMPONENT Mode)
PICTURE
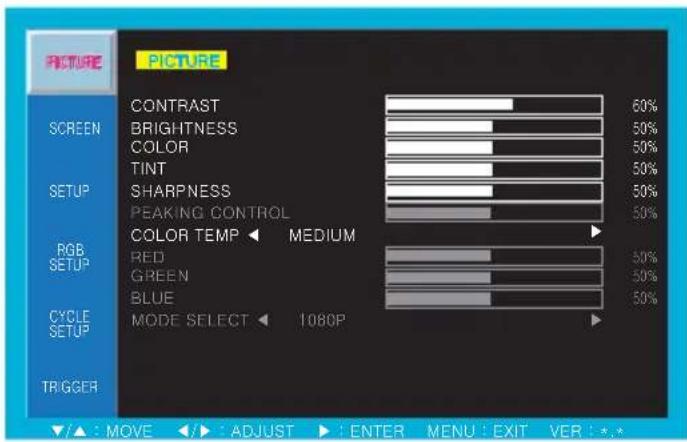
text_image
PICTURE CONTRAST 60% SCREEN BRIGHTNESS 50% COLOR 50% TINT 50% SETUP SHARPNESS 50% PEAKING CONTROL 50% RGB SETUP COLOR TEMP MEDIUM RED 50% GREEN 50% BLUE 50% CYCLE SETUP MODE SELECT 1080P TRIGGER /▲ : MOVE < /► : ADJUST ► : ENTER MENU : EXIT VER : *.*CONTRAST : Adjust visual color contrast
- Press the MENU/EXIT key to access menu.
- Use the ▲&▼arrow to highlight a selection.
- Press the ▶/SELECT to choose an item.
- Use the ▲&▼arrow to highlight a selection.
- Use the ▲&▼arrow to adjust the setting on a selected item.
COLOR : Adjust visual color of screen TINT : Adjust tint of color
BRIGHTNESS : Adjust color brightness
SHARPNESS : Adjust sharpness of screen COLOR TEMP : Switch color temperature of screen
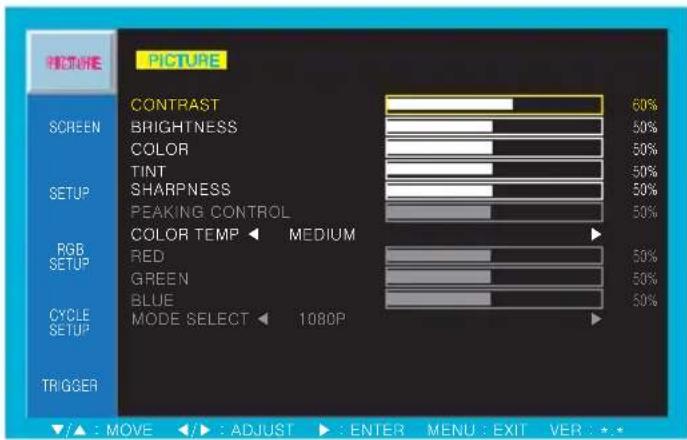
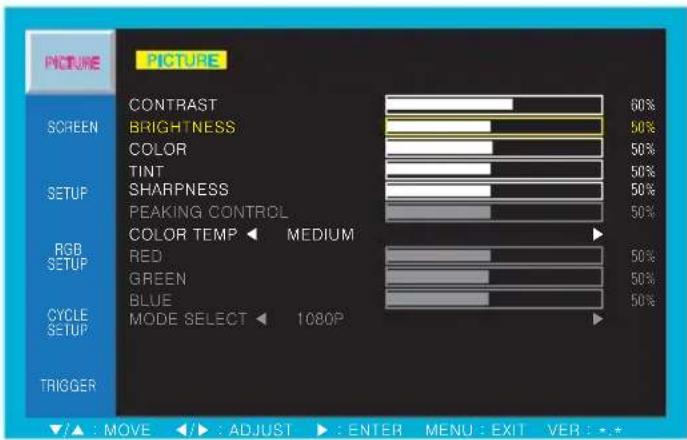
CONTRAST BRIGHTNESS
text_image
PICTURE CONTRAST 60% SCREEN BRIGHTNESS 50% COLOR 50% TINT 50% SETUP SHARPNESS 50% PEAKING CONTROL 50% RGB RED MEDIUM 50% SETUP GREEN 50% BLUE 50% CYCLE MODE SELECT 1080P 1080P TRIGGER ▲/▲ : MOVE ◀/► : ADJUST ► : ENTER MENU : EXIT VER : +•Default setting is 60% and adjustable from range of 0 to 100%
text_image
PICTURE CONTRAST BRIGHTNESS COLOR TINT SHARPNESS PEAKING CONTROL COLOR TEMP MEDIUM RED GREEN BLUE MODE SELECT 1080P SCREEN SETUP RGB SETUP CYCLE SETUP TRIGGER 7▲: MOVE ←→: ADJUST →: ENTER MENU: EXIT VER: *.*Default setting is 50% and adjustable from range of 0 to 100%
COLOR TINT
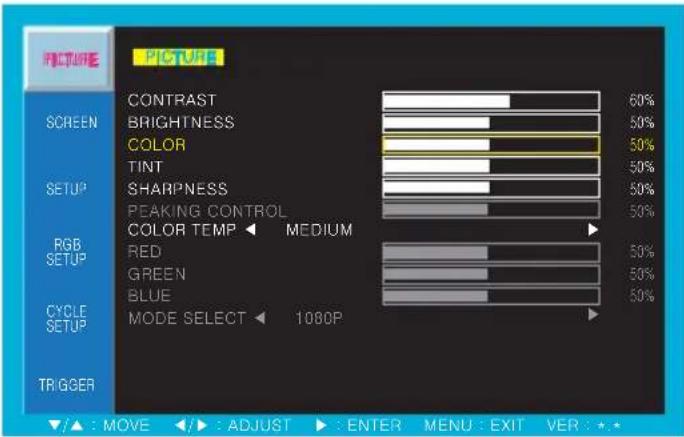
text_image
PICTURE PICTURE CONTRAST 60% SCREEN BRIGHTNESS 50% COLOR 50% TINT 50% SETUP SHARPNESS 50% PEAKING CONTROL 50% COLOR TEMP MEDIUM RGB RED 50% SETUP GREEN 50% BLUE 50% CYCLE MODE SELECT 1080P 1080P TRIGGER /▲ : MOVEDefault setting is 50% and adjustable from range of 0 to 100%
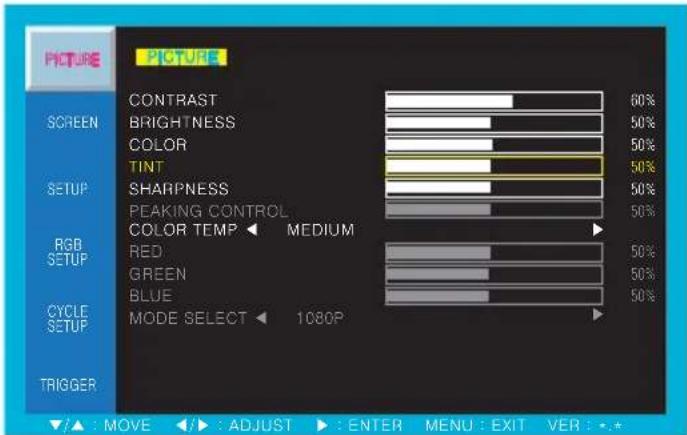
text_image
PICTURE PICTURE CONTRAST 60% SCREEN BRIGHTNESS 50% COLOR 50% TINT 50% SETUP SHARPNESS 50% PEAKING CONTROL 50% COLOR TEMP MEDIUM RGB SETUP RED 50% GREEN 50% BLUE 50% CYCLE SETUP MODE SELECT 1080P TRIGGER ▲: MOVE ▶: ADJUST ▶: ENTER MENU: EXIT VER: *.*Default setting is 50% and adjustable from range of 0 to 100%
SHARPNESS COLOR TEMP
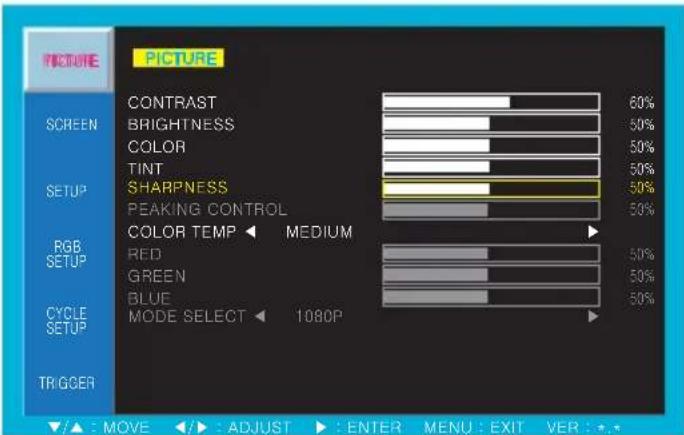
text_image
PICTURE PICTURE CONTRAST 60% SCREEN BRIGHTNESS 50% COLOR 50% TINT 50% SETUP SHARPNESS 50% PEAKING CONTROL 50% RGB SETUP COLOR TEMP MEDIUM RED 50% GREEN 50% BLUE 50% CYCLE MODE SELECT 1080P 1080P TRIGGER /▲: MOVE /►: ADJUST ►: ENTER MENU: EXIT VER: *.*Default setting is 50% and adjustable from range of 0 to 100%. Default setting is MEDIUM and switch to WARM, USER and COOL color temperature options
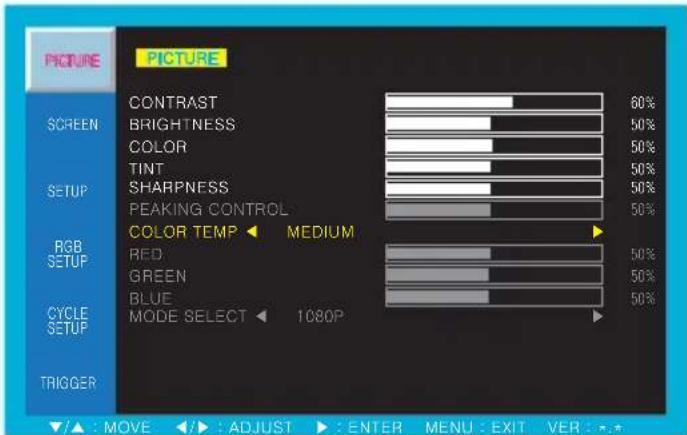
text_image
PICTURE PICTURE CONTRAST 60% SCREEN BRIGHTNESS 50% COLOR 50% TINT 50% SETUP SHARPNESS 50% PEAKING CONTROL 50% RGB SETUP RED 50% GREEN 50% BLUE 50% CYCLE SETUP MODE SELECT 1080P TRIGGER ▼/▲ : MOVE ◀/► : ADJUST ▶ : ENTER MENU : EXIT VER : ★★USER - Default setting of RED, GREEN, BLUE is 50% and adjustable from range of 0 to 100%
SCREEN
text_image
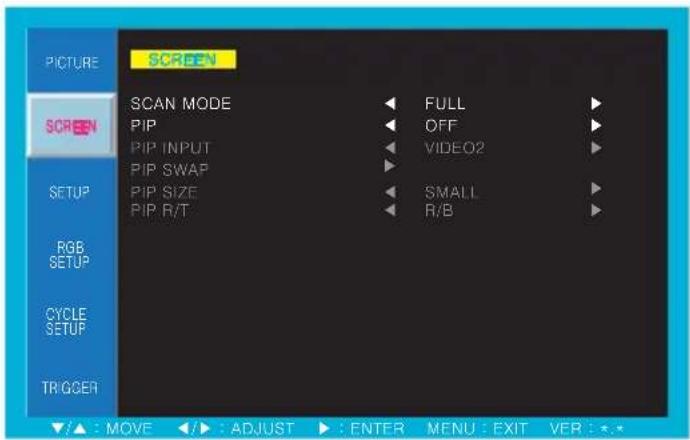
PICTURE SCREEN SCAN MODE PIP PIP INPUT PIP SWAP PIP SIZE PIP R/T FULL OFF VIDEO2 SMALL R/B SETUP RGB SETUP CYCLE SETUP TRIGGER /▲: MOVE ◀: ADJUST ▶: ENTER MENU: EXIT VER: *.*- Press the MENU/EXIT key to access menu.
- Use the ▲&▼arrow to highlight a selection.
- Press the ▶/SELECT to choose an item.
- Use the ▲&▼arrow to highlight a selection.
- Use the ▲&▼arrow to adjust the setting on a selected item.
SCAN MODE : Select the scan mode of the screen PIP : Activates PIP/PBP mode
PIP, PBP - COMBINATION OF SIGNAL INPUT
| SUB MAIN | VIDEO-1 VIDEO-2 S-VIDEO COMPONENT VGA DVI HDMI | |||||
| VIDEO-1 | X O O X X X X | |||||
| VIDEO-2 | O X O X X X X | |||||
| S VIDEO | O O X X X X X | |||||
| COMPONENT | O O O X X X X | |||||
| VGA | O O O X X X X | |||||
| DVI | O O O X X X X | |||||
| HDMI | O O O X X X X | |||||
SCAN MODE PIP
text_image
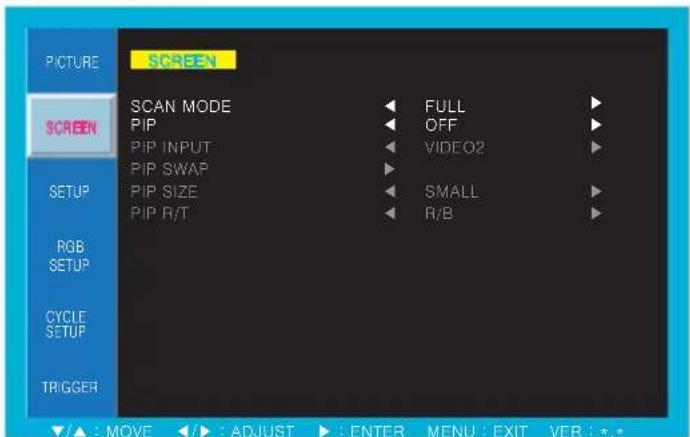
PICTURE SCREEN SCAN MODE PIP PIP INPUT PIP SWAP PIP SIZE PIP R/T FULL OFF VIDEO2 SMALL R/B RGB SETUP CYCLE SETUP TRIGGER /▲ : MOVE ◀ ▶ : ADJUST ▶ : ENTER MENU : EXIT VER : *.*Default setting is FULL and switch to UNDER, OVER and 4:3 scan mode options
text_image
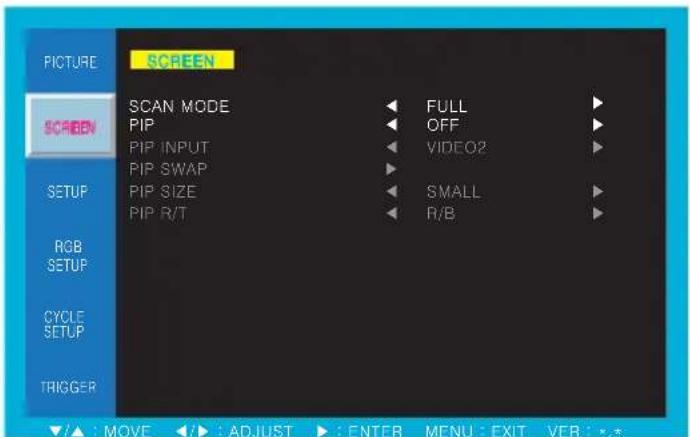
PICTURE SCREEN SCAN MODE PIP PIP INPUT PIP SWAP PIP SIZE PIP R/T FULL OFF VIDEO2 SMALL R/B SCRED SETUP RGB SETUP CYCLE SETUP TRIGGER ▲: MOVE ▶: ADJUST ▶: ENTER MENU: EXIT VER: *.*Default setting is OFF and switch to ON, DW1 and DW2 PIP/PBP mode options
ON - PIP INPUT : Select an input source for PIP mode (VIDEO1, VIDEO2, S-VIDEO)
PIP SWAP : Swap between main and PIP input
PIP SIZE : Select a size for PIP mode (SMALL, NORMAL, LARGE)
PIP R/T : Select a location for PIP mode (R/B, L/B, R/T, L/T)
SETUP
text_image
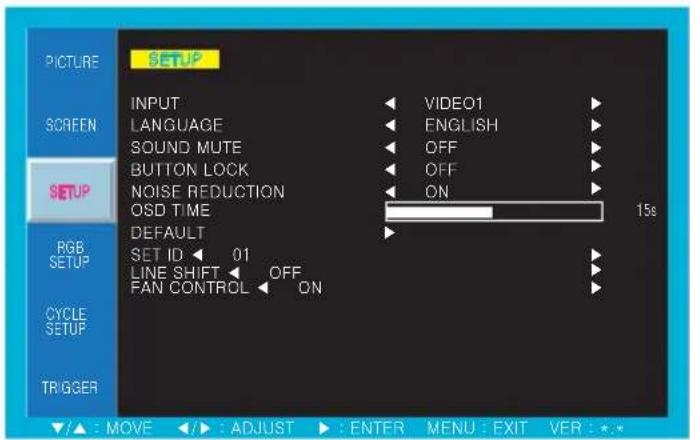
PICTURE SETUP INPUT LANGUAGE SOUND MUTE BUTTON LOCK NOISE REDUCTION OSD TIME DEFAULT SET ID 01 LINE SHIFT OFF FAN CONTROL ON VIDEO1 ENGLISH OFF OFF ON 15s RGB SETUP CYCLE SETUP TRIGGER /▲: MOVE ←→: ADJUST →: ENTER MENU: EXIT VER: *.*- Press the MENU/EXIT key to access menu.
- Use the ▲ &▼ arrow to highlight a selection.
- Press the ▶/SELECT to choose an item.
- Use the ▲ &▼ arrow to highlight a selection.
- Use the ▲&▼arrow to adjust the setting on a selected item.
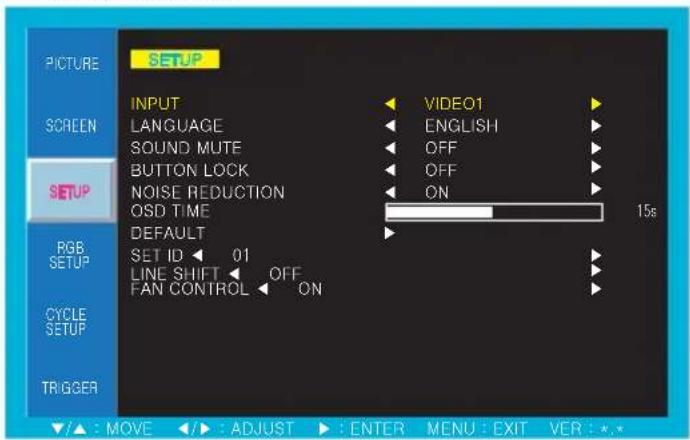
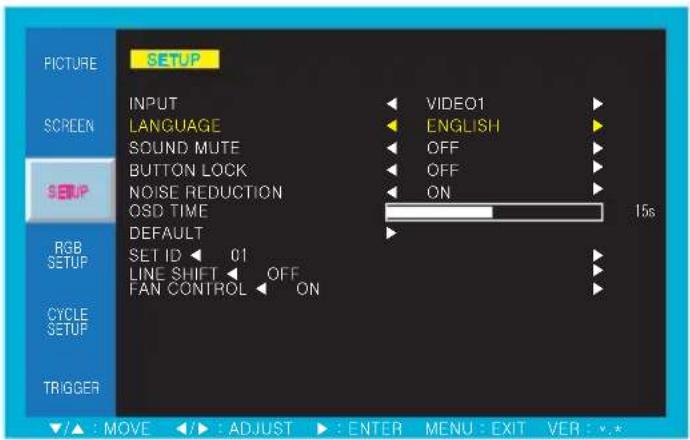
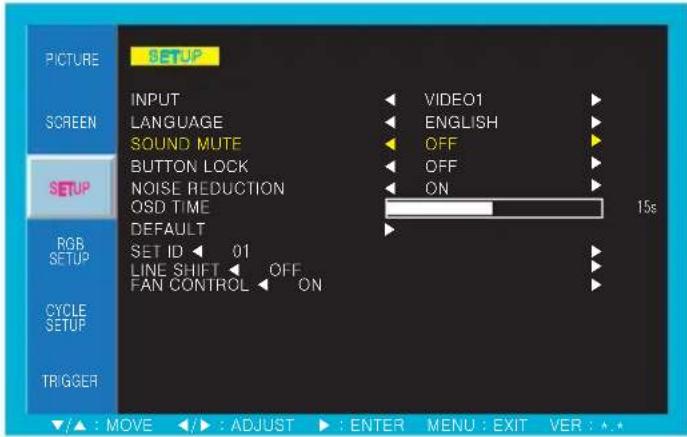
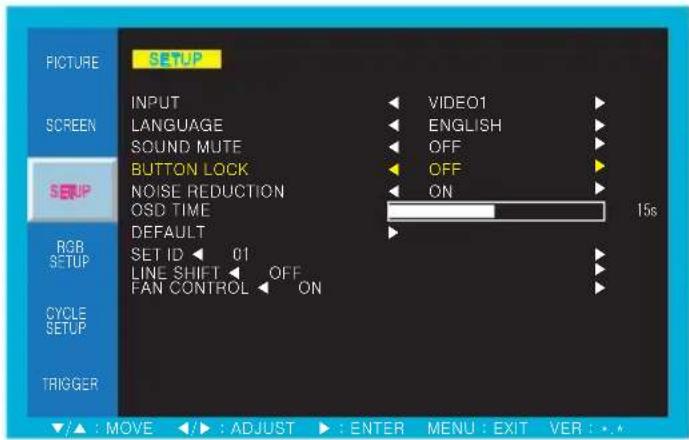
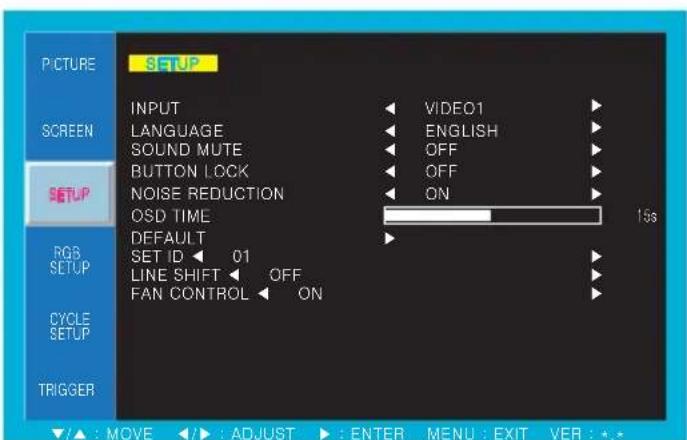
INPUT : Select an input source for main screen LANGUAGE : Set to different language mode SOUND MUTE : Turn on/off the sound BUTTON LOCK : Locking the button (Prevent operation) NOISE REDUCTION : Set a noise reduction mode OSD TIME : Set a time duration of OSD menu DEFAULT : Factory default setting SET ID : Set a set ID for RS-232 control LINE SHIFT : Move a little to protect the screen FAN CONTROL : Turn on/off the fan control
INPUT LANGUAGE
text_image
PICTURE SETUP INPUT LANGUAGE SOUND MUTE BUTTON LOCK NOISE REDUCTION OSD TIME DEFAULT SET ID 01 LINE SHIFT OFF FAN CONTROL ON VIDEO1 ENGLISH OFF OFF ON 15s RGB SETUP CYCLE SETUP TRIGGER /▲: MOVE /►: ADJUST /►: ENTER MENU: EXIT VER: *.*Inputs can be set to VIDEO1, VIDEO2, S-VIDEO, RGB PC, DVI, HDMI1, HDMI2 and COMPONENT mode
text_image
PICTURE SETUP INPUT LANGUAGE SOUND MUTE BUTTON LOCK NOISE REDUCTION OSD TIME DEFAULT SET ID 01 LINE SHIFT OFF FAN CONTROL ON 15s SCREEN SETUP RGB SETUP CYCLE SETUP TRIGGER ▲: MOVE ▶: ADJUST ▶: ENTER MENU: EXIT VER: *.*Default setting is ENGLISH and language setting can be set to ITALIAN, FRENCH, SPANISH and GERMAN
SOUND MUTE BUTTON LOCK
text_image
PICTURE SETUP INPUT LANGUAGE SOUND MUTE BUTTON LOCK NOISE REDUCTION OSD TIME DEFAULT SET ID ◀ 01 LINE SHIFT ◀ OFF FAN CONTROL ◀ ON VIDEO1 ENGLISH OFF OFF ON 15s RGB SETUP CYCLE SETUP TRIGGER /▲ : MOVE ◀/▶ : ADJUST ▶ : ENTER MENU : EXIT VER : ★★Default setting is OFF and switch to ON sound mute option
text_image
PICTURE SETUP INPUT LANGUAGE SOUND MUTE BUTTON LOCK NOISE REDUCTION OSD TIME DEFAULT SET ID 01 LINE SHIFT OFF FAN CONTROL ON VIDEO1 ENGLISH OFF OFF ON 15s RGB SETUP CYCLE SETUP TRIGGER ▲: MOVE ▶: ADJUST ▶: ENTER MENU: EXIT VER: *.*Default setting is OFF and switch to ON button lock option
Release the lock - Press KEY LOCK button on the remote control
- Press AUTO & VOLUME button on the key pad
NOISE REDUCTION OSD TIME
text_image
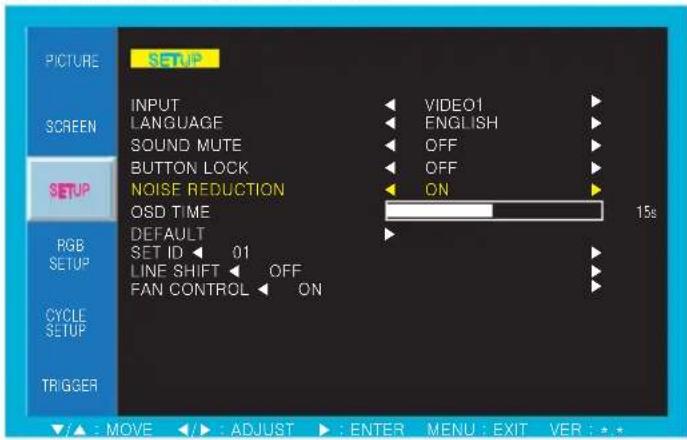
PICTURE SETUP INPUT LANGUAGE SOUND MUTE BUTTON LOCK NOISE REDUCTION OSD TIME DEFAULT SET ID 01 LINE SHIFT OFF FAN CONTROL ON VIDEO1 ENGLISH OFF OFF ON 15s RGB SETUP CYCLE SETUP TRIGGER /▲ : MOVE /► : ADJUST /► : ENTER MENU : EXIT VER : *.*Default setting is ON and switch to OFF noise reduction option
text_image
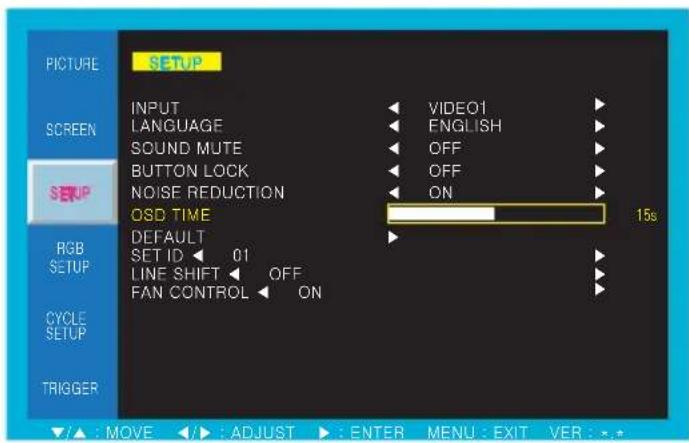
PICTURE SETUP INPUT LANGUAGE SOUND MUTE BUTTON LOCK NOISE REDUCTION OSD TIME DEFAULT SET ID 01 LINE SHIFT OFF FAN CONTROL ON VIDEO1 ENGLISH OFF OFF ON 15s RGB SETUP CYCLE SETUP TRIGGER ▲ : MOVE ▶ : ADJUST ▶ : ENTER MENU : EXIT VER : *.*Default setting is 15s and adjustable from range of 5 to 30s
DEFAULT SET ID
text_image
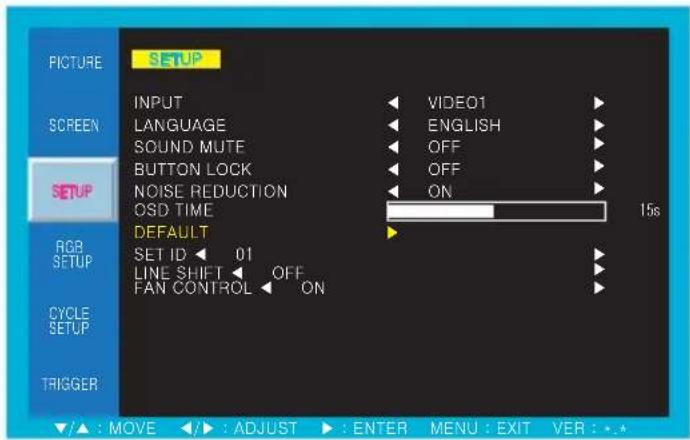
PICTURE SETUP INPUT LANGUAGE SOUND MUTE BUTTON LOCK NOISE REDUCTION OSD TIME DEFAULT SET ID 01 LINE SHIFT OFF FAN CONTROL ON VIDEO1 ENGLISH OFF OFF ON 15s RGB SETUP CYCLE SETUP TRIGGER ▲: MOVE ▶: ADJUST ▶: ENTER MENU: EXIT VER: ••DEFAULT is set OSD menu to factory default
text_image
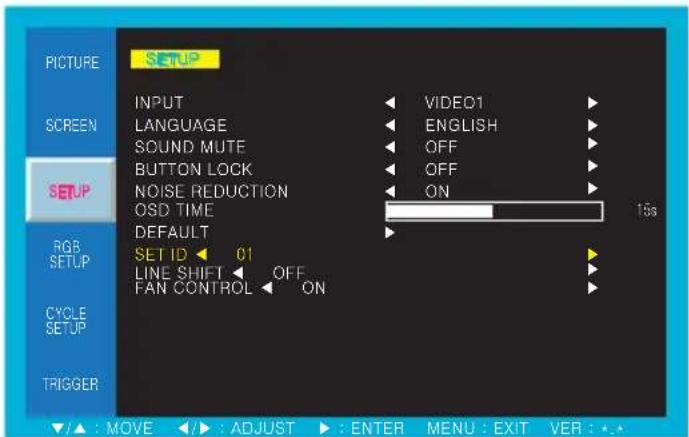
PICTURE SETUP INPUT LANGUAGE SOUND MUTE BUTTON LOCK NOISE REDUCTION OSD TIME DEFAULT SET ID 01 LINE SHIFT OFF FAN CONTROL ON 18s SCREEN SETUP RGB SETUP CYCLE SETUP TRIGGER ▲ : MOVE ▶ : ADJUST ▶ : ENTER MENU : EXIT VER : ★★Default setting is 01 and adjustable from range of 01 to 99
LINE SHIFT FAN CONTROL
text_image
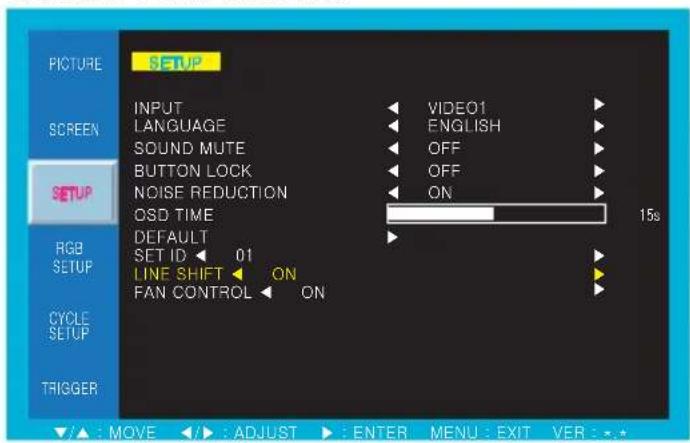
PICTURE SETUP INPUT LANGUAGE SOUND MUTE BUTTON LOCK NOISE REDUCTION OSD TIME DEFAULT SET ID 01 LINE SHIFT ON FAN CONTROL ON VIDEO1 ENGLISH OFF OFF ON 15s RGB SETUP CYCLE SETUP TRIGGER ▲: MOVE ▶: ADJUST ▶: ENTER MENU: EXIT VER: *.*Default setting is ON and switch to OFF line shift option Default setting is ON and switch to OFF fan control option
text_image
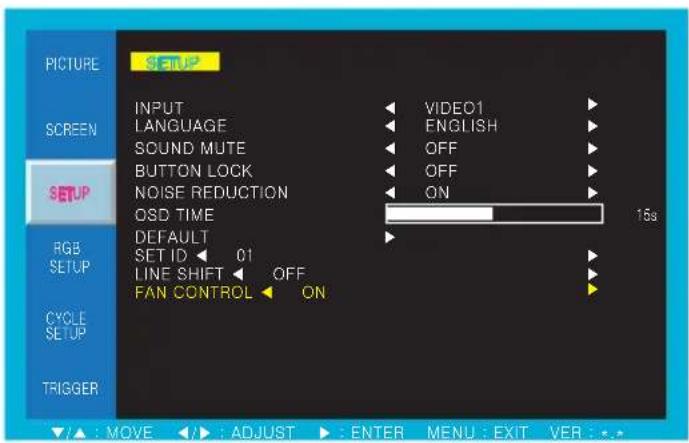
PICTURE SETUP INPUT LANGUAGE SOUND MUTE BUTTON LOCK NOISE REDUCTION OSD TIME DEFAULT SET ID ◀ 01 LINE SHIFT ◀ OFF FAN CONTROL ◀ ON VIDEO1 ENGLISH OFF OFF ON 15s RGB SETUP CYCLE SETUP TRIGGER ▲ : MOVE ◀ ▶ : ADJUST ▶ : ENTER MENU : EXIT VER : ★★40RNC is not activated
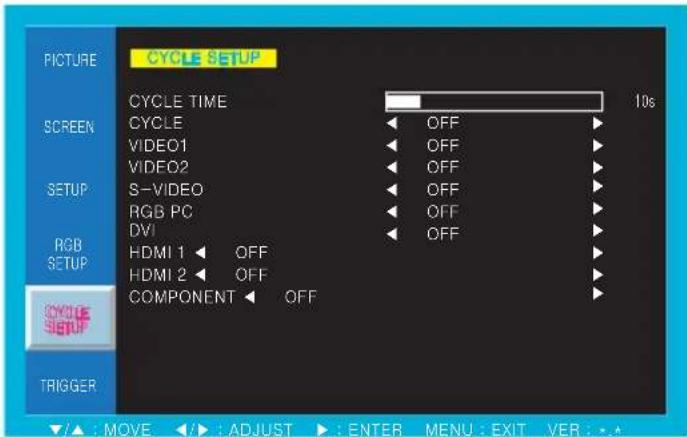
CYCLE SETUP
text_image
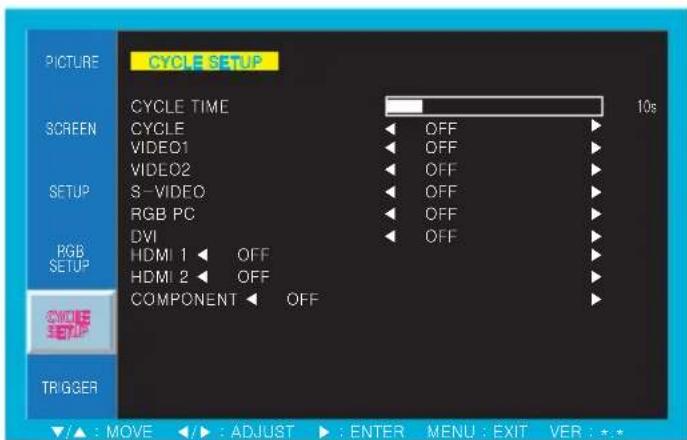
PICTURE CYCLE SETUP CYCLE TIME 10s SCREEN CYCLE OFF VIDEO1 OFF VIDEO2 OFF S-VIDEO OFF RGB PC OFF DVI OFF RGB SETUP HDMI 1 OFF HDMI 2 OFF COMPONENT OFF TRIGGER /▲ : MOVE /► : ADJUST ► : ENTER MENU : EXIT VER : *.*- Press the MENU/EXIT key to access menu.
- Use the ▲&▼arrow to highlight a selection.
- Press the ▶/SELECT to choose an item.
- Use the ▲ &▼ arrow to highlight a selection.
- Use the ▲&▼arrow to adjust the setting on a selected item.
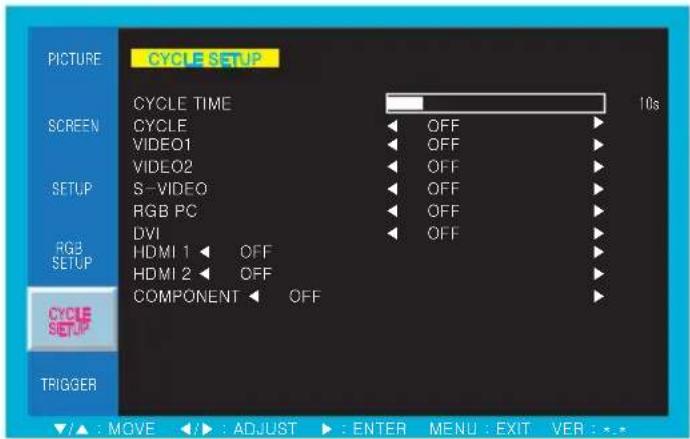
CYCLE TIME : Adjust cycle time to displayed on the screen CYCLE : Selected mode keep change continuously
CYCLE TIME CYCLE
text_image
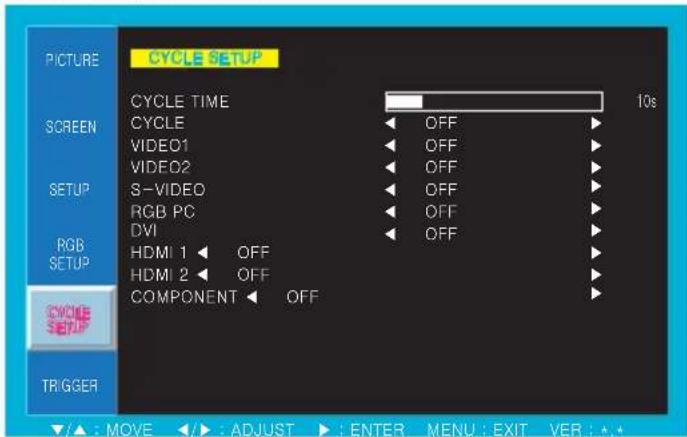
PICTURE CYCLE SETUP CYCLE TIME 10s SCREEN CYCLE OFF VIDEO1 OFF VIDEO2 OFF SETUP S-VIDEO OFF RGB PC OFF DVI OFF RGB SETUP HDMI 1 OFF HDMI 2 OFF COMPONENT OFF TRIGGER ▲: MOVE ▲: ADJUST ▶: ENTER MENU : EXIT VER : ▲Default setting is 10s and adjustable from range of 10 to 30s
text_image
PICTURE CYCLE SETUP CYCLE TIME 10s SCREEN CYCLE OFF VIDEO1 OFF VIDEO2 OFF S-VIDEO OFF RGB PC OFF DVI OFF RGB SETUP HDMI 1 OFF HDMI 2 OFF COMPONENT OFF CYCLE SETUP TRIGGER ▲ : MOVE ▶ : ADJUST ▶ : ENTER MENU : EXIT VER : ★★Default setting is OFF and switch to ON cycle option
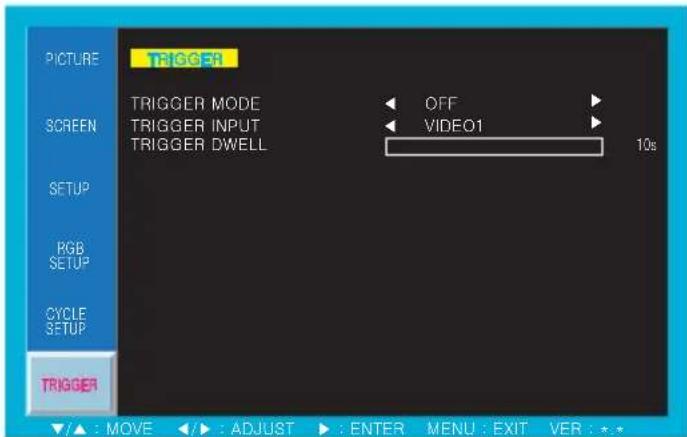
TRIGGER
text_image
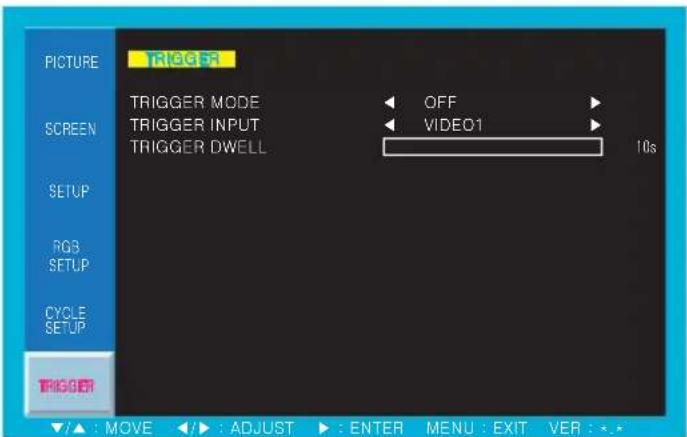
PICTURE TRIGGER SCREEN SETUP RGB SETUP CYCLE SETUP TRIGGER TRIGGER MODE OFF TRIGGER INPUT VIDEO1 TRIGGER DWELL 10s ▼/▲ : MOVE ◀/► : ADJUST ▶ : ENTER MENU : EXIT VER : *.*TRIGGER MODE : Set the trigger mode
TRIGGER DWELL : Set the display time of trigger mode
- Press the MENU/EXIT key to access menu.
- Use the ▲&▼arrow to highlight a selection.
- Press the ▶/SELECT to choose an item.
- Use the ▲ &▼ arrow to highlight a selection.
- Use the ▲&▼arrow to adjust the setting on a selected item.
TRIGGER INPUT : Select the input source of trigger mode
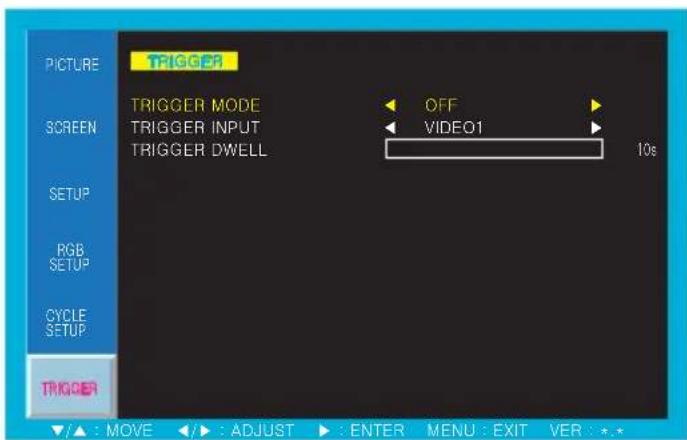
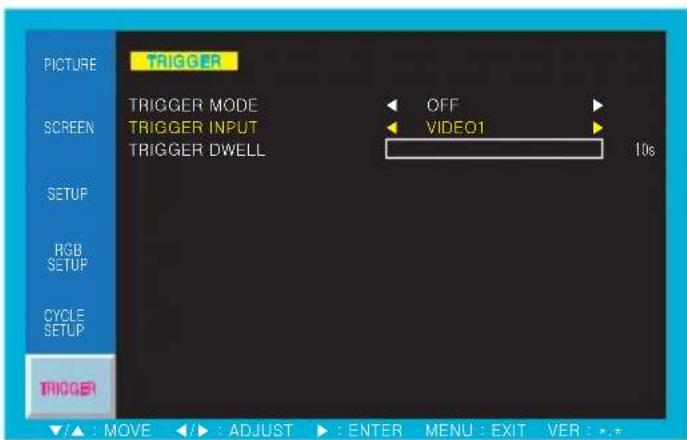
TRIGGER MODE TRIGGER INPUT
text_image
PICTURE TRIGGER SCREEN SETUP RGB SETUP CYCLE SETUP TRIGGER TRIGGER MODE OFF VIDEO1 10s /▲ : MOVE ◀️: ADJUST ▶: ENTER MENU: EXIT VER: *.*Default setting is OFF and switch to ON trigger mode
text_image
PICTURE TRIGGER SCREEN TRIGGER MODE TRIGGER INPUT TRIGGER DWELL OFF VIDEO1 10s SETUP RGB SETUP CYCLE SETUP TRIGGER ▲: MOVE ▶: ADJUST ▶: ENTER MENU: EXIT VER: *.*Inputs can be set to VIDEO1, VIDEO2 and S-VIDEO mode
TRIGGER DWELL
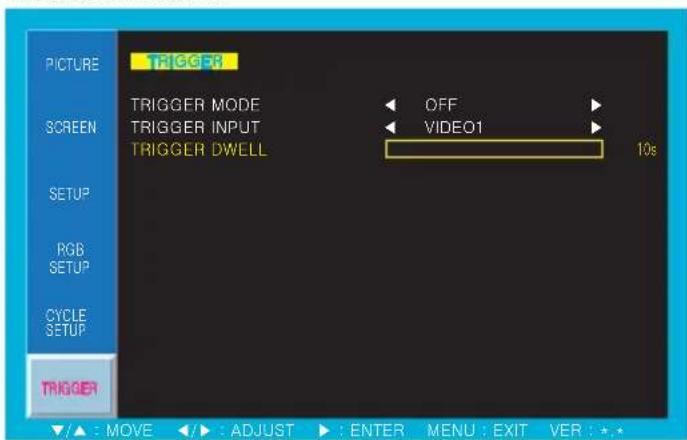
text_image
PICTURE TRIGGER SCREEN SETUP RGB SETUP CYCLE SETUP TRIGGER OFF VIDEO1 10s ▲: MOVE ◀: ADJUST ▶: ENTER MENU: EXIT VER: *.*Default setting is 10s and adjustable from range of 10 to 60s
5-3 Menu Setting (VGA Mode)
PICTURE
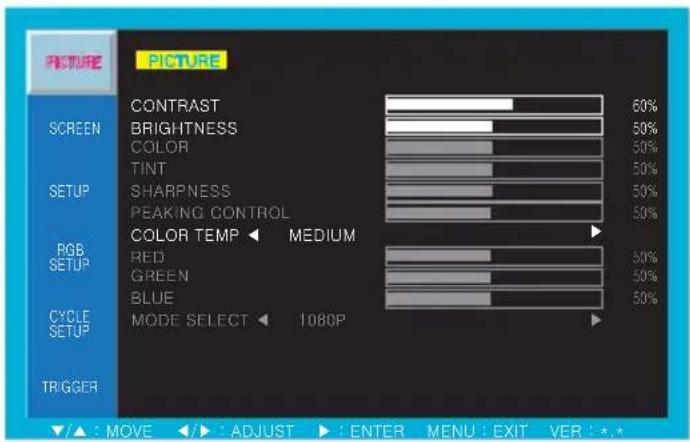
text_image
PICTURE CONTRAST 60% SCREEN BRIGHTNESS 50% COLOR 50% TINT 50% SETUP 50% SHARPNESS 50% PEAKING CONTROL 50% RGB SETUP MEDIUM COLOR TEMP RED 50% GREEN 50% BLUE 50% CYCLE SETUP MODE SELECT 1080P TRIGGER ▲: MOVE ▶: ADJUST ▶: ENTER MENU: EXIT VER: *.*CONTRAST : Adjust visual color contrast
COLOR TEMP : Switch color temperature of screen
- Press the MENU/EXIT key to access menu.
- Use the ▲&▼arrow to highlight a selection.
- Press the ▶/SELECT to choose an item.
- Use the ▲&▼arrow to highlight a selection.
- Use the ▲&▼arrow to adjust the setting on a selected item.
BRIGHTNESS : Adjust color brightness
CONTRAST BRIGHTNESS
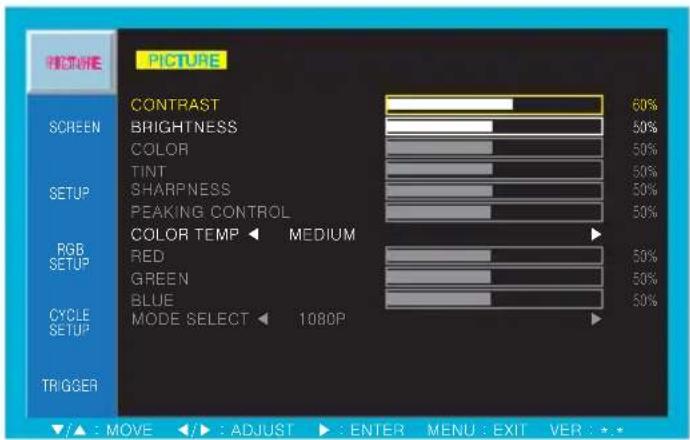
text_image
PICTURE CONTRAST 60% SCREEN BRIGHTNESS 50% COLOR 50% TINT 50% SETUP SHARPNESS 50% PEAKING CONTROL 50% RGB SETUP RED 50% GREEN 50% BLUE 50% CYCLE SETUP MODE SELECT 1080P 1080P TRIGGER /▲ : MOVE /► : ADJUST > : ENTER MENU : EXIT VER : +.*Default setting is 60% and adjustable from range of 0 to 100%
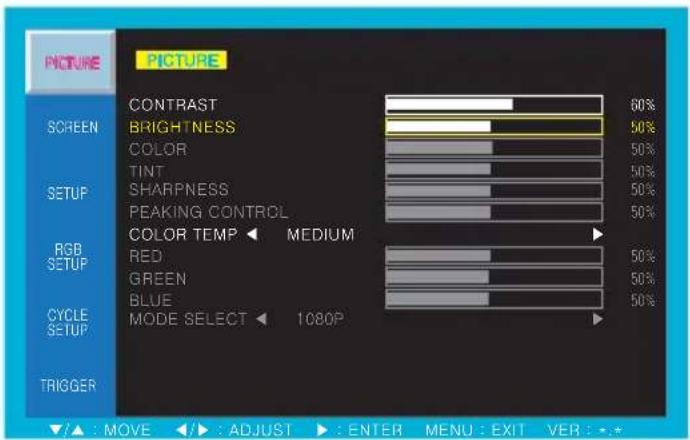
text_image
PICTURE CONTRAST 60% BRIGHTNESS 50% COLOR 50% TINT 50% SHARPNESS 50% PEAKING CONTROL 50% COLOR TEMP MEDIUM RGB RED 50% GREEN 50% BLUE 50% CYCLE MODE SELECT 1080P TRIGGER ▲: MOVE ▶: ADJUST ▶: ENTER MENU: EXIT VER: *.*Default setting is 50% and adjustable from range of 0 to 100%
COLOR TEMP
text_image
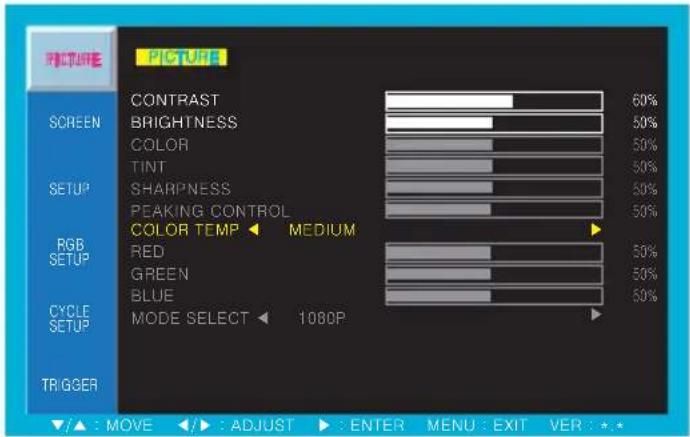
PICTURE PICTURE CONTRAST 60% SCREEN BRIGHTNESS 50% COLOR 50% TINT 50% SETUP SHARPNESS 50% PEAKING CONTROL 50% COLOR TEMP MEDIUM RGB SETUP RED 50% GREEN 50% BLUE 50% CYCLE SETUP MODE SELECT 1000P TRIGGER /▲ : MOVE /► : ADJUST ► : ENTER MENU : EXIT VER : *.*Default setting is MEDIUM and switch to WARM, USER and COOL color temperature options
USER - Default setting of RED, GREEN, BLUE is 50% and adjustable from range of 0 to 100%
SCREEN
text_image
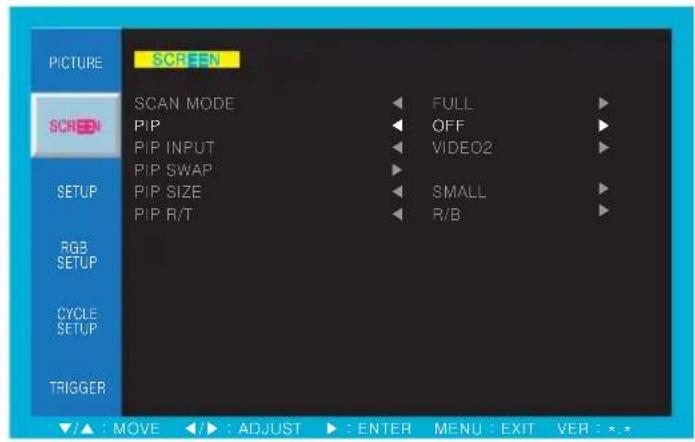
PICTURE SCREEN SCAN MODE P/P P/P INPUT P/P SWAP P/P SIZE P/P R/T FULL OFF VIDEO2 SMALL R/B RGB SETUP CYCLE SETUP TRIGGER /▲ : MOVE /► : ADJUST ▶ : ENTER MENU : EXIT VER : ×-×PIP : Activates PIP/PBP mode
- Press the MENU/EXIT key to access menu.
- Use the ▲&▼arrow to highlight a selection.
- Press the ▶/SELECT to choose an item.
- Use the ▲&▼arrow to highlight a selection.
- Use the ▲&▼arrow to adjust the setting on a selected item.
PIP
text_image
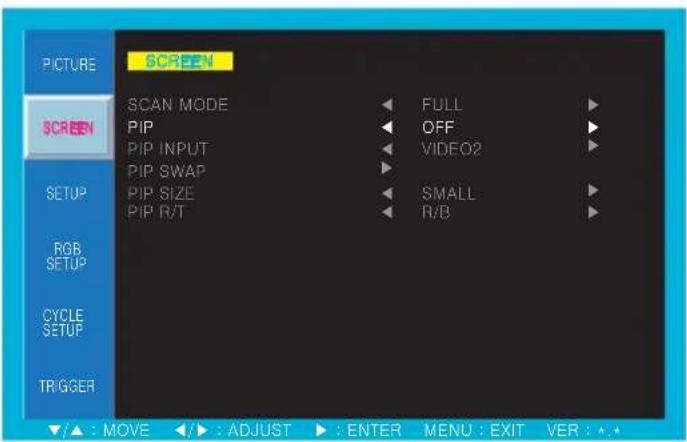
PICTURE SCREEN SCAN MODE FULL PIP OFF PIP INPUT VIDEO2 PIP SWAP PIP SIZE SMALL PIP R/T R/B SETUP RGB SETUP CYCLE SETUP TRIGGER /▲ : MOVE /► : ADJUST /► : ENTER MENU : EXIT VER : ★★Default setting is OFF and switch to ON, DW1 and DW2 PIP/PBP mode options
ON - PIP INPUT : Select an input source for PIP mode (VIDEO1, VIDEO2, S-VIDEO)
PIP SWAP : Swap between main and PIP input
PIP SIZE : Select a size for PIP mode (SMALL, NORMAL, LARGE)
PIP R/T : Select a location for PIP mode (R/B, L/B, R/T, L/T)
* R/T, L/T - 46RNCS model only
SETUP
text_image
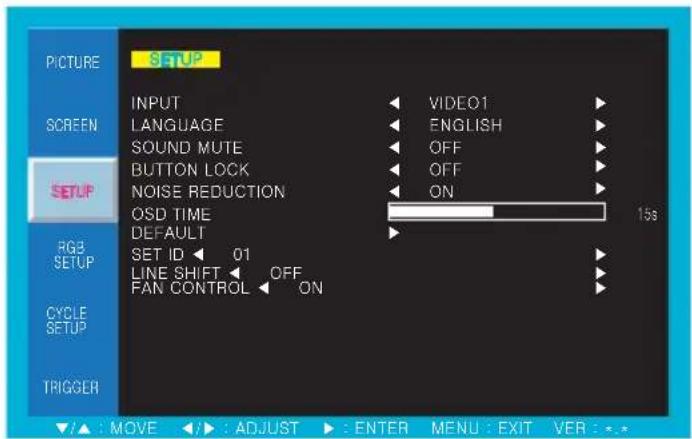
PICTURE SETUP INPUT LANGUAGE SOUND MUTE BUTTON LOCK NOISE REDUCTION OSD TIME DEFAULT SET ID 01 LINE SHIFT OFF FAN CONTROL ON VIDEO1 ENGLISH OFF OFF ON 15s RG3 SETUP CYCLE SETUP TRIGGER MOVE ADJUST ENTER MENU EXIT VERThis function of each menu is listed page 16 Please refer to page 16 for SETUP menu
- Press the MENU/EXIT key to access menu.
- Use the ▲&▼arrow to highlight a selection.
- Press the ▶/SELECT to choose an item.
- Use the ▲&▼arrow to highlight a selection.
- Use the ▲&▼ arrow to adjust the setting on a selected item.
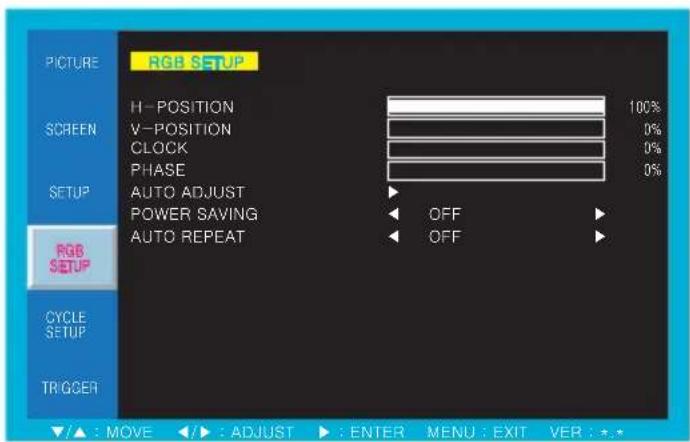
RGB SETUP
text_image
RGB SETUP H-POSITION 100% SCREEN V-POSITION 0% CLOCK 0% PHASE 0% SETUP AUTO ADJUST POWER SAVING OFF AUTO REPEAT OFF RGB SETUP CYCLE SETUP TRIGGER ▲: MOVE ▶: ADJUST ▶: ENTER MENU: EXIT VER: *.*- Press the MENU/EXIT key to access menu.
- Use the ▲&▼arrow to highlight a selection.
- Press the ▶/SELECT to choose an item.
- Use the ▲&▼arrow to highlight a selection.
- Use the ▲&▼arrow to adjust the setting on a selected item.
H-POSITION : Adjust horizontal position of monitor V-POSITION : Adjust vertical position of monitor
CLOCK : Adjust clock of monitor PHASE : Adjust phase of monitor
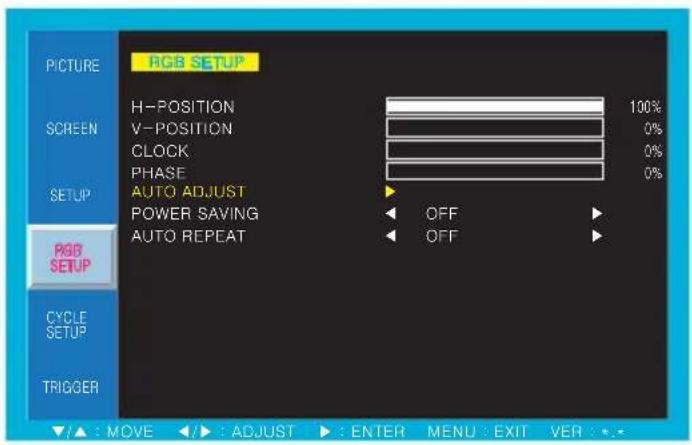
AUTO ADJUST : Auto adjust position of screen POWER SAVING : Power saving mode
AUTO REPEAT : Adjust auto repeat of monitor
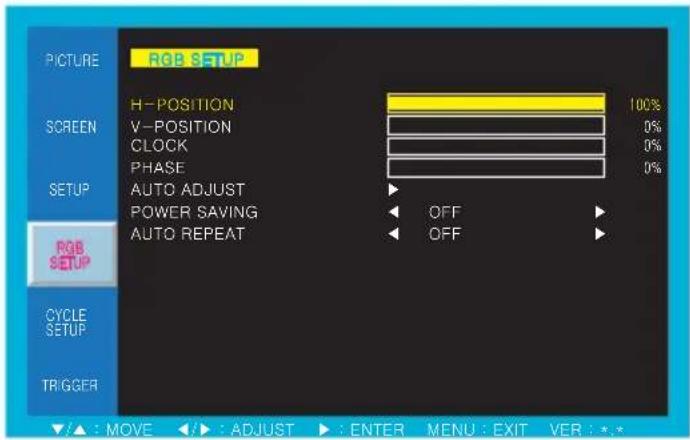
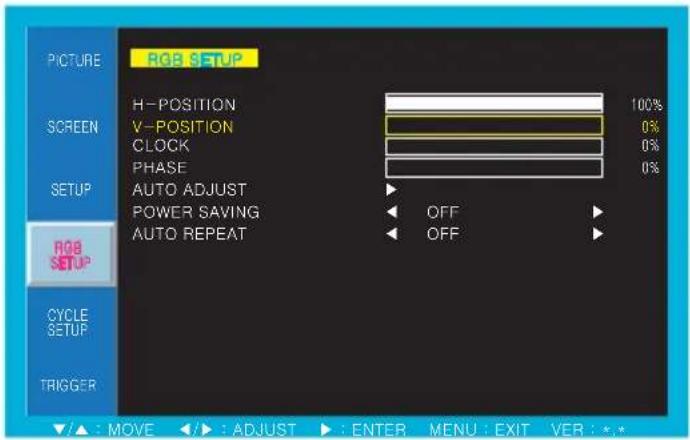
H-POSITION V-POSITION
text_image
PICTURE RGB SETUP H-POSITION 100% SCREEN V-POSITION 0% CLOCK 0% PHASE 0% SETUP AUTO ADJUST POWER SAVING OFF AUTO REPEAT OFF RGB SETUP CYCLE SETUP TRIGGER ▲: MOVE ▶: ADJUST ▶: ENTER MENU: EXIT VER: *.*Can be set between 0 to 100% horizontal position of monitor by manually
text_image
PICTURE RGB SETUP H-POSITION 100% SCREEN V-POSITION 0% CLOCK 0% PHASE 0% SETUP AUTO ADJUST POWER SAVING OFF AUTO REPEAT OFF RGB SETUP CYCLE SETUP TRIGGER ▲: MOVE ◀: ADJUST ▶: ENTER MENU: EXIT VER: *.*Can be set between 0 to 100% vertical position of monitor by manually
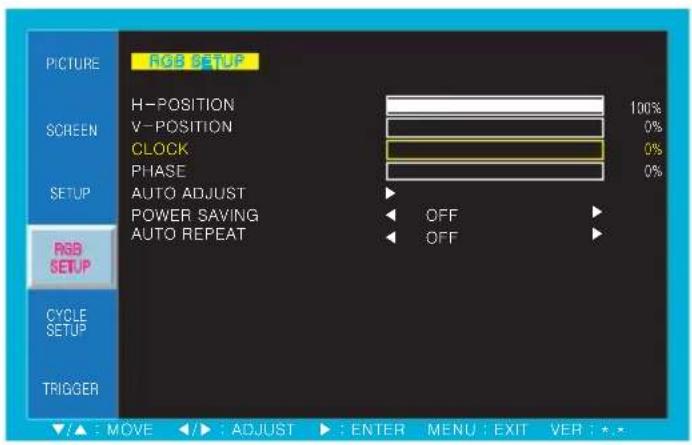
CLOCK PHASE
text_image
RGB SETUP H-POSITION 100% SCREEN V-POSITION 0% CLOCK 0% PHASE 0% SETUP AUTO ADJUST POWER SAVING OFF AUTO REPEAT OFF RGB SETUP CYCLE SETUP TRIGGER ▲: MOVE ◀: ADJUST ▶: ENTER MENU: EXIT VER: *.*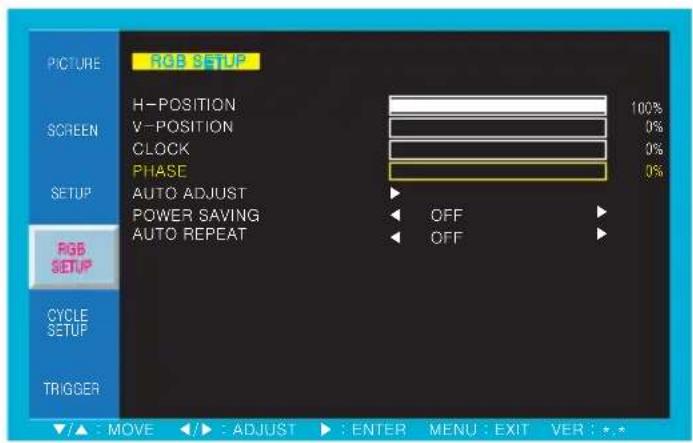
text_image
PICTURE RGB SETUP H-POSITION 100% SCREEN V-POSITION 0% CLOCK 0% PHASE 0% SETUP AUTO ADJUST POWER SAVING OFF AUTO REPEAT OFF RGB SETUP CYCLE SETUP TRIGGER ▲ : MOVE ◀: ADJUST ▶: ENTER MENU: EXIT VER: *.*Can be set between 0 to 100% phase of monitor by manuallyCan be
AUTO ADJUST POWER SAVING
text_image
RGB SETUP H-POSITION 100% V-POSITION 0% CLOCK 0% PHASE 0% AUTO ADJUST POWER SAVING OFF AUTO REPEAT OFF PICKLE SETUP CYCLE SETUP TRIGGER ▲: MOVE ▶: ADJUST ▶: ENTER MENU : EXIT VER : *.*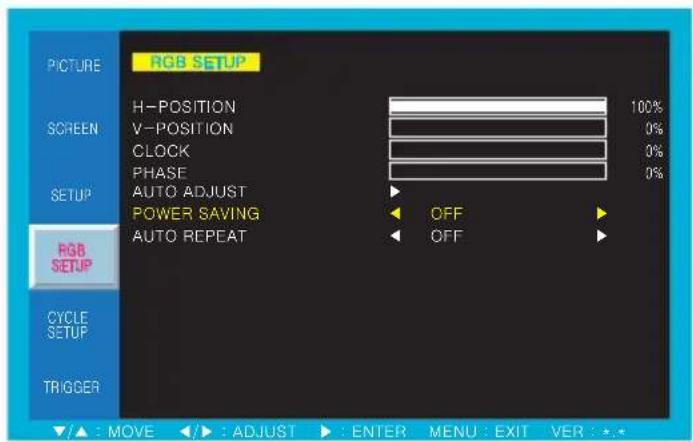
text_image
PICTURE RGB SETUP H-POSITION 100% SCREEN V-POSITION 0% CLOCK 0% PHASE 0% SETUP AUTO ADJUST POWER SAVING OFF AUTO REPEAT OFF RGB SETUP CYCLE SETUP TRIGGER ▲ : MOVE ▶ : ADJUST ▶ : ENTER MENU : EXIT VER : *.*Default setting is OFF and switch to ON power saving modeAuto adj
AUTO REPEAT
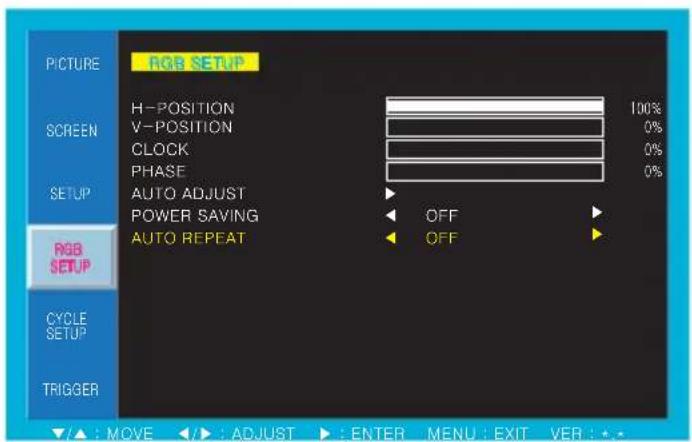
text_image
PICTURE RGB SETUP H-POSITION 100% SCREEN V-POSITION 0% CLOCK 0% PHASE 0% SETUP AUTO ADJUST POWER SAVING OFF AUTO REPEAT OFF RGB SETUP CYCLE SETUP TRIGGER ▲: MOVE ▶: ADJUST ▶: ENTER MENU : EXIT VER : *.*Default setting is OFF and switch to ON auto repeat mode
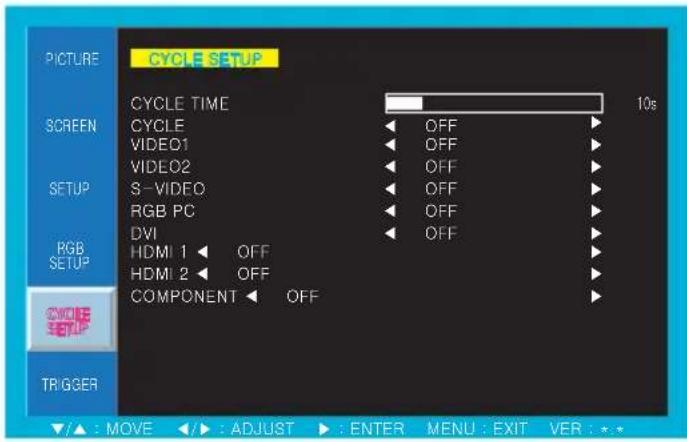
CYCLE SETUP
text_image
PICTURE CYCLE SETUP CYCLE TIME 10s SCREEN CYCLE OFF VIDEO1 OFF VIDEO2 OFF S -VIDEO OFF RGB PC OFF DVI OFF RGB SETUP HDMI 1 OFF HDMI 2 OFF COMPONENT OFF TRIGGER ▼/▲ : MOVE ←/► : ADJUST ► : ENTER MENU : EXIT VER : ★★This function of each menu is listed page 19
Please refer to page 19 for CYCLE SETUP menu
- Press the MENU/EXIT key to access menu.
- Use the ▲&▼arrow to highlight a selection.
- Press the ▶/SELECT to choose an item.
- Use the ▲ &▼ arrow to highlight a selection.
- Use the ▲&▼arrow to adjust the setting on a selected item.
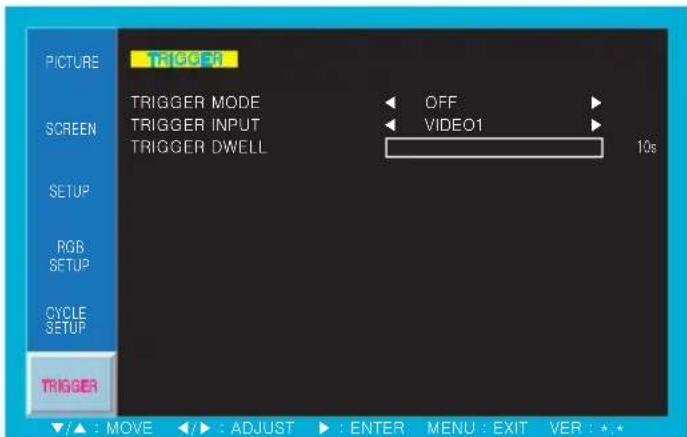
TRIGGER
text_image
PICTURE TRIGGER SCREEN SETUP RGB SETUP CYCLE SETUP TRIGGER TRIGGER MODE OFF TRIGGER INPUT VIDEO1 TRIGGER DWELL 10s ▼/▲ : MOVE ◄► : ADJUST ► : ENTER MENU : EXIT VER : +,*This function of each menu is listed page 20
Please refer to page 20 for TRIGGER menu
- Press the MENU/EXIT key to access menu.
- Use the ▲&▼arrow to highlight a selection.
- Press the▶/SELECT to choose an item.
- Use the ▲&▼arrow to highlight a selection.
- Use the ▲&▼arrow to adjust the setting on a selected item.
VGA / DVI / HDMI Mode Tables
VGA / DVI Mode
| MODE | RESOLUTION VERTICAL FREQUENCY (Hz) | |
| VGA | 720X400 70 | |
| 640X480 60 / 72 75 | ||
| SVGA 800X600 50 / 60 / 72 / 75 | ||
| XGA 1024X768 50 / 60 / 75 | ||
| WXGA 1366X768 60 | ||
| UXGA 1600X1200 60 | ||
| HD 1920X1080 60 | ||
HDMI Mode
| RESOLUTION VERTICAL FREQUENCY (Hz)MODE | ||
| EDTV 480i | 720X480 30 | |
| EDTV 576i | 720X576 25 | |
| SDTV 480p | 720X480 60 | |
| SDTV 576p 720X576 60 | ||
| HDTV 720p 1280X720 50 / 60 | ||
| HDTV 1080i 1920X1080 | 30 / 25 | |
| HDTV 1080p | 1920X1080 | 50 / 60 |
Note : Not all resolutions generated by your video source are available on the monitor.
5-4 Menu Setting (DVI, HDMI Mode)
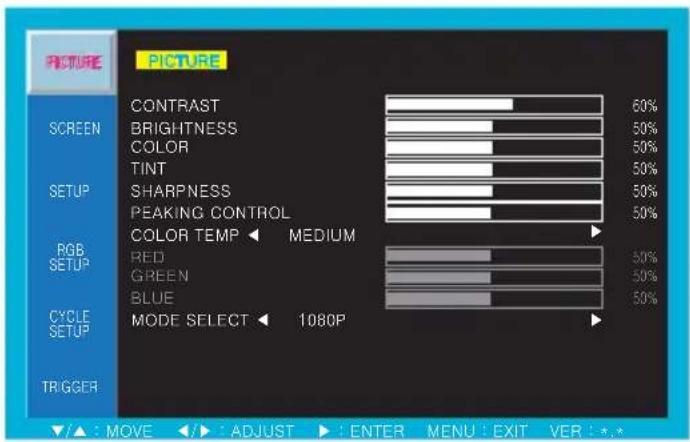
PICTURE
text_image
PICTURE CONTRAST 60% SCREEN BRIGHTNESS 50% COLOR 50% TINT 50% SETUP SHARPNESS 50% PEAKING CONTROL 50% RGB SETUP COLOR TEMP MEDIUM RED 50% GREEN 50% BLUE 50% CYCLE SETUP MODE SELECT 1080P TRIGGER ▲: MOVE ▶: ADJUST ▶: ENTER MENU EXIT VER :*.*CONTRAST : Adjust visual color contrast
- Press the MENU/EXIT key to access menu.
- Use the ▲&▼arrow to highlight a selection.
- Press the ▶/SELECT to choose an item.
- Use the ▲&▼arrow to highlight a selection.
- Use the ▲&▼arrow to adjust the setting on a selected item.
COLOR : Adjust visual color of screen TINT : Adjust tint of color
BRIGHTNESS : Adjust color brightness
SHARPNESS : Adjust sharpness of screen COLOR TEMP : Switch color temperature of screen
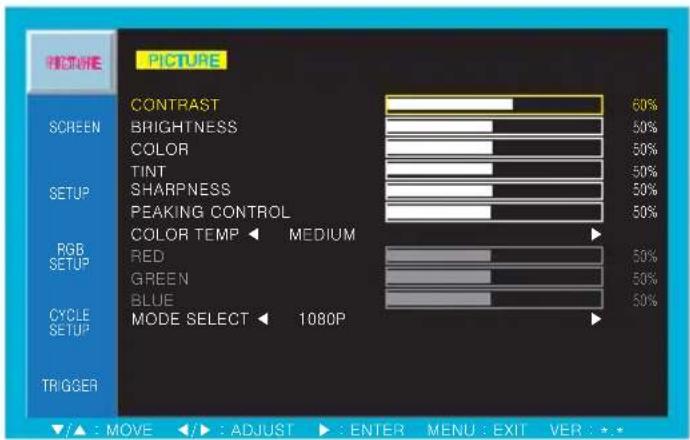
CONTRAST BRIGHTNESS
text_image
PICTURE CONTRAST 60% SCREEN BRIGHTNESS 50% COLOR 50% TINT 50% SETUP 50% SHARPNESS 50% PEAKING CONTROL 50% COLOR TEMP MEDIUM RGB SETUP RED 50% GREEN 50% BLUE 50% CYCLE SETUP MODE SELECT 1080P TRIGGER /▲ : MOVE /► : ADJUST > : ENTER MENU : EXIT VER : +.*Default setting is 60% and adjustable from range of 0 to 100%
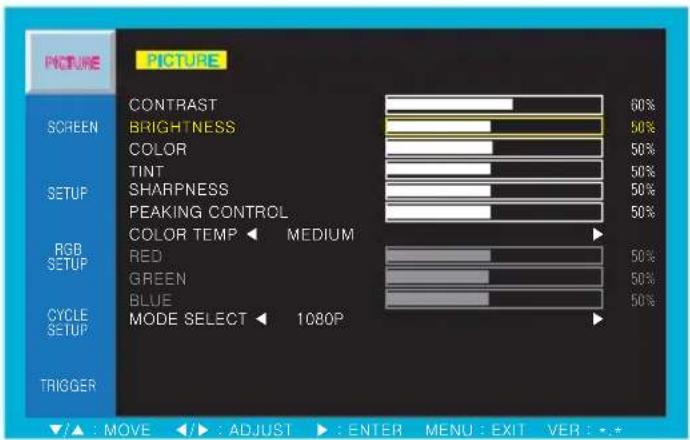
text_image
PICTURE CONTRAST 60% BRIGHTNESS 50% COLOR 50% TINT 50% SHARPNESS 50% PEAKING CONTROL 50% COLOR TEMP MEDIUM RGB RED 50% GREEN 50% BLUE 50% CYCLE MODE SELECT 1080P TRIGGER ▲: MOVE ↓: ADJUST ▶: ENTER MENU: EXIT VER: *.*Default setting is 50% and adjustable from range of 0 to 100%
COLOR TINT
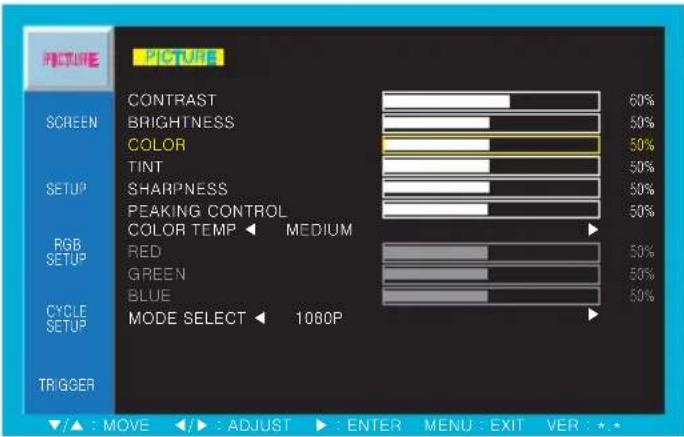
text_image
PICTURE PICTURE CONTRAST 60% SCREEN BRIGHTNESS 50% COLOR 50% TINT 50% SETUP SHARPNESS 50% PEAKING CONTROL 50% COLOR TEMP MEDIUM RGB SETUP RED 50% GREEN 50% BLUE 50% CYCLE SETUP MODE SELECT 1080P TRIGGER /▲ : MOVEDefault setting is 50% and adjustable from range of 0 to 100%
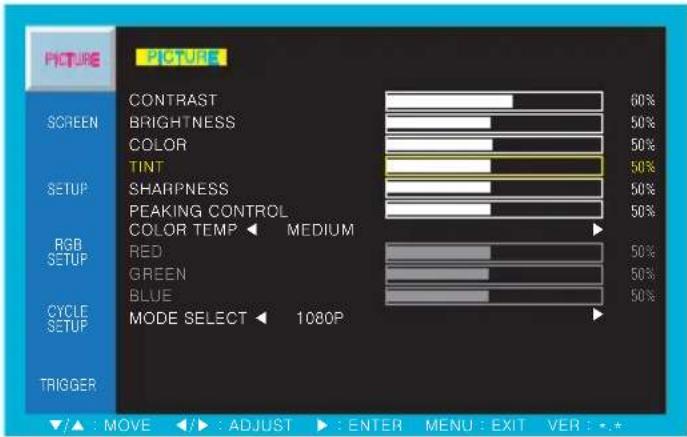
text_image
PICTURE PICTURE CONTRAST 60% SCREEN BRIGHTNESS 50% COLOR 50% TINT 50% SETUP SHARPNESS 50% PEAKING CONTROL 50% COLOR TEMP MEDIUM RGB RED 50% SETUP GREEN 50% BLUE 50% CYCLE MODE SELECT 1080P SETUP 1080P TRIGGER /▲ : MOVE ←→ : ADJUST → : ENTER MENU : EXIT VER : *.*Default setting is 50% and adjustable from range of 0 to 100%
SHARPNESS
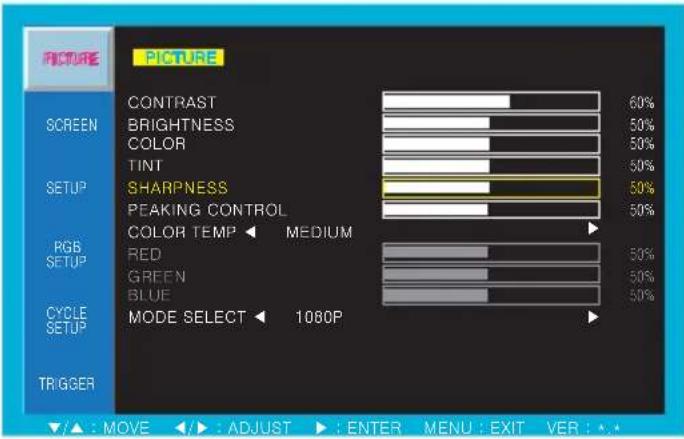
text_image
PICTURE PICTURE CONTRAST 60% SCREEN BRIGHTNESS 50% COLOR 50% TINT 50% SETUP SHARPNESS 50% PEAKING CONTROL 50% COLOR TEMP MEDIUM RGB RED 50% SETUP GREEN 50% BLUE 50% CYCLE MODE SELECT 1080P 1080P TRIGGER ▲: MOVE ◀: ADJUST ▶: ENTER MENU: EXIT VER: ★★Default setting is 50% and adjustable from range of 0 to 100%
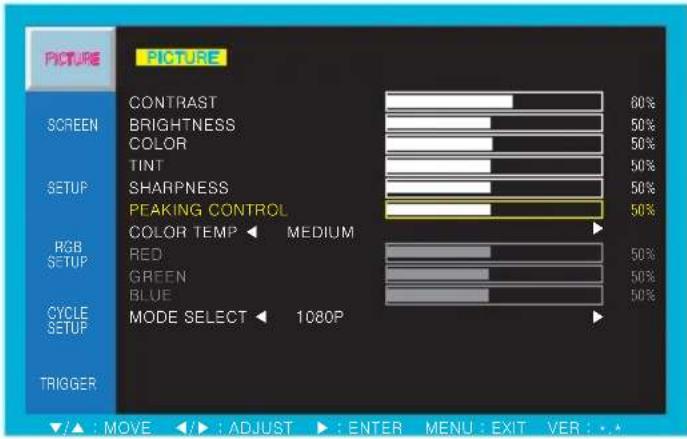
PEAKING CONTROL
text_image
PICTURE PICTURE CONTRAST 80% SCREEN BRIGHTNESS 50% COLOR 50% TINT 50% SETUP SHARPNESS 50% PEAKING CONTROL 50% RGB COLOR TEMP MEDIUM SETUP RED 50% GREEN 50% BLUE 50% CYCLE MODE SELECT 1080P SETUP TRIGGER ▼/▲ : MOVE ←/► : ADJUST ► : ENTER MENU : EXIT VER : ••Default setting is 50% and adjustable from range of 0 to 100%
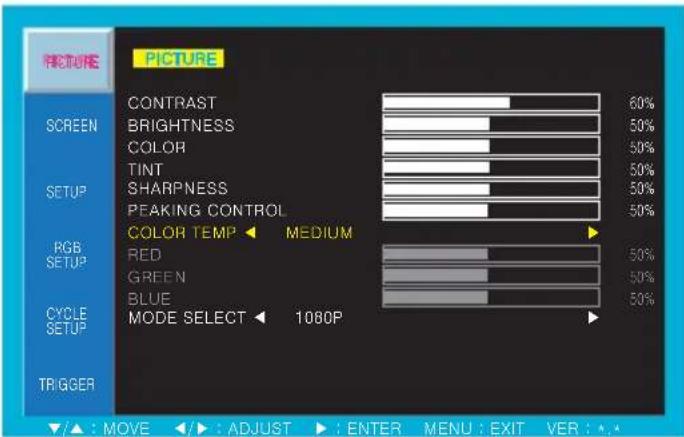
COLOR TEMP
text_image
PICTURE PICTURE CONTRAST 80% SCREEN BRIGHTNESS 50% COLOR 50% TINT 50% SETUP SHARPNESS 50% PEAKING CONTROL 50% RGB SETUP COLOR TEMP MEDIUM RED 50% GREEN 50% BLUE 50% CYCLE SETUP MODE SELECT 1080P TRIGGER /▲ : MOVEDefault setting is MEDIUM and switch to WARM, USER and COOL color temperature options
USER - Default setting of RED, GREEN, BLUE is 50% and adjustable from range of 0 to 100%
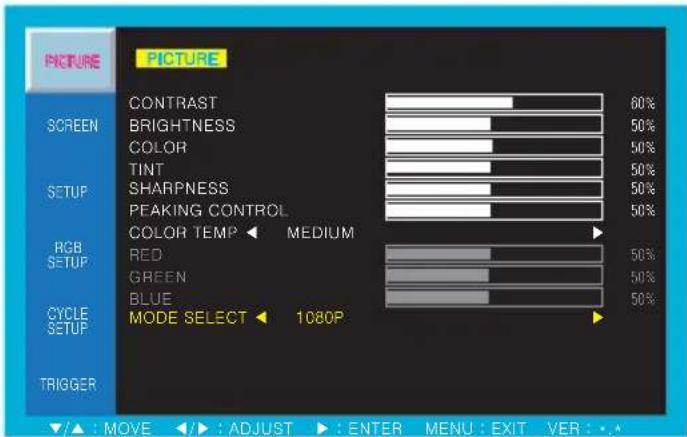
MODE SELECT
text_image
PICTURE CONTRAST 60% BRIGHTNESS 50% COLOR 50% TINT 50% SHARPNESS 50% PEAKING CONTROL 50% COLOR TEMP MEDIUM RGB RED 50% GREEN 50% BLUE 50% CYCLE MODE SELECT 1080P SETUP 1080P TRIGGER ▲: MOVE ▶: ADJUST ▶: ENTER MENU: EXIT VER: *.*Default setting is 1080p and switch to 1920X1080 mode
1080P - Bluray, DVD player and AV video equipment (2% Over Scan)
1920X1080 - It is the fit image on PC In (Just/Real Scan)
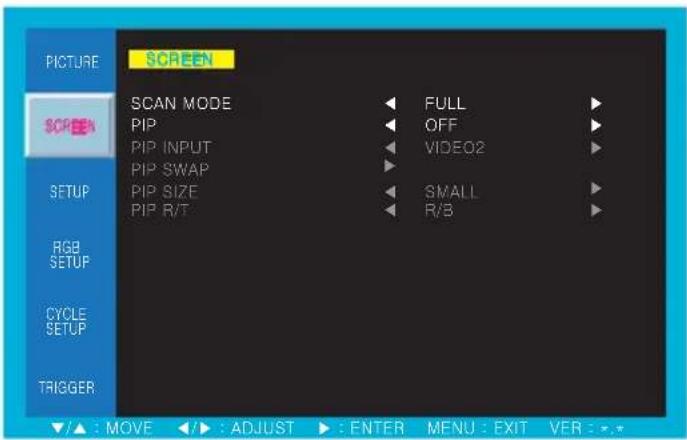
SCREEN
text_image
PICTURE SCREEN SCAN MODE PIP PIP INPUT PIP SWAP PIP SIZE PIP R/T FULL OFF VIDEO2 SMALL R/B SCREEN SETUP RGB SETUP CYCLE SETUP TRIGGER ▲: MOVE ◀: ADJUST ▶: ENTER MENU: EXIT VER: -•This function of each menu is listed page 22
Please refer to page 22 for SCREEN menu
- Press the MENU/EXIT key to access menu.
- Use the ▲&▼arrow to highlight a selection.
- Press the ▶/SELECT to choose an item.
- Use the ▲&▼arrow to highlight a selection.
- Use the ▲&▼arrow to adjust the setting on a selected item.
SETUP
text_image
PICTURE SETUP INPUT LANGUAGE SOUND MUTE BUTTON LOCK NOISE REDUCTION OSD TIME DEFAULT SET ID 01 LINE SHIFT OFF FAN CONTROL ON VIDEO1 ENGLISH OFF OFF ON 15s RGB SETUP CYCLE SETUP TRIGGER ▲: MOVE ▶: ADJUST ▶: ENTER MENU: EXIT VER: ★★This function of each menu is listed page 16
Please refer to page 16 for SETUP menu
- Press the MENU/EXIT key to access menu.
- Use the ▲&▼arrow to highlight a selection.
- Press the ▶/SELECT to choose an item.
- Use the ▲&▼arrow to highlight a selection.
- Use the ▲&▼arrow to adjust the setting on a selected item.
CYCLE SETUP
text_image
PICTURE CYCLE SETUP CYCLE TIME 10s SCREEN CYCLE OFF VIDEO1 OFF VIDEO2 OFF S-VIDEO OFF RGB PC OFF DVI OFF RGB SETUP HDMI 1 OFF HDMI 2 OFF COMPONENT OFF CYCLE SETUP TRIGGER ▲: MOVE ▶: ADJUST ▶: ENTER MENU : EXIT VER : *.*This function of each menu is listed page 19
Please refer to page 19 for CYCLE SETUP menu
- Press the MENU/EXIT key to access menu.
- Use the ▲&▼arrow to highlight a selection.
- Press the ▶/SELECT to choose an item.
- Use the ▲&▼arrow to highlight a selection.
- Use the ▲&▼arrow to adjust the setting on a selected item.
TRIGGER
text_image
PICTURE TRIGGER SCREEN TRIGGER MODE OFF TRIGGER INPUT VIDEO1 TRIGGER DWELL 10s SETUP RGB SETUP CYCLE SETUP TRIGGER ▼/▲ : MOVE ▶: ADJUST ▶: ENTER MENU : EXIT VER : *.*This function of each menu is listed page 20
Please refer to page 20 for TRIGGER menu
- Press the MENU/EXIT key to access menu.
- Use the ▲&▼arrow to highlight a selection.
- Press the ▶/SELECT to choose an item.
- Use the ▲&▼arrow to highlight a selection.
- Use the ▲&▼arrow to adjust the setting on a selected item.
5. SERIAL WIRED CONTROLLER SETTING
text_image
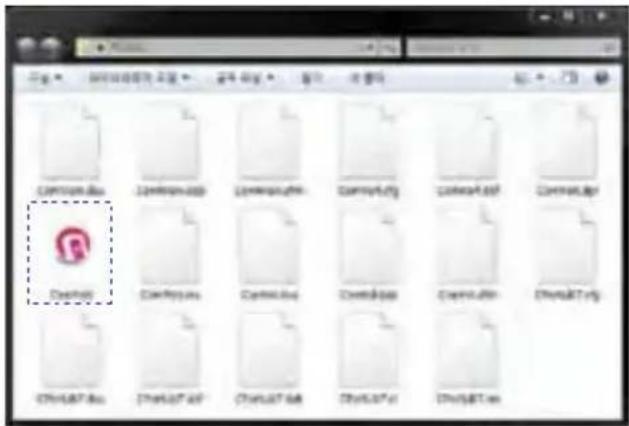
CommonBox CommonBox CommonBox CommonBox CommonBox CommonBox CommonBox CommonBox CommonBox CommonBox CommonBox CommonBox CommonBox CommonBox CommonBox CommonBox CommonBox CommonBox CommonBox CommonBox CommonBox CommonBox CommonBox CommonBox CommonBox CommonBox CommonBox CommonBox CommonBox CommonBox CommonBox CommonBox CommonBox CommonBox RandomBox RandomBox RandomBox RandomBox RandomBox RandomBox RandomBox RandomBox RandomBox RandomBox RandomBox RandomBox RandomBox RandomBox RandomBox RandomBox RandomBox RandomBox RandomBox RandomBox RandomBox RandomBox RandomBox RandomBox RandomBox RandomBox RandomBox RandomBox RandomBox RandomBox RandomBoxCopy a folder from install CD to hard disk Double click the 'ComPort.exe' file
text_image
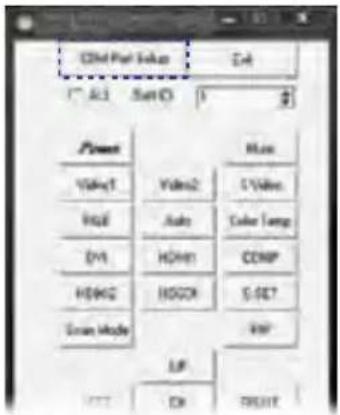
Ctrl Port Value A4 A1 Sun/O # # # # # # # # # # # # # # # # # # # # # # # # # # # # # # # # # # # # # # # # # # # # # # # # # # # # # # # # # # # # # # # # # # # # # # # # # # # # # # # # # # # # # # # # # # # # # # # # # # # # #Click the 'Com Port Setup' button
text_image
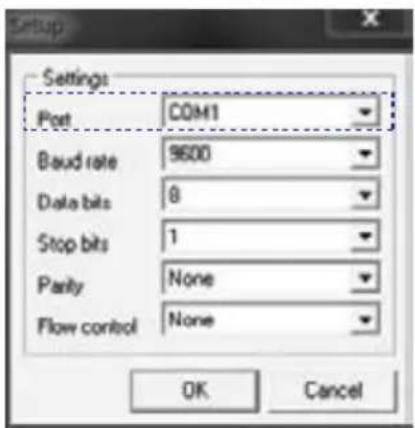
Settings Port COM1 Baud rate 9600 Data bits 8 Stop bits 1 Parity None Flow control None OK CancelSelect 'Port' number from full down button Click the OK button, the program will be activated
text_image
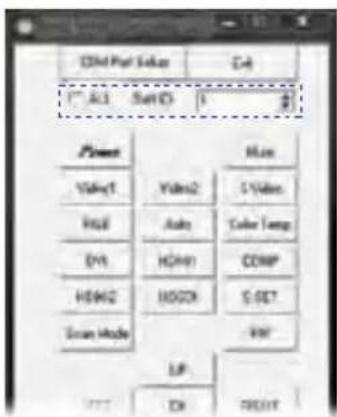
Child Perf. Value A1 S### 1 Power Value1 Value2 Value3 Value4 Value5 Value6 Value7 Value8 Value9 Value10 Value11 Value12 Value13 Value14 Value15 Value16 Value17 Value18 Value19 Value20 Value21 Value22 Value23 Value24 Value25 Value26 Value27 Value28 Value29 Value30 Value31 Value32 Value33 Value34 Value35 Value36 Value37 Value38 Value39 Value40 Value41 Value42 Value43 Value44 Value45 Value46 Value47 Value48 Value49 Value50 Value51 Value52 Value53 Value54 Value55 Value56 Value57 Value58 Value59 Value60 Value61 Value62 Value63 Value64 Value65 Value66 Value67 Value68 Value69 Value70 Value71 Value72 Value73 Value74 Value75 Value76 Value77 Value78 Value79 Value80 Value81 Value82 Value83 Value84 Value85 Value86 Value87 Value88 Value89 Value90 Value91 Value92 Value93 Value94 Value95 Value96 Value97 Value98 Value99 Value100Select 'Set ID' number from full down button
If you check 'All' box, you can controlled all monitor at the same time
This function of 'Set ID' is listed page 16 & 18
Please refer to page 16 & 18 for SETUP menu
UART SETTING KEY CODE
Baud rate - 9600 bps
Data bits - 8 bits
Stop bits - 1 bit
Parity - None
UART TRANSFER PROTOCOL
| HEADER(2 Bytes) | ID REMOTE ID KEY CODE | |
| (2 Bytes) (2 Bytes) (2 Bytes) (2 Bytes) | ||
| 0xAA, 0x55 | 0x00 ~ 0x63 | 0x20, 0xDF Key. -Key |
| 0x00 : Master ID(All) | ||
| 0x01 ~ 0x63 : Set ID | ||
| KEY NAME | HEX CODE | HEX CODE | KEY NAME | HEX CODE | HEX CODE | KEY NAME | HEX CODE | HEX CODE |
| POWER | 0x00 | 0xFF | Video1 | 0x12 | 0xED | S.SET | 0x1F | 0xED |
| UP | 0x02 | 0xFD | Video2 | 0x13 | 0xEC | Scan Mode | 0x20 | 0xDF |
| Mute | 0x03 | 0xFC | S-Video | 0x14 | 0xEB | PIP | 0x21 | 0xDE |
| Key Lock | 0x05 | 0xFA | RGB | 0x15 | 0xEA | P.Input | 0x22 | 0xDD |
| LEFT | 0x07 | 0xF8 | Auto | 0x18 | 0xE7 | P.Loc | 0x23 | 0xDC |
| OK | 0x08 | 0xF7 | Color Temp | 0x19 | 0xE6 | P.Size | 0x24 | 0xDB |
| RIGHT | 0x09 | 0xF6 | DVI | 0x1A | 0xE5 | P.swap | 0x25 | 0xDA |
| Menu/Exit | 0x0C | 0xF3 | HDMI1 | 0x1B | 0xE4 | Still | 0x26 | 0xD9 |
| DOWN | 0x0E | 0xF1 | COMP | 0x1C | 0xE3 | Power ON | 0x2D | 0xD2 |
| HDMI2 0x1D | 0xE2 | Power OFF 0x2E | 0xD1 | |||||
ex) Sequential Protocol Sending - Set ID : 01, Key Name : POWER ON
0xAA, 0x55, 0x01, 0xFE, 0x20, 0xDF, 0x2D, 0xD2
HEADER 10 REMOTE 0 KEY CODE
- FEATURE
| General Features | 46RNCSR | 46RNHSR | 55RNCSR | |
| Bezel Width | Outside to BEZEL | 27.0 / 32.0 mm | 15.5 mm | |
| Outside to Active Area | 28.4 / 33.7 mm | 17.5 mm | ||
| Screen Size 46.0 inches | 46.0 inches | 54.6 inches | ||
| Resolution 1366*768 pixels | 1920*1080 pixels | 1920*1080 pixels | ||
| Pixel Pitch 0.7455*0.7455 mm | 0.530*0.530 mm | 0.630*0.630 mm | ||
| Brightness | 2400(indoor)/3000(outdoor) cd/m^2 | 900(indoor)/1300(outdoor) cd/m^2 | 1150(indoor)/1500(outdoor) cd/m^2 | |
| Contrast Ratio 2900:1 | 3000:1 | 3500:1 | ||
| Aspect Ratio 16:9 | 16:9 | 16:9 | ||
| Viewing Angle (H/V) 176/176 degrees | 176/176 degrees | 176/176 degrees | ||
| Display Color 16.7 million | 16.7 million | 16.7 million | ||
| Response Time 16 ms | 8 ms | 8 ms | ||
| Video System NTSC/PAL | NTSC/PAL | NTSC/PAL | ||
| Interface | Video In/Out (BNC Type) 2/2 | 2/2 | 2/2 | |
| S-Video In/Out 1/1 | 1/1 | 1/1 | ||
| VGA In (15Pin D-Sub) 1 | 1 | 1 | ||
| Component 1 | 1 | 1 | ||
| DVI In/HDMI In | 1/2 | 1/2 | 1/2 | |
| RS-232 In/Out 1/1 | 1/1 | 1/1 | ||
| Audio Transmitter | Audio In (RCA Type) | 3 | 3 | 3 |
| PC Stereo In | 1 | 1 | 1 | |
| Built in Speakers | Y (4W*2) | Y (7.5W*2) | Y (7.5W*2) | |
| Remote Control Y | Y | Y | ||
| RS-232 Control Monitor OSD | Monitor OSD | Monitor OSD | ||
| Multi Display Function | PIP/PBP | PIP/PBP | PIP/PBP | |
| Special Features | Filter Type | 3D Comb Filter | 3D Comb Filter | 3D Comb Filter |
| Deinterlacing | Y | Y | Y | |
| Auto Pixel Shift | Y | Y | Y | |
| FAN On/Off Conrol | Y | Y | Y | |
| Trigger Source Switching Y (NO/NC) | Y (NO/NC) | Y (NO/NC) | ||
| LCD Protection Glass N | N | N | ||
| Noise reduction | Y | Y | Y | |
| Auto source sequencing | Y | Y | Y | |
| Multi Lingual Language | Eng, Spa, Fre, Ger, Ita | Eng, Spa, Fre, Ger, Ita | Eng, Spa, Fre, Ger, Ita | |
| Dimension | Outline Dimension | 42.7*5.2*24.8 inches | 42.7*5.2*24.8 inches | 49.0*5.4*28.2 inches |
| Cabinet | Cabinet Color | Black | Black | Black |
| Cabinet Material | Electro-Galvanized Steel | Electro-Galvanized Steel | Electro-Galvanized Steel | |
| Power | Electrical Ratings | AC 100~240 V (50/60Hz) | AC 100~240 V (50/60Hz) | AC 100~240 V (50/60Hz) |
| Circumstance | Operating Temperature | 0~50 celsius | 0~50 celsius | 0~50 celsius |
| Storage Temperature | -20~65 celsius | -20~65 celsius | -20~65 celsius | |
| Mounts | VESA Mounts Size | 600*400 mm | 600*400 mm | 600*400 mm |
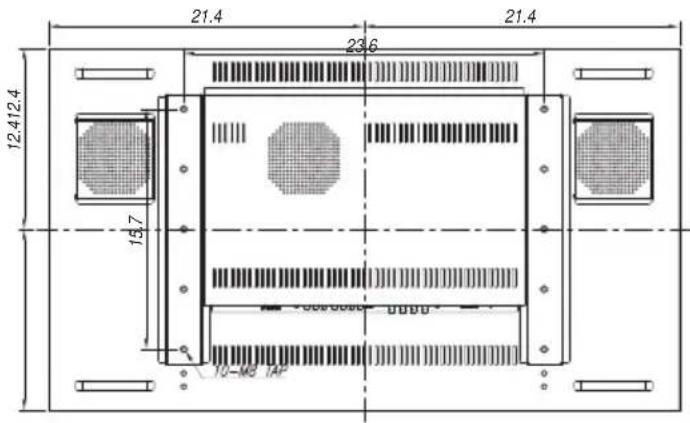
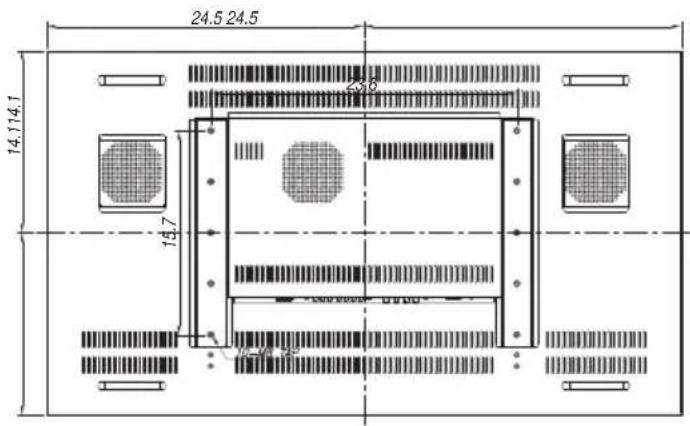
7. MECHANICAL DRAWING
Units : inches
text_image
21.4 23.6 21.4 12.412.4 15.7 10-M8 1AP46RNCSR / 46RNHSR
text_image
24.5 24.5 14.1 14.1 18.7 20.9 100mm 100mm55RNCSR
8. 2Year Limited Warranty
All ORION Images products carry a limited warranty from ship date against defects in materials and workmanship. ORION Images is not liable for improper installation that results in damage to mounts, adapters, display equipment or personal injury.
Contact ORION Images
In the event of missing and/or damage equipment, or technical questions, the following information can help in the completion of the installation.
Address: 7300 Bolsa Avenue, Westminster, CA 92683
Tel: 714-766-6300 / Fax: 714-766-6310
Email: sales@orionimages.com
Website: http://www.orionimages.com
9. TROUBLESHOOTING
* When the following troubles are occurred, follow the trouble shooting. Before contacting a service center.
| Troubleshooting | Troubleshooting Tip |
| The screen doesn’t show up | 1. Make sure if the power supply is connected property |
| 2. Turn on the power. | |
| 3. Select the input signal right for the connected port. | |
| The screen is too light or to dark | Control the BRIGHTNESS |
| The screen size is not fit for the PC signal | Press the AUTO key among keys in the front.(It is used only in the PC signal) |
| The screen color shows strange in the PC signal | In the FUNCTION menu of OSD menu, perform the AUTOADJUST. |