FG200 - Media player Mpio - Free user manual and instructions
Find the device manual for free FG200 Mpio in PDF.


User questions about FG200 Mpio
0 question about this device. Answer the ones you know or ask your own.
Ask a new question about this device
Download the instructions for your Media player in PDF format for free! Find your manual FG200 - Mpio and take your electronic device back in hand. On this page are published all the documents necessary for the use of your device. FG200 by Mpio.
USER MANUAL FG200 Mpio
Thank you for purchasing MPIO FG200. FG200 is a Digital Multimedia Player for convenient music listening and multimedia contents (Movies, photos). For appropriate use of the product, please use the User's Manual before using the device.
http://www.mpio.co.kr
Information about MPIO products, answers to any questions and firmware (system software) upgrade to enhance the device's performance are available at our web site.
▶Copyrights
- This User's Manual, related patents, trademarks, copyrights and other intellectual properties rights are property of MPIO Co., Ltd. Any copies, reproduction, or translation of the product or document in whole or part as well as compressing the documents in an electronic format without authorization of MPIO Co., Ltd. is restricted by the law.
Trademarks
- Microsoft, Windows, Windows Explorer and Windows logo are registered trademarks of Microsoft Corporation.
- Intel and Pentium are registered trademarks of Intel Corporation.
- The systems or products referred to in this manual are registered trademarks of their respective owners. ™ or ® marks are not always necessarily marked.
▶ Limited Liability
- The manufacturer / retailer of this product will not be held liable for the accidental damages including injuries and bodily harm caused by use other than its intended purpose. The information on this document was marked on the product at the point of sale, and it may be changed without notification for continuous performance upgrades and improvements.
■ Safety Precautions
mp210
The following information is for protecting the user's safety and any property damages. Please read the following information and use the product accordingly.
Do not use in high temperature(near heating device or heatgenerators)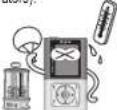 | Do not use in minus zero temperaturesor outdoors during winter (operatingtemperature 5°C~45°C).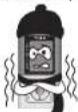 | Do not use in high humidity or placesof dropping in water.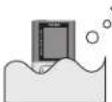 |
Do not use in places with highamount of dust.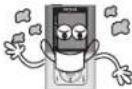 | Do not use in direct sunlight orinside a car.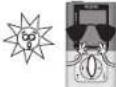 | Do not use in places with highvibration.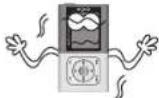 |
Do not use near highly magneticdevices.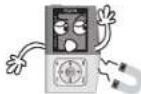 | Be Careful of strong impact. Do not dismantle, repair, or modifythe product. | 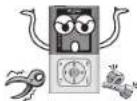 |
Be careful of foreign substances entering the product interior, E.g.) Paper clips, paper, water, drinks, etc.
When removing foreign substances from the product surface, always use a soft cloth or a towel. Do not use chemical solvents.
User Safety
① Traffic safety
- Do not listen to music using headphones or earphones when riding a bicycle, motorcycle, or driving a vehicle. It is dangerous and it may be against the law in some regions.
- When listening to music, FM radio, watching a movie or viewing a photo while walking, please lower the headphone or earphone volume. High-volume use is dangerous while walking.
② Hearing Protection
- Do not use headphones or earphones for a long period of time. Professionals suggest that long use of all portable audio devices may have a possibility of causing hearing loss.
Data Storage
① MPIO Co., Ltd. will not be responsible for data loss or damages occurred while transferring data between the product and a PC.
② When storing important data, please make a back-up copy. The data may be damaged due to malfunction or other elements such as outer impact or lack of battery. Please note that in case of data loss, MPIO Co., Ltd. will not be responsible for the lost data.
③ When inserting/removing the USB plug into a computer, please do so by holding the plug.
④ When the product is connected to a computer, please do not cause impact or shake the connector.
⑤ You should back up the data saved in the product before requesting the after service. MPIO will consider that the customers have backed up their data before sending it to MPIO for after service. MPIO will not back up your data upon receiving the after service request. Additionally, MPIO will bear no responsibility over data loss during the service.
■ Table of Contents
mp20
Getting Started
■Safety Precautions 4
■Product Features 8
■Components 9
■ Name of the Parts 10
Connection
■ Recharging 12
■ Connecting to a PC 14
Connecting to a PC with a USB Cable 18
■Installing USB Driver manually....19
■ Using Removable Disk Function .....21
■Before installing the Transcoder 23
■Installing the Transcoder 24
■ Using the Transcoder 26
Transcoding 26
Transcoding certain parts 27
Transcoding registered files 28
Transcoding registered files 28
Checking file information 29
Checking the information 29
Setting Directory 30
Setting Directory ....58
■ Using the Transcoder Player ....31
Basic Usage
■ Listening to music 32
■ Adjusting Volume / Using HOLD Switch ....33
■ Switching Mode 34
■ Voice Recording ....35
■ Direct Encoding ....36
■ Using Navigation Mode 37
■ Setting My List ....38
■ Setting my photo as screen saver 39
■ Finding music/voice recording files ....40
■ Listening to FM Radio 41
Changing frequency (Scan Mode) 41
Setting save channel 41
Listening to saved channels (Channel Mode)....42
■ Recording FM Radio 43
Additional Usage
■ Setting Repeat ....44
■ Setting Menu 45
■ Setting AUDIO 46
Changing the EQ Setting 46
Setting User's EQ 47
Setting 3D sound 48
Setting Bass/Treble 49
Changing play order 50
■ Setting Radio 51
Setting FM Band 51
Selling FM Sound 52
Setting Auto Channel Save 53
Setting seek steps 54
■ Setting Recorde Functions ....55
Setting Recording Mode 55
Setting Recording Quality 56
Recording Level Control Setting 57
Setting Voice Activity Detector (VAD) 58
Auto Sync settings 59
Setting Automatic Level Control (ALC) 60
Setting Tuner Reservation / Voice Reservation .....61
■ Setting Video 62
Viewing image / playing movie ....62
■ Setting Display 63
Select Visualization 63
Selecting Menu Language 64
Setting Track Information Indicator 65
Setting Playing Time Indicator 66
Setting Scroll Speed 67
Setting Lighting Time 68
Setting Brightness 69
Setting Screen Saver 70
Setting Lyrics 71
■ Setting System 72
Saving Auto Play Settings 72
Setting Resume 73
Setting Fade in 74
Setting Playback Speed 75
Deleting Files / Folder from menu 76
Deleting Files in navigation mode ....../
Setting Sleep Timer 78
Setting Auto Power Off 79
Setting Time 20
Setting Time 80
Setting Alarm 81
Checking System Information 62
Checking System Information 82
Setting Default 80
Setting Default 62
■ Setting Game 83
How to play 83
Customer Support
■Menu Structure 84
■ Formatting 86
■ Storing Default Settings ....89
■ Upgrading Firmware 90
Upgrading Firmware in Macintosh 92
■ Troubleshooting 93
■ Product Specifications 95
■ Product Features
* A Digital Multimedia Player with music video, photo, and various music file format playback capabilities with ultra-small, simple design and Full Color OLED screen.
■ Small, cute, ultra-compact and more elegant design with an aluminum body
Flash memory type devices are a fashion item that emphasize on its small size and exterior design. It goes well with any style of wardrobe in outdoor.
■ Adopted OLED, which can be seen at any angle together with a clear and vivid Color Display
FG200 provides more diverse functions than what it is made for. Viewing photos or movies in color, it can be used for various multimedia contents.
■ USB 2.0 High Speed Data Transfer
Transferring multi-megabytes of data is a snap with over 82 Mbps speed!
■ USB Mass Storage Support
FG200 also has removable disk function. Have your data accessible anytime, anywhere.
■ Multi Format and WMA, DRM protected file playback
FG200 is capable of playing MP3, WMA, OGG(\~Q10) format files as well as WMA, DRM protected WMA files purchased in online shops.
■ FM Radio Support
Beyond a simple radio function, FG200 supports Auto Preset Functions for storing your favorite stations.
■ MP3 Playback, Voice Recording, FM Radio listening and Direct Encoding are its most basic functions!
FG200 offers all the functions of conventional digital audio players, as well as other various functions such as movie, photo and text viewers.
■ Supports 3D effects and 9 types of EQ
Outstanding sound quality by applying the Wool'son 8750 codec, usually adopted by the expensive HDD type players. FG200's sound settings include 9 EQ settings; Pop, Rock, Jazz, Techno, Reggae, Live, Soft, and Classic and full 3D sound as well as User's EQ.
■ Bundled Real Player
With the bundled Real Player program, users can easily create MP3 files and create a music library.
■ Components
mp210
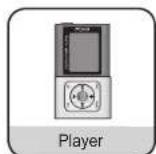
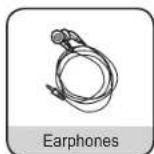
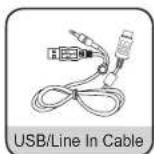
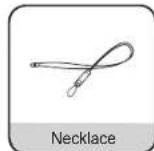
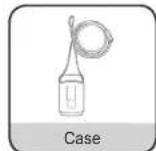
Note
● Actual player may vary slightly from images shown, and subject to change without notice.
● Broken accessories may be purchased separately at MPIO Service Center.
■ Name of the Parts
m210
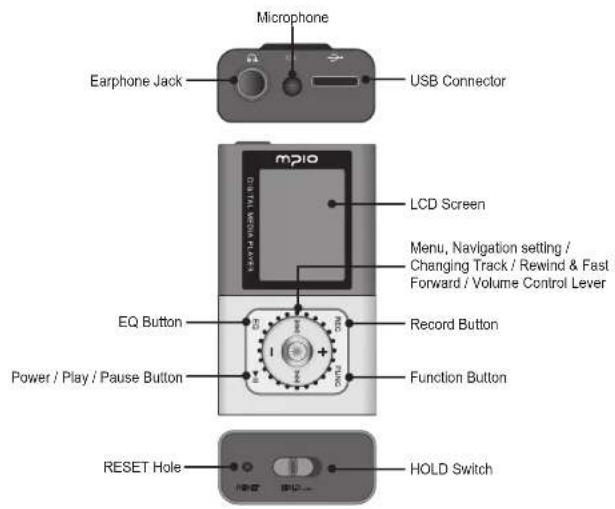
text_image
Microphone Earphone Jack USB Connector mp10 Digital Audio System LCD Screen Menu, Navigation setting / Changing Track / Rewind & Fast Forward / Volume Control Lever EQ Button Record Button Power / Play / Pause Button Function Button RESET Hole HOLD SwitchNote
- Pressing the RESET hole with a pen tip will turn off the device and reset it to default settings when turned back on.
- When RESET, all menu settings are returned to its default setting.
Using the lever
Functioning by pushing the lever up, down, left, right direction and pressing it.
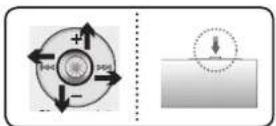
Pressing Lever: Press the lever down or press and hold it. Pushing Up: Push the lever or push and hold it up. Push Down: Push the lever or push and hold it down. Pushing to Left: Push the lever or push and hold it to left. Pushing to Right: Push the lever or push and hold it to right.
LCD Screen
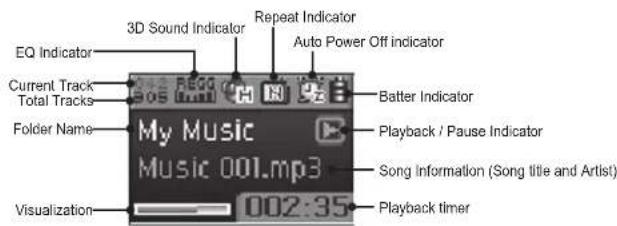
text_image
EQ Indicator Current Track Total Tracks Folder Name My Music Music 001.mp3 Visualization 3D Sound Indicator Repeat Indicator Auto Power Off indicator Batter Indicator Playback / Pause Indicator Song Information (Song title and Artist) 002:35 Playback timer■ Recharging
m210
Charging the battery while the power is off
1 Connect the player to the PC USB terminal as described in the figure, while the power is off, using the USB cable.
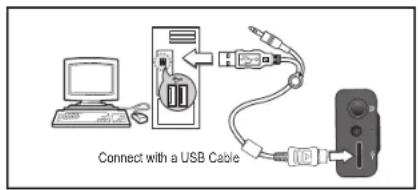
text_image
Connect with a USB Cable2 The USB cable connection status will be displayed on the LCD.
3 If no data transmission is detected between PC and portable disc, battery charging will be started after a certain period of time with battery lamp ( ) flashing.
- When using the player for a first time, recharge the player for 4 hours before use. Recharging time: 3 hours (From Empty to Full)
Note
- You can also charge the battery while playing back the music when you connect the USB cable while the power is on. At this time, the available battery amount lamp will flash so that you can check the charging status. When fully charged, the icon will be changed to ( ).
About the Internal Rechargeable Battery
- Do not charge the battery past the specified time.
- Do not charge the battery past the specified time. It may cause a fire.
- When the playback time reduces dramatically, the internal rechargeable battery must be replaced.
● Overcharging and complete discharging the battery may reduce its lifespan. - To use the battery for a long time, recharge the battery fully, and recharge it after complete discharge. Repeatedly recharging the battery after short use may reduce its lifespan. If recharged after short use, repeating full recharge and drain will restore the battery's performance.
- When using the battery for a first time, or first time in several months, recharge it fully before use.
● Battery is an expendable item. Its performance will decrease after the point of purchase. - Do not make the battery come in contact with electric conductors such as a necklace. It may cause fire or electric shock.
Note
- Contact MPIO Service Center for replacing the internal battery.
■ Connecting to a PC
m210
System Requirement
IBM PC
System: USB Interface 2.0, Standard device and a CD-ROM Driver equipped CPU: Pentium 133MHz or faster
Memory: 64MB or more
Hard disk space: 20MB or more
Supported Operating Systems: Windows 98 / 98SE / ME / 2000 / XP
Macintosh
System: USB Interface 2.0, Standard device and a CD-ROM Driver equipped
EX) Power Mac G3 (Blue & White) / G4 / G4 Cube, iMac / iBook, PowerBook, PowerBook G4
Memory: 64MB or more
Hard disk space: 20MB or more
Supported Operating Systems: Mac OS version 9.2 or later
Caution
- Connection using USB Hubs or extension cables is not guaranteed.
Note
- In Windows 98 / 98SF, the program must be installed to use FG200 as a removable disk. Please install the USB drivers before use.
- In Windows ME, 2000, XP, FG200 may be used as a Removable Disk without any separate programs. FG200 is accessible though the Windows Explorer.
- To format, or upgrade the firmware of FG200 in Windows ME, 2000 or XP, please install the MPIO Utility.
Installing the software
How to install Windows 98 Device Driver, MPIO Utility and other utility

Insert the Installation CD into the CD-ROM Drive. The installation will auto-start and the installation will begin as shown in right. If the installation doesn't auto-start, double-click the CD-ROM icon in Windows Explorer.
text_image
Scanned screenshot of a software interface with Chinese text and a small icon, likely for installation or configuration.

Click the [Next] button.
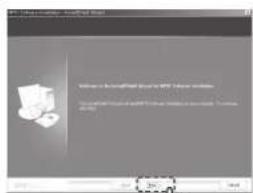
text_image
Scanned screenshot of a software installation window with Chinese text and a logo icon
Click
■ Connecting to a PC
m210
3 After selecting [FG200], click the [Next] button.

text_image
Click5 Click the [Install] button to install the selected utilities in order.
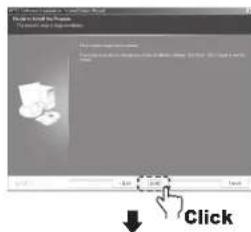
text_image
Click4 Click the [Next] button. All the utility programs will be installed. The user can select the programs needed to install. But, the following items must be installed, - Windows 98 Device Driver (Must be installed for Windows 98/98SE users) - MPIO Utility
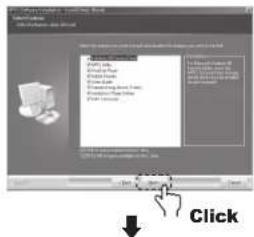
text_image
Add Delete Click6 Click the [Finish] button to finish the installation. Check the MPIO Utility icon on the desktop to confirm installation.

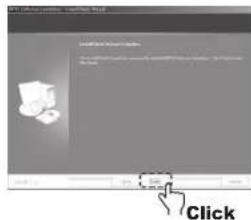
text_image
Click■ Connecting to a PC
Connecting to a PC with a USB Cable
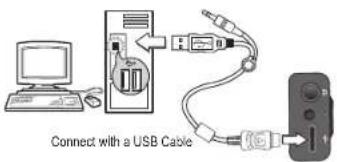
text_image
Connect with a USB Cable1 Connect FG200 to the PC with the USB cable as shown image.
- If the USB cable is disconnected from the PC during the initial USB driver installation or in middle of a command, it may malfunction.
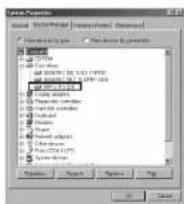
2 The USB Driver will be installed with a message indicating "Looking for a New Device" The installation screen may not appear. Check the Device Manager to confirm the installation.
Confirming USB Installation
- Windows 98/ME:
[Control Panel] → [Systems] → [Device Manager] → [Hard Disk Controller] → MPIO FG200 USB Device
- Windows 2000/XP:
[Control Panel] → [Systems] → [Hardware] → [Device Manager] → [Disk Drive] → MPIO FG200 USB Device
Note
- If the system operating under Windows 98:98SF doesn't connect with FG200 automatically, install the USB Driver manually by referring to "Installing USB Driver manually (Page 19, 20)".
■ Installing USB Driver manually

For Windows 98/98SE users, refer to the following procedure when the computer and the device does not connect.
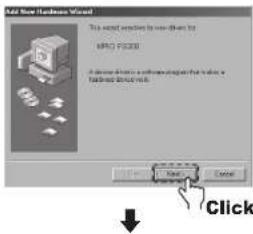
1 Connect FG200 with a computer with the USB cable. When "Add New Hardware Wizard" window appears on the screen as shown in right, click the [Next] button.
2 Check "Search for the driver for your device", click the [Next] button.
text_image
Add New Hardware Window This update version is now available for MPCO (F500) A device has a software installed that is also for additional devices.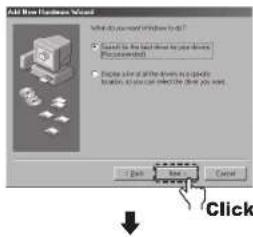
text_image
Add New Business Window • Select for the next dose for your daily (Place/Session) • Click the next dose for your daily location to you can choose if they want. - Buy Next Cancel Click■ Installing USB Driver manually
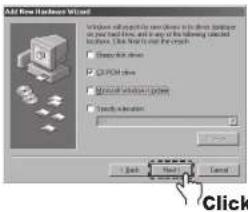
3 Insert the CD included in the package into the CD-ROM, check 'CD-ROM DRIVE' and click the [Next] button.
4 When the driver installation is completed, an "Installation complete" window will appear on the screen. Then, click the [Finish] button.
Go to the following destination to confirm that the installation was completed successfully.
- Windows 98/ME:
[Control Panel] → [Systems] → [Device Manager] → [Hard Disk Controller] → MPIO FG200 USB Device
text_image
All New Hardware Wizard Windows will add your own drive in the drive. It is also to add your hard drive, and it may be the following selected drive: Click Next to add the drive. □ Default drive □ Quick drive □ Quick drive / Quick drive □ Select drive Back Close Cancel Click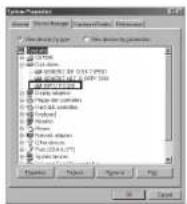
Note
- In Windows 98 / 98SE, the program must be installed to use FG200 as a removable disk. Please install the USB drivers before use.
■ Using Removable Disk Function

Uploading / Downloading File
1 Connect FG200 with a USB cable with the power turned OFF.
- If connected, a connection icon will appear in the LCD screen.
2 Run Windows Explorer on the PC
● A Removable Disk Drive Icon will be created in Windows Explorer.
● Double-click the Removable Disk Icon, When double-clicked, the connection icon on the LCD screen will change.
3 The user can store, delete data and create a folder in the same way as a hard drive. Copy & paste, Drag & Drop commands can be used in the same way to store data.
When Removable Disk Drive is selected, or a file is being transferred
Copy & Paste: Select the data to store, click on right mouse button. Select "Copy" and then "Paste" in the Removable Disk drive.
Drag & Drop: Select the data store, click and hold down the left mouse button to drag the files into the Removable Disk drive, and then release the left mouse button.
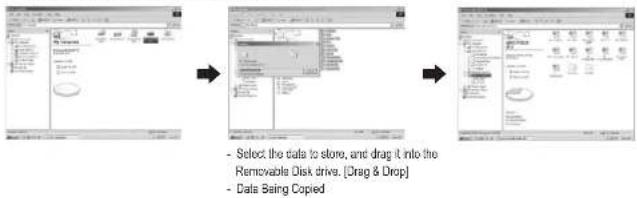
flowchart
graph LR
    A["Start"] --> B["Select the data to store, and drag it into the Removable Disk drive. [Drag & Drop"]]
    B --> C["Data Being Copied"]
Caution
- If the USB cable is disconnected while a file is being uploaded or downloaded, the device may malfunction.
- Only JPG format picture files are supported. The optimal resolution is 96x64. If the picture is bigger, it is automatically scaled to the screen resolution.
- Only store movie files that have been converted using the Transcoder. The device will not play other files.
■ Using Removable Disk
It is recommended that you follow these directions for separating the device from the PC safely. If these instructions are not followed, it may result in data damage or product malfunction.
Disconnecting the USB Cable
1 Place mouse cursor on "Stop a Hardware Device" icon in the system tray, and click right mouse button.
2 Select "Unplug or Eject Hardware".
3 Select USB Mass Storage Device from the list of hardware, and click the [Stop] button. When the "Stop a Hardware Device" window appears, select MPIO FG200 USB Device. Then, click the [OK] button and disconnect the USB Cable.
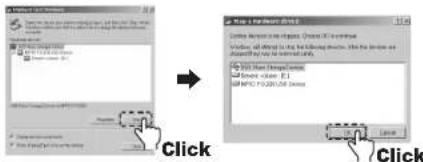
text_image
Click ClickNote
- In Windows 2000, disconnect the USB cable by clicking the [OK] button after the "Safely Remove Hardware" message appears.
In Windows XP, disconnect the USB cable after the "Safely Remove Hardware" message appears.
• Window 98/98SE Users - There is no Safely Remove Hardware command in Windows 98/98SE. The user must wait until the file/data transfer is complete, and then disconnect the USB Cable.
■ Before installing the Transcoder

To use the movie playback function appropriately, use the included PMP
Transcoder to convert the file into the required format.
All convertible files types may be converted and tested using the Transcoder.
About Transcoder...
MP4 PMP Transcoder is a program that converts the WMV, ASF, MPEG4, DivX, AVI file formats use in desktop PC environment into MP4 file format, which can be played by the PMP Player FG200.
● Supported File Types: AVI, MPEG4, WMV, DivX
The following hardware, software requirements must be met for the Transcoder to operate.
H/W Requirements
● CPU: Intel Pentium4 1 GHz or higher
● HDD: 20 MB or more
S/W Requirements
● Microsoft DirectX 9.0 or later (required)
● Microsoft Media Player 9.0
● Unified Codec Pack (K-Lite Codec Pack)
● OS : Windows98 SE / Windows ME / Windows 2000 / Windows XP
■ Please check the hardware specification of the PC to make sure it supports the Transcoder. The software specifications may be checked by downloading the required programs from the internet.
■ Installing the Transcoder
m210
Software installation
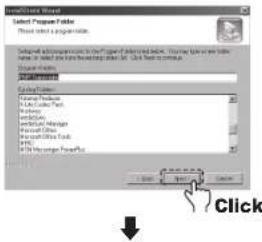
1 Select the PMP Transcoder included in the installation CD and run it.
2 Click the [Next] button.
3 Use the [Browse] button to select the target installation directory and then, click the [Next] button.
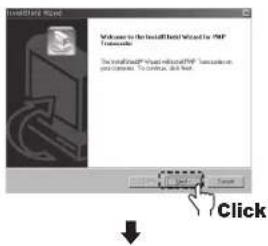
text_image
Installed Wizard Welcome to the installed Wizard for PDF Tomato The installed PDF version available in PDF Tomato program: To create, click Next Click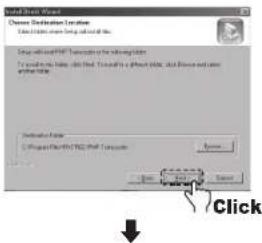
text_image
Create a new Computer Enter Destination Location Use the location to create a new file. Design will add a new computer in the existing folder. To create a new file, this file is currently a specific file. All files are used to create a new file. Downloaded file C:\Program Files\PTC2\PTC2\Computer Click4 Click the [Next] button.
5 When the installation is complete, click the [Finish] button The Transcoder icon will appear on the desktop.
text_image
InstallShield InstallShield/Visual Options Get the tool instead installing PHP to execute or save success.■ Using the Transcoder
mp210
Transcoding

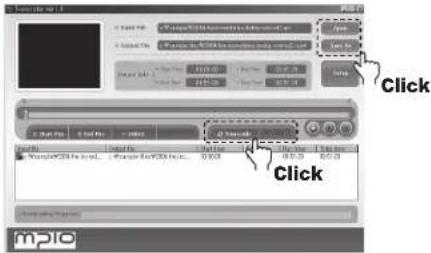
Double-click the Transcoder icon.

Press the Open button to select the Input File.
● The file name of the output file is as same as the input file besides the changed extension, MP4.

Press the Save As button to save the output file as a different file name and then, select the file name to be created.

Press the ☑ Transcode button to transcode the whole Input File.

Press the ■ Step button to stop trans-coding. The "Transcoding Complete" will appear when transcoding is finished.
text_image
MP10 Click ClickTranscoding certain parts

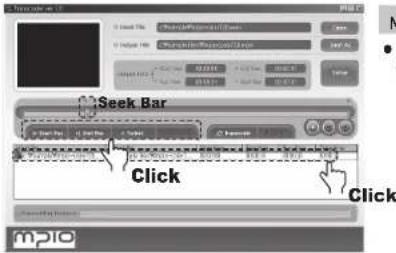
Select 1 file from the list box.
● Play the selected file.

Press the button to play back the selected file.

Move the seek bar to the intended starting position.

Press the In Start Pin button to set the start position. The ▼ mark will appear at the start position.

Move the seek bar to the intended ending position.

Press the ▪ End Pos button to set the end position. The ▪ mark will appear at the end position like the start position marker.

Press the √ selected button to confirm the selected section. The selected section will turn blue to indicate that it has been selected.

Press the button to cancel the selection.

Press the Transcode button to start conversion, and the "Transcoding Complete" will appear when transcoding is finished.
text_image
Seek Bar Click Click■ Using the Transcoder
m210
Transcoding registered files
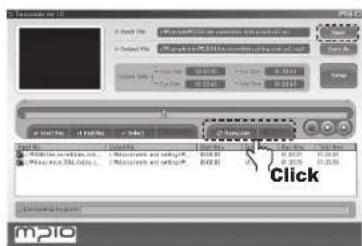
1 Select the files by clicking the Open button several times or drag & drop the files to transcode in the list box.
2 To cancel the selection of files to transcode, select the file to cancel, and click right mouse button and a pop-up window will appear. Choose "Deselect Selected List" to deselect selected files, or choose "Delete All List" to cancel all files.
3 Click the ☐ Transcode button to convert all files.
The file currently being converted will be highlighted in the list box.
4 Click the ▪ Stop button to skip the current file and convert the next file on the list.
text_image
MP10 ClickChecking File Information
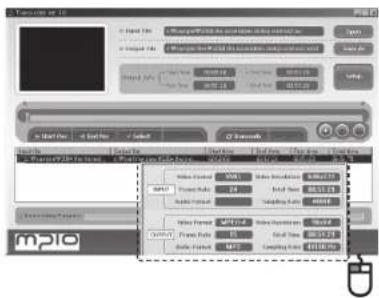
Select one of the files in the registered file list and double-click or click right mouse button and select "View File Information" to view the file information. The file information dialogue box will disappear when the ESC key is pressed or the mouse is clicked on top of the dialogue box.
text_image
MP10 File Edit View Help View Mode: 123.000 GB View History: 123.000 GB View Date: 2023-07-24 Export: MP10 Export Status: Normal Export Type: Normal Export Amount: $50,000 Export Price: $1.00 Export Price Range: 1.00 to1.00 Export Price Range: 1.00 to1.00 Export Price Range: 1.00 to1.00 Export Price Range: 1.00 to1.00 Export Price Range: 1.00 to1.00 Export Price Range: 1.00 to1.00 Export Price Range: 1.00 to1.50 Export Price Range: 1.00 to1.50 Export Price Range: 1.00 to2.00 Export Price Range: 1.00 to2.50 Export Price Range: 1.00 to3.00 Export Price Range: 1.00 to3.50 Export Price Range: 1.00 to5.00 Export Price Range: 1.00 to6.50 Export Price Range: 1.00 to9.50 Export Price Range: 1.00 to12.50 Export Price Range: 1.00 to18.50 Export Price Range: 1.00 to25.50 Export Price Range: 1.00 to35.50 Export Price Range: 1.00 to65.50 Export Price Range: 1.00 to125.50 Export Price Range: 1.00 to255.50 Export Price Range: 1.00 to355.50 Export Price Range: 1.00 to655.50 Export Price Range: 1.00 to125.50 Export Price Range: 1.00 to255.50 Export Price Range: 1.00 to355.50 Export Price Range: 1.00 to655.50 Export Price Range: 1.00 to125.50 Export Price Range: $(1) - (2) - (3) - (4) - (5) - (6) - (7) - (8) - (9) - (10) - (11) - (12) - (13) - (14) - (15) - (16) - (17) - (18) - (19) - (20) - (21) - (22) - (23) - (24) - (25) - (26) - (27) - (28) - (29) - (30) - (31) - (32) - (33) - (34) - (35) - (36) - (37) - (38) - (39) - (40) - (41) - (42) - (43) - (44) - (45) - (46) - (47) - (48) - (49) - (50) - (51) - (52) - (53) - (54) - (55) - (56) - (57) - (58) - (59) - (60) - (61) - (62) - (63) - (64) - (65) - (66) - (67) - (68) - (69) - (70) - (71) - (72) - (73) - (74) - (75) - (76) - (77) - (78) - (79) - (80) - (81) - (82) - (83) - (84) - (85) - (86) - (87) - (88) - (89) - (90) - (91) - (92) - (93) - (94) - (95) - (96) - (97) - (98) - (99) - (100)■ Using the Transcoder
Setting Directory
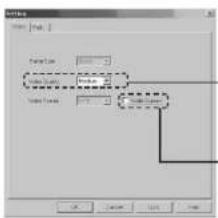
Set the video options, and set the directory for storing the Output File.

Click the

button to see the tab dialogue for Video and Directory Settings.

Select the tab to setup, and choose the options.
text_image
Form1 Form2 Form3 Form4 Form5 Form6 Form7 Form8 Form9 Form10 Form11 Form12 Form13 Form14 Form15 Form16 Form17 Form18 Form19 Form20 Form21 Form22 Form23 Form24 Form25 Form26 Form27 Form28 Form29 Form30 Form31 Form32 Form33 Form34 Form35 Form36 Form37 Form38 Form39 Form40 Form41 Form42 Form43 Form44 Form45 Form46 Form47 Form48 Form49 Form50 Form51 Form52 Form53 Form54 Form55 Form56 Form57 Form58 Form59 Form60 Form61 Form62 Form63 Form64 Form65 Form66 Form67 Form68 Form69 Form70 Form71 Form72 Form73 Form74 Form75 Form76 Form77 Form78 Form79 Form80 Form81 Form82 Form83 Form84 Form85 Form86 Form87 Form88 Form89 Form90 Form91 Form92 Form93 Form94 Form95 Form96 Form97 Form98 Form99 Form100Wide Screen
Many of DivX movies are made in 720x480 wide screen format. Choosing this option will show the movie in the original screen ratio.

Select the [Path] tab.
- Designated the directory for the converted files to be saved in.
![Mpio FG200 - Select the [Path] tab. - 1](/content/2026/05/820324/images/d0aa19205dd6a5145f1215a90dcac986750bf9eb7d84d2330e8598a2c54528f1.jpg)
text_image
Data Range: 10 Cancel Help OK■ Using the Transcoder Player


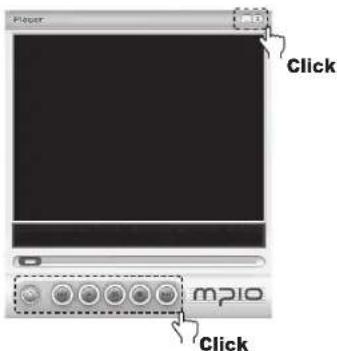
Double-click the PMP Transcoder Icon


Click the 📄 button to select the file to play. The file format is selected as a MP4.

Click the button to play the file.

Fast-forward or rewind by clicking the 📄 or 🐵 button.

Click the button to pause the video, and click the button to stop the video.

Click the button to minimize the window, and click the button to close it.
text_image
Player Click mPIO Click■ Listening to music
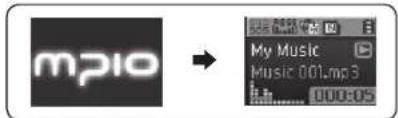
To play music (Turning power ON)
Press and hold the ▶ button to play the music after the logo screen appears.
text_image
mPIO My Music Music 001.mp3 000:05To stop (Turning Power OFF)
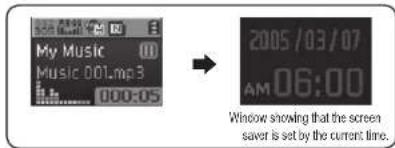
Press the ▶ button to pause the music during playback. If no other buttons are pressed for 8 seconds, the screen saver is automatically activated. The power will turn OFF automatically after 3 minutes. (In default setting)
Press and hold the ▶ button during playback to turn the power OFF.
text_image
My Music Music 0.01.mp3 000:05 2005/03/07 AM 06:00 Window showing that the screen saver is set by the current time.Note
- Screen saver and Auto Power Off reservation can be changed by setting. (Refer to page 70 and 79)
■ Adjusting Volume / Using HOLD Switch
mp210
To adjust the volume
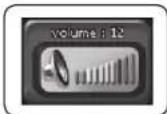
Push the lever toward + / - direction during playback or pause to adjust the volume.
Note
● The volume can be adjusted from 00 to 30.
- To adjust the volume gradually, push the lever and to adjust the volume fast, push and hold the lever.
HOLD Function
Use the HOLD function so that other buttons do not work during playback.
To use the HOLD function, push the ① switch in the direction of the arrow.
Note
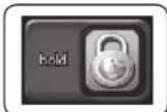
- If the HOLD function is activated, other buttons will not work. And an icon shown in right will appear on the LCD screen.
● To deactivated the HOLD function, push the switch in opposite the direction of the arrow.
■ Switching Mode
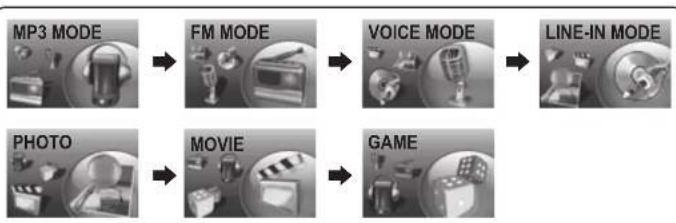
1 Press and hold the FUNC button during playback or in pause.
2 Push the lever toward + / - or ◀◀/▶▶ to select the mode to use and press the lever to switch.
● The mode with changing in the following order: MP3 MODE → FM MODE → VOICE MODE →
flowchart
graph LR
    A["MP3 MODE"] --> B["FM MODE"]
    B --> C["VOICE MODE"]
    C --> D["LINE-IN MODE"]
    E["PHOTO"] --> F["MOVIE"]
    F --> G["GAME"]
Note
- When switching the mode again, press and hold the FUNC button and move to the desired mode.
■ Voice Recording

1 Press the REC button during pause to switch into VOICE mode.
● Voice Recording does not work while music is playing.
2 Press the REC button again to begin recording.
- Press the ▶II button to pause the recording. Press the ▶II button again to resume the recording.
3 Press the REC button to stop recording.
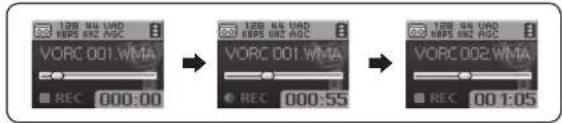
text_image
VORC 001 WMA REC. 000:00 VORC 001 WMA REC. 000:55 VORC 002 WMA REC. 001:05Note
- The files will be stored in order of VORC001, VORC002, etc. And it will be stored in the RECORD folder as a WMA file.
- When storing the voice recording files, recording wills stop automatically if there aren't sufficient memory space.
- Pressing the REC button in FM Mode will record the radio. Be sure to use voice recording in MP3 Mode.
- IF VAD setting is activated, the device will not record anything until it detects a sound from the microphone. Refer to page 58 for details.
■ Direct Encoding
1 Connect the auxiliary device's output (or Line Out jack) and USB Cable to the USB port.
2 Press the REC button in the external input mode, and play back the external sound device. (Refer to page 34, Switching Mode)
3 Encoding will begin.
- Press the ▶ button tol pause encoding. Press the ▶ button to resume encoding.
4 Press the REC button to stop encoding.
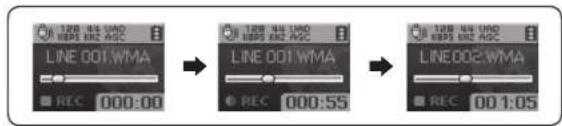
text_image
LINE DOTWMA REC 000:00 LINE DOTWMA REC 000:55 LINE DOTWMA REC 00:1:05Note
- The files will be encoded in order of LINE001, LINE002, etc. The files will be stored in the RECORD folder as WMA files.
- If there isn't sufficient memory space while encoding, encoding will stop automatically.
- The encoding will stop if the Line in cable is disconnected while recording.
- Encoding will not work if there aren't sufficient battery remaining.
- Be sure to set the auxiliary device's volume in an appropriate level before encoding. Too high or low volume may result in poor audio quality.
■ Using Navigation Mode

The Navigation Mode allows you to find the file or switch modes easily.
1 Press the lever during playback or in pause to enter Navigation Mode.
● A file list will appear on the LCD screen.
2 Select the file or folder to play.
- Entering a folder: After selecting the folder, press or push the lever in▶ direction.
- Leaving a folder: Push the lever in direction.
3 Press the FUNC button or push the lever in + / - directions to select Play Now and then, press the lever or push the ▶ button to play the file.
- Press the ▶II button or press the lever to play the selected file without using the pop up menu.
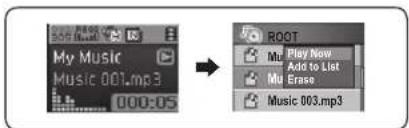
text_image
My Music Music 001.mp3 000:05 ROOT Mu Play New Add to List Mu Erase Music 003.mp3Note
- Push the lever toward | direction to exit the Navigation Mode.
- You can play the music, voice recording, photo or movie files using the navigation mode.
■ Setting My List
Setting My List
Select music files, voice recording files or encoded files in My List.
1 Press the FUNC button after move to folder or file you wish in Navigation Mode
● A pop up menu will appear.
2 Push the lever in + / - directions to select Add to List, and press the lever to add the selected items to My List.
- Choose Add to My List after selecting a folder will add all the playable files in the folder to My List.
- The icon of the selected file will be changed to (☑).
- Check the files selected in My List using the Navigation Mode.
3 Enter My List in Navigation Mode and play the selected files.
4 To deselect the files from My List, use the Navigation Mode to select the file to remove. Then, press the FUNC button and select Off the List.
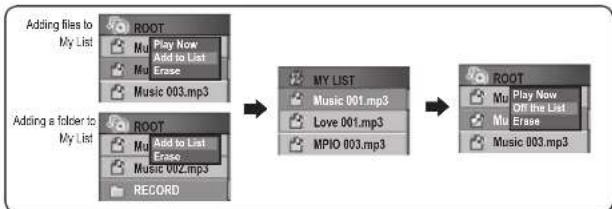
flowchart
graph LR
    A["Adding files to My List"] --> B["Adding a folder to My List"]
    B --> C["ROOT"]
    C --> D["MY LIST"]
    D --> E["ROOT"]
    E --> F["Output"]

    subgraph Results
    G["My List: Music 001.mp3, Love 001.mp3, MPIO 003.mp3"] --> D
    H["My List: Music 002.mp3, Music 003.mp3"] --> E
    I["My List: Play Now Add to List Erase"] --> E
Note
● Photos or movies cannot be added to MY LIST.
- If a playable music file is stored in the Folder / Movie folder, it can be added to MY LIST.
■ Setting my photo as screen saver

Select a photo for screen saver.
1 Go to the Photo folder in the Navigation mode, and press the FUNC button shortly.
● The pop up Menu will appear.
2 Push the lever toward + / - directions to select Add screen, and press the lever.
3 The selected photo file is set as screen saver.
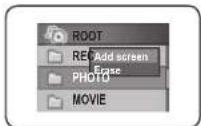
Note
- If you select [Display] → [Screen Saver] → [My Photo] in the Menu, the selected photo file will be shown when screen saver is activated. (Refer to page 70)
■ Finding music / voice recording files
Fast Forward / Rewinding during playback
- Push the lever in |←/→| directions during playback to Fast forward / rewind the music. Release the lever to resume playback.
Finding files during playback
● Push the lever in ▶ direction during playback to play the next track.
- After starting playing back, push the lever in direction to go back to the last track in the first 5 seconds and push the lever in direction after 5 seconds to restart the current track from the beginning.
Finding files when playback is stopped
- Push the lever in ◀◀/▶▶ directions to move to next / previous track when playback is stopped.
Note
● The MP2 or MP1 format files with extensions changed to MP3 may not played by FG200.
- When playing VBR files, pushing the lever in direction within the first 4 seconds may not play the previous track.
■ Listening to FM Radio

Press and hold the FUNC button to switch to FM Mode. (Refer to "Mode Switching" on page 34)
Changing frequency (Scan Mode)
- Push the lever in ◀◀/▶▶ direction to adjust the frequency.
Note
- Frequency seek steps can be changed in [FM Radio]/[Seek Step] Menu settings.
Setting save channel
A function for saving the selected frequency
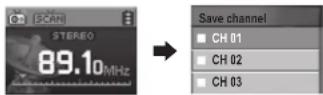
1 When the lever is pressed while listening to FM Radio, Save channel screen will appear.
2 Push the lever in +1 - direction to select channel number. Push the lever in ▶ direction or press it to save the frequency.
Note
● The channel can be saved up to 30.
- The stored channels can be checked in the [FM Radio] [Save channel] Menu.
● FM Channels cannot be deleted.
■ Listening to FM Radio
Listening to saved channels (Channel Mode)
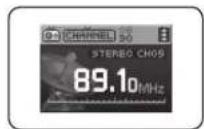
Press the FUNC button to change the reception mode (SCAN↔ CHANNEL).
1 Press the FUNC button to select CHANNEL MODE.
2 Push the lever in ◀◀/▶▶ directions to move between the saved frequencies (channels).
3 The saved channel is selected.
Note
- If there aren't any saved frequencies (channels), Channel Empty! message will appear on the screen and the device will remain in SCAN mode.
- For more detailed information about the FM Menu, refer to pages 51\~54.
Chanel Empty!
■ Recording FM Radio

Records the selected FM Radio broadcast
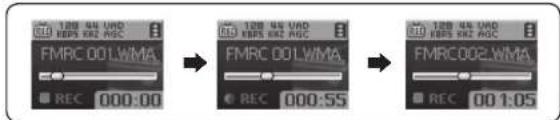
1 Press the REC button while listening to FM Radio to switch to FM Recording Mode.
2 Press the REC button again to begin FM recording.
● Press the ▶|| button to pause recording. Press the ▶|| button again to resume recording.
3 Press the REC button to stop recording
text_image
FMRC 001WMA REC 000:00 FMRC 001WMA REC 000:55 FMRC002WMA REC 001:05Note
- The recorded files will be saved in order of FMRC001, FMRC002, etc. The recorded files will be saved in the RECORD folder as WMA files.
- When saving the recorded files, the recording will stop automatically if there isn't sufficient memory space.
■ Setting Repeat
Repeat section start position
Press the REC button in the start position of the music/voice file to repeat during playback. ⬆ mark will appear in the LCD screen.
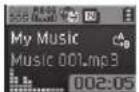
Repeat section end position
Press the REC button again at the desired end position.
C_B^A mark will appear in the LCD screen.
The selected section will be repeated.
Note
- Press the REC button again to release repeat.
- Push the lever in ◀◀/▶▶ directions to fast forward / rewind to turn off the repeat setting automatically.
■ Setting Menu
m210
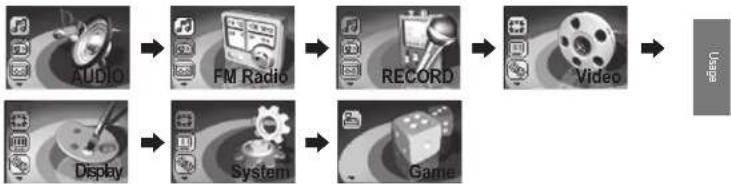
How to use the menu
Press and hold the lever to enter the menu.
Selecting Menu: Push the lever in + / - directions to move the highlight.
Entering Menu: Push the lever in▶ direction or press the lever to enter the menu.
Changing settings: Push the lever in +/ -directions to change the setting.
Saving Changed Settings: Push the lever in ➞ direction or press the lever to save the setting.
Going Back in Menu Tree: Push the lever in direction.
Canceling Menu Changes: Push and hold the lever to turn Menu Mode OFF.
flowchart
graph LR
    A["AUDIO"] --> B["FM Radio"]
    B --> C["RECORD"]
    C --> D["Video"]
    D --> E["Game"]
    E --> F["System"]
    F --> G["Display"]
AUDIO: Setting the audio settings for music / voice recording files
FM Radio: Setting the options of FM Radio Mode
RECORD: Setting the options for voice recording mode
Video: Playing movies, viewing a photo or checking My List
Display: Setting the options for the screen
System: Adjusting system settings
Game: Playing a game
■ Setting AUDIO
m210
Changing the EQ Setting
1 Select AUDIO in the menu.
2 Push the lever in +/ -directions to select EQ and then, push the lever in ▶ direction or press it to enter.
3 Push the lever in + / - directions to elect the EQ item and then, push the lever in ▶ direction or press it to save the setting. After saving, device will automatically return to the previous menu.

text_image
AUDIO 1. EQ 2. User EQ 3. 3D Effect EQ ✓ Normal Pop RockNote
- EQ Icon order
The EQ icons will be changed in the following order:
Normal (NOR) → Pop (POP) → Rock (ROCK) → Jazz (JAZZ) → Techno (TECII) → Reggae (REGG) → Live (LIVE) → Soft (SOFT) → Classic (CLAS) → User's EQ (USER EQ) - Press the FUNC button to change directly in the Playback screen.
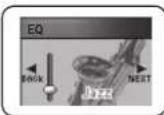
Using the EQ Button
1 Press the EQ button while music is playing.
2 Push the lever in |←/→| direction to select EQ and then, push the lever in +1 - directions to select the EQ mode.
3 Press the EQ button to save the setting. The device will return to the previous menu.
46
Setting User EQ
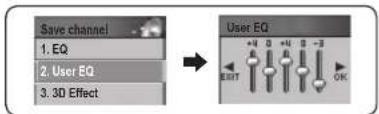
You can define your own EQ effect by adjusting the setting values in each frequency range, instead of the pre-defined EQ setting values.
1 Select AUDIO in the menu.
2 Push the lever in +/−directions to select User EQ and then, push the lever in ▶ direction or press it to enter.
- User EQ setting will appear in the LCD screen.
3 Push the lever in|<</>>| directions to change the frequency band and then, push the lever in +/ - directions to adjust the frequency band settings.
4 After adjusting each frequency band, push the lever in ▶ direction toward OK to save the setting. Pressing the lever shortly also saves the setting.
text_image
Save channel 1. EQ 2. User EQ 3. 3D Effect User EQ EXIT OKNote
- Canceling User EQ Settings
Push the lever in direction and move to the EXIT to cancel User EQ setting
■ Setting AUDIO
mp210
Setting 3D sound
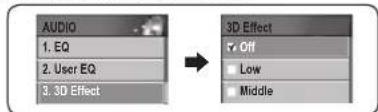
3D sound effect will enhance your music experience.
1 Select AUDIO in the menu.
2 Push the lever in + / - directions to select 3D Effect and then, push the lever in ▶ direction or press it to enter.
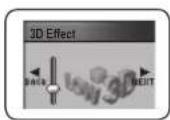
3 Push the lever in +/ - directions to select the 3D effect and then, push the lever in ▶ direction or press it to save. After saving, the device will return to its previous menu.
text_image
AUDIO 1. EQ 2. User EQ 3. 3D Effect 3D Effect Off Low MiddleNote
• 3D Sound order
The 3D Sound setting will be changed in the following order:
Off (OFF) → Low (LOW) → Middle (MD) → High (HI)
- Press the FUNC button to change directly in the Playback screen.
Using the EQ Button
1 Press the EQ button while music is playing.
2 Push the lever in |←/→| direction to select the 3D Effect and then, push the lever in +/ - directions to select the 3D Effect effect.
3 Press the EQ button to save the setting and then, the device will return to its previous menu.
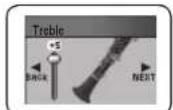
Setting Bass/Treble
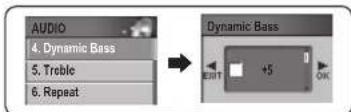
Adjusting bass and treble will provide more dynamic music playback.
1 Select AUDIO in the menu.
2 Push the lever in + / _directions to select Dynamic Bass / Treble and then, push the lever in ▶ direction or press it enter.
● A setting screen will appear.
3 Push the lever in +1-directions to select the Bass/Treble setting.
● Bass/Treble levels may be adjusted from +1 to +5.
● Turn the setting OFF if you do not wish to use the setting.
4 After adjusting the setting, push the lever in▶1 direction and move to the OK to save the setting. Pressing the lever shortly will also save the setting.
Note
- Canceling Bass/Treble Settings
Push the lever in left direction and move to the EXIT to cancel the setting.
Using the EQ Button
1 Press the EQ button while music is playing.
2 Push the lever in ◀◀/▶▶ directions to select Dynamic Bass/Treble, then adjust the setting Push the lever in + / -directions.
3 Press the EQ button to save the settings. After saving, the device will return to its previous menu.
■ Setting AUDIO
Changing play order
FG200 allows the user to change the order of the songs to be played.
1 Select AUDIO in the menu.
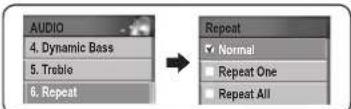
2 Push the lever in + / - directions to select Repeat and then, push the lever in ➞ direction or press it to enter.
3 Push the lever in + / - directions to select the repeat mode and save the setting push the lever in▶ direction or press it. After saving the setting, the device will return to its previous menu.
text_image
AUDIO 4. Dynamic Bass 5. Treble 6. Repeat Repeat Normal Repeat One Repeat AllNormal: Plays the files and folders played in the folder(where playable music is stored).
Repeat One: Repeats one songs.
Repeat All: Repeats all playable songs.
Random All: Plays all playable files in random order.
Folder: Plays the files stored in the selected folder once.
Repeat Folder: Repeats the files stored in the folder.
Random Folder: Plays the files in the selected folder in random order.
Note
- Repeat Mode changing order
Normal (N) → Repeat One (N) → Repeat All () → Random All () → Folded () → N
Repeat Folder ( A→ Random Folder ( ). R - Press the FUNC button to change directly in the Playback screen.
■ Setting Radio
m210
Setting FM Band
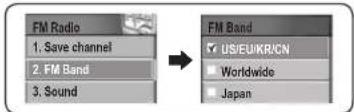
Select the FM frequency band to receive.
1 Select FM Raido in the menu.
2 Push the lever in +1-directions to select FM Band and then, push the lever in ▶ direction or press it to enter.
3 Push the lever in +1-directions to select the FM Band and then, push the lever in direction or pushing it to save. After saving the FM Band setting, the device will return to its previous menu.
text_image
FM Radio 1. Save channel 2. FM Band 3. Sound → FM Band US/EUKR/CN Worldwide JapanFM Frequencies for each region
| US/EUROPTE/KOREA/CHINA (Standards) | 87.5MHz ~108MHZ |
| International (Standard) | 76MHz ~108MHZ |
| Japan (Standard) | 76MHz ~92MHZ |
■ Setting FM Radio
mp20
Setting FM Sound
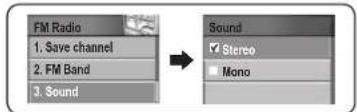
Select the sound modes for FM Radio.
1 Select FM Radio in the menu.
2 Push the lever in + / - directions to select Sound and then, push the lever in▶ direction or press it to enter.
3 Push the lever in +1 = directions to select the FM sound and then, push the lever in ▶ direction or press it to save. After saving, the device will return to its previous menu.
text_image
FM Radio 1. Save channel 2. FM Band 3. Sound Sound ✓ Stereo ■ MonoNote
- Press the ▶ button while listening to FM Radio to change the sound modes MONO and STEREO.
Setting Auto Channel Save
Follow the directions in FM Radio Mode only.
Auto Preset menu is only accessible in RADIO Mode.
1 Select FM Radio in the menu.
2 Push the lever in + / - directions to select AUTO Preset and then, push the lever in ▶ direction or press it to begin AUTO Preset.
3 The device automatically deletes the saved channels, and replaces it with the auto-scanned frequencies in order.
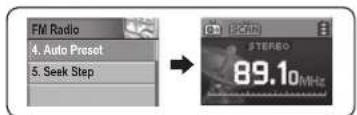
text_image
FM Radio 4. Auto Preset 5. Seek Step STERBO 89.10MHzNote
● Maximum channel saving is 30 channels.
- The stored channels can be checked in the [FM Radio] → [Save channel] Menu.
■ Setting RADIO
■ Setting Recorde Functions
mpio
Setting seek steps
Select the seek steps for scanning frequencies.
1 Select FM Radio in the menu.
2 Push the lever in + / - directions to select Seek Step and then, push the lever in ▶ direction or press it to enter.
3 Push the lever in +1 - directions to select the seek step and then, push the lever in▶ direction or press it to save. After saving, the device will return to its previous menu.
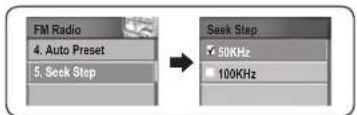
text_image
FM Radio 4. Auto Preset 5. Seek Step Seek Step 50KHz 100KHzSetting Recording Mode
1 Select RECORD in the menu.
2 Push the lever in + / - directions to select Recording Option and then, push the lever in ▶ direction or press it to enter.
3 Push the lever in + / -directions to select the recording mode and then, push the lever in direction or press it to save. After saving, the device will return to its previous menu.
4. After exiting from the menu, press the REC button to begin recording.
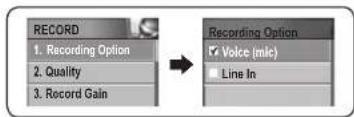
flowchart
graph LR
    A["RECORD"] --> B["Recording Option"]
    B --> C["Voice (mic)"]
    B --> D["Line In"]
    A --> E["1. Recording Option"]
    A --> F["2. Quality"]
    A --> G["3. Record Gain"]
Note
● Voice (mic): Select for voice recording
- Line In: Select for Line In recording or external microphone recording.
(Refer to page 36 for information about connecting line-in inputs.)
■ Setting Recorde Functions
mpio
Setting Recording Quality
Select the recording quality for voice recording and line-in recording.
1 Select RECORD in the menu.
2 Push the lever in +/ - directions to select Quality and then, push the lever in ▶ direction or press it to enter.
● Recording Quality Screen will appear on the screen.
3 Push the lever in ◀◀/▶▶ directions to select the level and then, push the lever in + / - directions to adjust the level.
4 After setting the level value for each frequency, save it by pushing the lever in▶ direction toward OK. Pressing the lever shortly will also save the setting. After saving, the device will return to its previous menu.
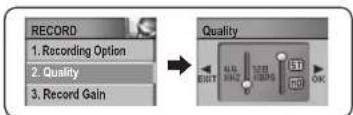
text_image
RECORD 1. Recording Option 2. Quality 3. Record Gain Quality EXIT OKRecording Quality Adjustment Value
| Sample Rate | 32kHz | 44kHz |
| Bit Rate | 48kbps(ST: Stereo) | 32kbps(MO: Mono) |
| * | 64/80/96/128kbps(ST: Stereo) |
Note
- Canceling recording quality setting:
Push the lever in direction and move to the EXIT to cancel the recording quality setting. - Increasing sample rate and bit rate will increase quality, but be sure to check for sufficient memory space because the file size will increase as well.
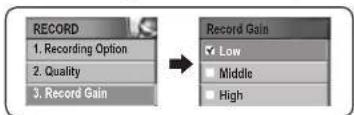
Recording Level Control Setting
Adjust the amplification rate of the voice signal.
1 Select RECORD in the menu.
2 Push the lever in + / -directions to select Record Gain and then, push the lever in ▶ direction or press it to enter.
3 Push the lever in + / - directions to select the amplification rate and then, push the lever in direction or press it to save. After saving, the device will return to its previous menu.
flowchart
graph LR
    A["RECORD"] --> B["1. Recording Option"]
    A --> C["2. Quality"]
    A --> D["3. Record Gain"]
    B --> E["Record Gain"]
    C --> E
    D --> E
    E --> F["Low"]
    E --> G["Middle"]
    E --> H["High"]
■ Setting Recorde Functions
mp20
Setting Voice Activity Detector (VAD)
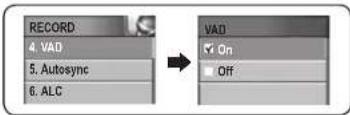
VAD (Voice Activity Detector)
VAD is a function that begins recording when the device detects a voice signal, and stops recording when the signal is absent. The VAD level is adjustable so the recording begins when the recording signal from the internal microphone reaches the user's designated level.
1 Select RECORD in the menu.
2 Push the lever in + / - directions to select VAD and then, push the lever in ▶ direction or press it to enter.
3 Push the lever in +1 - directions to Select voice detection and then, push the lever in >>1 direction or press it to save the setting. After saving, the device will return to its previous menu.
text_image
RECORD 4. VAD 5. Autosync 6. ALC VAD On OffOn: When VAD is turned ON, the device will keep recording when the input signal maintains at the set level.
Off: When VAD is turned OFF, the device will keep recording once it begins regardless of the input signal.
Auto Sync settings
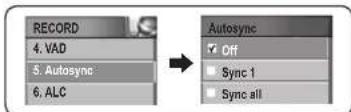
Auto Sync allows the user to separate the songs automatically when encoding from Line-in input.
1 Select RECORD in the menu.
2 Push the lever in +/ -directions to select Autosync and then, push the lever in ▶ direction or press it to enter.
3 Push the lever in +1 -directions to select the Auto Sync mode and then, push the lever in direction or press it to save the setting. After saving, the device will return to its previous menu.
text_image
RECORD 4. VAD 5. Autosync 6. ALC Autosync ✓ Off ■ Sync 1 ■ Sync allOff: When encoding using LINE-IN input, the device will store the songs from LINE-IN input as one file. (Ex: LINE001.WMA)
SYNC 1: When encoding using LINE-IN input, the device will store one song.
SYNC all: When encoding using LINE-IN input, the device will store all songs into separate files. (Ex: LINE001.WMA, LINE002.WMA, LINE003.WMA, etc)
■ Setting Recorde Functions
mp20
Setting Automatic Level Control (ALC)
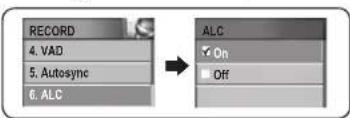
Allows enhances the input signal level (or gain) from a line-in input, allowing the user to record distant sounds and adjust recording quality.
(VAD and ALC are functions used in professional voice recorders. The same quality of functions are provided in FG200)
1 Select RECORD in the menu.
2 Push the lever in + / - directions to select ALC and then, push the lever in ▶ direction or press it to enter.
3 Push the lever in +/ - directions to turn the ALC On or Off and then, push the lever in ▶ direction or press it to save. After saving, the device will return to its previous menu.
text_image
RECORD 4. VAD 5. Autosync 6. ALC ALC On OffOn: Turning the ALC ON will enhance the input signal and record distant sounds clearly. Off: Turning the ALC OFF will recording the input signal without any enhancements.
Setting Tuner Reservation / Voice Reservation
Tuner Reservation / Voice Reservation function allows the user to reserve date, time, frequency and duration for recording.
1 Select RECORD in the menu.
2 Push the lever in + / - directions to select Tuner Reservation or Voice Reservation. Push the lever in ▶ direction or press it to Enter.
● Reservation screen will appear on the LCD screen.
3 Push the lever in ◀◀/▶▶ directions to move the cursor and then, push the lever in +/ - directions to set the date, time, frequency and duration.
4 When finished, save the setting by pushing the lever in▶ direction toward OK. Pressing the lever shortly will also save the setting. After saving, the device will return to its previous menu.
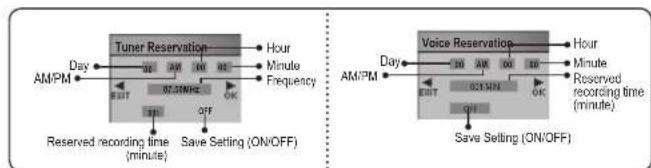
flowchart
graph TD
    subgraph Tuner_Reservation
        A["AM/PM"] --> B["Day"]
        B --> C["EXIT"]
        C --> D["80.3MHz"]
        D --> E["OFF"]
        E --> F["Save Setting (ON/OFF)"]
    end

    subgraph Voice_Reservation
        G["AM/PM"] --> H["Day"]
        H --> I["EXIT"]
        I --> J["80.3MHz"]
        J --> K["OFF"]
        K --> L["Save Setting (ON/OFF)"]
    end

    style Tuner_Reservation fill:#f9f,stroke:#333
    style Voice_Reservation fill:#f9f,stroke:#333
Note
- Canceling reserved settings
Push the lever towards the direction and move to the Exit direction to cancel the reservation settings.
■ Setting Video
■ Setting Display
m210
Viewing image / playing movie
1 Select Video in the menu.
2 Push the lever in + / - directions to select Photo or Movie and then, push the lever in ▶ direction or press it to enter.
3 Push the lever in + / - directions to select the player options and then, push the lever in ▶ direction or press it to execute the file.
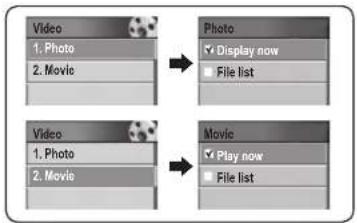
flowchart
graph TD
    A["Video\n1. Photo\n2. Movie"] --> B["Photo\n✓ Display now\n■ File list"]
    C["Video\n1. Photo\n2. Movie"] --> D["Movie\n✓ Play now\n■ File list"]
Note
- When selecting List View for images and video
Push the lever in +/ - directions to select the file and then, push the lever in ▶ direction or press it to execute the file.
Select Visualization
Select the visualization shown at the bottom of the LCD screen.
1 Select Display in the menu.
2 Push the lever in + / - directions to select Visualization and then, push the lever in ▶ direction or press it to enter.
3 Push the lever in + / - directions to select the visualization to use and then, push the lever in ▶ direction or press it to save. After saving, the device will return to its previous menu.
● The selected visualization will appear at the bottom of the LCD Screen.
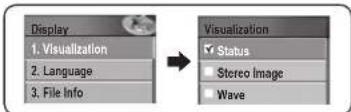
Visualization Setting Icons
| Status | |
| Stereo Image | |
| Wave | |
| Level Meter | |
| Clock | |
| File Information |
■ Setting Display
mpio
Selecting Menu Language
You can select the menu language from English, Japanese, Chinese (simplified). Chinese (Traditional), Korean, Spanish, German and French.
1 Select Display in the menu.
2 Push the lever in + / - directions to select Language. push the lever in ▶ direction or press it to enter.
3 Push the lever in + / - directions to select the desired menu language and then, push the lever in direction or press it to save. After saving, the device will return to its previous menu.
● The selected language will appear in the menu.
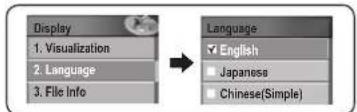
flowchart
graph LR
    A["Display"] --> B["Language"]
    A --> C["1. Visualization"]
    A --> D["2. Language"]
    A --> E["3. File Info"]
    B --> F["English"]
    B --> G["Japanese"]
    B --> H["Chinese(Simple)"]
Note
- The 47 languages (Afrikaans, Albanian, Arabic, etc) not included in 8 language of the Language menu are not supported as a menu language.
- The 55 languages shown in the Language settings also support ID3 tags. Refer to page 65 for ID3 tags.
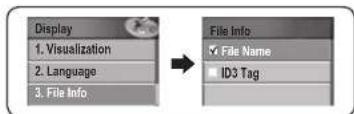
Setting Track Information Indicator
Set the Music file information shown in the LCD screen.
1 Select Display in the menu.
2 Push the lever in + / - directions to select File Info and then, push the lever in▶ direction or press it to enter.
3 Push the lever in + / - directions to select the file information indicator and then, push the lever in
▶ direction or press it to save the setting. After saving, the device will return to its previous menu.
text_image
Display 1. Visualization 2. Language 3. File Info File Info: ✓ File Name ■ ID3 TagFile Name: It only shows file name as ID3 tag information.
ID3 Tag: Shows ID3 tag information if available. If not, the device will display the file name.
Note
- 55 languages shown in Language settings are supported as ID3 tags. Refer to page 64 for language setting.
■ Setting Display
mp210
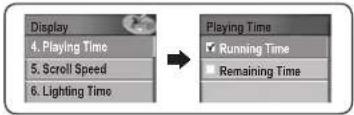
Setting Playing Time Indicator
Select the Playing Time indicator shown in the LCD screen.
1 Select Display in the menu.
2 Push the lever in + / - directions to select the Playing Time and then, push the lever in direction or press it to enter.
3 Push the lever in + / - directions to select the Playing Time Indicator and then, push the lever in
▶ direction or press it to save. After saving, the device will return to its previous menu.
flowchart
graph LR
    A["Display"] --> B["Playing Time"]
    A --> C["4. Playing Time"]
    A --> D["5. Scroll Speed"]
    A --> E["6. Lighting Time"]
    F["Playing Time"] --> G["Running Time"]
    F --> H["Remaining Time"]
Running Time: Shows the playing time of the current song. Remaining Time: Shows the remaining time of the current song.
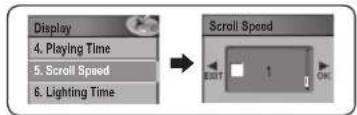
Setting Scroll Speed
Adjust the scroll speed of the text shown in the LCD screen.
1 Select Display in the menu.
2 Push the lever in +1Directions to select Scroll Speed and then, push the lever in▶1 direction or press it to enter.
3 Push the lever in + / -directions to select the desired scroll speed. Push the lever in ▶ direction toward OK to save the setting. Pressing the lever shortly will also save the setting. After saving, the device will return to its previous menu.
text_image
Display 4. Playing Time 5. Scroll Speed 6. Lighting Time Scroll Speed EXIT 1 OKNote
- Scroll Speed can be adjusted from 1-90. It is divided into 16 steps. Select the desired scroll speed.
■ Setting Display
m210
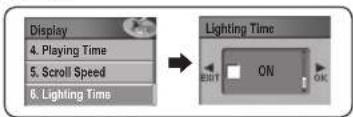
Setting Lighting Time
Set the light time for the LCD screen.
1 Select Display in the menu.
2 Push the lever in +/ - directions to select Lighting Time and then, push the lever in ▶ direction or press it to enter.
3 Push the lever in +/ - directions to select the desired lighting time. Save the setting by pushing the lever in ▶ direction toward OK. Pressing the lever shortly will also save the setting. After saving, the device will return to its previous menu.
text_image
Display 4. Playing Time 5. Scroll Speed 6. Lighting Time Lighting Time ON EXIT OKNote
● The lighting time can be adjusted from 5–100 seconds. It is divided in 20 steps.
- Selecting ON will maintain the backlight ON and then, the screen saver will be disabled.
Setting Brightness
Set the brightness of the LCD screen.
1 Select Display in the menu.
2 Push the lever in +/–directions to select Brightness. Push the lever in ➞ direction or press it to enter.
3 Push the lever in +1-directions to select the desired brightness level. Save the setting by pushing the lever in▶ direction toward OK. Pressing the lever shortly will also save the setting. After saving the setting, the device will return to its previous menu.
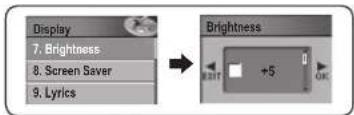
text_image
Display 7. Brightness 8. Screen Saver 9. Lyrics Brightness +5Note
● Brightness can be adjusted from +1 to +5.
● The higher number indicates higher brightness.
■ Setting Display
mp20
Setting Screen Saver
1 Select Display in the menu.
2 Push the lever in +/ – directions to select Screen Saver and then, push the lever in ▶ direction or press it to enter.
3 Push the lever in +/ -directions to select the desired screen save and then, push the lever in direction or press it to save. After saving, the device will return to its previous menu.
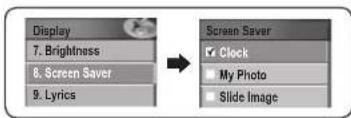
text_image
Display 7. Brightness 8. Screen Saver 9. Lyrics Screen Saver Clock My Photo Slide ImageClock: Shows the date and time.
My Photo: Shows one of the stored photo images.
Slide Image: Shows a slideshow of the stored photo images.
Note
● The screen saver will not be activated if backlight is set as ON.
- The screen saver will only be activated during the set light time (5\~100 seconds). After that, the screen will be powered off and screen saver will not be activated.
Setting Lyrics
1 Select Display in the menu.
2 Push the lever in +/–directions to select Lyrics and then, push the lever in ▶ direction or press it to enter.
3 Push the lever in +1-directions to turn LYRICS ON of OFF and then, push the lever in direction or press it to save. After saving, the device will return to its previous menu.
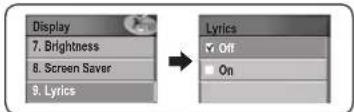
text_image
Display 7. Brightness 8. Screen Saver 9. Lyrics Lyrics ✓ Off ■ OnOff: Hides the lyrics of the current song.
On: Shows the available lyrics information of the current file.
Note
- For more details on lyric information, see the Inserting a Lyric section in the appendix (Synchronizing the lyric). This function is not available for other languages than Korean, Chinese, and Japanese.
■ Setting System
m210
Saving Auto Play Settings
The device may be set to play music automatically once the power is turned ON.
1 Select System in the menu.
2 Push the lever in + / - directions to select Auto Play and then, push the lever in ▶ direction or press it to enter.
3 Push the lever in + / - directions to turn Auto Play On or Off and then, push the lever in direction or press it to save. After saving, the device will return to its previous menu.
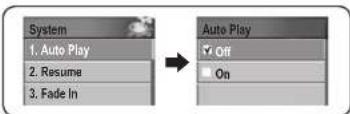
flowchart
graph LR
    A["System"] --> B["1. Auto Play"]
    A --> C["2. Resume"]
    A --> D["3. Fade In"]
    E["Auto Play"] --> F["Off"]
    E --> G["On"]
On: The device will automatically play music once the power is turned On. Off: The device will not play music once the power is turned On. To play music, press the ▶I button.
Setting Resume
When turned On, the Resume function allows the player to begin playing music from the last position.
1 Select System in the menu.
2 Push the lever in + / _directions to select Resume and then, push the lever in ▶ direction or press it to enter.
3 Push the lever in + / -directions to turn Resume On or Off and then, push the lever In▶ direction or press it to save. After saving, the device will return to its previous menu.

Off: When turned On, the device will turn the play music from the beginning. On: When turned On, the device will play music from the last position.
■ Setting System
m210
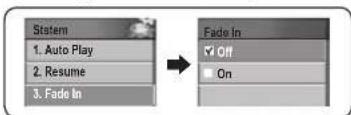
Setting Fade in
Fade in setting increase the music volume steadily so that the user is not surprised by the loud music.
1 Select System in the menu.
2 Push the lever in + / - directions to select Fade In and then, push the lever in ▶ direction or press it to enter.
3 Push the lever in + / - directions to turn Fade In On or Off and then, push the lever in ▶ direction or press it to save. After saving, the device will return to its previous menu.
flowchart
graph LR
    A["Stater"] --> B["Auto Play"]
    A --> C["Resume"]
    A --> D["Fade In"]
    E["Fade In"] --> F["Off"]
    E --> G["On"]
On: When the music begins, the volume will increase steadily from low. Off: When the music begins, it will be played in the original volume.
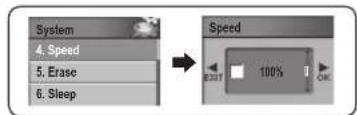
Setting Playback Speed
1 Select System in the menu.
2 Push the lever in + / -directions to select Speed and then, push the lever in ▶ direction or press it to enter.
3 Push the lever in + / - directions to select the playback speed and then, press the lever in ▶ direction toward OK to save. Pressing the lever shortly will also save the setting. After saving, the device will return to its previous menu.
text_image
System 4. Speed 5. Erase 6. Sleep Speed EXIT 100% OKNote
- Canceling playback speed settings
Push the lever in direction and move to the EXIT to cancel the playback speed settings.
● The playback speed can be adjusted from 50% to 200%. - The higher percentage represents increased speed. The default setting of 100% is recommended for listening to music.
■ Setting System
mpio
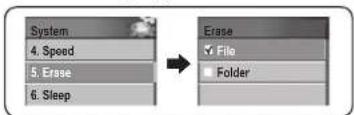
Deleting Files / Folder from menu
1 Select System in the menu.
2 Push the lever in + / - directions to select Erase and then, push the lever in ▶ direction or press it to enter.
3 Selecting a file
After selecting FILE pushing the lever in +/ - directions, push the lever in >>I direction or press it to enter navigation mode. Select the file to erase by using the lever. When you press the lever, a confirmation window will appear. Select YES to erase the file.
4 Selecting a folder
After selecting FOLDER pushing the lever in + / -directions, push the lever in ▶ direction or press. It to enter navigation mode. Select the folder to erase by using the lever. When you press the lever, a confirmation window will appear. Select YES to erase the folder.
- If there are files remaining in the folder, the folder will not be erased. Be sure to erase the files within the folder before deleting the folder itself.
- Erase Folder is a function for erasing empty folders ONLY.
flowchart
graph LR
    A["System"] --> B["4. Speed"]
    A --> C["5. Erase"]
    A --> D["6. Sleep"]
    E["Erase"] --> F["File"]
    E --> G["Folder"]
Note
- Selecting NO will cancel the erase.
- The erasable folders and files will have a 📄 icon next to them.
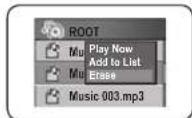
Deleting Files in navigation mode
1 Select the file to erase in navigation mode and then, press the FUNC button shortly.
● A pop up menu will appear on the screen.
2 Push the lever in +/ -directions to select Erase and then, push the lever in ▶ direction or press it.
3 The selected file is erased.
Note
- Canceling navigation, exit from navigation mode.
■ Setting System
mpio
Setting Sleep Timer
When listening to music or FM radio, you can set up the device so that the power is automatically turned OFF after a certain period of time.
1 Select System in the menu.
2 Push the lever in +/ -directions to select Sleep and then, push the lever in ▶ direction or press it to enter.
3 Push the lever in + / - directions to set the timer and then, push the lever in ▶ Idirection toward OK to save the setting. Pressing the lever shortly will also save the setting. After saving, the device will return to its previous menu.
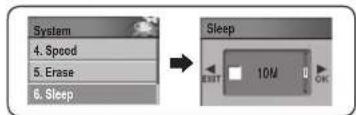
flowchart
graph LR
    A["System"] --> B["4. Speed"]
    A --> C["5. Erase"]
    A --> D["6. Sleep"]
    B --> E["→ Sleep"]
    E --> F["10M timer OK"]
Note
- Canceling Sleep Timer
Push the lever in direction and move to the EXIT to cancel the sleep timer. - The Sleep Timer can be set between 10 minutes to 20 minutes. Set it as OFF to keep the device turned ON.
Setting Auto Power Off
Auto Power Off function turns the power OFF when a certain period of time passes after the music is paused or stopped.
1 Select System in the menu.
2 Push the lever in + / - directions to select Auto Power Off and then, push the lever in ▶ direction or press it to enter.
3 Push the lever in +1-directions to set the Auto Power OFF timer. Push the lever in▶ direction toward OK to save the setting. Pressing the lever shortly will also save the setting. After saving, the device will return to its previous menu.
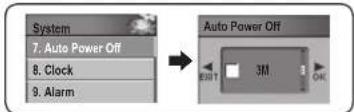
text_image
System 7. Auto Power Off 8. Clock 9. Alarm Auto Power Off EXIT 3M OKNote
- Canceling Auto Power Off Settings
Push the lever in direction and move to the EXIT to cancel the Auto Power Off settings. - Auto Power Off timer can be set between 3 minutes to 15 minutes. To keep the device turned ON, set Auto Power Off as OFF.
■ Setting System
mp20
Setting Time
1 Select System in the menu.
2 Push the lever in +/ -directions to select Clock and then, push the lever in ▶ direction or press it to enter.
● A clock setting screen will appear on the screen.
3 Move the cursor by using the lever in ◀◀/▶▶ directions. Push the lever in + / - directions to set the year, month, date and time.
4 When done, push the lever in ▶ direction toward OK to save the setting.
Pressing the lever shortly will also save the setting. After saving, the device will return to its previous menu.
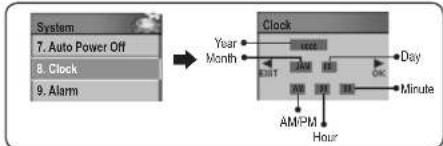
flowchart
graph LR
    A["System"] --> B["Clock"]
    B --> C["Year"]
    B --> D["Month"]
    B --> E["Day"]
    B --> F["Hour"]
    B --> G["Minute"]
    B --> H["AMPM"]
    H --> I["Clock"]
Note
- Canceling Time Setting
Push the lever in bidirectional direction and move to the EXIT to cancel the time setting. - When clock is selected as a screen saver or visualization, the set time will appear on the LCD screen.
80
Setting Alarm
1 Select System in the menu.
2 Push the lever in + / - directions to select Alarm and then, push the lever in ▶ direction or press it to enter.
● Alarm Setting Screen will appear on the screen.
3 Move the cursor by using the lever in ◀◀/▶▶ directions and then, push the lever in + / - directions to set the year, month, day and alarm setting time.
4 When done, push the lever in▶ direction toward OK to save the setting.
Pressing the lever shortly will also save the setting. After saving, the device will return to its previous menu.
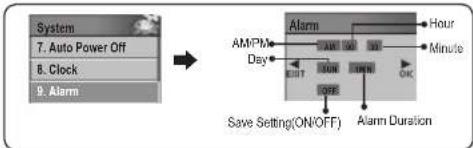
flowchart
graph LR
    A["System"] --> B["7. Auto Power Off"]
    B --> C["8. Clock"]
    C --> D["9. Alarm"]
    D --> E["Alarm"]
    E --> F["AM/PMs"]
    E --> G["Day"]
    E --> H["Hour"]
    E --> I["Minute"]
    E --> J["Save Setting(ON/OFF)"]
    E --> K["Alarm Duration"]
Note
- Canceling Alarm Setting
Push the lever in bidirectional and move to the EXIT to cancel the alarm setting.
■ Setting System
■ Setting Game
mpio
Checking System Information
System Information shows the firmware version, used memory and total memory information.
1 Select System in the menu.
2 Push the lever in + / - directions to select Information and then, push the lever in ▶ direction or press it to enter.
3 The System Information will be shown on the screen
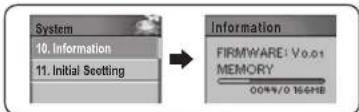
flowchart
graph LR
    A["System"] --> B["10. Information"]
    A --> C["11. Initial Setting"]
    D["Information"] --> E["FIRMWARE: Vo.01 MEMORY"]
    E --> F["00%/0.166HB"]
Setting Default
Resets all the user's menu settings and initializes all menu settings to default settings.
1 Select System in the menu.
2 Push the lever in +/ -directions to select Initial Seetting and then, push the lever in ▶ direction or press it to enter.
3 Move the lever to the + / - directions and select 'Yes' to initialize all settings of the menu.
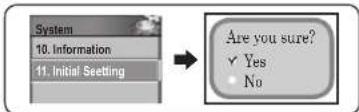
flowchart
graph LR
    A["System"] --> B["10. Information"]
    A --> C["11. Initial Setting"]
    C --> D["Are you sure?"]
    D --> E{Yes}
    D --> F{No}
How to play
1 Select Game in the menu.
2 Push the lever in + / - directions to select push!! rush!! and then, push the lever in ▶ direction or press it to enter.
3 Push the lever in|◄◄/►►, or + / - directions to play.
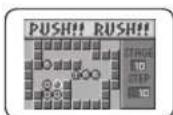
Note
- Only push!! rush!! game is stored upon the point of shipping. 2 more games can be added by upgrading the firmware.
● Other games owned by the user cannot be used in FG200. - Download and enjoy more games by visiting our website at www.mpio.co.kr (Korea), www.mpio.com (other countries).
■ Menu Structure
mp210
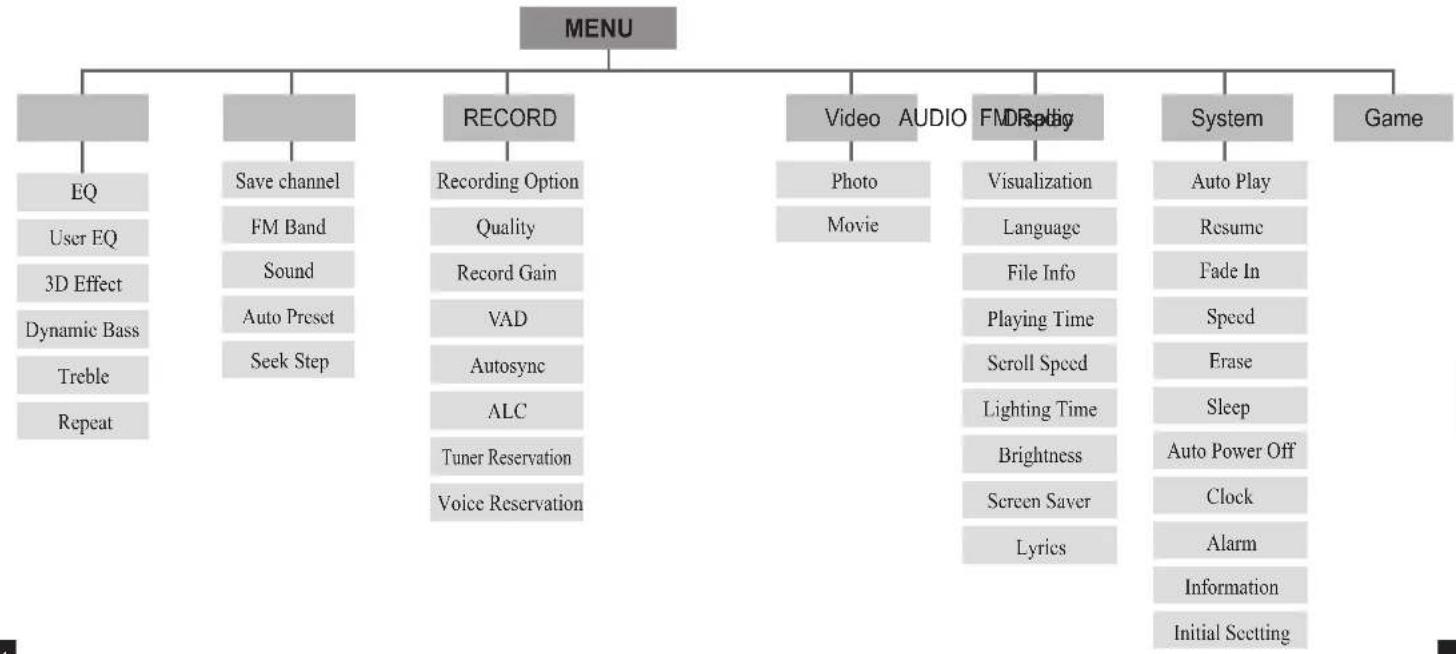
flowchart
graph TD
    A["MENU"] --> B["EQ"]
    A --> C["Save channel"]
    A --> D["RECORD"]
    A --> E["Video AUDIO"]
    A --> F["FMDisplay"]
    A --> G["System"]
    A --> H["Game"]

    B --> B1["User EQ"]
    B --> B2["3D Effect"]
    B --> B3["Dynamic Bass"]
    B --> B4["Treble"]
    B --> B5["Repeat"]

    C --> C1["FM Band"]
    C --> C2["Sound"]
    C --> C3["Auto Preset"]
    C --> C4["Seek Step"]

    D --> D1["Recording Option"]
    D --> D2["Quality"]
    D --> D3["Record Gain"]
    D --> D4["VAD"]
    D --> D5["Autosync"]
    D --> D6["ALC"]
    D --> D7["Tuner Reservation"]
    D --> D8["Voice Reservation"]

    E --> E1["Photo"]
    E --> E2["Movie"]

    F --> F1["Visualization"]
    F --> F2["Language"]
    F --> F3["File Info"]
    F --> F4["Playing Time"]
    F --> F5["Scroll Speed"]
    F --> F6["Lighting Time"]
    F --> F7["Brightness"]
    F --> F8["Screen Saver"]
    F --> F9["Lyrics"]

    G --> G1["Auto Play"]
    G --> G2["Resume"]
    G --> G3["Fade In"]
    G --> G4["Speed"]
    G --> G5["Erase"]
    G --> G6["Sleep"]
    G --> G7["Auto Power Off"]
    G --> G8["Clock"]
    G --> G9["Alarm"]
    G --> G10["Information"]
    G --> G11["Initial Setting"]
■ Formatting
m210
You can format FG200 from a Windows PC using MPIO Utility.
1 Connect the player to the PC USB terminal while the power is on, using the USB cable.
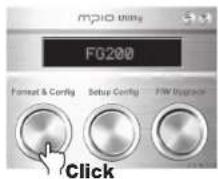
2 Double-click MPIO Utility icon in your desktop.
3 Click the [Format & Config] button.
4 Click the [OK] button.
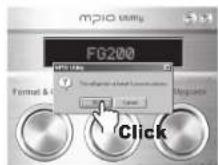
5 Click the [ Start ] button.
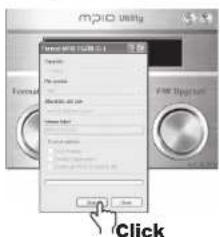
text_image
Add Click6 Click the [OK] button.
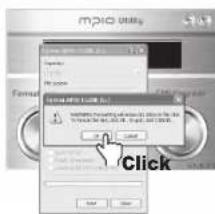
text_image
MP30 Microsoft Teams Microsoft Teams (Windows) Microsoft Teams (Windows) 12.000-12.000 Microsoft Teams (Windows) 12.000-12.000 Microsoft Teams (Windows) 12.000-12.000 Microsoft Teams (Windows) 12.000-12.000 Microsoft Teams (Windows) 12.000-12.000 Microsoft Teams (Windows) 12.000-12.0007 When formatting is complete, click the [OK] button.
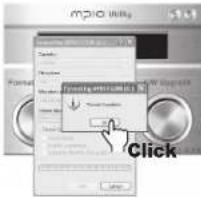
text_image
MP30 Click9 Click the [OK] button after the "Safely Remove Hardware" message appears as shown.
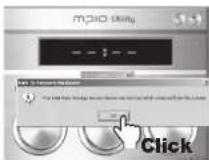
8 Click the [ Close ] button.
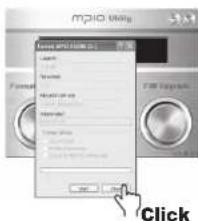
text_image
MP10 MP10 MP10 MP10 (2) Layered Audio Audio file name Audio file name Audio file name Audio file name Audio file name Audio file name Audio file name Audio file name Audio file name Audio file name Audio file name Audio file name Audio file name Audio file name Audio file name Audio file name Audio file name Audio file name Audio file name Audio file name Audio file name Audio file name Audio file name Audio file name Audio file name Audio file type Audio file type Audio file type Audio file type Audio file type Audio file type Audio file type Audio file type Audio file type Audio file type Audio file type Audio file type Audio file type Audio file type Audio file type Audio file type Audio file type Audio file type Audio file type Audio file type Audio file type Audio file type Audio file type Audio file type Audio file type Audio file types: Audio file types: Audio file types: Audio file types: Audio file types: Audio file types: Audio file types: Audio file types: Audio file types: Audio file types: Audio file types: Audio file types: Audio file types: Audio file types: Audio file types: Audio file types: Audio file types: Audio file types: Audio file types: Audio file types: Audio file types: Audio file types: Audio file types: Audio file types: Audio file types: Audio file types: Audio Audio file types: Audio Audio file types: Audio Audio file types: Audio Audio file types: Audio Audio file types: Audio Audio file types: Audio Audio file types: Audio Audio file types: Audio Audio file types: Audio Audio file types: Audio Audio file types: Audio Audio file types: Audio Audio file types: Audio Audio file types: Audio Audio file types: Audio Audio file types: Audio Audio file types: Audio Audio Audio10 After clicking the [OK] button, Format & Config (Default Setting Restoration) is complete. You may separate the device from the PC.
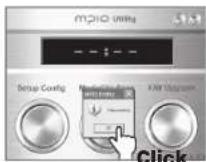
Note
- The captured screens of MPIO Utility may vary for the user's PC environment.
- MPIO Utility cannot be run under MAC OS.
- For information regarding MPIO Utility installation, refer to [Installing the software] on page 15.
■ Formatting
Follow the instructions when formatting FG200 using a Windows PC without MPIO Utility. Using MPIO Utility is recommended for formatting the device.
1 Select the Removable Disc icon. Click your right mouse button and select FORMAT. Click the [Start] button,
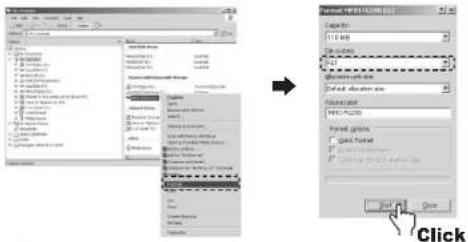
text_image
Add Delete Add to Delete Add to Delete Add to Delete Add to Delete Add to Delete Add to Delete Add to Delete Add to Delete Add to Delete Add to Delete Add to Delete Add to Delete Add to Delete Add to Delete Add to Delete Add to Delete Add to Delete Add to Delete Add to Delete Add to Delete Add Add Delete Add to Delete Add to Delete Add to Delete Add to Delete Add to Delete Add to Delete Add to Delete Add to Delete Add to Delete Add to Delete Add to Delete Add to Delete Add to Delete Add to Delete Add to Delete Add to Delete Add to Delete Add to Delete Add to Delete Edit... Edit... Edit... Edit... Edit... Edit... Edit... Edit... Edit... Edit... Edit... Edit... Edit... Edit... Edit... Edit... Edit... Edit... Edit... Edit... Edit... Edit... Edit... Edit... Edit... Edit... Edit... Edit... Edit... Edit... Edit... Edit... Edit... Edit... Edit... Edit... Edit... Edit... Edit... Edit... Edit... Edit... Edit... Edit... Edit... Edit... Edit... Edit... Edit... Edit... Edit...Note
- When formatting the device using the Windows FORMAT Command, it must be formatted in FAT or FAT16. To use the device after it has been formatted, the default settings must be restored using MPIO Utility. Refer to page 89 [Storing Default Settings] for more information.
● The captured screens of MPIO Utility may vary for the user's PC environment.
Caution
- When formatted, the menu settings will be changed to default settings.
● The files in FG200 WILL BE LOST after formatting.
■ Storing Default Settings

When FG200 has been formatted using the Windows FORMAT Command (FAT or FAT16), the default settings must be restored using MPIO Utility's Setup Config function. Refer to page 15 [Installing the software] for more information about installing MPIO Utility.
1 Turn the player off, and connect to the PC using the USB cable.
2 Double-click MPIO Utility icon in your desktop.
3 Click the [Setup Config] button.
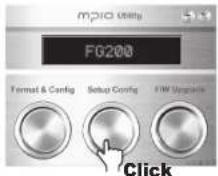
5 Click the [OK] button after the Safely Remove Hardware message appears as shown.
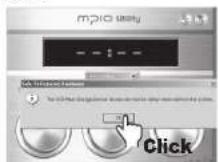
4 Click the [OK] button
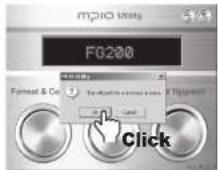
6 After clicking the [OK] button, Setup Config (Default Setting Restoration) is complete. You can unplug the device from the PC.
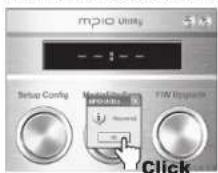
■ Upgrading Firmware
m210
Refer to page 15 [Installing the software] for information on how to install MPIO Utility.
1 Download the firmware from MPIO web site and save it on the PC. (www.mpio.co.kr)
2 Turn the player off, and connect to the PC using the USB cable.
3 Double-click MPIO Utility icon in your desktop.
4 Click the [F/W Upgrade] button.
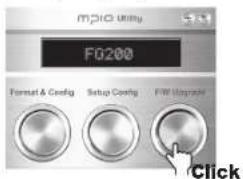
text_image
MPIC Utility F0200 Format & Config Setup Config FWI Upgrade Click5 Click the [OK] button.
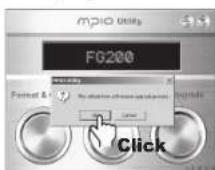
6 Select the downloaded Upgrade.FG200.dwu file in the [Browse] window and then, click the [Open] button.
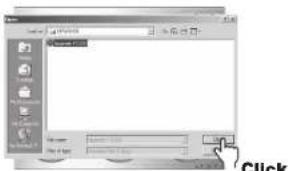
text_image
Microsoft 文件(F) 我的文档 我的电脑 我的音乐 我的视频 我的音乐窗口 文件名(N): Microsoft Word 文档 图片类型(T): 正常 大小(S): 100 缩放方式: 自动 剪切(T) 缩放 复制(C) 取消(C) 粘贴(P) 帮助(H) Ctrl+Alt+Alt+Alt+Alt+Alt+Alt+Alt+Alt+Alt+Alt+Alt+Alt+Alt+Alt+Alt+Alt+Alt+Alt+Alt+Alt+Alt+Alt+Alt+Alt+Alt+Alt+Alt+Alt+Alt+Alt+Alt+Alt+Alt+Alt+Alt+Alt+Alt+Alt+Alt+Alt+Alt+Alt+Alt+Alt+Alt+Alt+Alt+Alt+Alt+Alt+ Alt+F Alt+F Alt+F Alt+F Alt+F Alt+F Alt+F Alt+F Alt+F Alt+F Alt+F Alt+F Alt+F Alt+F Alt+F Alt+F Alt+F Alt+F Alt+F Alt+F Alt+F Alt+F Alt+F Alt+F Alt+F Alt+F Alt+F Alt+F Alt+F Alt+F Alt+F Alt+F Alt+F Alt+F Alt+F Alt+F Alt+F Alt+F Alt+F Alt+F Alt+F Alt+F Alt+F Alt+F Alt+F Alt+F Alt+F Alt+F Alt+F Alt+F Alt+Alt+F Alt+F Alt+F Alt+F Alt+F Alt+F Alt+F Alt+F Alt+F Alt+F Alt+F Alt+F Alt+F Alt+F Alt+F Alt+F Alt+F Alt+F Alt+F Alt+F Alt+F Alt+F Alt+F Alt+F Alt+F Alt+F Alt+F Alt+F Alt+F Alt+F Alt+F Alt+F Alt+F Alt+F Alt+F Alt+F Alt+F Alt+F Alt+F Alt+F Alt+F Alt+F Alt+F Alt+F Alt+F Alt+F Alt+F Alt+F Alt+F Alt+F AllNote
- The firmware upgrade file that you can download from the MPIO website is compressed as a Zip file. "Upgrade 1G200.dwu" file will be created when you uncompress the zip file.
7 Click the [OK] button after the Hardware Safely Removed message appears as shown.
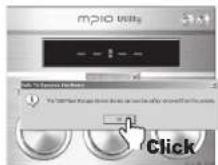
8 After clicking the [OK] button, the first part of firmware upgrade is complete.
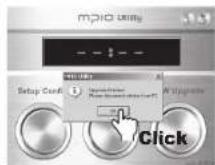
9 Separate FG200 from the computer. When FG200 is turned ON, the firmware will be upgraded automatically. (The upgrade status will be shown in the LCD screen as shown below.)
When the firmware upgrade is complete, FG200 will be turned OFF automatically.
Caution
- Causing outer impact on FG200 or lack of battery during firmware upgrade may cause a malfunction.
■ Upgrading Firmware
■ Troubleshooting
m210
Upgrading Firmware in Macintosh
1 Download the firmware upgrade for Macintosh at MPIO website, uncompress it and save it on the computer. (www.mpio.co.kr)
2 Tum the player off, and connect to the PC using the USB cable.
3 Store the required file for firmware upgrade (Upgrade_FG200.ROM) in FG200.
4 Separate FG200 from the computer.
5 Once FG200 is separated from the computer, the firmware will be upgraded automatically. The upgrade status will be shown in the LCD screen as shown below.
When the firmware upgrade is complete, FG200 will be turned OFF automatically.
Note
- To upgrade the firmware, there must be 10MB of free memory space in FG200's memory.
- Formatting FG200's memory using Macintosh PC is not recommended. To format FG200, please contact the customer support center.
- The firmware upgrade files for Macintosh are compressed as Stuffit files. "Upgrade_FG200.dwu" file will be created when you uncompress the zip file.
- Please be noted that the player can be broken down or malfunction can be caused, if external shock is applied or the battery is not sufficient during the firmware upgrade.
I cannot turn on the player.
■ If the battery is completely discharged (flat), the player cannot be turned on. Replace with battery with new one and turn the player on.
Letters on the LCD look broken.
■ Check the Language settings in DISPLAY Menu and check the file information settings.
I can't record voices.
■ Check the Recording setting in the RECORD menu.
■ Make sure that FG200 is not in HOLD.
■ Check your free memory space and delete unnecessary files.
I can't play video.
- Check that the file is in MP4 format and convert the file on a PC using the bundled Trans coder.
■ Install the necessary codec and/or utilities for converting the file on a PC.
■ Play the files on the PMP Player provided with the PC to be played on the player.
I can't see photos / Photos look corrupt
■ Check the format of the file and make sure that it is JPEG format.
- Check the size of the file. FG200 will automatically shrink the file and the file may not be the problem.
■ Troubleshooting
■ Product Specifications
mp20
There's a lot of noise when I listen to radio and I can't get a good reception.
■ FG200 may be influenced by other nearby electronics. Maintain sufficient distance from other electronics.
■ The earphone acts as an antenna when listening to radio. FG200 will lose its reception if the earphone is not plugged in. Also check the earphone's condition.
■ The reception sensitivity may be different depends on the area.
I can't download files from a PC.
■ Check the USB cable between the PC and FG200. Make sure that it is connected firmly.
- Do not use USB hubs or extension cables and try plugging the cable directly to the PC's USB port.
I can't hear anything.
■ Check the volume.
■ There may be noise or skipping if the music file is corrupt.
■ The reception may be influenced by other nearby electronics.
FG200 suddenly stops and something seems wrong.
- Check the battery. Lack of battery may cause FG200 to stop.
■ Press the RESET key on the lower side of FG200.
Upgrading the firmware is too hard.
■ Try using the bundled MPIO utility. Mac users can just copy the provided file into FG200.
| Dimensions | 32(W) x 65(H) x 15(D) mm | |
| Weight | 34.5g | |
| Display(LCD) | Full Color OLED (1", 96x64) | |
| Memory | 256MB / 512MB / 1GB / 2GB | |
| Decoding | MP3, WMA/(WMA DRM), OGG(-Q10) | |
| Voice Recording | WMA | |
| Audio | Frequency Range | 20Hz - 20kHz |
| S/N ratio | 90dB | |
| Output Power | 13mW/Channel (Europe ; 6mW/Channel) | |
| Format | mp3, vma, ogg(-Q10) | |
| Video | View angle | 180 degrees ( Up / Down / Right / Left ) |
| Color | 65K Full Color | |
| Image | JPEG | |
| Playable Format | MP4 | |
| Convertible Format | mpeg4, WMV, AVI, Divx (by PC Converting) | |
| FM Radio | Frequency Band | 76 - 108MHz |
| FM Recording | WMA | |
| Languages | Menu Languages | English, Korean, Japanese Chinese(simplified), Chinese(traditional), German, French, Danish |
| Supported Languages (ID 3 Tag Languages) | 55 Languages supported | |
| PC Interface | PC Interface | USB 2.0(High Speed) |
| Transfer Speed | 82Mbps | |
| Supported OS | Windows 96 / SE / ME / 2000 / XP | |
| Macintosh : Mac OS Version 9.2 or later. | ||
| Removable Disk | Supported | |
| Battery | Type | Lithium Polymer Rechargeable Battery |
| Battery life | Abcat 11 hours | |
| Operating Temperature | 5°C ~ 40°C | |
Note
- The actual memory available to use may differ from the product's memory capacity due to the logical file system.
- 2 Gigabyte is planned to be available by 2nd half of 2005. The actual release date may vary.
- The battery life may differ from specifications depending on the actual use and menu settings.
- The data transmission speed may differ depending on the user's PC specifications.
- PC connection using USB Hubs or extension cables is not guaranteed.